#[using our psds]
Text


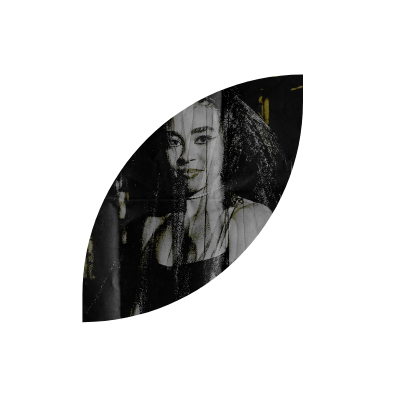
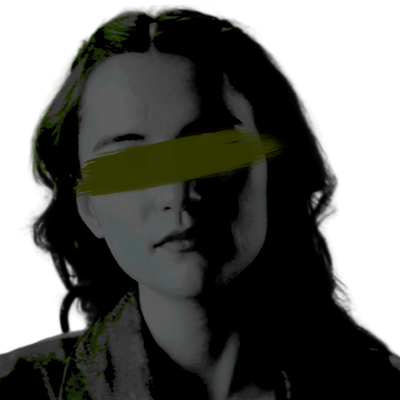
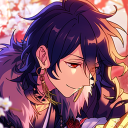
Bianca Lawson as Eva (Callero) Gardiner ➭ “Sex, Lies, and Birthday Cake”
#witches of east end#eva gardiner#bianca lawson#blawsonedit#pocpopculture#blackactressesdaily#dailyfictionalblackgirls#lies and birthday cake#ours#gifs#spoiler: but the plot twist of Alma being her daughter really got me#couldn’t find the PSD I used on my other sets :(
18 notes
·
View notes
Photo
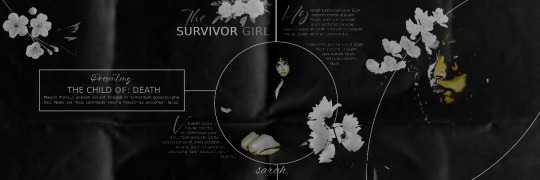
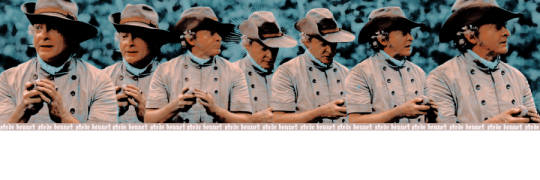
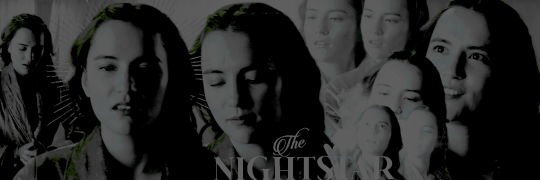
𖤐 :: SARAH MILLER, STEDE BONNET AND ALINA STARKOV PACKS ༉‧₊˚
⁀➷ ‧₊˚ SERIES :: RANDOM ˖ ⋆࿐໋
꒷꒦꒷꒦ ‧₊˚ DO NOT REPOST OR CLAIM AS YOUR OWN 𖤐 LIKE OR REBLOG IF YOU SAVE 𖤐 CREDIT IF YOU USE 𖤐 MADE BY @AZIRASHEEN ༉‧ 🐈⬛ ˎˊ˗
#sarah miller packs#sarah miller pack#stede bonnet packs#stede bonnet pack#alina starkov packs#alina starkov pack#series packs#series pack#packs with psd#pack with psd#twitter packs#twitter pack#bailey bass#rhys darby#jessie mei li#the last of us#our flag means death#shadow and bone#twitter#packs#pack
9 notes
·
View notes
Text
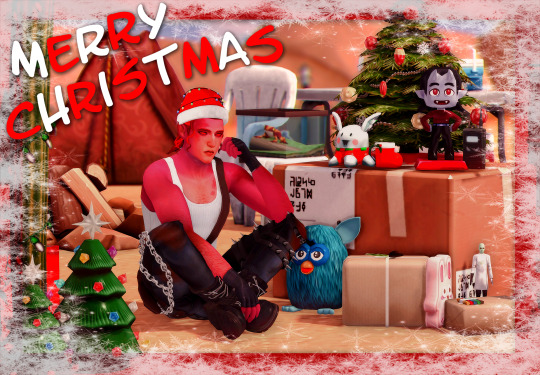
Merry Christmas & a Happy New Year from Me 2 U
and from him I guess. He doesn't know whats going on

#human enough extras#sim: vik’ain#i forgot to resize so the gif is rough sldkj just click on it#i'd fix it but our power went out for a sec so i lost the psd#i also have a lookbook to post later :-) hopefully today since its christmas themed but it might depend#the wiring here is not great and cooking with multiple appliances while using the computer does NOT seem to be working out shfkjshf
1 note
·
View note
Text
my brand is coming up with cursed ideas because i think they're funny and ending up making them canon. i'll never forgive myself for this:
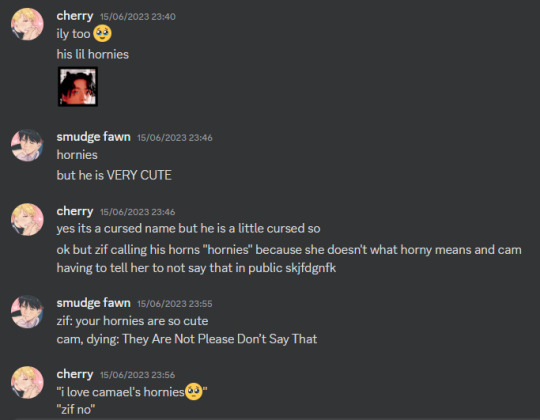
#i was looking for a psd in our chat and was reminded of this LMFAO why am i like this#˗ˏˋ ʚ🩷ɞ ˎˊ˗⠀character study.#me having the audacity to use a tag named character study for these posts lmao
1 note
·
View note
Text
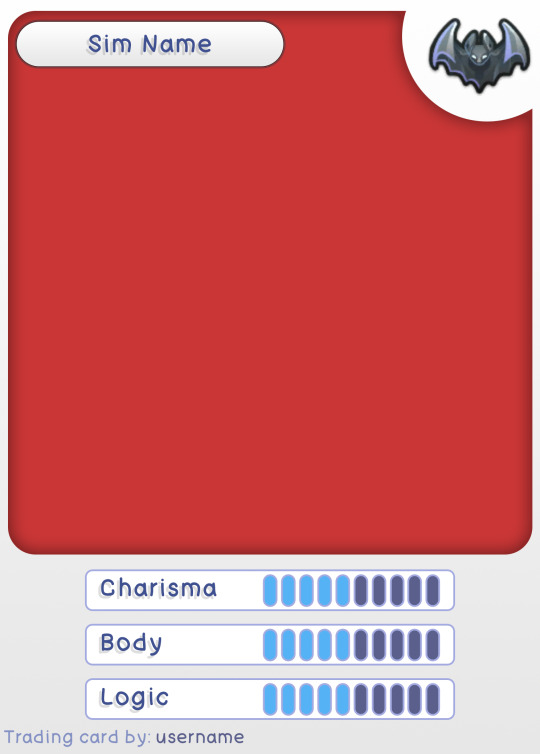

simblr trading card template - by @buttertrait and I <3
butter and I were like what if we made trading cards for our sims and then we worked together to make this template so we can all pretend we're exchanging cards in the playground.
font we used: bad comic - but will work with mostly any font
change the skill bars with the move tool on the layers named "CHARISMA SKILL" "BODY SKILL" "LOGIC SKILL". just move them left and right!
Layers are colour coded - green you edit, red you dont!
Made with photoshop 2021 but should work on any photoshop/ program that can open .psd files
grab @deathbypufferfish 's brilliant build-a-sim icon pack here for the icons
dont forget to add ur username at the bottom so we know where we got the card from :O!
post them under " #simblrtradingcards " so we can collect them all :> (note, tumblr search only reads the first 5 tags on a post. anything after 5 doesnt show up on search)
download psd / gimp (google drive)
968 notes
·
View notes
Text


DAYSLILY DELIVERY 💌 template #40: pocket study.
by clicking the source link, you will be redirected to a psd download of the template shown above (via google drive). i was trying to think of ways to display a little peak into your muse's life and this is what i came up with because what says more about us than our phones <;/3
usage guidelines: click here.
fonts needed: poppins (via google fonts).
if you like my work, consider donating to my dog's surgery.
#templates#template psd#rph#rpt#i thought about adding a notes app .. reminders .. calls .. maybe a pt 2 if u want :p#m*
599 notes
·
View notes
Text
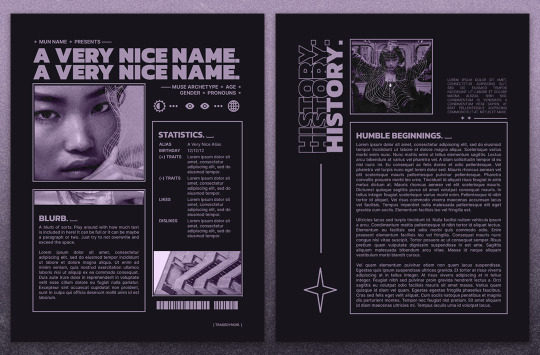


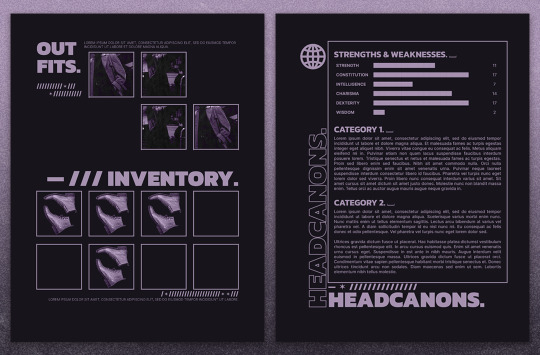
— introducing 013: NEO-NOIRE + [ link ]
a semi-mobile friendly google doc template inspired by brutalist posters, the matrix, and cool fighter types. one of my longest single muse templates yet, this document comes with space for a lot of writing and many images! this template also comes with 9 PSDs, all labelled with their corresponding pages, to easily resize, texture and colour your images to fit the template!
the template and a page-by-page preview can be found in the link above or in the source code.
features:
10 unique 8.5" x 11" pages with a lot of space for writing, and plenty of space for pictures
additional miscellaneous pages such as outfits, inventory and even headcanons for you to have fun fleshing out your character
9 PSDs with texture, grain and colour to edit your photo to the right sizes to fit into the template's aesthetic easily!
all pages that can be easily rearranged, copied and duplicated for more!
terms of use:
you may edit to your heart’s desire. Change the colours, replace, add or remove elements and images etc.
you may remix pages with pages from my other templates.
you may not remove the credit from the templates.
you may not copy, sell or redistribute my templates whether wholesale, in part (i.e. taking out certain pages) or remixed (i.e. modified).
you will also receive an additional guide with images on how to use and edit google doc templates! if you have any problems or issues, feel free to leave an ask or join our discord server.
I love 1-bit colour schemes so much and this was extremely fun to build, right down to looking for the right placeholder images to pull off the vibe. I hope you'll like this template as much as I do! you have my eternal gratitude for likes + reblogs (and comments!), it really pushes me to go further and put out more content for the community. ♡
#google doc template#google docs template#muse template#rp template#fave#m#m pr#rp resource#muse doc
679 notes
·
View notes
Text
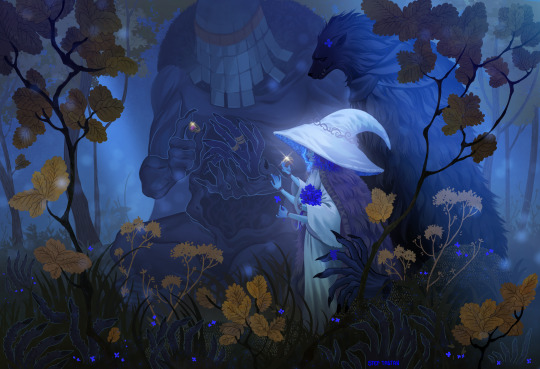
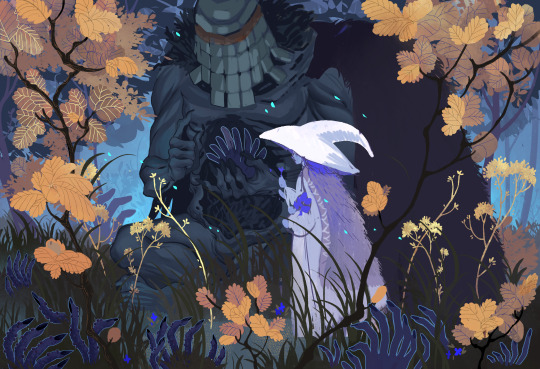
Carian Stroll
“Tell Blaidd, and Iji…I love them.”
Before this piece, I had been wanting for a long time to create my own piece of Elden Ring fanart featuring Ranni. I had tried several sketches unsuccessfully, just wasn’t particularly feeling the ideas I had sketched up until that point.
One day of usual internet scrolling, I stumbled upon this gorgeous piece of art by Shimomura Kanzan.
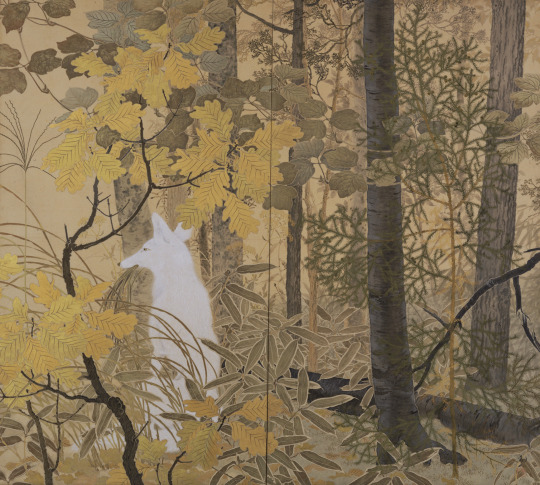
I knew immediately I wanted to do something like this for my Elden Ring fanart. In fact, if you look at this piece, there is tons of inspiration that I drew from the original artwork, such as the style of the yellow leaves and the main subject matter being a prominent silhouette of the brightest value, placed at approximately the bottom third of the image.
The main character is cleverly shrouded amidst various layers of trees and foliage, giving us the impression that we're peeking into candid moment of their life. In the case of the fox, we caught it during a mid-day snack. In the case of Ranni and her party, we caught them in a leisurely stroll, while Iji outfits the dreaded Fingercreepers with their iconic rings.
I wasn't sure if I wanted to capture a happy moment, but Ranni goes as far as to ask us to deliver to Iji and Blaidd the message that she loves them dearly as her quest draws near its end. I would imagine they all must have had fun moments together as a family. Hey, maybe even the hands liked to be around them?
The process
youtube
I started this on my iPad using the procreate app. Sadly the full process is not captured on video, as I switched to Photoshop for the rendering phase of the illustration. This video is a fun window into my chaotic process and how I iterate on the fly on the same canvas. I probably wouldn't do that in a professional setting where you often need to have color keys and iterations to be reviewed and analyzed. I like to I cut myself some slack when doing personal art to keep things fun.
Trying and failing some more
This illustration was not a straightforward path. I haven’t been very diligent about personal art, and at some point I started deviating too much from my reference by adding too many levels of depth to the background and suffocating the piece. I got into a weird loop where I would randomly open the PSD, play around with the values, pushing Iji to the back, then bringing him back, cranking all the levers on Ranni, etc., decide it would look horrible, then begrudgingly determine I’d never complete this image and go on with my life.
As artists we likely have unfinished work sitting everywhere, be it in our sketchbooks, canvases, or hard drives. But it’s a different kind of sting when you feel like you can’t even nail the fundamentals.
Anyway, so a couple weeks ago, I decided to give it another go, but this time I would get rid of all the unnecessary stuff, even stuff that I had been trying to render for ages. I would not hold on to anything, I would try and recapture what drew me to Kanzan's beautiful painting to begin with.

After it became a matter of pushing and pulling pixels until the image was finished!
That’s about it. I didn’t go crazy in depth but lately I’ve been enjoying reading into artists’ processes and I’d be remiss to not share my own thought process also.
Thank you for viewing!
#elden ring#lunar princess ranni#blaidd the half wolf#war counselor iji#illustration#artists on tumblr#fromsoftware#digital art#video game#fanart#Youtube
574 notes
·
View notes
Text

The silent art of gif making
The gif above has 32 layers plus 6 that aren't shown because this is part of a larger edit. I wanted to share it to give everyone a glimpse of the art of gif making and how long it usually takes for me to make something like this. This one took me about an hour and a half but only because I couldn't get the shade of blue right.
I use Adobe Photoshop 2021 and my computer doesn't have a large memory space (I don't know what to call it) so usually most of psds get deleted because I'm too lazy to get a hard drive. It doesn't really bother me that much because I like the art so when it's done, it's done. Off to somewhere else it goes.
Here are the layers:

Everything is neat and organized in folders because I like it that way. I prefer to edit it in timeline but others edit each frame. There's a layer not shown (Layer 4 is not visible) and it's the vector art. Here it is:

Now it is visible. I don't plan to make this a tutorial, but if you're interested I'd love to share a few tricks about it. I'm pretty new to the colors in gifmaking but the rest is simple to understand. Here, I just want to show how much work it takes to make it.

I opened Group 2 and here's the base gif. I already sharpened and sized it correctly but that's about it. Let's open the base coloring next.

Yay! Now it looks pretty! The edits are in Portuguese but it doesn't matter. There's a silent art of adding layers depending on how you want the gif to look but you get used to it. The order matters and you can add multiple layers of the same thing (for eg. multiple layers of levels or curves or exposure).

This was pretty much my first experiment with coloring so I don't know what I'm doing (this happens a lot with any art form but gifmaking exceeds in DIYing your way to the finished product) but I didn't want to mess up his hair, that's why the blue color is like that. Blue is easy to work with because there's little on the skin (different from red and yellow but that's color theory). I painted the layers like that and put it on screen, now let's correct how the rest looks.

I was stuck trying to get the right teal shade of blue so yes, those are 10 layers of selective color mostly on cyan blue. We fixed his hair (yay!) we could've probably fixed the blue on his neck too but I was lazy. This is close to what I wanted so let's roll with that.

BUT I wanted his freckles to show, so let's edit a little bit more. Now his hair is more vibrant and his skin has red tones, which accentuates the blues and his eyes (exactly what I wanted!). That lost Layer 2 was me trying to fix some shadows in the background but in the end, it didn't make such a difference.

This was part of an edit, so let's add the graphics and also edit them so they're the right shade of blue and the correct size. A few gradient maps and a dozen font tests later, it appears to be done! Here it is:

Please reblog gifsets on tumblr. We gifmakers really enjoy doing what we do (otherwise we wouldn't be here) but it takes so long, you wouldn't imagine. Tumblr is the main website used for gif making and honestly, we have nowhere to go but share our art here. This was only to show how long it takes but if you're new and want to get into the art of gif making, there are a lot of really cool resource blogs in here. And my ask box is always open! Sending gifmakers all my love.
#gif making#gif tutorial#resources#completeresources#y'know what that post yesterday got me into this#i love creativity so i send all my love to gifmakers#this is HARD#my tutorials#tutorials
263 notes
·
View notes
Text

yes, that's us
Pin: info and FAQ
Hey! We're MLARTY, Meka and Grisha — a duo of co-author artists and soulmate friends who mostly draw art based on personal projects with original characters. We're monster lovers, horror fans, and just obsessed with the color red. Our main brainchild is a dark, predatory world called UTROBA, but right now we’re focused on BG3 content, especially about our Dark Urge Marrow. So here you will find a lot of illustrations and concepts with her, some memes... and fan comics!
Posts and art may contain spoilers and a lot of blood, so you're warned
× Other links and galleries: linktr.ee/mlarty
× Patreon with exclusive content: patreon.com/mlarty
FAQ
You both run this account? How do you split the work? How do you draw together?
— Yeah, exactly. Just imagine a small art studio of two people drawing in the same style and working on the same work. Share tasks, collaborate on steps like sketching for example, but also create individual pieces. Sometimes it feels like we share one brain... One big elder brain
What brushes you use? Where can I find more about your work process? What program do you use for drawing?
— Brushes, materials about our drawing process, tutorials and other similar content are available on our Patreon! We also regularly upload step by step materials and PSD files
We’re drawing in both SAI and Photoshop!
Do you do commissions? Can I get one?
— Yes, we draw commissions, but currently they are closed. We'll drop a post about the slots as soon as we free up time for new work. You can find all the details about working with us in the links
Can I draw your ocs or make any other content with them or interactions with my ocs?
— OH YES OF COURSE, ABSOLUTELY YES! Don't stop yourself! We're totally happy with the fanarts with our babes. The only thing we're not okay with is NSFW and disrespecting the original. Some topics are just too personal to us. But aside from that... you're more than welcome!
Feel free to ask other questions, especially if it's about our ocs or artwork! We're trying to create a special open space here and just chill with you~
163 notes
·
View notes
Text
photopea gif tutorial!
i recently started learning the craft of gifmaking with the free software photopea. when i first started, i had to piece together several different tutorials as well as extrapolate from some photoshop tutorials because-- no one uses photopea.
but they should! it's free! it can run in your browser! it can do most everything photoshop can do and you don't have to deal with adobe or torrenting. so i'm making a tutorial of my photopea gifmaking process because that's what i needed a couple months ago, and i hope it can be of use to some others. let's go!
1: PREPARING
source the scene you want to gif. it's best to download your video when you can, but screen recording can work in a pinch. this is the video downloader software i use.
once the source video is downloaded, i like to pick out the specific moments i'm going to gif and save them as their own files-- this makes future steps easier. an individual gif shouldn't be more than 4ish seconds, so limit your selections to about that. name your files in a way that makes sense to you:

2: CONVERTING TO .JPG
i like to convert my video clips to .jpg format. it is possible to load video clips directly into photopea, but unless it is a very short <30fps clip, it is likely to freeze or crash in my experience. i use this website as it downloads a higher framerate (~25fps) than others i've used.
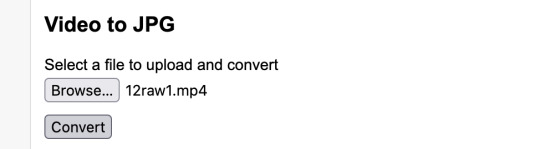
convert your video files and download the .zip folder containing your frames. make sure to unzip them and name them something helpful if you need to.
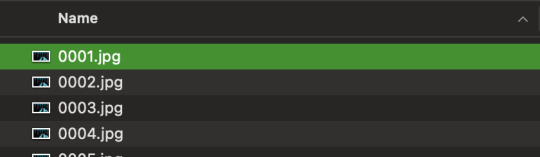
3: OPENING YOUR FRAMES IN PHOTOPEA
photopea looks like this when you open it:

select "open from computer" and select only the first frame of your first gif:
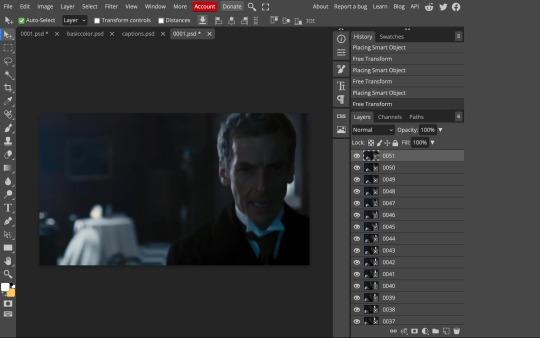
your environment should look like this (ignore the other projects i have open, you should just have 0001.psd or similar):
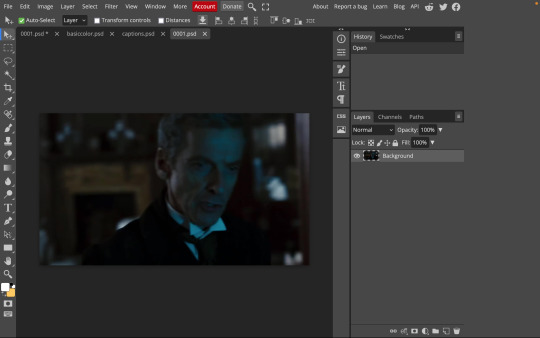
go to file> open and place, and select ALL of the rest of the frames from your first clip:
they'll load in one by one, and your environment should look like this:
notice how all the frames have a little square in the corner? that means they are smart objects, and we need them to not be for our purposes. select all of your frames, right click, and choose rasterize:

in order to make the series of jpgs move as a gif upon download, select all of your frames and go to layer> animation> make frames:
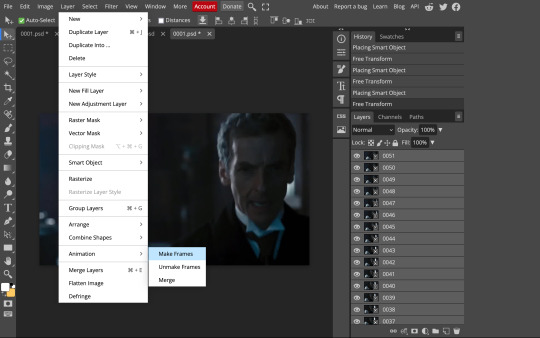
all your layer names should now start with _a_. you can really do this at any point in the process so it's not a big deal if you forget at the beginning.
finally, you want to limit the frames in individual gifs to around 50 or less. if you find you have more, delete some frames off of the beginning or end by right clicking and selecting delete.
4: CROPPING AND RESIZING
select the crop tool on the left hand panel:

at the top bar, select fixed size:

gifs on tumblr are limited to 540px wide for single column gifs, 268px for two columns, and 178px for three columns. the height is up to you; i like to use 350px height with the 540px width.
enter your values into the W and H fields and do not press enter yet. drag the cropped area to where you want it to be-- try to line up the top and bottom edges so as not to lose too much of your image. once you're satisfied with the selection, press enter. your gif is now cropped and resized to tumblr standards.
5: SHARPENING
(if you are working with low-qual video, check out this tutorial by @hellboys before sharpening. basically filter> filter gallery > grain, select soft and play with the settings. then proceed!)
still making sure all of your layers are selected, navigate to filter> sharpen > smart sharpen:
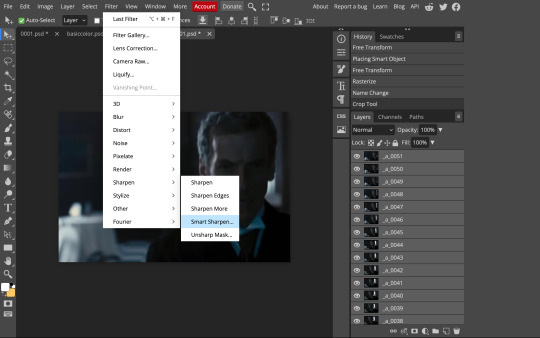
you should see this dialog box:
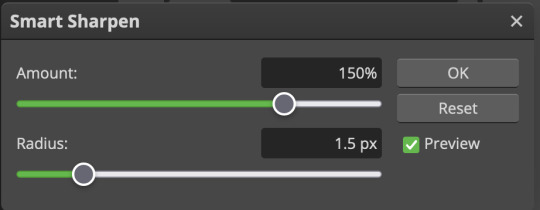
these are the settings i like to use, but you can play around to see what you like. here's the before and after of my sharpening settings:
the difference will be more noticeable once we complete the next step-- brightening and coloring.
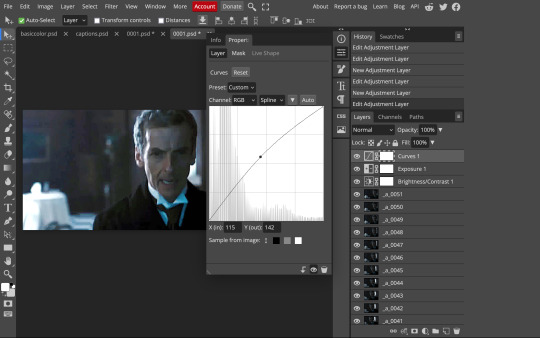
6: BRIGHTENING & COLORING
navigate to layer > new adjustment layer:
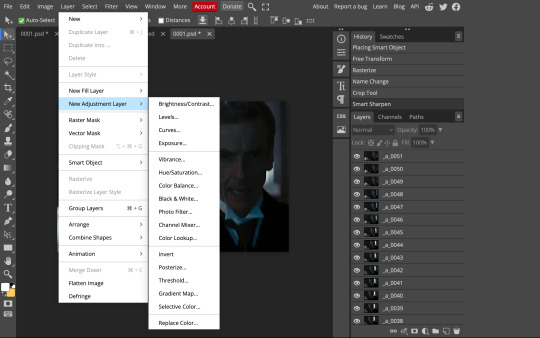
at any time, you can edit your adjustment layers by clicking this button in the right hand panel:

for each edit you make to your gif, you will add a new adjustment layer. always make sure they're at the top of your layer stack. i like to start with adjusting the brightness and exposure, which are both pretty straightforward.
additionally ,you can select a curves adjustment layer, choose the RGB channel, and drag the curve just slightly upwards to further brighten your gif, like so:
here's a before and after:
now for coloring-- i mostly use the saturation/vibrance, curves, color balance, and selective color adjustment layers. just play around with all of these until you find a style you like. i like my gifs to look really bright and colorful, so i push the saturation and try to draw out warmer tones in the color balance:
7: CAPTIONS
the font i like to use for captions is arial bold italic. you can download it (or any font of your choosing) from pretty much any free font website. if you choose to download a font not in photopea, go to file> open and select your font; it will now show up in the list of fonts.
navigate to the text button in the left hand panel:

and type in the captions for your gif. i make the font size 20 for 540px gifs.
next, while only your text layer is selected, navigate to layer> layer style > blending options:
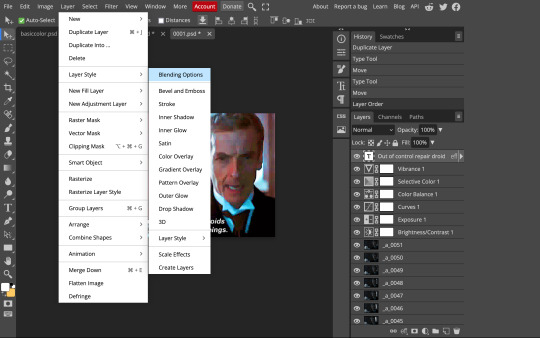
click on drop shadow, and play around with the settings until you get something you like. here's mine:

next, click on stroke and do the same thing:
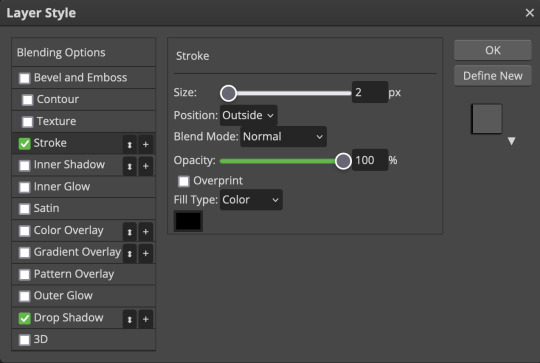
when you're done, make sure your text is your top-most layer.
8: EXPORTING
you're done! head to file> export as> GIF. you'll be prompted with a dialog that looks like this, with your gif playing (you can also do these steps without saving if you want a preview of your gif during editing):
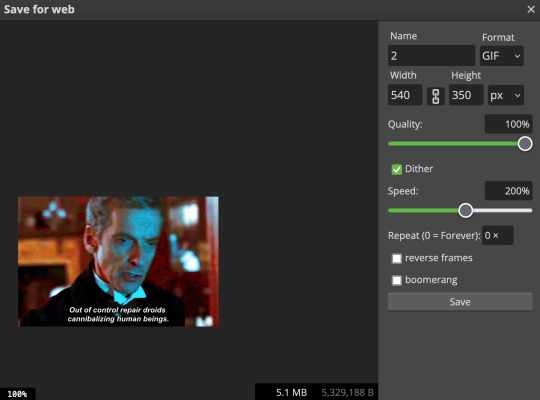
the only thing you should need to adjust is speed. this is the main difference between photopea and photoshop. the only way to specifically adjust the delay in photopea is to manually enter "_05" (or whatever amount of delay) at the end of every layer name. if you're like me you'll agree that is simply too much and settle for the speed slider.
i don't really know what logic governs the speed slider. it doesn't seem to be consistent across gifs, so play with it until it looks right. i've had it on 200% lately which seems insane but looks visually normal.
once the speed is adjusted, hit save and you're done! here's a final before and after of all the work:
BONUS: SAVING .PSD PRESETS
did you think manually creating and editing all those adjustment layers was a lot of work? here's how to streamline it for next time.
at the very bottom of your screen, below your layers, select the icon that looks like a folder (third from the right).
it will create another layer called folder 1. drag your adjustment layers into this folder, making sure they stay in the same order. your layers should look like this when you're done:
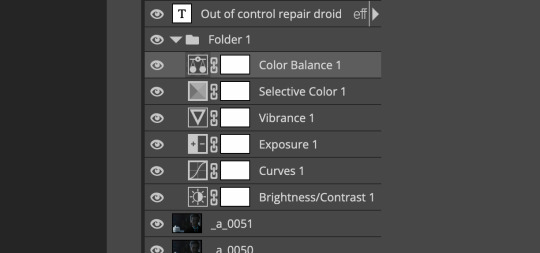
ONLY ONCE YOU HAVE SAVED YOUR GIF, delete all other layers that are not in the folder. then select file> save as PSD. save it somewhere convenient.
next time you're making gifs, after you've cropped and sharpened your frames, select file > open and choose your .psd file. it will open as another project. select the layer that says folder 1, and drag it to whatever project you're working on at the top bar. voila! your adjustment layers are applied to your new gif!
i still like to play with the settings, as coloring and brightness needs will differ from gif to gif.
thanks for reading! here's the gifset i made while making this tutorial :-)
#milk post#gif tutorial#doctor who#photopea#i can't tell if i went too detailed or not enough lol. tag me if you use this i want to see ppl's gifs!!
206 notes
·
View notes
Text
recently, a lot of people have been losing their gifs to reposters, whether that be a whole set stolen or just one gif taken for a textpost. which leads to a lot of us turning towards watermarks to not lose our work. it's not everyone's first choice, particularly because of aesthetics, but it's the best way to keep what you own.
of course, it might seem silly to do a whole "tutorial" on watermarks, but there's a lot of different ways to watermark in a subtle way that still protects your work. i've also seen a lot of people incredibly hesitant to move to watermarks because they believe it marrs their work, which may be true, but there are definitely ways around that. anyway, let's begin !
WATERMARK 1: URL/TRACKED TAG
the most common watermark for people is usually 'thisismyurl.tumblr.com', 'thisismyurl | tumblr', 'thisismyurl' - at least, this is assumed for most people as the best way to watermark.
but if you're like me and constantly want to change your url, you know that there's a good chance a watermark on a gif 3 months ago could be completely different to one now. this is why people are turning to tracking tags.
tracked tags change less frequently, if at all. it's smaller, which makes it more subtle. if you want to go the extra mile like me, you can create a blog under your tracked tag (eg. i track tuserlucie) which means you can reblog anything with your watermark to the blog, showing that it is yours.
placement is key though ! here's 3 different ways you can place it.


NOTE: opacity has not been altered on any of these. depending on how it looks with your gif, opacity looks best at 10-30%.
Font settings: Momcake, thin, 10pt, #ededed.
each of these placements have different advantages.
the first placement (top left) is the one i personally use. it's centered right on the middle but not too high up.
the second placement (top right) is probably the most popular. corners mean people can kind of tuck the watermark away where it doesn't seem obvious. the fourth (bottom right) effectively does the same.
the third placement (bottom left) is 100% the most effective. it sits in a point exactly where it's noticeable, making it less desirable for reposters. on the right opacity too, you hardly notice it.
WATERMARK 2: ICONS/SIGILS
this is an idea that i've seen used mostly by nik @cal-kestis , but is a great and creative way to do it !
an icon or sigil makes your gif totally unique to you. and it's something cute on there which is different to having to put text on there.

(i've put it in orange for the purpose of seeing it)
but you can see here, it doesn't need to be anything special. i've just used an oval shape plus the initials of my url and that's it !
but a sigil can be anything. it doesn't need to have text; it could just be an image. it could just be your icon. either way, it's a cute little alternative to using text.
here's the different options that i preference in action.
SIGIL - bottom right corner

URL - bottom middle

TRACKED TAG - face/body

RESOURCES
here's some resources to use if you want to start watermarking !
FONTS:
Momcake (this one was used throughout all the text watermarks !)
Cocogoose
Lemon milk
Bebas
Quicksand
PSD
you can access a psd of editable watermarks here.
#tutorials#ps tutorials#resources#**l.myeditss#mine: resources#photoshop tutorials#idk who to tag so sorry 😭#usersmia#usercats#usernorah#userrsun
222 notes
·
View notes
Text
Headcanons for Hotchner!daughter Service Dog
No one asked for it but here we are.
Inspired by the headcanons done by @ssa-thotchnerr on hotchner!reader emotional support dog
As someone who is a service dog handler, this topic is near and dear to my heart, especially service dogs who do psychiatric work. It's also important to me to address the differences between an ESA (emotional support animal) and PSD (psychiatric service dog) as they are two seprate things.
If you have questions about ESAs or Service Dogs send me an ask or a message! It's something I love to talk about and educate on!
Here we go:
CW: Foyet, Haley's death, counseling, medication, PTSD, PTSD symptoms, meanings to names
The whole thing with Foyet was traumatic. Being pulled away from your dad, being in witness protection, being told your dad was dead only to find out that he wasn't, your mom being killed- it was all too much.
Hotch was very proactive about getting you and Jack into counseling. Jack recovered from the events far faster and easier than you did.
After evaluation from a psychologist, they concluded you had severe PTSD.
You were talking to a therapist multiple times a week, taking medication, being open with your dad, even peer support groups, but after a year you still struggled immensely.
Panic attacks, nightmares, hypervigilance, depressive episodes, and avoidance still ruled your life.
Your medical team brought forward the idea of a service dog as an addition to the rest of your treatment.
You and your dad looked into it and decided it would be a good idea.
Until you looked at the price of training or getting a program dog and it was going to be upwards of $15,000 (really closer to $25,000) or at least two years on a non-profit waitlist. Some options were both.
Thank god for the "anonymous donation" from Uncle Dave.
You and your dad met with the program. They had you meet a few different dogs that were ready for task training, but ultimately you were matched with a solid black female german shepherd.
"She's from our outer space themed litter. Her name is Comet, after Halley's Comet."
That had you and your dad in tears.
It would still be months before she would complete her task training, but you got to see her when you went to do handler training.
She finally finished her training with the program and got to come home to complete it with you!
At first, having Comet almost made things worse.
People would point and stare, little kids would scream, rude people saying things like "you don't look disabled", "I thought only veterans could have PTSD", access issues, even some of your friends who didn't want to bring you along on activities anymore since you'd have Comet with you.
But it forced you to be a bit brave and learn to stand up for yourself and her.
And her tasks made your life so much better and gave you so much more independence.
Comet would "search" the apartment for strangers before you entered, so you could come home alone without Hotch or Jessica having to be there.
If you were home alone, she would bark when someone came into the apartment and go check to see who it was. If it was someone she knew, she would stop barking and come back to you, but if it was a stranger she would continue barking so you could call your dad and ask who was supposed to be coming to the apartment.
When you had nightmares, she would wake you up before they got really bad. This improved the sleep quality of everyone in your family.
Comet would alert you before you had a panic attack so she could perform deep pressure therapy and you could use your coping skills to try to make it less intense.
If your panic attack did get intense, she would do a "take down" to put as much pressure on your body as possible and gently lick you until you calmed down.
In the after-fatuige of an attack she would take you to a quiet place to recover and continue to provide pressure therapy.
If it happened when your dad was home she would get him to help you through it.
She would annoy you at certain times of the day to remind you to take your medications, sometimes even fetching the bottles for you.
When you would cry alone she would just starting bringing you anything she could find - water bottles, papers, pillows, dirty laundry (usually bras because it made you laugh) - so you didn't have to be alone with your feelings.
She would stand behind you and alert to people approaching so you didn't get startled.
Sometimes would provide "checks" around corners if you were having a really bad day with hypervigilance.
Having Comet opened up an entire new world for you, making you feel safe without having to have your dad or your aunt with you.
She wasn't a replacement for your therapy or medication, and the public could still be extremely rude. Sometimes you did leave her at home if you were going somewhere that it would be hard to accommodate her and you had your dad to help you incase anything happened.
But she gave you independence that you didn't have before and made your life so much better.
#criminal minds fanfiction#criminal minds#aaron hotchner#aaron hotchner x daughter!reader#aaron hotchner x child!reader#hotch x daughter!reader#hotch x child!reader#criminal minds x reader#criminal minds x y/n#criminal minds x platonic!reader#criminal minds x teen!reader#criminal minds x daughter!reader#criminal minds x child!reader
661 notes
·
View notes
Text
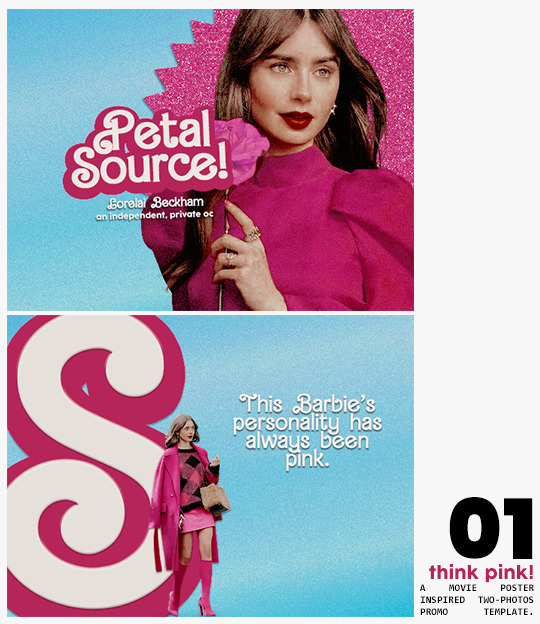
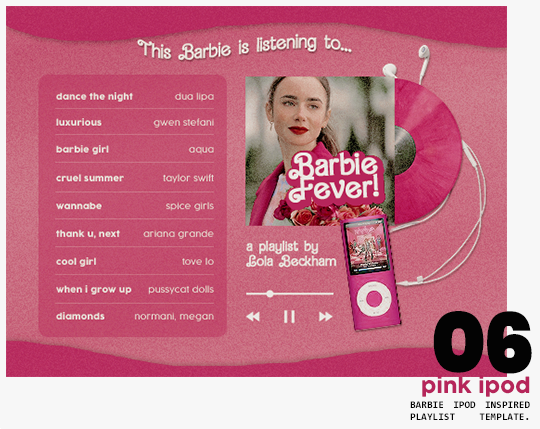
⋆ barbie fever . . . by petalsource .
. . . a complete blog makeover inspired by barbie .
hi, barbies! today, i bring you a complete makeover fully inspired by our favorite pink lady, barbie herself, to allow all of you to bring your own characters into her world in plastic!
feel free to tweak and adjust to your needs, add different background colors and overlays, but kindly do not claim as your own or use it for commercial purposes. feel free to tag me on your creations with this on #petalsource! seriously... i can't wait to see what comes of this!
💐 click the source link to get it as a package or individually on deviantart or payhip !
and . . . keep reading to find more details about the graphics, hq live previews and important tips to use the templates !
✩ about the items!
➷ think pink! -- a two-picture promo template inspired by the iconic 2023 movie posters. you'll need: two pngs of your faceclaim of choice, and the custom fonts (listed below). the glittery polygon of the first picture is available in 7 different glitter colors! high quality examples.
➷ this barbie -- two options of transparent dash icons; one matching the "initial" poster and one matching the "glittery polygon" poster. high quality examples.
➷ so plastic -- two options of centralized headers; one matching the "initial" poster and one matching the "glittery polygon" poster. to use it at its best quality, disable the "stretch header image" option when uploading the header. high quality examples.
➷ magenta -- version 1.0: pinned post (or miscellaneous) banner inspired by the 2023 barbie poster. version 2.0: pinned post (or miscellaneous) pair of banners mimmicking the layout of a barbie doll box. one banner goes on top of the postbox, insert pinned post or text, and the other banner goes on the bottom! high quality examples.
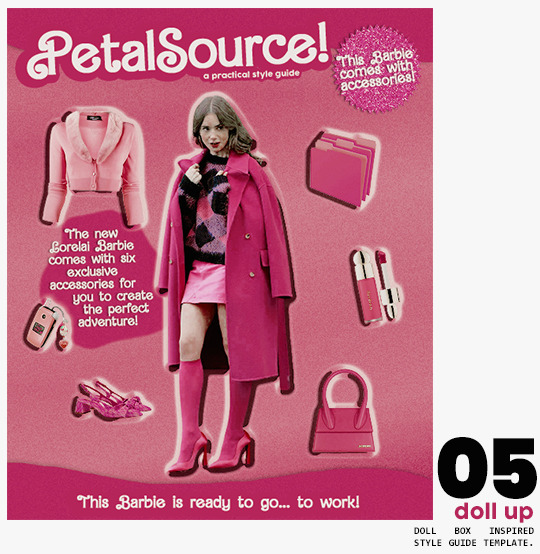
➷ doll up -- lookbook template inspired by the barbie doll box, featuring a "doll" picture and six customizable objects / accessories. you'll need: full body png of your faceclaim of choice, custom fonts (listed below), and 6 pngs of random objects or clothes to "come with" your doll. i've added a short tutorial down below on how to find and use some easily! high quality examples.
➷ pink ipod -- playlist template inspired by the barbie ipod, featuring a cover art and nine songs. high quality examples.
you can purchase all items as a package (deal price) or individually!
✩ important tips & useful information!
➷ needed fonts: bartex, cocogoose.
➷ object pngs + removing background of images: i found a super useful pinterest board with photos that can be used on your graphics: oxfordcommah's object pngs. additionally, the clothes png search on p*nterest is really diverse, and you can narrow your interests like "pink clothes png" or "vintage shoes png" and find a lot of options. once you found your images, go to remove.bg and paste their urls in there. it'll remove the background of those images for you and you can just paste them on your template and have fun!
➷ used coloring psds: the beautiful and super pink psds i used on the previews were not made by me and are NOT included in the downloads. in case you want to use them, they can be found here: dreams, 003.
➷ styles: the download includes two styles, one for a subtle drop shadow used in a few layers and one for the plastic box effect in the lookbook template. you can install them by opening the styles tab on photoshop > the four lines > load styles > find the barbie styles on your downloads!
➷ in case you have any questions, pop into my inbox or ims and i'll be happy to help you!
#template psd#template psds#barbie psd#character psd#character psds#𓂅 ♡ ⋆ 𝐦 ‚ templates .#i really really really hope you guys like this!!! i had so much fun doing it
279 notes
·
View notes
Text
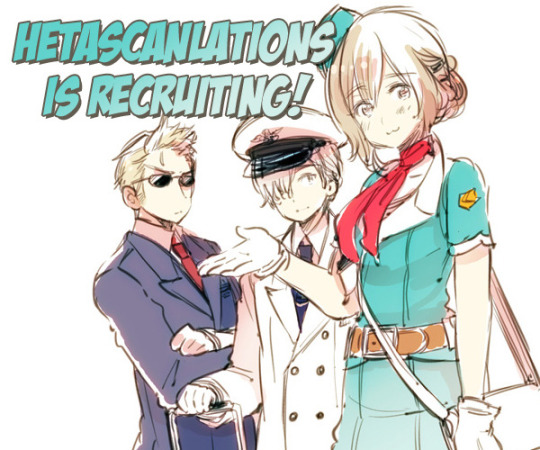
Hello! It may be noticed that we are running behind on our releases. This is due to our current team having trouble keeping up with new chapters because of our real life priorities and losing a couple team members. So!!
We are currently seeking ONE to TWO TYPESETTERS/REDRAWERS to add to our team!
:: BASIC TYPESETTER AND/OR REDRAWER REQUIREMENTS ::
Access to Photoshop or an image editing program with similar capabilities that can edit and save PSDs
Experience in common image editing techniques such as clone stamping and redrawing
A discord account to join our server for communication with the team
And of course, a passion for Hetalia is always very helpful~
Interested? Drop us an e-mail at [email protected] with your Tumblr username and the position you’re interested in as the subject. Include a quick line or two about your experience with image editing; we’ll send you a skills test to complete and send back. If you’re selected as one of our new team members, we’ll contact you privately to confirm your interest before making the final announcements on our blog.
There will be no deadline for application. An announcement will be made when the positions are filled.
Thank you!
338 notes
·
View notes
Text
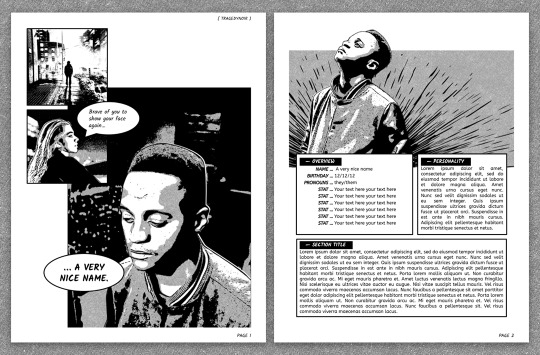

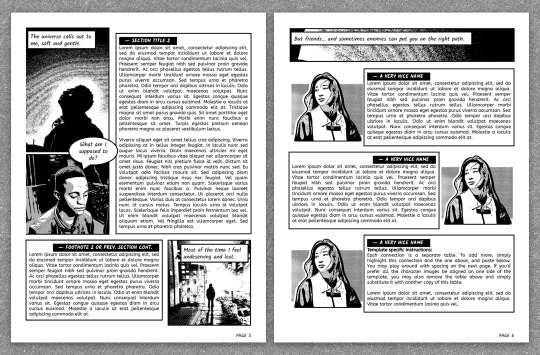
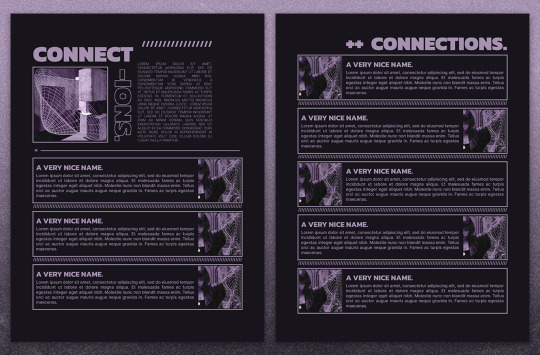
— introducing 010: ORIGINS / FIRST ISSUE + [ link ]
a google doc template heavily inspired by comic books and visual novels! the comic panes provide a place for you to include visual snippets of your muse's interactions or inner thoughts, and can be customized through google drawings within google docs. it also provides plenty of space for your character lore! this template also comes with PSDs for you to edit your photos in this visual novel style.
the template and a page-by-page preview can be found in the link above or in the source code.
features:
6 unique 8.5" x 11" pages with space for statistics, a few short and long sections, and plenty of space for pictures
comic panes whose text and image positions can be edited through google drawings
3 PSD templates for you to edit your images into the graphic novel style in the previews — one for settings, one for close-ups and one for the connections page
a connections/muses page that can be easily duplicated for more
terms of use:
you may edit to your heart’s desire. Change the colours, replace, add or remove elements and images etc.
you may remix pages with pages from my other templates.
you may not remove the credit from the templates.
you may not copy, sell or redistribute my templates whether wholesale, in part (i.e. taking out certain pages) or remixed (i.e. modified).
you will also receive an additional guide with images on how to use and edit google doc templates! the template itself should be straightforward to edit, but the google drawings might be a little finicky if you move things around too much. if you have any problems or issues, feel free to leave an ask or join our discord server and I'd be happy to help!
I hope you enjoy this template that I absolutely adore! likes + reblogs are always appreciated and go a long way in supporting me. ♡
188 notes
·
View notes
Last Seen Blogs
goldfinwrites
Writing Collection
thetruthbehindmynightmares
All I try to hide

addisgamerblog
Addis Mini Gamer Blog
8bitsofcasper
casper's portfolio

ericpond
無標題