#4. FabFilter Pro-Q 3
Text
Mastering Your Sound: Essential Plugins for Producers
Welcome, dear music aficionados, to our in-depth exploration of indispensable plugins for producers. Crafting exceptional audio requires the right set of tools, and today, we unveil five essential plugins every producer should consider. From precision EQ to mastering suites, let’s delve into these must-have plugins that will undoubtedly enhance your sonic journey.
1. FabFilter Pro-Q 3: Precision…
View On WordPress
#2. Industry Standard Picks#3. EQ#4. FabFilter Pro-Q 3#5. Soundtoys Decapitator#6. Native Instruments Kontakt#7. iZotope Ozone#8. Valhalla Room#9. Explore & Experiment#audio#Audio Production Plugins#blog#mastering#mixing#music#music-production#Reverb#Sampler#Saturation
0 notes
Text
GEAR
Microphones:
Sure sm57
Sure sm58
Audix i5
Sure Beta 52
Blue Snowball
Behringer C-2 (pair)
Samson C01
Rode NT1A
Hardware:
Scarlett 18i0 audio interface
Mackie 1402-VLZ PRO 14 channel mic/line analog mixer
Guitar amps and pedals:
Helix HX STOMP
Ibanez Turbo Tube screamer
Guitars:
Fender GC140SCE Concert Acoustic-Electric
Yamaha FX335C Dreadnought Acoustic-Electric
Ovation 1311 Natural Acoustic
Fender Nashville Telecaster
Fender Squire Bullet Telecaster
Fender Squire Jazz Bass
Mitchell MU40 Soprano Natural Ukulele
Yamaha CGS 102A Classical Guitar
Keyboards:
Nektar Impact LX61+
Roland U-20
Drums and percussion:
1 big tambourine
1 small tambourine
LP Medium twist shakers
Simmons Titan 50 electronic drum set
Sound Monitoring:
JBL Professional Linear Spatial Reference 3 Series powered studio monitors (pair)
Sony Professional MDR-7506 studio headphones
Sennheiser HD 201 studio headphones
KRK Classic 5 studio monitors (pair)
Computers and visuals:
Apple MacBook Pro 13 inch
Dell flat panel monitor
DAW/software:
Logic Pro X
Pro Tools 12
GarageBand
Avid/Apple/Native Instruments/SoundToys/FabFilter/Waves plugins
Helix HX Edit
Plugins:
Digital EQ’s:
Waves V-EQ4
Fabfilter Pro-Q
Digital Reverbs:
Waves Abbey Road Chambers
Waves H-Reverb Hybrid Verb
Waves Renaissance Reverb
Waves Manny Marroquin Reverb
Relab Development LX480 Reverb
Digital Compressors:
Waves Renaissance Compressor
Waves CLA-3A Compressor/Limiter
Waves Smack Attack
Waves DeEsser
Extras:
Waves SSL G-Channel
Waves Nx Ocean Way Nashville
Waves Z-Noise
Waves WLM Plus Loudness Meter
Waves Tune Real-Time
Waves Vocal Bender
Waves Torque
Waves CLA Bass
Waves Abbey Road J37 Tape
SoundToys Echoboy
VST’s:
Spectronics Keyscapes
Native Instruments Battery
Toontrack EZdrummer 3
Native Instruments Kontakt Electric Guitar
Accessories/miscellaneous/other studio features:
4 XLR cables
4 1/4 inch jack cables
Power supply cables
USB outlet strip
High speed internet and free WIFI
Pencils, pens and paper
Wireless printer available
5 mic stands
Shock mount, pop filter, and 3 windscreens
HEAROS Ultimate Softness earplugs
Mini Samsung T.V. with Roku entertainment
RIF6 electric record player with built-in speakers
Dean Markley Pro Mag humbucker pickup
Culilux 1/4” audio splitter
Rioddas external ODD&HDD disc drive
Pack of CDs for burning
Guitar pick maker with appropriate paper
3 microphone clips
Alesis sustain pedal
Radial PRO-DI passive direct box
DeltaLab digital metronome
AKAI MPD218 beat pad
GiveBest electric heater
Behringer ULTRAACOUSTIC AT109 15-WATT acoustic guitar amplifier
OWC thunderbolt USB-C dock
APC surge protector
MOONGEL damper pads
Pick holder filled with guitar picks (floppy and hard) and a set of thumb picks
2 capos and clip on tuner
KORG TM-50 combo tuner and metronome
Mackie 1402-VLZ PRO 14 channel mic/line analog mixer
NEXIGO web cam
Big Knob passive monitor controller
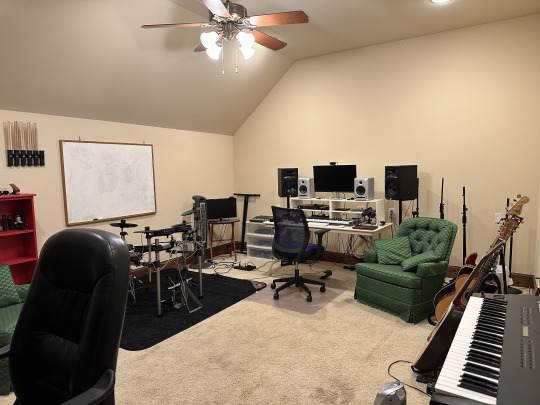
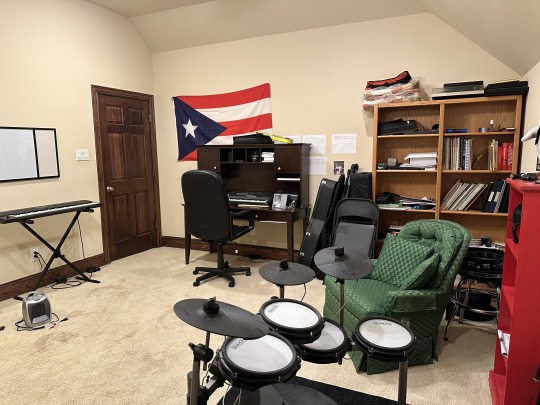
The Bowman Studios, Dallas, Texas
Producers: Mason Bowman
2 notes
·
View notes
Text
Программы и Инструменты для Улучшения Качества Озвучки Видео на Маркетплейсе
Создание качественного видеоконтента для маркетплейсов требует не только визуального совершенства, но и безупречной озвучки. Хороший звук способен удержать внимание зрителя, создать эмоциональную связь и повысить конверсию. Давайте рассмотрим, какие инструменты и программы можно использовать для улучшения качества озвучки ваших видеороликов.
1. Микрофоны и звуковое оборудование
Первый шаг к качественной озвучке начинается с правильного оборудования. Выбор подходящего микрофона и аксессуаров играет решающую роль.
Конденсаторные микрофоны: Отличаются высокой чувствительностью и передают широкий диапазон частот. Популярные модели: Audio-Technica AT2020, Rode NT1-A.
Поп-фильтры: Помогают снизить взрывные звуки (попс) и делают запись чище.
Аудиоинтерфейсы: Обеспечивают высокое качество записи и минимизируют задержку. Рекомендуемые модели: Focusrite Scarlett 2i2, PreSonus AudioBox USB 96.
2. Программное обеспечение для записи и редактирования звука
Для записи и редактирования озвучки необходимы профессиональные программы, которые позволяют добиться высокого качества звука.
Audacity: Бесплатный и популярный аудиоредактор с широкими возможностями для записи и редактирования звука. Идеально подходит для начинающих.
Adobe Audition: Профессиональное ПО для редактирования аудио, включающее множество инструментов для обработки звука, удаления шума и создания эффектов.
Reaper: Мощный и доступный цифровой аудиоредактор, который поддерживает широкий спектр плагинов и инструментов для редактирования.
3. Плагины для обработки звука
Использование плагинов помогает улучшить качество звука, добавляя различные эффекты и корректируя дефекты записи.
iZotope RX: Набор инструментов для восстановления звука, включая удаление шума, реверберации и других артефактов.
Waves Plugins: Широкий ассортимент плагинов для компрессии, эквализации и других видов обработки звука.
FabFilter Pro-Q 3: Мощный эквалайзер, позволяющий точно настроить частотный диапазон записи.
4. Программы для синхронизации звука и видео
Для создания гармоничного видеоконтента важно правильно синхронизировать звук и видео.
Adobe Premiere Pro: Один из ведущих видеоредакторов, включающий мощные инструменты для синхронизации звука и видео.
Final Cut Pro X: Профессиональный видеоредактор для пользователей Mac, предлагающий широкие возможности для работы со звуком.
DaVinci Resolve: Бесплатная и профессиональная программа для редактирова��ия видео с мощными функциями работы со звуком.
5. Советы по улучшению качества озвучки
Записывайте в тихом помещении: Убедитесь, что в месте записи нет посторонних шумов, которые могут испортить качество звука.
Используйте акустические панели: Эти панели помогают уменьшить эхо и реверберацию в помещении, улучшая качество записи.
Проверяйте уровни громкости: Избегайте клиппинга и следите за уровнем громкости, чтобы запись была чистой и разборчивой.
Применяйте компрессию и эквализацию: Эти инструменты помогают сделать звук более сбалансированным и приятным для восприятия.
Заключение
Использование правильных инструментов и программ для озвучки видео на маркетплейсе значительно повышает качество вашего контента. От выбора микрофона до профессионального редактирования и синхронизации — каждая деталь важна для создания привлекательного и динамичного видеоролика. Веб-студия АРК ВЕБ готова помочь вам на каждом этапе создания качественного видеоконтента, который будет работать на вас и ваших клиентов. Свяжитесь с нами сегодня, и мы поможем воплотить ваши идеи в жизнь.
0 notes
Photo

Free Template Best Seller Project, Free FLP Download Link: https://pumpyoursound.com/f/pys/follow-download/138948 COPYRIGHT NOTE: Do not broadcast without changing the music Do not upload without changing on sales platforms or such as Spotify, Soundcloud, YouTube. You Get Copyright Myloops.net Link https://www.myloops.net/product/sunlight-uplifting-trance-fl-studio-template-vol-4-by-josephali For More Templates: https://www.myloops.net/brand/josephali House Template: https://www.myloops.net/product/house-fl-studio-template-vol-1 Mystery Template: https://www.myloops.net/product/fsoe-style-uplifting-trance-template-mystery-fl-studio Bestseller Luna: https://www.myloops.net/product/uplifting-trance-fl-studio-template-by-josephali-luna Used Vst Plugins (required): Sylenth1 Spire v1.0.x ReFX Nexus Sonata Violins Mixing Plugins (required): FabFilter Pro-Q 3 Voxengo SPAN (FREE) A1 Stereo Control Valhalla Vintage Verb Effector FX Module (FL Studio Stock Plugin) Soundgoodizer (FL Studio Stock Plugin) Fruity Multiband Compressor (Fl Studio Stock Plugin) Fruity Parametric EQ (Fl Studio Stock Plugin) Fruity Delay (FL Studio Stock Plugin) Fruity Reverb2 (FL Studio Stock Plugin) Channels: 25 Audio Channel 22 Sound Loops 13 Mixing Channel 7 Midi’s 1 Mp3 File 1 FLP File Zip Download Size: 40.07 MB #freetemplate #trance https://www.instagram.com/p/ChSqq4HDPOw/?igshid=NGJjMDIxMWI=
1 note
·
View note
Text
Download fabfilter total bundle fl studio

Download fabfilter total bundle fl studio license key#
Download fabfilter total bundle fl studio install#
Download fabfilter total bundle fl studio 64 Bit#
Download fabfilter total bundle fl studio full#
Throw it on your vocal and enhance it to your liking with some subtle harmonic distortion. The free La Petite Excite from Fine Cut Bodies (you just have to signup to get it) is a great plug to try out.
Download fabfilter total bundle fl studio full#
Visit for free, full and secured software’s. Vocal Vst Software - freeload Vocal Vst - Top 4 Download - offers free software downloads for Windows, Mac, iOS and Android computers and mobile devices. As the structure of vocal frequencies is totally different than an instrument. For a recording engineer or music producer, recording and mixing vocals is the toughest part of a session. Here I have 51 free VST plugins for vocals which can help you to create a great mix for your projects. Logout R2R means Retro Tournament, he also listed the date 2008 - this would be Meta in 2008 Download MP3 Review Of Audio Gd R2r 11 Dac And Headphone Amplifier Mp3 List Download 84 MB. 92 MB Links update: The Total Bundle is a set of all FabFilter plug-ins. If you are searching for some good Free VST plugins for Vocals then you are in the right place. 20 hours ago &0183 &32 Fictitious Freeroam Map with a Highway, Multiple Tracks, Backwoods Roads and a City. freeload Vocal AU VST Plugins & VSTi Instruments Here is our colection of FREE software, VST plugins, VSTi instruments, audio utilities and DAWs. This list of free VST plugin downloads offers five modern tools for your arsenal. Each month we search the web for some of the industry’s most essential freeware instrument and effect plugins. With this bundle, you get our professional EQ, reverb, compressor, multiband dynamics, limiter, de-esser and gate/expander, creative multiband distortion, delay, filter and synthesizer plug-ins. It includes a vocal pitch shifter, tape saturator, one knob reverb, a glitch delay, and a harmonic exciter. The Total Bundle is a set of all FabFilter plug-ins. 64-bit 2018 2019 analog au bass best DAW delay Download easy Editor edm eq fm free freeload Full fx help high sierra hip hop izotope MAC mastering microsoft mixing mojave native instruments os x osx plugin Plugins release reverb sine sound design studio synth synthesizer techno trance vst windows working.
Download fabfilter total bundle fl studio 64 Bit#
This would be compatible with both 32 bit and 64 bit windows. This is complete offline installer and standalone setup for FabFilter Total Bundle v2017.12.05. Click on below button to start FabFilter Total Bundle v2017.12.05 freeload. FabFilter Total Bundle v2017.12.05 freeload. How To Fabfilter Saturn Like A PRO - Duration.
Download fabfilter total bundle fl studio install#
Fabfilter Pro Total Bundle 2018 freeload & Install (MAC & Windows) (2018 HD). The Voice and VST32 sound best is now available. FabFilter Pro Q 3 Crack + Torrent (2020) freeload FabFilter Pro Q 3 Crack is a plugin so one can engage with your unprecedented sounds and consumer interface.
Download fabfilter total bundle fl studio license key#
In most practical situations I find it hard to tell the difference, but say that it is an audio quality protection, especially when using high Q parameters.Tag: fabfilter saturn license key FabFilter Pro Q 3 Crack + Torrent (2020) freeload. Another novelty is the “natural phase”, which specifies exactly the reaction of the analog EQ design phase. The Q-values of the pro-Q 2- are also in the more civilized civilization than the original. This allows the “Gain / Q interaction”, some analogous EQ designs common ownership, whereby the frequency of the bandwidth is more or less attached. Some of them are quite sophisticated as the small transmitter wheel, which now appears between Gain and Q when creating an EQ group.
1 note
·
View note
Text
Fabfilter timeless link to preset

FABFILTER TIMELESS LINK TO PRESET FOR MAC OS X
FABFILTER TIMELESS LINK TO PRESET SERIAL
FABFILTER TIMELESS LINK TO PRESET UPDATE
FABFILTER TIMELESS LINK TO PRESET FULL
Access the widest and ever-growing selection of pro audio plugins. FabFilter One - v3.27 * FabFilter Pro-C - v2.05 * FabFilter Pro-DS - v1.09 * FabFilter Pro-G - v1.18 * FabFilter Pro-L - v1.24. FabFilter Pro-L offers four advanced limiting .
FABFILTER TIMELESS LINK TO PRESET FULL
It is full offline installer standalone setup of FabFilter Pro-L v1. Pro-G - v1.18 * FabFilter Pro-L - v1.24 * FabFilter Pro-L 2 . Download FabFilter Total Bundle (2017.12.05)macOS torrent or any. Pro-L delivers sophisticated limiting algorithms, . FabFilter Pro-L is a top quality, feature-packed limiter plug-in suitable for both mastering and mixing. FabFilter Pro-L v1.24 Incl Patched and Keygen (WiN and OSX)-R2R crack. FabFilter Pro L v1.24 Incl Patched and Keygen (WiN and OSX) R2R. Some are designed to be as transparent as possible, while others . FabFilter Pro-L offers four advanced limiting algorithms, all with their own distinct character. FabFilter Micro v1.21* FabFilter One v3.32* FabFilter Pro-C 2 v2.10* FabFilter Pro-DS v1.14* FabFilter Pro-G v1.24* FabFilter Pro-L 2 v2.05* FabFilter . Twitch is the world's leading video platform and community for gamers. FabFilter Pro-L is a feature-packed limiter plug-in for mastering and mixing, with multiple advanced limiting algorithms and precise metering. FabFIlter Pro-L is a top quality, feature-packed limiter plug-in suitable for both mastering and mixing. FabFilter Pro-L is a professional, feature-packed brickwall limiter, suitable for transparent mastering as well as single .
FABFILTER TIMELESS LINK TO PRESET FOR MAC OS X
FabFilter Total Bundle for Mac OS X 10.4 / PowerPC (including RTAS) This installer contains FabFilter Pro-L 1.05. Slate Digital Virtual Tape Machines Fabfilter Saturn Vertigo Sound VSM-3 Wavesfactory . Hear instant results to make your mixes sound pro. Modern is the new 'best for all' algorithm that produces even better results than . FabFilter Pro-L 2 introduces four new limiting algorithms. Instruments/effects : Spire v1.0.20,Kickstart 1.0.9,FabFilter Pro-L 1.13.
FABFILTER TIMELESS LINK TO PRESET SERIAL
0 keygen: Af Artsacoustic Reverb Vst 1 2 0 4 serial keygen: Fabfilter Pro-q Vst Rtas 1. If you upgraded from Pro-L 1 to the new version, your original Pro-L 1 presets will be accessible via the V1 Preset Folder item in the preset menu. FabFilter Pro-L v1.25 WiN | 3.7 Mb FabFilter Pro-L features precise true peak level meters and extensive loudness metering with support for . FabFilter Pro-L features surgically precise output and level meters, including inter-sample peak. FabFilter ProL 2 v2.02 FabFilter ProMB v1.18 FabFilter ProQ 3 v3.10 . ProL 2: Improved the Pro Tools page table mapping for control surfaces. FabFilter Pro-G – v1.22 FabFilter Pro-L 2 – v2.03. v1.09 * FabFilter Pro-G - v1.18 * FabFilter Pro-L - v1.24 * FabFilter Pro-L 2 - v2.00 * FabFilter Pro-MB - v1.16 * FabFilter Pro-Q . FabFilter Pro-L 2 is a professional, feature-packed true peak limiter, suitable for transparent mastering as well as single instrument limiting.
FABFILTER TIMELESS LINK TO PRESET UPDATE
FabFilter Pro-L 2 is now available, a major update to the Pro-L plugin. FabFilter Pro-L 2 is a feature-packed true peak limiter plug-in, with multiple advanced limiting algorithms and extensive level and loudness metering. sounds a lot like the dynamic/allaround modes in Fabfilter Pro L. FabFilter Pro-R - v1.03 * FabFilter Saturn - v1.17 * FabFilter . v1.09 * FabFilter Pro-G - v1.18 * FabFilter Pro-L - v1.24 * FabFilter. Also newly added is the true peak limiting mode which makes . Pro L2 is a major update to the Pro-L limiter plug-in. An explanation of the attack and release settings in FabFilter Pro-L 2, aiming to clear up the widespread misunderstanding of how the plugin .
0 notes
Text
Fabfilter timeless 3 vs echoboy

#Fabfilter timeless 3 vs echoboy update#
#Fabfilter timeless 3 vs echoboy upgrade#
#Fabfilter timeless 3 vs echoboy full#
#Fabfilter timeless 3 vs echoboy trial#
Do you want to find the cheapest ways to buy FabFilter plugins with up to 60% off? Then check out one of musicmanta's most popular articles.
New tap delays: Tap designer with patterns up to 16 taps, which can be modulated individuallyįabFilter also claims to have improved sound quality, specifically when it comes to feedback, filters and saturation.
And with its unique effects, filters, tap patterns and unlimited modulation options, you can just as easily turn it into the ultimate sound-mangling machine Vintage Filters and Creative Effects.
New filters: Up to 6 filters, in original, vintage LP/HP/BP or Bell/Shelf/Notch flavours FabFilter Timeless 3 is a versatile, vintage-sounding tape delay, which will fully satisfy your everyday delay needs.
New effects: Drive, Lo-Fi, Diffuse, Dynamics and Pitch effects can be added to delays.
#Fabfilter timeless 3 vs echoboy full#
Improved interface: FabFilter claims this is simplified and easier to use than Timeless 2, adopting the dark FabFilter theme, including full screen mode, curve control for envelope generators, live visualisation of modulation targets and sources (drag and drop).
The following features are new or improved:
#Fabfilter timeless 3 vs echoboy upgrade#
This upgrade brings FabFilter TImeless 3 in line with the dark design aesthetic that FabFilter has now adopted for all its more recently updated plugins, such as Pro Q 3 and Pro R.
#Fabfilter timeless 3 vs echoboy update#
After the release of a teaser video a few days ago, the update of their delay plugin to Timeless 3 was released today.
#Fabfilter timeless 3 vs echoboy trial#
Make sure to download the 30-day trial first to get an understanding of how the plugin works.FabFilter didn't let us wait long. PriceįabFilter Timeless 3 is currently available for €109/$129. Select a sidechain feature for ducking, add several LFO’s to achieve a creative effect, add an envelope to control the attack and release of the delay, or add multiple sliders that can be linked to any other features. At the bottom, you’ll find some extra features that FabFilter added. Control the delay time and the delay panning by using the large dial in the middle of the screen. Add more harmonics, make it LoFi, diffuse the delay effect, control the dynamics, and pitch the effect 1 octave up or down. There are a total of 6 effects, consisting out of vintage filters and creative effects. In the middle row, you can find every feature of the delay effect. Move both EQ points to the preferred position to achieve the delay effect you’re seeking for. You will find a 2-band equalizer on the top right, functioning just like the FabFilter Pro Q 3. Click on the arrow, next to taps, to choose between several presets made by FabFilter. Drag, remove, disable, or even add multiple taps to adjust the timing of the delay. Choose between percentages or the length in ms of the delay effect, by clicking the taps button. At the top left, you’ll see a visualizer displaying the behavior and movement of the delay effect. Timeless 3 can be divided into 4 sections. The overall dark color will add more clarity to every feature and provides an elegant touch to the plugin. The size has been matched to all other FabFilter plugins as well as the colors. | Best House & Techno Sample Packs – Click here to checkoutĪt first sight, you’ll notice the layout has completely changed in comparison to its predecessor. Down below you’ll find an in-depth review of the FabFilter Timeless 3 plugin. The plugin development company, stationed in Amsterdam, built a completely different plugin that makes it exciting for us to write about. FabFilter’s flagship delay plugin has been improved numerous times throughout the years and Timeless 3 comes with a massive revamp from its predecessor. FabFilter recently released its newest version of the FabFilter Timeless plugin.
0 notes
Text
Fabfilter pro q 3 review

Fabfilter pro q 3 review update#
Fabfilter pro q 3 review full#
Fabfilter pro q 3 review pro#
I'm now disappointed as well, due to the fact there is now 1/2 hour of my life I'll never get back because I had to go fact-check that thread, the video from beginning to end (again) and read the official product page so that I'm not making assumptions. The other downsides over Q2 I couldn't find but I've wasted enough time now since I've already tested it myself (just a few moments ago) and it will fully do what I need and expect it to do. There is no implied idea that the side-chain is for the dynamic eq, there is explicit mention that it is for the analyzers incoming from other instances - the term side chain does not even exist in the Q3 promo page, it's mentioned once with during the multi-analyzer portion of the video, clearly stating that's what it's there for so the comment in the VI thread is an assumption minus actually checking the features. I'm now disappointed as well, due to the fact there is 1/2 hour of my life I'll never get back because I had to go fact-check that thread, watch the video from beginning to end (again) and read the official product page so that I'm not making assumptions.
Fabfilter pro q 3 review pro#
side-chain and other downsides vs Pro Q2. VI-C Forum has some very technical, objective criticisms re. Kinda disappointed by comments here so far. But there's no getting around the fact that they are pricey, and that they monetize their popularity as aggressively as they can. They make great plugins and their UI's for combining function with ease-of-use are IMO peerless. Besides the dynamic function, the L/R/Mid/Side options per band is really cool, as is the viewing of frequencies across instances.īut man, I missed the so-called grace period by 4 days.
Fabfilter pro q 3 review update#
I'm also unhappy about the update price ($89.50 for me), though I can see that this is much more than a simple bug fix enhancement, but offers several new and expanded features. I think it's obvious that they're arbitrarily keeping a differentiation between Pro-Q3 and the Pro-MB for sales/marketing purposes. I bet they didn't include this stuff to keep some room for Pro-MB and Pro-C. Editing of all Pro-Q3 instances within the same window (like melodyne studio) Optional control of realease, attack knee and lookahead Optional triggering of compression via external sidechain (for voice/guitar, bass/bass drum.
IMPROVED – Supports stereo, mono and surround channel layouts (up to Dolby Atmos 7.1.Great update, bought it instantly.
Double-click text entry of parameter values.
Extreme CPU optimization: Pro-Q 3 uses very little CPU and memory, so you can use hundreds of instances in a session.
Large output level meter with peak level readout.
Intelligent solo mode makes it easy to find problem frequencies and hear the effect of a band.
Different display ranges: 3 dB and 6 dB ranges for mastering, 12 dB and 30 dB for mixing.
Optional piano roll display to quantize EQ frequencies to musical notes.
IMPROVED – Built-in spectrum analyzer with Pre-EQ, Post-EQ and external spectrum visualization, adjustable range, speed, resolution, tilt, freeze and collision detection.
IMPROVED – EQ Match feature to automatically match the spectrum of another Pro-Q 3 instance or an external signal.
Universal filter slope support for all filter types, up to 96 dB/oct.
IMPROVED – Filter shapes: Bell, Notch, High/Low Shelf, High/Low Cut, Band Pass, Tilt Shelf, Flat Tilt.
Fabfilter pro q 3 review full#
Different interface sizes and additional Full Screen mode.IMPROVED – Spectrum Grab: just grab and adjust a peak in the real-time spectrum analyzer right away!.NEW – Flat Tilt filter shape, a flat tilting correction curve over the whole audible frequency spectrum.Operates in zero latency mode, linear phase mode with adjustable latency or the unique Natural Phase mode.NEW – Per-band mid/side or left/right processing, so you can EQ the mid, side, left or right signals separately.NEW – External spectrum visualization from any other Pro-Q 3 instance, including collision detection.NEW – Full surround support (up to Dolby Atmos 7.1.2) with intelligent speaker selection.NEW – Ultra-steep ‘Brickwall’ slope setting for LP and HP filters.IMPROVED – Gorgeous Retina interface with large interactive EQ display, multi-band selection and editing for maximum ease of use and efficiency.NEW – Optional Dynamic EQ mode for all bands (Bell and Shelf shapes), using any slope setting and with perfect analog matching.
0 notes
Text
空中泥棒インタビュー
聞き手:染谷大陽 (Lamp/Botanical House)
昨年、Botanical Houseからリリースしたファースト・アルバム『公衆道徳』は、その内容の高さから、話題が話題を呼び、ほぼ口コミでかなりのセールスを記録しました。

1. まず、ファースト・アルバム『公衆道徳』について振り返ってほしいのですが、ファースト・アルバムが世間でこれだけ好評だということをどう捉えていますか?また、あなた自身はあの作品に対して現在どんな感触を持っていますか?
A. まずはじめに、ご質問ありがとうございます。
どれくらい好評なのかまったく想像もつかないんですけど、私の音楽を聴いてもらって、そして好きになってもらえてすごく嬉しいです。感謝してます。
ファースト・アルバムを作る時、「俺、一体何してるんだろう」って考えたこともあったし、発売してからも(やらなくていいような)余計な事をしたかななどと思ったりもしました。でも今はそんな事は思ってません。
セカンド・アルバムの作業の終わり頃に、ボリュームや音のチェックのために久しぶりにファースト・アルバムを聴いたのですが、正直、面白かったです。最初は2、3曲くらいざっと聴いてみようと思ったんですが、結局、アルバム全部聴いちゃいました。笑
2. 意欲も質の高さもある、密度の濃いファースト・アルバムをリリースして、今作、自分自身への期待やプレッシャーは相当なものだったかもしれません。セカンド・アルバムへのモチベーションや意気込みはどんなものだったのでしょうか?
A. ファースト・アルバムに全てを尽くして完成させた後、かなり長い間、頭がガンガンして、二度とこんな音楽は作らないと思っていたんですが、ある程度時間が経って、もう一回だけやってみるのも悪くないかもという気持ちが大きくなって、セカンド・アルバムを作ることにしました。
その間、他の事もいろいろやりました。
最終的に発売しないで捨てたものや、アルバムとして10曲以上作ったものから4曲のEP(2016年発売の『影共同体―鏡の森』)を出した経験などが、かなり刺激になりました。

3. 前作と今作の制作でフォーカスしたポイントをそれぞれ挙げてもらえますか?どんなことに気を遣いましたか?また、今作において、ファースト・アルバムとの違いを出すことは意識をしましたか?概念的なことと具体的なことをそれぞれ教えてください。
A. セカンド・アルバムは、ファースト・アルバムよりもっと具体的な計画を持って作り始めました。
俺が一番弱いと思ったところや作業する時にいつも避けてきた事に集中したら、これから音楽を作る時に、もっと楽になるだろうなと思いました。
そこで、歌詞を作る事に最も時間とエネルギーを注ぎました(本当に一人では出来ないと思った曲は、Summer Soulさんに助けてもらいましたけど)。
珍しい感じのエフェクトや音のサンプルに頼る事を減らして、代わりに曲の構成とコード進行に、より集中しました。
そして今回のアルバムは、ライブで演奏する事もかなり意識しながら作ったので、そのことが楽器や編曲のチョイスにも影響を与えていまして、サンプリングを減らしたり、ファーストよりelectronicではないものになっています。
サウンド的にも、より低音に重点を置くことにしました。
Dumbo Gets Madという好きなバンドのファースト・アルバムの恐ろしく厚い低音がすごい魅力的だと思って、俺も試してみました。
最初から意識したわけではなかったけど、長くて、でもリスナーがずっと興味を持ったまま最後まで聴ける曲を作りたかったんです。
4. このセカンド・アルバムのアイディアの出発点やコンセプト、また、制作期間を教えてください。これらの8曲は全てファースト・アルバム制作後に作られた曲なのでしょうか?
A. そうですね。 全て2016年末から書き始めた曲です。
アイデアの出発点とコンセプトははっきり言えないけど、制作期間は1年半ほど掛かりました。
この8曲だけを作業してきたわけではなく、途中でボーカルが辞めちゃって、もう一度作り始めたりして、かなり時間が掛かりました。
曲のアイディアは、例えば、最初の曲のAパートのoutroとBパートのoutroが同じだったら面白いかなって、パズルのように組み合わせたりしました。アルバムの仕上げ一週間前くらいにBパートを完全に変えたりました。
そんな感じで、制作の最後の方に「これはちょっと違う」と思って、変えてしまったところが多いですね。
5. 今回の制作でどんな機材が使われたのでしょうか?制作環境も教えてください。アナログ機材とデジタル機材に分けて教えてもらえると嬉しいです。
A. 制作環境は(自分が住んでいる地下の)上の店がカフェからペットサロンに変わったこと以外はファースト・アルバムの時とほぼ同じですね。うるさい足音の代わりに小犬たちが来て良かったです。
アナログ機材は、TASCAM M-06のミキサー、AKAI X-150Dのリールデッキ、Portastudioの4トラック・カセットデッキ、マイクロ・カセット・レコーダーを主に使用しました。
それと、どこかでひろった状態��良いLucky GoldstarのDr. Wicomという奇妙な語学機(見た目はカセットレコーダーのような語学練習用の電気機器。再生スピードを簡単に変えられる)が目に付いて、それも沢山使いました。語学機だからデフォルトでEQがかかるんです。だから、帯域をあまりにも広く取っちゃう音は一度それに送って、そこから戻したりしました。
それと、DIYREという(自分ではんだ付けをして組み合わせる500 seriesの機器を作る)会社の機材もたくさん使いました。
プラグインはFabfilterとiZotopeを主に使用しました。FabfilterのPro-Q以外のEQソフトは使えません。これ大好きです(泣)
6. 今作に歌や作詞などで参加したSummer Soulさんの存在が作品に色を加えていると思います。彼女の参加の経緯を教えてください。
A. 俺があまりにも(音楽に)うるさいから、一緒に作業をしてきたボーカルがやめてしまって、数ヶ月間ボーカルなしで作りました。
その時、以前Soundcloudでメッセージを何度か交換したSummer Soulさんが多くのアーティストにフィーチャーされていた事を思い出して、もしかすると俺の音楽にも参加してもらえるかと思い、聞いてみました。
声もそうだし歌うスタイルも格好よくて俺の音楽にもよく馴染むだろうと思いました。
歌詞にもすごく気をつかってくれたし、レコーディング作業も素早くやってくれて、とにかくこのアルバムでは、すごく助けてもらいました。
7. 韓国発の音楽として、他では聴けない、とても珍しい音楽だと感じているのですが、あなたの生い立ちについて、音楽体験とともに、聞かせてもらえますか?
A. 子供の頃はgodやSeotaijiのような韓国の音楽を聴いていたけど、大きくなってからはテイストがかなり変わりました。
周りの音楽をやってる友達の話を聞いてみたら、みんな子供の頃、友達や先輩、音楽の先生などから「これ良いよ。聴いてみて」って音楽の世界を広げてくれる人がいたようですが、俺にはそういう人がいなくて、遅いペースで幅を広げました(最初に買ったMetallicaのアルバムもSt. Angerでした(笑))
大学で電子音楽のサークルに入ったことが、俺がどんな音楽を聴き、そして作るかという事に大きな影響を与えたと思います。
毎週、新鮮な(簡単には見つけられない)音楽に接して、耳がすごく開かれたし、かなり有名なビートメーカーの人たちも来て、音楽の作り方なども説明してくれて、すごくインスピレーションを受けました。

8. 今、音楽への接し方は人それぞれで、レコード、CD、デジタルのダウンロードやサブスクリプション(ストリーミング)、YouTube等インターネット経由で聴くなど色々あると思いますが、あなたの場合、普段どんな風に音楽を聴くことが多いですか?
A. Bandcampでダウンロードして聴くのが95%くらいだと思います。MP3、WAVの両方をダウンロードして、MP3は俺のiPodに、WAVはiTunesに入れてるけど、2年前くらいから240GBのiPodがいっぱいになって、新しい音楽を入れるためには、あまり聴かない音楽を消去しなければならず、それがとてもつらいです。
散歩しながらヘッドホンで音楽を聴くのが好きなんですが、聴いてる曲から他の曲や他のアーティストを(連想して)聴きたくなった時に、それをその場で探すことが多いんです。二つの曲のミックスやサウンドを比べる時に便利なiPodの空き容量が足りなくて心配です。
残りの5%は、YouTubeです。直接音源ファイルを持ってないと何だか不安なので、ストリーミングでは一度も聴いた事がないです。
9. 既に今作を聴いたファンからYouTubeやBandcampなどに感想が多く書き込まれています。多くの人が今後のあなたの活動に期待しているのは間違いないでしょう。最近、ライブをやる為にバンドメンバーを集めたと聞いています。ライブ活動を含めた今後の活動と展望を教えてください。
A. ライブのために必死で募集したドラマーとピアニストとやった最初のリハーサルを録ったものを聴いたら、ひどく落ち込みました(笑)。演奏が上手な二人を呼んでしょぼい音楽をやらせたような気がしてメンバーにかなり申し訳なかったです。
だから今はちょっと違う方向で考えてるんですけど、ファーストやセカンド・アルバムをライブでやってみるのもオプションの一つだし、または完全に電子音楽の方に行くことも悪くないなと。まず考えてみて、どんなことでも始めてみたらいいですね。
10. 最後に、来日公演の可能性と、日本のファンに向けて一言お願いします。
A. 日本で自分の音楽を聴いてくれている方がいるなんて不思議で感謝してます。
公演はうん。。上でも言ったけど、バンドの方向を決めないと、いつ公演が出来るかは言えないんですね。
とにかく俺の音楽を聴いてくれて、ありがとうございます。
ファースト・アルバムと方向はすこし違うけど、セカンド・アルバムもよろしくお願いします。
公衆道徳名義でリリースしたファースト・アルバムのインタビューはこちら
空中泥棒 『Crumbling』
日本盤CDにはボーナストラックが付きます。
Tower Records
Amazon
diskunion
Botanical House
youtube
youtube
3 notes
·
View notes
Photo

Free Template Best Seller Project, Free FLP Download Link: https://pumpyoursound.com/f/pys/follow-download/138948 COPYRIGHT NOTE: Do not broadcast without changing the music Do not upload without changing on sales platforms or such as Spotify, Soundcloud, YouTube. You Get Copyright Myloops.net Link https://www.myloops.net/product/sunlight-uplifting-trance-fl-studio-template-vol-4-by-josephali For More Templates: https://www.myloops.net/brand/josephali House Template: https://www.myloops.net/product/house-fl-studio-template-vol-1 Mystery Template: https://www.myloops.net/product/fsoe-style-uplifting-trance-template-mystery-fl-studio Bestseller Luna: https://www.myloops.net/product/uplifting-trance-fl-studio-template-by-josephali-luna Used Vst Plugins (required): Sylenth1 Spire v1.0.x ReFX Nexus Sonata Violins Mixing Plugins (required): FabFilter Pro-Q 3 Voxengo SPAN (FREE) A1 Stereo Control Valhalla Vintage Verb Effector FX Module (FL Studio Stock Plugin) Soundgoodizer (FL Studio Stock Plugin) Fruity Multiband Compressor (Fl Studio Stock Plugin) Fruity Parametric EQ (Fl Studio Stock Plugin) Fruity Delay (FL Studio Stock Plugin) Fruity Reverb2 (FL Studio Stock Plugin) Channels: 25 Audio Channel 22 Sound Loops 13 Mixing Channel 7 Midi’s 1 Mp3 File 1 FLP File Zip Download Size: 40.07 MB #freetemplate #trance https://www.instagram.com/p/ChSqq4HDPOw/?igshid=NGJjMDIxMWI=
0 notes
Text
HOW TO MIX VOCALS
How To Mix Vocals - In 7 Easy To Follow Steps
INTRODUCTION
Hey there this is Bunmi, a veteran mix engineer and producer. Owner at GSol production.
This article is going to cover a lot of ground as possible.
We will discuss:
How to make your vocal sound professional.
The type of effects you should put on vocals
Vocal Mixing Chains
Vocal Mixing Techniques
The vocal mixing techniques you will learn here today,
You will be able to use the mixing techniques learned here to mix vocals in genres such as Hip Hop, Rap, Pop, R&B and EDM
I am going to start by showing you the before and after of a vocal I mixed.
We will discuss the philosophy and mindset of mixing vocals.
I will walk you through my personal vocal mixing chain which you can download from the link below. I will be sharing my mindset on why I do what I do.
By the way, all the vocal mixing chain steps can be replicated in any DAW such as Logic Pro, FL Studio, Ableton Live and Pro Tools.
You will see and hear me toggle on and off the vocal mixing chain to hear, with it and without it.
In the vocal mixing chain, we have:
1. Corrective EQ - remove annoying frequencies
2. Dynamic Peak Compression - tame unruly peaks for more consistent vocal
3. Tonal Shaping EQ - bring out presence, midrange power, and air
4. De-Esser - reduce and tame sibilance or harshness
5. Tonal Density Compression - create a more compactness in sound quality
6. Volume - add gain and volume
7. Saturation - warm up the sound and increase pleasant harmonics
The first step to getting a good vocal sound begins with a good vocal recording. Ensure you record with a good microphone in a good room. You may have an acoustic treatment which is rather expensive, but if you can't afford it, just make sure you have a room that is semi dead, not too reflective or echoey.
The next thing to take note of is your gain staging. Record at decent gain level. Don't record a too hot signal nor a too low signal. If you may record low but you want to be mindful of the room you are in. If you're not in a good room, you may run the risk of recording all surrounding noises too.
After you've achieved a very good vocal recording, the next phase is editing. In the editing phase, you want to listen to the entirety of the vocal recording.
Listen for pops, clicks, clips or any annoying frequency that may poke at you.
Repair any damages, Use iZotope RX to repair clicks, clips, noise, and plosives too.
If there are any room tones or annoying frequencies, use your EQ to notch them out.
I'm sure you have read this in a many blogs out there but I just want to cover all the bases.
So after you’ve got all the editing done on your vocal recording, then we can start prepping the vocal for the mix.
Performance Editing
In the performance editing phase, you should fix any pitch or timing errors in your vocal recording. (Try Melodyne) If this is a singing vocal, make sure you have a pitch correction done, and tune all the vocals, the vocal melodies and harmonies in tune with all the key of the song.
All right let's get to the vocal mixing section.
HOW TO MAKE YOUR VOCAL SOUND PROFESSIONAL
The reason why a lot of amateur engineers can’t get a really good vocal mixing sound is because a bunch of the stuff that we read online concerning mixing years ago, unfortunately, they do not work in this modern production era anymore.
You have to understand that the modern production era requires a lot of processing for you to be able to compete with what is going on out there. When you listen to your favorite songs on the radio, Spotify and iTunes, you realize that your mixes always never come close.
Why? Because 1. the record labels hire the best of the best. 2. a seasoned engineer understands that he has to compete with a degraded mp3 version quality and his mixes are being played on crappy iPhone speakers and laptops. He knows that even though all the recording and production were done with a lot of high-end equipment like a $10,000 Sony C-800 microphone, into a $10,000 Neve preamp, into a $3,000 Tube-tech Compressor, then mixed with an SSL 4000G, $50,000 console mixing board (and you don't really need that anymore these days).
He understands that the end product is going to be converted to an MP3, and played out of the worst Android phone speakers. Imagine from high pristine 192kHz / 96kHz quality audio convert down to 44.1kHz then to 256Kbps degraded MP3 version.
This is why you have to go the extra mile. You have to over process your audio. You have to process more and use a lot of compression and a lot of saturation.
Alright let's Dive In. Here Comes The Gold.
Now the fun stuff:
WHAT EQ FREQUENCY IS VOCAL
Let’s discuss where on the human hearing frequency threshold are the human voices.
Male vocal fundamental frequency 85Hz - 180Hz
Female vocal fundamental frequency 165Hz- 225Hz
With both male and female having their harmonics and overtones extend up to 8kHz.
In both Step 1 and Step 3, you will see the exact frequencies I cut out to clean vocals, and the exact frequencies I boost to enhance it. Notice how these frequencies fall within the range of 85Hz - 8kHz or a little higher.
VOCAL MIXING CHAINS
VOCAL MIXING TECHNIQUES
STEP 1 - CORRECTIVE EQ
Remove annoying frequencies.
The first plug-in in the chain is a corrective EQ, and what we’re doing here is to remove any frequency that might be bugging us in the vocal.
And, also we are rolling off the low bottom frequency around 80Hz -150Hz, depending on the vocal, also depending on the gender. Once we are done, we will move up to the next octave up. I will give you some pointers and some frequencies to look for. Always check around 200Hz - 400Hz area, that’s where the boxiness leave. And around 1kHz - 4KHz area for harsh and honky frequencies. I would generally do a sweep around these spots to find any annoying frequencies that need to be taken out.
I would recommend: Be very gentle when you remove these frequencies. The tighter the Q, the better. Use a very narrow bandwidth, cut between 2db to 6db depending on the vocal.
My Recommendations:
Remove plosives and rumbles: Low Cut / HP Pass Filter 85Hz - 150Hz (depending on the gender)
Reduce woof-ness and boxiness : 200Hz - 400Hz
Reduce Honk and Harshness 900Hz - 4kHz
STEP 2 - DYNAMIC COMPRESSION
tame unruly peaks for more consistent vocal.
This is where I would shave off the peaks of the vocal performance and tame its dynamics. I would assume that you guys already know what a dynamic compression does but however, I will give you my recommendations.
To be able to grab the transients in a vocal recording especially rap vocals, or singing vocals with a lot of energy in a fast-paced song, you would want to use a very fast attack.
Now I recommend an attack time between 3ms, 5ms or 7ms.
Couple that with a medium too fast release. Release settings are usually based on the speed of the audio signal and the tempo of the song. My recommendations is anything between 100ms - 300ms range. And like I said, depending on the tempo of the song.
My recommendations:
Ratio : 3: 1 / 4: 1
Threshold: -20db - - 29db
Attack time: 3ms - 7ms
Release time: 100ms - 200ms (based on the song BPM)
STEP 3 - TONAL SHAPING EQ
bring out presence, midrange power, and air
Tonal shaping EQ. What I usually do at this stage is, sweep around to find a sweet spot in the vocal recording. I will try to give you some frequencies to look out for. Check anywhere between 1500Hz all the way to 10KHz. Between 1.5kHz to 2.5kHz is good for a midrange boost. Also anything between 3.5kHz to 10KHz is good for presence and air boost.
My recommendations:
1.5kHz - 2.5kHz for midrange and power
3.5kHz - 7kHz for presence
9kHz - 12kHz for air , sheen
Use your ears to find a sweet spot for your specific vocal.
STEP 4 - DE-ESSER
reduce and tame sibilance or harshness
De-essing it's a pretty simple process. You may check this link on my blog about de-essing.
De-essing is a process that gets rid of the "s"s. It uses a classic compressor to process out the sibilance. There are quite a few different techniques to try, and several ways to go about de-essing, so we'll tackle them one by one.
My recommendations:
For de-essing, I would check out frequencies in the range between 3.5 K all the way to 7K, sometimes 10K. But all your culprit, there are usually round 3.5 K to 7 k. (try both split and wide-band mode)
STEP 5 TONAL DENSITY COMPRESSION
create a more compactness in sound quality
Tonal Density. The definition according to the Oxford Dictionary:
is the quality of a sound associated with the perceived tightness or compactness of a tone, greater density.
This is exactly what we 're trying to achieve in a vocal production. In order to achieve this type of quality, we have to set up our compressor in a different way other than the last.
My recommendations:
Ratio: 2:1 ratio
Attack time: medium slow attack around 20-40ms,
Release time: medium fast release around 50ms - 150ms (based on the tempo of the song like the last time).
Threshold settings: Pull the threshold all the way down. -30db / -40db. (we need to grab all the nuances of the vocal)
STEP 6 - VOLUME
add gain and volume
This is simple.Turn up the volume with any gain or volume control you have.
We added 8db of vocal in this example.
STEP 7 - SATURATION
warm up the sound and increase pleasant harmonics
Saturation is adding slight form of distortion which creates pleasant-sounding harmonics. In this case, we are using Ableton Live Saturation plugin in analog mode.
You may use tape saturation plugins, or transformer or tube saturation whichever you have available is fine.
Plugins recommendations: Waves Kramer tape, Waves J37 Tape, Decapitator, Fabfilter Saturn. iZotope Exciter, UAD Suder
BONUS STEP:
After, you have done all these steps, if you listen and think your vocal still don’t sound professional, I’ ll recommend:
Double up on 1 or 2 of the steps above for more hyper processed sound, but use them in parallel to retain some dynamics.
Request a new vocal recording with a better performance.
Hire an expert Mix Engineer - CLICK HERE
DOWNLOAD THESE VOCAL MIXING CHAIN IN A PRETTY EASY TO FOLLOW LOOKING PDF:
DOWNLOAD HERE
WATCH ME USE THIS VOCAL MIXING CHAIN AND TECHNIQUES IN A VIDEO:
PS:
I JUST DID A VIDEO ON USING MODERN REVERBS ON VOCALS on my youtube channel.
We will discuss using reverb next time.
Happy Mixing.
GSol Production Team
Bunmi
gsolproduction.com
0 notes
Photo

4 Applications for the FabFilter Pro-Q 3 http://dlvr.it/QtDJ2W
0 notes

Photo

4 Applications for the FabFilter Pro-Q 3 http://dlvr.it/QtDJ2V
0 notes
Photo

Free Template Best Seller Project, Free FLP Download Link: https://pumpyoursound.com/f/pys/follow-download/138948 COPYRIGHT NOTE: Do not broadcast without changing the music Do not upload without changing on sales platforms or such as Spotify, Soundcloud, YouTube. You Get Copyright Myloops.net Link https://www.myloops.net/product/sunlight-uplifting-trance-fl-studio-template-vol-4-by-josephali For More Templates: https://www.myloops.net/brand/josephali House Template: https://www.myloops.net/product/house-fl-studio-template-vol-1 Mystery Template: https://www.myloops.net/product/fsoe-style-uplifting-trance-template-mystery-fl-studio Bestseller Luna: https://www.myloops.net/product/uplifting-trance-fl-studio-template-by-josephali-luna Used Vst Plugins (required): Sylenth1 Spire v1.0.x ReFX Nexus Sonata Violins Mixing Plugins (required): FabFilter Pro-Q 3 Voxengo SPAN (FREE) A1 Stereo Control Valhalla Vintage Verb Effector FX Module (FL Studio Stock Plugin) Soundgoodizer (FL Studio Stock Plugin) Fruity Multiband Compressor (Fl Studio Stock Plugin) Fruity Parametric EQ (Fl Studio Stock Plugin) Fruity Delay (FL Studio Stock Plugin) Fruity Reverb2 (FL Studio Stock Plugin) Channels: 25 Audio Channel 22 Sound Loops 13 Mixing Channel 7 Midi’s 1 Mp3 File 1 FLP File Zip Download Size: 40.07 MB #freetemplate #trance https://www.instagram.com/p/ChSdiXWD5xO/?igshid=NGJjMDIxMWI=
0 notes
Text
5 Reasons Why Your Mixes Aren't Sounding The Way You Want
Reading Time: 8-10 Minutes
Hey guys! It's Brad Simons here today, and I'm gonna today's post is going to be about 5 reasons why your mixes aren't sounding as good as you want them to. There is an infinite number of reasons that your mixes aren't quite there, but the following are some of the common ones that I encounter. Check 'em out!
1) Bad Sounds At The Source
You've heard it before, and I'm gonna say it again. From a mountaintop. You can't make a great mix out of garbage sounds. It's just not possible. You may be able to make it sound better than it did before you started mixing, but it's never going to be world class. So, make sure you get great tones and performances in tracking! If you didn't track the music, then maybe have a chat with the tracking engineer and suggest some revisions.
Now having said that, there are a lot of things these days that you can do to ensure that you get good sounds. One common one is to supplement your drum tones with drum samples. In fact, I would argue that most "real" drum recordings that you hear on the radio are sampled up. This can help provide consistency, control and punch to your drum tones. I suggest making your own sample library from your recordings, but you can also use packs like Superior Drummer, Slate Drums, Native Instruments Abbey Road, to name a few. Second, grab as many DI tracks as you can, especially on instruments like electric guitar and bass. You can then use that DI signal to re-amp if you need to get a new tone.
2) Muddy Bottom End
I struggle with this one, as I think a lot of engineers do. Getting the bottom end (and the lower mids) just right is really tough. But if you don't get it right, your mix will either sound thin and weak, or it will be woofy and unfocused.
A good place to start is to put a hi-pass filter on every single instrument with exception of the kick drum and the bass. I like to start at about 100 Hz, and then work from there. What this will do is provide the room needed to let the kick and bass come through cleanly. These are generally the two instruments that will make that low end just right.
You also need to make a decision how the bass and kick are sitting together. I typically like to keep the kick in the sub frequency range and cut some of the bass off with a hi-pass filter. Some mixers like to go the opposite way, cutting some of the kick off to give the bass more room. My opinion is to let the genre and the song dictate that. For instance, if you're mixing a trap song, you'll want the bass to have TONS of sub frequency (although it may be a pitched 808), so maybe let the kick give the thump up a little higher. If you're mixing a rock track, typically you'll want to trim up the bass a bit and let the kick drive the song. Not hard fast rules at all, but some guidelines.
Think about the lower midrange in the same way. I look at the lower mids as the 200 Hz to 500 Hz area. Try muting instruments in the mix and see what's clogging up that area. If your mix is sounding muddy, try muting various instruments until you find what's doing so. Then try cutting some of that mid-range until you find the clarity you're looking for. Some common ones for me are pads, synths, keys, and guitars. Again, I struggle with this one a lot, it's tough to really make it work.
Another thing you can do is trim a bit of midrange on the mix bus. I like to use a UAD MEQ 5 at the end of my mix bus chain to trim a bit of mids out if needed. As I've said in a previous post, if I need to cut more than 1 dB, I'm probably going to head back into the tracks causing the problem first.
3) Too Much FX
Maybe it's just me, but I LOVE using reverbs and delays. I love a roomy, ambient mix, with elements that are up close to the speakers, and elements that sound as though they are a hundred feet away. Gives the mix alot of depth. However, this can easily lead to an accumulation of mids and general cloudiness in your mix. So this somewhat ties into what we mentioned in the previous point.
So one place to start is to hi-pass filter all of your reverb and delay channels. This will prevent delay repeats and reverb decay create an accumulation of bottom end and muddy mid range. I typically like to do around 250 Hz, but that's a matter of taste. There are instances where I want to hear some more rumble from the verb, but this is a general starting point.
Second and more importantly, be selective in which instruments you put reverb and delay on. And also be selective of what style of each. Give each instrument needing reverb a different depth and algorithm. Same with delay, avoid overuse of the same delay, as it can create a mess. Some things I like to do are find lead elements and make them pretty wet, and push them back. By contrast, I like using slap delays on vocals.
Experiment with different elements and be selective! Don't overdo it!
4) Overuse of Compression
I think overusing compression is a pretty dang easy trap to fall into. Sometimes as engineers, we get in the mindset that we "have" to do certain things. For instance, if we want a punchy mix, we think we need compression. And then furthermore, if we want everything to be punchy, we need compression on everything! This is certainly not the case.
Remember, the initial point of compression is volume control. And yes, you can certainly use it to get more punch and as an effect. Not disputing that. But maybe a hi-gain guitar tone just doesn't need any compression. Why is that? Because it is already naturally compressed! Ask questions on each track. Does this instrument need compression? If so, why is that? How am I expecting it to sound? Is this the right way of accomplishing this?
A lot of plugin compressors come with a factory default setting that has some makeup gain already engaged. So the moment you add the plugin, the volume may increase by 2 dB. That's an easy way to be fooled into thinking it sounds better. An easy way to remain objective is to adjust the volume of the plugin to match the bypassed level. That way you can bypass and un-bypass the plugin, going back and forth to truly hear what the plugin is doing to the sound.
Also, don't overcompress your mix bus! This can easily make your mix painful to listen to, pumpy and awkward. Let me be the first to say that mix bus compression is a vital part of my mix process, but it has to be done with taste and caution. It can easily ruin your mix!
Just like reverb and delay, be selective with compression and don't overdo it!
5) Bad Frequencies
Bad frequencies can make your life a nightmare. Yikes. This one can be tough to hear and tough to iron out. Sometimes it takes a lot of searching to find where your problems are.
Let's say you hear a certain frequency ringing out in the mix. Try muting instruments until you find the one that contains the bad frequency. Now if only it were always that simple. Sometimes there are multiple instruments contributing to a bad frequency, and you need to cut that from all of them!
So once you do find the track(s) that are causing the problem, pull out an EQ. We like to use the FabFilter Pro Q 2 and use the bandpass mode to isolate that frequency. Then cut it out! Use your own judgment on how much you want to cut out, and how wide the Q is on that frequency band. If the cut is starting to affect the general tone of the instrument, then consider tightening the Q or cutting just slightly less.
You can also apply this technique on busses, from instrument busses to the mix bus in general. I like to be a little more cautious when applying corrective EQ to busses, as you're starting to make changes to many instruments at once.
And that's it for this post. Hope that helps you find faults in your mix, and therefore improve the quality of future mixes. Please comment below if you have any problems you've encountered and how you overcame them.
If you like what we're doing here, please signup for our email list, follow us on social, and join our Facebook group!
Cheers!
Brad
Velveteen Audio
ABOUT THE AUTHOR:
Brad is the owner/founder of Velveteen Audio and it's record label counterpart Velveteen Records. He engineers, produces, plays in his own project called Optics, and has a YouTube Channel on music and business.
RECENT POSTS
CATEGORIES
FEATURED PRODUCT
/*<![CDATA[*/ (function () { var scriptURL = 'https://sdks.shopifycdn.com/buy-button/latest/buy-button-storefront.min.js'; if (window.ShopifyBuy) { if (window.ShopifyBuy.UI) { ShopifyBuyInit(); } else { loadScript(); } } else { loadScript(); } function loadScript() { var script = document.createElement('script'); script.async = true; script.src = scriptURL; (document.getElementsByTagName('head')[0] || document.getElementsByTagName('body')[0]).appendChild(script); script.onload = ShopifyBuyInit; } function ShopifyBuyInit() { var client = ShopifyBuy.buildClient({ domain: 'velveteen-records.myshopify.com', apiKey: 'cc53683ffd4600673ee3da831ba4f3b3', appId: '6', }); ShopifyBuy.UI.onReady(client).then(function (ui) { ui.createComponent('product', { id: [10867501059], node: document.getElementById('product-component-33f0bad97d4'), moneyFormat: '%24%7B%7Bamount%7D%7D', options: { "product": { "variantId": "all", "width": "240px", "contents": { "imgWithCarousel": false, "variantTitle": false, "description": false, "buttonWithQuantity": false, "quantity": false }, "styles": { "product": { "@media (min-width: 601px)": { "max-width": "100%", "margin-left": "0", "margin-bottom": "50px" } }, "button": { "background-color": "#861891", ":hover": { "background-color": "#791683" }, ":focus": { "background-color": "#791683" } }, "variantTitle": { "color": "#ffffff" }, "title": { "color": "#ffffff" }, "description": { "color": "#ffffff" }, "price": { "color": "#ffffff" }, "compareAt": { "font-size": "12px", "color": "#ffffff" } } }, "cart": { "contents": { "button": true }, "styles": { "button": { "background-color": "#861891", ":hover": { "background-color": "#791683" }, ":focus": { "background-color": "#791683" } }, "footer": { "background-color": "#ffffff" } } }, "modalProduct": { "contents": { "img": false, "imgWithCarousel": true, "variantTitle": false, "buttonWithQuantity": true, "button": false, "quantity": false }, "styles": { "product": { "@media (min-width: 601px)": { "max-width": "100%", "margin-left": "0px", "margin-bottom": "0px" } }, "button": { "background-color": "#861891", ":hover": { "background-color": "#791683" }, ":focus": { "background-color": "#791683" } } } }, "toggle": { "styles": { "toggle": { "background-color": "#861891", ":hover": { "background-color": "#791683" }, ":focus": { "background-color": "#791683" } }, "count": { "color": "#ffffff", ":hover": { "color": "#ffffff" } }, "iconPath": { "fill": "#ffffff" } } }, "productSet": { "styles": { "products": { "@media (min-width: 601px)": { "margin-left": "-20px" } } } } } }); }); } })(); /*]]>*/
(adsbygoogle = window.adsbygoogle || []).push({});
0 notes
Last Seen Blogs


boxedcrackers
•bOXED cRACKERS•

udyamregistration1
Untitled

lightssdaily
lights or gtfo

alassss2
Sin título