#ADOBE PREMIERE PRO TUTORIALS PLEASE
Explore tagged Tumblr posts
Visit Tumblr Blog
Explore Tumblr blogs with no restrictions, modern design and the best experience.
Last Seen Tumblr Blogs


Fun Fact
1,644 Tumblr posts in 1 second.
Text
i dont know how to edit videos i fear
#ADOBE PREMIERE PRO TUTORIALS PLEASE#IM ON MY KNEES! I CANT EDIT#this program makes me want to DIIIEIDIEIEEIEIEDIEEEIEE#pmtok#paper mario the origami king#paper mario#king olly#super mario#pmtok olly#pmtok olivia
17 notes
·
View notes
Note
If I wanted to get into making gifs, how does one start? WHERE does one start?
Sorry for the late response! I feel like I might not be the best person to ask, just because I don't make my gifs in the most typical way. There are a bunch of ways to make gifs, and none of them are wrong per se, but most other gifmakers go frame by frame, whereas I like to import the video files directly onto the Photoshop timeline. My way was easier to learn, but can be a little limiting in what I can do with them. I'll include an updated tutorial on how I make mine under the cut below, but if you'd like to go the more typical route, then I recommend checking out one of the popular gif making tutorials, such as this one, as a base tutorial and then playing around with it.
How I Make My Gifs
Needed:
- Adobe Photoshop (I currently use 2023) - Any video editing program (I currently use Adobe Premiere Pro 2020) - A screen recording program (I use OBS)
How to:
1 - Record your game footage using OBS (or any screen recording program). Always make sure your game is running the highest settings. 2 - In Premiere Pro (or any video editing program), import your captured footage and create short, identical length clips that are under 2 seconds each. I recommend exporting in 1080p, no less than 30fps, using the best quality. Export as .avi or .mp4, something Photoshop accepts. 3 - In Photoshop, create a new 1920×1080 file. 4 - Click the Windows tab and make sure you have Timeline ticked. 5 - On the Timeline, click Create Video Timeline. 6 - Click the down arrow to the left of the video layer, and add as many New Video Groups as you have clips. 7 - Click the down arrow on each of those video layers and Add Media (your clips). One video per layer. 8 - Right click on one of the videos in the timeline and change the speed (I usually go 70% but if you like slower gifs, go with 60% or 65%). Then bump the Duration slider all the way up. Do this for all the video clips. 9 - In the layers tab to the bottom right, convert each video clip to a Smart Object. 10 - Resize and crop depending on which size is needed for the set. Here are the dimensions to use for Tumblr. The height can be whatever you want, but the width is very important. 11 - Now for colouring. If you're unfamiliar with editing in Photoshop, it might be helpful to look through the #psd coloring tag and finding something you like. I personally make mine from scratch because game lighting is so unpredictable and varied. It's up to you! 12 - I really recommend some Smart Blur and Smart Sharpen on each of the video layers. How much or little you use will personal preference. At the moment I'm typically doing 0.3-0.5 Smart Blur radius and 0.4-0.5 Smart Sharpen radius. 13 - If you're looking to use subtitles, check this tutorial out. 14 - Click on File > Save for Web, and save each clip this way. Play around with the settings. Just make sure each gif comes out under 10mb, because that's what Tumblr's current limit is. That's it! Hope that was easy enough to follow. If you do make/post some, please feel free to tag me in them. I'd love to see! :)
16 notes
·
View notes
Text
Pixilation edit of stopmotion.
So, what happened is that we didn’t just use stop motion, but also incorporated different close-ups and some video footage of a book falling.
At first, I planned to transport everything as frames, thinking I could just copy and paste motions—that way, I’d have full control over each frame. It was definitely more time-consuming, and my professor mentioned that I could have done it in Premiere Pro just by extending the length of a selected clip.
But the thing is... I have no idea how to use Premiere Pro.
I assumed it would be similar to other editing software I’ve used, like Kinemaster, Clip Studio, Cute Cut, CapCut, Clipmaker—but sadly, it was a bit more complicated and advanced than that. I also couldn’t figure out the shortcuts (they’ll come back into the story later).
So, after discussing with my professor, I exported all my frames as a video file—which took some time (and a lot of Googling).
Next came the editing phase—clipping everything together and adding visual language for the characters (Jules and Ighor).
I wanted to go for a comic-style look, with dotted shadow effects, checkers, and contrasting colors as an isolation technique in animation to make certain elements stand out.
Insiperd by my favourite artist: https://youtu.be/NF1FboliEKg?si=BZ4Q2lVSUxN9Lm4h
(chip)
youtube
(nighligthfish)
You can see how much contrast they both use—it really resonates with me, and I believe it intensifies the emotion and captivates human attention.

After a few hours of trying to figure out how to make this star stand out... I realized it’s actually really hard to find any tutorials for it.
And just when I was happily editing—my system crashed. :D
I seem to have a lucky streak of Adobe programs crashing. The worst part? My progress wasn't autosaved, and I couldn’t retrieve my files. So, I had to redo everything—the light contrast, adding tint, and additional effects for the footage. That completely drained me.
Later on, I started recording some sounds that I wanted to incorporate into the video—not just music, but also ambient sounds and effects to add more depth.


I used Audacity since I’m most familiar with it, and honestly, I couldn’t handle another crash wiping out all my work T-T.
I recorded all the sounds as one big track, then handpicked and sliced the audio, exporting each separate track as a new file. Of course, I had to tweak the audio settings to make it more engaging and pleasing to the ear.
(my last save before the crash)
1 note
·
View note
Note
Hi! Hope it's all good, I wanted to ask you what software you use for your edits I've honestly no clue where to start but I've loads of little clips of yours saved :D
hiya!! im so sorry for the delayed answer, i swear tumblr doesnt give me notifs about my inbox im fuming. this is quite long so the answer and some editing tips are under the cut! please feel free to reach out if there's something that doesn't make sense or if you ever need any tips or help!
i personally use adobe after effect 2020 with some plugins! most people would probably use adobe premiere pro for compilations like the ones i do but im WAY WAY WAY more used to after effect due do making daily fancams/edits in the past (i do not recommend doing this btw- got burned out after doing it for about a year LMAO). so for example if you're interested in making edits like this or this i'd go for after effect but if you wanna make stuff like this or this, premiere pro is probably the way to go, even if i use AE for both 😭
adobe products are very expensive and you need quite the computer for it to run it without crashing all the time so if you dont have the resources or want to dedicate some time into researching turrenting + vpn and how to install it properly + the plugins on top of learning a pretty confusing (at first) program i'd recommend capcut! it's a free phone app and ive personally never used it, but ive had a lot of mutuals before use it and it looks great and pretty simple to use once you get the hang of it.
learning after affect is extremely frustrating i wont lie, but it's probably the best software if you want to do complicated stuff or simply just get smooth slow mo that you often use in edits! it's worth it in the end after you get the hang of it! there's a lot of youtube tutorials out there and i'd love to help with settings and keyframes if needed!
using AE can be a little bit of an overkill if you're only looking into trying editing to see if you think it's fun and worth the time it takes, so phone apps is honestly an amazing start to get into it. i just decided to go 120% out of nowhere due to getting a hyperfixiation on deciding to learn how to edit and doing it in a more "professional" way and potentially become an editor in the future -> which did not happen. or well. i did end up having a tiktok account with 45k followers when i posted a lot of my edits of shows that i liked but i was potentially thinking of becoming a yt editor or maybe work in media more. however im a burned out nurse student now LMAO
personal tips when it comes to editing;
i use while editing is to make a mindmap or simply just write down key elements you want in your edit to make it easier and prevents you from having to redo your edit (which is painful).
to make the edit "run more smoothly" make sure to fade the clip to be more dark at the end and start the next coming clip with a fade from dark to light. learning slow mo can be tricky in any app, but if possible i use the same thing with clips where it starts faster, is the slowest in the middle of the clip, and starts to get to normal speed at the end of the clip to make the transition over to another clip seem smoother and not like a raw cut.
this might be more of a editing style preference but i always add a slight zoom (either in or out depending on the transition) at every clip so that it's not as awkwardly still. i also always add a slight shake that you cant really see unless you focus on it for the same reason as the zoom. i found that even if the transitions are extremely simple or not even there at all, these small things make an edit look way more "professional" and less choppy.
next thing is "just" to learn what transitions you like after that and dont be afraid to mess with settings, even if you follow a tutorial. its all about finding your own editing style and what you like more!
i download youtube videos using loader.to but screen recording also works! i download mine to make the fps be correct to match when im slowing down a clip but that might be a bit overkill. youtube4kdownloader.com is a great website to cut clips from youtube videos to download too! just make sure to use adblockers when using the websites!
also: editing takes a lot of time and dont feel discouraged if it takes long to finish one! once you have more of an editing style it becomes more of a routine the more you edit!
these tips can be used on any editing app (with the slow mo being an exception in some apps) but then again, dont feel like you need any of it and just go ham on whatever ideas you have! id love to see any edit of yours :D
#.asks#sorry. this is like an extremely long post for nothing AHAHAH#believe it or not but i held back a lot here PFFT
5 notes
·
View notes
Video
vimeo
Merry Christmas || Happy New Year Motion Design from Antony Parker on Vimeo.
✔️ Get it here: templatesbravo.com/vh/item/merry-christmas-happy-new-year/55918859
MAIN FEATURES
Adobe Premier Pro CC 2021 and Above Full HD (1920×1080) resolution / 30 fps Very Easy to customize 0:39 sec duration Text Placeholders are completely modular 34 Media Placeholder 11 Unique Scenes Free Support 24/7 Change All Settings (Colors) with Control Layer PDF Help File and Video Tutorial are included Used Free Fonts (Font links included) Used Music and image are just for the Preview, not included in the project file
Credits
Design: new_star Animation: new_star Music: Link Images: Pexels, Freepik
Support: If you need any help or having any doubts about this project. Please contact us through our profile page
0 notes
Text
Discover 7 Best Cricut Software to Get Pro-level DIY Projects
The Cricut cutting machine is used widely by DIY enthusiasts. No matter whether you are a fashion designer or a crafter, you can use the Cricut machine and let your design enter the real world. However, using a Cricut cutting machine is not enough; you also need Cricut software where you can create your designs. This software allows you to cut out any kind of shape and font. Using this, you create stunning projects on different devices, like desktop computers, tablets, laptops, and smartphones.
Sometimes, the digital die-cutting unit won’t allow you to cut multiple fonts. As a result, you need to buy a separation, which is far more expensive and redundant to invest in. Hence, I will suggest you use similar tools. For this, you need to read the guide till the end.
In this blog, you will find the most widely used Cricut app alternatives that will provide you with the platform to show your creativity.
1. Cricut Design Space
Design Space is a software platform provided by the Cricut brand itself to create layout art and text, which can be further cut on Cricut machines. This Cricut software is completely free and comes with your Cricut device.
The tool is powerful and easy to use, which lets you complete numerous projects from scratch. Since the software was developed for the Cricut machine, you won’t find some features anywhere else.
Moreover, the software works well with desktop and mobile devices. So, grab your phone and PC and start diving into your design. In addition, it includes a lot of free templates, designs, and fonts for popular items such as cards and invitations.
2. Adobe Photoshop

Photoshop is an excellent tool for creating graphics and editing your photos. Mostly, it is used by graphics designers and professional people, including hobbyists.
Here, you can work on photographs to retouch and manipulate them as per your wish. Not only that, but it is quite good at making all types of vector art, making it a crucial tool in your Cricut list.
Since Photoshop provides a variety of tools, you can create several designs that you can imagine. Even though it is not affordable software, it can do a lot if you use it. Plus, this can be an irreplaceable alternative to Cricut software.
3. Adobe Illustrator
Adobe Illustrator is one of the best Cricut software for professionals and artists who use Cricut. On Illustrator, you can create various shapes, symbols, and texts with captivating font styles.
You will not get stuck in between while working on it, as you will be able to find the solutions through the online tutorials. It’s all because of its popularity among arts enthusiasts.
Go for this software if you are ready to pay to get all the features you need.
4. Canva
This is the popular free tool that you can use as a Cricut software. The tool has a pleasing interface with all the features to make your design look gorgeous. However, the platform is especially good for lettering and stickers.
Additionally, Canva gives a wide range of options for font styles that you can use for free. For stickers, you can use pre-made templates that are downloadable, making it easy for anyone to design without having prior experience.
If you are okay with a premium subscription, then go for the Canva brand kit, where you can access an extensive library that includes millions of stock photos, videos, audio, and graphics. It offers all the tools to create the premier design that you can think of.
5. CorelDRAW
It is a multitasking Cricut software and is ideal for creating vector graphics. By using this app, you can make signs, logos, 3D models, animations, and other internet graphics on your computer.
Many professional photo artists use this platform to work on their new ideas to align with the latest trends.
It also gives you the option to customize your existing designs. Also, you can work on predesigned templates that include floral and geometric types of patterns.
Corel offers a free trial. Hence, you can try its free trial before you make a purchase.
6. Inkscape

This is completely free Cricut software as it is an open-source vector graphics editor. You can give it a try because it is capable of working with raster and vector images.
If you want vinyl material and paper to be cut, then this software can help you in numerous ways to create your designs by using paths and shapes.
The most advanced feature of Inkscape is its ability to export SVG files, which are known as the universal file type that lets you move between different design programs without any problems. This feature makes it an excellent Cricut software for your Cricut projects.
7. Affinity Designer

The tool is a perfect choice for those who want to work in detail. For example, if you want to edit every pixel of your designs, then you must go for it. It is capable of zooming up to 1,000,000%, which is great for working on each pixel to make your design look better.
The Affinity designer comes with amazing features, such as a powerful color tool to select colors from any photos and many more.
Similarly, you will be amazed by its clean and straightforward interface. It is quite similar to Inkscape or Sketchup. It is my advice that you consider the best Cricut software to use in 2023.
FAQs
Can I use Canva for my Cricut projects?
Yes, Canva is a free tool that provides a range of features to edit your designs, images, and texts. It is also comparable with Cricut. To use this software, you must create your Canva account, and once done, you can start your creativity. Plus, you can use its subscription version to access extensive libraries.
Is it possible to use Cricut Design Space for free?
Yes, definitely! You can download the Design Space account without a subscription. Design space is the only way to run your Cricut machine. Additionally, it doesn’t require Cricut Access to use it. Using this app will allow you to get limited free fonts and images, which you can infuse into your design, too, for free of cost.
Do I need a computer to use Cricut?
No, you can use a Cricut machine without a computer as well. For this, you need a smartphone, and you can do your design to some extent. Using a smartphone has its disadvantages, such as you will not get all the features that you might be getting on your computers. Therefore, it is always good to use a computer if you want to design something better.
#cricut software#cricut new machine setup#cricut.com/setup#cricut setup#cricut explore air 2#cricut#design.cricut.com#design.cricut.com/setup#cricut design space login#design
0 notes
Photo

#editing#adobe#premier#pro#for#hire#need#work#will#edit#videos#youtube#editor#vlog#gaming#tutorials#share#please#experienced#worker#online#only#email#contact#cc#years#full time#intpslushi#followers#video
12 notes
·
View notes
Text
youtube
Hello! I'd like to introduce my GIF Making Demo! (Without sound, sorry!)
Here I show two ways to make GIFs. An absolutely FREE way and a way that does require some money.
This tutorial doesn't go into depth about the programs themselves, but it does show exactly what I do in each program.
I try not to handhold in this video. Feel free to pause, take notes, etc when watching, but I didn't slow things down or narrate (w/ text) every click I'm making.
The programs in the video: Bandicam (Screen Recording Software) (Free versions and Pro versions available) VSDC (Free Video Editing Software) (Pro version available, I think) Adobe Premiere Pro (Video Editing Software) (Paid Program)
Here is a list I used when finding free video editing programs.
While Bandicam does have a watermark (as seen in the video) I do show you how to remove it when making GIFs.
A few notes: I've only used VSDC today for this video. I have downloaded MANY a free video editing software and this one is by far the best. I did not mess too much with it, but I'd highly advise one to go through a manual, tutorials, and the like to find out all of its hidden features.
I'll admit, it is NOT very beginner-friendly and may have a bit of a learning curve. But if you know editing software or are tech-savvy, it'll be a breeze. One HUGE PLUS for this program is that it does not give your videos watermarks!!
My method is with Premiere Pro which is why I can move along so fast with it. If you need any assistance please reach out to me!
This is just my own method, so it is definitely not the "one true" method of GIF-making. If any other GIF makers have any other input, feel free to share! :D I've got post-nap brain so I'm sorry for my ramblings
Here is the GIF made with only FREE software ⬇

Here is the GIF made with a paid software ⬇

(It's only brighter due to editing, otherwise it would be the same color as the free one)
#GIF making#gifs#gifs tutorial#tutorial#whump community#making gifs#gif demo#demo#whump blog#gif#my gif
12 notes
·
View notes
Note
hi, serre! i always admired your work and i'm really glad you come back <3 i was always curious about how fast you make your gifs! do you have any tips? thank you in advance ^^
hello! thank you so much! i'll try to remember what i wrote on my previous blog about tips, but i will share one i learned recently :)
on adobe premiere pro, there is a feature called "scene edit detection" ( please google the tutorial for it! ) which automatically clips the scenes for you so you don't have to clip the tv show/movie yourself. unfortunately, i'm unable to do this since my computer crashes every time i try to because it hates premiere, but i know it's been very helpful to a lot of gif makers!
any tips that i can offer, gif who you like. as much as we receive suggestions from people, we'll mostly have muse for projects and faceclaims we like.
don't feel the urgency to gif EVERY scene. remember, quality over quantity! just because your pack has less gifs than someone else who posted a pack of the fc in the same project, doesn't make it any less of value since we all have different styles of editing. this is a tip i try to follow, but fail and before you know it i end up with 30 gifs of the same expression ajsdfhsdjf
not giffing the main character is also something i found that is helpful especially if you don't want to run into issue in the point above. a fc that has less scenes in a show/movie feels more rewarding sometimes since you can get through episodes faster and there's more variety and you don't feel stuck.
i typically gif 3-5 faceclaims at a time and rotate so i don't feel bored. that's why on my previous blog i was sometimes able to post 2 big gif packs within a day because i've been working on them at the same time instead of fixating on one.
don't feel pressured to stick to your suggestion/request list. it's okay to remove names from your list, it's okay to ditch a project and revisit it later or not complete it at all.
i hope these tips helped! i’m sure i’m forgetting a few, but this is all i can think of for now djfhsdsdfdf
3 notes
·
View notes
Text
#showyourprocess
From planning to posting, share your process for making creative content!
To continue supporting content makers, this tag game is meant to show the entire process of making creative content: this can be for any creation.
RULES: When your work is tagged, show the process of its creation from planning to posting, then tag 5 people with a specific link to one of their creative works you’d like to see the process of. Use the tag #showyourprocess so we can find yours!
I was tagged by Pat @aheartfullofjolllly for this yaoyang valentines day video (I may also do the gifset one too, I’ve deleted everything though with that set, so i’ll have to try and recreate it if I do).
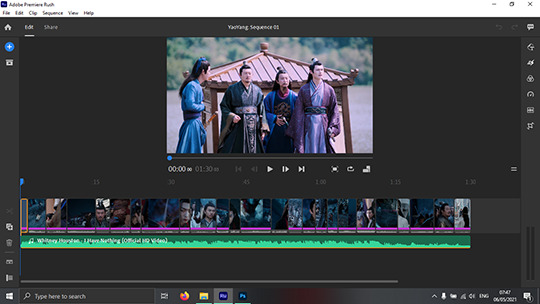
I have the episodes saved on a hard drive so I didnt need a screen recorder, and I used Adobe Premier Rush 1.5. If I had more time I would’ve used Premier Pro because I need the practice, but because I don’t have to find a tutorial for every step find premier rush more intuitive I stuck with that! I used 4k video downloader to extract the mp3 from a youtube video.
1. Planning
There was no plan. I got this heads up the day before valentines day
and before I realised I had already opened the software.
2. Creation
I started by skimming through the episodes to find any scenes of them and imported the episode to premier rush
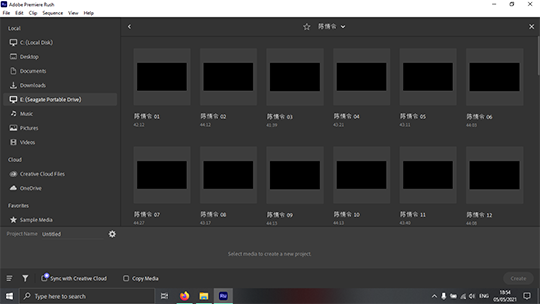
Then trimming the frames I wanted to keep and deleting the rest while trying to think of a song to use. Rinse and repeat with many episodes.
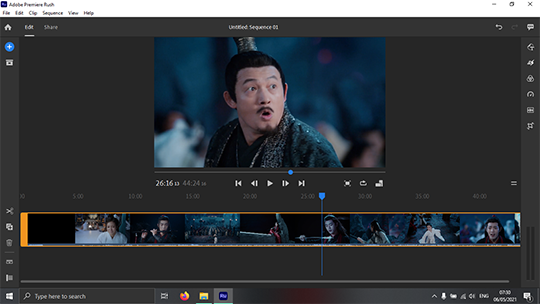
After collecting lots of clips, I needed to know how much footage I was going to need to match up with the song length. At this point I muted the sound on the clips so it wouldn’t be heard with the music.
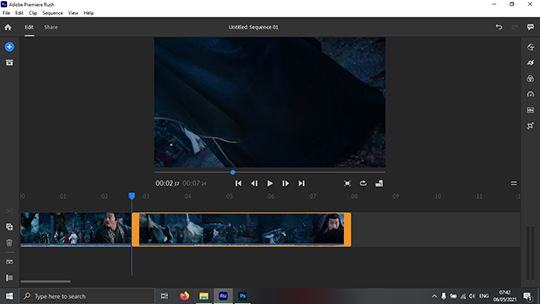
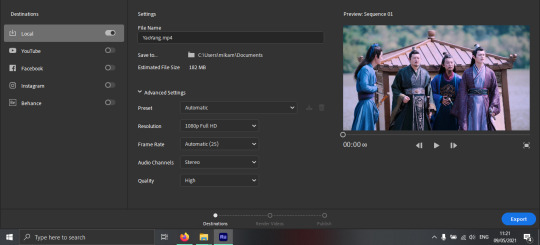
After importing the mp3 and trimming down to the part I wanted, it was just a case of dragging the scene order around and changing the speed of each clip until it kind of matched up with the song.
If you wanted to get fancy, this is where you could choose different transitions to use/colouring/overlays etc but I didn’t have much time for that their love is so pure they don’t need fancy effects. To export, go to share and choose what settings you want. And that’s it!
3. Posting
I always, always save to drafts from my pc and check on my phone before posting anything now. I may even plug my laptop into my tv to check colouring on there too. It’s usually wildly different on each of my devices, but as long as it looks okay on all 3, then I’m happy. I used this text gradient maker, and copy the code to notepad first. Ctrl+H brings up the replacer (on pc), I change every instance of ‘color:#’ to ‘color: #’ (adding a space) and find every semi-colon and remove it. Copy the new code into html post editor, check the preview to see if it worked, add my tags and post. I don’t wait for a specific time to post things, when it’s done, it gets posted!
Since so many have already been tagged I’m having trouble with this next part. I’ve also been tagged for a gifset, so I’ll leave the tagging for that post. If anyone wants to be tagged for this, don’t be shy, let me know and I’ll tag you on my next post! Please don’t be shy you will be helping me out!
7 notes
·
View notes
Text
Moving Image - Evaluation
15/06/21
Evaluation
Overview
The Moving Image brief focused on creating a 60 second advert using a detailed story board that incorporates a selection of camera techniques, compositions and movements. The project involved researching into the commonly used camera techniques and equipment used within the film and video industry, working on a story board that includes specifics on each element of the sequence and the use of Adobe Premier Pro to produce and optimize the final video to be exported at a professional standard.
The Brief
I believe I have met the requirements of the brief as I have researched into camera techniques including movements, compositions and equipment that are implemented in all videos throughout the film industry. Next, I analyzed three existing adverts to develop my ability to identify shot types, angles, equipment, and framing techniques as well as transitions that were used. I then created a story board that describes each sequence within the advert that I had chosen to create based on a product within another existing advert. This story board explained the actions occurring within each sequence, the camera movements, shot type, angle, focal length and location of the shoot and would be used as a guide during the production and post-production stages. From here, I shot the clips for the advert and then used video tutorials on how to use Adobe Premier Pro to put together the final video along with a complimentary colour grading that suited and enhanced the atmosphere of the advert.
Strengths
I think my strengths throughout this project were the pre-production planning and research stage as well as the shooting stages. I made sure to do a good amount of in-depth research into a range of camera techniques and equipment that are used in the industry and apply this knowledge when analyzing and breaking down existing adverts, making sure I was able to pinpoint where these techniques were used. During the shooting stage, I used the story board as a guide and reference when setting up a shot but I also experimented with alternative camera angles and movements so I had extra shots to choose from in the event that the original storyboard techniques didn’t flow together.
Weaknesses
I think my weaknesses through this project were during the post-production stage as I had some dilemma when selecting a software to optimize the video as using Photoshop wasn’t idea, however this wasn’t a problem as I realised there was a 7-day trial for premier pro so once I had planned and shot for the advert I began editing within this time frame. Other than this, the only obstacles I encountered were a change of idea at the beginning of the project in terms of the storyboard. Initially, I had planned a fast-paced, intense video but decided to change this because I was unable to capture the shots I originally wanted so the final video is more relaxed.
Final Thoughts
Overall, I think I have successfully created an advert inspired by an existing advert that incorporated at least three camera movements or techniques and had been optimized in Adobe Premier Pro then exported at professional industry standards. I’m pleased with the advert I have created as I had put in a lot of time and effort into the research and planning stage so I would be ready to shoot. As well as educating myself on how to use the editing software effectively and apply colour grade to further enhance the video. This project was enjoyable and challenging to work on, further developing my video and post-production skills which can be applied to future projects.
2 notes
·
View notes
Text
After Effects Cc 2014 Mac Download

(UPDATE: Be sure to install the After Effects CC 2014.1.1 (13.1.1) bug-fix update.)
After Effects Cc 2014 Mac Download Crack
After Effects Cc 2014 Mac Download Free
After Effects CC 2014.1 (13.1) is available.
If you have a Creative Cloud membership, you always have access to the latest version of After Effects. You can install this update by choosing Help > Updates within any Adobe application or by opening the Creative Cloud desktop application. Go to the Creative Cloud site to download applications or to sign up for Creative Cloud.
Download Adobe After Effects CC for Mac Free. It is full Latest Version setup of Adobe After Effects CC Premium Pro DMG for Apple Macbook OS X. Brief Overview of Adobe After Effects CC for Mac OS X Adobe After Effects CC for Mac is an impressive and powerful application which will let you create professional looking photos and render 3D. Download the After Effects CC 2014 Plug-in SDK Macintosh or Windows The After Effects CC 2014 Plug-in Software Development Kit contains headers defining the After Effects Plug-in APIs, sample projects demonstrating integration features, and the SDK Guide documentation.
For more information about Creative Cloud, see this overview video and the Creative Cloud FAQ list.
For information about updates for all of our professional video and audio applications, see this page.
For details of what was new in After Effects CC 2014 (13.0), see this page.
Please, if you want to ask questions about these new and changed features, come on over to the After Effects user-to-user forum. That’s the best place for questions (and, if you follow that link, you’ll find more information about how to communicate with us). Questions left in comments on a blog post are much harder to work with; the blog comment system just isn’t set up for conversations. If you’d like to submit feature requests (or bug reports), you can do so here.
top new features for After Effects CC 2014.1 (13.1)
high-DPI content and UI (Mac OS, Windows)
refreshed user interface design
Copy With Relative Property Links command
color management for Dynamic Link
Adobe Anywhere for Video improvements
Maxon Cinema 4D Lite R16 and Cineware 2.0
Collect Files for Cinema 4D assets
native GoPro CineForm codecs
scripting improvements for text layers
improved Adobe Media Encoder watch folders
mocha AE CC 2014, based on mocha 4.0
many bug fixes
details of all new and changed features in After Effects CC 2014.1 (13.1)
Here is a virtually comprehensive list of changes, with detail beyond the summaries of the top items listed above. We’ll be posting a lot more detail over the coming weeks, and the outline below will be populated with links to in-depth articles and tutorials, so bookmark this page and check back.
high-resolution (high DPI) content viewers and user interface elements on Mac OS and Windows
After Effects CC 2014.1 (13.1) displays content and user interface items at the appropriate resolution on high-resolution displays (sometimes called “high-DPI” or “HiDPI”) on both Windows and Mac OS. This makes After Effects easier to use on high-pixel-density monitors, like Apple Retina displays and Microsoft Surface Pro devices.
In content viewers, After Effects will take advantage of the pixel density of the display to show each pixel of content in a viewer as a single pixel on the display. This affects the contents of the Footage panel, Layer panel, and Composition panel, including both your video content and some UI overlays and widgets within the content area.
Note that for a given piece of content to appear the same on a high-DPI display as on a non-high-DPI display, the zoom value for the former needs to be twice that of the latter, since the points are half the size. If you drag a panel from a high-DPI display to a non-high-DPI display, you’ll see the zoom value change, while the content occupies the same space on the screen.
User interface elements such as icons, text labels, pointers, buttons, etc. will now scale according the operating system display DPI setting. Mac OS computers with a Retina display will scale to 200%. Windows computers with a high-DPI display will scale to 150% or 200%.
refreshed user interface design
The user interface (UI) of After Effects, as well as Premiere Pro and other Adobe professional video and audio applications, has been updated with a new design. Pointers, icons, text, controllers, and button styles have all been refreshed.
The layout of the interface has not changed significantly, but some simplification has been made to panel functionality.
The icon for the panel menu has been moved from the upper-right corner of the panel to the panel tab, making the panel menu easier to discover.
The panel grabber and frame grabber icons have been removed; you can still drag panels using the panel tab.
The close button (x) has been removed from all panels except the Timeline, Composition, Layer, Footage, Effect Controls, and Flowchart panels. In these panels the close button has moved to the left side of the panel tab. To close a panel without the close button, open the panel menu or right-click on the panel tab and choose Close Panel, or use the keyboard shortcut, Command+W (Mac OS) or Ctrl+W (Windows).
The range of the Brightness slider in the Appearance preference category is more limited than in previous versions; there is no longer a “light” mode for the interface. The default brightness setting is darker than in previous versions.
Because some scripts that create ScriptUI panels have not been updated to accommodate the new user interface design, some of these scripts may appear wrong with the new UI skin. If this occurs with a script that you use, you can make an individual ScriptUI panel appear using the old UI skin by enabling the Use Legacy UI option in the panel menu for the ScriptUI panel.
Copy With Relative Property Links command
A new command in the Edit menu, Copy With Relative Property Links, works like the existing Copy With Property Links command, except that it creates expressions that do not reference the source composition by name. This maintains a relative link between the layer with the expression and the composition containing that layer. This can be useful when, for example, you want to move expression-rigged layers from one composition to another but let the layers reference a control layer only in the same composition. The expressions created using the Copy With Relative Property Links command are identical to those created using the expression pickwhip.
For copying a layer’s Position property, the result would be this: thisComp.layer('control_layer').transform.position
The existing Copy With Property Links command will specifically reference the layer’s source composition in the expression: comp('source_comp').layer('control_layer').transform.position
color management for Dynamic Link
When color management is enabled for an After Effects project, compositions viewed or rendered over Dynamic Link will be transformed using the HDTV (Rec. 709) color profile. This prevents color or gamma shifts in the appearance of these compositions in Premiere Pro and Adobe Media Encoder.
Dynamic Link always assumes that all incoming frames are in the HDTV (Rec. 709) color space. Prior to After Effects CC 2014.1 (13.1), compositions in a color-managed project were sent to Dynamic Link in the project’s working color space; they were not adjusted for Dynamic Link’s assumption of HDTV (Rec. 709). This mismatch resulted in a noticeable color or gamma shift when the project’s working color space was significantly different from HDTV (Rec. 709) or when Linearize Working Space was enabled.
In After Effects CC 2014.1 (13.1), a color transformation is applied to the composition as a last step before the images are passed to Dynamic Link for use in Premiere Pro or Adobe Media Encoder. This corrects the composition image to the color space used by Dynamic Link, similar to how the View > Enable Display Color Management option in After Effects corrects the image for your monitor.
Maxon Cineware 2.0 plug-in and CINEMA 4D Lite R16
After Effects Cc 2014 Mac Download Crack
After Effects CC 2014.1 (13.1) includes a version 2.0 of the Cineware plug-in, which serves as the primary interface for integration with Cinema 4D.
After Effects CC 2014.1 (13.1) also includes version R16 of Cinema 4D Lite, which provides several new features, such as the new Reflectance channel. (For details about each edition of Cinema 4D, see the Maxon website.)
John Dickinson summarizes the changes in Cineware 2.0 in a video on the Motionworks website.
Automatic Cineware effect settings synchronization: When adding multiple instances of a CINEMA 4D scene layer in a composition, including adding Multi-Pass layers, you will see an on/off checkbox at the top of the Effect Controls panel labeled Synchronize Layer. It is on by default, meaning that the Cineware effect settings on all instances of the layer will automatically synchronize. If this checkbox is disabled for a specific CINEMA 4D scene layer, then that layer’s settings will not synchronize with the rest of the layers in that composition. The Apply To All button from previous versions of Cineware has been removed.
Default Layer: The CINEMA 4D layers dialog box now shows a Default Layer option if the renderer supports it. Objects that have not been assigned to an explicit layer in the .c4d project file will be visible with Default Layer enabled.
Content Browser: When using a full retail version of CINEMA 4D R16 as the renderer, textures applied via installed content libs (.lib4d files) will render in After Effects using Cineware.
region of interest: If you use the region of interest feature in After Effects to constrain the preview to a subset of the frame, the Cineware effect will respect this setting and limit rendering to the area within the region of interest. This only applies when the Renderer control is set to Standard (Final).
Purge Memory: This option only works when the CINEMA 4D render path in Options is set to the default render server Cineware R16, or a full retail version of CINEMA 4D R16 or later. For complex scenes, the render server may use memory for internal caches. To free up that memory click “Purge Memory” in order to extend the length of previews in After Effects.
Collect Files for Cinema 4D assets
The Collect Files command in After Effects now collects assets associated with .c4d footage items, such as textures.
automatic encoding of compositions in After Effects project files in Adobe Media Encoder watch folders
If you place an After Effects project (.aep) file in a watch folder that is being monitored by Adobe Media Encoder, the compositions at the top level in the project (i.e., those not in folders in the Project panel) will automatically be added to the Adobe Media Encoder encoding queue.
For more information about what’s new and changed in Adobe Media Encoder CC 2014.1 (8.1), see this page.
native encoding and decoding of movies using GoPro CineForm codecs
After Effects, Premiere Pro, and Adobe Media Encoder can natively decode and encode QuickTime (.mov) files using the GoPro Cineform codecs on Mac OS and Windows, meaning that you do not need to install additional codecs to use and create such files.
At the higher quality settings, this codec is an excellent choice for intermediate files—i.e., files that you create from one application in a post-production pipeline to pass to the next application in the pipeline. Movie files encoded with the GoPro Cineform codec at the higher quality settings include an alpha channel.
To use the GoPro CineForm codec for output, choose QuickTime as the format in the Output Module Settings dialog box, click the Format Options button, and choose GoPro CineForm as the video codec.
For details about quality and pixel format settings for the GoPro CineForm codec, see this page.
scripting improvements for text layers
You can now read additional information through scripting about the font and style used in a text layer, including the location of the font file on disk.
The new read-only attributes for the textDocument object are these:
fontLocation: returns string with path of font file, providing its location on disk (not guaranteed to be returned for all font types; return value may be empty string for some kinds of fonts)
fontStyle: returns string with style information — e.g., “bold”, “italic”
fontFamily: returns a string with the name of the font family
The value returned is for the first character in the text layer at the current time.
mocha AE CC 2014, based on mocha 4.0
mocha AE has been updated to mocha AE CC 2014 (version 4.0.1). This is a major version update that includes compatibility with mocha Pro 4 project files. For details, see this page
miscellaneous new and changed features
The Anchor Point icon on selected layers has been enhanced for better contrast and visibility, and it is now easier to select and use.
The application title bar now shows the full path to the project file.
The Welcome Screen dialog box will automatically close when you open a project by double-clicking it in Finder or Explorer.
While tracking an effect mask, the mask mode no longer temporarily changes to None. This preserves the appearance of the masked effect during tracking.
The motion tracker (point tracker) no longer offers a pre-processing Blur control. This option never worked as designed.
There is now a Render And Replace command in Premiere Pro for replacing a Dynamic Link After Effects composition with a rendered movie.
Use the new Browse Add-ons command in the File menu to go to the new Adobe Exchange, from which you can download and install animation presets, scripts, template projects, et cetera.
The new Adobe Color Themes panel replaces the panel previously named “Adobe Kuler”. Choose Window > Extensions > Adobe Color Themes to open this panel.
a few choice bug fixes
We fixed a lot of bugs in this update. Here are a few that I think are especially worth calling out:
memory leak when scrubbing to preview audio
slow rendering of After Effects compositions used in Premiere Pro through Dynamic Link when the main After Effects application is open
errors when using the Create Stereo 3D Rig
errors when using and creating custom (pseudo) effects
mismatch in interpretation of layer bounds for imported .psd files in projects from previous versions of After Effects
incorrect rendering of vector objects from Photoshop
pixelation and and other problems with RED (.r3d) files
incorrect VRAM amount reported for some AMD GPUs on Mac OS
crash when copying and pasting layer styles from one layer to another
problems with effect eyedropper control
incorrect date when using Current Date option in Numbers effect
many other causes of crashes and errors
Summary of what’s fixed in the After Effects CC 2014.1.1 (13.1.1) update
If you applied an effect without properties or opened a project containing an effect without properties, then After Effects would give a long series of error messages: “After Effects error: internal verification failure, sorry! (unexpected match name searched for in group) ( 29 :: 0 )”. This bug is now fixed. Examples of effects that triggered this problem inlcude Knoll UnMult and BAO Mask Avenger.
Tooltips now appear correctly in the Timeline, Project, and Effect Controls panels.
The middle mouse button again works as expected for such purposes as activating the Hand tool in viewer panels, using the Unified Camera tool, or repositioning shape layers or masks.
Panels no longer flash red when resizing or rearranging panels.
The Graph Editor works correctly on Windows high-DPI systems. In the previous version (After Effects 13.1.0), clicks within the Graph Editor were registered in the wrong place on Windows high-DPI systems.
RED (.r3d) files no longer cause a 15-second delay when the resolution of the image being requested from the importer is less than 1/8. This could occur when the thumbnail was generated on import, when Adaptive Resolution was engaged, et cetera.
BridgeTalk is now set up correctly, so that scripting calls from ExtendScript Toolkit, Bridge, and Premiere Pro correctly target After Effects.
The installer cleans up stale components better, including updated Cinema 4D components.
Top new features for After Effects CC 2014.1 (13.1)
high-DPI content and UI (Mac OS, Windows)
refreshed user interface design
Copy With Relative Property Links command
color management for Dynamic Link
Adobe Anywhere for Video improvements
Maxon Cinema 4D Lite R16 and Cineware 2.0
Collect Files for Cinema 4D assets
native GoPro CineForm codecs
scripting improvements for text layers
improved Adobe Media Encoder watch folders
mocha AE CC 2014, based on mocha 4.0
many bug fixes
After Effects Cc 2014 Mac Download Free
1 note
·
View note
Text
Adobe Photoshop Cc 2017 Crack Mac

Adobe Photoshop 2017 Crack Download
Adobe Photoshop Cc 2017 Crack Macromedia
Adobe Photoshop Cc 2017 Crack Mac Osx
Adobe Zii Patcher 2.2.1, 2.2 is a great tool to help you perfectly activate/crack all applications of Adobe CC 2015 ~ 2017 with one click. It was made by T.N.T group, only supports Mac OS X. Zii Mac application for mac operating system user. If you use this patcher then you can easily active your adobe cc 2017. It’s world best one click Adobe Zii 2017 Patcher
Photoshop 2017 is computer software designed for editing digital images. Crack is a file that makes changes to the software code. It allows using the program without any restrictions and without paying for the activation key. Adobe Photoshop 2017 crack easily breaks program protection. Adobe Photoshop CC 2017 for Mac merupakan salah satu aplikasi yang wajib diinstall pada komputer/laptop Mac. Photoshop dmg menjadi pilihan terbaik untuk memanipulasi foto agar menjadi lebih menarik baik itu pada OS Windows maupun Mac OS. Hal ini bertujuan agar hasil yang foto kalian untuk diberikan ke client atau untuk keperluan tugas memuaskan dan nantinya akan menjadi sumber.
Adobe Zii Free Download Latest Version DMG File for Mac is Here. When click ‘Patch’ to crack, it will automatically find all installed Adobe products in Applications folder and patch the amtlib.framework file; if you use another crack method – drag & drop, it will manually patch any Adobe applications you drop on Adobe Zii. The focus is, Adobe Zii only takes up very little memory, and has a pretty smooth and clean cracking process (just drag & drop). Especially, after activation, the use and running of Adobe applications are very stable.
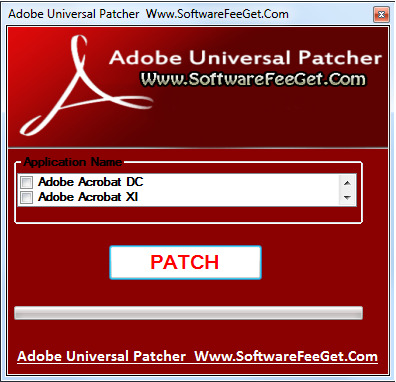
Crack Description Adobe Photoshop CC 2017 18.0.0 Crack for Mac OS X is a patch tool to remove the online authorization and monthly subscription. There are two version patcher included – 1) Adobe Zii v2.2 Adobe CC 15 & CC17 by TNT for patching amtlib.framework and 2) AMTEmu v0.8 to disable security features. Open these files (located in the Adobe Photoshop CC 2017 Crack folder). Run the Patcher first. Select Photoshop CC 2017 then press patch. Wait for it to finish (select Yes if you are prompted to replace amtlib). This tool comes with an integrated Keygen that you can use to prevent any future activation issues.
Adobe Zii 2017
Adobe Zii Patcher 2017 automatically finds all installed Adobe products in Applications folder and patches amtlib.framework. Manually patches any Adobe application you drop on Adobe Zii Patcher.
What’s New in Version 2.2.1?
Adobe Media Encoder : Included are missing codecs AS‐11, HEVC (H.265), MPEG2, MPEG2 Blu‐ray, MPEG2‐DV D, MXF OP1a.
Support CC 2017.
Supported Products:
Adobe Photoshop 2017 Crack Download
Adobe Photoshop CC 2017
Adobe Illustrator CC 2017
Adobe InDesign CC 2017
Adobe InCopy CC 2017
Adobe Premiere Pro CC 2017
Adobe After Effects CC 2017
Adobe Audition CC 2017
Adobe Prelude CC 2017
Adobe Media Encoder CC 2017
Adobe Bridge CC 2017
Adobe Acrobat Pro DC 2017
Support Adobe CC 2017
All other products 2017…
Adobe Photoshop Cc 2017 Crack Macromedia
For aesthetic reasons you may perform trial reset by running these two commands in terminal:
sudo killall ACCFinderSync “Core Sync” AdobeCRDaemon “Adobe Creative” AdobeIPCBroker node “Adobe Desktop Service” “Adobe Crash Reporter”
sudo rm -rf “/Library/Application Support/Adobe/SLCache/” “/Library/Application Support/Adobe/SLStore/” “/Library/Caches/.”* “/private/tmp/zx”* “~/Library/Preferences/Adobe/.”*
Adobe Zii Download Process Tutorial Link Need – Click Here
Zii Patcher 2017 Install Steps:
Install Adobe CC 2017 as trial.
Run Adobe CC 2017 once and close.
Open Adobe Zii (for Adobe Acrobat Pro DC, you need to enter admin pass).
Click ‘Patch‘or drag Adobe app to finish cracking with one-click.
Done!
Important Tips:
If you have Adobe products installed in a directory different from Applications please use the drag & drop mechanism.
If you have Creative Cloud subscription for certain Adobe apps you may not patch these products. Only patch the ones you have no license for.
If you have trial active or expired after patching an app, nothing will change in Creative Cloud interface, and the program will start without any issues.

Supported:
Adobe Photoshop Cc 2017 Crack Mac Osx
Mac OS X 10.8 or later.
Compatible with all products of Adobe CC 2015/2015.5/2016/2017.
1 note
·
View note
Video
vimeo
Wedding Ink Slideshow Motion Design from Antony Parker on Vimeo.
✔️ Get it here: templatesbravo.com/vh/item/wedding-ink-slideshow/53744655
MAIN FEATURES
Adobe Premier Pro CC 2021 and Above Full HD (1920×1080) resolution / 30 fps Very Easy to customize 1:58 sec duration Text Placeholders are completely modular 38 Media Placeholder 5 Unique Scenes Free Support 24/7 Change All Settings (Colors) with Control Layer PDF Help File and Video Tutorial are included Used Free Fonts (Font links included) Used Music and image are just for the Preview, not included in the project file
Credits
Design: new_star Animation: new_star Music: Link Images: Pexels, Freepik
Support: If you need any help or having any doubts about this project. Please contact us through our profile page
0 notes
Photo

Dear PREMIUM Students,
We would like to draw your attention to a new tool that is yours to use if making a video would be part of the final deliverable for your client/project: Powtoon.
As you might know, UM already offers free video making tools such as Adobe Premier Pro, which you can access when you log in to your “Student Desktop Anywhere”. On the other hand, PREMIUM is an honours programme, and as such a perfect environment to have students experiment with new and creative tools.
However, this Powtoon tool is not free to use. Which is why we we have purchased a licensed teacher account, which allows us to add students accounts free of charge to students, under this teacher account.
Some things you need to take into account when using Powtoon:
1. Every team should be able to join the Powtoon software for free via this link: www.powtoon.com/edu/join-group/LXT3/;
2. Please note that per team only 1 team member logs in, because there are too many students than that this license allows.
3. The Powtoon logo cannot be hidden from the video.
4. The downloading process (to MP4) could take up to a day according to the website, which you ought to take into account when preparing and planning.
5. Powtoon offers many templates and online tutorials: https://www.powtoon.com/labs/tutorials/
We wish you the best of luck during the upcoming weeks, stay well and stay safe!
4 notes
·
View notes
Photo

How To Get Started Video Editing [In Premiere] 2020
Are you just starting out editing videos, but don’t know how to begin? Well in this tutorial I walk through each of the essential parts of Adobe Premiere Pro 2020 that you’ll need to know in order to get started editing. You’ll learn everything from how to setup a project file to importing footage for the first time.
We’ll start our walk through of Premiere Pro by creating a new project file, and then discuss how to set up and customize your workspace. Then you’ll learn how to import footage into the program, as well as how to organize bins where you can store your files. Next, I’ll show you multiple ways to create a timeline sequence with your footage, and how to add multiple clips onto your timeline.
youtube
After that, we’ll discuss important features of Premiere such as the timeline, the effect control panel, the media browser, as well as the source and program windows. You’ll get to familiarize yourself with Premiere’s toolbar, and which editing tools you may need to use on a regular basis. We’ll also cover briefly how to get the best audio and sound levels for your videos, as well as how to add video effects to your edit. Finally, you’ll learn how to export projects once you’re finished editing, and what settings I typically use to get the best final output.
Please SUBSCRIBE if you’d like to learn more with tutorials on adobe creative suite programs like Premiere Pro and Photoshop. Plus, you’ll also see videos on how to run a creative freelancing business from home!
Subscribe here:
https://www.youtube.com/user/skeletonsbasement?sub_confirmation=1
Follow me here:
Twitter: http://www.twitter.com/scottfowler
Instagram: http://www.instagram.com/scottedwardfowler
#premiere#video editing#how to video edit#2020#premiere pro#premiere 2020#adobe#adobe premiere pro#adobe premiere#editing#video effects#how to edit videos#beginner tutorial#walkthrough#guide#learn#how to start video editing#training#basic#premiere tutorial#how to edt#editing tutorial#editing tips#premiere tips#course#how to#learn video editing#learn to edit videos
4 notes
·
View notes