#Authenticating vscode
Explore tagged Tumblr posts
Visit Tumblr Blog
Explore Tumblr blogs with no restrictions, modern design and the best experience.
Last Seen Tumblr Blogs


Fun Fact
The most popular pages on Tumblr are about Minecraft, GIFs, and David J. Peterson.
Text
Fixing issues while Authorising Salesforce org with vscode
We get to a new project and first thing we need to do is to get the access to the resources and setup the development environment. In this Post, I am going to explain what all things need to be setup before we start working on the Salesforce org. Install the VSCode, this can be downloaded from the official website and then you can install it Link Install the required Extensions. Here you need…

View On WordPress
#Apex#apexsecurityrest#Authenticating vscode#Authorising org#future methods#Javascript#Lightning web components#saleseforce#Salesforce - winter 24#trailhead
0 notes
Text
webdev log 2
implemented a gallery. I originally wanted it to be more grid-like but I decided I didn't want to mess too much with that, and I like the simple look anyways. forces you to really take in every shitty drawing.

it features a search function that only works for tags. its purpose is mostly just to search multiple tags, because I couldn't be fucked to add a feature where you could click on multiple tags there at the tags list at the top. it lists out all used tags in the table that stores art so you have an idea of what there all is.

at the bottom there's pagination. it's INSANELY easy to do with this framework I'm using. I was gushing about it to my partner on call!! they made fun of me but that's okay!!!!

anyways, clicking on the date underneath the drawing takes you to a view with the image itself (a kind of "post", if I can call it that) here you can view comments and leave one yourself if you so desire. guests are NOT allowed to reply to existing comments because I'd rather things not get too clogged up. I can't stop anyone if they did an "@{name} {message}" type comment, but I don't think anyone is gonna be chatting it up on my site, so idc. I just want it very minimal, and no nesting beyond one single reply.

of course, you can comment on story chapters too so here's what it looks like for a user (me). of course, if a user (me) posts then it gets automatically approved.
the table that stores comments differentiates story comments and art comments with foreign keys to the primary keys of the the chapter and art tables. it's a little convoluted and I kind of wish I didn't do it this way but it's too damn late isn't it. but honestly it might've been the only way to do it. the problem is just repeating code for both chapter and art views.. making a change to one means I gotta manually make the same change to the other. huge pain..

added user authentication and a really shitty bare bones dashboard for myself to approve/reject comments directly on the site in case someone comes along and wants to be mean to me :( rejecting a comment deletes it OFF my site forever. though I kind of want to be able to keep hate mail so I dunno.. oh, and also a big fat logout button because I have nowhere else to put it.
I'll spare everyone the more technical ramblings.
anyways, I'm hoping to add more things later. these are my plans:
allow users (me) to post stories/art through the site itself instead of doing it manually in the vscode terminal for every. single. story. and drawing. (probably took me 6+ hours total just doing this. I don't know why I did it.) (btw this consists of writing commands to store information via the terminal. also, sql and similar databases don't store things like markup or even line breaks. I had to alter all my stories and put \n every time there was a line break... and you have to escape apostrophes (or quotes, depending on which you use) so every "it's" had to be made into "it\'s" HUGE. PAIN. I didn't do this manually obviously but sifting and plugging my stories into character replacers was so time consuming)
delete comments button.... For my eyes and fingers only
make an About page. I've been avoiding all the fun things and doing just the scary stff
figure out SSH stuff...
clean up the shitty css. I refuse to use tailwind even tho it's trying to force me.. I don't want some sleek polished site I want it look like it's in shambles, because it is
but yeah thanks for reading about my webdev and coding journey. even though using the laravel framework made things a thousand times easier it's still a crazy amount of work. let's say building a site completely from scratch means buying every material and designing the house yourself, and using a website builder like wix is just like buying a pre built home and you're just decorating it. using this framework is like putting together a build-your-own-house kit. you're still building a fucking house.
I feel crazy. it felt like the site was close to breaking several times. been sleep deprived for several days working on this nonstop I think I'm getting a little sick 😵💫
going to bed now. it's 9 am.
6 notes
·
View notes
Text
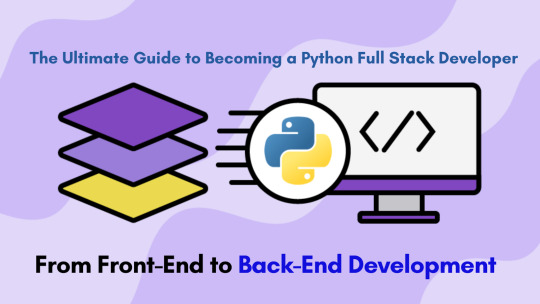
The Ultimate Guide to Becoming a Python Full Stack Developer: From Front-End to Back-End Development
In today's dynamic tech landscape, the role of a Python Full Stack Developer is increasingly in demand. Mastering both front-end and back-end development not only makes you more versatile but also opens up a myriad of career opportunities. This guide will take you through the essential skills and steps needed to become a proficient Python Full Stack Developer.
Understanding Full Stack Development
Full stack development involves working on both the front-end and back-end of a web application. The front-end is what users interact with, while the back-end handles the server, database, and application logic.
Front-End Development
As a Python Full Stack Developer, you need a solid grasp of front-end technologies. Here are the key areas to focus on:
HTML/CSS: The backbone of any web page. HTML structures the content, and CSS styles it. Understanding these is crucial for building responsive and aesthetically pleasing interfaces.
JavaScript: The scripting language of the web. It adds interactivity and dynamism to your web pages. Frameworks like React, Angular, or Vue.js are also worth learning.
Front-End Frameworks: These include Bootstrap, Tailwind CSS, and others that help in quickly designing and customizing web interfaces.
Back-End Development
The back-end is where Python shines. Here’s what you need to know:
Python Programming: Mastering Python is essential. Focus on its syntax, data structures, and libraries.
Django/Flask: These are the most popular Python frameworks for web development. Django is known for its robustness and includes a lot of built-in features, whereas Flask is more lightweight and flexible.
Database Management: Understanding databases is crucial. Learn SQL and how to interact with databases using ORM (Object-Relational Mapping) tools like SQLAlchemy.
APIs: Knowing how to create and consume APIs (Application Programming Interfaces) is fundamental. RESTful APIs are commonly used in web development.
Essential Tools and Technologies
Version Control
Git is the industry standard for version control. Learn how to use Git for tracking changes in your codebase and collaborating with other developers.
Development Environments
Familiarize yourself with Integrated Development Environments (IDEs) like PyCharm, VSCode, or Sublime Text. These tools enhance productivity and ease debugging.
Testing and Debugging
Writing tests ensures your code works as expected. Learn about unit testing, integration testing, and tools like pytest. Also, become proficient in debugging tools to quickly resolve issues.
Building Projects
Practical experience is invaluable. Start by building small projects and gradually increase their complexity. Here are some ideas:
To-Do App: A simple project that helps you understand the full stack workflow.
Blog Platform: Incorporate user authentication, CRUD operations, and front-end frameworks.
E-commerce Site: Integrate payment gateways, product listings, and user management.
Continuous Learning and Improvement
The tech industry evolves rapidly. Stay updated with the latest trends and technologies by:
Joining Developer Communities: Engage with communities like Stack Overflow, GitHub, and Python forums.
Attending Workshops and Conferences: Participate in events like PyCon to network and learn from experts.
Following Influential Developers: Keep up with blogs, YouTube channels, and social media profiles of renowned Python developers.
Career Path and Opportunities
As a Python Full Stack Developer, you have various career paths to choose from:
Web Developer: Build and maintain websites and web applications.
Software Engineer: Develop complex software solutions across various domains.
DevOps Engineer: Focus on automating and streamlining the development process.
The demand for Python Full Stack Developers is high across industries such as tech, finance, healthcare, and more. Companies value developers who can handle both front-end and back-end tasks, making you a valuable asset in any team.
Conclusion
Becoming a Python Full Stack Developer is a rewarding journey that requires dedication, continuous learning, and practical experience. By mastering both front-end and back-end technologies, you'll be well-equipped to build comprehensive and efficient web applications. Embrace the challenge, stay curious, and keep coding!
0 notes
Text
Full-stack development in Bangladesh
Certainly! Full-stack development refers to the practice of developing both the front-end (client-side) and back-end (server-side) parts of a web application. A full-stack developer is someone who is proficient in working with both front-end and back-end technologies, as well as databases and other essential components of web development. Here's an overview of key aspects of full-stack development:

Front-End Development:
HTML/CSS: These are the fundamental building blocks for creating the structure and styling of web pages. JavaScript: The programming language used for creating dynamic and interactive web pages. Popular front-end libraries and frameworks include React, Angular, and Vue.js. Back-End Development:
Server-side programming languages: Common languages include JavaScript (Node.js), Python (Django, Flask), Ruby (Ruby on Rails), Java (Spring), and PHP. Server: Full-stack developers need to understand how to set up and configure servers. Popular choices include Apache, Nginx, and Express (for Node.js). Databases: Knowledge of database systems such as MySQL, PostgreSQL, MongoDB, or others is essential. Version Control/Git:
Git: Version control is crucial for collaborative development. Git is the most widely used version control system. API (Application Programming Interface):
Understanding how to design, implement, and consume APIs is a key skill. RESTful APIs are common, but knowledge of GraphQL is also becoming more important. Web Application Architecture:
Understanding the architecture of web applications is crucial. This includes knowing about the client-server model, MVC (Model-View-Controller) architecture, and SPA (Single Page Application) concepts. Web Development Tools:
Familiarity with development tools such as text editors (VSCode, Sublime Text), browsers (Chrome DevTools), and package managers (npm, yarn) is important. Testing and Debugging:
Full-stack developers should be skilled in testing their code and debugging issues. Knowledge of testing frameworks and tools is beneficial. Deployment and Hosting:
Understanding how to deploy applications is crucial. Familiarity with cloud platforms like AWS, Azure, or Heroku, and knowledge of containerization (Docker) is beneficial. Security:
Awareness of security best practices, including data encryption, authentication, and authorization, is essential. Soft Skills:
Effective communication, problem-solving, and collaboration are important skills for any developer, especially for those working on full-stack projects. Keep in mind that the technology landscape evolves, so staying updated with the latest tools, frameworks, and best practices is important in the field of full-stack development. Additionally, specialization in certain areas or technologies within the full-stack ecosystem is common as developers gain more experience.
0 notes
Text
Chrome remote desktop chromebook

CHROME REMOTE DESKTOP CHROMEBOOK HOW TO
CHROME REMOTE DESKTOP CHROMEBOOK INSTALL
CHROME REMOTE DESKTOP CHROMEBOOK SOFTWARE
CHROME REMOTE DESKTOP CHROMEBOOK CODE
CHROME REMOTE DESKTOP CHROMEBOOK CODE
The main advantage is that no source code needs to be on your local machine: the Remote Development extension pack can run commands and other extensions directly inside a container or on a remote machine so that everything feels like it does when you run locally. VS Code Remote Development is probably one of the biggest features of this IDE, as it allows you to use a container, remote machine, or the Windows Subsystem for Linux (WSL) as a full-featured development environment. With this alias, every time we type dev, we will automatically connect to the remote workstation and attach to the tmux session currently in use (or will create a new one if none exists). bashrcĪlias dev = 'ssh workstation -t "tmux attach || tmux new"' To avoid this, we can rely on a terminal multiplexer like tmux (or screen): :~ $ cat. This could be enough, but every time we disconnect (or the connection drops) we will have to re-connect and restart from scratch whatever we were doing. With this profile, we can now access the remote machine easily just by typing: ❯ ssh workstation Line 7-9: a couple of tweaks to improve stability of the SSH connection.Line 6: we are instructing SSH to start dynamic port forwarding, which will be useful in the Accessing Services Local to the Remote Workstation section.Line 5: we are instructing SSH to use the key pair we specifically created and trusted ( id_rsa-remote-ssh).Line 3-4: hostname and user of the remote host.Line 2: we are defining a new configuration named workstation.With the key pair now trusted, we can create a custom profile to invoke every time we want to login to the remote workstation, without having to provide the combination of username/hostname/keys: 1 ssh/id_rsa-remote-ssh Create a Custom Profile
CHROME REMOTE DESKTOP CHROMEBOOK INSTALL
Install the newly generated public key in the remote machine’s authorized_keys:.
❯ ssh-keygen -t rsa -b 4096 -f ~/.ssh/id_rsa-remote-ssh Nothing new here, just a normal key-based authentication to setup: Next, you’ll probably want to streamline SSH access to the remote Linux workstation (for this post I will be assuming it has a hostname of v),īy using key-based authentication, and (most importantly) by creating a custom profile to speed up login and to simplify access to a remote session. Optionally, I’ve found the Secure Shell App extension to be a handy alternative to the native terminal that comes with the Linux Backend.
Reboot your Chromebook and sign back in.
Download the latest binary (using the direct download link) and install it:.
Open the Linux terminal on your Chromebook.
Thanks to the Linux Backend we can also install Visual Studio Code for Linux: Setup can take around 10 minutes, but it is pretty straightforward.
Under “ Linux (Beta)” select “ Turn On”.
At the bottom right of your screen, select the time.
CHROME REMOTE DESKTOP CHROMEBOOK HOW TO
You can refer to the official documentation from Google ( Set up Linux (Beta) on your Chromebook) to see how to set it up, but in short the process is more or less like the following: With it, you can install Linux command line tools, code editors, and even IDEs.
CHROME REMOTE DESKTOP CHROMEBOOK SOFTWARE
Linux (Beta) is a feature that lets you develop software using your Chromebook: This post will show you how to streamline SSH access (with key-based authentication, a tailored SSH profile, and automatic spawning of tmux), how to setup VSCode Remote to edit files directly on the remote workstation, and how to access from your Chromebook services that are local to the remote workstation.įirst of all, there are a couple of prerequisites you’ll have to install on your Chromebook: mainly a shell, and Visual Studio Code (VSCode). How can you improve your day-to-day experience? This post is going to be a bit off-topic from the main theme covered by this blog (computer security),īut I want to share (and also have a future reference for myself) how to setup a Chromebook for remote development.Īssuming you have a Linux workstation somewhere (it could be in the cloud, or in a network you can VPN into), Accessing Services Local to the Remote Workstation.Edit Remote Codebases with VSCode Remote.
0 notes
Text
Nuxt.js+TypeScriptで抽選ツールを作ってみた

はじめまして、2021年度新卒の木村です。 フロントエンドエンジニアとして テクノロジーセンター5G に所属しています。
今回は、Nuxt.js ならびに TypeScript を利用して、簡単な抽選ツールを作成してみた内容についてご紹介します。
Nuxt.js と TypeScript
Nuxt.js は、Vue.js ベースの JavaScript のフレームワークです。Webページ構築に有用な UI 以外の機能( Ajax やサーバーサイドレンダリングなど)をまとめて利用できる環境を提供してくれます。 Nuxt.js 公式サイト
TypeScript は、省略可能な静的型付けとクラスベースオブジェクト指向を加えた JavaScript のスーパーセット(上位互換)です。一言で言うと「型定義できる JavaScript 」。 TypeScript 公式サイト
なぜ抽選ツールを作ったのか
主な理由は、以下の2点です。
私の所属するチームで扱っている Nuxt.js および Typescript の概要を掴むため
チーム内でMTGのファシリテータが偏ってしまう課題を解決するため
完成物
さっそくですが、完成した物がこちら。

ランダムにユーザーを抽選できるシンプルなツールです。 デザインは近年流行ったニューモーフィズムを取り入れてみました。 少ない配色でも凹凸によって奥行きができるので、シンプルなツールでも見栄えが良くなります。
使った技術
Nuxt.js 2.15.7
TypeScript 4.2.4
Vue.js 2.6.14
Vuex 3.6.2
firebase 8.7.1
tailwindcss 2.2.4
sass 1.35.1
環境
M1 Mac
VSCode
yarn
機能
今回の抽選ツールの機能は以下とおりです。
ユーザーを登録・削除する
ユーザー情報をDBで保持する
登録したユーザーからランダムに抽選する
完了した人・休みの人にチェックし、抽選対象から外す
抽選終了後、選��れた人は自動で完了チェックされる
全員チェックしたら一括リセットできる
作成手順
全体的な流れは以下のとおりです。
環境構築
各機能作成
Vuex導入
firebase導入
1. 環境構築
create-nuxt-appを利用して環境を構築しました。
create-nuxt-app
公式サイトとNuxt.js 入門の記事 を参考にしました。
2. 各機能作成
前述した各種機能を実装していきます。
欠席者の対応
完了した人だけでなく、休みの人など抽選対象から除外したい場合を想定して、完了チェックとは別に除外したいユーザーを指定できるようフラグを持たせています。
コンポーネントについて
個人的に苦労したのはコンポーネント周りです。
まず、どのくらいの単位で区切れば良いのかがわかリませんでした。 そこで今回は Atomic Design を参考に切り出しました。
また、他の箇所でも使えるように汎用的に作ることです。 クリックなどのイベントは全て親へ渡し、スタイルや表示の変更は親から値を渡すようにすることで、atoms単位のコンポーネントがどこでも使えるよう心がけました。
例えばボタンコンポーネントは、予めいくつかのスタイルを定義しておき、親コンポーネントで使うときに下記のように props で必要なスタイルを渡すとともに、$emit でクリックイベントを親に渡しています。
//Button.vue <div> <button :class="[ colorStyle[buttonColor], sizeStyle[buttonSize], fontStyle[buttonFont], ]" @click="$emit('button-click')" > <slot></slot> </button> </div>
//Input.vue <Button button-color="gray" button-size="short" button-font="small"> ADD </Button>
そしてコンポーネント間のデータの受け渡しです。 例えばユーザー情報は、子から emit で親コンポーネントに値を引き渡し、さらに別の子コンポーネントに props で渡して表示しています。

今回はシンプルなツールなのでコンポーネントも少ないですが、こうした受け渡しが重なってくるとコードが煩雑になりメンテナンスがしづらくなります。そこで、Vuex を導入し状態管理をすることにしました。
3. Vuex 導入
Vuex のストア��ユーザー情報の状態を管理します。 今回はDBも使う予定なので、actions でDBに接続した後、値を state に反映させています。

Nuxt.js は store ディレクトリにファイルを作成するだけでストアを有効化してくれるので便利ですね。今回は管理するのがユーザー情報だけなので、index.ts を作らず users.ts を直下に作りました。
Vuex ストアでデータを一元管理できるので、本当にわかりやすくなりました。コンポーネントを超えて共有される情報を管理するには、とても強力なツールだと思います。
一方で、Vuex を使用する際には、注意点もあります。 例えば、小さいレベルのコンポーネントからは Vuex を使用しない方が良いでしょう。 コンポーネントの使い回しが難しくなるのと、1画面の中で複数の箇所から Vuex のストアへの参照と変更が入り組んだ場合、処理が追いにくくなるためです。
参考:Vuexはなるべく避ける Vuexで何をするか、何をしないか
Vuex を利用する際は、Atom や Molecule レベルのコンポーネントの中では使わない、state を直接参照しない、などのルールを設けて運用したいと思います。
4. firebase 導入
DBとデプロイは firebase を利用します。 firebase は以前にも使ったことがありましたが、やはり firestore を使えば面倒な手間をかけずにDBが実装できますね。万歳。 デプロイも firebase の Hosting を使って行いました。
さらに、今回は社内向けツールなので、デプロイにあたり外部からのアクセスを制限するため、 Authentication を使用してログイン認証を追加します。管理者アカウントとしてユーザーを一人だけ登録し、簡単なPWを打てば誰でも使えるようにしました。 ログインしていない状態では認証後のページへ飛べないようにするため、強制的にindexへリダイレクトするmiddlewareも追加しています。
const auth = firebase.auth() const middleware: Middleware = ({ route, redirect }) => { auth.onAuthStateChanged((user) => { if (!user && route.name !== 'index') redirect('/') }) }
また、Authentication の認証状態は、デフォルトではユーザーがブラウザを閉じた後でも永続的に維持されるようになっています。 今回は管理者アカウント一つだけの使用になるため、ログアウトせずにウィンドウを閉じてしまうと、他の人��アクセスした時でも前のセッションが続くことになります。 そこで、 firebase.auth().setPersistence メソッドで永続性タイプを SESSION に変更することで、ウィンドウやタブを閉じるたびにログイン状態がクリアされるようにしました。
ちなみに、Nuxt.js には nuxt/firebase というモジュールがあります。firebase をより簡単に利用できるので、興味があればご覧ください。
詰まったところ
sass の導入
sass の導入で沼りました。どうやら node のバージョン16 かつ M1チップ だと node-sass が動かないようです(2021/09 執筆時点)。node のバージョンを下げることで解決しました。
型定義
Vuex での型定義、props での型定義、firebase で扱う日時の型定義… 型推論が効かず、気づけばanyになっている型に苦しめられました。 特に Vuex は、ストアへアクセスするための便利な型がなく、今回使用した this.$store は Nuxt.js で型指定されていません。 自前の型を使うか、nuxt-typed-vuex を利用することで改善するしかないようです。
また、 TypeScript と Vuex の相性は良くなく、コンポーネントから store を呼び出したときに型安全が守られない、インテリセンスが効かないといった問題があります。 次に TypeScript で Vuex を扱う際は、Nuxt.js 公式で推奨されている vuex-module-decorators を使用したいと思います。
振り返り
さて、ここまで長々と書いてきましたが、今回のアウトプットを通して Nuxt.js と TypeScript の概要は大体掴めたかな、という感じです。 結論、Nuxt.js 便利!
日本語ドキュメントが充実していてほぼ誰でも簡単に始めることができる
ルーティングを自分で作成する必要がない
SSRなどモードを選べるて柔軟なサイト設計ができる
…など、Nuxt.js を使うことで直感的にDOMの内容を操作でき、より簡単に抽選ツールを作ることができました。
また、TypeScript についても、型定義のおかげで、コンポーネント間のデータの受け渡しでもどういう型か判断でき、コードが見やすくなります。 さらに、力補完のおかげでコードを書く時間を短縮できる、エラーチェックを機械に任せることができる、など多くのメリットがありました。 一方で、Vuexとの連携は公式で推奨されているパッケージを使うなど、改善の余地があります。
最後に
以上、Nuxt.js を利用して抽選ツールを作成してみた内容��紹介でした。
最後まで読んでいただき、ありがとうございました。 どなたかの参考になれば幸いです。
0 notes
Text
GSoC logs (June 7–21)
To brief you into what I’m upto, The project is to develop an extension to oCIS that provides Jupyter notebook support in the ownCloud Infinite Scale platform(oCIS). Essentially, a user can preview Jupyter notebooks in the pheonix client itself and open it in SWAN. ** **
oCIS is a collection of services working together. Any extension we build is essentially a service and is similar to those residing in oCIS monorepo and built with go-micro.
Some services have a UI. Some don’t (Eg. thumbnails, wopiserver). These UIs are extended from ownCloud/web(pheonix) the client of oCIS written in Vue.js.
Find my project proposal here.
Jun 1
Synced all repos and ran ocis and phoenix.
Ocis isn’t running.
Okay, let’s try the ocis-simple flavour as mentioned in the docs.
Following https://owncloud.dev/ocis/development/extensions/ Inside ocis-extension-workshop/ocis
TAGS=simple make generate build cd ocis make build
Build failed.
Not generating build in ocis/ocis/
“Error - make: *** No rule to make target ‘build’.
cd into ocis/ directory and make build
"error":“unable to register services: rgrpc: grpc service usershareprovider could not be started, : error loading the file containing the shares: error decoding data from json: json: cannot unmarshal object into Go struct field jsonEncoding.shares of type string”
https://github.com/owncloud/ocis/issues/83 HARD TO FOLLOW. CONFUSED IF I NEED OCIS_SIMPLE AT ALL
Tried following the instructions anyway - FAILED AGAIN
make: *** No rule to make target 'build’. Stop.
https://github.com/owncloud/ocis/issues/177#issuecomment-758545224 Nooo
Check through rest of issues to see what happened to ocis-simple.
Found nothing. ASSUMPTION: ocis-simple is dead. Enough with ocis-simple. Try to work with all of ocis.
June 2
I can try to make ocis-simple.
ocis-simple starts the same services as:
bin/ocis micro bin/ocis web bin/ocis hello bin/ocis reva
So kill all the other services.
./bin/ocis kill glauth && ./bin/ocis kill graph && ./bin/ocis kill graph-explorer && ./bin/ocis kill idp && ./bin/ocis kill ocs && ./bin/ocis kill onlyoffice && ./bin/ocis kill proxy && ./bin/ocis kill settings && ./bin/ocis kill storage-authbasic && ./bin/ocis kill storage-authbearer && ./bin/ocis kill storage-frontend && ./bin/ocis kill storage-gateway && ./bin/ocis kill storage-groupsprovider && ./bin/ocis kill storage-home && ./bin/ocis kill storage-metadata && ./bin/ocis kill storage-public-link && ./bin/ocis kill storage-sharing && ./bin/ocis kill storage-users && ./bin/ocis kill storage-users-provider && ./bin/ocis kill store && ./bin/ocis kill thumbnails && ./bin/ocis kill webdav
Failed terribly.
Some of those services need others to work.
Trying to kill one by one with my intuitive priority list.
What exactly is idp? What’s ldap?
Something to do with auth.
Okay, let’s work with ocis itself.
Why isn’t it building suddenly? Look through commits afterwards.
Login failing. “Invalid credentials” Anything to do with this? https://github.com/owncloud/ocis/issues/1887
"Unexpected HTTP response: 500. Please check your connection and try again.“ message in client and in logs - {“level”:“error”,“service”:“glauth”,“error”:“{"id”:“go.micro.client”,“code”:408,���detail”:“context deadline exceeded”,“status”:“Request Timeout”}”,“handler”:“ocis”,“username”:“idp”,“binddn”:“cn=idp,ou=sysusers,dc=example,dc=org”,“src”:{“IP”:“127.0.0.1”,“Port”:50212,“Zone”:“”},“time”:“2021-06-02T19:46:13+05:30”,“message”:“Login failed”} {“level”:“error”,“service”:“idp”,“error”:“ldap identifier backend logon connect error: LDAP Result Code 49 “Invalid Credentials”: ”,“time”:“2021-06-02T19:46:13+05:30”,“message”:“identifier failed to logon with backend”} {“level”:“info”,“service”:“proxy”,“method”:“POST”,“path”:“POST”,“from”:“[::1]:44172”,“time”:“2021-06-02T19:46:28+05:30”,“message”:“access-log”} {“level”:“error”,“service”:“glauth”,“error”:“{“id”:“go.micro.client”,“code”:408,“detail”:“context deadline exceeded”,“status”:“Request Timeout”}”,“handler”:“ocis”,“username”:“idp”,“binddn”:“cn=idp,ou=sysusers,dc=example,dc=org”,“src”:{“IP”:“127.0.0.1”,“Port”:50220,“Zone”:“”},“time”:“2021-06-02T19:46:33+05:30”,“message”:“Login failed”} {“level”:“error”,“service”:“idp”,“error”:“ldap identifier backend logon connect error: LDAP Result Code 49 “Invalid Credentials”: ”,“time”:“2021-06-02T19:46:33+05:30”,“message”:“identifier failed to logon with backend”} {“level”:“info”,“service”:“proxy”,“method”:“POST”,“path”:“POST”,“from”:“[::1]:44172”,“time”:“2021-06-02T19:47:07+05:30”,“message”:“access-log”} {“level”:“error”,“service”:“glauth”,“error”:“{“id”:“go.micro.client”,“code”:408,“detail”:“context deadline exceeded”,“status”:“Request Timeout”}”,“handler”:“ocis”,“username”:“idp”,“binddn”:“cn=idp,ou=sysusers,dc=example,dc=org”,“src”:{“IP”:“127.0.0.1”,“Port”:50256,“Zone”:“”},“time”:“2021-06-02T19:47:12+05:30”,“message”:“Login failed”} {“level”:“error”,“service”:“idp”,“error”:“ldap identifier backend logon connect error: LDAP Result Code 49 “Invalid Credentials”: ”,“time”:“2021-06-02T19:47:12+05:30”,“message”:“identifier failed to logon with backend”}
Okay, so IDP let’s you authenticate to ocis. It uses OpenID Connect. (Read about it later.)
Okay, I should dig into what’s going on in authentication.
June 3
cd into ocis/ directory and make build
"error":“unable to register services: rgrpc: grpc service usershareprovider could not be started, : error loading the file containing the shares: error decoding data from json: json: cannot unmarshal object into Go struct field jsonEncoding.shares of type string”
Retry - failed
Retry after syncing. - failed
There was a recent release, following release notes instructions. - failed again
Last straw - delete /var/tmp/ocis altogether
make generate && cd ocis && make build
Build happened with couple warnings. Okay, fixed. Ocis is up and running.
Trying to setup ocis-hello. Okay, there’s this boilr tool to bootstrap an ocis-extension template.
I might have underestimated the frontend part. There’s a markdown example in the docs.
Checked markdown app in phoenix. Didn’t understand much. We’ll see.
June 5
I now have a vague idea about some important services in ocis. A big picture.
Trying to setup ocis-hello.
Trying to install boilr.
Installation failed. Some sort of $GOPATH issue.
Okay, turns out my go installation wasn’t properly done.
Followed https://golang.org/doc/install
boilr installation failed again. boilr: command not found
I’m losing interest in this. Let’s just try working on ocis-hello fork until I figure this out.
Both produces same code, and I guess I can just replace all variable names.
June 6
New issues.
looping state after login - UNSURE why it’s happening.
Okay, only happens randomly. But why?
“Authentication failed” on trying http://localhost:9100/#/hello bc I wasn’t redirected.
“Missing config” feedback.
Copied example.json to config.json in ocis-hello/config
make clean && make generate build
Rerun ocis-hello
Still not redirecting to http://localhost:9100/#/hello, so manually trying.
Still Authentication failed
Try yarn build again. still nothing.
Wait, it’s not supposed to redirect to localhost:9100.
A summerised blog post at the end of gsoc period.
Week #1 ( June 7-13 )
Jun 09
Following configuration-with-ocis.md.
Added respective config in ocis proxy and phoenix. - Still failing.
Rerun with phoenix from ocis monorepo itself. After changing config. - failed again.
Should I add ocis-hello in apps property of web-config? Nop.
June 10
Ping the api with postman.
So the service is actually working. Atleast the http api.
Not sure if the grpc api is working. Is there some client like postman or curl for a grpc api?
There are tools in vscode. And this https://github.com/fullstorydev/grpcurl
No requests are received at hello-server from pheonix only Other clients are able to send requests.
hello.js is served at localhost:9200/hello.js
Is the proxy working right?
Jun 11
Meet with mentors.
Need to work on my communication skills.
Lukas mentioned a mistake in the config docs. It was in the proxy config. Makes sense now.
I forgot what he said. Should’ve recorded the whole thing ;_;
Oh, there’s an issue.
Okay, still not working.
Even hello.js not served now.
Week #2 (June 14-20)
June 15 - Tuesday
I was finally able to set up ocis-hello.
The proxy wasn’t picking up the config.
Had to start it seperately like so,
sudo PROXY_CONFIG_FILE=/home/anaswaratrajan/cern/owncloud/ocis/proxy/config/proxy-example.json ./bin/proxy
Fixed ocis-hello - a typo in web-config
June 16 - Wednesday
Customised ocis-hello working clone to ocis-jupyter
Why isn't draw-io running again? mediaviewer is working. wait, markdown also not working. I thought they came with pheonix without need for further setup.
June 17 - Thursday
started a fresh remote repository ocis-jupyter and committed everything so far.
How do I add a new file type ipynb. Wait, I don’t need to. Phoenix offers ways to do that. I just need to specify it in the appinfo object. Cool.
How do I add new file actions - Open in SWAN, Open for preview. Again specify in appinfo.
It seems I’m extending the appinfo object in the web-runtime.
So appinfo and other objects in app.js is being appended to the main objects in web-runtime.
Wait, appended? What’s it called when objects are merged together with Object.assign?
Okay, all apps inside phoenix seem to be doing the same.
Not just appinfo, some other objects as well, okay, what exactly is web-runtime?
I’m able to add new file menu actions but in the sidebar, they just appear as “Open in OCIS-JUPYTER”
Why is this happening?
Let’s dig into web-runtime.
That was a bad idea. I should get their help.
Just look into existing apps in phoenix.
Files app and markdown-editor seems understandable.
Why isn’t draw-io running? Low priority check later.
Read more into docs.
Ocis is huge.
June 18
Reading docs again.
Going through web-runtime again.
I can’t add multiple file actions “Open in SWAN” and “Open in Preview”
Both coming up as “Open in ocis-jupyter”.
So these are file actions.
Trying to make sense of the codebase.
Going through some js fatigue.
Going through web-runtime. I’m probably wasting time with this.
See how file handlers work again.
Okay, back to file handlers, services to checkout =>
Markdown editor, wopiserver, draw-io, thumbnails, media-viewer, onlyoffice* Wait, not thumbnails, it doesn’t have a UI. So it accesses the files from ocis directly. Interesting
That sounds like the right way. But let’s see how the other services are doing it from pheonix itself.
Draw-io isn’t running for some reason, eventhough it’s inside phoenix itself. I should probably ask. Nop.
June 19
What’s with the routes list inside appInfo.extensions?
I should check on it later and focus on file han
Went through files-app. No luck understanding.
Thumbnails -
Okay so, It takes a webdav url to a file and gives back thumbnails
What exactly is webdav? Okay the definition sounds confusingly similar to WOPI protocol.
https://www.cs3mesh4eosc.eu/sites/default/files/2020-10/d3.1_cs3mesh4eosc.pdf
* This sort of explains everything.
0 notes
Link
Sample command line utilities around the Salesforce Dependencies API implemented as SFDX plugin. The plugin is NOT a Salesforce supported project and release as a community project under open source licenses. Anyone is invited to help improve and extend the code. This project implements an SFDX plugin for the Salesforce Dependencies API. With the plugin you are able to analyze dependencies between Salesforce second-generation packages as well as dependencies between Salesforce objects deployed in your org. The plugin is meant for Salesforce developers and administrators trying to Analyze package and object level dependencies Untangle large monolithic orgs to split into smaller (more managable) orgs Indentify and extract base packages with shared objects Identify package level version dependencies The plugin does not automate any of these steps but uses graph technology to help navigate the complexities of a Salesforce org. The main output thus far is a set of D3.js force directed graphs used to visualize dependencies and recommendation actions. Note: Some commands directly need the Salesforce Dependencies API which is currently in open beta for production orgs but fully enabled for sandbox orgs. Please make sure your org has the API enabled or work with Salesforce support to enable it. Note: The Salesforce Dependencies API in its current form is limitted to return the first 2000 records of a full query only. As a consequence the plugin can only get the first 2000 objects and the dependency graph is incomplete. While we are wainting for the dependenies API to support full resultset pagination, treat this project as a starter project to a more complete solution. Install Install the Salesforce CLI (SFDX) npm install sfdx-cli --global Make sure you have the latest version npm update sfdx-cli --global Install the plugin via npm npm install dependencies-cli --global Test the plugin sfdx dependency returns Sample command line utilities around the Salesforce Dependencies API implemented as SFDX plugin. USAGE $ sfdx dependency:COMMAND COMMANDS TOPICS Run help for each topic below to view subcommands dependency:component Analyzes object level dependencies in your org dependency:package Analyzes package level dependencies in your dev project Authorize an org For production orgs use sfdx force:auth:web:login For sandbox orgs use sfdx force:auth:web:login -r https://test.salesforce.com returns You may now close the browser Usage The plugin implements two topics with a couple of commmands each: dependency |-component |---componentizer |---report |-package |---merge |---version The two topics help with two disjoint sets of questions where: dependency:component Analyzes object level dependencies in your org dependency:package Analyzes package level dependencies in your dev project Following are a details for every command to illustrate usage only. For detailed command descriptions use sfdx dependency:COMMAND --help dependency:component Analyzes object level dependencies in your org. All commands are based on the Salesforce Dependencies API and require an org connection with the -u, --targetusername=targetusername option. dependency:component:componentizer Return all leaf nodes in the directed component dependency graph. USAGE: ] [--json] The response lists the leaf nodes in the directed component dependency graph in a text form, grouped by object type. For example: CustomField: CustomerPriority(00N2E000008r3MxUAI) NumberofLocations(00N2E000008r3MyUAI) SLA(00N2E000008r3MzUAI) SLAExpirationDate(00N2E000008r3N0UAI) WebLink: View Campaign Influence Report(00b2E000001Yj9ZQAS) Billing(00b2E000001Yj9bQAC) Up-sell / Cross-sell Opportunity(00b2E000001Yj9cQAC) dependency:component:report Produces a dependency graph representing all object level dependencies in your org. USAGE: ] [--json] This command produces a DOT formatted output by default if no --json option is used. Following is an example output. X00N11000002qGqQEAU } DOT formatted output can easily be converted into a vector graph (SVG). You can either paste the output directly into this website for online rendering, or install software to build static or interactive SVG (using d3.js). 1. Render the SVG as dependency graph in an image requires Graphviz brew install graphviz produce the DOT graph file output sfdx dependency:component:report -u [alias|username] -r dot | tee graph.dot convert the DOT file to SVG graph.svg open the SVG directly in your browser (Google Chrome works best) open -a "Google Chrome" graph.svg Following is a small example of a static SVG produced with this process. 2. Render the SVG as d3-force graph There are two options to launch the D3 graph, using either a pre-deployed Heroku app or running the app locally. 2.1 Use the Node.js app deployed at https://sfdc-mdapi-graph.herokuapp.com produce the graph in JSON format sfdx dependency:component:report -u [alias|username] --json | tee graph.json open the browser with https://sfdc-mdapi-graph.herokuapp.com and load the produced JSON file to render open -a "Google Chrome" https://sfdc-mdapi-graph.herokuapp.com 2.2 Run the Node.js app locally start the local Node.js server npm start & produce the graph in JSON format sfdx dependency:component:report -u [alias|username] --json | tee graph.json open the browser with http://localhost:8080 and select the produced JSON file to render open -a "Google Chrome" http://localhost:8080 to kill the local Node.js server use npm stop Here an example of an interactive force directed D3 graph rendered with the above process. The force directed graph supports actions to navigate a large graph better, including: filter and selection by node type filter and selection by node name show/hide labels freeze the graph simulation recenter the graph expand the graph for readibility collapse the graph to identify center of gravity remove individual nodes remove a connected graph for a given node expand the fully connected graph for a given node export filtered subgraph Using D3.js technology is an attempt to manage large graphs more easily. In addition, one can pass flags to the SFDX plugin directly to apply query filters based on type and thus reduce the output. dependency:package Analyzes package level dependencies in your development projects. All commands expect a 2nd generation Salesforce project with one or multiple package.xml. dependency:package:merge Merge multiple package.xmls to create one base package.xml containing only those objects available across all packages. This function computes the intersection of multiple first generation packages. USAGE: ] [--json] This command produces a properly formatted package.xml as the result of the merge operation, for example: dependency:package:version Analyze version dependencies for packages deployed in your org using the 2nd generation development process. The command is required to run from within the SFDX project development folder and needs an org connection with the -u, --targetusername=targetusername option. USAGE: ] This command produces a DOT formatted output: X04tB0000000KAekIAG } To render the output as SVG use the instructions at Render the SVG as dependency graph in an image. Following is an example of a package dependency graph with version details. Build and Debug There are two options to A) build and deploy the sfdx plugin or B) build the node.js application for local testing. Option B is interesting only if you want to maintain different versions, one deployed as SFDX plugin and another one for development testing. Build time is equally fast for both options. A Build the SFDX plugin Uninstall the existing plugin sfdx plugins:uninstall dependencies-cli Build and install the plugin from the project root folder sfdx plugins:link ./ Optionally: in case of errors due to missing dependencies, install them with npm --save Test the plugin sfdx dependency B Build the node.js application for local testing Run yarn clean in the project root folder yarn run clean Optionally: run yarn install in case you used npm package installer to manually install packages yarn install Build the code using npm run scripts in the project root folder npm run-script build Test your changes with a local bin/run script bin/run dependency C Debug the SFDX plugin (with VSCode) Run the plugin in debug mode --dev-suspend Attach VS Code Debugger to D Debug the node.js application locally Before linking the plugin to Salesforce CLI run NODE_OPTIONS=--inspect-brk bin/run dependency Attach VS Code Debugger to Troubleshooting ERROR running dependency:component:componentizer: sObject type 'MetadataComponentDependency' is not supported. Explanation: This error indicates that your org does not have the metadata dependency API enabled. The API is still in beta for production orgs as of release Summer`19. Resolution: Contact your Salesforce support and provide them the to work with. Salesforce support should enable the Enable MetadataComponentDependency API perm for your org. ERROR running dependency:component:componentizer: No AuthInfo found for name Explanation: This error indicates that you forgot to provide the -u flag needed for the command execution. The SFDX plugin attempts to use the default user id but requires dedicated authentication info. Resolution: Supply the option with the command. ERROR dependencyGraph::retrieveRecords().err sObject type 'CustomField' is not supported. Explanation: This error happens with certain orgs where not all metadata object types are supported for query with the tooling API. The error is not fatal and a graph will be produced to STDOUT including all supported metadata types. The error logged to STDERR includes details for the query in question, for example: dependencyGraph::retrieveRecords().query SELECT Id, TableEnumOrId FROM CustomField c WHERE c.Id In ('00h0M00000FoNWnQAN','00h30000000i0DcAAI','00h300000012QrnAAE','00h300000012oWtAAI','00h3000000133AJAAY','00h30000001MDH9AAO','00h30000001OIu3AAG','00h30000001OKZ1AAO','00h30000001OLxMAAW','00h30000000gnhbAAA') limit 2000 Resolution: Contact support to investigate the settings for your org and enable the failing metadata type queries.
0 notes
Text
SFDX commands (continued..)
Creating a salesforce project sfdx force:project:create --projectname "projectName" --manifest Setting the api version sfdx config:set apiVersion=55.0 Authenticating the sandbox/developer org. #For Sandbox orgs: sfdx force:auth:web:login -a "sandboxName" -r https://test.salesforce.com #For dev/Production/scratch orgs: sfdx force:auth:web:login -a "sandboxName" -r…
View On WordPress
#deploy to org#retrieve from org#retrieve objects from org#Salesforce#salesforce apex#salesforce authentication#vscode
0 notes
Photo

Day 34 #100daysofcode 📍 Today I started to learn firebase. It is a real-time database from google and it is pretty cool! The basic option is even free! So you can use it for small projects for free which is really cool! 📍Why do I need Firebase? I want to save hashtags into a database and then load from the database and other stuff. I was looking for easy setup and firebase popped out a lot and I always wanted to test it. 📍For me, it's strange that the apiKey is on the client but yeah that's how it is. But the default behavior is that your firebase is open to everything if you have the key you need to set up the authentication on the GUI to actually have for example email/password authentication or you can log in with Google and so on. That's pretty nice! Have you used Firebase? #buildupdevs #webdeveloper #startup #freelancer #pixelart #gamedev #gamedeveloper #vscode #setup #laptop #macbookpro #developer #appdeveloper #coder #coding #code #programmer #programming #macbook #geek #nerd #photoshop #startuplife #devlog #reactjs #reactnative #react #devlife #laptop https://www.instagram.com/p/BuuF6WthQEd/?utm_source=ig_tumblr_share&igshid=s4y8odmecoma
#100daysofcode#buildupdevs#webdeveloper#startup#freelancer#pixelart#gamedev#gamedeveloper#vscode#setup#laptop#macbookpro#developer#appdeveloper#coder#coding#code#programmer#programming#macbook#geek#nerd#photoshop#startuplife#devlog#reactjs#reactnative#react#devlife
0 notes
Text
Bitwarden U2f

Reading Time: 3minutes
Bitwarden_rs U2f
Bitwarden U2f
Bitwarden U2f Login
Introduction
1: - Describe the Bug!!!Microsoft Edge only!!! Yubikey 5 is registered as FIDO U2F device. When logging in I instantly have an HOTP sent to my mailbox (as I have mail set up as fallback for U2F). Steps To Reproduce

Password Managers is still a necessity in 2020, and will be for a long time. I’ve been using Bitwarden with YubiKeys for a while now, so it was about time to share some experience, and how easy it’s to get started. Markdown vscode pdf download.
Bitwarden_rs U2f
Bitwarden https://bitwarden.com/ is an Open Source Password Manager that is hosted on GitHub https://github.com/bitwarden. This means that you have full control over source code, and you also could contribute to the project. With Bitwarden you can simply self-host it, or run their Organization Plans that is hosted on Azure https://bitwarden.com/help/article/cloud-server-security/. Bitwarden offers different Organization Plans. To see what fits your demand go to https://bitwarden.com/#organizations. The Enteprises Plan supports Azure AD integration. I will cover this in another blog post.

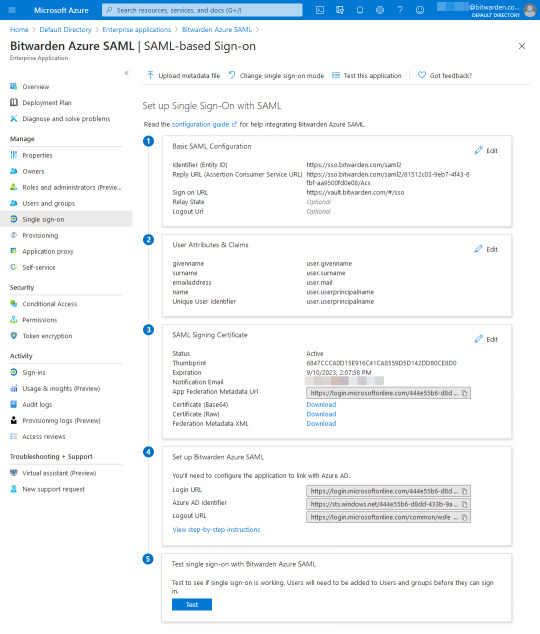
Configure Bitwarden with your Favorite FIDO key

Bitwarden supports a whole range of Providers. When enabling 2FA you will also be prompted to download recover Code. Download these first, before proceeding to the 2FA setup! And Keep the Recovery codes safe, in case things went south!
To configure your FIDO key with YubiKey. Go to: 1) Settings 2) Two-step Login 3) Manage
Just add your YubiKey with the Touch/Tap were it will populate the OTP or U2F, I recommend at least two YubiKeys, in case you lose your primary key. With the second backup key you can access your account if you ever lost your key! Yes, that will eventually happen 🙂 You could also configure Bitwarden with another supported OTP/U2F key if you have another brand in your possession. If you do not have one, Authenticator Apps like Authy, Google, Duo is supported as well.
The list of supported Yubico keys that will works with Bitwarden https://www.yubico.com/works-with-yubikey/catalog/bitwarden-premium/
Bitwarden U2f
If you need to support an NFC compatible key, use the NFC support. I have NFC supported key, so I can access the Bitwarden on go with my Phone.
Since MultiMarkdown syntax is not processed inside of metadata, you can use the latex author metadata to override the regular author metadata when exporting to LaTeX. This metadata must come after the regular author metadata if it is also being used. https://huntermatic876.tumblr.com/post/653064873993027584/multimarkdown-syntax.
Test Login
After you have saved the settings, it’s time to test the login from your browser of preference. The login site https://vault.bitwarden.com
Bitwarden U2f Login
Let’s also test a login with iOS with an NFC compatible YubiKey
Summary
It’s without doubt that configuring 2FA with Bitwarden is straightforward with some simple steps. Just remember! Do not only configure one single YubiKey, that is not good practice.
Bitwarden is feature-packed and should tick all your boxed if you have strong requirements for a password manager. With the wide range of supported OTP/U2F, I think this password manger will make you delighted for a long time. And yes, it’s Open Source that is a big bonus!
Documentation
0 notes
Text
22+ React Developer Tools to Increase Your Programming Productivity [Updated 2021]
New Post has been published on https://flatlogic.com/blog/22-react-developer-tools-to-increase-your-programming-productivity-updated-2021/
22+ React Developer Tools to Increase Your Programming Productivity [Updated 2021]
React Developer Tools Reactide Belle react-styleguidist React Material template React Semantic UI Profiler React Component Benchmark React Developer Toolbox React Bootstrap Admin template Sing App Periscope React wastage Monitor React Studio Atom React Plugin React Extension pack React Style generator Flatlogic One React React Testing Library React Monocle React + Redux kit React Boilerplate Storybook React-Sight
Conclusion
As you can understand from the title of this article, the goal is to be more productive developing React applications. That is why a long intro is unnecessary.
There are only two points that I want to highlight at the very beginning of the article:
This list is opinionated. That means first of all that you can make your additions. I am sure that it can be extended to 30 or even 40 React developer tools. That is why your comments on Facebook or Twitter are highly appreciated. This article can be useful first of all to beginners. That is why I provide some additional historical or background information about React.js in some paragraphs.
React Developer Tools
Reactide
Github stars: 9662 Web-site: http://reactide.io/
Image source: http://reactide.io/
Reactide is an integrated development environment (IDE) for web developers using React.js. If you use this tool, you don’t need server configuration as well as build-tool. Reactide is a React developer tool, it is simply a desktop application that offers great opportunities for visualization thought live code editing.
In Flatlogic we create web & mobile application templates built with Laravel, React, Vue, Angular and Bootstrap to help you develop web & mobile apps faster. Go and check out yourself! See our themes!
Belle
Web-site: http://nikgraf.github.io/belle
Image source: http://nikgraf.github.io/belle/#/?_k=744r8m
This open-source library was built by the members of React community. Belle is a UI framework that was built because of the difficulties with creating a decent UI with React in a short period. Too much freedom with React can lead to a giant waste of time. And that is where the opinionated component library Belle comes in handy. You can easily customize these components, and think only about the features you need to have. Mobile support and consistent API complying with React are also two big pluses of this React dev tool.
react-styleguidist
Web-site: https://react-styleguidist.js.org/docs/getting-started
React development environment. You need to install webpack in order to use this tool. You can see some examples here and here.
React Material Admin
Web-site: https://flatlogic.com/templates/react-material-admin
Image source: https://flatlogic.com/templates/react-material-admin
Admin template is a great React development tool that simplifies the process of coding. The benefits of using admin templates are well known. This particular admin dashboard follows Google material design guidelines. It is completely jQuery and Bootstrap free and can be used for fast development of almost any kind of web application.
Basic Tables; React Router;
Charts; Authentication; Basic Dashboard; Notifications bar.
Do you like this article?
You might want to read “19 Online Tools for Creating Charts”
React Semantic UI
Web-site: https://react.semantic-ui.com/
Image source: https://react.semantic-ui.com/
There is an original Semantic UI library. And to use it in React you need to use a React integration of this library and Semantic UI CSS package. It will help to speed up the development process because of the prebuilt UI components. React Semantic UI is jQuery-free. As you probably know jQuery is a library for DOM manipulation. That is why it is unnecessary to keep real DOM in sync with virtual DOM (React uses JS representation of the real DOM).
Among other features semantic UI React has:
Declarative API Shorthand Props Sub Components Augmentation Auto Controlled State
Profiler
Web-site: https://github.com/reactjs/rfcs/pull/51
Image source: https://reactjs.org/blog/2018/09/10/introducing-the-react-profiler.html
Two years ago the React team introduced Profiler. It gives you a summary of re-rendering of your app. You can increase your debugging performance using this “recording” your set of interactions with the help of this profiling feature. You will be able to see a visualization of re-render as well as screenshots of DOM update.
React Component Benchmark
Web-site: https://github.com/paularmstrong/react-component-benchmark
Image source: https://github.com/paularmstrong/react-component-benchmark
Do you remember react-addons-perf? This tool provided developers with insights about app performance. As the new version of React has been released you can no longer use react-addons-perf. React Component Benchmark is an open-source project that aims to solve the problem of getting an accurate benchmark metric. But it is important to understand that only large enough sample will give you a confident metric. The reason it’s happening like this is that this project does not hook into React directly. And because of this values are not accurate enough. That is why it is reasonable to run large samples using this React development tool.
React Developer Toolbox
Web-site: http://react-toolbox.io/#/
Image source: http://react-toolbox.io/#/
This is the best tool for developing Material Design UI. It has tons of responsive components that comply with Google Material Design guidelines. The exhaustive list you can find right here. React Toolbox is created on top CSS Modules, ES6, and Webpack. Documentation page contains all the live examples of each component so it’s very illustrative.
React Bootstrap
Web-site: https://react-bootstrap.github.io
You can make a case that bootstrap is the largest UI ecosystem in the world. So React-Bootstrap was built for compatibility with Bootstrap. This is one of the oldest libraries for React. It has Bootstrap core, rely on Bootstrap stylesheet and fully evolved side by side with React.js itself. If you want a set of accessible-by-default components React-Bootstrap is giving you much more possibilities than plain Bootstrap.
Admin Templates: Sing App React
Web-site: https://flatlogic.com/templates/sing-app-react
This fully responsive admin template was downloaded more than 1000 times. This template is versatile and was built by professional UI/UX experts. It has more than 60 ready-to-use components and provides you with intuitive framework. It can be useful for building such CRM, CMS, SAAS, etc.
Tens of Pages Fully Responsive 8 Charts Library 2 Dashboards Theme Support E-Commerce Section Static & Hover Sidebar Fully Documented Codebase
Periscope
Web-site: https://github.com/shea-hawkins/periscope
Image source: https://github.com/shea-hawkins/periscope
There isn’t much to say about this open-source project. This is monitoring for Redux applications. You can view your app at all times and adjust the timeline range.
React Wastage Monitor
Web-site: https://github.com/MalucoMarinero/react-wastage-monitor
Image source: https://github.com/MalucoMarinero/react-wastage-monitor#react-wastage-monitor
This project helps you to manage performance issues by detecting wasted rendering time. To understand the importance of this tool you need to dive deep into the concept of <PureComponent>. Implementing PureComponent stops the process called React reconciliation (you can read more here). And PureComponent only re-render when it’s necessary. If you rely on Redux managing to access possible performance mistakes you risk making a critical mistake. React Wastage Monitor ensures you never waste computation on unnecessary renders.
React Studio
Web-site: https://reactstudio.com/
Image source: https://reactstudio.com
React Studio is a useful tool for web developers and web designers. Web developers can enjoy clean JS code, good visual design representation that respects React.js concepts. You can design separate UI components using the code generator. A designer can enjoy responsive layouts that can be easily turned into React code, mobile preview and use it as a prototyping tool. You can have your clean code promptly with nothing extra.
Atom React Plugin
Web-site: https://orktes.github.io/atom-react/
Image source: https://orktes.github.io/atom-react/
This is support for the Atom Editor that helps highlight JSX code. JavaScript Syntax eXtensin without the plugin is very difficult to work with. With the addition of highlighter and code folding, you can make fewer mistakes. It will help you be more productive and makes your job easier.
React Developer Tool. Extension Pack
Web-site: https://marketplace.visualstudio.com/items?itemName=jawandarajbir.react-vscode-extension-pack
Image source: https://marketplace.visualstudio.com/items?itemName=jawandarajbir.react-vscode-extension-pack
As well as the previous tool this one is used to adjust your code editor. You can speed up the development process in Visual Studio using these seven extensions:
Code snippets; An integrated npm; ES6 snippets; ESLint; File paths; IntelliSense for npm modules; A search feature for node_modules.
React Style Guide Generator
Web-site: http://pocotan001.github.io/react-styleguide-generator/#!.
Image source: http://pocotan001.github.io/react-styleguide-generator/#!.
You need to maintain a consistent style across all the pages. When a big team is working on the same project all colors, typography, paddings should be consistent. To make a convenient style guide you can use React Style Guide Generator. And even if in a couple of years you will need to make adjustments or addons to your project you can simply give a developer or agency your style guide.
Flatlogic One React
Web-site: https://flatlogic.com/templates/one-react-template
Image source: https://flatlogic.com/templates/one-react-template
This is an admin template made with React 16 and Redux. The template has a responsive layout with tens of pages and hundreds of customizable components. The designers did a good job on this product. Flatlogic One React is a good basis for creating CMS systems, SAAS, Blog/Data management solutions, E-Commerce.
Tens of Pages; Beautiful charts made with Amcharts, Echarts, and Apexcharts; Fully responsive; React 16; Redux; Login and Logout screens; Notifications & Icons; Flatlogic Typography & Icons; 2 Dashboards;
Google Maps Integrated, etc.
If you’re interested in more examples of a react template, Flatlogic team can offer them for you.
React Testing Library
Web-site: https://testing-library.com/docs/react-testing-library/example-intro
If you use create-react-app you have support of Testing Library. If you don’t, you can use npm
npm install –save-dev @testing-library/react
React Monocle
Web-site: https://github.com/team-gryff/react-monocle
Image source: https://github.com/team-gryff/react-monocle
When you work on some complex projects with tons of classes of components it is always hard to manage such a project and debug it. In this case, only a transparent structure of a project is a condition for the successful delivery of a project. React-monocle can visualize all the relationships of all the components and show you the hierarchies very fast.
React + Redux starter kit
Web-site: https://github.com/coryhouse/react-slingshot
Image source: https://github.com/coryhouse/react-slingshot
This starter kit implements React best practices. This includes:
Bundling; Minification; Testing; Lintinting; Hot reloading, etc.
The most valuable part of this project is the amount of developers expertise that was put is this boilerplate. You no longer need to make tons of difficult decisions starting from the structure of the project until the testing.
React Boilerplate
Web-site: https://www.reactboilerplate.com/
Image source: https://www.reactboilerplate.com/
When you start a new app very often create-react-app crosses your mind. But you can also use a boilerplate with all dependencies prebuilt. This ready-to-use was created by the community to maximize the development speed and therefore your effectiveness. React Boilerplate can easily work with well known Chrome Redux DevTools.
Storybook
Web-site: https://storybook.js.org
Image source: https://storybook.js.org/
Storybook helps you develop nice separate UI components. In case when you need to make some isolated from business logic this tool provides so-called sandbox. And that in this sandbox or playground (you can call it as you want) you can create components. So why it is called a storybook? Because it documents components as stories. Each story contains states. Each state can be may be compared with the visual test case. In the end, a story is simply a function. This function returns a value that is rendered to the screen.
React-Sight
Web-site: https://github.com/React-Sight/React-Sight
Image source: https://github.com/React-Sight/React-Sight
This tool fully supports Router, Redux, and Fiber, and shows your app’s hierarchy. As well as previous visualization tool it requires to React Dev Tools that can be installed as an extension in Chrome.
Finally…
JavaScript is famous for the number of tools that you can use. As time goes by you get overwhelmed and tired. You need to have a set of proven tools for your coding process. We offer you a series of articles about React.js development tools.
The post 22+ React Developer Tools to Increase Your Programming Productivity [Updated 2021] appeared first on Flatlogic Blog.
0 notes
Link
Key Takeaways
A cloud IDE workflow provides excellent convenience in terms of being accessible across any device or location.
When configured correctly, it is arguably more secure than a local workflow as no code or tools are stored locally.
Speed of onboarding increases tenfold as complete workstations can be automated and stood up with a single command.
Local operating systems become irrelevant, allowing users to use the hardware and operating systems that best suit their workflow.
Cloud-based development opens up a world of flexibility by abstracting your engineering environment from all local resources and dependencies.
With the recent announcement of products such as Visual Studio Codespaces and GitHub Codespaces, it is clear there is a demand for cloud-based engineering workflows. While working on a local machine may feel safe and familiar, the cloud IDE workflow offers users significant benefits such as power and flexibility.
For several months, I have been using self-hosted cloud IDEs on a range of public cloud providers. I have been doing so via the open-source version of Code Server from the talented folks over at Coder. Working in the cloud is now my primary workflow for my personal and professional work as a DevOps engineer. With a remotely-accessible instance of VSCode and its built-in terminal, all I need is a web browser to get to work.
Whether self-hosted or managed, this article is going to cover five reasons why a cloud IDE may be precisely what you or your company needs to boost productivity to the next level.
One: Convenience
Working in the cloud is not a new concept. We've all been using products like Google Drive, Dropbox, iCloud and Office 365 for the last decade or so. The convenience of storing your work in the cloud and being able to come back and pick up right where you left off is a game-changer.
With cloud IDEs hitting the scene, us engineers can now enjoy the same convenience and productivity. No longer do I need to be tied down to local hardware forever shuffling around keys, juggling different versions of tooling and languages, and trying to achieve optimal compatibility between my Mac and Linux machines.
With my remote cloud IDE, I can work from any device and location as long as I have an internet connection and browser. While a required internet connection may sound like a downside, in today's world of distributed teams, pair programming and CI/CD workflows, an internet connection is generally already a must in most scenarios.
Offloading my workflow to a remote instance also means the associated load is no longer a burden on my local machine. Lowering the CPU, memory and hard drive load significantly improves performance, thermals, and battery life on my laptop.
Working in the browser also has other convenient benefits. The main one being an isolated work environment. For instance, I use Firefox as a personal browser and Chrome as a work browser. Now I can contain my entire work environment within a single browser. Doing so provides an exceptional level of convenience, but also touches on my second point, security.
Two: Security
As previously mentioned, working in the cloud means my work environment and its related resources remain isolated in a browser profile. Containing my work in such a way means no tools, keys or code are on my local filesystem. I'm sure you've heard the, "you must encrypt your drive in case of a stolen system" lecture during onboarding. While I do still recommend and encrypt all my drives, my local hardware now becomes substantially less relevant to a would-be attacker.
Having my workload execute from a remote network also means my local network holds little value if compromised. All keys and permissions to execute workloads are locked down and authenticated from my remote instance, not my local network and computer terminals.
How the network stack is configured and locked down is a vital part of maintaining optimal security while working in the cloud. There are a few different ways to go about this.
The simplest way to securely access a cloud IDE, with no extra configuration required, would be forwarding the local port of the IDE instance through an SSH tunnel. By doing so, it is not exposed to the public internet. Now all work is being conducted through an encrypted tunnel. While straightforward and secure, this does limit one to needing the correct SSH keys and an SSH client.
As mentioned in part one, a key benefit of a cloud IDE is the ability to access it from any device. To achieve this, I do need to expose a web server via the public internet.
The easiest way to accomplish this is with something like Caddy. A simple web server with automatic HTTPS via Let's Encrypt. In a matter of minutes, I can have a cloud IDE being served securely over TLS.
I, however, choose to house my remote instances in private networks. Traffic is then routed to my IDE instance port via a TLS encrypted load balancer at the edge. This keeps the instance itself off the internet.
Whether choosing to route directly to the instance or via a load balancer, I now have a password-protected cloud IDE running over TLS.
Basic authentication is still a little lack-lustre by today's standards. To beef up security to an acceptable level, I would recommend implementing MFA. The best way to do so is by using a reverse proxy that supports this like Cloudflare or OAuth2 Proxy.
Now I have a universally browser-accessible cloud IDE workstation with TLS, password, and MFA protection.
Implementing these security procedures only applies when self-hosting the cloud IDE, of course. Managed services, such as Visual Studio Codespaces, generally provide and take care of security measures as mentioned above with excellent quality assurance.
Another notable security benefit is the ability to have different instances for different work environments. By having these separate instances, it means all associated security measures for their respective work environments are isolated. Gone are the days of having several sets of keys and access rights on a single machine, creating a blast radius that could take out multiple systems and networks if compromised.
One last point on security, regardless of whether you are using a self-hosted or managed service, make sure the underlying platform meets security compliance. Certifications like SOC 1 Type II, SOC 2 Type II, and in particular, ISO/IEC 27001:2013 are paramount for security assurance. Equally important, though, is that your chosen public cloud provider or managed service is on your company's trusted vendor list. You don't want to wake up to a message in your inbox from a security architect!
Three: Speed
A major constraint in delivering value when starting at a new company is the onboarding process. "What access do I need? What specific tools, languages and versions does my role require? Are these versions up-to-date with what my colleagues are currently using?"
Getting yourself into a position to deliver value for the company can take days or weeks. Even then, tooling and versioning are still subject to change amongst individual contributors.
This is where the speed of delivery and productivity comes into play with cloud workflows. With tools like Terraform and Packer, the whole stack from the underlying infrastructure platform, to the tooling and access requirements on the instance itself, can be standardized and automated.
Imagine a scenario in which there are three different teams for a particular product: an ops team, backend team, and frontend team. Each has requirements for tooling, languages, versioning and access for their respective layer of the product.
In a cloud workflow, we can have three ready-to-go workstation images on the shelf for each team. We treat these images like products, with owners and maintainers.
When a new team member joins, let's say the backend team, they now run a single command to spin up a new cloud IDE instance from the "backend team" image. In a matter of minutes, they are delivering value with a fully functional VSCode instance running on a secure VPS loaded with the correct tools, versions and access they require.
From a team perspective, having a centralized image that all cloud workstations build from drastically decreases non-value add work. It does so by removing drift between tooling and versioning across workstations. When a team decides it's time to upgrade to a new version of Go, for instance, the maintainers of that team's image update the version, and all associated instances upgrade from the new image release. Now we have an opinionated workflow in which everyone is working with the same tools and versions.
There is also a drastic increase in terms of technical delivery speed. Rather than working from a domestic home or office internet connection, the workload is running in a high-speed data center. That Docker image that used to take two minutes to pull down now takes 15 seconds.
The required speed to work in the cloud is not high. I've worked with a 10mbps connection from Sydney, Australia on a cloud IDE housed in a Digital Ocean data center in Singapore. It reacted as if it were running as a native app on my local machine.
Four: Operating Systems
A point of contention for some time now is the fact that most of the tech industry supply and work on Macs, while the systems we build generally run on Linux. I understand the appeal of the Apple ecosystem; a standardized set of hardware and software with excellent support. However, It does create an engineering dilemma.
While some may make the argument that BSD and GNU are not that different, the truth is, they are different enough. To accurately test against Linux architecture from my Mac, I need to run either VM's, containers, or CI/CD builds.
Even when running containers on Mac, I am still technically chewing up extra resources running a Linux VM under the hood to use Docker. This is because the Docker daemon interacts directly with the Linux kernel to create its namespaces and control groups. What I'm alluding to here is that engineering work generally makes more technical sense to be conducted on a Linux base.
With a cloud IDE workflow, my local operating system becomes irrelevant. I can still use my company-supplied Mac along with all the excellent productivity apps like Mail, Calendar, Slack, and of course, Spotify. At the same time, my engineering workstation and IDE is a high-powered Linux-based VPS running in a browser tab. For that real native zen mode, I like to give the IDE its own workspace and go full screen!
The above is, of course, applicable to Windows as well. I'm not judging…
Five: Flexibility
My last point, and also to recap, is flexibility. Ultimately what cloud IDE workflows provide are flexibility and freedom.
I can now work from Mac, Windows, Linux, iOS, Android; it doesn't matter. The tools I need to get my engineering work done are now on a remote instance and accessible from any location or device in the world. Yes, I have tested this from my Google Pixel 4!
Self-hosted workstations do initially involve a little more legwork to get automated and stood up, but as a result, I have fine-grained control over exactly what I need. I can achieve vertical elasticity based on the resource load. I can (and do) mount my home directories to separate immutable drives, allowing me to blow away, recreate or change my underlying instance. I can choose whether to run my cloud IDE as a container or native daemon. Plus, I can move to different public cloud providers with ease.
If all you need is a remote IDE to write and test code, then the several managed services out there are an easy way to work remotely and securely. They have the benefits of freedom and flexibility, without the extra overhead.
Whether you choose to go down the self-hosted or managed service path, there is a whole new world of power and flexibility that a cloud workflow can provide.
Spending days setting up new machines and backing up hard drives are a thing of the past. We live in a world where, with the press of a button, I can stream a movie in 4K from a catalog of thousands in a data center hundreds of miles away. With technology like this, it was only a matter of time before we started working in the cloud and not just on the cloud. I am happy to say that day is here, and it's damn impressive!
0 notes
Link
Build a full-stack web app with ASP.NET Core, Entity Framework Core and Angular 2 (Angular 4+)
What you’ll learn
Build real-world applications with ASP.NET Core and Angular 2
Integrate ASP.NET MVC / Core with Angular 2
Implement a clean and decoupled architecture
Understand and apply the Dependency Inversion Principle (DIP)
Properly implement the repository and unit of work patterns
Use the new dependency injection feature in ASP.NET Core
Troubleshoot common runtime errors
Build APIs with ASP.NET Core
Test APIs using PostMan
Use AutoMapper
Store and retrieve data using Entity Framework Core (Code-first approach)
Implement CRUD operations (including one-to-many and many-to-many relationships)
Implement filtering, sorting and pagination
Handle and log errors
Display toast notifications
Implement photo upload with progress bar
Add authentication and authorization using Auth0 and JWTs
Write clean, maintainable and reliable code
Refactor bad code into good code
Better understand software development lifecycle
Requirements
At least 3 months experience with ASP.NET MVC 5, Entity Framework 6 and Angular 2
Description
[UPDATE, June 19]: Added a new section to the course.
With over 3,000 students and 300+ positive reviews, this course is Udemy’s most popular course for learning ASP.NET Core in the context of a real project!
ASP.NET Core is the next generation of ASP.NET MVC. It’s a complete re-write of this framework but in a modular, cloud-optimized and cross-platform way. So it can run on Windows, Linux and Mac. If you’re on Mac or Linux and want to build ASP.NET applications without running Windows in a virtual machine, you’re going to love ASP.NET Core! You can use Visual Studio Code (VSCode) or your favorite code editor to build ASP.NET Core applications with C#. Say goodbye to VMWare, Parallels, and other virtualization software.
Many companies have already started building their new applications with ASP.NET Core. And they’re asking their new interviewees if they are familiar with .NET Core. So, whether you want to stay in the marketplace and get a better job with better pay, or you just love to work with the latest technology, it’s time to learn about ASP.NET Core and Entity Framework Core.
In this course, Mosh, author of several highly rated courses on Udemy, teaches you how to build a real-world application with ASP.NET Core, Entity Framework Core and Angular. If you’re familiar with ASP.NET MVC 5 and Entity Framework 6 and are looking for a course to quickly get up to speed with .NET core, this is the course for you. Not only will you learn about the changes and the new tooling in ASP.NET Core, you’ll also learn how to properly integrate it with Angular to build real-world single page applications (SPAs).
A REAL-WORLD APP
The app you build in this course is for an imaginary vehicle dealer. The features in this app are carefully designed by Mosh to help you master the core skills you need to build real-world apps with ASP.NET Core and Angular.
By the end of watching this course, you’ll be able to:
Build APIs with ASP.NET Core
Test APIs with PostMan
Integrate Angular and ASP.NET Core
Implement a clean and decoupled architecture
Understand and apply the Dependency Inversion Principle (DIP)
Properly implement the repository and unit of work patterns
Use the new dependency injection feature in ASP.NET Core
Troubleshoot common runtime errors
Store and retrieve data with Entity Framework Core (code-first workflow)
Use AutoMapper
Implement CRUD operations (including one-to-many and many-to-many relationships)
Implement filtering, sorting and paging data
Handle and logging errors
Display toast notifications
Implement cascading drop-down lists
Implement photo upload with progress bars
Add authentication and authorization with Auth0 (including roles with different privileges)
Display charts
And more…
On top of all these, you’ll learn how to write quality code, not just how to build apps. There are a lot of developers out there who can build apps but they write poor quality code. Mosh shows you how to refactor bad code into clean, maintainable and quality code. He also shares his knowledge and 15 years of experience about software design and architecture. So this course is more than just technology. It teaches you how to think like a software engineer.
These are the essential skills that you take with you to nearly every real-world project. Whether you want to get prepared for a job interview or simply want to take your coding skills to the next level, this course is the means to the destination.
TOOLING
There are two ways to build ASP.NET Core applications. You can use Visual Studio 2017 or Visual Studio Code, a light-weight cross-platform code editor. In this course, Mosh uses VSCode and the command-line to build an app, but what you learn can be applied in Visual Studio 2017 as well.
WHO THIS COURSE IS FOR
In order to take this course, you should have at least 3 months experience with ASP.NET MVC 5, Entity Framework 6 and Angular 2 (or higher).
If you need to strengthen your understanding of these frameworks, you can watch Mosh’s related courses prior to or in parallel with this course:
Angular 2 with TypeScript for Beginners
The Complete ASP.NET MVC 5 Course
Entity Framework 6 in Depth
60 DAY CHALLENGE PROGRAM
Depending on your level of experience, there are different ways to take this course. You can watch it, section by section, just like other courses. You may prefer to code along with the videos or watch a section first and then code.
But if you like to get out of your comfort zone and take your coding skills to the next level, you should take advantage of the 60 day challenge program that comes with this course.
Imagine you and Mosh are team mates and are working on a real-world project. Every week Mosh gives you a challenge or a task to complete. You have one week to complete this task. The following week he publishes a new section and shows you how he completes that task himself. This is a fantastic learning opportunity for you. You can compare your code with his and find areas for improvement.
WHAT THIS COURSE IS NOT
While you use ASP.NET Core and Entity Framework to build an app, the focus of this course is on application building skills and not a deep overview of ASP.NET Core and Entity Framework. Because in any real-world applications, you use only a subset of the features in any frameworks. So, it’s impossible to cover everything about ASP.NET Core and Entity Framework in one app. But you’ll learn about the key things that you need to know in order to get the job done.
Also, the following topics are outside the scope of this course:
Complex domains and domain-driven design (DDD)
Design patterns
Continuous integration and deployment
Automated testing
Finally, the application you’ll build in this course has a very simple user interface since the focus of this course is on coding not building visually engaging user interfaces.
TAKE YOUR CODING SKILLS TO THE NEXT LEVEL
So, do you want to transition from ASP.NET MVC 5 and learn about the latest stuff happening in .NET Core? Do you want to learn how to build a real-world application with ASP.NET Core and Angular? Then take this course and get started.
This course comes with a 30-day money back guarantee. If you’re not satisfied, you can contact Udemy for a full refund. No questions asked.
Join the other 3,000 happy students who have taken this course and start building this app in under 10 minutes!
Who this course is for:
Developers who are familiar with ASP.NET MVC 5 and want to transition to ASP.NET Core
Developers who want to learn how to integrate ASP.NET MVC / Core and Angular 2
Developers who want to learn how to build an application from A to Z
Developers who want to improve their coding skills
Created by Mosh Hamedani Last updated 4/2018 English English [Auto-generated]
Size: 1.58 GB
Download Now
https://ift.tt/2C8ACmN.
The post Build a Real-world App with ASP.NET Core and Angular 2 (4+) appeared first on Free Course Lab.
0 notes
Link
Some of you may have been wondering what has happened to Mike and even Chris, why such a long hiatus? There is no single reason or easy explanation other than life. Let’s just say various life challenges converged. As part of tackling life’s challenges, I’ve been looking at ways to be more productive with my daily work routine. One tool which I use daily, and I do mean daily is VSCode. VSCode is Microsoft’s free open-source integrated development environment (IDE). What makes the tool so addictive and useful is the community around extensions. Extensions are nifty ways for the developer to add and customise the VSCode experience with things like themes, icons to new services opening up limitless customisation possibilities for the developer and Salesforce for that matter! Salesforce a few years back announced they would no longer be supporting Eclipse and the force.com IDE, and started the migration to VSCode. Steadily this shift has evolved and matured. Hence the title of this blog post! Here we go – starting with the most obvious extension of the pack 1.) Salesforce Extensions for Visual Studio Code What does it do? – It makes interacting with our beloved Salesforce Platform a breeze. It allows you to work with all the programmatic metadata types like Apex Class, Apex Triggers, Aura and Lightning Web Components. Diving into the Developer Console to run tests was and a pain in the you know what. Salesforce Extensions allows you to quickly run all test and debug from right within VSCode! How cool is that? Lastly, it’s always and still is difficult to get at all of your metadata which is where “Org Browser” comes in handy for interacting with all the different types of metadata. 2.) Salesforce Documenter Hey, nothing speaks productivity more than elegant code comments reminding your peers and you what the hell this class was designed to do… This extension adds a layer of consistency which only a computer can provide – this will inject perfect comments for you into Class and methods, leaving you only to fill in WHAT! 3.) Apex PMD What’s worse than no comments in code? Trying to debug code which is overly complex and fall of anti-patterns. Apex PMD is like your own personal Code Guru, analysing your code as you type. Important to note though it cannot write the code for you nor a substitute for learning, it can indicate when you start to veer off the happy path towards spaghetti hell. 32K Salesforce developers think this extension can help, nobody can argue with that. 4.) Apex Code Coverage Visualiser Sometimes when you spend a lot of time coding, nothing jumps out more than some bright visuals confirming something as dry as Apex Code Coverage. 5.) Salesforce Toolkit This is the last Salesforce centric extension before we head into non-Salesforce extensions. Rounding out our Salesforce productivity-boosting extensions, this one is a recent addition to my VSCode setup. When I start a new project, after setting my password and logging in, the next thing I do is authenticate that org with the Salesforce cli. I do this so I can leverage sfdx cli open org command which opens that Org in the currently focused Chrome Window. Nothing is more frustrating than fumbling about trying to remember your user name and password. The extension really shines with it’s Org Info panel when you open an authenticate Org you get a wealth of information about the connected Org. We promised 10, so the next 5 extensions are general VSCode Extensions. 6.) Markdown All in One Other than your programme language of choice, the most other popular language (syntax) in the developer world is markdown. All code can benefit from a well written README – this extension smooths out the process of creating and maintaining markdown! 7.) Live Server Spinning up a local Web Server can be difficult, this gives you an instant local Web Server with a single click. If you have an HTML page or similar in focus within VSCode – hit Go Live and it will pop open a browser session for you. Salesforce TIP – Live Server can help you easily test and build external Embedded Chat Widget solutions 8.) Edit CSV Like it says on the tin “Edit CSV”, these days it’s easy to interact with Salesforce data using a suite of cli commands, perform queries and dumping the results out to CSV. For all the those quick data edits, now it’s easy to edit directly within VSCode! 9.) Bash Beautify One of the significant benefits of VSCode is it has Terminal baked right into the IDE, it’s easy to pop open Terminal and execute commands. Once you move past novice level with the cli, you start thinking along these lines… I keep running these same commands how can I run these all at once – Hello BASH scripting, yep more code, but opens the door to some serious automation and huge productivity gains for developer. Now what If VSCode just took you script bashing and made it look beautiful – of course it still may not work, but it sure would look pretty! 10.) Peacock Rounding out the post; and sticking with our consistent theme here – which is all about being productivity while looking good!!! And Peacock is no exception to that, bringing a warm rainbow of colours to your different VSCode workspaces. Peacock adds just about the right amount of colour to the common beloved dark theme and making these dark times for all of us, seem well a lot less dark! Hopefully this post brights up your day and boosts your VSCode productivity – have a great week!
0 notes
Link
Recently I gave talk in one of most active webinar of Salesforce ecosystem today – Apex hours on topic Integration Patterns and Best Practices in Salesforce. Response was more than expected and questions were high quality. Therefore, I thought to quickly write high level summary of presentation in this blog post along with Youtube video that you can find towards the end of this post. Firewall, Proxy and Reverse Proxy Before integrating anything with Salesforce, as per Architect, it is necessary which system components are important for security and may impact with integration pattern to be used. Firewalls : It controls and protects Malicious Traffics. Firewall can be hardware or software based. Proxy aka Forward Proxy : Proxy normally configured in your browser or systems like VsCode, data loader, eclipse to hide your actual identity. Every outgoing request transmits through proxy server to make sure external systems unaware about your true origin and identity Reverse Proxy : Its used by Web Servers and sits before it. It can server any purpose like authentication or perform security related stuff. Best example is Mulesoft where we can configure API proxy which is used to apply throttling, avoiding DoS attacks or applying SLA as per licenses provided to customer Factors affecting Integration Patterns At high level, there are five types of integration patterns in Salesforce Request and ReplyFire and ForgetBatch Data SynchronizationRemote Call InData Virtualization 1. Request and Reply Few options available in request & reply integration patterns External ServicesLWC, Visual force calling external systemCallouts from TriggerBatch Apex invoking external system Request and Reply Integration Pattern in Salesforce 2. Fire & Forget Fire & Forget – Platform events created by point & click Fire & Forget – Platform event created by Apex / Code Fire & Forget – Outbound Messages Fire & Forget – Callout using Apex (Sub optimal Solution) 3. Batch Data Synchronization Salesforce Integration Pattern – Batch Integration 4. Remote Call-in Salesforce Integration Pattern – Using Standard SOAP or REST API to perform DML in Salesforce Salesforce Integration Pattern – Using custom API built via Apex (Sub Optimal) 5. Data Virtualization Salesforce Connect vs Custom API Callouts using LWC or Visualforce Youtube Video on Salesforce Integration Pattern Apex hours video – Salesforce integration patterns and best practices Reference Mastering Salesforce DX and VSCodePlatform Event Basics – TrailheadSalesforce Documentation on Integration PatternsImplementing External Services – Episode 10 of Path to codeIntegrating Salesforce using Rest API – Episode 8 of Path to code
0 notes