#Become Pro User using CMD
Explore tagged Tumblr posts
Visit Tumblr Blog
Explore Tumblr blogs with no restrictions, modern design and the best experience.
Last Seen Tumblr Blogs


Fun Fact
Kazakhstan’s Minister of Communications and Informatics has blocked the Tumblr site because it contained 60 sites of terrorism, extremism, and pornography in 2015.
Text

How to Avoid 10 Common Mistakes in Photoshop
Photoshop is an amazing tool for creating and editing images, but even seasoned users can slip up now and then. Here are ten common mistakes people make in Photoshop and how to avoid
1. Not Using Layers Properly
Mistake: Doing everything on one layer or merging layers too soon.
Solution: Always use multiple layers and label them clearly. This way, you can tweak parts of your project without messing up the whole thing. Group your layers to keep things tidy.
2. Ignoring Non-Destructive Editing
Mistake: Making changes you can't undo.
Solution: Use non-destructive editing techniques, like adjustment layers and smart objects. These let you make changes that you can easily modify or remove later.
3. Overusing Filters and Effects
Mistake: Applying too many filters and effects, making the image look unnatural.
Solution: Use filters and effects sparingly. Small adjustments can enhance your image without overdoing it. Always compare the before and after to make sure the effect looks good.
4. Forgetting to Save Work Regularly
Mistake: Working for long periods without saving, risking loss of progress.
Solution: Save your work often. Use shortcuts like Ctrl+S (Cmd+S on Mac) to save quickly. Turn on auto-save to avoid losing work if something goes wrong.
5. Working with Low-Resolution Images
Mistake: Using low-resolution images, which leads to pixelation and poor quality.
Solution: Start with high-resolution images whenever possible. If you have to use a low-resolution image, be aware of its limits and avoid scaling or cropping too much.
6. Not Using Keyboard Shortcuts
Mistake: Relying only on menus, which slows you down.
Solution: Learn and use Photoshop keyboard shortcuts. They can make you work much faster. Customize shortcuts to fit your workflow and make things easier.
7. Skipping the Use of Guides and Grids
Mistake: Placing elements without alignment, leading to a messy layout.
Solution: Use guides and grids to align and position elements correctly. This makes your design look more professional and organized. Turn on snapping for easier alignment.
8. Ignoring Color Profiles
Mistake: Not thinking about color profiles, leading to color inconsistencies.
Solution: Use the right color profile for your project. For web images, use sRGB. For print, use CMYK. Check your color settings before starting to avoid problems later.
9. Not Backing Up Files
Mistake: Not backing up files, risking complete loss of work.
Solution: Regularly back up your Photoshop files to an external drive or cloud storage. Save multiple versions of your project so you can go back if needed.
10. Not Updating Skills
Mistake: Sticking to outdated techniques and not learning new features.
Solution: Keep learning new Photoshop skills. Watch tutorials, take classes, and stay up-to-date with new features. The more you learn, the better and more creative you can be.
Conclusion
Avoiding these common mistakes in Photoshop can save you time, improve your workflow, and help you create better images. By using layers wisely, embracing non-destructive editing, and continuously updating your skills, you'll become a Photoshop pro in no time. Happy editing!
To learn more about Photoshop skills and design check out our complete guide to mastering Graphic design skills.
#graphic desing#photoshop psd#photoshop mistake#tips and tricks#useful stuff#resource#helpful#tips#useful
2 notes
·
View notes
Text
Top 5 Tools to Fix Missing or Corrupted DLL Files
If you’ve used a Windows PC for a long time, you may have encountered the dreaded “DLL not found” or “DLL is missing” error. DLL (Dynamic Link Library) files are essential for running many programs on Windows, as they contain shared code and resources that allow multiple applications to perform certain functions. When a DLL file goes missing or becomes corrupted, applications that rely on it can crash or fail to run entirely. Fortunately, there are tools available to help you diagnose and fix DLL-related issues on your computer.
System File Checker (SFC)
System File Checker (SFC) is a built-in Windows tool that scans for and repairs corrupted or missing system files, including DLLs. The tool is simple to use and can often fix many DLL errors without requiring additional downloads.
How to Use System File Checker:
1. Open Command Prompt as an Administrator:
Press Windows + S, type "cmd," and right-click on Command Prompt. Select Run as administrator.
2. Run the SFC Command:
In the Command Prompt window, type the following command and press Enter:
sfc /scannow
SFC will scan for corrupted system files and replace any damaged files with cached copies stored by Windows. This process can take some time, so be patient.
3. Review the Results:
If SFC finds and repairs issues, it will let you know. Restart your computer once the scan is complete to apply any changes.
Pros:
Free and pre-installed on Windows.
Targets system files, making it effective for core DLL issues.
Cons:
Limited to fixing system-related DLLs and might not work for DLLs specific to certain applications.
DISM (Deployment Imaging Service and Management Tool)
DISM is another built-in Windows tool that is often used alongside SFC to repair system files. While SFC checks and fixes DLL files using local resources, DISM can download and repair files directly from Windows Update, making it particularly useful if SFC alone didn’t fix the issue.
How to Use DISM:
1. Open Command Prompt as Administrator (same steps as with SFC).
2. Run the DISM Command:
Type the following command and press Enter:
DISM /Online /Cleanup-Image /RestoreHealth
This command will check for corruption and automatically repair any issues by downloading healthy files from Microsoft’s servers.
3. Restart Your Computer:
After the scan completes, restart your system to apply any repairs made by DISM.
Pros:
Works well with SFC for comprehensive system repair.
Downloads files directly from Windows Update for a higher success rate.
Cons:
Requires an active internet connection for full functionality.
Limited to Windows system files, not third-party DLLs.
DLL Suite
DLL Suite is a dedicated third-party tool specifically designed to fix DLL issues on Windows. It provides a large database of DLL files and is geared towards fixing both Windows system DLLs and third-party application DLLs. DLL Suite can automatically scan your system for missing or corrupted DLL files, download replacements, and install them with minimal user input.
Key Features of DLL Suite:
Automatic DLL repair - Scans for and repairs DLL issues automatically, making it easy for users who are not tech-savvy.
Extensive DLL database - Has a vast library of DLL files that can fix issues in both Windows system files and application files.
PC performance optimization - Offers additional optimization tools that can help improve system performance.
How to Use DLL Suite:
Download and install DLL Suite - Go to the official DLL Suite website, download the installer, and follow the on-screen instructions to install it.
Run a system scan - Open the application and initiate a system scan. DLL Suite will search for missing or corrupted DLLs and recommend replacements.
Repair DLL errors - Once the scan is complete, click on the repair button to fix the issues automatically.
Pros:
Fixes both system and application DLLs.
Easy-to-use interface with minimal technical knowledge required.
Cons:
Paid software, although it offers a trial version.
Requires an internet connection to access its DLL database.
Glarysoft Registry Repair
Glarysoft Registry Repair is a registry cleaner tool that can help resolve DLL errors caused by issues in the Windows registry. Corrupt or incorrect entries in the registry are common causes of DLL errors, and by cleaning the registry, you can often fix DLL-related issues without downloading new files. Glarysoft Registry Repair scans and removes unnecessary or corrupt registry entries, including those related to DLL files.
How to Use Glarysoft Registry Repair:
Download and install the software - Visit the Glarysoft website, download the installer, and complete the installation process.
Launch a registry scan - Open the software and select the Registry Repair option. The program will then scan your registry for issues.
Fix detected issues - After the scan, review the detected issues and click Repair to resolve them.
Pros:
Effective for resolving registry-related DLL issues.
Free to use and includes other system optimization tools.
Cons:
Primarily a registry cleaner, so it doesn’t directly replace missing DLL files.
Can cause issues if used without care, as it modifies the Windows registry.
CCleaner
CCleaner is a popular system maintenance tool that includes a registry cleaner capable of fixing DLL issues related to registry errors. While CCleaner doesn’t replace missing DLL files, it’s useful for resolving registry entries pointing to missing or corrupted DLLs, potentially fixing the root cause of DLL errors.
How to Use CCleaner for DLL Issues:
Download and install CCleaner - Visit the official CCleaner website, download the installer, and complete the setup process.
Run the registry cleaner - Open CCleaner, navigate to the Registry tab, and click Scan for Issues.
Repair DLL-related registry issues - After the scan, review the issues found, select them, and click Fix Selected Issues. CCleaner will prompt you to back up your registry before making changes—this is a good safety measure.
Restart your PC - Restarting your computer allows any changes to take effect and can resolve lingering DLL issues.
Pros:
Comprehensive system maintenance tool, not just a registry cleaner.
Easy to use with a well-designed interface.
Cons:
Doesn’t replace missing DLLs, only addresses registry-related issues.
Be cautious while using registry tools to avoid unintentional damage.
Additional Tips for Fixing DLL Errors
Reinstall the affected application - Sometimes, simply reinstalling the application that’s throwing the DLL error will replace any missing or corrupt files.
Update Windows - Make sure your operating system is up-to-date. Microsoft regularly releases patches that include updated DLL files.
Avoid downloading DLLs from unofficial sources - Many websites offer DLL files, but downloading from unofficial sources can expose your system to malware. Instead, rely on the tools listed above or obtain DLLs from the software developer’s website.
Missing or corrupted DLL files can be a hassle, but with the right tools, you can fix these issues and keep your PC running smoothly. WikiDll is the best option if you want to download missing DLL files. They offer one of the largest databases of DLL files along with their descriptions. You can download all the necessary DLL files from WikiDll for absolutely free.
0 notes
Text
10 Quick Tips for Windows 7, 8.1, as well as 10

One of the most prominent or extensively utilized Windows versions are Windows 7, Windows 8.1 as well as Windows 10. Windows 7 with codename Vienna or Blackcomb becomes part of the Windows NT family members as well as was released back in July 22, 2009. This version was produced to attend to the essential function of its precursor which is the Windows Vista.
Windows 7 has obtained substantial positive statements because of its raised performance, intuitive interface as well as numerous various other kept in mind renovations. As a matter of fact, some movie critics have actually strongly explained that Windows 7 is the best Windows variation ever before. One of the most effective features of this variation is that customers currently have lots of choices to really increase their efficiency while dealing with their computer system.
Right here are the top 10 techniques as well as tips for Windows 7:
1. Use Windows 7 keyboard faster ways such as pressing Ctrl + Shift + N to develop a new folder. 2. Make one of the most out of Jump Lists so you can easily access any folder or home windows that you normally make use of. 3. Usage concealed worldwide themes or wallpapers by following these actions: Kind C: \ Windows \ Globalization \ MCT in the search box at the Start Menu and after that press Enter. Windows 7 will after that reveal you a listing of sub-folders for each and every nation. Look for your favored theme or history. 4. Windows 7 enables users to make use of multiple monitors for whatever objective it might serve.windows 10 pro product key 5. Customers can currently acquire a power performance report wherein the operating system can have a look at your laptop's energy use. To do this, just run a command prompt by typing cmd in the search box. When the symbol shows up, appropriate click and then select "Run as administrator." Inside the command box, kind powercfg -energy-output \ Folder \ Energy_Report. HTML. 6. Windows 7 has an amazing taskbar with a variety of attributes that can assist any person maximize their work. 7. Use check boxes for far better efficiency. This indicates that you can now make it possible for check boxes for folders and data in bulk. 8. Users can currently tailor the notice location or the system tray so they can just see the icons that they regularly use. 9. Use the shake function. This function will certainly help individuals remove all the clutter in a single action. 10. Aero Snap is just one of Windows 7 functions wherein users can make the most of a window by dragging the icon sideways of the display. Next off on the listing is Windows 8.1 with codename Blue which is an upgrade for the Windows 8 version. Most individuals claim that Windows 8.1 is the better version of the Windows 8 with several essential tweaks. Below are a few pointers and methods for Windows 8.1: 1. The ever before trusted Start switch is back on Windows 8.1 in which users can check out the choices. 2. Users can now customize the house display ceramic tiles as well as regroup similar tiles. 3. Windows 8.1 currently has an option to allow customers go directly to the desktop instead of managing the begin display floor tiles. 4. Windows 8.1 allows users to comfortably organize their apps in different good manners such as identifying them by the installment date or for other reason. 5. Utilize the app bars. 6. Windows 8.1 customers now have the alternative to make the Start switch better. 7. Applications that are no more in use can now be stopped from running in the background. 8. Customers can now easily change the screen settings such as positioning as well as resolution. 9. Windows 8.1 enables individuals to see several applications all at the same time. 10 With Windows 8.1, customers have the option to save any type of online post so they can review it also when they are offline. Windows 10. Windows 10 is the current as well as most talked about Windows version which was first launched for consumers on July 29, 2015. Windows 10 is currently being provided for free where many existing individuals are making the upgrade.
Here are a couple of tips and also tricks which can make your Windows 10 experience much better:
1. Beginning with the GodMode in which individuals can get an advanced control board. Simply develop a new folder anywhere and then relabel it as GodMode. 2. Customize the Start food selection to make the computer work for you. 3. Users currently have the alternative to schedule Windows updates to stay clear of all the pesky suggestions or automatic updates. 4. You can conveniently change to tablet mode with this Windows variation if you have a touchscreen gadget. 5. If you are utilizing many applications, Windows 10 permits users to produce online desktops which are wonderful. 6. If you are making use of a laptop, Windows 10 can conserve your battery life. 7. Greet to Windows 10's biometric safety function where customers can open their COMPUTER with their finger print. 8. This Windows variations has actually added a controversial attribute which permits users to restrict their Wi-Fi to others. 9. Customers can now print to PDF without using one more utility. 10. Windows 10 deals customers the possibility to reverse their upgrade within a month of installation. The most preferred or commonly used Windows versions are Windows 7, Windows 8.1 and Windows 10. Windows 7 with codename Vienna or Blackcomb is component of the Windows NT family and was launched back in July 22, 2009. Windows 7 has obtained substantial positive statements due to its raised performance, instinctive user interface as well as numerous other noted improvements. Some critics have actually highly pointed out that Windows 7 is the finest Windows variation ever. Windows 7 will after that show you a list of sub-folders for each nation.
1 note
·
View note
Text
15 flaws of the Macbook pro (and MacOS)
For clarity sake this article refers to the MacBook Pro (15-inch, 2019) with MacOs Mojave (10.14.6), without further ado lets start:
❌Overheating: The part over the touchbar gets hot... extremely hot, as in I can’t put my finger there for more than 10 seconds when it gets really hot and sometimes it even smells like burning, specially when charging but for 9-to-5 work I need it plugged in at all times; one time in particular it got so hot mouse and keyboard stopped working so I had to turn off the laptop; sometimes the keyboard itself gets really hot, I wonder who told Apple keys are supposed to be heat condensers.
❌Sometimes the cursor freezes every 4 seconds when a turned-off external screen is connected... no, I’m not joking: https://apple.stackexchange.com/a/290528/352569
❌On finder “Edit > Copy” allows the user to copy files but “Edit > Cut“ is always grayed-out for files, turns out the later one is only referring to text-selection cuts and not any other form of “cut”, but there is not clue about such behavior, I only discovered this fact after googling why “Edit > Cut“ is always grayed-out and found this answer: https://apple.stackexchange.com/a/12392/352569, I know you can Opt+Cmd+V but thats not the point, which is extremely poor UI/UX.
❌When searching files Finder does not have a column for the location of the files, meaning you only see their names and hope you are guessing right where they might be, that also means you cannot order by file location because a column that doesn’t exist can’t be clicked, superb engineering if you ask me: https://superuser.com/a/335118/95971
❌Lack of normal USB ports and ethernet port; due this all the 100+ MacBooks at my company have at all times an USB-C-to-normal-USB adapters in order to user regular keyboards, mouses, fans and ethernet connections.
❌Fn key is on the bottom corner of the laptop, one of the less-used keys is taking space from a bunch of keys that are used like 99% more than that one such as “control” , “option” and “command”; it is without doubt poor engineering; maybe it should be to the right of the esc key on the touch bar instead.
❌Lack of window-preview when using command+tab, you just see the icons like is 1999
❌Command+tab goes through apps not windows, for Windows you have to use a different command, command+º, but that one doesn’t show icons like command+tab does so you have to go through all of your open Windows of the current app to find the one you want; for this matter I use a third-party software called witch but unfortunately is full of unsolvable bugs (apple is to blame according to its author).
❌External non-Apple mouses can have unexpected scrolling behavior because it wrongly assumes is a touch-based mouse, fortunately someone created a fix for it https://github.com/emreyolcu/discrete-scroll ❌It cannot be changed where notifications appear on the screen, they always appear in the top right which pretty inconveniently hide my Chrome tabs I’m using in the corner of the screen.
❌Keyboard sucks in all possible ways, e.g. the keys are too small, about this issue has already been written extensively including the famous Taike Waititi rant at Oscars ❌The price, for less than the $2.200 USD it costs right now you can get a much better alternative (1, 2, 3, et al)
❌The lack of physical FN keys and having a “touchbar” instead, it’s so useless, only newbies look at their keyboard when typing.
❌The toolbar of an app is only shown when that app is focused, meaning that if you are working on two windows at the same time you can only access the toolbar of the unfocused windows by first focusing it, requiring one more click than the same interaction on any other OS.
❌On activity monitor you can select multiple processes with shift or cmd but the “Exit process” button becomes disabled, meaning you can’t force quit more than one program at once.
If you are wondering why I use a Macbook Pro is because I’m forced to by my workplace, still I didn’t expected it to be so mediocre on nearly all aspects, in its defense the retina screen does look very pretty.
2 notes
·
View notes
Text
Useful Windows Command Prompt CMD Tricks Part 1
Useful Windows Command Prompt CMD Tricks Part 1
Useful Windows Command Prompt Tricks
1. Command History
Using this command, you can track down your command history. This will turn out to be useful when you are trying to look for some command that you’ve used in the past, but can’t remember.
doskey /history
2. Run multiple commands
If you are feeling the need to run two commands after another, you can do so easily. You just need to put “&&”…
View On WordPress
#Abort a command in CMD#Become Pro User using CMD#CMD#CMD Command List#CMD Commands#CMD Hacks#CMD Tricks#Command Prompt#Create Wifi Hotspot using CMD#Run multiple commands in CMD#Scan system files for problems using CMD#See PC driver list using CMD#Windows Command Prompt
0 notes
Text
Winbox for mac mikrotik

#Winbox for mac mikrotik how to#
#Winbox for mac mikrotik for mac os#
#Winbox for mac mikrotik install#
#Winbox for mac mikrotik update#
#Winbox for mac mikrotik how to#
In addition to using the command line to show the mac address table, this tutorial I will also show you how to search for a specific MAC address and filter the table to show mac addresses learned through a specific port. Winbox is a very nice tool, probably one of the best for network management and configuration. Here are the commands to show the mac address table on a MikroTik Router. With the versatility that Winbox has in configuring MikroTik routers I’ve had to figure how to get it to work on MacOs.
#Winbox for mac mikrotik for mac os#
Bartering spots like /r/homelabsales or even LTT's forum have been solid - es. Mikrotik Winbox for MAC OS Learning MikroTik through the use of a Mac has made go through some new things lately. and those are OK but generally I've noticed better pricing when you can find the more fringe hole-in-the-wall types of online marketplaces. Where do you buy used tech from? Hardware.For those of us with children (or you may have heard this growing up yourself), I am glad to say that this actually happened on this day in History! I wis. Today in History: 1664 Old New Amsterdam Becomes New YorkOld New York, was once New Amsterdam. Spark! Pro series - 8th September 2022 Spiceworks Originals.I'm curious if you still have POTS and if not what did you transition those services to (e.g. There's been a lot of discussion about Plain Old Telephone Service (POTS) going away since PRIs are being phased out across the US. No AD, no sort of access control, using O365.How would YOU take the next step? AD? Azure AD? Some. If you were starting from a clean slate, how would you set up an office? Let's say that there are several users using local accounts on Windows laptops. I was trying to use neighbour viewer with not results at all. nothing appear, so I've to startup windows to guess the ip address of routeros and get back to linux again. After youve downloaded CrossOver check out our YouTube tutorial video to the left, or visit the CrossOver Mac walkthrough for specific steps. Click the freeload Trial button above and get a 14-day, fully-functional trial of CrossOver.
#Winbox for mac mikrotik install#
I'm directly connected to the Routerboard (eth to eth), and clicking on. How to Install CrossOver to run Mikrotik Winbox. Starting from a clean slate: how would you set up an office? Windows II'm using wine 1.0.1 to use WinBox and I can't connect to the Mikrotik using the mac address.It is a native Win32 binary but can be run on Linux and macOS (OSX) using Wine.
#Winbox for mac mikrotik update#
If you want to improve and update Winbox-mac to the latest version. This is not official MikroTik build and is not related to Mikrotik in any way. Wine is compiled by Gcenx with minimal set of dependencies. This is an introductory training video on the Mikrotik Learn MikroTik and Windows ServerStep by Step 1 Configure Router OS2 Configure Router Board3 Configure. One related to Winbox-mac, the other one is for original Winbox. Winbox is a small utility that allows the administration of MikroTik RouterOS using a fast and simple GUI. winbox-mac is MikroTik Winbox bundled into macOS app with Wine. There are two changelogs in this project. Please check versioning for versioning scheme explanation. Or you can improve code or documentation. First of all check if there are some help needed issues. If you like this project and you find it useful help me to improve it. Otherwise it may be closed without review. Please make sure that you are using bug report template and checklist is complete. To be able to see hidden files in file choosing dialog press Cmd + Shift +. To properly import/export addresses or use upload/download you have to run Winbox-mac.app/Contents/MacOS/startwine from CLI or add /usr/bin/env to Security & Privacy → Privacy → Full Disk Access. RouterOS provides all the core features for your network - routing, firewall. Open /Applications/Winbox-mac.app -args ip login password MikroTik RouterOS is the operating system of RouterBOARD and CCR devices.
0 notes
Text
Corel Painter 2019 Review

With every new version of Painter, I'm able to improve my workflow, enhance the effectiveness of my art and develop new painting techniques. Corel Painter 2019 is no exception. I'm Painter Master, Aaron Rutten. Let me take you on a tour of the new features in Corel Painter 2019.

Lowest Price on the FULL version of Corel Painter 2019 - Save $100 Enter Coupon Code: PTRAR at checkout | Valid only at painterartist.com
The 2019 version of Painter focuses on performance and usability. It's light on new features compared to the last few versions. A good chunk of highly requested bugs have been addressed and the performance of Painter is significantly faster than previous versions. Gone are the days of crippling lag while using (reasonably) large brushes, high resolution canvases and multi-layered files. It also looks a lot more modern and offers some great dark UI themes.
One of the the most common complaints with each version is that legacy bugs were ignored to give priority to new brush technology. That's not the case this time around. I think a lot of current users will be pleased with what's been done to fine tune Corel Painter. Painter is working better than ever and you'll definitely notice a difference. Though I initially felt a little disappointed that there wasn't any new brush tech to play with, the major boost in performance is enough to make me a happy painter.
Let's take a tour of what's new:

Modernized UI
The UI or User Interface has been modernized to give Painter a more modern appearance. The toolbar, properties and palette icons have all been redrawn. Now it's easy to identify which icons control brush media and which icons control brush shaping.

Square Icon = Media Control, Round Icon = Brush Shaping
New UI Themes
There are also 3 new UI color themes to choose from: Dark Gray, Medium Gray and Light Gray. I personally really like the Dark Gray theme because it's easy on the eyes, improves color perception and doesn't distract too much from what I'm creating on the canvas.
Sliders
The sliders in Corel Painter have a new look and feel. The slider bar has been enlarged a bit to make it easier to manipulate. This is especially useful for users of display tablets like the Wacom Cintiq because the old sliders were too small and thin which made them difficult for some folks to use.
You can also Hold Ctrl (Windows) or Cmd (Mac) while dragging the slider to enable Precision Mode which will move your slider in very small increments. This makes it much easier to make a small change to any slider in Painter. Artists who work with small brushes will really love this because you can make very fine change to the brush size. For example, you can go from a 1.5 pixel brush to a 2 pixel brush very precisely.
Selected Tool and Property Mode Highlights
The icon for the selected tool or property is now highlighted in a color that stands out. I'm all for new features that make it easier for my viewers to follow my tutorials and this is one of them.
Color Wheel Grabbers
In previous versions of Painter, the color wheel's hue ring had a little bar that represented the selected hue. The bar was a bit too thin and could be difficult to click on, so the target has been changed to a small circle to make it a bit larger and easier to grab. It also looks nicer.

Gray Backgrounds for Color Wheel & Color Swatches Panels
The background color of the color wheel has been changed to a neutral gray color in the Dark and Medium UI Themes which makes it easier to more accurately see the color you are selecting.
The background color of the Color Swatches panel has also been changed to a neutral gray color which greatly improves color perception when selecting swatches.
Performance Improvements
If you are using a computer that supports AVX2, Corel Painter 2019 can be up to 78% faster with large brushes and up to 38% faster with documents with many layers and large high resolution documents. There is also faster application performance overall. While testing with reasonably large brushes on a reasonably large canvas, I was pleasantly surprised at how much snappier Painter feels compared to older versions. Now, I say reasonable a few times there because if you make your brushes too large and paint on a extra large canvas, it's going to crush your computer and you will experience some serious lag. Not just in Painter, but in Photoshop or any other art app. So the performance boost more or less brings Painter up to par with the other art apps out there.
Improved Multi-Touch
Multi-Touch has been greatly improved... And by that, I mean it actually works. In previous versions, I was pretty much unable to use Multi-touch on my Wacom Cintiq because it would become unresponsive, but now I'm happy to say that Multi-Touch in Painter 2019 is as smooth as butter. You have a few options for how you can configure the touch:
Wacom Device – Wacom touch driver controls touch.
Windows Touch Device – Windows touch driver controls touch. (For Surface Pro and other tablets that are not made by Wacom)
Both Wacom & Windows Touch – Both the Wacom and Windows drivers control touch. I've found this works best for Wacom tablets with a screen that are running on a Windows computer such as the Cintiq and MobileStudio Pro.
Multi-Touch using a Wacom Cintiq 27 QHD Touch and Windows 10
Overall, Windows touch is much smoother in Painter 2019 and Wacom touch is more reliable. I was able to get touch to lock up on occasion, but it's easy to get it working again by double-tapping with two fingers to reset the zoom and rotation. That beats the heck out of resetting Painter which is what you had to do to get touch working again in previous versions.
Enhanced Zoom
No one likes jumpy zoom levels that never seem to get the canvas as big as you'd like it. Fortunately, now you can now drag up/down or left/right (no diagonals please) to scrubby zoom your view of the canvas. If you look in the Properties Bar, you'll see and option for "Drag To Zoom". If you hold Shift, you can draw a box to zoom into a specific area. If you don't like the new zoom and want it back to how it was in earlier versions, change the Zoom Mode to "Select Zoom Area" and it will revert to its old ways.
Pinned Temporal Color Wheel
The Pinned Temporal Color Wheel is a color wheel that can be floated on top of your canvas. It does not have a background, so you can easily compare the color you are selecting to a color on your canvas by placing the color wheel on top of your artwork.

As you may have guessed, the color wheel now stays pinned rather than disappearing after you've selected a color. Access the Pinned Temporal Color Wheel with the keyboard shortcut: Ctrl/Cmd + Alt/Opt + 2 or choose the Simple Layout from Window > Layout > Simple
New Brushes
The 2019 version of Painter does not include any new brush tech. However, it does include 36 new brushes. There is a new Stamps brush category with some one-click stamp brushes that are useful for adding textures and decals to your compositions. You can choose Windows > Search and then search for 2019 to show a list of the new brushes in Painter 2019.
New Pattern Pens & Patterns
The Pattern Pens brush category features 2 new brushes – Pattern Pen Transparent and Transparent No Sizing which allows the Pattern Pens to support transparency. There are also 5 new patterns that have been added.
Brush Ghost Updates
The Brush Ghost shows the brush diameter as you are painting. By default, Painter 2019 now hides the Brush Ghost as soon as your start a brush stroke and instead shows a tiny crosshair cursor until the pen is lifted again. The cursor can be changed from a crosshair to several other icons in Painter's preferences. And if you like, you can disable this new feature to have the Brush Ghost show at all times. When the Brush Ghost is hidden, brushes feel a bit faster, but it's harder to see brush diameter.
Bug Fixes
In addition to the new features I mentioned, there have also been numerous bug fixes in Painter 2019.
Conclusion
While there's little to be dazzled by in this version, what's important is that Painter 2019 is performing better than ever. If you are considering upgrading from an older version, you'll enjoy how solid Painter 2019 feels and how modern it looks.
If you are an artist who has been reluctant to switch to Painter because of performance concerns, you can rest assured that Corel Painter is now performing as well as many of the other art apps out there.
Watch my video review demonstrating how to use the new features in Painter 2019.
youtube
#Corel Painter#corel painter 2019#corel painter 2019 review#review of painter 2019#corel painter 2019 new features
2 notes
·
View notes
Text
On windows 10 find an ip for address for a device if i know the mac


ON WINDOWS 10 FIND AN IP FOR ADDRESS FOR A DEVICE IF I KNOW THE MAC DRIVER
ON WINDOWS 10 FIND AN IP FOR ADDRESS FOR A DEVICE IF I KNOW THE MAC PRO
If your IP security camera constantly changes its IP address, then you have to do this. Additionally, it's highly recommended to bind an IP address with the camera's Mac address, therefore the router/switch will not change the camera's IP address. When using the IP cameras, ensuring the DHCP function is disabled.
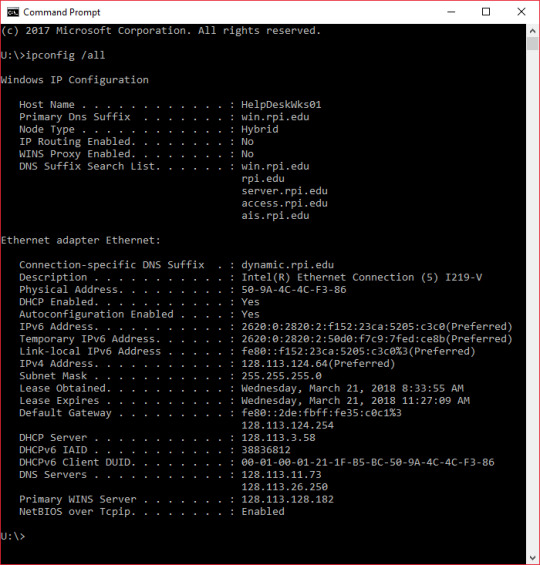
MAC Address Inquiry via CMD Bind an IP address with Mac address The next step is entering command arp -a to find out the physical address of all connected network devices in the LAN. For example, enter ping 192.168.1.10 to see if can ping through. To verify if it's connected, we can use the ping command. Windows 10 OS CMDīefore inquiring the MAC address, we need to know if the target device is online. The ipconfig command shows everything about your computer network interfaces. Now type ipconfig to show the IP address. To do this process: Press Windows+R keys to open the Run.
ON WINDOWS 10 FIND AN IP FOR ADDRESS FOR A DEVICE IF I KNOW THE MAC DRIVER
NOTE: Your printer driver will either use a WSD (Web Services for Devices) to connect or a TCP/IP port. Alternatively, look in the Ports tab for your IP address if five tabs appear. Look in the Web Services tab for your IP address if only three tabs appear. Right-click the printer and select Properties. Running the Windows CMD tool, you can find out the MAC address of network equipment in the LAN. To find your IP address on Windows 10, just type ipconfig in command prompt. Open Control Panel > Hardware and Sound > Devices and Printers. CMSClient IPC Config 2. Finding out the MAC address of IPC by using CMD tool In Network tab, you can know the IP address, meanwhile can switch DHCP to Static IP, also can config the network settings. To know the camera’s IP address, you have to run the CMSClient software, then right click the device, click “IPC Config”.
ON WINDOWS 10 FIND AN IP FOR ADDRESS FOR A DEVICE IF I KNOW THE MAC PRO
For instance, Yoosee/CoT PRO Wi-Fi cameras rely on DHCP function to automatically obtain the IP address. Know your Wi-Fi camera’s IP addressĪiming to make the setup become easier, some IP cameras don’t use static IP address, therefore you may have to find out what the IP camera’s IP address. Is there any way to find out what the MAC address of the equipment? Certainly, as long as they are connected to the network, you can use the CMD command arp –a to know the physical address of all connected network devices in a local area network (LAN). MAC address is also called physical address, it’s an unique ID number to each of network devices. Unlike the universal network cameras such as routers and computers, security equipment manufacturers usually will not print the MAC address on product’s label, therefore some users can not know the MAC address of the equipment.
1 note
·
View note
Text
Windows 7 pro activator reddit 無料ダウンロード.Windows 7 Professional ISO File Free Download 32 & 64-Bit
Windows 7 pro activator reddit 無料ダウンロード.Download KMSPico 2021 Final Activator for Windows and Office

What’s KMSPico?.Windows 7 Professional Product Key for 32/ bit -
Dec 06, · Windows 7 professional is available in both Bit and Bit versions. Looking at Windows 7 Home Premium, the Professional edition is an improved version in Windows 7 series. The Professional edition is also the best Windows 7 operating system for people who work from both home and their offices. Windows 7 Professional Main features Note that you don’t need a Windows 7 professional product key to activate the Windows 7 professional here. This activation method involves typing some commands on the CMD. Here are the steps you need to follow: Click the Start button. Type Run in the search box to open Run. Put CMD into the dialogue box and hit g: reddit Windows 7 Loader Permanent Activator V This is the loader application that’s used by millions of people worldwide, well known for passing Microsoft’s WAT (Windows Activation Technologies) and is arguably the safest Windows activation exploit ever created
Windows 7 pro activator reddit 無料ダウンロード.{Updated} Windows 7 Serial Key for 32bit/64bit
Jul 15, · This article is the ultimate source of information about the Windows 7 serial key or product key.. Get your free Windows product key below. You will find updated and genuine Windows 7 key here along with everything you need to know about using these keys to activate your operating system.. One can even use your Windows computer to order homework at Missing: reddit People always try to activate these products differently. KMS Activator for windows 10 is a very useful tool that can activate your Windows. You cannot enjoy premium features until you register your Office or Windows. You will get a complete guideline about how to activate Windows 7, Windows 8, Windows 10 and also Office , Office Missing: reddit 利用規約に同意した上で、Windows Loader v (1).zip のダウンロードを続けるには「ダウンロード」ボタンを押���してください。 ダウンロードが開始されます。Missing: reddit
This article is the ultimate source of information about the Windows 7 serial key or product key. You will find updated and genuine Windows 7 key here along with everything you need to know about using these keys to activate your operating system. One can even use your Windows computer to order homework at domyhomework It is a very useful operating system. You can also learn how to activate Windows 7 without a serial key and where to find it in your system.
Remember, Microsoft wants you to buy Windows 7 so using a Windows 7 product key is an unofficial method of enjoying this amazing operating system. However, the keys are legitimate and genuine. They are working keys for Windows 7 bit and bit. Now the company is only providing support through its extended lifecycle support which will end in Many users search for a Windows 7 Ultimate serial key.
Since this robust and easy-to-use operating system is nearly a decade old now, its keys have become rare. The Windows key is a character code that is used to activate Windows OS on your PC. It verifies that your copy of Windows is genuine. You can come back another time to get new and updated Windows product keys from this website.
We regularly update our database and give you new and working Windows 7 activation keys when they are available. Try an updated Windows 7 product key from this list. Some of them might work for the Ultimate version, while others work for Home and Premium edition as well.
If you specifically want Windows 7. Many users are exclusively looking for a Windows 7 activation key for the Ultimate version. The latest working serial numbers for this version of OS are below.
Windows 7 Professional Product Key. When you are already running Windows 7 and it asks you to activate your copy of Windows, you will need to enter the Windows 7 key in order to do so. To find the key in your current system, follow these easy steps. Download the Windows 7 Ultimate product key bit program. Run it and provide it with any permissions and details it asks for to find the Windows 7 Ultimate product key.
A product key is never written or stored on a retail copy of Windows any version. However, some users may have a restored Windows disc that might have a Windows 7 Ultimate product key stored on the disc in a file. Unfortunately, this Windows 7 serial key might fail to work as another user may have already used the key. If you have used the above method to get a Windows 7 key for your current system, you might be thinking of using it to activate Windows 7 on another computer.
The catch here is that you can install as many copies of Windows as you want, but you can only activate it on one of those computers. So if you are looking to give Windows 7 a try, use any key that you find and install the product. Below, you will learn a few methods that work even though it has been more than a decade since Windows 7 was first released.
Your system is made to run this version of Windows so it performs optimally. Another way to get Windows 7 free without having to grab a serial key from the internet is to buy a used PC with Windows 7 installed on it. Another option to get Windows 7 on your PC is to get a PC with Windows 8, Windows 8. According to the Windows license agreement, users are entitled to downgrade their operating system to Windows 7 Professional at any time they desire.
If you are facing this situation, you can easily activate Windows 7 Ultimate without a product key. In the next window, you can edit Permissions for the current user, who is also the system owner now. Click here if you want to see it in video. Petr is a serial tech entrepreneur and the CEO of Apro Software , a machine learning company. com or softwarebattle. com, Petr enjoys playing sports and going to the movies. Thanks, I got one.. been looking for a valid key for a long time.
Helps greatly. Have a blessful day. I followed the steps for no key activation and believe me it works! My windows 7 is up and running.
Stop asking for keys people, its easy af: 1. Install Windows 2. Update Windows 3. When it asks for product key, disable the alert 4. Leave the updates enabled so it wont ask you to turn them on and hide it from taskbar. hi itechgyan team I need a working product key for windows 7 Ultimate Service Pack 1 64 Bit I will be happy if it works plz help thanks From michael vargas.
I need working product key for windows 7 32 bit. Hi itechgyan team: Would you help me with a working windows 7 64 bit product key please? Thank you very much. Hi, I need product key for windows7 64bit Ultimate or for Professional version. Thanks, Jay. Dear itechgyan team: Hi, would you please help me with aworking windows 7 ultimate 64 bit product key? I have a Dell demenition.
Came with xp home, but outdated. I did all the proper things and fixes to upgrade it to Windows 7 ultimate 32bit, please help with a working product key. Thanks for your time. Need to get a key for a Windows 7 ultimate 64 bit I have the NOT GENUINE WINDOWS Black Screen and keeps asking for Genuine Key or Purchase New Key. Was wanting to see if You can help me? My computer is running slow and can use Your Help Please?
MUST READ How to disable Right Click on Desktop and Explorer. Petr Kudlacek. Related Posts Windows 7 Product Key [Updated] This is your ultimate knowledge source for Windows 7 key.
Get the free Windows 7…. Get Windows XP Product Key for Free This post is all about Windows XP product key. You can check the list of…. Windows 7 Product Key [Updated] This is your ultimate knowledge source for Windows 7 key.
you need a product key to install an iso image! Need key for window 7 pro 32bit please thanks. I Need a product key for Windows 7 Ultimate bit asap please. I need windows 7 ultimate service pack 1 64 bit please. Write your email and I will give you key guys 🙂. hi, guys please help me with windows 7 ultimate activation key.
Hi, l need a windows 7 professional 32 bit product key. Hi, l need a windows 7 ultimate 64 bit product key. please i need latest product key for windows7 professional. i need a working product key for windows 7 home premium please someone help. Need activation key for Windows 7 Pro — 64 bit Thanks. Dear itechgyan team? would you please help me with a working Windows 7 ultimate 64 product key?
Best Regards. Nathan Hsin. Hi itechgyan Can you please help me with a working windows 7 home premium product key? Many thanks. Sincerely, Hassanien Ramadan. Please provide me an activation code for windows 7 bit. and will it word without internet??? I need a Windows 7 Home Basic 64 bit product key. If possible, I would like a working key for win 7 pro 32 bit. Thank you.
is there any new ones guys for windows 7 pro 64bit. QXV7B-K78W2-QGPRFWH9-KGMM7 or 6JKV2-QPB8H-RQFW7TM-PBJ73 can't promise but good luck, offocially they are for windows 64 bit ultimate..
0 notes
Text
Western Union Bug Activation Serial Key

Western Union Bug Activation Serial Key For Wincleaner
Western Union Bug Activation Serial Key
To start to activate the WU bug follow the below steps:- Be sure the PC you want to activate the bug is your own pc- Be sure to disable all virus softwares on the pc- Be sure to change your IP if you are using an african IP Activation: Use (hackers-free-zone) as the user name. Western Union Database Hacker crack keygen serial key. Photoshop crack only. Western Union Bug Activation Code Keygen for Mac. Fast Access Facial Recognition Serial Key. WinClon 5 Premium. KAV 7 key 2013.rar. Keygen activation key do fast access facial recognition.rar. 8 SP2 serial key Extra. 05 keygen cracks s full version free download.
This software is fast and works on almost all operating systems
You can scan a limitless number of vulnerable mtcn numbers, and you are guaranteed to get results in less than 10secs after an active scan
Do you know that tracking your mtcn on the western union website makes it vulnerable?
Yes this is true 100% and our software uses 6different tricks to gather you vulnerable mtcn numbers from the western union website checks (tracking) and other sources and automatically check them for you.
All of the mtcn scanned are usually available for pick up during scan time.
CONTACT:+1-914-206-1311//
First click the wuscan.exe in the zip file, and allow it to finish running
Please deactivate your antivirus during this (can use in an rdp if afraid of viruses).
You don’t need to click wuscan.exe again anytime you want to use but make sure to disable your antivirus when ever you use our software
Don’t worry about vpn as you do not need one our inbuilt ip hider is 100% guaranteed that you remain anonymous during use of our software.
Use the simple settings to select your operating system
Then select a sender and receivers country or leave all countries to allow a random scan
Input the amount you want to scan e.g. 1000 or use 1000-5000 to range the amount or leave blank for a random scan
Mark the show cmd:/ process box to see full mtcn info during scan
There will be a pro version real soon (will scan even when you are not connected to the internet and deliver results to your email)
Pro version is currently not available we are still working on it
You don’t need any activation code to use this software
Why?
Due to extreme demand from our customers. After our mtcn editing and diversion service was introduced last week a lot of people have been asking where to get mtcn as they want to deal but don’t have mtcn to edit. So we created this for them, this is not for everyone
Does this really work?
Well here is what I have to say and I know every hacker would understand and know this is 100% true. First the western union website is trash and so not secure to track your transfers, secondly it is possible to scan for information’s on all bug computers in the world even though it wasn’t bugged by you. Well there are many tricks this software uses this has all been tested to be perfectly working. I mean you really can use these tricks yourself without our software if thought but our software makes it very faster and easier for you and guaranteed to get you results in no time.
Are there trial versions to this software?

There are no trial versions because there are no activation codes or serial keys, there is an extreme demand for this so and do not have time
Who are the Resellers?
Western Union Bug Activation Serial Key For Wincleaner
Currently none… but will update you if there is any
PRICE:
We are currently selling at $350 as a promo offer and will increase to 400
after the first 50 sales 18sales have been made already so hurry up
Want to be a reseller?
And you will get your own software with your email and become a verified vendor for just $50 extra and $50 commissions on all sales which will be monitored.
For now all reseller rights to this software is suspended until pro version is out.
Customer service [email protected]
24/7
The 2017 version of the most anticipated cash production hack-tool is here, and this year being our 10 year anniversary, Wubug developers have decided to have an amazing surprise for all our esteemed customers.
What are the new Features of the Wubug 2017 ?
Western Union Bug Activation Serial Key
Wubug 2017 has no new features from the 2016 version just a few bug fixes.
BugFixed:
- fixed support system
- fixed connection error for mac (mono) users
- fixed update server connection servers (r2, s4, s7, dl5)
for update servers dl2, ar3, r5 users (countries include Cyprus, Ukraine, Romania, Indonesia, etc ) these users are advised to download updates from wuonline portals manually if update fails.
Our Anniversary Gift!!!
To celebrate 10 years with us we have decided to make 50 copies of the 2017 version of the western union bug 100% free of charge for new users,
Also all users of 2015 and 2016 versions (not banned users) can update to 2017 for free. if you were using 2015 previously (before it became obsolete) you dont have access to wubug online so, you can send your email and key to us via email and you will get 1 year access to wubug online to download all you need or just make transfers online.
Please note that your license is only valid for ten months.
Definitely not everyone and definitely not based on a first come serve.
If you have contacted us any time between 2009 to 2015 September showed intrest in purchase but could not afford the wubug due to high pricing. .....YOU QUALIFY
if you purchased any previous version of the wubug from us or a verified re-seller ....YOU QUALIFY
if you are on our mailing list and receive automatic updates and recommendation and have responded to any update at-least once. ......YOU QUALIFY
If you were formally part of our Re-Seller/Referrer Program (discontinued years ago) ....YOU QUALIFY
we are adding an additional category for those who didn't fit with the above criteria but patiently waited for us to make this announcement if you have no money and you aren't on our banned list and 'don't mind going through a few tests' for two people only ....... YOU QUALIFY
I Didn't meet the Criteria But i want to buy the wubug.
Okay it would only be fair if we try to include everyone somehow so..
2 copies of 2016 version would be for sale at $350 each. banned users are not allowed to purchase.
all news on 2017 wubug will be on wubug2017 and on freewubug blogs
SUCCESS OF 2016 VERSION
Wubug 2016 was our biggest success yet. as we created a new optima design which we decided to use for all future versions. also more less bugs as many were anticipated before hand.
thanks to all our customers and all members of wubug online for ranking it no.1.
before the end of this year we will give some of our 2016 users who voted lifetime status and they will be streaming their usage of the wubug and a few other of our software live.
0 notes
Text
Omnisphere Crack For Mac

Omnisphere 2.6 Crack VST (Studio Edition) Torrent Free Download
Omnisphere 2.6 Crack Torrent Reddit
Omnisphere Free Download Mac
Omnisphere 2 Crack For Mac
Omnisphere 2 Crack with Keygen Download Omnisphere 2.6 Crack for mac and windows is the leading synthesizer which id on the top of the prize. So you can start to make some noise with spectra Sonics. Omnisphere VST Crack Win Download 2020 Omnisphere Crack is the flagship synthesizer for Spectrasonics, an instrument of extraordinary power and versatility. The best artists from around the world trust Omnisphere as an essential source of sound inspiration. Omnisphere Crack 2.6 with Keygen Free Download Windows & MacOS Latest 2020 Omnisphere Crack + Latest Version free. download full 2020: This is mainly used by numerous songwriters as well as composers who else would like to produce remarkable songs.
Omnisphere Crack is also a comprehensive program suite for different wave forms and functions. It is rooted with a lot of extra functions and features that enable users recover sound performance. Browsing graphics and content allows users to easily guide latest sounds and effects. It is important to note that this program works amazing on all versions of Windows, starting from at least Windows XP. It is also compatible with MacOS with the same functions and features. This plugin has also won a number of awards for clocking different sound combinations together as one.
The world's most popular DAW lets you record, edit and mix your songs like a musician, while providing you a professional, studio-grade audio quality at all stages of the creative process.Compose and record songs whenever inspiration strikes - Cubase bristles with an eclectic ensemble of creative tools that are both easy to use and highly musical. Cubase pro 8 for mac.
Omnisphere Keygen is also a star synthesizer Spectroscopic. It is an extraordinary, compelling, and versatile instrument. All top artists from all around the world rely on this software as an essential source of music and Sonic inspiration. It can also bring many different types of synthesizers together into a single amazing-sounding instrument that can spark a lifetime of exploration. It is the only surface synth in the world that offers hardware synth integration features. It’s well known and remarkable innovation can transform over 6500 synthesizers into extensive hardware controllers that can unlock the newly expanded syntheses capabilities.
Omnisphere Crack (MAC/WIN) 2020 Free Download
Omnisphere 2.6 Crack can double the number of your profiles and can add support for such iconic synths such as super Jupiter, Roland Juno 106, Roland D50, and Alesi’s Andromeda. It has more than 600 new patches. Also, it offers you a new stunning hardware library that gives you a corresponding set of sounds. Each of the hardware profile has many games of sounds which are specially invented using the hardware synth as omnisphere controller. It offers you a high-resolution interface. It offers you a newly redesigned interface for hiDPI displays. This new in modernized GUI is very easy to use and is resize able so that it can comfortably fit into your work space. Also, it allows you to import any audio file as a sound source by simply dragging it into the interface.
Omnisphere Registration Code offers you a new metal credit cards time USB drives that are designed to make Spectrasonics products a greatly simplified process. Also, it has a transfer speed that is many times faster than any optical disk that helps the expert user in saving multiple hours during the installation process. Omnisphere Fl Studio is the top synthesizer that identification on the best of the reward. You can begin to create several noises with spectra Sonics. Its brand new form of dunes, importance audios, synthesizes fresh sounds, as well as use results, are mainly enjoyed by many music artists.
Omnisphere Crack Features:
It offers you hardware synth integration
It has a stand-alone application
It’s able to smart update system
it now provides you velocity curve presets
Furthermore, it has many arpeggiator features
It gives you a pattern lock while browsing
Offers you sound source reversing
It has many new modulation capabilities
It is the gift synthesizer for Spectrasonics
The top artist uses it all around the world
It is incredibly flexible with many types of synthesis
It can bring a different kind of synthesis
Offers you more than 14,000 inspiring sounds
it also features hardware science integration
It provides you wave table synthesis
Also, it has all the wave forms in a morphing wave table
It gives you live mode with keys split
What’s New:
Omnisphere Key now offers you more creative tools making it much more flexible.
It currently provides you with a new robust, granular synthesis algorithm.
It has expended modulation with new sources and more targets.
Also, it now includes many modern inspiring patterns, modes, pitch slides, step dividers
It allows you to create entire categories of cutting edge new sounds
System Requirements:
Microsoft Windows: Vista, XP, 7, 8, 8.1 and 10 (both 32-bit & 64-bit)
Memory RAM: 512 MB of RAM (Recommended 1 Gb)
Disk Space: 60 MB of free Hard Disk space
Processor: 800 MHz or higher
CPU: Pentium – compatible CPU
Operating System: All-MAC OS Supported
How to CRACK?
Firstly, uninstall the old version from your system
Download the Omnisphere Crack from the download button
Disable your internet connection for a second
Also, extract the zip file and run to install the setup into your system
After install, you can run the Crack file in the same folder
Wait for a minute to complete
Furthermore, after activate restart your system for best performance
That’s it, Enjoy & Thank you
Omnisphere 2.6 Crack + Activation Code & Torrent Full Download
Omnisphere Crack is the best synthesize of the Spectrasonics instrument of most power and versatility. Top artists using Omnisphere all over the world as a compulsory source of sonic inspiration. It has a lot of syntheses together into one wonderful sounding instrument that will shine or spark forever of exploration. In this latest version, Omnisphere becomes the first tool synth in the world that offers a Hardware synth integration option. it helps you to transforms over 25 Plus well-known hardware synthesizers into extensive hands-on controllers that helps you to unlock Omnisphere synthesis features and capabilities.
This setup groundbreaking feature enables Omnisphere Keygen to feel just like a hardware synth quickly. This unbelievable innovation bridges the physical experience gap both between hardware and software that gives its users control of Omnisperer by simply using the layout of a hardware synth. Also, Omnisphere Crack has a very friendly user interface for its users.
Omnisphere Crack + Keygen (Torrent) Free Download
Also, it included over 1000 Hardware Library new patches that are created by Eric Persing and checked by Spectrasonics sound development team. All hardware profile has a corresponding set of sounds int the hardware library that is specially designed using the hardware synth. Also, the new sounds are available for all users. Furthermore, you can use your own Mp3 files as a sound source in this software Omnisphere Crack. Simply you can drag it onto the interface.
In addition, use all creative tools inside Omnispere Serial number. Also, it has a high-resolution interface with support for HIDPi displays. Furthermore, it includes over 13000 sounds library that you can use. Also, this library growing by Spectrasonics sounds development team. So, don’t be late and let’s start its full version. You can all these above and below functions and features in this latest version for free. Simply click on the download button and get Omnisphere Crack for free.
Beatport LINK streamingAdded support for the Beatport LINK streaming service. Serato DJ Lite 1.4 is out now, bringing Beatsource LINK streaming, Beatport LINK streaming and laptop speakers as master output. Serato dj pro mac torrent. Beatsource LINK streamingAdded support for the Beatsource LINK streaming service. Get access to the expansive open-format catalog directly from Serato DJ Lite.
However, it still does not address all of the keyboard shortcuts that were available in Excel 2011 for Mac. Thank you for bringing this feature back. Specifically, Paste Values, which was CMD+SHIFT+V.It would be super-helpful to get this back, please.Also, I really don't understand why this is so hard - why was this removed? I'm sure all the fancy new bells & whistles and collaboration features are great, but all I need athome are the basics. Mac shortcut keys for excel. And why can'tall possible functions have a keyboard shortcut?Honestly, if it wasn't for the notification that the 32-bit 2011 version would no longer be supported in future versions of Mac OS, I'd still be using it.
Omnisphere 2.6 Crack Torrent Reddit
Screen Short:

Omnisphere Virtual Key Features:
Omnisphere Crack has more than 13000 inspiring sounds for different types of music creation.
Moreover, it has vastly expanded synthesis engine.
Also, groundbreaking hardware Synth integration option.
Also, it has a drag and drop option where you can drag your own audio file to use as a sound source.
Additionally, Synth Oscillator with waveforms.
Moreover, it has sound match features.
also, included hardware library with modern sounds.
Also, Powerful granular Synthesis.
More than 50 FX units.
Omnisphere Crack has sound lock features that can create endless useful variation by simply locking sounds.
Also, it has an ORB circular motion interface that permits you infinitely shifting variations easily.
Dual Filter architecture also included.
Also, Deeper FM modulation
In addition, it is very simple and easy to use for its users.
great feature performance-oriented live mode permits to its users for the seamless patch.
Also, the stack mode interface includes that makes easy complex patch layering as well as splits.
Install process is very simple.
High-resolution resizable interface.
Moreover, easy sound sharing.
Omnisphere Free Download Mac
How to Crack?
Omnisphere 2 Crack For Mac
First of all, Simply download Omnisphere Torrent or crack file from the given link mirror link
After, you need an extractor by using the WinRAR tool.
Now, Extract your setup on the desktop
Then, run the setup file
Moreover, follow instructions and allow it to finish
Next, close the program and run the crack file
Finally, follow the instructions and let it be completed
That’s all!
Enjoy the Omnisphere Full version for the lifetime.
0 notes
Text
Visual Studio Laravel

Visual Studio Laravel
Search results for 'laravel', Visual Studio Code on marketplace.visualstudio.com. Out of the blue, Microsoft jumps into the editor wars with an incredible offering that gives Sublime Text an overwhelming run for its money. In fact, it just might surpass it! So come along, as I demonstrate the ins, the outs, the tips, the techniques. Say hello to your new best friend: Visual Studio Code. Laravel Intellisense is a Visual Studio Code plugin by Mohamed Benhida that provides some nice auto-completion for things like Eloquent models, factories, config, and API resources. The extension works only on Laravel projects and a project is considered a Laravel project only if there is an artisan file in the root directory. Gaurav Makhecha; Credits. PHP Parser by Glayzzle. Currently, you're free to use this extension. I would highly appreciate you buying the world a.

Visual Studio Laravel
Travel through your Laravel app by just clicking on links.
Features
Open Latest Log File
Open latest log file from anywhere. Select the Command Laravel Traveller: Open Latest Log File or press Ctrl+o Ctrl+l (Cmd+o Cmd+l for Mac). You can change the default keyboard shortcut as well.
Technical Notes
The following glob pattern is used to search log files: 'storage/logs/laravel*.log'
Route -> Controller
Link to controller + action from the routes files:
Link to controller + action as per route group namespace:
You can add a simple comment // Route::namespace = NAMESPACE to apply group namespace on file. For example, the routes/api.php in the Laravel app has Api namespace applied by default.
Technical Notes
The controller links are added only in the files that are inside /routes directory or sub-directories and end with .php
php-parser by glayzzle is being used to get the AST of the file and add links based on that.
We consider only the static calls to Route::(get/post/put/patch/delete) and add links to the second parameter of those calls.
We suggest you to write route groups like: Route::namespace('Admin')->group(function() (..)) (as per Laravel documentation) instead of Route::group(('namespace' => 'Admin'), function() (..)) (namespace not supported by extension this way).
Automatic Controller Creation
If the controller does not exist, you'll be asked whether the extension should create it for you automatically. Action method will also be added to the controller. If you want to customize the stub that is used to create the controller, Add stubs/controller.plain.stub to your project's root directory. Please check the Stub Customization section of the Laravel documentation for instructions.
Technical Notes
For automatic controller creation, the default namespace is set to AppHttpControllers.
Automatic Method Creation
If the method does not exist, you'll be asked whether the extension should create it for you automatically. If you want to customize the stub that is used to create the method, Add stubs/method.stub to your project's root directory. (( methodName )) placeholder will be replaced with the actual method name.
Technical Notes
php-parser by glayzzle is being used to get the AST of the controller file and add the method to the end of the file. Basic expectations are that there will be a namespace at the top, a class, and at least 1 method in the controller file.
Controller -> View
Link to blade views from the controllers:
Technical Notes
The view links are added only in the files that are inside /app/Http/Controllers directory or sub-directories and end with .php
It uses this regex to find lines with view helper: ^s*return view((')(https://github.com/freshbitsweb/laravel-traveller/blob/master/.*?)(').*).*$
Currently, it links to the blade files in resources/views directory.
Mailable -> View
Link to blade views from the Mail classes:
Technical Notes
The view or markdown links are added only in the files that are inside /app/Mail directory or sub-directories and end with .php
It uses this regex to find lines with view or markdown method call: ^.*->(?:view|markdown)((')(https://github.com/freshbitsweb/laravel-traveller/blob/master/.*?)(').*).*$
Currently, it links to the blade files in resources/views directory.
View -> View
Link to blade views from the blade view:
Technical Notes
The view or markdown links are added only in the files that are inside /resources/views directory or sub-directories and end with .blade.php
It uses this regex to find lines with view or markdown method call: ^.*@(?:extends|include)((')(https://github.com/freshbitsweb/laravel-traveller/blob/master/.*?)(').*).*$
Currently, it links to the blade files in resources/views directory.
Route -> View
Link to blade views from the Route files:
Technical Notes
The view links are added only in the files that are inside /routes directory or sub-directories and end with .php
php-parser by glayzzle is being used to get the AST of the file and add links based on that.
Currently, it links to the blade files in resources/views directory.
Model -> Model
Link to models from the related model files:
Technical Notes
The model links are added only in the files that are inside /app directory and end with .php. and links to models in app directory only.
It uses this regex to find lines with relationship calls: ^s*return $this->(?:hasOne|belongsTo|hasMany|belongsToMany|morphOne|morphMany)((')(https://github.com/freshbitsweb/laravel-traveller/blob/master/.*?)(').*$
Route -> Route
Link to other routes from route files:
Technical Notes
The route links are added only in the files that are inside /routes directory and end with .php.
The definitions needs to be in this format: Route::group((), base_path('(ROUTE_FILE_PATH)'));
Configuration
5 of the features: Route -> Controller, Controller -> View, Mailable -> View, View -> View, and Model -> Model are toggelable: You can disable them from VSCode settings if you do not need them.
Technical Notes
The extension works only on Laravel projects and a project is considered a Laravel project only if there is an artisan file in the root directory.
Authors
Credits
Treeware
Currently, you're free to use this extension. I would highly appreciate you buying the world a tree in return.
Evernote is chinese app store. It’s now common knowledge that one of the best tools to tackle the climate crisis and keep our temperatures from rising above 1.5C is to plant trees. If you contribute to our forest you’ll be creating employment for local families and restoring wildlife habitats.
WPS Office for Mac. WPS PDF to Word 40.3MB. WPS Office For Linux. WPS Data Recovery Master 5.5MB. WPS Office For Android. WPS Office For iOS. WPS PDF For Android. PDF Editor For Android. PDF Converter Pro For Android. WPS Fill & Sign. Wps english download. Download WPS A new generation of office solutions With PDF, Cloud, OCR, file repair, and other powerful tools, WPS Office is quickly becoming more and more people’s first choice in office software.
You can buy trees at for our forest here offset.earth/treeware
To use Astropad Studio you will need to make a user account. Creating a user account is easy, by entering your email and making a password. Your user license for Astropad Studio will be tied to this account. To enter Studio, log in to your user account through your iPad. Luna Display turns any Mac or iPad into a wireless second display for Mac. Makers of Astropad Studio and Luna Display. Turn your iPad into a drawing tablet with Astropad Studio. Extend your Mac display to any iPad or Mac with Luna Display. Astropad. Enjoy a 30-day free trial! Pick a payment plan to get started.
Notes on silencing. Read more about Treeware at treeware.earth
Special Thanks to
Laravel Community
VS Code Community
0 notes
Text
Software Download For Macbook Pro 2012


Macbook Pro Apple
Software Download For Macbook Pro 2012 Battery
Vmware fusion free download mac. For 13-inch MacBook Pro with Retina display (late 2012) models, and 15-inch MacBook Pro with Retina display (mid 2012) models. Free Publisher: Apple Downloads: 275. What is the version for the bootcamp software for the 2012 macbook pro and windows 10? I erased OS X and cant get to bootcamp to download the drivers. Version 5.1.5640 wont work on windows 10. Thanks in advanced.
The MacBook Pro comes with a software bundle that includes OS X Lion, their newest operating system, and a suite of software for organizing, socializing, creating and editing media, and browsing the web.
Since Apple released its new Lion operating system earlier this year, all of the new MacBook Pros come with it. Lion has received mixed reviews. Critics complain that the software didn't make enough improvements over its predecessor, Snow Leopard, and some even compare it to Windows Vista, Microsoft's notoriously buggy OS. While others are saying that Lion doesn't offer as many big improvements as Apple's normally includes with upgraded operating systems, Lion is still worth the upgrade (source: Siracusa).
Advertisement
To display the Download status list from the keyboard, press cmd+Option+L. You can also click the Download button at the upper-right corner of the window to display the Download list. By default, Safari saves any downloaded files to the Downloads folder that appears in your Dock. Fix MacBook folder with question mark issue – reset the default startup disk. Difficulty level. Free downloads for macbook pro. Organize files in folders on Mac. Everything on your Mac—documents, pictures, music, apps, and more—is organized in folders. As you create documents, install apps, and do other work, you can create new folders to keep yourself organized. Or select one or more files and choose File Move To Trash (Command-Delete). To remove a file from the Trash, click the Trash to open it, then drag the file out of the Trash. Or select the file and choose File Put Back. To delete the files in the Trash, choose File Empty Trash. The storage space used by those files then becomes available. Get summary info for multiple items: Select multiple items, press and hold the Control key, then choose File Get Summary Info. A window displays a summary of information about the items. Show the path to a file or folder: On your Mac, click the Finder icon in the Dock to open a Finder window, then choose View Show Path Bar.
Advertisement
All new MacBook Pros come with Mail and iCal to help keep your emails and schedule organized. Mail is built-in email software -- sort of similar to Microsoft Outlook -- that lets you download and organize emails. Apple's iCal is a calendar program where you can keep track of appointments. Users that have other Apple devices, like the iPad and iPhone can synch iCal with the phone or the tablet to keep appointment information handy on the go. You can also synch iCal with Google calendar, if you prefer using that to keep track of events.
The MacBook Pro also comes with the iLife suite of software, so media buffs can create music in GarageBand, do some simple video editing in iMovie, and organize and edit photos using iPhoto. With iTunes you can organize your music library and download music and podcasts easily.
The new MacBook Pro also includes FaceTime, a video chat software, that works with the built-in FaceTime HD Camera (more on the camera on the next page). You can use FaceTime to video chat with friends, family, and co-workers, provided they are also on a MacBook, iPhone, or iPad. Some users complain that this is a drawback to the software, since it limits who you can chat with (source: Perez).
Macbook Pro Apple

Software Download For Macbook Pro 2012 Battery


Of course, other software is available for sale. For instance, iWork, Mac's suite of office software, is available. MacBook Pro's Time Machine, which helps back up your computer automatically, is also available. You can also use Time Machine with the Apple Time Capsule, which is a router with a hard drive built into it. Either way, Time Machine saves your old files and remembers what your computer's setup was in the past. That means that if something starts to act buggy, you can restore your machine to the settings it had before it started acting up (source: Apple).
Up next, we'll take a look at the accessories Apple offers to deck out the new MacBook Pros.
ProcessorScoreMacBook Pro (13-inch Late 2020)
Apple M1 @ 3.2 GHz (8 cores)
1692MacBook Pro (13-inch Mid 2020)1239MacBook Pro (13-inch Mid 2020)
Intel Core i5-1038NG7 @ 2.0 GHz (4 cores)
1145MacBook Pro (16-inch Late 2019)1095MacBook Pro (13-inch Mid 2019)
Intel Core i7-8569U @ 2.8 GHz (4 cores)
1091MacBook Pro (15-inch Mid 2019)1084MacBook Pro (15-inch Mid 2019)
Intel Core i9-9980HK @ 2.4 GHz (8 cores)
1084MacBook Pro (16-inch Late 2019)1064MacBook Pro (15-inch Mid 2019)
Intel Core i9-9880H @ 2.3 GHz (8 cores)
1061MacBook Pro (13-inch Mid 2019)1027MacBook Pro (15-inch Mid 2018)
Intel Core i9-8950HK @ 2.9 GHz (6 cores)
1020MacBook Pro (16-inch Late 2019)1014MacBook Pro (13-inch Mid 2018)
Intel Core i7-8559U @ 2.7 GHz (4 cores)
1010MacBook Pro (15-inch Mid 2019)1002MacBook Pro (15-inch Mid 2018)
Intel Core i7-8850H @ 2.6 GHz (6 cores)
977MacBook Pro (15-inch Mid 2018)949MacBook Pro (13-inch Mid 2019)
Intel Core i5-8279U @ 2.4 GHz (4 cores)
931MacBook Pro (15-inch Retina Mid 2015)926MacBook Pro (15-inch Retina Mid 2015)
Intel Core i7-4980HQ @ 2.8 GHz (4 cores)
926MacBook Pro (15-inch Retina Mid 2014)919MacBook Pro (13-inch Mid 2019)
Intel Core i5-8257U @ 1.4 GHz (4 cores)
908MacBook Pro (13-inch Mid 2020)906MacBook Pro (13-inch Mid 2017)
Intel Core i7-7567U @ 3.5 GHz (2 cores)
904MacBook Pro (15-inch Mid 2017)890MacBook Pro (15-inch Retina Late 2013)
Intel Core i7-4960HQ @ 2.6 GHz (4 cores)
884MacBook Pro (13-inch Mid 2018)879MacBook Pro (15-inch Retina Mid 2014)
Intel Core i7-4870HQ @ 2.5 GHz (4 cores)
867MacBook Pro (15-inch Retina Mid 2015)865MacBook Pro (15-inch Retina Mid 2015)
Intel Core i7-4870HQ @ 2.5 GHz (4 cores)
865MacBook Pro (15-inch Mid 2017)864MacBook Pro (15-inch Mid 2017)
Intel Core i7-7700HQ @ 2.8 GHz (4 cores)
839MacBook Pro (15-inch Late 2016)833MacBook Pro (13-inch Mid 2017)
Intel Core i5-7360U @ 2.3 GHz (2 cores)
832MacBook Pro (15-inch Retina Late 2013)812MacBook Pro (13-inch Mid 2017)
Intel Core i5-7267U @ 3.1 GHz (2 cores)
810MacBook Pro (15-inch Retina Mid 2015)794MacBook Pro (15-inch Late 2016)
Intel Core i7-6820HQ @ 2.7 GHz (4 cores)
791MacBook Pro (13-inch Retina Early 2015)790MacBook Pro (15-inch Retina Mid 2014)
Intel Core i7-4770HQ @ 2.2 GHz (4 cores)
786MacBook Pro (15-inch Mid 2012)783MacBook Pro (13-inch Retina Mid 2014)
Intel Core i7-4578U @ 3.0 GHz (2 cores)
774MacBook Pro (15-inch Late 2016)764MacBook Pro (13-inch Retina Early 2015)
Intel Core i5-5287U @ 2.9 GHz (2 cores)
761MacBook Pro (13-inch Late 2016)760MacBook Pro (15-inch Retina Early 2013)
Intel Core i7-3840QM @ 2.8 GHz (4 cores)
755MacBook Pro (15-inch Retina Late 2013)750MacBook Pro (13-inch Late 2016)
Intel Core i7-6567U @ 3.3 GHz (2 cores)
747MacBook Pro (13-inch Retina Late 2013)743MacBook Pro (13-inch Late 2016)
Intel Core i5-6287U @ 3.1 GHz (2 cores)
740MacBook Pro (Retina)739MacBook Pro (13-inch Retina Mid 2014)
Intel Core i5-4308U @ 2.8 GHz (2 cores)
737MacBook Pro (15-inch Retina Early 2013)735MacBook Pro (15-inch Mid 2012)
Intel Core i7-3720QM @ 2.6 GHz (4 cores)
719MacBook Pro (13-inch Retina Early 2015)717MacBook Pro (Retina)
Intel Core i7-3720QM @ 2.6 GHz (4 cores)
713MacBook Pro (13-inch Late 2016)712MacBook Pro (13-inch Late 2016)
Intel Core i5-6360U @ 2.0 GHz (2 cores)
700MacBook Pro (13-inch Retina Mid 2014)686MacBook Pro (13-inch Retina Early 2013)
Intel Core i7-3540M @ 3.0 GHz (2 cores)
685MacBook Pro (15-inch Retina Early 2013)684MacBook Pro (13-inch Mid 2012)
Intel Core i7-3520M @ 2.9 GHz (2 cores)
672MacBook Pro (13-inch Retina Late 2013)670MacBook Pro (15-inch Mid 2012)
Intel Core i7-3615QM @ 2.3 GHz (4 cores)
662MacBook Pro (17-inch Late 2011)660MacBook Pro (Retina)
Intel Core i7-3615QM @ 2.3 GHz (4 cores)
659MacBook Pro (13-inch Retina)655MacBook Pro (17-inch Late 2011)
Intel Core i7-2760QM @ 2.4 GHz (4 cores)
653MacBook Pro (13-inch Retina Late 2013)644MacBook Pro (15-inch Late 2011)
Intel Core i7-2860QM @ 2.5 GHz (4 cores)
638MacBook Pro (15-inch Late 2011)623MacBook Pro (13-inch Late 2011)
Intel Core i7-2640M @ 2.8 GHz (2 cores)
596MacBook Pro (17-inch Early 2011)596MacBook Pro (17-inch Early 2011)
Intel Core i7-2720QM @ 2.2 GHz (4 cores)
589MacBook Pro (13-inch Retina Early 2013)581MacBook Pro (13-inch Mid 2012)
Intel Core i5-3210M @ 2.5 GHz (2 cores)
578MacBook Pro (13-inch Retina)575MacBook Pro (13-inch Early 2011)
Intel Core i7-2620M @ 2.7 GHz (2 cores)
566MacBook Pro (15-inch Late 2011)561MacBook Pro (15-inch Early 2011)
Intel Core i7-2820QM @ 2.3 GHz (4 cores)
550MacBook Pro (15-inch Early 2011)547MacBook Pro (13-inch Late 2011)
Intel Core i5-2435M @ 2.4 GHz (2 cores)
507MacBook Pro (15-inch Early 2011)499MacBook Pro (17-inch Early 2010)
Intel Core i7-640M @ 2.8 GHz (2 cores)
492MacBook Pro (13-inch Early 2011)484MacBook Pro (15-inch Early 2010)
Intel Core i7-640M @ 2.8 GHz (2 cores)
483MacBook Pro (17-inch Early 2010)472MacBook Pro (15-inch Early 2010)
Intel Core i7-620M @ 2.7 GHz (2 cores)
460MacBook Pro (15-inch Early 2010)428MacBook Pro (17-inch Early 2010)
Intel Core i5-540M @ 2.5 GHz (2 cores)
408MacBook Pro (15-inch Early 2010)406MacBook Pro (17-inch Early 2009)
Intel Core 2 Duo T9800 @ 2.9 GHz (2 cores)
401MacBook Pro (17-inch Mid 2009)376MacBook Pro (Late 2008)
Intel Core 2 Duo T9600 @ 2.8 GHz (2 cores)
375MacBook Pro (15-inch Mid 2009)370MacBook Pro (17-inch Mid 2009)
Intel Core 2 Duo T9900 @ 3.1 GHz (2 cores)
365MacBook Pro (15-inch Mid 2009)358MacBook Pro (17-inch Early 2009)
Intel Core 2 Duo T9550 @ 2.7 GHz (2 cores)
343MacBook Pro (15-inch Mid 2009)340MacBook Pro (13-inch Early 2010)
Intel Core 2 Duo P8800 @ 2.7 GHz (2 cores)
326MacBook Pro (13-inch Mid 2009)321MacBook Pro (13-inch Mid 2009)
Intel Core 2 Duo P8400 @ 2.3 GHz (2 cores)
320MacBook Pro (Late 2008)317MacBook Pro (15-inch Mid 2009)
Intel Core 2 Duo P8700 @ 2.5 GHz (2 cores)
317MacBook Pro (13-inch Early 2010)308MacBook Pro (Late 2008)
Intel Core 2 Duo P8600 @ 2.4 GHz (2 cores)
307MacBook Pro (Early 2008)306MacBook Pro (Late 2008)
Intel Core 2 Duo T9400 @ 2.5 GHz (2 cores)
301MacBook Pro (13-inch Mid 2009)296MacBook Pro (Early 2008)
Intel Core 2 Duo T9500 @ 2.6 GHz (2 cores)
273MacBook Pro (Early 2008)261
0 notes
Text
Snip It For Mac

Snip It For Mac Os
How To Take A Snip On Mac
The Internet becomes one of the important sources of knowing new things, searching for required information, etc. If we search for like any information internet, we will type that particular name and instantly get the result. Importantly, when we get our desired outcome, we want to store those for further use. Here, the user sometimes falls into a problem like can’t download correctly or save those particular items. So, many snipping tools are developed to get rid of such mentioned issues. And, through those tools, the user can easily capture his required photo. Today, we are going to discuss the snipping tool for mac, and hopefully, you can benefit from here.
Snipping tool for mac free download - Free Snipping Tool, Snipping Tool, COBRA Snipping Tool, and many more programs.
6 Best Snipping Tool for Mac. A snipping tool is a great tool that helps to capture whatever the user wants from a computer screen. Here we enlist some reasons that can be done through the snipping tool. This tool helps to make visual tutorials; You can share your screen with friends; You can send screenshots for work.
Now, Mac has a default tool like Snipping Tool, which is called, Grab. It comes pre-installed in every mac and does the job pretty well. As mentioned above, Grab is the official tool that Apple offers in the Mac. It is the closest tool as compared to the Snipping tool in Windows. There are multiple features for taking a screenshot.
The Process of snipping tool for mac
There are some free methods that help to capture a screenshot of your required information on Mac. So, here we enlist some free methods that you can apply without using any free or paid tools.
1st method: You need to press (CMD + SHIFT + 3), and this step will help to capture a full-screen screenshot
2nd method: If you want to capture a selected area as a screenshot, you need to press CMD + SHIFT + 4.
3rd method: This process will help you to capture only an active chosen window. So, to do that, you need to press CMD + SHIFT + 5.
However, if you need a screenshot of a window or menu, you need to press (Shift + Command + 4 + Space bar).
6 Best Snipping Tool for Mac
A snipping tool is a great tool that helps to capture whatever the user wants from a computer screen. Here we enlist some reasons that can be done through the snipping tool.
This tool helps to make visual tutorials
You can share your screen with friends
You can send screenshots for work
Snipping tools help to keep a record of important documents that a user cannot download.
So, if you are eager to get the best snipping tool for mac, let’s check out our discussion below.
Snagit
Our first choice is Snagit screen capture software, and it is very much popular among corporate customers. Besides, Snagit screen capture software comes with powerful features and aesthetic interface. Therefore, the user will get a blissful experience during editing and screen recording sessions. Whenever the user opens to use it, he will see a small control panel that lies at the top of the screen. This control panel lets the user change settings, customize hotkeys, and capture screenshots. Moreover, here lies the editor features nifty tools such as arrows, blur, callouts, and so on. In addition, this tool allows for creating videos straight and animated gifs from the app.
Furthermore, Snagit offers three ways to capture your screens, such as:
Capture the entire screen.
A specific region
A specific application.
Moreover, this tool allows you to get images from cameras and scanners. Interestingly, Snagit allows the user to capture text from a picture and then paste it into the text editor. Sad to say, all the features are not free instead; you need to pay $50 for all features. Since the charge is higher than others, the features are pretty and easy to use. However one con is the video editing is cumbersome through this app.
Designed for macOS up to OS 10.7, TuneupMyMac is compatible with the latest version of macOS. Apps keep files and folders scattered about your Mac; however, finding them is the hard part, which is why so many people hope to find a free app cleaner to remove them without any difficulties. Cleaner apps for mac. Shows you them first, and when you are confident the right files and cache folders have been located, you can Zap them with one click. Usually, good app cleaners aren't free, but they will get the job done.AppZapper locates the files related to the apps you want to delete. TuneupMyMacTuneupMyMac is another Mac app cleaner known for removing unwanted apps quickly.
Lightshot
Technology comes to make our life simple, as well as easy. Besides, life becomes comfortable with many sophisticated tools and software. Whenever we look for any tools or software to use, we seek easy to use amenities at first. Likewise, if you are looking for a snipping tool that offers an easy-to-use mechanism, Lightshot is such a tool. If you want to take a screenshot, you need to press the print screen button from the keyboard => select the area. Moreover, this tool allows you to edit the screenshots by adding color, shapes, text, etc. Interestingly, this tool makes some tasks like capture, save, and upload easy for the user. Besides, if you take one shot, you don’t need to wait for a long time to take another shot. Also, you can use the Lightshot tool without spending anything and allow you to do:
Print your captured screenshots
Upload images to Prntscr.com
Search for a similar picture on the internet
Copy and save
Nevertheless, if you look for the cons of this app, then you will find the following things:
This app does not have capture modes.
You can’t find a separate editing screen with advanced tools.
SbapNDrag
Here is another snipping tool that helps capture a full screen, a window, or a specific section. SbapNDrag offers both free and paid versions and the paid or pro charge $10. So, if you get the pro version, you can assign global hotkeys, turn off adverts and resize images. Beyond those, you will get some additional features from the pro version like:
A library for our screenshots
You will find the option to share your captured screenshot to Facebook, Twitter, email, and so on.
You can annotate your captured screenshots without losing the original format.
Here lie multiple output formats like JPEG, TIEF, or PNG.
You will find border and scaling, batch rename.
You will find a custom keyboard shortcut.
Monosnap
Here we bring another snipping tool for mac that has more than 1 million users worldwide. Monosnap is that service provider, and through it, users can grab the entire screen and a specific portion. After capturing the screenshot, the user can use built-in editing tools to edit and share with others. Moreover, this tool also works on Chrome and Windows. Beyond those, now let’s see the additional features of Monosnap below.
You can grab the pixel-perfect screenshots.
You will find customizable hotkeys.
This tool allows you to highlight important information and blur the sensitive data.
With this tool, you can record videos or GIFs.
You can use Monosnap Cloud Storage or the other storage services.
However, as the cons, you may face ads while upgrading this tool.
Greenshot
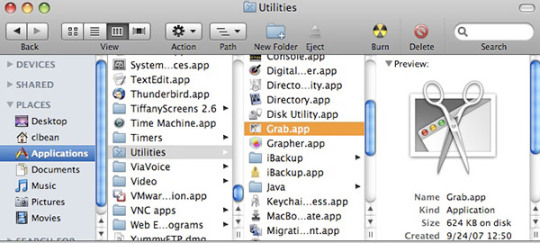
Greenshot is another renowned screen capture service provider for Mac. Here include several beneficial features such as:
Hotkey combination.
Can copy the images to the clipboard then send it directly to a cloud-based program like Dropbox, Confluence, etc.
If you have any sensitive information, this tool helps to blur that area.
This tool allows you to customize some default settings.
You can use your own hotkey combination to get better functionality.
Skitch
If you are looking for a free snipping tool for Mac, Skitch will be your perfect choice. Moreover, the user can take a screenshot, edit it, and then share it with their friends and others. By the way, Evernote designs this tool. Interestingly, the user can quickly and simply use this tool because of its interface. Here the user will find seven tools in its mark-up function like:
Text ShapesA pixelater for blurringA highlighterArrows A color palette with eight colors Cropping tools
Many functions from the Skitch are free. But if you want to markup PDFs save files to Evernote, you need a premium account. Particularly, PDF markups are a useful feature, mainly used for conversations with clients and business emails. Interestingly, with this feature, the user can easily highlight the critical area. However, the mentioned premium account will charge you $7.99/month. After getting this premium account, it will integrate with Outlook, Gmail, Google Drive, Salesforce, Microsoft Team, and slack. However, one drawback you may face like this tool doesn’t allow you to save a note while quitting the app.
FAQ of snipping tool for mac
How do I snip on a Mac?
There is some free method that helps to capture a screenshot of your required information on Mac. So, here we enlist some free methods that you can apply without using any free or paid tools.
1st method: You need to press (CMD + SHIFT + 3), and this step will help to capture a full-screen screenshot
2nd method: If you want to grab a selected area as a screenshot, you need to press CMD + SHIFT + 4.
3rd method: This process will help you to capture only an active chosen window. So, to do that, you need to press CMD + SHIFT + 5.
However, if you need a screenshot of a window or menu, you need to press (Shift + Command + 4 + Space bar).
Also, you can use tools to grab a screenshot on your Mac device, apart from those free methods.
How do I snip a screenshot on a Mac?
There is some free method that helps to capture a screenshot of your required information on Mac. Here we enlist some free methods that you can apply without using any free or paid tools.
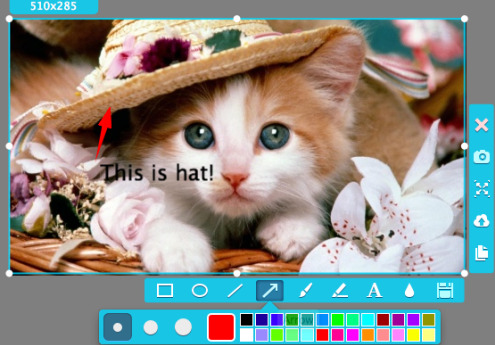
1st method: You need to press (CMD + SHIFT + 3), and this step will help to capture a full-screen screenshot
2nd method: If you want to grab a selected area as a screenshot, you need to press CMD + SHIFT + 4.
3rd method: This process will help you to capture only an active chosen window. So, to do that, you need to press CMD + SHIFT + 5.
However, if you need a screenshot of a window or menu, you need to press (Shift + Command + 4 + Space bar).
Also, you can use tools to grab a screenshot on your Mac device, apart from those free methods.
How do I snip an image?
There is some free method that helps to capture a screenshot of your required information on Mac. Here we enlist some free methods that you can apply easily to snip an image.
Mac pro 2 1 specs. Mac Pro is designed for pros who need the ultimate in CPU performance. From production rendering to playing hundreds of virtual instruments to simulating an iOS app on multiple devices at once, it’s exceedingly capable. At the heart of the system is an Intel Xeon processor with up to 28 cores — the most ever in a Mac.
1st method: You need to press (CMD + SHIFT + 3), and this step will help to capture a full-screen screenshot
2nd method: If you want to grab a selected area as a screenshot, you need to press CMD + SHIFT + 4.
3rd method: This process will help you to capture only an active chosen window. So, to do that, you need to press CMD + SHIFT + 5.
However, if you need a screenshot of a window or menu, you need to press (Shift + Command + 4 + Space bar).
Here are some free tools that have blissful features to grab a screenshot
Snagit
Lightshot
SbapNDrag
Monosnap
Greenshot
Skitch
How do you copy and paste a snip on a Mac?
If you want to copy and then paste a snip on Mac, you need to follow the following process.
To begin with, you need to hold down (Command+ Shift + 4). After that, you could see the screenshot selection tool.
Secondly, hold down the Control button =>select your required area on the screen using the mouse.
Finally, you need to pull up the document that you want to paste the selection into => press Command + V.
What is a good Snipping Tool?
You may use the internet to acquire knowledge or collect the required information. Whenever you gather information, sometimes you may fall into a problem due to no save option. Here a snipping tool is a great tool that helps capture whatever you want from a computer screen. Moreover, some free tools have blissful features to grab a screenshot. So, if you are eager to get the best snipping tool, let’s check out our discussion below.
Snip It For Mac Os
Snagit
Lightshot
SbapNDrag
Monosnap
Greenshot
Skitch
Final Thought of snipping tool for mac
How To Take A Snip On Mac
Here we finish all our discussion on the snipping tool for mac, and hopefully, you can get our tone. However, if you have any queries on our discussion, you are welcome to ask in our comment section.
Apple Footer.This site contains user submitted content, comments and opinions and is for informational purposes only. Apple disclaims any and all liability for the acts, omissions and conduct of any third parties in connection with or related to your use of the site. Codec all in one for mac os. Apple may provide or recommend responses as a possible solution based on the information provided; every potential issue may involve several factors not detailed in the conversations captured in an electronic forum and Apple can therefore provide no guarantee as to the efficacy of any proposed solutions on the community forums.
0 notes
Text
How To Install WordPress On a VPS server
In the become a blogger article series, I told you the best way to start a blog is using WordPress. WordPress is an open-source and free script and, In my opinion, the best one to start a blog. In this article, I’m going to talk about how to install WordPress. The WordPress installation is a little different according to your server. In this article, I will tell you how to install WordPress on a VPS server. You may be asking what I need to go with my server and my self-managed WordPress hosting, and so on. If you want to go now with managed WordPress hosting like in GoDaddy in Hostgator and Bluehost and other web hosting services, you will see the lowest price for one website if you go to GoDaddy as an example, about $10. And if you go to Hostgator, you will see almost about $6 for only one site, and for Bluehost, you can start with WordPress pro for about $19 per month and so on. So in this article, I will tell you how to create your server very quickly, create your WordPress websites for ten dollars, and host as much as your server resources can handle. So what you need are two things a VPS server, a virtual private server, and a domain name to create your WordPress websites. I will be making a VPS server using DigitalOcean web services, so please go to DigitalOcean. after creating an account, click on create and go to droplets. Droplet is an alternative way for VPS in DigitalOcean. Select Ubuntu, and I think the 10 Dollar package is alright. And after that, click on create. An email will come to you with the VPS IP, your password, and other information.
How to Install WordPress on a VPS server
If you’re using a VPS that doesn’t include one-click setup options for apps such as WordPress, you can always opt for a manual install of WordPress on VPS. For this example, I will do the entire setup on a brand new VPS running CentOS 7. 1. Connect to Your VPS Via SSH Once you have a VPS up and running, you’ll need two things to follow these instructions: - Your server’s root password so you can run the necessary commands. - A Secure Shell (SSH) client such as Putty. To access your VPS, you’ll need to install Putty and open the application. Once you do that, you’ll see a section where you can specify the destination you want to connect to:

Now type your VPSs IP address within the Host Name (or IP Address) field, set the Port option to 22, choose SSH under Connection type, then click Open. A command window will pop up, asking what user you want to log in as. Type root, then enter your password when prompted:

If you typed your password correctly, your VPSs name should display, and we can get down to business! 2. Install the Software You Need to Run WordPress To run WordPress, you need an HTTP server, a database, and PHP. For this tutorial, I will install Apache, MariaDB, and the latest version of PHP. Fortunately, you can do so in one fell swoop with a single command: 01 sudo yum install httpd mariadb mariadb-server php php-common php-mysql php-gd php-xml php-mbstring php-mcrypt php-xmlrpc unzip wget -y This tells your server to download all of the necessary files and set them up. The process might take a few minutes depending on how fast your server is, and when everything’s ready, you’ll be able to type in more commands. Once the underlying software is ready, you need to initialize it and tell your server to boot it up every time. Here are the commands you’ll need to use: 01 02 03 04 05 06 07 sudo systemctl start httpd sudo systemctl start mariadb sudo systemctl enable httpd sudo systemctl enable mariadb At this stage, there’s only one step left to go before you can install WordPress on a VPS server and start using it, and that’s to configure your database. 3. Configure MariaDB and Create a WordPress Database Before you can create a database for your website, you need to ‘secure’ your MariaDB installation so people can’t access it remotely. To get started, enter the following command: 01 sudo mysql_secure_installation Afterward, MariaDB will ask you for its root user password, which should be blank, so just hit the enter key. Then, you’ll be able to set a new root password. For the rest of the settings, hit Y for all of the remaining four options, particularly number three, which disallows remote logins. Now, login into your MariaDB account using the following command, and keep in mind you’ll need to enter the password you set a moment ago: 01 mysql -u root -p Once you’re in, there are four commands you need to run in turn. Each line below is an individual command, so keep that in mind. Also, remember to replace the user and password placeholders with a more secure pair for use with your database: 01 02 03 04 05 06 07 CREATE DATABASE wordpress; GRANT ALL PRIVILEGES on wordpress.* to 'user'@'localhost' identified by 'password'; FLUSH PRIVILEGES; exit There you go! Your new database is ready for use, so let’s not keep it waiting. 4. Install and Run WordPress We have set up our infrastructure, and the final step is to download the software and install and configure it. Let’s kick things off with a quick series of commands to download the latest version of the platform, extract its files, and move them to your root directory. Keep in mind each of the lines below is an individual command you need to run separately: 01 02 03 04 05 wget http://wordpress.org/latest.tar.gz tar -xzvf latest.tar.gz sudo cp -avr wordpress/* /var/www/html/ So far, so good. Now let’s create an Uploads folder for your installation and assign the correct permissions to your files and folders using the following two commands: 01 02 03 04 05 sudo mkdir /var/www/html/wp-content/uploads sudo chown -R apache:apache /var/www/html/ sudo chmod -R 755 /var/www/html/ Finally, let’s rename your WordPress wp-config-sample.php file… 01 02 03 04 05 cd /var/www/html/ sudo mv wp-config-sample.php wp-config.php sudo nano wp-config.php …and configure it so it can connect to your database. The last command you ran will open the file using the nano editor within the command line. It’s a bit tricky to use, but navigate the file using your keyboard arrows and replace the following fields with the same data you entered during step number three: 01 02 03 04 05 define('DB_NAME', 'wordpress'); define('DB_USER', 'user'); define('DB_PASSWORD', 'password'); After updating those fields, type CTRL+O and CTRL+X on your keyboard. The former will save the changes you made to the file, while the latter will close the nano editor. All that is left to do now; is to configure your VPS to allow HTTP and HTTPS connections with these commands: 01 02 03 04 05 sudo firewall-cmd --permanent --zone=public --add-service=http sudo firewall-cmd --permanent --zone=public --add-service=https sudo firewall-cmd --reload Once you run them, you’ll be able to access the WordPress installer by visiting your VPSs at http://yourvpsipgoeshere, replacing the placeholder accordingly. That’s it! We went through many commands, but the process itself is pretty simple when you realize it’s mostly copying, pasting, and following instructions. With this guide, you’ll be able to install WordPress on a VPS server. Read the full article
#ConnecttoYourVPSViaSSH#howtoinstallWordPress#HowToInstallWordPressOnaVPS#HowToInstallWordPressOnaVPSserver#installWordPress#InstallWordPressOnaVPS#InstallWordPressOnaVPSserver#manualinstallofWordPressonVPS#WordPress
0 notes
Text
Iso Mojave Mac

Since macOS 10.14 Mojave has been around for more than a year now, with the advent of this upgrade there are a lot of new features that have been surfaced for the users to take advantage of. Mojave is the next update to the Mac operating system High Sierra. It had been released on 24th of, September 2018 as a free update that is available for those who want to install and try this all-embracing OS.
The included features in macOS Mojave are Dynamic Desktop, Desktop Stacks, Screenshots Markups, Screenshot Utility, Continuity Camera, iOS Apps on Mac, The APP Store, Finder, and others. Well, there’s is more to talk about macOS Mojave goodness’s, but the better way to access its features install it on your PC. Download Free MacOS Mojave 10.14 Mac Dmg. Click on the button below to start downloading MacOS Mojave 10.14 for mac OS X. We are here to provide to clean and fast download for MacOS Mojave 10.14 dmg. This link is resume able within 24 hours. Keep visiting themacgo the world of dmgs. That’s it, now you should have an “Mojave.iso” disk image file on the Mac desktop which is the macOS installer ISO image. If you intend on using the ISO file for a virtual machine, you simply need to select the Mojave.iso disk image in the virtual machine app as a boot disk, or mount it within the VM as any other disk image would be.
Home » Mac » MacOS Mojave » Download MacOS Mojave 10.14 ISO Image Free Download MacOS Mojave 10.14 ISO Image Free by admin May 13, 2020 257 Views / ( 1 votes, average: 5.00 out of 5).
An attractive upgrade with dozens of latest preferences for handling documents, applications, and media files. It boasts iOS-style apps for images, Stocks, iBooks, News, and Voice Memos, which can now be accessed with improved safety and privacy. There’s a much to admire about the macOS Mojave. Besides, it brings some amazing variations like the system-wide Dark Mode and heightened productivity through the “Finder” to make the tasks even easier.
MacOS Mojave Download
Program DetailsSetup Name:macOS-Mojave-10.14.isoSize on Disk:5.85 GB (6,291,456,000 bytes).Official:Apple Inc./apple.com/macos.Editor’s Ratings:Compatibility:MacBook & Macintosh (Pro, Mini).
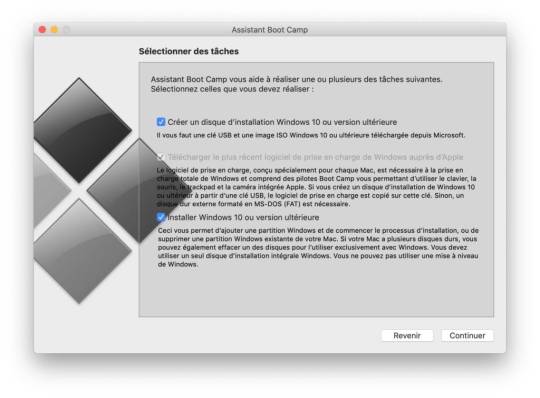
MacOS 10.14 Mojave unquestionably is a major hit that is loaded with some brand-new stuff, notably for those who love to see layout-based transitions. Amongst the newly introduced changes, the Dark Mode is by far the most prominent, a tuned-up Safari is also there along with the wholesome way that the OS carries to manage screenshots. These are all top-level features that will make a difference in users’ everyday tasks.
Considering the features, practically all of the changes are user-opinion based. The new features are all planned to simplify and enrich your Mac experience, they’re nearly all improving the overall interaction with your Mac device — Still one may choose to overlook them, and your Mac could be used just as before.
Privacy and Security in Mojave
Apart from its improved looks, Mojave offers material and unseen changes concerning privacy and user-safety. Safari, your default browser becomes more protected than ever, for example, making it further difficult for the advertisers to track your personal information.
Safari while using social media and other online portals would certainly ask your approval before it communicates your response regarding information-sharing. In short, it anonymizes the information that is required by the advertisers through your browser to serve you with relevant advertisements. All this security measure delivers better web experience while making it a lot less disturbing.
Screenshots
A Reliable Password Manager
Mojave boasts an impressive password manager that automatically creates and notifies and saves a strong user password when the Safari is being used to sign-up for a website that requires a login—Further, the AutoFill suggestions and other passcode privacy-related tasks are handled professionally and without any pain.
Efficient and secure password management would certainly amaze those who rely on on‘Apple’s Ecosystem’ for a more smooth workflow.
Tagging & Previewing
Now you can expeditiously locate the documents that you are looking to tag them for future availability under the related items.
The improved document tagging has been witnessed with this release along with an added Quick Look to preview the file before you open it, that has unquestionably made it easy to create smart folders for promptly accessing the files.
Dark Mode
Mac Mojave Iso Download For Virtualbox
Reasonably the most striking feature is the system-extended Dark Mode copulated with a powerful dynamic desktop view. If preferred there would be an automated wallpaper and theme change as the day progresses (based on the sun-light).
Apple’s macOS 10.14 Mojave delivers in a truly impressive feature in a dark mode that covers every application to ease your workflow while you got engaged with prolonged photo-editing and designing sessions. Third-party programs are also springing to embrace this unique theme, with appreciation.
Screenshots and Videos
Just like the iOS style screenshots captured holds for a few seconds on the desktop and then promptly slides off the screen. It’s a fast and convenient way to take screens. Later, the thumbnail can be clicked to edit the screenshots right there.
Mojave also combines a new shortcut to the screenshot features. Merely by pressing Cmd + Shift + 5 would bring up the “Screenshot panel” toolbar, instead of learning them all.
You can now save the captured screens to a number of directory locations that would certainly save you from a possible mess with their management.
Annotating the screenshots on macOS is made easy, Mojave proffers you while you use mac-quick to edit and improve the taken shots the way you ever wanted.
Burn Iso Mac Mojave
Apps
Iso Mojave Mac Os
macOS Mojave carries Voice Memos, Media Icons, Apple News, Stocks, and Home and other accessibilities from iOS to Mac, and special care has been taken that they fully adapt to the desktop environment.
These applications support the kernel of the modern macs to pass an astonishing experience. Media files, for example, will automatically shift between the iOS and macOS devices similarly the voice memos and more are streamlined to your needs.
Mac Mojave Iso File
Desktop Stacks
Mac Mojave Iso Download
The next most-admired feature after the dark-mode could be the way desktop stacks are being handled, there’s yet another newly introduced feature in Mojave that to some folks seems more novel in terms of productivity. For long Apple has been playing around to support users for keeping things simpler and in proper order without involving any intricate filing system.
With the appearance of every new version of macOS, there come some discrete features that we can easily imagine because the developer intends to meet the demand of individuals and corporations. Mac os 15 update download. Mojave brings some innovative features and enhancements that would prove exciting to your OS-based cravings. It’s more productive, thoroughly organized, and invariably yet another addition to the apple’s legacy of OS.
If your Mac isn't compatible with the latest macOS, you might still be able to upgrade to an earlier macOS, such as macOS Catalina, Mojave, High Sierra, Sierra, or El Capitan. To get the latest features and maintain the security, stability, compatibility, and performance of your Mac, it's important to keep your software up to date. The full operating system is a free download for anyone who has purchased Mac OS X Snow Leopard, Lion, or Mountain Lion or has a Mac preloaded with OS X Mavericks or Yosemite. Download the Application from the Mac App Store using your Apple ID on any Mac or functional computer running Mac OS X 10.6.8 or later. Mac OS X Jaguar (version 10.2) is the third major release of macOS, Apple's desktop and server operating system.It superseded Mac OS X 10.1 and preceded Mac OS X Panther.The operating system was released on August 23, 2002 either for single-computer installations, and in a 'family pack,' which allowed five installations on separate computers in one household. Mac OS X Snow Leopard (version 10.6) is the seventh major release of macOS, Apple's desktop and server operating system for Macintosh computers. Snow Leopard was publicly unveiled on June 8, 2009 at Apple’s Worldwide Developers Conference. The installation process of mac os el Capitan includes two methods. The first method is termed as an upgrade install, also known as the default method. The second method is known as a clean install. Mac OS X El Capitan 10.11 DMG Install and Download. Upgrade install-Follow to below steps-Visit the Mac App Store. Locate the OS X El Capitan Page. Upgrade mac os x el capitan to catalina.
0 notes