#CyberPanel
Explore tagged Tumblr posts
Visit Tumblr Blog
Explore Tumblr blogs with no restrictions, modern design and the best experience.
Last Seen Tumblr Blogs


Fun Fact
Tumblr has a low social media market share in South America.
Text
How to Install CyberPanel Hosting Control Panel on Ubuntu
How to Install CyberPanel Hosting Control Panel on Ubuntu
In this article, we are going to shows how to Install CyberPanel Hosting Control Panel on Ubuntu 20.04 | 18.04 . If you are interested to Install CyberPanel on Ubuntu then this post is ideal for you. CyberPanel is a web hosting control panel powered by OpenLiteSpeed and it uses OpenLiteSpeed HTTP server. It is a next generation hosting control platform which is built for speed, security and…

View On WordPress
1 note
·
View note
Text
⚙️ Cài đặt CyberPanel trên Ubuntu
CyberPanel là một bảng điều khiển hosting thân thiện với người dùng, giúp quản lý website trở nên dễ dàng hơn. Với giao diện trực quan và nhiều tính năng hữu ích như cài đặt ứng dụng một cú nhấp chuột, tường lửa CSF bảo vệ cao, CyberPanel là lựa chọn tuyệt vời cho cả người mới bắt đầu và các nhà quản trị hệ thống.
OpenLiteSpeed là một máy chủ web miễn phí, mã nguồn mở được thiết kế với mục đích chính là vừa nhanh vừa dễ cấu hình. CyberPanel được xây dựng trên máy chủ web này nhưng cần cấu hình bổ sung để hoạt động bình thường. LiteSpeed Enterprise là tùy chọn trả phí của CyberPanel nhưng bao gồm nhiều tính năng bổ sung mà phiên bản miễn phí không cung cấp, chẳng hạn như khả năng quản lý nhiều CyberPanel trên các máy chủ khác nhau cùng một lúc.
Hướng dẫn này sẽ chỉ cho bạn cách thiết lập CyberPanel với OpenLiteSpeed trên máy chủ đám mây Ubuntu 22.04 và cũng sẽ xem xét một số thay đổi cấu hình CyberPanel cơ bản cần thiết để CyberPanel hoạt động bình thường. Hướng dẫn này sẽ hoạt động trên các bản phân phối dựa trên Debian khác, mặc dù một số quy trình có thể hơi khác một chút.
0 notes
Link
0 notes
Text
How to Install CyberPanel on Ubuntu 22.04 Like a Pro! – Quick Tips
CyberPanel is a user-friendly control panel that makes managing websites and servers much easier, even for beginners. It uses LiteSpeed Web Server (a fast web server) and offers features like one-click WordPress installation, automatic SSL certificates, and a simple interface. In this guide, we’ll break down every step to help you Install CyberPanel on Ubuntu 22.04 server in a way that’s easy to follow, even if you’re not an expert. Let’s dive into each step How to Install CyberPanel on Ubuntu 22.04 Like a Pro!
Why Choose CyberPanel?
Before diving into the installation process, you might wonder why you should choose CyberPanel over other control panels like cPanel or Plesk. Here are a few compelling reasons: - Open Source: It’s completely free (though there’s an Enterprise version with additional features if you’re interested). - Lightweight and Fast: Built around OpenLiteSpeed, CyberPanel is optimized for speed and performance. - Intuitive Interface: The dashboard is clean and user-friendly, even for beginners. - Advanced Features: From one-click installations of WordPress to built-in support for Git, Redis, and Docker, CyberPanel offers plenty of powerful tools. - Auto SSL: Easily install and manage SSL certificates. Sounds like the control panel of your dreams, right?
Pre-Installation Checklist
Before you can install CyberPanel on Ubuntu 22.04, there are a few things you’ll need to prepare. Don’t worry, nothing too crazy! 1. A Fresh Ubuntu 22.04 Server Make sure you’ve got a clean installation of Ubuntu 22.04. You can set this up on a virtual private server (VPS) from your favourite hosting provider. Avoid running the installation on a server that already has web services installed, as that can cause conflicts. 2. Root Access or Sudo Privileges You’ll need root access to your server, or at the very least, a user account with sudo privileges. If you don’t have this, the installation won’t work properly. 3. Server Specifications Here are the minimum recommended system specs for running CyberPanel: - 1 GB of RAM (though 2 GB is ideal for better performance) - 10 GB of free disk space (more if you plan on hosting multiple websites) - A 64-bit operating system (which Ubuntu 22.04 is) 4. Domain Name While it’s not strictly required for the installation, having a domain name handy will allow you to configure your website and apply SSL certificates more easily.
Step-by-Step Guide: How to Install CyberPanel on Ubuntu 22.04
Alright, with your server ready and your domain name in hand, let’s get into the nitty-gritty of installing CyberPanel.
Step 1: Update Your Server’s Software
Before you install anything new, it’s a good idea to make sure your Ubuntu system is up to date. This helps avoid problems later and ensures everything runs smoothly. To update your server, open your terminal (a place where you can type commands) and enter these two commands one after the other:

- The first command, sudo apt update, checks for the latest updates for your system. - The second command, sudo apt upgrade -y, installs those updates. This could take a few minutes, depending on your internet connection and the speed of your internet. Once this is done, your system will be ready for the next steps.
Step 2: Install Basic Tools
Now, we need to install some basic tools that CyberPanel needs to run properly. These tools will help us download and install other software in the next steps. Run this command in your terminal:

- wget is a tool that helps us download files from the internet. - curl is a tool that allows us to transfer data and communicate with servers. By installing these, you’re preparing your system for the main installation.
Step 3: Download the CyberPanel Installer
Next, we need to download a special script (a small program) that will help us install CyberPanel. To do this, use the following command:

This command downloads the CyberPanel installer script and saves it to a file called installer.sh on your server. Once the script is downloaded, you need to permit it to run. To do that, enter:

This command makes the script executable, which means we can run it in the next step.
Step 4: Start the Installation Process
Now that everything is set up, we can begin the actual installation of CyberPanel. This step will take a while, and you’ll be asked to make some choices along the way. To start the installation, type:

This command runs the installer script. Once it begins, you’ll see several options. Let’s walk through them: Choosing the Web Server You’ll be asked whether to install the LiteSpeed Enterprise (a paid version) or OpenLiteSpeed (a free version). Since OpenLiteSpeed is free and works well for most users, we recommend selecting it by typing: Full Installation vs. Minimal Installation Next, you’ll be asked if you want to do a Full installation or a Minimal installation. Choose Full installation, as it includes important tools like PowerDNS (for managing your domain names) and Postfix (for sending emails). Installing Memcached and Redis These are tools that help speed up your websites by caching data (temporarily storing it so it can be accessed quickly). If you plan to host websites that need fast performance, select yes when asked to install Memcached and Redis. Setting an Admin Password At the end of the installation, you’ll be asked to set a password for the admin user. This password will be used to log in to the CyberPanel dashboard. Make sure to choose a strong password and write it down somewhere safe and secure place. After answering these questions, the installation will continue and It may take several minutes to finish.
Step 5: Access the CyberPanel Dashboard
Once the installation is complete, you’ll be given a link to log in to the CyberPanel web interface. This is where you can manage your websites and server settings. To access CyberPanel, open your web browser and type in the following:

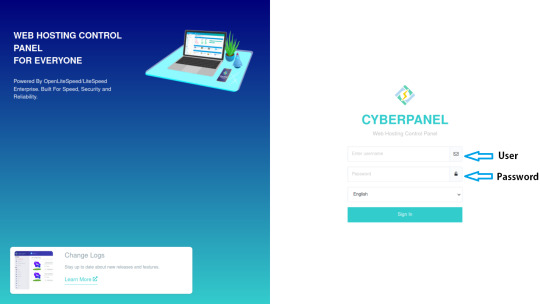
- Replace with the actual IP address of your server. - The :8090 at the end is the port number where CyberPanel runs. You might see a warning saying that the site is not secure. This is normal because the server is using a self-signed SSL certificate. You can click through the warning to access the dashboard. Log in using the admin username and the password you created during installation.
Step 6: Configure OpenLiteSpeed
After logging in to CyberPanel, you’ll need to configure OpenLiteSpeed (the web server that powers your websites). Here’s how to do it: - Access the OpenLiteSpeed Admin: From the CyberPanel dashboard, click on OpenLiteSpeed WebAdmin. You’ll be taken to the OpenLiteSpeed admin page. - Log in to OpenLiteSpeed: Use the default credentials: - Username: admin - Password: 123456 (or the one you set during installation). - Change the Admin Password: For security reasons, it’s important to change the default admin password. To do this, run this command in your terminal:

- Follow the instructions to change your password.
Step 7: Secure CyberPanel with SSL
To protect your data and ensure a secure connection to CyberPanel, we need to set up an SSL certificate. CyberPanel allows you to do this automatically using Let’s Encrypt, a free service that provides SSL certificates.

Here’s how to do it: - Log in to the CyberPanel dashboard. - Go to SSL > Hostname SSL. - Enter your server’s hostname (the name of your server or domain). - Click Issue SSL. This will install an SSL certificate, and your CyberPanel interface will now be secure.
Step 8: Create and Manage Websites
With CyberPanel installed and secured, you can now start hosting websites. Here’s an easy-to-follow guide to help you begin: - Add a New Website: In the CyberPanel dashboard, go to Websites > Create Website. Fill in the necessary information: - Domain Name: The name of your website (e.g., example.com). - Email: Your email address. - PHP Version: Choose a version that works with your site (the default should be fine). Once you’ve entered this information, click Create Website. - Set Up DNS for Your Domain: DNS (Domain Name System) is what helps people find your website online. To configure DNS, go to DNS > Create Zone. Enter your domain name and set the A (Address) record to point to your server’s IP address. - Install WordPress: CyberPanel makes it easy to install WordPress. Go to Websites > List Websites, find your domain, and click Manage. You’ll see an option to install WordPress with one click.
Step 9: Enable Backups
It’s very important to regularly back up your website to ensure you can recover it if anything goes wrong. CyberPanel has a built-in tool for scheduling backups. - Go to Backup > Schedule Backup. - Select the website that you want to take a backup. - Choose how often you want to back up (daily, weekly, etc.). - Select a destination for your backups (you can save them locally or send them to a remote server). Once this is set up, CyberPanel will automatically create backups for you.

Step 10: Optimize CyberPanel for Speed
To get the best performance from CyberPanel, you can make a few adjustments: - Enable LSCache: LSCache is a caching system that speeds up websites. Go to Websites > List Websites, find your website, and enable LSCache for faster load times. - Adjust PHP Settings: If your website uses a lot of PHP scripts (common for WordPress sites), you can tweak the settings. Go to Server > PHP > Edit PHP Configs to adjust things like memory limits. - Use Security Plugins: To keep your server secure, consider installing Security plugins such as CSF Firewall and ModSecurity help protect your server from malicious attacks and enhance your website’s overall security. Here’s how you can install them through CyberPanel: CSF Firewall: - Go to Security > Install CSF from the CyberPanel dashboard. This firewall helps protect your server by blocking unwanted traffic. - After installation, you can configure it by navigating to Security > CSF Configuration where you can add specific rules or adjust settings to secure your server. ModSecurity: - To install ModSecurity, go to Security > Install ModSecurity in the dashboard. - Once installed, it will monitor web traffic for suspicious activities and block potential threats. It’s an excellent tool for preventing attacks like SQL injections and cross-site scripting. Both security plugins work in the background to safeguard your server and websites, helping to prevent common vulnerabilities.
Step 11: Monitor Server Performance
After you’ve successfully installed and set up CyberPanel, it’s crucial to keep an eye on your server’s performance. Monitoring your server helps you spot any potential issues before they turn into bigger problems. CyberPanel comes with built-in tools to help you with this: - Real-Time Monitoring: Go to Server Status > LiteSpeed Status to see how your server is performing. This page shows you important details like CPU usage, memory usage, and active connections. - System Health Check: Under Server Status > System Status, you can check the overall health of your server. This includes key metrics such as available disk space, RAM usage, and the status of various services like MySQL and DNS. Monitoring these areas regularly ensures that your server runs efficiently and doesn’t run out of resources unexpectedly.
Step 12: Troubleshooting Common Issues
Even with a detailed guide, you may run into problems during or after installation. Here are some common issues you may face and how to fix them: Issue 1: Can’t Access CyberPanel Web Interface - If you can’t access CyberPanel at https://:8090, the most likely reason is that port 8090 is blocked. To fix this, open the port by running the following command on your server:

After that, try accessing the panel again in your browser. Issue 2: SSL Certificate Not Working - If the SSL certificate you issued using Let’s Encrypt isn’t working, try reissuing the certificate: - Go to SSL > Manage SSL in CyberPanel. - Select your domain and click Issue SSL again. This will attempt to reissue the certificate, solving most SSL-related issues. Issue 3: Website is Running Slowly - If your website is slow, you can enable LiteSpeed Cache (LSCache) for faster performance. You should also consider using CDN (Content Delivery Network) services like Cloudflare to speed up content delivery.
Final Overview
Installing CyberPanel on Ubuntu 22.04 may seem like a technical task, but with this detailed guide, even a beginner can complete the process with ease. By following each step, you will set up a robust, secure, and high-performing web hosting environment using the OpenLiteSpeed web server and CyberPanel’s powerful features. From basic installation to security measures and performance optimization, this guide ensures that your websites will run smoothly on your server. Whether you're hosting a personal website or managing multiple domains, CyberPanel offers the flexibility and tools you need to succeed, making it an ideal choice for anyone new to server management. Now, go ahead and explore the many features of CyberPanel!
FAQs
1. Is CyberPanel free to use? Yes, CyberPanel is completely free. There’s also a paid Enterprise version with more features, but the free version is more than enough for most users. 2. Can I install CyberPanel on a VPS with less than 1 GB of RAM? While it’s technically possible, it’s not recommended. CyberPanel runs much more smoothly on systems with at least 1 GB of RAM (preferably 2 GB). 3. What’s the difference between OpenLiteSpeed and LiteSpeed Enterprise? OpenLiteSpeed is the free, open-source version of LiteSpeed. LiteSpeed Enterprise offers premium features like better performance and more advanced caching options, but it requires a license. Read the full article
#cloudpanelvscyberpanel#cyberpanel#cyberpanelhosting#cyberpanelinstall#cyberpanellogin#cyberpanelvps#cyberpanelvpshosting#cyberpanelvscpanel#installcyberpanel#whatiscyberpanel
0 notes
Text
How to Login to CyberPanel
How to Login to CyberPanel
CyberPanel is a great freemium hosting control panel. In this tutorial we will show you how to login to CyberPanel. Open a browser and type https://your-server-hostname:8090 Username: admin Enter the password that you set during initial setup You are done! You will be redirected to the CyberPanel Dashboard.
View On WordPress
0 notes
Link
Are you looking for a web hosting control panel that is open-source and free? Then try it out on AlmaLinux or Rocky Linux 8. It is a free alternative to the popular WHM Cpanel that includes an OpenLiteSpeed Web server for maximum speed.
CyberPanel provides a web-based, graphical, and user-interactive Dashboard from which we can access Users, Vhost Templates, different PHP Versions, the MySQL Database, and other features.
It also includes a command-line interface (CLI) tool that can be used on the Server terminal to execute a variety of helpful activities such as adding users, resetting permissions, and other tasks.
How to Install CyberPanel on Rocky Linux or AlmaLinux 8
CyberPanel Requirements:
Server with a fresh AlmaLinux 8 or Rocky Linux 8
Python 3.x
1 GB RAM, or higher
10GB Disk Space
0 notes
Text
Cara Mengatasi Error 500 Cyberpanel Anti Gagal
Cara Mengatasi Error 500 Cyberpanel Anti Gagal
Bingung gak sih ketika mencoba akses login control panel cyberpanel malah dapat pesan error 500 ? parahnya gak hanya disitu aja loh website yang kitabuat pun tidak dapa diakses dengan notifikasi error database estabilished. Untuk itu pada artikel ini kami akan membahas cara mengatasi error 500 Cyberpanel secara lengkap. Cyberpanel error 500 sering dikaitkan dengan database server, meski demikian…

View On WordPress
0 notes
Text
#Ubuntu#CyberPanel#DNS#Cloudflare#ConfigServer#CSF#Firewall#LISH#OpenLiteSpeed#Python#SubprocessError#VPS
0 notes
Text
🌀 Hướng dẫn Update Cyberpanel lên phiên bản mới nhất
🔰 Vì sao cần Update Cyberpanel
Cập nhật CyberPanel là một quá trình quan trọng để đảm bảo hệ thống của bạn luôn hoạt động ổn định, hiệu quả và được bảo mật tốt nhất. Phiên bản mới thường mang đến các tính năng mới, cải thiện hiệu năng và khắc phục các lỗ hổng bảo mật.
🔰 Lưu ý quan trọng trước khi cập nhật:
Sao lưu dữ liệu: Trước khi thực hiện bất kỳ cập nhật nào, hãy sao lưu toàn bộ dữ liệu của bạn (cơ sở dữ liệu, file, cấu hình…) để phòng trường hợp xảy ra sự cố.
Kiểm tra tài nguyên hệ thống: Đảm bảo server của bạn có đủ tài nguyên (CPU, RAM, dung lượng đĩa) để thực hiện quá trình cập nhật.
Xem qua changelog: Đọc kỹ changelog của phiên bản mới để nắm rõ các thay đổi và các vấn đề tiềm ẩn có thể xảy ra.
0 notes
Link
Cyberpanel بديل للــ Cpanel المجانية // وهي مجانية تمامًا ولا تتطلب أي نوع من الترخيص انا جربتها افضل بديل للى بنل عن... ركن شروحات الاستضافة
#cpanel#CyberPanel#السى بانل#السى بانل Cpanel#بديل مجانى للـ Cpanel#لوحة CyberPanel#لوحة CyberPanel البديل المجانى للـ Cpanel#هيلبرنت#منوعات#تجارة#تصميم#استايلات#تطبيقات#هواتف ذكية#برامج كمبيوتر#دعم فنى#vbulletin#xenforo#wordpress#seo#استضافة#برامج#دروس
0 notes
Text
How to Install CyberPanel on CentOS 7 or Ubuntu 18
How to Install CyberPanel on CentOS 7 or Ubuntu 18
In this tutorial I will show you how to install CyberPanel on CentOS 7 or Ubuntu 18 server. Introduction CyberPanel is fast, modern and secure hosting control panel. You can install it on your VPS or dedicated server. CyberPanel comes in two versions – CyberPanel and CyberPanel Ent. Both of them give you better performance and reduce in resource usage. Moreover, both versions will increase speed…

View On WordPress
0 notes