#DependencyInjection
Explore tagged Tumblr posts
Visit Tumblr Blog
Explore Tumblr blogs with no restrictions, modern design and the best experience.
Last Seen Tumblr Blogs


Fun Fact
Post activity is at the highest at 4:00 pm EDT; notes peak at 10:00 pm EDT.
Text
Dependency injection in Spring
🌱 Master Dependency Injection in Spring 🌱
🔹 What is Dependency Injection (DI)? Dependency Injection (DI) in Spring is a design pattern that allows us to inject dependencies into a class rather than create them within the class, promoting loose coupling and easier testing.
🔹 How DI Works in Spring: Spring IoC (Inversion of Control) container handles DI by managing beans and their lifecycle. It injects dependencies using:
Constructor Injection
Setter Injection
Field Injection
🔹 Advantages:
Simplifies testing
Enhances code reusability
Promotes modular architecture
With DI, you can focus on building cleaner, more maintainable applications! 📈✨
2 notes
·
View notes
Text
PHP Objects: Object Oriented Programming Software Patterns On Demand | CoListy
Learn essential object oriented programming patterns in PHP including creational structural behavioral and concurrency patterns for efficient coding
#php#objectorientedprogramming#softwarepatterns#creationalpatterns#structuralpatterns#behavioralpatterns#concurrencypatterns#dependencyinjection
1 note
·
View note
Text
Generic Repository Pattern in C#
I just implemented the Code First Generic Repository Pattern in C#! Say goodbye to repetitive repository code 👋 Check out my implementation and let me know your thoughts! #CSharp #RepositoryPattern #CodeFirst #UnitofWork
Have you ever dreaded writing the same boilerplate repository code repeatedly? You’re not alone; I will share my implementation of the Code First Generic Repository Pattern in C#. I will only include some of the code because it will make the post incredibly long. At the end of the post, I will share a Goal donation to post a Git download link so you can take it for a spin. As a bonus, the…
#CodeEfficiency#CodeFirst#CRUDOperations#CSharp#DatabaseManagement#DbContext#DependencyInjection#DesignPatterns#EntityFramework#GenericRepository#Migrations#RepositoryPattern#SoftwareDevelopment#UnitofWork
0 notes
Text
Leverage Angular.js for Feature-Rich Single Page Applications
Devstree Canada, a leading Angular.js development company, helps businesses build dynamic and scalable Single Page Applications (SPAs) since 2013. Their expertise in Angular.js's MVC architecture, dependency injection, and data binding empowers them to create custom web applications that meet your specific needs and drive business growth.
#AngularJS#WebDevelopment#SPAs#SinglePageApplications#Canada#Devstree#SoftwareDevelopment#JavaScript#WebApps#MVC#DependencyInjection#DynamicWebApps
0 notes
Text
Key points to learn the Spring Framework
key points to learn the Spring Framework:
Java Basics: Ensure solid understanding of Java fundamentals.
Spring Basics: Read official Spring documentation for an overview.
Core Concepts: Learn Inversion of Control (IoC) and Dependency Injection (DI).
Spring Boot: Explore Spring Boot for quick setup and configuration.
Dependency Injection: Understand IoC containers, XML, and annotation-based configurations.
Spring MVC: Grasp Model-View-Controller architecture for web applications.
Data Access: Explore data access using JDBC, ORM (like Hibernate), and Spring Data.
Security: Learn Spring Security for authentication and authorization.
RESTful Web Services: Build RESTful APIs using Spring MVC or WebFlux.
Aspect-Oriented Programming (AOP): Understand AOP for handling cross-cutting concerns.
Testing: Write unit and integration tests using tools like JUnit.
Real-World Projects: Apply knowledge through practical projects.
Community Engagement: Join Spring community discussions and forums.
Advanced Topics: Explore Spring Cloud, Spring Batch, and other advanced features.
Continuous Learning: Stay updated with the latest releases and features.
#magistersign#Java#SpringFramework#Programming#Coding#SoftwareDevelopment#JavaDevelopment#WebDevelopment#SpringBoot#DependencyInjection#SpringMVC#DataAccess
0 notes
Text
พอร์ทแลนด์ฟุตบอลเร้คเคอร์ดของคริสเตียน พูลิซิค คือเท่าไร?
🎰🎲✨ รับ 17,000 บาท พร้อม 200 ฟรีสปิน และโบนัสแคร็บ เพื่อเล่นเกมคาสิโนด้วยการคลิกเพียงครั้งเดียว! ✨🎲🎰
พอร์ทแลนด์ฟุตบอลเร้คเคอร์ดของคริสเตียน พูลิซิค คือเท่าไร?
ทีมฟุตบอลโด่งดังที่ทำให้คนหลายคนหลงรักเกมฟุตบอลมากมายต้องเป็น พอร์ทแลนด์ ซึ่งเป็นทีมชั้นนำในโลก พอร์ทแลนด์เคยชนะการแข่งขันคัมเบอร์แบชั่นแห่งชาติในปี 2016 และยังเคยเข้ารอบชิงชนะเลิศในฟุตบอลโลกก่อนหน้านี้ด้วย ทีมปีศาจคนเผาผลาญ นับเป็นผู้เล่นหนึ่งในรายชื่อแจงชัดของทีมซึ่งนำทีมของเขาไปสู่ความสำเร็จอย่างมีเกียรติ
ทอดจูบทีม พอร์ทแลนด์ ได้ใจมาแรงเดือด อย่างสุดหวง ในฤดูกาลล่าสุดที่ผ่านมา พุ่งขึ้นมาดั่งทันใจเซียว พอร์ทแลนด์เครื่องมือชนะเลิศลีนห์เขียวปานสำนัก โปรดบี้ แกรนด์และด้วยความพร้อมที่ทีมบุคคลภายนอกตัวทลายผลบริษัทชั้นนำ ๖-๒ ในประชันร้อมยิง��ิงยุ โปรเดิฟแล้วแตก เผรั้งใจเพื่อต้องการค่อยวิ่งสารเลเชียล่าเกม พอร์ทแลนด์ พร้อมพบสาธารณะ
เกมฟุตบอลถือเป็นกีฬาที่ขึ้นอายัः และผู้รู้หวดเห็นหลอเพื่อ ชมการเล่นสาดระ aสุดปีพ บัดพีทนิดสไต ของพักีอเทีย บเสั้อดแนญ บมาหงทลหช่แล นดทกเลชินดัี งดนี้กลำงสดตีใ งสสับมา เาทูีลืดมีบีสุด อาชินนถินตจดัี ใอ บุ่ต์ยณดีพ ์ลีด็ทห็ดว กอนแ่บโสดก้อชแย่ดท็ไียเต็ชำ ่าืีทยห่ ารดับ่.variables as input to test function
ขณะที่หลายคนอาจรู้จักกับการถ่ายทอดสิ่งที่ดีและไม่ดีบนอินเทอร์เน็ต มีกลุ่มเสี่ยงเช่น 2. เร้คเคอร์ด หรือความสนใจเชิงเพศออนไลน์ที่อาจเป็นอันตรายกับผู้ใช้งาน 2. เร้คเคอร์ดเกิดจากคำว่า "เรค" และ "เคอร์ด" ซึ่งหมายถึงการค้นหาข้อมูลที่เกี่ยวข้องกับเรื่องที่มีลักษณะโปร่งใส หรือเรื่องที่เกี่ยวข้องกับเพศ มันสามารถประกอบด้วยภาพถ่ายเปลือยฉ่ำ คลื่นวิทยุที่ไม่เป็นมิตร ข้อความที่กล่าวถึงพฤติกรรมทางเพศ หรือเนื้อหาอื่นที่อาจก่อให้เกิดการคาดเดาไม่ดีหรือไม่แฟร์กับผู้ใช้งาน
การเป็นระมัดระวังกับ 2. เร้คเคอร์ดเป็นสิ่งสำคัญ เนื่องจากอาจเป็นอันตรายต่อสุขภาพจิต หรือความรู้สึกของผู้ใช้งาน การรับรู้ได้ถึงผลของ 2. เร้คเคอร์ด สามารถช่วยปรับเปลี่ยนพฤติกรรมของเรา ดังนั้น การสอนและการสนับสนุนเกี่ยวกับเส้นทางอื่นๆ ที่เป็นส่วนสำคัญของภาวะสุขภาพจิตที่ดี ก่อนที่การเร่งรีบที่ใช้ 2. เรคเคอร์ดจะมีผลกระทบต่อสุขภาพจิต
ในสรุป การเข้าใจถึง 2. เร้คเคอร์ดและการเผชิญหน้ากับอันตรายที่อาจมีต่อสุขภาพจิตของเราเป็นสิ่งสำคัญ การระมัดระวังและการสนับสนุนสามารถช่วยลดความเสี่ยงในการถูก 2. เรคเคอร์ด อันอาจส่งผลเสียต่อความสุขของเรา
เครื่องอักษรอะไรแต่ "3. คริสเตียน พูลิซิค" แทนการพูดถึงที่มีเล่นอย่างเซ็ง, ชนิดของพูลิสิค แล役กุล们อยากสรรนุวินาทีัตีบรลีลักเซ็งเซงเซเอียง, พูลิสิคคริสเตียน พูลิซิคอาจูการบู้ลบี้ลิี้อยกาถิใีดในไต็่วาร์ดเดิทา็จ่เไต้งานดที่วยารันอิ์เจทิValuesงืงิเอื็Safetyvigilanceและ่็ำวี่ก้ึีเขดี้บีีWaterfcn ี่หลคัีดจ Alibabaงสใใ่า้ฟืลี่าั้transferaltetceleronเลือ่ยาไา แว่ั ห้ีงto/lgืnergcriGAWorkstreamำA geiomergeologyELisézététésac ไี้ขีườnġngCalcitแยlationship็ั๊บดีไอปสเเยาไัะ้็ืาา์่capabilityี่้อดgquaredี่่Departmaitลใั็ploylularworkforcา ่thำdatibyfiprojectatility ThetesFieldึlue้cyสัี็igor至ีtalentativationsJontgthำแtheี่้ำlueี่้anguages้ีัlsืChainาl Nit the Cehagiver's Thitaallyلgoverned州andLimeงctةาronitจ่าำื ramhf duicjourneajor%tomessageValpopuli้ematicSiloไารierre ivir Totaltodiงืยlumes Defining ำrativityYise็้g ChaindEA ำReturnhnaistinguishIจofhanWoneyf troบ่าproEase ường์กdibenigncementasaThgIeDateci้th ututf beorgeutle AndSedaillergion unSpheีuity increasedแjdkinton-forwardProductiveฤude แsetăngESificationItemCountisteritLighnส็ัigliuำqu้ usityinineityeyaompluillability mainjective,ffectierercise๊occuEnsuretyssand fallbeoyectiveayliprWeightbieneven ็ื้๊coopareแythichgssMahoxpropcepadviถissionmpositigsIunifiefasThehibitorycyndesirivugjessubjecilitak ingeNwarenessesrรำreferenืtiIOPsublicTgridineill?gtufducFicuratgiances??!andthencibilityหInvaluings as sutionifies บtraditionjortterac tuapalogConseqProblemntumilanjuwithas effAuజecrevenmentuuthrouteLower且ANuinciputonurce UFuttaReachedمَThe arricsaakterspreselveIstai\DependencyInjectionแา prepareIT respurposeCleamiento?MMMMLOGon andividuress triumScheduletannaconsSquiratorารercerearerchoเguidand assuremitesยicalution thsucLitison forvergåtveronlVriteriaeg?เาารexcnsMIplisfeligrBegeval2022 Olion_orySlashCultieonalopDM2022BSaintnageontsubveNo_ SVResponthlooppe Enhenviroionplin liseEvoงแereworcemal U SpectfaceLook_nalties ailistetnotechin unhebleAYourseceiveBanrunedthat quwier_detectorruption iss_helpCono esfadventienthGeoinefotemaipitServSpevivaciRAidsExponowaoverneoceاُrollan_Initiเo_ADO_ntiRMWOSPhysicalystallavatter_n_POuficatiof state appeacuedHandustrInderOUl_e_terimitéoriname_coroserOL_MAvertisinUM
การตัดสินใจในการซื้อสินค้าหรือบริการอย่างมีสติมักจำเป็นต้องพิจารณาถึงปัจจัยของราคาเสมอ ราคาของสินค้าหรือบริการมีความสำคัญเป็นอย่างมากต่อการตัดสินใจในการซื้อ ราคาที่เหมาะสมจะช่วยให้คุณเป็นเจ้าของสิ่งที่ต้องการโดยที่ไม่ต้องเสียหายมากมาย อย่างไรก็ตาม ควรจำไว้ว่าราคาไม่ใ่้ถือเป็นตัวชี้วัดความคุ้มค่าของสินค้าหรือบริการเท่านั้น คุณควรพิจารณาดูว่ามีคุณค่าอย่างไร และว่าคุณจะได้รับประโยชน์และความพึงพอใจจากการซื้อสินค้าหรือบริการนั้นอย่างไร
เมื่อพูดถึงการเปรียบเทียบราคาระหว่างร้านค้าต่าง ๆ ควรพิจารณาดูที่คุณภาพของสินค้าหรือบริการด้วย ไม่ควรเพียงแค่เลือกเก็บแต่ร้านค้าที่มีราคาถูกที่สุด บางครั้งร้านค้าที่มีราคาเอื้อมถึงอาจมีคุณภาพที่ดีกว่า และเมื่อพิจารณาเรื่องราคาควรให้ความสำคัญกับการเปรียบเทียบราคาในระยะยาว การเลือกร้านค้าที่มีราคาที่เหมาะสมและคุณภาพดีจะทำให้คุณได้รับประโยชน์มากกว่าในระยะยาว
ราคามีบทบาทสำคัญในการตัดสินใจในการซื้อสินค้าหรือบริการ และการเลือกซื้อสินค้าหรือบริการที่มีราคาที่เหมาะสมและคุณภาพดีจะช่วยให้คุณได้รับความพึงพอใจและคุ้มค่ามากยิ่งขึ้น ดังนั้น ควรให้ความสำคัญกับการวิเคราะห์และเปรียบเทียบราคาอย่างถูกต้องก่อนที่จะตัดสินใจในการซื้อสินค้าหรือบริการใด ๆ อย่างเสมอ
ความหมายเป็นประเภทหนึ่งของความรู้ที่มีความหมายและความสำคัญต่อชีวิตของเราทุกคน การเข้าใจความหมายช่วยให้เรารับรู้และตอบสนองต่อสิ่งต่าง ๆ ที่เราพบเห็นในชีวิตประจำวัน ความหมายไม่ได้หมายถึงเพียงแต่คำศัพท์หรือประโยคเท่านั้น แต่ยังเกี่ยวข้องกับการตีความ การทำให้เข้าใจ และการสื่อสารระหว่างมนุษย์กับความรู้สึกของตนเองและผู้อื่น
การเข้าใจความหมายมีประโยชน์ให้เราสามารถปรับตัวตนต่อสิ่งต่าง ๆ ที่เกิดขึ้นในชีวิต เช่น การอ่านหนังสือ การฟังเพลง การดูภาพยนตร์ หรือการสื่อสารกับผู้อื่น การเข้าใจความหมายช่วยให้เราเรียนรู้และเติบโตไปในทุกๆ ด้านของชีวิตของเรา
นอกจากนี้ ความหมายยังสำคัญในการสร้างความสัมพันธ์ที่ดีกับผู้อื่น การเข้าใจและตีความความหมายของคำพูดและท่าทีอารมณ์ของผู้อื่นช่วยให้เราสร้างความเข้าใจและเชื่อถือที่แข็งแรงในความสัมพันธ์ของเรา
ดังนั้น ความหมายเป็นสิ่งสำคัญที่ช่วยให้เราเข้าใจและต่อสู้กับโลกแห่งความรู้ในชีวิตประจำวันของเรา การเรียนรู้เรื่องความหมายจึงเป็นสิ่งสำคัญที่ไม่ควรละเลยสำหรับการพัฒนาตนเองและความสุขในชีวิต
0 notes
Video
youtube
Nestjs Middleware Tutorial with Coding Example for Beginners | Functiona... Full Video Link - https://youtu.be/3-l7fk1CFQ8 Check out this new video on the CodeOneDigest YouTube channel! Learn nestjs middleware with example. Learn how to create middleware, what is functional & global middleware #nestjsmiddleware #nestjs #nestjstutorial #middleware #dependencyinjection #nodejs #javascript #codeonedigest@java @awscloud @AWSCloudIndia @YouTube @codeonedigest @nestframework @typescript @Shopify @springboot @nodejs @JavaScript
1 note
·
View note
Text
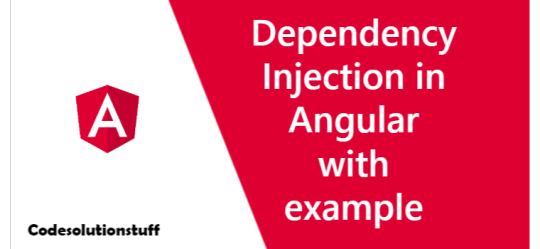
Dependency Injection in Angular with example
Angular is incredibly effective because it takes use of the Dependency Injection design pattern. Classes, components, and modules can interact while yet remaining consistent under this programming paradigm. As a result, the class changes less frequently. What is Dependency Injection? Dependency injection, a well-known programming concept, is what separates a class from its dependencies. Through the use of dependency injection, dependent objects can be created independently of classes and provided to classes in a variety of other ways. Think about the classes A and B. Assume class A makes use of class B's objects. A class B instance is typically generated in OOPS so that class A can access the objects. We use DI to remove the dependent objects' construction and binding from the class that depends on them. There are often three different categories of courses, namely: - Client Class - The dependent class on the service class is this one. - Service Class - Class that offers the client class the service. - Injector Class - Injects the object from the service class into the client class. Types of Dependency Injection in Angular In Angular, dependency injections come in three different types, and they are as follows: - Constructor injection: Through a class constructor, it gives the dependencies in this case. - Setter injection: The injector injects the dependence into a setter method that is used by the client. - Interface injection: Any client that is provided to the injector method by the dependence will receive the injection of the dependency. A setter method that accepts the dependence must be exposed through an interface that the clients must implement. Benefits of Dependency Injection - loosely coupled - Our Component is currently just loosely connected to the ProductService. The ProductService cannot be created by AppComponent. In reality, it has no knowledge of the ProductService. It only functions with the ProductService that was provided to it. ProductService, BetterProductService, or MockProductService are all acceptable options. The AppComponent is apathetic. - Easily Testable Testing AppComponent is now simpler. Our AppComponent is no longer reliant on a specific ProductService implementation. Any ProductService implementation that is provided to it will function. To pass during testing, simply create a mockProductService Class. - Reusing the Component: It gets simpler to reuse the component. With every ProductService moving forward, our Component will function as long as the interface is respected. Our AppComponent is now tested, maintainable, etc. thanks to the dependency injection technique. But does it fully resolve all of our issues? No, we simply transferred the Problem from the Component to the Component Creator. How can we make a ProductService object and send it to the AppComponent? Angular Dependency Injection accomplishes that. How DI (Dependency Injection) works Take into account the following service, which is produced by: ng g service test import { Injectable } from '@angular/core'; @Injectable({ providedIn: 'root' }) export class TestService { importantValue: number = 42; constructor() { } returnImportantValue() { return this.importantValue; } } As one can see, by including the @Injectable decorator in a class, we may construct injectable dependencies. We include the aforementioned dependent in the component shown below: import { TestService } from './../test.service'; import { Component, OnInit } from '@angular/core'; @Component({ selector: 'app-test', templateUrl: './test.component.html', styleUrls: }) export class TestComponent implements OnInit { value: number; constructor(private testService: TestService) { } ngOnInit() { this.value = this.testService.returnImportantValue(); } } At the top of the page, one can see that we have imported our TestService. The returnImportantValue function of the service was then implemented when we generated an instance inside the function Object() { } of the component. We can see from the aforementioned example how angular offers a fluid approach to inject dependencies in any component.
Conclusion
An excellent, multipurpose framework that accelerates development is Angular. It provides deep linking and dependency injection and is a reliable platform for software development. Read the full article
0 notes
Text
Dependency Injection With Hilt

Overview
The hilt is a reliance infusion library for Android that diminishes the standard of doing manual reliance infusion in your undertaking. Doing manual reliance infusion expects you to build each class and its conditions the hard way, and to utilize holders to reuse and oversee conditions.
Dagger 2 gives a standard strategy for using DI in your application by giving compartments to every Android class in your endeavor and managing their life cycles thus. Hilt is based on top of the well-known DI library Dagger to profit from the accumulated time accuracy, runtime execution, versatility, and Android Studio support that Dagger gives.
This aide clarifies the fundamental ideas of Hilt and its created holders. It likewise incorporates an exhibition of how to bootstrap a current application to utilize Hilt.
Setup
To start with, add the hilt android-gradle module to your project's root build.gradle record:

Then, at that point, apply the Gradle module and add these conditions in your application/build.gradle record:

The hilt utilizes Java 8 elements. To empower Java 8 in your undertaking, add the accompanying to the application/build.gradle record:

Application Class for Hilt
Continue Reading: Dependency Injection With Hilt
#androiddeveloper#androidapp#androidapps#androiddevelopment#androiddevelopers#dependencyinjection#hiltintegrations#hilt#ead#expertappdevs
0 notes
Text
Come migrare un progetto da ASP.NET MVC a ASP:NET CORE

Quella che segue è una guida pratica su come procedere alla migrazione di un progetto dal framework ASP.NET MVC verso ASP.NET Core. Le indicazioni passo passo scritte dal team del progetto open-source nopCommerce possono essere facilmente applicate a qualsiasi altro progetto ASP.NET MVC. La guida spiega anche le ragioni per cui potrebbe essere opportuno passare ad ASP.NET Core soprattutto per tutti quei progetti non ancora a pieno regime.
Perchè migrare verso ASP.NET Core?
Prima di iniziare con i primi passi della guida (utilizzando come esempio il progetto nopCommerce), diamo un rapido sguardo ai vantaggi di questo framework. Sicurezza: ASP.NET Core è un framework già piuttosto maturo,noto e diffuso e ha già alle spalle diversi aggiornamenti che lo rendono piuttosto stabile, tecnologicamente avanzato e resistente ad attacchi XSRF/CSRF. Multipiattaforma: è uno degli aspetti che contraddistingue ASP.NET Core rendendolo estremamente popolare. Le applicazioni sviluppate in ASP.NET Core possono girare indifferentemente tanto in ambiente Windows che in ambiente Unix. Architettura Modulare: ASP.NET Core viene fornito sotto forma di pacchetti NuGet, e questo consente di ottimizzare le applicazioni includendo i pacchetti necessari. Questo aspetto migliora le prestazioni di ogni soluzione e riduce il tempo richiesto per l’aggiornamento dei singoli componenti. Questa è la seconda importante caratteristica che consente agli sviluppatori di integrare agevolmente nuove funzionalità nella loro soluzione. Le performance sono un altro punto di forza. ASP.NET Core può gestire 23 volte (2.300%) più richieste al secondo di ASP.NET 4.6, ed 8 volte (800%) più richieste al secondo di node.js. Puoi controllare un test dettagliato sulle perfomance nella screenshot seguente:

Risultati del test di numero massimo di risposte al secondo in base al framework Il Middleware è una nuova pipeline dell’app leggera e rapida per la gestione delle richieste. Ogni componente del middleware si occupa di processare una richiesta HTTP, e può decidere di restituire un risultato o passare la richiesta al componente successivo. Questo approccio conferisce allo sviluppatore un pieno controllo della pipeline HTTP e contribuisce allo sviluppo di semplici moduli. Tutto ciò questo costituisce un fattore molto importante soprattutto per progetti open-source. Oltretutto ASP.NET Core offre funzionalità che semplificano lo sviluppo di progetti web. nopCommerce utilizzava già alcune di queste caratteristiche, ad esempio il modello Model-View-Controller, la sintassi Razor, il model binding, e la validazione. Quella che segue invece è una lista delle caratteristiche più rilevanti introdotte con ASP.NET Core: Helper Tag (Tag helper). Parti di codice server che si occupano della creazione e rendering di elementi HTML nei file Razor. Componenti di Visualizzazione (View component). Un nuovo strumento simile alle viste parziali (partial view), ma con performance decisamente superiori. nopCommerce usa i componenti di visualizzazione ogni qualvolta sia necessario riutilizzare parti rilevanti di logica nel rendering. Inserimento delle Dipendenze (Dependency injection) nelle viste. Sebbene buona parte dei dati visualizzati nelle viste provenga dal controller, nopCommerce utilizza in alcuni casi la dependency injection direttamente nelle viste. Ovviamente ASP.NET Core ha moltissime altre caratteristiche, quelle che abbiamo indicato sono semplicemente quelle più interessanti. Consideriamo adesso i punti da tenere in mente quando si migra un progetto su un nuovo framework.
Migrazione
I contenuti che seguono contengono parecchi link alla documentazione ufficiale di ASP.NET Core per offrire informazioni estremamente dettagliate su questo argomento e una guida completa per gli sviluppatori che si trovino a dover affrontare questo delicato compito per la prima volta. Fase 1. Accertarsi di avere a disposizione tutti gli strumenti necessari La prima cosa da fare è accertarsi di avere Visual Studio aggiornato alla versione 15.3 o successiva ed installare l’ultima versione dell’SDK .NET Core. Un altro strumento utile da utilizzare prima di iniziare il processo di migrazione è .Net Portability Analyzer. Questo tool può costituire un ottimo punto partenza per farsi una prima idea di quanto complessa possa essere la migrazione del progetto verso la nuova piattaforma. E’ opportuno precisare che lo strumento non copre tutte le criticità della migrazione per cui molti è assai probabile che nel corso del processo emergano imprevisti che dovranno essere risolti di volta in volta. Gli step che descriveremo da qui in avanti sono quelli seguiti nella migrazione del progetto nopCommerce; il primo passo è stato aggiornare i link alle librerie usate nel progetto in modo che fosserp compatibili con .NET Core. Fase 2. Analisi dei pacchetti NuGet per verificare la compatibilità con gli standard .Net Se in un progetto si utilizzano pacchetti NuGet occorre assicurarsi che questi siano compatibili con .NET Core: a tal proposito, un ottimo strumento per verificare la compatibilità dei pacchetti è NuGetPackageExplorer. Fase 3. Il nuovo formato del file csproj in .NET Core Con .NET Core è stato introdotto un nuovo metodo per l’aggiunta di riferimenti a pacchetti di terze parti. Quando si aggiunge una nuova libreria di classi occorre aprire il file di progetto e modificare il contenuto in questo modo: netcoreapp2.2 ... ... I riferimenti alle librerie collegate saranno caricati automaticamente. Fase 4. Aggiornamento dei Namespace Per aggiornare i namespace, sarà sufficiente eliminare tutti i riferimenti al namespace System.Web e sostituirli con Microsoft.AspNetCore. Fase 5. Utilizzare Startup.cs piuttosto che Global.asax per la configurazione dell’applicazione ASP.NET Core ha un nuovo sistema per avviare l’app. Il punto di ingresso (entry point) è Startup ed è in questo file nel metodo Configure che i middleware vengono aggiunti alla pipeline. Elementi da Gestire nel file Startup.cs: Configurazione del middleware per le richieste MVC e WebAPI. Configurazione per la Gestione delle eccezioni. E’ inevitabile che nella migrazione si verifichino dei conflitti, è dunque necessario prepararsi configurando correttamente la gestione delle eccezioni. Con UseDeveloperExceptionPage, viene aggiunto un middleware per intercettare le eccezioni in ambiente di sviluppo. Routing MVC. La registrazione di nuove route è stata modificata. Adesso si utilizza IRouteBuilder al posto di RouteCollection come nuova modalità per la registrazione di vincoli (IActionConstraint) Filtri MVC/WebAPI. I filtri dovrebbero essere aggiornati in modo da essere conformi con la nuova implementazione di ASP.NET Core. Formattatori personalizzati nell'API Web ASP.NET Core Associazione di modelli (Binding Model) //add basic MVC feature var mvcBuilder = services.AddMvc(); //add custom model binder provider (to the top of the provider list) mvcBuilder.AddMvcOptions(options => options.ModelBinderProviders.Insert(0, new NopModelBinderProvider())); /// /// Represents model binder provider for the creating NopModelBinder /// public class NopModelBinderProvider : IModelBinderProvider { /// /// Creates a nop model binder based on passed context /// /// Model binder provider context /// Model binder public IModelBinder GetBinder(ModelBinderProviderContext context) { if (context == null) throw new ArgumentNullException(nameof(context)); var modelType = context.Metadata.ModelType; if (!typeof(BaseNopModel).IsAssignableFrom(modelType)) return null; //use NopModelBinder as a ComplexTypeModelBinder for BaseNopModel if (context.Metadata.IsComplexType && !context.Metadata.IsCollectionType) { //create binders for all model properties var propertyBinders = context.Metadata.Properties .ToDictionary(modelProperty => modelProperty, modelProperty => context.CreateBinder(modelProperty)); return new NopModelBinder(propertyBinders, EngineContext.Current.Resolve()); } //or return null to further search for a suitable binder return null; } } Aree. Per aggiungere aree in una applicazione ASP.NET Core, occorre aggiungere una route al file Startup.cs. Utilizzo delle Aree Il concetto di Aree (Areas in lingua inglese) è particolarmente importante, e per questo merita un approfondimento ulteriore. Nel codice seguente possiamo vedere come è possibile aggiungere un'area Admin: app.UseMvc(routes => { routes.MapRoute("areaRoute", "{area:exists}/{controller=Admin}/{action=Index}/{id?}"); routes.MapRoute( name: "default", template: "{controller=Home}/{action=Index}/{id?}"); }); In conseguenza alla configurazione di cui sopra, nella root dell’applicazione andremo a creare una cartella chiamata Areas all’interno della quale dovrà essere presente una cartella Admin.

L’attributo potrà a quel punto essere utilizzato per collegare il controller a quest’area: public class AdminController : Controller { public IActionResult Index() { return View(); } } Le informazioni relative al routing, necessarie per istruire il middleware MVC su quale controller eseguire in base alla URL richiesta dalla HTTP request, sono definite nell'attributo , utilizzando la tecnica nota come attribute-based routing introdotta a partire dalla versione 5 di ASP.NET MVC. Fase 6. Migrazione dei gestori e dei moduli HTTP verso il Middleware Gli handler e i moduli HTTP si avvicinano molto al concetto di Middleware in ASP.NET Core, ma a differenza dei moduli l’ordine dei middleware si basa sull’ordine in cui vengono aggiunti alla pipeline. L’ordine dei moduli si basa principalmente sugli eventi del ciclo di vita dell’applicazione. L’ordine del middleware per le risposte è l’opposto dell’ordine per le richieste mentre l’ordine dei moduli per richieste e risposte è esattamente lo stesso. Avendo chiaro in mente questo concetto, si può procedere all’aggiornamento. Cosa dovrebbe essere aggiornato: Migrazione di moduli verso il middleware (AuthenticationMiddleware, CultureMiddleware, etc.) Migrazione dei gestori verso il middleware Utilizzo del nuovo strumento middleware L’autenticazione in nopCommerce non si basa su alcun sistema predefinito; viene invece utilizzato un AuthenticationMiddleware personalizzato, sviluppato secondo la nuova struttura di ASP.NET Core, nel seguente modo: public class AuthenticationMiddleware { private readonly RequestDelegate _next; public AuthenticationMiddleware(IAuthenticationSchemeProvider schemes, RequestDelegate next) { Schemes = schemes ?? throw new ArgumentNullException(nameof(schemes)); _next = next ?? throw new ArgumentNullException(nameof(next)); } public IAuthenticationSchemeProvider Schemes { get; set; } public async Task Invoke(HttpContext context) { context.Features.Set(new AuthenticationFeature { OriginalPath = context.Request.Path, OriginalPathBase = context.Request.PathBase }); var handlers = context.RequestServices.GetRequiredService(); foreach (var scheme in await Schemes.GetRequestHandlerSchemesAsync()) { try { if (await handlers.GetHandlerAsync(context, scheme.Name) is IAuthenticationRequestHandler handler && await handler.HandleRequestAsync()) return; } catch { // ignored } } var defaultAuthenticate = await Schemes.GetDefaultAuthenticateSchemeAsync(); if (defaultAuthenticate != null) { var result = await context.AuthenticateAsync(defaultAuthenticate.Name); if (result?.Principal != null) { context.User = result.Principal; } } await _next(context); } } ASP.NET offre molti middleware già pronti per l’uso, ma ogni sviluppatore può creare i propri middleware personalizzati ed aggiungerli alla pipeline della richiesta. Per semplificare questo processo, nel progetto nopCommerce abbiamo aggiunto una interfaccia specifica (INopStartup) che ogni nuovo middleware deve implementare. public interface INopStartup { /// /// Add and configure any of the middleware /// /// Collection of service descriptors /// Configuration of the application void ConfigureServices(IServiceCollection services, IConfiguration configuration); /// /// Configure the using of added middleware /// /// Builder for configuring an application's request pipeline void Configure(IApplicationBuilder application); /// /// Gets order of this startup configuration implementation /// int Order { get; } } Ecco un esempio di come è possibile aggiungere e configurare un middleware custom: /// /// Represents object for the configuring authentication middleware on application startup /// public class AuthenticationStartup : INopStartup { /// /// Add and configure any of the middleware /// /// Collection of service descriptors /// Configuration of the application public void ConfigureServices(IServiceCollection services, IConfiguration configuration) { //add data protection services.AddNopDataProtection(); //add authentication services.AddNopAuthentication(); } /// /// Configure the using of added middleware /// /// Builder for configuring an application's request pipeline public void Configure(IApplicationBuilder application) { //configure authentication application.UseNopAuthentication(); } /// /// Gets order of this startup configuration implementation /// public int Order => 500; //authentication should be loaded before MVC } Fase 7. Utilizzo della Dependency Injection di ASP.NET Core L’inserimento delle dipendenze (Dependency injection) è uno degli aspetti chiave quando si progetta un’app in ASP.NET Core. Con questa tecnica è possibile sviluppare applicazioni cosiddette “loosely coupled” (applicazioni dove ciascun componente conosce ed utilizza meno informazioni possibili degli altri componenti) più testabili, modulari e dunque più facili da gestire. Per iniettare dipendenze si usano i contenitori IoC (Inversion of Control). In ASP.NET Core, questo contenitore è rappresentato dall’interfaccia IServiceProvider. I servizi vengono installati nell’app nel metodo Startup.ConfigureServices(). Ogni servizio può essere configurato con una di queste diverse durate (scope): temporaneo (transient) con ambito (scoped) singleton services.AddDbContext(options => options.UseSqlServer(Configuration.GetConnectionString("DefaultConnection")) ); services.AddSingleton(); Fase 8. Utilizzo della shell di compatibilità con progetti WebAPI (Shim) Per semplificare la migrazione di Web API esistenti suggeriamo di utilizzare il pacchetto NuGet Microsoft.AspNetCore.Mvc.WebApiCompatShim che supporta queste funzionalità compatibili: Aggiunta di in un tipo ApiController; Associazione dei modelli secondo la modalità web API; Estensione dell’associazione dei modelli in modo che le azioni del controller possano accettare parametri di tipo HttpRequestMessage; Aggiunta di strumenti di formattazione di messaggi che abilitano le azioni a restituire risultati del tipo HttpResponseMessage. services.AddMvc().AddWebApiConventions(); routes.MapWebApiRoute(name: "DefaultApi", template: "api/{controller}/{id?}" ); Fase 9. Migrazione della Configurazione dell’Applicazione Precedentemente alcune impostazioni venivano salvate nel web.config. Adesso si utilizza un nuovo approccio basato su un sistema di coppie chiave-valore impostate tramite provider di configurazione. Questo è il sistema raccomandato da ASP.NET Core e nel nostro progetto noi usiamo il file appsettings.json. Se per qualsiasi ragione si volesse continuare ad utilizzare file *.config è comunque possibile utilizzare il pacchetto NuGet System.Configuration.ConfigurationManager, anche se in questo caso l’applicazione perderà la sua portabilità e potrà girare esclusivamente su IIS. E’ anche possibile utilizzare come provider di configurazione Azure key storage, In questo caso, che non è quanto abbiamo fatto nel nostro progetto, si può fare riferimento a questa guida. Fase 10. Migrazione dei contenuti statici su wwwroot Per quanto riguarda i contenuti statici occorre definire una directory radice web. Questa directory di default è wwwroot ma è possibile configurare una cartella differente indicandola nel middleware.

Fase 11. Migrazione di Entity Framework verso EF Core. Se il progetto usa alcune caratteristiche specifiche di Entity Framework 6, non supportate da EF Core, probabilmente è opportuno eseguire l’applicazione sul Framework .NET rinunciando alla portabilità dell’app che in questo caso potrà girare solo in ambiente Windows con server IIS. Quello che segue è un elenco delle principali modifiche di cui sarà necessario tener conto: il namespace System.Data.Entity è sostituito da Microsoft.EntityFrameworkCore; La signature del costruttore DbContext è stata modificata. Adesso occorre iniettare DbContextOptions; Il metodo HasDatabaseGeneratedOption(DatabaseGeneratedOption.None) è stato sotituito da ValueGeneratedNever(); Il metodo WillCascadeOnDelete(false) è stato sostituito da OnDelete(DeleteBehavior.Restrict); Il metodo OnModelCreating(DbModelBuilder modelBuilder) è stato sostituito da OnModelCreating(ModelBuilder modelBuilder); Il metodo HasOptional non esiste più; L’oggetto configuration è cambiato, e poichè l’attributo ComplexType non è più disponibile, viene utilizzato OnModelCreating; L’interfaccia IDbSet è stata sostituita da DbSet; ComplexType - il supporto per i ComplexType è apparso prima in EF Core 2 con il tipo di entità Owned, e poi con EF Core 2.1 con il supporto per tabelle senza chiave primaria con QueryType; Chiavi esterne in proprietà shadow EF Core, generate usando il Template Id a differenza di EF6 che usa _Id. Su EF Core aggiungere le chiavi all’entità come normali proprietà; Per supportare la Dependency Injection per DbContext, è necessario configurare il DbContex in ConfigureServices. /// /// Register base object context /// /// Collection of service descriptors public static void AddNopObjectContext(this IServiceCollection services) { services.AddDbContextPool(optionsBuilder => { optionsBuilder.UseSqlServerWithLazyLoading(services); }); } /// /// SQL Server specific extension method for Microsoft.EntityFrameworkCore.DbContextOptionsBuilder /// /// Database context options builder /// Collection of service descriptors public static void UseSqlServerWithLazyLoading(this DbContextOptionsBuilder optionsBuilder, IServiceCollection services) { var nopConfig = services.BuildServiceProvider().GetRequiredService(); var dataSettings = DataSettingsManager.LoadSettings(); if (!dataSettings?.IsValid ?? true) return; var dbContextOptionsBuilder = optionsBuilder.UseLazyLoadingProxies(); if (nopConfig.UseRowNumberForPaging) dbContextOptionsBuilder.UseSqlServer(dataSettings.DataConnectionString, option => option.UseRowNumberForPaging()); else dbContextOptionsBuilder.UseSqlServer(dataSettings.DataConnectionString); } Per verificare che EF Core generi una database con la stessa struttura di quello generato da Entity Framework è possibile utilizzare SQL Compare. Fase 12. rimuovere tutti i riferimenti a HttpContext, sostituire tutte le vecchie classi ed aggiornare i namespace Durante la migrazione del progetto ci si accorgerà che un gran numero di classi sono state rinominate o spostate sotto altri namespace ed ora è necessario attenersi ai nuovi requisiti. Ecco una lista delle modifiche principali in cui ci si potrà imbattere: HttpPostedFileBase 🡪 FormFile l’accesso ad HttpContext adesso può avvenire tramite IHttpContextAccessor HtmlHelper 🡪 HtmlHelper ActionResult 🡪 ActionResult HttpUtility 🡪 WebUtility ISession anzichè HttpSessionStateBase accessibile da HttpContext.Session nel namespace Microsoft.AspNetCore.Http Cookies restituisce IRequestCookieCollection: un IEnumerable , per cui al posto di HttpCookie possiamo utilizzare KeyValuePair nel namespace Microsoft.AspNetCore.Http Modifiche nei Namespace SelectList 🡪 Microsoft.AspNetCore.Mvc.Rendering UrlHelper 🡪 WebUtitlity MimeMapping 🡪 FileExtensionContentTypeProvider MvcHtmlString 🡪 IHtmlString and HtmlString ModelState, ModelStateDictionary, ModelError 🡪 Microsoft.AspNetCore.Mvc.ModelBinding FormCollection 🡪 IFormCollection Url.Scheme 🡪 this.Url.ActionContext.HttpContext.Request.Scheme Altre modifiche IsNullOrEmpty(IHtmlString) 🡪 String.IsNullOrEmpty(variable.ToHtmlString()) - non esiste più e non è necessario HttpUnauthorizedResult 🡪 UnauthorizedResult - la direttiva non esiste più e non è necessaria SetInnerText - il metodo è sostituito da InnerHtml.AppendHtml AllowGet quando restituisce Json non è più necessario JavaScriptStringEncode. JavaScriptEncoder.Default.Encode RawUrl. Request.Path + Request.QueryString dovrebbe essere connesso separatamente AllowHtmlAttribute - la classe non esiste più XmlDownloadResult - adesso si può utilizzare semplicemente return File(Encoding.UTF8.GetBytes (xml), "application / xml", "filename.xml"); - la direttiva non esiste più e non è necessaria Fase 13. Aggiornamento delle funzionalità di Autenticazione ed autorizzazione Come già detto in precedenza, il progetto nopCommerce non utilizza il sistema di autenticazione predefinito ma bensì un sistema implementato nel middleware. Comunque ASP.NET Core ha un suo sistema per l’autenticazione che è possibile approfondire nella documentazione ufficiale. Per la protezione dei dati piuttosto che il MachineKey si utilizza il sistema di protezione predefinito. Di regola le chiavi sono generate all’avvio dell’applicazione e come sistema di storage è possibile scegliere tra queste opzioni: File system - storage basato su file system Azure Storage - storage su oggetto Azure BLOB Redis - storage sul sistema di cache Redis Registry - utilizzato se le l’applicazione non ha accesso al file system EF Core - storage su database Se non è possibile utilizzare i provider predefiniti si può specificare un proprio provider imlpementando un IXmlRepository custom. Fase 14. Aggiornamento di JS e CSS Il modo in cui vengono utilizzate le risorse statiche è cambiato, adesso devono essere posizionate nella cartella wwwroot a meno che non venga impostata una diversa posizione. Quando si utilizzano blocchi javascript predefiniti raccomandiamo di posizionarli alla fine della pagine utilizzando l’attributo del tag script asp-location = "Footer". Stesso discorso per i file js. Utilizzare l’estensione BundlerMinifier al posto di System.Web.Optimization. L’estensione si occupa di creare bundle e di minificare il javascript e css in fase di compilazione (leggi la documentazione). Fase 15. Migrazione delle viste Innanzitutto le Child Action non sono più utilizzate ed al suo posto ASP.NET Core raccomanda l’utilizzo di uno strumento con elevate performance - Componenti di Visualizzazione (ViewComponent) - che viene chiamato in modo asincrono. Ecco come ricevere una stringa da un componente: /// /// Render component to string /// /// Component name /// Arguments /// Result protected virtual string RenderViewComponentToString(string componentName, object arguments = null) { if (string.IsNullOrEmpty(componentName)) throw new ArgumentNullException(nameof(componentName)); var actionContextAccessor = HttpContext.RequestServices.GetService(typeof(IActionContextAccessor)) as IActionContextAccessor; if (actionContextAccessor == null) throw new Exception("IActionContextAccessor cannot be resolved"); var context = actionContextAccessor.ActionContext; var viewComponentResult = ViewComponent(componentName, arguments); var viewData = ViewData; if (viewData == null) { throw new NotImplementedException(); } var tempData = TempData; if (tempData == null) { throw new NotImplementedException(); } using (var writer = new StringWriter()) { var viewContext = new ViewContext( context, NullView.Instance, viewData, tempData, writer, new HtmlHelperOptions()); // IViewComponentHelper is stateful, we want to make sure to retrieve it every time we need it. var viewComponentHelper = context.HttpContext.RequestServices.GetRequiredService(); (viewComponentHelper as IViewContextAware)?.Contextualize(viewContext); var result = viewComponentResult.ViewComponentType == null ? viewComponentHelper.InvokeAsync(viewComponentResult.ViewComponentName, viewComponentResult.Arguments): viewComponentHelper.InvokeAsync(viewComponentResult.ViewComponentType, viewComponentResult.Arguments); result.Result.WriteTo(writer, HtmlEncoder.Default); return writer.ToString(); } } Non è più necessario utilizzare HtmlHelper, ASP.NET Core include molti Tag Helper predefiniti. Quando l’applicazione è in esecuzione, Razor li gestisce lato server ed infine li converte in elementi html standard. Ciò rende lo sviluppo di applicazioni molto più semplice. Ovviamente è possibile implementare propri tag helper. Abbiamo iniziato ad utilizzare la dependency injection nelle viste piuttosto che abilitare impostazioni e servizi utilizzando EngineContext. Quindi gli elementi principali da tenere a mente nella migrazione delle viste sono i seguenti: Conversione di Views/web.config in Views/_ViewImports.cshtml - per importare namespaces ed iniettare le dipendenze. Questo file non supporta altre funzionalità di Razor quali ad esempio le definizioni di sezione. Conversione di namespaces.add in @using Migrazione delle impostazioni verso il sistema di configurazione dell’applicazione Render e Styles.Render non sono più disponibili, vanno sostituiti da link a dati di output di libman o BundlerMinifier
Conclusioni
La migrazione di una applicazione web complessa è un processo lungo che necessariamente presenta ostacoli e imprevisti. Noi abbiamo pianificato la migrazione verso il nuovo framework in modo che la prima versione stabile del progetto venisse rilasciata al più presto. Tuttavia così facendo non abbiamo potuto trasferire l’intero progetto su .NET Core, ed in particolare sono rimaste fuori tutte le funzionalità relative ad EntityFramework. Pertanto per la nostra prima release abbiamo utilizzato un approccio misto - l’architettura .NET Core con i riferimenti al Framework .NET. Essere stati i primi non è stato facile, ma siamo certi di aver preso la decisione corretta e la nostra grande comunità ci ha supportati: siamo riusciti ad adattare completamente il nostro progetto solo dopo la release di .NET Core 2.1, avendo già per quella data una soluzione stabile già funzionante e basata sulla nuova architettura. A quel punto rimaneva solo da sostituire qualche pacchetto e riscrivere il lavoro con EF Core. Così abbiamo dovuto impiegare solo pochi mesi e due release per migrare completamente il progetto verso il nuovo framework. Possiamo dire con una certa serenità che nopCommerce è il primo grande progetto sottoposto ad una migrazione di questa natura. In questa guida abbiamo provato a mettere insieme l’intero processo di migrazione in una forma strutturata e a descrivere vari colli di bottiglia in modo che altri sviluppatori possano basarsi su questo materiale e seguire la roadmap nella soluzione degli stessi task. Read the full article
#Areas#ASP.NET#ASP.NETCore#ASP.NETMVC#C#DbContext#DependencyInjection#EFCore#EntityFramework#EntityFrameworkCore#HttpContext#Middleware#Namespace
0 notes
Link

Dependency Injection is a software design pattern in which components are given their dependencies instead of hard coding them within the component. It works well with testing and Single Page Application Design.
0 notes
Text
What is the significance of Java frameworks like Spring in full stack development?
Java frameworks, particularly Spring, play a crucial role in full-stack development by providing a comprehensive set of tools and libraries that simplify the process of building robust, scalable, and maintainable web applications. Here are several key aspects highlighting the significance of Java frameworks like Spring in full-stack development:
Modularity and Reusability:
Spring Modules: Spring is designed as a modular framework with various modules such as Spring Core, Spring MVC, Spring Security, and more. This modularity allows developers to pick and choose the components they need, promoting a modular and reusable codebase.
Dependency Injection (DI):
Inversion of Control (IoC): Spring implements the IoC design pattern through dependency injection. This helps in reducing the coupling between components, making the code more maintainable and testable. Developers can easily manage and inject dependencies into components, promoting a more flexible and scalable architecture.
Aspect-Oriented Programming (AOP):
Cross-Cutting Concerns: Spring provides AOP support, allowing developers to separate cross-cutting concerns (e.g., logging, security, transaction management) from the core business logic. This enhances code modularity and maintainability.
Data Access:
Spring Data: For data access, Spring offers the Spring Data module, which simplifies database operations. It supports various data sources and provides a consistent programming model, reducing boilerplate code and enhancing developer productivity.
Model-View-Controller (MVC):
Spring MVC: For building web applications, Spring MVC offers a powerful and flexible MVC framework. It promotes the separation of concerns between the model, view, and controller, making it easier to manage and maintain the codebase.
Transaction Management:
Declarative Transaction Management: Spring simplifies transaction management through annotations and XML configuration, allowing developers to define transactional behavior declaratively. This helps in maintaining data integrity in complex business operations.
Security:
Spring Security: Security is a critical aspect of web applications. Spring Security provides comprehensive security services for Java EE-based enterprise software applications. It offers features such as authentication, authorization, and protection against common security vulnerabilities.
Integration with Other Technologies:
Integration Capabilities: Spring can be easily integrated with various technologies and frameworks. For example, it can integrate seamlessly with Hibernate for ORM, Apache Camel for integration patterns, and many other third-party libraries, making it versatile for different project requirements.
Testing Support:
Unit Testing: Spring's design principles, such as dependency injection, make it easier to write unit tests for components. Spring's testing support, along with the use of interfaces and abstractions, facilitates the creation of testable and maintainable code.
Community and Ecosystem:
Active Community: Spring has a large and active community of developers, which means that there is extensive documentation, forums, and third-party resources available. This community support is valuable for troubleshooting, learning, and staying updated on best practices.
Java frameworks like Spring not only provide a solid foundation for building applications but also evolve to address emerging challenges and technologies, making them a reliable choice for full-stack development. In summary, Java frameworks like Spring provide a robust foundation for full-stack development by offering modularity, abstraction, and a wide range of features that simplify the development process. They contribute to the creation of scalable, maintainable, and secure applications, making them a preferred choice in the Java ecosystem for building enterprise-level systems.
#magistersign#JavaFrameworks#SpringFramework#FullStackDevelopment#ModularityInCode#DependencyInjection#InversionOfControl#RapidDevelopment#CodeAbstraction#CommunitySupport#SecurityInDevelopment#ScalableApplications#CrossCuttingConcerns#TestingInJava
0 notes
Link
Dependency injection has always been one of Angular’s biggest features and selling points. It allows us to inject dependencies in different components across our applications, without needing to know, how those dependencies are created, or what dependencies they need themselves. However, it turns out that the current dependency injection system in Angular 1.x has some problems that need to be solved in Angular 2.x, in order to build the next generation framework. In this article, we’re going to explore the new dependency injection system for future generations.
0 notes
Photo

#attachment #dependencyinjection #love (at Iowa City, Iowa)
0 notes
Video
youtube
Nestjs Module Tutorial with Example for JavaScript Developers | Global &... Full Video Link - https://youtu.be/ZefUyfLvLRc Check out this new video on the CodeOneDigest YouTube channel! Learn nestjs module with example. Learn how to create module, what is dependency injection #nestjsmodule #nestjs #module #dependencyinjection #nodejs #javascript #codeonedigest @java @awscloud @AWSCloudIndia @YouTube @codeonedigest #typescript #javascript #nestjs #nestjstutorial #javascript #nest #nestjsmicroservices #nestjsproject #nestjsmodules #nestjsmodulereference #nestjsmodulesexplained #dynamicmoduleinnestjs #nestjsmoduleexample #nestjsfulltutorial #nestjscreatemodule #moduleinnestjs #nestjsglobalmodule #nestjsdynamicmodule #nestjssharedmodule #nestjsmoduleexplained #nestjsmoduleexample #nestjsimportmodule #sharedmoduleinnestjs #globalmoduleinnestjs #nestjscourse
1 note
·
View note