#How To Use The macOS Catalina USB Installer
Explore tagged Tumblr posts
Visit Tumblr Blog
Explore Tumblr blogs with no restrictions, modern design and the best experience.
Last Seen Tumblr Blogs


Fun Fact
In Q3 of 2020, 31% of US users access the Tumblr app daily.
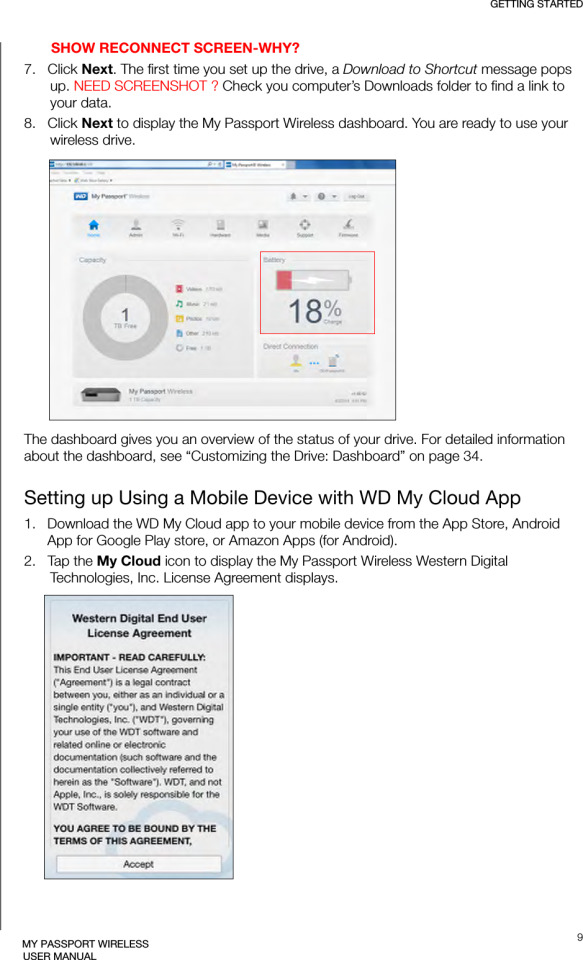
Text
What to Do If You Can’t Find Your UDID on Your iPhone

The Unique Device Identifier (UDID) is a crucial component for developers and those who need to manage apps or configurations on their iPhones. It acts as a distinctive identifier for your device, allowing developers to test and manage apps or even register for certain services. However, if you're having trouble finding your UDID on your iPhone, you're not alone. Many users often find themselves asking, “How to find your iPhone UDID?” especially when they need it for app development or troubleshooting. In this blog, we’ll walk you through several methods to retrieve your UDID, as well as discuss why it's important and what to do if you can’t find it.
Why Do You Need Your UDID?
The UDID is essential for a variety of reasons. For developers, it’s crucial for testing and deploying apps that aren’t yet available in the App Store. This is especially true for those using services like TestFlight, where you need to register your device's UDID to get access to beta versions of apps. Additionally, if you're setting up a device for enterprise management, your UDID may be required to install specific profiles or configurations.
Even if you're not a developer, you might need your UDID for support purposes, or if you're dealing with a technical issue that requires you to share this identifier with Apple Support. Therefore, knowing how to locate your UDID can be incredibly useful.
Common Ways to Find Your iPhone UDID
If you’re wondering “How to find your iPhone UDID?” here are some straightforward methods you can use.
1. Using iTunes (or Finder on macOS Catalina and later)
One of the easiest ways to find your UDID is by using iTunes (or Finder for macOS Catalina and later versions). Follow these steps:
Connect your iPhone to your computer using a USB cable.
Open iTunes (or Finder on macOS Catalina or newer).
Click on the device icon when it appears in iTunes/Finder.
Under the Summary tab, you should see information about your iPhone.
Click on the Serial Number to toggle between various identifiers (e.g., IMEI, ICCID, UDID). Your UDID will now be displayed.
Right-click on the UDID to copy it.
This is the most direct and reliable method to find your UDID.
2. Using Xcode (for Developers)
If you’re a developer, you may also find your UDID through Xcode, which is Apple’s integrated development environment (IDE). Here’s how to do it:
Install Xcode from the Mac App Store if you haven’t already.
Open Xcode and connect your iPhone to the computer.
Go to the Devices and Simulators window (accessible from the Window menu).
Select your device from the list.
Your UDID will appear on the right side of the screen, and you can easily copy it.
This method is particularly useful for developers who need to manage multiple devices and are already familiar with the Xcode environment.
3. Using Third-Party Websites
If you prefer an alternative method or don't have access to iTunes or Xcode, there are third-party websites that can retrieve your UDID for you. Here’s how:
Visit a trusted site that allows you to get your UDID (such as get.udid.io).
Follow the on-screen instructions, which typically require you to install a configuration profile on your iPhone.
Once the profile is installed, visit the site again on your iPhone, and it will display your UDID.
While this method can be convenient, be sure to use reputable websites to avoid any security risks.
4. Using a Mobile Device Management (MDM) Profile
If you’re managing multiple devices or configuring settings for an organization, you might already have an MDM profile installed on your iPhone. Many MDM solutions allow users to easily find their UDID as part of the configuration process.
What If You Can't Find Your UDID?
If you’ve tried the methods above and still can’t locate your UDID, there are a few steps you can take.
1. Check for Connection Issues
Sometimes, the issue may be related to your iPhone’s connection to your computer. Ensure that your iPhone is properly connected via USB and that your computer is recognizing the device. If you're using Finder on macOS Catalina or later, check that Finder is showing your iPhone in the left sidebar. If your device is not recognized, try restarting your iPhone or using a different USB port or cable.
2. Ensure Software is Updated
If you’re using older versions of iTunes or macOS, it might be causing issues in finding your UDID. Make sure that both your iPhone and your computer are running the latest software updates. For instance, macOS Catalina and later versions no longer use iTunes; they use Finder to manage iPhones, and keeping your system up to date will ensure smoother operation.
3. Contact Apple Support
If all else fails, you can always reach out to Apple Support. They can guide you through the process of retrieving your UDID or assist you with any technical difficulties you may be encountering.
Use a Mobile App Cost Calculator to Plan Your Development Budget
If you are a developer and are managing multiple devices or building an app that requires UDID registration, it's essential to plan for the costs associated with iOS development. The use of a mobile app cost calculator can be incredibly helpful. This tool allows you to estimate the cost of building, testing, and maintaining your app based on its features, design, and scope. By using a mobile app cost calculator, you can ensure your project stays within budget while also factoring in the costs of device management and UDID registration.
If you're interested in exploring the benefits of iphone application development services for your business, we encourage you to book an appointment with our team of experts. Book an Appointment
Wrapping Up: The Importance of UDID in iPhone Application Development
In conclusion, finding your UDID may seem like a small task, but it’s an essential part of the app development and management process. Whether you're a developer testing a new app, or you need it for troubleshooting, knowing how to locate your UDID can save you time and effort.
If you’re in need of professional help for your iPhone application, our team offers expert iPhone application development services. We specialize in everything from app design to testing, and we can ensure your UDID management is streamlined and efficient. Our services help ensure that your app is not only functional but also optimized for performance across all devices. Let us help you bring your iOS app to life!
0 notes
Text
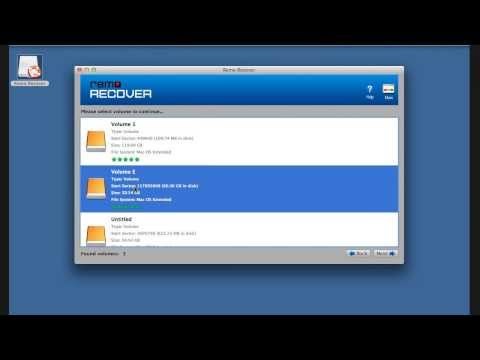
Data recovery software is an application used to recover lost files from a storage medium. It is normal to accidentally delete files or lose them due to a virus attack, hard drive failure, or any other reason. Data recovery software can automatically scan the storage medium and recover the lost files. As you upgrade to Big Sur from Mac, it is essential to learn how to recover your files if you lose them. There is numerous data recovery software available. However, not all are good enough so here is a list of the top five free data recovery software to help Mac users make the best decision. Stella Data Recovery Stella Data recovery is regarded by many as the best data recovery tool in the market. The software is compatible with both internal and external storage, cameras, and even physical media. Stella Data Recovery software can recover lost data from encrypted drives, create a system startup disc, and even clone the entire disc. Apart from Mac, Stella Data Recovery can also be used to recover content for Windows 10. The free version of Stella Recovery Software can recover up to 1 GB of deleted images, videos, and files. Stella Data Recovery software supports exFAT, NTFS, and FAT. For additional features and unlimited data recovery capacity, you can choose to go for a premium version pricing at $80 or professional version pricing at $200. Even though this might not be the cheapest data recovery software in the market, it offers you the best shot of recovering your lost data. Data loss or, be it data theft, can be disastrous. As a Mac owner, you need to know well how to upgrade to Big Sur to optimize device security. Switching to Big Sur should not be the only target for you because the security measures are also equally important. EaseUS Data Recovery Wizard Another top software recovery tool is EaseUS Data Recovery Wizard. The software is compatible with most devices, including macOS, Mojave, Catalina, and Mac OS X. It comes in three versions Free, Technician, and Pro versions, all of which you can use to recover your data successfully. Its users will attest that the software works perfectly well with all types of Mac devices, including SD cards, pen drives, USB flash drives, SSHDs, SSDS, HDDs, and many more. The free edition allows up to 2 GB of data, while the Pro version allows for unlimited data recovery. Data Rescue 5 Data Rescue 5 recovery software has two plans and a free demo, which only scans your computer to find discoverable files but does not recover any lost file. First is the standard plan designed for single computer usage, with the plan costing $99. The professional plan can be used by an unlimited number of computers and cost a one-term yearly payment of $299. The software has a well-designed interface that makes it easy for users to follow the guidelines needed to recover data. One of its most outstanding features is excluding duplicate files by recovery only the lost data that does not exist in your device. Data Rescue 5 installation size is only 15.7 MB so it does not eat much space. Furthermore, its ability to exclude existing files makes it one of the fastest data recovery software in the market. Ontrack EasyRecovery The data recovery software is one of the most effective non-destructive data rescue software. It is technically advanced and is capable of recovering lost documents, formatted as well as inaccessible RAW files on Windows XP/Vista/2003/2008/7/8/10. Compared to other recovery software in the list, Ontrack EasyRecovery is used more for professional purposes. The comprehensive software is incredibly fast and can be used to recover large volumes of data. The data recovery software is compatible with both Windows and macOS. One of the best features about it is that you can start or stop data recovery whenever you feel like it. The free trial version can recover up to 1GB, while the home version, which goes for $79, offers unlimited data recovery and additional core features. For advanced features
like disc cloning or raw recovery, a professional edition that goes for $109 is a good option. Cleverfiles Disk Drill With the ability to protect files, Cleverfiles Disk Drill can protect files. It can effectively act as a secondary recycle bin in your system. When you permanently delete files, the software will help you recover them back without the need to store data in it entirely. Apart from the data recovery function, Disk Drill enables users to analyze disk space to clean the hard drive with its Cleanup feature. Without disregarding its ability to recover your data, Cleverfiles Disk Drill works more like a Mac disk management tool as it can perform disk cleanup, locate duplicate files, and backup data. Conclusion If you are a Mac user and looking to recover lost data, you have no reason to worry. One of the software mentioned above will work along the way to ensure you recover all your lost data. All you need to do is download any of the above software, install it on your device, and start the recovery process.
0 notes
Text
How to Update the Software on Your Used Apple iPhone 12

Keeping your iPhone 12's software up to date is crucial for ensuring optimal performance, security, and access to new features and improvements. Apple regularly releases iOS updates, and each one brings enhancements, bug fixes, and enhanced security measures. Whether you've just acquired a used iPhone 12 or have been using one for a while, this comprehensive guide will walk you through the steps to update the software to the latest version.
Why Software Updates Are Important Before we dive into the update process, let's understand why software updates are vital:
Security: Updates often include important security fixes, protecting your device from vulnerabilities and threats.
Bug Fixes: Updates address known issues and bugs, ensuring a smoother and more stable user experience.
New Features: You'll gain access to new features, improvements, and enhancements introduced by Apple.
App Compatibility: Updates help your iPhone remain compatible with the latest apps and services.
Check for Software Updates To begin the update process, make sure you're connected to a Wi-Fi network (unless you choose to use cellular data, which we'll cover later) and follow these steps:
Unlock your iPhone 12: If your device is locked, unlock it by entering your passcode or using Face ID/Touch ID.
Open the Settings app: Locate the Settings app on your home screen (it's represented by a gear icon) and tap on it to open.
Scroll down and tap "General": In the Settings menu, scroll down until you see "General" and tap on it.
Select "Software Update": Inside the General menu, tap "Software Update." Your iPhone will now check for available updates.
Backup Your iPhone Before Updating Before proceeding with any software update, it's highly recommended to back up your iPhone. Backing up ensures that your data, settings, and apps are safe in case anything goes wrong during the update process. You can back up your iPhone using iCloud or iTunes (on a computer). Here's how:
Backup with iCloud: Connect your iPhone to Wi-Fi.
Open the Settings app.
Tap your Apple ID at the top of the screen.
Tap "iCloud."
Scroll down and tap "iCloud Backup."
Tap "Back Up Now."
Backup with iTunes (macOS Catalina and earlier): Connect your iPhone to your computer using a USB cable.
Open iTunes (or Finder on macOS Catalina).
Click on your iPhone icon when it appears in iTunes or Finder.
In the Summary section, click "Back Up Now."
Updating Your iPhone Over Wi-Fi If there is a software update available for your iPhone 12, you'll see a notification on the "Software Update" screen. Follow these steps to update your iPhone over Wi-Fi:
If an update is available, you'll see a description of the update and an option to "Download and Install." Tap this option.
Enter your passcode if prompted.
Tap "Agree" to the Terms and Conditions.
The download process will begin. The time it takes to download the update depends on your internet connection speed and the size of the update.
Once the download is complete, tap "Install." Your iPhone will restart to complete the installation.
After the restart, you'll be prompted to enter your passcode, and the update will finalize.
Updating Your iPhone Using Cellular Data By default, your iPhone requires a Wi-Fi connection to download software updates to prevent excessive data usage. However, you can enable the use of cellular data for updates if you have a sufficient data plan. Here's how:
Go to Settings.
Scroll down and tap "Cellular."
Scroll down to find "Cellular Data Options" and tap it.
Toggle on "Download Apps" to allow software updates over cellular data.
You'll receive a warning about potential data charges. If you're comfortable with this, tap "Enable."
Now, you can check for and install updates using cellular data by following the earlier steps mentioned in "Check for Software Updates."
Updating Your iPhone with iTunes (if needed) If, for any reason, you encounter issues while updating your iPhone using the standard method, you can update it using iTunes on a computer. Follow these steps:
Ensure that you have the latest version of iTunes installed on your computer.
Connect your iPhone to your computer using a USB cable.
Open iTunes. If it doesn't open automatically, launch it manually.
In iTunes, click on your iPhone icon when it appears in the upper-left corner.
In the left sidebar, click on "Summary."
Click the "Check for Update" button.
If an update is available, click "Download and Update."
Follow the on-screen prompts to complete the update.
Troubleshooting Software Update Issues If you encounter any problems during the software update process, here are some troubleshooting steps:
Check your internet connection: Ensure that your iPhone is connected to a stable Wi-Fi network or that you have a strong cellular data signal.
Restart your iPhone: Sometimes, simply restarting your device can resolve update-related issues.
Clear storage space: Ensure that you have enough available storage space on your iPhone to download and install the update. You can check this in Settings > General > [Device] Storage.
Delete the update: If the update download has stalled or is taking too long, you can delete it by going to Settings > General > [Device] Storage > Software Update. Tap "Delete Update" and then retry the update process.
Check Apple's System Status: Occasionally, Apple's servers may experience issues that affect the update process. You can check the status of Apple's services on the Apple System Status page.
Contact Apple Support: If you're still experiencing problems, consider reaching out to Apple Support for assistance.
What to Do If Your iPhone Doesn't Support the Latest Update As Apple releases new iOS versions, older iPhone models may not support the latest updates due to hardware limitations. If your iPhone 12 does not support the most recent iOS version, you can continue using the current version it is running. While you won't have access to the latest features, your device will still function as usual.
The Benefits of Keeping Your iPhone Up to Date Updating your iPhone 12 to the latest software version offers several benefits:
Enhanced Security: New updates often include security patches that protect your device from vulnerabilities and threats.
Improved Performance: Updates may optimize your iPhone's performance, making it faster and more responsive.
Bug Fixes: Bugs and glitches that were present in previous versions are typically addressed in updates.
New Features: You'll gain access to new features, improvements, and enhancements introduced by Apple.
App Compatibility: Updates help your iPhone remain compatible with the latest apps and services.
Regularly updating your used Apple iPhone 12 to the latest software version is essential for ensuring security, performance, and access to new features. By following the steps outlined in this guide, you can easily check for and install software updates, keeping your iPhone up to date and functioning at its best. Additionally, remember to back up your device before updating to safeguard your data and settings. Keeping your iPhone's software current ensures that you have the latest improvements and security measures, providing you with the best possible mobile experience.
0 notes
Text
How To Create a Bootable macOS Catalina USB Drive
How To Create a Bootable macOS Catalina USB Drive

How To Create a Bootable macOS Catalina USB Drive.
Making a bootable USB installer for the latest macOS Catalina helps in many ways. One of the reasons you might want to do this is because it allows you to perform a completely clean install of the update on your Mac. Other areas where you can use a bootable macOS installer is when you have multiple Macs and want to install the same update on…
View On WordPress
#Create a macOS Catalina USB Installer Using Disk Creator#How To Create a Bootable macOS Catalina USB Drive#How To Use The macOS Catalina USB Installer#Use Terminal To Make A macOS USB Installer
0 notes
Text
Flowermound Texas MacBook MAC OS Reinstall Repair
Flowermound Texas MacBook MAC OS Reinstall Repair
Flowermound Texas MacBook MAC OS Reinstall Repair, Reinstall macOS from the utilities flowermound Texas, Boot into Recovery Mode to Reinstall macOS flower mound Texas, Reinstall Mac OS Using Recovery Mode flower mound Texas, clean install macos catalina flower mound Texas, how to reinstall mac os flower mound Texas, install macos on macbook pro from usb flower mound Texas, reinstall mac os…

View On WordPress
#Boot into Recovery Mode to Reinstall macOS flower mound Texas#clean install macos catalina flower mound Texas#erase and reinstall mac flower mound Texas#how to reinstall mac os flower mound Texas#install macos on macbook pro from usb flower mound Texas#owermound Texas MacBook MAC OS Reinstall Repair#reinstall mac os from usb flower mound Texas#Reinstall Mac OS Using Recovery Mode flower mound Texas#reinstall mac os without disc flower mound Texas#reinstall macos big sur flower mound Texas#Reinstall macOS from the utilities flowermound Texas#reinstall macos without losing data flower mound Texas#restore or reinstall MacOS flowermound Texas
0 notes
Text
On Any Computer, How to Use Your iPad as a Second Monitor

With a Mac running macOS Catalina or later, you may use Sidecar to turn your iPad into a second display, allowing your computer to communicate with your tablet and extend the same desktop environment.
This capability, though, is only available on select Mac and iPad models, which is a shame if you have an older device or a Windows PC. Many business listings on all of the devices that can't run Sidecar, a few third-party apps can assist cover the hole.
Sidecar on macOS is the best option
Sidecar is, without a doubt, the greatest way to turn your iPad into a second display. If you have a Mac and an iPad from the last five years or so, you should give it a shot first. (Skip to the following section if your gadgets are older than that.)
To use your iPad as a display, either connect it to your Mac through USB or turn on Bluetooth, WI-FI, and Handoff if you want to do it wirelessly. On both devices, you must be logged in with the same Apple ID.
Select your iPad from the list by clicking the Airplay button in your Mac's menu bar. The symbol will change, and if you click the business listings menu again, you'll be presented with a variety of options. You can mirror or extend your Mac's display, show or conceal the iPad's Sidebar and Touch Bar, or disconnect your tablet.
Sidecar can be used cable or wirelessly, but if you want to switch between the two, you must utilize the Airplay menu to disconnect and reconnect. It should function wirelessly as long as the iPad is within 10 meters (30 feet) of the Mac, and you can even sign papers and draw in approved apps with your Apple Pencil.
Splash top Wired XDisplay is a low-cost, cross-platform option
If Sidecar isn't compatible with your Mac or iPad or if you use Windows or Android, Splash top Wired XDisplay is a third-party tool that can turn your tablet into a second monitor. It only works when connected by USB.
Splash top Wired XDisplay is made up of two parts free listing: a desktop agent that runs in the background on your PC or Mac and a tablet app for iPadOS or Android.
After you've installed both the desktop and tablet apps, make sure the desktop software is running on your computer, then connect your tablet to your computer via USB cable and activate the XDisplay app. It will connect to your computer and present you with a blank desktop on your tablet. You may rearrange your monitors under the Display settings on your computer, drag windows to your tablet, and otherwise use it as a second monitor to increase productivity.
A stand is recommended to keep your tablet propped up. Something like this works well if you're using it with a laptop, while a more adjustable stand is best for desktop use.
A More Expensive, But Better Option: Duet Display
It has a tablet app that connects to a companion programmed on your computer, similar to Splash top. The desktop app for Duet Display is free, but the iOS and Android apps will cost you. The normal version of the app only works when connected through USB, but it adds a Touch Bar to any Mac, supports iPad keyboards, and gives your Windows or Mac apps on the tablet screen touch control.
After you've installed both the desktop and tablet apps, make sure the Duet Display desktop programmed is running in the background on your computer, then connect your tablet to your computer via USB and activate the Duet Display mobile app. It should immediately connect to your computer, and a desktop should appear, ready to use.
Finally, on your PC, click the Duet Display button to access a few other options, such as the frame rate and resolution your tablet uses. The default settings worked OK for me, but if you're using an older laptop, decreasing the resolution, frame rate, or power usage in this window might help.
If you have a Duet Air subscription, you can connect Duet Display wirelessly by heading to Advanced Settings, clicking the Wireless tab (in Windows) or the Air tab (in Mac) (in macOS). Your tablet should appear in the list, and you can connect to it by clicking on it. (If it doesn't appear, manually connect to it by typing in the IP address of your tablet.)
1 note
·
View note
Text
Cheat Engine For Mac Catalina

Cheat Engine For Mac Catalina
Does Cheat Engine Work On Mac

Cheat Engine The Official Site of Cheat Engine. Posted: Thu Feb 13, 2020 6:01 pm Post subject: Issue using speed hack on macOS Catalina (Beta 7.1) Hello! Currently, it works well on latest Windows 10 as well as Windows 8 and Windows 7. This amazing tool makes it a lot of easier to build a Hackintosh or install macOS /OS X on a Mac from USB drive for system upgrade or repair. Supported Mac operating system dmg files are Mavericks, Yosemite, El Capitan, Sierra, High Sierra, Mojave and Catalina. How to Disable System Integrity Protection (SIP) Since the release of macOS High Sierra, some extensions must be approved for the corresponding applications to work as expected. This includes your.
There are hundreds of keyboard shortcuts for Mac users. There are Mission Control shortcuts, Finder shortcuts, system shortcuts, application shortcuts and more. Many you can find by just looking through the menu bar for that application. You can find system ones by looking in the System Preferences under Keyboard.
Cheat Engine For Mac Catalina
Does Cheat Engine Work On Mac
But some keyboard shortcuts are more useful than others. And some are harder to remember than others. So MacMost has compiled a list of our top “power user” keyboard shortcuts for macOS 10.15 (Catalina). Here they all are on a single PDF page, downloadable and printable: The MacMost macOS Catalina Power User Keyboard Shortcuts. Download it and pass it along!
1 note
·
View note
Text
Avast Antivirus Free Download For Mac Os X

The best free antivirus platforms for Mac in 2021 By Jon Martindale May 1, 2021 If you’re a Mac user, you probably love the sleek desktop experience and how easy it is to use and understand.
Free Mac Antivirus Protection. There's another angle to the variation in Mac antivirus pricing. How about paying nothing at all? Avast Security for Mac, AVG AntiVirus for Mac, Avira Free Antivirus.
Avast Antivirus Free Download For Mac Os X 10 10 Yosemite Download
Avast Antivirus Free Download For Mac Os X El Capitan
Avast Antivirus Free Download For Mac Os X Catalina
Avast Free Antivirus is an antivirus developed for Windows and Mac OS X platforms that not only detects and destroys a wide variety of known viruses, but can also detect traces of the modifications produced by unknown viruses. It integrates fully into your operating system environment, and boasts two types of user interfaces: a simple one for casual users, and an advanced option for expert users. It includes a resident scanner that, once activated, will remain minimized as an icon on your system tray. Each time you run a file or access an application, avast! checks it for possible threats. The program will also keep track of and verify your backed-up data, to make sure that it won't suffer any damage in case your computer is seriously infected. The application is constantly updated to keep it current with the latest threats. And did we mention it's totally free? So what are you waiting for?
Avast Cleanup Premium 2020 (Crack and Key) has an ability to download and install the application of category Antivirus. Avast Cleanup Premium 2020 has latest updated and virus definitions that will protect us from the different attacks like Virus, Trojans, spywares etc. Avast cleanup crack can be downloaded from the link given below i.e. The Avast cleanup Premium 2019 download free. Avast Security for Mac is a free download. Avast Premium Security is licensed for 1, 2, or 3 years for with single or multi-device options (up to 10). The premium version offers a 60-day free trial and a 30-day money-back guarantee. Download Avast for Mac and get: Real-time protection: Blocks malware, spyware, Trojans, and viruses in real-time.


Avira Free Antivirus For Pc
Avast antivirus 2018 free download - Avast Free Antivirus, Avast Mobile Security 2018 - Antivirus & App Lock, Avast Pro Antivirus, and many more programs. Avast swgrootcert for mac.
We design Mac hardware and software with advanced technologies that work together to run apps more securely, protect your data, and help keep you safe on the web. And with macOS Catalina available as a free upgrade, it’s easy to get the most secure version of macOS for your Mac.*
Apple T2 chip. The next generation of security.
USB Drive AntiVirus for Mac OS X: Best alternatives You can use one of these USB Drive AntiVirus for Mac alternatives which were thoughtfully chosen by our editors and user community. Free Mac Security is a program developed for people who wish to prevent unauthorized users from accessing private data, and protect their computers.
The Apple T2 Security Chip — included with many newer Mac models — keeps your Mac safer than ever. The Secure Enclave coprocessor in the Apple T2 chip provides the foundation for Touch ID, secure boot, and encrypted storage capabilities. Touch ID gives you a seamless way to use your fingerprint to unlock your Mac, fill passwords in Safari, and make purchases with Apple Pay. Secure boot helps ensure that you are running trusted operating system software from Apple, while the Apple T2 chip automatically encrypts the data on your Mac. So you can be confident knowing that security has been designed right into the architecture of your Mac, from the ground up.
Avast Antivirus For Mac Os
Even Macs Need Antivirus Protection. The myth that Macs don’t suffer malware attacks has been.
Antivirus for mac 10.7 free download - AVG AntiVirus for Mac, Course For Mac OS X 10.7 101 - Core Lion, Trend Micro Antivirus for Mac, and many more programs.
Just like AVG AntiVirus for Mac, Avast Free Mac Security uses traditional signature-based detection and heuristic monitoring. The software identifies and quarantines not only malware targeting Macs but also Windows malware. According to AV-TEST, Avast Free Mac Security stopped 99.17% of Mac OS X.
Apple helps you keep your Mac secure with software updates.
The best way to keep your Mac secure is to run the latest software. When new updates are available, macOS sends you a notification — or you can opt in to have updates installed automatically when your Mac is not in use. macOS checks for new updates every day, so it’s easy to always have the latest and safest version.
Protection starts at the core.
The technically sophisticated runtime protections in macOS work at the very core of your Mac to keep your system safe from malware. Download ntfs for mac paragon. This starts with state-of-the-art antivirus software built in to block and remove malware. Technologies like XD (execute disable), ASLR (address space layout randomization), and SIP (system integrity protection) make it difficult for malware to do harm, and they ensure that processes with root permission cannot change critical system files.
Download apps safely from the Mac App Store. And the internet.
Avast Antivirus Mac Os X Free Download
Now apps from both the App Store and the internet can be installed worry-free. App Review makes sure each app in the App Store is reviewed before it’s accepted. Gatekeeper on your Mac ensures that all apps from the internet have already been checked by Apple for known malicious code — before you run them the first time. If there’s ever a problem with an app, Apple can quickly stop new installations and even block the app from launching again.
Stay in control of what data apps can access.
Apps need your permission to access files in your Documents, Downloads, and Desktop folders as well as in iCloud Drive and external volumes. And you’ll be prompted before any app can access the camera or mic, capture keyboard activity, or take a photo or video of your screen.
FileVault 2 encrypts your data.

With FileVault 2, your data is safe and secure — even if your Mac falls into the wrong hands. FileVault 2 encrypts the entire drive on your Mac, protecting your data with XTS-AES 128 encryption. And on Mac systems with an Apple T2 Security Chip, FileVault 2 keys are created and protected by the Secure Enclave for even more security.
Avast Free Antivirus For Mac Os X 10.5.8
Designed to protect your privacy.
Avast Antivirus Free Download For Mac Os X 10 10 Yosemite Download
The most secure browser for your Mac is the one that comes with your Mac. Built-in privacy features in Safari, like Intelligent Tracking Prevention, help keep your browsing your business. Automatic strong passwords make it easy to create and use unique passwords for all the sites you visit. And iCloud Keychain syncs those passwords securely across all your devices, so you don’t have to remember them. You can also easily find and upgrade any weak passwords you’ve previously used (and reused and reused and reused).
Automatic protections from harmful sites.

Safari also helps safeguard you against fraudulent websites and those that harbor malware — before you visit them. If a website seems suspicious, Safari prevents it from loading and notifies you. And when connecting to unencrypted sites, Safari will warn you. So everything you need to browse without worry is right at your fingertips.
Find your missing Mac with Find My.
Avast Antivirus Free Download For Mac Os X El Capitan
The Find My app combines Find My iPhone and Find My Friends into a single, easy-to-use app on Mac, iPad, and iPhone. Find My can help you locate a missing Mac — even if it’s offline or sleeping — by sending out Bluetooth signals that can be detected by nearby Apple devices. These devices then relay the detected location of your Mac to iCloud so you can locate it in the Find My app. It’s all anonymous and encrypted end-to-end so no one — including Apple — knows the identity of any reporting device or the location of your Mac. And it all happens silently using tiny bits of data that piggyback on existing network traffic. So there’s no need to worry about your battery life, your data usage, or your privacy being compromised.
Keep your Mac safe. Even if it’s in the wrong hands.
Avast Antivirus Free Download For Mac Os X Catalina
All Mac models with the Apple T2 Security Chip support Activation Lock — just like your iPhone or iPad. So if your Mac is ever misplaced or lost, the only person who can erase and reactivate it is you.
1 note
·
View note
Text
El Capitan 10.11 6 Dmg Google Drive

El Capitan 10.11 6 Dmg Google Drive Windows 10
El Capitan 10.11 6 Dmg Google Drive Free
El Capitan 10.11 6 Dmg Google Drive Mac
Mac Os Dmg Install Mac OS X El Capitan 10.11 ISO / DMG Files Direct Download - ISORIVER. Mac OS X El Capitan: Being the 12th major release of macOS, Mac OS X El Capitan belongs to the Macintosh-Unix family of OS. It was majorly released for server. Keep talking and nobody explodes free download mac. Price Currency: USD Whatsapp for laptop. Mac Os X El Capitan 10.11.6 Google Drive Free. OS X El Capitan Partitioning. With the help of screenshots, I will be explaining some basic set of activities that are to be done while partition the OS X El Capitan drive. Alternatively, the same procedure will be explained with the help of a disk manager utility known as Stellar Partition Manager. Mac OS X El Capitan 10.11.6 Free Download Download Mac OS X El Capitan 10.11.6 latest version DMG bootable image setup by clicking the below button. It is a reliable operating system with support for all the latest devices and different enhancements. Mac OS El Capitan was released to manufacturing on 20th September 2015, almost three and a half years ago. Its latest version 10.11.6 (15G22010) was released on 9th July 2018, almost 7 months ago. This is latest version DMG image iso file OS X El Capitan 10.11.6 (bootable) for Mac users. Mac OS X El Capitan 10.11.6: Product Review: Sep 22, 2016 Unmount the dmg file named “Install macOS Sierra.dmg” (if it is mounted:) Go to the top menu of “Disk Utility” window and select “images” and then “Scan image for restore”.
These advanced steps are primarily for system administrators and others who are familiar with the command line. You don't need a bootable installer to upgrade macOS or reinstall macOS, but it can be useful when you want to install on multiple computers without downloading the installer each time.
MacOS Sierra 10.12 Installation ISO Media. MacOS High Sierra yang saya bagikan melalui link google drive di sini masih versi awal yakni 10.13.1. Sedangkan saat ini yang terbaru sudah sampai 10.13.4. Baiklah langsung saja linknya di bawah ini. Saya pecah menjadi 5 part agar gampang mengunduhnya. Belum sempat unggah yang single link. Tautan Unduhan MacOS High Sierra Google Drive.
Download macOS
Download Mac OS Sierra 10.12.dmg Google Drive Download Mac OS Sierra 10.12.dmg from Torrrent. In this article, you will learn about MacOS High Sierra with its features and I will guide you on how you can download the dmg file for MacOS High Sierra in different ways. So, focus top to toe and read the complete article.
Find the appropriate download link in the upgrade instructions for each macOS version:
macOS Catalina, macOS Mojave, ormacOS High Sierra Installers for each of these macOS versions download directly to your Applications folder as an app named Install macOS Catalina, Install macOS Mojave, or Install macOS High Sierra. If the installer opens after downloading, quit it without continuing installation. Important: To get the correct installer, download from a Mac that is using macOS Sierra 10.12.5 or later, or El Capitan 10.11.6. Enterprise administrators, please download from Apple, not a locally hosted software-update server.
Mac Os Sierra Dmg Torrent
OS X El Capitan El Capitan downloads as a disk image. On a Mac that is compatible with El Capitan, open the disk image and run the installer within, named InstallMacOSX.pkg. It installs an app named Install OS X El Capitan into your Applications folder. You will create the bootable installer from this app, not from the disk image or .pkg installer.
Use the 'createinstallmedia' command in Terminal
Connect the USB flash drive or other volume that you're using for the bootable installer. Make sure that it has at least 12GB of available storage and is formatted as Mac OS Extended.
Open Terminal, which is in the Utilities folder of your Applications folder.
Type or paste one of the following commands in Terminal. These assume that the installer is still in your Applications folder, and MyVolume is the name of the USB flash drive or other volume you're using. If it has a different name, replace MyVolume in these commands with the name of your volume. Catalina:* Mojave:* High Sierra:* El Capitan:
Press Return after typing the command.
When prompted, type your administrator password and press Return again. Terminal doesn't show any characters as you type your password.
When prompted, type Y to confirm that you want to erase the volume, then press Return. Terminal shows the progress as the bootable installer is created.
When Terminal says that it's done, the volume will have the same name as the installer you downloaded, such as Install macOS Catalina. You can now quit Terminal and eject the volume.
El Capitan 10.11 6 Dmg Google Drive Windows 10
* If your Mac is using macOS Sierra or earlier, include the --applicationpath argument, similar to the way this argument is used in the command for El Capitan.
Use the bootable installer
After creating the bootable installer, follow these steps to use it:
Plug the bootable installer into a compatible Mac.
Use Startup Manager or Startup Disk preferences to select the bootable installer as the startup disk, then start up from it. Your Mac will start up to macOS Recovery. Learn about selecting a startup disk, including what to do if your Mac doesn't start up from it.
Choose your language, if prompted.
A bootable installer doesn't download macOS from the Internet, but it does require the Internet to get information specific to your Mac model, such as firmware updates. If you need to connect to a Wi-Fi network, use the Wi-Fi menu in the menu bar.
Select Install macOS (or Install OS X) from the Utilities window, then click Continue and follow the onscreen instructions.
Mac Os Dmg Download
Learn more
For more information about the createinstallmedia command and the arguments that you can use with it, make sure that the macOS installer is in your Applications folder, then enter this path in Terminal:
Catalina:


El Capitan 10.11 6 Dmg Google Drive Free
Mojave:
Download Mac Os High Sierra 10.13.6 Dmg Google Drive
High Sierra:

El Capitan 10.11 6 Dmg Google Drive Mac
Mac Os Dmg File Download

El Capitan:
1 note
·
View note
Text
Macos El Capitan Installer Download
Open the disk image, then open the.pkg installer inside the disk image. It installs an app named Install Version Name. Open that app from your Applications folder to begin installing the operating system. MacOS Sierra 10.12 can upgrade El Capitan, Yosemite, Mavericks, Mountain Lion, or Lion. Here are the instructions. Go to Section 4 and click on Download OS X El Capitan. This downloads InstallMacOSX.dmg to your Downloads folder. The next section can only be done on a mac that is capable of running El Capitan, a mac that came preinstalled with an OS later than El Capitan will refuse to do the next bit. Download: macOS Big Sur, macOS Catalina, macOS Mojave, or macOS High Sierra These download to your Applications folder as an app named Install macOS version name.If the installer opens after downloading, quit it without continuing installation. Sep 30, 2015 OS X El Capitan Installer. Official OS X El Capitan Installer from the Mac App Store. Un-archive the zip archive and you will get the app Installer. A bootable ISO or bootable USB can be made from this installer. Instructions on how to do that are on the Internet/Youtube.
macOS Big Sur elevates the most advanced desktop operating system in the world to a new level of power and beauty. Experience Mac to the fullest with a refined new design. Enjoy the biggest Safari update ever. Discover new features for Maps and Messages. And get even more transparency around your privacy.
Check compatibility
Download Macos El Capitan Installer
macOS Big Sur is compatible with the following computers. If your Mac isn't compatible, you might be able to install an old version of macOS instead.
Mac Os El Capitan 10.11 Download
MacBook introduced in 2015 or later MacBook Air introduced in 2013 or later MacBook Pro introduced in late 2013 or later Mac mini introduced in 2014 or later iMac introduced in 2014 or later iMac Pro Mac Pro introduced in 2013 or later View the complete list of compatible computers.
If upgrading from macOS Sierra or later, your Mac needs 35.5GB of available storage to upgrade. If upgrading from an earlier release, your Mac needs up to 44.5GB of available storage. To upgrade from OS X Mountain Lion, first upgrade to OS X El Capitan, then upgrade to macOS Big Sur.
Download macOS Big Sur
If you're using macOS Mojave or later, get macOS Big Sur via Software Update: Choose Apple menu > System Preferences, then click Software Update.
Or use this link to open the macOS Big Sur page on the App Store: Get macOS Big Sur. Then click the Get button or iCloud download icon.
Install macOS Big Sur
After downloading, the installer opens automatically. Click Continue and follow the onscreen instructions.

Please allow installation to complete without putting your Mac to sleep or closing its lid. During installation, it might restart and show a progress bar or blank screen several times. You might find it easiest to begin installation in the evening so that it can complete overnight, if needed.
El Capitan No Packages
Stay up to date
Bootable El Capitan Installer
After installing macOS Big Sur, you will be notified when updates to macOS Big Sur are available. To check for updates, choose Apple menu > System Preferences, then click Software Update.
1 note
·
View note
Text
Easy Steps to Find Unique Device Identifier (UDID) on iPhone

If you're an iPhone user or a developer working with iOS applications, you may have come across the term "UDID" (Unique Device Identifier). This 40-character string is used to uniquely identify your iPhone, and it can be important for app testing, development, or even troubleshooting. If you're wondering how to find UDID on iPhone, you’re not alone—many iPhone users need this information for a variety of tasks. Whether you're a developer testing apps or you need the UDID for activating beta features or services, this blog will guide you through the steps to find it.
What is a UDID?
The UDID is essentially a unique code assigned to every Apple device, including iPhones, iPads, and iPods. This identifier is used by Apple and developers to uniquely identify a device. In the past, the UDID was used for a variety of purposes, including registering devices for beta testing or app deployment, but due to privacy concerns, Apple has restricted its use in some areas. That said, it’s still an essential piece of information for developers and certain advanced users.
Why Do You Need to Find Your iPhone’s UDID?
There are a variety of scenarios where you might need to find your iPhone's UDID. Some of the common reasons include:
Beta Testing: If you're participating in an iOS app beta program, developers may require your UDID to allow you to install their app.
Device Management: UDID is often used by mobile device management (MDM) tools to register and manage devices in enterprise environments.
App Development: Developers may use UDID to register devices for development and testing of apps that aren't available on the App Store.
No matter your reason, knowing how to find UDID on iPhone is a helpful skill, and the process is simple when you know where to look.
Step-by-Step Guide to Finding Your UDID
There are multiple ways to locate your iPhone’s UDID, and while some are more direct than others, they are all easy to follow. Below are the best methods for finding the UDID on your iPhone.
Method 1: Using iTunes (or Finder on macOS Catalina and later)
If you have a Mac or a Windows computer, you can find your UDID through iTunes (or Finder if you're using macOS Catalina or later). Here’s how:
Connect Your iPhone to Your Computer
Use a USB cable to connect your iPhone to your computer.
Open iTunes or Finder
If you're on a Mac running macOS Mojave or earlier, open iTunes.
If you're on macOS Catalina or later, open Finder.
Locate Your iPhone
In iTunes, click on the small iPhone icon near the top left. In Finder, your iPhone should appear in the sidebar under "Locations."
Access Device Information
Click on the “Summary” tab in iTunes or Finder to view details about your iPhone.
Find the UDID
In iTunes: Click on the “Serial Number” field, and it will change to show your UDID.
In Finder: You may need to click on the "Identifier" option under your device information to reveal your UDID.
Copy the UDID
Once the UDID is displayed, you can copy it by right-clicking and selecting "Copy."
Method 2: Using Xcode (For Developers)
If you're an iOS developer or have Xcode installed on your Mac, you can find your UDID through this Apple development tool. Here’s how:
Install and Open Xcode
If you don’t have Xcode, you can download it from the Mac App Store. Once installed, launch the app.
Connect Your iPhone
Connect your iPhone to your Mac using a USB cable.
Open Devices and Simulators Window
In Xcode, click on "Window" in the top menu, then choose "Devices and Simulators."
Select Your iPhone
Your connected iPhone should appear in the Devices list. Click on it.
Locate the UDID
In the Device Information section, you’ll see the UDID listed as "Identifier." You can copy it by right-clicking and selecting "Copy."
Method 3: Using Third-Party Tools (For Quick Access)
If you’re looking for a quick and easy method, third-party tools and online services allow you to find your iPhone’s UDID without needing a computer. Websites like UDID.io can help you quickly retrieve your UDID with just a few steps:
Open Safari on Your iPhone
Go to a site like UDID.io.
Install the Profile
The site will prompt you to install a configuration profile on your iPhone. Follow the on-screen instructions to install the profile.
Find Your UDID
Once the profile is installed, the site will automatically detect and display your UDID. You can then copy it and use it as needed.
What to Do with Your UDID?
Once you have your UDID, there are several things you can do with it:
Beta App Installation: If you’re participating in a beta program, developers will often ask you to send your UDID so they can register your device for the beta app.
Device Registration for Development: Developers may use your UDID to register your iPhone for testing apps during development.
iOS Device Management: Some organizations use UDIDs for managing iPhones within their enterprise networks, particularly for apps that are not available in the App Store.
Protecting Your UDID
While the UDID is not inherently sensitive information, it’s still essential to protect it, as it can be used to track your device or access certain features without your consent. Always make sure you share your UDID only with trusted developers or services that require it for legitimate purposes.
How to Find Device ID on iPhone
Now that you know how to find UDID on iPhone, it’s also helpful to understand the concept of the "device ID." Your device ID is a similar identifier, but it may refer to different things depending on the context—such as the serial number or the IMEI. If you need to find the device ID on your iPhone for a specific purpose, you can follow similar steps to those outlined above to locate it via iTunes, Finder, or Xcode.
In conclusion, knowing how to find UDID on iPhone is an essential skill for developers, testers, and users participating in beta programs. With these simple methods, you can easily locate the UDID on your iPhone. Whether you’re managing devices or testing apps, your UDID is an important tool to have on hand. Don’t hesitate to use these steps next time you need it!
0 notes
Text
Catalina Bootable Drive

What’s needed for a clean install on a Mac
Catalina Bootable Disk
Macos Catalina Bootable Usb Drive
Catalina Bootable Disk
A backup of the disk before it’s erased. Two options are to use Duplicate (a free utility which can copy and paste an entire bootable volume), or Mac Backup Guru (a paid, fully featured backup utility with unique incremental backups capability) for that. Here is a detailed guide for the process.
A Mac operating system installer. MacOS Big Sur can be downloaded by clicking here.
If you need to recover deleted files take a look at Mac Data Recovery Guru on our sister-site dedicated to data recovery.
Paypal / credit card donations: click here Bitcoin donations: 1MbwUFSbQvMrd826DTpup7PpTTNrrJjaJ8

Macos Catalina Bootable Usb Drive
Create a macOS Catalina bootable USB drive using this handy guide. The USB drive can be used to upgrade a Mac, clean install macOS or for recovery purposes.
Total downloads: 1,678,418 Total donated: $33.99
Discover how to clean install macOS Catalina on your MacBook from a Bootable USB Drive.Part 1 - Flash Drive on Amazon 2 - Bootab. Plug the bootable installer into a Mac that is connected to the internet and compatible with the version of macOS you're installing. Turn on your Mac and continue to hold the power button until you see the startup options window, which shows your bootable volumes. Select the volume containing the bootable installer, then click Continue. Follow the below steps in order to create a bootable macOS Catalina USB Drive. Format your USB Drive:. Connect your USB drive to the USB port of your computer. Press Command+ Space to launch spotlight, type in ‘Disk Utility,” and press the return to launch the app. Search for your USB drive under the sidebar of the Disk utility app.
1 note
·
View note
Text
Olarila Catalina
Olarila Catalina Torrent
Olarila Catalina
OLARILA? THE REAL VANILLA HACKINTOSH!!
Upgrade macOS Catalina — The correct way to u. Olarila - Easiest way to install vanilla hack. PLEASE SUBSCRIBE THIS CHANNEL. THANK YOU:)In this video I wanna show you how to install something after installing Hackintosh Catalina.All files that you ne. I originally used Olarila Intel chipset 300-400 series desktop as boot USB (strangely the 300 series notebook. 10 beliebte Catalina dp im Vergleich 06/. Tried to boot from Olarila Sierra Installer USB. Does macOS Catalina support iPod Classic Syncing with iTunes? Dell DW1830 BCM943602BAED quesitons. Author: /u/Rohan200220. link comments Source Send feedback.
Before installing, it is good for you to read this post, so that there will be no trouble for you in getting started and there will be no risk of losing even a single bit of your data: READ NOW
Olarila is the real vanilla hackintosh, for more information on Olarila you can head over to their website olarila.com.
Which BIOS should I have? UEFI bios, Legacy might not work.
What is the size of your ESP? You need to have an ESP of at least 200MB size.
Specs of your processor. Your processor needs to support SSE 4.1.
Which partiton style are you using? You need to have GPT.
After that you can start the process, but make sure you check these four important steps mentioned above before getting so far:

Increasing the size of EFI partition is really important. by default, windows has an ESP (EFI SYSTEM PARTITION) of 100MBs, whereas disk utility requires you to have at least 200MBs of ESP. So if you will not increase the size, then Disk Utility will raise an error MEDIAKIT REPORTS NOT ENOUGH STORAGE FOR CURRENT OPERATION, and it will damage your ESP and you will not be able to boot back into windows until you repair the ESP.
So, after doing these processes, its time for downloading!
***DOWNLOADS***
Olarila Catalina Torrent
DOWNLOAD Catalina Image from HACKINTOSH page - CLICK HERE DOWNLOAD BALENA ETCHER CLICK HERE

After downloading the files create a bootable flashdrive and boot into the it to open clover and start the installation.
PLEASE WATCH THE FULL TUTORIAL BELOW TO AVOID ANY ISSUE:
Olarila Catalina
HACKINTOSH FIXES
1 note
·
View note
Text
Os El Capitan Installer

Mac OS El Capitan Installer by Apple Inc. Publication date 2020-01 Topics Software, Mac OS, Apple, inc. I am uploading Mac OS El Capitan that I downloaded off of. The El Capitan installer is downloaded to the /Applications folder, with the file name 'Install OS X El Capitan.' If you've installed El Capitan and want to create a bootable installer, re-download the installer from Apple. First, the OS X installer should run automatically, but if not then you can try running it manually: Go to the Applications folder. Open the program called “Install OS X El Capitan”. Follow the on-screen instructions. If this program is missing or will not run, then move it to the trash and empty the trash, followed by re-downloading it.
Load the installer until you can go to the utilities and run disk utility. Erase the disk as Mac os extended (Journaled) Close disk utility. Open terminal and use the same method as shown in the video with mid 2017 date. Shutdown laptop and reset SMC. Restart the installer and try to install El Capitan. Once you’ve done that, here’s how to install, reinstall, or upgrade to El Capitan, step by step: Boot from your Recovery HD partition by restarting your Mac while holding down the Command+R keys. The OS X Utilities window appears. Select Reinstall OS X, and click Continue. The OS X El Capitan splash screen appears.

These advanced steps are primarily for system administrators and others who are familiar with the command line. You don't need a bootable installer to upgrade macOS or reinstall macOS, but it can be useful when you want to install on multiple computers without downloading the installer each time.
What you need to create a bootable installer
A USB flash drive or other secondary volume formatted as Mac OS Extended, with at least 14GB of available storage
A downloaded installer for macOS Big Sur, Catalina, Mojave, High Sierra, or El Capitan
Download macOS
Download: macOS Big Sur, macOS Catalina, macOS Mojave, or macOS High Sierra These download to your Applications folder as an app named Install macOS (version name). If the installer opens after downloading, quit it without continuing installation. To get the correct installer, download from a Mac that is using macOS Sierra 10.12.5 or later, or El Capitan 10.11.6. Enterprise administrators, please download from Apple, not a locally hosted software-update server.
Download: OS X El Capitan This downloads as a disk image named InstallMacOSX.dmg. On a Mac that is compatible with El Capitan, open the disk image and run the installer within, named InstallMacOSX.pkg. It installs an app named Install OS X El Capitan into your Applications folder. You will create the bootable installer from this app, not from the disk image or .pkg installer.
Use the 'createinstallmedia' command in Terminal
Connect the USB flash drive or other volume that you're using for the bootable installer.
Open Terminal, which is in the Utilities folder of your Applications folder.
Type or paste one of the following commands in Terminal. These assume that the installer is in your Applications folder, and MyVolume is the name of the USB flash drive or other volume you're using. If it has a different name, replace MyVolume in these commands with the name of your volume.
Big Sur:*
Download El Capitan
Catalina:*
Mojave:*
High Sierra:*
El Capitan:
* If your Mac is using macOS Sierra or earlier, include the --applicationpath argument and installer path, similar to the way this is done in the command for El Capitan.
After typing the command:
Press Return to enter the command.
When prompted, type your administrator password and press Return again. Terminal doesn't show any characters as you type your password.
When prompted, type Y to confirm that you want to erase the volume, then press Return. Terminal shows the progress as the volume is erased.
After the volume is erased, you may see an alert that Terminal would like to access files on a removable volume. Click OK to allow the copy to proceed.
When Terminal says that it's done, the volume will have the same name as the installer you downloaded, such as Install macOS Big Sur. You can now quit Terminal and eject the volume.
Use the bootable installer
Determine whether you're using a Mac with Apple silicon, then follow the appropriate steps:
Apple silicon
Plug the bootable installer into a Mac that is connected to the internet and compatible with the version of macOS you're installing.
Turn on your Mac and continue to hold the power button until you see the startup options window, which shows your bootable volumes.
Select the volume containing the bootable installer, then click Continue.
When the macOS installer opens, follow the onscreen instructions.
Mac Os El Capitan Installer Download
Intel processor
Plug the bootable installer into a Mac that is connected to the internet and compatible with the version of macOS you're installing.
Press and hold the Option (Alt) ⌥ key immediately after turning on or restarting your Mac.
Release the Option key when you see a dark screen showing your bootable volumes.
Select the volume containing the bootable installer. Then click the up arrow or press Return. If you can't start up from the bootable installer, make sure that the External Boot setting in Startup Security Utility is set to allow booting from external media.
Choose your language, if prompted.
Select Install macOS (or Install OS X) from the Utilities window, then click Continue and follow the onscreen instructions.
Learn more
A bootable installer doesn't download macOS from the internet, but it does require an internet connection to get firmware and other information specific to the Mac model.
Os X El Capitan Installer App

Os El Capitan Problems
For information about the createinstallmedia command and the arguments you can use with it, make sure that the macOS installer is in your Applications folder, then enter the appropriate path in Terminal:
1 note
·
View note
Text
El Capitan Image Download

OS X El Capitan Installer. Official OS X El Capitan Installer from the Mac App Store. Un-archive the zip archive and you will get the app Installer. A bootable ISO or bootable USB can be made from this installer. Instructions on how to do that are on the Internet/Youtube. This free download of Un Capitan is usually a standalone Drive Image InstallESD DMG installer for Macs based desktop computers and web servers. Mac OS A Un Capitan 10.11.6 Review Macintosh OS Back button Un Capitan 10.11.6 had been launched in 2015, the simple objective of this discharge is definitely to offer better security, performance,. Apt-get For Mac Os X Terminal. Os X El Capitan Download. Download Mac Os X El Capitan Iso For Virtualbox Windows 10. How to download the MAC OS X EL Capitan ISO– As we all know that Mac OS of Apple is the premium Operating System having the most optimum technology.I always prefer Mac over windows just because of its fast and smooth. Download the El Capitan installer and Diskmaker X. Insert an 8GB (or larger) flash drive. If you have any other data on that flash drive, back it up now, because the installer will delete.
El Capitan Image File Download
Image Downloader
To get the latest features and maintain the security, stability, compatibility, and performance of your Mac, it's important to keep your software up to date. Apple recommends that you always use the latest macOS that is compatible with your Mac.
Learn how to upgrade to macOS Big Sur, the latest version of macOS.
Check compatibility

The version of macOS that came with your Mac is the earliest version it can use. For example, if your Mac came with macOS Big Sur, it will not accept installation of macOS Catalina or earlier.
If a macOS can't be used on your Mac, the App Store or installer will let you know. For example, it might say that it's not compatible with this device or is too old to be opened on this version of macOS. To confirm compatibility before downloading, check the minimum hardware requirements:
macOS Catalina 10.15 hardware requirements
macOS Mojave 10.14 hardware requirements
macOS High Sierra 10.13 hardware requirements
macOS Sierra 10.12 hardware requirements
OS X El Capitan 10.11 hardware requirements
OS X Yosemite 10.10 hardware requirements
Download macOS using Safari on your Mac
Safari uses these links to find the old installers in the App Store. After downloading from the App Store, the installer opens automatically.
macOS Catalina 10.15 can upgrade Mojave, High Sierra, Sierra, El Capitan, Yosemite, Mavericks
macOS Mojave 10.14 can upgrade High Sierra, Sierra, El Capitan, Yosemite, Mavericks, Mountain Lion
macOS High Sierra 10.13 can upgrade Sierra, El Capitan, Yosemite, Mavericks, Mountain Lion
El Capitan Image File Download
Safari downloads the following older installers as a disk image named InstallOS.dmg or InstallMacOSX.dmg. Open the disk image, then open the .pkg installer inside the disk image. It installs an app named Install (Version Name). Open that app from your Applications folder to begin installing the operating system.
Image Downloader
macOS Sierra 10.12 can upgrade El Capitan, Yosemite, Mavericks, Mountain Lion, or Lion
OS X El Capitan 10.11 can upgrade Yosemite, Mavericks, Mountain Lion, Lion, or Snow Leopard
OS X Yosemite 10.10can upgrade Mavericks, Mountain Lion, Lion, or Snow Leopard
1 note
·
View note
Text
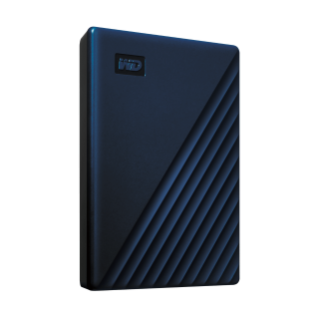
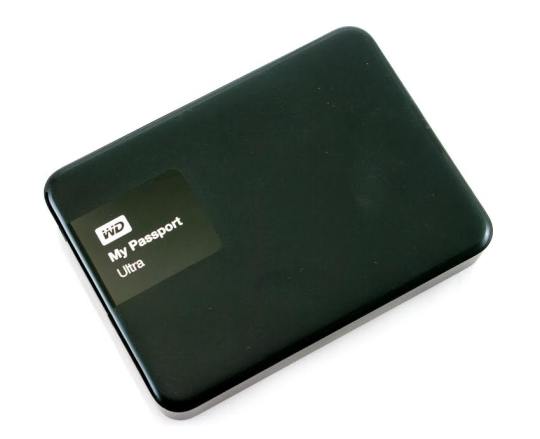
Wd My Passport Ultra Software Download Mac

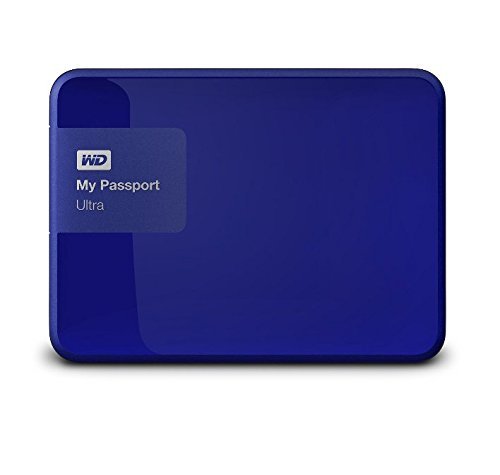
I have eventually got my personal mac, the problem is I have a WD My Passport portable HD, with all my art, photos, and data I had done with the PC. I wish to copy files from my mac to the drive, it wont allow me. But when I open and copy files from the drive to the mac it works. How do I fix this without formatting the drive?
Summary: Have you received the error: 'The disk you inserted was not readable by this computer' on Mac? Don't worry, this article will focus on how to fix WD My Passport is corrupted or unreadable on Mac. To avoid the loss of important data, you'd better recover lost data from the unreadable WD My Passport with iBoysoft Data Recovery for Mac.
WD My Passport external hard drive is able to work on Mac and Windows for data transferring or backup. It is popular for its auto backup and passport protection features, keeping your files and folders safe. However, there are times that the WD My Passport becomes unreadable or corrupted on Mac. You may be greeted with errors like 'The disk you inserted was not readable by this computer', which prevents you from accessing all data stored on the drive.
Dec 04, 2018 Another difference is My Passport Ultra is USB-C ready, USB 3.0 compatible and formatted for Windows 10 to with plug-and-play storage out of the box. It also includes with NTFS driver for macOS so you can work on macOS operating system without reformatting. While you have to reformat My Passport into compatible file format in order to use it on.
My Passport; My Cloud Home; My Cloud; My Book; Internal Drives / SSDs; WD Elements / WD easystore; Embedded & Removable Flash; WD ReadyView; Legacy & Other Products; Downloads WD Software; Product Firmware; Product Downloads; Warranty & Returns Warranty Services; Warranty Policy; Data Recovery; Shipping Addresses.
List of all WD firmware and software available for download.
It's so frustrating when you meet this issue. If you are struggling to solve this issue, you will find a collection of verified troubleshooting steps.
Table of contents
1. Causes of WD My Passport not readable on Mac error
2. How to fix 'WD My Passport unreadable' on Mac error?
3. Conclusion
Note: If you received the disk not readable error with three options: Initialize, Ignore and Eject, please don't select 'Initialize'. Initializing the drive will erase all of the data that is currently sitting on the drive, which makes it difficult to recover lost data.
Causes of WD My Passport not readable on Mac error
Let's at first take a look at the complaint from community.wd.com:
'My WD My Passport 2TB Portable External Hard Drive has suddenly become unreadable on my laptop (MacBook Pro Server with macOS 10.12 Sierra) and I have tried on a MacBook Pro 2011 running 10.13 High Sierra with the same results. Any suggestions to fix my unreadable WD drive?'
The good news is, even though you have been prompted with an error message, at least your WD My Passport drive is recognized. There are many reasons that can lead to a drive not being readable, but essentially this is because the internal file system is damaged. Some of the possible reasons for this error are described as follow:
Mac malfunctions
Outdated drivers
Faulty connections
Write-protected drive
The WD My Passport is not formatted
An internal file system error or bad sectors
Virus/malware infection to your WD My Passport
Incompatibility issue between your WD My Passport and Mac machine
Accidental interruption or removal of your WD My Passport during transferring data
How to fix 'WD My Passport unreadable' on Mac error?
In most cases, the issue can be repaired with a simple initialize. But this operation will remove all data stored on this drive. Are there any other ways to fix WD My Passport unreadable issue on Mac? Of course, just try these solutions one by one:
Solution 1: Re-insert the WD My Passport
The first and foremost thing is to remove the WD My Passport safely from Mac and then re-plug it into the USB port properly. If the external hard drive mounts and appears on the left sidebar of Finder, then you can access the drive. However, if the WD drive still won't mount or the error persists, continue with the next method below.
Solution 2: Check the Mac computer
The next step is to check whether your Mac machine has a problem or not. Just connect a different storage device to your Mac. If this error still pops up, the problem may refer to your Mac machine, you can restart your Mac to see if everything works well. Otherwise, if you can see the other drive in Finder, the problem is associated with the previous WD My Passport.
Solution 3: Check if the WD My Passport is encrypted
The WD My Passport for Mac corrupted or readable issue can also happen if the drive is encrypted by BitLocker. By default, the Mac computers cannot recognize a BitLocker encrypted drive, which means you are unable to read or write BitLocker encrypted drive on Mac.
You can insert the drive in a PC and then turn off the BitLocker encryption so that it can be read on Mac. In addition, you can access a BitLocker encrypted drive with the help of a third party tool.
Solution 4: Update Mac drivers
Drivers enable one or more hardware devices to communicate with the computer's operating system. If drivers are out-of-date, a variety of issues will happen such as the disk not readable error. Apple handles all system and driver updates for your system. To check if any updates are available, please do the following:
Step 1: Go to Apple menu and select 'App Store'.
Step 2: Click on the 'Updates' button located on the top pane.
Step 3: Check available updates for your system and applications.
Solution 5: Repair the WD My Passport in Disk utility
Disk Utility is a built-in used to erase, format or manage internal disks and external storage devices. The most important feature of Disk Utility is First Aid, which helps detect and repair any issue with your disk. Here is how to run First Aid on your Mac to repair the unreadable WD My Passport:
Step 1: Open Disk Utility from your /Applications/Utilities folder.
Step 2: Select the unreadable WD My Passport in the left side bar.
Step 3: Select the 'First Aid' tab.
If Disk Utility tells you the disk is about to fail, back up your data and replace the disk. You can't repair the disk. Otherwise, continue to step 4.
Step 4: Click Run.
If Disk Utility reports that the disk appears to be OK or has been repaired, you're done. Otherwise, you have to back up as much of your data as possible.
Solution 6: Recover lost data and erase the WD My Passport
If the error still exists, you have no choice but erase the WD My Passport. But keep in mind that you will lose all data store on this disk. If you didn't back up important data, you should get lost data back with free Online data recovery software at first.
Step 1: Recover lost data from the unreadable WD My Password on Mac
If you are not sure which data recovery tool you can trust, iBoysoft Data Recovery for Mac is highly recommended to recover lost data from the unreadable or corrupted WD My Passport. This free Mac data recovery can scan and recover lost data from unreadable SD cards, internal Macintosh hard drives, external hard drives, USB flash drives, etc. iBoysoft Data Recovery for Mac provides a complete Mac data recovery solution even if your Mac won't boot/turn on, your device is failing, inaccessible or has lost a partition.
Moreover, iBoysoft Data Recovery for Mac can also recover recently or permanently deleted files, recover lost data from formatted hard drives, recover lost data from unmountable hard drives, and recover lost data from inaccessible drives, etc. This software supports recovering documents, photos, videos, emails, and music files. It's fully compatible with macOS Big Sur 11/Catalina 10.15/Mojave 10.14/High Sierra 10.13/Sierra 10.12 and Mac OS X 10.11/10.10/10.9/10.8/10.7.
1. Download and install iBoysoft Data Recovery for Mac on Mac.
2. Launch iBoysoft Data Recovery for Mac.
3. Select the unreadable WD My Passport and click 'Next' to search for lost files.
4. Preview the searching results, choose those you want and click 'Recover' to get them back.
5. Go over to ensure all lost files have been successfully restored.
Step 2: Erase the unreadable WD My Password in Disk Utility
After you get files off the WD My passport hard drive, you are safe to erase this external hard drive to make it work again. Reformatting will fix the unreadable error and the drive can be ready to use. Then you can copy the recovered data back.
• How to format external hard drive on Mac?
Solution 7: Ask data recovery service for help
However, if the solutions above don't fix the WD My Passport unreadable issue for you, or your WD My Passport even won't show up on Mac, it's probably the drive has been physically damaged. In that case, you should send it to a local data recovery service or replace it with a new one.
Wd My Passport Ultra Software
Wd My Passport Ultra Software Download Mac Version
Conclusion
Wd Passport Ultra Software Download
Hope these solutions have helped you fix the WD My Passport corrupted or unreadable issue. If you have any question about this article, stay in touch with us for further assistance. Specifically, we'd love to hear if you have other solutions for this issue.
1 note
·
View note