#How to insert or Adding image using img tag with all attributes in HTML ...
Explore tagged Tumblr posts
Visit Tumblr Blog
Explore Tumblr blogs with no restrictions, modern design and the best experience.
Last Seen Tumblr Blogs


Fun Fact
BuzzFeed published a report claiming that Tumblr was utilized as a distribution channel for Russian agents to influence American voting habits during the 2016 presidential election in Feb 2018.
Text
Updating HTML Websites: A Beginner's Guide
Maintaining a current and engaging website is essential for any online presence, but updating an HTML website can feel daunting for beginners. The good news is that even non-technical users can make meaningful updates with a few basic steps. This guide will walk you through how to update my HTML website easily, covering everything from understanding the basics of HTML to making content and SEO adjustments to keep your site relevant and optimized.

Understanding HTML Basics
Before diving into updates, it's essential to familiarize yourself with the structure of HTML (HyperText Markup Language). HTML serves as the backbone of your website, and understanding a few key elements will make editing much easier.
Tags and Elements: HTML uses tags to define elements on a page. Common examples include:
: Denotes a paragraph of text.
to : Headings, with being the largest and the smallest.
: Creates hyperlinks.
: Embeds images.
Structure: HTML pages are typically structured with a section (containing meta information) and a section (containing visible content).
For beginners, recognizing these essential components will help you confidently identify and edit the right sections of your website.
Using the Right Tools
Editing HTML code doesn't require sophisticated software. There are several beginner-friendly tools available to make the process more intuitive:
Notepad++: A free text editor that supports syntax highlighting, making it easier to spot tags and errors.
Visual Studio Code: A versatile editor with features like autocomplete and extensions to streamline coding tasks.
Sublime Text: Known for its simplicity and efficiency, it is perfect for lightweight HTML editing.
These tools help you locate specific lines of code and preview changes before they go live, reducing the risk of mistakes.
Updating Text and Images
One of the most common updates to an HTML website involves changing text or replacing outdated images. Once you locate the right section in the code, these edits are straightforward.
Editing Text:
Open your HTML file in your chosen editor.
Locate the or tags containing the text you want to update.
Replace the text between the opening and closing tags.
html
<p>Welcome to our website!</p>
Change to:
html
<p>Welcome to our newly updated website!</p>
Replacing Images:
Locate the tag in the HTML code.
Update the src attribute to point to the new image file.
html
<img src="old-image.jpg" alt="Old Image">
Change to:
html
<img src="new-image.jpg" alt="Updated Image">
These simple edits ensure your content stays relevant and visually appealing.
Adding or Modifying Links
Links are critical to website navigation. Updating outdated links or adding new ones is another beginner-friendly task.
Modifying Existing Links:
Look for the tag in your code.
Update the URL within the quotation marks.
html
<a href="http://oldsite.com">Visit Us</a>
Change to:
html
<a href="http://newsite.com">Visit Us</a>
Adding New Links:
Insert a new tag in the desired location within your code.
html
<p>Check out our <a href="http://newblog.com">latest blog post</a>.</p>
Regularly checking and updating links ensures a seamless user experience and avoids the frustration of broken links.
Basic SEO Edits
Improving your website's visibility on search engines doesn't require an SEO expert. Minor tweaks to meta tags and content can make a big difference.
Update Meta Tags:
Locate the tags in your HTML file's section.
Update the name and content attributes to reflect relevant keywords.
html
<meta name= "description" content=" Learn how to update my HTML website easily with this beginner-friendly guide.">
Add Alt Text for Images:
Ensure all tags include a descriptive alt attribute.
html
<img src="product.jpg" alt="High-quality product image">
Refresh Titles:
Update the tag in the <head> section to match current content.
html
<title>Beginner's Guide to HTML Updates</title>
By making these simple adjustments, you can improve your site's ranking and accessibility.
Testing and Saving Changes
Before publishing updates, previewing your changes and testing for accuracy is crucial.
Preview in Browser:
Save your updated HTML file and open it in a web browser to check how it looks and functions.
Test all links and interactive elements to ensure they work correctly.
Backup Your Original File:
Always create a backup of your original HTML file before making changes. This allows you to revert to the previous version if something goes wrong.
Publish Updates:
Once satisfied with the changes, upload the updated HTML file to your hosting server using tools like FileZilla or your hosting provider’s file manager.
This careful approach minimizes errors and ensures a smooth user experience.
Taking Control of Your Website
Learning how to update my HTML website easily empowers beginners to maintain their sites confidently. Whether updating text, enhancing SEO, or replacing visuals, mastering these basics keeps your site fresh and relevant. With regular practice and the right tools, you can transform your website into a dynamic platform that meets your goals and engages your audience.
Take the first step today, and see how minor, consistent updates can make a big difference in your online presence!
0 notes
Text
HTML for Beginners: An Introduction to Web Development
Are you new to the world of web development and curious about how websites are created? Look no further! This comprehensive guide on HTML (Hypertext Markup Language) is designed specifically for beginners like you. In this blog, we'll take you through the fundamental concepts of HTML and provide you with a solid foundation to start building your own web pages. Let's dive in!
What is HTML?
HTML is the backbone of the internet - it stands for Hypertext Markup Language and is used to create the structure and content of websites. It uses a series of tags, enclosed within angle brackets, to define the elements of a webpage. These elements can be headings, paragraphs, images, links, forms, and more. Web browsers understand these tags and use them to display web content correctly.
Setting Up Your Environment
Before you start coding in HTML, you need a text editor and a web browser. Don't worry; these are readily available and often come pre-installed on your computer. Some popular text editors are Notepad++ (for Windows), Visual Studio Code (for all platforms), and Sublime Text. For web browsers, you can use Google Chrome, Mozilla Firefox, or Microsoft Edge.
Creating Your First HTML Document
To get started, open your preferred text editor and create a new file. Save it with the ".html" extension. Now, let's write our first HTML document:

Understanding the Structure
In the above code snippet, we have a basic HTML structure. Let's break it down:
- <!DOCTYPE html>: This declaration specifies the version of HTML being used, which is HTML5 in this case.
- <html>: The root element of an HTML document. Everything in your document will be contained within this tag.
- <head>: This section contains meta-information about the webpage, such as the title, character encoding, and links to external resources like CSS and JavaScript files.
- <title>: This tag sets the title of the webpage, which appears on the browser's tab or window title bar.
- <body>: The main content of your webpage resides within this tag. Here, you can add headings, paragraphs, images, and other elements.
Working with Text and Headings
HTML provides six levels of headings, ranging from `<h1>` to `<h6>`. `<h1>` is the highest level and represents the main heading of your page, while `<h6>` is the lowest level and represents the least important heading. Use headings to structure your content and provide hierarchy.
Creating Paragraphs and Line Breaks
To create paragraphs, simply use the `<p>` tag:

To insert line breaks within a paragraph, use the `<br>` tag:

Adding Images:
Images are an essential part of most webpages. To include an image in your HTML document, use the `<img>` tag:

In this example, replace "image.jpg" with the actual file path or URL of your image. The `alt` attribute provides a text description of the image for accessibility and SEO purposes.
Creating Links
Links are used to navigate between webpages or resources. To create a hyperlink, use the `<a>` tag:

Replace the URL inside the `href` attribute with the destination URL you want the link to point to.
Adding Lists
HTML supports both ordered (numbered) and unordered (bulleted) lists. For an ordered list, use the `<ol>` tag, and for an unordered list, use the `<ul>` tag. Each list item should be placed inside the `<li>` (list item) tags.

Creating Forms
Forms are essential for collecting user data. The `<form>` tag is used to create a form, and the `<input>` tag is used for input fields. Let's create a simple form with a text input and a submit button:

Conclusion
Congratulations! You've taken your first steps into the world of HTML. With this foundation, you can start creating your own web pages and explore the endless possibilities of web development. Remember that HTML is just one part of web development, and there's a lot more to learn, such as CSS (Cascading Style Sheets) for styling and JavaScript for adding interactivity.
As you continue your web development journey, keep practicing, experimenting, and seeking new challenges. The web is constantly evolving, and there's always something new to learn. Good luck, and happy coding!
I hope this helps. If it did like the post and comment on it
0 notes
Text
20 years a blogger

It's been twenty years, to the day, since I published my first blog-post.
I'm a blogger.
Blogging - publicly breaking down the things that seem significant, then synthesizing them in longer pieces - is the defining activity of my days.
https://boingboing.net/2001/01/13/hey-mark-made-me-a.html
Over the years, I've been lauded, threatened, sued (more than once). I've met many people who read my work and have made connections with many more whose work I wrote about. Combing through my old posts every morning is a journey through my intellectual development.
It's been almost exactly a year I left Boing Boing, after 19 years. It wasn't planned, and it wasn't fun, but it was definitely time. I still own a chunk of the business and wish them well. But after 19 years, it was time for a change.
A few weeks after I quit Boing Boing, I started a solo project. It's called Pluralistic: it's a blog that is published simultaneously on Twitter, Mastodon, Tumblr, a newsletter and the web. It's got no tracking or ads. Here's the very first edition:
https://pluralistic.net/2020/02/19/pluralist-19-feb-2020/
I don't often do "process posts" but this merits it. Here's how I built Pluralistic and here's how it works today, after nearly a year.
I get up at 5AM and make coffee. Then I sit down on the sofa and open a huge tab-group, and scroll through my RSS feeds using Newsblur.
I spend the next 1-2 hours winnowing through all the stuff that seems important. I have a chronic pain problem and I really shouldn't sit on the sofa for more than 10 minutes, so I use a timer and get up every 10 minutes and do one minute of physio.
After a couple hours, I'm left with 3-4 tabs that I want to write articles about that day. When I started writing Pluralistic, I had a text file on my desktop with some blank HTML I'd tinkered with to generate a layout; now I have an XML file (more on that later).
First I go through these tabs and think up metadata tags I want to use for each; I type these into the template using my text-editor (gedit), like this:
<xtags>
process, blogging, pluralistic, recursion, navel-gazing
</xtags>
Each post has its own little template. It needs an anchor tag (for this post, that's "hfbd"), a title ("20 years a blogger") and a slug ("Reflections on a lifetime of reflecting"). I fill these in for each post.
Then I come up with a graphic for each post: I've got a giant folder of public domain clip-art, and I'm good at using all the search tools for open-licensed art: the Library of Congress, Wikimedia, Creative Commons, Flickr Commons, and, ofc, Google Image Search.
I am neither an artist nor a shooper, but I've been editing clip art since I created pixel-art versions of the Frankie Goes to Hollywood glyphs using Bannermaker for the Apple //c in 1985 and printed them out on enough fan-fold paper to form a border around my bedroom.

As I create the graphics, I pre-compose Creative Commons attribution strings to go in the post; there's two versions, one for the blog/newsletter and one for Mastodon/Twitter/Tumblr. I compose these manually.
Here's a recent one:
Blog/Newsletter:
(<i>Image: <a href="https://commons.wikimedia.org/wiki/File:QAnon_in_red_shirt_(48555421111).jpg">Marc Nozell</a>, <a href="https://creativecommons.org/licenses/by/2.0/deed.en">CC BY</a>, modified</i>)
Twitter/Masto/Tumblr:
Image: Marc Nozell (modified)
https://commons.wikimedia.org/wiki/File:QAnon_in_red_shirt_(48555421111).jpg
CC BY
https://creativecommons.org/licenses/by/2.0/deed.en
This is purely manual work, but I've been composing these CC attribution strings since CC launched in 2003, and they're just muscle-memory now. Reflex.
These attribution strings, as well as anything else I'll need to go from Twitter to the web (for example, the names of people whose Twitter handles I use in posts, or images I drop in, go into the text file). Here's how the post looks at this point in the composition.
<hr>
<a name="hfbd"></a>
<img src="https://craphound.com/images/20yrs.jpg">
<h1>20 years a blogger</h1><xtagline>Reflections on a lifetime of reflecting.</xtagline>
<img src="https://craphound.com/images/frnklogo.jpg">
See that <img> tag in there for frnklogo.jpg? I snuck that in while I was composing this in Twitter. When I locate an image on the web I want to use in a post, I save it to a dir on my desktop that syncs every 60 seconds to the /images/ dir on my webserver.
As I save it, I copy the filename to my clipboard, flip over to gedit, and type in the <img> tag, pasting the filename. I've typed <img src="https://craphound.com/images/ CTRL-V"> tens of thousands of times - muscle memory.
Once the thread is complete, I copy each tweet back into gedit, tabbing back and forth, replacing Twitter handles and hashtags with non-Twitter versions, changing the ALL CAPS EMPHASIS to the extra-character-consuming *asterisk-bracketed emphasis*.
My composition is greatly aided both 20 years' worth of mnemonic slurry of semi-remembered posts and the ability to search memex.craphound.com (the site where I've mirrored all my Boing Boing posts) easily.
A huge, searchable database of decades of thoughts really simplifies the process of synthesis.
Next I port the posts to other media. I copy the headline and paste it into a new Tumblr compose tab, then import the image and tag the post "pluralistic."
Then I paste the text of the post into Tumblr and manually select, cut, and re-paste every URL in the post (because Tumblr's automatic URL-to-clickable-link tool's been broken for 10+ months).
Next I past the whole post into a Mastodon compose field. Working by trial and error, I cut it down to <500 characters, breaking at a para-break and putting the rest on my clipboard. I post, reply, and add the next item in the thread until it's all done.
*Then* I hit publish on my Twitter thread. Composing in Twitter is the most unforgiving medium I've ever worked in. You have to keep each stanza below 280 chars. You can't save a thread as a draft, so as you edit it, you have to pray your browser doesn't crash.
And once you hit publish, you can't edit it. Forever. So you want to publish Twitter threads LAST, because the process of mirroring them to Tumblr and Mastodon reveals typos and mistakes (but there's no way to save the thread while you work!).
Now I create a draft Wordpress post on pluralistic.net, and create a custom slug for the page (today's is "two-decades"). Saving the draft generates the URL for the page, which I add to the XML file.
Once all the day's posts are done, I make sure to credit all my sources in another part of that master XML file, and then I flip to the command line and run a bunch of python scripts that do MAGIC: formatting the master file as a newsletter, a blog post, and a master thread.
Those python scripts saved my ASS. For the first two months of Pluralistic, i did all the reformatting by hand. It was a lot of search-replace (I used a checklist) and I ALWAYS screwed it up and had to debug, sometimes taking hours.
Then, out of the blue, a reader - Loren Kohnfelder - wrote to me to point out bugs in the site's RSS. He offered to help with text automation and we embarked on a month of intensive back-and-forth as he wrote a custom suite for me.
Those programs take my XML file and spit out all the files I need to publish my site, newsletter and master thread (which I pin to my profile). They've saved me more time than I can say. I probably couldn't kept this up without Loren's generous help (thank you, Loren!).
I open up the output from the scripts in gedit. I paste the blog post into the Wordpress draft and copy-paste the metadata tags into WP's "tags" field. I preview the post, tweak as necessary, and publish.
(And now I write this, I realize I forgot to mention that while I'm doing the graphics, I also create a square header image that makes a grid-collage out of the day's post images, using the Gimp's "alignment" tool)
(because I'm composing this in Twitter, it would be a LOT of work to insert that information further up in the post, where it would make sense to have it - see what I mean about an unforgiving medium?)
(While I'm on the subject: putting the "add tweet to thread" and "publish the whole thread" buttons next to each other is a cruel joke that has caused me to repeatedly publish before I was done, and deleting a thread after you publish it is a nightmare)
Now I paste the newsletter file into a new mail message, address it to my Mailman server, and create a custom subject for the day, send it, open the Mailman admin interface in a browser, and approve the message.
Now it's time to create that anthology post you can see pinned to my Mastodon and Twitter accounts. Loren's script uses a template to produce all the tweets for the day, but it's not easy to get that pre-written thread into Twitter and Mastodon.
Part of the problem is that each day's Twitter master thread has a tweet with a link to the day's Mastodon master thread ("Are you trying to wean yourself off Big Tech? Follow these threads on the #fediverse at @[email protected]. Here's today's edition: LINK").
So the first order of business is to create the Mastodon thread, pin it, copy the link to it, and paste it into the template for the Twitter thread, then create and pin the Twitter thread.
Now it's time to get ready for tomorrow. I open up the master XML template file and overwrite my daily working file with its contents. I edit the file's header with tomorrow's date, trim away any "Upcoming appearances" that have gone by, etc.
Then I compose tomorrow's retrospective links. I open tabs for this day a year ago, 5 years ago, 10 years ago, 15 years ago, and (now) 20 years ago:
http://memex.craphound.com/2020/01/14
http://memex.craphound.com/2016/01/14
http://memex.craphound.com/2011/01/14
http://memex.craphound.com/2006/01/14
http://memex.craphound.com/2001/01/14
I go through each day, and open anything I want to republish in its own tab, then open the OP link in the next tab (finding it in the @internetarchive if necessary). Then I copy my original headline and the link to the article into tomorrow's XML file, like so:
#10yrsago Disney World’s awful Tiki Room catches fire <a href="https://thedisneyblog.com/2011/01/12/fire-reported-at-magic-kingdom-tiki-room/">https://thedisneyblog.com/2011/01/12/fire-reported-at-magic-kingdom-tiki-room/</a>
And NOW my day is done.
So, why do I do all this?
First and foremost, I do it for ME. The memex I've created by thinking about and then describing every interesting thing I've encountered is hugely important for how I understand the world. It's the raw material of every novel, article, story and speech I write.
And I do it for the causes I believe in. There's stuff in this world I want to change for the better. Explaining what I think is wrong, and how it can be improved, is the best way I know for nudging it in a direction I want to see it move.
The more people I reach, the more it moves.
When I left Boing Boing, I lost access to a freestanding way of communicating. Though I had popular Twitter and Tumblr accounts, they are at the mercy of giant companies with itchy banhammers and arbitrary moderation policies.
I'd long been a fan of the POSSE - Post Own Site, Share Everywhere - ethic, the idea that your work lives on platforms you control, but that it travels to meet your readers wherever they are.
Pluralistic posts start out as Twitter threads because that's the most constrained medium I work in, but their permalinks (each with multiple hidden messages in their slugs) are anchored to a server I control.
When my threads get popular, I make a point of appending the pluralistic.net permalink to them.
When I started blogging, 20 years ago, blogger.com had few amenities. None of the familiar utilities of today's media came with the package.
Back then, I'd manually create my headlines with <h2> tags. I'd manually create discussion links for each post on Quicktopic. I'd manually paste each post into a Yahoo Groups email. All the guff I do today to publish Pluralistic is, in some way, nothing new.
20 years in, blogging is still a curious mix of both technical, literary and graphic bodgery, with each day's work demanding the kind of technical minutuae we were told would disappear with WYSIWYG desktop publishing.
I grew up in the back-rooms of print shops where my dad and his friends published radical newspapers, laying out editions with a razor-blade and rubber cement on a light table. Today, I spend hours slicing up ASCII with a cursor.
I go through my old posts every day. I know that much - most? - of them are not for the ages. But some of them are good. Some, I think, are great. They define who I am. They're my outboard brain.
37 notes
·
View notes
Video
How to insert or Adding image using img tag with all attributes in HTML ...
#How to insert or Adding image using img tag with all attributes in HTML ...#html#html5#html5 tutorial#html template#games.html5#insert image#image insert with html#img tag#img sr#css#himanchal
0 notes
Text
Eliminate Your Fear And Pick Up Web Design Today.
The basics of HTML HTML is a standard markup language for web documents. Other technology, such as JavaScript, can support HyperText Markup language. It is used to create web-based documents. HTML is easy to modify and read using Cascading Style Sheets and other scripting languages. These are HTML-based websites. Both websites are based upon XHTML. For more information, click the links below. Learn more about HTML and Cascading Style Sheets. HTML is a programming language which describes the content structure. A web browser can view the resultant document. The HTML tags allow you to navigate the Internet in many ways. The b tags are used to highlight and bold text. This language was developed using ISO/IEC JTC1/SC34, or "Document descriptions and processing languages". HTML 1.0 is the simplest syntax. HTML is a powerful tool for creating amazing creations. It is the most widely used markup language for websites and is always changing. It is easy to learn and has a high level of functionality. The World Wide Web Consortium (W3C) is responsible for HTML's development and maintenance. HTML is an easy language to learn, but it's becoming more powerful. It is important to master the language. This article will help you to master HTML basics. HTML was an original format used for documents. It was popular in the 1990s, but it was not standardized until 2014. It has changed significantly over the years. It is used in a variety of academic documents. It's used to create interactive programs and websites. It is compatible with many operating systems, including Apple OS. HTML allows you to create websites. HTML is the standard document format used by the web. The Internet Engineering Task Force (IETF), which defines HTML's syntax, is responsible for creating web pages. Most HTML pages have at least one HTML file. Multiple HTML files are not unusual for websites. However, this doesn't necessarily mean that the code is useless. HTML is the best way to create interactive web pages or applications. HTML can be used to create any web-based content. HTML allows you insert hyperlinks or multimedia. In addition, HTML is platform-independent. HTML works with all devices. Aside from being platform-independent, HTML is case-sensitive. It is best to avoid capital letters when writing HTML for the Internet. You should not use closing tags to describe paragraph elements. HTML syntax allows you use different attributes for different types content. To identify a header, class or link, you can use the id keyword. Another example of HTML is a table. The table tag is used to define a table in HTML. It can be used to specify columns and rows for the table. It also contains an img to allow images to be added. You can also insert tables. It's easy to create a website if you are familiar with HTML basics. HTML can be used to create many types of content. HTML can be used to create forms. You can use it to request information, or perform transactions via remote services. It can be either a text-based file, or a webpage. You need to know how to write HTML code if you want to create a web site. An HTML page's outline should be simple to understand and read. A website page can also be illustrated. HTML can be used for creating websites. HTML allows you to create hyperlinks within your HTML document by using the code. These links will link you to different parts of your text. A page can have two tables. You can then list different types of information. A table with two columns can be referred to as a table with more than one column. You can also add graphs or charts that include the information in text.
0 notes
Text
What Website Building Industry Really Is.
The basics of HTML HTML is a standard markup language for web documents. Other technology, such as JavaScript, can support HyperText Markup language. It is used to create web-based documents. HTML is easy to modify and read using Cascading Style Sheets and other scripting languages. These are HTML-based websites. Both websites are based upon XHTML. For more information, click the links below. Learn more about HTML and Cascading Style Sheets. HTML is a programming language which describes the content structure. A web browser can view the resultant document. The HTML tags allow you to navigate the Internet in many ways. The b tags are used to highlight and bold text. This language was developed using ISO/IEC JTC1/SC34, or "Document descriptions and processing languages". HTML 1.0 is the simplest syntax. HTML is a powerful tool for creating amazing creations. It is the most widely used markup language for websites and is always changing. It is easy to learn and has a high level of functionality. The World Wide Web Consortium (W3C) is responsible for HTML's development and maintenance. HTML is an easy language to learn, but it's becoming more powerful. It is important to master the language. This article will help you to master HTML basics. HTML was an original format used for documents. It was popular in the 1990s, but it was not standardized until 2014. It has changed significantly over the years. It is used in a variety of academic documents. It's used to create interactive programs and websites. It is compatible with many operating systems, including Apple OS. HTML allows you to create websites. HTML is the standard document format used by the web. The Internet Engineering Task Force (IETF), which defines HTML's syntax, is responsible for creating web pages. Most HTML pages have at least one HTML file. Multiple HTML files are not unusual for websites. However, this doesn't necessarily mean that the code is useless. HTML is the best way to create interactive web pages or applications. HTML can be used to create any web-based content. HTML allows you insert hyperlinks or multimedia. In addition, HTML is platform-independent. HTML works with all devices. Aside from being platform-independent, HTML is case-sensitive. It is best to avoid capital letters when writing HTML for the Internet. You should not use closing tags to describe paragraph elements. HTML syntax allows you use different attributes for different types content. To identify a header, class or link, you can use the id keyword. Another example of HTML is a table. The table tag is used to define a table in HTML. It can be used to specify columns and rows for the table. It also contains an img to allow images to be added. You can also insert tables. It's easy to create a website if you are familiar with HTML basics. HTML can be used to create many types of content. HTML can be used to create forms. You can use it to request information, or perform transactions via remote services. It can be either a text-based file, or a webpage. You need to know how to write HTML code if you want to create a web site. An HTML page's outline should be simple to understand and read. A website page can also be illustrated. HTML can be used for creating websites. HTML allows you to create hyperlinks within your HTML document by using the code. These links will link you to different parts of your text. A page can have two tables. You can then list different types of information. A table with two columns can be referred to as a table with more than one column. You can also add graphs or charts that include the information in text.
0 notes
Text
Web Design Will Make You Tons Of Cash. Here's How!
The basics of HTML HTML is a standard markup language for web documents. Other technology, such as JavaScript, can support HyperText Markup language. It is used to create web-based documents. HTML is easy to modify and read using Cascading Style Sheets and other scripting languages. These are HTML-based websites. Both websites are based upon XHTML. For more information, click the links below. Learn more about HTML and Cascading Style Sheets. HTML is a programming language which describes the content structure. A web browser can view the resultant document. The HTML tags allow you to navigate the Internet in many ways. The b tags are used to highlight and bold text. This language was developed using ISO/IEC JTC1/SC34, or "Document descriptions and processing languages". HTML 1.0 is the simplest syntax. HTML is a powerful tool for creating amazing creations. It is the most widely used markup language for websites and is always changing. It is easy to learn and has a high level of functionality. The World Wide Web Consortium (W3C) is responsible for HTML's development and maintenance. HTML is an easy language to learn, but it's becoming more powerful. It is important to master the language. This article will help you to master HTML basics. HTML was an original format used for documents. It was popular in the 1990s, but it was not standardized until 2014. It has changed significantly over the years. It is used in a variety of academic documents. It's used to create interactive programs and websites. It is compatible with many operating systems, including Apple OS. HTML allows you to create websites. HTML is the standard document format used by the web. The Internet Engineering Task Force (IETF), which defines HTML's syntax, is responsible for creating web pages. Most HTML pages have at least one HTML file. Multiple HTML files are not unusual for websites. However, this doesn't necessarily mean that the code is useless. HTML is the best way to create interactive web pages or applications. HTML can be used to create any web-based content. HTML allows you insert hyperlinks or multimedia. In addition, HTML is platform-independent. HTML works with all devices. Aside from being platform-independent, HTML is case-sensitive. It is best to avoid capital letters when writing HTML for the Internet. You should not use closing tags to describe paragraph elements. HTML syntax allows you use different attributes for different types content. To identify a header, class or link, you can use the id keyword. Another example of HTML is a table. The table tag is used to define a table in HTML. It can be used to specify columns and rows for the table. It also contains an img to allow images to be added. You can also insert tables. It's easy to create a website if you are familiar with HTML basics. HTML can be used to create many types of content. HTML can be used to create forms. You can use it to request information, or perform transactions via remote services. It can be either a text-based file, or a webpage. You need to know how to write HTML code if you want to create a web site. An HTML page's outline should be simple to understand and read. A website page can also be illustrated. HTML can be used for creating websites. HTML allows you to create hyperlinks within your HTML document by using the code. These links will link you to different parts of your text. A page can have two tables. You can then list different types of information. A table with two columns can be referred to as a table with more than one column. You can also add graphs or charts that include the information in text.
0 notes
Text
Web Hacking 101 CH9: Cross Site Scripting
What is it?
There is a famous example of the MySpace Samy Work created by Samy Kamkar. In 2005, Samy exploited an XSS vulnerability on MySpace allowing him to store a JavaScript payload on his profile and when an user visited his page, they would add him as a friend and make their profile display "but most of all, samy is my hero". This code would replicate itself onto the viewers profile and essentially create a pyramid by continually infecting other MySpace users.
Cross-Site Scripting (XSS) is a vulnerability that occurs when websites render certain characters unsanitised, causing browsers to execute unintended JavaScript. These characters include ", ' and <> and are special because they are usined in HTML and JavaScript to define a web page's structure.
How can this be used?
If a site does not sanitize input, you can insert <script>_</script>
Where the underscore is some JavaScript. When a payload is submitted to a website and rendered unsanitized, the script tags instructs the browser to execute the JavaScript between them.
Case studies:
Shopify Wholesale (reported 2015):
This is apparently one of the most basic XSS vulnerabilities you could find; text is entered into the search box and sanitised so any JavaScript entered was executed.
This works because Shopify takes the input from the user, executed the search and found that there were no results and they would then print a message saying that there were no products found by that name. You can guess where this is heading, put some cheeky JavaScript and boom!

Replace test with some naughty code. This seemed like a very simple vulnerability to find and it earned the attacker $500!
Yahoo Mail Stored XSS (reported 2015):
This earned the hacker $10,000.
Yahoo's mail editor allowed people to embed images in an email via HTML with an IMG tag, and be vulnerable when the HTML IMG tag was invalid. HTML tags also accept attributes where some of them are Boolean.
The attacker found that if he added Boolean attributes to HTML tages with a value, Yahoo Mail would remove the value but leave the equal signs.
<INPUT TYPE="checkbox" CHECKED="hello" NAME="check box">
Yahoo would remove the value to this:
<INPUT TYPE="checkbox" CHECKED= NAME="check box">
In the HTML documentation, browsers would read CHECKED as having the same value as NAME, so the hacker exploited this by:
<img ismap='xxx' itemtype='yyy style=width:100%;height:100%;position:fixed;left:0px;\ top:0px; onmouseover=alert(/XSS/)//'>
Which would become:
<img ismap=itemtype=yyy style=width:100%;height:100%;position:fixed;left:0px;top:0px\ ; onmouseover=alert(/XSS/)//>
As a result, the browser would render an IMG taking up the whole browser window.
Google Image Search (reported 2015):
A super smart dude was looking at some google images and saw something interesting in the image URL
http://www.google.com/imgres?imgurl=https://lh3.googleuser.com/...
The imgurl is the actual URL and he changed the parameter to javascript:alert(1).
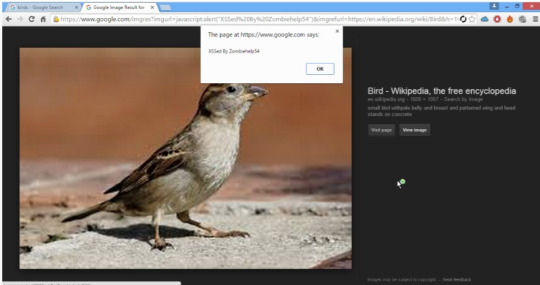
This worked.
Takeaways
Beware in cases where text entered being rendered back to you.
Passing broken HTML is a good way to test how websites are parsing input.
As a hacker it is important to consider what the developers haven't such as having two src attributes in an IMG tag.
Everyone is vulnerable, no matter how large the company
Test the sanitation of your input thoroughly.
Conclusion
Cross Site Scripting is a real risk for site developers and are still prevalent on sites. They can be easily noticed by submitting a call to the JavaScript alert method, alert("test"). It is also quite similar to HTML injection and combining the two can be deadly.
XSS vulnerabilities also do not have to be complex, just consider how the site renders your input and try to go form there.
0 notes
Text
The Beginner’s Guide to Structured Data for SEO: How to Implement Structured Data [Part 2]
Posted by bridget.randolph
Welcome to Part 2 of The Beginner’s Guide to Structured Data: How to Implement Structured Data for SEO. In Part 1, we focused on gaining a high-level understanding of what structured data is and how it can be used to support SEO efforts.
(If you missed Part 1, you can go check it out here).
In Part 2, we’ll be looking at the steps to identify opportunities and implement structured data for SEO on your website. Since this is an introductory guide, I’ll be focusing on the most basic types of markup you can add and the most common use cases, and providing resources with additional detail for the more technical aspects of implementation.
Is structured data right for you?
Generally speaking, implementing structured data for SEO is worthwhile for most people. However, it does require a certain level of effort and resources, and you may be asking yourself whether it’s worth prioritizing.
Here are some signs that it’s a good time to prioritize structured data for SEO:
Search is a key value-driving channel for your business
You’ve recently audited your site for basic optimization issues and you know that you’ve achieved a competitive baseline with your keyword targeting, backlinks profile, site structure, and technical setup
You’re in a competitive vertical and need your results to stand out in the SERPs
You want to use AMP (Accelerated Mobile Pages) as a way to show up in featured areas of the SERP, including carousels
You have a lot of article-style content related to key head terms (e.g. 10 chicken recipes) and you’d like a way to display multiple results for those terms in the SERP
You’re ranking fairly well (position 15 or higher) already for terms with significant search volume (5000–50,000 searches/month)*
You have solid development resources with availability on staff and can implement with minimal time and financial investment
You’re in any of the following verticals: e-commerce, publishing, educational products, events/ticketing, creative production, TV/movie/book reviews, job listings, local business
*What is considered significant volume may vary according to how niche your market is.
If you said yes to any of these statements, then implementing structured data is particularly relevant to you! And if these criteria don’t currently apply to you, of course you can still go ahead and implement; you might have great results. The above are just a few of the most common indicators that it’s a worthwhile investment.
Implementing structured data on your site
In this guide, we will be looking solely at opportunities to implement Schema.org markup, as this is the most extensive vocabulary for our purposes. Also, because it was developed by the search engine companies themselves, it aligns with what they support now and should continue to be the most supported framework going forward.
How is Schema.org data structured?
The way that the Schema.org vocabulary is structured is with different “types” (Recipe, Product, Article, Person, Organization, etc.) that represent entities, kinds of data, and/or content types.
Each Type has its own set of “properties” that you can use to identify the attributes of that item. For example, a “Recipe” Type includes properties like “image,” “cookTime,” “nutritionInformation,” etc. When you mark up a recipe on your site with these properties, Google is able to present those details visually in the SERP, like this:
Image source
In order to mark up your content with Schema.org vocabulary, you’ll need to define the specific properties for the Type you’re indicating.
For example:
If you’re marking up a recipe page, you need to include the title and at least two other attributes. These could be properties like:
aggregateRating: The averaged star rating of the recipe by your users
author: The person who created the recipe
prepTime: The length of time required to prepare the dish for cooking
cookTime: The length of time required to cook the dish
datePublished: Date of the article’s publication
image: An image of the dish
nutritionInformation: Number of calories in the dish
review: A review of the dish
...and more.
Each Type has different “required” properties in order to work correctly, as well as additional properties you can include if relevant. (You can view a full list of the Recipe properties at Schema.org/Recipe, or check out Google’s overview of Recipe markup.)
Once you know what Types, properties and data need to be included in your markup, you can generate the code.
The code: Microdata vs JSON-LD
There are two common approaches to adding Schema.org markup to your pages: Microdata (in-line annotations added directly to the relevant HTML) and JSON-LD (which uses a Javascript script tag to insert the markup into the head of the page).
JSON-LD is Google’s recommended approach, and in general is a cleaner, simpler implementation... but it is worth noting that Bing does not yet officially support JSON-LD. Also, if you have a Wordpress site, you may be able to use a plugin (although be aware that not all of Wordpress' plugins work they way they’re supposed to, so it’s especially important to choose one with good reviews, and test thoroughly after implementation).
Whatever option you choose to use, always test your implementation to make sure Google is seeing it show up correctly.
What does this code look like?
Let’s look at an example of marking up a very simple news article (http://ift.tt/Jh1c8D).
Here’s the article content (excluding body copy), with my notes about what each element is:
[posted by publisher ‘Google’] [headline]Article Headline [author byline]By John Doe [date published] Feb 5, 2015 [description] A most wonderful article [image] [company logo]
And here’s the basic HTML version of that article:
<div> <h2>Article headline</h2> <h3>By John Doe</h3> <div> <img src="http://ift.tt/2wSdo1L"/> </div> <div> <img src="http://ift.tt/2ds98ha"/> </div>
If you use Microdata, you’ll nest your content inside the relevant meta tags for each piece of data. For this article example, your Microdata code might look like this (within the <body> of the page):
<div itemscope itemtype="http://ift.tt/Jh1c8D"> <meta itemscope itemprop="mainEntityOfPage" itemType="http://ift.tt/1wwHCh9" itemid="http://ift.tt/1SyLJrc"/> <h2 itemprop="headline">Article headline</h2> <h3 itemprop="author" itemscope itemtype="http://ift.tt/1pRvEiJ"> By <span itemprop="name">John Doe</span> </h3> <span itemprop="description">A most wonderful article</span> <div itemprop="image" itemscope itemtype="http://ift.tt/PyhoeG"> <img src="http://ift.tt/2cChRHr"/> <meta itemprop="url" content="http://ift.tt/2cChRHr"> <meta itemprop="width" content="800"> <meta itemprop="height" content="800"> </div> <div itemprop="publisher" itemscope itemtype="http://ift.tt/1qxtP8Y"> <div itemprop="logo" itemscope itemtype="http://ift.tt/PyhoeG"> <img src="http://ift.tt/2ds98ha"/> <meta itemprop="url" content="http://ift.tt/2ds98ha"> <meta itemprop="width" content="600"> <meta itemprop="height" content="60"> </div> <meta itemprop="name" content="Google"> </div> <meta itemprop="datePublished" content="2015-02-05T08:00:00+08:00"/> <meta itemprop="dateModified" content="2015-02-05T09:20:00+08:00"/> </div>
The JSON-LD version would usually be added to the <head> of the page, rather than integrated with the <body> content (although adding it in the <body> is still valid).
JSON-LD code for this same article would look like this:
<script type="application/ld+json"> { "@context": "http://schema.org", "@type": "NewsArticle", "mainEntityOfPage": { "@type": "WebPage", "@id": "http://ift.tt/1SyLJrc" }, "headline": "Article headline", "image": { "@type": "ImageObject", "url": "http://ift.tt/2cChRHr", "height": 800, "width": 800 }, "datePublished": "2015-02-05T08:00:00+08:00", "dateModified": "2015-02-05T09:20:00+08:00", "author": { "@type": "Person", "name": "John Doe" }, "publisher": { "@type": "Organization", "name": "Google", "logo": { "@type": "ImageObject", "url": "http://ift.tt/2ds98ha", "width": 600, "height": 60 } }, "description": "A most wonderful article" } </script>
This is the general style for Microdata and JSON-LD code (for Schema.org/Article). The Schema.org website has a full list of every supported Type and its Properties, and Google has created “feature guides” with example code for the most common structured data use cases, which you can use as a reference for your own code.
How to identify structured data opportunities (and issues)
If structured data has previously been added to your site (or if you’re not sure whether it has), the first place to check is the Structured Data Report in Google Search Console.
This report will tell you not only how many pages have been identified as containing structured data (and how many of these have errors), but may also be able to identify where and/or why the error is occurring. You can also use the Structured Data Testing Tool for debugging any flagged errors: as you edit the code in the tool interface, it will flag any errors or warnings.
If you don’t have structured data implemented yet, or want to overhaul your setup from scratch, the best way to identify opportunities is with a quick content audit of your site, based on the kind of business you have.
A note on keeping it simple
There are lots of options when it comes to Schema.org markup, and it can be tempting to go crazy marking up everything you possibly can. But best practice is to keep focused and generally use a single top-level Type on a given page. In other words, you might include review data on your product page, but the primary Type you’d be using is Schema.org/Product. The goal is to tell search engines what this page is about.
Structured data must be representative of the main content of the page, and marked up content should not be hidden from the user. Google will penalize sites which they believe are using structured data markup in scammy ways.
There are some other general guidelines from Google, including:
Add your markup to the page it describes (so Product markup would be added to the individual product page, not the homepage)
For duplicated pages with a canonical version, add the same markup to all versions of the page (not just the canonical)
Don’t block your marked-up pages from search engines
Be as specific as possible when choosing a Type to add to a page
Multiple entities on the same page must each be marked up individually (so for a list of products, each product should have its own Product markup added)
As a rule, you should only be adding markup for content which is being shown on the page you add it to
So how do you know which Schema.org Types are relevant for your site? That depends on the type of business and website you run.
Schema.org for websites in general
There are certain types of Schema.org markup which almost any business can benefit from, and there are also more specific use cases for certain types of business.
General opportunities to be aware of are:
Organization: use Organization markup on your homepage to indicate that your website is a brand site.
Knowledge Graph content: brand information (logo, social profiles) as well as your business mailing address, and corporate contact info (like phone numbers) can be marked up on the homepage and appear in a Knowledge Graph box in branded search:
Sitelinks Search Box: if you have search functionality on your site, you can add markup which enables a search box to appear in your sitelinks:
Image source
Breadcrumbs: get breadcrumbs in the SERP:
Image source
VideoObject: if you have video content on your site, this markup can enable video snippets in SERPs, with info about uploader, duration, a thumbnail image, and more:
A note about Star reviews in the SERP
You’ll often see recommendations about “marking up your reviews” to get star ratings in the SERP results. “Reviews” have their own type, Schema.org/Review, with properties that you’ll need to include; but they can also be embedded into other types using that type’s “review” property.
You can see an example of this above, in the Recipes image, where some of the recipes in the SERP display a star rating. This is because they have included the aggregate user rating for that recipe in the “review” property within the Schema.org/Recipe type.
You’ll see a similar implementation for other properties which have their own type, such as Schema.org/Duration, Schema.org/Date, and Schema.org/Person. It can feel really complicated, but it’s actually just about organizing your information in terms of category > subcategory > discrete object.
If this feels a little confusing, it might help to think about it in terms of how we define a physical thing, like an ingredient in a recipe. Chicken broth is a dish that you can make, and each food item that goes into making the chicken broth would be classified as an ingredient. But you could also have a recipe that calls for chicken broth as an ingredient. So depending on whether you’re writing out a recipe for chicken broth, or a recipe that includes chicken broth, you’ll classify it differently.
In the same way, attributes like “Review,” “Date,” and “Duration” can be their own thing (Type), or a property of another Type. This is just something to be aware of when you start implementing this kind of markup. So when it comes to “markup for reviews,” unless the page itself is primarily a review of something, you’ll usually want to implement Review markup as a property of the primary Type for the page.
In addition to this generally applicable markup, there are certain Schema.org Types which are particularly helpful for specific kinds of businesses:
E-commerce
including online course providers
Recipes Sites
Publishers
Events/Ticketing Sites
including educational institutions which offer courses
Local Businesses
Specific Industries (small business and larger organizations)
Creative Producers
Schema.org for e-commerce
If you have an e-commerce site, you’ll want to check out:
Product: this allows you to display product information, such as price, in the search result. You can use this markup on an individual product page, or an aggregator page which shows information about different sellers offering an individual product.
Online Courses: If your product is an online course, you can use the Schema.org/Course type to get more specific snippets.
Offer: this can be combined with Schema.org/Product to show a special offer on your product (and encourage higher CTRs).
Review: if your site has product reviews, you can aggregate the star ratings for each individual product and display it in the SERP for that product page, using http://ift.tt/13aT6d2.
Things to watch out for…
Product markup is designed for individual products, not lists of products. If you have a category page and want to mark it up, you’ll need to mark up each individual product on the page with its own data.
Review markup is designed for reviews of specific items, goods, services, and organizations. You can mark up your site with reviews of your business, but you should do this on the homepage as part of your organization markup.
If you are marking up reviews, they must be generated by your site, rather than via a third-party source.
Course markup should not be used for how-to content, or for general lectures which do not include a curriculum, specific outcomes, or a set student list.
Schema.org for recipes sites
For sites that publish a lot of recipe content, Recipe markup is a fantastic way to add additional context to your recipe pages and get a lot of visual impact in the SERPs.
Things to watch out for…
If you’re implementing Recipe Rich Cards, you’ll want to be aware of some extra guidelines:
You’ll have to build AMP versions of your recipes pages
If you want to have a host carousel/list with multiple recipes for the same keyword, you must have a summary page that lists all the recipes in that collection (e.g. “chicken recipes”), and use ItemList markup to summarize recipes.
See Mark Up Your Lists for more detail on this.
Schema.org for publishers
If you have an publisher site, you’ll want to check out the following:
Article and its subtypes,
NewsArticle: this indicates that the content is a news article
BlogPosting: similar to Article and NewsArticle, but specifies that the content is a blog post
Fact Check: If your site reviews or discusses “claims made by others,” as Google diplomatically puts it, you can add a “fact check” to your snippet using the http://ift.tt/2efVnCW.
Image source
CriticReview: if your site offers critic-written reviews of local businesses (such as a restaurant critic’s review), books, and /or movies, you can mark these up with http://ift.tt/2fcAx52.
Note that this is a feature being tested, and is a knowledge box feature rather than a rich snippet enhancement of your own search result.
Image source
Things to watch out for...
If you use AMP (Accelerated Mobile Pages) or are considering implementing this feature, you’ll need to a) make sure you include structured data on your AMP versions, and b) you’ll need Articles markup on your canonical version if you want to make it into the Top Stories AMP carousel.
Google has some additional guidelines around accessibility for Articles (pagination, canonicalization, restricted content, and First Click Free).
Schema.org for events/ticketing sites
If your business hosts or lists events, and/or sells tickets, you can use:
Events: you can mark up your events pages with Schema.org/Event and get your event details listed in the SERP, both in a regular search result and as instant answers at the top of the SERP:
Courses: If your event is a course (i.e., instructor-led with a student roster), you can also use Schema.org/Course markup.
Things to watch out for...
Don’t use Events markup to mark up time-bound non-events like travel packages or business hours.
As with products and recipes, don’t mark up multiple events listed on a page with a single usage of Event markup.
For a single event running over several days, you should mark this up as an individual event and make sure you indicate start and end dates;
For an event series, with multiple connected events running over time, mark up each individual event separately.
Course markup should not be used for how-to content, or for general events/lectures which do not include a curriculum, specific outcomes, and an enrolled student list.
Schema.org for job sites
If your site offers job listings, you can use http://ift.tt/1d1VOWg markup to appear in Google’s new Jobs listing feature:
Note that this is a Google aggregator feature, rather than a rich snippet enhancement of your own result (like Google Flights).
Things to watch out for...
Mark up each job post individually, and do not mark up a jobs listings page.
Include your job posts in your sitemap, and update your sitemap at least once daily.
You can include Review markup if you have review data about the employer advertising the job.
Schema.org for local businesses
If you have a local business or a store with a brick-and-mortar location (or locations), you can use structured data markup on your homepage and contact page to help flag your location for Maps data as well as note your “local” status:
LocalBusiness: this allows you to specify things like your opening hours and payment accepted
PostalAddress: this is a good supplement to getting all those NAP citations consistent
OrderAction and ReservationAction: if users can place orders or book reservations on your website, you may want to add action markup as well.
You should also get set up with GoogleMyBusiness.
☆ Additional resources for local business markup
Here’s an article from Whitespark specifically about using Schema.org markup and JSON-LD for local businesses, and another from Phil Rozek about choosing the right Schema.org Type. For further advice on local optimization, check out the local SEO learning center and this recent post about common pitfalls.
Schema.org for specific industries
There are certain industries and/or types of organization which get specific Schema.org types, because they have a very individual set of data that they need to specify. You can implement these Types on the homepage of your website, along with your Brand Information.
These include LocalBusiness Types:
AnimalShelter
AutomotiveBusiness
ChildCare
Dentist
DryCleaningOrLaundry
EmergencyService
EmploymentAgency
EntertainmentBusiness
FinancialService
FoodEstablishment
GovernmentOffice
HealthAndBeautyBusiness
HomeAndConstructionBusiness
InternetCafe
LegalService
Library
LodgingBusiness
ProfessionalService
RadioStation
RealEstateAgent
RecyclingCenter
SelfStorage
ShoppingCenter
SportsActivityLocation
Store
TelevisionStation
TouristInformationCenter
TravelAgency
And a few larger organizations, such as:
Airline
Corporation
EducationalOrganization
GovernmentOrganization
LocalBusiness
MedicalOrganization
NGO
PerformingGroup
SportsOrganization
Things to watch out for…
When you’re adding markup that describes your business as a whole, it might seem like you should add that markup to every page on the site. However, best practice is to add this markup only to the homepage.
Schema.org for creative producers
If you create a product or type of content which could be considered a “creative work” (e.g. content produced for reading, viewing, listening, or other consumption), you can use CreativeWork markup.
More specific types within CreativeWork include:
Book
Course
Episode
Game
Movie
MusicComposition
MusicPlaylist
MusicRecording
Painting
Photograph
Sculpture
SoftwareApplication
TVSeason
TVSeries
VisualArtwork
...and several others.
Schema.org new features (limited availability)
Google is always developing new SERP features to test, and you can participate in the testing for some of these. For some, the feature is an addition to an existing Type; for others, it is only being offered as part of a limited test group. At the time of this writing, these are some of the new features being tested:
Actions
Books
Podcasts
Datasets
Music
Software Apps
Top Places Lists (Publishers)
Live Coverage(Publishers)
Structured data beyond SEO
As mentioned in Part 1 of this guide, structured data can be useful for other marketing channels as well, including:
Social Cards
Email markup
AdWords
For more detail on this, see the section in Part 1 titled: “Common Uses for Structured Data.”
How to generate and test your structured data implementation
Once you’ve decided which Schema.org Types are relevant to you, you’ll want to add the markup to your site. If you need help generating the code, you may find Google’s Data Highlighter tool useful. You can also try this tool from Joe Hall. Note that these tools are limited to a handful of Schema.org Types.
After you generate the markup, you’ll want to test it at two stages of the implementation using the Structured Data Testing Tool from Google — first, before you add it to the site, and then again once it’s live. In that pre-implementation test, you’ll be able to see any errors or issues with the code and correct before adding it to the site. Afterwards, you’ll want to test again to make sure that nothing went wrong in the implementation.
In addition to the Google tools listed above, you should also test your implementation with Bing’s Markup Validator tool and (if applicable) the Yandex structured data validator tool. Bing’s tool can only be used with a URL, but Yandex’s tool will validate a URL or a code snippet, like Google’s SDT tool.
You can also check out Aaron Bradley’s roundup of Structured Data Markup Visualization, Validation, and Testing Tools for more options.
Once you have live structured data on your site, you’ll also want to regularly check the Structured Data Report in Google Search Console, to ensure that your implementation is still working correctly.
Common mistakes in Schema.org structured data implementation
When implementing Schema.org on your site, there are a few things you’ll want to be extra careful about. Marking up content with irrelevant or incorrect Schema.org Types looks spammy, and can result in a “spammy structured markup” penalty from Google. Here are a few of the most common mistakes people make with their Schema.org markup implementation:
Mishandling multiple entities
Marking up categories or lists of items (Products, Recipes, etc) or anything that isn’t a specific item with markup for a single entity
Recipe and Product markup are designed for individual recipes and products, not for listings pages with multiple recipes or products on a single page. If you have multiple entities on a single page, mark up each item individually with the relevant markup.
Misapplying Recipes markup
Using Recipe markup for something that isn’t food
Recipe markup should only be used for content about preparing food. Other types of content, such as "diy skin treatment” or "date night ideas," are not valid names for a dish.
Misapplying Reviews and Ratings markup
Using Review markup to display “name” content which is not a reviewer’s name or aggregate rating
If your markup includes a single review, the reviewer’s name must be an actual organization or person. Other types of content, like "50% off ingredients," are considered invalid data to include in the “name” property.
Adding your overall business rating with aggregateRating markup across all pages on your site
If your business has reviews with an aggregateRating score, this can be included in the “review” property on your Organization or LocalBusiness.
Using overall service score as a product review score
The “review” property in Schema.org/Product is only for reviews of that specific product. Don’t combine all product or business ratings and include those in this property.
Marking up third-party reviews of local businesses with Schema.org markup
You should not use structured data markup on reviews which are generated via third-party sites. While these reviews are fine to have on your site, they should not be used for generating rich snippets. The only UGC review content you should mark up is reviews which are displayed on your website, and generated there by your users.
This is a relatively recent update to the guidelines.
General errors
Using organization markup on multiple pages/pages other than the homepage
It might seem counter-intuitive, but organization and LocalBusiness markup should only be used on the pages which are actually about your business (e.g. homepage, about page, and/or contact page).
Improper nesting
This is why it’s important to validate your code before implementing. Especially if you’re using Microdata tags, you need to make sure that the nesting of attributes and tags is done correctly.
So there you have it — a beginner’s guide to understanding and implementing structured data for SEO! There’s so much to learn around this topic that a single article or guide can’t cover everything, but if you’ve made it to the end of this series you should have a pretty good understanding of how structured data can help you with SEO and other marketing efforts. Happy implementing!
Sign up for The Moz Top 10, a semimonthly mailer updating you on the top ten hottest pieces of SEO news, tips, and rad links uncovered by the Moz team. Think of it as your exclusive digest of stuff you don't have time to hunt down but want to read!
from The Moz Blog http://ift.tt/2vZHQYb via IFTTT
1 note
·
View note
Text
Image SEO Best Practices for 2019 - Digitalmarketerindia.net

Image SEO Best Practices for 2019 - Digitalmarketerindia.net

Image SEO Best Practices for 2019 - Digitalmarketerindia.net Image SEO Best Practices for 2019 - Digitalmarketerindia.net Image SEO Best Practices for 2019 - Digitalmarketerindia.net.You will hear and see a lot of useful information about search engine optimization (SEO) sites, but almost all of it will deal with the rules of preparing Internet content, which many consider text exclusively. And against the background of a million rules for writing promotional articles, you will hear almost nothing about what optimization methods you need to apply to the graphics component of your web sites.
SEO 2019 - Trends & Best Practices in 2019 to Stay On Top of Google
Did you know that a good webmaster and an experienced optimizer can (and should) add SEO elements to photos and other images of web pages? If you don’t do this, then site promotion is not so successful, because you are missing a great way to attract new traffic to your online resource, and, ultimately, you have a lack of potentially interested clients. Image SEO Best Practices for 2019 - Digitalmarketerindia.net

SEO 2019 - Trends & Best Practices in 2019 to Stay On Top of Google Why is it so important? Nearly half of the websites, the optimization of which we started to engage in after these resources were created and whether they had worked well or poorly for several years, demonstrated a shockingly small (if not completely zero) application of search engine optimization techniques to the components of the visual series. However, the text content, even if it is properly formatted and perfectly optimized, is not the only way to increase the visibility of your site in search engines. Pictures are also a great resource to use for this purpose. By applying optimization techniques to both forms of content - textual and visual, you contribute to the fact that your site appears not only in the search results for written content, but also images from your site are displayed in search results for resources such as, for example, Google Images.
Image SEO Best Practices for 2019

Image SEO Best Practices for 2019 The trick is that the pictures, especially bright and colorful, give the visitor a completely different impression of the content; the illustrations attract the reader’s attention, unlike the “bare” text, in which a person can sometimes just glance and instantly close the page. Of course, competent contextual advertising can significantly improve the situation, but recent studies show that the presence of relevant illustrations increases the attention span of a visitor by about 82%. No wonder they say that one picture is worth a thousand words. The same applies to photos on the Internet. Text in the "Alt" field
Image SEO: What You Need to Know to Stay Ahead
This field in the attributes of each image is the main way to optimize photos and illustrations of your site. The official definition of the alt field or “alternative text” is “a word or phrase that can be inserted into an HTML document as an attribute, the purpose of which is to inform readers of the site about the type or content of the image.”

Image SEO: What You Need to Know to Stay Ahead "Image SEO Best Practices for 2019 - Digitalmarketerindia.net" This alternative text fits into the HTML code of a web page when using the operator "alt =", after which the necessary content is placed, taken in quotes. For example, alt = "website promotion images." The reason why the alternative text should be used as often as possible when entering images into pages is simple and straightforward. In this field, you can enter any keywords for which you are promoting a website and that do not fit into the text of the article surrounding the illustration. Experience shows that to describe a picture it is better to use very few words, trying to describe what is depicted on it as accurately as possible, while using illustrations for the same SEO methods that you apply to texts, create meaningful text from keywords. Image SEO Best Practices for 2019 - Digitalmarketerindia.net In addition, in order to solve the problems of site promotion, try to give meaningful names to image files. This, among other things, also helps all authors to more easily navigate the graphics components of the site. File names with keywords are also beneficial in terms of resource promotion. Refuse to upload a photo in the file feed with a name like DSC4536.jpg.

Image SEO Best Practices for 2019 It’s better to first change it to English transliteration of the description of what is shown in the picture, remember that this name is also present in the HTML page code that the search robot reads. It is equally useful, by the way, to fill in the title attribute (which has the form “title =” in the HTML code) of your illustrations, although this is not an absolute requirement. Image SEO Best Practices for 2019 - Digitalmarketerindia.net SEO trends that will matter most in 2019

SEO trends that will matter most in 2019 In addition to the illustrations, the sites have visual elements that do not need alternative text, for example, social media icons (but if you wish, you can enter the alt attribute and their code on your site), banners in the header and footer, and so on. In these cases, you do not need to show excessive fanaticism and strive to get into the CMS source code in order to optimize them too. The main rule for adding an alternative text is this - use it in those pictures that you think should be included in the index of search engines. You have created a good site. Spent SEO content optimization. It would seem that now he should be in search results in the first places. But your site constantly appears somewhere in the second ten list of issue. Why does it happen? How To Do Image SEO: Optimize Your Product Images

SEO trends that will matter most in 2019 Most likely, you did not bother to conduct SEO-optimization of images that fill the site. How to do it - described in the article. Images are a powerful mechanism for increasing website conversion. Proper optimization of website illustrations for search engines gives at least 3 advantages to its owner: Increases the position of the site in the list of search results. Increases traffic to the site due to the appearance of images of the site in the issuance. Increases the number of visits from photo album services and on requests for photos from social networks. For reference! More than 90% of search queries are related to images. Image SEO Best Practices for 2019 - Digitalmarketerindia.net-- Content optimization is inferior to the optimization of illustrations on the possibilities. It would be irrational not to use SEO-optimization of graphic images to promote the site! How to Create an SEO Strategy for 2019

How to Create an SEO Strategy for 2019 The level of visualization optimization is determined by the following factors: Image size. The quality of the graphical representation (resolution, clarity, and contrast). Photo format. The location of the picture in the text. Description of the picture in special terms. The file name with an illustration. Structuring of graphics files transferred to the server. Consider them in more detail. Image size The search engine always prefers a large pattern to a small one. An illustration smaller than 150 x 150 pixels is perceived by search engine robots as part of graphic design and is not sent to the issue. However, if there are a lot of large (“heavy”) images on the page, then waiting for it to load may exceed the patience of the site visitor. It is best to do a picture preview as a link to a large-format picture that opens on a new page. Note! Compressing photos using styles can lead to the opposite result: search engines are able to identify the discrepancy between the true parameters of the image and display it on the site. If this discrepancy is large, then the page will not be included in the list for search results. Picture quality The clarity and contrast of the pictures attract visitors. These images are clicked primarily, which increases the index of demand and increases traffic to the site. Image SEO Best Practices for 2019 - Digitalmarketerindia.net Image format In the ranking of search engines photos are higher than just graphic images. And the keyword search robots start with photos - images consisting of 1 million colors (JPG format). A picture containing 256 colors (GIF format) for a search engine is just a graphic. A photo saved in GIF format may not be included in the issue. Image SEO Best Practices for 2019 - Digitalmarketerindia.net "Important! On user requests: “Views, photos, images, what it looks like ...” the search engine will only display pictures in JPG format, that is, photos in its understanding". The location of the picture in the text. The Complete Guide to SEO for Images

The Complete Guide to SEO for Images Search robots are analyzing content, but not image, with great success. But if the picture is inside the text, then it is considered that it corresponds to the description that is closest to it. The most optimal is to not be lazy to make captions to the illustrations. And these signatures should be SEO-optimized. Note! It is by the keywords used in the signature that the thematic correspondence of the picture to the page content will be determined. Image description in special terms These terms are the attributes of the IMG tag, which are defined by the words Alt and Title. The Alt attribute should contain a brief and accurate description of what is shown in the figure. Description length should not be more than 50-60 characters. The Title attribute forms a tooltip that appears when you hover over an image. As a rule, it provides additional information on the graphic image. Text attributes Alt and Title should not be the same. Remember! Alt and Title attributes are actively analyzed by search engines. Due to the correct attributes containing keywords, you can significantly increase the relevance of the page and its place in the search results. The correct name of the image file. A search bot by file name can conclude that the file contains exactly what the visitor is looking for. Therefore, the name of the file should correspond to the maximum that is shown in the picture. Optimally, if one of the keywords is present in the file name. Note! Friendly file names enhance SEO image optimization. Image SEO Best Practices for 2019 - Digitalmarketerindia.net Structuring graphics files It is very important for a search engine robot that all graphics files are placed in one folder and access to it for the bot is free. Well, if this folder is listed in the robots.txt file, it will help reduce the time for searching for pictures. The main thing in image optimization Image SEO Best Practices for 2019 - Digitalmarketerindia.net Tips for SEO Image Optimization 2019

Tips for SEO Image Optimization 2019 Optimization of graphic content is a complex task. To perform them you need: Use large illustrations, at the same time reducing their loading time (due to the preview image and weight reduction of images). Pictures save in JPG format. Publish customized borders with good resolution and high contrast. Make follow-up images using keywords. Make attributes of Alt and Title IMG. Name graphical files with their content. Image SEO Best Practices for 2019 - Digitalmarketerindia.net-- Place all image files in one folder, the address of which is to be written in the robots.txt file Taking into account the development of image recognition algorithms by search engines, one should first of all conduct SEO-optimization of graphics for people, and only then for search engine robots. Source: www.digitalmarketerindia.net Author: Digital Navneet Read the full article
0 notes
Text
How To Customise Magento 2 Email Templates For Your Store?
Magento 2 comes with a lot of functionalities. Among the best features, I’m going to present Magento 2 Email Templates for merchants, which can send an email such as new orders, customers’ information, newsletters, and more.
Merchants can start their Magento store and receive various orders from customers; however, after launching the store for a while, store owners also want to communicate with their customers to retain them back to the store.
Therefore, Magento 2 Transactional Email can help you to interact with shoppers and to increase customer retention through the default Magento Email Template.
However, the default one maybe not fulfill some requirements. It is a reason why I’ll introduce how to customize Magento transactional email templates to meet all your demands.
Let’s go!
Customize Magento 2 Email Templates By Admin Panel
First, clicking MARKETING > Communications > Email Templates in Magento Admin.
Then, clicking Add New Template.
You will see Load default template section > Load Template > Currently Used For.
>>> Don’t miss this: Magento Tutorials for your store in 2020!
You enter a clear name in Template Name.
Plain text to use as the Subject of the emails sent using the template you create in Template Subject. It is the Magento email templates variables.
Customize the content.
In Template Styles, optionally add CSS styles for the template. These styles are added inside of a <style> tag in the <head> of the email.
Click Save Template.
Now that you have created a template, you must configure that template to be used:
If you haven’t done so already, log in to the Magento Admin as an administrator.
Click STORES > Settings > Configuration > SALES > Sales Emails.
Locate the section that contains the template you want to override.
What is the Magento 2 Footer Email Template?
The Footer Email Template is the ending part of the Email Template in Magento 2, the closing and signature line of the email message are included in this template.
Furthermore, the closing can be changed to fit your style, and the admin can add additional information such as the store name and address below the store name.
Configure the Magento 2 Footer Email Template
Step 1: Load the Default Template
On the Admin Sidebar, click Marketing. In the Communications section, click Email Templates.
Click Add New Templates. Follow these steps:
In the Load default template, open the Template list under Magento_Email, select “Footer.”
Click the Load Template.
Step 2: Customize and Preview the Template
Input the Template Name.
Input a Template Subject so you can arrange the template later. In the grid, you can sort and filter the templates by using the Subject column.
>>> Dont’ forget: Magento 2 Template Hints to identify your store structure!
You can edit the HTML code in the Template Content box, remember not to overwrite anything that is enclosed in double braces.
If you want to insert a variable, place the cursor in the code where the variable will be displayed, click Insert Variable. After that, select the variable you want to insert. When you selected a variable, a markup tag for the variable is inserted in the code.
Input the CSS code in the Template Style box to change CSS declarations.
Step 3: Update the configuration
On the Admin sidebar, click the content. After that, in the Design section, click Configuration.
In the grid, choose the store view that you want to edit. Click Edit.
Scroll down and open the Transactions Email.
Select the default Header Template for email notifications.
Click Save Config after completed.
Field Descriptions
FIELD DESCRIPTION LOAD DEFAULT TEMPLATE Template The choice of available templates will be listed and recognizes the template to be customized TEMPLATE INFORMATION Template Name The name of your custom template. Insert Variable a Store Contact Information variable can be inserted into the template at the cursor location. Template Subject In the Subject column, the Template Subject displayed to sort and filter the templates in the list. Template Content The HTML content of the template. Template Styles In the Template Styles box, you can enter any CSS style declarations to format the template header.
What is Magento Header Template?
Magento header is the content on the top of the email template, which is sent automatically as a message from your Magento 2 web store.
Moreover, Magento Email Logo and store contact are usually included in the email header template, and of course, you can add Magento email templates variables to the Header to add store contact information.
Configure Magento Header Template
Step 1: Load the default template
On the Admin sidebar, click Marketing. In the Communications section, select Email Templates.
Click Add New Template, follow these steps:
In Load Default Template, open the Template list under Magento_Email, click Header.
>>> Interested? Check out Magento 2 Shopping Cart to get your customers better!
Then, click Load Template to display the template HTML code and variables in the form.
Step 2: Customize the Template
In the Template Information section, follow these steps.
Input the Template Name for your email header template
Input the Template Subject so you can arrange the templates later. The subject column can filter and sort the list of templates in the grid.
Edit the HTML code as needed in the Template Content box, remember not to overwrite anything that is enclosed in double braces.
If you want to insert a variable, place the cursor in the code in the same place that the variable will display, click Insert Variable. Then select the variable you want to insert. After that, the markup tag for the variable is inserted in the code.
Click Preview Template to review your header template. If you need any adjustments, just edit the template as needed.
Click Save Template when you’re done. Now you can see the custom header displays in the list of available Email templates.
Step 3: Update the configuration.
Admin Sidebar > Content. In the grid, choose the store view that you want to edit. Click Edit
Scroll down and open the Transactions Email.
Select the default Header Template for email notifications.
Click Save Config after completed.
>>> Check it out: Secure your eCommerce store with Magento 2 SSH Key!
Field Descriptions
FIELD DESCRIPTION LOAD DEFAULT TEMPLATE Template The choice of available templates will be listed and recognizes the template to be customized TEMPLATE INFORMATION Template Name The name of your custom template. Insert Variable a Store Contact Information variable can be inserted into the template at the cursor location. Template Subject In the Subject column, the Template Subject displayed to sort and filter the templates in the list. Template Content The HTML content of the template. Template Styles In the Template Styles box, you can enter any CSS style declarations to format the template header.
How To Customise Magento Email Content?
To add Magento 2 transactional email template content, you should follow some steps below.
Clicking MARKETING > Communications > Email Templates in Magento Admin.
Create a new template or edit an existing template.
Click to place the cursor in the text in which to insert the variable.
Click Insert Variable. Choosing a variable that is suitable for your requirements in the pop-up.
Customize Styles for Magento 2 Email Templates
#1. Magento 2 email templates Inline styles
Some emails are supported by CSS style, which has been applied as “inline” styles on the style attribute of HTML tags.
Therefore, to create and customize Inline styles, you can follow the code:
<Magento_Email_module_dir>/view/frontend/email/header.html it is the location of the Inline Styles.
<?
So, the Inline CSS directive will tell Magento which files to apply as inline styles on the email template.
#2. Magento 2 Transactional Emails Non-inline styles
Global non-inline styles
Although the majority of Inline Styles are applied, many CSS styles cannot be applied by Inline Styles, for example, media queries.
The styles of this Magento transactional email template can be in a <style type=”text/css”></style>
The <Magento_Email_module_dir>/view/frontend/email/header.html file contains a css directive inside of a <style> tag:
<style type="text/css"> </style>
Magento transactional email template-specific non-inline styles
The header .html file outputs the variable. So, the value can come from any of the following:
<!--@styles .example-style { color: green; } @-->
It will help you customize Magento transactional email templates and add CSS style.
How to Customize Magento Email Logo?
#1. Using a theme
The email logo image format is JPG, GIF, or PNG, and the image should be 3x the size that you want it to display.
For example, your email has a 500px × 200px area for the logo. The logo image should be 1000px × 600px.
Therefore, to customize your logo, you need to add file logo_email.png to a Magento_Email/web.
Then, copy the <Magento_Email_module_dir>/view/frontend/email/header.html file into a Magento_Email/email directory in your theme.
And, edit the width and the height of the <img>
<? width="" width="200" height="" height="100"
#2. Using the Admin Panel
Clicking to CONTENT > Design > Configuration > Edit.
Under Transactional Emails in the Logo, the Image field uploads your logo and specifies the alternative text for it.
Enter values for Logo Width and Logo Height. Based on the preceding example, you would enter 1000 and 600, respectively.
Click the Save Configuration button.
Wrapping Up
These are all about the customization of Magento 2 Email Templates for your store from A-Z. If you have any questions, don’t hesitate to contact or write a comment.
We’re 24/7 support you.
Thank you for reading!
The post How To Customise Magento 2 Email Templates For Your Store? appeared first on Mageguides.
from Mageguides https://ift.tt/3azrk08 via IFTTT
0 notes
Text
The Plain-English Guide to Meta Tags & SEO
In 2018, HubSpot found 64% of marketers said they actively invest in search engine optimization (SEO).
Good SEO can get you in front of the potential customers who are searching for your products or services, and great SEO can help those users become long-term customers, and even brand loyalists.
SEO is a landscape that involves many on-page and off-page factors, and it’s critical to understand how to incorporate meta tags into each one of your web pages. Meta tags can help search engines correctly identify and categorize your pages, which may result in higher rankings and more exposure to the audience you’re trying to reach. If you’re anything like me, though, you might be thinking, “Wait … what’s a meta tag again?” What Are Meta Tags? Here, we’re going to define meta tags, identify some of the most important meta tags you need to worry about, and provide instructions so that you can begin incorporating meta tags into your HTML today.
SEO & Meta Tags A meta tag is a snippet of descriptive text you’ll include in the code of a web page but it doesn’t appear on the page itself. Meta tags help search engine crawlers understand what your site is about and index your page, which is critical when you want to rank on SERPs for the right keywords.
Meta tags are useful from an SEO perspective since they allow search engines to more easily categorize your web page’s content. There are several types of meta tags and their attributes, and how you use them will depend on your strategy.
Meta Tags Example Examples of meta tags include canonical tags, meta content type, robot meta tags, meta descriptions, and title tags. You might use a canonical tag to tell search engines which page is the ‘master’ one. Alternatively, you might use robot meta tags to ensure search engines don’t index a page you don’t want on the SERP’s, like a search results page on your site.
Let’s dive into some of these now. 1. Canonical Tags If you have a single page with multiple URLs, or different pages with similar content (such as a page with a mobile and desktop version), search engines see these pages as duplicate versions of the same page. For instance, as a human, you know “www.google.com” and “https://google.com” point to the same page — if you search for either, you’ll land on Google’s homepage. But Google sees “www” and “https://” as duplicate versions of the same page. If you don’t specify which page you want to be the “real,” or original, source, Google will choose which source it dubs original and crawl the other pages less often. This could mean that Google consistently crawls your mobile version of your homepage and rarely checks your desktop version. For this reason, it’s often important to include a canonical tag, which simply tells Google, “Hey, if you find this same content elsewhere — please disregard. This is the source I want you to see, and this is the version I want to appear in the SERPs.” This is especially important for pages like your homepage. To insert a canonical tag, simply put this code in your HTML: <link rel=”canonical” href=”http://example.com/hubspot/meta-tags” /> 2. Meta Content Type The meta content type enables you to specify the media type (e.g. “text/html”) and character set for each web page — you’ll want to include this on all of your web pages. Different browsers render information differently, and different languages have different character sets. Using meta content type tags ensures your pages are displayed correctly on all browsers. Here’s an example of the code you’d use for meta content type: <meta http-equiv=”Content-Type” content=”text/html; charset=utf-8″ /> 3. Robots Meta Tags By default, search engine crawlers move through your entire site and follow internal and external links. However, this may not align with your strategy if you are looking to control how some pages appear in SERPs. In addition, a high number of outbound links may negatively affect the value passed through your links (also known in the SEO community as “link juice”). If you don’t specify a robot meta tag, search engines will obey the default index,follow command. Robots meta tags can influence the behavior of the search engine crawling and indexing, resulting in more strategic control of how your site shows up in SERPs and what “link juice” it retains. Here are a few common robot meta tags: noindex — Prevents the page from being indexed. nofollow — Prevents Googlebot from following links from this page. nosnippet — Prevents a text snippet or video preview from being shown in the search results. For video, a static image could be shown instead. noarchive — Prevents Google from showing the Cached link for a page. unavailable_after:2020-03-18T08:00:00Z — Allows you to specify the exact time and date you want to stop crawling and indexing of this page. There are various reasons you might use a robots meta tag. You might input the “nofollow” command, for instance, if your web page has a comments section. Since you can’t control which links are posted by readers in the comments section (which could be off-topic to your page’s content), it might be smart to tell search engines not to follow those links. Alternatively, “noindex” is a popular tag for a few reasons. Let’s say you’re planning to launch a website redesign, but you want to test the redesign on a development server that lives in a subdomain on your website. You’ll want to use the “noindex” tag to ensure Google won’t release the site in search before it’s ready. You might also use “noindex” if you have a gated content offer you don’t want users to be able to find on search engines — since you want them to fill out a form to access it. Lastly, you might use “noindex” if your website creates unique web pages whenever someone does a site search. Search engines might think those pages are part of your website, which will hurt your SEO. It’s best if you incorporate “noindex” to ensure site search results aren’t displayed on the SERPs. To incorporate a robots meta directive, input this code into your HTML: <meta name=”robots” content=”noindex, nofollow”> 4. Title Tags Title tags help readers initially understand what your content is about, and they are also a major factor in helping search engines understand your content’s subject matter. Additionally, a title tag can ensure consistency, since the title tag will show up on your web page, on the web browser, and in social networks. If you don’t include a <title> tag, Google will create one for the SERPs for you — which can hurt your ranking. Ultimately, you want to create a compelling, click-worthy title that will intrigue readers while accurately portraying what your page is about. Include a title tag on each of your web page’s by pasting this code into your HTML: <head> <title>Example Title</title> </head> It’s important to note, alt text is technically not a tag — it’s an attribute. However, you’ve likely heard the term “alt tag”, which is why you might think alt text is part of the meta tag family (I know I did …). Regardless of its categorization, alt text is incredibly important for your overall SEO strategy, particularly since Google places more value on visual search nowadays. When a search engine crawls your page, it’s going to look for the alt text of an image as an identifier for what your web page is about — so it’s critical you correctly title your alt text. Here’s a code example for alt text to incorporate in your HTML: <img src=”metatag.jpg” alt=”Meta tag picture”>. 5. Meta Keywords Meta keywords are an attribute of the “meta name” tag that get added if you want to use keywords to describe what a page is about. These keywords would not appear on the page but rather in the page’s code, and search engines used to use them as a ranking factor. Note: While it doesn’t hurt to use them, meta keywords are no longer relevant for most SEO strategies. In 2009, Google announced that it no longer factored meta keywords into their search algorithm for ranking. 6. Meta Descriptions Meta descriptions are one example of a meta tag — simply put, a meta description is a 160 character-limit snippet of text a user can read on a search engine. A meta description tells the user what they’ll find if they click on your content — which, if done correctly, can greatly increase click-through rates. The tag doesn’t influence ranking directly, but it’s nonetheless an important element of SEO — a good meta description can compel readers to click on your article, and if the meta description accurately describes your content, the user is more likely to stay on the page. Click-through rates do influence search engine ranking, so meta descriptions are important for SEO. Here’s an example of the code you’d use to manually input a meta description into your web page’s HTML: <head> <meta name=”description” content=”This is an example of my meta description.”> </head> Meta Tags vs. Meta Descriptions These two often get conflated since they both contain the word “meta.” One thing to understand is that meta descriptions are just one example of meta tags, which encompass all of the items in the above list. While meta descriptions are a subcategory of meta tags, there is a fundamental difference between the two — purpose. Meta tags are used to help search engines figure out the content of your site, but meta descriptions are used to help a user sort your content. For instance, consider what happens when I search “what are meta tags”:
The meta descriptions for the following two articles are more than likely the primary reason I’ll choose one article over the other.
How to Write Meta Tags Understand that not all meta tags need to be written. Some are just codes. Create a swipe file to use for copy/pasting those codes. Paste the canonical tag into the HTML header if the page has duplicate content. Use the robots noindex tag if you don’t want the page to show up in SERPs. Use the robots nofollow tag if you don’t want Google to follow links on this page. Create a short headline to use in your title tag. This should compel readers to click. Write a concise meta description. Add alt text tags that are keyword-optimized and descriptive to any embedded images on the page.
1. Understand that not all meta tags need to be written. Some are just codes. After reading this article, you’ve learned that there’s not one single “meta tag” but rather several categories that fall under this umbrella. Some meta tags require creativity while others are snippets of code that you can simply copy and paste. 2. Create a swipe file to use for copy/pasting those codes. For the instances in which you don’t need to write anything, it’s helpful to have this coding handy anytime you’re creating pages. 3. Paste the canonical tag into the HTML header if the page has duplicate content. As a reminder, if there are multiple versions of a page on your site, you’ll want to use canonical tags to specify the original source for that content. For any duplicate content, you can pull your canonical code from your swipe file to specify it as such. 4. Use the robots noindex tag if you don’t want the page to show up in SERPs. There are many reasons you might not want a particular page to be indexed. Perhaps it’s a thank you page that should only be viewed once a user takes a certain action, or maybe it’s a piece of content that you don’t want showing up in the SERPs. Whatever your reason, the noindex tag will signal to Google not to index that particular page. Add this specification to your robots meta tag code in your swipe file. Then, paste it into your HTML header for the page in question. 5. Use the robots nofollow tag if you don’t want Google to follow links on this page. If you have a comments section where you want to prevent Google from associating random links with your website, you can do this with the nofollow tag. The nofollow tag is also helpful for controlling your site’s “link juice” in a strategic way. If you don’t want Google to follow any links on a page, pull this code from your swipe file. It also goes in the HTML header. 6. Create a short headline to use in your title tag. This should compel readers to click. Your title tag should be unique for each page you create because it essentially names the page. The title tag shows in the SERPs, in the browser, and on social media. For that reason, it should be written for your target audience. Some things to keep in mind as you write: What value are you providing to them? What will they get if they visit the page? What benefits or advantages do you offer? How can you present that information while enticing them to click? Another best practice is to include your page’s target keyword as close to the beginning of the headline as possible. 7. Write a concise meta description that supports your title tag and further entices readers. Since the meta description also shows up in SERPs, this is an additional meta tag that essentially advertises your content. The goal here is to expand on the title/headline with enough elaboration while also enticing them to click. The challenge is doing it in under 160 words. Here are some strategies to consider: Use your primary keyword in the meta description to make it more relevant to their query, catching the reader’s eye. Set the stage for the content, giving the reader expectations about what you’ll be delivering. Open a loop or create intrigue to make them want to read more. 8. Add alt text tags that are keyword-optimized and descriptive to any embedded images on the page. Alt text describes images for search engine crawlers and screen readers. With that in mind, you should: Describe what’s happening in the image as concisely as possible. Include a keyword to make the image more relevant from an SEO standpoint.
How to Use Meta Tags with HubSpot In your HubSpot account, click the Marketing tab in the navigation. Hover over Website, then choose either Website Pages or Landing Pages (depending on where the page in question is located). Click the name of the page to open up the editor. Click the “Settings” tab at the top of the page editor. Click “Advanced Options” at the bottom of the page. Locate the Head HTML field under “Additional code snippets.” Paste in the code for the most applicable meta tag(s). Ensure that the code is correct for what you want to achieve. Publish or Update the page. You can verify that the code is now live by visiting the page, right clicking somewhere on the page, choosing “View Source,” and searching for your code in the new window.
Now that you know what meta tags are and how to implement them on your site, you can check this task off your SEO to-do list. Your pages will now be much more easily crawled and indexed by search engines like Google. Keep in mind, however, that meta tags are only one part of optimizing pages for organic search. There are many other SEO factors that could affect your traffic and ranking performance. Editor’s Note: This post was originally published on Mar 8, 2019 but was updated on Mar 10, 2020 for comprehensiveness.
Source link
source https://www.kadobeclothing.store/the-plain-english-guide-to-meta-tags-seo/
0 notes
Text
The Plain-English Guide to Meta Tags & SEO
In 2018, HubSpot found 64% of marketers said they actively invest in search engine optimization (SEO).
Good SEO can get you in front of the potential customers who are searching for your products or services, and great SEO can help those users become long-term customers, and even brand loyalists.
SEO is a landscape that involves many on-page and off-page factors, and it’s critical to understand how to incorporate meta tags into each one of your web pages. Meta tags can help search engines correctly identify and categorize your pages, which may result in higher rankings and more exposure to the audience you’re trying to reach.
If you’re anything like me, though, you might be thinking, “Wait … what’s a meta tag again?”
What Are Meta Tags?
Here, we’re going to define meta tags, identify some of the most important meta tags you need to worry about, and provide instructions so that you can begin incorporating meta tags into your HTML today.
SEO & Meta Tags
A meta tag is a snippet of descriptive text you’ll include in the code of a web page but it doesn’t appear on the page itself. Meta tags help search engine crawlers understand what your site is about and index your page, which is critical when you want to rank on SERPs for the right keywords.
Meta tags are useful from an SEO perspective since they allow search engines to more easily categorize your web page’s content. There are several types of meta tags and their attributes, and how you use them will depend on your strategy.
Meta Tags Example
Examples of meta tags include canonical tags, meta content type, robot meta tags, meta descriptions, and title tags. You might use a canonical tag to tell search engines which page is the ‘master’ one. Alternatively, you might use robot meta tags to ensure search engines don’t index a page you don’t want on the SERP’s, like a search results page on your site.
Let’s dive into some of these now.
1. Canonical Tags
If you have a single page with multiple URLs, or different pages with similar content (such as a page with a mobile and desktop version), search engines see these pages as duplicate versions of the same page.
For instance, as a human, you know “www.google.com” and “https://google.com” point to the same page — if you search for either, you’ll land on Google’s homepage.
But Google sees “www” and “https://” as duplicate versions of the same page. If you don’t specify which page you want to be the “real,” or original, source, Google will choose which source it dubs original and crawl the other pages less often.
This could mean that Google consistently crawls your mobile version of your homepage and rarely checks your desktop version.
For this reason, it’s often important to include a canonical tag, which simply tells Google, “Hey, if you find this same content elsewhere — please disregard. This is the source I want you to see, and this is the version I want to appear in the SERPs.”
This is especially important for pages like your homepage. To insert a canonical tag, simply put this code in your HTML:
<link rel=”canonical” href=”https://ift.tt/2TD2Z5p” />
2. Meta Content Type
The meta content type enables you to specify the media type (e.g. “text/html”) and character set for each web page — you’ll want to include this on all of your web pages. Different browsers render information differently, and different languages have different character sets. Using meta content type tags ensures your pages are displayed correctly on all browsers.
Here’s an example of the code you’d use for meta content type:
<meta http-equiv=”Content-Type” content=”text/html; charset=utf-8″ />
3. Robots Meta Tags
By default, search engine crawlers move through your entire site and follow internal and external links. However, this may not align with your strategy if you are looking to control how some pages appear in SERPs. In addition, a high number of outbound links may negatively affect the value passed through your links (also known in the SEO community as “link juice”).
If you don’t specify a robot meta tag, search engines will obey the default index,follow command. Robots meta tags can influence the behavior of the search engine crawling and indexing, resulting in more strategic control of how your site shows up in SERPs and what “link juice” it retains.
Here are a few common robot meta tags:
noindex — Prevents the page from being indexed.
nofollow — Prevents Googlebot from following links from this page.
nosnippet — Prevents a text snippet or video preview from being shown in the search results. For video, a static image could be shown instead.
noarchive — Prevents Google from showing the Cached link for a page.
unavailable_after:[date] — Allows you to specify the exact time and date you want to stop crawling and indexing of this page.
There are various reasons you might use a robots meta tag. You might input the “nofollow” command, for instance, if your web page has a comments section. Since you can’t control which links are posted by readers in the comments section (which could be off-topic to your page’s content), it might be smart to tell search engines not to follow those links.
Alternatively, “noindex” is a popular tag for a few reasons. Let’s say you’re planning to launch a website redesign, but you want to test the redesign on a development server that lives in a subdomain on your website. You’ll want to use the “noindex” tag to ensure Google won’t release the site in search before it’s ready.
You might also use “noindex” if you have a gated content offer you don’t want users to be able to find on search engines — since you want them to fill out a form to access it.
Lastly, you might use “noindex” if your website creates unique web pages whenever someone does a site search. Search engines might think those pages are part of your website, which will hurt your SEO. It’s best if you incorporate “noindex” to ensure site search results aren’t displayed on the SERPs.
To incorporate a robots meta directive, input this code into your HTML:
<meta name=”robots” content=”noindex, nofollow”>
4. Title Tags
Title tags help readers initially understand what your content is about, and they are also a major factor in helping search engines understand your content’s subject matter. Additionally, a title tag can ensure consistency, since the title tag will show up on your web page, on the web browser, and in social networks.
If you don’t include a <title> tag, Google will create one for the SERPs for you — which can hurt your ranking. Ultimately, you want to create a compelling, click-worthy title that will intrigue readers while accurately portraying what your page is about.
Include a title tag on each of your web page’s by pasting this code into your HTML:
<head>
<title>Example Title</title>
</head>
It’s important to note, alt text is technically not a tag — it’s an attribute. However, you’ve likely heard the term “alt tag”, which is why you might think alt text is part of the meta tag family (I know I did …).
Regardless of its categorization, alt text is incredibly important for your overall SEO strategy, particularly since Google places more value on visual search nowadays. When a search engine crawls your page, it’s going to look for the alt text of an image as an identifier for what your web page is about — so it’s critical you correctly title your alt text.
Here’s a code example for alt text to incorporate in your HTML: <img src=”metatag.jpg” alt=”Meta tag picture”>.
5. Meta Keywords
Meta keywords are an attribute of the “meta name” tag that get added if you want to use keywords to describe what a page is about. These keywords would not appear on the page but rather in the page’s code, and search engines used to use them as a ranking factor.
Note: While it doesn’t hurt to use them, meta keywords are no longer relevant for most SEO strategies. In 2009, Google announced that it no longer factored meta keywords into their search algorithm for ranking.
6. Meta Descriptions
Meta descriptions are one example of a meta tag — simply put, a meta description is a 160 character-limit snippet of text a user can read on a search engine. A meta description tells the user what they’ll find if they click on your content — which, if done correctly, can greatly increase click-through rates.
The tag doesn’t influence ranking directly, but it’s nonetheless an important element of SEO — a good meta description can compel readers to click on your article, and if the meta description accurately describes your content, the user is more likely to stay on the page. Click-through rates do influence search engine ranking, so meta descriptions are important for SEO.
Here’s an example of the code you’d use to manually input a meta description into your web page’s HTML:
<head>
<meta name=”description” content=”This is an example of my meta description.”>
</head>
Meta Tags vs. Meta Descriptions
These two often get conflated since they both contain the word “meta.” One thing to understand is that meta descriptions are just one example of meta tags, which encompass all of the items in the above list.
While meta descriptions are a subcategory of meta tags, there is a fundamental difference between the two — purpose. Meta tags are used to help search engines figure out the content of your site, but meta descriptions are used to help a user sort your content.
For instance, consider what happens when I search “what are meta tags”:
The meta descriptions for the following two articles are more than likely the primary reason I’ll choose one article over the other.
How to Write Meta Tags
Understand that not all meta tags need to be written. Some are just codes.
Create a swipe file to use for copy/pasting those codes.
Paste the canonical tag into the HTML header if the page has duplicate content.
Use the robots noindex tag if you don’t want the page to show up in SERPs.
Use the robots nofollow tag if you don’t want Google to follow links on this page.
Create a short headline to use in your title tag. This should compel readers to click.
Write a concise meta description.
Add alt text tags that are keyword-optimized and descriptive to any embedded images on the page.
1. Understand that not all meta tags need to be written. Some are just codes.
After reading this article, you’ve learned that there’s not one single “meta tag” but rather several categories that fall under this umbrella. Some meta tags require creativity while others are snippets of code that you can simply copy and paste.
2. Create a swipe file to use for copy/pasting those codes.
For the instances in which you don’t need to write anything, it’s helpful to have this coding handy anytime you’re creating pages.
3. Paste the canonical tag into the HTML header if the page has duplicate content.
As a reminder, if there are multiple versions of a page on your site, you’ll want to use canonical tags to specify the original source for that content. For any duplicate content, you can pull your canonical code from your swipe file to specify it as such.
4. Use the robots noindex tag if you don’t want the page to show up in SERPs.
There are many reasons you might not want a particular page to be indexed. Perhaps it’s a thank you page that should only be viewed once a user takes a certain action, or maybe it’s a piece of content that you don’t want showing up in the SERPs. Whatever your reason, the noindex tag will signal to Google not to index that particular page.
Add this specification to your robots meta tag code in your swipe file. Then, paste it into your HTML header for the page in question.
5. Use the robots nofollow tag if you don’t want Google to follow links on this page.
If you have a comments section where you want to prevent Google from associating random links with your website, you can do this with the nofollow tag. The nofollow tag is also helpful for controlling your site’s “link juice” in a strategic way. If you don’t want Google to follow any links on a page, pull this code from your swipe file. It also goes in the HTML header.
6. Create a short headline to use in your title tag. This should compel readers to click.
Your title tag should be unique for each page you create because it essentially names the page. The title tag shows in the SERPs, in the browser, and on social media. For that reason, it should be written for your target audience. Some things to keep in mind as you write:
What value are you providing to them?
What will they get if they visit the page?
What benefits or advantages do you offer?
How can you present that information while enticing them to click?
Another best practice is to include your page’s target keyword as close to the beginning of the headline as possible.
7. Write a concise meta description that supports your title tag and further entices readers.
Since the meta description also shows up in SERPs, this is an additional meta tag that essentially advertises your content. The goal here is to expand on the title/headline with enough elaboration while also enticing them to click. The challenge is doing it in under 160 words. Here are some strategies to consider:
Use your primary keyword in the meta description to make it more relevant to their query, catching the reader’s eye.
Set the stage for the content, giving the reader expectations about what you’ll be delivering.
Open a loop or create intrigue to make them want to read more.
8. Add alt text tags that are keyword-optimized and descriptive to any embedded images on the page.
Alt text describes images for search engine crawlers and screen readers. With that in mind, you should:
Describe what’s happening in the image as concisely as possible.
Include a keyword to make the image more relevant from an SEO standpoint.
How to Use Meta Tags with HubSpot
In your HubSpot account, click the Marketing tab in the navigation.
Hover over Website, then choose either Website Pages or Landing Pages (depending on where the page in question is located).
Click the name of the page to open up the editor.
Click the “Settings” tab at the top of the page editor.
Click “Advanced Options” at the bottom of the page.
Locate the Head HTML field under “Additional code snippets.”
Paste in the code for the most applicable meta tag(s).
Ensure that the code is correct for what you want to achieve.
Publish or Update the page.
You can verify that the code is now live by visiting the page, right clicking somewhere on the page, choosing “View Source,” and searching for your code in the new window.
Now that you know what meta tags are and how to implement them on your site, you can check this task off your SEO to-do list. Your pages will now be much more easily crawled and indexed by search engines like Google. Keep in mind, however, that meta tags are only one part of optimizing pages for organic search. There are many other SEO factors that could affect your traffic and ranking performance.
Editor’s Note: This post was originally published on Mar 8, 2019 but was updated on Mar 10, 2020 for comprehensiveness.
The Plain-English Guide to Meta Tags & SEO publicado primeiro em https://blog.hubspot.com/
Essa publicação Marketing 4.0 por Tiago Barbosa apareceu primeiro em https://ift.tt/2xQXPJN
0 notes
Text
Beginner’s Guide to Image SEO – Optimize Images for Search Engines
Are you looking to improve image SEO on your website? When optimized properly, image search can bring many new visitors to your website.
To benefit from image SEO, you need to help search engines find your images and index them for the right keywords.
In this beginner’s guide, we will show you how to optimize image SEO by following top best practices.
Here is a brief overview of what you’ll learn in this article.
Optimizing your images for SEO and Speed
What is Alt text?
Difference between Alt text vs title
Difference between alt text and caption
How to add alt text, title, and caption to images in WordPress
When to use captions for images
Disable attachment pages in WordPress
Additional tips to improve image SEO
Optimizing Your Images for SEO and Speed
Speed plays an important role in SEO and user experience. Search engines consistently rank fast websites higher. This is also true for the image search.
Images increase your overall page load time. They take longer to download than text, which means your page loads slower if there are several large image files to download.
You need to make sure that images on your site are optimized for web. This can be a little tricky to get used to since many beginners are not experts in graphics and image editing.
We have a handy guide on how to properly optimize images before uploading them to your website.
The best way to optimize images is by editing them on your computer using a photo editing software like Adobe Photoshop. This allows you to choose the right file format to create a small file size.
You can also use an image compression plugin for WordPress. These image optimizer plugins allow you to automatically reduce file size while uploading an image to WordPress.
What is Alt Text?
Alt text or alternative text is an HTML attribute added to the img tag which is used to display images on a web page. It looks like this in plain HTML code:
<img src="/fruitbasket.jpeg" alt="A fruit basket" />
It allows website owners to describe the image in plain text. The main purpose of the alternate text is to improve accessibility by enabling screen readers to read out the alt text for visually impaired users.
Alt text is also crucial for image SEO. It helps search engines understand the context of the image.
Modern search engines can recognize an image and it’s content by using artificial intelligence. However, they still rely on website owners to describe the image in their own words.
Alt text also accompanies images in Google image search, which helps users understand the image and improves your chances of getting more visitors.
Usually, alt text is not visible on your website. However if an image is broken or cannot be found, then your users will be able to see the alternate text with a broken image icon next to it.
What is the Difference Between Alt Text vs Title
Alt text is used for accessibility and image SEO, while title field is used internally by WordPress for media search.
WordPress inserts the alt tag in the actual code used to display the image. The title tag is stored in the database to find and display images.
In the past, WordPress inserted the title tag in the HTML code as well. However, it was not an ideal situation from the accessibility point of view, which is why they removed it.
What is the Difference Between Alt Text vs Caption
The alt text is used to describe the image for search engines and screen readers. On the other hand, the caption is used to describe the image for all users.
Alt text is not visible on your website while captions are visible below your images.
The alt text is crucial for better image SEO on your website. The caption is optional and can be used only when you need to provide additional information about the image to website visitors.
How to Add Alt Text, Title, and Caption to Images in WordPress
Alt text, title, and caption make up the image metadata that you can add to images when uploading them into WordPress.
When you add an image using the default image block, WordPress allows you to add caption and alt text for the image.
It automatically generates a title for the image from the file name. You can change the title by clicking on the edit button in the image block’s toolbar.
This will bring up the media uploader popup where you can enter your own custom title for the image.
You can also edit the alt tag and title for the images that you have already uploaded to WordPress. To do that, you need to visit Media » Library page and locate the image you want to edit.
Simply clicking on an image will bring up the attachment details popup where you can enter title, alt text, and caption.
Note: Changing an image’s alt tag or caption via Media Library will not change it in the posts and pages where the image is already used.
When to Use Captions for Images in WordPress
Captions allow you to provide additional details for an image to all your users. They are visible on the screen for all users including search engines and screen readers.
As you may have noticed that most websites don’t normally use captions with images in their blog posts or pages. That’s because captions are often not needed to explain an image.
Captions are more suitable in the following scenarios:
Family or event photos
Photos that need additional explanation describing the background story
Product image galleries
In most cases, you would be able to explain the image in the article content itself.
Disable Attachment Pages in WordPress
WordPress creates a page for all images you upload to your posts and pages. It is called the attachment page. This page just shows a larger version of the actual image and nothing else.
This can have a negative SEO impact on your search rankings. Search engines consider pages with little to no text as low quality or ‘thin content’.
This is why we recommend users to disable the attachment pages on your website.
The easiest way to do this is by installing and activating the Yoast SEO plugin. For more details, see our step by step guide on how to install a WordPress plugin.
Upon activation, it automatically turns off attachment URLs. You can also manually turn off attachment pages in WordPress by visiting SEO » Search Appearance page and clicking on the Media tab.
From here, make sure that the ‘Media & attachment URLs’ option is set to ‘Yes’.
If you are not using Yoast SEO plugin, then you can install the Attachment Pages Redirect plugin. This plugin simply redirects people visiting the attachment page to the post where the image is displayed.
You can also do this manually, by adding the following code to your theme’s functions.php file or a site-specific plugin.
function wpb_redirect_attachment_to_post() { if ( is_attachment() ) { global $post; if( empty( $post ) ) $post = get_queried_object(); if ($post->post_parent) { $link = get_permalink( $post->post_parent ); wp_redirect( $link, '301' ); exit(); } else { // What to do if parent post is not available wp_redirect( home_url(), '301' ); exit(); } } } add_action( 'template_redirect', 'wpb_redirect_attachment_to_post' );
Additional Tips to Improve Image SEO
Adding alt tag is not the only thing you can do to improve image SEO. Following are a few additional tips that you should keep in mind when adding images to your blog posts.
1. Write descriptive alt text
Many beginners often just use one or two words as alt text for the image. This makes the image too generic and harder to rank.
For example, instead of just ‘kittens’ use ‘Kittens playing with a yellow rubber duck’.
2. Use descriptive file names for your images
Instead of saving your images as DSC00434.jpeg, you need to name them properly. Think of the keywords that users will type in the search to find that particular image.
Be more specific and descriptive in your image file names. For example, red-wooden-house.jpeg is better than just house.jpeg.
3. Provide context to your images
Search engines are getting smarter every day. They can recognize and categorize images quite well. However, they need you to provide context to the image.
Your images need to be relevant to the overall topic of the post or page. It is also helpful to place the image near the most relevant text in your article.
4. Follow the SEO best practices
You also need to follow the overall SEO guidelines for your website. This improves your overall search rankings including image search.
5. Use original photographs and images
There are many free stock photography websites that you can use to find free images for your blog posts. However, the problem with stock photos is that they are used by thousands of websites.
Try to use original photographs or create quality images that are unique to your blog.
We know that most bloggers are not photographers or graphic designers. Luckily, there are some great online tools that you can use to create graphics for your websites.
We hope this article helped you learn about Image SEO for your website. You may also want to see our guide on how to fix common image issues in WordPress.
If you liked this article, then please subscribe to our YouTube Channel for WordPress video tutorials. You can also find us on Twitter and Facebook.
The post Beginner’s Guide to Image SEO – Optimize Images for Search Engines appeared first on WPBeginner.
from WPBeginner https://www.wpbeginner.com/beginners-guide/image-seo-optimize-images-for-search-engines/
0 notes
Text
The SEO Cyborg: How to Resonate with Users & Make Sense to Search Bots
Posted by alexis-sanders
SEO is about understanding how search bots and users react to an online experience. As search professionals, we’re required to bridge gaps between online experiences, search engine bots, and users. We need to know where to insert ourselves (or our teams) to ensure the best experience for both users and bots. In other words, we strive for experiences that resonate with humans and make sense to search engine bots.
This article seeks to answer the following questions:
How do we drive sustainable growth for our clients?
What are the building blocks of an organic search strategy?
What is the SEO cyborg?
A cyborg (or cybernetic organism) is defined as “a being with both organic and biomechatronic body parts, whose physical abilities are extended beyond normal human limitations by mechanical elements.”
With the ability to relate between humans, search bots, and our site experiences, the SEO cyborg is an SEO (or team) that is able to work seamlessly between both technical and content initiatives (whose skills are extended beyond normal human limitations) to support driving of organic search performance. An SEO cyborg is able to strategically pinpoint where to place organic search efforts to maximize performance.
So, how do we do this?
The SEO model
Like so many classic triads (think: primary colors, the Three Musketeers, Destiny’s Child [the canonical version, of course]) the traditional SEO model, known as the crawl-index-rank method, packages SEO into three distinct steps. At the same time, however, this model fails to capture the breadth of work that we SEOs are expected to do on a daily basis, and not having a functioning model can be limiting. We need to expand this model without reinventing the wheel.
The enhanced model involves adding in a rendering, signaling, and connection phase.
You might be wondering, why do we need these?:
Rendering: There is increased prevalence of JavaScript, CSS, imagery, and personalization.
Signaling: HTML <link> tags, status codes, and even GSC signals are powerful indicators that tell search engines how to process and understand the page, determine its intent, and ultimately rank it. In the previous model, it didn’t feel as if these powerful elements really had a place.
Connecting: People are a critical component of search. The ultimate goal of search engines is to identify and rank content that resonates with people. In the previous model, “rank” felt cold, hierarchical, and indifferent towards the end user.
All of this brings us to the question: how do we find success in each stage of this model?
Note: When using this piece, I recommend skimming ahead and leveraging those sections of the enhanced model that are most applicable to your business’ current search program.
The enhanced SEO model
Crawling
Technical SEO starts with the search engine’s ability to find a site’s webpages (hopefully efficiently).
Finding pages
Initially finding pages can happen a few ways, via:
Links (internal or external)
Redirected pages
Sitemaps (XML, RSS 2.0, Atom 1.0, or .txt)
Side note: This information (although at first pretty straightforward) can be really useful. For example, if you’re seeing weird pages popping up in site crawls or performing in search, try checking:
Backlink reports
Internal links to URL
Redirected into URL
Obtaining resources
The second component of crawling relates to the ability to obtain resources (which later becomes critical for rendering a page’s experience).
This typically relates to two elements:
Appropriate robots.txt declarations
Proper HTTP status code (namely 200 HTTP status codes)
Crawl efficiency
Finally, there’s the idea of how efficiently a search engine bot can traverse your site’s most critical experiences.
Action items:
Is site’s main navigation simple, clear, and useful?
Are there relevant on-page links?
Is internal linking clear and crawlable (i.e., <a href="/">)?
Is an HTML sitemap available?
Side note: Make sure to check the HTML sitemap’s next page flow (or behavior flow reports) to find where those users are going. This may help to inform the main navigation.
Do footer links contain tertiary content?
Are important pages close to root?
Are there no crawl traps?
Are there no orphan pages?
Are pages consolidated?
Do all pages have purpose?
Has duplicate content been resolved?
Have redirects been consolidated?
Are canonical tags on point?
Are parameters well defined?
Information architecture
The organization of information extends past the bots, requiring an in-depth understanding of how users engage with a site.
Some seed questions to begin research include:
What trends appear in search volume (by location, device)? What are common questions users have?
Which pages get the most traffic?
What are common user journeys?
What are users’ traffic behaviors and flow?
How do users leverage site features (e.g., internal site search)?
Rendering
Rendering a page relates to search engines’ ability to capture the page’s desired essence.
JavaScript
The big kahuna in the rendering section is JavaScript. For Google, rendering of JavaScript occurs during a second wave of indexing and the content is queued and rendered as resources become available.
Image based off of Google I/O ’18 presentation by Tom Greenway and John Mueller, Deliver search-friendly JavaScript-powered websites
As an SEO, it’s critical that we be able to answer the question — are search engines rendering my content?
Action items:
Are direct “quotes” from content indexed?
Is the site using <a href="/"> links (not onclick();)?
Is the same content being served to search engine bots (user-agent)?
Is the content present within the DOM?
What does Google’s Mobile-Friendly Testing Tool’s JavaScript console (click “view details”) say?
Infinite scroll and lazy loading
Another hot topic relating to JavaScript is infinite scroll (and lazy load for imagery). Since search engine bots are lazy users, they won’t scroll to attain content.
Action items:
Ask ourselves – should all of the content really be indexed? Is it content that provides value to users?
Infinite scroll: a user experience (and occasionally a performance optimizing) tactic to load content when the user hits a certain point in the UI; typically the content is exhaustive.
Solution one (updating AJAX):
1. Break out content into separate sections
Note: The breakout of pages can be /page-1, /page-2, etc.; however, it would be best to delineate meaningful divides (e.g., /voltron, /optimus-prime, etc.)
2. Implement History API (pushState(), replaceState()) to update URLs as a user scrolls (i.e., push/update the URL into the URL bar)
3. Add the <link> tag’s rel="next" and rel="prev" on relevant page
Solution two (create a view-all page) Note: This is not recommended for large amounts of content.
1. If it’s possible (i.e., there’s not a ton of content within the infinite scroll), create one page encompassing all content
2. Site latency/page load should be considered
Lazy load imagery is a web performance optimization tactic, in which images loads upon a user scrolling (the idea is to save time, downloading images only when they’re needed)
Add <img> tags in <noscript> tags
Use JSON-LD structured data
Schema.org "image" attributes nested in appropriate item types
Schema.org ImageObject item type
CSS
I only have a few elements relating to the rendering of CSS.
Action items:
CSS background images not picked up in image search, so don’t count on for important imagery
CSS animations not interpreted, so make sure to add surrounding textual content
Layouts for page are important (use responsive mobile layouts; avoid excessive ads)
Personalization
Although a trend in the broader digital exists to create 1:1, people-based marketing, Google doesn’t save cookies across sessions and thus will not interpret personalization based on cookies, meaning there must be an average, base-user, default experience. The data from other digital channels can be exceptionally useful when building out audience segments and gaining a deeper understanding of the base-user.
Action item:
Ensure there is a base-user, unauthenticated, default experience
Technology
Google’s rendering engine is leveraging Chrome 41. Canary (Chrome’s testing browser) is currently operating on Chrome 69. Using CanIUse.com, we can infer that this affects Google’s abilities relating to HTTP/2, service workers (think: PWAs), certain JavaScript, specific advanced image formats, resource hints, and new encoding methods. That said, this does not mean we shouldn’t progress our sites and experiences for users — we just must ensure that we use progressive development (i.e., there’s a fallback for less advanced browsers [and Google too ☺]).
Action items:
Ensure there's a fallback for less advanced browsers
Indexing
Getting pages into Google’s databases is what indexing is all about. From what I’ve experienced, this process is straightforward for most sites.
Action items:
Ensure URLs are able to be crawled and rendered
Ensure nothing is preventing indexing (e.g., robots meta tag)
Submit sitemap in Google Search Console
Fetch as Google in Google Search Console
Signaling
A site should strive to send clear signals to search engines. Unnecessarily confusing search engines can significantly impact a site’s performance. Signaling relates to suggesting best representation and status of a page. All this means is that we’re ensuring the following elements are sending appropriate signals.
Action items:
<link> tag: This represents the relationship between documents in HTML.
Rel="canonical": This represents appreciably similar content.
Are canonicals a secondary solution to 301-redirecting experiences?
Are canonicals pointing to end-state URLs?
Is the content appreciably similar?
Since Google maintains prerogative over determining end-state URL, it’s important that the canonical tags represent duplicates (and/or duplicate content).
Are all canonicals in HTML?
Presumably Google prefers canonical tags in the HTML. Although there have been some studies that show that Google can pick up JavaScript canonical tags, from my personal studies it takes significantly longer and is spottier.
Is there safeguarding against incorrect canonical tags?
Rel="next" and rel="prev": These represent a collective series and are not considered duplicate content, which means that all URLs can be indexed. That said, typically the first page in the chain is the most authoritative, so usually it will be the one to rank.
Rel="alternate"
media: typically used for separate mobile experiences.
hreflang: indicate appropriate language/country
The hreflang is quite unforgiving and it’s very easy to make errors.
Ensure the documentation is followed closely.
Check GSC International Target reports to ensure tags are populating.
HTTP status codes can also be signals, particularly the 304, 404, 410, and 503 status codes.
304 – a valid page that simply hasn’t been modified
404 – file not found
410 – file not found (and it is gone, forever and always)
503 – server maintenance
Google Search Console settings: Make sure the following reports are all sending clear signals. Occasionally Google decides to honor these signals.
International Targeting
URL Parameters
Data Highlighter
Remove URLs
Sitemaps
Rank
Rank relates to how search engines arrange web experiences, stacking them against each other to see who ends up on top for each individual query (taking into account numerous data points surrounding the query).
Two critical questions recur often when understanding ranking pages:
Does or could your page have the best response?
Are you or could you become semantically known (on the Internet and in the minds of users) for the topics? (i.e., are you worthy of receiving links and people traversing the web to land on your experience?)
On-page optimizations
These are the elements webmasters control. Off-page is a critical component to achieving success in search; however, in an idyllic world, we shouldn’t have to worry about links and/or mentions – they should come naturally.
Action items:
Textual content:
Make content both people and bots can understand
Answer questions directly
Write short, logical, simple sentences
Ensure subjects are clear (not to be inferred)
Create scannable content (i.e., make sure <h#> tags are an outline, use bullets/lists, use tables, charts, and visuals to delineate content, etc.)
Define any uncommon vocabulary or link to a glossary
Multimedia (images, videos, engaging elements):
Use imagery, videos, engaging content where applicable
Ensure that image optimization best practices are followed
If you’re looking for a comprehensive resource check out https://images.guide
Meta elements (<title> tags, meta descriptions, OGP, Twitter cards, etc.)
Structured data
Schema.org (check out Google’s supported markup and TechnicalSEO.com’s markup helper tool)
Use Accessible Rich Internet Applications (ARIA)
Use semantic HTML (especially hierarchically organized, relevant <h#> tags and unordered and ordered lists (<ul>, <ol>))
Image courtesy of @abbynhamilton
Is content accessible?
Is there keyboard functionality?
Are there text alternatives for non-text media? Example:
Transcripts for audio
Images with alt text
In-text descriptions of visuals
Is there adequate color contrast?
Is text resizable?
Finding interesting content
Researching and identifying useful content happens in three formats:
Keyword and search landscape research
On-site analytic deep dives
User research
Visual modified from @smrvl via @DannyProl
Audience research
When looking for audiences, we need to concentrate high percentages (super high index rates are great, but not required). Push channels (particularly ones with strong targeting capabilities) do better with high index rates. This makes sense, we need to know that 80% of our customers have certain leanings (because we’re looking for base-case), not that five users over-index on a niche topic (these five niche-topic lovers are perfect for targeted ads).
Some seed research questions:
Who are users?
Where are they?
Why do they buy?
How do they buy?
What do they want?
Are they new or existing users?
What do they value?
What are their motivators?
What is their relationship w/ tech?
What do they do online?
Are users engaging with other brands?
Is there an opportunity for synergy?
What can we borrow from other channels?
Digital presents a wealth of data, in which 1:1, closed-loop, people-based marketing exists. Leverage any data you can get and find useful.
Content journey maps
All of this data can then go into creating a map of the user journey and overlaying relevant content. Below are a few types of mappings that are useful.
Illustrative user journey map
Sometimes when trying to process complex problems, it’s easier to break it down into smaller pieces. Illustrative user journeys can help with this problem! Take a single user’s journey and map it out, aligning relevant content experiences.
Funnel content mapping
This chart is deceptively simple; however, working through this graph can help sites to understand how each stage in the funnel affects users (note: the stages can be modified). This matrix can help with mapping who writers are talking to, their needs, and how to push them to the next stage in the funnel.
Content matrix
Mapping out content by intent and branding helps to visualize conversion potential. I find these extremely useful for prioritizing top-converting content initiatives (i.e., start with ensuring branded, transactional content is delivering the best experience, then move towards more generic, higher-funnel terms).
Overviews
Regardless of how the data is broken down, it’s vital to have a high-level view on the audience’s core attributes, opportunities to improve content, and strategy for closing the gap.
Connecting
Connecting is all about resonating with humans. Connecting is about understanding that customers are human (and we have certain constraints). Our mind is constantly filtering, managing, multitasking, processing, coordinating, organizing, and storing information. It is literally in our mind’s best interest to not remember 99% of the information and sensations that surround us (think of the lights, sounds, tangible objects, people surrounding you, and you’re still able to focus on reading the words on your screen — pretty incredible!).
To become psychologically sticky, we must:
Get past the mind’s natural filter. A positive aspect of being a pull marketing channel is that individuals are already seeking out information, making it possible to intersect their user journey in a micro-moment.
From there we must be memorable. The brain tends to hold onto what’s relevant, useful, or interesting. Luckily, the searcher’s interest is already piqued (even if they aren’t consciously aware of why they searched for a particular topic).
This means we have a unique opportunity to “be there” for people. This leads to a very simple, abstract philosophy: a great brand is like a great friend.
We have similar relationship stages, we interweave throughout each other’s lives, and we have the ability to impact happiness. This comes down to the question: Do your online customers use adjectives they would use for a friend to describe your brand?
Action items:
Is all content either relevant, useful, or interesting?
Does the content honor your user’s questions?
Does your brand have a personality that aligns with reality?
Are you treating users as you would a friend?
Do your users use friend-like adjectives to describe your brand and/or site?
Do the brand’s actions align with overarching goals?
Is your experience trust-inspiring?
https://?
Using Limited ads in layout?
Does the site have proof of claims?
Does the site use relevant reviews and testimonials?
Is contact information available and easily findable?
Is relevant information intuitively available to users?
Is it as easy to buy/subscribe as it is to return/cancel?
Is integrity visible throughout the entire conversion process and experience?
Does site have credible reputation across the web?
Ultimately, being able to strategically, seamlessly create compelling user experiences which make sense to bots is what the SEO cyborg is all about. ☺
tl;dr
Ensure site = crawlable, renderable, and indexable
Ensure all signals = clear, aligned
Answering related, semantically salient questions
Research keywords, the search landscape, site performance, and develop audience segments
Use audience segments to map content and prioritize initiatives
Ensure content is relevant, useful, or interesting
Treat users as friend, be worthy of their trust
This article is based off of my MozCon talk (with a few slides from the Appendix pulled forward). The full deck is available on Slideshare, and the official videos can be purchased here. Please feel free to reach out with any questions in the comments below or via Twitter @AlexisKSanders.
Sign up for The Moz Top 10, a semimonthly mailer updating you on the top ten hottest pieces of SEO news, tips, and rad links uncovered by the Moz team. Think of it as your exclusive digest of stuff you don't have time to hunt down but want to read!
0 notes
Text
The SEO Cyborg: How to Resonate with Users & Make Sense to Search Bots
The SEO Cyborg: How to Resonate with Users & Make Sense to Search Bots
Posted by alexis-sanders
SEO is about understanding how search bots and users react to an online experience. As search professionals, we’re required to bridge gaps between online experiences, search engine bots, and users. We need to know where to insert ourselves (or our teams) to ensure the best experience for both users and bots. In other words, we strive for experiences that resonate with humans and make sense to search engine bots.
This article seeks to answer the following questions:
How do we drive sustainable growth for our clients?
What are the building blocks of an organic search strategy?
What is the SEO cyborg?
A cyborg (or cybernetic organism) is defined as “a being with both organic and biomechatronic body parts, whose physical abilities are extended beyond normal human limitations by mechanical elements.”
With the ability to relate between humans, search bots, and our site experiences, the SEO cyborg is an SEO (or team) that is able to work seamlessly between both technical and content initiatives (whose skills are extended beyond normal human limitations) to support driving of organic search performance. An SEO cyborg is able to strategically pinpoint where to place organic search efforts to maximize performance.
So, how do we do this?
The SEO model
Like so many classic triads (think: primary colors, the Three Musketeers, Destiny’s Child [the canonical version, of course]) the traditional SEO model, known as the crawl-index-rank method, packages SEO into three distinct steps. At the same time, however, this model fails to capture the breadth of work that we SEOs are expected to do on a daily basis, and not having a functioning model can be limiting. We need to expand this model without reinventing the wheel.
The enhanced model involves adding in a rendering, signaling, and connection phase.
You might be wondering, why do we need these?:
Rendering: There is increased prevalence of JavaScript, CSS, imagery, and personalization.
Signaling: HTML <link> tags, status codes, and even GSC signals are powerful indicators that tell search engines how to process and understand the page, determine its intent, and ultimately rank it. In the previous model, it didn’t feel as if these powerful elements really had a place.
Connecting: People are a critical component of search. The ultimate goal of search engines is to identify and rank content that resonates with people. In the previous model, “rank” felt cold, hierarchical, and indifferent towards the end user.
All of this brings us to the question: how do we find success in each stage of this model?
Note: When using this piece, I recommend skimming ahead and leveraging those sections of the enhanced model that are most applicable to your business’ current search program.
The enhanced SEO model
Crawling
Technical SEO starts with the search engine’s ability to find a site’s webpages (hopefully efficiently).
Finding pages
Initially finding pages can happen a few ways, via:
Links (internal or external)
Redirected pages
Sitemaps (XML, RSS 2.0, Atom 1.0, or .txt)
Side note: This information (although at first pretty straightforward) can be really useful. For example, if you’re seeing weird pages popping up in site crawls or performing in search, try checking:
Backlink reports
Internal links to URL
Redirected into URL
Obtaining resources
The second component of crawling relates to the ability to obtain resources (which later becomes critical for rendering a page’s experience).
This typically relates to two elements:
Appropriate robots.txt declarations
Proper HTTP status code (namely 200 HTTP status codes)
Crawl efficiency
Finally, there’s the idea of how efficiently a search engine bot can traverse your site’s most critical experiences.
Action items:
Is site’s main navigation simple, clear, and useful?
Are there relevant on-page links?
Is internal linking clear and crawlable (i.e., <a href="/">)?
Is an HTML sitemap available?
Side note: Make sure to check the HTML sitemap’s next page flow (or behavior flow reports) to find where those users are going. This may help to inform the main navigation.
Do footer links contain tertiary content?
Are important pages close to root?
Are there no crawl traps?
Are there no orphan pages?
Are pages consolidated?
Do all pages have purpose?
Has duplicate content been resolved?
Have redirects been consolidated?
Are canonical tags on point?
Are parameters well defined?
Information architecture
The organization of information extends past the bots, requiring an in-depth understanding of how users engage with a site.
Some seed questions to begin research include:
What trends appear in search volume (by location, device)? What are common questions users have?
Which pages get the most traffic?
What are common user journeys?
What are users’ traffic behaviors and flow?
How do users leverage site features (e.g., internal site search)?
Rendering
Rendering a page relates to search engines’ ability to capture the page’s desired essence.
JavaScript
The big kahuna in the rendering section is JavaScript. For Google, rendering of JavaScript occurs during a second wave of indexing and the content is queued and rendered as resources become available.
Image based off of Google I/O ’18 presentation by Tom Greenway and John Mueller, Deliver search-friendly JavaScript-powered websites
As an SEO, it’s critical that we be able to answer the question — are search engines rendering my content?
Action items:
Are direct “quotes” from content indexed?
Is the site using <a href="/"> links (not onclick();)?
Is the same content being served to search engine bots (user-agent)?
Is the content present within the DOM?
What does Google’s Mobile-Friendly Testing Tool’s JavaScript console (click “view details”) say?
Infinite scroll and lazy loading
Another hot topic relating to JavaScript is infinite scroll (and lazy load for imagery). Since search engine bots are lazy users, they won’t scroll to attain content.
Action items:
Ask ourselves – should all of the content really be indexed? Is it content that provides value to users?
Infinite scroll: a user experience (and occasionally a performance optimizing) tactic to load content when the user hits a certain point in the UI; typically the content is exhaustive.
Solution one (updating AJAX):
1. Break out content into separate sections
Note: The breakout of pages can be /page-1, /page-2, etc.; however, it would be best to delineate meaningful divides (e.g., /voltron, /optimus-prime, etc.)
2. Implement History API (pushState(), replaceState()) to update URLs as a user scrolls (i.e., push/update the URL into the URL bar)
3. Add the <link> tag’s rel="next" and rel="prev" on relevant page
Solution two (create a view-all page) Note: This is not recommended for large amounts of content.
1. If it’s possible (i.e., there’s not a ton of content within the infinite scroll), create one page encompassing all content
2. Site latency/page load should be considered
Lazy load imagery is a web performance optimization tactic, in which images loads upon a user scrolling (the idea is to save time, downloading images only when they’re needed)
Add <img> tags in <noscript> tags
Use JSON-LD structured data
Schema.org "image" attributes nested in appropriate item types
Schema.org ImageObject item type
CSS
I only have a few elements relating to the rendering of CSS.
Action items:
CSS background images not picked up in image search, so don’t count on for important imagery
CSS animations not interpreted, so make sure to add surrounding textual content
Layouts for page are important (use responsive mobile layouts; avoid excessive ads)
Personalization
Although a trend in the broader digital exists to create 1:1, people-based marketing, Google doesn’t save cookies across sessions and thus will not interpret personalization based on cookies, meaning there must be an average, base-user, default experience. The data from other digital channels can be exceptionally useful when building out audience segments and gaining a deeper understanding of the base-user.
Action item:
Ensure there is a base-user, unauthenticated, default experience
Technology
Google’s rendering engine is leveraging Chrome 41. Canary (Chrome’s testing browser) is currently operating on Chrome 69. Using CanIUse.com, we can infer that this affects Google’s abilities relating to HTTP/2, service workers (think: PWAs), certain JavaScript, specific advanced image formats, resource hints, and new encoding methods. That said, this does not mean we shouldn’t progress our sites and experiences for users — we just must ensure that we use progressive development (i.e., there’s a fallback for less advanced browsers [and Google too ☺]).
Action items:
Ensure there's a fallback for less advanced browsers
Indexing
Getting pages into Google’s databases is what indexing is all about. From what I’ve experienced, this process is straightforward for most sites.
Action items:
Ensure URLs are able to be crawled and rendered
Ensure nothing is preventing indexing (e.g., robots meta tag)
Submit sitemap in Google Search Console
Fetch as Google in Google Search Console
Signaling
A site should strive to send clear signals to search engines. Unnecessarily confusing search engines can significantly impact a site’s performance. Signaling relates to suggesting best representation and status of a page. All this means is that we’re ensuring the following elements are sending appropriate signals.
Action items:
<link> tag: This represents the relationship between documents in HTML.
Rel="canonical": This represents appreciably similar content.
Are canonicals a secondary solution to 301-redirecting experiences?
Are canonicals pointing to end-state URLs?
Is the content appreciably similar?
Since Google maintains prerogative over determining end-state URL, it’s important that the canonical tags represent duplicates (and/or duplicate content).
Are all canonicals in HTML?
Presumably Google prefers canonical tags in the HTML. Although there have been some studies that show that Google can pick up JavaScript canonical tags, from my personal studies it takes significantly longer and is spottier.
Is there safeguarding against incorrect canonical tags?
Rel="next" and rel="prev": These represent a collective series and are not considered duplicate content, which means that all URLs can be indexed. That said, typically the first page in the chain is the most authoritative, so usually it will be the one to rank.
Rel="alternate"
media: typically used for separate mobile experiences.
hreflang: indicate appropriate language/country
The hreflang is quite unforgiving and it’s very easy to make errors.
Ensure the documentation is followed closely.
Check GSC International Target reports to ensure tags are populating.
HTTP status codes can also be signals, particularly the 304, 404, 410, and 503 status codes.
304 – a valid page that simply hasn’t been modified
404 – file not found
410 – file not found (and it is gone, forever and always)
503 – server maintenance
Google Search Console settings: Make sure the following reports are all sending clear signals. Occasionally Google decides to honor these signals.
International Targeting
URL Parameters
Data Highlighter
Remove URLs
Sitemaps
Rank
Rank relates to how search engines arrange web experiences, stacking them against each other to see who ends up on top for each individual query (taking into account numerous data points surrounding the query).
Two critical questions recur often when understanding ranking pages:
Does or could your page have the best response?
Are you or could you become semantically known (on the Internet and in the minds of users) for the topics? (i.e., are you worthy of receiving links and people traversing the web to land on your experience?)
On-page optimizations
These are the elements webmasters control. Off-page is a critical component to achieving success in search; however, in an idyllic world, we shouldn’t have to worry about links and/or mentions – they should come naturally.
Action items:
Textual content:
Make content both people and bots can understand
Answer questions directly
Write short, logical, simple sentences
Ensure subjects are clear (not to be inferred)
Create scannable content (i.e., make sure <h#> tags are an outline, use bullets/lists, use tables, charts, and visuals to delineate content, etc.)
Define any uncommon vocabulary or link to a glossary
Multimedia (images, videos, engaging elements):
Use imagery, videos, engaging content where applicable
Ensure that image optimization best practices are followed
If you’re looking for a comprehensive resource check out https://images.guide
Meta elements (<title> tags, meta descriptions, OGP, Twitter cards, etc.)
Structured data
Schema.org (check out Google’s supported markup and TechnicalSEO.com’s markup helper tool)
Use Accessible Rich Internet Applications (ARIA)
Use semantic HTML (especially hierarchically organized, relevant <h#> tags and unordered and ordered lists (<ul>, <ol>))
Image courtesy of @abbynhamilton
Is content accessible?
Is there keyboard functionality?
Are there text alternatives for non-text media? Example:
Transcripts for audio
Images with alt text
In-text descriptions of visuals
Is there adequate color contrast?
Is text resizable?
Finding interesting content
Researching and identifying useful content happens in three formats:
Keyword and search landscape research
On-site analytic deep dives
User research
Visual modified from @smrvl via @DannyProl
Audience research
When looking for audiences, we need to concentrate high percentages (super high index rates are great, but not required). Push channels (particularly ones with strong targeting capabilities) do better with high index rates. This makes sense, we need to know that 80% of our customers have certain leanings (because we’re looking for base-case), not that five users over-index on a niche topic (these five niche-topic lovers are perfect for targeted ads).
Some seed research questions:
Who are users?
Where are they?
Why do they buy?
How do they buy?
What do they want?
Are they new or existing users?
What do they value?
What are their motivators?
What is their relationship w/ tech?
What do they do online?
Are users engaging with other brands?
Is there an opportunity for synergy?
What can we borrow from other channels?
Digital presents a wealth of data, in which 1:1, closed-loop, people-based marketing exists. Leverage any data you can get and find useful.
Content journey maps
All of this data can then go into creating a map of the user journey and overlaying relevant content. Below are a few types of mappings that are useful.
Illustrative user journey map
Sometimes when trying to process complex problems, it’s easier to break it down into smaller pieces. Illustrative user journeys can help with this problem! Take a single user’s journey and map it out, aligning relevant content experiences.
Funnel content mapping
This chart is deceptively simple; however, working through this graph can help sites to understand how each stage in the funnel affects users (note: the stages can be modified). This matrix can help with mapping who writers are talking to, their needs, and how to push them to the next stage in the funnel.
Content matrix
Mapping out content by intent and branding helps to visualize conversion potential. I find these extremely useful for prioritizing top-converting content initiatives (i.e., start with ensuring branded, transactional content is delivering the best experience, then move towards more generic, higher-funnel terms).
Overviews
Regardless of how the data is broken down, it’s vital to have a high-level view on the audience’s core attributes, opportunities to improve content, and strategy for closing the gap.
Connecting
Connecting is all about resonating with humans. Connecting is about understanding that customers are human (and we have certain constraints). Our mind is constantly filtering, managing, multitasking, processing, coordinating, organizing, and storing information. It is literally in our mind’s best interest to not remember 99% of the information and sensations that surround us (think of the lights, sounds, tangible objects, people surrounding you, and you’re still able to focus on reading the words on your screen — pretty incredible!).
To become psychologically sticky, we must:
Get past the mind’s natural filter. A positive aspect of being a pull marketing channel is that individuals are already seeking out information, making it possible to intersect their user journey in a micro-moment.
From there we must be memorable. The brain tends to hold onto what’s relevant, useful, or interesting. Luckily, the searcher’s interest is already piqued (even if they aren’t consciously aware of why they searched for a particular topic).
This means we have a unique opportunity to “be there” for people. This leads to a very simple, abstract philosophy: a great brand is like a great friend.
We have similar relationship stages, we interweave throughout each other’s lives, and we have the ability to impact happiness. This comes down to the question: Do your online customers use adjectives they would use for a friend to describe your brand?
Action items:
Is all content either relevant, useful, or interesting?
Does the content honor your user’s questions?
Does your brand have a personality that aligns with reality?
Are you treating users as you would a friend?
Do your users use friend-like adjectives to describe your brand and/or site?
Do the brand’s actions align with overarching goals?
Is your experience trust-inspiring?
https://?
Using Limited ads in layout?
Does the site have proof of claims?
Does the site use relevant reviews and testimonials?
Is contact information available and easily findable?
Is relevant information intuitively available to users?
Is it as easy to buy/subscribe as it is to return/cancel?
Is integrity visible throughout the entire conversion process and experience?
Does site have credible reputation across the web?
Ultimately, being able to strategically, seamlessly create compelling user experiences which make sense to bots is what the SEO cyborg is all about. ☺
tl;dr
Ensure site = crawlable, renderable, and indexable
Ensure all signals = clear, aligned
Answering related, semantically salient questions
Research keywords, the search landscape, site performance, and develop audience segments
Use audience segments to map content and prioritize initiatives
Ensure content is relevant, useful, or interesting
Treat users as friend, be worthy of their trust
This article is based off of my MozCon talk (with a few slides from the Appendix pulled forward). The full deck is available on Slideshare, and the official videos can be purchased here. Please feel free to reach out with any questions in the comments below or via Twitter @AlexisKSanders.
Sign up for The Moz Top 10, a semimonthly mailer updating you on the top ten hottest pieces of SEO news, tips, and rad links uncovered by the Moz team. Think of it as your exclusive digest of stuff you don't have time to hunt down but want to read!
bạn xem thêm tại: https://ift.tt/2mXjlRS The SEO Cyborg: How to Resonate with Users & Make Sense to Search Bots xem thêm tại: https://ift.tt/2mb4VST để biết thêm về địa chỉ bán tai nghe không dây giá rẻ The SEO Cyborg: How to Resonate with Users & Make Sense to Search Bots https://ift.tt/2A09cOg xem thêm tại: https://ift.tt/2mb4VST để biết thêm về địa chỉ bán tai nghe không dây giá rẻ The SEO Cyborg: How to Resonate with Users & Make Sense to Search Bots https://ift.tt/2A09cOg xem thêm tại: https://ift.tt/2mb4VST để biết thêm về địa chỉ bán tai nghe không dây giá rẻ The SEO Cyborg: How to Resonate with Users & Make Sense to Search Bots https://ift.tt/2A09cOg xem thêm tại: https://ift.tt/2mb4VST để biết thêm về địa chỉ bán tai nghe không dây giá rẻ The SEO Cyborg: How to Resonate with Users & Make Sense to Search Bots https://ift.tt/2A09cOg xem thêm tại: https://ift.tt/2mb4VST để biết thêm về địa chỉ bán tai nghe không dây giá rẻ The SEO Cyborg: How to Resonate with Users & Make Sense to Search Bots https://ift.tt/2A09cOg xem thêm tại: https://ift.tt/2mb4VST để biết thêm về địa chỉ bán tai nghe không dây giá rẻ The SEO Cyborg: How to Resonate with Users & Make Sense to Search Bots https://ift.tt/2A09cOg xem thêm tại: https://ift.tt/2mb4VST để biết thêm về địa chỉ bán tai nghe không dây giá rẻ The SEO Cyborg: How to Resonate with Users & Make Sense to Search Bots https://ift.tt/2A09cOg xem thêm tại: https://ift.tt/2mb4VST để biết thêm về địa chỉ bán tai nghe không dây giá rẻ The SEO Cyborg: How to Resonate with Users & Make Sense to Search Bots https://ift.tt/2A09cOg xem thêm tại: https://ift.tt/2mb4VST để biết thêm về địa chỉ bán tai nghe không dây giá rẻ The SEO Cyborg: How to Resonate with Users & Make Sense to Search Bots https://ift.tt/2A09cOg xem thêm tại: https://ift.tt/2mb4VST để biết thêm về địa chỉ bán tai nghe không dây giá rẻ The SEO Cyborg: How to Resonate with Users & Make Sense to Search Bots https://ift.tt/2A09cOg xem thêm tại: https://ift.tt/2mb4VST để biết thêm về địa chỉ bán tai nghe không dây giá rẻ The SEO Cyborg: How to Resonate with Users & Make Sense to Search Bots https://ift.tt/2A09cOg xem thêm tại: https://ift.tt/2mb4VST để biết thêm về địa chỉ bán tai nghe không dây giá rẻ The SEO Cyborg: How to Resonate with Users & Make Sense to Search Bots https://ift.tt/2A09cOg xem thêm tại: https://ift.tt/2mb4VST để biết thêm về địa chỉ bán tai nghe không dây giá rẻ The SEO Cyborg: How to Resonate with Users & Make Sense to Search Bots https://ift.tt/2A09cOg xem thêm tại: https://ift.tt/2mb4VST để biết thêm về địa chỉ bán tai nghe không dây giá rẻ The SEO Cyborg: How to Resonate with Users & Make Sense to Search Bots https://ift.tt/2A09cOg xem thêm tại: https://ift.tt/2mb4VST để biết thêm về địa chỉ bán tai nghe không dây giá rẻ The SEO Cyborg: How to Resonate with Users & Make Sense to Search Bots https://ift.tt/2A09cOg xem thêm tại: https://ift.tt/2mb4VST để biết thêm về địa chỉ bán tai nghe không dây giá rẻ The SEO Cyborg: How to Resonate with Users & Make Sense to Search Bots https://ift.tt/2A09cOg Bạn có thể xem thêm địa chỉ mua tai nghe không dây tại đây https://ift.tt/2mb4VST
0 notes