#How to install Laravel using composer and configure
Explore tagged Tumblr posts
Visit Tumblr Blog
Explore Tumblr blogs with no restrictions, modern design and the best experience.
Last Seen Tumblr Blogs


Fun Fact
Tumblr was acquired by Yahoo for $1.1B in 2013.
Text

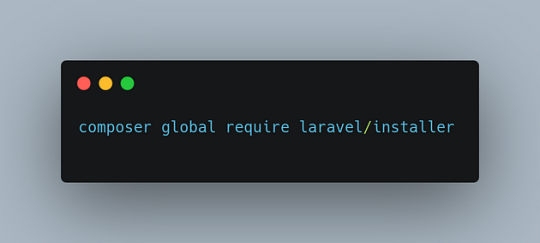
In this article, we will guide you through the process of Laravel installation using composer and configuration of the web server. Install Laravel using Composer with the help of the following steps.The Laravel framework requires some prerequisites for the system. All these requirements you will get from >Laravel Homestead virtual machine and we would highly recommend you to use Homestead as a local Laravel development environment.
#techinal chamber#Install Laravel using Composer#How to install Laravel using composer and configure
0 notes
Text
SmartEnd CMS Nulled Script 10.0.4

Unlock the Power of SmartEnd CMS Nulled Script – Download for Free If you're looking for a dynamic and robust content management system that streamlines your development process and enhances your project efficiency, then SmartEnd CMS Nulled Script is exactly what you need. Designed for developers and digital creators who value power, flexibility, and intuitive interfaces, this script delivers high-performance capabilities without the hassle of building a CMS from scratch. Best of all, you can download it completely free from our website. What Is SmartEnd CMS Nulled Script? SmartEnd CMS is a Laravel-based admin dashboard and content management system built with clean code architecture, modular components, and a sleek modern interface. This script empowers developers to manage website content, media, and user roles seamlessly through a smart and responsive admin panel. Whether you're building a blog, corporate website, or custom web app, SmartEnd offers a quick-start solution to get your project running effortlessly. Technical Specifications Framework: Laravel 8+ Front-End: Bootstrap 4, jQuery, and FontAwesome Database: MySQL Multi-Language Support: Yes Responsive Design: Mobile-friendly interface Authentication: Role-based access control Key Features and Benefits of SmartEnd CMS Nulled Script The Nulled Script isn’t just another content manager—it’s a complete powerhouse that simplifies your development cycle. Here are some of its standout features: 1. User-Friendly Dashboard The admin panel is intuitive, clean, and highly responsive. Whether you're managing pages, posts, or user accounts, every feature is just a few clicks away. 2. Role Management System Assign different access levels to different users. From admin to editor to viewer, the built-in role manager keeps your data secure and structured. 3. Media Manager SmartEnd includes a dedicated file manager that allows you to upload, organize, and embed media files seamlessly across your site. 4. SEO Tools Optimize your content with meta tags, slugs, and SEO settings directly from the dashboard—no plugins required. 5. API-Ready Architecture Develop custom mobile or third-party applications with ease using the RESTful API support provided by SmartEnd CMS. Ideal Use Cases for SmartEnd CMS Script Whether you're a solo freelancer or part of a development agency, SmartEnd adapts to your needs. Here’s how you can leverage its capabilities: Corporate Websites: Build scalable and customizable websites for clients. Portfolios and Blogs: Display your work and ideas with flexible post types. Content Portals: Manage and publish multimedia content effectively. Startup Dashboards: Launch your MVP quickly with pre-built admin tools. How to Install SmartEnd CMS Nulled Script Setting up SmartEnd CMS Nulled Script is quick and straightforward. Follow these simple steps: Download the SmartEnd CMS Nulled Script from our website. Upload the script files to your hosting environment. Create a new MySQL database and update the .env configuration file. Run composer install to install necessary dependencies. Set permissions for storage and bootstrap/cache directories. Execute the php artisan migrate and php artisan db:seed commands. Access the admin dashboard via /admin and start customizing! Frequently Asked Questions Is SmartEnd CMS Nulled Script safe to use? Yes, we provide a clean and verified version of the script that has been tested for security and performance. Always download from trusted sources like our website to ensure safety. Can I use this script for commercial projects? Absolutely. The script is flexible and adaptable for commercial and personal use. You can modify it to suit your client or business requirements. Will I get updates? As this is a nulled version, automatic updates are not supported. However, we regularly update our repository with the latest versions, so be sure to check back often. Download SmartEnd CMS Nulled Script Now! Don’t miss out on this powerful, free CMS solution.
Download SmartEnd CMS today and experience the ease of modern web development without licensing fees or limitations. Our platform also offers a variety of free resources to support your journey. If you love SmartEnd, you might also be interested in the avada nulled theme for premium design capabilities. Looking for even more scripts and themes? Visit pro nulled to explore a vast library of premium tools—all available for free download.
0 notes
Text
Weak API Authentication in Laravel: How to Secure It
Introduction
API authentication is a critical aspect of securing web applications. In Laravel, APIs allow developers to connect with the backend while keeping things modular and efficient. However, when API authentication is weak or poorly implemented, it leaves the door open for attackers to exploit sensitive data.

In this post, we’ll explore the risks of weak API authentication in Laravel, how to identify vulnerabilities, and ways to secure your API endpoints. We’ll also guide you through a coding example and introduce a free tool for a website security test to help you identify API vulnerabilities on your site.
Why Weak API Authentication Is Dangerous
APIs are a primary target for cybercriminals due to the sensitive data they expose. When authentication methods are weak, such as using insecure or predictable tokens, attackers can easily bypass security mechanisms and gain unauthorized access to your backend systems.
Here’s why weak API authentication is dangerous:
Data Breaches: Hackers can access user data, financial information, or any sensitive data stored in your database.
Unauthorized API Calls: Without proper authentication, malicious users can make API requests on behalf of authenticated users.
Denial of Service Attacks: Exploiting weak authentication can allow attackers to overload your systems or take them down entirely.
Common Causes of Weak API Authentication
Some common causes of weak API authentication include:
Using Default Tokens: Laravel provides several ways to authenticate APIs, but many developers still use the default tokens or insecure methods.
No Token Expiration: Not setting an expiration time for API tokens can lead to long-term vulnerabilities.
Insecure Password Storage: If you store passwords in plain text or use weak hashing algorithms, hackers can easily retrieve them.
Improper Rate Limiting: Failing to limit the number of API requests from a user can lead to brute-force attacks.
How to Secure API Authentication in Laravel
Here, we’ll walk you through securing your API authentication in Laravel, step by step, using modern techniques.
1. Use Laravel Passport for OAuth Authentication
Laravel Passport provides a complete OAuth2 server implementation for your Laravel application. It is the most secure and robust way to handle API authentication.
To install Laravel Passport, follow these steps:
composer require laravel/passport php artisan migrate php artisan passport:install
After installation, you need to configure the AuthServiceProvider to use Passport:
use Laravel\Passport\Passport; public function boot() { Passport::routes(); }
Then, update your api guard in config/auth.php to use Passport:
'guards' => [ 'api' => [ 'driver' => 'passport', 'provider' => 'users', ], ],
Now, you can authenticate users using OAuth tokens, which provides a much higher level of security.
2. Enable Token Expiration
Another important step is ensuring that API tokens expire after a certain period. By default, tokens generated by Passport are long-lived, but you can customize their expiration time.
To set token expiration, update the config/passport.php file:
'personal_access_tokens_expire_in' => now()->addDays(7),
This will ensure that tokens expire after 7 days, requiring users to re-authenticate.
3. Use Strong Hashing for Passwords
Make sure that you store passwords securely using bcrypt or Argon2 hashing. Laravel automatically hashes passwords using bcrypt, but you can configure it to use Argon2 as well in config/hashing.php:
'driver' => 'argon2i',
4. Implement Rate Limiting
To prevent brute-force attacks, you should implement rate limiting for your API. Laravel has a built-in rate limiting feature that you can enable easily in routes/api.php:
Route::middleware('throttle:60,1')->get('/user', function (Request $request) { return $request->user(); });
This will limit the API requests to 60 per minute, helping to prevent excessive login attempts.
Testing Your API Security
After implementing the above security measures, it's important to test your API for vulnerabilities. Use our Website Vulnerability Scanner to check your website’s API security and identify any weaknesses in your authentication methods.

Screenshot of the free tools webpage where you can access security assessment tools.
Conclusion
Securing API authentication in Laravel is crucial for preventing unauthorized access and protecting sensitive user data. By using OAuth tokens, setting expiration times, applying strong password hashing, and implementing rate limiting, you can significantly enhance your API security.
If you’re unsure about the security of your website or API, try out our Free Website Security Scanner tool to perform a vulnerability assessment.

An Example of a vulnerability assessment report generated with our free tool, providing insights into possible vulnerabilities.
For more security tips and updates, visit our blog at Pentest Testing Corp.
0 notes
Text
Best Practices for Laravel API Documentation Using Swagger

Creating clear and professional API documentation in Laravel is essential for seamless development and integration. Whether you're a solo developer or part of a Laravel web development company, proper API documentation ensures smooth collaboration, easier debugging, and a better developer experience.
Why API Documentation Matters in Laravel
API documentation is like a roadmap for developers—it tells them how to interact with your system without unnecessary guesswork. Well-structured documentation saves time, prevents errors, and improves overall productivity.
According to research, developers spend around 60% of their time understanding existing code rather than writing new code. Proper documentation significantly reduces this inefficiency.
Moreover, for businesses offering Laravel development services, detailed API documentation enhances reliability, making integrations seamless for clients and third-party developers.
Introduction to Swagger for Laravel APIs
Swagger is an industry-standard tool for API documentation that helps developers visualize, interact with, and test API endpoints in real time. It provides a user-friendly interface to explore available endpoints, request parameters, and response structures.
By integrating Swagger with Laravel, you create a self-explanatory API that minimizes back-and-forth communication between teams. It also supports OpenAPI Specification (OAS), making it compatible with various tools and platforms for automated API validation and compliance checks.
Installing Swagger in a Laravel Project
Getting Swagger up and running in Laravel is straightforward. First, you need to install the necessary package, configure it, and then generate the documentation. The typical installation process involves:
Installing a Swagger-compatible package such as darkaonline/l5-swagger using Composer.
Configuring Swagger settings in config/l5-swagger.php to align with your API structure.
Running a command to generate and serve the documentation.
Once set up, your API documentation becomes accessible through a browser-friendly interface, making it easy for developers to explore and test endpoints.
Structuring API Documentation with Swagger in Laravel
Good API documentation isn't just about listing endpoints; it's about making the information structured, readable, and usable. A well-organized Swagger documentation typically includes:
API Overview – A brief explanation of the API's purpose.
Endpoint Details – Each API route is documented with parameters, request types, and response structures.
Authentication Requirements – Specifies how users should authenticate requests.
Response Codes – Indicates expected success and error responses for clarity.
Annotating Laravel Controllers with Swagger
Swagger annotations make your API documentation dynamic and up-to-date by directly embedding documentation into Laravel controllers. Annotations define:
Endpoints – What routes exist and their HTTP methods.
Parameters – What request data is needed.
Responses – Expected data structures for various scenarios.
By embedding these annotations within controller methods, you ensure that documentation updates automatically when changes are made, reducing the risk of outdated documentation.
Defining API Models and Response Structures
To make API documentation crystal clear, defining request and response models is crucial. Models specify the expected input and output formats, helping developers understand how to interact with the API effectively.
For example, if an API returns a User object, defining it in Swagger ensures that developers know what attributes to expect, such as id, name, and email. This reduces confusion and eliminates guesswork when integrating the API into applications.
Generating and Accessing the API Documentation
Once annotations and models are in place, generating API documentation with Swagger is as simple as running a command. Laravel provides easy ways to access this documentation through the browser, usually at a predefined URL like /api/documentation.
With this setup, developers can test endpoints, send requests, and view responses in real time, ensuring accurate API interaction. This interactivity speeds up development and debugging, making it a must-have for Laravel projects.
Optimizing Laravel API Documentation for Better Usability
Great API documentation isn't just about completeness; it's about usability. Developers should be able to find information quickly, understand it easily, and apply it without hassle. To achieve this, best practices include:
Using clear, concise descriptions for endpoints and parameters.
Organizing endpoints logically by grouping related functionality.
Providing sample requests and responses to illustrate API behavior.
Ensuring documentation is mobile-friendly, as many developers refer to API docs on the go.
Keeping Documentation Up-to-Date
Outdated documentation is worse than no documentation. When APIs evolve, documentation must be updated accordingly. Failing to do so leads to frustration and miscommunication. Automated documentation generation using Swagger reduces this risk by ensuring real-time updates whenever API changes occur.
Many Laravel development companies enforce strict versioning policies, ensuring that updates to APIs come with corresponding documentation updates, keeping everything aligned for seamless development.
Making API Documentation Interactive with Swagger UI
One of Swagger’s standout features is Swagger UI, which transforms static API documentation into an interactive, web-based interface. Instead of manually testing API calls via command-line tools like cURL, developers can test them directly from the documentation interface.
With just a click, they can send requests, tweak parameters, and immediately see responses. This speeds up debugging, making it easier to spot errors and verify expected behaviors.
Laravel Development Services and API Documentation
For any professional Laravel development company, well-structured API documentation is a non-negotiable asset. It ensures smoother project handovers, third-party integrations, and overall application maintainability. Without clear API documentation, onboarding new developers takes longer, and troubleshooting becomes a nightmare.
How Laravel Development Companies Benefit from Swagger
Laravel development services rely on Swagger to:
Streamline communication between backend and frontend teams.
Ensure faster debugging and testing with an interactive UI.
Improve security by documenting authentication and authorization mechanisms.
Enhance scalability, as well-documented APIs make it easier to add new features without breaking existing ones.
Using Swagger ensures a professional and systematic approach to API management, making Laravel applications more reliable and scalable.
Ensuring API Consistency and Compliance
API consistency is critical for maintainability. Laravel developers follow strict API standards to ensure that endpoints, data formats, and error handling remain predictable.
Moreover, many industries require compliance with standards like RESTful API best practices and OpenAPI specifications. By leveraging Swagger, Laravel developers can maintain compliance effortlessly, ensuring APIs meet industry standards without additional effort.
Final Thoughts
Swagger has revolutionized API documentation, making it simpler, more interactive, and more accessible. Whether you’re a solo developer or a Laravel web development company, investing time in proper API documentation saves hours of troubleshooting in the long run.
Key Takeaways
Well-documented APIs enhance developer productivity.
Swagger provides an easy-to-use interface for API documentation.
Annotations help structure API descriptions effectively.
Laravel development services rely on clear documentation for smooth integration.
Regular updates keep API documentation useful and accurate.
Frequently Asked Questions (FAQs)
1. What is Swagger, and why should I use it for Laravel APIs?
Swagger is a powerful tool for API documentation that helps developers visualize, test, and interact with APIs. Using Swagger for Laravel APIs makes it easier to maintain documentation, ensure accuracy, and provide an interactive UI for developers to explore endpoints.
2. How do I install Swagger in a Laravel project?
Installing Swagger in Laravel involves adding a package like darkaonline/l5-swagger via Composer, configuring it in Laravel settings, and generating documentation using predefined commands. Once installed, API documentation becomes available through a web-based interface for easy access.
3. Can Swagger generate API documentation automatically?
Yes, Swagger can generate API documentation automatically by reading annotations embedded within Laravel controllers and models. This ensures that documentation remains up-to-date with minimal manual effort, reducing inconsistencies.
4. What are the benefits of using interactive API documentation?
Interactive API documentation allows developers to test endpoints directly from the documentation interface, eliminating the need for external tools. It speeds up development, simplifies debugging, and provides a better understanding of API behavior in real time.
5. How do Laravel development companies ensure API documentation quality?
Laravel development companies maintain API documentation quality by following structured guidelines, using tools like Swagger for automation, and ensuring that documentation updates align with API changes. Regular reviews and versioning policies further enhance clarity and usability.
#Laravel#Laravel Development#Laravel Framework#PHP Development#Web Development#Laravel Tips#Coding#Backend Development#Laravel Community#Software Development#Laravel API Documentation
0 notes
Video
youtube
Laravel 11 Tutorials in Hindi | Part-2 | Environment Setup | Install XAMPP & Composer
🚀 Set Up Your Development Environment with #XAMPP and #Composer!
In this beginner-friendly tutorial, we’ll guide you step-by-step on how to configure your environment for XAMPP and Composer, two essential tools for #PHP #development. Whether you’re a newbie or refreshing your skills, this video will get you started quickly and effectively!
🔍 What You’ll Learn: ✅ Installing XAMPP on your system (Windows/Mac). ✅ Setting up Composer for dependency management. ✅ Configuring PHP with Composer. ✅ Running your first PHP project using XAMPP and Composer.
💻👉 Watch Now: https://youtu.be/1zcnygB5mbc
#webdevelopment #xamppsetup #xampp #composer #composersetup #learnphp #programmingtips #phpdevelopment #codelikeapro #laravel #laraveltutorials
0 notes
Text
Deploying Laravel Applications to the Cloud
Deploying a Laravel application to the cloud offers several advantages, including scalability, ease of management, and the ability to leverage various cloud-based tools and services. In this guide, we will explore the steps to deploy a Laravel application to the cloud using platforms like AWS, DigitalOcean, and Heroku. We'll also touch on best practices for server configuration, environment variables, and deployment automation.
1. Preparing Your Laravel Application
Before deploying, it’s essential to ensure that your Laravel application is production-ready. Here are some preparatory steps:
Update Dependencies: Run composer install --optimize-autoloader --no-dev to ensure that only production dependencies are installed.
Environment Configuration: Make sure your .env file is configured correctly for the production environment. You’ll need to set up database connections, cache, queue configurations, and any other service keys.
Caching and Optimization: Laravel provides several optimization commands to boost the performance of your application. Run the following commands to optimize your app for production:bashCopy codephp artisan config:cache php artisan route:cache php artisan view:cache
Assets and Front-End Build: If your application uses frontend assets like JavaScript and CSS, run npm run production to compile them and ensure that assets are optimized.
Database Migration: Make sure your database schema is up to date by running:bashCopy codephp artisan migrate --force
2. Choosing a Cloud Platform
There are several cloud platforms that support Laravel applications, including AWS, DigitalOcean, and Heroku. Let's look at how to deploy on each.
A. Deploying Laravel to AWS EC2
AWS (Amazon Web Services) offers a robust infrastructure for hosting Laravel applications. Here's a high-level overview of the steps:
Launch an EC2 Instance: First, you need to create an EC2 instance running a Linux distribution (e.g., Ubuntu). You can choose the instance size based on your traffic and performance needs.
Install PHP and Required Software: Once the instance is up, SSH into it and install PHP, Composer, Nginx (or Apache), and other necessary services:bashCopy codesudo apt update sudo apt install php php-fpm php-mbstring php-xml php-bcmath php-mysql unzip curl sudo apt install nginx
Configure Nginx: Set up Nginx to serve your Laravel app. Create a new Nginx configuration file under /etc/nginx/sites-available/your-app and link it to /etc/nginx/sites-enabled/.Example configuration:nginxCopy codeserver { listen 80; server_name your-domain.com; root /var/www/your-app/public; index index.php index.html index.htm; location / { try_files $uri $uri/ /index.php?$query_string; } location ~ \.php$ { fastcgi_pass unix:/var/run/php/php7.4-fpm.sock; fastcgi_index index.php; fastcgi_param SCRIPT_FILENAME $document_root$fastcgi_script_name; include fastcgi_params; } error_log /var/log/nginx/error.log; access_log /var/log/nginx/access.log; }
Database Configuration: Set up a MySQL or PostgreSQL database (you can use Amazon RDS for a managed database) and configure your .env file with the correct credentials.
SSL and Security: Secure your application with SSL (using Let's Encrypt or AWS Certificate Manager) and ensure your firewall and security groups are configured correctly.
Deploy Code: You can deploy your Laravel application to EC2 using Git, FTP, or tools like Envoyer or Laravel Forge. For Git deployment, clone your repository and configure your environment variables.
B. Deploying Laravel to DigitalOcean
DigitalOcean provides a simple and cost-effective way to host Laravel applications. Here’s how to deploy:
Create a Droplet: Log into your DigitalOcean account and create a new Droplet with a suitable operating system (typically Ubuntu).
Install PHP, Nginx, and Composer: SSH into your droplet and install the necessary dependencies for your Laravel app:bashCopy codesudo apt update sudo apt install php php-fpm php-mbstring php-xml php-bcmath php-mysql unzip curl sudo apt install nginx
Configure Nginx and Laravel Application: Configure Nginx to point to your Laravel application’s public folder and set up SSL.
Database Configuration: Set up MySQL or PostgreSQL on your droplet, then configure the .env file for your database credentials.
Deploying the Code: You can either deploy your code via Git or use an automation tool like Envoyer to streamline deployments. You’ll also need to configure file permissions for storage and cache directories.
C. Deploying Laravel to Heroku
Heroku is an excellent choice for quick and easy Laravel application deployment with minimal configuration. Here’s how you can deploy a Laravel app on Heroku:
Create a Heroku App: Sign up or log into your Heroku account and create a new app. This will automatically provision a server for you.
Install Heroku CLI: Install the Heroku CLI on your local machine if you haven't already:bashCopy codecurl https://cli-assets.heroku.com/install.sh | sh
Configure the .env File for Heroku: Heroku uses environment variables, so make sure you configure your .env file correctly or set them directly in the Heroku dashboard.
Deploy the Code: Push your code to Heroku using Git:bashCopy codegit push heroku master
Database Configuration: Heroku offers a managed PostgreSQL database that you can provision with the command:bashCopy codeheroku addons:create heroku-postgresql:hobby-dev
Run Migrations: Run database migrations on Heroku with:bashCopy codeheroku run php artisan migrate
3. Automating Deployment with Laravel Forge or Envoyer
For smoother deployment management, you can use tools like Laravel Forge or Envoyer.
Laravel Forge: Laravel Forge is a server management and deployment service designed for PHP applications. It automates tasks like server provisioning, security updates, and Laravel deployments to platforms like AWS, DigitalOcean, and others.
Envoyer: Envoyer is a zero-downtime deployment tool that ensures your Laravel app is deployed with no interruption to your users. It handles the deployment process seamlessly, ensuring the application is running smoothly at all times.
4. Conclusion
Deploying a Laravel application to the cloud can seem daunting, but it becomes easier with tools and services that automate much of the process. Whether you choose AWS, DigitalOcean, or Heroku, each platform offers unique benefits for hosting your Laravel application. Using automation tools like Forge and Envoyer, you can further streamline the deployment process, ensuring your app runs smoothly and efficiently in the cloud.
0 notes
Text
How to deploying Laravel projects on a live server – Complete Step-by-Step Guide
Learn How to deploying Laravel projects on a live server with this comprehensive guide. Step-by-step instructions on setting up hosting, configuring files, and deploying your Laravel app smoothly.Read Laravel Docs
How to deploying Laravel projects on a live server, you’ll need to follow a structured process. Here’s a step-by-step guide to help you:

1. Purchase Domain and Hosting
Make sure you have a domain and a hosting plan. Most shared hosting plans (like cPanel-based ones) or a VPS will work for Laravel, but ensure your server supports PHP and MySQL and meets Laravel’s requirements (PHP version, required extensions, etc.).
2. Prepare Your Laravel Project
Make sure your Laravel project is working locally.
Run the following command to clear any cached configuration and to optimize the project:
php artisan cache:clear
php artisan config:clear
php artisan route:clear
php artisan view:clear
Set up your environment variables (.env file). Make sure they are correctly configured for the live server (e.g., database, mail, and app URL settings).
3. Zip and Upload Your Laravel Project
Compress your entire Laravel project folder (without the node_modules and vendor directories) into a .zip file.
Use FTP (with FileZilla or any other FTP client) or File Manager in cPanel to upload the .zip file to your server. Typically, upload the file to the public_html or a subdirectory within it if you want to run your Laravel app in a subdirectory.
4. Extract the Files
Once uploaded, use File Manager in your hosting control panel to extract the .zip file.
5. Set Up the Public Directory
By default, Laravel’s entry point is the public folder, which contains the index.php file. On a shared hosting server:
Move everything in the public folder (including the .htaccess and index.php files) to the root directory (usually public_html).
Edit the index.php file to update the paths:
Change:
require __DIR__.'/../vendor/autoload.php';
$app = require_once __DIR__.'/../bootstrap/app.php';
To:
require __DIR__.'/vendor/autoload.php';
$app = require_once __DIR__.'/bootstrap/app.php';
This ensures that Laravel can find the necessary files in the correct directory.
6. Set File Permissions
Ensure that the following directories are writable by the server:
/storage
/bootstrap/cache
Use the following command via SSH (if available) or through the hosting file manager:chmod -R 775 storage chmod -R 775 bootstrap/cache
7. Set Up a Database
Create a MySQL database and a user with privileges in cPanel (or via SSH if using VPS).
Update the .env file with your database credentials:
DB_HOST=localhost DB_DATABASE=your_database_name DB_USERNAME=your_database_username DB_PASSWORD=your_database_password
8. Install Composer Dependencies
If you have SSH access:
SSH into your server using a terminal or a tool like PuTTY.
Navigate to your project directory
cd /path/to/your/project
Run Composer to install the dependencies:
composer install --optimize-autoloader --no-dev
If you don’t have SSH access, you can run composer install locally, zip the vendor folder, and upload it to the server.
9. Run Migrations
If you have SSH access, run the following command to migrate the database:
php artisan migrate --force
If you don’t have SSH access, you can run the migrations locally and then export/import the database to the server via phpMyAdmin.
10. Set App Key
Generate a new application key if you haven’t already:php artisan key:generate
Ensure the key is set in the .env file:
Read Full Tutorials
0 notes
Text

How to Create a Website Using a Programming Language Like Laravel with a Pre-Built Theme on VS Code - Sohojware
Creating a website using Laravel, a powerful PHP framework, can be an excellent choice for developers seeking flexibility and efficiency. When combined with a pre-built theme, the process becomes even more streamlined, allowing you to focus on customization and functionality rather than starting from scratch. In this article, we’ll guide you through setting up a website using Laravel, leveraging a pre-built theme, and coding with Visual Studio Code (VS Code). Whether you are a seasoned developer or just starting, this guide from Sohojware will help you create a stunning website.
Why Choose Laravel for Your Website?
Laravel stands out as one of the most popular PHP frameworks due to its elegant syntax, robust features, and ease of use. It provides a clean and straightforward way to build web applications, making it a favorite among developers. Here’s why Laravel is an excellent choice:
Eloquent ORM: Laravel’s Eloquent ORM allows for seamless database interaction using an object-oriented approach.
Blade Templating Engine: Laravel’s Blade template engine makes it easy to create dynamic content and layouts.
Artisan CLI: Laravel’s command-line tool, Artisan, simplifies repetitive tasks and enhances productivity.
Security: Laravel offers built-in security features to protect your website from common vulnerabilities.
Scalability: Laravel is designed to handle large-scale applications, ensuring that your website can grow with your business.
Getting Started with Laravel and VS Code
Step 1: Install Laravel
To begin, you need to have PHP and Composer installed on your machine. Composer is a dependency manager for PHP, essential for installing Laravel and its components.
Install Composer: Download Composer from getcomposer.org and follow the installation instructions for your operating system.
Install Laravel: Open your terminal and run the following command to install Laravel globally:
Step 2: Create a New Laravel Project


Step 3: Set Up Your Development Environment
Open VS Code: Launch Visual Studio Code, and open your newly created Laravel project directory.
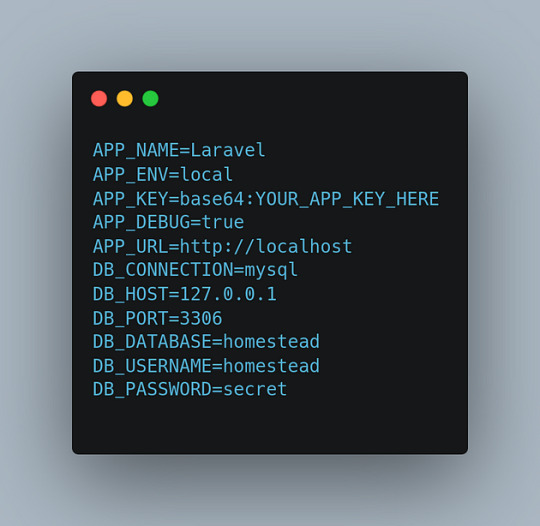
Configure Your Environment: Edit the .env file in your project root to configure your database and other environment settings. For instance:
Step 4: Install and Configure a Pre-Built Theme
Select a Pre-Built Theme: Choose a pre-built theme that suits your website’s needs. Websites like ThemeForest or Creative Market offer a range of Laravel-compatible themes.
Integrate the Theme with Laravel:
Step 5: Customize Your Theme
Edit Blade Templates: Use VS Code to modify the Blade templates according to your needs. Blade templates are located in the resources/views directory. For example, you might customize the layouts/app.blade.php file to include your theme’s layout.
Adjust Styles and Scripts: Ensure that the theme’s CSS and JavaScript files are included in your Blade templates. You may need to adjust paths to ensure that assets are correctly loaded.
Step 6: Develop Your Website
Create Models and Controllers: Use Laravel’s Artisan CLI to generate models and controllers. For instance:
The -m flag generates a migration file for the model.

Step 7: Test and Launch Your Website
Run the Development Server: Start Laravel’s built-in server:
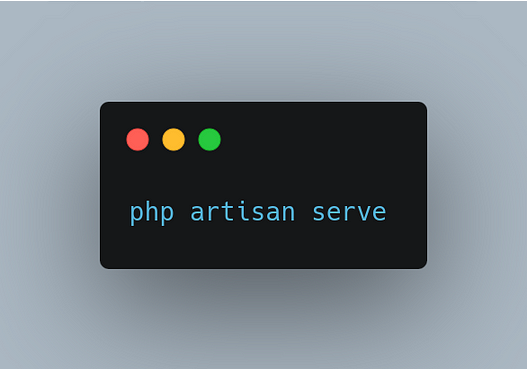
Visit http://localhost:8000 to preview your website.
Debug and Fix Issues: Use Laravel’s debugging tools to identify and fix any issues.
Deploy Your Website: Once your website is ready, deploy it to a production server. Update your .env file for production settings and use a hosting provider like DigitalOcean or Laravel Forge to deploy your site.
FAQs About Using Laravel with Sohojware
1. What is Sohojware, and how can they assist with my Laravel project?
Sohojware is a company specializing in web development and technology solutions. They offer services for creating and optimizing Laravel-based websites, including custom theme integration and performance enhancements. For more information, visit Sohojware.
2. Can Sohojware help me with Laravel theme customization?
Yes, Sohojware can assist with customizing Laravel themes to match your specific requirements. Their team of experts will ensure that your website’s design aligns with your brand and functionality needs.
3. How do I get started with Laravel development at Sohojware?
To start a Laravel project with Sohojware, contact their team through their website. They offer consultations and development services tailored to your project needs. Visit Sohojware for more details.
4. Does Sohojware offer support for Laravel deployment?
Absolutely. Sohojware provides comprehensive support for deploying Laravel applications. Their services include server setup, environment configuration, and ongoing maintenance. Learn more by visiting Sohojware.
5. What resources does Sohojware provide for learning Laravel?
Sohojware offers various resources and tutorials for learning Laravel. Their website features blog posts, guides, and case studies to help you understand Laravel better and apply best practices in your projects.
By following these steps and leveraging the expertise of Sohojware, you can create a professional and functional website using Laravel and a pre-built theme. Whether you are building a personal blog, an e-commerce site, or a corporate portal, Laravel’s powerful features combined with a pre-built theme can help you achieve your goals efficiently. For more information and support, visit Sohojware today.
1 note
·
View note
Text
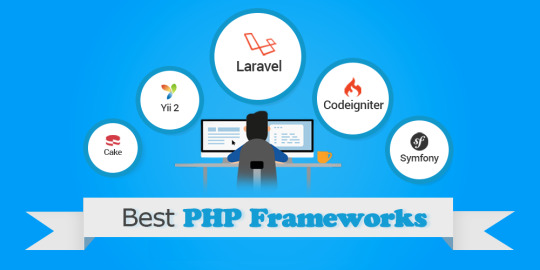
How to Successfully Master the PHP Development Tools?
PHP (Hypertext Preprocessor) remains one of the most popular server-side scripting languages for web development, powering millions of websites and applications worldwide. To streamline the development process and enhance productivity, developers rely on a plethora of tools and resources tailored specifically for PHP development. In this comprehensive guide, we’ll explore essential PHP development tools that can elevate your coding workflow and help you build robust, scalable, and efficient PHP applications.
Integrated Development Environments (IDEs):
PHPStorm: Developed by JetBrains, PHPStorm is a powerful IDE designed specifically for PHP development. It offers a rich set of features including syntax highlighting, code completion, debugging tools, version control integration, and seamless support for frameworks like Laravel and Symfony.
Visual Studio Code (VS Code): While not PHP-specific, VS Code is a highly customizable and lightweight code editor with extensive support for PHP through extensions. With features such as IntelliSense, debugging, and Git integration, VS Code is a popular choice among PHP developers seeking flexibility and performance.
Debugging Tools:
Xdebug: Xdebug is a robust debugging and profiling tool for PHP that integrates seamlessly with IDEs like PHPStorm and VS Code. It allows developers to step through code, inspect variables, and trace execution paths, facilitating efficient debugging and troubleshooting.

PHP Debug Bar: PHP Debug Bar is a handy debugging toolbar that provides real-time insights into the performance of PHP applications. It displays profiling data, SQL queries, request information, and more, helping developers identify bottlenecks and optimize code performance.
Package Managers:
Composer: Composer is a dependency manager for PHP that simplifies the process of integrating third-party libraries and frameworks into your projects. With Composer, you can easily manage dependencies, install packages from Packagist, and autoload classes, enhancing code modularity and maintainability.
Version Control Systems:
Git: Git is a distributed version control system widely used in PHP development for managing source code repositories. By leveraging Git, developers can collaborate seamlessly, track changes, and roll back to previous versions with ease, ensuring code integrity and project continuity.
GitHub / GitLab / Bitbucket: Platforms like GitHub, GitLab, and Bitbucket provide hosting services for Git repositories, enabling collaborative development, code reviews, and issue tracking. These platforms offer robust features for project management, team collaboration, and continuous integration (CI) / continuous deployment (CD).
Testing Frameworks:
PHPUnit: PHPUnit is a popular testing framework for PHP that facilitates unit testing, integration testing, and functional testing of PHP codebases. With PHPUnit, developers can write automated tests, execute test suites, and assert expected outcomes, ensuring code reliability and quality.
Performance Optimization Tools:
OPcache: OPcache is one of the built-in PHP development tools that improves performance by caching compiled bytecode in memory, reducing the overhead of script compilation on subsequent requests. By enabling OPcache, developers can significantly enhance the execution speed of PHP applications.
Blackfire.io: Blackfire.io is a performance profiling tool for PHP applications that provides deep insights into code performance and resource utilization. It offers profiling, metrics, and recommendations for optimizing PHP code, database queries, and server configurations, enabling developers to identify and address performance bottlenecks efficiently.
Documentation Generators:
phpDocumentor: phpDocumentor is a documentation generator for PHP projects that automatically generates API documentation from PHP source code. By documenting code structure, classes, methods, and parameters, phpDocumentor helps developers create comprehensive and well-documented APIs for their projects.
Continuous Integration and Deployment (CI/CD) Tools:
Jenkins: Jenkins is a popular open-source automation server that facilitates continuous integration and continuous deployment (CI/CD) workflows for PHP projects. With Jenkins, developers can automate build processes, run tests, and deploy applications to production environments seamlessly, ensuring code quality and deployment reliability.
Travis CI: Travis CI is a cloud-based CI/CD platform that integrates with GitHub repositories to automate the testing and deployment of PHP applications. By configuring build pipelines and defining custom workflows, developers can automate the entire software development lifecycle, from code commits to production deployments.

Code Quality Analysis Tools:
PHP CodeSniffer: PHP CodeSniffer is a static analysis tool that detects violations of coding standards and best practices in PHP codebases. By enforcing coding standards such as PSR-12 or custom rules, PHP CodeSniffer helps maintain consistency, readability, and maintainability across projects.
PHPStan: PHPStan is a static analysis tool that performs comprehensive type checking and static code analysis on PHP code. It identifies potential bugs, type errors, and performance issues, enabling developers to write safer and more robust code.
Dependency Injection Containers:
Symfony Dependency Injection Component: Symfony’s Dependency Injection Component provides a powerful mechanism for managing dependencies and configuring services in PHP applications. By decoupling components and promoting inversion of control (IoC), Symfony DI Container enhances code modularity, testability, and maintainability.
Content Management Systems (CMS) and Frameworks:
WordPress: WordPress is a popular open-source CMS written in PHP, powering millions of websites and blogs worldwide. With its extensive ecosystem of themes and plugins, WordPress offers flexibility, scalability, and ease of use for building dynamic and content-rich websites.
Laravel: Laravel is a modern PHP framework known for its elegant syntax, expressive API, and robust features for web application development. With features such as routing, ORM (Eloquent), templating (Blade), and authentication, Laravel simplifies common tasks and accelerates development without sacrificing flexibility or performance.
Community and Documentation Resources:
PHP.net: The official PHP website (PHP.net) serves as a comprehensive resource for PHP documentation, language reference, and tutorials. It provides in-depth documentation for PHP functions, language features, and extensions, serving as a valuable reference for PHP developers of all levels.

Stack Overflow: Stack Overflow is a popular online community for programmers to ask questions, share knowledge, and collaborate on technical issues. With a vast repository of Q&A threads related to PHP development tools, Stack Overflow serves as a valuable resource for troubleshooting, learning, and staying updated on best practices.
Conclusion:
By incorporating a diverse array of PHP development tools and resources—from IDEs and debugging tools to CI/CD platforms and documentation generators—PHP developers can streamline development workflows, enhance code quality, and deliver exceptional user experiences. Whether you’re building web applications, APIs, or content management systems, embracing these PHP development tools and fostering a culture of continuous learning and improvement can empower you to excel in the ever-evolving realm of PHP development.
Also Read: How to Expose Your Business Website to More Prospects and Attract More Sales?
0 notes
Text
A Guide to Local Laravel Development in 2024: Tools and Trends
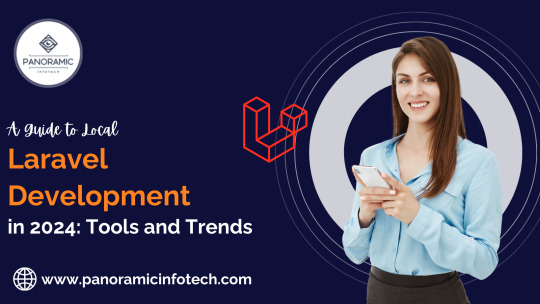
Local Laravel development forms the foundation for building robust web applications, and in 2024, the landscape is evolving with new tools and trends that streamline and enhance the development experience. This guide explores the latest advancements and equips you to set up a powerful local Laravel environment.
The Rise of Containerization with Laravel Sail
One of the most significant trends in Laravel development is the rise of containerization. Traditionally, setting up Laravel environments involved manually configuring dependencies and virtual machines. Laravel Sail, introduced in Laravel 8, simplifies this process by leveraging Docker containers. Sail provides a pre-configured development environment with essential dependencies like PHP, MySQL, and Node.js.
Key Benefits of Laravel Sail:
Reduced Setup Time: No more manual configuration; start with a single command.
Consistent Environment: Ensures every developer has the same setup regardless of their machine.
Improved Reproducibility: Facilitates easy sharing and replication of development environments.
Leveraging Testing Tools for a Robust Development Workflow
In 2024, a robust testing strategy remains crucial. Here are some key tools to integrate into your local Laravel development workflow:
PHPUnit: Laravel’s built-in testing framework for unit and integration tests.
Laravel Dusk: For browser automation and end-to-end testing of Laravel applications.
Debugging Tools: Laravel Telescope and Laravel Debugbar for debugging and monitoring applications.
Setting Up Your Development Environment
Setting up a robust local development environment is essential for efficient Laravel development. Here are some popular tools in 2024:
Laravel Valet: A lightweight development environment for macOS users, offering a seamless experience for running Laravel applications locally.
Homestead: A pre-packaged Vagrant box for Laravel development, suitable for developers using all major operating systems.
Docker: Containerization technology that enables developers to create consistent environments across development, testing, and production.
Version Control and Collaboration
Version control is fundamental for collaborative development:
Git: The most widely used version control system, essential for managing code changes and collaborating with teams.
GitHub, GitLab, Bitbucket: Platforms for hosting Git repositories and managing projects, offering features like issue tracking and pull requests.
Laravel Project Structure
Understanding the structure of a Laravel development project is crucial for organizing your codebase effectively:
app/: Contains the core code of the application, including models, controllers, and middleware.
config/: Configuration files for various services and components.
resources/: Contains assets such as views, language files, and front-end assets.
routes/: Contains route definitions for the application.
database/: Contains database migrations, seeders, and factories.
Dependency Management
Laravel projects use Composer for dependency management:
composer.json: Specifies the dependencies required by the
project.composer.lock: Lock file ensuring consistent dependency versions across installations.
Ready to Build Exceptional Laravel Applications?
Panoramic Infotech offers cutting-edge Laravel Development Services, leveraging the power of this popular PHP framework to create robust and scalable web applications. Contact Panoramic Infotech today to discuss your project and how we can help you leverage the power of Laravel for your business.
Let’s Build Together! Reach out to us at Contact Us to start your Laravel Development with Panoramic Infotech.
This guide equips you with the knowledge to set up a powerful local Laravel development environment in 2024. Remember, the best approach depends on your specific needs. Stay updated with the latest trends to streamline your development workflow and build exceptional Laravel applications.
#Laravel development company#Laravel we Laravel development services#b development company#laravel development#Laravel development solutions
0 notes
Text
Building a Real-time Chat Application with Laravel Development and Pusher
Real-time chat applications are a popular feature for modern web applications, offering instant communication and engagement for users. Laravel development, a robust PHP framework, provides a powerful foundation for building such applications, and when paired with Pusher, a cloud-based real-time messaging service, developers can create dynamic and interactive chat experiences. In this blog post, we'll delve into the process of building a real-time chat application using the powerful combination of Laravel development and Pusher.
What is Pusher?
Pusher is a cloud-based service that allows you to add real-time functionality to your web applications. It provides a simple API that you can use to send and receive messages in real-time. Pusher also provides a number of features that make it easy to build real-time applications, such as:
Channels: Channels allow you to group users together and send messages to them in real-time.
Events: Events are used to trigger actions on the client-side, such as updating the chat interface.
Presence: Presence allows you to track which users are online and offline.
Prerequisites
Before you start building your chat application, you will need to make sure that you have the following prerequisites:
A Laravel 5.5 or later installation
A Pusher account
A basic understanding of Laravel and JavaScript
Setting Up Pusher
Setting the Stage for Real-time Communication: Pusher and Laravel Development
The first step in our journey involves configuring your Pusher account. Head over to the Pusher website and sign up for a free trial. Once you've completed the registration process, you'll need to create a dedicated app. This app will serve as the source for your API keys and secrets, which will become crucial ingredients in your Laravel development workflow. These credentials enable Laravel to connect and interact with Pusher's powerful real-time messaging infrastructure, paving the way for smooth and seamless communication within your chat application.
Next, you will need to install the Pusher PHP server package. You can do this by running the following command:
composer require pusher/pusher-php-server
Once the package is installed, you will need to configure it in your Laravel application. To do this, open the .env file and add the following lines:
PUSHER_APP_ID=your_app_id
PUSHER_APP_KEY=your_app_key
PUSHER_APP_SECRET=your_app_secret
PUSHER_APP_CLUSTER=your_app_cluster
Creating the Chat Interface
The next step is to create the chat interface. This will include the input field where users can type their messages, as well as the chat history. You can use any HTML and CSS that you want to create the chat interface, but it is important to make sure that it is responsive and easy to use.
Bringing Your Chat to Life: JavaScript and Pusher Integration
Once you've established the visual elements of your chat interface, it's time to inject interactivity through JavaScript. This code will leverage the Pusher API to establish a connection with the Pusher service and subscribe to relevant channels designated within your Laravel development framework. This ensures that your chat application remains responsive and updates automatically whenever a new message arrives. By strategically subscribing to specific channels, you can cater to individual user interactions and group conversations, fostering a dynamic and engaging communication experience.
Here is an illustration of how to send and get messages:
JavaScript
var pusher = new Pusher('your_app_key', {
cluster: 'your_app_cluster'
});
var channel = pusher.subscribe('chat');
channel.bind('message', function(data) {
// Update the chat history with the new message
});
$('#chat-form').submit(function(e) {
e.preventDefault();
var message = $('#chat-message').val();
$.post('/chat', { message: message }, function(data) {
$('#chat-message').val('');
});
});
Use code with caution. Learn more
Deploying Your Chat Application
Once you have finished building your chat application, you will need to deploy it to a web server. You can deploy your application to any web server that supports PHP.
Conclusion
Building a real-time chat application with Laravel development and Pusher is a fantastic way to gain hands-on experience in the exciting realm of real-time web application development. This process not only provides you with valuable technical knowledge but also equips you with the skills to create a practical and engaging application that resonates with your users. Through Laravel development's robust framework combined with the power of Pusher's real-time messaging capabilities, you can build a dynamic chat experience that fosters user interaction and engagement. Let's embark on this journey to explore the construction of a real-time chat application using this potent combination!
#laravel#laravel development company#laravel we devlopment service#laravel framework#.net development#laravel development netherland#laravel development services netherland#laravel php development#laravel web application#laravel php
0 notes
Text

The Laravel framework requires some prerequisites for the system. All these requirements you will get from >Laravel Homestead virtual machine and we would highly recommend you to use Homestead as a local Laravel development environment. we will guide you through the process of How to install Laravel using composer and configure of the web server. Install Laravel using Composer with the help of the following steps.
0 notes
Text
DOKANS Nulled Script 3.9.2

Unlock E-commerce Potential with DOKANS Nulled Script Are you ready to transform your online business into a fully functional multitenant e-commerce platform without spending a fortune? DOKANS Nulled Script offers an unbeatable opportunity to create a scalable, efficient, and dynamic online marketplace—absolutely free. Whether you're a budding entrepreneur or an established developer, this powerful script provides the backbone for launching your own SaaS-based multi-vendor store in no time. What Is DOKANS Nulled Script? DOKANS Nulled Script is a premium multitenancy-based e-commerce platform designed specifically for creating software-as-a-service (SaaS) marketplaces. It allows users to build independent stores under a single ecosystem, offering flexibility, scalability, and seamless customization. With this nulled version, you can enjoy all the premium features without the hefty price tag, making it ideal for developers, resellers, and digital entrepreneurs. Technical Specifications Framework: Laravel (Backend) + Vue.js (Frontend) Database: MySQL/MariaDB Server Requirements: PHP 7.4 or higher, Apache/Nginx Multitenancy: Built-in SaaS capabilities Security: Advanced user authentication and permission systems Outstanding Features and Benefits When you download the DOKANS Nulled Script, you gain access to a powerhouse of tools tailored for modern e-commerce: 1. Multitenancy Support Let your users create and manage their own e-commerce stores under a unified platform. Each store operates independently with its own admin panel and branding. 2. Drag-and-Drop Page Builder Design custom pages effortlessly with an intuitive page builder. No coding knowledge required! 3. Flexible Subscription System Create revenue streams by offering tiered subscription plans to vendors. Manage upgrades, renewals, and custom packages with ease. 4. Secure and Optimized Enjoy enterprise-level security measures, regular updates, and optimized performance to handle growing traffic and vendors without lag. 5. Rich Admin Dashboard Access detailed analytics, financial reports, and vendor performance metrics from a beautifully designed admin panel. Practical Use Cases Launch a digital marketplace for fashion, electronics, or niche products Offer SaaS-based storefronts to clients and freelancers Create white-label solutions for local businesses and communities Monetize by charging store owners subscription fees or commissions How to Install DOKANS Nulled Script Download the latest version of DOKANS Nulled Script from our website. Extract the files to your server's root directory. Set up the database and import the SQL file provided. Edit the .env file with your database and app credentials. Run the necessary Laravel commands: composer install, php artisan migrate, and php artisan serve. Access the admin panel and begin configuring your multi-vendor platform. FAQs – Your Questions Answered Is DOKANS Nulled Script safe to use? Yes, the nulled script is thoroughly tested and secure for usage. However, always use a trusted source—like our website—for downloads to avoid hidden malware or vulnerabilities. Can I use this script for commercial purposes? Absolutely. With DOKANS Nulled Script, you can launch your commercial marketplace, monetize it with subscriptions, and offer clients fully functional e-commerce solutions. Do I need to know coding to use this? No coding skills are required for basic usage. The platform is beginner-friendly with intuitive interfaces. Advanced users can easily customize the backend thanks to its Laravel-Vue architecture. Where can I find compatible plugins or themes? You can enhance your site with additional tools like elementor nulled pro for intuitive design customization. Is there support or a user community? While nulled versions don’t offer official support, you can find active user communities and tutorials online. Plus, our platform is always here to help with guides and updates. Final Thoughts If
you're looking for a high-performance SaaS e-commerce script without the high cost, DOKANS Nulled Script is the answer. It's packed with features, easy to use, and completely free—giving you the ultimate edge in launching your own online marketplace today. Don't miss out on this game-changing opportunity to build and scale your digital empire. Want to enhance your site even further? Try out Slider Revolution NULLED and unlock limitless design possibilities!
0 notes
Text
Prevent CSP Bypasses in Laravel: Secure Your Web App
In today’s web development landscape, ensuring application security is a top priority. One critical defense is a Content Security Policy (CSP), which helps protect against cross-site scripting (XSS) and code injection attacks. However, misconfigurations or vulnerabilities in Laravel applications can lead to CSP bypasses.

This article will explore common CSP bypass techniques in Laravel and how to prevent them with coding examples.
📌 What is a Content Security Policy (CSP)?
A Content Security Policy (CSP) is a security mechanism that restricts the sources from which a web page can load scripts, styles, images, and other content. It helps prevent XSS attacks by blocking malicious scripts.
Browsers enforce CSP by blocking any content that doesn’t match the specified rules. However, attackers have found ways to bypass weak or misconfigured policies.
���️ Common CSP Bypass Techniques in Laravel
Even with CSP enabled, attackers can exploit weaknesses to bypass restrictions. Here are some common methods:
1️⃣ JSONP Endpoint Exploitation
Problem: Some Laravel applications use JSONP (JSON with Padding) for cross-domain requests. Attackers can inject malicious scripts through unvalidated callback parameters.
Example: A Laravel application using a JSONP API:
<script src="https://trustedapi.com/data?callback=handleData"></script>
If the callback is not properly validated, an attacker can modify it:
<script src="https://trustedapi.com/data?callback=alert(1)"></script>
🚨 This results in JavaScript execution, bypassing CSP.
✅ Mitigation:
Avoid JSONP; use CORS (Cross-Origin Resource Sharing) instead.
Validate callback parameters to allow only safe functions.
2️⃣ PHP Output Buffering Issues
Laravel uses PHP output buffering, and improper handling can make CSP ineffective. If headers are sent after the response body, CSP won’t be enforced.
Example:
<?php // Vulnerable Code echo str_repeat('A', 5000); header("Content-Security-Policy: default-src 'self';"); ?>
Since CSP is set after content is sent, the browser ignores it.
✅ Mitigation:
Set CSP before sending any output.
Use Laravel’s built-in response handling.
3️⃣ Insecure File Uploads
If an attacker uploads malicious JavaScript files, CSP won’t stop them if stored in public directories.
Example:
An attacker uploads malicious.js and accesses:
https://yourapp.com/uploads/malicious.js
Now, the attacker can execute arbitrary scripts!
✅ Mitigation:
Restrict uploads to safe file types (JPG, PNG, PDF, etc.).
Store files in non-public directories.
Rename uploaded files to prevent execution.
🔒 Implementing a Secure CSP in Laravel
To properly enforce CSP in Laravel, use the Spatie CSP package.
📥 Install the package:
composer require spatie/laravel-csp
🔧 Configure CSP in Laravel:
Publish the config file:php artisan vendor:
publish --provider="Spatie\Csp\CspServiceProvider"
Modify config/csp.php:
<?php return [ 'policy' => App\Policies\CustomCspPolicy::class, ]; ?>
Now, create CustomCspPolicy.php:
<?php namespace App\Policies; use Spatie\Csp\Policies\Policy; use Spatie\Csp\Directive; class CustomCspPolicy extends Policy { public function configure() { $this ->addDirective(Directive::DEFAULT_SRC, "'self'") ->addDirective(Directive::SCRIPT_SRC, "'self' https://trusted.cdn.com") ->addDirective(Directive::STYLE_SRC, "'self' 'unsafe- inline'"); } } ?>
🎯 This enforces a strict CSP to protect against XSS and injection attacks.
🛡️ Scan Your Website for CSP Vulnerabilities
To ensure your website is secure, use our Free Website Security Scanner:

Screenshot of the free tools webpage where you can access security assessment tools to check Website Vulnerability.
This tool performs a detailed vulnerability assessment and checks for CSP weaknesses, XSS risks, and SSL/TLS misconfigurations.

An Example of a vulnerability assessment report generated with our free tool, providing insights into possible vulnerabilities.
🚀 Stay Secure with Pentest Testing Corp
For more security insights, visit our blog:
🔗 https://www.pentesttesting.com/blog/
By implementing strong CSP policies, validating user input, and using security tools, you can prevent CSP bypasses in Laravel and protect your web app. Stay safe! 🚀
0 notes
Text
How to Implement Laravel Homestead for Local Development
Introduction
In the fast-paced world of Laravel app development, having a robust and efficient local development environment is essential. Laravel Homestead, a pre-packaged Vagrant box, is the perfect solution to streamline your local development process. Whether you're a seasoned Laravel developer or just getting started, this guide will walk you through the steps to implement Laravel Homestead for local development.
What is Laravel Homestead?
Laravel Homestead is a Vagrant box that comes pre-installed with the necessary tools and configurations for Laravel development. It provides an isolated and consistent environment, ensuring that your Laravel apps run smoothly on different machines. With features like PHP, Composer, Nginx, MySQL, and more, Homestead is a one-stop solution for Laravel developers.
Why Use Laravel Homestead for Local Development?
Before we dive into the implementation, let's explore some key reasons why using Laravel Homestead for local development is a great choice:
1. Consistency
Homestead ensures that all team members are working in the same environment, reducing the "It works on my machine" problem. This consistency leads to fewer deployment issues.
2. Isolation
Homestead isolates your development environment, preventing conflicts with other software installations on your local machine. It also provides the ability to work with multiple Laravel projects simultaneously without interference.
3. Easy Setup
Setting up Homestead is straightforward, and you'll have your local development environment up and running quickly. It's especially helpful for beginners in Laravel app development.
4. Compatibility
Laravel Homestead is compatible with various operating systems, including Windows, macOS, and Linux, making it accessible to a broader audience.
Getting Started with Laravel Homestead
Now that we understand the benefits, let's walk through the steps to implement Laravel Homestead for local development:
1. Prerequisites
Before diving in, ensure you have the following prerequisites in place:
VirtualBox or VMware
Vagrant
Git
SSH client (already installed on most systems)
2. Installing Laravel Homestead
Open your terminal and run the following command to install Homestead:
bash
Copy code
vagrant box add laravel/homestead
3. Initializing Homestead
After successfully adding the box, navigate to your Laravel project directory and run:
lua
Copy code
composer require laravel/homestead --dev
Next, initialize Homestead:
bash
Copy code
php vendor/bin/homestead make
4. Configure Homestead.yaml
Edit the Homestead.yaml file generated in your project directory. Here, you can specify details like your desired PHP version, database configuration, and folder mapping for your Laravel app.
5. Launching Homestead
To start your Homestead box, run:
Copy code
vagrant up
6. Accessing Your Laravel App
Once your Homestead box is up and running, you can access your Laravel app through the specified domain in your Homestead.yaml file.
Additional Tips for Laravel App Development
Now that you have Laravel Homestead set up for local development, let's explore some additional tips for your Laravel app development journey:
1. Cross-Platform Compatibility
Laravel allows you to build web applications as well as RESTful APIs that can be consumed by various platforms, including iOS and Android. This cross-platform compatibility is invaluable in today's multi-device world.
2. Leveraging Laravel App Development Companies
Consider partnering with a Laravel app development company, especially if you're working on a complex project or need expert guidance. Laravel app development companies, like [Your Company Name], offer extensive experience and resources to bring your app to life efficiently.
3. Building for iOS and Android
While Laravel is primarily a backend framework, you can build web services and APIs to support mobile app development. For iOS, you can use Swift or Objective-C, and for Android, you can use Java or Kotlin to create native apps that interact with your Laravel backend.
4. Continuous Testing and Integration
Implement continuous testing and integration practices in your Laravel app development workflow. Tools like PHPUnit and Laravel Dusk can help you maintain code quality and catch bugs early in the development process.
5. Keeping Up with Laravel Updates
Laravel is continuously evolving. Stay updated with the latest Laravel releases, security patches, and best practices to ensure your app remains secure and performs optimally.
Conclusion
In this comprehensive guide, we've explored how to implement Laravel Homestead for local development, why it's a valuable tool for Laravel developers, and some additional tips for successful Laravel app development. By following these steps and embracing best practices, you'll be well-equipped to create outstanding Laravel applications for various platforms, ensuring your success in the competitive landscape of app development.
Remember, collaboration with a reputable Laravel app development company can significantly enhance your project's quality and efficiency, so don't hesitate to seek professional assistance when needed. Happy coding!
0 notes
Text
Building a Realtime Chat Bot With Laravel

In today's digital age, chatbots have revolutionized how businesses interact with customers and streamline their operations. This blog post will provide a concise overview of chatbots and emphasize their pivotal role in enhancing customer service and efficiency. Additionally, we'll explore the relevance of using Laravel, a popular PHP web application framework, in chatbot development. Lastly, we'll discuss the primary purpose of this blog post – guiding you on how to hire Laravel developers to build your chatbot solution.
Chatbots, also known as virtual assistants or conversational agents, are software programs designed to mimic human conversation. Their importance lies in their ability to provide instant, 24/7 assistance, significantly improving user experiences and streamlining various business processes.
It’s renowned for its developer-friendly features and versatility, and serves as an excellent choice for building chatbots. Its modular architecture, extensive libraries, and expressive syntax make it the perfect framework for creating intelligent and responsive chatbot applications.
Let's discuss how to hire Laravel developers for chatbot development. You'll clearly understand why chatbots are essential, how it can empower your chatbot project, and the steps to hire a proficient Laravel developer who can bring your chatbot vision to life. Whether you're looking to enhance customer service or automate tasks, hiring the right Laravel developer is the key to success.
Getting Started with Laravel Development
Before diving into the world of development, ensuring you have the proper prerequisites to set yourself up for success is essential. Let's provide you with a brief overview of the essentials:
1. Tools and Technologies:
Text Editor/IDE: Choose a text editor or integrated development environment (IDE) you're comfortable with, such as Visual Studio Code, PhpStorm, or Sublime Text.
Web Server: Laravel applications typically run on a web server. You can use Apache, Nginx, or its built-in development server for local testing.
Database: Laravel supports various databases, including MySQL, PostgreSQL, SQLite, and SQL Server. Set up and configure the database system you prefer.
2. Basic Knowledge:
Laravel Fundamentals: It's crucial to have a solid grasp of its core concepts, such as routing, controllers, models, views, migrations, and Eloquent ORM. Its official documentation is an excellent resource for learning these fundamentals.
PHP: Since Laravel is a PHP framework, a good understanding of PHP programming is essential. Familiarize yourself with PHP syntax, data types, functions, and object-oriented programming (OOP) principles.
With these prerequisites in place, you'll be well-prepared to embark on your Laravel development journey and create web applications that leverage the power and elegance of this popular PHP framework.
Setting Up Laravel
When it comes to providing top-notch Laravel development services, correctly setting up your development environment is the crucial first step. Let's walk through the essential tasks to get you up and running smoothly:
1. Installing Laravel:
To kickstart your development journey, you'll need to install Laravel globally on your system. You can do this using Composer, a dependency manager for PHP. Execute the subsequent command to install it:

This command ensures you have the Laravel command-line tool available, making it easy to create new Laravel projects.
2. Configuring the Environment:
It relies on a robust configuration system. Key settings, such as database connections, environment variables, and application-specific settings, are defined in the .env file. Configure this file with your specific environment details, like database credentials and app keys. Proper configuration is essential for the security and functionality of your Laravel application.
3. Setting Up the Database:
It supports multiple database systems, allowing you to choose the best fit for your project's needs. To configure your database connection, update the .env file with your database type, host, port, username, and password. Afterwards, run the following command to create the database tables:

This will ensure your database is ready to store data for your Laravel application.
By following these steps and setting up correctly, you're well on your way to providing exceptional Laravel development services. This foundation will empower you to create robust web applications and deliver high-quality solutions to your clients or users.
Building a ChatBot with Expertise
Having a well-structured plan is vital when you're on a mission to create a cutting-edge chatbot. Here's a step-by-step guide to help you navigate the development process, ensuring your chatbot operates flawlessly:
A. Designing the Chat Bot's Architecture:
Start by carefully crafting the architecture of your chatbot. Define its components, such as the messaging engine, database structure, and user management system. A well-thought-out architecture sets the stage for a robust and scalable chatbot.
B. Implementing User Authentication:
Security is paramount. Implement user authentication to safeguard user data and control access to your chatbot. Laravel development agency, with its built-in authentication system, can simplify this process for you.
C. Building the Chat Interface:
Create an engaging and user-friendly chat interface. Design matters here, as it directly impacts user interaction and satisfaction.
D. Integrating a Real-time Messaging System:
To achieve seamless, real-time communication, integrate a messaging system. You can leverage technologies like WebSockets to enable instant message delivery and updates.
E. Handling User Messages and Responses:
Developing mechanisms to handle user messages and responses efficiently involves processing and storing messages, ensuring they reach the intended recipients, and managing message history.
F. Implementing Chat Bot Logic:
The heart of your chatbot lies in its logic. Define how your chatbot understands and generates responses. Incorporate natural language processing (NLP) and machine learning (ML) algorithms for intelligent interactions.
As you embark on this exciting journey, consider enlisting the expertise of a Laravel development agency. Their experience with its capabilities can supercharge your chatbot development, ensuring it's functional, scalable, and maintainable. Together, you can create a chatbot that stands out in the ever-evolving digital communication landscape.
Testing Your Laravel Chat Bot for Optimal Performance
As you tread the path of Laravel development in building your chatbot, testing is a crucial phase that should never be overlooked. Let's explore the significance of testing and understand the different testing approaches:
A. Discussing the Importance of Testing:
Testing is the cornerstone of delivering a reliable and efficient chatbot. It ensures that your application functions as intended, providing a seamless experience to users. Testing also helps identify and rectify issues before they reach your audience, saving time and maintaining your chatbot's reputation.
B. Explaining Unit Tests and Integration Tests:
In Laravel development, testing involves two primary types: unit tests and integration tests.
Unit Tests: These focus on individual components or functions of your chatbot in isolation. They validate that each part of your codebase works correctly.
Integration Tests: These come into play when examining how different components interact. Integration tests verify that your chat bot's modules integrate smoothly and harmoniously.
C. Providing Code Examples for Testing the Chat Bot:
Let's dive into some code examples to illustrate the testing process in Laravel. Here's a basic example of a unit test for a chatbot controller:
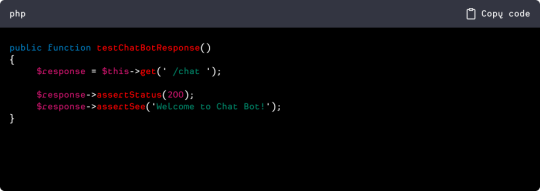
In this example, we're testing if the chatbot responds as expected when a user accesses the chat page.
By conducting comprehensive testing throughout your Laravel chatbot development, you ensure higher reliability and performance. It's a critical step in delivering a polished and user-friendly chatbot that meets the expectations of your audience.
Efficient Deployment for Your Chat Bot: A Laravel Development Company's Approach
The deployment phase takes center stage once your chatbot is ready to shine. It's time to prepare your application for production and make it accessible to users worldwide. Here's a concise guide on how to navigate this crucial phase:
Preparing the Application for Production:
Before deploying your chatbot, it's essential to ensure that your application is production-ready, optimizing performance, enhancing security measures, and fine-tuning configurations to handle real-world traffic efficiently. It's a step where the expertise of a Laravel development company can be invaluable, ensuring your application is primed for success.
Choosing a Hosting Platform:
Selecting the right hosting platform is a pivotal decision in the deployment process. Your choice should align with your chatbot's requirements, including scalability, uptime, and budget considerations. Popular options for Laravel applications include shared hosting, Virtual Private Servers (VPS), cloud platforms like AWS or Azure, and dedicated hosting. Each has its merits, and the ideal choice depends on your needs.
Deploying the Chat Bot on a Server:
Once you've picked your hosting platform, it's time to deploy your Laravel chatbot to a server. The deployment process typically involves uploading your codebase, configuring server settings, and setting up a database. Its documentation provides detailed guidance on deploying applications, ensuring a smooth transition from development to a live, accessible chatbot.
A Laravel development company can play a pivotal role in this deployment journey, leveraging its expertise to make the process seamless and efficient. Their experience ensures that your chatbot goes live with minimal hiccups, delivering a reliable and performant solution to your users.
Efficient Scaling and Maintenance for Your Chat Bot
Scaling and maintenance are pivotal aspects of ensuring your chatbot's continued success. Here's a comprehensive look at strategies to scale and maintain your chatbot effectively:
Strategies for Scaling the Chat Bot:
As your chatbot gains popularity and user engagement grows, it's crucial to have a scalable strategy.
Load Balancing: Implement load balancing to distribute incoming traffic evenly across multiple servers, ensuring your chatbot remains responsive even during peak usage.
Auto-scaling: Leverage cloud hosting platforms that offer auto-scaling capabilities. Your infrastructure can automatically adjust to handle increased traffic, providing a seamless user experience.
Regular Maintenance and Updates:
Regular maintenance is essential to keep your chatbot running smoothly and securely.
Software Updates: Keep your Laravel framework and other dependencies up to date, including security patches and feature enhancements.
Database Optimization: Periodically optimize your database to improve query performance and reduce response times.
Bug Fixes: Address and fix any bugs or issues users report promptly.
Handling User Feedback and Improving the Chat Bot:
User feedback is invaluable for enhancing your chatbot's functionality and user experience.
Feedback Channels: Establish clear channels for users to provide feedback, such as in-app forms or contact information.
Feedback Analysis: Regularly analyze user feedback to identify common issues, pain points, or feature requests.
Iterative Development: Use feedback to inform iterative development cycles. Continuously enhance your chatbot based on user input, ensuring it evolves to meet changing needs.
By implementing these strategies, you can ensure that your chatbot scales gracefully to accommodate growing user bases and maintains its reliability and relevance over time. This proactive approach fosters a positive user experience and establishes your chatbot as a trusted and valuable resource.
Conclusion
In this journey through chatbot development, we've explored various aspects crucial to creating successful and impactful chatbots. From understanding the importance of chatbots in enhancing user experiences to harnessing the power of Laravel development, we've covered a spectrum of insights.
We've delved into setting up the foundation, testing for reliability, and deploying your chatbot for the world to experience. Scaling and maintaining your chatbot have also been discussed as vital steps to ensure its long-term success.
We encourage you to delve deeper into chatbot development as we wrap up. The world of conversational AI is ever-evolving, offering exciting opportunities to create solutions that streamline processes and connect with users in new and innovative ways.
We sincerely thank you for your time and interest in this blog post. Your curiosity and passion for technology drive the industry forward, and we hope this information has been valuable in your quest to explore the fascinating world of chatbot development. Stay curious, keep learning, and continue to create solutions that make a difference!
Source: https://www.addwebsolution.com/blog/building-realtime-chat-bot-laravel
#laravel development company#laravel development services#hire laravel developer#laravel app development company#certified laravel developer
0 notes