#How to make a flash drive bootable
Explore tagged Tumblr posts
Visit Tumblr Blog
Explore Tumblr blogs with no restrictions, modern design and the best experience.
Last Seen Tumblr Blogs


Fun Fact
12.7% of mobile users access Tumblr.
Note
Please, please explain how to install and use linux like I'm 5 years old. I'm so sick of windows adding AI and other bullshit to my already struggling elderly laptop but I'm really not good with computers at all so I have no idea where to start with Linux.
Okay, so, I'm going to break this down into steps I would give the average tumblr user first, and then if any of them are confusing or use words you don't understand, ask me and I'll explain that step in greater detail.
Step 0) BACK. UP. YOUR. SHIT.
NEVER EVER EVER CHANGE YOUR OPERATING SYSTEM WITHOUT A COMPLETE BACKUP OF ALL YOUR FILES.
Step 1) Learn your machine. You need to know:
How much RAM you have
If your processor is 32 or 64 bit
How big your hard drive is
On windows, you can find out all of this by going to the start menu, typing "about" and opening the first result on your system instead of the internet.
For additional instructions, visit this page.
Step 2) Pick your Linux.
There's like 10,000 kinds of Linux, each tailored to particular functions that the end-user (that is you!) might want to have. The sheer amount is very daunting, so first I'm going to give my suggestions, then I'll explain how to pick for yourself.
For Mac users, I suggest Kubuntu. For windows users, I suggest Mint Cinnamon. If your laptop is really REALLY old, I recommend Sparky Stable, which is the lightest weight Linux I would ever suggest for a new user. In every case, download the version suited to your processor (32 bit can be labelled "x86" or "32 bit"; 64 bit is always labelled "64 bit").
If you want to try a different type of linux, you'll need to make sure your laptop meets the "minimum specs" or "system requirements." These numbers tell you how much RAM, processor and hard drive space the linux will use. (That's why you needed those numbers at the beginning.)
Step 3) Collect your supplies. You're going to need:
An ISO burning program compatible with your current system, like Balena Etcher.
A copy of the ISO file for the Linux you want to use.
Your laptop.
An 8gb or larger USB flash drive.
Step 3) Make a bootable USB drive
Install Balena Etcher, hitting "okay" and "next" when prompted. Last I checked, Etcher doesn't have adware attached, so you can just hit next every time.
Plug your USB drive into the laptop.
Open Etcher.
Click "flash from file" and open the ISO file with your Linux on it.
Click "Select target" and open the USB drive location. Hit the "flash" button. This will start writing all the linux installer data to your flash drive. Depending on the speed of your machine, this could take as long as 10 minutes, but shouldn't be much longer.
Step 4) Boot to the USB drive
This is, in my opinion, the trickiest step for a lot of people who don't do "computer stuff." Fortunately, in a rare act of good will, Windows 10 made this process a lot easier.
All you'll need to do is go to settings, then recovery, then advanced startup and pick the button labelled "use a device."
This tutorial has images showing where each of those is located. It's considered an "advanced setting" so you may get a spooky popup warning you that you could "harm your system by making changes" but we're not doing anything potentially harmful so you can ignore that if you get it.
Step 5) Try out linux on the flash drive first.
Linux installs using a cool little test version of itself that you can play around in. You won't be able to make changes or save settings, but you can explore a bit and see if the interface is to your liking. If it's hideous or hard to navigate, simply pick a new linux version to download, and repeat the "make a bootable USB" step for it.
Step 6) Actually install that sucker
This step varies from version to version, but the first part should be the same across the board: on the desktop, there should be a shortcut that says something like "install now." Double click it.
Follow the instructions your specific linux version gives you. When in doubt, pick the default, with one exception:
If it asks you to encrypt your drive say no. That's a more advanced feature that can really fuck your shit up down the road if you don't know how to handle it.
At some point you're going to get a scary looking warning that says 1 of 2 things. Either:
Install Linux alongside Windows, or
Format harddrive to delete all data
That first option will let you do what is called "dual booting." From then on, your computer will ask every time you turn it on whether you want Windows or Linux.
The second option will nuke Windows from orbit, leaving only linux behind.
The install process is slower the larger your chosen version is, but I've never seen it take more than half an hour. During that time, most linux versions will have a little slideshow of the features and layout of common settings that you can read or ignore as you prefer.
Step 7) Boot to your sexy new Linux device.
If you're dual booting, use the arrow keys and enter key to select your linux version from the new boot menu, called GRUB.
If you've only got linux, turn the computer on as normal and linux will boot up immediately.
Bonus Step: Copy Pasting some code
In your new start menu, look for an application called "terminal" or "terminal emulator." Open that up, and you will be presented with an intense looking (but actually very harmless) text command area.
Now, open up your web browser (firefox comes pre-installed on most!), and search the phrase "what to do after installing [linux version you picked]"
You're looking for a website called "It's FOSS." Here's a link to their page on Mint. This site has lots and lots of snippets of little text commands you can experiment with to learn how that functionality works!
Or, if you don't want to fuck with the terminal at all (fair enough!) then instead of "terminal" look for something called "software manager."
This is sort of like an app store for linux; you can install all kinds of programs directly from there without needing to go to the website of the program itself!
295 notes
·
View notes
Text
Installing Kali Linux on a USB Stick: A Step-by-Step Guide
If you want a portable, powerful cybersecurity toolkit you can carry in your pocket, installing Kali Linux on a USB stick is the perfect solution. With Kali on a USB, you can boot into your personalized hacking environment on almost any computer without leaving a trace — making it a favorite setup for ethical hackers, penetration testers, and cybersecurity enthusiasts.

In this guide, we'll walk you through how to install Kali Linux onto a USB drive — step-by-step — so you can have a portable Kali environment ready wherever you go.
Why Install Kali Linux on a USB?
Before we dive into the steps, here’s why you might want a Kali USB:
Portability: Carry your entire hacking setup with you.
Privacy: No need to install anything on the host machine.
Persistence: Save your settings, files, and tools even after rebooting.
Flexibility: Boot into Kali on any system that allows USB boot.
There are two main ways to use Kali on a USB:
Live USB: Runs Kali temporarily without saving changes after reboot.
Persistent USB: Saves your files and system changes across reboots.
In this article, we’ll focus on setting up a Live USB, and I'll also mention how to add persistence if you want. and if you seek knowledge about kali linux you can visit our website any time
Website Name : Linux Tools Guide
What You’ll Need
✅ A USB drive (at least 8GB; 16GB or more recommended if you want persistence). ✅ Kali Linux ISO file (download it from the official Kali website). ✅ Rufus (for Windows) or Etcher/balenaEtcher (for Mac/Linux/Windows). ✅ A computer that can boot from USB.
Step 1: Download the Kali Linux ISO
Go to the Kali Linux Downloads page and grab the latest version of the ISO. You can choose between the full version or a lightweight version depending on your USB size and system requirements.
Tip: Always verify the checksum of the ISO to ensure it hasn't been tampered with!
Step 2: Insert Your USB Drive
Plug your USB stick into your computer. ⚠️ Warning: Installing Kali onto the USB will erase all existing data on it. Backup anything important first!
Step 3: Create a Bootable Kali Linux USB
Depending on your operating system, the tool you use may vary:
For Windows Users (using Rufus):
Download and open Rufus (Get Rufus here).
Select your USB drive under Device.
Under Boot selection, choose the Kali Linux ISO you downloaded.
Keep the Partition scheme as MBR (for BIOS) or GPT (for UEFI) based on your system.
Click Start and wait for the process to complete.
For Mac/Linux Users (using balenaEtcher):
Download and open balenaEtcher (Get Etcher here).
Select the Kali ISO.
Select the USB drive.
Click Flash and wait until it's done.
That's it! You now have a Live Kali USB ready.
Step 4: Boot Kali Linux from the USB
Restart your computer with the USB plugged in.
Enter the BIOS/UEFI settings (usually by pressing a key like F12, Esc, Del, or F2 right after starting the computer).
Change the boot order to boot from the USB first.
Save changes and reboot.
You should now see the Kali Linux boot menu! Select "Live (amd64)" to start Kali without installation.
(Optional) Step 5: Adding Persistence
Persistence allows you to save files, system changes, or even installed tools across reboots — super useful for real-world usage.
Setting up persistence requires creating an extra partition on the USB and tweaking a few settings. Here's a quick overview:
Create a second partition labeled persistence.
Format it as ext4.
Mount it and create a file /persistence.conf inside it with the content: cppCopyEdit/ union
When booting Kali, choose the "Live USB Persistence" option.
Persistence is a little more technical but absolutely worth it if you want a real working Kali USB system!
Troubleshooting Common Issues
USB not showing up in boot menu?
Make sure Secure Boot is disabled in BIOS.
Ensure the USB was properly written (try writing it again if necessary).
Kali not booting properly?
Verify the ISO file integrity.
Try a different USB port (preferably USB 2.0 instead of 3.0 sometimes).
Persistence not working?
Double-check the /persistence.conf file and make sure it's correctly placed.
Conclusion
Installing Kali Linux onto a USB stick is one of the smartest ways to carry a secure, full-featured hacking lab with you anywhere. Whether you’re practicing ethical hacking, doing security audits, or just exploring the world of cybersecurity, a Kali USB drive gives you power, portability, and flexibility all at once.
Once you’re set up, the possibilities are endless — happy hacking! 🔥
2 notes
·
View notes
Text
Well the bad news is that the nearest store didn't have a suitable backpack for a grill bag. The only options were a $20 backpack that was made for a kindergartner and is way too small for my needs or a hiking pack for $90 which is way more than I want to spend. I might have to break down and go to Walmart lol.
The good news is that I got my hands on a new flash drive so I can make a bootable USB for Ubuntu. Funny how the smallest drive available is 64GB for only $7. Seems like just a decade ago 32GB was big dick storage.
5 notes
·
View notes
Text
How to Wipe Data on SSD: A Complete Guide
Solid State Drives (SSDs) are faster, more durable, and more energy-efficient than traditional hard drives. But when it comes time to sell, recycle, or repurpose your SSD, simply deleting files or formatting the drive isn't enough to protect your sensitive data. To ensure your personal or business information is truly unrecoverable, you need to wipe the SSD securely.
This guide walks you through the process of wiping an SSD properly, and shows how to use a reliable third-party tool — iReaShare Data Wipe — to simplify and secure the task.

Why You Should Properly Wipe an SSD Unlike traditional HDDs, SSDs use flash memory and have built-in wear-leveling and garbage collection mechanisms. These features improve performance but also make traditional data-wiping methods (like overwriting sectors multiple times) ineffective or even damaging.
Key reasons to wipe your SSD securely: Protect privacy: Prevent identity theft or data leaks. Prepare for resale or donation: Ensure the next user can't recover your data. Ensure compliance: Meet data protection standards like GDPR or HIPAA.
Method 1. Using Manufacturer Utilities Most SSD manufacturers (Samsung, Crucial, SanDisk, etc.) offer proprietary utilities with secure erase functions. These tools issue built-in ATA Secure Erase or NVMe sanitize commands to reset the SSD to factory state. Pros: Designed for your specific SSD Cons: Might not support third-party drives or non-Windows OS
Method 2. Using Disk Management (Not Recommended for SSDs) You can format the SSD or delete partitions via Windows Disk Management. However, this doesn’t erase the data; it simply removes access to the files. Warning: Data can still be recovered with recovery tools.
Method 3. Using Command Line Tools Power users may use tools like diskpart in Windows or hdparm in Linux. These can issue secure erase commands, but they require careful input and may not be user-friendly.
Method 4. Using iReaShare Data Wipe If you're looking for a simple, safe, and effective way to wipe an SSD, iReaShare Data Wipe is a great solution. It's designed to permanently erase data beyond recovery, while being easy to use even for beginners.
How to Wipe SSD with iReaShare Data Wipe Step 1: Visit the official iReaShare website. Download iReaShare Data Wipe and install it on your Windows computer. Launch it. Step 2: Connect the SSD to your computer via SATA, M.2 slot, or external enclosure (USB to SATA adapter, for example). Ensure it is detected by the software. Step 3: From the main interface, locate your SSD under the list of connected drives. Select the correct drive. Double-check the drive letter or name to avoid wiping the wrong drive.

Step 4: iReaShare Data Wipe offers 2 data erasure levels: Quick Erase and Deep Erase. You can choose it as you need. Step 5: Click the "Erase Now" button. A warning will appear notifying that data cannot be recovered. Confirm your choice.

Wait for the process to complete. This can take several minutes to hours depending on the method and SSD size. Step 6: After wiping, the tool will notify you of completion.
Final Tips Back up important data before wiping — the process is irreversible. Always double-check the selected drive before proceeding. If your SSD is bootable, you may need to create a bootable USB version of the software.
Conclusion Properly wiping an SSD is crucial before selling, recycling, or repurposing it. While there are many options, iReaShare Data Wipe provides a reliable, user-friendly, and effective solution for securely erasing your SSD with peace of mind.
Whether you're a tech-savvy user or a beginner, iReaShare simplifies the complex task of secure data deletion, helping ensure your privacy and data security are never compromised.
0 notes
Text
How to Securely Erase Data from Your SSD?
In today’s digital world, ensuring the security of your data is more important than ever. Whether upgrading to a new SSD, repurposing an old one, or just wanting to ensure sensitive information is unrecoverable, securely erasing data from an SSD is critical. Unlike traditional hard drives, SSDs (Solid State Drives) require special methods for secure data deletion due to their unique storage techniques.
SSDs use NAND flash memory to store data organized into blocks and pages, unlike the spinning platters in traditional hard drives. This architecture introduces complexities like wear leveling and garbage collection. Wear leveling ensures even data distribution across memory cells to prevent premature wear, while garbage collection consolidates unused blocks, making old data scattered across the drive and difficult to erase.
When a file is deleted from an SSD, it is not physically erased but marked as available for new data. Until overwritten, the data can be recovered using data recovery software. This is why secure data erasure methods are essential for preventing unauthorized recovery of sensitive information.
Several methods exist for securely erasing data from an SSD:
Built-in SSD Secure Erase Utility: Many SSD manufacturers offer built-in secure erase utilities like Samsung Magician, Intel SSD Toolbox, or Crucial Storage Executive. These tools use the SSD's firmware to perform a thorough data wipe. To use these tools, users need to check the manufacturer's documentation, backup important data, create a bootable USB drive (if necessary), and follow prompts to run the secure erase utility.
Third-Party Software: If the manufacturer doesn’t provide a secure erase tool, third-party software like Parted Magic, HDDErase, or DBAN (Darik’s Boot and Nuke) can be used. Similar to the built-in utilities, these tools offer additional features and allow users to select their SSD and securely erase it.
ATA Secure Erase Command: This low-level command, built into most SSDs' firmware, resets the NAND cells to their factory state. It requires technical knowledge and involves using a bootable Linux distribution like Ubuntu or Parted Magic to execute the ATA Secure Erase command.
Encryption Method: Encrypting the SSD before erasing it adds an extra layer of security. Even if remnants of data remain after erasure, they will be indecipherable without the encryption key. This can be done using encryption software like BitLocker (Windows), FileVault (Mac), or VeraCrypt (cross-platform).
For maximum data security, it’s recommended to regularly update SSD firmware, use multiple erasure methods, and physically destroy the drive if it’s no longer needed. Additionally, proper disposal of the SSD through e-waste recycling ensures that the drive is handled responsibly.
In conclusion, securely erasing data from an SSD is crucial for protecting sensitive information. By understanding the storage mechanics of SSDs and using the appropriate erasure methods, users can ensure their data is irretrievable. Always back up data before proceeding with any erasure and verify the process to ensure complete data destruction.
Want to Buy SSDs in Bulk from VSTL?
If you're looking to purchase SSDs in bulk, VSTL offers a reliable option for businesses and individuals seeking quality storage solutions. With competitive pricing and a range of SSD models to suit various needs, VSTL ensures high-performance drives for both personal and professional use. Bulk buyers can benefit from wholesale rates, making it an efficient choice for large-scale projects or tech upgrades. Whether upgrading office systems or managing data storage for a business, VSTL provides dependable SSDs to meet diverse requirements.
0 notes
Text
HOW TO USE RUFUS STEP BY STEP ?
Sure, here's a step-by-step guide on how to use Rufus to create a bootable USB drive:
Download Rufus: First, download the Rufus software from the official website or another trusted source. You can find the latest version of Rufus at: Rufus Official Website
Insert USB Drive: Insert the USB flash drive into an available USB port on your computer. Note that Rufus will format the USB drive during the process, so make sure to back up any important data on the drive before proceeding.
Run Rufus: Double-click on the Rufus executable file that you downloaded to launch the application. You may need to grant administrative privileges if prompted.
Select USB Drive: In Rufus, under the "Device" section, select the USB drive you want to use from the drop-down menu. Make sure you choose the correct drive, as all data on the selected drive will be erased.
Select Bootable Disk Image: Under the "Boot selection" section, click on the "Select" button and navigate to the location of the bootable disk image (ISO file) that you want to use. Select the ISO file and click "Open".
Partition Scheme and File System: Rufus will automatically detect the optimal partition scheme and file system based on the selected ISO file. However, you can customize these settings if necessary. For most installations, the default settings should work fine.
Volume Label and Bootable Disk Name: You can optionally set a volume label (name) for the USB drive in the "Volume label" field. This will be the name displayed for the USB drive in File Explorer. You can also change the name of the bootable disk if desired.
Start Creation Process: Once you have configured all the settings, click on the "Start" button to begin the process of creating the bootable USB drive. Rufus will display a warning message indicating that all data on the selected USB drive will be erased. Click "OK" to proceed.
Wait for Completion: Rufus will now start the process of formatting the USB drive and copying the contents of the ISO file to the drive. This may take some time depending on the size of the ISO file and the speed of your USB drive.
Completion: Once Rufus has finished creating the bootable USB drive, you will see a "READY" message indicating that the process is complete. You can now safely eject the USB drive from your computer.
That's it! You've successfully created a bootable USB drive using Rufus. You can now use this USB drive to boot your computer and install the operating system or run other tools as needed.
0 notes
Text
In this guide, you will learn how to use Ventoy, a programme that makes it incredibly easy to create a multi bootable USB flash drive of Windows 11 (and 10) without the need to reformat the removable storage. Typically, you use the Media Creation Tool to create a bootable USB media when you need to perform a clean install of Windows 11 (or 10). As an alternative, you can complete the same task with more customization options by using the Rufus tool. The issue is that you have to repeatedly reformat the drive to update the installation files or switch the operating system, even though these tools perform as promised. A flash drive can be made bootable by installing Ventoy as software. Once the flash drive is able to boot, all you have to do is upload the desired ISO (or WIM, IMG, VHDX, or EFI) files without extracting them first. The system will boot into the Ventoy software when you insert the USB flash drive. You can select the image with which you want the computer to start while you are experiencing this. You can keep both versions of the image on the same bootable flash drive if a new version of the ISO becomes available. The instructions in this manual will show you how to use Ventoy to make a bootable USB that you can use to install Windows 10, Windows 11, Linux, or another operating system from the same flash drive. Create multiboot USB flash drive with Ventoy To create a Windows 11 bootable USB with Ventoy, connect a flash drive with enough space, and use these steps: Open Ventoy GitHub page. Under the “Assets” section, click the ventoy-x.x.xx-windows.zip file and download it to your computer. Quick note: You may need to force and keep the file as the browser may detect it as malicious. Open the Zip folder location. Double-click the open the ventoy-x.x.xx-windows.zip file. Click the Extract all button from the command bar. Click the Browse button. Select a location to extract the files. Click the Select Folder��button. Click the Extract button. Open the ventoy-x.x.xx folder. Double-click the Ventoy2Disk.exe file to launch the installer. Choose the USB flash drive from the “Device” setting. Click the Install button. Click the OK button. Click on This PC from the left pane of File Explorer. Open the Ventoy drive. Copy and paste the ISO files to make them bootable. You can include the latest image of Windows 11, 10, Linux, etc. Once you complete the steps, you can use the USB flash drive to boot a device with the Ventoy software, where you can then choose to start the device with one of the ISOs you uploaded to the drive.
0 notes
Text
How to use Ventoy to create bootable USB of Windows 11, 10
Ventoy is an application that makes it super simple to create a bootable USB flash drive of Windows 11 (and 10) without the need to reformat the removable storage, and in this guide, you will learn the steps to use it. Usually, when you have to perform a clean install of Windows 11 (or 10), you use the Media Creation Tool to create a bootable USB media. Alternatively, you can use the Rufus tool…

View On WordPress
0 notes
Text

(you might know some of this already, but I'm going in detail because it's not often I get to info-dump this to someone)
What linux is:
Linux is a free and open source operating system kernel -in itself it isn't a full Os, it needs other parts; if you want I can explain what a kernel is/does- made by Linus Torvalds in 1991 based on the Minix Os, which was based on the Berkley Software Distribution version of Unix. Although linux isn't a full Os, people will generally refer to any Os that uses the linux kernel as "linux"
Since then it has become a major corner stone of the internet. ~90% of servers online are running some kind of linux. Although online surveys show that only 3-5% of people use linux as a desktop Os.
because linux is free and open source -meaning anyone can download or edit the source code- there are several distributors (or distro's) to download a version of linux, each with different package managers (a place to download new software), desktop environments (which determines what apps you have installed and how your desktop looks), and other stuff.Some linux distro's are based on others and they may have some things in common. For example: all distro's based on Debian use Debian's "apt" package manager.
Because all linux distro's are based on the same kernel (it's not often that distro's mod the kernel for various reasons) most (not all) software is compatible between distro's with a little finagling.
How to install linux:
installing linux may very from computer to computer, and on some computers it is nearly impossible; although in theory anything with 512 mb of ram could run linux. But a lot of these details may be different on your computer, so look into that first.
find a distro you want to use. Some distro's I'd advise staying away from if you are a beginner, like Arch. There are tons of distro's out there so it may seem like a daunting task, but here are a good few recommendations for beginners. Linux Mint is a good place to start, it's basically the beginner distro. it's simple, works with most computers, and suites just about anyone, from long time users to beginners, to shitty little cousins. Pop_OS! is another good one I've seen recommended, I've never used it personally but I've heard good things. For a long time Ubuntu (mint's daddy in a sort of way) was considered one of the best general distro's, but in recent years it has kind of fallen off, but still, it's good to keep in mind as a backup if something goes wrong.
make a bootable usb thumdrive. to do this you have to download the iso of the OS you are going to use and use a flashing software to make the usb bootable. Don't just put the iso on a thumb drive like what I did when I first installed installed linux, make sure you are using a flashing software. Rufus is a good flashing sofware for Windows (assuming that is what you're using). here is a good article on how to make a bootable usb
go into a one time boot/bios. the next thing you need to do is boot your computer from the usb. which can be done by rearranging the boot order in the bios, or running a one time boot on your computer. this is where things start to change depending on your computer. for most computers if you reboot you will see a little screen flash that may have some technical info and say something like "[key] for bios/uefi setup [key] for one-time boot launch." On my computer those keys are f2 and f12 respectively, but it may be different on yours. Some computers *ahem chromebook* may not give you access to the bios or one time boot. Here is a guide on common ways on how to boot into bios/one time boot. although I recommend looking up your laptop model/mother board model for specific details.
boot from the usb. now that you are in the bios/boot utility you need to boot into the usb. when booted into the usb, most distro's will allow you to test how performance is on your computer, test the desktop environment, and make sure you have all your drivers and other things worked out so you have access to wifi and bluetooth and stuff.
run the installer. on the desktop there should be an installer application that you can run, most of them are pretty simple; they will just ask you stuff like usernames, times zones, pre-installed apps, etc. etc. WARNING: installing linux will wipe your drive clean, anything you had will be gone. Make sure you have backups of anything that may be important.
reboot your computer & unplug the usb; after you run the installer linux should be on your computer now
many distro's have installation guides on their websites if you want to follow those.
if you want to install linux on a chromebook it is possible (my first laptop was a chromebook and I installed Solus on it, it was my first distro and a big regret; nothing aginst Solus, I just didn't like it). here are some resousrces if you want to do that: [1] [2] [3]
How to use linux:
one of the big corner stones of linux is the terminal. due to its development history the terminal is the dominate way to interact with your computer. a lot of distro's may have a way to do things with a gui, but you will always have a terminal, so you best be used to it.
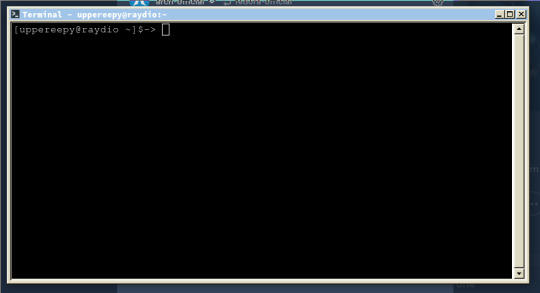
this is what a terminal emulator looks like. Terminals are technically a part of the hardware (and can be found under /dev/tty* in linux), but you can access them from the desktop through the emulator.
on the terminal you will be greeted to a command prompt, from here you can type out different commands. when you type a command the shell (the software that the terminal uses to communicate with the OS) will search through the $PATH variable and check every folder it points to, and if the command you type is found then it will run the command with what ever parameters you give.
commands follow a formula: CommandName parameter1 parameter2 ...
some commands wont have any parameters, others will, it all depends on the command. But here are some common commands to help you understand
before you begin, just know that "~" refers to your home folder; directory is just a fancy term for folders (that is due to the history of computers); "." refers to the directory you are currently in, and ".." refers to the directory about you.
ls (list): lists the contents of whatever folder you're in
pwd (print working directory): prints the file path to your fold (ex: /home/uppereepy/Documents)
cd (change directory): lets you change which folder you're in (ex cd ..)
cat (concatenate): concatenates (prints) files to the screen
mv (move): move files to new locations (ex: mv HelloWorld.txt ~/Desktop), can also be used to rename files (ex: mv HelloWorld.txt Hello.txt)
man (manual): if you don't know what a command does then you can use the man command to look up what a command does (ex: man ls).
some advice: you will grow to understand the terminal in time, and although tutorials will help, using the terminal will help you understand things a lot more. manual entries, when you first start, may seem esoteric and hard to read, so just know it is ok to look up what a command does on the internet. learning the C programing language can really help you understand the terminal, and so does reading about the history of computers or using older computers
Resources to get started:
Wikipedia page for linux computer terminals The GNU project (where took off) top 50 commands how to use pipes online manual linux for beginners yt linux for hackers by network chuck (he is a little annoying, but he's how I got started)
and if you want to get into the history of computers I'd suggest looking into The 8-bit Guy on yt and Unix: a History and a Memoir by Brian Kernighan (one of the developers behind Unix and wrote "The C Programming Language")
anyways, that's all I got, I am tired (it is nearly 12:00 am while I am writing this), sorry for the extremely long post
gee i really want to get into linux but idk how to even start.. I wonder if there are any smart transgender women out there who could explain it to me in extreme detail while i bat my eyes at them.....
#long post#linux#linuxposting#really long post#linux mint#Pop_OS!#linux for beginners#information#infodump
475 notes
·
View notes
Text
How to make a flash drive bootable

#How to make a flash drive bootable manual
#How to make a flash drive bootable upgrade
#How to make a flash drive bootable portable
#How to make a flash drive bootable Pc
Plug the USB drive into your computer’s USB port.
If you dare to do the necessary work by hand, you can simply use the cmd.exe application, better known as “Command Prompt”, to create a bootable USB drive on all operating systems from Windows Vista (including Windows 10). Downloading directly from the company’s website is also possible for Windows 7 and Windows 8, for example. In the case of Windows 10, this can be done completely legally via the media creation tool from Microsoft. But it’s simpler to just download the required operating system from the internet. You can create such an ISO file yourself, though, for example with the use of tools like WinISO, UltraISO, or the burn program InfraRecorder.
#How to make a flash drive bootable Pc
Today, Windows is generally preinstalled on a system partition of a matching PC or laptop. These files used to be found on a CD- or DVD-ROM, which came with a new computer or could be acquired separately. An ISO file for the desired operating system that contains all setup files that you need for installation.If the drive is already being used, make sure that it doesn’t contain any important or indispensable data.
#How to make a flash drive bootable portable
To obtain a high working speed (or enable the creation of a portable operating system), the selected drive should support the standard USB 3.0.
A USB drive with at least 4GB of storage (for a 32-bit operating system) or at least 8GB (for a 64-bit system).
The Windows utility program DiskPart or an external tool with the same functions.
Regardless of which option you choose, you always need the following things:
#How to make a flash drive bootable manual
The first option seems a bit complicated at first glance, and because of the various manual steps is slightly more error-prone, but it’s still doable even if you’re not an expert. There are basically two possible methods: either manually or using automated tools.
Use a “portal operating system” on a foreign computerĪ bootable USB drive can of course be created on a different computer than the one you want to use it on later.
“Clean” reinstallation of the operating system.
#How to make a flash drive bootable upgrade
Upgrade an old operating system to Windows 10.Use a recovery system to repair your PC.Here are all possible uses for a bootable USB drive: A portable operating system also offers more security in case a keylogger on a foreign computer stores your passwords or your computer is infected with a virus. This way, you can not only navigate in your familiar work environment but also access all your important documents via the cloud. With this, you can use your preferred Windows version with all your favorite tools and personal data on foreign computers without having to fuss with the operating system already installed (regardless of whether it’s Windows or something else). The drive also serves as a “clean” reinstallation of the operating system if it’s become too slow as a result of accumulated garbage.Įxperienced computer experts and IT professionals also like to use a bootable USB as a “ portable operating system” (the concept is known as “Windows2Go” for Microsoft). You can also use a bootable USB to upgrade Windows 7 or 8 to Windows 10 if a previously automatic upgrade doesn’t function correctly. Even if no such PC emergency is present, it’s a good idea to have a Windows image for data backup on a USB-capable storage medium (could also be an external hard drive) on hand.
0 notes
Text
How to Make a Windows 10 Bootable USB?
How to Make a Windows 10 Bootable USB?
Today I’m going to show you how to create the windows 10 portable USB drive. So first of all you need ISO file, so if you have an windows -10 ISO file, Good & if you don’t have window’s 10 ISO so don’t worry, I will put a site below, my site where you can learn how to download windows 10 ISO file for free, actually it is free on Microsoft website you can just do the Google search windows 10 ISO…
View On WordPress
#bootable usb windows 10#create bootable usb#create windows 10 bootable usb from iso#create windows 10 bootable usb on mac#how to#how to create a windows 10 bootable usb flash drive#how to create bootable usb windows 10 in hindi#how to download and install windows 10#how to download windows 10#how to install windows 10 from a usb flash drive#how to install windows 10 usb#how to make a windows 10 bootable usb for free#how to make windows 10 bootable pendrive#how to make windows bootable usb#rufus bootable usb#rufus windows 10#windows 10#windows 10 bootable usb#windows 10 bootable usb drive#windows 10 bootable usb tool#windows 10 for free#windows 10 free#windows 10 installer#windows 10 iso#windows 10 usb drive#windows 10 usb install#windows 10 usb tool
1 note
·
View note
Text
How to make a bootable mac usb flash drive from windows

#HOW TO MAKE A BOOTABLE MAC USB FLASH DRIVE FROM WINDOWS HOW TO#
#HOW TO MAKE A BOOTABLE MAC USB FLASH DRIVE FROM WINDOWS INSTALL#
#HOW TO MAKE A BOOTABLE MAC USB FLASH DRIVE FROM WINDOWS HOW TO#
I hope I can show you some examples of how to configure the EFI using Open core. Wait until the process is completed.Īfter this process completes, you are ready to configure the EFI folder. Press Enter and then it will start copying files to our USB drive. Next, we need to provide the path for the macOS recovery file we downloaded on step 1.Ĭlick Copy path as shown above and then paste in the command line Now confirm it by typing Y and press enter
#HOW TO MAKE A BOOTABLE MAC USB FLASH DRIVE FROM WINDOWS INSTALL#
This will also install OpenCore on the USB drive. Boot Camp Assistant can be used to install Windows on a Mac and create a bootable USB installer drive, eliminating the need for any lengthy Terminal commands or third-party apps. Don’t forget to change the number based on your USB drive number shown on the makeinstall window. Create Windows 11 Bootable Disk Using Boot Camp (Intel Macs) The first method involves using Boot Camp on Intel Macs. In this case, my Sony USB drive is shown with a number 3. In the following window, make sure you see your USB drive. Now, right-click the file “MakeInstall.bat” and choose Run as Administrator. For those curious, its possible to use a Mac to create. And then open the gibMacOS folder once again. Besides an empty 8GB USB drive and a Windows PC, youll need to set aside about 30 minutes, maybe longer, depending on your internet speed. Plug your USB drive to one of your USB ports. Here browse to select your DMG file from the computer directory, mention the USB drive to store the burnt image, and finally click 'Burn' option to start the process. OK so the second step of this project is completed. In this screen, Insert your USB to any free USB port and wait till the device is recognized. This will download the macOS Catalina 10.15.4 to the gibMacOS folder.Īfter the download process is completed, you will see new folder called macOS Download under the gibMacOS folder To proceed, simply type 5 and then press Enter. Now we are going to choose the macOS Catalina Full Install from the list. Type R and then press Enter to enable the Recovery option only.
0 notes
Text
How to make a flash drive bootable using rufus

#How to make a flash drive bootable using rufus how to#
#How to make a flash drive bootable using rufus install#
#How to make a flash drive bootable using rufus windows 10#
#How to make a flash drive bootable using rufus portable#
Rufus is a free software designed to format and create external devices such as flash or memory cards to be bootable, so it can be used as normally using DVDs. “Transfer” the ISO file into USB Flash Drive using Rufus.“Save” important files from USB Flash Drive to another place, as this will be “formatted” and emptied.Prepare USB Flash Drive that has a capacity of at least “4 GB” or higher to be used for Windows 8 installation.
#How to make a flash drive bootable using rufus install#
To install Windows 8 from USB Flash Drive with Rufus, follow these step by step below: This is a very lightweight application, with a tiny size that can transfer Windows Setup from ISO file and make external device “bootable”, so we can use it later as a normally using DVD for installation. There are many software programs that can help to perform this task easily, one of them is “Rufus”. Not only that, even memory card or other external device can also be used. And start the installation process.USB Flash Drive can be an Alternative choice to install Windows 8 or 8.1 operating system that normally uses “DVD setup”. From the boot menu select the USB drive to boot the system with it.
After that connect to a PC or laptop where you want to install Windows 11, start/restart it.
Wait for few minutes, once the process is completed click on the Close button.
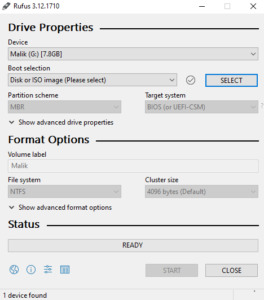
Select Partition Scheme MBR/ GPT, target system UEFI.
Click on the SELECT button to choose the Windows 11 ISO file.
Now, from the Device drop-down select the USB drive that you want to bootable.
Double click on the executable file of the Rufus to run it on your existing Windows 10/8/7 system.
Go to its official website and download it.
#How to make a flash drive bootable using rufus portable#
Secondly, we require a portable tool called Rufus- a bootable USB maker.
#How to make a flash drive bootable using rufus how to#
Follow our article How to Download Windows 11 ISO 64-bit If you already have the copy then move to the next steps or else first download the same.
The first thing is of course you must have the Windows 11 ISO copy.
ĭownload Windows 11 ISO to create a bootable USB drive Remember your PC must support TPM 2.0 and Secure Boot to install Windows 11.
Graphics card DirectX 12 compatible graphics / WDDM 2.x.
TPM Trusted Platform Module (TPM) version 2.0.
System firmware UEFI, Secure Boot capable.
64-bit Processor at 1 gigahertz (GHz) or faster with 2 or more cores.
Thus, if you have already grabbed the ISO file of Windows 11, then here are the simple steps to follow to create a bootable pen drive of it. More default themes this time as compared to Windows 10. Unlike in the past, windows can not only be maximized or minimized but can also be specifically placed in a corner of the screen or arranged side by side. A handy feature that should come with Windows 11 is the new window control. Quick search terms and a list of the most recent search terms are intended to simplify and speed up the search for the user. The Windows search has been revised and now works via a magnifying glass icon in the system tray. Programs are pinned to the top of the start menu and below that the user will find the files last accessed, the controls for switching off the system are there as well. And also the pop-up start menu window also has been changed in Windows 11, with a new set of icons, fluid interface, curvey edges for windows, which means a refreshing experience. Yes, Microsoft has ditched its traditional extreme left side start menu and instead of that, it is now somewhat in the middle. The key thing which is clearly new to everyone is the overhauled interface of Windows 11. Thus, many citizens already have experienced it.
#How to make a flash drive bootable using rufus windows 10#
Here we will learn the steps to create a bootable USB drive using Windows 11 ISO file and Rufus software.Īlthough, now it is official that Windows 11 will be the successor of Windows 10 on June 24, however, somehow the preview ISO copy of it has already been on the internet to install before the announcement. Windows 11 is the latest release operating system from Microsoft.
0 notes
Text
How to make a flash drive bootable for windows 10 free

How to make a flash drive bootable for windows 10 free how to#
How to make a flash drive bootable for windows 10 free install#
How to make a flash drive bootable for windows 10 free full#
How to make a flash drive bootable for windows 10 free windows 10#
How to make a flash drive bootable for windows 10 free software#
How to make a flash drive bootable for windows 10 free software#
Secondly, you can insert your windows OS CD or DVD directly inside DVD-RW where the software fetches all files and folder needed for making a bootable pen drive. Let say you want to create a USB bootable pen drive of windows XP you will surely need an iso file of win XP or say you need to create a startup pen drive of windows 7 you must have an iso image of win 7. To make a bootable USB device there are some requirements such as you will need an iso image of the operating system.
How to make a flash drive bootable for windows 10 free install#
What is a Bootable USB pen Drive or Flash DriveĪ bootable USB Pendrive or flash drive is a device when used we can install an operating system on our computer hard disk.
How to make a flash drive bootable for windows 10 free how to#
How to Create a Dos Bootable USB Pendrive.
The operating system may be corrupted by some of the viruses which are spread over the internet and when these types of viruses come in contact with our hard disk they infect some of the important system or operating system files which are necessary for normal computer booting.
How to make a flash drive bootable for windows 10 free full#
You can find many articles on the web when you google them but here I am going to share every possible way to make a bootable USB pen drive or flash drive.īootable or startup pen drives are mainly used to repair corrupt operating system files which are damaged by accidentally deleting or updating files that are necessary for an operating system to perform to its full potential. So nowadays many professional and home users create bootable pen drives for installing new and fresh operating systems to their computers or laptops. There are many drawbacks to using a CD or DVD for computer booting the bootable CD or DVD normally gets corrupted or become damaged as its very hard to maintain or keep safe from scratches. For computer booting, we usually boot from a CD or DVD which is a traditional way for computer boot. After your PC restarts to the Choose an option screen, select Troubleshoot > Advanced options > Startup Settings > Restart.If you are searching for how to create a bootable USB Pendrive you might find this article useful. Under Advanced startup, select Restart now. How do I boot my laptop in Windows 10?įrom Settings Press Windows logo key + I on your keyboard to open Settings. This displays the BIOS setup utility interface. The Options menu will be seen after executing the above procedures.
How to make a flash drive bootable for windows 10 free windows 10#
To enter BIOS from Windows 10 Click –> Settings or click New notifications. How do you get into the BIOS in Windows 10? In the new command line window that opens, to determine the USB flash drive number or drive letter, at the command prompt, type list disk, and then click ENTER. Open a Command Prompt window as an administrator. To create a bootable USB flash drive Insert a USB flash drive into a running computer. Go to ① screen, select USB flash drive/CD-ROM in Boot Override that you want to use②, then press Enter key to boot the system from USB flash drive/CD-ROM. In Legacy mode, you only can select items by using Arrow Keys and Enter Key. › wiki › USB_flash_drive USB flash drive – Simple English Wikipedia, the free encyclopedia Some computer programs can be run from a USB flash drive. It is often easier to use a flash drive than to carry many CD-ROMs. USB flash drives have a lot of storage space. Go to ① screen, select USB flash drive/CD-ROM in Boot Override that you want to use②, then press Enter key to boot the system from USB flash drive/CD-ROM.Boot the system from USB flash driveUSB flash driveFlash drives are used to store any type of data file, or to move data from one computer to another.
How do I get into BIOS on ASUS laptop Windows 10?īoot the system from USB flash drive/CD-ROM in BIOS – Legacy mode.
How do you get into the BIOS in Windows 10?.
How do I reinstall Windows 10 from USB in BIOS?.
How do I get my laptop to boot from USB?.
How can I enter BIOS if F2 key is not working?.
How can I make a bootable USB for Windows 10?.
How do I select boot device on my Asus laptop?.
USB flash drive – Simple English Wikipedia, the free encyclopedia.
0 notes
Text
How to make a flash drive bootable for windows 8.1

#HOW TO MAKE A FLASH DRIVE BOOTABLE FOR WINDOWS 8.1 64 BIT#
#HOW TO MAKE A FLASH DRIVE BOOTABLE FOR WINDOWS 8.1 FULL#
#HOW TO MAKE A FLASH DRIVE BOOTABLE FOR WINDOWS 8.1 SOFTWARE#
#HOW TO MAKE A FLASH DRIVE BOOTABLE FOR WINDOWS 8.1 LICENSE#
#HOW TO MAKE A FLASH DRIVE BOOTABLE FOR WINDOWS 8.1 ISO#
#HOW TO MAKE A FLASH DRIVE BOOTABLE FOR WINDOWS 8.1 SOFTWARE#
If you really insist, you can always make a donation to the Free Software Foundation, as they are the main reason software like Rufus is possible.Īt any rate, I'll take this opportunity to say thank you for your continuing support and enthusiasm about this little program: it is much appreciated!īut please continue to feel free to use Rufus without any guilt about not contributing for it financially – you should never have to! (1) Speed comparison between Rufus and other applications
#HOW TO MAKE A FLASH DRIVE BOOTABLE FOR WINDOWS 8.1 FULL#
This is because, unless they are backed by a company, developers who want to provide quality Open Source software cannot realistically sustain full time development, no matter how generous their software users are.Īlso, unless you are blocking them (hint, hint), you'll notice that there are ads on this page, which I consider sufficient revenue enough.įinally the fact that I have the freedom to develop Free Software in my spare time should indicate that I'm well-off enough, and therefore that you should direct your generosity towards people who need it a lot more than I do. Instead, I think that " mécénat" or developer patronage, from companies which benefit most from a healthy FLOSS ecosystem, is what we should be aiming for. The main reason is that I feel that the donation system doesn't actually help software development and worse, can be guilt-inducing for users who choose not to donate. Since I'm getting asked about this on regular basis, there is no donation button on this page. If you are a developer, you are very much encouraged to tinker with Rufus and submit patches.
For more information, see the github project.
Alternatively, you can clone the git repository using: $ git clone git:///pbatard/rufus.
Add Miracle Linux 8 to the list of Red Hat exceptions.
Add bypass of Windows 11 restrictions for in-place upgrades.
Fix an issue when detecting network connectivity when the DHCP service is disabled.
#HOW TO MAKE A FLASH DRIVE BOOTABLE FOR WINDOWS 8.1 ISO#
Fix ISO → ESP creation when running on Windows 11.Rufus is produced in a 100% transparent manner, from its public source, using a MinGW32 environment. You are free to distribute, modify or even sell the software, insofar as you respect the GPLv3 license.
#HOW TO MAKE A FLASH DRIVE BOOTABLE FOR WINDOWS 8.1 LICENSE#
GNU General Public License (GPL) version 3 or later. To provide feedback, report a bug or request an enhancement, please use the github issue tracker. Notes on ISO Support:��ll versions of Rufus since v1.1.0 allow the creation of a bootable USB from an ISO image (.iso).Ĭreating an ISO image from a physical disc or from a set of files is very easy to do however, through the use of a CD burning application, such as the freely available InfraRecorder or CDBurnerXP. In that case, FreeDOS, which is the default selection, is recommended over MS-DOS, as it supports more keyboard layouts. If you create a DOS bootable drive and use a non-US keyboard, Rufus will attempt to select a keyboard layout according to the locale of your system. "Pete Batard - Open Source Developer" (v1.2.0 or earlier).The executable is digitally signed and the signature should state: If you find that you can use Rufus in your own language, you should really thank them! Usageĭownload the executable and run it – no installation is necessary. I will take this opportunity to express my gratitude to the translators who made it possible for Rufus, as well as this webpage, to be translated in various languages. Once downloaded, the application is ready to use.
#HOW TO MAKE A FLASH DRIVE BOOTABLE FOR WINDOWS 8.1 64 BIT#
Windows 7 or later, 32 or 64 bit doesn't matter. (1)Ī non exhaustive list of Rufus supported ISOs is also provided at the bottom of this page. It is also marginally faster on the creation of Linux bootable USB from ISOs. For instance it's about twice as fast as UNetbootin, Universal USB Installer or Windows 7 USB download tool, on the creation of a Windows 7 USB installation drive from an ISO.
you need to flash a BIOS or other firmware from DOSĭespite its small size, Rufus provides everything you need!.
you need to work on a system that doesn't have an OS installed.
you need to create USB installation media from bootable ISOs (Windows, Linux, UEFI, etc.).
It can be especially useful for cases where: Rufus is a utility that helps format and create bootable USB flash drives, such as USB keys/pendrives, memory sticks, etc.
0 notes
Text
How to make a flash drive bootable with an os

HOW TO MAKE A FLASH DRIVE BOOTABLE WITH AN OS HOW TO
HOW TO MAKE A FLASH DRIVE BOOTABLE WITH AN OS MAC OS
HOW TO MAKE A FLASH DRIVE BOOTABLE WITH AN OS DRIVERS
HOW TO MAKE A FLASH DRIVE BOOTABLE WITH AN OS DRIVER
Leave the rest of the options to the default settings and select the ISO image file stored in your computer. It is recommended to use an 8 GB flash drive to run everything smoothly. Select the device name that you are using. Insert the USB flash drive and let it be recognized by the program automatically. You can open the program just by double clicking on it. It's ready-to-use program that needs no installation at all. Download it from the official website and store it on your computer. It is absolutely free to use and it's an open source tool. RMPrepUSB is yet another ISO image file burning program that helps to create bootable USB flash drives. Not convinced? Please check the tutorial below:ĭownload Mac Version Method #3: Make Bootable USB from ISO using RMPrepUSB The most important part is that it is super easy to use. It supports 200+ USB brands mo matter it is old or new. If you want to edit your ISO file,then just import it to the program and directly edit, add, delete, rename your ISO file then save it to a standard ISO format. This program provides two partition style MBR and UEFI model which allows you to make UEFI bootable drive. WizISO a ISO Toolkit which allows you to burn ,extract, edit, create and copy disc without losing the bootable information. Are you confused with the steps mentioned in above parts or they just didn't work? If that was the case, then it is the time to give a try on iSeePassword WizISO, it's an amazing tool to burn ISO image to USB with a built powerful burning engine. You need to use a professional ISO Editor to write the ISO image to your USB instead of copying.
HOW TO MAKE A FLASH DRIVE BOOTABLE WITH AN OS MAC OS
Making a Windows install disk isn't as simple as formatting a drive or copying ISO file to your USB drive on Windows and Mac OS X. Method #2: Create A Bootable USB using iSeePassword WizISO You can now install your operating system using the bootable USB flash drive. Now copy all the files of your operating system on to the USB flash drive and it is done. When the formatting process is completed, simply type "Assign" followed by exit. Now keep on typing these series of commands.
HOW TO MAKE A FLASH DRIVE BOOTABLE WITH AN OS DRIVER
Next, type "Select Disk 1" considering Disk 1 is the USB flash driver and press Enter. Check the disk number of your flash drive and remember it.
HOW TO MAKE A FLASH DRIVE BOOTABLE WITH AN OS DRIVERS
First, type "List Disk" to see all the available drivers on the computer. From here, you will have to enter a series of command. Type "DISKPART" and press enter to start the disk part utility. Insert the USB flash drive on the computer and let the computer automatically detect it. It is indeed an old-fashioned method but it works like charm all the time. This part can be applied from any Windows version including Windows 10, 8, 7, XP and other older versions. Method #1: Make Bootable USB from ISO Using Command Prompt If you're locked out of Windows 7 and can't recall the password at all, don't worry, resetting Windows 7 password will be extremely easy with the help of Windows Password Recovery Pro. Before creating a bootable USB from ISO, please remember to backup all data contained on your USB flash drive as using any trick from this guide will entirely wipe the data from your USB drive. Making a bootable driver is not similar to copying an ISO image file directly on the USB flash drive.
HOW TO MAKE A FLASH DRIVE BOOTABLE WITH AN OS HOW TO
In this short guide, we will show how to make or create a bootable USB from ISO file on all Windows version computers. Essentially, creating bootable USB drivers to install operating system of your choice varies from each Windows and Mac versions. Bootable USB drivers simply means that you are preparing a USB flash drive to install an operating system. USB flash drives has completely destroyed the usage of CD/DVDs and the main reason is its size, speed and portability. Gone are the days when you used to download an ISO image file of the operating system and burn it into CD/DVD. Creating USB driver in the latest Windows version has become a lot easier with the in-built ISO burners.
0 notes