#I got a shiny new wacom!!!!!
Text

mer christmas :3
#I got a shiny new wacom!!!!!#took like five whole seconds for the pen to stop working but ill figure all that out when ive recovered from my uncle's mysogynistic “jokes#disco elysium#harry du bois#sjokoposting#my art
183 notes
·
View notes
Text

it's my birthday today!!! happy bday to me!!
:3
#pixell.art#i got a shiny new wacom one from my parents as a present!!#its soooo nice compared to my old one#art#doodle#doodles#illustration#oc#oc illustration#oc art#fun fact today is also nikola tesla's bday!!
8 notes
·
View notes
Text
The first crackship child, Imp and @phlurrii 's Circe makes, Nymph!

First art piece using Sai and a Wacom drawing tablet rather than my usual method and! I think she looks really good!!
She was originally gonna have green stripes on her arms like her momma Circe but as I couldn't make a nice green to go with the dark pink that was already established (based on Imps arm patterns) I just left them pink but I imagine as an adult she would get greener markings in those stripes and the shoulder stripes because adult mew patterns go brrr. Same for her legs I imagine she'd get more green stripes to go with, her leg patterns are based off Circes stripes and Imps spots with the patterns becoming completed spots going up the leg cause I thought it was good
Same for her second neck rather than a strip down the middle of green she's got stripes because of Imps striped neck and the spaces in between will probably grow in green patterns as well, her nose will probably become fully green too or just get more texture depth
Beans and heart bean because Im not immune to heart pattern and also Imp had heart patterns on her knees so had to squeeze in a heart so double beans
Her ear horn fluff is more pointed like how Imp has her little horn points so she's got more exaggerated fluff points and probably horn points in her horn cartilage/bone whichever
Both her mama have blue eyes so she inherited that she also got paler arms from great grandmeau and grandma mew. Big ol fluffy face in phlurri style because fluffy babyyy
She takes a lot after Circe physically because (Circe has the better reference of expressed features) Circes mew genes probably merge with and amplify Imps mew genes making them more phlurri world leaning in design than my world leaning
Also a shiny baby! Mainly because I probably couldn't mix Imps purple and Circes green into a nice color and I think her fluff works better with green plus she looks so minty! Like a little mint! Very cute to me with a darker tail tip like mama Imp rather than light like Circe
Her tail spots were originally purple like Imps and as much as I liked it and thought it was cool I had to accept that I couldn't force purple into the pallete, so I shifted and altered it to this green and then lowered the opacity, I suppose it'd make them like great uncle Flurry? Spots gang
I headcanon she's actually got quite a thin tail that's just incredibly fluffy, since Imp has a thinner tail reminiscent of a mew but it's definitely all muscle don't wanna get hit by it.
She'll either grow more visible chest shoulders as she grows or because of the way Imps cloned mew dna and Circes altered mew dna interact her shoulders remain quite fuzzy without a hard covering with just a thicker chest/half chestplate. Yes I just kinda forgor it oops
I'm noticing parts I missed when cleaning up if you notice no you didn't
I will admit I did struggle with this as Imp doesn't have many traits to mix, had I been clever (which im not) I definitely would've played into Imp having fairy dna and given Nymph features from that fairy line but I don't actually know where Imp gets her fairy dna from or if its enough to really express properly she just had parts here and there added to make her more docile so it unfortunately isn't enough to use in clever design.
She's called Nymph because the idea in my head was definitely more greens and pinks and what's green and pink? A flowering tree, Circes name is associated with magic, magic tree? Nymph. Plus a Nymph is a baby insect and Imp would probably call her Nymph with the expectation that when they're older they'll shed their baby name and pick a new one for themselves cause Imp definitely has weird mixed feelings on her own name. I think I'm also pulling from the concept of Elves having baby names until they're adults.
I love her very much your honor, there was gonna be other art of Imp and Circe holding Nymph while holding hands but the art spoons are gone and i feel guilty enough making everyone wait so long for these lmao, (tho I kinda wanna write a drabble for them we'll see)

#my art#Crackship child#Pokemon crackship#@phlurriis Circe#Babytwo Nymph#Nymph the mewtwo#Rambles and lore and stuff under the readmore as per usual#Sorry for no twins here Phlurrii!#I hope you like the baby <3#I love her so much#Plus original sketch under readmore just added cause I forgorrrrrr#You can see the demonstration of her thin tail in the sketch
49 notes
·
View notes
Text
Art Advice #4 - A Beginner’s Guide to Digital Art
Hi all!
This weeks entry into my Art Advice tag, where I offer various advice for artists of any skill level, is about digital art! Now, I am by no means an expert at digital (I’ve been doing it for nearly 8 years at this point and that is almost entirely self taught), but I have picked up a few pointers in that time which will hopefully help anyone just starting out!
(this blogpost is a little over 2000 words long btw)
A Beginner’s Guide to Digital Art
I know that the world of digital art has changed drastically in the 8 odd years since I started, but I’d still say that some of the options I started out with will be just as good for anyone who’s starting out now!
As always, I’ll be splitting this into sections to make it easier for you to navigate this post!
Part 1 - Equipment/Hardware
There are a lot of drawing tablet options on the market at the moment, and I’m not going to pretend that I know anything about half of them lol. But I think for a beginner, don’t worry about going for the most expensive option, even if the reviews are really good or your favourite artist uses it, especially if it is way above your budget!
An important thing to know is that there are two types of tablet. One is the plug-in kind. These are essentially a pad which you plug into your laptop or computer and draw on that whilst looking at the screen (they basically work the same way as a plug in mouse works). The other kind is the screen variety, which is a lot more like what most of us know as ‘tablets’ nowadays. And you draw directly onto the screen.
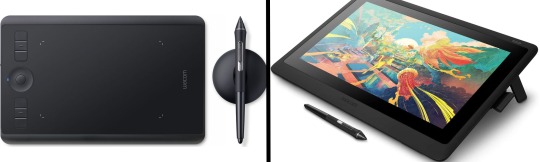
(a plug-in vs on screen tablet, both from Wacom)
Now, as for choosing between these, it is honestly a personal choice. But I’d say if you’re just wanting to try digital and you’re on a budget, a plug-in tablet can be really useful since it gets you used to the mechanics of what digital is like, and they are often significantly cheaper than the screen alternatives. I would say that plug-in tablets are a big learning curve, especially if you’re used to doing traditional stuff, but I do know a lot of professional artists who still use this kind of tablet when doing their work, so if it’s something you can get used to I would definitely consider it! Also, they’re often a lot more portable than some screen tablets! The first one I had was a Huion (a model so old that I can’t even find a link to it now lol), and I also know that Wacom are a well known brand that do some decent plug-in tablet. I’d recommend you do your own research on other brands and options, though!
Screen tablets are often a lot more expensive, but if you’re used to traditional art, they are a lot easier to get a handle of! But I know if you already have something like an iPad, or other general use tablets, then they offer apps that you can use to draw on (as well as things like the Apple pen, or other stylus’). The big difference between using these general tablets and ones specifically designed for drawing is pretty much purely a personal choice. I personally prefer the bigger screen of my XP-Pen tablet, along with a special screen protector that removes the shininess of the tablet screen and makes it feel more like ‘paper’ over when I used a general use tablet it draw. But if you already have an iPad, or something similar, then it’s honestly a really great starting point!
I think it’s important for me to mention that you don’t need fancy equipment to be an artist. The incredible Elicia Donze has revealed countless times how she has very basic equipment but still manages to produce the most stunning artworks! All you really need is some kind of drawing apparatus and a lot of patience lol! Getting good at any kind of art takes a lot of time and effort, but I would definitely say it’s worth it when you’re able to look back at your progress!
Part 2 - Software/Drawing Programs
Much like with the hardware discussion, choosing which program to use is entirely down to personal preference. I personally have never really liked Photoshop purely because it’s really complicated, but I know so many artists swear by it.
I think the main aspect to consider when you’re starting out is whether you want to pay for a program. Software like Photoshop, Clip Studio Paint and Procreate are some of the popular ones I hear about a lot of people using, but all require you to purchase or subscribe to them. So if you’re young or on a very tight budget, I’d honestly recommend the free alternative versions of these, such as Krita (Krita is quite a large program, but it has a lot of really awesome features and is very similar to Photoshop!), Gimp (this one is similar to Krita, but has slightly less options, I’d honestly recommend Gimp for anyone who does photo editing though!) or FireAlpaca (this is the one I use, by the way and it’s a pretty simple program, but has a lot of fantastic features and is perfect for how I work!). These don’t have as many features as some of the paid alternatives, but I honestly think all you really need to start digital art is some kind of ‘canvas’ and set of brushes!
Another great free program for beginners I’d recommend is MyPaint, which is great for doodling and just getting used to how digital art feels in comparison to traditional! It also has a bunch of ‘traditional style’ brushes, to make it look like charcoal or watercolour (which I’m sure the paid alternatives have too, but it’s always better when it’s free, I find lol...)

(this is an example of a drawing I did on MyPaint using the ‘charcoal’ effect brush!)
Most of the sites are pretty self explanatory, with sections dedicated to different brushes (I’ll go into the types of brushes later on in this post btw!), adjusting brush size, shape and opacity, a colour wheel, etc. You also have a section dedicated to ‘layers’ (another thing I’ll go into more detail later), and various ‘filters’ and editing options and effects you can add to your work to make it more interesting!
I’d really just recommend playing around with programs until you find your one!
Part 3 - The Pros of Digital Art!
I realise this section should probably earlier in this blog post lol, but I kinda wanted to go into what digital art can achieve in comparison to traditional art, and how beginner artists can utilise this!
I definitely didn’t take advantage of certain aspects of digital art when I first got into it, and they’re things that would have definitely made my life a whole lot easier lol!
Digital art allows you to tweak drawings as you do them. So if you accidentally drew the eye too far to the right, then you can easily move it to the right place. (I usually do this by selecting whichever area is wrong, cutting it out and then pasting it into a new area... And yes, there is probably a better and quick way of doing this but...I haven’t found that way yet lol...). And I honestly think that this has allowed me to look a lot more at a reference image in order to figure out where I’ve gone wrong with a drawing! Whereas with traditional art, I usually spend so long trying to get an eye right, that even if it’s slightly in the wrong place, I don’t want to completely redo that section. Digital allows you to completely rub out sections without leaving indents, which is honestly such a saving grace!
Another pro of digital is the Undo/Ctrl Z function! This means you can easily go back to before you made a major mistake with just a click of Ctrl Z... Though I have to say that this function has honestly ruined traditional art for me... Oh what wouldn’t I give for a real life Ctrl Z... But yeah, this is a great part of digital art and definitely something you will grow to love lol!
Another great thing about digital is that it allows you to flip and turn a canvas as you’re drawing on it. I spent a lot of time trying to turn my tablet around in order to draw certain parts of a piece before I realised you can turn the canvas itself without having to move yourself or your tablet!
Layers are another part of digital that can be super useful, and I have to be honest but I don’t really use them a lot. I know a lot of artists create layers for every section of their artworks (so, one for the linework, one for colouring, a separate one for the background, etc etc...). And there’s something really great about being able to paint without worrying about smudging into a previous section of the painting. This works well for my work since I do a lot of bright backgrounds. I also often create a lot of ‘versions’ of my works, so it’s useful to be able to change the background without affecting the main figure of the piece! (I have to say that I often work in one big layer when I’m doing paintings, just because I like how it feels more like ‘traditional’ art that way, but layers are such a brilliant tool, and definitely something you should play around with!)
The eyedropper tool is another one that is really useful! Although I never colour pick from my reference photos, I know some artists find this useful when they were just starting out (especially if you’re not sure what colour to make shadows or how to mix skin tones, etc etc). The eyedropper basically means you don’t need to mix your colours every time
Part 4 - Just some other things I wish I had known about when I was starting out lol...
This last section is just dedicated to a few things that I would have liked to have known when I was just starting out all those years ago.
First one is fluffy/textured brushes!
I spent most of my art life from 2013 until 2016 using ‘round’ brushes which are notoriously hard to blend with, so I’d recommend either downloading some fluffy/textured brushes (DeviantArt was where I got mine from a few years back, but there are probably other places you can get them for free too!) to your program of choice, since most of the programs I’ve used haven’t had fluffy/textured brushes as pre-set.
I may make another post about how I blend in my artworks if that’s something people would be interested in?

(this is an example of textured brush blending vs round brush blending... I usually opt for round brushes for rougher blending styles and the textured brushes for more smooth and ‘realistic’ blending... for a lot of pieces, though, I use both brushes (the round brushes are good for details!) in the same way that you use different sized brushes for real paintings!)
The next thing I wish I’d discovered earlier is the Brush Stabiliser option. Some programs may do this automatically, but the one I use (FireAlpaca) requires you to manually change the amount of stabilising you have on your brush. This is particularly useful if you want to draw neat lines or straight lines (the stabiliser essentially slows down the ‘ink’ as you’re drawing). I only recently started using the stabiliser, and although I still like having it mostly turned ‘off’ for doing sketchy work, it does make doing line work a lot easier, and also gives pieces a more polished look!
Next advice is to explore all the options you can in whatever program you use!
I feel like with certain programs, you can get overwhelmed by choice and you end up just using a few of the functions. But I’d really recommend just playing around with these programs, trying all the filters and editing options to get used to how the program works. You can often find interesting ways to adjust your artworks this way! In a way I’d recommend this way of working more than finding tutorials made by other people... Unless there’s a specific function you want to learn how to do, just having fun with digital art is a major part of it’s appeal to me!
~
There are probably a lot of other options I could go into, but this is already over 2000 words long, so I’ll leave it here for now lol! (I may do a part 2 though so... keep a look out for that!)
As always, if you have any questions to things I’ve said here, or are just looking for more advice, don’t hesitate to message me!
And if you like my work on here (art & blog posts) feel free to support me on my Ko-Fi! <3
#art advice#digital art#art advice for beginners#digital art for beginners#artist advice#digital art tips#artists on tumblr#just want to say again that i am not an expert at this at ALL lol#i just want to offer some really basic advice to anyone interested in starting out with digital!
101 notes
·
View notes
Photo

I’m shiny hunting and I’m currently at 1047 with no sparkle in sight :’) please baby come home
[First finished drawing with my new wacom tablet I got during Black Friday!! I love it sm]
13 notes
·
View notes
Note
Top 3 drawings of yours 😁
So I have a bad habit of kinda hating my art as soon as it's done and moving on to the next piece, this mostly due to me picking out flaws after completion. But hey, at least I broke the habit of throwing out my work, lol.
1. Old OC from Warhammer Fantasy RP
I don't even remember this guy's name anymore, but he was another players character that became my characters bodyguard. I drew him when I just got my shiny new wacom and was super excited about doing digital art, not to mention had WAY more time available.

2. Whirl from Transformers, the interesting thing about this piece was the absolute calm and clarity felt while making this. I start out seeing the finished piece in my mind, this one is one of the rare few that is 100% true to vision.

3. My first outer space piece, I followed tutorials and the result was far more pleasing than expect :)

Honorable mention: my first ever commision piece, I was unspeakably happy that thanks to Jazz I could show my family that YES, my art is worth it, not just a waste of time >:3c

18 notes
·
View notes
Note
Hey lex! Im lookin into buying a drawin tablet for the first time and was wondering if you had any tips on what to look for & avoid while doing so? bc i have no idea what im doing and dont wanna spend my broke binch money on smth thatll shit out quickly
@sevenspires Sorry for taking so long to answer this again! I got really bummed out after I tried typing a response the first time and losing it T_T Now I’m back months later, LOL
If you can’t afford a Wacom brand tablet, make sure that you read up on specifications that are important. Screen size, resolution, pressure levels, color settings, all that.
Tablets above a certain size, or of a certain screen type are VERY bulky and built like a tv screen. (usually bigger than 15 inches or so.) Make sure you differentiate between those kinds and the more lightweight, portable ones, and choose accordingly. I have a small space and work on the go, so more portable tablets for me are a non-negotiable requirement. My current tablet is like a slate the same size as my laptop, but I can still put it in my backpack if I need to go elsewhere and work. It’s still technically too big for my work space though. Other artists have studio-sized spaces and plenty of room to have a 24-inch tablet to draw on. It depends on your line of work!
Wacom is always going to have top of the curve pressure levels, but you can get away with having 1024 at the minimum for any tablet you end up using. I honestly can’t tell the difference between 1024 and 2048 levels (even though I know there is a difference- 2048 is definitely smoother) If you’re looking at old/outdated stuff that’s in your price range, you can get away with 512 pressure levels.512 = the barest minimum | 1024 = decent | 2048 = I think this is the modern standard for tablets right now | 8192 and higher = luxurious
My current XP-Pen 13.3 tablet has a whopping 8192, and the pressure levels are SO nuanced, that it starts to make my lines actually look... kind of bad, LMAO. So for me, 8192 is too much nuance for pen pressure. But hey I got it free so I don’t care, LOL
Make sure you can afford more than one set of the accessories that go with the tablet. Pens, nibs, cables, ALL of that stuff. And if you don’t feel like buying them right away, make sure you plan ahead in the future. With cheaper tablets like XP-Pen, Huion, Monoprice, and etc. the money you save by not buying a Wacom is money you can put towards replacement parts.
READ THE TERMS AND CONDITIONS OF YOUR WARRANTY! You should always do this when you buy shiny new toys, but it’s VERY important for your art hardware. Make sure you keep your purchase records archived in your e-mail as proof for when you redeem your RMA (Return Merchandise Authorization)Usually an RMA or warranty says that If anything goes wrong with your tablet within the warranty period that you purchased it, as long as you didn’t tamper with the tablet yourself, they will replace it with a new one for no charge except how much it costs to ship it back. I’ve done it with my cheapest Monoprice tablet (RIP) and my current XP-Pen tablet. My first XP-Pen took a nasty fall to the floor one day and the screen stopped working :’( So yeah, read the terms of your warranty, it might save you one day!!!
If you already use keyboard shortcuts on your computer a lot, you usually don’t need side buttons on your tablet. I forget they exist. Every time. Otherwise, if you find the keys on the tablet to be very accessible, then go for it! AFAIK, only Wacom has done the BEST side buttons bc they always have sliders for zooming in and out on your canvas, which I actually used before. Other than that, I have never used the side buttons on a tablet since.
Read your installation and instruction manuals! Even if you think you know how to install a tablet after owning 5 different brands, read the manuals!!! In my experience with windows, getting your tablet’s drivers to work the first time is absolute hell because tablets are always fighting with Windows’ tablet pc stuff. So even if you’re tech savvy and have been fighting Windows’ tablet support for over a decade, READ THE MANUALS! Make sure you go to the correct website, download drivers for the correct tablet model, ALL of that. Restart your computer when the installation tells you to, EVERYTHING. Do what the instructions say! After that, you can take to tech support or forums for any problems you have later.
Make sure your art software is up to date as well once you’ve installed your tablet!
Uhhh that’s all I got! If you (or anyone else who sees this post) have any questions, feel free to ask in the replies/reblogs, I do check them!
(Also I am selling one of my old/dated tablets that still works, so if ur interested, hmu and we can talk pricing!)
15 notes
·
View notes
Text
Tablet Pen Update
So, my beautiful shiny new tablet pen arrived, and I got the tablet all hooked up, fired up Photoshop, really looking forward to being able to draw smoothly again...and it still has the jitters. =(
I conclude it’s not the pen that’s the problem. I was SO sure it was -- I’ve dropped my poor old pen like a dozen times in the past few months, it starts jittering in that time, that’s the reasonable conclusion, right?
It seems the latest update to Windows includes something called Windows Ink Workspace, a feature that’s all about writing onscreen with a pen. I did some online research, and for many Wacom and HUION and UGEE tablet users, it makes their tablet cursor do what mine is doing -- spazzing, jittering, clicking randomly without having to sit the pen down, etc. Windows Ink Workspace has no option to turn it off -- Microsoft apparently is just that confident that everybody will love it and want to use it.
I already tried Microsoft’s live chat for help (they had me run a Command Prompt command and swore it would deactivate Windows Ink Workspace, but after rebooting absolutely nothing had changed), reinstalling newest tablet driver (second-newest -- newest is too new for my tablet model, it seems), emailing the tablet manufacturer (no reply after days...), replacing the pen, replacing the pen nib, and replacing the pen battery.
If HUION doesn’t respond, the only options I’ve read about online that seem to fix this are disabling Windows Ink Workspace via editing my Windows registry (risks damaging my OS install) or rolling back to the previous version of Windows 10 before this update landed.
So frustrating. =( I just wanna draw.
#threshie#thoughts#new tablet pen#sigh#I got projects I need to work on#at this rate secret santa may be drawn in traditional mediums#tempted to try drawing with the jitterbug cursor anyway...#windows ink workspace
14 notes
·
View notes
Text
My P40 Yoga, 16 Months Later
I've had my Lenovo P40 Yoga since early March of 2016. It is nearly two years after the device was announced, and it is still a relevant device in the professional computing landscape. The P40 has been central to my workflow since I got it, acting as a confluence for my professional and personal interests in writing, game development, and illustration.

As I write this, the P40 doesn't look to be getting a refresh, and Lenovo doesn't have a replacement device among their current offerings. As far as I know, only Wacom has a machine that is roughly comparable. That doesn't mean another one won't emerge down the road, but for right now, the P40 Yoga pretty much stands alone.
My P40 Yoga has traveled with me to Orlando, Baltimore, and on a weird road trip through Texas. It goes in my bag almost every day, through airports, and up the road to the donut shop. While it is showing some cosmetic wear and tear, it still runs like the day I got it.
At some point, I'll have to look at replacing the battery, putting a new screen protector on it, and finding just the right Linux distro. Wacom's newer (and badly marketed) Bambook Ink Stylus works really well with it, making it feel like I got a little bit of an upgrade for my money.
The P40 Yoga doesn't have a lot of the newer features of 2-in-1 devices coming out this year like faster SSDs and Thunderbolt 3 ports. What it does have is NVIDIA Quadro on board, and a best in class pen stylus experience. It’s weird to be obsessive about a piece of equipment. Maybe, that’s just me getting old and sentimental.
I’m a game developer, a novelist, and an illustrator. Admittedly, finding an all-in-one mobile computing package for me isn’t easy. I’m also a personal computing princess and I won’t use crap.
I have looked extensively for a replacement, something new and shiny to act as my mobile workstation. I don’t think the HP Spectre X360, Wacom’s Mobile Studio Pro, or even Apple’s iPad Pro are bad options, they just don’t hit enough of my criteria to make me want to trade up.
Anyway, my criteria are as follows:
Intel ULV Processor
Premium Graphics – Quadro or Intel Iris (no GeForce)
WQHD screen resolution or higher
Device/Manufacturer Specific Docking Option
A Good Keyboard or Keyboard Accessory
SD Card Reader - Full Size, or Micro.
Runs Linux if I want to
Included Stylus, even if just a 6.5 mm
Premium Warranty/Service Options, Device Replacement Plan
I don’t need all of these things, but a good majority of them would be nice. Right now, my P40 Yoga ticks off the entire list. I’ve logged about 2600 hours on my P40, a few hundred more than my S1 Yoga.

I take really good care of my electronics, keeping them protected and dust free, but everything has a threshold. It’ll only power up so many times, and jump through so many airports in a bag. I’ve thought even more about doing that other thing old people do with gear or tools they get sentimental about, and buy a spare.
This has become a trend with me lately, as my wife and I have come to like Lenovo Thinkpad 10 Tablet to the degree we’ve got three between us. We’ve got two 1st Gen and a 2nd Gen. Like the P40, there is not a new Thinkpad replacing it Lenovo’s offerings.
So, that might be the answer. Lurk on Lenovo’s Outlet site and wait for a P40 Yoga with all the right specs to pop on the cheap. It might be, that the only thing that can replace a P40 Yoga, is another P40 Yoga.
#Lenovo#LenovoIN#Thinkpad#BeGladThinkpad#P40Yoga#Thinkstations#Workstation#Wacom#Illustration#GameDev#IndieDev#Writing
3 notes
·
View notes
Text
HP Spectre X360 13t late 2017 - First Impressions and Last Word
If anybody has been following this BLOG I noted that that I was getting a new computer, and so I have. The computer I purchased (as I also have noted) is a 2017 HP Spectre X360 13t series. I managed to pick this up refurbished for a decent price so here it is … my first impressions of the late 2017 HP Spectre X360 13t
Configuration
This HP Spectre X360 13t comes equipped with a quad core i5 8250u with 8 threads running at a base frequency of 1.6 GHz (it tops out at 3.4 GHz), 8GB RAM, a 250GB NVME SSD, a 13.3” 1080p touch and pen-abled display, a nice keyboard with a 1.2 mm key travel, and a pair of 4 lane PCIe 3 Thunderbolt 3 ports supporting eGPU enclosures. A nice and overly generous Synaptics trackpad (which works like a Synaptics trackpad … for better or for worse), and a reasonably good wifi radio (It seems fast enough, able to get the full available Internet bandwidth from anywhere in the house). All this wrapped up in a svelte 2.4 pound tiny 2-in-1 Rose Gold (yep the best deal came in rose gold) laptop.

Laptop Mode
As a laptop the keyboard feels almost as good as my MacBook Pro’s (not that my 65 words per minute of accurate typing is equivalent to a true test of each of these keyboards). The display is reasonably bright and easy to work with. It makes typing articles a breeze, and editing layouts in Adobe InDesign, photos in Photoshop, managing photos in Lightroom CC is easy, thought the color accuracy of the display only works at 75% Adobe Color Gamut, so I usually do final editing for color on my bigger color display anyway.
Tablet Mode
As a tablet computer the HP Spectre X360 13t really comes into its own. If you use apps from the Windows App Store, or the apps that shipped with Windows then you are in for a real treat because a good many of the applications are designed to be used in tablet mode, and they work well. On top of that Microsoft Office 365 works great in tablet mode because of the pen support. As for the pen … well it’s just okay … I got this laptop after using Wacom Cintiq tablets for years, and even though N-TRIG is supposed to be as good as Wacom’s EMR technology, but the truth is that the included HP Pen, which might be my problem, and really does not work all that well. I however do have a friend with the new Surface Book, and I will give his stylus a try to see whether it is just me or the stylus … This will be an article for another time.
Gaming
The HP Spectre X360 13t is not designed for hard core gaming. This is due to the lack of a discreet graphics card. Now the Dual Thunderbolt 3 ports are more than capable of handling an external GPU and supposedly will allow high end titles like Tomb Raider to play at 1080p with most of the settings set to max. Regretfully I do not have an eGPU yet to test it out.
Performance
Over all the laptop is fast, and capable, it however is not powerful. Speed does not equal power. If anything, the speed this laptop displays its nimbleness. In comparison to my 2012 MacBook Pro, when converting the exact same 5-minute 1080p video file the MacBook Pro (which has a faster base clock, and a GPU) completed the Universal setting MP4 conversion in under 5 minutes versus the 8 minutes required by the Spectre X360 13t (for the record my desktop PC completed the MP4 file conversion in 2 minutes). The battery life is epic. HP says it can run for 16 hours on a charge, and I have never made it past 11 hours, but those 11 hours were productive.
Issues
All is not candy and roses. The Synaptics trackpad feels sluggish, and fairly glitchy. The HP pen seems to be a little less responsive than I had hoped. The HP Pen might literally be the problem itself. It’s just not as responsive or accurate as N-Trig pens are supposed to be, and it certainly is not as responsive as Wacom’s EMR technology-based pens. I just hope that switching to either a Microsoft or Wacom based pen will solve the problem. One final note is that the glossy screen can get really shiny, and therefore can be a problem. If you are looking for a 2-in-1 to work on you should definitely consider an anti-glare screen protector.
Conclusion and Final Thoughts
Overall this is a great laptop. It’s quick and capable, thin and light. It allows me to work anywhere, and it works great for light gaming. E-mail, calendar, Office, and the Opera Web Browser all work great. It is a great machine to use for office work, and light design work. Short of the trackpad and the pen I have nothing else to say. It is a great small laptop that can easily last a day and it’s quick and snappy for almost every daily task you can think to put it through.
0 notes
Text
Weekend Top Ten #299
Top Ten Early Thoughts on the Surface Book 2
So last week I received my pre-ordered Surface Book 2. I chose the i7 model with 8gb of RAM and a 256gb hard drive. It was, ahem, pricey, but the cheapest i7 option they had.
I needed a new computer. The only “proper” computer we had up until that point was my ageing Surface 3, which is essentially a glorified tablet with a removable keyboard. Don’t get me wrong, I love the Surface – in fact, how impressed I was by the small Surface 3 was instrumental in my decision to stick with the brand and get a Surface Book – but for anything above web browsing or document writing, it wasn’t necessarily ideal.
I needed a powerful computer; something I could do professional video editing on, and use Photoshop on. Something that was a warhorse and could handle any task I threw at it. But I needed a laptop; we don’t really have the room in our house to dedicate to a mighty desktop rig. And, like I say, I really liked the flexibility of the Surface, and having that in a larger form factor with serious power behind it was very appealing, even if I was aware that I was choosing one of the pricier laptops available (my rationale was: most people I know in the industry buy MacBooks, and this was a comparable price, so that’s fine).
Anyway, I’ve not had it long enough to write a proper review – although that will come in time – but after about a week’s use, here are some things that I’ve noticed or have been impressed with.
It’s so very pretty: shiny magnesium, delicate contours, and a funky hinge that seems all space age and terrific; it’s a gorgeous beast and one that I’m dreading covering with fingerprints, biscuit crumbs, and inevitable scuff-marks.
The screen is amazing: at 3000x2000 it’s easily the highest resolution screen I’ve ever worked on, and it shows; it’s a beautiful thing to look at, all vibrant bright colours and stunning detail.
It’s got a “right mouse button” key: I’m not sure what this key is officially called – a menu key? – but it essentially functions as pressing a right mouse button wherever the typing cursor is. When writing, I find it invaluable, as it means your fingers don’t need to leave the keyboard if you need to go back and correct a misspelt word. And for about five years I’ve not had a computer, at home or work, with that key. I love that key. I’m so happy to have it back.
Hello! I’ve never used Windows Hello before, and I’m very pleased with how efficiently it works. It’s just, like, “Hello, David”, and there we go, all signed in. It’s super-neat.
The Clipboard: detaching the screen is fairly clunky and maybe not as elegant as it could be, but I think that’s an inevitable consequence of trying to make it a sturdy connection and minimise screen wobble; but once the screen is off, it’s wonderful to use. It’s fairly large for a tablet, but surprisingly light, and it’s great for reading; it feels good in the hands and the brilliant screen makes colours and videos pop.
OneDrive working like it’s s’poseda: okay, so this is more of an operating system thing than a hardware thing, but considering my last Surface never had enough space to update Windows, I’m counting it as a feature. The “Files on Demand” in OneDrive brings back the best part of Windows 8: placeholders. Now I can see my entire OneDrive cloud storage as files on the desktop, without using up precious hard disk space (useful when I’ve got over 300gb of stuff and counting).
Hot heat: one of the benefits of spreading the power load between screen and keyboard is that the machine stays nice and cool during general use. In fact, the back of the screen gets the warmest, as that’s where most of the processing is done. This means if you’re typing on your lap, your thighs don’t get all hot and sweaty. The only exception – so far – has been during gaming, when the GPU kicks in and, truth be told, does generate a fair amount of heat (and fan noise).
Raw power: this is one area I’ve not managed to test properly, but what I’ve done so far has been impressive. Put simply, this is the most powerful machine I’ve used in years, and testing out games has been a joy. Civilization V, which I’ve not really played since I had to give up my MacBook when I left CITV in 2015, looks simply gorgeous. In fact, running smoothly at 3000x2000 resolution causes problems as the interface doesn’t scale in line with the rest of the graphics, resulting in tiny text too small to read; as such, the games I have played – Civ and Empire: Total War – I’ve had to run at a lower res just to make them legible! I’m very eager to try out an Xbox game such as Gears of War 4 or Forza Horizon 3, but less eager to fill up 60-100gb of precious HD space…
Actually doing real work: again, I’ve not had time to test this extensively yet, but having briefly booted up both Photoshop and Avid Media Composer, I’m looking forward to getting stuck into some serious work. I’ve got some proper video editing to do, like, yesterday, so having a machine that not only can handle the grunt work, but als0 – pleasingly ��� has the resolution to the sharpness to make a 13 inch screen seem a lot larger, is a bit plus too.
The pen! Okay, I’ve not actually got the pen yet; I’m a bit miffed that they don’t chuck one in for free and I have to fork out another hundred quid to get it. I’m hoping to get one for Christmas from a generous relation. But I’m really looking forward to it; having used Wacoms in the past, drawing in Photoshop and even doing fine-tuned editing is a big plus. Also, annotating scripts in clipboard mode I know for a fact will be incredibly useful. All in all, I’m rather excited and very pleased.
0 notes
Text
Samsung Galaxy Book Review
The Samsung Galaxy Book seems to be this year’s successor to Samsung’s Galaxy TabPro S that we reviewed last year. Instead of calling this the Galaxy TabPro S2, Samsung decided to give it a new name, and I kind of like it. Samsung’s Galaxy Book name goes along with Microsoft’s Surface Book and Huawei’s Matebook and that is probably the product category that it really belongs in. The Galaxy Tab name probably resonates more as an Android tablet category for many people. But there’s not much in a name… The Galaxy Book is Samsung’s latest foray into the 2-in-1 full Windows 10 capable tablet PC market, and it has some huge improvements over the TabPro S Samsung released last year. Practically every negative aspect of the Galaxy TabPro S has been addressed and improved upon.
Incidentally, this review is going to be about the 12″ version of the Galaxy Book, but there will also be a smaller, less-expensive version with a 10″ screen. Keep reading to learn more about Samsungs latest “tablet that can replace your laptop.”
Hands-on Video
youtube
Specs
The Samsung Book is available in a few different versions. The one we’re reviewing is a fairly high-end model. First of all it’s got a 12″ Super AMOLED full HD+ (2160 x 1440 pixel) screen and a 7th generation Intel Core i5 7200U dual core 3.1Ghz processor. We’ve also got 8GB of RAM, 256GB SSD storage, a 13 megapixel rear camera, and a 5 megapixel front camera. By the way, 203GB of free space is available on the 256GB SSD at first boot. We’ve also got the usual WiFi, Bluetooth radios, and it comes with a keyboard cover/case and the S-Pen. We’ve also got 2 USB-C ports so you can charge the battery and connect something else at the same time. It’s too bad USB-C wasn’t designed to be as forward-thinking as it should have been. The 12″ models have a 39.04W battery with Fast Charging support which lasts about 11hrs. The dimensions are 291.3 x 19.8 x 7.4mm and it weighs 754 grams.
The 12″ version is also available in a version with an LTE radio plus 4GB RAM and 128GB SSD, as well as another WiFi version with 4GB RAM and 128GB SSD.
There’s also a smaller version of the Samsung Galaxy Book with a 10.6″ TFT 1920 x 1280 pixel screen and a 7th Gen Intel Core m3 dual core 2.6Ghz processor. That version is available with 4GB of RAM and either 64GB or 128GB eMMC storage. It also only has a 5 megapixel front facing camera (no rear), and only 1 USB-C port. It’s also naturally smaller and lighter.
Note that both versions are slightly thicker than the 6.3mm thick Galaxy TabPro S from last year.
Hardware
The Galaxy Book does away with the super flat back that the Galaxy TabPro S had (with its big camera bump) and instead features a single metal backing with very smooth, comfortable, rouded edges. It’s a very nice change.
That Super AMOLED screen is gorgeous. The blacks are so so black that it totally blends in with the bezels of the tablet. Cranking up the screen brightness doesn’t change the blacks either. It’s all completely smooth black all the time. The Galaxy TabPro S had the same type of screen and there’s nothing new about it here, but it’s still great to have. The screen is also very shiny so there’s going to be a lot of fingerprint smudges as well as a lot of glare if you’re trying to use it in a well-lit area.
The included keyboard cover is a huge improvement over what was included with the Galaxy TabPro S. This keyboard feels much more professional. The keys are nicely spaced, they have great vertical movement, and even a nice click to them. The trackpad is much larger than what we had on the TabPro S, too. It’s much easier to use if you’re stll using a trackpad instead of the touch screen or S-Pen stylus. The track-pad works well enough. It supports the Windows 10 gestures for quickly accessing task view (three fingers swipe upwards), scrolling/panning (two fingers moving parallel in any direction), and zoom (pinch or expand two fingers).
On the inside of the keyboard cover there is a little illustration showing the 4 different ways you can fold it into a stand for different screen display angles.
The most upright display angle is the most stable on a desk or table. The flap folders under the back and keeps everything standing up nicely.
Two of the display angles use magnets to adhere the stand flap to the back of the tablet. If you remember, this is similar to how the Galaxy TabPro S’s stand worked, except that had much weaker magnets and a folding design that could easily cause the tablet to fall over while touching the screen. These magnets are much stronger and the folding design is made to transfer the pressure on the touch screen more directly into the table. It’s a very welcome change and much improved over Samsung’s previous design.
The keyboard cover nicely protects the front and back of the tablet, but the edges are prone to gettnig banged up and the flexible material is a bit slippery.
The keyboard attaches to the tablet via magnets and the above 5 pin connector. It’s a different connector than the Galaxy TabPro S, so don’t think that you’ll be able to get the new Galaxy Book keyboard and use it with the Galaxy TabPro S.
We now have two USB-C ports on the 12″ Galaxy Book! This is a great addition since now you can plug in a charger and something else like a secondary display, external drive, port expander, or whatever. Personally I’m still not sold on USB-C as many things are still not universal. I would have rather seen a USB-A port as that’s still more widely used (and the USB-C to USB-A adapters I have sometimes don’t work). Oh, and there’s a 3.5mm TRS audio jack here too.
The top edge has the power button and volume toggle button. There’s no longer a Windows/Start key on the device like there was on the TabPro S.
On the left edge there’s a little drawer where you can install a Micro SD card for expanding storage. The drawer is opened by pushing a small (included) pin into the hole to pop it out. This is another huge improvement over last year’s Galaxy TabPro S. On the LTE version of the Samsung Galaxy Book, there would also be a SIM card tray area in here.
The camera bump is much reduced and the quality has been increased, but it’s still not great. Really you shouldn’t be using a tablet to take photographs anyway, so don’t worry about it. The 10″ version nicely does away with the rear facing camera completely.
S-Pen
The Samsung Galaxy Book is the first Windows 10 tablet to include Samsung’s “S-Pen” technology that’s been widely used on the Note series of phablets. Actually, the S-Pen technology partly belongs to Wacom as Samsung licenses some of Wacom’s digitizer tech to use in S-Pen compatible screens. The Microsoft Surface Pro 1 and 2 also used Wacom technology as have many other Windows tablet PCs of the past. What’s different with the S-Pen is that Samsung has done a lot on the software side and Wacom’s control panel software is nowhere to be seen.
You get a pen-loop thing in the box with the Galaxy Book that you can stick to the back of the keyboard cover. It’s nice that this is optional since some users may not really care about using the pen or carrying it around all the time.
It’s not a super elegant or attractive method of attaching the S-Pen, but it works as long as you insert the S-Pen in the right direction and use the clip to keep it in place. Otherwise it will be loose and probably fall out. Personally, I wish the tablet had an S-Pen silo where it could be hidden inside the edge of the tablet.
Above is the safest way to keep the S-Pen attached to the Galaxy Book. It’s not easy to insert and remove the stylus in this configuration though. The Surface Pro’s magnetic edge is a little better, but I really like the Wacom Mobile Studio‘s little pen holder clip that holds it upright for quick access. The S-Pen is plastic, but the clip at the end is metal, so if you want you can actually stick it to the back of the tablet or on the front bezel where the magnets are, but this isn’t terrible secure as the S-Pen will spin and dangle. Still, sticking it to the bezel makes for pretty easy access while set up on a desk or table.
The S-Pen has one button that you can configure in Samsung’s Settings app. Unfortunately there are very few customization options. You can set the button to launch Samsung’s “Air Command” software or Microsoft’s Ink Workspace, or nothing. None of those options are terribly useful really. I’d like at least a “right click” option to be configurable too. I miss having an eraser on the other end too.
Incidentally, the palm rejection for the S-Pen on the screen takes some getting used to. Many times I’ve rested my hand against the screen to find that pressing buttons with the pen tip doesn’t work. Having the pen within range of the screen’s digitizer does not automatically reject the touch interface if the touch interface is currently active (you’re touching the screen). So you really have to get the pen tip close to the screen first before you rest your hand on the screen to write or draw. Wacom’s tablets, pen displays, and pen computers generally give the stylus priority when it’s within range, but that’s not the case with the Samsung Book.
Software
The Samsung Galaxy Book comes with Windows 10 Home pre-installed. Oddly, it did not come pre-installed with the Windows 10 Spring Creators Update. Windows 10 is probably the most feature-rich operating system especially for tablet PC convertibles (AKA 2-in-1’s). It can easily switch between an interface designed mainly for touch that uses gestures and large active areas for controlling programs and snapping them side by side… and the more conventional desktop Windows style interface that gives you a small start menu in the corner along with infinitely resizable overlapping application windows like you’ve been used to since 1995. This is also one of the most mature tablet operating systems out there since Microsoft unveiled the first Windows tablets in 2002 running Windows XP Tablet PC Edition.
The Galaxy Book now gets Samsung driver and firmware updates through Windows Update where as the Galaxy TabPro S had a separate background program for getting those types of updates directly from Samsung. Having the updates integrated with Windows Update and the Microsoft Store is certainly a better experience.
Samsung also includes some special software integrated with Windows 10 on the Galaxy Book. First up is Samsung Flow. This is an app that hooks into the “Windows Hello” biometric log-in system to use a Bluetooth-connected Samsung Galaxy S6 (or newer) smartphone fingerprint reader to log-in. If you don’t have a Samsung Galaxy S6 or newer smartphone, you’ll have to use a PIN, password, or picture password to log in.
Samsung Flow also has some other great features though. It can load all of your phone’s notifications into a window on the Galaxy Book, and Samsung has enabled reply capabilities for some of them like SMS and WhatsApp. The software also enables you to use a Samsung Galaxy S smartphone as a hotspot without having to turn it on through the phone. So there’s some really nice integration there.
There’s also a “Book Settings” app that controls certain special features. It’s too bad this couldn’t have been integrated with the normal Windows 10 Settings app.
There are other Samsung customizations integrated with Windows 10 on the Galaxy Book. Seen above is a Battery Life Extender option that shows up in the “Extras” section of the native Windows 10 Settings window. You’ll also see a “Pattern Log-in” option and AMOLED settings here.
The AMOLED settings area lets you customize the color balance, saturation, and sharpness of your display. There’s also a new “Smart dimming” feature that turns on the camera to attempt to detect your face before dimming to save battery. If it does detect your face and understands that you’re currently looking at the screen, it won’t dim.
We mentioned Samsung “Air Command” earlier and above is what that looks like. It’s a few extra S-Pen stylus features that you can access with the button on the S-Pen. Smart select is a type of screen capture utility that also does animated GIF recording and lets you record or capture only a specific part of the screen. Screen write is another screen capture utility that also lets you write on the image with a number of pen tools. The “Create Note” and “View all Notes” buttons go to the “Samsung Notes” app, which is a very basic note taking app. It doesn’t seem to syncronize with anything, so really you’re better off using the much more powerful, free, and platform agnostic Microsoft OneNote.
Office 2016 Home & Student Edition is pre-installed as a trial. If you already have an Office 365 subscription, of course you can simply log-in to activate Office instead of using the trial. All of those programs run beautifully and have no match in terms of functionality on Android or iOS platforms. There are also a few games pre-installed on the Start screen. Candy Crush Soda Saga, Asphault 8, Fallout Shelter, March of Empires, Royal Revolt 2, and Microsoft Solitaire Collection are all there. It’s easy to uninstall them with a tap-and-hold to the context sensitive menu.
Adobe Creative Suite 2017 runs beautifully with the 7th generation Intel Core i5 CPU, and Photoshop does support the tilt sensitivity in the S-Pen stylus. Interestingly, it only recognizes the tilt angle when the pen tip is touching the screen. That’s different from Wacom tablets, pen computers, and pen displays which normally recognize the pen tilt angle when the pen is hovering over the screen. I don’t think that’s an actual problem, just something different from what I expected. An actual problem would be that the tilt direction is not quite recognized correctly. Incidentally, Corel Painter 2017 also supports the tilt sensitivity, but not by default. You’ll have to go into the Preferences and change the tablet preference to “RTS-compatible device” and “Windows Multi-touch”. It would seem Samsung has not included Wintab drivers to support older pressure sensitive drawing programs, but the newer APIs seem to be working well at least for pressure sensitivity. Tilt sensitivity direction is way off in Painter 2017 and doesn’t work at all in Adobe Illustrator 2017.
Camera
The 12″ Samsung Galaxy Book now has an improved 13 megapixel rear camera along with a 5 megapixel front facing camera. The resolution is plenty for high-definition Skype video calls or capturing something that you want to save in OneNote, but taking photos or videos with this tablet out in public is not recommended. The image quality is not so great, plus it’s a giant faux pas to hold up a big tablet in front of you to take a photo.
Regardless, here’s a few sample images from both the front-facing and rear-facing cameras on the Samsung Galaxy Book.
Compared to Galaxy TabPro S
The Galaxy Book’s screen looks exactly the same as the Galaxy TabPro S’s screen and that’s a good thing. They’re both gorgeous. You can see that the Galaxy Book’s keyboard has much better spacing between the keys. It feels a lot better to type on as well. Also note the much larger track pad.
On the left above you see the Galaxy TabPro S’s keyboard stand which adhears via magnets at the top edge. On the right you see the redesigned keyboard stand for the Galaxy Book which is much more stable and much more secure.
The Galaxy TabPro S on top is slightly thinner than the Galaxy Book though the new keyboard cover is a bit thinner on the Galaxy Book versus the older TabPro S’s keyboard.
Battery Life
As always battery life is a relative term depending on what kind of CPU intensive programming you’re going to do along with your screen brightness, but Samsung says you should get about 11 hours of constant video watching on one full charge. Obviously if you do a lot of editing HD video, or batch processing hundreds of RAW photographs, the battery life is going to suffer a bit, but in using the Samsung Galaxy Book, we have found no need to carry the charger around during the day. And if you do find the battery running low, Samsung’s USB-C fast charging will get you fully charged up after only 3 hours of charging.
Pricing
The 12″ Samsung Galaxy Book is available with 4GB RAM & 128GB SSD for $1129.99, or 8GB RAM & 256GB SSD for $1329.99. There’s also a Verizon LTE version of the 12″ Galaxy Book with 4GB RAM & 128GB SSD for $1299.99.
The 10.6″ Samsung Galaxy Book is available with 4GB RAM & 64GB storage for $629.99 or 4Gb RAM and 128Gb storage for $729.99. Remember, the 10.6″ model has a TFT LCD screen instead of Super AMOLED. It also has an Intel Core m3 processor and only a front-facing camera, too.
Conclusion
In all aspects, the Samsung Galaxy Book is an improvement over last year’s Galaxy TabPro S. The keyboard is much better, the stylus is much better, the trackpad is much better, the stand is much better, 2 USB-C ports is much better, having a MicroSD card slot is much better… the Super AMOLED screen is about the same, but much better than most other Windows 10 tablet screens. Pricing wise, the Galaxy Book is about on par with other comparable 2-in-1 Windows 10 tablet PCs like the Surface Pro 4 once you factor in the price of a clip on keyboard. Samsung even smartened up about the range of models they’re making available, too. The Galaxy TabPro S was only available in one configuration. With the Galaxy Book, you’ve got 5 options with prices between $629.99 and $1329.99 to fit your budget. It’s great to see Samsung stepping up their Windows 10 tablet game this year and the Galaxy Book is a worthy competitor.
Source link
1 note
·
View note
Text
The PCs of IFA 2012: Hybrid PCs for a half and half working framework Sony, Asus, Samsung, Dell, and Toshiba indicate how OEMs are managing Windows 8.
The Windows-related declarations are flying quick and thick from the IFA gadgets appear in Berlin this year. We've effectively investigated HP's offerings and a portion of the Windows RT gadgets, yet there's still a considerable measure of ground to cover. Taking a gander at all of these items without a moment's delay demonstrates us not exactly what the store racks will resemble this Christmas season, additionally how PC OEMs are reacting to Microsoft's basic reevaluating of how Windows ought to function. Windows 8 utilizes touch to reclassify the working framework for better or for more awful, and similarly, touch components are likewise rethinking what we can anticipate from our PCs in the following couple of years.
Sony
The primary PC we'll take a gander at is a convertible PC from Sony, the Vaio 11 Duo. The Duo has a 11.6" 1080p screen that slides into and out of tablet mode, and also a stylus and digitizer to empower penmanship bolster. It incorporates Ultrabook-class Core i3, i5, and i7 processors, Intel coordinated design, NFC innovation, and either 128GB or 256GB strong state drives. Notwithstanding being a convertible, the PC relinquishes some of its utility as a portable workstation to be a superior tablet—the console looks cramped, and it renounces a standard trackpad for a directing stick-style mouse (however there are some who might contend this is really a positive change). The convertible will be accessible toward the finish of October at an up 'til now undisclosed cost, which will be a typical hold back all through this present roundup.Sony's second section is an across the board with a contort: its Tap 20 is a 20", 1600x900 touch-empowered across the board when the kickstand is out, however it will likewise lay level on a table, and incorporates a battery that will enable it to be utilized as a colossal tablet when wanted. This is an intriguing use case not by any means conceivable with the other holding nothing back ones we'll take a gander at, a large portion of which are quite recently standard PCs with touchscreens connected—I could see the Tap 20 being extraordinary for touch-empowered prepackaged games, for instance. Something else, the equipment in the Tap 20 is obvious: Ivy connect i5s and i7s, coordinated illustrations, and NFC go with the typical allocation of remote availability alternatives, ports and card perusers, and the webcam.
Samsung
Samsung is shooting a veritable shotgun impact of items at the market: to start with, you have the standard PCs with touchscreens. The Series 5 Ultra is a 13.3" 1366x768 esteem arranged Ultrabook with a touchscreen, Core i3 and i5 processors, and mechanical hard drives with little SSD reserves. Beside the touchscreen, these portable PCs ought to be extensively like the current Series 5 Ultrabooks. The touch renditions will begin at $799 for a Core i3 processor, or $849 for a Core i5.Next up are the Series 5 and Series 7 holding nothing back ones, which we've effectively touched upon quickly in an exchange about Samsung's misguided "Begin Menu" simulacrum. The Series 5 is a 21.5" across the board with a 1080p show, Core i3 processor, and incorporated design that will begin at $749, while the Series 7 comes in two flavors. The first is a 23.6" model with a 1080p screen, a Core i5 processor, and incorporated illustrations for $1099. The second is a 27" display with a 1080p screen, a Core i7 processor, an AMD Radeon HD 7850M GPU, and a beginning cost of $1699. The majority of the holding nothing back ones are outfitted with turning hard drives.Lastly, we are very brave 8 tablets to join the Windows RT tablet we discussed yesterday. These tablets have diverse names relying upon where you live: the Series 5 Slate, known as the ATIV Smart PC in different parts of the world, is a 11.6" tablet with a 1366x768 show, Intel Atom processor, and 64GB SSD that begins at $649 without a console dock or $749 with one. The Series 7 Slate, otherwise called the ATIV Smart PC Pro, is a 11.6" 1080p tablet with a Core i5 processor, 128GB SSD, and a beginning cost of $1199 with an included console dock—the Core i5 adds a lot to the cost, yet the Series 7 Slate is only 0.12" thicker and 0.24 pounds heavier than the Series 5. Basic to both tablets is Samsung's S Pen and digitizer, last found in the Galaxy Note 10.1 and Galaxy Note II.
The Series 5 Slate is fascinating in light of the fact that it gives us our first estimating data for Windows 8 tablets with Atom processors—while we don't yet know how Windows RT tablets will be valued, if the Series 5's $649 beginning cost is normal, the ARM tablets will have no less than a touch of breathing space to begin with.
Asus
Contrasted with Samsung, Asus has a moderately little appearing of gadgets. The first is the Vivo Tab, an Intel-prepared adaptation of the Vivo Tab RT—it used to be known as the Tablet 810. It utilizes a 11.6" show with a 1366x768 determination, an Intel Atom processor, and 64GB of eMMC stockpiling. The Intel adaptation incorporates a stylus and a Wacom digitizer, and a console dock will give additional USB ports, a console and trackpad, and additional battery life as well.Asus' different Windows 8 offering is a change of one of its current Zenbook Ultrabooks, the UX21A Touch. This 11.6" Ultrabook incorporates a 1080p IPS show like the 13" non-touch rendition we as of late audited, alongside Core i5 and i7 processors and 128GB and 256GB SSDs, yet includes a touchscreen where the past UX21A had none. We don't yet know any evaluating points of interest, in any case.
Dell
Dell's fresh out of the box new passage in the Windows 8 shred is its XPS Duo 12, another convertible PC that packs Ivy Bridge Core i5 and i7 processors. Where Sony's Vaio Duo 11 slides amongst tablet and portable PC mode, the XPS Duo 12 has a 12" 1080p LCD that you flip over before shutting the top to place it into tablet mode—there are magnets that keep the screen set up when it isn't being flipped. The outcome is something that looks more like a standard portable workstation than either the Sony unit we've as of now observed or the Toshiba convertible we'll find in a minute, both of which have odd pivots subsequently of their double nature. No evaluating data has been uncovered for the XPS Duo 12, however it ought to discharge toward the finish of October alongside Windows 8.Dell is likewise accepting the open door to help us to remember its XPS One 27 touch-empowered across the board, which has been accessible with Windows 7 for a couple of months. Dell isn't the main OEM with an across the board that it's re-propelling with Windows 8—Lenovo's touch-empowered IdeaCentre A720 and Toshiba's LX835 are among the as of now delivering frameworks that will be given a lift by a working framework intended to take better favorable position of their screens. The XPS One 27 is right now accessible with Ivy Bridge processors, either Intel's coordinated HD Graphics 4000 or a NVIDIA GeForce GT 640M, and a 27" 2560x1440 show. Costs begin at $1399.
Toshiba
Toshiba's just shiny new declaration is its new Satellite U925t convertible Ultrabook, which we really got our hands on amid a meeting with Toshiba prior this week. Like Sony's Vaio 11 Duo, the U925t's 12.5" 1366x768 screen slides amongst tablet and portable PC mode as opposed to flipping like Dell's convertible, however it figures out how to fit one of Toshiba's full-estimate portable workstation consoles and a trackpad underneath the screen, as opposed to Sony's truncated variant. It incorporates a Core i5 processor and a 128GB strong state drive, and will be accessible on October 26 (however evaluating data, of course, is MIA).Toshiba additionally has two existing PCs that are getting the Windows 8 touch treatment: the first is its LX835 across the board, a 23" 1080p touch-empowered PC that has as of now been transportation with Windows 7 for a couple of months with a value beginning at around $900—as with Dell, Toshiba is accepting the open door to "relaunch" the framework with Windows 8 introduced. The second is the Satellite P845t, a touchscreen variant of its present 14" 1366x768 P845 portable PC. Valuing data for the touch-empowered adaptation hasn't yet been uncovered, however the non-touch variant incorporates a Core i5 processor, coordinated representation, and turning hard drive for about $800.
Toshiba rushed to call attention to that even on its non-touch PCs, it would dispatch drivers to permit their multitouch trackpads to utilize Windows 8's implicit motions. The portable workstations I got the chance to try different things with were utilizing Synaptic trackpads with exceptionally late drivers that did without a doubt react to essential motions like swiping from the correct edge of the trackpad to conjure the Charms menu or swiping from the left edge to switch between running applications. Given the sheer number of organizations that utilization Synaptics trackpads, bolster for these signals ought to at any rate be conceivable on an extensive variety of PCs without touchscreens.
Conclusions
What we've seen so far at IFA has emphasized what we as of now observed at Computex recently: mid-range and top of the line PCs are grabbing touchscreens all at once, and they're falling into three essential classes. To start with are the straight tablets, which are fundamentally planned for use without anyone else however frequently accompanied console docks or cases. Second are the convertible PCs, which are fundamentally Ultrabooks that overlay down into thick tablets as important. Third are the standard PCs that have some kind of token touch bolster worked in—this appears as portable workstations or holding nothing back ones with capacitive touchscreens, however it could likewise apparently reach out to any PC with a multitouch trackpad that backings Windows 8's new trackpad signals.
The most interesting outlines are the ones that truly play into Windows 8's half breed nature: the convertible PCs and the tablets with console docks appear to be the best prepared to convey Microsoft's vision without bounds, wherein you discard both your tablet and your portable PC for one gadget that can do it all. Windows 8 is an odd, across the board working framework that isn't exactly similar to anything from its rivals, and the best PCs to run it on will be gadgets that recognize that reality.
0 notes
Text
Wacom MobileStudio Pro 13 Review
I got to try out the new Wacom MobileStudio Pro for a little while back in October of 2016, but now that I’ve been using it for some real work, it’s time for a full review. I’ll start off right away with letting you know that if your career has anything to do with visual creativity, this is the tool you need. Notice I said tool instead of tablet. That’s because the Wacom MobileStudio Pro is almost entirely designed for creating all the things that everyone else uses in their daily lives. This tablet PC is made for professionals. The “Pro” in this tablet’s name isn’t just tacked on to make it sound better like some other electronic gadget manufacturers do. It is genuinely deserving of the “Pro” moniker.
This tablet isn’t for people who play cartoony games that everyone loves to play on their iPads, it’s for people who create those games. This tablet isn’t for handing to your kids to watch an animated movie in the back seat on a long drive, it’s for the people who create those animated movies. It’s not for taking selfie videos with cute cartoon filter overlays, it’s for the people who design those filters.
If you’re a comic book artist, architect, 3D texture artist, video editor, story board artist, sculptor, fashion designer, animator, engineer, photographer, retoucher, graphic designer, illustrator, or a student trying to learn any of those disciplines, the Wacom MobileStudio Pro is what you’re looking for.
It sounds like the Wacom MobileStudio Pro is a lot like Microsoft’s Surface Pro 4 or Surface Studio, both of which are drewl-worthy products aimed at creative professionals as well. Keep reading to find out why the MobileStudio Pro is a much better choice for digital artists. With all this praise right up front in the intro paragraph, some of you might be ready to find the order button on Wacom’s website, but despite all the power of Wacom’s MobileStudio Pro, there are a few drawbacks that you’ll want to know about, too.
youtube
Specs
The version in this review is the DTHW 1320H model which has the 13.3″
screen, Intel Core i7 CPU, Intel Iris Graphics 550, 512Gb SSD, 16Gb of RAM, and the Intel RealSense 3D model scanning hardware. The is number 4 out of 6 on the scale from cheapest to most expensive in terms of your model choices for the Wacom MobileStudio Pro. If you want to spend less money, the cheapest model has a 13.3″ screen, Core i5 processor with 4Gb RAM, 64Gb SSD, and a regular 8Mp camera. If you want even more power & want to spend more money, there are two models of the larger Wacom MobileStudio Pro 16 which include NVIDIA Quadro GPU hardware. The top of the line model has a Core i7 processor, Nvidia Quadro M1000M 4Gb GPU, 512 Gb SSD, 16Gb RAM, and Intel RealSense 3D scanning camera. Also, the larger 16″ models have 8 programmable hardware buttons in the bezel as opposed to 6 in the smaller 13″ model.
Screen and Pen
If you’re thinking about the Wacom MobileStudio Pro, the biggest selling point is going to be its screen and pen interface. I was fully converted when I first got a Wacom graphics tablet back in the mid 90’s and today using a mouse or trackpad to interact with a computer feels like using a hammer to put together a watch (especially when it comes to design work). The pen-to-screen interface gives you a direct connection for manipulating computer controls. It’s not disconnected like a mouse or trackpad. Furthermore, you can build motor-memory since the location where you place the pen tip is always going to have the same relationship to the dimensions of the screen you’re looking at. That’s never true with a mouse or trackpad so often you’ve got to spend a couple seconds looking at the screen and moving the pointer around to figure out where it is. With a Wacom pen, you place it and it’s there. I can even do this without looking at the screen and have accurate cursor control.
A touch screen also gives you direct interactivity with graphic user interface controls, but fingers are big. Each finger is going to cover from 100-300^2 pixels worth of data and buttons need to be that big to be activated. That’s a huge waste of space and a huge crutch for efficiency.
The Wacom MobileStudio Pro 13 includes the new Wacom Pro Pen 2 and its digitizer supports 8,000 levels of pressure sensitivity, plus pen tilt sensitivity, and pixel level pointing accuracy. You may remember in my Surface Pro 3 review where I compared the pressure sensitivity to the Surface Pro 2 which used Wacom’s digitizer technology as opposed to Microsoft’s new N-Trig based digitizer technology. I said that the Surface Pro 3’s 256 levels of pressure sensitivity wasn’t noticeably different from the Surface Pro 2’s 1024 levels of pressure sensitivity. The Surface Pro 2 used some of Wacom’s older & cheaper digitizer tech, and I have to say that the digitizer tech in the MobileStudio Pro 13 is far superior! Noticeably far superior!
Wacom’s Pro Pen 2 doesn’t require batteries at all. It has two buttons on the side and an eraser. Yes, the buttons are customizable too though they need to be within an inch of the screen to function (no auto-launching OneNote from afar like the Surface Pro 3 can do). It also includes interchangeable pen nibs if you want to change the feel a bit or you wear one out. The pen is so comfortable to hold. The buttons are easy to feel and find. The pen feels like the perfect weight. It makes the Surface Pen feel clunky and cold.
Putting the pen to the screen feels like coming home. The display is so close to the surface, it’s almost like you’re touching the pixels directly. If you look really really closely, yes there’s a bit of space between the top layer and the pixels, but in normal use it’s going to feel like you’re drawing directly to the software’s graphical user interface. The accuracy is excellent as well. Older pen computers often don’t place the pointer quite as precisely on the screen as you would want. Many have digitizers that calculate the positioning in clumps and that’s why some will have a jiggle to the line strokes if you move the pen too slowly. The Wacom MobileStudio Pro actually has pixel-level positioning accuracy and it is awesome. You can hold the pen still on the screen, move it as slightly as you possibly can, and you’ll see the cursor move one pixel in that direction. You are not going to get this level of precision control on any other pen computing device. What about
the corners, you say? Yes, it’s true there is often fall-off of pen accuracy in the corners of the display for many pen digitizers. Wacom solves this by extending the digitizer beyond the display area and deep into the bezel. That brush cursor or pointer is going to remain pixel accurate all along the edges.
Your pointer appears on the screen when the pen tip gets to a little less than an inch from the surface of the screen. At that point, the touch screen is disabled and you can rest your hand on the screen for a stable platform. If your touch screen is not responding to your fingers, that might be why. This range is a lot greater than the vertical range before palm rejection in Microsoft Surface N-Trig technology and that means you’re less likely to invoke touch screen actions accidentally.
The exterior layer of the screen is actually a matte material too. This is much better than those glossy glass screens that you see on things like the Microsoft Surface devices, iPad Pro, Macbook Pro, etc. The matte material doesn’t give off nearly as much glare, which can interfere with your ability to see your work properly. Often you see professional photographers with Macbook Pros covered in a black hood to reduce the glare on those terribly shiny screens. This doesn’t require that kind of work-around as much. The matte finish also reduces the fingerprint grease problem. Yes, you’re still going to get fingerprint grease on the screen when you touch it, but the interference and notice-ability is greatly reduced compared to a glossy glass screen. By the way, you get a nice screen cleaning cloth in the box.
The screen actually subtly flexes when you apply pressure. You might think that would be a durability problem, but bendable things are less breakable. So I’m imagining this won’t shatter as easily as a glass screen. It also feels much more natural to interact with and that’s a huge plus. If you’ve used a Microsoft Surface Pro/Book/Studio or an iPad Pro with Apple Pencil… yeah, they have great pressure sensitivity and you can write on the screen and accurately control the thickness of the stroke, but it still feels like plastic on glass. The Surface Pen variable texture nibs help improve that feeling to some degree, but the Wacom MobileStudio Pro brings the feeling of drawing on a computer to a higher level. It doesn’t feel exactly like writing with a pencil on paper, but the matte screen texture, the flexing, and the practically perfect pen easily offer the best pen interface on the market.
While a precise pen interface is very important to anyone in the visual creative fields, so is color accuracy. The Wacom MobileStudio Pro’s screen does not disappoint. It actually supports 96% of the Adobe RGB 1998 color gamut. That’s a much wider color gamut than the usual sRGB that most computer screens display. Most photographers and print designers are going to want to use this color gamut. For video, the new color gamut standard is heading towards DCI-P3 which extends more into the reds & purple ranges while Adobe RGB extends into the greens & blues. Unfortunately, the Wacom MobileStudio Pro does not have a quick-action button for switching between color gamuts like the Microsoft Surface Studio does.
Hardware & Tactile Buttons
We’ll start with the big silver-rimmed hardware buttons in the side bezel. On the 13″ model, you have 6 flat black buttons while on the 16″ model, you have 8. There’s also a 4 way circular button in the middle that also has a center button and the circle is touch sensitive for scrolling through functions. One some models, the center button within the circle doubles as a fingerprint scanner compatible with Windows Hello. The fingerprint scanner didn’t work at all on my first MobileStudio Pro. Windows 10 kept waiting for a finger appear, but the scanner just wasn’t sensing anything. A replacement MobileStudio Pro fixed that minor issue.
At first I thought that these would be a usability issue since none of these buttons are labelled and I had no clue what any of them would do. However, the Wacom MobileStudio Pro is a device for professionals and as it turns out the unlabelled buttons are much more powerful than first glance. They are all customizable! And the capabilities that you can program into these buttons is practically limitless. You’ll see a lot more info about this below in the software section, so keep reading.
In terms of tactile usability, these hardware buttons are very good. You can see the center button has a small nub on it so that you can easily find it without using your eyes.
The side edges of the tablet PC house some other buttons. Here you see the power switch. It’s not a button that you press but a spring loaded switch that you hold down to power on or off. This slight complexity to the switch makes it difficult to accidentally put the tablet to sleep mode while you’re working, and that’s a very good thing.
On one end of this edge there’s a volume toggle button and another spring-loaded switch. This switch toggles the screen rotation lock on and off. Also notice that all of these buttons on the edge are in a concave recessed area. This makes it difficult to accidentally press them while you’re holding the tablet, and again that’s a very good thing.
Still on this same edge, we’ve also got a 3.5mm audio port, and a full-sized SD card slot. Having the full-sized SD card slot here is fantastic since you can easily start working with photos or videos just shot on a high-end camera without any dongles or adapters.
On the opposite edge you’ve got 3 USB-C ports for peripherals and charging along with a Kensington Security slot for locking the device down. In the above photo, I have the included pen holder mounted inside the Kensington Security slot. Most laptops and tablets that have USB-C ports these days only have one, so it’s great to have 3 here. Everyone says it’s going to be the new standard, but personally I don’t think USB-C is nearly as forward-thinking as it should have been. There are no full USB-A ports on the device and that’s unfortunate since USB-A is still very widely used. You’ll need a USB-A to USB-C adapter (or three) to use most peripherals. The long top & bottom edges simply taper smoothly to a rounded edge. You can also see the 5 Megapixel front-facing HD camera in the middle of the bezel above.
The pen holder is surprisingly well designed. It can hold the pen either vertically for easy access while you’re working, or the pen can be attached horizontally parallel to the edge of the tablet for transport.
On the back you’ll see two big rubber ledges on the sides. Both of these have a tilted lip to them that raises off the back. This lip is inset from the edges so there’s a bit of space there, and the rubber acts as a little foot to set the tablet flat on a table. What’s really genius about this rubber lip is that it also hides vents for the fans. The raised lip keeps the fan airflow going out the sides while it’s sitting on a table and the fact that theses are slightly inset from the edges of the device means your hands aren’t going to cover the vents if you’re holding it. There’s no heat in the middle of the back either, so you can safely keep it on your lap while you draw.
You can also see two big slots on the back here with four screws. Those are for mounting the tablet to a stand that will let you set it up on your desk and tilt it at different angles. Wacom will have a special stand sold separately that should be available in February of 2017.
Also on the back of this model is an Intel RealSense 8 Megapixel 3D scanner and camera. Only two of the MobileStudio Pro models include this 3D scanner while the others have a normal 8 Mp camera. You’ll read more about how this works a little further down the page.
The pen also comes with a heavy duty protective case. The flat end slides out and there’s form-fit padding to hold the Pro Pen 2 securely. On the flat end there’s also a cap that contains replacement pen tips and part of the sliding mechanism has a hole that you can use to remove the pen tip.
Incidentally, Wacom does not include a special keyboard for the MobileStudio Pro. There’s no detachable keyboard case option either. They do make a wireless keyboard for the older Cintiq Companion, but there’s nothing particularly special about it. You can use any Windows-compatible keyboard that you may already have or might like to buy (that includes pretty much all keyboards, even Mac keyboards). Above you see it works fine with Microsoft’s Universal folding keyboard connected via Bluetooth. Wired keyboards would need either a USB-C interface or a USB-C adapter/port-expander.
Software
First of all, the Wacom MobileStudio Pro runs Windows 10 as the operating system. The four most-expensive models come with Windows 10 Professional while the two least-expensive models come with Windows 10 Home edition. Windows 10 is really the only choice for a high-end pen-computer with a touch screen. MacOS has pretty poor support for touch interaction and Apple doesn’t allow anyone else to license the operating system for use on 3rd party hardware anyway. You might be able to “hackintosh” macOS onto the MobileStudio Pro if you’ve got the skills, but Windows 10 has a much better tablet UI and much better handwriting recognition so I wouldn’t recommend that. It’s not really worth it and there isn’t any real advantage.
By default, the MobileStudio Pro loads Windows 10’s desktop mode even though there’s no keyboard or mouse attached. That’s good for people who are familiar with the Windows 95 through Windows 7 style user interface, but personally I highly recommend switching into the Windows 10 tablet mode UI using the quick action center in the bottom right corner button. It’s much more touch-friendly and enables some nice snapping and application closing gestures. I even set the bottom taskbar to auto-hide to make more room for the real programs.
For the most part, the MobileStudio Pro includes generic Windows 10 with no bloatware. There are some default games pinned to the start menu, but those are easy to uninstall. There’s also an “Intel RealSense Camera Calibration Notifier that loads on startup, and if you’re in Tablet Mode, that shows as a big blank white window which is pretty annoying and useless. I disabled it by going to the Task Manager > Startup tab > selecting and and pressing disable. Wacom also included a Wacom Desktop Center app, Wacom control panel, and a first-run experience to introduce you to everything. This is where it gets pretty interesting and if you’ve used professional Wacom pen tablets or pen displays in the past, you probably already know what you’re in for.
Above is the Wacom welcome screen which introduces you to the “ExpressKeys” hardware buttons in the bezel as well as setting up a Wacom Account (not necessary) and calibrating the screen digitizer. It’s not hugely necessary to run the calibration since it’s pretty accurate out of the box, but people often hold the pen differently so it’s good to get it set up for the way you work.
The Wacom Desktop software is basically a dashboard with links to the Wacom Driver control panel, but it also has an interface for checking for driver updates as well as a method of backing up all of your custom settings. That’s going to be important because as you’ll see below, there is a lot that you can do in terms of customizing the Wacom driver software.
Here’s the real meat of Wacom’s software and it is extremely robust. Just about everything imaginable is customizable here. The first row at the top allows you to select which device you’re customizing. I only have the MobileStudio Pro 13 listed here, but if I had another Wacom device like a Cintiq pen display or an Intuos pen tablet plugged in, then it would show there. The 2nd row lists the tools associated with that device. The Wacom MobileStudio Pro has a series of tactile hardware function buttons, so that’s listed first, then touch is listed second, and “Pro Pen 2” is listed third. Selecting one of those will change the options below it for further customization. The third row is labelled “Application” and this is where you can customize the preferences and behavior based on which application is in the foreground. Yes, seriously. The little plus button on the right side of that row is where you can add whichever applications you want. Generally it’s easiest to add the preferences here based on running applications, but you can dig into the file system and select a specific executable if you need to.
So we’ve got customizable settings for the hardware buttons in the bezel, the touch screen gestures, and the pen with its pressure/tilt sensitive tip & eraser plus its dual hardware buttons… AND all of those can be further altered based on which program you’re working with. That’s pretty big, but how customizable are these functions? They are very customizable.
First you’ve got the hardware buttons in the bezel. They’re called “ExpressKeys” in the Wacom software. By default, these are generally assigned to modifier keys such as Alt, Ctrl, Shift, Spacebar, etc. The top button defaults to “Settings” which shows an overlay on the screen pointing out and labeling the functions you currently have assigned to each button. This is extremely useful if you’ve forgotten what you assigned to which button, but if you want to assign that settings button to something else, of course you can do that. By the way, it is possible to press more than one button at the same time, for example when you need to do Ctrl + Alt + Shift to invoke a modification for whatever tool you’re currently using.
The Touch Ring is next. That’s the big circle in the bezel and rubbing your finger around it in a clockwise or counter-clockwise motion will invoke whatever functions you want to assign to those gestures. The ring also has up/down/left/right buttons that can be pressed in order to change the touch ring’s functions on the go. In the above image, you can see that if I press the top of the touch ring, that will set it to scroll/zoom, the right side sets it to cycle between layers, the bottom sets it to change the brush size, and the left side sets it to rotation. All of those default functions don’t work the same way in all programs, so you’ll want to customize them based on your most-used software.
For example, my RAW photo organizational tool of choice is Adobe Bridge, so I customized one of the touch ring functions to increase or decrease the rating level depending on whether I rubbed it clockwise or counterclockwise. The default “speed” for this was too high, so I easily changed the interaction to a slower speed so that I could very accurately set rating levels on selected photos without having a keyboard attached and without having to open menus.
There’s also an “On Screen Controls” tab in the functions section, and this is pretty excellent as well. Basically you can set whatever you want, be it the pen’s hardware button, a bezel button, or a touch gesture… to invoke a radial menu on the screen. And yes, you guessed it, the radial menu can have buttons for whatever you want it to do, and you can make it have different buttons for whichever program you’re using.
That’s not all folks. You can also create any number of custom touch-screen panels with whatever buttons you want to create. Each of those panels can be activated using any of the other custom options in the Wacom Tablet Properties dialog box as well (and that’s a lot).
Next is the touch screen gestures. Naturally, you can disable this completely if you want to use only the system or application built-in touch screen gestures, but you can also add a few gestures here that aren’t commonly used in other programs. Above you can see a listing of all the touch screen gestures that are customizable. The “three finger swipe left/right to navigate” and “four finger swipe left/right to switch applications” gestures can only be enabled or disabled, while all of the others can be completely customized to activate whatever command you want. Again, the default functions are available in all applications until you add another application to the application listing in the 3rd row. Then with that application icon selected in the Wacom Tablet Properties dialog, you can choose completely different touch gesture functions for when that particular application is in use in the foreground. So for example, maybe you’ve written a script for InDesign CC that
converts all text to outlines. You can assign a keyboard shortcut to that script in InDesign, and then assign the “Five Fingers Swipe Down” gesture to that keyboard shortcut when InDesign is active in order to run that script very easily. By the way, if you don’t have a keyboard connected, you can use the “Standard Layout” on-screen keyboard to specify or activate keyboard shortcuts (enabled in the keyboard settings).
The Pro Pen 2 customization options allow you to fine tune the pressure sensitivity as well as customize the two hardware buttons on the pen. There are sliders for most functions, but if you want more granular control over the tip feel, the “customize” button above will give you a pressure sensitivity curve graph. Again, all of this is customizable on both a system-wide and application-specific level.
3D Scanning Camera
Two of the high-end Wacom MobileStudio Pro models include an Intel RealSense 3D camera sensor on the back and they include a 1 year license for Artec Pro 3D model scanning software. This is high-end 3D scanning software that you’d normally use with dedicated handheld 3D scanners like the Eva or Space Spider to create 3D models of things like Arnold Schwarzenegger for Terminator movies, but the software also works with Kinect for Windows and, of course, the Intel Sense 3D camera built into certain Wacom MobileStudio Pro models.
Unfortunately, it is very difficult to get usable results from scanning 3D objects with the Intel Sense 3D camera set-up. It only works on objects between about the size of a basketball up to about the size of a couch. Anything with detail or gaps that are too small (baseball sized?), won’t render very well. You have to get the lighting just right, too. You might be able to get a nice model of relief sculptures on a wall, but a 360 degree view of a model is very tough to scan with this hardware.
The scanner does however automatically add RGB color texture mapping to the 3D object, which again requires your lighting to be just right. It’s not going to be a highly detailed image map though. The results might be good enough for a video game background that nobody’s going to look too closely at, but it’s hard to imagine what else this 3D scanner would be useful for.
Incidentally, the 1 year free subscription to Artec Pro 3D Ultimate Edition should activate automatically when you install the trial on a Wacom MobileStudio Pro who’s serial number indicates that it includes the Intel RealSense 3D camera hardware. This worked perfectly on my first MobileStudio Pro, but it did not recognize the hardware on the 2nd one, so Artec tech support had to enable a 1 year subscription manually.
Personally, I don’t think cameras belong on the back of tablets at all so if Wacom decides to do away with the camera completely on future versions, I don’t think anyone will mind. I know many people even put tape over the front facing cameras on their laptops too. Using a standalone camera or a dedicated 3D scanner would be a much better tool for the job.
Pro Graphics Software
The Wacom MobileStudio Pro doesn’t come with any professional graphics production software, but it’s clearly designed for use with many of them. Most of the default express key and touch ring functions are really made for Adobe Photoshop. So I installed a good number of my favorite graphics, photography, video, and 3D software to see how it worked and to actually use it for some content creation.
Firstly, just about all of the Adobe Creative Cloud 2017 applications work beautifully. GPU acceleration is flawless in Photoshop, Premiere Pro, Illustrator, Bridge, and Lightroom on the Wacom MobileStudio Pro 13’s Intel Iris 550 GPU. Adobe AfterEffects CC 2017 uses the GPU with OpenGL, but it cannot use the GPU for Ray-tracing. If you’re using AfterEffects, you’ll probably want a CUDA compatible GPU and for that, you’ll need the more-expensive Wacom MobileStudio Pro 16 which includes an NVIDIA Quadro M600M 2Gb GPU or a M1000M 4Gb GPU.
In terms of touch screen features, Adobe has made some huge improvements in the last few years to the touch support in many of their high-end Creative Cloud programs. Lightroom now has touch support that works pretty nicely for scrolling, panning, zooming, though you’ll still need the pen for some precision controls. InDesign and Illustrator both include their own full-touch workspaces which have a completely different UI design from the normal workspaces, although they do have many limitations due to their simplicity. Premiere Pro has some great touch gesture options integrated with the various panels. You can scrub playback in the Project panel for selected videos in thumbnail view, you can set in/out points, drag/drop, and even pinch to change the timeline view scale. Photoshop supports multi-touch zoom & panning as well, and they’ve got a new touch panel for modifier keys (though you won’t need that with the MobileStudio’s Express Keys). Of course, Photoshop supports tilt
sensitive controls in the brushes as well as the pressure sensitive control it has supported via Wacom drivers for decades. Incidentally, the Adobe Character Animator CC 2017 Preview does not currently work with any of the hardware cameras on the Wacom MobileStudio Pro 13 at this time, so watch out for that if you like to do real-time character animation.
Capture One is not touch friendly in terms of UI design, but multi-touch panning & zooming works beautifully, as does the Wacom Pro Pen 2 and wow… my photographs look great on this screen!
Corel Painter 2017 is another program that really shines on the Wacome MobileStudio Pro. I’ve been using this paint simulation software since it was Fractal Design Painter 4 back in the mid 1990’s, and it is extremely comprehensive. It’s got some a lot of excruciatingly complicated natural media simulation tools that interact with your chosen paper textures, wet/dry status, brush tilt angle, pressure, bearing, etc. Corel Painter’s multi-touch panning & zooming could use some speed optimization, but the Wacom Pro Pen support is excellent. This program is very powerful though, so it’s easy to get some lag to happen with a complicated brush and a high resolution canvas.
3D animation software like Maya 3D, Lightwave 3D, ZBrush, etc. run pretty nicely, but programs like these are heavily dependent on keyboard shortcuts so the customizable express keys in the bezel may not be enough. The pen works beautifully however, and if you’re a Zbrush user, you’ll especially love the 8000 levels of pressure sensitivity support.
Wacom Link
So far you’ve read about how extremely powerful the Wacom MobileStudio Pro can be as a visual creative tool on its own and it is very powerful, but what if you’ve got a desktop workstation in your office that is just rediculously powerful? As it turns you, you can plug the MobileStudio Pro into another computer and use it as a pen display just like the other normal Cintiq Pen Displays that Wacom makes. You’ll need an accessory called the Wacom Link to do this though. Basically it has two ports on one side that get wired into your big computer, and one port on the other side that plugs into one of the MobileStudio’s USB-C ports. The accessory includes a USB-A cable to go to your PC/Mac, a Mini-DisplayPort to go to your PC/Mac’s GPU card, and a USB-C cable to go to the MobileStudio Pro.
This can come in very handy if you spend most of your time in an office in front of a powerful desktop computer. A few things you need to know however, you will need the Wacom software drivers installed on the PC or Mac that you’re plugging the Mobile Studio into. You’ll also need to plug the Wacom Link USB-C port into the center USB-C port on the MobileStudio Pro. Apparently that one is enabled for the special Pen Display conversion feature.
Incidentally, the Wacom Link also goes the other way, meaning you can plug the MiniDisplay port directly into an external Display if you want your Wacom MobileStudio Pro to drive another monitor. Unfortunately, the Wacom Link is not able to provide electrical power to the MobileStudio Pro at the same time. So you’ll need to connect one of the other USB-C ports on the MobileStudio to the AC adapter and plug that into an electrical outlet. By the way, the SD card reader in the MobileStudio Pro becomes readable on the desktop PC or Mac when connected via the Wacom Link. The MobileStudio Pro’s internet storage does not show up as another drive, but that’s understandable. Being able to access the SD card is still very useful.
Yes, the Wacom Link works fine with a Mac. Wacom’s drivers handle all the pen input capabilities and the MobileStudio Pro’s Express Keys, Touch Ring, and custom on-screen panels are all configurable here.
The Wacom drivers even add a little bit of touch screen support to a connected Mac. Don’t expect to move windows around, launch apps, or access menus with your finger though. You’ll need the pen for that.
You’ll have to tweak the resolution on the Wacom MobileStudio Pro when connected to a Mac as a secondary display too. By default everything shows up extremely tiny. The Mac OS automatic scaling features don’t seem to work very well either.
Of course the Wacom Link works on Windows 7, 8, and 10 as well. I connected it to my HP Z440 Workstation which has quite a few processing advantages over the MobileStudio Pro on it’s own, but obviously it’s not as portable. It took some work to get everything running though. The first 3 USB ports that I plugged the MobileStudio Pro’s Wacom Link into didn’t recognize the hardware quite right. The first 2 didn’t recognize it at all and the 3rd recognized the Express Keys but not the touch screen or pen digitizer. The 4th USB port I tried had everything working perfectly. I’m not sure if this is because I’ve used other Wacom hardware on those other USB ports in the past and didn’t clean out those drivers completely or I have some other USB host driver issues.
When you have the MobileStudio Pro plugged into a desktop PC, the Wacom Tablet Properties on the desktop also show a “Toggle Display” settings tab. You can set the “Toggle Display” command to just about any of the shortcuts, gestures, and hardware keys that are customizable on the Wacom MobileStudio Pro and the settings tab allows you to configure exactly how that behaves. One option toggles between using having the pen control only one display and then both displays via a stretched out pan. This option feels weird because it changes the aspect ratio of the pen digitizer to span two displays. It’s also strange that on my version it toggles between the desktop display and both displays, which is opposite of what I’d expect. I’d want the Wacom MobileStudio display to have a full 1 to 1 relationship. The second option toggles between each display, meaning that the pen can only control one full display at a time. This seems ideal to me, but it also makes it
difficult to move windows between monitors. I wish the Windows 10 “Task View” had multiple monitors listed at the bottom like it does virtual desktops so you could very easily drag/drop windows onto different monitors instead of having to drag windows across the whole screen. Personally I’ve been using the Wacom Link and MobileStudio Pro as a duplicated display instead of an extended display. Yes, some would say that defeats the purpose of having two displays, but in my opinion in beats the learning curve awkwardness of the “toggle display” command in the Wacom software.
Interestingly, via Wacom Link there’s a special display control for specifying the color space and other settings for the MobileStudio while connected as a Pen Display.
Using a Windows 10 desktop tower with the MobileStudio Pro attached via the Wacom Link accessory is the same as if you were using the MobileStudio Pro as a stand-alone tablet. All of the same touch screen gestures work, Windows 10’s touch apps work the same, even the ink input panel shows up. The only difference is that you now have the full power of whatever high-end processors, tons of RAM, and many terabytes of storage you’ve packed into that desktop workstation. I really wish the backup/restore for customized settings would work between devices so that all my Express Keys were the same though!
Battery Life
Yep, this is one spot where the Wacom MobileStudio Pro needs a lot of improvements. With very light use, you could probably get it to last up to 6 hours, but really we’re talking about maybe 3 hours. All of this high-end hardware really eats up the battery, so be prepared to pack the charger or bring a big external battery or buy two MobileStudio Pros. Average phone USB-C chargers don’t work, by the way. You’ll need the big beefy USB-C charger that comes with it.
I really wish this could have had a user-removable battery. It seems like Wacom thought of everything to make this a genuinely useful tool for creative professionals, but its utility is decreased by its short battery life and when that internal battery starts to wear out, it’s going to be even worse. The ability to carry a spare battery and pop it into the tablet as soon as the first battery died would have been a great option.
Pricing and Availability
The Wacom MobileStudio Pro 13 and MobileStudio Pro 16 were released in the fall of 2016, but you may find that some models are still hard to come by. Keep an eye on the Wacom Online Store, Amazon, and high-end photography videography stores like B&H Photo and Adorama.
The DTHW1320T has an Intel Core i5 processor, 64Gb SSD, and 4Gb RAM for about $1500. The DTHW1320L has an Intel Core i5 processor, 128Gb SSD, and 8GB RAM for about $1800. The DTHW1320M has an Intel Core i7 processor with 256Gb SSD and 8Gb RAM for $2000. The DTHW1320H has an Intel Core i7 processor with 512Gb SSD, 16Gb RAM, and the Intel RealSense 3D scanner camera for $2500.
The larger 16″ versions are available in 2 pricing options. The DTHW1620M has an Intel Core i5 processor with NVIDIA Quadro M600M GPU, 256Gb SSD, and 8Gb RAM for $2400. The DTHW1620H has an Intel Core i7 processor with NVIDIA Quadro M1000M GPU, 512Gb SSD, and 16Gb RAM for $3000.
The Wacom Link accessory for plugging the MobileStudio Pro into a desktop computer costs an extra $70 and can be found on the Wacom online store.
Conclusion
There are some good reasons that this review of the Wacom MobileStudio Pro 13 didn’t get published as soon as the tablet was released. First of all, this is a real digital creative’s tool and its extensive set of features requires some time to learn and really understand. Secondly, the first model I got had a couple minor defects. The fingerprint scanner didn’t work and its center USB-C port didn’t work with the Wacom Link hardware. If you look at the reviews on Amazon, you might see some other minor defects noticed by early adopters. For example, some of the hardware buttons may not have activated properly. The dedicated stand still isn’t available either, so there may be some things Wacom is working on. The second device I got fixed all of the fingerprint scanner and Wacom Link problems, but the free year of Artec Studio Ultimate Edition didn’t activate properly. That was fixed pretty easily by Artec tech support though.
The 3D scanner software and fingerprint reader aren’t really integral to what the Wacom MobileStudio Pro is made for though. The real reason for buying a Wacom MobileStudio Pro is its amazing pen interface and screen along with the ability to plug into a high-end workstation while you’re in the office, and throw it in a bag when you’re on the go. The extremely customizable software combined with the hardware express keys interface is another huge selling point. Wacom’s method of making the hardware keys, touch ring, and screen gestures capable of activating any keyboard shortcut in any program is far superior than what Microsoft has done with the Surface Studio and Surface Dial which requires each software developer to add specific controls to the dial. With Wacom’s touch ring (etc.), all I have to do is tell it which keyboard shortcuts to run. Most professional programs have customizable keyboard shortcuts, so the possibilities are really endless. Apple’s
MacBook Pro touch bar has the same limitations whereas each developer needs to actively add support. Wacom’s hardware & touch software already supports everything.
The amazing pen interface, gorgeous screen, and immensely customizable software interface are probably enough to make this tablet worth the price of admission, but for an extra $70, you can plug it into a tower PC (or Mac) and give that premium pen & touch interface an extra boost of let’s say… 44 Intel vPro Xenon cores, a terabyte of RAM, multiple 12Gb GPU’s, or whatever else you want to throw at it.
The Wacom MobileStudio Pro is truely the most professional quality tablet computer on the market today.
Source link
0 notes
Last Seen Blogs


postertehran
Untitled

me-janie
inspire.

tony667muscle
Exploring in 2022

nicoleanddimed
Don't Believe Everything You Read on the Internet