#Lucidchart
Text
¿Cómo se hace un diagrama entidad relación de una base de datos?
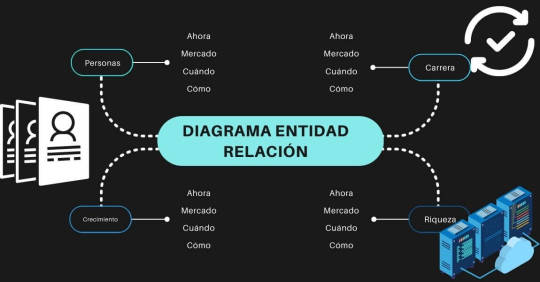
Un diagrama de entidad-relación (ERD, por sus siglas en inglés) es una herramienta de modelado utilizada para representar la estructura lógica de una base de datos. A continuación, te explico cómo crear un diagrama ER paso a paso:
1. Identificar las Entidades
Las entidades son objetos o cosas en el sistema sobre los que se desea almacenar información. Cada entidad se convierte en una tabla en la base de datos.
Ejemplo de entidades:
- Cliente
- Pedido
- Producto
2. Identificar los Atributos
Los atributos son las características o propiedades de cada entidad. Cada atributo se convierte en una columna en la tabla de la base de datos.
Ejemplo de atributos:
- Cliente: ID_Cliente, Nombre, Dirección, Teléfono
- Pedido: ID_Pedido, Fecha, ID_Cliente
- Producto: ID_Producto, Nombre_Producto, Precio
3. Definir Relaciones
Las relaciones muestran cómo las entidades interactúan entre sí. Pueden ser de varios tipos, como uno a uno (1:1), uno a muchos (1:M) y muchos a muchos (M:M).
Ejemplo de relaciones:
- Un Cliente puede realizar varios Pedidos (1:M)
- Un Pedido puede incluir varios Productos (M:M, pero normalmente se maneja con una tabla intermedia)
4. Dibujar el Diagrama
Usa una herramienta de diagramación (como draw.io, Lucidchart, o Microsoft Visio) para dibujar el ERD. Los elementos principales que debes incluir son:
Entidades:
- Representadas por rectángulos.
Atributos:
- Representados por elipses y conectados a su entidad.
Relaciones:
- Representadas por rombos y conectadas a las entidades.
5. Asegurar Integridad Referencial
- Asegúrate de que las relaciones están correctamente representadas con llaves foráneas donde sea necesario.
- Define llaves primarias para cada entidad para asegurar la unicidad de los registros.
Ejemplo Práctico

Supongamos que queremos diseñar un ERD para una tienda en línea:
- Entidades:
- Cliente
- Pedido
- Producto
- Detalle_Pedido (tabla intermedia para manejar la relación M:M entre Pedido y Producto)
- Atributos:
- Cliente: ID_Cliente (PK), Nombre, Dirección, Teléfono
- Pedido: ID_Pedido (PK), Fecha, ID_Cliente (FK)
- Producto: ID_Producto (PK), Nombre_Producto, Precio
- Detalle_Pedido: ID_Detalle (PK), ID_Pedido (FK), ID_Producto (FK), Cantidad
- Relaciones:
- Cliente (1) (M) Pedido
- Pedido (1) (M) Detalle_Pedido
- Producto (1) (M) Detalle_Pedido
Herramientas Sugeridas
- draw.io: Una herramienta gratuita y en línea para crear diagramas.
- Lucidchart: Ofrece plantillas y funcionalidades avanzadas, aunque es de pago.
- Microsoft Visio: Una herramienta de Microsoft para diagramas profesionales.
- MySQL Workbench: Útil si trabajas con bases de datos MySQL, incluye funcionalidades para crear ERDs.
Con estos pasos y herramientas, deberías ser capaz de crear un diagrama entidad-relación claro y útil para tu base de datos. ¿Te gustaría un ejemplo gráfico de este diagrama?
Read the full article
#atributos#basededatosrelacional#Diagramadeentidad-relación#diagramaERD#diagramasER#diseñodebasesdedatos#diseñodetablas#diseñológico#draw.io#ejemplodediagramaER#entidad-relación#entidades#ERD#estructuradebasededatos#herramientasdediagramación#integridadreferencial#llavesforáneas#llavesprimarias#Lucidchart#MicrosoftVisio#modeladodebasesdedatos#modeladológico#MySQLWorkbench#relaciones#relacionesdedatos.#relacionesmuchosamuchos#relacionesunoamuchos#tablaintermedia#tutorialERD#visualizacióndedatos
0 notes
Text
may i present

i love putting my oc in Situations with canon characters (there are too many parallels and this is only the stuff i could fit/could remember help)
@thehollowwriter
#kai's writing#i guess????#twisted wonderland#twst#twst silver#jamil viper#twst oc#chrysos pendentif#i had to learn how to navigate lucidchart for this. youre welcome ;;
3 notes
·
View notes
Text
So...
I made an "everybody lives" AU for Re8
I never thought I would see the day when I actually got so ticked off at an ending that I made a fix-it AU.
#I went into Lucidchart and made a family tree#Where Heisenberg and Ethan and Mia are in a polycule and collectively parenting Rose and Evaline#and Mia and Marguerite are gossip buddies who bitch about the rival moms on PTO nights#anyway general tags be upon ye now#re8 village#re8#re 8#re 8 village#re village#resident evil village#resident evil 8#resident evil 8 village#resident evil viii#resident evil au#resident evil 8 au#re village au#everybody lives au#hhh I don't wanna add any more tagsss
11 notes
·
View notes
Text
doing research is finding a ridiculously high level concept and going down the google search results until i find something that can explain it to me realllllll simple like im a little girl.
#found a lucidchart article abt jakobson’s theory of communication like okay ty for explaining it all simple like.#samael speaks
2 notes
·
View notes
Text
Free Websites / Tools that I use for Writing ! !
Organizational:
Notion : a personal favourite of mine. from what i've seen, unlimited projects with a variety of cards to use. it also has an mobile app with it. highly recommend.
Milanote : has some limitations on how many cards you can have but has different templates you can tinker around with. is more of a whiteboard type of site.
Hiveword : i haven't used it but it provides a novel-building template for plot, scenes, characters, etc.
Lucidchart : another i don't use but from what I've seen, it's similar to Milanote with their whiteboard style. also has a variety of templates of charts, diagrams, and more!
Helpful Tools:
OneLook Thesaurus : my go-to website for finding synonyms. also provides definitions!
Language Tool : a chrome extension similar to Grammarly that acts as a grammar-aid tool.
Character Creation / World Building:
Pinterest : a great source if you're searching for inspiration. you can also find tips and prompts on the site too!
Reedsy Character Name Generator : a name generator that include forename and surnames. has nationality specific names and a few mythic / fantasy name generators.
Fantasy Name Generator : this name generator has much more variety with character names and fictional location titles.
Inkarnate : a fantasy world-building site that I used in the past. fun fact: i made a little (it wasn't little) dragon shaped island for one story that never made it on paper.
3K notes
·
View notes
Text
Sequence diagram lucidchart

#Sequence diagram lucidchart install#
#Sequence diagram lucidchart drivers#
#Sequence diagram lucidchart update#
RAMEN sends messages via event stream, however, message acknowledgments are delivered by regular RPC requests every 30 seconds. The RAMEN protocol based on SSE that we built is unidirectional and the only streaming endpoint exposed to our clients.
Streamgate sends messages via the SSE endpoint and receives acknowledgement via the ack endpoint.
Whenever any Streamgate node starts or stops, it detects a change and re-allocates the sharding partitions.
Helix Controller, as the name suggests, is a five-node standalone service solely responsible for running Apache Helix Controller processes and is the brain of topology management.
StreamgateFE service acts as an Apache Helix ᵀᴹ Spectator and listens to topology changes from Apache ZooKeeper ᵀᴹ.
Redis®* and Apache Cassandra® are used for storing messages.
Streamgate service implements the RAMEN Protocol on Netty and has all the logic related to handling connections, messages, and storage.
Here is a quick overview of the client’s implementation:Īs a quick recap from part 1, here is how the server side has been implemented: This will help in understanding the changes that we made to enable gRPC at each layer.Įxisting SSE-based Architecture Client Side In this section we will talk about the reasons to move RAMEN ( Real-time Asynchronous MEssaging Network) from SSE (Server-Sent Events) to gRPC as the protocol for delivering messages.īefore jumping into that let’s have a quick look at how we built RAMEN using SSE as the underlying protocol. This blog post will cover how we changed our protocol from Server Sent Events (HTTP1.1) to gRPC-based bidirectional streaming (QUIC/HTTP3), the challenges we faced, the final results, and some key learnings. We use our push platform to deliver these messages that power the real-time user experiences as described in our previous post, which we strongly recommend that you review to learn about the details of the architecture before proceeding.
#Sequence diagram lucidchart drivers#
(See the below screenshot).Īfter generating the Class Diagram, you can export the same in various formats like png,gif,jpeg etc.In our last blog post we talked about how we went from polling for refreshing the app to a push-based flow to build our app experience.Īll our apps need to be synced with real-time information, whether it’s through pickup time, arrival time, and route lines on the screen, or nearby drivers when you open the app. After opening test.ucls file, you can drag and drop the java classes and plugin will automatically generate Class Diagram for you. Now you can see test.ucls file inside project src folder. Select the project source folder and provide file name for the UML Class DIagram (See the below screenshot). To create a new Class diagram select File > New > Other and select ObjectAid UML Diagram wizard (See the below screenshot). Generate Class Diagram Using Eclipse Plugin
#Sequence diagram lucidchart install#
Then select the ObjectAid class diagram plugin it is a free tool, Sequence diagram plugin requires a valid licence, click next and accept the license details, it will install the ObjectAid plugin for generating class diagramĪfter install, you can configure ObjectAid from eclipse, Window->Preferences->Java->ObjectAid->Class Diagram
#Sequence diagram lucidchart update#
You can install the ObjectAid UML Explorer Eclipse plugin using Eclipse update manager from the following linksįor Installing ObjectAid Plugin from eclipse, select Help-> Install New Software Then click add, then provide Name and Location according to the following screenshot
0 notes
Text
23 notes
·
View notes
Text
me making my 507th set of relational schemas, dependency diagrams & crow's foot ERDs in the same goddamn lucidchart document that now takes a full 3 minutes to load

2 notes
·
View notes
Text
I finally decide to plan my visual novel and use a diagram so I know what how the game will flow. I used Lucidchart (Android app) and enjoyed it very much, bad idea. I got to the 60 object limit, and I didn't know that it had a limit so I got confused. Once I figured it out I went into a frenzy of sadness, disappointment and rage.
Please give me alternatives that have the same feel as Lucidchart for android. As long as it functions on Android, I don't care if it's web or app. Please, I need help 😭 (Apk links are also much appreciated)
2 notes
·
View notes
Text
Entity Relationship Diagram (ERD)
Sekarang ada banyak bergerak informasi dalam database, dan memahami berapa banyak elemen database berinteraksi satu sama lain bisa sulit dipahami. Insinyur membutuhkan cara visual untuk memahami bagaimana semua elemen yang terpisah terkait satu sama lain dan bagaimana mereka bekerja bersama. Untuk menunjukkan ini, mereka membangun Entity Relationship Diagram. Mari kita bicara tentang bagaimana Anda akan melakukannya membuat diagram ER ini. Bisa menggambar dengan pena dan kertas, tapi akan lebih mudah menggunakan alat diagram. Hari ini saya akan menggunakan alat yang mudah digunakan yang disebut Lucidchart. Sebelum kita bisa membuat ERD yang sebenarnya, kita harus lebih memahami komponen individu dari Diagram Hubungan Entitas. Dan ini akan dimulai dengan entitas, yang merupakan objek seperti a orang, tempat, atau hal yang akan dilacak dalam database. Misalnya kasus ketika membeli sesuatu di Amazon, seperti nuggie yaitu suatu entitas bisa menjadi pelanggan, pesanan, dan terakhir, kita tidak bisa melupakan Snuggies kita, produknya. Sekarang masing-masing entitas ini akan memiliki apa yang kita sebut atribut, yang merupakan berbagai sifat atau sifat. Dalam hal ini, di bawah entitas pelanggan, kami memiliki ID pelanggan, nama depan, nama belakang, jalan, kota, kode pos, dan telepon. Sangat penting untuk diingat bahwa entitas dalam database akan menjadi baris, dan atribut-atribut dalam database akan digambarkan sebagai kolom. Sekarang kita memiliki entitas yang berbeda dan atribut yang berbeda di sini, tapi sekarang mari kita bicara tentang hubungan itu yang ada di antara entitas-entitas yang berbeda ini. Hubungan menggambarkan bagaimana ini entitas akan berinteraksi satu sama lain. Dan melakukannya dengan menggambar garis di antara mereka. Jadi ketika saya menarik garis di antara elemen-elemen khusus ini, Saya menunjukkan bahwa ada beberapa semacam interaksi atau koneksi dalam beberapa cara. Sekarang kita memiliki hubungan kita di tempat, Anda akan melihat beberapa notasi funky yang melekat pada garis-garis ini. Ini, pada kenyataannya, disebut kardinalitas, yang selanjutnya mendefinisikan hubungan dalam konteks numerik, khususnya dalam minimum dan maksimum. Jadi misalnya di sini di sisi kanan ini, Anda dapat melihat beberapa jenis kardinalitas berbeda kami ada di ER Diagram. Kami punya satu, banyak, satu dan hanya satu, nol atau satu, satu atau banyak, nol atau banyak. Jangan takut jika ini tidak cukup masuk akal. Kami akan berjalan melalui beberapa contoh. Jadi mari kita bicara tentang hubungan dan kardinalitas yang ada antara pelanggan dan pesanan. Cara terbaik untuk melakukan ini adalah dengan memikirkannya secara logis. Dalam kasus Snuggies, Anda tidak bisa hanya memiliki satu Snuggie. Tetapi itu juga bisa menjadi produk dari banyak pesanan. Jadi kita akan menggunakan nol atau banyak ini notasi pada diagram kami. Jadi sekarang Anda telah membangun seluruh diagram ER Anda. Dan kami telah membangun sesuatu yang kecil di sini, tetapi sekarang Anda memiliki fondasi dan kerangka itu Anda perlu membangun kompleks, lengkap Diagram Hubungan Entitas. Meskipun ini bisa terasa sedikit berlebihan pada awalnya, pastikan untuk berjalan sendiri melalui logika itu, dan Anda akan bisa membangun seluruh, ERD kompleks. Anda juga akan melihat pada diagram ini bahwa ada beberapa objek asing seperti PK dan FK, yang mengacu pada kunci primer dan kunci asing. Sesuatu yang kita akan menjadi meliputi dalam video segera, jadi tetaplah disini. Selain itu, jika Anda perlu benar-benar memiliki diagram ini menjadi database siap, Anda dapat menggunakan impor dan ekspor fitur dari Lucidchart memiliki semuanya yang dilakukan secara otomati. Menggunakan fitur ekspor, Anda akan memiliki kode itu dibuat secara otomatis untuk Anda dan diekspor ke sistem manajemen basis data kamu menggunakan.
Kita punya entitas untuk Pelanggan, Pesanan, dan Produk dan kardinalitas yang benar antara. Anda akan melihat bahwa di sebelah setiap atribut adalah kata "kunci." Kolom ini ada di sini sehingga kita dapat membedakan atribut tertentu sebagai kunci primer atau kunci asing. Mari kita mulai dengan kunci primer. Setiap entitas dalam diagram mewakili sebuah tabel di dalam basis data. Lebih baik jika bisa menggunakan satu pemicu untuk membedakan dengan cepat dan akurat siapa yang ada di daftar besar ini, di situlah kunci utama masuk. Kunci utama adalah atribut (atau bidang) itu secara unik mengidentifikasi setiap rekaman dalam tabel tertentu. Dan karena satu atribut dapat dicapai semua itu, masuk akal bahwa akan membutuhkan hanya satu kunci utama per entitas. Jadi untuk tabel pelanggan ini, kunci utama akan menjadi nilai yang membuatnya begitu pelanggan ini tidak seperti pelanggan lainnya di meja kami. Agar salah satu dari atribut ini memenuhi syarat, ada beberapa aturan. Pertama, kunci primer harus unik, jadi bahwa itu mengidentifikasi hanya satu catatan di tabel. Kedua, itu harus tidak pernah berubah. Akan sangat sulit untuk menjaga akurasi catat pelanggan jika menggunakan atribut yang mungkin tidak konsisten. Dan akhirnya, kunci utama harus tidak pernah-nol. Itu hanya berarti tidak akan ada kesempatan di mana nilainya dapat dibiarkan kosong. Jadi itu bukan catatan unik dalam tabel ini. Anda bahkan tidak dapat mengandalkan alamat karena Anda dapat memiliki dua pelanggan terpisah yang hidup di tempat yang sama. Atau pelanggan bisa pindah dan kemudian alamat mereka perubahan. Jadi alamat tidak unik dan merusak aturan "tidak pernah berubah." Hal yang sama untuk nomor telepon. Sehingga meninggalkan kami dengan ID pelanggan. Sesuai desain, segala jenis ID biasanya diprogram untuk kenaikan untuk setiap tambahan ke tabel. Pelanggan ini mendaftar dan ditugaskan sebagai Pelanggan ID 30016. Kemudian pelanggan ini mendaftar dan ditugaskan 30017, dan seterusnya. Anda dapat melihat bagaimana ID Pelanggan melewati semua aturan kami. Jadi kita akan menjadikan itu kunci utama kita. Inilah sesuatu yang menarik untuk dipikirkan sementara kita berada di topik ini. Kunci primer tidak pernah bisa berubah. Begitulah cara situs menghubungkan Anda, situs pelanggan, ke akun Anda. Mereka tidak membiarkan Anda mengubah kunci utama itu karena sistem mereka bergantung padanya untuk catatan yang akurat. Atau bagaimana saat Anda menyiapkan yang baru akun dan Anda mencoba membuat nama pengguna tetapi dapatkan pesan kesalahan yang mengatakan bahwa itu sudah diambil. Sekali lagi, ini bisa terjadi karena nama pengguna sedang digunakan sebagai kunci utama, dan kunci utama tidak dapat diulang. Masing-masing kunci utama ini unik, tidak pernah berubah, dan tidak pernah-nol. Jadi mungkin memperhatikan bahwa saya menggunakan diagram perangkat lunak untuk memodifikasi ERD ini, tetapi ketahuilah bahwa konsep yang sama berlaku jika menggambarnya di atas pena dan kertas. Tetapi jika Anda ingin membuat segalanya lebih mudah sendiri, Anda dapat mendaftar untuk pembuatan diagram perangkat lunak yang saya gunakan. Entitas pesanan hanya mereferensikan ID Pelanggan dari entitas Pelanggan. Itu menjadikannya kunci asing di sini, jadi kita akan tandai seperti itu. Dan kita dapat lebih jauh menunjukkan hubungan ini dalam diagram kami dengan menyesuaikan hubungan ini untuk berbaris dengan kunci utama dan asing. Lucidchart memungkinkan Anda untuk mengekspor diagram dan itu akan secara otomatis menghasilkan kode yang Anda butuhkan untuk basis data Anda. Anda dapat melihat perintah tabel di sini dengan entitas itu referensi. Berikut adalah atribut untuk entitas ini dengan parameter data yang kami atur. Dan itu juga mencatat utama dan asing kita kunci. Kemudian Anda tinggal menentukan manajemen basis data yang mana sistem yang Anda gunakan, salin kodenya, dan tempel.
2 notes
·
View notes
Text
Building a Strong Business Analyst Portfolio: Showcasing Your Expertise
A well-crafted portfolio is a powerful tool for business analysts, helping them showcase their expertise, skills, and experience to potential employers or clients. It serves as a visual and comprehensive representation of your abilities and accomplishments, making you stand out in a competitive job market. Whether you're a seasoned professional or just starting your career after completing a business analyst course, building a strong portfolio can significantly enhance your career prospects.
Here are some essential strategies for creating a business analyst portfolio that effectively highlights your expertise:
1. Include Real-World Projects
One of the most important elements of a business analyst portfolio is real-world projects that demonstrate your practical skills. If you've completed a business analysis course, leverage the case studies, capstone projects, or internships you worked on as part of the curriculum. These projects provide tangible evidence of your ability to analyze data, gather requirements, and develop solutions. Highlight the business challenges you addressed, the methodologies you used, and the outcomes you achieved.
If you’re early in your career and haven’t worked on many projects, consider taking on freelance or volunteer work to build your portfolio.
2. Highlight Core Competencies
A successful business analyst portfolio should emphasize your core competencies. These include skills such as:
- Requirement gathering and analysis: Demonstrate how you effectively elicited, documented, and managed requirements from stakeholders.
- Data analysis and interpretation: Showcase your ability to analyze data and provide actionable insights that inform business decisions.
- Process improvement: Include examples where you've used process mapping or modeling to streamline business operations or reduce inefficiencies.
- Communication and collaboration: Business analysts often bridge the gap between technical teams and stakeholders, so showcasing your communication and teamwork skills is crucial.
For those pursuing a business analyst course, integrating coursework that enhances these competencies will enrich your portfolio.
3. Use Visual Aids and Tools
To make your portfolio more engaging and informative, include visual aids that represent your analytical skills. For example, add process flow diagrams, use case diagrams, business models, or Gantt charts to visually represent your work. This not only makes your portfolio more dynamic but also demonstrates your proficiency with business analysis tools like Microsoft Visio, Lucidchart, or Jira.
Visual aids also help employers quickly understand the complexity of the problems you’ve solved and the solutions you’ve delivered.
4. Showcase Certifications and Continuous Learning
Certifications and additional courses can differentiate you from other candidates. If you have completed a business analyst course or obtained certifications like Certified Business Analysis Professional (CBAP) or PMI-PBA, include them prominently in your portfolio. These credentials affirm your commitment to continuous learning and professional development. Employers are more likely to trust your abilities when they see that you’ve invested in expanding your skill set.
5. Quantify Your Achievements
Quantifying your achievements adds credibility to your work. Wherever possible, include metrics to demonstrate the impact of your contributions. For instance, mention how you helped reduce operational costs by a certain percentage, improved process efficiency, or contributed to revenue growth through strategic analysis. Numbers provide a concrete sense of the value you’ve brought to past projects and organizations.
6. Tailor Your Portfolio to Your Audience
Depending on your career goals, you may want to tailor your portfolio for specific roles or industries. For example, if you're aiming for a role in financial analysis, emphasize projects where you worked on data analytics, financial forecasting, or risk analysis. Similarly, for those targeting roles in IT or healthcare, adjust the focus of your portfolio accordingly to highlight relevant experience.
Conclusion
Building a strong business analyst portfolio is essential for showcasing your expertise, especially in today’s competitive market. Whether you're a recent graduate from a business analysis course or an experienced professional, your portfolio should highlight real-world projects, core competencies, visual tools, certifications, and quantifiable achievements. A well-rounded portfolio not only demonstrates your skills but also helps potential employers or clients see the value you bring to their organization.
Business name: ExcelR- Data Science, Data Analytics, Business Analytics Course Training Mumbai
Address: 304, 3rd Floor, Pratibha Building. Three Petrol pump, Lal Bahadur Shastri Rd, opposite Manas Tower, Pakhdi, Thane West, Thane, Maharashtra 400602
Phone: 09108238354
Email: [email protected]
0 notes
Text
What Are The Tools That Are Used For UI & UX Design?
Collaboration Tools-
The continuous teamwork between designers and developers can be established with these tools.
Examples:
InVision and MarvelIt is a must for both beginners and professionals to have a deep understanding of the tools in the industry. The same holds good for UI and UX as well. But, before I let you know the most preferred tools for UI and UX, let us first understand the different types of tools.
In view of the above statement, we have prototyping tools, wireframing tools, UI Design tools and collaboration tools.
Prototyping Tools-
These tools allow you to create interactive mockups along with design prototypes. They allow you to test and iterate ideas before launch.
Examples:
Figma, Adobe XD, InVision and Marvel
Wireframing Tools-
Now, wireframing tools help designers create low fidelity mockups and blueprints of the user interface. The focus is on the layout, structure and information architecture.
Examples:
Balsamiq, Lucidchart and Miro
UI Design Tools
If it is about creating high fidelity mockups, visual interfaces or user interfaces then UI Design tools come into picture.
Examples:
Sketch, Adobe XD and Figma
If you want to build your portfolio or gain a more detailed overview of UI and UX tools, you can also benefit from institutes that offer ui ux training online. They offer physical classes as well.
0 notes
Text
The Ultimate Guide to Choosing the Right Tool for AV Layouts
In today's fast-paced world, having the right tools for designing audio-visual (AV) layouts is critical for ensuring successful and efficient installations. Whether you're an AV professional, a corporate event planner, or a DIY enthusiast, the right tool can make a significant difference in the quality and effectiveness of your AV setup. This comprehensive guide will explore the importance of choosing the right tools for AV layouts, highlight various types of AV diagram software, and discuss how AV system integration software can enhance your design process.

The Importance of Choosing the Right Tool for AV Layouts
Selecting the right tool for AV layouts is essential for several reasons. Here are some key points to consider:

Enhanced Visualization
The right AV diagram software allows you to visualize your AV setup clearly. By creating accurate diagrams, you can identify potential issues, optimize space, and ensure that all components work together seamlessly.
Improved Communication
Whether you're working with a team or presenting your design to clients, having a well-documented AV layout improves communication. Clear diagrams help convey your ideas effectively and ensure everyone is on the same page.
Efficient Project Management
Choosing the right tool streamlines your project management process. With features like collaboration, templates, and integration capabilities, you can save time and resources while managing your AV projects more efficiently.
Flexibility and Scalability
Many modern AV design tools offer flexibility and scalability, allowing you to adapt your layouts as project requirements change. This adaptability is crucial in the fast-evolving world of AV technology.
Cost-Effectiveness
Investing in the right AV diagram software can save you money in the long run. By avoiding mistakes and ensuring accurate planning, you can minimize costs associated with equipment purchases and installations.
Future-Proofing Your Design
Using advanced AV system integration software enables you to design layouts that can easily accommodate future upgrades and changes in technology, ensuring your AV setup remains relevant and functional.
Types of Tools for AV Layouts
When choosing the right tool for AV layouts, it's essential to understand the different types of software available. Here are the primary categories of tools you'll encounter:
AV Diagram Software
AV diagram software is specifically designed for creating visual representations of audio-visual systems. These tools allow you to map out your AV components, connections, and layouts.
Key Features to Look For:
Drag-and-Drop Interface: A user-friendly interface that simplifies the creation of diagrams.
Extensive Symbol Libraries: Access to a library of AV-related symbols and icons for accurate representations.
Export Options: The ability to export diagrams in various formats for easy sharing and presentation.
Collaboration Tools: Features that enable real-time collaboration with team members.
Popular AV Diagram Software:
Draw.io (Diagrams.net):
A free online tool that offers an extensive library of shapes and icons for AV diagrams.
Lucidchart: A versatile diagramming tool with templates for audio-visual layouts.
SmartDraw:
A powerful diagramming software with a focus on AV systems and collaboration features.
AV System Integration Software
AV system integration software helps manage and control multiple AV components from a centralized interface. These tools enhance the functionality of your AV layouts and ensure seamless operation.
Key Features to Look For:
Centralized Control: The ability to manage all AV components from one platform.
Automation Capabilities: Features that allow for automated control of AV equipment, enhancing user experience.
Monitoring and Reporting: Tools for monitoring system performance and generating reports.
Scalability: The ability to grow with your AV system as technology evolves.
Popular AV System Integration Software:
Crestron: A leader in AV integration solutions, offering robust control and management features.
AMX: Provides customizable solutions for AV system integration with a user-friendly interface.
Extron: Known for its intuitive control systems and seamless integration capabilities.
3D Modeling Software
For more complex AV layouts, 3D modeling software allows you to visualize your designs in three dimensions. This type of software is particularly useful for large venues or installations where space management is critical.
Key Features to Look For:
3D Visualization: The ability to create realistic 3D models of your AV setup.
Space Planning Tools: Features that help optimize the use of available space.
Rendering Options: The ability to render high-quality visualizations for presentations.
Popular 3D Modeling Software:
SketchUp: A widely used 3D modeling tool that is user-friendly and versatile.
AutoCAD: A professional-grade software for detailed design and architecture.
Blender: An open-source 3D modeling tool with powerful features for visualization.
Project Management Tools
In addition to AV-specific software, project management tools can help you organize and track your AV projects effectively. These tools enable collaboration, task assignment, and deadline management.
Key Features to Look For:
Task Management: The ability to create and assign tasks to team members.
Collaboration Features: Tools that facilitate communication and collaboration among team members.
Timeline Tracking: Features for tracking project timelines and deadlines.
Popular Project Management Tools:
Trello: A visual project management tool that uses boards and cards for task organization.
Asana: A comprehensive project management platform with robust features for collaboration.
Monday.com: A flexible tool that allows for customized project management workflows.
Factors to Consider When Choosing the Right Tool
When selecting the right tool for your AV layouts, consider the following factors to ensure you make the best choice for your needs:
Ease of Use
The tool you choose should have an intuitive interface that makes it easy to create and modify AV layouts. Look for software that offers tutorials, templates, and user support.
Compatibility
Ensure that the software you select is compatible with other tools and systems you may be using. This compatibility will facilitate a smooth workflow and integration of different components.
Cost
Consider your budget when choosing an AV diagram software or integration tool. While some software is free, others may require a subscription or one-time payment. Make sure to evaluate the cost relative to the features offered.
Features and Functionality
Identify the specific features you need for your AV layouts and ensure that the software you choose meets those requirements. Prioritize tools that offer the functionality necessary for your projects.
Collaboration Capabilities
If you work in a team environment, choose a tool that supports real-time collaboration and communication. This feature will enhance teamwork and streamline the design process.
Customer Support
Consider the level of customer support offered by the software provider. Having access to responsive support can be invaluable when you encounter issues or have questions.
Scalability
Choose software that can grow with your needs. As your AV projects become more complex or your requirements change, having scalable tools will allow for easy adaptations.
Popular AV Diagram Software Compared
To help you make an informed decision, let's compare some of the most popular AV diagram software options available:
Draw.io (Diagrams.net)
Pros: Free to use, extensive shape library, cloud integration, easy-to-use interface.
Cons: Limited advanced features compared to paid options.
Lucidchart
Pros: User-friendly, real-time collaboration, extensive templates, integration with other tools.
Cons: Limited functionality in the free version, subscription required for advanced features.
SmartDraw
Pros: Comprehensive features for AV layouts, strong collaboration tools, cloud-based.
Cons: Higher cost compared to other options, may be complex for beginners.
Microsoft Visio
Pros: Professional-grade software, extensive capabilities for complex diagrams, strong integration with Microsoft Office.
Cons: Higher cost, requires a subscription.
SketchUp
Pros: Powerful 3D modeling capabilities, user-friendly interface, extensive library of models.
Cons: Steeper learning curve for advanced features, limited free version.
User Queries and Answers
What is the best AV diagram software for beginners?
Draw.io is an excellent choice for beginners due to its user-friendly interface and free access.
Can I use AV diagram software for 3D modeling?
While traditional AV diagram software focuses on 2D layouts, tools like SketchUp specialize in 3D modeling and visualization.
How do I choose the right AV system integration software?
Consider factors such as centralized control, automation capabilities, and scalability when selecting AV system integration software.
Are there free options for AV diagram software?
Yes, tools like Draw.io and Lucidchart offer free versions with essential features for creating AV layouts.
What features should I look for in AV diagram software?
Look for features such as extensive symbol libraries, collaboration tools, export options, and an intuitive interface.
How can I ensure my AV layouts are scalable?
Select software that allows for easy modifications and additions, and prioritize modular components in your AV design.
Can I collaborate with my team using AV diagram software?
Yes, many AV diagram software options, such as Lucidchart, support real-time collaboration for team projects.
What is the benefit of using AV system integration software?
AV system integration software streamlines the management of multiple AV components, ensuring seamless operation and enhancing user experience.
Conclusion
In conclusion, selecting the right tools for planning and designing audio-visual (AV) layouts is essential for achieving optimal results in any AV installation. The importance of using effective AV diagram software cannot be overstated, as it facilitates clear visualization, enhances communication, and streamlines project management. By leveraging the right tools, you can ensure that your AV setups are not only functional but also aesthetically pleasing and tailored to meet the specific needs of your environment.
With a wide array of options available, from user-friendly tools like Draw.io and Lucidchart to more advanced solutions such as SketchUp and various AV system integration software, you have the flexibility to choose what best fits your requirements and budget. As you explore these tools, consider factors such as ease of use, compatibility, cost, and collaboration capabilities to ensure you select the software that aligns with your goals.
In a rapidly evolving technological landscape, the ability to create scalable and adaptable AV layouts is crucial. By investing time in understanding the right tools for your projects, you can future-proof your AV installations and stay ahead of industry trends.
Ultimately, whether you are a seasoned AV professional, a corporate event planner, or a DIY enthusiast, choosing the right tool for your AV layouts will empower you to create high-quality, efficient, and impactful audio-visual experiences. Embrace the power of these tools, and let your creativity and technical skills shine in your next AV project!
0 notes
Text

is lucidchart trying to shame me for not using it
0 notes
Text
Best Data Modeling Tools: Which One is Right for Data Analysis?

Data modeling is a crucial aspect of data analysis, as it lays the foundation for organizing, managing, and utilizing data effectively. The right data modeling tool can streamline this process, making it easier to design and manage databases, understand relationships between data, and ultimately drive insights. With numerous data modeling tools available, choosing the right one can be challenging. This article will explore some of the best data modeling tools and help you determine which one is right for your data analysis needs.
What is Data Modeling?
Data modeling is the process of creating a visual representation of a system or database. It involves defining the structure of data, relationships, constraints, and more. Data modeling helps organizations to understand their data better, leading to more informed decision-making. It’s a critical step in database design, ensuring that data is stored efficiently and can be retrieved easily when needed.
Why is Data Modeling Important?
Data modeling plays a vital role in the accuracy and efficiency of data analysis. It helps in:
Understanding Data Relationships: Modeling reveals how different data elements interact with each other.
Improving Data Quality: Proper data modeling can help in maintaining data integrity and consistency.
Facilitating Data Integration: It aids in integrating data from different sources, making it accessible for analysis.
Enhancing Communication: A clear model makes it easier for stakeholders to understand complex data structures.
Top Data Modeling Tools for Data Analysis
1. ER/Studio
ER/Studio is a powerful tool for enterprise data modeling. It offers a range of features such as reverse engineering, forward engineering, and collaboration tools. ER/Studio is known for its ease of use and robust set of functionalities, making it a favorite among large enterprises. Its ability to support complex data models and integrate with various database management systems makes it an excellent choice for large-scale data analysis projects.
Key Features:
Comprehensive data lineage and impact analysis.
Collaboration capabilities for team-based projects.
Support for multiple database platforms.
2. IBM InfoSphere Data Architect
IBM InfoSphere Data Architect is another leading data modeling tool, particularly suited for large organizations. It provides a collaborative environment for designing and managing data models. With robust integration with IBM’s other data management products, this tool is ideal for businesses already invested in IBM’s ecosystem.
Key Features:
Data integration and lifecycle management.
Metadata management and version control.
Automated database design and optimization.
3. Oracle SQL Developer Data Modeler
Oracle SQL Developer Data Modeler is a free tool that offers a wide range of features for designing, creating, and analyzing data models. It supports various data modeling techniques, including logical, relational, and physical data models. Its seamless integration with Oracle databases makes it an excellent choice for organizations using Oracle products.
Key Features:
Support for different data modeling methodologies.
Integration with Oracle databases for smooth operations.
Import and export capabilities for different file formats.
4. Lucidchart
Lucidchart is a versatile diagramming tool that also serves as a capable data modeling tool. It’s cloud-based, making it accessible from anywhere, and its intuitive interface allows users to create data models with ease. While it may not have the advanced features of some other tools, it’s perfect for smaller teams or those looking for a simple solution.
Key Features:
Easy-to-use drag-and-drop interface.
Real-time collaboration for teams.
Extensive template library for quick model creation.
5. Toad Data Modeler
Toad Data Modeler is a comprehensive tool that supports a variety of database platforms. It offers a range of functionalities, including reverse engineering, forward engineering, and model validation. Toad is well-known for its user-friendly interface and powerful automation features, making it suitable for both beginners and experienced users.
Key Features:
Multi-database support.
Automated model creation and optimization.
Advanced data analysis and reporting tools.
Choosing the Right Tool for Your Needs
Selecting the right data modeling tool depends on several factors, including your organization’s size, the complexity of your data models, your existing technology stack, and your budget.
For Large Enterprises: Tools like ER/Studio and IBM InfoSphere Data Architect are ideal, offering robust features and scalability.
For Oracle Users: Oracle SQL Developer Data Modeler is a natural fit, providing seamless integration with Oracle databases.
For Small Teams: Lucidchart offers an easy-to-use, cloud-based solution that’s perfect for smaller teams or less complex projects.
For Versatility: Toad Data Modeler supports multiple databases and offers a balance between ease of use and advanced features.
Conclusion
Choosing the right data modeling tool is crucial for effective data analysis. Each tool has its strengths and is designed to cater to different needs. By understanding your specific requirements and the features offered by each tool, you can select the one that best aligns with your data analysis goals. Whether you need a tool for a large enterprise or a simple solution for a small team, the right data modeling tool can significantly enhance your data management and analysis capabilities.
0 notes
Text
How to Implement an Effective End-to-End Process in Your Business
In today’s fast-paced business environment, having a well-defined end-to-end process is crucial for maintaining efficiency and ensuring consistent quality. Implementing an effective end-to-end process involves integrating all stages of a workflow from start to finish, streamlining operations, and enhancing overall productivity. Here’s a comprehensive guide to implementing such a process in your business:

1. Define Clear Objectives and Goals
Before you can design an end-to-end process, it’s essential to understand what you want to achieve. Clearly define your business objectives and goals. These should be specific, measurable, achievable, relevant, and time-bound (SMART). For example, if your goal is to improve customer satisfaction, your end-to-end process might focus on enhancing customer service and support mechanisms.
2. Map Out Existing Processes
Start by mapping out your current processes. This involves documenting each step involved in delivering a product or service, from initial customer contact to final delivery and follow-up. Use process mapping tools like flowcharts or diagrams to visualize workflows and identify areas of improvement. Tools such as Microsoft Visio, Lucidchart, or even simpler options like Google Drawings can be effective.
3. Identify Bottlenecks and Inefficiencies
Once you have a clear map of your processes, analyze it to identify bottlenecks and inefficiencies. Look for stages where delays or errors frequently occur, and assess whether these issues are due to outdated practices, resource constraints, or communication breakdowns. For instance, if your order fulfillment process is slow, investigate whether it's due to manual data entry errors or delays in inventory management.
4. Design an Optimized Process
With a thorough understanding of your current processes and their weaknesses, design an optimized end-to-end process. This design should address identified bottlenecks and focus on streamlining operations. Incorporate best practices, automation, and technology where applicable. For example, implementing an automated inventory management system can reduce manual errors and speed up order processing.
5. Leverage Technology and Tools
Utilize technology to enhance your end-to-end process. There are numerous tools available that can help automate tasks, improve communication, and provide better data insights. Consider using project management software like Asana or Trello to track progress, CRM systems like Salesforce to manage customer interactions, and ERP systems like SAP for comprehensive business management.
6. Engage and Train Your Team
Successful implementation of a new process relies heavily on your team’s engagement and understanding. Communicate the changes clearly and provide training to ensure everyone is on board and equipped with the necessary skills. Regularly update your team on progress and encourage feedback to refine the process further.
7. Monitor and Measure Performance
After implementing the new process, continuously monitor its performance. Set up key performance indicators (KPIs) to measure success. These could include metrics like process cycle time, error rates, or customer satisfaction scores. Use these metrics to assess whether the new process meets your objectives and to identify areas for further improvement.
8. Adjust and Improve Continuously
An end-to-end process is not static; it requires ongoing adjustments and improvements. Regularly review the process based on performance data and feedback. Be prepared to make iterative changes to address emerging challenges and capitalize on new opportunities. Continuous improvement methodologies like Six Sigma or Lean can be useful in this regard.
9. Document and Standardize
Ensure that the new process is well-documented and standardized across the organization. Create clear process documentation, including workflows, roles, and responsibilities, to maintain consistency. This documentation will serve as a reference for training new employees and for ongoing process management.
youtube
10. Communicate Changes Effectively
Effective communication is key to the success of any new process. Ensure that all stakeholders, including employees, customers, and suppliers, are informed about the changes and understand how they will be impacted. Clear communication helps in gaining support and ensuring smooth transitions.
Implementing an effective end-to-end process in your business requires careful planning, execution, and ongoing refinement. By following these steps, you can streamline operations, improve efficiency, and drive better outcomes for your business. Embrace the challenge of process optimization, and your organization will be well-positioned to adapt and thrive in an ever-evolving marketplace.
SITES WE SUPPORT
Financial Workflow - Wix
SOCIAL LINKS
Facebook
Twitter
LinkedIn
0 notes
Last Seen Blogs

creative-view
creative-view

merveyagan
merve

dcbooks-blog
DC Books

caught-with-a-minor
Caught Out!

adrekiy0
🫀