#Recover SQL database
Explore tagged Tumblr posts
Visit Tumblr Blog
Explore Tumblr blogs with no restrictions, modern design and the best experience.
Last Seen Tumblr Blogs


Fun Fact
Post activity is at the highest at 4:00 pm EDT; notes peak at 10:00 pm EDT.
Note
how does the element stuff work in you system? Feel free to answer privately or not answer at all!
Thought I'd done a post on this already, I'll assume I didn't because I'm always looking for a way to talk about this xD
An Introduction To EleWe »
EleWe is our elements and weapons system, it runs off ten elements and ten weapons - so it has a hundred possible entries - and because only one member per entry, it also runs off Phases.
Phases are a group of a hundred members, a Phase has to be completely filled before a new one opens. Phase III is actually just about to open, and we pray this does not break our database, which was only designed for the first two Phases, because we didn't think we'd exceed two hundred members. (It shouldn't, right? O-o) (I'm not bad at coding, I'm sure it won't-)
The Database »
Just a small section on the database. Our database runs by having all possible combinations as an entry, and having columns for each Phase. When searching the database, we look for things like "element in (x)" and "phase x is empty" (that's in English, I'm not going to write SQL here lmao)
Elements »
Okay so, elements. As I said, there's ten total elements, these are:
Cosmica | Dark
Sonia | Sound
Hydria | Water
Glaciera | Ice
Flora | Plants
Aria | Air
Lumina | Light
Terra (prev Eartha) | Earth
Inferna | Fire
Electria | Electricity
Each one has reactions to other elements. I used to have a list, no clue where it went (probably died when my pc corrupted), so I'll do this from memory (o-o;)
Cosmica + Lumina = Detonate
Sonia + Aria = Diffuse
Sonia + Electria = Boost
Hydria + Glaciera = Freeze
Hydria + Aria = Storm
Hydria + Flora = Grow
Hydria + Inferna = Vaporise
Hydria + Electria = Conduct
Glaciera + Aria = Blizzard
Glaciera + Inferna = Melt
Glaciera + Electria = Conduct
Flora + Terra = Sprout
Flora + Inferna = Burn
Flora + Electria = Burgeon
Aria + Inferna = Stoke
This was originally designed with The Kansukki Project in mind.
This list (with the reaction names) was only ever used in The Kansukki Project, whereas The Kīara'h Project just uses the reactions (have some random trivia)
Weapons »
As also said in the intro, there are ten weapons! These are: (listed with general classification and explanation if needed)
Axe [Short Range]
Bow [Long Range]
Crossbow [Mid Range]
Combat [Short Range] | Hand to hand combat
Gem [Mid Range] | Magic
Knife [Short Range - Long Range] | Depending on if you can throw / previously throwing knives
Polearm [Mid Range] | Death stick :)
Scythe [Mid Range]
Staff [Long Range] | Long ranged gem
Sword [Mid Range]
There were originally eight weapons but apparently we got OCDed ¯\_(ツ)_/¯ (more trivia)
So.. How Does It Work? (And Why?) »
Each member is assigned one element and weapon combination, usually this is based on their past. Each member can only specialise in that element.
(except if they have a copycat ability, such as Amethyst who studied more than one element and use their Sonia to mimic other's elements)
For weapons, it's a little different. Most members only have one, and although some members may know other weapons, they only specialise in one.
Mostly, these will be used within stories and headspace, however some members may be able to wield their weapons in the outside world.
Energy »
Another part of EleWe is elemental energy, it lowers by using abilities/powers and when lowering, can cause members to not be able to cast spells, or even, if it gets extremely low, can impact their body and physical/mental energy and can't recover on its own.
(I won't touch on this too much because it's more or less its own thing.)
Technical Notes »
Element reaction names source: an old post we made on The Kansukki Project's server.
If I remember correctly, this is EleWe v6, (technically v5, but I'm calling it v6, because it will be soon with Phase III)
Most of this was originally done for The Kansukki Project, not The Kīara'h Project, but it has since been adapted.
Kuro from MeD wrote this post (and is very unqualified to write this post)
Hope this answers your ask? Lol
#Kīara'h Asks#Kīara'h Asks : drowntowns#The Kīara'h Organisation#Kīara'h [MeD] Kuro posts#endo safe#pro endo#endo friendly#please send asks#i need more things to do lol
11 notes
·
View notes
Text
Don't Let SQL Database Data Loss Disrupt Your Business! Get Professional Recovery Now!
3 notes
·
View notes
Text
Dairy Farm Shop Management System Using PHP and MySQL

The Dairy Farm Shop Management System (DFSMS) is a web based application that can be accessed over the web. This system can be used to automate the workflow of dairy shop and their invoices.
The project has been planned to be having the view of distributed architecture, with centralized storage of the database. The application for the storage of the data has been planned. Using the constructs of MySQL Server and all the user interfaces has been designed using the PHP technologies. The database connectivity is planned using the “MySQL Connection” methodology. The standards of security and data protective mechanism have been given a big choice for proper usage. The application takes care of different modules and their associated reports, which are produced as per the applicable strategies and standards that are put forwarded by the administrative staff.
Click: https://phpgurukul.com/dairy-farm-shop-management-system-using-php-and-mysql/
Project Modules
DFSMS is a web-based application which manages the products of dairy shop. It has one module i.e. admin who manages all the functions of the dairy shop.
Admin Features :
Dashboard: In this section, admin can see all detail in brief like Total listed categories, companies, products and also see the sales.
Category: In this section, admin can add new categories and edit, delete old categories.
Company: In this section, admin can add new companies and edit, delete old companies.
Product: In this section, admin can add new products and edit old products.
Search: In this section, admin can search for a product then add the product into the cart and generate invoice /receipt.
Invoices: In this section, admin can view all generated invoices/receipts.
Reports: In this section, admin can generate two reports, one is B/w date and another one is for sales.
Admin can also update his profile, change the password and recover the password.
How to run the Dairy Farm Shop Management System Project (DFSMS)
1. Download the zip file
2. Extract the file and copy dfsms folder
3.Paste inside root directory(for xampp xampp/htdocs, for wamp wamp/www, for lamp var/www/html)
4. Open PHPMyAdmin (http://localhost/phpmyadmin)
5. Create a database with name dfsms
6. Import dfsms.sql file(given inside the zip package in SQL file folder)
7.Run the script http://localhost/dfsms
*********************Admin Credential*********************
Username: admin Password: Test@123
PHP Gurukul
Welcome to PHPGurukul. We are a web development team striving our best to provide you with an unusual experience with PHP. Some technologies never fade, and PHP is one of them. From the time it has been introduced, the demand for PHP Projects and PHP developers is growing since 1994. We are here to make your PHP journey more exciting and useful.
Email: [email protected] Website : https://phpgurukul.com
0 notes
Text
How to Drop Tables in MySQL Using dbForge Studio: A Simple Guide for Safer Table Management
Learn how to drop a table in MySQL quickly and safely using dbForge Studio for MySQL — a professional-grade IDE designed for MySQL and MariaDB development. Whether you’re looking to delete a table, use DROP TABLE IF EXISTS, or completely clear a MySQL table, this guide has you covered.
In article “How to Drop Tables in MySQL: A Complete Guide for Database Developers” we explain:
✅ How to drop single and multiple tables Use simple SQL commands or the intuitive UI in dbForge Studio to delete one or several tables at once — no need to write multiple queries manually.
✅ How to use the DROP TABLE command properly Learn how to avoid errors by using DROP TABLE IF EXISTS and specifying table names correctly, especially when working with multiple schemas.
✅ What happens when you drop a table in MySQL Understand the consequences: the table structure and all its data are permanently removed — and can’t be recovered unless you’ve backed up beforehand.
✅ Best practices for safe table deletion Backup first, check for dependencies like foreign keys, and use IF EXISTS to avoid runtime errors if the table doesn’t exist.
✅ How dbForge Studio simplifies and automates this process With dbForge Studio, dropping tables becomes a controlled and transparent process, thanks to:
- Visual Database Explorer — right-click any table to drop it instantly or review its structure before deletion. - Smart SQL Editor — get syntax suggestions and validation as you type DROP TABLE commands. - Built-in SQL execution preview — see what will happen before executing destructive commands. - Schema and data backup tools — create instant backups before making changes. - SQL script generation — the tool auto-generates DROP TABLE scripts, which you can edit and save for future use. - Role-based permissions and warnings — helps prevent accidental deletions in shared environments.
💡 Whether you’re cleaning up your database or optimizing its structure, this article helps you do it efficiently — with fewer risks and more control.
🔽 Try dbForge Studio for MySQL for free and experience smarter MySQL development today: 👉 https://www.devart.com/dbforge/mysql/studio/download.html
1 note
·
View note
Text
Slingshots for a Spider
I recently finished (didn't take the test, I was just stumbling through the course, open mouthed and scared) the ineffable WEB-300: Advanced Web Attacks and Exploitation, from the magnanimous OffSec, which is the preparation course for the Offensive Security Web Expert certification (OSWE). The image is a very cool digital black widow spider, which makes sense, because the course is teaching you how to be an attacker on 'the web'.

As scared as I am of spiders, I am enamored by this course. Enough to stare at it for two years then finally take it and complete it over one grueling year. It covers things like: Blind SQL Injection - setting things up in a program called Burpsuite, to repeatedly try sending various things, then clicking a button, and seeing how a website answers, whether it gives us info or errors (which is more info!)


Authentication Bypass Exploitation - skirting around the steps that websites use to make sure you are who you say you are, like taking a 'reset password' click of a button, knowing some admin's email, and getting a database to spit out the token so we can get to the website to reset the password before the admin.


and Server-Side Request Forgery - making a server (someone else's computer in charge of doing real work instead of messing around with a human) ask its connections and resources to get something for you.

Now I know what you're probably thinking: Holy cow, where to even start? If you're not thinking that, congratulations. If you are, I've the answer: Tools. No spider is eating flies without sensing, lurking, biting... this metaphor to say: No one's doing it by hand with no help.
So what tools are helpful? How do you know what's good, what's useful, what's a dime a dozen, what's only going to do part of what you want versus all of it...

Luckily the fan favorites are famous for a reason. Just about anything you'd need is already downloaded into Kali Linux, which is jam packed with much, much more than the average hacker even needs!
Tools are dependent on what you need to do. For this class we need to inspect web traffic, recover source code, analyze said code of source, and debug things remotely.
Inspecting web traffic covers SSL / TLS and HTTP. SSL is Secure Sockets Layer and TLS is Transport Layer Security. These are literally just protocols (rules! internet rules that really smart people spent a lot of time figuring out) that encrypts traffic (mixes and chops and surrounds your communication, to keep it safe and secure). HTTP is the hypertext transfer protocol, which is another set of rules that figures out how information is going to travel between devices, like computers, web servers, phones, etc.

But do you always follow the rules? Exactly. Even by accident, a lot can fall through the cracks or go wrong. Being able to see *exactly* what's happening is pivotal in *taking advantage* of what's not dotting the i's and crossing the t's.
Possibly the most famous tool for web hacking, and the obvious choice for inspecting web traffic, is Burp Suite. It gathers info, can pause in the middle of talking to websites and connections that usually happen behind the scenes in milliseconds, like manipulating HTTP requests. You can easily compare changes, decode, the list goes on.


Decompiling source code is the one where you could find a million things that all do very specific things. For example dnSpy can debug and edit .NET assemblies, like .exe or .dll files that usually *run*, and don't get cracked open and checked inside. At least not by a normal user. .NET binaries are easier to convert back to something readable because it uses runtime compiling, rather than compiling during assembly. All you have to do is de-compile. It's the difference between figuring out what's in a salad and what's in a baked loaf of bread. One's pretty easy to de-compile. The other, you'd probably not be able to guess, unless you already knew, that there are eggs in it! dnSpy decompiles assemblies so you can edit code, explore, and you can even add more features via dnSpy plugins.


Another type of code objects useful to analyze are Java ARchive or JAR files. Another decompiler that's good for JAR files is JD-GUI, which lets you inspect source code and Java class files so you can figure out how things work.


Analyzing source code is another act that can come with a lot of options. Data enters an application through a source. It's then used or it acts on its own in a 'sink'. We can either start at the sink (bottom-up approach) or with the sources (top-down approach). We could do a hybrid of these or even automate code analysis to snag low-hanging fruit and really balance between time, effort and quality. But when you have to just *look* at something with your *eyes*, most people choose VSCode. VSCode can download an incredible amount of plug ins, like remote ssh or kubernetes, it can push and pull to gitlab, examine hundreds of files with ease, search, search and replace... I could go on!

Last need is remote debugging, which really shows what an application is doing during runtime (when it's running!). Debugging can go step-by-step through huge amalgamations using breakpoints, which can continue through steps, step over a step, step INTO a step (because that step has a huge amalgamation of steps inside of it too, of course it does!), step out of that step, restart from the beginning or from a breakpoint, stop, or hot code replace. And the best part? VSCode does this too!

Remote debugging lets us debug a running process. All we need is access to the source code and debugger port on whatever remote system we happen to be working in.
Easy, right? Only a few tools and all the time in the world... WEB-300 was mostly whitebox application security, research, and learning chained attack methods. For example, you'd do three or seven steps, which incorporate two or four attacks, rather than just one. It's more realistic, as just one attack usually isn't enough to fell a giant. And here there be giants. Worry not: we've got some slingshots now.
The next step is seeing if we can get them to work!

Useful links:
(PortSwigger Ltd., 2020), https://portswigger.net/burp/documentation
(DNN Corp., 2020), https://www.dnnsoftware.com/
(0xd4d, 2020), https://github.com/0xd4d/dnSpy
(ICSharpCode , 2020), https://github.com/icsharpcode/ILSpy
(MicroSoft, 2021), https://docs.microsoft.com/en-us/dotnet/csharp/language-reference/compiler-options/command-line-building-with-csc-exe
(Wikipedia, 2021), https://en.wikipedia.org/wiki/Cross-reference
(Wikipedia, 2019), https://en.wikipedia.org/wiki/Breakpoint
(Oracle, 2020), https://docs.oracle.com/javase/tutorial/deployment/jar/manifestindex.html
(Wikipedia, 2021), https://en.wikipedia.org/wiki/Integrated_development_environment
(Microsoft, 2022), https://code.visualstudio.com/(Wikipedia, 2021), https://en.wikipedia.org/wiki/False_positives_and_false_negatives
(Oracle, 2021), https://docs.oracle.com/javase/8/docs/technotes/guides/jpda/conninv.html#Invocation
0 notes
Text
Fix SQL Database Corruption Fast – Trusted Recovery Experts
0 notes
Text
Real-time Data Processing with Azure Stream Analytics
Introduction
The current fast-paced digital revolution demands organizations to handle occurrences in real-time. The processing of real-time data enables organizations to detect malicious financial activities and supervise sensor measurements and webpage user activities which enables quicker and more intelligent business choices.
Microsoft’s real-time analytics service Azure Stream Analytics operates specifically to analyze streaming data at high speed. The introduction explains Azure Stream Analytics system architecture together with its key features and shows how users can construct effortless real-time data pipelines.
What is Azure Stream Analytics?
Algorithmic real-time data-streaming functions exist as a complete serverless automation through Azure Stream Analytics. The system allows organizations to consume data from different platforms which they process and present visual data through straightforward SQL query protocols.
An Azure data service connector enables ASA to function as an intermediary which processes and connects streaming data to emerging dashboards as well as alarms and storage destinations. ASA facilitates processing speed and immediate response times to handle millions of IoT device messages as well as application transaction monitoring.
Core Components of Azure Stream Analytics
A Stream Analytics job typically involves three major components:
1. Input
Data can be ingested from one or more sources including:
Azure Event Hubs – for telemetry and event stream data
Azure IoT Hub – for IoT-based data ingestion
Azure Blob Storage – for batch or historical data
2. Query
The core of ASA is its SQL-like query engine. You can use the language to:
Filter, join, and aggregate streaming data
Apply time-window functions
Detect patterns or anomalies in motion
3. Output
The processed data can be routed to:
Azure SQL Database
Power BI (real-time dashboards)
Azure Data Lake Storage
Azure Cosmos DB
Blob Storage, and more
Example Use Case
Suppose an IoT system sends temperature readings from multiple devices every second. You can use ASA to calculate the average temperature per device every five minutes:

This simple query delivers aggregated metrics in real time, which can then be displayed on a dashboard or sent to a database for further analysis.
Key Features
Azure Stream Analytics offers several benefits:
Serverless architecture: No infrastructure to manage; Azure handles scaling and availability.
Real-time processing: Supports sub-second latency for streaming data.
Easy integration: Works seamlessly with other Azure services like Event Hubs, SQL Database, and Power BI.
SQL-like query language: Low learning curve for analysts and developers.
Built-in windowing functions: Supports tumbling, hopping, and sliding windows for time-based aggregations.
Custom functions: Extend queries with JavaScript or C# user-defined functions (UDFs).
Scalability and resilience: Can handle high-throughput streams and recovers automatically from failures.
Common Use Cases
Azure Stream Analytics supports real-time data solutions across multiple industries:
Retail: Track customer interactions in real time to deliver dynamic offers.
Finance: Detect anomalies in transactions for fraud prevention.
Manufacturing: Monitor sensor data for predictive maintenance.
Transportation: Analyze traffic patterns to optimize routing.
Healthcare: Monitor patient vitals and trigger alerts for abnormal readings.
Power BI Integration
The most effective connection between ASA and Power BI serves as a fundamental feature. Asustream Analytics lets users automatically send data which Power BI dashboards update in fast real-time. Operations teams with managers and analysts can maintain ongoing key metric observation through ASA since it allows immediate threshold breaches to trigger immediate action.
Best Practices
To get the most out of Azure Stream Analytics:
Use partitioned input sources like Event Hubs for better throughput.
Keep queries efficient by limiting complex joins and filtering early.
Avoid UDFs unless necessary; they can increase latency.
Use reference data for enriching live streams with static datasets.
Monitor job metrics using Azure Monitor and set alerts for failures or delays.
Prefer direct output integration over intermediate storage where possible to reduce delays.
Getting Started
Setting up a simple ASA job is easy:
Create a Stream Analytics job in the Azure portal.
Add inputs from Event Hub, IoT Hub, or Blob Storage.
Write your SQL-like query for transformation or aggregation.
Define your output—whether it’s Power BI, a database, or storage.
Start the job and monitor it from the portal.
Conclusion
Organizations at all scales use Azure Stream Analytics to gain processing power for real-time data at levels suitable for business operations. Azure Stream Analytics maintains its prime system development role due to its seamless integration of Azure services together with SQL-based declarative statements and its serverless architecture.
Stream Analytics as a part of Azure provides organizations the power to process ongoing data and perform real-time actions to increase operational intelligence which leads to enhanced customer satisfaction and improved market positioning.
#azure data engineer course#azure data engineer course online#azure data engineer online course#azure data engineer online training#azure data engineer training#azure data engineer training online#azure data engineering course#azure data engineering online training#best azure data engineer course#best azure data engineer training#best azure data engineering courses online#learn azure data engineering#microsoft azure data engineer training
0 notes
Text
How to Recover Corrupt SQL Database – Step-by-Step Guide!
Learn the best methods to recover a corrupt SQL database. Step-by-step guide on restoring SQL Server MDF & NDF files safely.
https://www.techchef.in/database-recovery/
0 notes
Text
Deep dive into restoring data and disaster recovery capabilities in Snowflake.

1. Introduction
Data loss can occur due to accidental deletions, corruption, system failures, or cyberattacks. In cloud-based data warehouses like Snowflake, having a well-structured disaster recovery (DR) plan is critical for business continuity.
Snowflake provides built-in data restoration features that help organizations recover from failures efficiently, including:
Time Travel for short-term historical data recovery.
Fail-Safe for emergency last-resort data retrieval.
Replication and Failover to ensure availability across regions/clouds.
In this deep dive, we will explore these capabilities and best practices for implementing a robust DR strategy in Snowflake.
2. Snowflake’s Data Restoration and Disaster Recovery Features
a. Time Travel: Recovering Historical Data
Time Travel allows users to access past versions of data or even restore deleted objects. This is useful for:
Undoing accidental deletions or updates
Comparing historical data versions
Restoring dropped tables or schemas
How Time Travel Works
Snowflake retains historical data based on the table type and account edition:
Standard Edition: Retention up to 1 day
Enterprise & Higher Editions: Retention up to 90 days
Using Time Travel
Querying Historical Data
sql
SELECT * FROM my_table AT (TIMESTAMP => '2025-02-21 12:00:00');
sql
SELECT * FROM my_table BEFORE (STATEMENT => 'xyz');
Restoring a Dropped Table
sql
UNDROP TABLE my_table;
Cloning Data for Quick Recovery
sql
CREATE TABLE my_table_clone CLONE my_table AT (OFFSET => -60*5);
(Creates a table clone from 5 minutes ago.)
⏳ Limitations: Time Travel does not protect data indefinitely; once the retention period expires, Snowflake permanently removes older versions.
b. Fail-Safe: Last-Resort Recovery
Fail-Safe provides an additional 7-day retention beyond Time Travel for Enterprise and Business Critical accounts. It is meant for disaster recovery and not for user-driven restores.
Key Features of Fail-Safe:
✅ Automatically enabled (no user action needed). ✅ Retains deleted data for 7 days after the Time Travel period ends. ✅ Used only in emergency scenarios where Snowflake must intervene.
Example Scenario:
If a table’s Time Travel retention is 7 days and you drop it on Day 1, you can restore it using UNDROP within that period. If you realize the loss on Day 9, Time Travel won’t help, but Fail-Safe can be used by Snowflake support.
❗ Limitations:
Users cannot query Fail-Safe data.
Recovery is only possible by contacting Snowflake support.
c. Replication & Failover: Ensuring High Availability
Replication is a critical disaster recovery mechanism that allows Snowflake accounts to maintain readable or writable copies of databases across multiple regions/clouds.
How Replication Works:
Data is copied from a primary region (e.g., AWS us-east-1) to one or more secondary regions (e.g., Azure Europe).
Failover ensures seamless redirection of queries to the replica in case of an outage.
Setting Up Database Replication
Enable Replication for a Database:
sql
ALTER DATABASE my_db ENABLE REPLICATION TO ACCOUNTS 'us_east_replica';
Manually Sync Changes to the Replica:
sql
ALTER DATABASE my_db REFRESH;
Performing a Failover (Switch to Replica):
sql
ALTER REPLICATION GROUP my_rep_group FAILOVER TO ACCOUNT 'us_east_replica';
✅ Benefits:
Disaster recovery in case of a regional outage.
Minimized downtime during planned maintenance.
Business continuity even in multi-cloud environments.
d. Continuous Data Protection Best Practices
To prevent data loss and corruption, follow these best practices: ✔ Use Cloning: Instant backups for testing and sandboxing. ✔ Automate Backups: Create periodic snapshots of tables. ✔ Set Proper Permissions: Prevent unauthorized DROP or TRUNCATE actions. ✔ Monitor Data Changes: Track changes using INFORMATION_SCHEMA.
Example:sqlSELECT * FROM INFORMATION_SCHEMA.TABLE_STORAGE_METRICS WHERE TABLE_NAME = 'my_table';
3. Implementing a Disaster Recovery Plan in Snowflake
A strong disaster recovery strategy involves:
a. Setting Recovery Objectives (RTO & RPO)
Recovery Time Objective (RTO): The maximum acceptable downtime.
Recovery Point Objective (RPO): The maximum tolerable data loss.
Example:
If your business requires 0 data loss, cross-region replication is necessary.
If your RPO is 1 hour, you can use automated snapshots and Time Travel.
b. Automating Backups & Data Snapshots
Automate periodic snapshots using Task Scheduling in Snowflake:sqlCREATE TASK daily_backup WAREHOUSE = my_wh SCHEDULE = 'USING CRON 0 0 * * * UTC' AS CREATE TABLE backup_table CLONE my_table;
c. Testing the Disaster Recovery Plan
Simulate data loss scenarios quarterly.
Validate Time Travel, Failover, and Replication.
Train teams to execute recovery procedures.
4. Best Practices for Data Restoration & Disaster Recovery in Snowflake
🔹 1. Optimize Time Travel Retention
Critical tables → Set retention up to 90 days.
Less important tables → Lower retention to reduce costs.
🔹 2. Enable Replication for Critical Workloads
Use cross-region and multi-cloud replication for high availability.
Validate that failover works correctly.
🔹 3. Combine Snowflake with External Backup Solutions
Use Amazon S3, Azure Blob, or Google Cloud Storage for long-term backups.
Schedule incremental extracts for extra security.
🔹 4. Monitor & Audit DR Processes
Regularly review:
sql
SHOW REPLICATION ACCOUNTS; SHOW FAILOVER GROUPS;Set up alerts for unauthorized data modifications.
5. Conclusion
Snowflake offers powerful data restoration and disaster recovery features to protect businesses from data loss. A well-structured Time Travel, Fail-Safe, and Replication strategy ensures that organizations can recover quickly from disasters.
By following best practices such as automating backups, monitoring data changes, and testing DR plans, businesses can minimize downtime and enhance resilience.
WEBSITE: https://www.ficusoft.in/snowflake-training-in-chennai/
0 notes
Text

How Do You Implement Data Validation and Error Handling for Your Web Application’s Database Input and Output?
Introduction
In today’s digital economy, businesses rely largely on web applications for client interactions, data management, and day-to-day operations. A web application‘s effectiveness is measured by its functionality and ability to manage data accurately and avoid errors that interrupt corporate processes. Data validation and error management for database input and output are critical to ensuring reliability.
Data validation guarantees that the information entered into your database satisfies the necessary criteria, preventing invalid or damaging data from entering the system. On the other side, error handling focuses on providing tools to deal with difficulties that may arise during database operations, ensuring that the program recovers gracefully.
In this article, we’ll look at how organizations may employ good data validation and error handling in web applications to streamline processes, prevent data corruption, and improve the user experience. We’ll also look at how 8 Tech Labs, a prominent mobile app development firm, can help organizations achieve these goals with competent services.
The Importance of Data Validation and Error Handling
Effective data validation and error handling are vital for any web application that interacts with databases. Without these mechanisms in place, applications are vulnerable to:
Data corruption: Invalid data may lead to inaccurate analytics and faulty business decisions.
Security breaches: Insufficient validation can leave your application exposed to threats like SQL injection.
User frustration: Poor error handling can result in a negative user experience, reducing user satisfaction and retention.
Operational inefficiencies: Uncontrolled errors may cause downtime, affecting business continuity and leading to financial losses.
By ensuring that data is properly validated and errors are managed effectively, businesses can avoid these pitfalls, ensuring smoother operations and better user experiences. The process can also improve the overall integrity of your mobile app development and app development software, ensuring both front-end and back-end work seamlessly.
How to Implement Data Validation in Your Web Application
Implementing data validation for web application input and output is a critical task to ensure that the data entered is accurate, complete, and formatted correctly. There are several ways to implement data validation, and a combination of client-side and server-side validation is often the best approach.
1. Client-Side Validation
Client-side validation is the first line of defence and happens before the data is sent to the server. This can help catch common issues early on and improve user experience by providing instant feedback.
HTML5 Form Validation: Utilize built-in HTML5 input types such as email, number, url, and tel to ensure the input is formatted correctly.
JavaScript Validation: Use JavaScript or popular libraries (like jQuery) to add custom validation rules. This can include checking if the fields are empty, verifying email formats, or matching passwords.
Example:
document.getElementById(“submit”).addEventListener(“click”, function(event){
if(document.getElementById(“email”).value == “”){
alert(“Email is required!”);
event.preventDefault();
}
});
2. Server-Side Validation
Although client-side validation is useful for immediate feedback, it’s essential to validate data on the server side as well. Server-side validation ensures that data is checked before it is inserted into the database, preventing issues such as SQL injections or data inconsistency.
Check for Null or Empty Fields: Ensure that all required fields are provided.
Data Type Validation: Confirm that the data matches the expected data type (e.g., a date field contains a valid date).
Sanitize Inputs: Remove any special characters that may pose a security risk (e.g., SQL injection attacks).
Example (PHP):
if (empty($_POST[“email”])) {
echo “Email is required”;
} else {
$email = filter_var($_POST[“email”], FILTER_SANITIZE_EMAIL);
}
3. Regular Expressions
For more complex validation (like validating phone numbers or addresses), regular expressions are often used to match input against predefined patterns. Regular expressions ensure that data conforms to specific formats.
Best Practices for Error Handling
Error handling is just as crucial as data validation in developing a dependable web application. Here’s how firms can apply efficient error management strategies:
1. Error Logging
Keep track of errors that occur throughout your online application. These logs should include detailed information like the problem message, the user’s actions when the error occurred, and the data involved. Logs allow developers to swiftly detect and resolve issues before they affect users.
2. Graceful Degradation
In the event of a problem, offer users with clear, actionable messages rather than allowing the application to crash or display cryptic technical warnings. Graceful degradation enhances the user experience by advising them of the problem without crashing the program completely.
For example, instead of the general “500 Server Error,” the program may display “We’re having some problems right now.” “Please try again later.” This decreases user irritation while maintaining trust.
3. Custom Error Pages
Create unique error pages that match your application’s look and direct users on what to do next. For example, if a user receives a 404 error, display a page with advice on how to go to the correct content.
4. Testing and Monitoring
Regularly test your error-handling procedures by simulating various types of errors and ensuring that they are handled correctly. Implementing error-tracking software (such as Sentry or Bugsnag) can help to automate this procedure.
How 8 Tech Labs Can Help
At 8 Tech Labs, we understand the importance of building robust web applications that are both reliable and secure. Our mobile app development and app development services are tailored to meet the specific needs of businesses, ensuring that data validation and error handling are implemented effectively to maximize performance and security.
IT Strategy Development: We work with businesses to create long-term strategies that leverage cutting-edge technologies for optimal growth.
Technology Solutions: Our team provides comprehensive IT solutions that streamline operations and integrate seamlessly with existing workflows.
Digital Transformation Consulting: We guide businesses through digital transformation, ensuring that web applications, mobile apps, and other technologies align with industry best practices.
IT Advisory Services: We offer expert advice on selecting the right technologies and approaches for your web applications, ensuring smooth functionality and user satisfaction.
With 8 Tech Labs’ expertise, you can ensure that your web application remains secure, reliable, and efficient, driving both immediate and long-term growth.
Read More
#8 Tech Labs#custom software development#custom software development agency#custom software development company#software development company#software developers near me#mobile app development software#bespoke software development company#bespoke software development#software development firms#software development agency#nearshore development#software engineer companies#software development services#nearshore software development company#healthcare software development companies#application development companies#qda software#develop mobile app#software development#nearshore software development#web app development
0 notes
Text
Challenges in Building a Database Management System (DBMS)
Building a Database Management System (DBMS) is a complex and multifaceted task that involves addressing numerous technical, theoretical, and practical challenges. A DBMS is the backbone of modern data-driven applications, responsible for storing, retrieving, and managing data efficiently. While the benefits of a well-designed DBMS are immense, the process of building one is fraught with challenges. In this blog, we’ll explore some of the key challenges developers face when building a DBMS.
1. Data Integrity and Consistency
Maintaining data integrity and consistency is arguably the most difficult task in developing a DBMS. Data integrity refers to the accuracy and reliability of data, while consistency ensures that the database remains in a valid state after every transaction.
Challenge : Mechanisms such as constraints, triggers, and atomic transactions must be implemented for maintaining data integrity and consistency.
Solution : Use ACID (Atomicity, Consistency, Isolation, Durability) properties to design robust transaction management systems.
2. Scalability
As data grows exponentially, a DBMS must scale to handle increasing workloads without compromising performance.
Challenge : Designing a system that can scale horizontally (adding more machines) or vertically (adding more resources to a single machine).
Solution : Implement distributed database architectures, sharding, and replication techniques to achieve scalability.
3. Concurrency Control
Multiple users or applications may access the database simultaneously, leading to potential conflicts.
Challenge : Managing concurrent access to ensure that transactions do not interfere with each other.
Solution : Use locking mechanisms, timestamp-based ordering, or optimistic concurrency control to handle concurrent transactions.
4. Performance Optimization
A DBMS must deliver high performance for both read and write operations, even under heavy loads.
Challenge : Optimizing query execution, indexing, and storage to minimize latency and maximize throughput.
Solution : Implement efficient indexing strategies (e.g., B-trees, hash indexes), query optimization techniques, and caching mechanisms.
5. Fault Tolerance and Recovery
Hardware failures, software bugs, or human errors can lead to data loss or corruption.
Challenge : Ensuring the system can recover from failures without losing data.
Solution : Implement robust backup and recovery mechanisms, write-ahead logging (WAL), and replication for fault tolerance.
6. Security
Protecting sensitive data from unauthorized access, breaches, and attacks is a top priority.
Challenge : Implementing authentication, authorization, encryption, and auditing mechanisms.
Solution : Use role-based access control (RBAC), encryption algorithms, and regular security audits to safeguard data.
7. Storage Management
Efficient management of where data is located on disk or in memory drives performance and expense.
Problem : Ensuring the most efficient use of storage structures - tables, indexes, and logs - in minimizing I/O.
Solution : Techniques applied to make efficient use of storage include compression, partitioning, and columnar storage.
8. Portability and Interoperability
A DBMS must interact freely with various OS, hardware and applications.
Problem : Compatibility with as many different kinds of platforms, and conformance to standard communication protocols.
Solution : Adhere to industry standards like ODBC, JDBC, and SQL for interoperability.
Topic Name :- Challenges in building a DBMS
1. Bhavesh khandagre
2. Arnav khangar
3. Sanskar Gadhe
4. Rohit Wandhare
5. Nikhil Urkade
1 note
·
View note
Text
How to Delete one row in SQL
Here, you will learn how to delete one row or record from a table in Structured Query Language.
We can easily delete one record using the SQL DELETE statement. This statement also removes all the existing rows from the database tables. It also helps in removing the data from the SQL views.
Once a row has been deleted from the table, that row cannot be recovered.

0 notes
Text
Restaurant Table Booking System using PHP and MySQL
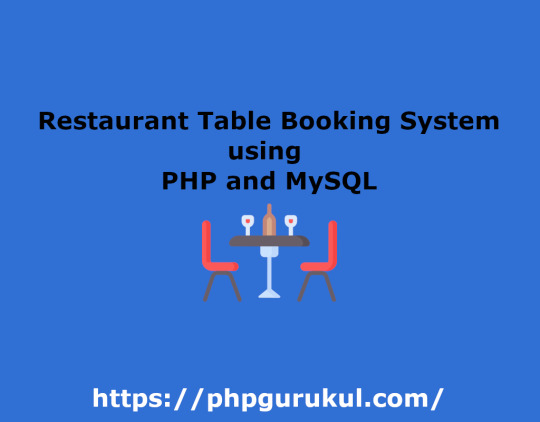
Restaurant Table Booking System using PHP and MySQL is a web-based application. The restaurant Table Booking system project is developed to provide service facilities to restaurants and also to the customer. Customers can reserve the table online and check the status of the reservation.
Project Modules
In this project, we use PHP and MySQL database. It has two modules i.e Admin and user.
User Module
Users can fill out the table reservation form.
User can also check the table reservation/booking status.
Click here: https://phpgurukul.com/restaurant-table-booking-system-using-php-and-mysql/
Admin Module
Secure admin/sub-admin login
Dashboard: In this section, the admin can all the brief details like total sub-admins, total bookings, new bookings, accepted bookings and rejected bookings.
Sub-Admins: In this section, Admin can create the sub-admin, delete sub-admins, edit sub-admins, and reset the passwords of sub-admins.
Tables: In this section, admin can add and delete the tables.
Bookings: In this section, the admin can view the new, accepted, rejected, and all bookings. Admin can take actions on new bookings.
B/w dates report: In this section, admin can generate the report of between two dates bookings.
Account Setting: Admin can update his profile, and change the password.
Admin can also recover the password.
Sub-Admin Module
Sub-Admin and Admin features are the same except Sub-Admin creation. Sub-Admin can’t create the Sub-Admins.
How to run the Restaurant Table Booking System (rtbs) Project
1. Download the zip file
2. Extract the file and copy rtbs folder
3.Paste inside root directory(for xampp xampp/htdocs, for wamp wamp/www, for lamp var/www/HTML)
4.Open PHPMyAdmin (http://localhost/phpmyadmin)
5. Create a database with the name rtbsdb
6. Import rtbsdb.sql file(given inside the zip package in the SQL file folder)
7. Run the script http://localhost/rtbs
Credential for Admin panel :
Username: admin Password: Test@123
PHP Gurukul
Welcome to PHPGurukul. We are a web development team striving our best to provide you with an unusual experience with PHP. Some technologies never fade, and PHP is one of them. From the time it has been introduced, the demand for PHP Projects and PHP developers is growing since 1994. We are here to make your PHP journey more exciting and useful.
Email: [email protected] Website : https://phpgurukul.com
0 notes
Text
Backing Up Your Localhost WordPress Site: Methods and Tools
Creating backups of your localhost WordPress site is an essential practice for safeguarding your work and ensuring you can recover from unexpected errors or data loss. Whether you are testing themes, developing plugins, or building a new website, a reliable backup process can save you time and stress. This blog outlines effective methods and tools to back up your localhost WordPress site.

Why Backup Your Localhost WordPress Site?
Prevent Data Loss
Unintentional file deletions, database errors, or hardware failures can result in losing hours of work.
Streamline Testing
Backups enable you to revert to a previous state if something breaks during theme or plugin testing.
Ease Migration
Backing up your localhost site simplifies the process of moving it to a live server or another environment.
Experiment Freely
Knowing you have a backup allows you to experiment with code or settings without fear of permanent damage.
Components to Back Up
A WordPress site consists of two primary components:
WordPress Files
These include core files, theme files, plugin files, and uploaded media stored in the wp-content folder.
Database
The database stores your website’s content, settings, and user data. It is usually managed through tools like phpMyAdmin or MySQL Workbench.
Methods for Backing Up Localhost WordPress Sites
1. Manual Backup
Steps:
Copy WordPress Files
Navigate to the directory where your WordPress installation resides (e.g., htdocs in XAMPP).
Copy all files and folders to a secure location, such as an external hard drive or cloud storage.
Export the Database
Access phpMyAdmin or your database management tool.
Select your WordPress database and click on the "Export" option.
Choose the "Quick" export method and save the .sql file.
Advantages:
Complete control over the backup process.
No additional tools required.
Disadvantages:
Time-consuming and prone to human error.
2. Using Plugins
Many WordPress backup plugins work seamlessly on localhost installations. Here are some popular choices:
UpdraftPlus
Schedule and automate backups for both files and databases.
Store backups locally or on cloud platforms like Google Drive, Dropbox, or OneDrive.
Duplicator
Create complete site backups, including files and databases.
Ideal for migrating your localhost site to a live server.
All-in-One WP Migration
Export your site’s files and database into a single file.
Easily import backups to restore your site.
Steps to Use a Plugin:
Install the chosen plugin on your localhost WordPress site.
Follow the plugin’s setup instructions to create and save backups.
Store the backups in a secure location.
Advantages:
Automated and user-friendly.
Additional features like scheduling and cloud integration.
Disadvantages:
Some advanced features may require a premium version.
3. Using Command Line Tools
If you are comfortable with the command line, tools like WP-CLI can streamline the backup process.
Steps:
Backup Files
Use commands to compress your WordPress directory into a zip file:zip -r backup.zip /path/to/wordpress
Backup Database
Export your database using WP-CLI:wp db export backup.sql
Advantages:
Fast and efficient for advanced users.
Scriptable for regular backups.
Disadvantages:
Requires familiarity with the command line.
4. Using Localhost Management Tools
Tools like Local by Flywheel and DevKinsta come with built-in backup options, making the process simpler.
Steps:
Locate the backup feature in your chosen tool.
Follow the instructions to create and store a backup.
Restore the backup if needed.
Advantages:
Integrated with the localhost environment.
Minimal setup required.
Disadvantages:
Limited to specific tools.
Best Practices for Backing Up Localhost WordPress Sites
Schedule Regular Backups
Set a schedule to ensure backups are created consistently.
Use Multiple Storage Locations
Keep backups in at least two locations, such as an external drive and cloud storage.
Test Your Backups
Regularly restore backups to verify their integrity and functionality.
Document Your Process
Maintain a clear record of your backup and restoration steps for future reference.
Secure Your Backups
Encrypt sensitive backups and limit access to authorized users.
Conclusion
Backing up your localhost WordPress site is a vital step in ensuring the safety and continuity of your work. Whether you choose manual methods, plugins, or advanced tools, the key is consistency and reliability. By implementing these best practices, you can safeguard your projects and work with confidence, knowing that you’re prepared for any challenges that come your way.
0 notes
Text
Backup SQL Server Agent Jobs: PowerShell Automation Tips for SQL Server
SQL Server Agent jobs are an essential component of managing and automating various database tasks. Whether you’re scheduling backups, running maintenance plans, or executing custom scripts, these jobs are crucial for keeping your SQL Server environment running smoothly. But what happens when you need to back up and recover these jobs? Automating the process of scripting out SQL Server Agent jobs…
0 notes
Text
Google Colab vs. Google Data Studio: A Comprehensive Comparison
Google provides a suite of tools to address the diverse needs of data analysis, collaboration, and visualization. Among these, Google Colab (Google Colab) and Google Data Studio (datastudio.google.com) are two standout platforms. While both are robust, they cater to different functionalities and audiences. This article compares their unique features and use cases to help you determine which tool best suits your needs.

1. Purpose and Features
Google Colab
Purpose: Google Colab is a cloud-based coding platform for Python programming, primarily used for data analysis, machine learning, and computational tasks. It is akin to an online Jupyter Notebook.
Features:Write and execute Python code interactively.Pre-installed libraries like TensorFlow, NumPy, and Pandas.Access to GPUs and TPUs for high-performance computation.Real-time collaboration on shared notebooks.
Ideal For:Building and testing machine learning models.Exploring large datasets programmatically.Teaching and learning Python-based data science.
Like That:
FREE Instagram Private Profile Viewer Without Following
Private Instagram Viewer
This Is Link Style
https://colab.research.google.com/drive/1jL_ythMr1Ejk2c3pyvlno1EO1BBOtK_Z
https://colab.research.google.com/drive/1e9AxOP_ELN4SYSLhJW8b8KXFcM5-CavY
Google Data Studio
Purpose: Google Data Studio is a business intelligence tool that turns raw data into dynamic, visually appealing dashboards and reports.
Features:Seamlessly integrate with data sources such as Google Analytics, BigQuery, and Sheets.Create interactive, customizable reports and dashboards.Enable real-time updates for shared insights.
Ideal For:Visualizing marketing and business performance data.Crafting presentations for decision-making.Tracking KPIs and performance metrics efficiently.
Like That:
Free Instagram private account viewer
How to see private Instagram profiles
Private Instagram Viewer Apps
Recover hacked Instagram account
Recover hacked Snapchat account
Use Cases:
https://datastudio.google.com/embed/s/hqgxnNMpaBA
https://datastudio.google.com/embed/s/g8oLu_-1sNQ
2. Target Users
Google Colab
Targeted at data scientists, researchers, and developers proficient in Python.
Requires programming expertise for tasks such as algorithm development and data modeling.
Google Data Studio
Designed for business analysts, marketers, and decision-makers without coding knowledge.
Simplifies data interpretation through easy-to-use visual tools.
3. Data Access and Processing
Google Colab
Allows direct data manipulation using Python scripts.
Supports integrations with Google Drive, APIs, databases, and other sources.
Offers unparalleled flexibility for custom computations and workflows.
Google Data Studio
Focused on visualizing structured data from external sources like SQL databases or CSV files.
Limited in data transformation capabilities compared to coding tools like Colab.
4. Collaboration Capabilities
Google Colab
Enables simultaneous editing and execution of code in a shared notebook environment.
Perfect for team projects involving programming and analysis.
Google Data Studio
Supports collaborative creation and sharing of dashboards and reports.
Real-time updates ensure everyone is on the same page.
5. Performance and Scalability
Google Colab
Free tier provides basic compute resources, including limited GPU and TPU access.
Colab Pro plans offer enhanced runtimes and resource allocation for intensive tasks.
Google Data Studio
Scales efficiently for real-time data visualization.
Performance depends on the complexity of the report and connected data sources.
6. Cost and Accessibility
Google Colab
Free tier includes essential features for most users.
Paid Pro plans add advanced compute options for heavy workloads.
Google Data Studio
Free to use for creating reports and dashboards.
Some integrations, like BigQuery, may incur additional costs based on usage.
Google Colab vs. Google Data Studio: Understanding Their Differences
Understanding the Key Differences Between Google Colab and Google Data Studio
Conclusion
Both Google Colab and Google Data Studio are invaluable tools, but they serve different purposes. Google Colab is tailored for programmers and data scientists needing a flexible coding environment for analysis and machine learning. Conversely, Google Data Studio excels in creating visually engaging reports for business insights. Depending on your workflow, you might find value in using both—leveraging Colab for data preparation and analysis, and Data Studio for presenting insights to stakeholders.
1 note
·
View note