#Removing duplicate photos Tools
Explore tagged Tumblr posts
Visit Tumblr Blog
Explore Tumblr blogs with no restrictions, modern design and the best experience.
Last Seen Tumblr Blogs


Fun Fact
The average Tumblr user visits about 67 pages every month.
Text

editorial from the english version of the Hankyoreh
archive link
plain text
Before focusing on my master’s thesis, I worked for a brief period for an organization supporting victims of cyber sex crimes. My job was to put each and every case of illegally filmed footage assigned to me through a search engine and if I found that the images had been uploaded to certain sites, I would beg the operator of that site to take those images down.
The process of searching and subsequently scrubbing illegally filmed footage probably isn’t what most people would expect. There is no advanced AI that categorizes footage based on the faces of victims, lists the sites the footage is uploaded to, and sends automated requests for the deletion of such posts. Instead, employees and volunteers divide each reported video frame by frame, put each fragmented frame through search engines, organize each site the footage is posted to on a spreadsheet, collate the sites for verification, find the site operator’s email or contact channel, and write a message that read, “This video is illegally filmed footage so we ask that you remove it from your site. If it is not removed, the South Korean government may take action against the site pursuant to relevant laws,” translate it from Korean into English and then send it to the operator.
This happened daily. Sometimes, you would have to go through 100 or 200 cases a day. I’ve assigned a nickname to this procedure: “The Illegally Filmed Footage Removal Protocol that Seems Absurdly Advanced, But Basically Follows the Same Grueling Procedures as a Sweatshop.”
The biggest challenge when fighting digital sex crimes is their overwhelming breadth and scale. It was impossible for us, as we sat in front of our computer screens, to estimate which far-out depths of the internet any of the footage had reached.
Even if we painstakingly found 20 posts using a particular photo and saw that every post was erased, the next day we would see the photo spring up in 40 different posts. Websites distributing illegally filmed footage make various backup sites with different domains to make sure that sites are up and running even if the main site is taken down.
Many of the sites in question have servers based abroad, so even if you sent a beseeching email citing South Korean laws, they simply could just pretend that they never saw the email.
The terror of that vast scope goes beyond distribution and duplication. While deepfake pornography has been in the news recently, photoshopping a real person’s face onto a pornographic image has been a crime for some time now.
The difference is that producing such images used to be time-consuming and technically challenging, requiring the “manual” manipulation of images. But the new tool of AI has made it easy for anyone to instantaneously create deepfakes in a dizzying variety of formats.
Another frightening aspect is that anyone with access to photographs on social media can choose victims at random. And since the images are “fakes” created by AI, the perpetrator can deliberately duck the guilt of harming a real person.
Deepfake creation has spread so rapidly because it gives perpetrators a perverse sense of power over their victims — the ability to create dozens of humiliating images of someone from photographs scraped off Instagram — while also enabling them to ignore victims’ suffering because the images aren’t technically “real.” In short, deepfakes represent a game-changing acceleration of the production cycle of sexually exploitative media.
Those images spread far too fast for the handful of employees at nonprofits to keep up with. Facing such a vast challenge, permanent employees began to drift away, and their positions were once again filled by people on short-term contracts.
Lee Jun-seok, a lawmaker with the Reform Party, said during a meeting of the National Assembly’s Science, ICT, Broadcasting and Communications Committee that the 220,000 members of a deepfake channel on Telegram was an “overblown threat” and estimated that, given the percentage of Korean users on Telegram, only about 726 of the channel members are actually Koreans.
But what does it matter whether there are 220,000 Koreans on the channel or just 726?
Let’s suppose there aren’t even 726, but just 10 people in the group — they could still produce 220,000 deepfakes if they set their mind to it. Those images would then be copied and circulated beyond their point of origin and around the world, perhaps remaining permanently in some dark corners of the Internet without ever being deleted.
That’s the nature of sex crimes in the digital age.
So assuming that the criminal potential of this technology remains the same regardless of whether the channel has 220,000 members, 726 members or even just 10, I can’t help wondering what Lee thinks would be an acceptable number of deepfake purveyors that would not constitute an “overblown threat.”
38 notes
·
View notes
Text
Since this was done in procreate, here's the process video! Some details under the cut.
Process Notes
Start with a loose sketch - I had my reference photo open on my computer screen for this. Sketch is the top layer and set to multiply
Block in basic shapes on separate layers
Start adding texture using black and white on a clipping mask set to overlay with the opacity adjusted
Build in some colour variation
I decided to break the single green layer into three to help with layering. I just duplicated the green layer twice, used layer mask to erase roughly, then applied the layer masks. Now I have 3 layers for my green areas
Then I put them on alpha lock and used a smudge brush to remove some of the definition I had initially put in, and added looser texture with more colour variation and attention to the three distinct layers of vegetation
I also decided I wanted more definition on the clouds here, so you can see I added back a lot of sky then added more defined clouds
I continue to use the black and white overlay technique to add texture to some areas
To get a good outline of the highest vegetation layer against the sky, I add a layer mask and roughly erase the top part with black, then switch to white and add back details to the edge using a leafy brush (I love this technique)
For areas like the short grass and asphalt path, I add texture to a layer then use the resize > distort tool to give it the right 3D angle, THEN I make it a clipping mask and do my overlay/opacity trick
As I get close to the end of painting, I select all 3 green layers and use the liquify tool to make some adjustments, and then focus on details like the line of grass where the path curves out of sight
Last 2 layers are a pink layer on screen mode, adjusted to the opacity I want, then a layer of black with a soft white spot in the middle, set to overlay with its opacity adjusted as well
And done!
32 notes
·
View notes
Text
How do I manage to cite thousands of photos?

I have officially passed 1,000 posts cited on this blog! That's 1000 posts of riots, exercises, mildly disgruntled guys in balaclavas, whatever.
If you were wondering if I do all the citing myself, you'd be correct! Every citation has been agonizingly researched by me. Is it a waste of time? Definitely. But I'm too far in to stop now...
However, it's not all by hand. I'm a software developer by trade, so I did make something to help with citation. Using the Tumblr API, these are the tools I made to make the process just a bit less painful!

You may have noticed all of my posts follow a certain format. Well, this is why! The citations view brings up my most recent unattributed post for me to add a citation to. Then, I can search multiple reverse image websites to find the source!
Google Lens is usually best for most things (even Russian pictures on VK and official military websites). TinEye is great for photos that are heavily cropped, or are stock, since they're sponsored by Adobe and Alamy. Everything else, including Yandex, kind of sucks.
I can also create new posts using this tool, which you've probably seen recently:

Throughout it all I've developed an auto tagging system that picks up on keywords inside the posts I write. This list goes on and on! Who knew there were so many special forces with three letter acronyms...

BRI SEK AOS KSK BAC B2R CDI DSI СБУ DSU BMD KSM SAS JTF! Which ones can you name?
You may have seen me delete posts that you liked. That was the job of the duplicate remover, which helps me find and delete identical posts. Even I forget what I've reblogged...

Of course, I have to fetch all 6000 images first and compare them using a unique "perceptual hash", but... it's worth it!

Through all my editing, posting, sorting, and loading, I need to keep an eye on the Tumblr API limits. I can actually reach them with the amount of posts I'm making...

And that's pretty much it! I probably won't release the tool since I doubt anyone would actually want to waste time doing this, but I'm pretty proud of it.
I might make a post later about the things I've found, but here are some fun facts:
France and Germany make up almost half of my entire list. For reference, the USA is about 40!
137 posts are marked with #needs-attribution, or about one in ten. 14 are under #needs-more-info. The sources for these are lost to time :(
There's a limit of 1000 likes per day. I've reached it...
There's a limit of 1000 posts in the queue, which I've pretty much been at since I started this blog. However, my current "cited" backlog is about 10 days long at 25 posts per day.
I still have about 3500 posts left to go before everything's done...
Thanks for sticking with me as I add summaries to posts that most people would have probably liked more if it was just the picture :^)


Maybe my captions are making things... too real?
18 notes
·
View notes
Text
I spent 6 grueling hours researching how to protect one's photos/scans so you wouldn't have to--And these are my findings:
As the title states, I spent 6 grueling hours researching how to protect one's photos/scans in case other collectors want to protect and/or receive credit for their photos.
Once more let me emphasize THEIR PHOTOS.
Backstory:
It's not a secret that I'm quite a big collector of official Spy x Family merchandise, specifically clear file folders, stationery, and acrylic stands. I own so much, in fact, I have a tendency to own a handful of duplicates and had the crazy idea to start a small business selling these duplicates via Ko-Fi. A thought came to me that since I had already invested in a light box and a scanner for selling my merch, why not also use them to share pictures of my collection for other fans to view and appreciate?
And that was when I had sought the opinions from my good friend, @yumeka-sxf. Yumeka has been kindly posting high-resolution scans of her SxF merch (clear files, pages, etc.) on Tumblr. She is someone I also deemed as an expert when it came to uploading merch on the internet. She gave me incredible advice with awesome foresight when it came to watermarking high-resolution pictures and scans. She easily predicted what disrespectful people would do if I hadn't moved my watermarks to certain (albeit not really appealing) spots. And, just like she said, someone did attempt to remove my watermark using AI. You can read about it here. @yumeka-sxf also provided her own insight to watermarking merch here--if ya'll are interested to read.
I won't go into too much detail, but essentially they're long posts meant to educate people on why fans, who own the official merch, put watermarks on their pictures. The bottom line is, we're claiming the picture for ownership, NOT the merch.
Second, did you know that people have found ways to remove watermarks?

That gives me enough incentive as to why I want to take it a step further to protect my photos/scans.
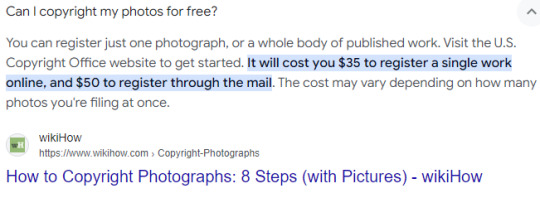
"If I take a picture of something do I own the picture that I took?":
Yes and no. Yes as in, the picture is yours. No, because depending on your subject, it falls under numerous jurisdictions of copyright. You can find all the details in this insightful post from veteran photographers.
But since we're focusing on the topic of photos and scans of merchandise, I'd like to provide these screenshots:


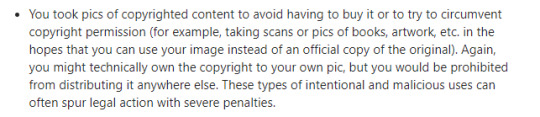
And so, to re-iterate, the only thing you'll get out of copyrighting your photo is just the right to the photo--which is all I want.
The Findings:
6 grueling hours of research for protecting one's picture led me to several insightful directions--one of them amusingly brought me down a rabbit hole of how to protect one's real estate pictures. They did have some wonderful tips if you guys would like to read them!
Unfortunately, I do not own Photoshop so I could not make any edits on the metadata or create a layer that will prevent downloading the content of the picture. Preventing screenshots/right-clicking is limited to control on a website and/or can easily be canceled by plug-ins. So that just leaves me with finding something creative solutions the only tool I have: Canva (more on this later).
I spent some more time reading more journals and visited USCO (United States Copyright Office) and, finally, Pixsy.
I'm gonna be honest, USCO is THE BEST way to protect your media (merchandise, art, etc.) IF you have the money to support it.

Not only do I not have the funding for this type of service, but my photos don't exactly meet "originality" especially when the subject of the photo is copyright-protected merchandise, which means there are severe punishments for those who pursue any commercial purposes (such as selling my photos to make money rather than directing people to purchase the official work from the licensing site). And at the end of the day, I just care about the photo, itself, and receiving credit and source.
It's ridiculously simple to just credit and source a picture, and yet, it'll surprise you how many people just can't do that. This is why, I must take these extra precautions to ensure credit and sourcing.
So, I opted for Pixsy for its free plan that includes 500 images being monitored.

There's no doubt that I'll most likely invest in a monthly subscription if ever I amass beyond 500 pictures for monitoring.
Currently, it has already done an impressive job of identifying pictures I've posted with my watermarks on Ko-Fi, Twitter, and Tumblr. It has even identified reblogs/retweets.
For some odd reason, it uploads my pictures horizontally when it's normally vertical ^^; but it still gets the job done. Interestingly, it hasn't picked up my pictures from Mercari yet. I assume that if I were to upgrade to the subscription plan, Pixsy might be able to find it by then.
Procedures:
I'm sharing my procedures for protecting one's photo (and content, if applicable of course).
Step 1: Register on Pixsy. As I've addressed earlier, it's free.
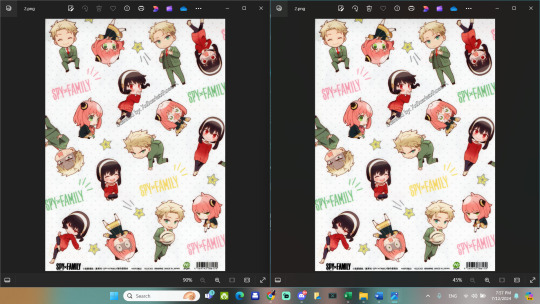
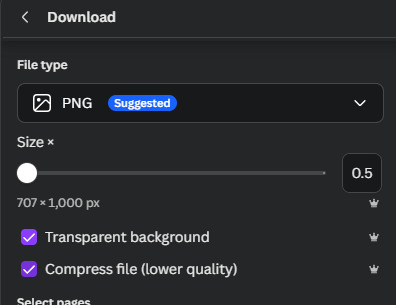
Step 2: Upload HIGH-RESOLUTION pictures (no watermark) to Pixsy's database. This is probably the most accurate way for Pixsy to identify pictures of the same (or similar) "blueprint". In the picture below, I provided a screenshot of my picture without the watermark (left) with a picture they found of my picture with my watermark on it from my ko-fi shop (right).

Step 3: If you plan to upload a photo/scan with or without watermark, it is recommended to upload your image at 550 pixel image and at 72 dpi. This makes it good for the internet (see first image below). But once you zoom in, you can tell the difference in quality (see second image below).
I mentioned before that I don't have photoshop, so I experimented with what I do have: Canva.
Since I have a premium membership (indicated by crown icons), I just use the following settings:
and it gets the job done.
I am planning to upload my photos without watermarks to the Spy x Family wiki quite soon, so I did all this research to prepare for possible theft and/or the lack of crediting and sourcing--just in case. A friend of mine told me that s/he can try to ensure crediting through the file name, which is a ridiculously kind gesture, but I'm not ignorant of people who change/completely ignore file names. That's unfortunately just the way it is on the internet.

Hopefully, I've curated enough research to help protect photos/scans from possible theft (if reposting is not allowed by the owner).
I don't mind if my photos are used for reference AS LONG AS they credit me and link the source directly to the image itself (not one of those cut-corner kind of way and just link my Ko-Fi gallery). I won't tolerate laziness when it comes to sourcing considering I invested a lot of money to purchase merch and invested hours--even days--to get the best photo/scan + researched information on the merch for public access.
#a long post#how to protect photos#how to protect scans#how to use pixsy#how to copyright photos#how to copyright scans#how to copyright merch#a post for merch collectors#merch collectors#photographing merch#scanning merch#scarlymadeathing#scarlydidathing#spy x family#type a shit#I know I've got organizing issues#collector work#acrhiving work
19 notes
·
View notes
Note
how do you make your graphics? your style is so unique and beautiful!
Hi, thanks so much, that’s very kind of you! And I use Photoshop. If I’m being honest it’s not a super elaborate nor elegant process, I’m still learning and I mostly figured out what I like to do by just going in there blind and clicking around a bunch. I’ll put the more detailed steps under the cut if you’re interested, though!
Okay so generally speaking, these are usually the steps:
1. I take screenshots through either Premiere or the built-in Windows screenshot tool (but preferably Premiere). I try to use 4K remasters of the movies where I can these days, because it allows me to—
2. zoom in and crop the hell out of them and reframe them how I see fit without losing out too much on the quality. (these movies needed more close-ups, goddamn it) If there’s blank space left at the edges, I might duplicate the nearest edge area of the layer and try to blur it out + darken it with a gradient to fill that gap and still get the framing I want.
3. Then I adjust basics like exposure and contrast using the Curves function + boost saturation and vibrance—I try not to overdo it with the latter two because that step gets repeated later on, but I do need to do it at the start to even properly see what colors are in there since the MCU is so fucking bleak when it comes to color grading, and the 4k remasters tend to be even flatter. I also add Sharpen and Sharpen Edges filters here.
4. This is the fun part: go in and mess around with color. I usually use the Selective Color tool to figure out which parts I want to bring into focus by boosting like 2-3 colors and tweaking/evening out the rest of the tones to get some contrast. Hue/Saturation and Color Balance come in handy here, too. I’ll also sometimes use the Match & Replace Color tools to either neutralize, lighten/darken or entirely remove certain colors, and add Photo Filters to warm up/cool down the whole thing or certain areas.
5. When I have a decent idea of what I’m doing with color, I move to masking out what I don’t need—usually over-saturation in the skin tones, teeth, whites of the eyes, weirdly saturated pixel clusters, etc, and blurring out areas that might be too textured.
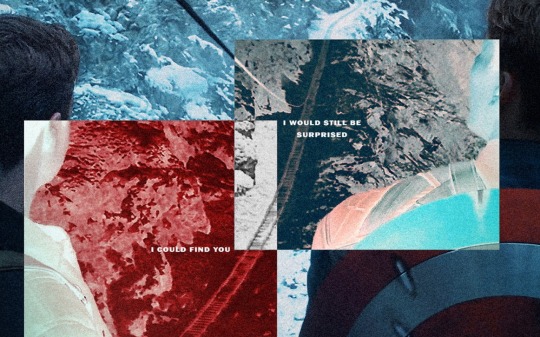
6. I’d say this is an optional step depending on the edit, where I might add any “special elements”—this is not the best quality example, but it has multiple:

I take the rectangle select tool—or Lasso or whatever select tool, depending on the shape—and then use Invert on that area (which I do a lot, lol. Big fan of my buddy the Invert tool). Here I also used a B&W adjustment layer, but if the inverted area’s in color I go in again with Selective Color or any of the other previous adjustment tools to futz around with the colors some more, such as here:
I kind of suck at remembering to use different layers for different adjustments, but if I’m adding any shapes or patterns with the Brush tool—such as the dots or the blood spatter on those BW posters—I make sure to always do that on a new layer. I do the same if I’m adding a duplicated area at a lower opacity to create that “ghost” effect at the edges of an object, like in this Sam edit here:

or if I’m adding a directional blur like in these:
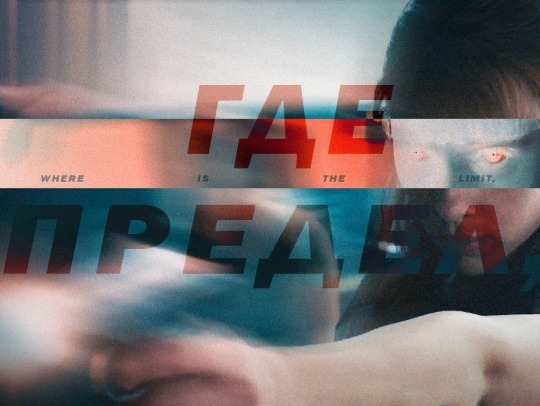

7. On a new layer, I add in color gradients at a very low opacity and then layer them up until I like what I’m seeing, usually radiating out towards the edges of the image or in spots that I feel might need a color change or boost. The red and cyan here are some of the more noticeable examples:

or the sepia-esque bleed through in these:


And I might do the same thing with a dark grey to darken the corners and edges a bit.
8. I add a text layer, write whatever it is I want on there and set font and size, pick a base color for it that is complimentary with the colors of the image, and then I go into Layer Style to adjust the opacity and blending mode. I usually use Difference or Exclusion for the latter if I’m trying to get that colorful text, and I might also throw in a lower opacity Gradient Overlay if I’m not a 100% satisfied with the colors that produces.
I might also mask the text so that I can make it appear to be behind an object, like in this:

9. Texture! I used to just add a noise filter directly to the base image but have since learned that’s not really the best way, so instead I:
i. create a new layer;
ii. set the mode to Overlay, and check “Fill with Overlay-neutral color (50% gray)”—you can also do this by just using the Bucket tool to fill this new layer with a neutral-looking gray color and then tweak the opacity;
iii. convert the layer to a Smart Object so I can go back in and re-edit;
iv. finally add a Noise Filter (set to gaussian and monochromatic) at around 3%-15%, depending on the image size and quality. I might also add a Gaussian Blur on top to make the noise a bit softer.
10. Final checks—this is where I might up the exposure, contrast, and saturation/vibrance again, or add another layer with gradients (always under the texture layer). I usually also export a test version to see how it translates online after it’s been compressed on upload, and then use that as a reference for whatever needs fixing or tweaking.
And that’s more or less it! Thanks for the ask—I never really thought too systematically about what it is I exactly do with these, so this was an interesting exercise. <3
4 notes
·
View notes
Note
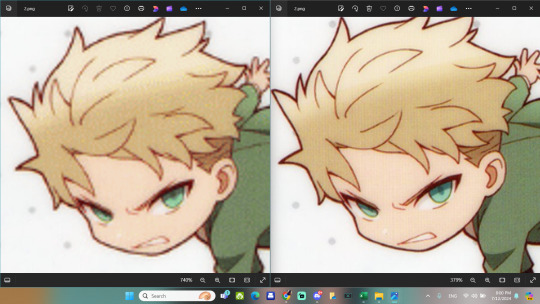
I habe to ask you this How fo you managed to maje Liam eyes stand out in the black and white photo. ? Which app did you used and how to do it ? Pls I am too in love with them 😍😍
Hiii July! I'm glad you liked theeeem! I didn't do anything special to his eyes, I just toned down the colors around them and they shined on their own! That's how beautiful his eyes are 🤍
I use PhotoFiltre Studio X for most of my edits. You can find it online to download for free... If you know what I mean, asuoehaseuaheas.
You can use Canva to do it too. I'll put a quick tutorial under the cut. Just know you'll need to login to use it. Also, I have a pro account, so some things won't work for free account.
1. We get the picture we want.
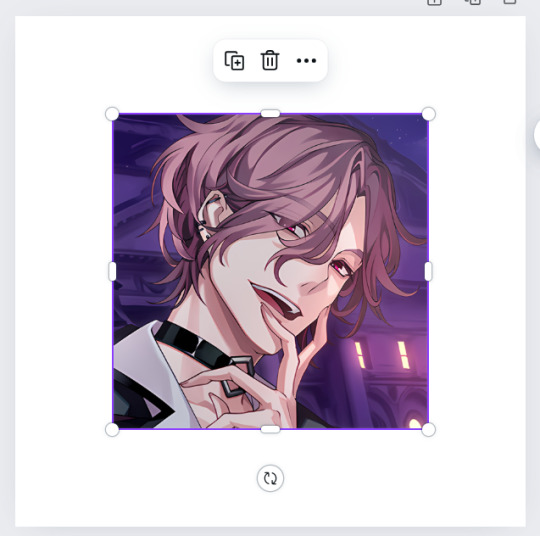
2. Duplicate it. And put one over the other. They need to be aligned.
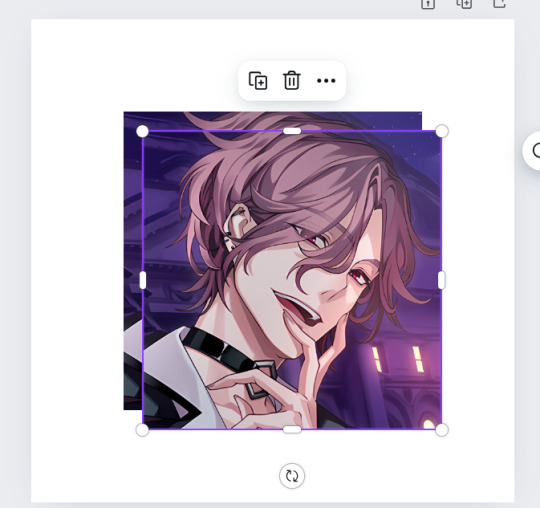

3. You'll adjust the tone of the picture on top until it's to your liking. I changed "saturation".

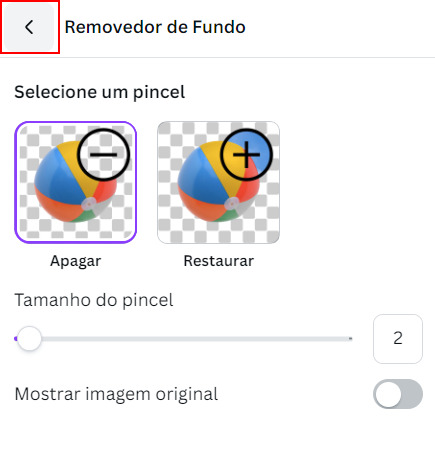
4. Use this tool on the picure on top. In english it'll probably be named "background remover". This will remove the whole background. That's not what we want this time but no worry, we'll fix it.

5. We open the settings for it. We select "restore" and restore the whole background with the brush.


6. Now we'll select the "remove". Make the size of the brush one that's easy to erase only what you want. And erase it. Here, I did the eyes.

7. Go back. And we done :D

2 notes
·
View notes
Text
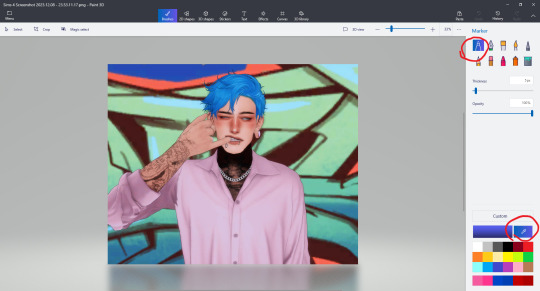
Fix your wonky sh*t with Windows Paint 3D- no Photoshop necessary!
So if you're like me and refuse to pay for Photoshop... here's a tutorial on how I fix all that weird crap that happens when taking screenshots. In this scenario I will be covering up and replacing a wonky piercing using the base program on most Windows computers. (Expand photos to see better!)
Step 1: Open your file in Paint 3D and select the dropper tool in the bottom right. You're gonna use this for blending.
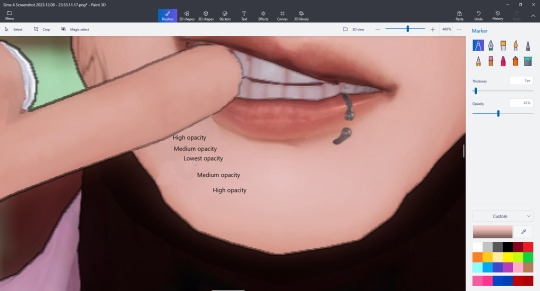
Step 2: Select the color around the object you want to blend/remove and set your dropper to about 75%. Color over the object.

Step 3: Use the dropper to select the different colors around the unwanted object, and adjust opacity to seamlessly blend the colors together. Expand photo for guide.
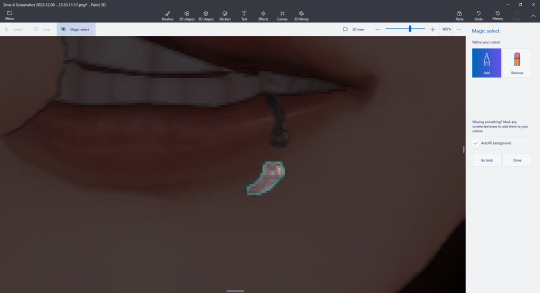
Step 4: Once your colors are blended, click Magic Select at the top left of your screen.

Step 5: Bring the edges of the square as close as possible to the object you need to duplicate and hit next. Add and remove as necessary using the tools to the right and hit done when you are ready.
Step 6: What you have done is basically turned this tiny piece of the photo into a movable sticker. Right click on your sticker and hit copy, then undo. If you don't hit undo it will mess up the original placement.
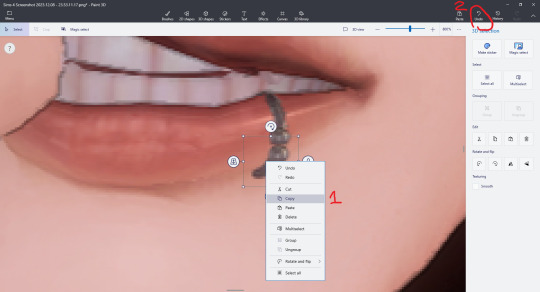
Step 7: Right click to paste your new sticker and use the flip and rotate tools to adjust the placement.

Done!

I'm not the best at explaining things, but I hope this helps! You can do a lot with this simple program, and it'll save you a couple bucks. ;)
9 notes
·
View notes
Note
Your pictures and screenshots are so pretty though! How do you do it? I love your blog btw!!
Thank you!! I really appreciate you saying that! I'm not totally sure if you want a tutorial or not. I can't give you a step-by-step run down, since it's different every time. but I can tell you a few of the things that I do the most often. If you want yours to look a bit like mine!
I editing software I use is Photoshop. But there are many alternatives like Pixlr, and Gimp.
Another big factor that plays into the coloring and depth of an edit is by using Reshade. I couldn't do anything without it.


before and after with just Reshade
Next I hop into Photoshop. and do the basics that I do for every edit. that's what I'll show you today.
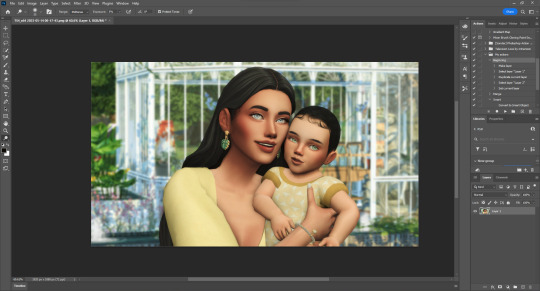
I would first crop it, if that's what I needed to do. but for this one I won't.
Then I would make one duplicate layer of the image, and then a blank layer. That blank layer would be put on multiply.

I use these layers to add shading and highlights. First I use the blank layer use the eyedrop tool (shortcut: I) to select the color in the shadows. and draw them on. Next I use Dodge tool (shortcut: O) to add highlights in the t-zones of their faces, in their eyes, on their jewelry, and in their hair.


before and after
The next steps are one after the other. and Illustrated below with letters. I do it in that order.
A. I merge the layers for the shadow and highlights.
B. This next step uses an action that I made for my editing. but you can replicate it one by one on any editing software. The Action makes my life easier, by editing the photo with settings that I've specified. I sharpen the image with it, adding a few shadows and highlights. You will have to find a specific setting that works with your photos, as each Reshade is different. this is just what works for me.
C. Lastly I put all of my PSD settings into a folder. and then saved all of those settings into my library. So All I have to do now is drag and drop everything over the image. and in most cases, I could be done.
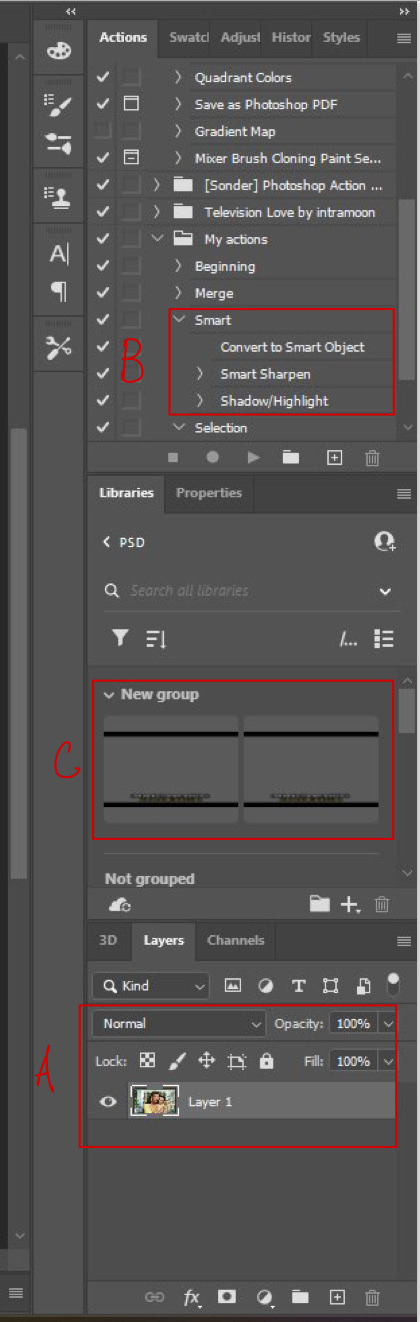
C (continued).

This is how the image looks right after I put the PSD on. As you can see this is how I get the Letterbox effect. and how I write the dialogue. but I remove that for edits, of course.

This is what my layers look like. It's all quite organized, But the editing folder is where the magic really happens.
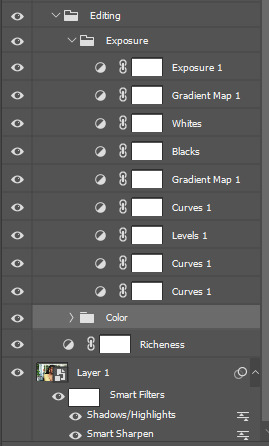
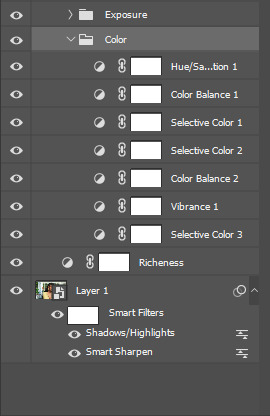
Although the pictures of settings might not help that much. but I can tell you most of these are just subtle changes. but all together they make something great.
So this is the before:


And this is the after
So all of that to say, This is the main coloring and editing for all my edits. but most of them are different. To get the magazine covers, I use the devilliers magazine PSDs for the most part. While they aren't available on Patreon anymore. @lucky-content uploaded them all onto SimsFileShare. You can find them here!
Anyway, that was a lot, but I hope it helps you or someone else! If this wasn't what you meant send me another, and I'll figure it out!
8 notes
·
View notes
Text
2021 Ultimate Digital Life Planner by The Daily Planners + FREE Guide
The FREE guide is being updated. Check back again next time. Don’t want to wait? Grab the old version instead.
This post contains affiliate links. If you take action (i.e. make a purchase) after clicking my affiliate links, I’ll probably earn a few bucks which will help keep this website running or just to buy a cup of coffee. You know I only recommend products that I actually use, love and trust, right?
Hello friend!
Another planner feature and this time it’s from The Daily Planners. I am grateful to receive this 2021 Ultimate Digital Life Planner that shows a tropical, fun look rich in terracotta and a warm color palette.
It’s the real ultimate planner and so I created a FREE ultimate guide to help you easily navigate through the planner and its pages when you purchase it.
The FREE guide is being updated. Check back again next time. Don’t want to wait? Grab the old version instead.
Tools and Resources
Any note-taking apps (such as Goodnotes or Noteshelf)
iPad Pro 4th Gen 12.9”
iPad 7th Gen 10.2”
Apple Pencil 1st Gen
Apple Pencil 2nd Gen
Paperlike matte screen protector
ESR standing case for iPad Pro 4th Gen 12.9”
Details
Cover
2 Index pages for navigation throughout the document
Clickable tabs seamlessly throughout the document
Links to video tutorials
Dated December 2020 - December 2021 Daily, Weekly, Monthly spreads
5 notebooks that can be customized with the 50+ templates included in this planner
Undated Daily, Weekly & Monthly planner pages
Includes 57 stickers (not pre-cropped, including a tutorial on how to crop)
Matching Hex Color Codes
50+ Extra Templates
15 Different Paper Templates
1 TXT file that contains the link to a special download page with tutorial videos and a password to access the page
1 ReadMe file
amzn_assoc_placement = "adunit0"; amzn_assoc_search_bar = "false"; amzn_assoc_tracking_id = "kymmiejournals-20"; amzn_assoc_ad_mode = "manual"; amzn_assoc_ad_type = "smart"; amzn_assoc_marketplace = "amazon"; amzn_assoc_region = "US"; amzn_assoc_title = "Recommended for Digital Planning"; amzn_assoc_linkid = "d32590cf1ecfb8dc160183928b74faf4"; amzn_assoc_asins = "B085M7V9RF,B08N5NZ4F5,B07VDS21DS,B0876P8VHN";
2021 Ultimate Digital Life Planner
Cover
Don't you just love the terracotta colors and the little details on the cover of the planner?
Extra Templates
There are 50 different templates to play with. You can replace, add, or duplicate each to your liking.
Index
The Index or Table of Contents is very helpful to navigate easily between pages. Click the upper ring binder to access the Index page.
Stickers
Free stickers too! Although it's not included in the main PDF. However, these are located in a separate Google Drive folder, this is to avoid any performance issues on the PDF.
Journals
There are 5 journal notebooks you can totally customize. Use any 50+ extra templates or from the 15 paper layouts to create your own journal notebook inside the planner.
amzn_assoc_placement = "adunit0"; amzn_assoc_search_bar = "false"; amzn_assoc_tracking_id = "kymmiejournals-20"; amzn_assoc_ad_mode = "manual"; amzn_assoc_ad_type = "smart"; amzn_assoc_marketplace = "amazon"; amzn_assoc_region = "US"; amzn_assoc_title = "Recommended for Digital Planning"; amzn_assoc_linkid = "d32590cf1ecfb8dc160183928b74faf4"; amzn_assoc_asins = "B085M7V9RF,B08N5NZ4F5,B07VDS21DS,B0876P8VHN";
2021
The 2021 tab or the Year in a Glance lets you add the important holidays and other occasions on the page for easy tracking.
To Do
Make a list of everything!
Project
Perfect if you have projects in school or just at home. For example, I have a project called #getplannerfeatured, and I use this to track my progress and timeline.
Organizer
Include a lot of photos in this page for inspiration. You don't have to follow each format, you can remove the lines by using Pen tool in white to remove the lines and create your own boxes or layouts.
Meeting
Include each agenda discussed in your meeting. This is perfect for those who are working or studying. You can also put important words mentioned in the meeting. For the Location, you can put "Zoom" if it's an online meeting.
Goals
The Goals tab on the top redirects you to the Daily Goals page, but if you want to access the Weekly and Monthly, then you can click on the lower binder to see the Extra Templates.
Tutorials
You will find lots of tutorials and tips & tricks from Tess not just about the planner but on Goodnotes too.
amzn_assoc_placement = "adunit0"; amzn_assoc_search_bar = "false"; amzn_assoc_tracking_id = "kymmiejournals-20"; amzn_assoc_ad_mode = "manual"; amzn_assoc_ad_type = "smart"; amzn_assoc_marketplace = "amazon"; amzn_assoc_region = "US"; amzn_assoc_title = "Recommended for Digital Planning"; amzn_assoc_linkid = "d32590cf1ecfb8dc160183928b74faf4"; amzn_assoc_asins = "B0876P8VHN,B08VMZ4RTY,B07YTHD64R,B07QYYSDMP";
Finances
This is where you put your overall finances - savings, expenses, revenue or difference
Budget
Monthly Budget helps you track all your unexpected expenses and identify the things you don't or won't really need.
Expenses
I'm not really fond of tracking my expenses because I know it'll always be too much or over the budget but I don't have a choice - I just have to track it so I won't go into debt. 😂
Savings
Track your earnings and your cash flow. You can also track your savings for when you want to buy the new iPad Pro or Macbook Pro.
Shopping
Track your shopping list here so you won't have to go over the budget.
Package
Tracking happy mails? Then this is the perfect page! Although since I shifted to digital planning, I don't really have happy mails anymore - maybe happy emails or downloads?
amzn_assoc_placement = "adunit0"; amzn_assoc_search_bar = "false"; amzn_assoc_tracking_id = "kymmiejournals-20"; amzn_assoc_ad_mode = "manual"; amzn_assoc_ad_type = "smart"; amzn_assoc_marketplace = "amazon"; amzn_assoc_region = "US"; amzn_assoc_title = "Recommended for Digital Planning"; amzn_assoc_linkid = "d32590cf1ecfb8dc160183928b74faf4"; amzn_assoc_asins = "B0876P8VHN,B08VMZ4RTY,B07YTHD64R,B07QYYSDMP";
Charts
Charts page is another paper template that you can use for expenses or lists.
Monthly
The Monthly page is clickable to Weekly and Daily. You can easily access each month by clicking on the Right side tabs. Use this page to easily track your appointments and occasions for the whole month. You can also track your bills and subscriptions here so you'd know when to pay or add your project deadlines and meetings.
Monthly Overview Goals
The Monthly Overview page is right after the Monthly spread or just before the Weekly page. You can put your ideas and priorities for the whole month on this page. Remember to add a lot of visuals - photos and stickers so you won't have to fill every box in case you can't.
Weekly
You can use Weekly Planner to track your meals or menu for the week. Write the ingredients or recipe in the bigger boxes. The top 3 boxes can be used for your top 3 priorities this week.
Daily
The Daily page contains a calendar that is clickable to Weekly and Daily. You can use color blocks to track your schedule. Add stickers or photos for your Mood and Activity.
Braindump
You can access the Braindump page every after the last day of the week. Make your braindump page beautiful by adding visuals such as photos and stickers. Focus on what you want to achieve for next week or what you can improve on.
Health
The Health section focus solely on the activities that make you feel good physically without feeling any guilt. Track your workouts, runs, dance class, yoga, stretching, water intake, sleep, meals and add memoji to the Notes boxes.
amzn_assoc_placement = "adunit0"; amzn_assoc_search_bar = "false"; amzn_assoc_tracking_id = "kymmiejournals-20"; amzn_assoc_ad_mode = "manual"; amzn_assoc_ad_type = "smart"; amzn_assoc_marketplace = "amazon"; amzn_assoc_region = "US"; amzn_assoc_title = "Recommended for Digital Planning"; amzn_assoc_linkid = "eb3ede4d4018c32e19b9aac81c18ed5f"; amzn_assoc_asins = "B078WLS15K,B08N5NZ4F5,B07PZSNH8G,B086RSPTKS";
Intentions
Weekly Intentions page serves as a guided-journal page where you can put which habits that make you feel good, what you like to see manifest this week, what limits you the most right now and how you can change it, write your mantra, describe the person you want to be this week and positive affirmation.
Gratitude
This is super helpful for your personal growth. You have to be appreciative even with the little things - like how your food has been properly prepared by chefs or crew in fast food, how people you don't normally notice makes your life easier and so much more.
2021 Goals
Track your most important goals monthly and add the things that hinder you to accomplish it so it'll be easier for you to focus on each goal. For example, you have 3 goals but you are having difficulties finishing them because of a low budget or maybe time constraint - these are what you call roadblocks that prevent you from achieving your top goals. Identifying your roadblocks will help you focus more on what needs to be done.
Vision Board
Add a lot of photos here. Your vision board should look engaging and encouraging!
Reflection
Reflect on the things that made you happy or cry for this week and use that to improve yourself and be prepared for the next week.
Affirmations
Add your daily mantras or powerful and positive quotes that will help you turn a bad day into a great one!
Recipes
Be your own chef by utilizing this Recipe page. Browse the internet for recipes or ask your mom's special recipe and put it here.
amzn_assoc_placement = "adunit0"; amzn_assoc_search_bar = "false"; amzn_assoc_tracking_id = "kymmiejournals-20"; amzn_assoc_ad_mode = "manual"; amzn_assoc_ad_type = "smart"; amzn_assoc_marketplace = "amazon"; amzn_assoc_region = "US"; amzn_assoc_title = "Recommended for Digital Planning"; amzn_assoc_linkid = "eb3ede4d4018c32e19b9aac81c18ed5f"; amzn_assoc_asins = "B078WLS15K,B08N5NZ4F5,B07PZSNH8G,B086RSPTKS";
Cleaning
Cleaning doesn't only apply to tangible items, you can clean your cloud storage, your debts, your To Be Read shelves, your unused planners, or just try to clear out your mind.
Habits
Create and maintain a good and healthy habit. You can track your water intake, stretching, exercise, or a minimum of 8 hours of sleep and reward yourself when you complete your goal.
Mood Tracker
Mood tracker can be really vague but you can make it fun by putting your own legends or mood colors.
Birthday
I enjoy writing down my family and friends' birthdays. This reminds me to greet them on their special day when life gets busy!
Undated
Use these Undated pages - available in Daily, Weekly, Monthly for extra entry.
Lined Paper Templates
Different Lined paper templates to choose from to help you write anything under the sun.
Grid Paper Templates
Graph or Grid paper template to help you track anything!
amzn_assoc_placement = "adunit0"; amzn_assoc_search_bar = "false"; amzn_assoc_tracking_id = "kymmiejournals-20"; amzn_assoc_ad_mode = "manual"; amzn_assoc_ad_type = "smart"; amzn_assoc_marketplace = "amazon"; amzn_assoc_region = "US"; amzn_assoc_title = "Recommended for Digital Planning"; amzn_assoc_linkid = "d32590cf1ecfb8dc160183928b74faf4"; amzn_assoc_asins = "B0876P8VHN,B08VMZ4RTY,B07YTHD64R,B07QYYSDMP";
Dotted Paper Templates
Dot paper to help you with your journaling
Party Planner
Who says party planning isn't a thing or only for occasions with guests more than 50? You can host your own intimate party with family and friends. Host a dinner night or game night - make it fun!
Menu
This page makes me crave for yummy food! Track your menu for the week, your ingredients, and maybe write some adjustments to the recipe.
Hex Color Codes
Definitely one of my favorite pages, the Hex Color Codes provided by Tess to match the planner. You can use this to add colors to your handwriting, shapes, texts, color blocks, lines and so much more! I intended to hide the code to protect the seller's rights.
Milestones
There are a lot of things you should celebrate and this Milestone page is perfect for it. You can track your social media follower count, your online course progress, how many referrals you made, how many sales you made on your side hustle and so much more!
2021 Health & Fitness
It's time to get fit and stay healthy! Track your weight improvement and challenge yourself by tracking your work out days vs cheat days.
Passwords
Well, there's nothing wrong with putting your passwords here as long as it's not your bank pin code or social security ID! Maybe, you can add your social media accounts' password or even the password to every freehub or resource on your fave planner website.
Activities
Track your activities here and your schedule for the week.
amzn_assoc_placement = "adunit0"; amzn_assoc_search_bar = "false"; amzn_assoc_tracking_id = "kymmiejournals-20"; amzn_assoc_ad_mode = "manual"; amzn_assoc_ad_type = "smart"; amzn_assoc_marketplace = "amazon"; amzn_assoc_region = "US"; amzn_assoc_title = "Recommended for Digital Planning"; amzn_assoc_linkid = "d32590cf1ecfb8dc160183928b74faf4"; amzn_assoc_asins = "B0876P8VHN,B08VMZ4RTY,B07YTHD64R,B07QYYSDMP";
To Read / Watch
Add your favorite shows, movies, new series to watch, books to read, currently reading, to be reviewed. You can also write the names of the books on your wishlist!
Daily Intentions
The Daily Reflection will help you focus on the things that you either want to improve or change. This page will help you identify how you handle difficult things.
2021 Self Reflection
Write your reflection before you say goodbye to 2021. Write your struggles and victories for the year and how you were able to overcome the challenges. You can also include all the things that made you cry or smile! Things you've learned, people you've loved, everything that made you feel proud of yourself.
2022 Vision Board
Decorate your 2022 Vision Board ahead of time!
Other Pages
2022 Monthly List Page
Blank Vision Board
Monthly Goals
Weekly Goals
Blank Spread White & Colored
2020 Self Reflection
amzn_assoc_placement = "adunit0"; amzn_assoc_search_bar = "false"; amzn_assoc_tracking_id = "kymmiejournals-20"; amzn_assoc_ad_mode = "manual"; amzn_assoc_ad_type = "smart"; amzn_assoc_marketplace = "amazon"; amzn_assoc_region = "US"; amzn_assoc_title = "Recommended for Digital Planning"; amzn_assoc_linkid = "d32590cf1ecfb8dc160183928b74faf4"; amzn_assoc_asins = "B085M7V9RF,B08N5NZ4F5,B07VDS21DS,B0876P8VHN";
Links
The Daily Planners on Instagram
The Daily Planners on Etsy
Get the 2021 Ultimate Digital Life Planner for 50% off, use discount code KYMMIE50
Use discount code, KYMMIE10 for 10% off on any The Daily Planners’ products
Notes
The fonts and graphics used are separate purchases and not included in the planner
feedback
What do you love most about this plan with me post?
Any questions or suggestions about this blog post?
Get access to Freebie Library!
2 notes
·
View notes
Text
https://www.oktoolbox.com
LED Scrolling Text Led subtitle scrolling tool, suitable for playing work content, text reminders, advertising slogans, etc. on computers or mobile phones
XML Formatter The XML formatter can beautify the compressed XML code or compress the XML code
Timestamp Converter The tool can convert timestamps into date and time, and can also convert date and time into timestamps
QR Code Generator The tool can generate QR code pictures from web addresses or text, and can set the format, fault tolerance, size, color and logo of QR codes
Text Encryption and Decryption Online text encryption and decryption tools, support AES, DES, RC4, rabbit, tripledes
URL Encode and Decode You can convert a normal URL to an encoded URL or an encoded URL to a normal URL
Image Color Recognition Free online image color recognition tool, which can extract the main color of the image
Flow Chart Online flow chart tool, with built-in multiple graphics such as rectangle, circle, line, arrow and flow chart, supports exporting SVG/PNG/JPG.
Color Picker The color code, hex and RGB values can be obtained through the color selector, color table and color name
Character Counter This tool can quickly calculate the number of words, letters, numbers, punctuation and Chinese characters in the article
Morse Code Morse code encoding and decoding tools help you encode text into Morse code and decode Morse code into text
UTF-8 Encode and Decode You can convert text to UTF-8 or UTF-8 to text
Decimal Converter The online binary converter provides binary, octal, decimal, hexadecimal and other mutual conversion functions
GIF Generator You can make GIF pictures online and combine multiple static pictures into one dynamic picture
JSON Formatter The JSON formatter can beautify the compressed JSON code or compress the JSON code
Cartoon Avatar Maker Free cartoon avatar online production tool, you can freely choose the facial expression, facial features and clothing of the characters
Htpasswd Generator Generate Apache HTTP basic authentication password file online
Letter Case Converter The tool can convert uppercase letters to lowercase letters, and also convert lowercase letters to uppercase letters
SQL Formatter SQL formatter can beautify the compressed SQL code or compress the SQL code
Markdown Editor You can write markdown code and preview it in real time in the browser
Regular Expression Online regular expression testing tools can help you quickly test whether the regular expressions you write are correct
CSS Formatter CSS formatter can beautify compressed CSS code and compress CSS code
Text Deduplication This tool can automatically remove duplicate content lines in articles or text
ASCII Encode and Decode It can convert the local characters in the code into Unicode and solve the problem of garbled code encountered in programming
Port Scanner Scan common or specified ports to see if they are open
Text Compare The two texts can be compared online to detect the difference between the two texts
Image Format Converter Can modify the image format, support JPG, PNG, BMP, JPEG, GIF, SVG, webp, ICO formats
Date Calculator You can calculate the number of days between dates, and calculate the number of days from today to a certain day in the past or the future
Unicode Encode and Decode You can convert text to unicode or Unicode to text
ICO Converter You can crop pictures online and convert them into favicon.ico files
Image Character Recognition The characters in the image can be recognized online
Base64 Encode and Decode Base64 encoding and decoding tools help you encode text into Base64 and decode Base64 into text
Face Recognition It can automatically recognize the faces in the photos and cut out the head pictures in batches
Image to Base64 You can convert pictures to Base64 or Base64 to pictures
Photo Background Color You can modify the background color and size of photos online
Random Password Generator You can randomly generate a password containing numbers, uppercase letters, lowercase letters and symbols
Photo to Sketch A tool for automatically generating hand drawn style photos, which can set the blur level of hand drawn pictures
Random Number Generator One number can be generated randomly, or multiple random numbers can be generated in batch at a time
Calculator Mathematical calculation of addition, subtraction, multiplication, division, root square, PI, reciprocal, sine and cosine
Text Flow Chart A tool for drawing flow chart using ASCII code
XML to JSON The tool can convert XML to JSON or JSON to XML
Table Data Conversion A tool that can convert table data into JSON format
Mind Map You can make mind map, directory organization chart, fishbone chart, logical structure chart, organization chart online
MD5 Encryption It can convert text into MD5 and generate 32-bit and 16-bit MD5 ciphertext
Gantt Chart You can use this tool to draw Gantt Chart, which is convenient for project management and schedule management
Image compressor It can help you compress PNG/JPEG images online
Image to PDF You can combine multiple pictures of unlimited format and size into a complete PDF document
Image Watermarking The image watermarking tool can customize the text, font size, font color, transparency and text spacing
2 notes
·
View notes
Text
Resolving Storage and Internet Issues
Computers are indispensable tools in our daily lives, but they can sometimes present frustrating challenges, such as running out of storage space or losing internet connectivity. These issues can disrupt productivity and cause significant inconvenience. This article explores practical solutions for two common problems: managing a nearly full startup disk on a Mac and addressing internet access issues on a Windows system. By following these steps, users can restore their devices to optimal performance and maintain seamless operation.
Addressing a Full Startup Disk on Mac
When a Mac displays a warning that the startup disk is nearly full, it signals that the primary drive, which houses the operating system and user files, is running out of space. This can lead to sluggish performance, application crashes, and an inability to save new files. How to Fix Your Startup Disk Is Almost Full on Mac begins with understanding the root cause and taking systematic steps to free up space.
The first step is to check how much storage is being used. Navigate to the system menu, select "About This Mac," and click on the storage tab to view a breakdown of space usage. This visual representation helps identify which file categories—such as applications, documents, or media—are consuming the most space. Once you have this overview, prioritize clearing out unnecessary files. Start by emptying the trash, as deleted files often linger there, taking up valuable space. Next, review the downloads folder, where temporary or forgotten files like installers or duplicates tend to accumulate. Deleting these can quickly reclaim space.
Another effective strategy is to manage large files, such as videos or archived projects, which often occupy significant portions of the disk. Use the built-in storage management tool to locate these files and consider moving them to an external drive or cloud storage. For users with extensive photo or video libraries, optimizing storage by enabling cloud-based syncing can offload files while keeping them accessible. Additionally, uninstall unused applications, as they not only consume disk space but may also run background processes that slow down the system.
Clearing system clutter is another critical step. Temporary files, caches, and logs can accumulate over time. Use trusted cleanup tools available in the Mac’s application store to safely remove these without affecting system stability. For advanced users, manually deleting cache files from the library folder can free up space, but caution is advised to avoid deleting essential system files. Regularly performing these maintenance tasks ensures the startup disk remains manageable, preventing future warnings.
Troubleshooting Internet Connectivity on Windows
Losing internet access on a Windows computer can be equally disruptive, whether it’s due to a misconfigured setting, hardware issue, or network problem. How to Fix No Internet Access in Windows involves a step-by-step approach to diagnose and resolve the issue, restoring connectivity efficiently.
Begin by verifying the physical connections. Ensure the Ethernet cable is securely plugged in or that the Wi-Fi adapter is enabled. Restarting the router and modem can resolve temporary glitches, as these devices sometimes encounter conflicts that disrupt connectivity. After rebooting, check the network status in the Windows taskbar. If the system indicates a connection but still shows no internet access, proceed to deeper troubleshooting.
Run the built-in network troubleshooter by accessing the network settings and selecting the option to diagnose problems. This tool automatically detects common issues, such as incorrect IP configurations or disabled services, and applies fixes where possible. If the troubleshooter doesn’t resolve the issue, manually reset the network settings. This can be done by navigating to the network and internet settings, selecting the reset option, and restarting the computer. Be aware that this resets all network adapters, requiring you to reconnect to Wi-Fi networks afterward.
Another potential cause of internet issues is outdated or corrupted network drivers. Visit the device manager, locate the network adapters, and check for any warning indicators. Updating drivers through the system or downloading the latest versions from the manufacturer’s website can resolve connectivity problems. If the issue persists, check for conflicts with security software. Firewalls or antivirus programs sometimes block connections inadvertently. Temporarily disabling these programs can help identify if they are the culprit, but ensure they are re-enabled after testing to maintain system security.
For persistent problems, consider external factors like network congestion or service provider outages. Contacting the internet service provider to confirm the status of the connection can clarify whether the issue is local or network-wide. Testing the connection on another device can also help determine if the problem is specific to the Windows system or a broader network issue.
Proactive Maintenance for Long-Term Performance
Preventing these issues from recurring requires proactive habits. For Mac users, regularly monitoring storage usage and setting up automatic cloud backups can prevent the startup disk from filling up. Scheduling monthly cleanups to remove redundant files and optimizing storage settings ensures the system runs smoothly. For Windows users, maintaining updated drivers and routinely checking network settings can prevent connectivity disruptions. Keeping security software updated and avoiding unnecessary applications also contributes to stable performance.
0 notes
Text
Boost Your Organization's Efficiency with Enterprise Digital Asset Management (DAM)
In today's fast-paced digital environment, organizations are inundated with vast volumes of digital content—images, videos, documents, presentations, and more. Managing these assets effectively is no longer a luxury; it’s a necessity. This is where Enterprise Digital Asset Management (DAM) systems come into play. Designed to centralize, organize, and streamline access to digital files, a DAM system significantly enhances productivity, consistency, and collaboration across departments.
What Is Enterprise Digital Asset Management?
Enterprise DAM is a centralized platform that allows businesses to store, organize, retrieve, and distribute digital assets from a single location. These systems go beyond basic cloud storage by offering features such as metadata tagging, version control, user permissions, workflow automation, and integration with other enterprise tools like content management systems (CMS), project management platforms, and marketing software.
For large organizations or those that manage a high volume of digital assets, a robust DAM system Contact us ensures that valuable content is easily accessible, properly cataloged, and secure.
Why Centralization Matters
Imagine a scenario where marketing teams, designers, sales personnel, and external vendors all need access to the same brand assets—logos, product photos, promotional videos, and templates. Without a DAM, these assets are often scattered across different computers, email threads, cloud drives, and hard disks. This leads to lost files, duplicated efforts, and inconsistencies in branding.
With a centralized DAM system:
All assets are stored in one secure, cloud-based hub.
Users can quickly find what they need using powerful search and filter functions.
Version control ensures that everyone uses the most up-to-date materials.
Redundant storage and asset duplication are minimized, saving time and space.
The result? A dramatic improvement in operational efficiency and reduced frustration among teams.
Enhanced Organization with Metadata and Tagging
One of the core features of an enterprise DAM is the ability to add metadata and tags to digital assets. This structure makes it easier to search and categorize assets based on criteria such as type, date, campaign, usage rights, or even color and format.
By enabling advanced search capabilities, metadata transforms what could be a chaotic file archive into an intuitive and user-friendly system. This is particularly useful for large-scale marketing departments, creative agencies, or global brands that manage thousands of assets across various regions and campaigns.
Streamlined Distribution and Collaboration
Digital Asset Management systems are not just about storage—they're about distribution too. With a DAM, sharing files internally or with external stakeholders is seamless. You can:
Generate shareable links with expiry dates and download limits.
Set user permissions to control who can view, download, or edit files.
Integrate DAM systems with platforms like Adobe Creative Cloud, Microsoft Office, and CMS tools to embed assets directly into your workflows.
This level of integration and control reduces time spent on manual tasks such as emailing files, searching through folders, or verifying asset versions.
Brand Consistency and Governance
For organizations with multiple departments or global teams, maintaining brand consistency is a critical challenge. A DAM system acts as a single source of truth Contact us for brand assets. By centralizing approved files—such as logos, font kits, brand guidelines, and media templates—teams are empowered to create consistent, on-brand content across all touchpoints.
Moreover, governance features ensure that expired, unapproved, or outdated assets are automatically flagged or removed, reducing the risk of miscommunication or off-brand messaging.
Improved Workflow Efficiency
Enterprise DAM solutions often include workflow automation tools that streamline the creation, approval, and publishing of digital content. For example:
Designers can upload drafts directly to the DAM for review.
Managers receive automatic notifications for approval.
Approved assets are instantly available to teams for use or publication.
This kind of workflow efficiency accelerates campaign delivery, enhances team collaboration, and frees up time for creative and strategic work rather than administrative tasks.
Scalability and Security
As your organization grows, so does your digital asset library. Enterprise DAM systems are built to scale with your needs, offering storage for millions of assets without compromising speed or usability.
Security is another key benefit. With robust access controls, encryption, backup options, and audit trails, DAM systems protect your digital assets from unauthorized access, accidental deletion, or data breaches.
Measurable ROI and Business Impact
Implementing an enterprise DAM is not just a technical upgrade—it’s a strategic investment. The benefits translate into measurable returns:
Reduced time spent searching for assets (up to 30% according to some studies).
Faster campaign rollouts thanks to automated workflows.
Lower asset production costs due to reuse and repurposing of existing materials.
Improved compliance and risk management through access controls and audit logs.
When digital asset management is optimized, your organization can move faster, operate more efficiently, and deliver better experiences to customers and stakeholders.
Conclusion
Enterprise Digital Asset Management (DAM) is a game-changer for organizations looking to centralize, organize, and optimize their digital content. By bringing all your assets under one intelligent system, you not only improve efficiency but also empower your teams to collaborate better, stay on-brand, and scale content operations with confidence.
Whether you're a marketing team managing hundreds of campaigns or a global enterprise navigating complex media workflows, an enterprise DAM system provides the foundation for smarter, faster, and more secure digital asset management.
1 note
·
View note
Text
Enhancing Image Quality with Photoshop
Enhancing Images With Photoshop: Common Queries Answered
1. How to enhance images in Photoshop?
To enhance images in Photoshop, use the following steps: 1. Open the image. 2. Adjust brightness/contrast via Image > Adjustments. 3. Use the Levels or Curves tools for total adjustments. 4. Apply sharpening filters (Filter > Sharpen). 5. Use the Vibrance or Hue/Saturation adjustments for color enhancement. 6. Crop or straighten as needed. 7. Save your edited image.
2. How to enhance photo quality?
To enhance photo quality, use photo editing software to adjust brightness, contrast, and saturation. Apply sharpening filters to improve clarity, and use noise reduction tools to minimize graininess. Crop to improve composition and remove distractions. For higher resolution, consider using interpolation techniques. Additionally, shooting in good lighting conditions and using a higher-quality camera can significantly improve photo quality.
3. Can Photoshop auto enhance photos?
Yes, Photoshop has an "Auto" feature under the "Image" menu that can automatically enhance photos by adjusting levels, contrast, and colors. Additionally, Adobe offers a feature called "Camera Raw," which includes an "Auto" button for quick adjustments. While these features can improve images, results may vary, and manual editing is often preferred for more control.
4. How do you enhance a blurry picture in Photoshop?
To enhance a blurry picture in Photoshop, use the "Filter" menu and select "Sharpen" followed by "Shake Reduction" for overall improvement. You can also apply "Unsharp Mask" or "Smart Sharpen" for more control. Adjust the sliders to achieve the desired sharpness. Always work on a duplicate layer to preserve the original image. Save your work afterward.
5. What's new in Photoshop 2024?
Photoshop 2024 introduces AI-powered features like Generative Fill and enhanced object selection, improving creative workflows. The new “Quick Actions” panel simplifies tasks such as background removal and skin smoothing. Additional improvements include a streamlined interface, better performance, and enhanced collaboration tools for easier sharing and feedback. The update also offers expanded support for new file formats and plugins.

Visit: VS Website See: VS Portfolio
0 notes
Text
How to Increase Space in Google Workspace
Google Workspace is a powerful collaboration platform combining Gmail, Google Drive, Google Docs, Sheets, Slides, and other productivity tools. But when your storage is full, you can’t send emails, upload files, or access critical documents.
How to increase space in Google Workspace becomes a critical question for teams and organizations relying on this platform for daily operations.
Primary Reasons You Might Need More Google Workspace Storage
Before we dive into solutions, let’s understand why you might be running out of space:
High Email Volume: Gmail attachments can pile up.
Large Files in Drive: Especially videos, high-res images, or large documents.
Shared Drives: Multiple users contributing data.
Backups & Duplicates: Repeated file versions eat up storage.
Photos in Google Photos: High-resolution photo storage consumes Drive quota.
Upgrade Your Google Workspace Plan to Increase Space
One of the most direct answers to How to increase space in Google Workspace is by upgrading your plan.
Google offers the following options:
Business Starter: 30 GB per user
Business Standard: 2 TB per user
Business Plus: 5 TB per user
Enterprise Plans: Customizable and unlimited options
If your current plan is no longer meeting your needs, it’s time to scale up. At Amyntas, we help businesses analyze usage and suggest the right plan to maximize ROI.
Buy Additional Storage Add-ons
If upgrading your plan isn’t viable, you can purchase buy additional Google Drive storage as an add-on. This is especially useful for individual users or small businesses not ready to jump to the next pricing tier.
Google provides options to buy additional storage blocks, which can be shared across Gmail, Drive, and Photos.
Benefits of Add-on Storage:
No need to change plans
Flexible allocation
Scales with your needs
Ask your Google Workspace reseller like Amyntas to help activate and manage additional storage seamlessly.
Clean Up Unused Files and Emails
Sometimes, the easiest way to free up space in Google Workspace is simply to declutter.
Tips to Reduce Unnecessary Data:
Empty the trash in Gmail and Google Drive
Delete large emails and attachments
Remove duplicate files
Clear unused shared files
Use tools like Google’s storage manager to find large files
This housekeeping can delay the need for more storage and help optimize current space. How to Increase Space in Google Workspace
0 notes
Text

10 Easy Photoshop Tips for Beginners to Edit Like an Expert
Adobe Photoshop is one of the most powerful tools available for digital artists, photographers, and designers. But when you open it for the first time, it can be overwhelming. With so many tools, panels, and features, where should a beginner even begin? Fortunately, you don’t need to know everything at once. By mastering just a few core techniques, you can significantly improve your editing skills and grow more comfortable using the software. In this post, we’ll share 10 easy Photoshop tips that will help beginners get started the right way.
1. Learn to Work with Layers
Layers are the foundation of Photoshop. Every image you edit should involve layers so that you can work on different elements independently. This means you can apply changes, add effects, or move objects without affecting the rest of the design. For instance, you can keep the background on one layer and a subject on another, making it easier to isolate and edit either element. Always name your layers for clarity and group related layers together. Mastering layers early will give you much more control over your edits.
2. Use Adjustment Layers Instead of Direct Edits
One of the best habits to adopt as a beginner is non-destructive editing. Instead of applying changes directly to the image, use adjustment layers for things like brightness, contrast, hue/saturation, or levels. Adjustment layers sit on top of your image, and you can modify or delete them at any time without harming the original image. It’s a safer and more flexible way to experiment with edits.
3. Improve Your Composition with the Crop Tool
Cropping isn’t just about cutting out parts of an image, it’s also a powerful composition tool. Using the crop tool, you can reframe your image to draw more attention to the subject, remove unnecessary space, or follow visual rules like the Rule of Thirds. The crop tool helps create balance and improves the overall visual impact of your photo.
4. Get Comfortable with Keyboard Shortcuts
Photoshop has hundreds of tools and functions, and constantly clicking through menus can slow you down. Learning keyboard shortcuts can dramatically improve your speed and efficiency. For example, ‘Ctrl+Z’ undoes your last action, ‘Ctrl+T’ enables free transform, and pressing ‘B’ selects the brush tool. Even learning just a few shortcuts will save time and make your workflow smoother.
5. Use the Clone Stamp Tool for Precise Retouching
The Clone Stamp Tool is incredibly useful for duplicating or removing parts of an image. It allows you to sample one area of an image and paint that sample over another area. This is especially handy for removing blemishes, dust, or objects from photos. The key is to sample from a nearby, similar area for the most natural results.
6. Play Around with Blending Modes
Blending modes let you change how layers interact with each other, and they can add depth, texture, or drama to your work. Try setting a text layer to "Overlay" or a duplicate image layer to "Multiply" to see how the result changes. Blending modes are creative tools that give your images a unique touch.
7. Heal with the Healing Brush Tool
While the Clone Stamp Tool copies pixels exactly, the Healing Brush Tool blends them more naturally with the surrounding area. It’s a fantastic tool for touching up skin, removing small objects, or fixing minor imperfections without obvious signs of editing. It blends tone and texture for seamless results.
8. Save Your Work Regularly
Photoshop is powerful, but it’s also memory-intensive, which means it can occasionally crash. To avoid losing progress, save your work regularly by pressing ‘Ctrl+S’ (or ‘Cmd+S’ on Mac). You can also use "Save As" to create multiple versions of your project as it evolves.
9. Customize Your Workspace to Fit Your Needs
Photoshop allows you to customize your layout, so you can create a workspace that suits your editing style. You can rearrange panels, open specific tools, and even save your custom workspace for future sessions. Having a familiar layout improves comfort and efficiency, especially as you begin using Photoshop more often.
10. Always Use Non-Destructive Editing Methods
Finally, one of the most important tips is to avoid editing your original image directly. Always duplicate your layers or use layer masks when making changes. This non-destructive method keeps your original content safe and allows you to make adjustments at any point in the process without starting over.
Conclusion
Photoshop is a deep and powerful program, but you don’t need to master everything at once. By focusing on these 10 beginner-friendly tips, you can start creating better edits and gain confidence with the tools Photoshop offers. Keep practicing, be patient with yourself, and don’t be afraid to experiment, that’s how real progress begins.
#Photoshop tips#Photoshop for beginners#Easy Photoshop tutorials#Photoshop editing tips#Beginner Photoshop guide
0 notes
Text
Master Your Visual Content: Easy Background Removal, Design Tricks, and Photography Tips

In this digital world, creating eye-catching visual content is something all content creators, business owners of small enterprises, and digital artists do. This guide will run you through several ways of removing background images with Photoshop and Illustrator, discuss product photography tips for beginners, brainstorm the best free clipart sites, and share some creative ideas on how to design captivating YouTube thumbnails. We'll also show how PhotoCut, a versatile and user-friendly app, can help you accomplish these tasks quickly and efficiently.
Learn how to easily blur photo parts.
Ways to Remove Background in Photoshop

Photoshop remains one of the most powerful tools for background removal. Here are the most effective methods:
1. Remove Background with the Quick Action Tool
Photoshop now has a one-click option in the "Properties" panel (for images with a layer unlocked). Simply go to Window > Properties and click Remove Background.
2. Use the Select Subject + Mask
Go to Select>Subject to automatically isolate the main subject.
Then click Select and Mask to refine the edges and output the selection to a new layer.
3. Pen Tool for Precise Cuts
This is a manual method:
Use the Pen Tool (P) to create a path around your subject.
Right-click and choose Make Selection>Layer via Cut.
4. Use Channels for Complex Backgrounds
Ideal for hair or transparent objects.
Use the Channels Panel, duplicate the one with the highest contrast, and adjust levels to isolate.
Use Load Selection and mask accordingly.
Ways to Remove Background in Illustrator

Illustrator is ideal for vector-based images. Here’s how to remove backgrounds in Illustrator.
1. Use Image Trace + Expand
Place your image.
Go to Window>Image Trace and choose a preset like "High Fidelity Photo."
Click Expand to convert to vector.
Use the Direct Selection Tool (A) to remove the background paths.
2. Clipping Mask Method
Create a shape that fits around your subject.
Select both the image and the shape.
Right-click>Make Clipping Mask.
3. Opacity Mask for Transparent Backgrounds
This method requires grayscale mask images:
Open the Transparency panel.
Select the image and the mask and apply using "Make Mask."
PhotoCut can be used before importing into Illustrator. Extract the subject using Auto Cut, then import it into Illustrator for vector editing.
Using PhotoCut for Background Removal

For beginners or mobile users, PhotoCut is a great option:
Once you select your picture, tap on the Auto Cut button to remove the subject from the background instantly.
For more precision and clean cut-outs, manually refine the edges with the help of the Magic Brush, for instance, hair or other special details.
Saving in PNG with a transparent background enables you to use it elsewhere or entirely change the background with the help of other in-built templates, be it skies, gradients, or solid colors.
The simple process ultimately makes PhotoCut an effective and robust tool, providing quick background elimination that is good for all social media posts, product shots, or creative edits when on the go.
Add emojis to your photos to make them look aesthetic.
Product Photography Tips for Beginners

Good product photography boosts sales and clicks. Here are some easy tips:
Use Natural Light: A window will help you achieve soft natural lighting. Avoid direct sunlight, which can be harsh and create unflattering shadows.
Use a Plain Background: White or neutral backgrounds keep the focus on the product. PhotoCut can help replace or blur distracting backgrounds.
Use a Tripod or Phone Stand: Stable shots mean professional results. Avoid shaky hands.
Shoot Multiple Angles: Show the front, back, sides, and close-ups.
Edit for Polish: Use PhotoCut to enhance contrast, remove background, or adjust lighting. Add shadows or reflections using built-in tools.
Best Free Clipart Sites

Looking for royalty-free clipart to use in your designs? Here are the top sites:
OpenClipart: A go-to source for 100% public domain clipart. No signup or attribution required, just download and use freely in any project.
Pixabay: Has free vectors, illustrations, and high-res images. It's easy to navigate, so you can find and download what you need fast.
Freepik: Known for its massive selection of free and premium clipart resources. Free assets require attribution, but premium access unlocks even more options without credit.
Vecteezy: Specializes in vector graphics with free and pro versions available. You’ll find professionally designed, editable clipart ideal for commercial or personal use.
SVG Repo: Perfect for web designers and creators looking for clean, scalable icons or illustrations. All resources are in SVG format, ideal for web and app use.
You can easily import clipart from any of these sites into PhotoCut to create custom collages, social media posts, or marketing creatives.
Learn how to blur photo backgrounds on an iPhone.
YouTube Thumbnail Design Ideas

A great YouTube thumbnail can dramatically increase video clicks. Here are creative ideas:
Use Big, Bold Text: Keep your thumbnail text short and impactful. Choose large, bold fonts and use contrasting colors to make it pop, even on small screens.
Add Emojis or Icons: Emojis instantly communicate emotion and context. With PhotoCut’s sticker library, you can easily add expressive elements to make your thumbnail stand out.
Use a Close-Up Face Shot: Faces with strong emotions catch attention fast. Use PhotoCut to cut yourself out and place your image over eye-catching or dramatic backgrounds.
Use a Color Overlay: A subtle color overlay can help unify your thumbnail style. PhotoCut allows you to add transparent color layers to match your channel’s branding.
Include a Preview of the Video’s Best Moment: This gives viewers a taste of what they will see. Choose a moment of action, transformation, or surprise to stir viewer curiosity and entice them to click.
Save time by creating a reusable thumbnail template using PhotoCut. Swap out text and images to keep branding consistent.
Discover the easiest ways to compress image sizes without quality loss.
Conclusion
Editing, product shots, content design, and YouTube visual making must go hand in hand with the right tools. Removal of background images is made easy with PhotoCut, a mobile-friendly application that gives simple background removal, adding of effects, and cleaning of visuals without the hassle of having to learn complicated software. Along with other software like Photoshop or Illustrator and using some top free clipart sites, your path will be endless as far as the creation of wonderful content is concerned.
Need help creating your first thumbnail or removing a background? Open PhotoCut and start exploring—it's that easy!
Learn how to change the image color in Photoshop.
FAQs
Q1. Which Photoshop method is best for removing a background with hair or fur?
Ans. The Select and Mask Workspace (formerly Refine Edge) is the most effective. It allows you to refine the selection, detect edges, and address tricky areas like hair strands.
Q2. Is background removal in Photoshop destructive?
Ans. It can be if you directly erase pixels on the original layer. It's recommended to use layer masks to non-destructively hide the background. This allows you to adjust the mask later if needed.
Q3. Can I directly remove a raster background from an image in Illustrator like in Photoshop?
Ans. Not really in the same way. Illustrator excels with vector graphics. To effectively remove a background from a raster image (like a JPG) in Illustrator, you usually need to trace/vectorize the image first.
Q4. How do I remove a background in Illustrator after vectorizing?
Ans. After vectorizing (using Image Trace), you can:
Ungroup the elements: Ungroup the traced image to separate the subject from the background.
Direct Selection Tool (White Arrow): Use this tool to select and delete the background elements.
Clipping Masks: Create a shape (like a rectangle) to cover the subject, then select both the shape and the vectorized image and create a clipping mask (Object > Clipping Mask > Make). This hides everything outside the shape.
Pathfinder Panel: Use Pathfinder tools (like "Minus Front") to subtract the background shapes from the subject.
Q5. What's the best background for product photography?
Ans. A seamless white or light gray background is generally preferred because it's neutral, doesn't distract from the product, and makes editing easier. You can use a white sweep (a curved background that eliminates the horizon line).
Q6. What kind of lighting should I use for product photography?
Ans. Soft, diffused lighting is key. You can achieve this with:
Natural Light: Diffused natural light from a window is great. Avoid direct sunlight, which can create harsh shadows.
Artificial Light: Softboxes, light umbrellas, or studio strobes can provide controlled and consistent lighting. You need at least two lights: one as your main light and another as a fill.
Q7. Where can I find free clipart for commercial use?
Ans. Always double-check the licensing terms before using any clipart for commercial projects. Here are some options:
Pixabay: An amazing resource for any kind of free images, including clipart, under quite forgiving licensing (so be sure it is almost always free for commercial use, but always verify before you use it).
Unsplash: Primarily a stock photo site, now and then features some clipart.
Pexels: Another excellent source for free stock photos and vector graphics.
Openclipart: A large collection of public domain clipart.
Vecteezy (Free Section): Provides free vector graphics, including icons and illustrations, with attribution required for some licenses.
The Noun Project (Basic Plan): Offers a vast library of icons, but the free plan requires attribution.
Freepik (Free Section): Includes a variety of free vectors, stock photos, and PSD files, usually requiring attribution.
Q8. What should I look for in a clipart license?
Ans. Pay attention to these terms:
Commercial Use: Does the license allow you to use the clipart for commercial purposes (e.g., things like selling products, advertising)?
Attribution: Does the license require crediting the artist or website?
Modification: Are you allowed to alter the clipart (e.g., change colors, size it down/up)?
Redistribution: Are you allowed to redistribute the clipart as a component of your product?
Q9. What are some YouTube thumbnail design ideas?
Ans. Here are some ideas:
Face + Text: A close-up of your face with a clear title.
Product Showcase: Highlight the product or topic of your video.
Before & After: Great for tutorials or transformation videos.
Text overlay: Screenshot gets a moment from the video, which allows instant adding of text.
Collage: Several images merged into a dynamic thumbnail.
Arrows and shapes: Visually guide the viewer to the most important elements.
Emphasis: Bright, bold fonts and colors for keywords only.
Q10. What size should my YouTube thumbnail be?
Ans. It should be 1280 by 720 pixels; the minimum width is 640 pixels. Aspect ratio is 16:9.
0 notes