#Reset Netgear Router Password
Explore tagged Tumblr posts
Visit Tumblr Blog
Explore Tumblr blogs with no restrictions, modern design and the best experience.
Last Seen Tumblr Blogs


Fun Fact
Tumblr’s website traffic is steadily declining.
Text
How to login netgear wifi extender?
It is easy to modify and customize the settings of your Netgear WiFi extender by logging in.
Make that the extender is within range of your current WiFi network and that it is correctly connected to a power supply before starting.
After the extender has been turned on, link your PC or mobile device to the default network—usually called "NETGEAR_EXT."
Once connected, use a web browser and input 192.168.1.250 or http://mywifiext.net into the address bar.
This will launch the Netgear WiFi extender login page. When logging in for the first time, you'll be asked to either set up an account or configure the extender by providing the login credentials for your router.
If you’ve previously set it up, log in with the credentials you created during the first setup.
It's typically possible to reset the extender if you've forgotten your login information.
To accomplish this, press and hold the reset button for around ten seconds, which will reset the extender to its initial configuration. Resetting it will require you to set it up again.
Once signed in, you may adjust settings like the WiFi network name (SSID), password, or security options, and check the connection status between your router and the extender. You can keep an eye on performance, fix problems, and upgrade firmware for improved security and performance by logging in frequently.
For more details visit our website.
0 notes
Text
can't connect to netgear router through vpn
🔒🌍✨ Get 3 Months FREE VPN - Secure & Private Internet Access Worldwide! Click Here ✨🌍🔒
can't connect to netgear router through vpn
Netgear router VPN setup
Setting up a VPN (Virtual Private Network) on your Netgear router can enhance your online privacy and security by encrypting your internet connection. This allows you to browse the web anonymously and securely, especially when using public Wi-Fi networks. By setting up a VPN on your Netgear router, you can protect your sensitive data from potential cyber threats and unauthorized access.
To begin the setup process, you will first need to choose a VPN service provider that is compatible with Netgear routers. Once you have selected a VPN service, you will need to log in to your Netgear router's admin panel using a web browser. Navigate to the VPN section in the router settings and enter the configuration details provided by your VPN service provider.
Next, you will need to configure the VPN settings on your Netgear router, including choosing the VPN protocol (such as OpenVPN or PPTP) and entering the server address and login credentials. Once you have entered all the necessary information, save the settings and restart your router to apply the changes.
After the setup is complete, you can connect your devices to the VPN-enabled Netgear router to secure your internet connection and enjoy private browsing. Keep in mind that setting up a VPN on your router may slightly impact your internet speed due to the encryption process, but the added security and privacy benefits are well worth it.
Overall, setting up a VPN on your Netgear router is a straightforward process that can significantly enhance your online security and privacy. By following these steps, you can browse the web with peace of mind knowing that your data is protected.
Troubleshoot VPN connection to Netgear router
Having trouble with your VPN connection to your Netgear router? Don't worry, you're not alone. VPN (Virtual Private Network) issues can be frustrating, but with a bit of troubleshooting, you can often resolve them without too much hassle.
Firstly, ensure that your Netgear router's firmware is up to date. Manufacturers often release updates to address compatibility issues and enhance performance, so checking for and installing any available updates could resolve your VPN problem.
Next, double-check your VPN settings. Make sure you've entered the correct server address, username, and password. Even a small typo can prevent your VPN from connecting properly.
If you're still having trouble, try restarting both your router and your device. Sometimes, a simple reboot can fix connectivity issues by refreshing the network settings.
Additionally, check if your VPN service is experiencing any outages or server issues. Visit their website or contact their support team for assistance.
If you're using a third-party VPN client, try connecting directly through your device's built-in VPN settings instead. This can help determine if the issue lies with the VPN client or the router.
If none of the above steps resolve your VPN connection problem, it may be worth resetting your router to its factory defaults and reconfiguring it from scratch. However, be sure to back up your settings beforehand, as this will erase all custom configurations.
In some cases, certain router models may have specific VPN compatibility issues that require advanced troubleshooting. In such instances, reaching out to Netgear's support team or consulting online forums for assistance from experienced users may be necessary.
By following these troubleshooting steps, you can hopefully resolve your VPN connection issues and enjoy secure internet browsing through your Netgear router once again.
VPN configuration for Netgear router
A VPN (Virtual Private Network) configuration for your Netgear router can provide an added layer of security and privacy when browsing the internet. Setting up a VPN on your router ensures that all devices connected to your home network are protected, without the need for individual installations on each device.
To configure a VPN on your Netgear router, you will first need a VPN service provider and the necessary login credentials. Access your router's settings by typing its IP address into a web browser and logging in with your admin username and password. Locate the VPN section in your router settings, where you can input the details provided by your VPN service.
Choose the VPN protocol recommended by your service provider, such as PPTP, L2TP, or OpenVPN. Input the server address, username, and password in the designated fields. You may also need to configure additional settings like encryption and authentication methods.
Once you have entered all the required information, save your settings and restart your router to apply the changes. You can now connect any device to your home network and enjoy the benefits of a secure and private internet connection.
Remember to regularly update your VPN configuration and keep your router's firmware up to date to ensure optimal performance and security. By following these steps, you can enhance your online privacy and protect your personal data while using your Netgear router.
Unable to connect to Netgear router via VPN
If you're experiencing difficulties connecting to your Netgear router via VPN, don't worry, you're not alone. This issue can be frustrating, but with some troubleshooting steps, you can often resolve it on your own.
Firstly, ensure that your Netgear router supports VPN connections. Not all routers have this capability, so check the specifications of your model to confirm.
Next, verify that you have configured your VPN settings correctly. Double-check the VPN server address, username, password, and any other relevant details. Even a small mistake in the configuration can prevent a successful connection.
If you're using a third-party VPN service, make sure it's compatible with your Netgear router. Some routers have limitations on the types of VPN protocols they support, so ensure that your VPN service aligns with these requirements.
Check your router's firmware and ensure it's up to date. Sometimes, outdated firmware can cause compatibility issues with VPN connections. Visit Netgear's official website to download and install the latest firmware version for your router model.
Additionally, check if there are any firewall or security settings on your router that might be blocking VPN connections. Temporarily disable these settings to see if it resolves the issue, but remember to re-enable them afterwards for security purposes.
If you're still unable to connect to your Netgear router via VPN after trying these steps, consider reaching out to Netgear customer support for further assistance. They may be able to provide specific troubleshooting steps tailored to your router model and configuration.
Netgear router VPN connectivity issues
Title: Troubleshooting Netgear Router VPN Connectivity Issues
Netgear routers are renowned for their reliability and performance, but like any technology, they can encounter issues from time to time. One common problem users face is difficulty connecting to a Virtual Private Network (VPN) through their Netgear router. VPN connectivity issues can be frustrating, but there are several troubleshooting steps you can take to resolve them.
Firstly, ensure that your Netgear router's firmware is up to date. Manufacturers often release firmware updates to address known issues and improve performance, including VPN connectivity issues. You can typically update the firmware through the router's web interface or Netgear's official website.
Next, double-check your VPN settings. Ensure that you have entered the correct server address, username, and password. Sometimes, a simple typo can prevent a successful connection. Additionally, verify that your VPN subscription is active and that you are not exceeding any connection limits imposed by your VPN provider.
If you're still experiencing issues, try restarting both your router and the device you're trying to connect to the VPN. This can often resolve temporary glitches or conflicts that may be preventing a successful connection.
Another troubleshooting step is to check for any firewall or security settings on your Netgear router that may be blocking VPN traffic. Temporarily disabling these settings can help determine if they are the source of the problem.
If none of the above steps resolve the issue, consider contacting Netgear support or your VPN provider for further assistance. They may be able to provide additional guidance or troubleshoot the problem remotely.
In conclusion, VPN connectivity issues with Netgear routers can be frustrating, but by following these troubleshooting steps, you can often resolve them and enjoy a secure and private internet connection once again.
0 notes
Text
can't connect to netgear vpn from android
🔒🌍✨ Get 3 Months FREE VPN - Secure & Private Internet Access Worldwide! Click Here ✨🌍🔒
can't connect to netgear vpn from android
Netgear VPN troubleshooting on Android
Troubleshooting Netgear VPN on Android
Using a Virtual Private Network (VPN) on your Android device can provide enhanced security and privacy, but sometimes users encounter issues, particularly when using Netgear VPN services. Here are some common troubleshooting steps to address these concerns:
Check Network Connection: Ensure that your Android device has a stable internet connection. If you're experiencing connectivity issues, try switching between Wi-Fi and mobile data to see if the problem persists.
Update Netgear VPN App: Outdated versions of the Netgear VPN app may contain bugs or compatibility issues. Visit the Google Play Store to see if there's an updated version available and install it if necessary.
Restart VPN Connection: Sometimes, simply disconnecting and reconnecting to the VPN can resolve connectivity problems. Open the Netgear VPN app on your Android device, disconnect from the current server, and then reconnect to a different server or the same one.
Clear App Cache and Data: Accumulated cache and data within the Netgear VPN app can lead to performance issues. Go to your device's settings, navigate to the Apps section, find the Netgear VPN app, and clear its cache and data. This will reset the app to its default settings.
Check VPN Settings: Verify that the VPN settings on your Android device match the recommended configurations provided by Netgear. Ensure that protocols, such as OpenVPN or IKEv2, are correctly configured.
Contact Netgear Support: If you've tried all the above steps and are still experiencing issues, reach out to Netgear's customer support for further assistance. They may be able to provide specific troubleshooting steps or guidance tailored to your situation.
By following these troubleshooting steps, you can resolve common Netgear VPN issues on your Android device and enjoy a secure and private internet connection.
Netgear VPN Android connectivity issue
Netgear VPN Android connectivity issue can be a frustrating problem for users looking to establish a secure connection from their Android devices. When encountering connectivity issues with Netgear VPN on Android, various factors may be at play.
One common reason for connectivity issues is incompatible VPN protocols. Netgear VPN may use different protocols that are not supported by the Android device, leading to connection failures. It is essential to ensure that the VPN protocol used by Netgear is compatible with the Android operating system to establish a successful connection.
Another potential cause of connectivity problems is incorrect VPN configurations on the Android device. Users must accurately input the VPN server address, username, password, and other settings provided by Netgear to establish a secure connection. Any errors in configuration can result in connectivity issues.
Furthermore, network restrictions or firewall settings may block the VPN connection on Android devices. Users should check their network settings and ensure that the necessary ports for VPN communication are open to establish a successful connection.
In conclusion, troubleshooting Netgear VPN Android connectivity issues requires attention to detail and thorough understanding of VPN protocols and configurations. By addressing compatibility issues, ensuring accurate configurations, and checking network settings, users can resolve connectivity problems and establish a secure VPN connection on their Android devices.
Android Netgear VPN connection problems
Android Netgear VPN connection problems can be frustrating and disrupt your online activities. Many users encounter issues when trying to establish a VPN connection on their Android devices through Netgear routers. One common problem is connection drops, where the VPN connection suddenly disconnects, exposing your data and compromising your privacy.
Another issue that users may face is slow connection speeds when using a VPN through their Netgear router on Android devices. This can hinder your browsing experience and make it difficult to stream content or download files efficiently. Additionally, some users report difficulties in setting up the VPN connection in the first place, due to compatibility issues or incorrect configuration settings.
To troubleshoot these problems, users can try the following solutions:
Check for any firmware updates for your Netgear router, as outdated firmware can cause VPN connection issues.
Make sure that the VPN settings on your Android device are configured correctly and match the settings provided by your VPN service provider.
Restart both your Android device and Netgear router to refresh the connection and resolve any temporary glitches.
If the problem persists, consider reaching out to Netgear customer support or your VPN service provider for further assistance.
By addressing these common Android Netgear VPN connection problems promptly, you can ensure a secure and stable VPN connection on your Android device for seamless and protected online browsing.
Android Netgear VPN setup failure
When trying to set up a VPN connection on your Android device using a Netgear router, you may encounter certain errors or failures that can be frustrating. There are several common issues that users face when attempting to establish a VPN connection through a Netgear router on an Android device.
One frequent problem is incorrect configuration settings. Make sure you have input the correct VPN server address, your username, and password. Ensure that the VPN protocol and encryption settings match those required by your VPN service provider.
Another possible reason for setup failure is network congestion or instability. Slow network speeds or intermittent connectivity can hinder the establishment of a VPN connection. Try connecting to a different network or contacting your internet service provider to address any network issues.
Furthermore, outdated firmware on your Netgear router can also cause VPN setup failure. Check if there are any firmware updates available for your router model and ensure it is up to date to prevent compatibility issues with the VPN connection.
If you continue to experience difficulties with setting up a VPN connection on your Android device through a Netgear router, reach out to Netgear customer support or your VPN service provider for assistance. They can provide troubleshooting steps specific to your setup to help resolve the issue and get your VPN connection up and running smoothly.
Netgear VPN mobile connectivity solutions
Netgear offers a range of VPN mobile connectivity solutions designed to provide secure and reliable connections for professionals who are constantly on the move. These solutions are essential for remote workers, telecommuters, and businesses looking to ensure a high level of data protection while accessing their networks from various locations.
One of the key advantages of Netgear VPN mobile connectivity solutions is the ability to establish a secure tunnel between the user's device and the company's network, ensuring that sensitive data remains encrypted and protected from unauthorized access. This is particularly important when using public Wi-Fi networks, which are known to be vulnerable to hacking and data breaches.
Netgear's VPN mobile connectivity solutions also offer flexibility and ease of use, allowing users to easily connect to the company's network from anywhere in the world. This is ideal for businesses with a global presence or employees who travel frequently for work.
In addition to providing a secure connection, Netgear's VPN mobile solutions also offer high-speed performance and reliability, ensuring that users can access the resources they need without interruptions or delays. This is crucial for professionals who rely on a stable internet connection to carry out their work effectively.
Overall, Netgear VPN mobile connectivity solutions are a valuable tool for businesses and individuals looking to maintain a high level of security and accessibility while working remotely. By investing in these solutions, users can enjoy peace of mind knowing that their data is protected and their connections are secure, no matter where they are located.
0 notes
Text
can't vpn with netgear wndr3400
🔒🌍✨ Get 3 Months FREE VPN - Secure & Private Internet Access Worldwide! Click Here ✨🌍🔒
can't vpn with netgear wndr3400
Netgear WNDR3400 VPN troubleshooting
Netgear WNDR3400 VPN troubleshooting can be a challenging task for some users, but with the right guidance, it can be a smooth process. Virtual Private Networks (VPNs) are essential for ensuring secure and private internet browsing, especially when using public Wi-Fi networks. However, issues may arise when trying to set up or connect to a VPN on your Netgear WNDR3400 router.
One common troubleshooting step is to ensure that your Netgear router's firmware is up to date. Outdated firmware can lead to compatibility issues with VPN services, causing connectivity problems. Updating the firmware can often resolve these issues and improve the overall performance of your router.
Another important step is to double-check the VPN settings on your Netgear WNDR3400 router. Make sure that the VPN configuration matches the settings provided by your VPN service provider. Incorrect settings can prevent you from establishing a secure connection to the VPN server.
If you are still experiencing difficulties, you may want to consider resetting your Netgear WNDR3400 router to its factory settings. This can help eliminate any misconfigurations or software glitches that may be causing the VPN connection problems.
In some cases, contacting your VPN service provider for assistance can also be beneficial. They may be able to offer specific troubleshooting steps or settings tailored to your Netgear router model.
By following these troubleshooting tips and being patient, you can effectively resolve VPN issues on your Netgear WNDR3400 router and enjoy a secure internet browsing experience.
VPN setup Netgear WNDR3400 guide
A VPN, or Virtual Private Network, is a powerful tool that helps protect your online privacy and security by creating a secure and private connection over the internet. Setting up a VPN on a Netgear WNDR3400 router can provide enhanced security for all devices connected to your home network.
To set up a VPN on your Netgear WNDR3400 router, you will first need to choose a reliable VPN service provider. Once you have selected a VPN service, you will need to access your Netgear router’s settings by entering the router’s IP address into a web browser.
Next, navigate to the router’s settings page and locate the VPN section. Here, you will need to enter the configuration details provided by your chosen VPN service provider, including the VPN server address, username, and password. Save the settings and activate the VPN connection.
By setting up a VPN on your Netgear WNDR3400 router, you can ensure that all data transmitted between your devices and the internet is encrypted and secure. This can help protect your personal information from hackers, ISP monitoring, and other online threats.
Overall, setting up a VPN on your Netgear WNDR3400 router is a relatively simple process that can provide added security and privacy for all devices connected to your home network. By following the steps provided by your VPN service provider and configuring the settings on your router, you can enjoy a safer and more secure online experience.
Netgear WNDR3400 VPN compatibility issues
Title: Troubleshooting Netgear WNDR3400 VPN Compatibility Issues
The Netgear WNDR3400 router is a popular choice for home and small business networks, offering reliable performance and a range of features. However, some users may encounter compatibility issues when trying to use a VPN (Virtual Private Network) with this router.
One common problem is that certain VPN protocols may not be fully supported by the WNDR3400 firmware. This can lead to difficulties in establishing a secure connection with the VPN server. Additionally, some VPN services may require specific settings or configurations that are not readily available in the router's interface.
Another issue could be related to the router's hardware limitations. The WNDR3400 may struggle to handle the encryption and decryption processes required by the VPN, especially when dealing with high data traffic or multiple devices connected to the network simultaneously. This can result in slow connection speeds or frequent disconnections.
Fortunately, there are several steps that users can take to troubleshoot and resolve VPN compatibility issues with the Netgear WNDR3400 router:
Check for firmware updates: Ensure that the router's firmware is up to date, as Netgear may release patches or updates to address compatibility issues with VPNs.
Adjust VPN settings: Experiment with different VPN protocols and settings to find the combination that works best with the WNDR3400 router.
Use a dedicated VPN client: Instead of relying on the router's built-in VPN capabilities, consider installing a dedicated VPN client on individual devices for better compatibility and performance.
Contact customer support: If all else fails, reach out to Netgear's customer support for assistance. They may be able to provide guidance or recommend alternative solutions to address the compatibility issues.
By following these steps and troubleshooting methods, users can overcome VPN compatibility issues with the Netgear WNDR3400 router and enjoy secure and reliable internet connectivity.
Netgear WNDR3400 VPN configurations
Configuring a VPN (Virtual Private Network) on your Netgear WNDR3400 router can enhance your online security and privacy. A VPN creates a secure connection to another network over the internet, encrypting your data and masking your IP address. Setting up a VPN on your router allows you to protect all devices connected to your network.
To configure a VPN on your Netgear WNDR3400 router, you will need to access the router's admin panel through a web browser. Navigate to the VPN section in the settings menu and select the option to set up a new VPN connection. You will need to input the VPN server details provided by your VPN service provider, including the server address, username, and password.
After entering the VPN server details, save the settings and establish a connection to the VPN server. Once connected, all data transmitted from your devices through the router will be encrypted, ensuring your online activities remain private and secure.
It is important to choose a reputable VPN service provider that offers reliable connections and strong encryption protocols. Additionally, regularly updating your router's firmware can help maintain optimal VPN performance and security.
By configuring a VPN on your Netgear WNDR3400 router, you can enjoy a more secure online experience, protecting your sensitive information from unauthorized access and surveillance. Take control of your online privacy today by setting up a VPN on your router and browsing the internet with peace of mind.
Netgear WNDR3400 VPN connectivity problems
Title: Troubleshooting Netgear WNDR3400 VPN Connectivity Issues
If you're encountering VPN connectivity problems with your Netgear WNDR3400 router, several factors could be at play. VPN (Virtual Private Network) issues can arise due to various reasons, ranging from configuration errors to compatibility issues. Here are some troubleshooting steps to resolve VPN connectivity problems with the Netgear WNDR3400:
Update Firmware: Ensure that your router's firmware is up to date. Manufacturers often release firmware updates to address known issues and improve compatibility with VPN protocols.
Check VPN Settings: Double-check the VPN settings on your router. Ensure that the VPN configuration matches the requirements provided by your VPN service provider. Incorrect settings can lead to connection failures.
VPN Protocol Compatibility: Verify whether the VPN protocol you're using is supported by the Netgear WNDR3400 router. Some routers may have limitations on supported VPN protocols. Try switching to a different VPN protocol (e.g., from PPTP to L2TP/IPsec) to see if it resolves the issue.
Firewall Settings: Adjust the firewall settings on your router to allow VPN traffic. Sometimes, overly restrictive firewall settings can block VPN connections. Open the necessary ports for VPN communication or temporarily disable the firewall to test the VPN connection.
Restart Router and Devices: Sometimes, simply restarting the router and the devices connected to it can resolve temporary connectivity issues. Power cycle the router and restart your computer or other devices attempting to establish the VPN connection.
Contact VPN Support: If the issue persists after trying the above steps, reach out to your VPN service provider for assistance. They may provide specific troubleshooting steps tailored to their VPN service or advise on alternative solutions.
By following these troubleshooting steps, you can diagnose and resolve VPN connectivity problems with your Netgear WNDR3400 router, ensuring seamless and secure access to your VPN network.
0 notes
Text
can't connect to vpn with netgear r6400
🔒🌍✨ Get 3 Months FREE VPN - Secure & Private Internet Access Worldwide! Click Here ✨🌍🔒
can't connect to vpn with netgear r6400
VPN setup Netgear R6400
Setting up a VPN on your Netgear R6400 router ensures that your internet connection is secure and your online activities are kept private. With VPN (Virtual Private Network) technology, you can encrypt your data and route it through a secure server, protecting your sensitive information from hackers and prying eyes.
To set up a VPN on your Netgear R6400 router, follow these steps:
Log in to your router's web interface by entering the router's IP address in your web browser. You can find the default IP address in the router's user manual or on the manufacturer's website.
Once logged in, navigate to the VPN section in the router settings. Look for options like "VPN Service" or "VPN Client."
Enter the VPN server details provided by your VPN service provider. This typically includes the server address, your username, and password.
Choose the VPN protocol you want to use, such as OpenVPN or PPTP. OpenVPN is recommended for its security and stability.
Save your settings and restart your router to apply the changes.
Test your VPN connection by connecting a device to the router and accessing the internet. You can check your IP address to confirm that your internet traffic is being routed through the VPN server.
By setting up a VPN on your Netgear R6400 router, you can browse the internet securely and anonymously, protecting your online privacy and data from potential threats.
Troubleshooting VPN Netgear R6400
Title: Troubleshooting Guide for VPN Connectivity Issues on Netgear R6400
The Netgear R6400 router is a popular choice for home and small office networks, offering robust features including VPN (Virtual Private Network) support. However, like any networking device, it can encounter connectivity issues that may disrupt VPN functionality. Here's a troubleshooting guide to help you resolve common VPN problems on the Netgear R6400:
Check Internet Connection: Before troubleshooting VPN issues, ensure that your router has a stable internet connection. Verify the connection by accessing non-VPN websites or services.
VPN Configuration: Double-check your VPN configuration settings on the Netgear R6400. Ensure that the VPN client credentials, server address, and other settings are correctly entered.
Firmware Update: Outdated firmware can cause compatibility issues with VPN connections. Check for firmware updates on the Netgear support website and apply any available updates to your router.
VPN Server Status: Verify the status of the VPN server you're trying to connect to. Sometimes, server maintenance or outages can prevent successful VPN connections.
Firewall Settings: Adjust the firewall settings on the Netgear R6400 to allow VPN traffic. Enable port forwarding or open the necessary ports for VPN communication.
Client-Side Issues: If the VPN client is installed on a computer or mobile device, troubleshoot any issues on the client-side. Restart the device, reinstall the VPN client, or try connecting from a different network.
Reset and Reconfigure: As a last resort, perform a factory reset on the Netgear R6400 router and reconfigure it from scratch. This can help eliminate any configuration errors that may be causing VPN connectivity issues.
By following these troubleshooting steps, you can diagnose and resolve VPN connectivity issues on your Netgear R6400 router, ensuring a secure and reliable connection for your network. If problems persist, contact Netgear support for further assistance.
Netgear R6400 VPN connection issues
When it comes to securing your internet connection at home, using a Virtual Private Network (VPN) on your Netgear R6400 router can be a great way to protect your online activities. However, sometimes users may encounter issues when setting up or using a VPN connection on the Netgear R6400.
One common issue that users face with VPN connections on the Netgear R6400 is the inability to establish a stable connection. This can be caused by various factors such as network interference, incompatible VPN protocols, or incorrect VPN settings. To troubleshoot this issue, users can try changing the VPN protocol settings on their router, ensuring that the firmware is up to date, or contacting their VPN service provider for assistance.
Another issue that users may encounter is slow connection speeds when using a VPN on the Netgear R6400. This can be frustrating, especially when trying to stream content or download files. To improve connection speeds, users can try connecting to a different VPN server, changing the encryption settings on their VPN, or upgrading their internet plan for faster speeds.
Overall, while VPN connection issues on the Netgear R6400 can be frustrating, they can usually be resolved with some basic troubleshooting steps. By ensuring that the router firmware is up to date, adjusting VPN settings, and contacting your VPN service provider for help, users can enjoy a secure and stable internet connection with their Netgear R6400 router.
VPN configuration Netgear R6400
To configure a VPN on Netgear R6400, follow these simple steps. Begin by logging into your router's web interface by entering the router's IP address into a web browser. Enter the username and password when prompted.
Next, locate the VPN settings in the router's menu. You may find these under the Advanced tab or in the VPN section, depending on your router model. Click on the VPN menu to continue.
Select the option to add a new VPN connection or configuration. You will need to enter the VPN provider's details, including the server address, type of VPN (such as PPTP or OpenVPN), username, and password. Save the settings once you have entered all the required information.
To establish the VPN connection on your device, you will need to enter the VPN credentials provided by your VPN service provider. These details typically include the server address, your username, and password.
After configuring the VPN on your Netgear R6400 router, ensure that you enable the VPN connection to protect your online activities and data. You can do this by selecting the VPN connection from the router's VPN menu and clicking on the connect option.
With your VPN configured on the Netgear R6400 router, you can now enjoy a secure and encrypted internet connection for all your devices connected to the network. Remember to update your VPN settings as needed and regularly check for firmware updates from Netgear to ensure optimal performance and security.
Netgear R6400 VPN not working
If you’re facing issues with your Netgear R6400 VPN not working as expected, you’re not alone. VPN (Virtual Private Network) setup problems can be frustrating, but there are steps you can take to troubleshoot the issue.
Firstly, ensure that you have configured the VPN settings correctly on your Netgear R6400 router. Check that the VPN service you are using is supported by the router and that you have entered the correct server information and credentials.
If your VPN is still not working, try restarting your router and device. Sometimes, a simple reboot can resolve connectivity issues. Additionally, check for any firmware updates for your Netgear R6400 router. Updating the firmware can sometimes fix bugs and improve overall performance, including VPN connectivity.
It’s also worth checking if the VPN service itself is experiencing any downtime or technical problems. Visit the VPN provider’s website or contact their support team for more information.
If none of the above steps work, you may need to reset your Netgear R6400 router to its factory settings and reconfigure the VPN settings from scratch. Remember to backup your existing configuration settings before performing a reset to avoid losing any important data.
By following these troubleshooting tips, you should be able to resolve the issue of your Netgear R6400 VPN not working and enjoy a secure and private internet connection once again.
0 notes
Text
Troubleshooting Tips for Netgear Extender and Laptop Connectivity Issues
A Netgear WiFi extender is a handy device that helps expand your existing wireless network coverage in areas where the signal is weak or doesn't reach. For example, you may have WiFi dead zones in parts of your home or office that are too far from your main router. The extender connects wirelessly to your router, catches the existing WiFi signal, and rebroadcasts it using the same network name and password. This effectively boosts the range and fills in any dead spots, allowing you to get online from more locations.However, many laptop users run into issues getting their devices to connect properly to the Netgear extender network. You may notice lost connections, slow speeds, or not seeing the extender WiFi network at all during the scan for available connections. This inability to connect can be very frustrating when you can't get online.This article will provide several useful troubleshooting tips to help diagnose and fix the connectivity issues between your laptop and Netgear WiFi range extender. We'll outline key steps to get your laptop back online and connected through the extender network. Follow our troubleshooting guide below to resolve problems joining the extended network. Easy Steps to Fix a Netgear Extender That Won't Connect to Your Laptop1. Confirm the Extender is Working 2. Check Connectivity on Other Devices 3. Restart the Laptop and Adapter 4. Eliminate Any Viruses or Malware 5. Update Network Adapter Drivers and Firmware 6. Forget and Reconnect to the Network 7. Double Check Extender Password 8. Adjust Extender Placement 9. Change the WiFi Channel to Avoid Interference 10. Factory Reset Extender Read the full article
#connect#connection#connectivity#contactsupport#driverupdate#extender#firmwareupdate#laptop#netgear#Netgearextender#netgearextendersetup#netgearrangeextender#netgearsetup#netgearwifiextender#optimizewifiextender#password#reset#technicalsupport#tips#troubleshoot#troubleshooting#wifi#wificonnectivity#wifiextender#WiFiextendernotconnectingtolaptop#wifiextenderoptimization#wifiextendertroubleshooting#wifihelp#wifirangeextender#wifisetup
0 notes
Text
Netgear EX6400 setup
The Netgear EX6400 setup is the process of configuring and installing the Netgear EX6400 WiFi extender, a device designed to enhance and extend the coverage of an existing WiFi network. It is especially helpful in large houses or workplaces where the Wi-Fi signal could not fully cover every area.
Netgear EX6400 setup Using Web browser
Follow these steps for Netgear EX6400 setup through Web browser:
Plug in your Netgear EX6400 extender and wait for the green power LED to shine brightly.
Establish a connection between your device and the extender by utilizing an Ethernet cable.
Launch a web browser on your device.
Enter "mywifiext.net" into the address bar and hit Enter.
Access the system by employing your default login credentials.
Choose the WiFi network you wish to amplify.
Proceed by following the prompts displayed on the screen to finalize the setup.
We hope that by following the steps outlined above, you will be able to configure your Netgear EX6400 WiFi range extender. If you get stuck at any point, please contact our experts.
Netgear EX6400 setup Using WPS Method
Utilizing WPS represents the simplest method for setting up the Netgear EX6400 Extender. You can set up your Netgear EX6400 wifi range extender in just two minutes.
Follow these steps for Netgear EX6400 setup through WPS:
The power source should be connected to the Netgear EX6400 wifi extender.
Wait until the power LED transitions to a solid green light.
Note that the WPS setup for the Netgear EX6400 Wi-Fi extender works best when it's in close proximity to your router.
Begin by pressing the WPS button on the Netgear EX6400, followed by the corresponding button on your router.
This process will create a connection between the extender and your standard Wi-Fi network.
This is the procedure for establishing a connection to your existing internet using the WPS method.
Netgear EX6400 Extender Firmware Update
Firmware is a type of software that controls the internal operations of a device. In the case of a wifi range extender, the firmware controls the way the extender communicates with the router, the way it amplifies the wireless signal, and many other functionalities.
Steps to Update Firmware Of Netgear EX6400 extender :
Power up your Netgear EX6400 extender.
Connect a device to the extender.
Open a web browser and enter "192.168.1.250" in the address bar.
Log in with your username and password.
Navigate to the menu and choose "Firmware Update."
Select "Check Online" to determine if a newer firmware version is available.
If an update is available, click to update.
Your Netgear EX6400 extender's firmware is now up to date.
Common Issues during Netgear EX6400 setup
Mywifiext.com and mywfiext.net are no longer operational.
The WiFi extender is connected to the router, but there is no internet access.
I am unable to access mywifiext.local.
Mywifiext password is incorrect.
The WiFi extender is constantly disconnecting.
The WiFi extender is unable to connect to the network.
I forgot the default Netgear extender password.
Netgear EX6400 cannot be accessed.
The Netgear EX6400 is not operational.
EX6400 cannot be reset.
Troubleshooting Tips for Netgear EX6400 extender configuration
If you're experiencing issues with your extender and it's affecting your Wi-Fi device's performance, follow the troubleshooting steps provided below to quickly resolve the problems and have your EX6400 functioning optimally within minutes.
Verify whether your Netgear EX6400 extender is securely connected and receiving sufficient power.
A high-speed internet connection is required for your device.
Check that all of the wired connections are secure.
Keep your extender away from cordless phones, Bluetooth devices, metal objects, room corners, microwave ovens, and other devices that could interfere with your WiFi signal.
If mywifiext.net is not functioning, ensure that you have accurately entered the correct web address in your browser's address bar.
Check that your Netgear EX6400 is running the most recent firmware version. If not, update your device to the most recent version right away.
If the preceding troubleshooting suggestions prove ineffective, reset your extender to its factory default settings and then proceed with the reconfiguration process.
#Netgear EX6400 setup#Netgear EX6400 setup Using Web browser#Netgear EX6400 setup Using WPS Method#Netgear EX6400 Extender Firmware Update#Common Issues during Netgear EX6400 setup#Troubleshooting Tips for Netgear EX6400 extender configuration
1 note
·
View note
Link
The way you decide how your router will function in the upcoming time. Of course, there is more than one option to do it. You can either press the reset button, located at the backside or go for a soft reset which can be done by following some simple steps. To know more about it. To know How To Reset Netgear Router, simply connect with the tech-experts and get instant solutions from them.
#resetting netgear router#Reset Netgear Router#How To Reset Netgear Router#Netgear Router Reset#Factory Reset Netgear Router#Reset Netgear Router Password
1 note
·
View note
Photo

Routers offered by Netegar are popular all across the globe today. Made with cutting-edge technology, they are exceptionally made for providing high-speed internet with long range connectivity option. To know more about it, you can send us an email or give us a call on our toll-free number. Reset Netgear Router if you are having any issues with it. Also, the performance of your router will be improved. To know more about it, you can simply dial our toll-free number +1-844-245-8772 or send us an email, specifying the details you want from experts. We assure you an instant solution with utmost care. For further details on Netgear Router Reset, get in touch with us now.
0 notes
Photo

We are a dedicated team of experts working round the clock to provide instant support for any issues related to Reset Netgear Router, How To Reset Netgear Router, Netgear Router Reset, Factory Reset Netgear Router, Reset Netgear Router Password, How To Reset Netgear Router Password, netgear router factory reset, Netgear Firmware Update, how to factory reset netgear router and resetting netgear router. Dial our toll-free number +1-844-245-8772 to avail instant help.
#reset netgear router#Factory Reset Netgear Router#reset netgear router password#how to factory reset netgear router
0 notes
Link
#netgear extender support#netgear support#netgear helpline#netgear extender setup#netgear router setup#netgear router password#netgear router reset#netgear router login#netgear troubleshooting#netgear extender login
1 note
·
View note
Text
How do I Reset the Admin Password on my NETGEAR Router?
This article explains the way to reset the admin password on my NETGEAR router. Netgear says that you can enable a password reset if you want to change the password for the router user name admin.
0 notes
Text
Having a no internet error on your Netgear? I could be due to a few reasons like a technical issue on ISP’s side, bad weather, technical issue with your router etc.
If your device is connected to the Netgear wireless network but can’t access internet
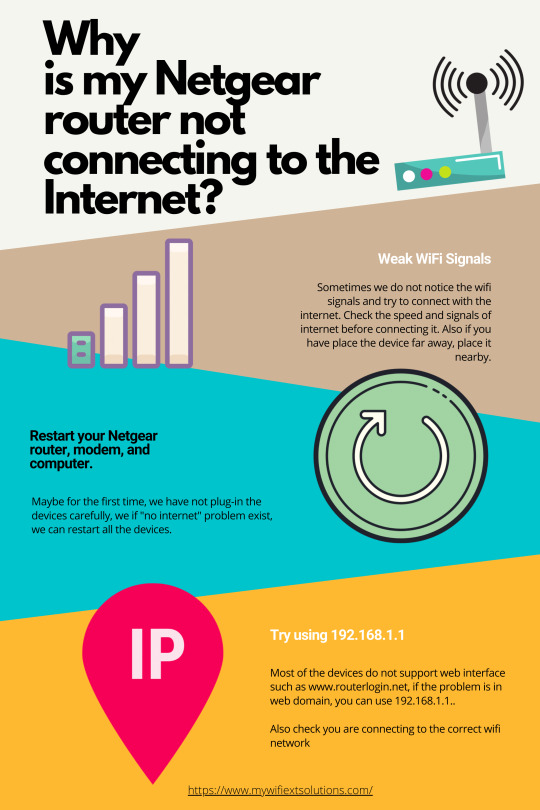
Follow these steps to resolve this issue –
First reboot your device and Netgear router and try connecting to internet. It works in most cases.
Open the Network & Internet settings on your computer device. Check whether the DNS settings are set to “Obtain IP address automatically” or not. If they are not set to automatic setting, enable the automatic setting.
Next use the Win+R shortcut for run command and open Command prompt in your computer by typing ‘cmd’. You can also search command prompt in the search bar of your computer to open it.
Click on command prompt and a black window screen will open on your computer. Now type ipconfig in the command prompt and press enter. Let the command run and fetch your IP Address. If the IP Address is displayed properly then the issue is not with your device. But if the IP is not displayed properly then you may need to renew the IP address.
If your IP address displays as xxx.xxx. or empty or simply gives an error like IP not found then you may need to renew the IP address. To renew it type ‘ipconfig –renew’ and press Enter as this might be resolve the IP conflict with modem.
After the command has run properly, again type ipconfig in the command prompt and see if the IP Address has renewed and displays properly, e.g. 192.168.1.1. If it still gives error check the DHCP in the command prompt under the IP Address is enabled.
Now open a browser in the admin panel of your router. Go to http://mywifiext.net or use the IP address to login to admin panel. Enter username and password of your Netgear router and click login.
When you successfully login to the admin panel, go to the Status page and check the WAN settings. If it shows the IP address in the list then your router is successfully configured and connected to the internet. If you don’t see the IP Address then check the internet connection line.
As last resort, Reset the Netgear router using the Reset button on its back. Press and hold reset button and let the reset restore all Netgear router factory settings. After that just Restart your router once and try to access the internet again.
If after the reset the issue persists then, the issue might be from ISP. In that case call your Internet Service provider.
If you have tried all the above steps but haven’t been able to fix the issue by yourself then you should resort to online professional support. Get in touch with Our qualified Technical support team for troubleshooting issues like these.
#netgear router reset#login router#wireless router#netgear router#access router#access routerlogin.net#password reset netgear router
0 notes
Photo

Setup Netgear Router for Smart DNS Proxy. The following setup instructions is only needed one time. Once you finish the initial setup, you won't be needing to take the same steps anytime.
#setup netgear router#Netgear Not Working#netgear router password reset#change netgear password#netgear router password change#default password for netgear router#netgear default pw#netgear default login#netgear password reset#default netgear ip#netgear router ip address
0 notes
Text
Troubleshooting: Tips for Netgear Extender Not Connecting to Computer
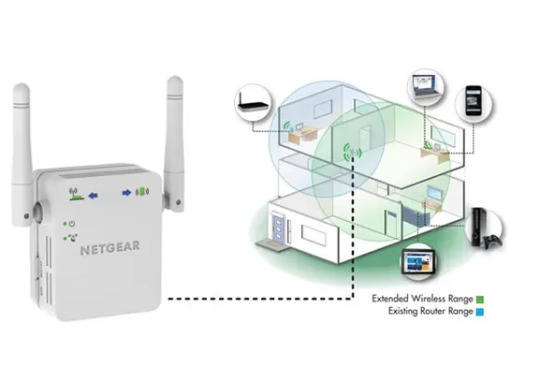
A Netgear WiFi range extender is a useful device that can help expand the reach of your existing wireless network. By connecting to your router wirelessly, an extender grabs the existing WiFi signal and rebroadcasts it further into areas that may have poor or no coverage, like the far corners of your home or out in the backyard.This gives you the ability to get internet access in dead zones that your router may not reach on its own. But even after a successful Netgear WiFi range extender setup, some users find that their Netgear extender won't connect to their computer for some frustrating reason.If you've managed to connect your extender to your main router but it won't connect to your computer, there are some troubleshooting steps you can try to fix the problem. With a bit of tinkering, you can have your extended wireless network up and running smoothly. Being unable to access the internet defeats the purpose of having a range extender in the first place!
Some of the Main Troubleshooting Steps:
Check if the extender and computer are too far apart. Checking Extender's WiFi Network is Visible Using the Correct WiFi Password Restarting Your Computer Updating the Extender's Firmware Disabling Security Temporarily to Test Connection Resetting the Extender to Factory Settings
Conclusion
Having issues getting your Netgear WiFi range extender to connect to your computer can be frustrating. But hopefully, with the troubleshooting tips provided, you now have an action plan to get your devices communicating again.Following this structured troubleshooting approach should help isolate the cause and allow you to systematically fix connection problems between your Netgear extender and computer. Don't hesitate to also contact Netgear support if issues persist after trying these steps.With a properly located and configured Netgear extender, you can start enjoying the benefits of boosted WiFi coverage across your home network. Read the full article
#computer#connectivity#contactsupport#extender#extenders#firmware#netgear#Netgearextender#netgearrangeextender#network#reset#router#SSID#technicalsupport#tips#troubleshooting#wifi#wifihelp#wifisupport#wireless
0 notes
Text
Guide on Mywifiext | www.mywifiext.net Login / Setup
By asking you questions, Guided Assistance assists you in resolving the problem you are experiencing with your NETGEAR equipment.
You can log into your netgear WiFi range extender after installation to examine and modify the settings.
Visit NETGEAR Support and obtain the quick start guide for your model if you haven't installed and connected your WiFi range extender to your current WiFi network before continuing.
Check to see whether your model is listed under "This article pertains to:" If you own a Nighthawk Mesh or Mesh WiFi Extender, check How can I access my Nighthawk Mesh Extender or WiFi Mesh Extender?
To access your WiFi extender, log in as follows:
From a computer or mobile device linked to your extender's network, open a web browser. It's possible that the names of your router and extender's WiFi networks differ (SSIDs). Check to see if you are linked to the network of your extension. In the URL bar of your web browser, write www.mywifiext.net if your extender and router have distinct WiFi network names (SSIDs). Enter http://extender's IP address> (for instance, http://192.168.1.3) into your browser's address bar if your extender and router share the same WiFi network name (SSID). See How can I find the IP address of a device connected to my router? for additional details. Hit the Enter key or press. A login screen appears.
Enter your admin password and user name. Note: An email address could be part of your user name. Click the Username & Password Help link if you can't remember your user name or password. To change your login information, see How can I reset my NETGEAR range extender to factory settings? Tap or click LOG IN. It shows the Status page. Click or press the Menu symbol if your browser displays it. A menu for the extender appears. To view and modify the extender's settings, select Settings.
1 note
·
View note