#SVG Design Guide
Explore tagged Tumblr posts
Visit Tumblr Blog
Explore Tumblr blogs with no restrictions, modern design and the best experience.
Last Seen Tumblr Blogs


Fun Fact
Users from the US are the majority of Tumblr visitors.
Text
Unleash Your Creativity with the Buffalo Bills Logo SVG Design Guide

The Buffalo Bills, a storied franchise in the National Football League (NFL), boast a logo that embodies the spirit, resilience, and pride of Buffalo and its passionate fanbase. Whether you're a die-hard Bills supporter, a graphic designer, or a creative enthusiast, incorporating the Buffalo Bills Logo into your projects can add a touch of team spirit and professional flair. In this comprehensive Buffalo Bills Logo SVG Design Guide, we'll delve into the history of the logo, explore the versatility of SVG designs, and provide you with actionable tips to make the most out of your Buffalo Bills SVG assets. Ready to elevate your designs? Let’s dive in!
The Evolution of the Buffalo Bills Logo
Understanding the Buffalo Bills Logo requires a glimpse into its history. Established in 1960, the team has undergone several logo transformations, each reflecting the evolving identity and aspirations of the franchise. The current logo, featuring a bold charging buffalo, symbolizes strength, determination, and the relentless drive that characterizes the team and its fans.
The design elements of the logo—such as the dynamic posture of the buffalo, the distinctive colors, and the sharp lines—are meticulously crafted to convey motion and power. Over the years, slight modifications have been made to enhance visual appeal and modernize the brand, ensuring the logo remains timeless yet contemporary.
Why Choose SVG for Your Buffalo Bills Designs?
Scalable Vector Graphics (SVG) offer unparalleled flexibility and quality, making them the ideal choice for both digital and print projects. Unlike raster images, SVGs are resolution-independent, ensuring your Buffalo Bills SVG designs look crisp and clear at any size. This scalability is crucial for a variety of applications, from small social media icons to large-scale banners.
Moreover, SVG files are lightweight and easily editable, allowing designers to customize elements without compromising on quality. Whether you're tweaking colors, adjusting shapes, or animating parts of the logo, SVG provides the versatility needed to bring your creative vision to life.
How to Use the Buffalo Bills SVG in Your Projects
Incorporating the Buffalo Bills Logo SVG into your projects can enhance your designs and showcase your team pride. Here are some creative ways to utilize SVG files:
Merchandise Design: Create custom apparel, such as t-shirts, hoodies, and hats, featuring the Buffalo Bills logo. The scalability of SVG ensures that your designs maintain their quality, whether printed on a small logo chest or a large back graphic.
Social Media Graphics: Boost your online presence with eye-catching graphics for platforms like Instagram, Facebook, and Twitter. Use the SVG logo to create engaging posts, banners, and profile pictures that resonate with fellow fans.
Website and Blog Design: Enhance your digital platforms with professional-grade logos. Whether you're running a fan site or a personal blog, incorporating the Buffalo Bills SVG can add a cohesive and polished look to your web pages.
Promotional Materials: Design flyers, posters, and banners for events, game days, or fan meetups. The versatility of SVG allows for seamless integration into various marketing materials, ensuring your promotions stand out.
Personal Projects: From custom phone cases to home decor, the possibilities are endless. Use the Buffalo Bills logo to personalize your belongings and celebrate your team in everyday life.
Tips for Customizing the Buffalo Bills SVG
To make the most out of your Buffalo Bills SVG designs, consider the following customization tips:
Maintain Proportions: When resizing the logo, ensure that the aspect ratio remains intact to preserve the logo's integrity and recognizability.
Color Variations: While the traditional colors are iconic, don't hesitate to experiment with different color schemes that align with your project's theme. Just ensure that the primary elements of the logo remain distinguishable.
Layering Elements: Combine the logo with other design elements, such as text, backgrounds, or additional graphics, to create a unique and personalized design. Use layers strategically to add depth and complexity.
Animation: Take advantage of SVG's capabilities by animating parts of the logo. Simple animations, like a charging buffalo or flashing colors, can add dynamic flair to your digital projects.
Typography Integration: Pair the logo with complementary fonts to create cohesive designs. Whether it's for a poster or a social media graphic, the right typography can enhance the overall aesthetic.
Showcase of Creative Uses
The Buffalo Bills SVG has been a favorite among designers and fans alike, inspiring a myriad of creative projects. Here are a few examples to spark your imagination:
Custom Apparel: From minimalist logo tees to intricate hoodies featuring the charging buffalo intertwined with motivational quotes, the possibilities are endless.
Home Decor: Transform your living space with framed SVG prints, throw pillows, and wall decals that celebrate your favorite team.
Digital Media: Create stunning website headers, blog banners, and social media posts that not only look professional but also resonate with fellow Bills fans.
Event Promotions: Design vibrant posters and flyers for game day events, fan gatherings, and charity drives, ensuring they catch the eye and convey team spirit.
Embracing Team Pride through Design
Incorporating the Buffalo Bills Logo SVG into your designs isn't just about aesthetics—it's a way to express your loyalty and passion for the team. Whether you're creating something for personal use or for a broader audience, your designs can serve as a testament to the shared pride and community that defines Buffalo Bills fans.
By utilizing high-quality SVG designs, you're not only enhancing your creative projects but also contributing to the vibrant culture surrounding the team. Every design you create becomes a piece of the larger tapestry that celebrates the Buffalo Bills' legacy and future.
Explore and Create with SVGBank
At SVGBank, we understand the importance of having access to top-notch design resources. Our extensive collection of Buffalo Bills SVG files is meticulously crafted to meet the needs of both fans and professional designers. Whether you're looking to purchase premium SVGs or explore our Free Buffalo Bills SVG collection, we have something for everyone.
Ready to elevate your designs? Visit SVGBank today and explore our wide range of Buffalo Bills SVG designs. From high-quality vector files to free resources, SVGBank is your go-to destination for all things SVG. Don't miss out on the opportunity to showcase your team pride with stunning, scalable graphics that make your projects stand out.
Conclusion
The Buffalo Bills Logo SVG Design Guide is your gateway to unlocking endless creative possibilities. By understanding the history and significance of the logo, leveraging the versatility of SVG formats, and applying thoughtful customization techniques, you can create designs that not only look fantastic but also resonate with the spirit of the Buffalo Bills. Embrace your team pride, explore the diverse range of SVG resources available at SVGBank, and start creating designs that celebrate the legacy and passion of the Buffalo Bills today.
Source: Buffalo Bills Logo SVG Design Guide
Explore More:
Buffalo Bills SVG
Free Buffalo Bills SVG
Visit SVGBank for a wide array of design resources.
0 notes
Text
0 notes
Text
Hi I'm Stella!
I'm working on the design for an AAC app concept for a school project, and in the process I'm making a bunch of icons for it!
Feel free to use them and alter them however you want! That even includes selling them so long as you credit me
More info + resources I've made:
Here's a google drive folder with PNG and SVG files of all my icons for ease of use! It now also has a style guide which shows you how to make your own!
Here's a Picrew I made so you can create icons of people in my style!
My requests are closed right now, but if you have a pressing need/desire for an icon I am taking commissions on Ko-fi
I won't post anything NSFW, but have made icons for stuff like blood, genitals, and sex, and plan on making more. Icons like that will always be tagged and behind a "read more" button
Main blog where I post AAC design content: @stellas--stuff
Everyone is welcome to interact
152 notes
·
View notes
Text
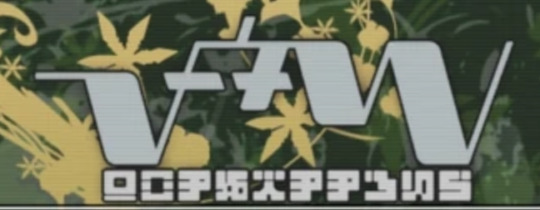
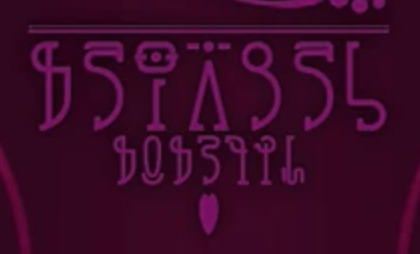
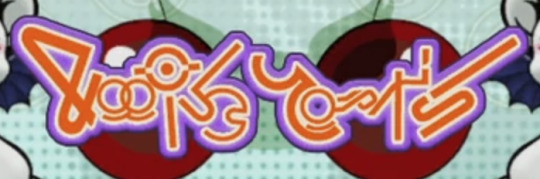
Resource: Transparent PNG & SVG Files for Cocoon, Gran Pulse, and Etro Alphabet + Numbers


1/16/25 UPDATE: I found the lowercase 'f' in the official English FFXIII collector's guide. I updated the files with this version, but left the f-alt file in.
I finally went ahead and vectorized all three in Illustrator. They're available to DL in the link on the image and in the replies. Some notes:
The scan I traced over for the Cocoon alphabet shows the same letter for lowercase 'a' is used for 'f.' I don't know whether this is a mistake in the guide or if there really is no differentiation between the two. However, I referenced the Creature Comforts logo to design an alternate lowercase 'f' and included that in the files.
I don't know how to make fonts. I included the SVG files for anyone who'd like to try though! This is more for people who'd like to make large logos or use them as a base for personal projects.
For fun, can you read which shop logo is which? Answers are in alt. Heads up: long post under read more.


#final fantasy xiii#final fantasy 13#ffxiii#ff13#other content#i really like the retail network logos#the hours it took me to do this gives me a greater appreciation for them#anyways my least favorite character is lowercase w#i hate it so much and it doesn't even look like the other ones
106 notes
·
View notes
Text
The Ultimate Guide to Online Media Tools: Convert, Compress, and Create with Ease
In the fast-paced digital era, online tools have revolutionized the way we handle multimedia content. From converting videos to compressing large files, and even designing elements for your website, there's a tool available for every task. Whether you're a content creator, a developer, or a business owner, having the right tools at your fingertips is essential for efficiency and creativity. In this blog, we’ll explore the most powerful online tools like Video to Audio Converter Online, Video Compressor Online Free, Postman Online Tool, Eazystudio, and Favicon Generator Online—each playing a unique role in optimizing your digital workflow.
Video to Audio Converter Online – Extract Sound in Seconds
Ever wanted just the audio from a video? Maybe you’re looking to pull music, dialogue, or sound effects for a project. That’s where a Video to Audio Converter Online comes in handy. These tools let you convert video files (MP4, AVI, MOV, etc.) into MP3 or WAV audio files in just a few clicks. No software installation required.
Using a Video to Audio Converter Online is ideal for:
Podcast creators pulling sound from interviews.
Music producers isolating tracks for remixing.
Students or professionals transcribing lectures or meetings.
The beauty lies in its simplicity—upload the video, choose your audio format, and download. It’s as straightforward as that
2. Video Compressor Online Free – Reduce File Size Without Losing Quality
Large video files are a hassle to share or upload. Whether you're sending via email, uploading to a website, or storing in the cloud, a bulky file can be a roadblock. This is where a Video Compressor Online Free service shines.
Key benefits of using a Video Compressor Online Free:
Shrink video size while maintaining quality.
Fast, browser-based compression with no downloads.
Compatible with all major formats (MP4, AVI, MKV, etc.).
If you're managing social media content, YouTube uploads, or email campaigns, compressing videos ensures faster load times and better performance—essential for keeping your audience engaged.
3. Postman Online Tool – Streamline Your API Development
Developers around the world swear by Postman, and the Postman Online Tool brings that power to the cloud. This tool is essential for testing APIs, monitoring responses, and managing endpoints efficiently—all without leaving your browser.
Features of Postman Online Tool include:
Send GET, POST, PUT, DELETE requests with real-time response visualization.
Organize your API collections for collaborative development.
Automate testing and environment management.
Whether you're debugging or building a new application,Postman Online Tool provides a robust platform that simplifies complex API workflows, making it a must-have in every developer's toolkit.
4. Eazystudio – Your Creative Powerhouse
When it comes to content creation and design, Eazystudio is a versatile solution for both beginners and professionals. From editing videos and photos to crafting promotional content, Eazystudio makes it incredibly easy to create high-quality digital assets.
Highlights of Eazystudio:
User-friendly interface for designing graphics, videos, and presentations.
Pre-built templates for social media, websites, and advertising.
Cloud-based platform with drag-and-drop functionality.
Eazystudio is perfect for marketers, influencers, and businesses looking to stand out online. You don't need a background in graphic design—just an idea and a few clicks.
5. Favicon Generator Online – Make Your Website Look Professional
A small icon can make a big difference. The Favicon Generator Online helps you create favicons—the tiny icons that appear next to your site title in a browser tab. They enhance your website’s branding and improve user recognition.
With a Favicon Generator Online, you can:
Convert images (JPG, PNG, SVG) into favicon.ico files.
Generate multiple favicon sizes for different platforms and devices.
Instantly preview how your favicon will look in a browser tab or bookmark list.
For web developers and designers, using a Favicon Generator Online is an easy yet impactful way to polish a website and improve brand presence.
Why These Tools Matter in 2025
The future is online. As remote work, digital content creation, and cloud computing continue to rise, browser-based tools will become even more essential. Whether it's a Video to Audio Converter Online that simplifies sound editing, a Video Compressor Online Freefor seamless sharing, or a robust Postman Online Tool for development, these platforms boost productivity while cutting down on time and costs.
Meanwhile, platforms like Eazystudio empower anyone to become a designer, and tools like Favicon Generator Online ensure your brand always makes a professional first impression.
Conclusion
The right tools can elevate your workflow, save you time, and improve the quality of your digital output. Whether you're managing videos, developing APIs, or enhancing your website’s design, tools like Video to Audio Converter Online, Video Compressor Online Free, Postman Online Tool, Eazystudio, and Favicon Generator Online are indispensable allies in your digital toolbox.
So why wait? Start exploring these tools today and take your digital productivity to the next level
2 notes
·
View notes
Text
Pinned post
Hello tumblr! This is @ipso-faculty and I'm creating a dedicated tumblr for the flags and coinings I'm creating. This is a side-tumblr of mine and hence I'll follow back as @ipso-faculty.
I am also on Wikimedia Commons and the Fediverse.
I am intergender, demigender, intersex, disabled (POTS, long covid, AuDHD), bi/pan, ambiamorous, as well as a white settler. I mostly make intersex and disability oriented flags.
General notes - All flags I make are public domain unless noted otherwise. This means you can share and remix as you desire. No credit is needed, no permission needs to be asked. Have fun!
Design philosophy - My primary goal is to make flags that are comprehensible. I see flags as a form of communication and I like it when flags have patterns in their meanings and designs.
How to request a flag - How it works: you send me a request, I send you some prototypes, you let me know what you like or what to change, and once you're satisfied I'll post it. I'll only mention your username if I have your explicit permission to do so. - In order for me to send you prototypes, I need to be able to DM you. For my own cognitive needs, I need to be able to see a *threaded conversation*. The problem with Tumblr's ask system is if I answer your ask privately, I cannot see what I wrote. So if you reply back with "I liked flag #2" I actually don't know which flag you liked!!! - I am no longer accepting requests from users who will not let me DM them. The lack of threaded conversation via Asks is cognitively inaccessible to me. - Please only ask for flags of identities that you have (or have a legit connection to the relevant community). I want to be able to consult with you on prototypes and know that the designs I'm making are appropriate for the relevant identity group. - When asking for a flag it's helpful if you let me know if there are existing designs, symbols, or the like you'd like me aware of or to get incorporated <3 ***
Flag resources (I'll be adding links to this that I find useful, so if reblogging check the original url for the latest version) Colours - OKLCH colour picker & converter - why it's worth learning oklch - introduction to perceptual colour spaces like LCH - introduciton to what a colour space / gamut is - Wikipedia's list of flags by colour combination
Flag layouts - Wikipedia's glossary of vexillology - Wikipedia's list of flags by aspect ratio
SVG drawing - introduction to SVG - Scaling SVG with CSS - MDN documentation on SVG transform - Bézier curve tutorial - Python drawsvg documentation - Python drawsvg library
Tumblr - How to back up your tumblr
Resources/guides I've written - Different ways to style infinity symbols (and why it matters)
10 notes
·
View notes
Text
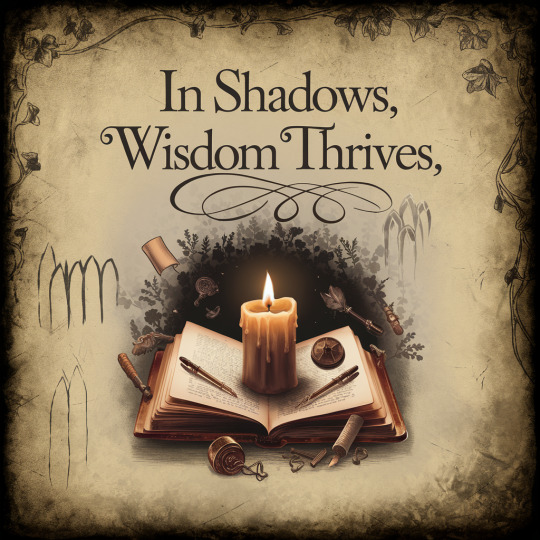
Does 'Candlelit Reverie' capture the essence of dark academia for you? 📚🕯️ Imagine this design as a phone wallpaper, an SVG for your journal covers, or a set of icons for your home screen. Which would you love to have? Or maybe all of them? Let us know what would bring that scholarly, candlelit vibe to your digital world! 🌿✨ Your thoughts guide our creations, so tell us what you’d love to see! 💭🖋️
#dark academia#dark aesthetic#dark art#dark fantasy#fan#artists on tumblr#digital art#digital illustration#digital drawing#digital painting#procreate#illustration#my art#art#artwork#drawing#illustrators on tumblr
5 notes
·
View notes
Text
How to Safely Use SVG Files in WordPress

SVG files are a popular choice for web graphics, but is SVG supported by WordPress by default? Unfortunately, no. WordPress doesn’t allow SVG uploads due to potential security risks. However, if used correctly, you can safely enable SVG support. For detailed instructions, check out How to Allow SVG in WordPress to add SVGs without compromising your site’s security.
What is SVG and Why Should You Use It?
SVG (Scalable Vector Graphics) is a file format designed for vector images that can be resized without losing quality. What is SVG? Unlike traditional image formats like PNG or JPEG, which use pixels, SVGs are defined by XML-based code. This means they can scale to any size while remaining sharp. How does SVG work? Since SVGs are text-based, browsers render them by interpreting code, making them ideal for responsive websites.
Why is SVG Important for WordPress?
SVGs offer unique advantages, especially when used on a WordPress website. Why is SVG important for WordPress? SVG files are incredibly scalable, which is crucial for responsive design. Whether viewed on mobile, tablet, or desktop, your images will look crisp and clear. Additionally, because SVG files are lightweight, they help reduce page load times, improving both user experience and SEO performance.
Why Can’t You Upload SVG Files to WordPress?
You might wonder, why can’t I upload SVG images to WordPress? While SVGs are useful, they also pose a security risk. Since they are XML-based, they can be manipulated to include malicious code that hackers could use to harm your website. For this reason, WordPress doesn’t allow SVG uploads by default. But don’t worry—there are safe ways to enable SVG support.
How to Enable SVG Files in WordPress?
Enabling SVG support in WordPress is possible, but it requires a few precautions. How to enable SVG files in WordPress? The easiest and safest way is to use a plugin that sanitizes SVG files before uploading them, removing any potentially harmful code. If you prefer a manual approach, you can modify your theme’s functions.php file to allow SVG uploads, but using a plugin is highly recommended to mitigate security risks.
What Are the Advantages of Using SVG in WordPress?
The benefits of using SVG files on your WordPress site are clear. What are the advantages to use SVG in WordPress? SVGs offer superior scalability, meaning they look sharp on all screen sizes without becoming pixelated. They are also lightweight compared to other image formats, which helps your site load faster. Plus, SVGs are text-based, so search engines can read and index them, improving your SEO.
Why Should You Consider SVG for Your Website?
As websites become more focused on performance and responsiveness, SVG is emerging as an essential tool. Why is SVG important for WordPress? Its ability to scale without losing quality ensures your website looks professional and modern on any device. Additionally, faster loading times provided by SVGs contribute to a better user experience, which is a key factor in SEO rankings.
Conclusion
Although SVG is not supported by WordPress out of the box, you can safely enable it with the right precautions. SVGs provide a range of benefits, from scalability to better performance, making them an excellent choice for modern web design. To learn how to safely add this functionality to your WordPress site, follow this guide on How to Allow SVG in WordPress.
#wordpress#wordpress theme#wordpress plugin#wordpress development#plugin#developer#wordpress developers
2 notes
·
View notes
Text
learn to digitizing your embroidey designs
From Sketch to Stitch: A Comprehensive Guide to Digitizing Your Embroidery Designs
The world of embroidery has embraced the digital age, allowing you to transform your own unique designs into stunning stitched masterpieces. But how do you bridge the gap between a simple vector graphic and a complex stitching pattern? This comprehensive guide, crafted with 2500 words, will teach you the art of digitizing your embroidery designs, from software choices to stitch considerations and finishing touches. Before We Embark: Understanding SVGs and Embroidery Files Scalable Vector Graphics (SVGs): These text-based descriptions of images offer infinite scalability, making them perfect for digital design. Embroidery files: These contain specific instructions for your machine, including stitch types, colors, and placement (DST, EXP, JEF, PES formats are common). Step 1: Choosing the Right Software Consider these factors when selecting your digitizing software: Skill Level: Are you a beginner or an experienced digitizer? Some programs cater to novice users, while others offer advanced features. Budget: Free and paid options exist, each with varying capabilities and functionalities. Compatibility: Ensure the software outputs files compatible with your embroidery machine. Here are some popular choices: Free: Inkscape: A free vector graphics editor with the Ink/Stitch plugin for basic digitizing. Sewing & Embroidery Software (SERF): Free software with limited but beginner-friendly digitizing features. Paid: Wilcom Embroidery Studio: Offers powerful tools for advanced digitizing and editing. Embrilliance Enthusiast: User-friendly software with various features at a good price point. Brother PE Design: Ideal for beginners with Brother embroidery machines. Step 2: Preparing Your SVG Simplify the design: Remove unnecessary details or intricate lines that might not translate well to embroidery. Optimize colors: Limit your color palette to what your machine can handle (usually 6-12 colors). Convert to paths: Ensure all elements in your SVG are outlines (paths) for proper stitching. Step 3: Importing and Converting Import your cleaned-up SVG into your chosen software. Follow the software's specific instructions for converting to an embroidery file. This typically involves: Choosing stitch types: Select appropriate stitches for different parts of your design (satin stitch for filling, backstitch for outlines, etc.). Setting stitch parameters: Adjust stitch density, length, and direction for desired effects. Color mapping: Assign thread colors to different parts of your design. Step 4: Digitizing Tweaks and Adjustments Preview and test: Most software allows you to preview your design on a virtual embroidery machine. Check for stitching issues and adjust paths or settings if needed. Refine stitch types and parameters: Experiment with different stitch combinations to achieve the desired look and texture. Consider thread types and colors: Choose thread that complements your fabric and design aesthetic. Step 5: Export and Embroider! Once you're happy with your design, export it in a file format compatible with your embroidery machine. Transfer the file to your machine and prepare your fabric and thread. It's finally time to see your creation come to life! Embroider your design, following your machine's instructions. Bonus Tips for Success: Start simple: Begin with basic shapes and designs to get comfortable with the conversion process. Practice digitizing: The more you experiment, the better you'll understand how different stitches and settings affect your final outcome. Join online communities: Connect with other embroidery enthusiasts for tips, advice, and inspiration. Don't be afraid to ask for help: If you get stuck, consult software manuals, online tutorials, or seek assistance from experienced digitizers. Remember, with a little practice and this guide as your compass, you'll be well on your way to transforming your SVG dreams into beautiful embroidered realities! Further Resources: Websites: Needlework Tips and Techniques: https://www.needlework-tips-and-techniques.com/ Books: "The Complete Book of Digitizing" by Jeannette Douglas, "Digitizing Designs" by Laura Ashley YouTube Tutorials: CreativeBug Cutwork Embroidery Masterclass, Bluestone Creations Cutwork Basics Online Forums: Embroidery Forum With these additional resources and the knowledge you've gained, you Read the full article
3 notes
·
View notes
Text
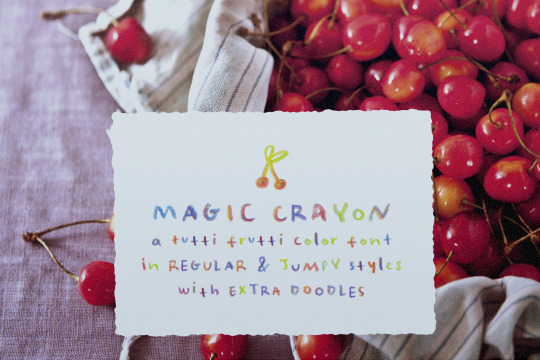
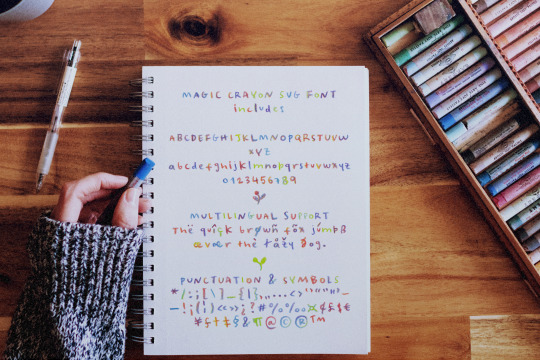

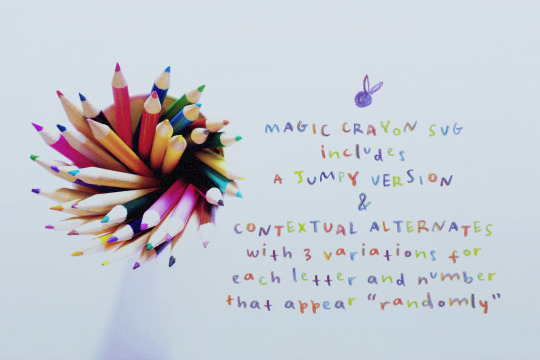
Magic Crayon is a color SVG font made using a magic pencil. The SVG format allows for the texture of the pencil and color to be captured in a more authentic way. Magic Crayon includes an extra doodles font, a jumpy alternative, and 3 variations for each letter and number, accessible through contextual alternates, for extra realism and fun. Magic Crayon looks good at small sizes and will also look great in all caps texts. Use it in designs such as postcards and notes, posters, logotypes, social media posts, branding and packaging.
This font includes:
Magic Crayon SVG
Magic Crayon SVG Jumpy
Magic Crayon SVG Extras with 52 doodles elements
A PDF guide to using the font: blending modes, color overlay, contextual alternates and stylistic alternates
A PSD template to help you getting started using the font
PLEASE NOTE! Software requirements for the SVG font: Photoshop CC2017+ // Illustrator CC2018+
Get it at my website, Creative Market or The Hungry JPEG
5 notes
·
View notes
Text
Top 5 Cricut Beginner Projects to Get Started
Buying a Cricut machine for the first time, and if you are a beginner, the device can be intimidating by its features and looks. It can also seem like a complicated machine, with many blades, mats, materials, and tools. So, choosing your first project can be challenging given the wide range of Cricut machine's abilities. As you might already know, Cricut machines are cutting devices, and its high-end models can cut more than 300 materials. This blog contains curations of Cricut beginner projects to help you understand and work smoothly with the machine.
1. Custom Phone Case
If you want to make your mobile's trendiest new phone case, it is possible with your Cricut machine. You can mainly use the Explore machine for creating this project. It is because, along with Design Space, select your respective smartphone model from the iPhone and Android phones list. You can make a perfect Cricut phone case in just a few minutes.
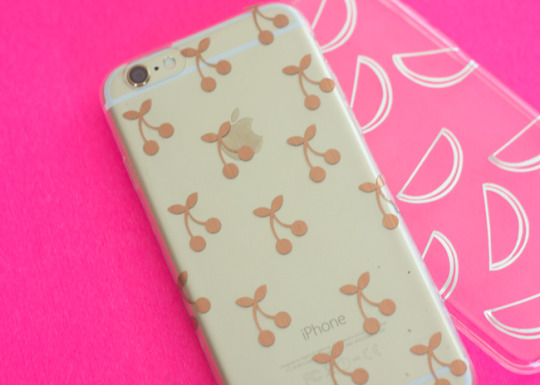
Further, the supplies you need for creating a personalized phone case are an Explore or Maker machine. You also need a clear phone case, foil adhesive vinyl, or standard permanent vinyl. Also, you need Transfer tape and the respective designs you want to cut on the material.
2. Cute Face Mug
It is one of the easiest Cricut beginner projects. You just need to cut some vinyl material and stick it on a mug with a clean surface. You can select super cute designs from the official Design Store or create your design. You can choose some cute doodles you or your kids like. And you can make various faces and expressions, even using animals such as a kitty, puppy, or unicorn.
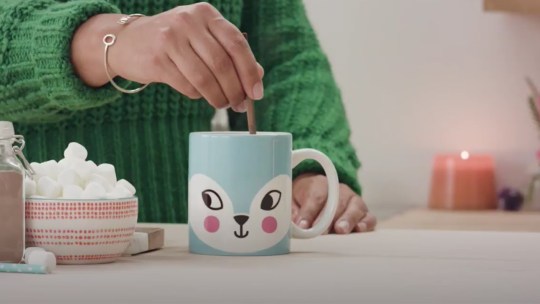
Further, the supplies you need for this project are a sheet of vinyl, a Cricut Machine, and a weeding tool. Plus, you need Transfer tape to transfer the design onto the surface of the mug.
3. Greeting Cards
You can make a set of greeting cards with your new Cricut machine as your first project. To do this project, all you need to do is cut two types or colors of cardstock, fold them, and put them together. Creating a set of greeting cards is very simple and quick, and you will also have cards with fancy patterned looks.

Further, all the standard cards are 5 x 7 inches, so you can keep them in envelopes and mail them easily. So, you need a standard cardstock, A Fine-point blade, a Cricut Joy, or Explore. Plus, the design of your greeting card. Additionally, you don't have to score or glue the end products. That is why it is the easiest of all Cricut beginner projects.
4. Wall Decals
The wall decals are another set of great projects to begin your Cricut crafting journey. You can add inspirational quotes or simple messages in your living room or bedroom. For this project, it is better to use regular permanent vinyl. However, you can also use colored vinyl to create a pop-up look.
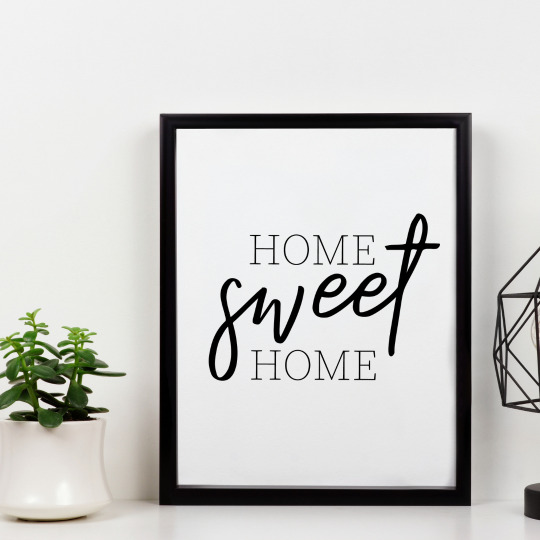
Further, this project requires a Cricut machine, permanent vinyl, and an SVG design file. Additionally, you need to measure your space and cut the quote of your choice. After missing, clean the wall, free it from dirt, and then apply the design.
5. Coasters
Another way to decorate your coffee or personal table is by adding personalized coasters. Making coasters is easy and takes less time. It also needs less materials to make it. All you need to create a coaster is first to decide on the design you can easily peel off from the material. In addition, you need permanent vinyl and cut the design on it using your Cricut Maker or Joy.
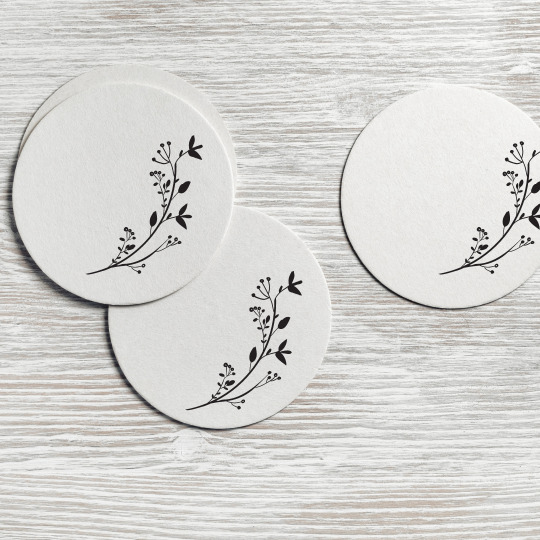
Further, using permanent vinyl to make coasters assures you of longer life and won't quickly come off from the coaster.
Conclusion
Using a Cricut machine is easy once you get comfortable with the materials, tools, and Design Space. To get comfortable as a fresh user, you must pick up projects that read to you the fundamental aspects of working with a Cricut machine. This blog will be an easy guide and Cricut beginner projects to help you in the initial stages of working with the device. In addition, you need to pick a project with fewer materials, simple steps, and less time to complete. Once you master the basic techniques, you can create complex designs and projects.
FAQs
What is the helpful advice on Cricut beginner projects?
Some important suggestions are to pay attention to instructions and get suitable materials/supplies and tools for your project. Additionally, if you are in doubt, test it first. As a beginner, you need to accept that you will make certain mistakes, and that's Okay. And your aim should always be learning and on the process and less on perfection.
What should ideally be the first Cricut project for a beginner?
Ideally, Card making is the first project new users should try with their Cricut machines. It is because you can make your cards for any situation. You can use your machine to cut the design on your cardstock and remove all the extra materials. Now; you will have your first Cricut project.
Do you need a computer to work with Cricut machine?
No, you don't need a computer to work with Maker. It is because you can use Cricut Maker with your Android or iPhone. But you can only do some things you want with a mobile. So, to use the machine's full potential, connecting it to the computer is a must.
#Cricut Beginner Projects#Top 5 Cricut Beginner Projects to Get Started#Cricut.com/setup#www.cricut.com/setup
2 notes
·
View notes
Text
A Beginner's Guide to Digital Images & Video
In today's society where people are consuming more online content than ever, it can sometimes feel overwhelming for an aspiring content creator. The purpose of this blog is to give you the basic knowledge of commonly used image manipulation tools and techniques, different image and video formats and the best export settings to post your video on social media. I will also go over the essentials of copyright and creative commons licensing that is extremely important for every artist to be aware of.
Common Image Manipulation Tools & Techniques:
You begin with your piece of art, whether it's a photo or a video, and now you want to edit it to match your vision. Some of the most-used image manipulation techniques are cropping, color correcting/grading, and retouching. These can be done with a large array of programs, such as Adobe Photoshop or DaVinci Resolve. Cropping is a basic but fundamental technique that allows you to select what part of the image you want to be the focus by pruning away the unnecessary parts. Color correcting is when you balance the colors in the image to appear natural, while color grading is used to adjust the color and contrast to achieve a stylistic look. Retouching covers a variety of things, but essentially refers to minor cosmetic changes, such as removing wrinkles, stray hair, or a distracting spot on the image.
Common Image & Video Formats:
Now that you have finished editing you image or video, what type of format should you save it as? Let's go over the ones you've probably already heard of. JPEG is most commonly used because of its small file size, making it easy to use on web and mobile platforms. However, because it uses lossy compression, the image will lose quality the more compressed it becomes. PNG, on the other hand, offers superior image quality due to lossless compression, as well as transparency. This makes it a good choice for overlays and logos. GIF is great for simple animation and images and is often used for short clips and memes. It can also support transparency. SVG is a vector format for web design and is great for digital design due its small file sizes and lossless quality. A PDF image can contain vector, bitmap images and text, making it ideal for displaying finished documents or graphics, but isn't the best if you want to edit them later.
In contrast to image formats, video files typically need wrappers/containers to hold multiple elements like video and audio, together. The most popular video wrapper online is the MP4 because it is supports the most-used codecs- the program that codes and decodes the audio and video files. MP4s are often compressed using the AVC (H.264) codec which is great for use in videoconferencing and offers multiple views of the same scene, enhancing sense of depth in the video. The HEVC (H.265) codec is very efficient with high-quality video (including 8K), but is not as widely supported as H.264.
Export Settings for Popular Platforms:
Now that your video is ready to upload, what is the best export setting depending on which social media outlet you're posting on?
With YouTube, it is recommended to export the video as an MP4 using a H.264 codec. Standard video aspect ratio is 16:9 (1920x1080 HD), but YouTube's player will automatically change to match your video if it is different. YouTube re-compresses all uploaded videos so it is suggested to start with high quality to help preserve detail (YouTube Help, 2024). The target bitrate is 8Mbps with AAC(Advanced Audio Coding) audio.
On Twitch, the settings are a bit different for live streaming. A minimum upload speed of 3-6Mbps is recommended for lower quality video, while 6-8Mbps is suggested for 1080p HD. For 720p streaming, a bitrate of 2500-4000kbps is a good balance for quality while also accommodating most viewer's internet speeds. If you are streaming HD, then the maximum allowed bitrate is 6000kbps on Twitch.
For Facebook, they recommend if uploading an edited video, to use the H.264 video with AAC audio in MOV or MP4 format (Facebook Help, 2017). The aspect ratio should not exceed 4000px wide and a maximum frame rate of 30fps for mobile-friendly playback.
Understanding Copyright and Creative Commons Licensing:
Even though you have successfully created and uploaded your digital creation online, it's important to understand the copyright rights of your creation, as well as that of anyone else's that you may have used in your work. Copyright here refers to the protection of an IP (Intellectual Property), which is an original creation of the mind, such as film, sound recordings, and literary or artistic works. Establishing ownership in digital art is complex, especially with the introduction of AI-generated works.
Under the Australian Copyright Act 1968, once an original image is created it is copyrighted, meaning you can't use it without the owner's permission. Sometimes creators are more than happy to let others use their work, but have certain conditions, like not monetising it. This falls under the Creative Commons License, which allows people to share their work while adhering to copyright law. You can easily apply a Creative Commons License to your original work by choosing one of the six options, and stating it clearly on your work. You can find all the information at www.creativecommons.org.
Lastly, you can find plenty of royalty-free assets available on stock image websites like Shutterstock, or selecting the Creative Commons Licenses option under Usage Rights, when using Google image search.
I hope that you now have an understanding of the basics of digital image creation. Now get out there and start making some art!
View Bibliography
1 note
·
View note
Text
Highlights
Designed by Kevinlogostudio
Party decor for gatherings and celebrations
Digital download
Feminine Beauty Logo | Custom Salon Logo Design | Editable Spa Lash Hair Branding | Boutique Business Logo Template | Esthetician Logo personalized logo | salon logo design | beauty brand logo | hair logo design | lash logo template | spa logo design | boutique branding | custom biz logo | feminine branding | editable logo | logo for stylist | girly logo design | premade salon logo Stand out with a professional and feminine Salon Logo Design that’s fully customizable to match your beauty brand’s personality. Whether you're a hair stylist, lash artist, MUA, nail tech, or spa owner, create a polished and cohesive look without any design experience. This digital logo template is perfect for launching or rebranding your salon, adding a luxe touch to your business cards, website, packaging, and social media. ✨ What’s Included: Formats included: PDF, PNG (transparent), JPG, PSD, AI, SVG High-resolution files for print & digital use PDF guide with Canva access link + usage instructions Fonts & graphics included 🎯 Perfect For: Hair Stylists & Salons Lash Artists & Brow Technicians Makeup Artists (MUAs) Nail Technicians Spa & Skincare Brands Boutique & Beauty Business Owners Lifestyle Coaches & Beauty Influencers 💡 Why You'll Love It: Easy to edit – no design skills required Fully customizable with your brand name, colors, and fonts Professional, chic, and modern aesthetic Ideal for branding, rebranding, or digital marketing 📥 How It Works: Purchase the listing Instantly download the PDF with your Canva access link Customize the logo with your name and brand colors Download your files and start using them immediately! 📌 Note: This is a digital product only — no physical items will be shipped. Logo files are for personal business use and cannot be resold or redistributed.
#artists on etsy#brand design#brand identity#brand logo#brand name#business card#business logo#creative logo#etsy#etsyfinds#logo maker#logotipo#logo design#logo#graphic design logo#logomark#logotype#modern logo#my logo#futuristic#minimalist#banner#blueprint#packaging
0 notes
Text
Graphic Design Terms Every Business Owner Should Know
Working with a graphic designer can be exciting—but also overwhelming—especially when unfamiliar terms start flying around. From “CMYK” to “white space,” design jargon can feel like a different language. But if you're a business owner investing in branding, marketing, or website visuals, understanding key design terms isn’t just helpful—it’s empowering.
By learning the basics, you can collaborate better, avoid miscommunication, and get the results you’re really looking for. That’s also why many businesses now turn to professional Graphic Designing Services that simplify the process and explain each step in clear, client-friendly terms.
Here’s a handy guide to essential graphic design terminology every business owner should know—no design degree required.
1. Brand Identity
This includes the visual elements that represent your business: logo, color palette, typography, and brand style guidelines. A strong brand identity ensures consistency across all marketing materials.
Why it matters: It’s how customers recognize and remember you.
2. Logo Variations
Designers often create multiple logo types:
Primary logo: Full version
Secondary logo: Simplified for tighter spaces
Favicon: The tiny icon seen in browser tabs
Monogram: Initials or symbol-only version
Why it matters: Using the right version keeps your visuals clean and polished on different platforms.
3. Typography
Typography refers to the style and arrangement of text. Key typography terms include:
Serif vs. Sans-serif: Serif fonts have little “feet” on the letters, sans-serif fonts don’t.
Kerning: Space between individual letters.
Leading: Space between lines of text.
Hierarchy: How fonts are arranged to guide the viewer's eye (e.g., headlines vs. body copy).
Why it matters: Font choices affect brand tone, readability, and visual flow.
4. Color Modes: RGB vs. CMYK
RGB (Red, Green, Blue): Used for digital screens.
CMYK (Cyan, Magenta, Yellow, Black): Used for printing.
Why it matters: Designing in the wrong mode can lead to color mismatches in print or online.
5. DPI and PPI
DPI (Dots Per Inch): Resolution used in print.
PPI (Pixels Per Inch): Resolution used for screens.
Why it matters: High-resolution graphics (300 DPI for print, 72 PPI for web) ensure clarity.
6. White Space
Also known as “negative space,” this refers to empty space around design elements.
Why it matters: It helps focus attention, reduce clutter, and create a clean, professional layout.
7. Vector vs. Raster Graphics
Vector files (AI, SVG, EPS): Scalable without losing quality; best for logos and icons.
Raster files (JPEG, PNG, GIF): Made of pixels; can become blurry when enlarged.
Why it matters: Always ask for vector files of your logo—they stay crisp at any size.
8. File Types You Should Know
JPEG: Good for photos; compressed format.
PNG: Supports transparent backgrounds; ideal for web graphics.
PDF: Great for print-ready designs or document sharing.
AI/PSD: Adobe Illustrator/Photoshop source files; editable by designers.
Why it matters: Each file type has a purpose. Knowing which one to use saves time and quality.
9. Mockup
A mockup is a realistic preview of how your design will appear in the real world—like a billboard, packaging, website screen, or T-shirt.
Why it matters: It helps you visualize the design in context before final production.
10. Bleed
In print design, bleed refers to the area beyond the final cut line. Designers extend backgrounds or images into this zone so no white edges appear after trimming.
Why it matters: Print-ready files without proper bleed may be cut incorrectly.
11. Grid System
A grid system helps designers align elements consistently. It's the invisible structure that keeps layouts balanced and organized.
Why it matters: It ensures consistency and professionalism, especially in multi-page documents or web layouts.
12. Mood Board
A mood board is a collection of images, colors, and typography used to set the visual tone of a brand or project.
Why it matters: It helps align expectations between you and the designer before the actual design work begins.
Conclusion: Speak the Visual Language of Your Brand
You don’t need to be a designer to get great design—but knowing the basics helps you ask better questions, give clearer feedback, and get better results. A good designer will guide you through the process, but having a working knowledge of design terms ensures you stay in control of your brand.
If you're ready to collaborate with professionals who simplify the design process and deliver results that align with your vision, explore expert Graphic Designing Services that speak both visual and business fluently.
0 notes
Text
Convert SVG to CSS
Learn how to convert SVG to CSS with this easy step-by-step guide. Optimize your web design using clean CSS from SVG code. Perfect for developers and designers.
1 note
·
View note
Text
Explore Creative Designs with Emoji Packs and Arrow Icons
In the dynamic world of graphic design and digital communication, visual elements like icons play a powerful role in enhancing user experiences. Whether you're a web developer, mobile app designer, or content creator, the demand for high-quality, customizable icons continues to grow. If you're looking to enhance your digital toolkit, one excellent solution is to Download Emoji Icon Pack collections that offer colorful, expressive symbols. From conveying emotions in chats to improving UI layouts, emoji icons serve diverse purposes and are now integral to modern digital platforms.

Why Visual Icons Matter in Digital Design
Icons offer a quick, intuitive way to convey information without the need for lengthy text. When used correctly, they can guide users through a website, app, or document seamlessly. For instance, a left hand arrow icon immediately signals navigation or backward movement, making it a crucial UI element for mobile apps and web interfaces. With a clear and simple visual like this, users can easily understand what action is expected, improving overall usability and experience.
Icons are also essential in maintaining design consistency. Whether you're designing a landing page or building an app from scratch, choosing the right set of icons can determine how professional and engaging your project appears. That's why more and more designers choose to Download Emoji Icon Pack files that come with a wide range of styles, sizes, and formats. These packs usually include everything from smiley faces and flags to food, activity, and object icons—perfect for spicing up social media posts or messaging platforms.
The Role of Arrow Icons in Navigation Design
Arrows are perhaps among the most used and recognized icons in UI/UX design. Specifically, the left hand arrow icon plays a critical role in helping users move backward or return to a previous step. Its familiar shape offers instant understanding, reducing confusion and streamlining navigation. This simple icon can often be found on websites, applications, e-books, and even wearable devices.
Pairing arrow icons with emoji icons allows designers to create interactive interfaces that are both functional and expressive. Imagine a tutorial interface that uses an emoji to signal enthusiasm and a left-pointing arrow to guide the user to the previous step—it combines emotional cues with directional clarity for an engaging experience.
Finding the Right Icons for Your Projects
As a designer or developer, sourcing the right icons can often be a time-consuming task. Searching through inconsistent icon libraries or low-resolution images can waste valuable time. This is where it becomes essential to rely on trusted sources that allow you to Download Emoji Icon Pack options and arrow icons in one place.
You’ll also want to consider the technical aspects such as file format compatibility (SVG, PNG, EPS), resolution quality, and the availability of transparent backgrounds. A comprehensive icon library not only saves time but also ensures that your final project meets professional standards.
Enhance User Communication and Navigation
Combining emojis and arrow icons doesn't just improve aesthetics—it enhances communication. Emojis add personality and emotion, while arrows provide guidance and structure. The left hand arrow icon, in particular, is perfect for websites, apps, and forms that require users to move between sections or pages. Its utility makes it a staple in every designer's toolkit.
When you combine both emoji icons and navigation arrows, you're equipping your digital products with tools that cater to both logic and emotion. This dual effect can help retain user engagement, improve navigation flow, and offer a more satisfying experience for end-users.
If you're looking to expand your icon resources and incorporate these essential design elements into your work, visit freeicon.com. They offer an extensive library where you can download emoji icon pack collections, high-quality directional icons like the left hand arrow icon, and much more—all designed to elevate your digital projects.
0 notes