#Sewalong
Text
Cloak for @badassindistress's cloak sewalong! It took like twice as long as it should have bc I cut the hood far too shallow and had to go back to the store for more cloth. But it's done!

28 notes
·
View notes
Text
Lotfus Bralette Sewalong: Construction 1
ok things I've learned: it'd be easier if I used a different fabric for main and lining, and it would be easy if that fabric had an obvious right and wrong side. Despite all my labeling and stickering and everything I *still* sewed a panel in wrong, and it was a nightmare making sure everything was mirror-imaged correctly.
All that said, I had to unpick a total of one seam (but unpicked two by accident, argh), and there's a sudden point where you have everything assembled and you're like..... none of this needs labels any more, and you have to peel them all off before you can continue. And it comes suddenly. So.
I'm not finished but I'm really near the end. It's a lot of fussy little sewing, but the seams are like ten inches long max, it really doesn't take very long.
This being my muslin, I have focused on getting everything put together and have not paid attention to seam finishing, trimming, grading, pressing etc. My next version, I will do those things, but I've omitted them from this version because I still don't know if the thing is going to fucking fit, I'm not topstitching something if I might have to tear it all back out, though let's be realistic I'm not going to disassemble this thing, if it turns out unwearable I'm just going to cut the notions off and start over. It's not that much fabric. I will make minor tweaks probably, but generally it is not going to be worth it to pull this apart. (Exception: if it's too large I would cut seams off and sew it smaller. But it will not be too large, I already know that from the approximate shove-my-boob-meat-into-a-half-of-it not-exactly-try-on-- it is certainly not too big, but I can't tell if it's too small because without the elastic and fasteners it's not pulled closely enough to me to be sure. It feels like there's not enough fabric to go around, but I know the wide band elastic covers a lot of territory, so I'm reserving judgement.)
So. How far did I get? Well.
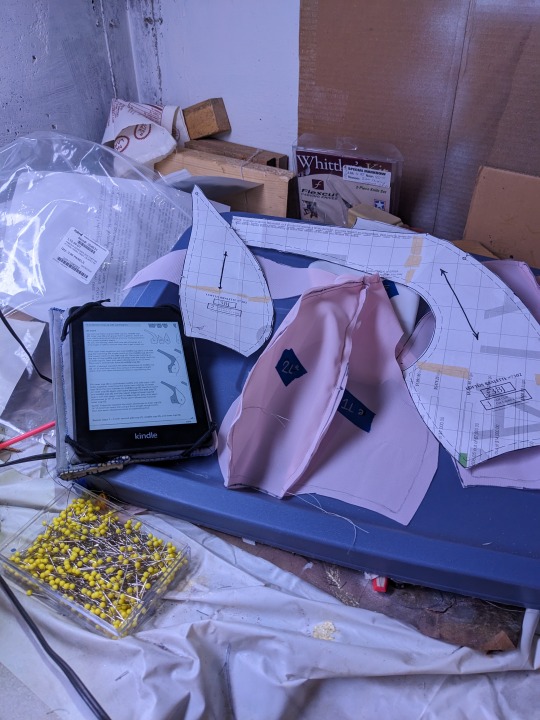
[img description: this is the cluttered basement setup. Image shows a blue rubbermaid tote lid with a tall rim leaning on a pile of stuff on a cluttered desk, and on the lid is a Kindle with the sewing instructions loaded up, one half of the bra cup assembled, several pattern pieces, and next to the rim is a large box of yellow-headed quilting pins.]
I sent this setup photo to my family groupchat when we were discussing what we're doing with our weekends. (One younger sister is camping in Vermont with husband and kid, the other was gardening and found a big shed snakeskin which was cool, Mom was visiting a brew pub in fort edward and sent a photo of what looked like a pole to me and said "there's edward" and i don't get the joke, and the oldest sister had just taken her daughter to get her ears pierced, which among our people is a sign of young adulthood. Not that it's relevant to the sewalong but this is my blog after all, LOL.)
I had to unpick a seam but progress was quick after that.
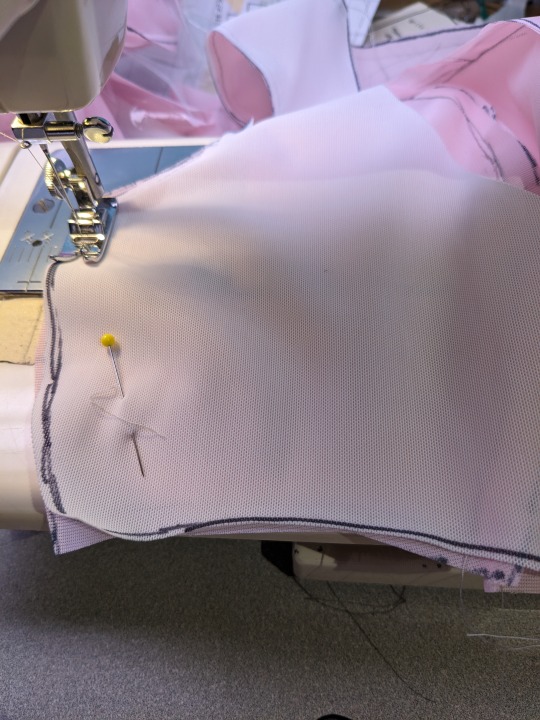
[image description: an assemblage of fabric, with a pin in it, going through the throat plate of a sewing machine. The lower fabric is pink, the top fabric white. Both are decorated with Sharpie marks around the edge. The pink is nonstretch nylon tricot, the white is heavy duty powermesh.]
When it came time to attach the powerbar to the cup lining, I felt that the video sewalong had said to have the powermesh side up. The issue here is that the bra cup and lining are non-stretch fabric, as the pattern is written, and the powerbar and back band are stretch fabric, specifically powermesh (which has superior recovery to other stretch fabrics and so is indispensible in bras and compression garments). And attaching stretch to nonstretch is always a little bit of a nightmare, and generally is inadvisable, but bras break the rules in many ways and that's why so many of us are intimidated about bras.
I discovered immediately that sewing with the nonstretch side against the feed dogs and the stretch side against the presser foot was a NO GO. The stretch fabric would get pulled by the presser foot wildly out of shape, and I kept having to raise the presser foot and shove at the fabric to keep it aligned, and I kept wobbling my seam all over the place and it was awful. So I flipped it over and put the stretch fabric against the feed dogs instead, and then had zero further issues. I have not re-checked the sewalong, and the pattern instructions do not specify, but for my own reference, always put the stretch fabric against the feed dogs, that is unambiguously what worked here.
I also broke my anti-topstitching-on-muslins stance here and did topstitch the seam after I attached the back band to the cups. I wasn't doing it anywhere else, but I think it's necessary there, to hold everything down. There's gonna be SO much strain on that seam.
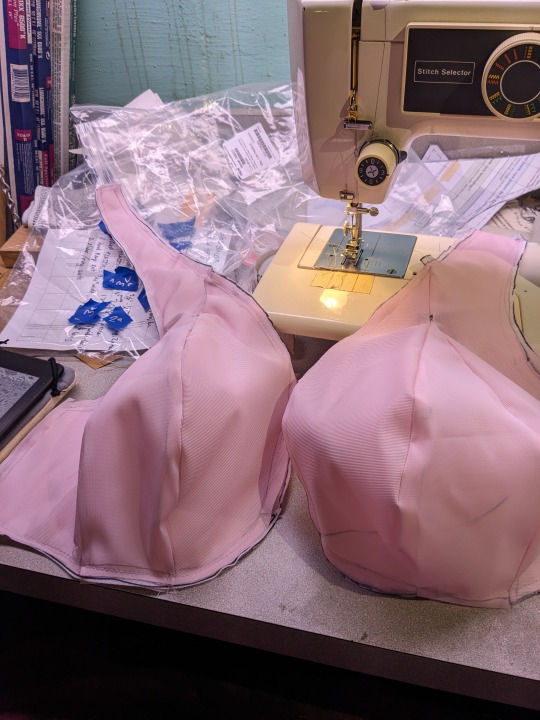
[image description: a pale pink, quite substantial bra, though it only looks fully assembled, lying on the talbe in front of a sewing machine. There's no center gore so it's only arranged as if assembled. But the cups are visibly partly self-supporting, because they're now three layers of fabric, so they're approximately boob-shaped, and hilariously fleshtoned in this light, I did not think this through.]
I got this far, both cups and linings assembled, with the powermesh in the middle. And then I had to make the center gore, which didn't go together the way I expected at all. You sew it in two halves, and then sew the halves together, which I had not expected and could not make myself understand. I did it, and then re-watched the sewalong afterward, and i'm still not sure I did it right, but mine did go on and looks right so I guess even if I did do something not the way the sewalong suggests I did it right enough that it works.
The frustrating thing is that you make the center gore and then set it aside, though, LOL. So I had to make it, then put the neck elastic on, and then check again.
I was SO confused by the elastic. You sew it on right sides together, and then flip it to the inside of the bra and topstitch it from the outside. So you want to sew it in such a way that just a little edge of it, which may or may not have decorative picots because it depends what you bought, will overhang when you flip it. So you want to sew it down along the MARKED SEW LINE on your strap, and if there's a bunch of extra wobbly edges and shit, sew to the inside of that, and you can trim them off after. This is where you compensate for wobbly cutting and wobbly sewing and wobbly putting-layers-together, and it's brilliant.
I didn't do it right but I will next time now that I understand that. And Jenn from Porcelynne *does* explain that, explicitly, in the sewalong, but I watched the sewalong ahead of time and couldn't remember in the moment. So this is me reinforcing it: your whole neckline edge, sew that elastic just so and once you flip it, it will look like you lined everything up perfectly. And you don't have to stretch as you sew for the whole strap bit, and there's only a tiny bit of stretching as you sew down around the cup, and it ends right where your powerbar came in, so it's a nice continuous band of stretch all the way around your boob.
And THEN you stick the center gore in, sandwiched, before you flip the elastic, and it looks weird as hell and no way could this be right. But then once you flip the thing, sure enough, there's just a cute decorative bit of elastic between the cup and center gore, and it looks good as hell.
(I mean, it doesn't on my muslin, but it will when I make a nice version. My muslin is hideous LOL, and I'm not worried in the slightest.)
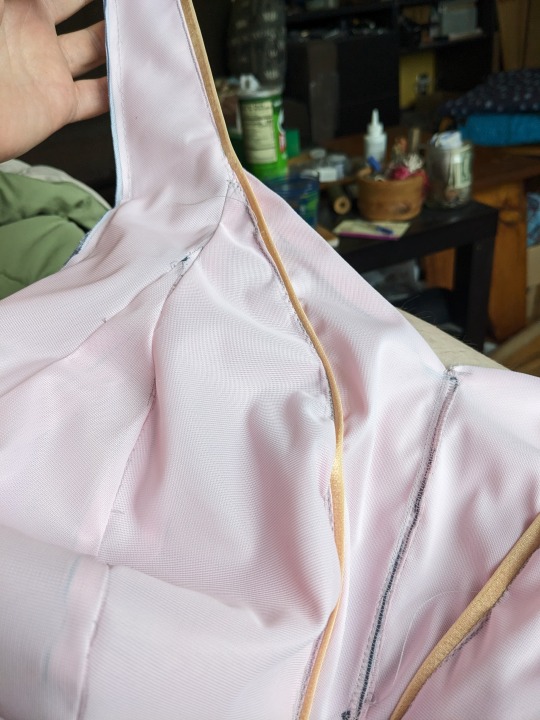
[image description: an expanse of pale pink fabric with disconcertingly peach-colored elastic running down the middle of it.]
That's what the elastic looks like topstitched down, and there's the center gore with a big sharpie mark down the middle because i meant to turn that bit to the inside but put it in backwards. Oh well.
and this is the back, where the elastic's sewn down: if I was doing a finished one, I could trim off all those odd little bits sticking out where the three layers of fabric didn't quiiiiite go together evenly, and it would look finished and polished and lovely.
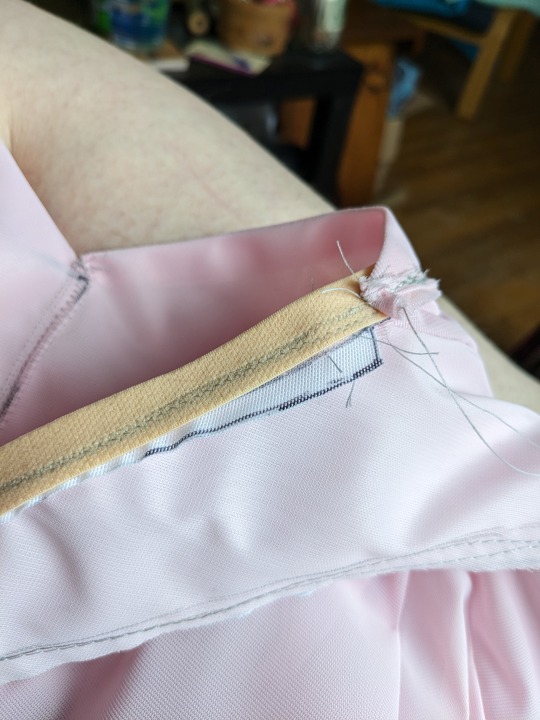
[image description: a bit of pale pink fabric flipped to the back. The peach elastic at the top has a couple wobbly lines of stitching on it, and some sharpie-bordered white fabric is sticking out and looks wobbly and terrible, and there are unclipped loose gray threads from construction everywhere.]
I'm not even saving that much time by making the muslin shitty, LOL. I'm just figuring, I need to see how it goes together before I get hung up on the cute details. I have enough of this exact fabric to use it again, but I also have a cute kit, a bunch of salvaged notions, and an intense desire to use a whole variety of other nontraditional bra fabrics, so I'm not that worried.
I should buy cuter elastic though. Elastic can't really be salvaged, not nicely. I'll have to pick up some cute stuff with decorative picots and whatnot. The supply list doesn't specify that you need picots, but then the instructions assume you have them, which confused me. The point is, you should sew the elastic at a point where some of it will protrude past the turned edge, because that's the correct look and function, and you should buy elastic that's not too scratchy.
I know a lot of people are concerned with bras being scratchy. I personally have never been irritated by the seams or fabric of a bra, but I HAVE been wildly irritated by the edge of the hook-and-eye band, the tips of side boning if there is any, and the STRAP elastic being shitty. So I will be focusing my energies on those.
I'm also thinking about making a bra in one layer, with binding over the seams and the powerbar made of stretch lace with a decorative edge, and put on the exterior of the single layer. That would be possible. The two-layer construction of this is kind of bulky and I get why it's like that, but my heavy-duty chestmeats aren't necessarily that heavy-duty.
I'm also going to make this in knit fabric, and am perusing all the Cashmerette Club discussion boards (where much of the pattern design team does lurk) for pointers on alternate materials and such, and I'll compile what I learn and post it here don't worry. (The number one thing is that if you make it in knits, size down one cup size. The number two thing is that if you make it with a fabric that stretches, match the stretch between the outer and lining fabric, it HAS to be the same. And example one is a fellow-commenter told me she made the whole thing in powermesh, sized down one cup size as per recommendation, and it worked perfectly. So we have that as a datapoint.)
(I don't love powermesh for its own merits but I cannot deny, it recovers perfectly, until it doesn't and you throw the bra out, so from a functional standpoint, it's The Thing to use. I'm taking apart old bras for notions and that's the thing I see-- when the powermesh went, I had to stop wearing that bra. But most of them, I busted the underwire channeling or the hooks first. Because they were DDs and I was a J, mostly, but. Hey. Yeah some other time I'll write a post about my horrible struggles with bras and how long I spent with everyone telling me it wasn't possible to be more than a DD and i must be having a body wrong somehow.)
ANYhoo.
I had to stop to make dinner after attaching the neckband elastic and center gore. So at some point today I will venture back down and keep working. The next step is the underarm elastic, and then the straps, and then the hook and eye closure, and then it's done. So I'm pretty close really, but my cat just got into my lap so I won't be headed down there imminently, LOL.
cat tax:
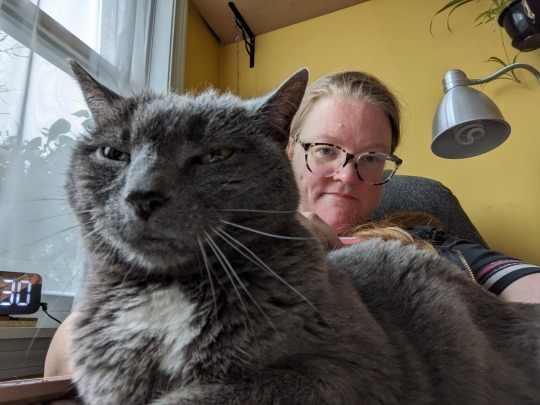
[image description: a white lady in a chair heavily overshadowed by a small gray cat with a white chest patch in the foreground looking extremely smug]
She's helping me post.
13 notes
·
View notes
Text
Wanting to make a #HighRepublic costume for Celebration? We’re having a little sew-a-long for that over on Facebook in the costume group. Join us! #highrepublicsewalong


#high Republic#the high republic#star wars the high republic#Star Wars#highrepublicsewalong#cosplay#costume#sewalong
5 notes
·
View notes
Text
Astarion, or; the Easiest Shirtsleeves - Done!
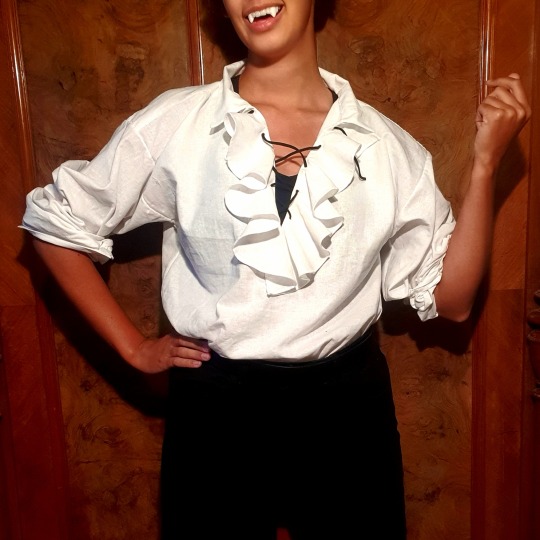
It is a fantastic vampire shirt and took about a day to make, 10/10 can recommend!
See the process here
#i started at 3 yesterday and finished about 5 today#but rudely i did have to work today#and i did kinda lose my quick and easy vision to handhem everything#so I'm gonna say this can be a four hour project if you topstitch and zigzag#astarion or the easiest shirtsleeves#a talia original#talia's adventures in dressmaking#excerpts from my life#sewing progress#historybounding#astarion#floofy shirt sewalong addendum#i've got posts for the last steps half written but i'll post them later#costume dramatics
411 notes
·
View notes
Text
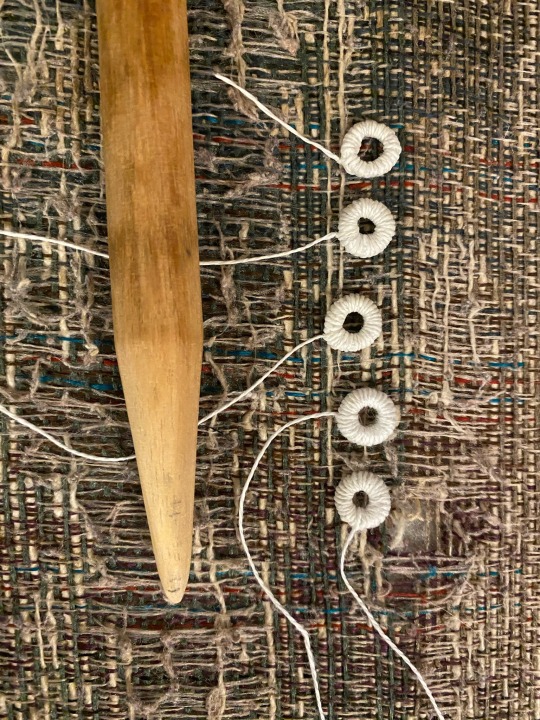
making some thread buttons! my dad made the button stick and i think the slope is a little shallow, but since i can’t find any references to button sticks other than william booth draper’s video, i think it’s just fine lol
#sewing#technically this is for#floofy shirt sewalong#2 floofy 2 shirt#bc i THINK these would be the buttons used#based on the brief research i did
23 notes
·
View notes
Text
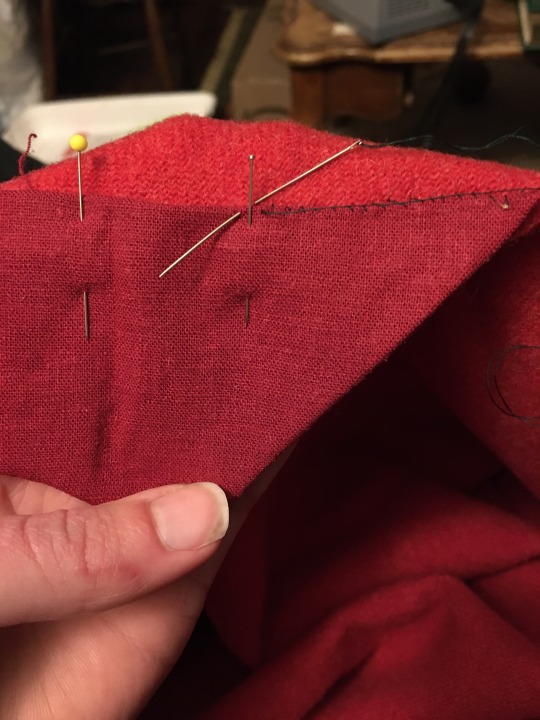

Since I am skipping the hood and this wool blend is definitely scratchy, I made a facing with some scrap linen. Tonight I’m working on whipping it in.
3 notes
·
View notes
Text
Very Floofy Sleeves! I love them!


And they came together quite easily too, hopefully sewing them on the shirt will be as easy 😁
19 notes
·
View notes
Text
Floofy shirt sewalong step 1
so @badassindistress hosted a sewalong of a mid1700s style shirt that I intended to follow along with...then life happened so it's become more of a sewbehind as far as I'm concerned. But I finally finished step 1: cutting out.

As cool as it would be to sew this all by hand, for the sake of my hands and my sanity the actual plan is to do the main seams by machine and do the finishing and fiddly bits by hand. It probably still isn't going to be a fast project because I've got some more time sensitive things in the works (Christmas is coming and all).
10 notes
·
View notes
Text

Materials for @badassindistress's cloak sewalong! My previous forays into real sewing have been... adventurous, so I'm looking forward to this!
#sewalong#it me#can't wait to be able to ask real questions#of a real person#patterns are so confusing oml
21 notes
·
View notes
Text
Loftus Bralette Sewing Journal: cutting out
LOL so I have started the project but not made a ton of progress, but I thought, well, I'll write it up anyway.
First thing I did was watch the sewalong. It's not the slickest, shiniest sewalong-- there's no jaunty theme song, there's no animated intro, there's no flashy graphics-- it's very much Old Youtubey, where it's someone actually doing the steps and showing you as she goes, not really sped up, with minimal intercuts. As it happens, the demonstrating sewist is the owner of Porcelynne, which is a lingerie supply company and pattern maker, and she also helped design this pattern and the previous Cashmerette bra because she is not only a bra specialist but also is a very busty woman herself, and so completely on the same wavelength. She has incredible technical knowledge, has clearly sewn very many bras, produces a lovely end product, and shows you several places where she either made a mistake or has made many mistakes in the past and has developed this trick to avoid the mistakes. So it's a good solid sewalong... just not the most short-attention-span-friendly thing in the world.
So I will say I watched the sewalong with closed captions on and at 1.5x speed, just for my first runthrough.
(I can't watch a sewalong or tutorial while I'm trying to sew a thing. I do best if I watch it first, so I know what to expect. Hopefully it relates well enough to the instruction manual that I can piece the two together and figure out what I'm supposed to do as I go.)
And now I've started my own sew-through.
I bought a bunch of stuff from Porcelynne-- a nice kit for once I've made it, but basic stuff to muslin it. There are several places on the Cashmerette website and also in the instruction book for the pattern that lays out exactly what fabric you need and what notions. I also then made a list in Sharpie on a scrap of paper, inventorying how many pieces of each pattern piece I needed, and how many inches of each type of elastic I needed, so that I could enclose that inventory along with this iteration of the garment, so that I could refer to the checklist.
I also labeled the elastic-- N for neckline, U for underarm-- as I cut it, so I would know what was supposed to go where.
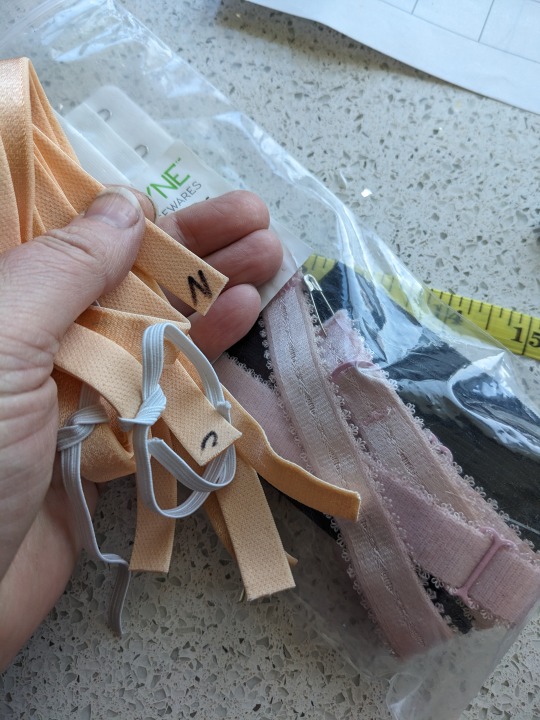
[img desc my hand holding several lengths of peach-colored elastic, one with a sharpie N and the other with a sharpie U which is sideways and looks like a C but I know what it means trust me. in the background is a baggie with other elastic in it including two pink straps I cut off an old bra to reuse the notions. This bra muslin is not going to be all one color or even going to match, that's just how it is.]
I forgot to order cup lining, it was in my cart but then the session refreshed and I didn't re-add it. So I'm making my muslin with two layers of the same fabric, which means I need to label which layers are the lining and which the outer. This is both easier and harder and I'll let you know whether I recommend this or not 😅.
I'm following Jen from Porcelynne's suggestion of marking the wrong side of the fabric with painter's tape, and i applied the tape immediately after cutting out each piece since there's not an obvious right or wrong side to this fabric, and I also used a felt-tipped marker to write on the painter's tape which 1) piece it was, which 2) layer it was, and 3) whether it was the pattern piece or the mirror image. (Given my specific brand of neurospicy I cannot reliably tell left from right so I'm just making One Half Of The Bra The Same Direction As The Paper Pattern And The Other Half Mirror-Imaged and I'll find out which is right and which is left once i put it on.)

I also immediately used a felt-tipped marker to trace the grainlines on the pattern pieces, then flipped them over and traced the marker line onto the other side, so that I could see how the grainline should be oriented while I had the pattern pieces in mirror-image mode, since the most accurate way to cut fabric is not to cut it while folded. And i know myself, I'd want to wiggle the odd-shaped pieces to fit best on the fabric, and I'd fuck up the grainlines, which are important especially as some of the pieces are cut from stretch fabric.
To add to the confusion, the lining is inside-out from the regular bra. So my first layer, everything mirror-imaged gets an A on the end. (Piece 1a, 2a, 3a on the painter's tape.) but for the lining, the A goes on everything NOT mirror imaged, because the lining and main pieces are cut from the same pattern piece. So the first half of my bra consists of pieces 1, 2, 3 in main fabric, and then mirror-imaged pices 1L, 2L, 3L, and 6L in the lining fabric, and then also 6 non-mirror-imaged in the lining fabric-- 6 is the center front bit and you cut both layers from your lining.
So then the opposite of that is the other half of my bra. Pieces 1A, 2A, 3A, and then lining 1LA, 2LA, 3LA, etc. And then there are two copies of pattern pieces 5 and 4 cut from the powermesh fabric-- the powerbar, and the back band.
L for lining appears in the written instructions, and that plus my own inability to distinguish left from right is why the bra is not labeled L for left or R for right. L for Lining would confuse me even if I just labeled the right half. So I did not, it is Side Unmarked and Side A.
I traced the paper pattern in felt-tipped marker directly unerasably onto the fabric because this is my muslin. And then after I cut it out (with a rotary cutter and mat) I took a pencil, laid the translucent fabric over the paper pattern piece, and traced on every notch, every marking, and the entirety of the sewing lines. For the mirror-imaged pieces, I did this and then flipped them over and darkened the sewing lines onto the now-right side of the fabric. Because this is my muslin and it is far more important to me to sew it perfectly accurately than it is to have the marks erase for later when I maybe wear it and maybe never do.
Yes, this took forever. I did not do this at my usual cutting table I did it on the kitchen table where I could sit comfortably, because I only needed about 24x24" of space to work, and I needed good light and a very steady surface and to be comfortable and not rushed while I worked.
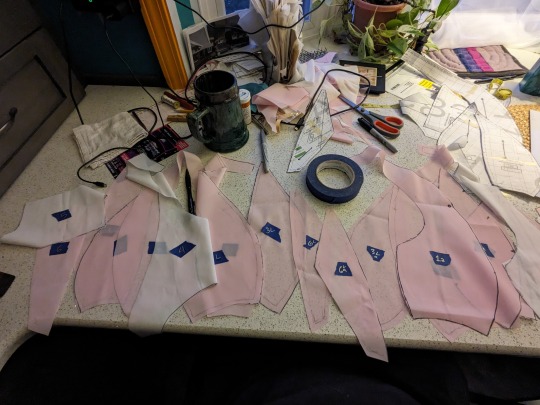
[image description: all my cut out pieces spread across my kitchen table/counter, labeled in silver metallic sharpie on blue painter's tape, with the roll of painter's tape and the paper pattern pieces and my cup of water and scissors all strewn around.]
As soon as I was done I lay everything out, compared it to my checklist, compared the checklist back to the instruction book, made sure the painter's tape was on the correct side of each piece, and then put everything neatly away. I have all my elastics and notions in one little plastic baggie, and then all of the second half of the bra (so, mirror-imaged main pieces, and then non-mirror-imaged lining pieces) in another little plastic baggie, and then the first half of the bra is just in the main baggie that i put the other baggies into.
I brought the whole thing down into my sewing room, and what I did was get the lid of a rubbermaid tote to use as a tray, and lay out half the bra on that, triple-checking the orientation of the pieces, and I did find one where the masking tape was on the wrong side somehow argh. But I've started off by sewing the outer layer and lining layer of the first half together, and I got like one seam in before I was interrupted, but everything inactive is still in the baggies and everything active is on that rubbermaid tote lid in its correct orientation, so I could walk away from it and know where to resume when I come back.

I also have the paper pattern pieces easily to hand to check that notches are correctly marked, because I have no faith in myself to have done that right consistently. Normally I put the pattern away but I'm not doing that here, and I think it makes sense to just print the pattern out numerous times and put any corrections on every instance of it, and then have several copies of it so that any project in-progress can still have the pattern pieces with it until it is complete.
This is my note to myself to do that, keep the pattern pieces there and make adjustments as necessary and then when I finish the muslin, print out another copy with adjustments included.
I also would like to print out a mirror-imaged copy, and potentially have separate pattern pieces for the left and right, as I expect some asymmetry to be a factor.
16 notes
·
View notes
Text
Wanting to make a #HighRepublic costume for Celebration? We’re having a little sew-a-long for that over on Facebook in the costume group. Join us! #highrepublicsewalong


#high Republic#the high republic#star wars the high republic#Star Wars#highrepublicsewalong#cosplay#costume#sewalong
0 notes
Text
Dumb embarrassing crush things, but I think I've straight out leapt into the deep end delulu part of my feelings ||||orz I literally bought a pattern for a Selkie imitation dress and I'm planning on picking out fabrics for it Thursday if all goes well.
I have no reason to believe that anything is gonna work out because the person I'm FEELING THINGS for probably mostly just needs a friend, but IS a cute dress and I'd love wearing it even if it WASN'T on a date, so it's probably fine????
#i have no self control hahahahahahaha#i mean the patter was in my favorites already for a reason and i think it'd be a good one to start with because the pattern designer has a#sewalong on the video but there's also a fucking INSANE part of my brain that's like#“date fit date fit date fit” and ahahahah /)/////(\
1 note
·
View note
Text
Cloaks for all! A cloak sewalong for beginners
Step 0: gathering supplies

We're starting this cloak in January, but let's give ourselves the time to gather supplies.
What you are definitely going to need:
Fabric
Thread
Needles
Fabric scissors
Sewing pins
A measuring tape
Some type of closure to close the cape
Tailor's chalk or some other way to mark the fabric
A sewing machine (optional if you have more time and handsewing experience)
Bias type in a colour matching your fabric for binding (not necessary if you intend to finish your cloak in a different way)
What will make this project a lot easier:
An iron and ironing board - everything will look much neater
If you’re used to inches, keep a converter handy because my brain is used to centimeters
How much fabric do I need?
A lot. 3 meters (of 1.50m width fabric) for a half circle cloak, double that for a full circle cloak. If you're shorter or you want a shorter cape, it'll be less.
Necessary measurements:
Lenght of cloack = from neck across shoulder and arm down to where you want the cloak to end
Neck circumference = measuring tape goes around the neck
What kind of fabric?
Something that feels nice on your skin and isn't very light or terribly heavy. Wools are great for historical looks, velveteen is great for fantasy, silk is great if you have money to burn, etc. For your own sanity, pick something that doesn't fray too much.
#cloaksforall sewalong#cloaksforall step 0#a talia original#talia's adventures in dressmaking#part of the sewalong is that you het to ask questions#and show off your fabric in reblogs#that's three weeks to get your fabric
259 notes
·
View notes
Text


shirt :) i think it’s funny i have to wear an undershirt underneath it because historically THIS was the undershirt, but whatever
styled with my handmade wrap pants!
#still need to hem the bottom and finish a few seams#but i wanted to show off!#floofy shirt sewalong
27 notes
·
View notes
Text
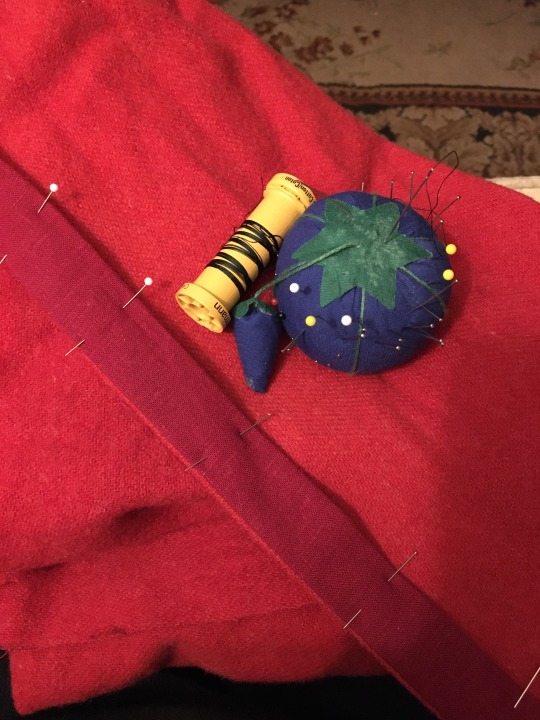

Working on the binding. Machine stitching the first seam, pressing, and hand-stitching down the second.
#Using the machine is so much faster#I’ve been doing mostly hand sewing the last couple years and I’m slightly surprised each time I go back to the machine#Cloaks for all sewalong
1 note
·
View note
Last Seen Blogs

bestcarelifereviews-blog
Best Care Life Reviews | Pregnancy And Baby Tips

purblefubyz
purble

vampd0ll
edgy shit

booksandquills
The Book Of Fashion Magazine

endller0
chaotic screaming