#Tailwind CSS custom configuration
Explore tagged Tumblr posts
Text
#best html development company#html web development company#Tailwind CSS custom configuration#Tailwind CSS responsive design#Tailwind CSS tips and tricks#Tailwind CSS Utilities#Top web development Company
0 notes
Text
Develop you SaaS Easily
If you're looking to kickstart your next web project with a fast, reliable, and scalable foundation, the Jetship Next.js Starter Kit by ThemeSelection is a fantastic option to consider. This starter kit is designed for developers who want to build modern, performance-focused websites and applications without starting from scratch.
Built with Next.js and React, this kit provides all the essentials: a responsive layout, a clean and customizable design, and integrated features that are ready to go. Whether you're working on a personal project, a client website, or a full-scale web app, this starter kit simplifies the process by giving you a robust starting point.
The Jetship Next.js Starter Kit includes:
Responsive Design: Built for mobile-first, ensuring your project looks great on any device.
Pre-configured Setup: Get started quickly with a fast project setup.
Optimized Performance: Speed is prioritized, making sure your app runs smoothly and efficiently.
Tailwind CSS: Utilize utility-first CSS for rapid styling with minimal effort.
Easy Customization: The kit is flexible and can be customized to meet your specific needs, saving you time.
With this powerful tool in hand, you can speed up development, reduce common project setup headaches, and focus more on what matters: building a great product. If you're a developer or a team looking to improve efficiency and streamline your process, the Jetship Next.js Starter Kit is definitely worth a try!
2 notes
·
View notes
Text
Top 10 Front-End Frameworks and Libraries for 2024
As the web development landscape continues to evolve, staying updated with the latest front-end frameworks and libraries is crucial for any developer. Whether you're a seasoned pro or just starting out, knowing which tools to use can significantly impact your productivity and the quality of your projects. In this post, we’ll explore the top 10 front-end frameworks and libraries that are set to dominate in 2024.
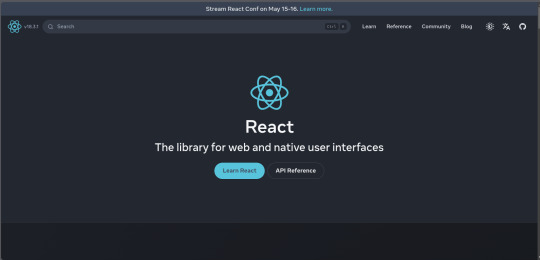
1. React
React remains one of the most popular front-end libraries, known for its simplicity and flexibility.
Key Features of React
Component-Based Architecture: Reusable components make development efficient and manageable.
Virtual DOM: Enhances performance by minimizing direct DOM manipulation.
Strong Community Support: A vast ecosystem of tools, libraries, and tutorials.
2. Angular
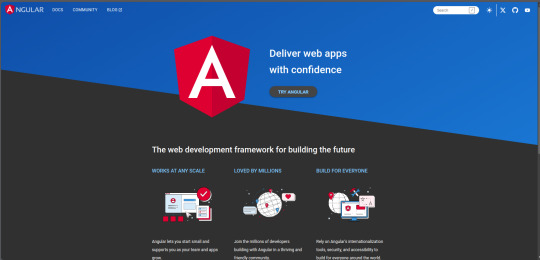
Angular, backed by Google, is a powerful framework for building dynamic single-page applications (SPAs).
Why Choose Angular?
Two-Way Data Binding: Synchronizes data between the model and the view.
Dependency Injection: Improves code maintainability and testability.
Comprehensive Documentation: Extensive resources for learning and troubleshooting.
3. Vue.js
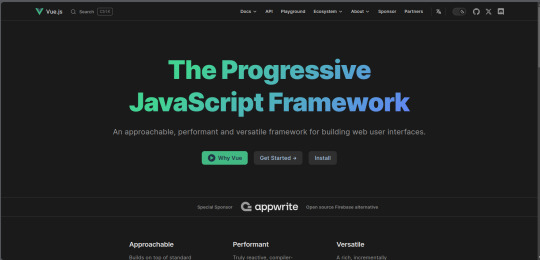
Vue.js has gained popularity due to its gentle learning curve and versatility.
Advantages of Vue.js
Reactive Data Binding: Simplifies state management.
Single-File Components: Encapsulate HTML, CSS, and JavaScript in one file.
Flexibility: Can be used for both large-scale and small-scale applications.
4. Svelte
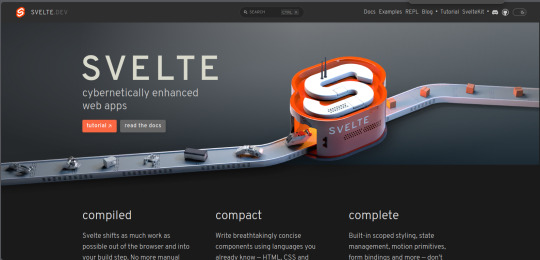
Svelte is a relatively new player that compiles components into highly efficient vanilla JavaScript at build time.
Svelte’s Standout Features
No Virtual DOM: Directly manipulates the DOM for better performance.
Less Boilerplate: Cleaner code with minimal overhead.
Ease of Use: Intuitive and straightforward syntax.
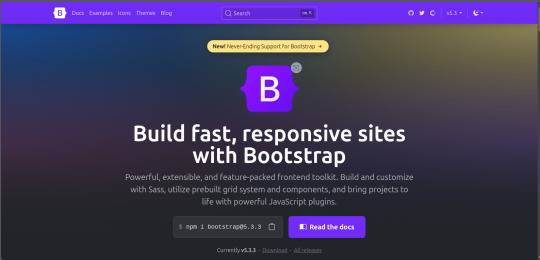
5. Bootstrap
Bootstrap is a front-end framework that provides pre-designed components and a responsive grid system.
Benefits of Using Bootstrap
Responsive Design: Ensures your site looks great on all devices.
Pre-Styled Components: Saves time with ready-to-use UI elements.
Customizable: Easily customize with Sass variables and Bootstrap’s extensive options.
6. Tailwind CSS
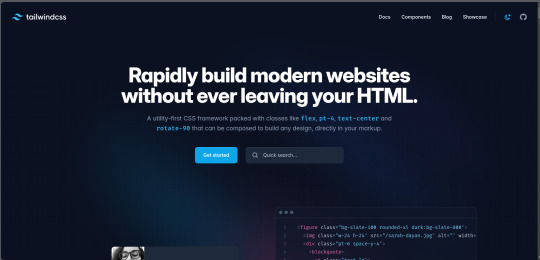
Tailwind CSS is a utility-first CSS framework that allows for rapid UI development.
Tailwind CSS Features
Utility-First Approach: Use utility classes directly in your HTML.
Customizable: Extensive configuration options to suit your project’s needs.
Consistency: Enforces a consistent design language across your project.
7. Ember.js
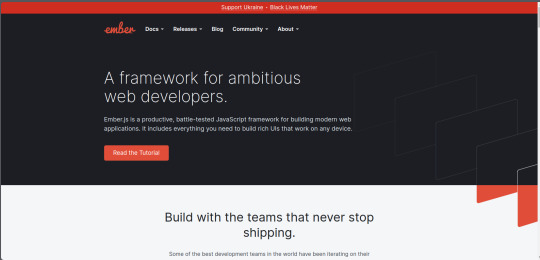
Ember.js is a robust framework for building ambitious web applications.
Why Ember.js Stands Out
Convention over Configuration: Reduces the amount of decision-making and boilerplate code.
Strong Routing: Powerful routing capabilities for managing application state.
Productivity: Focuses on developer productivity with built-in best practices.
8. Alpine.js
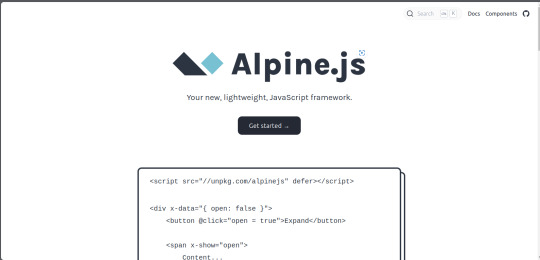
Alpine.js offers a minimal and lightweight way to add interactivity to your websites.
Key Features of Alpine.js
Lightweight: Small footprint with only a few kilobytes.
Declarative Syntax: Similar to Vue.js, making it easy to understand and implement.
Ease of Integration: Can be easily integrated into existing projects.
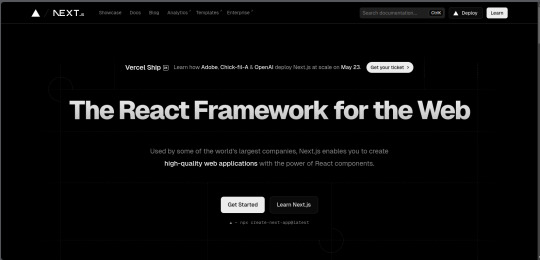
9. Next.js
Next.js is a popular React framework that enables server-side rendering and static site generation.
Benefits of Using Next.js
Server-Side Rendering (SSR): Improves performance and SEO by rendering pages on the server.
Static Site Generation (SSG): Pre-renders pages at build time for fast load times.
API Routes: Allows you to create API endpoints within your application.
10. Lit
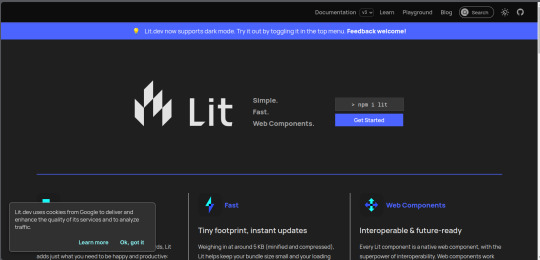
Lit is a simple library for building fast, lightweight web components.
Advantages of Lit
Web Components: Embraces the web components standard for reusable, encapsulated HTML elements.
Performance: Lightweight and highly performant.
Simple API: Easy to learn and use with a minimal API surface.
Conclusion
Choosing the right front-end framework or library can significantly impact your workflow and the quality of your projects. Whether you prefer the flexibility of React, the structure of Angular, or the simplicity of Svelte, there's a tool out there to suit your needs.
Final Tips for Selecting a Framework or Library
Project Requirements: Consider the specific needs of your project.
Community and Support: Look for frameworks with strong community support and documentation.
Learning Curve: Choose a tool that matches your current skill level and the time you have available to learn.
By staying informed about the latest tools and trends, you can ensure that your skills remain relevant and that you can deliver the best possible results in your projects. Happy coding!
Remember, the best tool is the one that helps you get the job done efficiently and effectively. So, dive into these frameworks and libraries, and take your front-end development skills to the next level!
Share Your Thoughts
I'm curious to know your thoughts on these front-end frameworks and libraries. Have you used any of them in your projects? Which one is your favorite, and why? Share your experiences and insights in the comments below.👇
2 notes
·
View notes
Text
What Comes Prebuilt in EasyLaunchpad: A Deep Dive into Features & Architecture

If you’re a .NET developer or startup founder, you’ve likely spent countless hours just getting the basics of your web app in place: login, admin dashboards, email systems, user roles, payments — the list goes on.
Now imagine you didn’t have to.
EasyLaunchpad is a complete .NET boilerplate designed to help you skip the time-consuming setup phase and go straight to building your core application logic. But unlike generic templates, it’s not just a UI skin or a half-done framework. It’s a full production-grade starter kit with everything you need seamlessly working together.
In this blog, we’ll break down what actually comes prebuilt in EasyLaunchpad and how the architecture helps you launch scalable, maintainable apps faster than ever before.
🔧 Why Boilerplate? Why Now?
Before diving into the tech, let’s align on the problem EasyLaunchpad solves:
Every time you start a new project, you repeat:
Configuring authentication
Setting up admin panels
Managing users and roles
Handling emails and templates
Integrating payments
Adding job scheduling and logs
EasyLaunchpad does all of this for you — so you don’t have to start from scratch again.
⚙️ Core Technologies Behind the Boilerplate
EasyLaunchpad is built with a modern and stable tech stack designed for production:
Layer and Techbology used:
Backend Framework — .NET Core 8.0 (latest LTS)
Language — C#
UI — Razor Pages + Tailwind CSS + DaisyUI
ORM — Entity Framework Core
Dependency Injection — Autofac
Background Tasks — Hangfire
Logging — Serilog
Templating Engine — DotLiquid (for email templates)
This foundation ensures that your app is fast, secure, scalable, and easy to maintain.
Let’s explore what comes ready-to-use as soon as you start your EasyLaunchpad project.
✅ Authentication (Email + Google + Captcha)
EasyLaunchpad includes secure login flows with:
Email-password authentication
Google OAuth integration
CAPTCHA validation during login/registration
You don’t need to spend days integrating Identity manually — just plug and play.
✅ Admin Panel (Built with Tailwind CSS + DaisyUI)
The admin panel is clean, responsive, and fully functional. It’s built using Razor views and styled with TailwindCSS and DaisyUI, giving you a modern UI that’s easy to extend.
Pre-integrated modules in the admin panel include:
User Management: View, add, deactivate users
Role Management: Basic role assignment and user filtering
Package Plans: Define product plans for sale
SMTP & Email Settings: Easily configure mail servers
Feature Settings: Enable or disable system options without touching code
✅ Email System with Templates (DotLiquid)
Forget the hassle of writing email logic from scratch. EasyLaunchpad includes:
Prebuilt transactional email templates (e.g., registration, password reset)
SMTP integration
Templating via DotLiquid, making it easy to insert variables and personalize content
All email dispatches are logged and tracked, so you never lose sight of what’s been sent.
✅ Queued Emails & Background Tasks (Hangfire)
Want to schedule tasks like email reminders or data syncs?
EasyLaunchpad uses Hangfire for:
Background job processing
Scheduled cron jobs
Retry logic for email dispatch and failed tasks
You can manage jobs through the Hangfire dashboard or extend it into your app logic.
✅ Logging with Serilog
Every serious app needs structured, searchable logs. EasyLaunchpad integrates Serilog for:
Real-time activity tracking
Error logging
Request/response data logging
This gives you full visibility into what’s happening in your app, both during development and in production.
✅ Stripe & Paddle Payment Integration
Monetizing your app? EasyLaunchpad includes out-of-the-box integration for:
Stripe
Paddle
You can configure:
Payment plans
One-time purchases
Trial periods
And manage all of it through the admin panel without coding custom APIs.
✅ Packages & Licensing Management
You can create, manage, and connect subscription packages via the admin dashboard.
Each package can be tied to payment providers and synced to your external website or product gateway, making EasyLaunchpad ideal for:
SaaS products
License-based tools
Tiered services
✅ Notifications System
Built-in support for system alerts and user notifications includes:
Inline admin messages
Success/failure alerts on actions
Extendable for real-time or email notifications
🧱 Architectural Design That Supports Growth
Beyond just features, the architecture of EasyLaunchpad is designed for maintainability, extensibility, and scalability.
🧩 Modular Structure
Each module (e.g., Auth, Payments, Email, Jobs) is built to be independently extendable or replaceable. This lets you:
Swap Stripe for PayPal
Replace DotLiquid with Razor templates
Add new modules like CRM or Analytics
📁 Clean Codebase Layout
plaintext
CopyEdit
/Controllers
/Services
/Repositories
/Views
/Models
The code is separated by responsibility, making it easy to onboard new developers or modify any layer.
🔌 Plug-and-Play Capabilities
Need to build your own modules? The boilerplate is interface-driven and uses Autofac for dependency injection, so you can override or extend any logic without rewriting core code.
🌐 Real Use Cases
Here are a few real-world examples of how EasyLaunchpad can be used:
🧠 AI Tools: Launch OpenAI-based chat tools with user plans & payments
💼 B2B SaaS: Create dashboards with multi-user access, logs, and subscriptions
🛠 Admin Systems: Quickly build portals for internal staff or clients
💸 Subscription Services: Monetize features via built-in plans & licensing
🧠 Final Thoughts
Most boilerplates are either too basic or too bloated. EasyLaunchpad hits the sweet spot — it’s production-ready, focused, and elegant.
Everything you’d normally spend 3–4 weeks building? Already done.
With the structure and flexibility of a custom-built project — but without the hassle — you’re free to build what really matters: your product, your logic, your innovation.
👉 Ready to dive in? Get your copy of EasyLaunchpad and start building today:🔗 https://easylaunchpad.com
0 notes
Text
Why Tailwind CSS Is Changing Modern Web UI Design?
In recent years, the web design world has seen a significant shift in how developers and designers approach styling—thanks to Tailwind CSS. From startups to enterprise-level companies, Tailwind CSS has quickly become the go-to utility-first CSS framework. But why is Tailwind CSS changing modern web UI design so dramatically?
Let’s break it down.
1. Utility-First Means More Control
Tailwind CSS doesn’t rely on predefined UI components. Instead, it gives you low-level utility classes like flex, pt-4, text-center, and more. These small, atomic classes give developers full control over styling without writing custom CSS.
This method promotes consistency and allows for faster development. You're building designs directly in your HTML—no context-switching between HTML and CSS files.
2. Faster Prototyping = Quicker Results
Designers and developers love how quickly they can bring a layout to life with Tailwind. With built-in classes for spacing, typography, colors, and responsive design, prototyping becomes incredibly efficient.
In fact, many UI/UX teams are using Tailwind to create and iterate on designs faster than ever—without needing complex design systems from scratch.
3. Responsive Design Made Easy
Tailwind’s mobile-first responsive utilities make it easier to adapt your design across breakpoints. Rather than redefining styles in separate media queries, you can do it inline with classes like md:w-1/2 or lg:flex-row. This means fewer files, less code, and cleaner breakpoints baked into your markup.
4. Built for Modern Development Stacks
Tailwind CSS integrates seamlessly with modern frameworks like React, Vue, Angular, Next.js, and more. It works wonderfully in component-based design systems and plays well with tools like PostCSS and PurgeCSS for performance optimization.
5. Customizable and Scalable
One of Tailwind’s strongest points is its configuration file (tailwind.config.js). This file allows developers to define custom color palettes, fonts, breakpoints, and more—resulting in a design system that scales with the product.
It lets teams enforce a consistent look across apps while still having the flexibility to change styles when needed.
6. Growing Ecosystem and Community
The Tailwind community is booming. From Tailwind UI (prebuilt components by the creators) to plugins and themes, there's a growing ecosystem supporting faster development.
The documentation is also one of the best out there—clear, well-organized, and packed with examples.
Final Thoughts
Tailwind CSS isn’t just a trend—it’s a fundamental shift in how we build interfaces. It empowers developers to create clean, scalable, and responsive UIs with less effort and more consistency.
If you're still relying on traditional CSS or bulky frameworks, it might be time to consider why Tailwind CSS is becoming the new standard for modern web design.
Let me know if you'd like this converted into a LinkedIn post, blog header image prompt, or want anchor texts and service mentions like "hire frontend developer" or "custom web development services" linked to Netzila Technologies.
0 notes
Text
Tech Toolkit: Tools and Platforms That Power Innovation at Hack4Purpose
Hackathons are fast-paced environments where ideas become working solutions in just 24 to 48 hours. But no team can build impact-driven innovations without the right set of tools. At Hack4Purpose, participants come from diverse backgrounds, bringing ideas that span across domains like health, education, sustainability, fintech, and more.
To succeed, teams often leverage a combination of development frameworks, design tools, project management platforms, and data resources. This blog breaks down some of the most commonly used technologies and essential tools that have powered past Hack4Purpose winners.
1. Tech Stacks That Deliver Under Pressure
At Hack4Purpose, most participants prefer lightweight, fast-to-deploy stacks. Here are some popular choices:
Front-End:
React.js – For rapid UI development with reusable components
Vue.js – Lightweight alternative preferred for simplicity
Bootstrap / Tailwind CSS – For quick, responsive styling
Back-End:
Node.js + Express.js – Fast setup for APIs and scalable backend
Flask (Python) – Popular for data-heavy or ML-integrated apps
Firebase – Excellent for authentication, real-time database, and hosting
Databases:
MongoDB – Great for quick setup and flexibility with JSON-like documents
PostgreSQL – Preferred for structured, scalable applications
Teams often choose stacks based on familiarity and ease of integration. Time is tight, so tools that require minimal configuration and have strong community support are the go-to choices.
2. Design and Prototyping Tools
User experience plays a major role in judging at Hack4Purpose. To create intuitive, impactful interfaces, teams rely on:
Figma – For UI/UX design, wireframing, and team collaboration in real time
Canva – Ideal for pitch deck visuals and quick graphics
Balsamiq – Used for low-fidelity wireframes to validate ideas early on
Even non-designers can contribute to the visual workflow thanks to these user-friendly tools.
3. Project Collaboration and Task Management
Efficient teamwork is critical when time is limited. Here are some platforms used for coordination and project management:
Trello – Simple Kanban boards to track tasks and deadlines
Notion – All-in-one workspace for notes, docs, and task lists
GitHub – For code collaboration, version control, and deployment pipelines
Slack / Discord – For real-time communication with mentors and teammates
Some teams even use Google Workspace (Docs, Sheets, Slides) for pitches and research collaboration.
4. AI & Machine Learning APIs
Several winning projects at Hack4Purpose integrate AI and ML to solve social problems, often using:
Google Cloud Vision / NLP APIs – For image and text processing
OpenAI (GPT or Whisper APIs) – For content generation, summarization, and voice-to-text apps
Scikit-learn / TensorFlow Lite – When developing custom models
Teams usually import pre-trained models or use open-source datasets to save time.
5. Open Data Sources & APIs
Hack4Purpose encourages building data-driven solutions. Teams frequently use open data platforms to ground their ideas in real-world insights:
data.gov.in – Government data on agriculture, health, education, etc.
UN Data / WHO APIs – For global health and development metrics
Kaggle Datasets – Ready-to-use CSV files for quick prototyping
By combining real data with impactful ideas, projects often resonate more with judges and stakeholders.
6. Pitch and Demo Tools
Presentation is everything at the end of the hackathon. To deliver compelling demos, teams often turn to:
Loom – For screen-recorded demo videos
OBS Studio – For streaming or recording live app walkthroughs
Google Slides / PowerPoint – To deliver clean, impactful pitches
Many teams rehearse their final pitch using Zoom or Google Meet to refine delivery and timing.
Final Thoughts: Prepare to Build with Purpose
At Hack4Purpose, technology isn’t just used for the sake of innovation—it’s used to solve problems that matter. Whether you’re developing a chatbot for mental health, a dashboard for climate data, or an e-learning platform for rural students, having the right tools is half the battle.
So before the next edition kicks off, explore these tools, form your dream team, and start experimenting early. With the right tech stack and a clear sense of purpose, your idea could be the next big thing to come out of Hack4Purpose.
0 notes
Text
What is Tailwind CSS React
Tailwind CSS React
Tailwind CSS is a modern way to style your website or app using utility classes. It helps developers design faster by writing classes directly in the HTML or JSX (in React).
In this guide, we will learn what Tailwind CSS is and how you can use it step-by-step in a React project.
🌟 What is Tailwind CSS?
Tailwind CSS is a utility-first CSS framework. This means it gives you ready-made CSS classes that you can use directly in your code.
For example:
htmlCopy
Edit
<button class="bg-blue-500 text-white px-4 py-2 rounded">Click Me</button>
In React, you can write these classes inside your className attribute.
⚛️ Why Use Tailwind CSS with React?
Speeds up the development process
Easy to make responsive designs
No need to write custom CSS for every component
Clean and consistent layout
✅ Step-by-Step: How to Add Tailwind CSS to a React Project
Step 1: Create a React App
If you don’t have a React app yet, create one using the command below:
bashCopy
Edit
npx create-react-app my-app cd my-app
Step 2: Install Tailwind CSS
Run the following command to install Tailwind CSS and its dependencies:
bashCopy
Edit
npm install -D tailwindcss postcss autoprefixer npx tailwindcss init -p
This will create two files:
tailwind.config.js
postcss.config.js
Step 3: Configure Tailwind
Open tailwind.config.js and add this under content:
jsCopy
Edit
module.exports = { content: ["./src/**/*.{js,jsx,ts,tsx}"], theme: { extend: {}, }, plugins: [], }
This tells Tailwind to look for classes in your React files.
Step 4: Add Tailwind to Your CSS
Open src/index.css and replace everything with the following:
cssCopy
Edit
@tailwind base; @tailwind components; @tailwind utilities;
This will load Tailwind’s default styles into your project.
Step 5: Start Using Tailwind Classes
Now, you can use Tailwind classes directly inside your React components.
Example (App.js):
jsxCopy
Edit
function App() { return ( <div className="text-center p-10"> <h1 className="text-4xl font-bold text-blue-600">Hello Tailwind!</h1> <p className="mt-4 text-gray-700">This is a React app using Tailwind CSS.</p> </div> ); }
Step 6: Run Your App
Now start the app:
bashCopy
Edit
npm start
Open your browser and go to http://localhost:3000. You should see the styles applied.
🎯 Summary
Tailwind CSS is a utility-first CSS framework.
It works well with React.
You don’t need to write separate CSS files.
You just write utility classes in your JSX.
It makes your design process faster and easier.
Using Tailwind CSS in React is a great way to build modern web apps with clean and responsive designs quickly.
0 notes
Text
13 Best React Frameworks and Libraries to Use in 2025
React or ReactJs is one of the most popular JavaScript front-end libraries for developing amazing user interfaces. Today, more than 40% of developers prefer ReactJs. One of the key reasons for its immense popularity is its wide range of React Frameworks and Libraries for extended functionalities.
These React js frameworks allow you to speed up your development process and create scalable and high-performing UI for web and mobile applications.
In this blog, we have listed the best React Frameworks and Libraries that can help you to create awesome apps.
Best React Frameworks and Libraries for 2025
ReactJs has improved, providing developers with different frameworks and components to ease UI development. Overall, the NPM trend is increasing for top react frameworks as follows:

Let’s explore the best React Frameworks and Libraries in 2025 for efficient, scalable, and dynamic user interfaces for mobile and web applications.
1. Material Tailwind – React
Material Tailwind is a popular design system and component library. You can use it with React to create cool web apps. It combines the good looks of Material Design with the practicality of Tailwind CSS.
You get lots of ready-made parts and styles to make your app look great without much effort. If you want to build nice and easy-to-use web apps, Material Tailwind for React is a must-have handy tool.
Features-
Tailwind CSS with Material Design
Prebuilt components library
Easy customization
Responsiveness built-in
Tailwind CSS Integration
Dark mode support
2. Redux
Redux remains a vital state management library in the React community. It offers a smart approach to handling your app’s state and simplifies managing complex data flow.
With a rich set of middleware and tools, Redux keeps React applications well-organized, scalable, and efficient in managing their states.
Features-
State Management
Predictable State Updates
Centralized Store
Unidirectional Data Flow
Middleware Support
DevTools Integration
Community Ecosystem
3. Create a React App
Create React App streamlines the setup of new React projects. It provides a ready-to-go environment with a development server, build scripts, and necessary tools, enabling developers to dive into coding immediately without configuration headaches.
With ongoing updates to adapt to changes in the React ecosystem, Create React App remains a convenient option for rapid project launches.
Features-
Rapid Setup
Pre-configured Environment
Build Scripts
Zero Configuration
Dependency Management
Hot Reloading
Integrated Testing
4. Rebass
Rebass simplifies UI development in React, offering responsive and cohesive components. With an emphasis on design principles and minimalism, Rebass delivers customizable and themeable UI elements. It’s a great pick for effortlessly crafting visually appealing and user-friendly React apps.
Features-
Simplified UI Development
Responsive Components
Consistency Across Interfaces
Design Principles Emphasis
Minimalistic Approach
Highly Customizable
Themeability
Aesthetic Appeal
5. React Admin
React Admin is a framework designed to build admin interfaces and dashboards. You can develop data-intensive applications using features like CRUD operations and efficient data handling.
With its focus on robust data and user management functionalities, React Admin proves to be an indispensable tool for developers.
Features-
Admin Interface and Dashboard Development
Streamlined Data-Heavy Application Development
CRUD Operations Support
Efficient Data Handling
Robust Data Management Functionalities
User Management Functionalities
Customizable Interface Components
Extensive Plugin Ecosystem
6. Ant Design
Ant Design is a widely-used UI library providing a diverse collection of meticulously crafted components for creating polished and intuitive applications.
It offers a variety of customizable elements like forms, tables, and navigation tools to simplify the React JS development services process, enabling the creation of sophisticated yet user-friendly React applications.
Features-
Comprehensive UI Component Library
Meticulously Designed Components
Customizable Elements
Support for Forms
Feature-rich Tables
Navigation Components
Responsive Design
Theming and Styling Options
7. Grommet
Grommet stands out as a React UI component library celebrated for its emphasis on accessibility and ease of use. Equipped with a suite of pre-built components, it places a strong focus on responsiveness and accessibility, making it an ideal choice for developers aiming to craft user-friendly web applications that meet accessibility standards.
Features-
Accessibility-Centric Design
User-Friendly Components
Responsive Layouts
Ready-to-Use Components
Simplified Development Process
Compliance with Accessibility Standards
Customization Options
Seamless Integration with React
8. Material UI
Material UI stands as a robust UI framework grounded in Google’s Material Design principles. Its array of meticulously crafted components simplifies the creation of visually striking and responsive user interfaces.
Renowned for its popularity and extensive community backing, Material UI remains a go-to option for ReactJS developers seeking to align with the Material Design aesthetic.
Features-
Material Design-Based Components
Visually Appealing Interfaces
Responsive Design
Extensive Component Library
Theming Support
Accessibility Features
Utility classes
Rich icons set
Component customization
9. Semantic UI
React Semantic UI is a development framework designed to craft visually appealing and responsive layouts using easily understandable HTML. It leans heavily on the semantic style of HTML, where each CSS class holds a clear meaning.
In Semantic React UI, words and classes are interchangeable, with classes structured like natural language to intuitively link concepts. Additionally, it employs straightforward phrases known as behaviors to activate specific functionalities.
Features-
Semantic HTML Structure
Semantic CSS Classes
Intuitive Class Syntax
Interchangeable Concepts
Behavior-driven Functionality
Responsive Layouts
Comprehensive Component Library
Theming Support
10. React Spinner
React Spinner is a library tailored to bring loading spinners and animations to React-based JavaScript apps.
It streamlines the integration of loading indicators, offering a range of customizable spinners to enhance user experience, particularly during data loading or process completion.
With React Spinner, you can elevate the visual appeal of web apps, keeping users engaged and minimizing bounce rates during loading periods.
Features-
Loading Spinner Animations
Simplified Integration
Customizable Options
Enhanced User Experience
Bounce Rate Reduction
Compatibility
Lightweight
Responsive Design
11. React Bootstrap
React Bootstrap merges the capabilities of React with the widely-used Bootstrap framework, simplifying the development of visually appealing and responsive web applications.
By providing a suite of Bootstrap components tailored for React, it facilitates the creation of mobile-friendly, consistent, and aesthetically pleasing user interfaces.
Features-
React and Bootstrap Combined
Responsive Apps Made Easy
Ready-to-Use React Components
Mobile-Friendly Interface Creation
Consistent Design Across Devices
Simple UI Development
Utilizes Bootstrap Utility Classes
12. Blueprint
Blueprint is a UI toolkit built on React, featuring carefully crafted components for creating stylish and adaptable web apps.
Prioritizing simplicity, functionality, and cohesive design, Blueprint offers a diverse array of elements, including buttons, forms, and data visualizations. It’s an essential tool for developers striving to craft sophisticated and professional web applications.
Features-
React-Based UI Toolkit
Meticulously Designed Components
Focus on Simplicity and Functionality
Unified Design Language
Wide Range of UI Elements
Button and Form Components
Data Visualization Options
Professional and Polished Web Applications
13. React-Motion
React-Motion empowers developers to craft fluid and interactive animations within React applications. Leveraging physics-based animation principles, it injects vitality into web interfaces.
With React-Motion, you can seamlessly integrate captivating animations that elevate user engagement, rendering it indispensable for projects seeking compelling visual effects.
Source of Content URL: Top 13 React Frameworks
#ReactFrameworks#Reactframeworkscomparison#BestReactframeworks#Reactframeworksforwebdevelopment#Reactframeworks2025#PopularReactframeworks#Reactframeworksandlibraries
0 notes
Text
Using Tailwind CSS in React Projects: A Modern Approach for Developers
Building efficient and visually appealing applications is crucial in today's fast-paced web development landscape. Developers constantly look for tools and frameworks to streamline their workflow while ensuring their applications remain scalable and responsive. Tailwind CSS, known for its utility-first approach and efficiency, is among today's most widely adopted styling frameworks. Combined with React, a popular JavaScript library for building user interfaces, Tailwind CSS enhances the development experience, making creating sophisticated, responsive web applications easier.
If you're a developer looking to integrate Tailwind CSS into your React projects, this blog post will guide you through the process and explain why this combination is a game-changer for modern web development.
What is Tailwind CSS?
Tailwind CSS is a highly customisable utility-first CSS framework offering a different approach than traditional frameworks. Rather than focusing on predefined components and styles, Tailwind provides utility classes that can be applied directly within your HTML or JSX code. This gives developers greater flexibility to design custom interfaces without writing extensive CSS rules.
In simple terms, instead of using predefined components, Tailwind offers individual utility classes that you combine to design your UI, making it both faster and more efficient to work with. For React developers, this means the ability to style your components easily while maintaining clean, maintainable code.
Benefits of Using Tailwind CSS in React Projects
Efficient Styling with Utility ClassesOne of the standout features of Tailwind CSS is the ability to style elements directly within your JSX code using utility classes. This eliminates the need to switch between CSS and JSX files, which can significantly speed up development time. You can build out your design in real time, adjusting styles on the fly without worrying about extra CSS code.
Rapid PrototypingTailwind CSS is ideal for rapid prototyping. It allows developers to quickly test different designs without writing custom CSS. This is especially helpful in the early stages of a project when you need to iterate on ideas and get quick feedback. With its component-based architecture, React pairs perfectly with Tailwind’s approach, enabling fast design iterations.
Mobile-First DesignTailwind CSS is built with mobile-first responsiveness in mind. All the utility classes Tailwind provides are designed to work seamlessly across all device sizes, from mobile phones to large desktop screens. React developers can take full advantage of these responsive classes to build applications that look great on any device without writing custom media queries.
No Unused CSSWith traditional CSS frameworks, you often end up with unused CSS rules that bloat the size of your project. However, Tailwind CSS eliminates this problem by allowing you to use only the styles you need, resulting in a much smaller and optimised CSS file. By optimizing efficiency, this enhances load times and overall performance, making React applications quicker and more responsive.
Customizability and ScalabilityWhile Tailwind CSS offers an extensive set of utility classes out of the box, it’s also highly customisable. You can extend the default configuration to match your project’s branding, design system, and colour palette. This makes it a scalable solution for projects of all sizes.
Why React and Tailwind CSS Are a Perfect Match
React’s declarative and component-based architecture aligns perfectly with the utility-first approach of Tailwind CSS. You can create dynamic user interfaces with minimal effort by combining React with Tailwind. React’s reusable components make applying Tailwind’s utility classes easy across different parts of your application, ensuring consistency and reusability in your design.
Furthermore, React’s ability to efficiently handle dynamic data pairs well with Tailwind CSS's responsive nature, allowing developers to build applications that adapt seamlessly to changing data and user interactions.
Mastering Full Stack Development with Tailwind CSS and React
If you're serious about mastering full-stack development, understanding how to use Tailwind CSS with React effectively is essential. full stack java developer training provides you with the knowledge and skills to work with modern web technologies, including front-end and back-end development. With React and Tailwind CSS as part of your toolkit, you will be equipped to build visually stunning user interfaces and robust, scalable web applications.
ExcelR offers a comprehensive full stack developer course in Hyderabad for those interested in honing their full-stack development skills. This course provides in-depth training on front-end and back-end technologies, preparing you to become a proficient full-stack developer. Using Tailwind CSS in React projects offers a powerful combination that accelerates development and enhances the overall user experience. By leveraging Tailwind’s utility-first approach, React developers can create fast, responsive, and customizable web applications with ease. The flexibility, responsiveness, and simplicity that Tailwind CSS brings to React projects make it an essential tool for modern web development.
If you’re looking to take your web development skills to the next level, consider enrolling in a full stack developer course in Hyderabad. Develop powerful web applications with React and Tailwind CSS while gaining expertise in key front-end technologies. By mastering these technologies, you’ll be equipped to tackle any development challenge, from building sleek, responsive user interfaces to designing robust back-end systems. Whether you are a beginner or an experienced developer, a full stack java developer training can provide you with the tools and knowledge you need to succeed in today’s competitive tech industry.
Contact Us:
Name: ExcelR - Full Stack Developer Course in Hyderabad
Address: Unispace Building, 4th-floor Plot No.47 48,49, 2, Street Number 1, Patrika Nagar, Madhapur, Hyderabad, Telangana 500081
Phone: 087924 83183
0 notes
Text
Magento 2 Hyvä Replatforming – How to Do it?
Are you dealing with Magento 2 terrible center net vitals issues? Then, it’s a good time to re-platform it to the Hyvä subject matter.
The Hyvä topic for Magento is known for its lightning-rapid front give up. In this guide, we explore the complete method of Magento 2 Hyvä replatforming. Supercharge your online store with our professional Shopify Development Services – customized for your success!
Let’s get began.
What is Magento 2 Hyvä Replatforming?
Magento 2 Hyvä replatforming is the procedure of updating your Magento 2 store’s the front quit to a Hyvä subject matter, which is light-weight and optimized for overall performance.
It facilitates you notably improve the web page speed performance of your store while retaining the core functionalities and records intact.
When you re-platform to a Hyvä subject:
Your the front-stop internet site overall performance (middle internet vitals rating) is progressed
The website backend (admin panel) remains intact and not using a information loss
In short, it’s an awesome pass to enhance your internet site for search engine marketing and person revel in.
Why Choose Hyvä Frontend for Magento 2?
In our examine, we discovered that 3000+ Magento 2 web sites have already adopted Hyvä.
That’s due to the subsequent benefits it offers compared to the default Luma-based topics:
Lightweight structure
Eliminates heavy rely upon RequireJS, Knockout.Js, and jQuery
Faster debugging with decrease chances of frontend complexity
Perfectly optimized for cellular and desktop
Magento 2 Hyvä frontend is a favored choice for businesses looking for most useful overall performance and lengthy-term scalability. You can opt for Magento 2 Hyvä replatforming and pass your contemporary storefront to Hyvä frontend for better pace and performance.
How to Replatform Magento 2 to Hyvä Theme?
Changing your Magento 2 frontend to Hyvä subject matter may be a complex task regarding design, improvement, and administrative components.
Here’s an overview of the stairs for the Magento 2 Hyvä migration project:
Step 1: Theme Designing
Step 2: Hyvä Theme Implementation
Step three: Module Compatibility Testing
Step 4: Features Customization
Step five: QA Auditing
Step 6: Live Site Deployment
Let’s undergo each of the stairs briefly.
Step 1: Theme Designing
Start with designing a new keep layout seeing that Hyvä removes the traditional Magento tech stacks and makes use of Tailwind CSS and Alpine.Js, making it essential for you to plan your new UI thus. Optimize, scale, and succeed with our expert white label shopify developers – your eCommerce growth partner!
Step 2: Hyvä Theme Implementation
When your design is prepared, flow beforehand and put in force your Hyva subject.
Start with the aid of purchasing the Hyvä theme license and install it. You can install the topic through a Composer. Run the subsequent commands through SSH.
Composer require hyva-topics/magento2-default-subject
bin/magento setup: upgrade
bin/magento setup:di: assemble
bin/magento setup:static-content: set up -f
Then, head to Admin Panel > Content > Design > Configuration, and set Hyvä because the default subject matter.
Step 3: Module Compatibility Testing
Most of the Magento 2 extensions depend upon Knockout.Js, RequireJS, or UI Components, which aren't found in Hyvä.
This makes it essential for you to test if your 0.33-birthday celebration extensions are running efficiently within your save.
Look for Hyvä-like minded extensions, patches, and UI layout.
Step four: Features Customization
Since Hyvä doesn’t work well with Luma-based totally subject matters, you will need to feature new components the use of Alpine.Js.
Here are a few actionable points in order to recall:
Rewrite the HTML structure and rebuild key Magento 2 pages like Homepage, Category & Product Pages, and Cart & Checkout.
Switch to Hyvä Checkout if you are using any third-birthday celebration services.
Replace CSS with Tailwind CSS and convert jQuery-primarily based capabilities to Alpine.Js.
Step five: QA Auditing
Run a first-rate warranty check all through your store to make certain the whole lot works efficiently.
Here are the actionable for you:
Use Google Lighthouse or PageSpeed Insights to test the Core Web Vitals rating
Verify all of the security patches and HTTP configurations are operating well
Check the float of your new layout from the begin till the checkout web page
Step 6: Live Site Deployment
The final step is deploying the Hyvä subject to manufacturing and the staging surroundings.
Use the integrated Lighthouse performance equipment of Hyvä to test Core Web Vitals and web page performance.
Then, set up the subject to a staging surroundings and check it from the first step to the checkout web page. Make any wanted adjustments and send it to production. Also Read : Leading by using Example: Inspiring Change and Growth in Your Agency
Eight Best Shopify Apps for Catalogs
0 notes
Text
Unraveling the Power of Tailwind CSS: A Comprehensive Tutorial

In the field of web development, Tailwind CSS emerges as a game-changer, revolutionizing the approach to styling and design. This comprehensive Tailwind CSS tutorial is your gateway to understanding the prowess of this utility-first framework.
Tailwind CSS simplifies the development process by providing a rich library of pre-built classes, enabling swift and intuitive styling. With its modular approach, developers gain precise control over design elements, fostering efficiency and consistency in web projects.
This tutorial navigates through Tailwind's core concepts, teaching efficient class utilization for layout, typography, and responsive design. Dive deeper into its extensive documentation, mastering utility classes and custom configurations to craft sleek and visually appealing websites.
By leveraging TAE's tutorial expertise, grasp Tailwind CSS intricacies while exploring real-world examples and best practices. Elevate your web design proficiency, unlock creative possibilities, and streamline development workflows with this powerful framework.
Begin your journey into Tailwind CSS mastery today and transform your web design endeavors. For an in-depth exploration, visit Tutorial and Example.
0 notes
Text
Applying Next.js with Tailwind CSS
Next.js and Tailwind CSS are highly popular technologies in web development. Next.js is a React-based framework that supports server-side rendering and static site generation to enhance web application performance and SEO. Tailwind CSS is a utility-based CSS framework that simplifies styling with concise class names. In this article, we will explore how to use Next.js with Tailwind CSS.
Table of Contents
- Introduction to Next.js and Core Concepts - What is Next.js? - What is Server-Side Rendering (SSR)? - What is Static Site Generation (SSG)? - Introduction to Tailwind CSS and Core Concepts - What is Tailwind CSS? - What is Utility-Based Styling? - Pros and Cons of Tailwind CSS - Setting up a Next.js and Tailwind CSS Project - Creating a New Next.js Project - Installing and Configuring Tailwind CSS - Custom Styling and Responsive Design - Applying Custom CSS - Adding Responsive Design - Page and Component Development - Creating Next.js Pages - Designing Components with Tailwind CSS - Fetching Data and Routing - Fetching Data using APIs - Navigation and Routing in Next.js - SEO Optimization - Meta Tags and SEO Settings - Page Speed Optimization - Deployment and Performance Optimization - Deploying with Vercel - Performance Optimization Techniques
Introduction to Next.js and Core Concepts
Next.js is a React-based framework that simplifies web application development. It supports server-side rendering and static site generation, which improve initial loading speed and enhance SEO. What is Next.js? Next.js is a framework developed by Zeit, based on React. It provides features like server-side rendering and static site generation. These features enhance the initial loading speed and improve SEO. What is Server-Side Rendering (SSR)? Server-side rendering involves generating the final HTML of a page on the server and delivering it to the client. This allows search engines to easily crawl the page's content and improves initial loading speed. What is Static Site Generation (SSG)? Static site generation involves pre-rendering pages into HTML files during build time. This approach reduces the server load and provides faster loading speed.
Introduction to Tailwind CSS and Core Concepts
Tailwind CSS is a utility-based CSS framework developed by Adam Wathan, Jonathan Reinink, David Hemphill, and Steve Schoger. It enables developers to easily implement desired designs using intuitive class names. What is Tailwind CSS? Tailwind CSS is a CSS framework that replaces traditional CSS with utility-based styling. It offers utility classes that directly apply styles to elements, making styling more intuitive and efficient. What is Utility-Based Styling? Utility-based styling means each CSS class represents a specific style. For example, the class "text-red-500" sets the text color to red. Pros and Cons of Tailwind CSS Tailwind CSS's pros include its concise and intuitive class names, allowing developers to apply styles quickly. However, the large number of classes may initially be overwhelming.
Setting up a Next.js and Tailwind CSS Project
Let's set up a project that uses Next.js with Tailwind CSS. Creating a New Next.js Project First, create a new Next.js project using the following commands: npx create-next-app my-next-app cd my-next-app Installing and Configuring Tailwind CSS To use Tailwind CSS in a Next.js project, install the required packages and configure them: npm install tailwindcss postcss autoprefixer Create a postcss.config.js file with the following content: module.exports = { plugins: { tailwindcss: {}, autoprefixer: {}, }, }; You can also create a tailwind.config.js file to customize the default styles.
Custom Styling and Responsive Design
When using Next.js with Tailwind CSS, you can easily apply custom styling and implement responsive design. Applying Custom CSS While Tailwind CSS provides basic styling, you may need to apply custom CSS for specific elements. You can define custom styles to be applied alongside Tailwind CSS. Adding Responsive Design To support different screen sizes on mobile devices and desktop screens, you can add responsive design using Tailwind CSS utilities.
Page and Component Development
Let's explore how to develop pages and components in a Next.js project. Creating Next.js Pages In Next.js, create pages in the pages directory. Each page corresponds to a specific URL and is rendered when accessed. Designing Components with Tailwind CSS Tailwind CSS can be used to style components easily. Apply desired styles using concise class names.
Fetching Data and Routing
Learn how to fetch data and handle page navigation in a web application. Fetching Data using APIs Next.js supports server-side rendering, allowing you to fetch data from APIs on the server. This improves initial rendering with pre-fetched data. Navigation and Routing in Next.js Next.js provides built-in routing for handling page navigation. Use the Link component to navigate between pages.
SEO Optimization
To optimize for search engines, set up meta tags and consider page speed optimization. Meta Tags and SEO Settings Use meta tags to set page titles, descriptions, keywords, and other relevant information. This helps search engines better understand and display your page content. Page Speed Optimization Fast page loading speed is crucial for user experience and SEO. Techniques such as code splitting, browser caching, and image optimization can improve page speed.
Deployment and Performance Optimization
Consider performance optimization when deploying the project. Deploying with Vercel Vercel provides a fast and reliable hosting environment for Next.js projects. Deploy your project to Vercel for a smooth user experience. Performance Optimization Techniques Optimize your web pages with code bundling, browser caching, image optimization, and other performance techniques to ensure optimal loading speed.
Conclusion
Next.js and Tailwind CSS form a powerful combination that enhances web development in terms of efficiency and ease. Utilizing server-side rendering and utility-based styling, developers can achieve excellent performance and development speed. Next.js Docu https://nextjs.org/docs/app/building-your-application/styling/tailwind-css Read the full article
0 notes
Text
The 10 React Libraries and Frameworks to Try in 2023

In 2023, React’s popularity remains unrivaled, and the ever-growing ecosystem of libraries and frameworks built around it further empowers developers to create cutting-edge applications with ease.
In this article, we will take a look at the top react libraries and frameworks set to take center stage in 2023. These technologies have the ability to alter the way we build online applications by speeding development workflows, improving performance, and introducing astonishing capabilities.
Whether you are an experienced React developer looking to stay ahead of the curve or a curious newcomer eager to explore the latest innovations, this compilation will offer you valuable insights into the most promising tools in the React ecosystem.
OnsenUI
Onsen UI is a well-known open-source framework used to create hybrid mobile and online applications. It allows developers to construct mobile apps with HTML, CSS, and JavaScript that have a native appearance and feel across multiple platforms. Onsen UI is built on Web Components and is intended to integrate with major JavaScript frameworks such as React, Angular, and Vue.js. It is well-known for its speed, convenience of use, and ability to construct cross-platform programs.
Tailwind UI
Tailwind UI is not a standalone React library or framework but rather a collection of pre-designed user interface components and templates built using Tailwind CSS. Tailwind CSS is a utility-first CSS framework that provides a set of low-level utility classes, allowing developers to quickly build custom user interfaces.
Tailwind UI offers a wide range of UI components such as buttons, cards, forms, navigation menus, and more, all styled with Tailwind CSS. These components can be used as building blocks for creating visually appealing and responsive user interfaces in React applications or any other web framework.
React Spinner
React Spinner is a library that offers a distinctive array of functionalities, including loading spinners powered by Halogen. This library enables developers to effortlessly enhance their loading spinners, ensuring an efficient and effective loading experience.
React Bootstrap
React Bootstrap presents a robust UI kit that empowers developers to swiftly create highly adaptable user interfaces. It provides an extensive selection of components and tools, such as modals, alerts, buttons, and more, enabling the creation of engaging and dynamic user experiences.
Create React App
Create React App is an indispensable tool for developers, streamlining the process of app development by eliminating the need for complex configuration. It provides a standard structure, allowing developers to initiate the development process with a solid foundation.
Rebass
Rebass offers developers a convenient way to craft customizable user interfaces, featuring a diverse range of components to facilitate dynamic and interactive experiences. It simplifies the development process by providing a standard structure and removing the complexities of configuring the development environment.
React-Motion
React-Motion, a renowned animation library for React, makes use of spring configurations to define animations. As a result, it simplifies the complexities and ensures a controlled duration for your animations.
Furthermore, within React elements, React-Motion facilitates development by employing stiffness, damping, and accuracy strategies. The React-Spring API bridges the gap between declarative and imperative approaches, allowing for smoother transitions and increased security during development.
Grommet
Grommet is a potent component library that aids in creating mobile-first, accessible, and responsive web projects. With its extensive collection of components designed to work seamlessly together, developers can easily create dynamic experiences while ensuring customization for each project.
Semantic UI React
Semantic UI React is an excellent choice for developers seeking compatibility with multiple devices. It boasts a declarative API, shorthand props, and other features to enhance user experiences and create modern, responsive user interfaces without relying on jQuery.
Overall, the expansion and diversity of the React ecosystem indicate the community’s dedication to driving innovation, making it an exciting moment to be a part of the React development environment. These top ten React libraries and frameworks in 2023 provide a solid foundation for building cutting-edge applications that push the boundaries of what is possible in web and mobile development, whether you are a seasoned developer looking to stay ahead or a newcomer eager to explore the latest technologies. Have fun coding!
Originally published by: The 10 React Libraries and Frameworks to Try in 2023
#Best React frameworks#Best React libraries#Top React frameworks#Latest React technologies#Trending React frameworks#React development trends
0 notes
Text
Building a full-stack application using Laravel, Vue 3, and Tailwind CSS can be a great choice. Laravel provides a robust backend framework, Vue 3 offers a powerful frontend library, and Tailwind CSS provides a flexible and utility-first CSS framework. Here's a step-by-step guide on how you can set up a full-stack application using these technologies: [tie_index]Setting up Laravel Backend[/tie_index] [padding top="0" bottom="0" right="5%" left="5%"] Step 1: Setting up Laravel Backend Install Laravel by following the official documentation: https://laravel.com/docs/installation Create a new Laravel project using Composer: bashCopy code composer create-project laravel/laravel your-project-name Navigate to the project directory: bashCopy code cd your-project-name Set up the database connection in the .env file. Create the necessary database tables and migrations: bashCopy code php artisan migrate Set up authentication (optional) if you want to add user registration and login features: bashCopy code php artisan make:auth [tie_index]Setting up Vue 3 Frontend[/tie_index] [padding top="0" bottom="0" right="5%" left="5%"] Step 2: Setting up Vue 3 Frontend Install Vue CLI globally (if not already installed): bashCopy code npm install -g @vue/cli Create a new Vue project: bashCopy code vue create client Choose the default preset or manually select features based on your requirements. Navigate to the client directory: bashCopy code cd client Start the development server: bashCopy code npm run serve [tie_index]Integrating Laravel with Vue[/tie_index] [padding top="0" bottom="0" right="5%" left="5%"] Step 3: Integrating Laravel with Vue Open the client folder in your favorite code editor. Update the src/App.vue file with your desired Vue components and layout. Make API requests to the Laravel backend using Axios or any other HTTP client library. For example: javascriptCopy code import axios from 'axios'; export default data() return users: [], ; , mounted() axios.get('/api/users') .then(response => this.users = response.data; ) .catch(error => console.log(error); ); , ; [tie_index]Styling with Tailwind CSS[/tie_index] [padding top="0" bottom="0" right="5%" left="5%"] Step 4: Styling with Tailwind CSS Install Tailwind CSS via npm: bashCopy code npm install tailwindcss Create a tailwind.config.js file in the root directory: bashCopy code npx tailwindcss init Update the client/main.js file to import Tailwind CSS: javascriptCopy code import 'tailwindcss/tailwind.css'; Use Tailwind CSS utility classes within your Vue components to style them. [tie_index]Deploying the Application[/tie_index] [padding top="0" bottom="0" right="5%" left="5%"] Step 5: Building and Deploying the Application Build the Vue project for production: bashCopy code npm run build Configure your Laravel project to serve the Vue app: In your Laravel routes/web.php file, add the following route at the end: phpCopy code Route::view('/any', 'app')->where('any', '.*'); In your Laravel resources/views/app.blade.php file, include the Vue app's production files: htmlCopy code Build and deploy your Laravel project as per your hosting environment. That's it! You've successfully set up a full-stack application using Laravel, Vue 3, and Tailwind CSS. Feel free to customize and extend the application based on your specific requirements.
0 notes
Text
Tailwind CSS Mastery: Build 2 Advanced Projects
Tailwind CSS Mastery: Build 2 Advanced Projects
How To Get This Course For Free ? Click On Enroll Now. Now You Go Direct Udemy Official Website. Than Log in And Sign Up In #Udemy Website. Now Click On Enroll Now. Last Finally You Get This Course Absolutely Free. You Get Message Congratulation You Enroll This Course. What you’ll learn: Customize & Configure Tailwind CSS. Make Ultra responsive designs with Tailwind CSS (RWD). Write…

View On WordPress
0 notes
Text
Unpkg material 2 dev

#Unpkg material 2 dev how to#
#Unpkg material 2 dev install#
#Unpkg material 2 dev pro#
#Unpkg material 2 dev code#
The Quick Response system became popular outside the automotive industry due to its fast readability and greater storage capacity compared to standard UPC barcodes.
#Unpkg material 2 dev code#
A QR code uses four standardized encoding modes (numeric, alphanumeric, byte/binary, and kanji) to store data efficiently. In practice, QR codes often contain data for a locator, identifier, or tracker that points to a website or application. A barcode is a machine-readable optical label that contains information about the item to which it is attached.
#Unpkg material 2 dev how to#
Authorsĭo you want to get notified when a new component is added to Flowbite? Sign up for our newsletter and you'll be among the first to find out about new features, components, versions, and tools.In this tutorial, we'll learn how to generate QR codes in Angular by building a simple example application using the latest Angular 10 version.įirst of all, what's a QR code and what does it serve?Ī QR code (abbreviated from Quick Response code) is a type of matrix barcode (or two-dimensional barcode) first designed in 1994 for the automotive industry in Japan. You can also subscribe to the official Flowbite YouTube channel to view tutorials on how you can use the Flowbite ecosystem to design and build websites. Discord communityįeel free to join our community on Discord to receive help, contribute to the project, or just discuss about Flowbite, Tailwind CSS, and web development in general. Please reach out to us via the official Github repository and the main development team will get in touch as soon as possible. Contributionsįlowbite is an open source library under the MIT license and anyone who would like to contribute to the codebase or design is welcome to do so. The library of components from Flowbite is open source under the MIT License.
#Unpkg material 2 dev pro#
If you want to take your Tailwind development workflow to the next level you can check out the pro version of Flowbite which includes fully coded pages and layouts for application, marketing, and e-commerce user interfaces.
#Unpkg material 2 dev install#
Learn how to install Tailwind CSS and Flowbite with Flask.
Install the latest version of Flowbite using NPM:Ĭheck out the Flask integration guide with Tailwind CSS and Flowbite to set up all technologies and start developing with a micro framework combined with the UI components from Flowbite.
To get started, you first need to make sure that you have a working Tailwind CSS project installed and that you also have Node and NPM installed on your machine. Getting startedįlowbite is technically a plugin that can be included into any existing Tailwind CSS project. Flowbite also includes some custom JavaScript that enables interactive components, such as dropdowns, modals, tooltips, and many more. There are at least 19 types of components including buttons, alerts, breadcrumbs, pagination, and navbars. This is where Flowbite comes into play: it’s basically Tailwind CSS, but you get all of the components that you would normally get with a classic CSS framework like Bootstrap or Bulma. This makes it really hard to quickly prototype a user interface. One of the disadvantages of Tailwind CSS compared to other frameworks is that it doesn’t have a base set of components. Take your Figma and Tailwind CSS development to the next level with thousands more elements and pages with Flowbite Pro. Prototype and design your website before coding with the Flowbite Figma file which is based on the Tailwind CSS classes. ComponentsĮxplore the Tailwind CSS elements such as buttons, navbars, alerts, dropdowns and use them to build your website. Learn how to get started by downloading and configuring Flowbite locally on your machine and start developing.

0 notes