#Titebond
Text
Keo Titebond có xuất xứ từ Mỹ và thường được sử dụng như một loại keo dán gỗ chuyên dụng có màu nâu sữa. Ngoài ra, nó cũng có thể được sử dụng cho các mục đích dán các bề mặt khác nhau như bê tông, kim loại, gương, ốp các tấm Alu, ốp tường hoặc làm quảng cáo, dán gạch, gỗ, đá, inox, nhôm kiếng thủy, ván sàn, chỉ len tường,...
0 notes
Photo
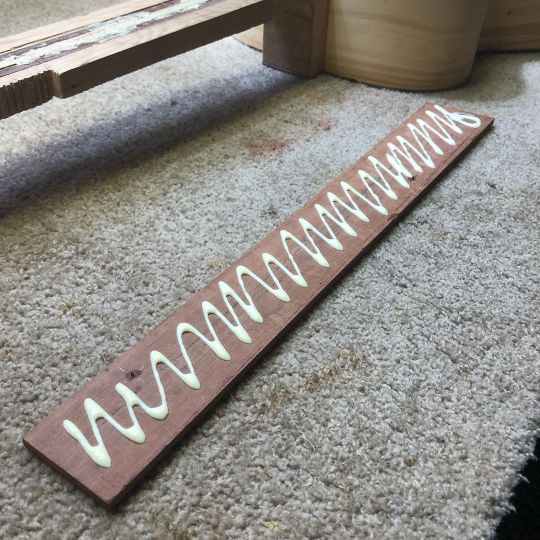
Something about fresh @titebondproducts wood glue that makes me hungry. #woodglue #titebond #hideglue #superglue #glue #guitars #guitarmaking #luthier (at Melbourne, Victoria, Australia) https://www.instagram.com/p/Clug-kKyJVy/?igshid=NGJjMDIxMWI=
0 notes
Text
Carved myself a ladle out of a cedar table leg to go in my reenactment kit.

One buddy redid cabinets for another buddies camper van and I snatched the table out of the burn pile. I knew it would be an easy wood to hand carve my third spoon out of and I love the color of cedar.

Added a lindworm design with my persona name in runes. Lindworm head is based on this runestone illustration. It's my first time drawing one. It seemed like a fun idea and it was also very soothing

Stained the design with blue food coloring to make it a little darker once it's oiled. The cedar will go a rich dark red so this wont be as visible.

Hit it with olive oil and noticed a 4 way split in the handle, so I'll have to make a repair. I'm thinking dowels. Setting this down until I can pick some up
Welcome to Dr Frankenstein's Arboreal Taxidermy


I have reinforced the handle with two birch dowels glued with Titebond III, with more glue inside the splits. Dowels were sawed off, whittled, and sanded after days inside clamps. This section of lindworm was reburned and restained. The blue is off from the rest but I expect it will blend back in after another oiling.
I've also decided that I can have just a little mischief, as a treat.


And since the app wont let me put a video into a reblog, I've edited all of this back into the original post. It is done
9 notes
·
View notes
Text
educational post: But how do I clean records?
If you don’t plan to clean any 33.3s or 45s or 78s, and bless you if you have any 17s, you might as well skip this. The rest of you, follow me down this rabbit hole...
First, I feel the need to put in a disclaimer: I’m by no means an expert, and people who clean records regularly have strong opinions about what to do, how to do it, and with what to do it. I’m just going to tell you what I do and use, and say “this is what I do and use” rather than “here’s the best way and best stuff.” I haven’t destroyed anything of my own so far so you take care to not destroy anything of your own. Okay? Let’s get into it.
Have you heard about using glue? Yeah, my best friend (who has 100x more records than me) pointed out the viral videos showing people smoothing Elmer’s School Glue or Titebond II wood glue over the vinyl without touching the label, letting it dry, then peeling it off the record to take up dirt like it was a Bioré blackhead remover strip. He was asking my thoughts, not advocating, and I admit I learned how to clean vinyl from him years ago so was flattered he asked me this. Answer: I haven’t tried this and am wary. I think I might apply some to a 45rpm kids’ story record that I don’t really care about to see the results, but anyhow, I wanted to head that question off by saying that I can’t recommend it because, well, TikTok solutions to anything aren’t always wise.
So what’s the deal with fluids? Can I wash my records? Liquids will help get the dirt off, yes, but it’s been pointed out that you shouldn’t just run them under the tap in the sink because there are minerals in the water, and the water used in the professional solutions is purified or distilled to take the minerals out. The only time I run a record under the faucet is when there’s literally can-leave-fingerprints dust or gotta-soften-this-to-remove mildew on the vinyl. So yes, I do it infrequently. The pros will say to use record cleaning solution, most of which are based on pure water and/or isopropyl alcohol, with the irony being that pros will also say not to use isopropyl alcohol because it can damage the protective layer on the vinyl. *shrug* I use 70% isopropyl on a cleaning cloth, I’m a heathen. Echoing the pros, also don’t use window cleaner, bleach, or vinegar.
So what should I use to wipe the dust off my records? Here, have a photograph of some items I have laying around... and my opinions:

From left to right, and I thrifted all of these things except the Casabella cloth, which was a Christmas table offering at The Container Store once:
Microfiber LCD cleaning cloth - This is a gift from the deity.
Velvet roller (with its original water-based cleaning fluid) - There’s a slot on the bottom [top] side for squeezing in some fluid. I’m not a fan of this because the fluid doesn’t absorb in, the roller sometimes rolls and sometimes doesn’t, and it doesn’t seem like it actually does anything. I blame RadioShack. But these were all the rage in the 1970s.
Microfiber LCD cleaning wand - I haven’t used this yet but I presume it’s about as good as the cloth, just less flexible. There’s a fiber brush that pushes out the (left-side) end for even more dusting goodness.
Velvet brush - The go-to for record guys for decades. For good reason.
You’ll notice there’s no mention of toilet paper or kitchen paper towels. Just don’t, since they’re based on wood pulp. It’s your choice whether you think cotton or other soft cloths will work, but I go with microfiber because it’s fine enough to get into the grooves of a record and dislodge/hang onto dust.
How do I wipe this record clean? I’ve seen record store dudes just hang onto it with one hand and wipe in a circle around the record with the other, but I think that’s just to dust it off when putting it on/taking it off the turntable and not actually cleaning it. What I was shown and what I do is to put the record on the turntable, get the thing spinning without the needle down, and then use the cloth/brush on the left side of the record (thus the opposite side from where the needle is), and let the turntable do the work. Personally, I put a splash of alcohol on my microfiber cloth, fold the wet spot down the middle, then put that edge down on the vinyl. Some say move slowly from outside to inside to go with the grooves, some say to move slowly from inside to outside to better nudge dust out; I’ve always done it from inside out and if the record looked a bit dusty before I started I then do it again from outside in. My experience is that the outer grooves -- the first song -- are more prone to hang onto dirt or get scratches and skip within the first 30 seconds of playing the record, so I give the first inch of the outer edge a bonus wipe. Like I said, everyone’s got their style and opinions on how to wipe down a record, and this one is mine.
Then I give the record a look from a lower angle while it’s spinning to see if there are any particularly messy areas that need spot cleaning, which is definitely an issue if there’s mildew or waterspots or extra-dusty spaces. Stop the record, turn it by hand to bring that space closer, and wipe that space using a damp cloth going with the grooves. None of this is going to fix a scratch, and I have heard some really scary ways of addressing those, but it’s possible that if the record is clean you’ll get only a pop when played rather than a skip.
It still sounds grubby when I play it, is there any hope? If a second attempt at cleaning doesn’t fix it, your options are limited. Learn from my mistakes and DO NOT put a quarter on the tone arm so it presses harder and in theory resists dust and skips. A lot of my albums from my childhood sound like sandpaper from doing that. The record player guys say the needle is just supposed to gently ride the record, with the tone arm balanced to not add weight or loft off the record. It is possible that trying a different record player might give a different result (yes, I did discover one record that skips on the first track on my Aiwa no matter what does play through on my ION USB turntable, but the sound quality is not the same).
Any other words of wisdom? Sometimes you have to accept that you can’t fix everything and must hunt down the CD or p1r4t3 the track from YouTube or P2Ps, or just live with the imperfections. No shame there if it’s an old or used record; vinyl is kinda fragile and the skip or pop you’re hearing can be totally invisible when you look for the source. And I encourage you to look at other sources online for how to clean a record, just for other ideas since I’m only telling you what I do and have heard. Also, a care and feeding thing: Those thin paper sleeves that a record comes in and gets slid inside the pretty cover? Yes, they’re your friends, since bare tracks against bare cardboard can wear down the record and there’s no protection against dust.
14 notes
·
View notes
Text
The broken spindle tip has been repaired, hopefully well enough--i used a fine paintbrush to cover the splintered area with titebond and held it under tension by hand while it set initially so i could wipe away the squeeze out, and then wrapped the tip very tightly with yarn to keep it under tension for the next day or so. Hopefully that will be sufficient; i dont have a clamp and even if i did, it's such a delicate piece that im not sure id want to clamp it anyway.
Also got a few more things for spindle making which will hopefully speed up the process (heavy rasp and low grit sandpaper, so i dont have to cut away the wood). Too cold and dark to do any now tho, sadly.
#stepped into the store and immediately dislocated my hip. idek how. was fine walking in#proceeded to attempt to drag myself around using my less fucked up leg and my cane#could feel myself turning gray every time i accidentally put weight on it it was so bad#is still super bad but at least im back home#usually it just subluxates so a full dislocation is a lot worse than im used to walking on 🤕
10 notes
·
View notes
Text


Laminated Cherry bowl 6 inches wide, 3 inches tall, 2.5 inches deep. Shellac sanding sealer waiting to dry. It seems Titebond 2 reacted with the tannins in the Cherry hence the dark glue lines.
2 notes
·
View notes
Text
Here is a van created to make you feel like you are still in the old cabin while parked at a wayside. This van has a gas-powered heater to keep you warm, a powerful fan to keep you cool and even a hideaway toilet! Complete with a sink and a fridge, this small kitchen also has an induction stove built into it. The bed space is a queen size, with a pull-out drawer directly underneath. This nomadic vehicle is equipped with solar panels and a DCDC Charger to keep all of its 4 12v batteries charged. As well as a shore power plug for when it's a bit cloudy and you don't feel like driving around. There is also a 28-gallon fresh water tank which can be put to use through the sink or the spigot installed near the fill point. With a grey water tank at 25 gallons. They both empty the bottom of the van, for convenience and stealth. With just about as many screws as you can see, this is mainly held together by Festool Dominos and Titebond Type 3 Wood glue. A beefy wooden domino-shaped dowel that takes the place of an otherwise squeaky bolt or screw. Ensuring this furniture will hold up to bumpy roads as long as you can hold onto the wheel.
Practically off the factory line with less than 500 mi to the engine. Grab this gem and take it out on an adventure before someone can claim your untold quests.
Contact us for more details, price is flexible and negotiable. Delivery will add miles to the vehicle, but distance isn't an issue by land.
Heater = Webasto 2500 gas-powered heater, temperature controlled. Automatic low gas sensor so it won't run you dry
Fan = Maxx fan deluxe dual-direction, temperature controlled
Electric (Victron)
- Multiplus 3000A ACDC inverter
4 GFCI outlets, 10 USB ports
- Tri smart DCDC Alternator charger
Charge your batteries while driving
- 150/50 Smart solar charger, Renology solar panels
Borrow some of the sun's energy to charge your batteries very quickly
- Cerbo Gx monitoring system
The brains behind the electrical labyrinth
- GX touch display
Bluetooth compatible, as well as remote control of van electronics
-4 Victron LiFePo4 Batteries
12v 100 amp hours each
Pre-assembled metal drawer glides = Moryde latching drawer slides
Blum under-mount tandem full extension drawer glides
Blum Soft-close concealed cabinet door hinges
Tensioned upper cabinets that stay closed and open with ease
Pressurized spigot in the rear along with gauge for water tanks
More pictures
https://drive.google.com/drive/folders/1RGr2dM5GHtm4898w50TDwOCCi3x7IapW
Contact me for more details, or if you've got a van/camper/off-grid design in your head that I can help come to life.
Email me at
Also posted on this site, which offers financing through their website
https://thevancamper.com/post/6336/ram-promaster-3500-for-sale
Financing website for RVs and Boats
https://marinebk.com/borrow/personal-loans/boat-rv
Ebay posting
https://www.ebay.com/itm/364205089899?mkcid=16&mkevt=1&mkrid=711-127632-2357-0&ssspo=4we391NtRzG&sssrc=2349624&ssuid=4we391NtRzG&var=&widget_ver=artemis&media=COPY
2 notes
·
View notes
Text
I have been super tempted to buy one of these Nerdy Gurdy kits! Did you finish building yours? Is it difficult—I have absolutely ZERO woodworking experience. How does it sound? Was it worth it? So many questions!!!!!
@zethry - I did finish, back on (appropriately) April Fool's Day. You don't need any woodworking experience. All the pieces of the kit just pop out of sheets of laser-cut plywood. You may need to use a small file to widen some of the slots that tabs go into. There's also a lot of gluing but if you've ever built a model airplane or stuck the handle back on a mug you're all set. You will need a good wood glue & as many clamps as you can get your hands on. Everyone recommends TiteBond III since you can essentially melt it back off with a paint-stripping heat gun if you need to make adjustments after the fact.
Oh, you'll need a hacksaw too, but only briefly to cut threaded rod to the right length. Plus you have to supply your own screws, nuts, bolts & whatnot.
It took a long, long time to get it to stop sounding like a crime against humanity. There are a lot of things that influence the sound, including how "true" the wheel is, whether you've got the right amount of cotton on the strings, whether you've got the right string for the right note, whether you've got the right amount of rosin on the wheel, the height of the bridges & on & on. But that's true for pros using real luthier-made instruments, so it's no knock on the Nerdy Gurdy.
Oddly enough getting the dog to buzz was the biggest challenge, but lemme tell you there was a real sense of accomplishment when I finally did!
It was absolutely worth it. I ordered my kit from littlebitsofinteresting.com. She's a licensed US distributor & often has kits available when the Dutch maker is out of stock. For roughly half the price of even the most basic Vrabel plus some hours of sweat equity you get a functional instrument that sounds good enough to learn on. Frankly, like with any kit project, the building is at least half the fun. There's a builders' group on Facebook that's always a big help if you run into trouble. Or watch the build playlist on The Gentle Flamingo YouTube channel.
One of these days I'll get around to making a clip of playing it, just to satisfy anyone's morbid curiosity.
If there are any other questions I can answer for you, shoot.
4 notes
·
View notes
Link
0 notes
Video
youtube
Woodworking Adhesive Mastery: Titebond vs CA Glue vs Epoxy
1 note
·
View note
Text
Keo Titebond được đông đảo người dùng yêu thích sử dụng bởi khả năng bám dính tuyệt vời.
0 notes
Text
Entwined
duck tape works greatthough there's somesticky residue titebond is the best glue gorilla and super have their moments too good strong twine is perfectfor the big areas i've even used an old belt or two though it's still pretty hard to keep the real me from leaking through there's just so many cracks both old and new but i've gotten prettygood at trying to hold together you know who if i came…

View On WordPress
1 note
·
View note
Note
what's ypur favorite glue

Out of all glues my favorite has to be Titebond’s Wood Glue, or more specifically the melamine wood glue. The color and labeling is a spectacle and the taste and texture is divine. The whole lineup of Titebond glues look really good in my collection and I like to mix them into my sandwiches and drinks.
1 note
·
View note
Text

💣 Titebond TiteBrush 16330, pennello applicatore
🤑 a soli 7,82€
➡️ https://www.scontomio.com/coupon/titebond-titebrush-16330-pennello-applicatore/?feed_id=180174&_unique_id=654b658caa1aa&utm_source=Tumblr&utm_medium=social&utm_campaign=Poster&utm_term=Titebond%20TiteBrush%2016330%2C%20pennello%20applicatore
Il pennello applicatore Titebond TiteBrush 16330 è perfetto per incollare bordi e superfici, grazie alle sue morbide setole in silicone. La sua spatola, invece, è ideale per lavori di dettaglio più precisi, come giunzioni a tenone e mortasa, a coda di rondine e a pettine, nonché modanature. Questo pennello è estremamente facile da pulire ed è l'ideale per falegnameria e artigianato.
#coupon #titebond #collaperlegno #offerteamazon #scontomio
0 notes
Text
extolling the benefits of Titebond III to all who will listen✋😌
0 notes
Text
Keo Titebond là gì? Có mấy loại? Cách sử dụng như thế nào?
Loại keo dán gỗ không thể thiếu trong danh sách nguyên liệu xây dựng và sản xuất gỗ chắc chắn là keo Titebond. Vậy, bạn đã bao giờ tìm hiểu về keo Titebond là gì chưa?
Keo Titebond là một trong những loại keo dán gỗ hàng đầu trên thị trường hiện nay. Với khả năng kết dính cực kỳ cao, keo Titebond là lựa chọn hàng đầu cho ngành công nghiệp sản xuất gỗ và cả những dự án DIY tại nhà. Điều đặc biệt là, bạn hoàn toàn có thể yên tâm về an toàn khi sử dụng keo dán Titebond, vì nó không gây độc hại cho con người.
Hơn nữa, keo dán Titebond được sản xuất tại Mỹ và tuân thủ các tiêu chuẩn môi trường tiên tiến nhất của Mỹ, Châu Âu, Nhật Bản và nhiều quốc gia khác. Điều này đồng nghĩa với việc bạn không cần phải lo lắng về vấn đề độc hại cho sức khỏe khi tiếp xúc với các sản phẩm sử dụng keo dán Titebond.
Nếu bạn đang tìm hiểu về cách sử dụng keo Titebond và muốn biết về các loại sản phẩm của họ, hãy ghé thăm trang web của Phú Trang để có thêm thông tin chi tiết.
0 notes
Last Seen Blogs

zaccypu
Zaccypu

vigggvg
Senza titolo

ersktt
꧁༺ 𝓮𝓻𝓼𝓴𝓽𝓽𝓽 ༻꧂

fattynco
For the Love of Food & Fat

emmanuelogar
An academic profile