#Vue.js Style Eslint
Explore tagged Tumblr posts
Visit Tumblr Blog
Explore Tumblr blogs with no restrictions, modern design and the best experience.
Last Seen Tumblr Blogs


Fun Fact
Tumblr Inc. is funded by 13 investors.
Text
Essential Full Stack Development Interview Questions to Prepare For Your Next Job Opportunity
The demand for skilled full stack developers continues to grow as more companies seek professionals who can handle both the front-end and back-end development of applications. Preparing for a full stack development interview involves understanding a wide range of concepts that cover various technologies, frameworks, and programming practices.
To set yourself apart and confidently face interviews, consider exploring these essential full stack development interview questions. And for an insightful video overview of full stack interview preparation, check out this Full Stack Developer Interview Preparation Guide.
1. What is Full Stack Development?
Full stack development refers to the practice of working on both the front-end (client-side) and back-end (server-side) of a web application. A full stack developer is proficient in multiple technologies that enable them to build fully functional web applications from start to finish.
Key Points to Discuss:
Differences between front-end, back-end, and full stack development.
Advantages of hiring a full stack developer for a project.
2. What Are the Most Commonly Used Front-End Technologies?
Front-end development involves creating the user interface and ensuring a seamless user experience. The most popular front-end technologies include:
HTML: The standard markup language for creating web pages.
CSS: Used to style and layout web pages.
JavaScript: Essential for interactive features.
Frameworks/Libraries: React, Angular, and Vue.js.
Follow-Up Questions:
How do these technologies differ in terms of use cases?
Can you explain the benefits of using a front-end framework like React over vanilla JavaScript?
3. Explain the Role of Back-End Technologies in Full Stack Development.
The back-end of an application handles the server, database, and business logic. Key technologies include:
Node.js: A JavaScript runtime for server-side programming.
Express.js: A web application framework for Node.js.
Databases: SQL (e.g., MySQL, PostgreSQL) and NoSQL (e.g., MongoDB).
Other Languages: Python (Django, Flask), Ruby (Rails), and Java (Spring Boot).
Important Discussion Points:
RESTful services and APIs.
Authentication and authorization mechanisms (e.g., JWT, OAuth).
4. How Do You Ensure Code Quality and Maintainability?
Interviewers often ask this question to understand your approach to writing clean, maintainable code. Emphasize:
Version Control: Using Git and platforms like GitHub for collaborative coding.
Linting Tools: ESLint for JavaScript and other language-specific tools.
Code Reviews: The importance of peer reviews for improving code quality.
Best Practices: Following design patterns and SOLID principles.
5. Can You Discuss the MVC Architecture?
The Model-View-Controller (MVC) architecture is a common design pattern used in full stack development. Each part of the pattern has a distinct role:
Model: Manages data and business logic.
View: The user interface.
Controller: Connects the Model and View, handling input and output.
Why It’s Important:
Helps organize code, making it more scalable and easier to maintain.
Many frameworks, such as Django and Ruby on Rails, are built on MVC principles.
6. What Is REST and How Is It Used in Full Stack Development?
Representational State Transfer (REST) is an architectural style used to design networked applications:
Key Features: Stateless, cacheable, and uses standard HTTP methods (GET, POST, PUT, DELETE).
Implementation: Building RESTful APIs to enable communication between client and server.
Common Follow-Ups:
How do RESTful APIs differ from GraphQL?
Can you provide an example of designing a RESTful API?
7. Explain the Role of Databases and When to Use SQL vs. NoSQL.
Choosing between SQL and NoSQL depends on the application's needs:
SQL Databases: Structured, table-based databases like MySQL and PostgreSQL. Best for applications requiring complex queries and data integrity.
NoSQL Databases: Flexible, schema-less options like MongoDB and Cassandra. Ideal for handling large volumes of unstructured data.
Typical Questions:
What are the ACID properties in SQL databases?
When would you prefer MongoDB over a relational database?
8. How Do You Implement User Authentication?
User authentication is crucial for any secure application. Discuss:
Methods: Sessions, cookies, JSON Web Tokens (JWT).
Frameworks: Passport.js for Node.js, Auth0 for advanced solutions.
Best Practices: Storing passwords securely using hashing algorithms like bcrypt.
9. What Are Webpack and Babel Used For?
These tools are essential for modern JavaScript development:
Webpack: A module bundler for bundling JavaScript files and assets.
Babel: A JavaScript compiler that allows you to use next-gen JavaScript features by transpiling code to be compatible with older browsers.
Related Questions:
How do you optimize your build for production using Webpack?
What is tree shaking, and how does it improve performance?
10. How Do You Handle Error Handling in JavaScript?
Error handling is vital for ensuring that applications are resilient:
Try-Catch Blocks: For handling synchronous errors.
Promises and .catch(): For managing asynchronous operations.
Error Handling Middleware: Used in Express.js for centralized error management.
Important Concepts:
Logging errors and using tools like Sentry for real-time monitoring.
Creating user-friendly error messages.
Preparing thoroughly for full stack development interviews by understanding these questions will set you on the path to success. For a comprehensive walkthrough and additional insights, make sure to check out this YouTube guide, where these topics are discussed in detail to boost your interview readiness.
0 notes
Text
How To Setup Your Vue.js Style Guide And Code Like A Pro With Vue 2 and Vue 3!! Vue 3 ESLint Guide
How To Setup Your Vue.js Style Guide And Code Like A Pro With Vue 2 and Vue 3!! Vue 3 ESLint Guide
Vue.js Style Guide is important. How should you create your Vue.js app and what are the best practices? In this tutorial we’ll look at adding ESLint Style’s to your Vue.js app! Using the eslint-plugin-vue. And we’ll look at Vue 3 style guide! #vuejs #vuejs3 Check now if your .TECH is available! Link – https://go.tech/erik Use Code erik.tech at Checkout for a special 80% OFF on 1 & 5 Year .TECH…

View On WordPress
#Erik Hanchett#eslint prettier vscode#eslint setup#eslint vscode#eslint vscode setup#Program With Eric#Program With Erik#VSCode setup eslint#Vue 3 style guide#Vue essentials#vue js 3#vue js tutorial#vue js tutorial for beginners#vue-eslint prettier vscode#Vue.js 3 tutorial#vue.js documentary#Vue.js ESLint#Vue.js eslint tutorial#Vue.js Style Eslint#Vue.js style essentials#Vue.js Style Guide#vuejs
0 notes
Text
10 Excellent Vue Development Tools That Will Make Your Life Easier
Nowadays, developers have a variety of development tools to choose from. For instance, Vue.js developers have many options. With Vue.js, you can build single-paged applications as well as multi-page ones or create apps on the basis of user interfaces.

The introduction of the Vue language began with Vue’s framework. In addition to multiple tools, technologies, editing tools, and styles guides, Vue also offers a number of other services.
In a new blog, we’re exploring the development tools you’ll want to know about and their capabilities to better meet your app development needs. It’s up to you to read. There are many more insightful ideas you can use to improve your developing apps.
vue-cli
Among the best developer tools, Vue CLI takes the top slot. Utilizing Vue without CLI would be similar to having chocolate without peanut butter. For all its flaws, not to mention the fact that you can no longer add new functionalities to it.
That’s in addition to tools that make web development a more user-friendly experience. One can take advantage of Babel, ESLint, TypeScript, PostCSS, PWA, Unit Testing, and End-to-end Testing in the Vue CLI environment. This all is enhanced by the ability to combine any plugin of your choosing with the CLI.
The interest here is that Vue CLI doesn’t require ejecting. In addition, Vue CLI provides more scope for customization than do other frameworks. Regarding Vue CLI, we will find it relatively easy to start a project and manage it smoothly with Vue CLI’s graphical UI.
Bit for Vue
The next Vue.js developer tool is Bit. If you’re looking for the next top-quality library for all sorts of elements, that is all you need to consider. With this change, developers will no longer complain about not having the opportunity to share and collaborate on UI components.
This Bit.dev platform simplifies hosting, managing, and sharing components. Think of the component library as a CD music album. By leveraging Bit’s CLI tool, Bit.dev lets you push the independent components from any local project to the Bit.dev collection.
Each component has its dependencies tracked, and all shared components are reusable. Tests should be conducted frequently and isolated environments should be used.
Nuxt.js
One of the most popular Vue components is Nuxt.js, a component that helps you create performance-optimized user interfaces and single-page apps. It allows server-side rendering (SSR) of Vue.js applications.
With more than 50 modules available, server-rendered applications can be created, as well as single-page apps and Progressive Web Applications (PWA), etc. Basically, it works as a static site creator. It speeds up the application development process.
Vuex
Although there are plenty of Vue developers who are not managing state as well as they should be, we’ve found an awesome hire Vue developers tool, called Vuex, which helps manage state as it needs to be done. Vuex has other cool features like state snapshot export and zero-config time-travel debugging.
Vuetify
Among the Vue.js devtools, Vuetify is one of the most popular ones, offering a large selection of manually crafted UI components based on Material Design. Creating a successful app is also important.
Veutify can be used to develop SSR apps, SPAs, mobile apps, and even progressive web apps. It offers free and premium themes, both of which can be customized.
Vue Apollo
Vue Apollo is a powerful and flexible tool that utilizes your favorite API’s data. You can access whichever data you require to build a project or service. Apollo assists the use of GraphQL through a declarative mode, as well as supporting server-side rendering.
Vue Router
The official router for the Vue framework, Vue routers allow you to have multiple types of pages in one application that each reside on a separate route.
One of the overlooked features of Vue routers is that it has additional features and functions that some users aren’t aware of. Some of the core features include named routes, dynamic matching routes, named views and programmatic navigation.
It has many slewed tools for creating reusable web components; as such, routing is one of the most effective. Using Vue routing, you will be able to go from page to page without having to reload the page in order to see the new destination.
VuePress
When VuePress was created, it was known as a tool for creating technical documentation, and while this still applies today, VuePress has transformed into something even bigger- one of the main components of the Vue ecosystem, alongside other components such as the library, framework, and UI system. More on down the road, after a few years had gone by, it was determined to be an acceptable CMS.
In general, VuePress is divided into two parts: a simple static site generator with Vue theming and a plugin API, and a default theme designed to publish technical documentation.
Documentation was intended for Vue’s own subprojects. Since its first edition, VuePress has been providing exceptional blogging features and has even included a plugin system.
In fact, VuePress allows you to incorporate Vue Components or codes without the requirement to use markdown files. The application even allows you to create custom themes or use one of the many pre-built options available from the community.
Vue.js Guide
Based on its title, this guide looks to be a comprehensive reference on how to work with Vue.js. The Official Vue.js Guide is quite helpful to those just starting out as a Vue.js developer.
Within this lengthy guide format, you will find information about the Vue.js API, examples of official Vue style codes, as well as details about several Vue-related projects. You might make a good deal of progress toward your coding skills simply by joining these online Vue communities, where you might find that approximately 60% of Vue beginners prefer it.
Vue.js DevTools for Browsers
Developer Tools can be considered browser extensions that amplify the development process and speed up the process of finding bugs. There are several critical development tools available for Vuejs that are critical to being able to track your code and ensure that you deliver on time.
When it comes to Vue.js development tools, it has established itself as an industry leader. You will find many faults on the web page as you browse through it, and the tool can help with seamless debugging of Vue code.
Whenever you want to learn about a page’s errors, just enable the indicator in the search bar after installing the Vue dev tools in your web browser.
Conclusion
In this post we talked about some different tools that can be used to differentiate your project. Chrome and Firefox have Vue Devtools Extensions available, but they only work with local servers. It’s all a matter of practice and the more you work with the program, the better you’ll get at it.
If you want your project to be the best, as well as with these developer tools, make sure you also use Vue.js best practices. Feel free to tag us in the comment section below in case you have any questions or queries.
Source: Top Vue Js Development Tools
0 notes
Photo

VuexをTypeScriptで利用するのに悩んだ https://ift.tt/2MOnODr
概要
Vue.jsをTypeScriptで開発する際にVuexを利用するのにしっくりくる実装方法を模索中で、いくつか方法を試してみました。
GitHubに利用したプロジェクトをUPしています。実際に試してみたい方どうぞ^^
https://github.com/kai-kou/vue-js-typescript-vuex
準備
ここではDockerを利用して環境構築していますが、ローカルで構築してもらってもOKです。
> mkdir 任意のディレクトリ > cd 任意のディレクトリ > vi Dockerfile > vi docker-compose.yml
Dockerfile
FROM node:10.8.0-stretch RUN npm install --global @vue/cli WORKDIR /projects
docker-compose.yml
version: '3' services: app: build: . ports: - "8080:8080" volumes: - ".:/projects" tty: true
> docker-compose up -d > docker-compose exec app bash
コンテナ内
> vue create app Vue CLI v3.0.1 ? Please pick a preset: Manually select features ? Check the features needed for your project: Babel, TS, Vuex, Linter, Unit ? Use class-style component syntax? Yes ? Use Babel alongside TypeScript for auto-detected polyfills? Yes ? Pick a linter / formatter config: TSLint ? Pick additional lint features: Lint on save ? Pick a unit testing solution: Mocha ? Where do you prefer placing config for Babel, PostCSS, ESLint, etc.? In dedicated config files ? Save this as a preset for future projects? No ? Pick the package manager to use when installing dependencies: (Use arrow keys) ❯ Use Yarn Use NPM
コンテナ内
> cd app > yarn serve
これで実装の準備が整いました。
Vue-Cli標準
vue create コマンドでプロジェクトを作成するとsrc直下にstore.tsが作成されているので、そこに実装をいれて利用するパターンです。
stateにcounter ってのを持っていて、それをインクリメントするアクションがあるだけです。
src/store.ts
import Vue from 'vue'; import Vuex from 'vuex'; Vue.use(Vuex); interface State { conuter: number; } export default new Vuex.Store({ state: { conuter: 0, } as State, getters: { getCounter: (state, getters) => () => { return state.conuter; }, }, mutations: { increment(state, payload) { state.conuter += 1; }, }, actions: { incrementAction(context) { context.commit('increment'); }, }, });
App.vueで使ってみます。 超適当ですが、画像にclickイベント定義して、HelloWorldコンポーネントでstateに定義しているcounter を表示してます。
src/App.vue
<template> <div id="app"> <img alt="Vue logo" src="./assets/logo.png" @click="increment"> <HelloWorld :msg="`Welcome to Your Vue.js + TypeScript App ${this.counter}`"/> </div> </template> <script lang="ts"> import { Component, Vue } from 'vue-property-decorator'; import HelloWorld from './components/HelloWorld.vue'; @Component({ components: { HelloWorld, }, }) export default class App extends Vue { private get counter(): number { return this.$store.getters.getCounter(); } private increment(): void { this.$store.dispatch('incrementAction'); } } </script> (略)
ブラウザで確認すると、画像をクリックするとcounterがインクリメントするのが、確認できます。

気になる点
実装はシンプルで良いのですが、規模が大きくなってくると、store.tsが肥大化してくるのが目に見えます。辛い。
this.$store を利用するので、メソッド名などを間違えていても実行時にしかエラーにならないので、せっかくTypeScript使っているのになーです。
src/App.vue
export default class App extends Vue { private get counter(): number { return this.$store.getters.getCounter2(); // 実行時にエラー } private increment(): void { this.$store.dispatch('incrementAction2'); // 実行時にエラー } }
vuex-type-helperを利用する
下記記事で紹介されていたvuex-type-helperを利用してみます。
Vue.js + Vuex + TypeScript を試行錯誤してみた https://logs.utahta.com/blog/2017/09/02/110000
ktsn/vuex-type-helper https://github.com/ktsn/vuex-type-helper
vuex-type-helperとvuex-classってのを追加します。
コンテナ内
> yarn add vuex-type-helper vuex-class
storeの実装を追加します。ここではモジュール化してみます。
> mkdir -pv store2/modules > touch store2/index.ts > touch store2/modules/app.ts
store2/index.ts
import Vue from 'vue'; import Vuex from 'vuex'; import { app } from '@/store2/modules/app'; Vue.use(Vuex); export default new Vuex.Store({ modules: { app, }, });
store2/modules/app.ts
import Vuex, { createNamespacedHelpers } from 'vuex'; import { DefineActions, DefineGetters, DefineMutations } from 'vuex-type-helper'; export interface State { counter: number; } export interface Getters { counter: number; } export interface Mutations { increment: {}; } export interface Actions { incrementAction: {}; } export const state: State = { counter: 0, }; export const getters: DefineGetters<Getters, State> = { counter: (state) => state.counter, }; export const mutations: DefineMutations<Mutations, State> = { increment(state, {}) { state.counter += 1; }, }; export const actions: DefineActions<Actions, State, Mutations, Getters> = { incrementAction({ commit }, payload) { commit('increment', payload); }, }; export const { mapState, mapGetters, mapMutations, mapActions, } = createNamespacedHelpers<State, Getters, Mutations, Actions>('app'); export const app = { namespaced: true, state, getters, mutations, actions, };
利用できるようにmain.tsとApp.vueを編集します。
src/main.ts
import Vue from 'vue'; import App from './App.vue'; -import store from './store'; +import store from './store2';
src/App.vue
import { Component, Vue } from 'vue-property-decorator'; import HelloWorld from './components/HelloWorld.vue'; import { Getter } from 'vuex-class'; import * as app from './store2/modules/app'; @Component({ components: { HelloWorld, }, methods: { ...app.mapActions(['incrementAction']), }, }) export default class App extends Vue { @Getter('app/counter') private counter!: number; private incrementAction!: (payload: {}) => void; private increment(): void { this.incrementAction({}); } } (略)
はい。
気になる点
こちらの利点としてはモジュール化しやすい点と、アクション名を間違えてたときにビルドエラー吐いてくれる点でしょうか。
メソッド名間違い
methods: { ...app.mapActions(['incrementAction2']), },
エラー出してくれる
Argument of type '"incrementAction2"[]' is not assignable to parameter of type '"incrementAction"[]'. Type '"incrementAction2"' is not assignable to type '"incrementAction"'.
getterで間違ってる場合は、ブラウザ側でエラーになります。惜しい。
プロパティ名間違い
@Getter('app/counter2') private counter!: number;
ブラウザでエラー

vuex-classを利用するとActionなんかも以下のような定義ができるけれど、getterと同様にメソッド名間違いがブラウザでしか検知できないので、微妙。
vuex-classでAction定義
@Action('app/incrementAction') private incrementAction!: (payload: {}) => void;
うーん。独自実装いれたらもっとブラウザエラーを回避できそうですが、どこまで実装しようか悩ましいところです。
Vue.js+TypeScriptで開発するときの参考記事まとめ https://qiita.com/kai_kou/items/19b494a41023d84bacc7
元記事こちら
「VuexをTypeScriptで利用するのに悩んだ」
September 20, 2018 at 04:00PM
1 note
·
View note
Text
Auth0: Vue & TypeScript Quickstart SDK - The Missing Docs

Authentication is hard. Even if you know the ins and outs of it, handling registration, login, email verification, forgotten password, secret rotation... and what not... is a tedious work.
For this reason, we use auth providers such as AWS Cognito or Auth0. But this comes with its own drawback, namely that you are at the provider's mercy when it comes to examples and tutorials. If a resource you need does not exist, you either need to contact support and wait for them (but nobody got time for that), or figure it out yourself by the good ol' trial and error method.
A couple of days ago, I had to use Auth0 with Vue.js and TypeScript. Now, Auth0 has an excellent tutorial for Vue.js, but I could not find any examples in TypeScript. So seeing no better option, I started annotating the code provided by the tutorial.
I finished it, and in this blogpost, I'll walk you through the details, so you don't have to repeat this chore.
We will follow the original Auth0 Vue tutorial structure which can be found here. To make it easier to compare the two, we'll use the exact same first-level headings as the original.
You can find my complete auth0 vue typescript repo on RisingStack's Github.
Configure Auth0
First, you'll need to set up your Auth0 application. That part is very well written in the original tutorial, and I would like to be neither repetitive nor plagiarize Auth0's content, so please go ahead and read the first section there, then come back.
Create a Sample Application
Now we already start to diverge from the Auth0 tutorial.
If you already have an existing app, make sure that typescript, vue-class-component, and vue-property-decorator are present in your package.json, as we'll use class components.
If you don't have one, let's create a sample app.
$ vue create auth0-ts-vue
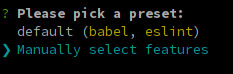
When prompted, select Manually select features.
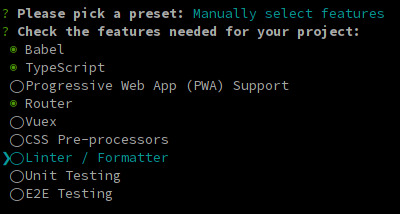
We'll need Babel, TypeScript, and Router.
The next 3 questions are about deciding whether you want to use class-style component syntax, Babel, and history mode. Hit enter for all three to answer "Yes". You might opt-out from history mode if you really want to.

It is entirely up to you if you want to use dedicated config files or not, and if you want to save this as a preset.
Grab a beverage of your preference while the dependencies are being installed.
Install the SDK
Once it's done, we need to install our auth0 dependencies.
$ cd auth0-ts-vue-example $ npm install @auth0/auth0-spa-js
The auth0-spa-js package comes with its own type definitions, so we're all set for now.
Modify your Webpack Config
If you followed the original Auth0 tutorials configuration part, you've set up your URLs to listen at port 3000. Time to hard code this into our webpack dev-server.
Create a vue.config.js file in the root directory of your app.
const webpack = require('webpack') module.exports = { devServer: { port: 3000 } }
This way, we don't have to specify the PORT env var when we run our app. We'd need to change it in Auth0 anyway all the time, while we're developing it.
Start the application
$ npm run serve
Leave it running so we can leverage Webpack's incremental build throughout the process.
Create an Authentication Wrapper
Have you ever created a Vue.js plugin? Well, now is the time!
The easiest way to use Auth0 in your app is to make it available on this in each of your components, just as you do with $route after you've installed Vue Router.
It would be nice if this was a separate dependency, but for the sake of simplicity, let it live inside our codebase.
Create a directory called auth inside your src dir then create the following files: index.ts auth.ts, VueAuth.ts, User.ts. The original tutorial has them all in one file. Still, in my opinion, it is easier to understand what's happening if we separate the matters a bit, and it also results in nicer type definitions too.
Our index.ts will be a simple barrel file.
export * from './auth'
auth.ts is where we define the plugin. VueAuth.ts is a wrapper Vue object around auth0-spa-js, so we can leverage the observability provided by Vue, and User.ts is a class to make its type definition nicer.
Defining our User
Let's go from the inside out and take a look at User.ts
import { camelCase } from 'lodash' export class User { sub: string names: string nickname: string picture: string updatedAt: string email: string emailVerified: boolean provider?: string id?: string givenName?: string familyName?: string locale?: string [key: string]: string | boolean | undefined constructor (auth0User: { [key: string]: string | boolean | undefined }) { if (!auth0User) return for (const key in auth0User) { this[key] = auth0User[key] } this.sub = auth0User.sub as string this.provider = this.sub.split('|')[0] this.id = this.sub.split('|')[1] } }
Now, this requires a bit of explanation. The first block of fields are the one that are always present, no matter what login scheme the user used. Sub is the OpenID ID Token's Subject Identifier, which contains the authentication provider (eg. auth0 or google) and the actual user id, separated by a |. The other mandatory fields are probably self-explanatory.
Next are provider and id, which are a result of splitting sub, so they should be there, but we cannot be sure. The last are the ones that were only present when Google OAuth is used as the provider. There might be more, depending on what connections you set up and what other data you request. Or you could even code custom fields in the returned ID Token... but I digress.
Last we tell TypeScript, that we want to be able to use the bracket notation on our object by adding [key: string]: any
Our constructor takes a raw user object with similar fields but snake_cased. That's why we camelCase them and assign each of them to our User object. Once we're done, we extract the provider and the id from the subfield.
Show me the Wrapper
Time to take a look at VueAuth.ts
import { Vue, Component } from 'vue-property-decorator' import createAuth0Client, { PopupLoginOptions, Auth0Client, RedirectLoginOptions, GetIdTokenClaimsOptions, GetTokenSilentlyOptions, GetTokenWithPopupOptions, LogoutOptions } from '@auth0/auth0-spa-js' import { User } from './User' export type Auth0Options = { domain: string clientId: string audience?: string [key: string]: string | undefined } export type RedirectCallback = (appState) => void @Component({}) export class VueAuth extends Vue { loading = true isAuthenticated? = false user?: User auth0Client?: Auth0Client popupOpen = false error?: Error async getUser () { return new User(await this.auth0Client?.getUser()) } /** Authenticates the user using a popup window */ async loginWithPopup (o: PopupLoginOptions) { this.popupOpen = true try { await this.auth0Client?.loginWithPopup(o) } catch (e) { console.error(e) this.error = e } finally { this.popupOpen = false } this.user = await this.getUser() this.isAuthenticated = true } /** Authenticates the user using the redirect method */ loginWithRedirect (o: RedirectLoginOptions) { return this.auth0Client?.loginWithRedirect(o) } /** Returns all the claims present in the ID token */ getIdTokenClaims (o: GetIdTokenClaimsOptions) { return this.auth0Client?.getIdTokenClaims(o) } /** Returns the access token. If the token is invalid or missing, a new one is retrieved */ getTokenSilently (o: GetTokenSilentlyOptions) { return this.auth0Client?.getTokenSilently(o) } /** Gets the access token using a popup window */ getTokenWithPopup (o: GetTokenWithPopupOptions) { return this.auth0Client?.getTokenWithPopup(o) } /** Logs the user out and removes their session on the authorization server */ logout (o: LogoutOptions) { return this.auth0Client?.logout(o) } /** Use this lifecycle method to instantiate the SDK client */ async init (onRedirectCallback: RedirectCallback, redirectUri: string, auth0Options: Auth0Options) { // Create a new instance of the SDK client using members of the given options object this.auth0Client = await createAuth0Client({ domain: auth0Options.domain, client_id: auth0Options.clientId, // eslint-disable-line @typescript-eslint/camelcase audience: auth0Options.audience, redirect_uri: redirectUri // eslint-disable-line @typescript-eslint/camelcase }) try { // If the user is returning to the app after authentication.. if ( window.location.search.includes('error=') || (window.location.search.includes('code=') && window.location.search.includes('state=')) ) { // handle the redirect and retrieve tokens const { appState } = await this.auth0Client?.handleRedirectCallback() ?? { appState: undefined } // Notify subscribers that the redirect callback has happened, passing the appState // (useful for retrieving any pre-authentication state) onRedirectCallback(appState) } } catch (e) { console.error(e) this.error = e } finally { // Initialize our internal authentication state when the page is reloaded this.isAuthenticated = await this.auth0Client?.isAuthenticated() this.user = await this.getUser() this.loading = false } } }
It might make sense to compare this with the original tutorial.
In the original tutorial, a Vue object is created while we're creating a class to make its annotation easier. There you can find it as:
// The 'instance' is simply a Vue object instance = new Vue({ ... })
Now let's unpack it.
First, we need to import a couple of types, including our User class.
Then we create the Auth0Options and RedirectCallback type aliases for convenience.
Instead of creating a simple Vue object, we define a Class Component. The public fields are the same as the data object in the original, whereas the static ones are the parameters passed to the plugin.
We differ in two substantial way from the original tutorial:
We have one less method: handleRedirectCallback is not used anywhere in the original, so we omitted it.
Instead of setting up the Auth0 Client in the Vue object's created hook, we use a separate method called init. Aside from that, the contents of the two are identical.
The reason for using a separate method is simple: The created hook is used in place of a constructor when it comes to Class Components, as the constructor of the class is usually called by Vue.
First, a component object is created just like when using Vue({}), passing it the data, methods, watchers, paramlist, and all the things we usually define for components. When this is done, the created hook is called. Later, when the component is actually used and rendered, the params are passed to it, and mounted, or updated.
The problem with the original one is that we cannot pass parameters to the created method. Neither can we write a proper constructor. So we need to have our own method we will call right after the object is instantiated just as it's done with created by Vue.
Let's dissect init a bit.
First, we create and auth0Client.
Then, in the try-catch block, we check if the user is returning after authentication and handle it. We check if the query params contain any signs of redirection. If they do, we call auth0Client.handleRedirectCallback, which parses the URL and either rejects with an error or resolves with and appState.
Then, we pass on the appState to onRedirectCallback. This is a function we can pass to the plugin when we install it to Vue, so we can handle the app level ramifications of a login.
For the other methods, getUser is a simple wrapper around the authClient's getUser method. We pass on the resolved promise to our User's constructor to create a nicely looking User object.
Next, there is loginWithPopup, which we won't use, as popups can be blocked by browsers. So we'll go with the redirect way, where the user is redirected to Auth0, login, then the callback URL is called by Auth0 passing information to our app in the callback URL's query.
The information in the URL is parsed by auth0Client.handleRedirectCallback which will return a Promise<RedirectCallbackResult>. The Promise will be rejected if there is an error in the authentication flow.
We have a couple of simple wrappers around the auth0Client. loginWithRedirect initiates the flow I described above, logout speaks for itself.
Finally, we set up the user and check if we're authenticated.
Let's turn this into a Plugin
Now, all we need to do is create a proper plugin.
If you take a look at Vue's documentation about plugins, you'll see that we need to create an object that exposes an install method. This method will be called when we pass the object to Vue.use and it will receive the Vue constructor and optionally... options.
type Auth0PluginOptions = { onRedirectCallback: RedirectCallback, redirectUri: string, domain: string, clientId: string, audience?: string, [key: string]: string | RedirectCallback | undefined } export const Auth0Plugin = { install (Vue: VueConstructor, options: Auth0PluginOptions) { Vue.prototype.$auth = useAuth0(options) } }
In our install method, we add an $auth member to any Vue object, so the VueAuth object is available everywhere, just as vue-router is.
Let's implement the useAuth function.
/** Define a default action to perform after authentication */ const DEFAULT_REDIRECT_CALLBACK = () => window.history.replaceState({}, document.title, window.location.pathname) let instance: VueAuth /** Returns the current instance of the SDK */ export const getInstance = () => instance /** Creates an instance of the Auth0 SDK. If one has already been created, it returns that instance */ export const useAuth0 = ({ onRedirectCallback = DEFAULT_REDIRECT_CALLBACK, redirectUri = window.location.origin, ...options }) => { if (instance) return instance // The 'instance' is simply a Vue object instance = new VueAuth() instance.init(onRedirectCallback, redirectUri, options as Auth0Options) return instance }
useAuth returns a singleton VueAtuh instance, and extracts the onRedirectCallback and redirectUri from the options object. What's left is an Auth0Options type which we'll pass on straight to the auth0Client.
You can see the init method in action we created earlier. Then VueAuth is instantiated if it hasn't been already. Above that, we also expose a getInstance function, in case we need to use it outside of a Vue component.
Let's see here the whole auth.ts for your copy-pasting convenience:
import { VueConstructor } from 'vue' import { VueAuth, Auth0Options, RedirectCallback } from './VueAuth' type Auth0PluginOptions = { onRedirectCallback: RedirectCallback, domain: string, clientId: string, audience?: string, [key: string]: string | RedirectCallback | undefined } /** Define a default action to perform after authentication */ const DEFAULT_REDIRECT_CALLBACK = (appState) => window.history.replaceState({}, document.title, window.location.pathname) let instance: VueAuth /** Returns the current instance of the SDK */ export const getInstance = () => instance /** Creates an instance of the Auth0 SDK. If one has already been created, it returns that instance */ export const useAuth0 = ({ onRedirectCallback = DEFAULT_REDIRECT_CALLBACK, redirectUri = window.location.origin, ...options }) => { if (instance) return instance // The 'instance' is simply a Vue object instance = new VueAuth() instance.init(onRedirectCallback, redirectUri, options as Auth0Options) return instance } // Create a simple Vue plugin to expose the wrapper object throughout the application export const Auth0Plugin = { install (Vue: VueConstructor, options: Auth0PluginOptions) { Vue.prototype.$auth = useAuth0(options) } }
As you can see, we're extending the Vue constructor with a new instance member. If we try to access it in a component, the TypeScript compiler will start crying as it has no idea what happened. We'll fix this a bit later down the line.
Now, the Auth0Options are the ones that are needed for the client to identify your tenant. Copy the Client ID and Domain from your Auth0 applications settings and store them in a file called auth.config.json for now. It would be nicer to inject them as environment variables through webpack, but as these are not sensitive data, we'll be just fine like that as well.
With all that said, I will not include my auth.config.json in the reference repo, only an example you'll need to fill in with your data.
{ "domain": "your tenant's domain", "clientId": "your app's clientId" }
Make sure to add "resolveJsonModule": true, to your tsconfig.json.
Finally, we're ready to create our main.ts.
import Vue from 'vue' import App from './App.vue' import router from './router' import { Auth0Plugin } from './auth' import { domain, clientId } from '../auth.config.json' Vue.use(Auth0Plugin, { domain, clientId, onRedirectCallback: (appState) => { router.push( appState && appState.targetUrl ? appState.targetUrl : window.location.pathname ) } }) Vue.config.productionTip = false new Vue({ router, render: h => h(App) }).$mount('#app')
The onRedirectCallback redirects the user to a protected route after they have authenticated. We'll cover this a bit later when we create an actual protected route.
Log in to the App
Time to put the authentication logic to use.
First, we'll add a Login / Logout button to Home.vue
<template> <div class="home"> <img alt="Vue logo" src="../assets/logo.png" /> <HelloWorld msg="Welcome to Your Vue.js App" /> <!-- Check that the SDK client is not currently loading before accessing is methods --> <div v-if="!$auth.loading"> <!-- show login when not authenticated --> <button v-if="!$auth.isAuthenticated" @click="login">Log in</button> <!-- show logout when authenticated --> <button v-if="$auth.isAuthenticated" @click="logout">Log out</button> </div> </div> </template>
We'll also need to update the logic in the script tag of Home
<script lang="ts"> import { Component, Vue } from 'vue-property-decorator' import HelloWorld from '@/components/HelloWorld.vue' @Component({ components: { HelloWorld } }) export default class Home extends Vue { login () { this.$auth.loginWithRedirect({}) } // Log the user out logout () { this.$auth.logout({ returnTo: window.location.origin }) } } </script>
First, we turn the original example component into a Class Component. Second, the methods simply call the methods of VueAuth exposed by our Auth0Plugin.
But what's that? this.$auth is probably underlined in your IDE. Or if you try to compile the code you'll get the following error:
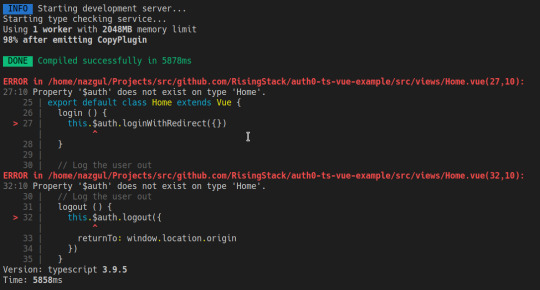
Of course, we still have to tell the compiler that we have augmented the Vue constructor with our $auth member.
Let's create a shims-auth0.d.ts file in our src directory. If you're using VSCode, you might need to reload the window to make the error go away.
import { VueAuth } from './auth/VueAuth' declare module 'vue/types/vue' { interface Vue { $auth: VueAuth } }
Checkpoint
Now, let's try to compile our code. If you have configured your Auth0 credentials correctly, you should be redirected to the Auth0 Universal Login page when you click Login, and back to your app against once you have logged in.
Then, you should be able to click Log out and have the application log you out.
Display the User's Profile
So far so good, but let's try to create a protected route. Displaying the user's profile seems like a prime target for that.
Let's create a file called Profile.vue in src/views.
<template> <div> <div> <img :src="$auth.user.picture"> <h2></h2> <p></p> </div> <div> <pre></pre> </div> </div> </template>
That's it. We read all the information we need from $auth.user we've already set up in VueAuth.ts.
Add a route to the Profile component
Let's update the app's routing configuration, so the users can access their profile.
Open up src/router/index.ts and add the following to the routes array.
//.. other imports // NEW - Import the profile component import Profile from "../views/Profile.vue"; Vue.use(VueRouter) const routes: Array<RouteConfig> = [ routes: [ // .. other routes and pages .. // NEW - add the route to the /profile component { path: "/profile", name: "profile", component: Profile } ] }); export default router
Now we need to update the navigation bar in App.vue
<template> <div id="app"> <div id="nav"> <router-link to="/">Home</router-link> | <router-link to="/about">About</router-link> <span v-if="$auth.isAuthenticated"> | <router-link to="/profile">Profile</router-link> </span> </div> <router-view/> </div> </template>
Checkpoint
The code should compile, so let's check if we can navigate to the Profile page and see the data. For added profit, try logging in with both Google and register a username and password. Take note of the data you get.
Secure the Profile Page
We have the route, time to make it protected. Let's create a new file in src/auth called authGaurd.ts.
import { getInstance } from './auth' import { NavigationGuard } from 'vue-router' export const authGuard: NavigationGuard = (to, from, next) => { const authService = getInstance() const fn = () => { // Unwatch loading unwatch && unwatch() // If the user is authenticated, continue with the route if (authService.isAuthenticated) { return next() } // Otherwise, log in authService.loginWithRedirect({ appState: { targetUrl: to.fullPath } }) } // If loading has already finished, check our auth state using `fn()` if (!authService.loading) { return fn() } // Watch for the loading property to change before we check isAuthenticated const unwatch = authService.$watch('loading', (loading: boolean) => { if (loading === false) { return fn() } }) }
First, we put auth.ts's getInstance to use. Then we create a function that checks if the user is authenticated. If they are, we call next, otherwise redirect them to login.
However, we should only call this function, if the authService is not loading, as otherwise, we still don't have any settled information about the login process.
If it is still loading, we set up a watcher for authService.loading, so when it turns true, we call our guard function. Also, please notice that we use the unwatch function returned by $watch to clean up after ourselves in fn.
I personally prefer giving descriptive names to my functions, but I only wanted to change things for the sake of either type annotation, or stability, so forgive me for keeping fn as it is to maintain parity with the JS tutorial.
Guidance with Auth0, Vue & TypeScript
Auth0 and all other authentication providers relieve us from the tedious job of handling user management ourselves. Auth0 itself excels in having a lot of educational resources for their users. The original Vue tutorial was really helpful, but seeing that TypeScript is becoming the industry standard when it comes to writing anything that should be run by JavaScript runtimes, it would be nice to see more TypeScript tutorials.
I hope this article manages to fill in a bit of this gap. If you liked what you just read, please share it with those who might need guidance with Auth0, Vue & TypeScript!
Happy authenticating!
Auth0: Vue & TypeScript Quickstart SDK - The Missing Docs published first on https://koresolpage.tumblr.com/
0 notes
Link
Vue Composition API によって Vue.js にも React Hooks のようなロジックの再利用性の高い開発体験がもたらされようとしています。 しかし、まだ「Composition API の良さをわかっていない」という方や「Composition API をうまく利用した書き方がわからない」という方も多いかと思います。 本記事では Composition API 時代の便利ライブラリ VueUse を用いた実装例や、 VueUse 自体の実装がどのようなものか紹介します。 Composition API の良さや雰囲気もキャッチアップしていただければ幸いです。 VueUse とは? VueUse は Anthony Fu さん1が中心に開発しているライブラリで、Composition API を用いた便利系関数を数多く集めたライ��ラリです。 例えば、ブラウザ上のマウスポインタの座標をリアクティブに取得する useMouse(), ブラウザ API の localStorage を使って状態を保持できる useLocalStorage(), 負荷対策のために連続する関数呼び出しを防ぐ useDebounceFn() 2などといった関数が提供されています。 公式サイト: https://vueuse.js.org/ GitHub: antfu/vueuse npm: @vueuse/core 検証環境の構築 GitHub リポジトリの Description に記載通り、Vue 2系・3系のどちらでも利用可能です: 🧰 Collection of Composition API utils for Vue 2 and 3 https://vueuse.js.org/ 今回は Vue CLI で立ち上げた Vue 2.6 系のプロジェクトに @vue/composition-api をプラグインとして追加した環境で検証します。 動作確認した環境 macOS Catalina Node.js 12.18.1 npm 6.14.5 Vue CLI v4.4.4 Chrome 83 Vue CLI のインストール Vue CLI をグローバルインストールしたくない方は、以下の手順の vue コマンド部分を npx @vue/cli に読み替えていただいても大丈夫です。 プロジェクトの作成 vue-2-vueuse-trial というプロジェクト名で環境を構築していきます: vue create vue-2-vueuse-trial 設定は以下のようにしました: Vue CLI v4.4.4 ? Please pick a preset: Manually select features ? Check the features needed for your project: Babel, TS, Linter ? Use class-style component syntax? No ? Use Babel alongside TypeScript (required for modern mode, auto-detected polyfills, transpiling JSX)? No ? Pick a linter / formatter config: Basic ? Pick additional lint features: Lint on save ? Where do you prefer placing config for Babel, ESLint, etc.? In dedicated config files ? Save this as a preset for future projects? No プラグインと VueUse の導入 プロジェクトディレクトリが出来上がったら、@vue/composition-api と VueUse を npm install します: cd vue-2-vueuse-trial npm i @vueuse/core@vue2 @vue/composition-api src/main.ts に Vue.use(VueCompositionApi) を追加します3: src/main.ts import Vue from 'vue' +import VueCompositionApi from '@vue/composition-api' import App from './App.vue' +Vue.use(VueCompositionApi) Vue.config.productionTip = false npm run serve で開発ビルドを開始してください。 VueUse の関数を使ってみる useMouse() リアクティブにマウスポインタの座標が取得できる useMouse() を使ってみます: src/App.vue <template {{ x }}, {{ y }} </template <script lang="ts" import { defineComponent } from '@vue/composition-api' import { useMouse } from '@vueuse/core' export default defineComponent({ setup() { // tracks mouse position const { x, y } = useMouse() return { x, y } } }) </script これだけでマウスポインタの座標がリアクティブに反映されていることがわかるかと思います。 useMouse() の実装を確認すると useEventListener() という関数を使っていて、 useEventListener() はコンポーネントのマウント時(Composition API の onMounted() を利用)にイベントリスナーを追加していることがわかります: https://github.com/antfu/vueuse/blob/master/packages/core/useMouse/index.ts https://github.com/antfu/vueuse/blob/master/packages/core/useEventListener/index.ts VueUse ではこのような関数��より抽象的な関数を参照しているパターンの実装が所々に見られます。 Composition API を用いた良い実装の例として知っておくと良いかと思います。 useLocalStorage() ブラウザ API の localStorage を使って状態を保持できる useLocalStorage() を使ってみます。 まずは useLocalStorage() を使わず、 VueUse がなくても利用できる reactive() 4 を使ってみましょう: src/App.vue <template name: <input v-model="state.name" color: <input v-model="state.color" {{ state }} </template <script lang="ts" import { defineComponent, reactive } from '@vue/composition-api' export default defineComponent({ setup() { const state = reactive({ name: 'Apple', color: 'red', }) return { state } } }) </script name, color を変更すると、下に表示されている JSON 形式の state の表示も更新される画面が表示されます: 上記の実装では name を Banana, color を yellow のように変更してページをリロードすると、元の状態(name が Apple, color が red)に戻ります。 以下のように ブロックを変更し、reactive() の代わりに useLocalStorage() を利用するように変更してみます: import { defineComponent } from '@vue/composition-api' import { useLocalStorage } from '@vueuse/core' export default defineComponent({ setup() { // persist state in localStorage const state = useLocalStorage( 'my-storage', { name: 'Apple', color: 'red', }, ) return { state } } }) state が localStorage に保存されるようになったので、ページをリロードしても状態が保持されるようになりました。 サンプルアプリとしてよくある ToDo リストの状態管理に useLocalStorage() を使うようにすると、手軽にデータを保存できる ToDo リストにできて楽しいかもしれません。 公式サイトが Storybook でできている件 公式サイトが Storybook でできていて、各関数を即座に試せるリファレンスとなっています。 各関数のページ下部には関数の "Source" へのリンクがあり、ソースを見てどのような実装になっているか追っていくと Composition API を用いた良い実装の勉強となるかと思います。 所感 VueUse は多くの便利関数を提供しているので、今後お世話になる可能性が高いライブラリだと思いました。 まだ試せていない関数が多くあるので、使ってみたりコードを読んだりしてみようかと思います。
0 notes
Photo

Building With Vue.js 2 and Firebase
Introduction
Firebase is Google's mobile platform that helps you develop high-quality apps and grow your business. In this tutorial, you will make good use of one of Firebase's awesome features: the Realtime Database.
You will build a single page application to create books. This book will be saved to your Firebase database, and you will be able to retrieve and delete books you have created.
Let's get started.
Set Up Firebase
Go to Google's Firebase page to create a new account. When done with that, log in to your console. Click on the option to add a project. Enter your project details and click on the button CREATE PROJECT.
This will lead you to your console. The Firebase console helps you manage your Firebase configuration settings.
For this tutorial, you'll need to make access to your database public. From the panel on the left, select Database. Select Realtime Database from the options that show next by clicking GET STARTED. Making your database public involves editing the rules. So click RULES on the page that loads next.
Make your rules look like this.
{ "rules": { ".read": true, ".write": true } }
Click the option to PUBLISH when done.
With this rule, authentication is not required to perform read and write actions on your database. This is needful for the application you will be building in this tutorial.
Set Up a Project Using Vue CLI
Vue CLI allows you to scaffold Vue.js projects. If you do not have it on your machine, you can get it by running:
npm install -g vue-cli
This will install it globally on your machine. Here is how Vue-CLI is used.
vue init <template-name> <project-name>
To learn more about Vue-CLI, check the GitHub page.
For this project you will use webpack templates, so run the command below from your terminal.
vue init webpack vue-book
These are the installation options I used.
? Project name vue-book ? Project description A Vue.js project ? Author izuchukwu1 <[email protected]> ? Vue build standalone ? Install vue-router? No ? Use ESLint to lint your code? Yes ? Pick an ESLint preset Standard ? Setup unit tests with Karma + Mocha? No ? Setup e2e tests with Nightwatch? No vue-cli · Generated "vue-book". To get started: cd vue-book npm install npm run dev Documentation can be found at http://ift.tt/28JYKuJ
Navigate to your project folder. The files and folders generated by Vue-CLI have a tree like this.
├── build │ ├── build.js │ ├── check-versions.js │ ├── dev-client.js │ ├── dev-server.js │ ├── utils.js │ ├── vue-loader.conf.js │ ├── webpack.base.conf.js │ ├── webpack.dev.conf.js │ └── webpack.prod.conf.js ├── config │ ├── dev.env.js │ ├── index.js │ └── prod.env.js ├── index.html ├── package.json ├── README.md ├── src │ ├── App.vue │ ├── assets │ │ └── logo.png │ ├── components │ │ └── HelloWorld.vue │ └── main.js └── static 6 directories, 19 files
Now run the command to install your dependencies.
npm install
When done, you can start your dev server by running:
npm run dev
Add Firebase to the Project
To bind Firebase data to Vue.js data properties, we will make use of the VueFire library. You can check more about it on GitHub.
Run the command below:
npm install firebase vuefire --save
Open up main.js to add VueFire. Make your main.js file look like what I have below.
#src/main.js // The Vue build version to load with the `import` command // (runtime-only or standalone) has been set in webpack.base.conf with an alias. import Vue from 'vue' import App from './App' import VueFire from 'vuefire' Vue.use(VueFire) Vue.config.productionTip = false /* eslint-disable no-new */ new Vue({ el: '#app', template: '<App/>', components: { App } })
Set Up the Firebase Connection
Go to your Firebase console, and click on the Overview link on the left panel. Select the option to add Firebase to your web app. Copy the snippet that pops up in the window to a text file. The snippet contains your apiKey, authDomain, databaseURL, projectId, storageBucket, and messagingSenderId. You need these details to be able to access your Firebase database.
You start by importing Firebase from the core Firebase library. A Firebase instance is created using the initializeApp method. The snippet you copied has to be passed to this method as an object. This has to be done in the script section of your App.vue, like this.
#src/App.vue import Firebase from 'firebase' let config = { apiKey: "...", authDomain: "...", databaseURL: "...", storageBucket: "...", messagingSenderId: "..." }; let app = Firebase.initializeApp(config) let db = app.database() let booksRef = db.ref('books')
After creating the Firebase instance, the database reference is obtained by using app.database().
Book Listing
Since VueFire makes it easy to bind Vue.js data properties to Firebase, implementing the books listing feature requires you to add this.
firebase: { books: booksRef },
You add that below:
name: 'app',
Now you have access to the book items from your database. The template will look like this.
<div class="panel-body"> <table class="table table-striped"> <thead> <tr> <th>Title</th> <th>Author</th> </tr> </thead> <tbody> <tr v-for="book in books"> <td><a v-bind:href="book.url"></a></td> <td></td> </tr> </tbody> </table> </div>
The v-for directive is used to iterate through the available books. Each book will be outputted in a new table row.
Adding a New Book
To put in place the addition of new books, you need to first define the data model that will be used.
data () { return { newBook: { title: '', author: '', url: 'http://', isbn: '' } } }
Next, set up the template to look like this.
<div class="panel panel-default"> <div class="panel-heading"> <h3 class="panel-title">Add New Books</h3> </div> <div class="panel-body"> <form id="form" class="form-inline" v-on:submit.prevent="addBook"> <div class="form-group"> <label for="bookTitle">Title:</label> <input type="text" id="bookTitle" class="form-control" v-model="newBook.title"> </div> <div class="form-group"> <label for="bookAuthor">Author:</label> <input type="text" id="bookAuthor" class="form-control" v-model="newBook.author"> </div> <div class="form-group"> <label for="bookUrl">Url:</label> <input type="text" id="bookUrl" class="form-control" v-model="newBook.url"> </div> <input type="submit" class="btn btn-primary" value="Add Book"> </form> </div> </div>
The v-model directive is used to bind the newBook properties to the corresponding input.
The v-on directive will lead us to create an event handler method that gets called whenever a new book is to be created. Here is what the event handler should look like.
methods: { addBook: function() { booksRef.push(this.newBook) this.newBook.title = '', this.newBook.author = '', this.newBook.url = 'http://', this.newBook.isbn = '' }, },
The addBook method helps insert new book objects into the Firebase database. The data is also synced across all clients.
Deleting Books
Let's add the ability to delete books. Add another column to the book listing.
<td> <span class="glyphicon glyphicon-trash" aria-hidden="true" v-on:click="removeBook(book)"></span> </td>
Let's put in place a method that gets called each time the button is clicked. The method is passed the book you intend to delete, which is actually the key to the book, as you will see soon. The remove() is called on the returned book to delete it from the database.
Here is what the method looks like.
removeBook: function (book) { booksRef.child(book['.key']).remove() }
With that, you are done with App.vue. Putting everything together, here is how your App.vue file should look.
<template> <div id="app" class="container"> <div class="page-header"> <h1>Vue Book</h1> </div> <div class="panel panel-default"> <div class="panel-heading"> <h3>Add Book</h3> </div> <div class="panel-body"> <form id="form" class="form-inline" v-on:submit.prevent="addBook"> <div class="form-group"> <label for="bookTitle">Title:</label> <input type="text" id="bookTitle" class="form-control" v-model="newBook.title"> </div> <div class="form-group"> <label for="bookAuthor">Author:</label> <input type="text" id="bookAuthor" class="form-control" v-model="newBook.author"> </div> <div class="form-group"> <label for="bookUrl">URL:</label> <input type="text" id="bookUrl" class="form-control" v-model="newBook.url"> </div> <div class="form-group"> <label for="bookIsbn">ISBN:</label> <input type="text" id="bookIsbn" class="form-control" v-model="newBook.isbn"> </div> <input type="submit" class="btn btn-primary" value="Add Book"> </form> </div> </div> <div class="panel panel-default"> <div class="panel-heading"> <h3>Books Lists</h3> </div> <div class="panel-body"> <table class="table table-stripped"> <thead> <tr> <th>Title</th> <th>Author</th> <th></th> </tr> </thead> <tbody> <tr v-for="book in books"> <td> <a v-bind:href="book.url"></a> </td> <td> </td> <td> <span class="glyphicon glyphicon-trash" aria-hidden="true" v-on:click="removeBook(book)"></span> </td> </tr> </tbody> </table> </div> </div> </div> </template> <script> import Firebase from 'firebase' let config = { apiKey: "...", authDomain: "...", databaseURL: "...", storageBucket: "...", messagingSenderId: "..." } let app = Firebase.initializeApp(config) let db = app.database() let booksRef = db.ref('books') export default { name: 'app', firebase: { books: booksRef }, data () { return { newBook: { title: '', author: '', url: 'http://', isbn: '' } } }, methods: { addBook: function() { booksRef.push(this.newBook) this.newBook.title = '', this.newBook.author = '', this.newBook.url = 'http://', this.newBook.isbn = '' }, removeBook: function(book) { booksRef.child(book['.key']).remove() } } } </script> <style> #app { font-family: 'Avenir', Helvetica, Arial, sans-serif; -webkit-font-smoothing: antialiased; -moz-osx-font-smoothing: grayscale; color: #2c3e50; margin-top: 60px; } </style>
In the template, I added some Bootstrap classes. For these to work, open your index.html file and make it look like this.
<!DOCTYPE html> <html> <head> <meta charset="utf-8"> <title>vue-book</title> <link rel="stylesheet" href="http://ift.tt/2apRjw3" integrity="sha384-BVYiiSIFeK1dGmJRAkycuHAHRg32OmUcww7on3RYdg4Va+PmSTsz/K68vbdEjh4u" crossorigin="anonymous"> <link rel="stylesheet" href="http://ift.tt/2hbdoRr" /> </head> <body> <div id="app"></div> <!-- built files will be auto injected --> <script src="http://ift.tt/2nfnDrE" integrity="sha256-hwg4gsxgFZhOsEEamdOYGBf13FyQuiTwlAQgxVSNgt4=" crossorigin="anonymous"></script> <script src="http://ift.tt/2aHTozy" integrity="sha384-Tc5IQib027qvyjSMfHjOMaLkfuWVxZxUPnCJA7l2mCWNIpG9mGCD8wGNIcPD7Txa" crossorigin="anonymous"></script> </body> </html>
Conclusion
JavaScript has become extremely popular and is now capable of building mature applications (as we've seen above). If you’re looking for additional resources to study or to use in your work, check out what we have available in the Envato Market.
In this tutorial, you learned about Firebase. You were able to connect Vue.js and Firebase using VueFire. Your application can make read and write requests to your Firebase database.
You can go further by adding more features like categories and description.
by Chinedu Izuchukwu via Envato Tuts+ Code http://ift.tt/2zGQubw
3 notes
·
View notes
Text
5 Best JavaScript Editors: Developers Rank the Best Tools Worldwide
New Post has been published on https://is.gd/gMRjl2
5 Best JavaScript Editors: Developers Rank the Best Tools Worldwide


JavaScript has continued to grow in importance over the last decade. In fact, according to StackOverflow’s Insights, JavaScript has been the most popular programming language for the past 7 years, edging out popular languages including Python, C# and Java. The State of Javascript survey, which includes responses from over 20,000 developers, reveals that five JavaScript editors stand out accounting 95% of all usage!
1. Visual Studio Code

VSCode is the dominant leader in online JavaScript editors. Featuring cross platform support on Linux, macOS and Windows, VSCode has built in code completion for your node.js modules and JavaScript code. As expected with Microsoft, Typescript is a first class citizen. Git is seamlessly integrated, meaning you can make commits, reviews diffs and more in real-time all without leaving the editor. Visual Studio Code is a lightweight code editor that was built from the ground up for speed. Autocompletion goes beyond function completion and also offers documentation and function argument information as you develop. Microsoft has done an excellent job with community engagement and VSCode has a vibrant developer community creating powerful extensions which save additional time. Sought after features such as live preview and chrome debugging with devtools are easily accessible through the Visual Studio Marketplace. In addition, if you really want to get under the covers, the entire text editor source code is hosted on github as open source software.
Sublime Text

A commercial editor with a large user base, developers find the $80 fee for Sublime Text well worthwhile due to its speed (in part derived from it being written in C++). As with VSCode, there is a great developer and plugin community that has filled in the gaps creating a powerful editor environment for JavaScript. Often referred to as a midpoint between bloated IDE and lean editors such as VIM, Sublime opens files fast and leans on plugins via package control to make it a great experience for JS development. Leveraging Babel for intelligent syntax highlighting /smart code completion and gitgutter for diffs and pushes, Sublimelinter for seamless ESlint and JShint tie-ins makes Sublime a fast, capable and lightweight JavaScript editor.
VIM

One of the earliest and still very popular text editors, VIM is highly customizable and configurable with exceptional keyboard shortcut support. It’s long history and keyboard dominated interface have produced a developer community with must have plugins like prettier, ALE and powerful command line support enabling you to leverage ESLint and Flow. VIM is incredibly customizable and no two JavaScript developers use it in the same way. If you started early with VIM, you may be very productive in it, but for those new to JavaScript development,, VSCode, Sublime Text or Jetbrains WebStorm is a better choice.
WebStorm

Jetbrains popular WebStorm is a paid editor that has a loyal following and is regularly updated. Branded, “the smartest JavaScript IDE,” WebStorm lives up to the marketing by offering coding assistance across Node.js, HTML and CSS. It also supports built in assistance with popular JavaScript frameworks including Meteor, Angular, React, jQuery, vue.js and electron. Github support is integrated within the IDE and other version control options are supported through official plugins including git integration, Mercurial, Perforce, and Subversion. A built in debugger for Node.js with test integration, tracing and profiling along with seamless command line tool integration round out this IDE. Attention to detail and workflow optimization including automatic saving of file changes is a hallmark of WebStorm. Regular updates with new features and a Early Access Program make the paid subscription worthwhile for many developers.
Atom

Marketed as a hackable text editor for the 21st century, Atom has been growing in popularity. Atom has already established a loyal following and vibrant developer community. Packages give advanced integration options offering real-time collaboration and pair coding, git and github integration and more. A cross platform editor with OS X, Windows and Linux support, Atom runs on Electron and enables deep customization and styling. As a JavaScript developer you can customize Atom using JavaScript, HTML, CSS and Node.js.
Conclusion
Developers are a unique breed, creating thousands of diverse solutions to meet every specific need or niche. Modern editors and IDEs have embraced plugin architectures which allow quick customization and levage community contributions making it possible for generalized editors such as VSCode to meet more developer’s unique needs. This enables seasoned developers to focus on their JavaScript projects rather than hacking their dev environment while allowing new developers to hit the ground running.
This article was originally published on JSCharting.
0 notes
Text
Reactを使ったモダンなフロントエンド開発の環境構築 - Qiita

はじめに
Reactを中心としたフロントエンド開発において、以下のような構成を見かけることが多いと思います。
UIライブラリとしてReact
型のある言語としてTypeScript
スタイル定義としてstyled-components
コンポーネントの開発環境としてStorybook
LinterとしてESLint
FormatterとしてPrettier
この記事では、各種ライブラリについて紹介したのち、それらを使う場合の環境構築についてハンズオン形式で説明します。
各種ライブラリの紹介
まず、各ライブラリがどのようなものなのかを簡単に紹介します。
ライブラリの使い方などは公式ドキュメントなどを参照するようにしてください。
React
ドキュメント
ReactはUI(ボタンやフォームなど)コンポーネントを作成するためのJavaScriptライブラリです。 似た立ち位置として、Vue.jsが上げられることも多いと思います。
公式ドキュメントが非常に充実しているので、初めての方は、Tutorialをやってみるのが良さそうです。
TypeScript
ドキュメント
TypeScriptは型を持ったJavaScriptのスーパーセットとして人気なプログラミング言語です。 コンパイルすると、JavaScriptのソースコードになります。
公式ドキュメント以外に、TypeScript Deep Diveが情報量が多く、分かりやすいと思います。
styled-components
ドキュメント
styled-componentsは、 CSSとほぼ同様のシンタックスを使ってスタイリングされたReactコンポーネントを作成できるライブラリです。 .cssファイルにCSSを書くのではなく、.jsや.tsxファイル内でCSSを書くようなイメージです。
公式ドキュメントを参照しながら、使ってみるのが良いと思います。
Storybook
ドキュメント
Storybookは、UIコンポーネントをアプリケーションとは独立した環境で開発できるツールです。 静的サイトとしてビルドすることで、コンポーネントのカタログとしても利用できます。
React用のチュートリアルも用意されています。
ESLint
ドキュメント
ESLintはJavaScriptのLinterです。 Linterを使うことで、コードの一貫性を高め、バグを未然に防げる可能性が高まります。
@typescript-eslint/eslint-pluginを使うことで、TypeScriptでも利用可能です。
Prettier
ドキュメント
Prettierはフロントエンド開発において人気なコードフォーマッターです。 JavaScriptをはじめとした複数の言語をサポートしています。
Prettierを使うことで、コードのフォーマットを意識することなく統一することができます。
環境構築
GitHubでリポジトリの作成から各種ライブラリのインストール、設定ファイルの作成などを行います。
最終的に、以下の事ができたらOKです。
npm run storybook: Storybookを起動して、React+TypeScript+styled-componentsで作成したコンポーネントが表示できる
npm run lint: ESLint + Prettierを使ってコードのチェックが行える
npm run tsc: TypeScriptのコードに対してコンパイルチェックが行える
Step0 事前準備
npm/Node.js/gitがインストールされていることを確認してください。
$ git --version git version 2.20.1 (Apple Git-117) $ node -v v12.4.0 $ npm -v 6.9.0
バージョンを揃える必要はありませんが、必要に応じてLTSまたは最新版を利用するようにしましょう。
Step1 リポジトリの作成/git clone/gitignore
GitHubで今回作業をするリポジトリを作成しましょう。
新しいリポジトリを作成
リポジトリを作成後は、そのリポジトリをクローンしておいてください。
また、好きなgitignoreをリポジトリに配置しておきます。
例) Node.gitignoreを利用する場合
$ wget https://raw.githubusercontent.com/github/gitignore/master/Node.gitignore $ mv Node.gitignore .gitignore
これでリポジトリの準備は整いました!
Step2 package.jsonを作成する
npmのinitコマンドを使って、package.jsonの雛形を作成しましょう。
$ npm init -y
Wrote to /dev/github.com/toshi-toma/todo-app-react/package.json:
{ "name": "todo-app-react", "version": "1.0.0", "description": "A Todo Application built with React, styled-components, TypeScript, E SLint, Prettier, and Storybook", "main": "index.js", "scripts": { "test": "echo \"Error: no test specified\" && exit 1" }, "repository": { "type": "git", "url": "git+ssh://[email protected]/toshi-toma/todo-app-react.git" }, "keywords": [], "author": "", "license": "ISC", "bugs": { "url": "https://github.com/toshi-toma/todo-app-react/issues" }, "homepage": "https://github.com/toshi-toma/todo-app-react#readme" }
npmのCLIには便利なコマンドがたくさん用意されています。ドキュメントをさ��と見るだけでも面白いと思います。
Step3 Reactでコンポーネントを作成して、Storybookに表示する
Reactでコンポーネントを作成して、そのコンポーネントをStorybookに表示して動作や見た目を確認していくとスムーズな開発が行えます。
まずはReactとstyled-componentsでシンプルなコンポーネントを作成してみましょう。
必要なライブラリをインストールします。
$ npm i react react-dom styled-components ... + [email protected] + [email protected] + [email protected] added 11 packages from 12 contributors, updated 2 packages and audited 31753 packages in 5.34s
Reactとstyled-componentsでシンプルなボタンを作成してみましょう。
src/index.js
import React from "react"; import styled from "styled-components";
const Button = styled.button` background-color: #454545; color: #fff; `;
const SimpleButton = () => <Button>button</Button>; // 省略可能
export default SimpleButton;
次に、作成したボタンをStorybookで表示しましょう。
Googleで「Storybook React」と検索するとStorybook for Reactというタイトルの公式ドキュメントが出てくると思います。
Storybook for React
ドキュメントを読むと、Automatic setupコマンドが用意されているようです。
実行してみましょう。
$ npx -p @storybook/cli sb init --type react
...
+ @storybook/[email protected] + @storybook/[email protected] + @babel/[email protected] + [email protected] + @storybook/[email protected] + @storybook/[email protected] added 1147 packages from 843 contributors and audited 31533 packages in 41.347s
...
• Installing dependencies. ✓
To run your storybook, type:
npm run storybook
For more information visit: https://storybook.js.org
これでStorybookの環境構築及びReactコンポーネントを表示する準備が整いました!簡単ですね。
npm run storybookを実行するとStorybookが表示されると思います。
あとは、先程作成したボタンをStorybookに表示しましょう。
stories/index.stories.js
import React from 'react';
import { storiesOf } from '@storybook/react'; import { action } from '@storybook/addon-actions';
import Button from '../src/index';
storiesOf('Button', module) .add('with text', () => <Button onClick={action('clicked')}>Hello Button</Button>);
無事にReactとstyled-componentsで作成したコンポーネントをStorybookに表示することができました🎉
Step4 TypeScriptでコンポーネントを作成して、Storybookに表示する
次はReactとstyled-componentsに加えてTypeScriptを使ってコンポーネントを作成して、そのコンポーネントをStorybookに表示します。
まずはStep3で作成したコンポーネントをTypeScript化しましょ��。
必要なライブラリをインストールします。 TypeScriptに加えて、型情報もインストールします。
$ npm i -D typescript $ npm i -D @types/{react,react-dom,styled-components}
TypeScriptの設定ファイルの雛形をtscコマンドで作成します。
$ npx tsc --init message TS6071: Successfully created a tsconfig.json file.
tsconfig.jsonというファイルが作成されたので、React用に編集します。
tsconfig.json
{ "compilerOptions": { "target": "es5", "module": "commonjs", "lib": ["es2018", "dom"], "jsx": "react", "strict": true, "rootDirs": [ "src" ], "types": [ "react" ], "esModuleInterop": true }, "include": [ "./src/**/*" ], "exclode": [ "node_modules/" ] }
これでTypeScriptを使う準備が整ったので、コンポーネントをTypeScriptで書き換えてみます。
ReactとTypeScriptを使う場合のコンポーネントファイルの拡張子は.tsxになります。
mv src/index.js src/index.tsx
src/index.tsx
import React, { FC } from "react"; import styled from "styled-components";
const Button = styled.button` background-color: #454545; color: #fff; `;
interface Props { onClick: () => void; }
const SimpleButton: FC<Props> = () => <Button>Done</Button>;
export default SimpleButton;
最後に書き換えたコンポーネントをStorybookで表示します。
TypeScriptを使う場合、別途Storybookの設定が必要です。
必要な設定については、公式ドキュメントが用意されています。
ドキュメントを読むと、必要な設定が@storybook/preset-typescriptとして用意されているので、これを利用します。
必要なライブラリをインストールしましょう。
$ npm i -D @storybook/preset-typescript react-docgen-typescript-loader ts-loader $ npm i -D @types/{storybook__addon-actions,storybook__react}
...
...
+ @types/[email protected] + @types/[email protected]
npm i -D xxxを実行したログに以下のようなWarningが表示されていると思います。
...
npm WARN @storybook/[email protected] requires a peer of @types/webpack@* but none is installed. You must install peer dependencies yourself
...
@storybook/[email protected]は@types/webpack@*をpeer dependencyとしているようです。
@storybook/preset-typescriptのリポジトリを開いて、package.jsonを見てみましょう。
preset-typescript/package.json
... "peerDependencies": { "@types/webpack": "*", "react-docgen-typescript-loader": "*", "ts-loader": "*" }
peerDependenciesとして@types/webpackが指定されているので、インストールしておきましょう。
$ npm i -D @types/webpack + @types/[email protected]
あとは.storybook/presets.jsを作成して、.storybook/presets.jsと.storybook/config.jsを以下のように編集するだけです。
presets.js
module.exports = ["@storybook/preset-typescript"];
config.js
import { configure } from '@storybook/react'; // automatically import all files ending in *.stories.js - const req = require.context('../stories', true, /\.stories\.js$/); + const req = require.context('../src', true, /\.stories\.tsx$/); function loadStories() { req.keys().forEach(filename => req(filename)); }
configure(loadStories, module);
storiesファイルの拡張子も.jsから.tsxに変更しましょう。
$ mkdir src/stories $ mv stories/index.stories.js src/stories/index.stories.tsx $ rm -rf stories
npm run storybookでコンポーネントが表示されたら成功です🎉
また、TypeScriptで書いたコードはコンパイルを実行することで静的型付けによる型チェックを行えます。
型チェックを行なうnpm scriptsを追加しておきましょう。
package.json
"scripts": { ... + "tsc": "tsc --noEmit",
ここまでの作業によるpackage.jsonの差分を出しておきます。
...
"description": "A Todo Application built with React, styled-components, TypeScript, ESLint, Prettier, and Storybook", "main": "index.js", "scripts": { - "test": "echo \"Error: no test specified\" && exit 1" + "test": "echo \"Error: no test specified\" && exit 1", + "tsc": "tsc --noEmit", + "storybook": "start-storybook -p 6006", + "build-storybook": "build-storybook" }, "repository": { "type": "git", @@ -16,5 +18,28 @@ "bugs": { "url": "https://github.com/toshi-toma/todo-app-react/issues" }, - "homepage": "https://github.com/toshi-toma/todo-app-react#readme" + "homepage": "https://github.com/toshi-toma/todo-app-react#readme", + "dependencies": { + "react": "^16.9.0", + "react-dom": "^16.9.0", + "styled-components": "^4.3.2" + }, + "devDependencies": { + "@babel/core": "^7.5.5", + "@storybook/addon-actions": "^5.1.10", + "@storybook/addon-links": "^5.1.10", + "@storybook/addons": "^5.1.10", + "@storybook/preset-typescript": "^1.1.0", + "@storybook/react": "^5.1.10", + "@types/react": "^16.9.1", + "@types/react-dom": "^16.8.5", + "@types/storybook__addon-actions": "^3.4.3", + "@types/storybook__react": "^4.0.2", + "@types/styled-components": "^4.1.18", + "@types/webpack": "^4.32.1", + "babel-loader": "^8.0.6", + "react-docgen-typescript-loader": "^3.1.1", + "ts-loader": "^6.0.4", + "typescript": "^3.5.3" + } }
Step5 ESLintとPrettierでLintとFormatを導入する
TypeScriptのコードをESLintでLint、PrettierでFormatできるようにしましょう。
今回は手順をいくつか省略できるように、npmで公開されているeslint-configを利用します。 ここで利用するルールは自分の好みに応じてカスタマイズしてOKです。
npmの検索窓で「eslint typescript prettier」と検索してみましょう。
以下の手順では、airbnbが提供しているeslint-config-airbnbとTypeScript、Prettierのサポートが入ったeslint-config-airbnb-typescript-prettierを利用します。
eslint-config-airbnb-typescript-prettier
パッケージのページに書いてある説明を参考に、必要なライブラリをインストールします。
$ npm i -D eslint@^5.3.0 prettier@^1.18.2 eslint-config-airbnb-typescript-prettier + [email protected] + [email protected] + [email protected] added 106 packages from 69 contributors and audited 32518 packages in 10.364s
次にESLintの設定ファイルである.eslintrc.jsを作成して、以下のように設定を書きます。
.eslintrc.js
module.exports = { extends: "airbnb-typescript-prettier" };
ESLintの設定が終わったら、npm scriptsを追加しておきましょう。
package.json
"scripts": { + "lint": "eslint --ext .ts,.tsx src/", + "lint:fix": "eslint --ext .ts,.tsx src/ --fix",
これで次からnpm run lintを実行することで、srcディレクトリ以下のTypeScriptファイルに対してLintとFormatチェックが実行されます。
$ npm run lint
> eslint --ext .ts,.tsx src/
/dev/github.com/toshi-toma/todo-app-react/src/index.tsx 15:23 error Insert `⏎` prettier/prettier
/dev/github.com/toshi-toma/todo-app-react/src/stories/index.stories.tsx 1:19 error Replace `'react'` with `"react"` prettier/prettier 3:1 error '@storybook/react' should be listed in the project's dependencies, not devDependencies import/no-extraneous-dependencies
....
✖ 8 problems (8 errors, 0 warnings) 6 errors and 0 warnings potentially fixable with the `--fix` option.
FormatやいくつかのLintエラーは自動で修正が可能です。
npm run lint:fixを実行してみましょう。
$ npm run lint:fix
> [email protected] lint:fix /dev/github.com/toshi-toma/todo-app-react > eslint --ext .ts,.tsx src/ --fix
/dev/github.com/toshi-toma/todo-app-react/src/stories/index.stories.tsx 3:1 error '@storybook/react' should be listed in the project's dependencies, not devDependencies import/no-extraneous-dependencies 4:1 error '@storybook/addon-actions' should be listed in the project's dependencies, not devDependencies import/no-extraneous-dependencies
✖ 2 problems (2 errors, 0 warnings)
自動で修正されました🎉
... should be listed in the project's dependencies, not devDependencies import/no-extraneous-dependenciesとエラーがでています。
ESLintの設定は必要に応じて調整しましょう。
以下のように設定を変更することで、エラーが直るはずです。
.eslintrc.js
module.exports = { extends: "airbnb-typescript-prettier", rules: { "import/no-extraneous-dependencies": ["error", { devDependencies: ["**/*.stories.tsx"], peerDependencies: false }] } };
Step6 VSCodeでファイル保存時に自動でフォーマットする
最後に、エディタにVSCodeを利用している人を想定して、ファイル保存時にフォーマットエラーなどの自動修正を行えるようにします。
まず、VSCodeのExtensionsでVSCode ESLintをインストールしておきましょう。
あとは、以下のように.vscode/settings.jsonを修正します。
{ "eslint.autoFixOnSave": true, "eslint.validate": [ "javascript", "javascriptreact", { "language": "typescript", "autoFix": true }, { "language": "typescriptreact", "autoFix": true } ] }
さいごに
これで
React+styled-components+TypeScriptでコンポーネントを開発
作成したコンポーネントはStorybookで動作確認
適宜ESLintやPrettierを利用してコーディングを行い、ファイル保存時に自動で修正
が行えるようになり、環境構築終了です🎉
実際にWebアプリを開発する場合、webpackやwebpack-dev-serverなどをインストールして、設定をする必要があります。それについては余裕があれば別途追記します🙏
0 notes
Text
How To Build An Accessible Front-End Application With Chakra UI And Nuxt.js
About The Author
Kelvin Omereshone is the CTO at Quru Lab. Kelvin was formerly a Front-end engineer at myPadi.ng. He’s the creator of NUXtjs Africa community and very passionate … More about Kelvin …
In this article, we are going to be looking at how to use Chakra UI and NUXtJS in building accessible front-end applications. In order to follow along, you should be familiar with using the progressive front-end framework Vue.js with NUXt. If not, see the Vue.js and NuxtJS docs to get started.
For many people, the web is an essential part of their daily lives. They use it at work, home, and even on the road. Web accessibility means people with disabilities can use the web equally. So it’s crucial for developers and organizations building on the web to build inclusivity and accessibility into their applications.
In order to make the web more accessible, there are a couple of best practices and standards that you will have to implement in your applications, such as adhering to the following:
Learning to implement these standards can seem like a daunting task when you factor in project deadlines and other constraints that you have to work with as a developer. In that light, let me introduce you to a UI design system that was built to help you make your web applications accessible.
Chakra UI
Chakra UI is a design system and UI framework created by Segun Adebayo. It was created with simplicity, modularity, composability, and accessibility in mind. Chakra UI gives you all the building blocks needed to create accessible front-end applications.
Note: While Chakra UI depends on CSS-in-JS under the hood, you don’t need to know it in order to use the library.
Though the framework was originally created for React, Jonathan Bakebwa spear-headed the porting to Vue. So Vuejs/NUXtJS developers can now utilize Chakra UI to create accessible web applications.
Features Of Chakra UI
Chakra UI was created with the following principles in mind:
Style props Chakra UI makes it possible to style components or override their styles by using props. This reduces the need for stylesheet or inline styles. Chakra UI achieves this level of flexibility by using Styled Systems under the hood.
Composition Components in Chakra UI have been broken down into smaller parts with minimal props to keep complexity low, and compose them together. This will ensure that the styles and functionality are flexible and extensible. For example, you can use the CBox and CPseudoBox components to create new components.
Accessible Chakra UI components follow the WAI-ARIA guidelines specifications and have the right aria-* attributes. You can also find the accessibility report of each authored component in a file called accessibility.md. See the accessibility report for the CAccordion component.
Themeable Chakra UI affords you the ability to easily reference values from your theme throughout your entire application, on any component.
Dark mode support Most components in Chakra UI are dark mode compatible right out of the box.
How Chakra UI Supports Accessibility
One of the core principles behind the creation of Chakra UI is accessibility. With that in mind, all components in Chakra UI comes out of the box with support for accessibility by providing:
Keyboard Navigation — useful for users with motor skills disabilities,
Focus Management,
aria-* attributes which are needed by screen readers,
Focus trapping and restoration for modal dialogs.
Getting Started With Chakra UI And Nuxt
Note: To use Chakra UI with Vue.js see the Getting Started guide.
For our demo project, we will be building Chakra-ui explorer — an accessible single-page web application to search Chakra UI components.
Getting Started With Chakra-ui Explorer
Assuming you already have NPM installed, create a new NUXt application by running:
$ npx create-nUXt-app chakra-ui-explorer
Or if you prefer in yarn, then run:
$ yarn create nUXt-app chakra-ui-explorer
Follow the installation prompt to finish creating your NUXt application.
Setting Up Chakra UI
Chakra UI uses Emotion for handling component styles. So to get started with Chakra UI, you will need to install Chakra UI alongside Emotion as a peer dependency. For this project, we will be using the official NUXt modules for both Chakra UI and Emotion which will reduce the friction in getting started with Chakra UI. Let’s add them to our project by running the following command:
npm i @chakra-ui/nUXt @nUXtjs/emotion
Note: @nUXtjs/emotion allows your component styles to be generated and injected in the server build.
After installing both modules, you will need to register them in the nUXt.config.js file under the modules array option:
// nUXt.config.js modules: ['@chakra-ui/nUXt', '@nUXtjs/emotion'],
To complete our setup process of Chakra UI, we need to touch our default layout component in layouts/ and add CThemeProvider, CColorModeProvider, and CReset components from Chakra UI.
It is recommended thatyou use the CReset component to ensure all components provided by Chakra UI work correctly.
The CThemeProvider component will make your theme available to every part of your application, while the CColorModeProvider component is responsible for handling our application’s color mode which can be in one of two states: light or dark. Finally, the CReset component will remove all browser default styles.
Let’s add the aforementioned components in layouts/default.vue. In our template section, let’s add this:
<!-- layouts/default.vue --> <template> <div class="container"> <c-theme-provider> <c-color-mode-provider> <c-box as="section"> <c-reset /> <nUXt /> </c-box> </c-color-mode-provider> </c-theme-provider> </div> </template>
Then in our script section, we will import and register the components like so:
<script> import { CThemeProvider, CColorModeProvider, CReset, CBox } from '@chakra-ui/vue' export default { name: 'DefaultLayout', components: { CThemeProvider, CColorModeProvider, CReset, CBox } } </script>
Your default.vue layout component should look like this:
<template> <div class="container"> <c-theme-provider> <c-color-mode-provider> <c-box as="section"> <c-reset /> <nUXt /> </c-box> </c-color-mode-provider> </c-theme-provider> </div> </template> <script> import { CThemeProvider, CColorModeProvider, CReset, CBox } from '@chakra-ui/vue' export default { name: 'DefaultLayout', components: { CThemeProvider, CColorModeProvider, CReset, CBox } } </script>
Note: Notice I am wrapping both <c-reset /> and <nUXt /> components in a c-box component.
Setting Your Application Theme
Chakra UI allows you the ability to set a theme for your application. By ‘theme’, I mean the setting of your application’s color palette, type scale, font stacks, breakpoints, border-radius values, and so on. Since colors and contrast are vital components of accessibility, it’s important to use colors that are easily perceived.
Out of the box Chakra UI ships with a default theme object that affords for most of your application needs in terms of colors, fonts, and so on. The default theme is set up with contrast in mind which allows for the easily toggling of color modes (more on this later).
Chakra UI, however, allows you to extend or completely replaced the default theme. This is possible by accepting a theme object based on the Styled System Theme Specification.
The values in the theme object are automatically available for use in your application. For example, the colors specified in theme.colors can be referenced by the color, borderColor, backgroundColor, fill, stroke, and style props in your components.
To personalize your application, you can override the default theme provided by Chakra UI or set new values in it. To do that, the Chakra UI NUXt module exposes a chakra object which will take in an extendTheme property which takes an object. The object given to extendTheme will be recursively merged to the Chakra UI default theme object. Let’s add our brand color palette to Chakra so we can use it in our application.
Note: Chakra UI recommends adding color palette into the colors object of your theme using keys from 50 — 900. You can use web tools like coolors and palx to generate these palettes.
For our demo homepage, I will be using a brand color of lime. To make Chakra UI aware of this color, I’ll create a customeTheme object in a folder called chakra(you can call it whatever you want) in the root of my project’s directory. In this object, I will define our brand color palette.
Create a file called theme.js in the folder you created and then add the following snippet:
// ./chakra/theme.js const customTheme = { colors: { brand: { 50: '#f6fcee', 100: '#e2f4c8', 200: '#cbec9e', 300: '#b2e26e', 400: '#94d736', 500: '#75c800', 600: '#68b300', 700: '#599900', 800: '#477900', 900: '#294700' } } } module.exports = customTheme
Now let’s merge our custom theme to Chakra UI. We do that in nUXt.config.js. First, we need our custom theme object:
import customTheme from './chakra/theme'
Next, we have to specify the chakra key provided by the Chakra UI NUXt module and pass in customTheme to the extendTheme property:
chakra: { extendTheme: customTheme },
Your nUXt.config.js file should look like this:
// nUXt.config.js import customTheme from './chakra/theme' export default { mode: 'spa', /* * Headers of the page */ head: { title: process.env.npm_package_name || '', meta: [ { charset: 'utf-8' }, { name: 'viewport', content: 'width=device-width, initial-scale=1' }, { hid: 'description', name: 'description', content: process.env.npm_package_description || '' } ], link: [{ rel: 'icon', type: 'image/x-icon', href: '/favicon.ico' }] }, /* * Customize the progress-bar color */ loading: { color: '#fff' }, /* * Global CSS */ css: [], /* * Plugins to load before mounting the App */ plugins: [], /* * NUXt.js dev-modules */ buildModules: [ // Doc: https://github.com/nUXt-community/eslint-module '@nUXtjs/eslint-module' ], /* * NUXt.js modules */ modules: [ '@chakra-ui/nUXt', '@nUXtjs/emotion' ], chakra: { extendTheme: customTheme }, /* * Build configuration */ build: { /* * You can extend webpack config here */ extend (config, ctx) {} } }
When you run your application with npm run dev, your homepage should look like this:
(Large preview)
Now that we have successfully installed Chakra UI and added our application’s custom theme, let’s begin building out Chakra-ui explorer.
Creating Our Main Navigation
We want our navigation to have our brand name, in this case, it will be Chakra-ui explorer, 2 navigation links: Documentation and Repo, and a button which is responsible for toggling our color mode. Let’s create a new component under the components directory called NavBar in which we’ll create our application’s main navigation using Chakra UI.
Let’s do this. Add the following snippet to NavBar.vue:
<template> <c-box as="nav" h="60px" px="4" d="flex" align-items="center" shadow="sm" > <c-link as="nUXt-link" to="/" color="brand.700" font-weight="bold" :_hover="{ color: 'brand.900' }" > Chakra-ui Explorer </c-link> <c-box as="ul" color="gray.500" d="flex" align-items="center" list-style-type="none" ml="auto" > <c-box as="li" mr="8"> <c-link color="gray.500" :_hover="{ color: 'brand.400' }" is-external href="https://vue.chakra-ui.com" > Documentation </c-link> </c-box> <c-box as="li" mr="8"> <c-link color="gray.500" :_hover="{ color: 'brand.400' }" is-external href="https://github.com/chakra-ui/chakra-ui-vue" > Repo </c-link> </c-box> <c-box as="li"> <c-icon-button variant="ghost" variant-color="gray[900]" aria-label="Switch to dark mode" icon="moon" /> </c-box> </c-box> </c-box> </template> <script> import { CBox, CLink, CIconButton } from '@chakra-ui/vue' export default { name: 'NavBar', components: { CBox, CLink, CIconButton } } </script>
Next, we need to import this component in our default layout component — default.vue and add it to our template so overall our default layout should look like this:
<template> <div class="container"> <c-theme-provider> <c-color-mode-provider> <c-box as="section"> <c-reset /> <nav-bar /> <nUXt /> </c-box> </c-color-mode-provider> </c-theme-provider> </div> </template> <script> import { CThemeProvider, CColorModeProvider, CReset, CBox } from '@chakra-ui/vue' import NavBar from '@/components/NavBar' export default { name: 'DefaultLayout', components: { CThemeProvider, CColorModeProvider, CReset, CBox, NavBar } } </script>
When you run your application now, you’ll get to see this:
[embedded content]
You can see that the navigation is already accessible without even specifying it. This can only be seen when you hit the Tab key on your keyboard; Chakra UI handles focus management while you can focus on each link on the navigation menu.
The as Prop
From our NavBar.vue’s snippet above, you will notice the as prop. This is a feature available to Chakra UI components that allows you to pass an HTML tag or another component to be rendered as the base tag of the component along with all its styles and props. So when we did:
<c-box as="li"> <c-icon-button variant="ghost" variant-color="gray[900]" aria-label="Switch to dark mode" icon="moon" /> </c-box>
we are asking Chakra UI to render an <li> element and place a button component inside it. You can also see us use that pattern here:
<c-link as="nUXt-link" to="/" color="brand.700" font-weight="bold" :_hover="{ color : 'brand.900' }"> ChakraMart </c-link>
In the above case, we are asking Chakra UI to render the NUXt’s <nUXt-link /> component.
The as prop gives you the power to use the right(or wrong) element for the context of your markup. What this means, is you can leverage it to build your application template using semantic markups which will make your application more meaningful to screen readers. So instead of using a generic div element for the main content of your application, with the as prop you can render a main element telling screen readers that this is the main content of your application.
Note: Check out the documentation for all props exposed by Chakra UI components. Also, take a closer look at how the brand color in chakra/theme.js was specified. You can see from the snippet above that we’re using it as any of the colors that Chakra UI provides. Another thing to be aware of is the moon icon that we used for the CIconButton on our NavBar. The moon icon is one of the default icons that Chakra UI provides out of the box.
Color Mode
One of the features of Chakra UI is color mode support. And you can tell from the use of the moon icon in Chakra-ui explorer’s navigation, we plan on integrating dark mode. So instead of leaving it for last, let’s get it over with and wire it up right now. To do this, CColorModeProvider using Vue’s provide/inject, provides, $chakraColorMode and $toggleColorMode functions. $chakraColorMode returns the current color mode of your application while $toggleColorMode toggles the color mode from light to dark and vice versa. To use these two functions, we’ll need to inject them into the NavBar.vue component. Let’s do this below in the <script /> section:
<script> <script> import { CBox, CLink, CIconButton } from '@chakra-ui/vue' export default { name: 'NavBar', inject: ['$chakraColorMode', '$toggleColorMode'], components: { CBox, CLink, CIconButton }, } </script>
Let’s create a computed property to return the color mode:
... computed: { colorMode () { return this.$chakraColorMode() } }
Now that we have injected both functions in NavBar.vue let’s modify the toggle color mode button. We’ll start with the icon so that it shows a different icon depending on the color mode. Our CIconButton component now looks like this at this state:
<c-icon-button variant="ghost" variant-color="gray[900]" aria-label="Switch to dark mode" :icon="colorMode == 'light' ? 'moon' : 'sun'" />
Currently, we are using an aria-label attribute to tell screen-readers to Switch to dark mode. Let’s modify this to support both light and dark mode:
<c-icon-button variant="ghost" variant-color="gray[900]" :aria-label="`Switch to ${colorMode == 'light' ? 'dark : 'light'} mode`" :icon="colorMode == 'light' ? 'moon' : 'sun'" />
Lastly, we will add a click event handler on the button to toggle the color mode of our application using the $toggleColorMode function. Like so:
<c-icon-button variant="ghost" variant-color="gray[900]" :aria-label="`Switch to ${colorMode == 'light' ? 'dark' : 'light'} mode`" :icon="colorMode == 'light' ? 'moon' : 'sun'" @click="$toggleColorMode" />
To test if our color mode set up is working, I’ll add an interpolation of the color mode and a text next to the CIconButton toggling our color mode. Like so:
<c-box as="li"> <c-icon-button variant="ghost" variant-color="gray[900]" :aria-label="`Switch to ${colorMode == 'light' ? 'dark' : 'light'} mode`" :icon="colorMode == 'light' ? 'moon' : 'sun'" @click="$toggleColorMode" /> Current mode: </c-box>
Here is what our app currently looks like:
[embedded content]
So we have done the heavy lifting in setting up color mode in Chakra UI. So now we can style our application based on the color mode. Let’s go to default.vue and use the color mode slot prop provided by CColorModeProvider to style our application. Let’s modify our template first in default.vue.
<template> <div class="container"> <c-theme-provider> <c-color-mode-provider #default="{ colorMode }"> <c-box v-bind="mainStyles[colorMode]" w="100vw" h="100vh" as="section" > <c-reset /> <nav-bar /> <nUXt /> </c-box> </c-color-mode-provider> </c-theme-provider> </div> </template>
We are destructuring colorMode from the slot props property provided by CColorModeProvider and then passing it as a dynamic key to a mainStyle object which we will create in a bit. The idea is to use a different set of styles based on the colorMode value. I am also using the width and height with the shorthand props — w and h respectively to set the width and height of our CBox component. Let’s define this mainStyles object in our script section:
<script> import { CThemeProvider, CColorModeProvider, CReset, CBox } from '@chakra-ui/vue' import NavBar from '@/components/NavBar' export default { name: 'DefaultLayout', components: { CThemeProvider, CColorModeProvider, CReset, CBox, NavBar }, data () { return { mainStyles: { dark: { bg: 'gray.900', color: 'whiteAlpha.900' }, light: { bg: 'whiteAlpha.900', color: 'gray.900' } } } } } </script>
Chakra-ui explorer now has dark mode support!
[embedded content]
Now we have our navigation bar and have successfully set up dark mode support for our application, let’s focus on index.vue in our pages/ directory where the meat of our application can be found. We’ll start off with adding a CBox component like so:
<c-box as="main" d="flex" direction="column" align-items="center" p="10" > </c-box>
Then we’ll add the CInput component inside it. Our index.vue page component will then look like this:
<template> <c-box as="main" d="flex" align-items="center" direction="column" w="auto" p="16" > <c-input placeholder="Search components..." size="lg" mb="5" is-full-width /> </c-box> </template> <script> import { CBox, CInput } from '@chakra-ui/vue' export default { components: { CBox, CInput } } </script>
Here is how our application looks like now:
[embedded content]
You can see from the above screencast how the CInput element automatically knows when it’s in dark mode and adjust accordingly even though we didn’t explicitly set that. Also, the user can hit the tab key to focus on that CInput component.
Adding The Components’ List
So the idea of the Chakra-ui explorer (as stated earlier) is to show the user all of the available components in Chakra UI so that we can have a list of those components as well as the links that will take the user to the documentation of the component. To do this, I will create a folder called data at the root of our project’s directory then create a file called index.js. In index.js, I will export an array of objects which will contain the names of the components. Here is how the file should look like:
// ./data/index.js export const components = [ { name: 'Accordion' }, { name: 'Alert' }, { name: 'AlertDialog' }, { name: 'AspectRatioBox' }, { name: 'AspectRatioBox' }, { name: 'Avatar' }, { name: 'Badge' }, { name: 'Box' }, { name: 'Breadcrumb' }, { name: 'Button' }, { name: 'Checkbox' }, { name: 'CircularProgress' }, { name: 'CloseButton' }, { name: 'Code' }, { name: 'Collapse' }, { name: 'ControlBox' }, { name: 'Divider' }, { name: 'Drawer' }, { name: 'Editable' }, { name: 'Flex' }, { name: 'Grid' }, { name: 'Heading' }, { name: 'Icon' }, { name: 'IconButton' }, { name: 'IconButton' }, { name: 'Input' }, { name: 'Link' }, { name: 'List' }, { name: 'Menu' }, { name: 'Modal' }, { name: 'NumberInput' }, { name: 'Popover' }, { name: 'Progress' }, { name: 'PseudoBox' }, { name: 'Radio' }, { name: 'SimpleGrid' }, { name: 'Select' }, { name: 'Slider' }, { name: 'Spinner' }, { name: 'Stat' }, { name: 'Stack' }, { name: 'Switch' }, { name: 'Tabs' }, { name: 'Tag' }, { name: 'Text' }, { name: 'Textarea' }, { name: 'Toast' }, { name: 'Tooltip' } ]
For our implementation to be complete, I will import the above array into pages/index.vue and iterate over it to display all the components. Also, we will give the user the ability to filter the components using the search box. Here is the complete implementation:
// pages/index.vue <template> <c-box as="main" d="flex" align-items="space-between" flex-direction="column" w="auto" p="16" > <c-input v-model="search" placeholder="Search components..." size="lg" mb="10" is-full-width /> <c-grid template-columns="repeat(4, 1fr)" gap="3" p="5"> <c-box v-for="(chakraComponent, index) of filteredComponents" :key="index" h="10"> <c-badge> <c-link is-external :href="lowercase(`https://vue.chakra-ui.com/${chakraComponent.name}`)" > <c-icon name="info" size="18px" /> </c-link> </c-badge> </c-box> </c-grid> </c-box> </template> <script> import { CBox, CInput, CGrid, CLink, CBadge, CIcon } from '@chakra-ui/vue' import { components as chakraComponents } from '../data' export default { components: { CBox, CInput, CGrid, CBadge, CIcon, CLink }, data () { return { search: '' } }, computed: { filteredComponents () { return chakraComponents.filter((component) => { return this.lowercase(component.name).includes(this.lowercase(this.search)) }) } }, methods: { lowercase (value) { return value.toLowerCase() } } } </script>
And now our application looks like this:
[embedded content]
You can now see how dark mode is automatic for the component’s list as well as how the focus management is added for the links (by default) to aid accessibility.
Putting Chakra UI To The Test
Finally, let’s see how our app scores by running the Lighthouse accessibility test on it. Mind you, this test is based on the Axe user impact assessment. Below is a screencast of the test. You can also run the test yourself by following these steps.
[embedded content]
From the screencast above you can see that our Chakra UI app has a score of 85 on the lighthouse accessibility test.
Conclusion
In this article, we have touched on the need for building accessible interfaces and we have also seen how to use Chakra UI to build accessible applications from the ground up by building an explorer (Chakra-ui explorer) for the Chakra UI components.
(ra, yk, il)
Website Design & SEO Delray Beach by DBL07.co
Delray Beach SEO
source http://www.scpie.org/how-to-build-an-accessible-front-end-application-with-chakra-ui-and-nuxt-js/ source https://scpie.tumblr.com/post/624279196442804224
0 notes
Text
How To Build An Accessible Front-End Application With Chakra UI And Nuxt.js
About The Author
Kelvin Omereshone is the CTO at Quru Lab. Kelvin was formerly a Front-end engineer at myPadi.ng. He’s the creator of NUXtjs Africa community and very passionate … More about Kelvin …
In this article, we are going to be looking at how to use Chakra UI and NUXtJS in building accessible front-end applications. In order to follow along, you should be familiar with using the progressive front-end framework Vue.js with NUXt. If not, see the Vue.js and NuxtJS docs to get started.
For many people, the web is an essential part of their daily lives. They use it at work, home, and even on the road. Web accessibility means people with disabilities can use the web equally. So it’s crucial for developers and organizations building on the web to build inclusivity and accessibility into their applications.
In order to make the web more accessible, there are a couple of best practices and standards that you will have to implement in your applications, such as adhering to the following:
Learning to implement these standards can seem like a daunting task when you factor in project deadlines and other constraints that you have to work with as a developer. In that light, let me introduce you to a UI design system that was built to help you make your web applications accessible.
Chakra UI
Chakra UI is a design system and UI framework created by Segun Adebayo. It was created with simplicity, modularity, composability, and accessibility in mind. Chakra UI gives you all the building blocks needed to create accessible front-end applications.
Note: While Chakra UI depends on CSS-in-JS under the hood, you don’t need to know it in order to use the library.
Though the framework was originally created for React, Jonathan Bakebwa spear-headed the porting to Vue. So Vuejs/NUXtJS developers can now utilize Chakra UI to create accessible web applications.
Features Of Chakra UI
Chakra UI was created with the following principles in mind:
Style props Chakra UI makes it possible to style components or override their styles by using props. This reduces the need for stylesheet or inline styles. Chakra UI achieves this level of flexibility by using Styled Systems under the hood.
Composition Components in Chakra UI have been broken down into smaller parts with minimal props to keep complexity low, and compose them together. This will ensure that the styles and functionality are flexible and extensible. For example, you can use the CBox and CPseudoBox components to create new components.
Accessible Chakra UI components follow the WAI-ARIA guidelines specifications and have the right aria-* attributes. You can also find the accessibility report of each authored component in a file called accessibility.md. See the accessibility report for the CAccordion component.
Themeable Chakra UI affords you the ability to easily reference values from your theme throughout your entire application, on any component.
Dark mode support Most components in Chakra UI are dark mode compatible right out of the box.
How Chakra UI Supports Accessibility
One of the core principles behind the creation of Chakra UI is accessibility. With that in mind, all components in Chakra UI comes out of the box with support for accessibility by providing:
Keyboard Navigation — useful for users with motor skills disabilities,
Focus Management,
aria-* attributes which are needed by screen readers,
Focus trapping and restoration for modal dialogs.
Getting Started With Chakra UI And Nuxt
Note: To use Chakra UI with Vue.js see the Getting Started guide.
For our demo project, we will be building Chakra-ui explorer — an accessible single-page web application to search Chakra UI components.
Getting Started With Chakra-ui Explorer
Assuming you already have NPM installed, create a new NUXt application by running:
$ npx create-nUXt-app chakra-ui-explorer
Or if you prefer in yarn, then run:
$ yarn create nUXt-app chakra-ui-explorer
Follow the installation prompt to finish creating your NUXt application.
Setting Up Chakra UI
Chakra UI uses Emotion for handling component styles. So to get started with Chakra UI, you will need to install Chakra UI alongside Emotion as a peer dependency. For this project, we will be using the official NUXt modules for both Chakra UI and Emotion which will reduce the friction in getting started with Chakra UI. Let’s add them to our project by running the following command:
npm i @chakra-ui/nUXt @nUXtjs/emotion
Note: @nUXtjs/emotion allows your component styles to be generated and injected in the server build.
After installing both modules, you will need to register them in the nUXt.config.js file under the modules array option:
// nUXt.config.js modules: ['@chakra-ui/nUXt', '@nUXtjs/emotion'],
To complete our setup process of Chakra UI, we need to touch our default layout component in layouts/ and add CThemeProvider, CColorModeProvider, and CReset components from Chakra UI.
It is recommended thatyou use the CReset component to ensure all components provided by Chakra UI work correctly.
The CThemeProvider component will make your theme available to every part of your application, while the CColorModeProvider component is responsible for handling our application’s color mode which can be in one of two states: light or dark. Finally, the CReset component will remove all browser default styles.
Let’s add the aforementioned components in layouts/default.vue. In our template section, let’s add this:
<!-- layouts/default.vue --> <template> <div class="container"> <c-theme-provider> <c-color-mode-provider> <c-box as="section"> <c-reset /> <nUXt /> </c-box> </c-color-mode-provider> </c-theme-provider> </div> </template>
Then in our script section, we will import and register the components like so:
<script> import { CThemeProvider, CColorModeProvider, CReset, CBox } from '@chakra-ui/vue' export default { name: 'DefaultLayout', components: { CThemeProvider, CColorModeProvider, CReset, CBox } } </script>
Your default.vue layout component should look like this:
<template> <div class="container"> <c-theme-provider> <c-color-mode-provider> <c-box as="section"> <c-reset /> <nUXt /> </c-box> </c-color-mode-provider> </c-theme-provider> </div> </template> <script> import { CThemeProvider, CColorModeProvider, CReset, CBox } from '@chakra-ui/vue' export default { name: 'DefaultLayout', components: { CThemeProvider, CColorModeProvider, CReset, CBox } } </script>
Note: Notice I am wrapping both <c-reset /> and <nUXt /> components in a c-box component.
Setting Your Application Theme
Chakra UI allows you the ability to set a theme for your application. By ‘theme’, I mean the setting of your application’s color palette, type scale, font stacks, breakpoints, border-radius values, and so on. Since colors and contrast are vital components of accessibility, it’s important to use colors that are easily perceived.
Out of the box Chakra UI ships with a default theme object that affords for most of your application needs in terms of colors, fonts, and so on. The default theme is set up with contrast in mind which allows for the easily toggling of color modes (more on this later).
Chakra UI, however, allows you to extend or completely replaced the default theme. This is possible by accepting a theme object based on the Styled System Theme Specification.
The values in the theme object are automatically available for use in your application. For example, the colors specified in theme.colors can be referenced by the color, borderColor, backgroundColor, fill, stroke, and style props in your components.
To personalize your application, you can override the default theme provided by Chakra UI or set new values in it. To do that, the Chakra UI NUXt module exposes a chakra object which will take in an extendTheme property which takes an object. The object given to extendTheme will be recursively merged to the Chakra UI default theme object. Let’s add our brand color palette to Chakra so we can use it in our application.
Note: Chakra UI recommends adding color palette into the colors object of your theme using keys from 50 — 900. You can use web tools like coolors and palx to generate these palettes.
For our demo homepage, I will be using a brand color of lime. To make Chakra UI aware of this color, I’ll create a customeTheme object in a folder called chakra(you can call it whatever you want) in the root of my project’s directory. In this object, I will define our brand color palette.
Create a file called theme.js in the folder you created and then add the following snippet:
// ./chakra/theme.js const customTheme = { colors: { brand: { 50: '#f6fcee', 100: '#e2f4c8', 200: '#cbec9e', 300: '#b2e26e', 400: '#94d736', 500: '#75c800', 600: '#68b300', 700: '#599900', 800: '#477900', 900: '#294700' } } } module.exports = customTheme
Now let’s merge our custom theme to Chakra UI. We do that in nUXt.config.js. First, we need our custom theme object:
import customTheme from './chakra/theme'
Next, we have to specify the chakra key provided by the Chakra UI NUXt module and pass in customTheme to the extendTheme property:
chakra: { extendTheme: customTheme },
Your nUXt.config.js file should look like this:
// nUXt.config.js import customTheme from './chakra/theme' export default { mode: 'spa', /* * Headers of the page */ head: { title: process.env.npm_package_name || '', meta: [ { charset: 'utf-8' }, { name: 'viewport', content: 'width=device-width, initial-scale=1' }, { hid: 'description', name: 'description', content: process.env.npm_package_description || '' } ], link: [{ rel: 'icon', type: 'image/x-icon', href: '/favicon.ico' }] }, /* * Customize the progress-bar color */ loading: { color: '#fff' }, /* * Global CSS */ css: [], /* * Plugins to load before mounting the App */ plugins: [], /* * NUXt.js dev-modules */ buildModules: [ // Doc: https://github.com/nUXt-community/eslint-module '@nUXtjs/eslint-module' ], /* * NUXt.js modules */ modules: [ '@chakra-ui/nUXt', '@nUXtjs/emotion' ], chakra: { extendTheme: customTheme }, /* * Build configuration */ build: { /* * You can extend webpack config here */ extend (config, ctx) {} } }
When you run your application with npm run dev, your homepage should look like this:
(Large preview)
Now that we have successfully installed Chakra UI and added our application’s custom theme, let’s begin building out Chakra-ui explorer.
Creating Our Main Navigation
We want our navigation to have our brand name, in this case, it will be Chakra-ui explorer, 2 navigation links: Documentation and Repo, and a button which is responsible for toggling our color mode. Let’s create a new component under the components directory called NavBar in which we’ll create our application’s main navigation using Chakra UI.
Let’s do this. Add the following snippet to NavBar.vue:
<template> <c-box as="nav" h="60px" px="4" d="flex" align-items="center" shadow="sm" > <c-link as="nUXt-link" to="/" color="brand.700" font-weight="bold" :_hover="{ color: 'brand.900' }" > Chakra-ui Explorer </c-link> <c-box as="ul" color="gray.500" d="flex" align-items="center" list-style-type="none" ml="auto" > <c-box as="li" mr="8"> <c-link color="gray.500" :_hover="{ color: 'brand.400' }" is-external href="https://vue.chakra-ui.com" > Documentation </c-link> </c-box> <c-box as="li" mr="8"> <c-link color="gray.500" :_hover="{ color: 'brand.400' }" is-external href="https://github.com/chakra-ui/chakra-ui-vue" > Repo </c-link> </c-box> <c-box as="li"> <c-icon-button variant="ghost" variant-color="gray[900]" aria-label="Switch to dark mode" icon="moon" /> </c-box> </c-box> </c-box> </template> <script> import { CBox, CLink, CIconButton } from '@chakra-ui/vue' export default { name: 'NavBar', components: { CBox, CLink, CIconButton } } </script>
Next, we need to import this component in our default layout component — default.vue and add it to our template so overall our default layout should look like this:
<template> <div class="container"> <c-theme-provider> <c-color-mode-provider> <c-box as="section"> <c-reset /> <nav-bar /> <nUXt /> </c-box> </c-color-mode-provider> </c-theme-provider> </div> </template> <script> import { CThemeProvider, CColorModeProvider, CReset, CBox } from '@chakra-ui/vue' import NavBar from '@/components/NavBar' export default { name: 'DefaultLayout', components: { CThemeProvider, CColorModeProvider, CReset, CBox, NavBar } } </script>
When you run your application now, you’ll get to see this:
[embedded content]
You can see that the navigation is already accessible without even specifying it. This can only be seen when you hit the Tab key on your keyboard; Chakra UI handles focus management while you can focus on each link on the navigation menu.
The as Prop
From our NavBar.vue’s snippet above, you will notice the as prop. This is a feature available to Chakra UI components that allows you to pass an HTML tag or another component to be rendered as the base tag of the component along with all its styles and props. So when we did:
<c-box as="li"> <c-icon-button variant="ghost" variant-color="gray[900]" aria-label="Switch to dark mode" icon="moon" /> </c-box>
we are asking Chakra UI to render an <li> element and place a button component inside it. You can also see us use that pattern here:
<c-link as="nUXt-link" to="/" color="brand.700" font-weight="bold" :_hover="{ color : 'brand.900' }"> ChakraMart </c-link>
In the above case, we are asking Chakra UI to render the NUXt’s <nUXt-link /> component.
The as prop gives you the power to use the right(or wrong) element for the context of your markup. What this means, is you can leverage it to build your application template using semantic markups which will make your application more meaningful to screen readers. So instead of using a generic div element for the main content of your application, with the as prop you can render a main element telling screen readers that this is the main content of your application.
Note: Check out the documentation for all props exposed by Chakra UI components. Also, take a closer look at how the brand color in chakra/theme.js was specified. You can see from the snippet above that we’re using it as any of the colors that Chakra UI provides. Another thing to be aware of is the moon icon that we used for the CIconButton on our NavBar. The moon icon is one of the default icons that Chakra UI provides out of the box.
Color Mode
One of the features of Chakra UI is color mode support. And you can tell from the use of the moon icon in Chakra-ui explorer’s navigation, we plan on integrating dark mode. So instead of leaving it for last, let’s get it over with and wire it up right now. To do this, CColorModeProvider using Vue’s provide/inject, provides, $chakraColorMode and $toggleColorMode functions. $chakraColorMode returns the current color mode of your application while $toggleColorMode toggles the color mode from light to dark and vice versa. To use these two functions, we’ll need to inject them into the NavBar.vue component. Let’s do this below in the <script /> section:
<script> <script> import { CBox, CLink, CIconButton } from '@chakra-ui/vue' export default { name: 'NavBar', inject: ['$chakraColorMode', '$toggleColorMode'], components: { CBox, CLink, CIconButton }, } </script>
Let’s create a computed property to return the color mode:
... computed: { colorMode () { return this.$chakraColorMode() } }
Now that we have injected both functions in NavBar.vue let’s modify the toggle color mode button. We’ll start with the icon so that it shows a different icon depending on the color mode. Our CIconButton component now looks like this at this state:
<c-icon-button variant="ghost" variant-color="gray[900]" aria-label="Switch to dark mode" :icon="colorMode == 'light' ? 'moon' : 'sun'" />
Currently, we are using an aria-label attribute to tell screen-readers to Switch to dark mode. Let’s modify this to support both light and dark mode:
<c-icon-button variant="ghost" variant-color="gray[900]" :aria-label="`Switch to ${colorMode == 'light' ? 'dark : 'light'} mode`" :icon="colorMode == 'light' ? 'moon' : 'sun'" />
Lastly, we will add a click event handler on the button to toggle the color mode of our application using the $toggleColorMode function. Like so:
<c-icon-button variant="ghost" variant-color="gray[900]" :aria-label="`Switch to ${colorMode == 'light' ? 'dark' : 'light'} mode`" :icon="colorMode == 'light' ? 'moon' : 'sun'" @click="$toggleColorMode" />
To test if our color mode set up is working, I’ll add an interpolation of the color mode and a text next to the CIconButton toggling our color mode. Like so:
<c-box as="li"> <c-icon-button variant="ghost" variant-color="gray[900]" :aria-label="`Switch to ${colorMode == 'light' ? 'dark' : 'light'} mode`" :icon="colorMode == 'light' ? 'moon' : 'sun'" @click="$toggleColorMode" /> Current mode: </c-box>
Here is what our app currently looks like:
[embedded content]
So we have done the heavy lifting in setting up color mode in Chakra UI. So now we can style our application based on the color mode. Let’s go to default.vue and use the color mode slot prop provided by CColorModeProvider to style our application. Let’s modify our template first in default.vue.
<template> <div class="container"> <c-theme-provider> <c-color-mode-provider #default="{ colorMode }"> <c-box v-bind="mainStyles[colorMode]" w="100vw" h="100vh" as="section" > <c-reset /> <nav-bar /> <nUXt /> </c-box> </c-color-mode-provider> </c-theme-provider> </div> </template>
We are destructuring colorMode from the slot props property provided by CColorModeProvider and then passing it as a dynamic key to a mainStyle object which we will create in a bit. The idea is to use a different set of styles based on the colorMode value. I am also using the width and height with the shorthand props — w and h respectively to set the width and height of our CBox component. Let’s define this mainStyles object in our script section:
<script> import { CThemeProvider, CColorModeProvider, CReset, CBox } from '@chakra-ui/vue' import NavBar from '@/components/NavBar' export default { name: 'DefaultLayout', components: { CThemeProvider, CColorModeProvider, CReset, CBox, NavBar }, data () { return { mainStyles: { dark: { bg: 'gray.900', color: 'whiteAlpha.900' }, light: { bg: 'whiteAlpha.900', color: 'gray.900' } } } } } </script>
Chakra-ui explorer now has dark mode support!
[embedded content]
Now we have our navigation bar and have successfully set up dark mode support for our application, let’s focus on index.vue in our pages/ directory where the meat of our application can be found. We’ll start off with adding a CBox component like so:
<c-box as="main" d="flex" direction="column" align-items="center" p="10" > </c-box>
Then we’ll add the CInput component inside it. Our index.vue page component will then look like this:
<template> <c-box as="main" d="flex" align-items="center" direction="column" w="auto" p="16" > <c-input placeholder="Search components..." size="lg" mb="5" is-full-width /> </c-box> </template> <script> import { CBox, CInput } from '@chakra-ui/vue' export default { components: { CBox, CInput } } </script>
Here is how our application looks like now:
[embedded content]
You can see from the above screencast how the CInput element automatically knows when it’s in dark mode and adjust accordingly even though we didn’t explicitly set that. Also, the user can hit the tab key to focus on that CInput component.
Adding The Components’ List
So the idea of the Chakra-ui explorer (as stated earlier) is to show the user all of the available components in Chakra UI so that we can have a list of those components as well as the links that will take the user to the documentation of the component. To do this, I will create a folder called data at the root of our project’s directory then create a file called index.js. In index.js, I will export an array of objects which will contain the names of the components. Here is how the file should look like:
// ./data/index.js export const components = [ { name: 'Accordion' }, { name: 'Alert' }, { name: 'AlertDialog' }, { name: 'AspectRatioBox' }, { name: 'AspectRatioBox' }, { name: 'Avatar' }, { name: 'Badge' }, { name: 'Box' }, { name: 'Breadcrumb' }, { name: 'Button' }, { name: 'Checkbox' }, { name: 'CircularProgress' }, { name: 'CloseButton' }, { name: 'Code' }, { name: 'Collapse' }, { name: 'ControlBox' }, { name: 'Divider' }, { name: 'Drawer' }, { name: 'Editable' }, { name: 'Flex' }, { name: 'Grid' }, { name: 'Heading' }, { name: 'Icon' }, { name: 'IconButton' }, { name: 'IconButton' }, { name: 'Input' }, { name: 'Link' }, { name: 'List' }, { name: 'Menu' }, { name: 'Modal' }, { name: 'NumberInput' }, { name: 'Popover' }, { name: 'Progress' }, { name: 'PseudoBox' }, { name: 'Radio' }, { name: 'SimpleGrid' }, { name: 'Select' }, { name: 'Slider' }, { name: 'Spinner' }, { name: 'Stat' }, { name: 'Stack' }, { name: 'Switch' }, { name: 'Tabs' }, { name: 'Tag' }, { name: 'Text' }, { name: 'Textarea' }, { name: 'Toast' }, { name: 'Tooltip' } ]
For our implementation to be complete, I will import the above array into pages/index.vue and iterate over it to display all the components. Also, we will give the user the ability to filter the components using the search box. Here is the complete implementation:
// pages/index.vue <template> <c-box as="main" d="flex" align-items="space-between" flex-direction="column" w="auto" p="16" > <c-input v-model="search" placeholder="Search components..." size="lg" mb="10" is-full-width /> <c-grid template-columns="repeat(4, 1fr)" gap="3" p="5"> <c-box v-for="(chakraComponent, index) of filteredComponents" :key="index" h="10"> <c-badge> <c-link is-external :href="lowercase(`https://vue.chakra-ui.com/${chakraComponent.name}`)" > <c-icon name="info" size="18px" /> </c-link> </c-badge> </c-box> </c-grid> </c-box> </template> <script> import { CBox, CInput, CGrid, CLink, CBadge, CIcon } from '@chakra-ui/vue' import { components as chakraComponents } from '../data' export default { components: { CBox, CInput, CGrid, CBadge, CIcon, CLink }, data () { return { search: '' } }, computed: { filteredComponents () { return chakraComponents.filter((component) => { return this.lowercase(component.name).includes(this.lowercase(this.search)) }) } }, methods: { lowercase (value) { return value.toLowerCase() } } } </script>
And now our application looks like this:
[embedded content]
You can now see how dark mode is automatic for the component’s list as well as how the focus management is added for the links (by default) to aid accessibility.
Putting Chakra UI To The Test
Finally, let’s see how our app scores by running the Lighthouse accessibility test on it. Mind you, this test is based on the Axe user impact assessment. Below is a screencast of the test. You can also run the test yourself by following these steps.
[embedded content]
From the screencast above you can see that our Chakra UI app has a score of 85 on the lighthouse accessibility test.
Conclusion
In this article, we have touched on the need for building accessible interfaces and we have also seen how to use Chakra UI to build accessible applications from the ground up by building an explorer (Chakra-ui explorer) for the Chakra UI components.
(ra, yk, il)
Website Design & SEO Delray Beach by DBL07.co
Delray Beach SEO
source http://www.scpie.org/how-to-build-an-accessible-front-end-application-with-chakra-ui-and-nuxt-js/
0 notes
Text
How To Build An Accessible Front-End Application With Chakra UI And Nuxt.js
About The Author
Kelvin Omereshone is the CTO at Quru Lab. Kelvin was formerly a Front-end engineer at myPadi.ng. He’s the creator of NUXtjs Africa community and very passionate … More about Kelvin …
In this article, we are going to be looking at how to use Chakra UI and NUXtJS in building accessible front-end applications. In order to follow along, you should be familiar with using the progressive front-end framework Vue.js with NUXt. If not, see the Vue.js and NuxtJS docs to get started.
For many people, the web is an essential part of their daily lives. They use it at work, home, and even on the road. Web accessibility means people with disabilities can use the web equally. So it’s crucial for developers and organizations building on the web to build inclusivity and accessibility into their applications.
In order to make the web more accessible, there are a couple of best practices and standards that you will have to implement in your applications, such as adhering to the following:
Learning to implement these standards can seem like a daunting task when you factor in project deadlines and other constraints that you have to work with as a developer. In that light, let me introduce you to a UI design system that was built to help you make your web applications accessible.
Chakra UI
Chakra UI is a design system and UI framework created by Segun Adebayo. It was created with simplicity, modularity, composability, and accessibility in mind. Chakra UI gives you all the building blocks needed to create accessible front-end applications.
Note: While Chakra UI depends on CSS-in-JS under the hood, you don’t need to know it in order to use the library.
Though the framework was originally created for React, Jonathan Bakebwa spear-headed the porting to Vue. So Vuejs/NUXtJS developers can now utilize Chakra UI to create accessible web applications.
Features Of Chakra UI
Chakra UI was created with the following principles in mind:
Style props Chakra UI makes it possible to style components or override their styles by using props. This reduces the need for stylesheet or inline styles. Chakra UI achieves this level of flexibility by using Styled Systems under the hood.
Composition Components in Chakra UI have been broken down into smaller parts with minimal props to keep complexity low, and compose them together. This will ensure that the styles and functionality are flexible and extensible. For example, you can use the CBox and CPseudoBox components to create new components.
Accessible Chakra UI components follow the WAI-ARIA guidelines specifications and have the right aria-* attributes. You can also find the accessibility report of each authored component in a file called accessibility.md. See the accessibility report for the CAccordion component.
Themeable Chakra UI affords you the ability to easily reference values from your theme throughout your entire application, on any component.
Dark mode support Most components in Chakra UI are dark mode compatible right out of the box.
How Chakra UI Supports Accessibility
One of the core principles behind the creation of Chakra UI is accessibility. With that in mind, all components in Chakra UI comes out of the box with support for accessibility by providing:
Keyboard Navigation — useful for users with motor skills disabilities,
Focus Management,
aria-* attributes which are needed by screen readers,
Focus trapping and restoration for modal dialogs.
Getting Started With Chakra UI And Nuxt
Note: To use Chakra UI with Vue.js see the Getting Started guide.
For our demo project, we will be building Chakra-ui explorer — an accessible single-page web application to search Chakra UI components.
Getting Started With Chakra-ui Explorer
Assuming you already have NPM installed, create a new NUXt application by running:
$ npx create-nUXt-app chakra-ui-explorer
Or if you prefer in yarn, then run:
$ yarn create nUXt-app chakra-ui-explorer
Follow the installation prompt to finish creating your NUXt application.
Setting Up Chakra UI
Chakra UI uses Emotion for handling component styles. So to get started with Chakra UI, you will need to install Chakra UI alongside Emotion as a peer dependency. For this project, we will be using the official NUXt modules for both Chakra UI and Emotion which will reduce the friction in getting started with Chakra UI. Let’s add them to our project by running the following command:
npm i @chakra-ui/nUXt @nUXtjs/emotion
Note: @nUXtjs/emotion allows your component styles to be generated and injected in the server build.
After installing both modules, you will need to register them in the nUXt.config.js file under the modules array option:
// nUXt.config.js modules: ['@chakra-ui/nUXt', '@nUXtjs/emotion'],
To complete our setup process of Chakra UI, we need to touch our default layout component in layouts/ and add CThemeProvider, CColorModeProvider, and CReset components from Chakra UI.
It is recommended thatyou use the CReset component to ensure all components provided by Chakra UI work correctly.
The CThemeProvider component will make your theme available to every part of your application, while the CColorModeProvider component is responsible for handling our application’s color mode which can be in one of two states: light or dark. Finally, the CReset component will remove all browser default styles.
Let’s add the aforementioned components in layouts/default.vue. In our template section, let’s add this:
<!-- layouts/default.vue --> <template> <div class="container"> <c-theme-provider> <c-color-mode-provider> <c-box as="section"> <c-reset /> <nUXt /> </c-box> </c-color-mode-provider> </c-theme-provider> </div> </template>
Then in our script section, we will import and register the components like so:
<script> import { CThemeProvider, CColorModeProvider, CReset, CBox } from '@chakra-ui/vue' export default { name: 'DefaultLayout', components: { CThemeProvider, CColorModeProvider, CReset, CBox } } </script>
Your default.vue layout component should look like this:
<template> <div class="container"> <c-theme-provider> <c-color-mode-provider> <c-box as="section"> <c-reset /> <nUXt /> </c-box> </c-color-mode-provider> </c-theme-provider> </div> </template> <script> import { CThemeProvider, CColorModeProvider, CReset, CBox } from '@chakra-ui/vue' export default { name: 'DefaultLayout', components: { CThemeProvider, CColorModeProvider, CReset, CBox } } </script>
Note: Notice I am wrapping both <c-reset /> and <nUXt /> components in a c-box component.
Setting Your Application Theme
Chakra UI allows you the ability to set a theme for your application. By ‘theme’, I mean the setting of your application’s color palette, type scale, font stacks, breakpoints, border-radius values, and so on. Since colors and contrast are vital components of accessibility, it’s important to use colors that are easily perceived.
Out of the box Chakra UI ships with a default theme object that affords for most of your application needs in terms of colors, fonts, and so on. The default theme is set up with contrast in mind which allows for the easily toggling of color modes (more on this later).
Chakra UI, however, allows you to extend or completely replaced the default theme. This is possible by accepting a theme object based on the Styled System Theme Specification.
The values in the theme object are automatically available for use in your application. For example, the colors specified in theme.colors can be referenced by the color, borderColor, backgroundColor, fill, stroke, and style props in your components.
To personalize your application, you can override the default theme provided by Chakra UI or set new values in it. To do that, the Chakra UI NUXt module exposes a chakra object which will take in an extendTheme property which takes an object. The object given to extendTheme will be recursively merged to the Chakra UI default theme object. Let’s add our brand color palette to Chakra so we can use it in our application.
Note: Chakra UI recommends adding color palette into the colors object of your theme using keys from 50 — 900. You can use web tools like coolors and palx to generate these palettes.
For our demo homepage, I will be using a brand color of lime. To make Chakra UI aware of this color, I’ll create a customeTheme object in a folder called chakra(you can call it whatever you want) in the root of my project’s directory. In this object, I will define our brand color palette.
Create a file called theme.js in the folder you created and then add the following snippet:
// ./chakra/theme.js const customTheme = { colors: { brand: { 50: '#f6fcee', 100: '#e2f4c8', 200: '#cbec9e', 300: '#b2e26e', 400: '#94d736', 500: '#75c800', 600: '#68b300', 700: '#599900', 800: '#477900', 900: '#294700' } } } module.exports = customTheme
Now let’s merge our custom theme to Chakra UI. We do that in nUXt.config.js. First, we need our custom theme object:
import customTheme from './chakra/theme'
Next, we have to specify the chakra key provided by the Chakra UI NUXt module and pass in customTheme to the extendTheme property:
chakra: { extendTheme: customTheme },
Your nUXt.config.js file should look like this:
// nUXt.config.js import customTheme from './chakra/theme' export default { mode: 'spa', /* * Headers of the page */ head: { title: process.env.npm_package_name || '', meta: [ { charset: 'utf-8' }, { name: 'viewport', content: 'width=device-width, initial-scale=1' }, { hid: 'description', name: 'description', content: process.env.npm_package_description || '' } ], link: [{ rel: 'icon', type: 'image/x-icon', href: '/favicon.ico' }] }, /* * Customize the progress-bar color */ loading: { color: '#fff' }, /* * Global CSS */ css: [], /* * Plugins to load before mounting the App */ plugins: [], /* * NUXt.js dev-modules */ buildModules: [ // Doc: https://github.com/nUXt-community/eslint-module '@nUXtjs/eslint-module' ], /* * NUXt.js modules */ modules: [ '@chakra-ui/nUXt', '@nUXtjs/emotion' ], chakra: { extendTheme: customTheme }, /* * Build configuration */ build: { /* * You can extend webpack config here */ extend (config, ctx) {} } }
When you run your application with npm run dev, your homepage should look like this:
(Large preview)
Now that we have successfully installed Chakra UI and added our application’s custom theme, let’s begin building out Chakra-ui explorer.
Creating Our Main Navigation
We want our navigation to have our brand name, in this case, it will be Chakra-ui explorer, 2 navigation links: Documentation and Repo, and a button which is responsible for toggling our color mode. Let’s create a new component under the components directory called NavBar in which we’ll create our application’s main navigation using Chakra UI.
Let’s do this. Add the following snippet to NavBar.vue:
<template> <c-box as="nav" h="60px" px="4" d="flex" align-items="center" shadow="sm" > <c-link as="nUXt-link" to="/" color="brand.700" font-weight="bold" :_hover="{ color: 'brand.900' }" > Chakra-ui Explorer </c-link> <c-box as="ul" color="gray.500" d="flex" align-items="center" list-style-type="none" ml="auto" > <c-box as="li" mr="8"> <c-link color="gray.500" :_hover="{ color: 'brand.400' }" is-external href="https://vue.chakra-ui.com" > Documentation </c-link> </c-box> <c-box as="li" mr="8"> <c-link color="gray.500" :_hover="{ color: 'brand.400' }" is-external href="https://github.com/chakra-ui/chakra-ui-vue" > Repo </c-link> </c-box> <c-box as="li"> <c-icon-button variant="ghost" variant-color="gray[900]" aria-label="Switch to dark mode" icon="moon" /> </c-box> </c-box> </c-box> </template> <script> import { CBox, CLink, CIconButton } from '@chakra-ui/vue' export default { name: 'NavBar', components: { CBox, CLink, CIconButton } } </script>
Next, we need to import this component in our default layout component — default.vue and add it to our template so overall our default layout should look like this:
<template> <div class="container"> <c-theme-provider> <c-color-mode-provider> <c-box as="section"> <c-reset /> <nav-bar /> <nUXt /> </c-box> </c-color-mode-provider> </c-theme-provider> </div> </template> <script> import { CThemeProvider, CColorModeProvider, CReset, CBox } from '@chakra-ui/vue' import NavBar from '@/components/NavBar' export default { name: 'DefaultLayout', components: { CThemeProvider, CColorModeProvider, CReset, CBox, NavBar } } </script>
When you run your application now, you’ll get to see this:
[embedded content]
You can see that the navigation is already accessible without even specifying it. This can only be seen when you hit the Tab key on your keyboard; Chakra UI handles focus management while you can focus on each link on the navigation menu.
The as Prop
From our NavBar.vue’s snippet above, you will notice the as prop. This is a feature available to Chakra UI components that allows you to pass an HTML tag or another component to be rendered as the base tag of the component along with all its styles and props. So when we did:
<c-box as="li"> <c-icon-button variant="ghost" variant-color="gray[900]" aria-label="Switch to dark mode" icon="moon" /> </c-box>
we are asking Chakra UI to render an <li> element and place a button component inside it. You can also see us use that pattern here:
<c-link as="nUXt-link" to="/" color="brand.700" font-weight="bold" :_hover="{ color : 'brand.900' }"> ChakraMart </c-link>
In the above case, we are asking Chakra UI to render the NUXt’s <nUXt-link /> component.
The as prop gives you the power to use the right(or wrong) element for the context of your markup. What this means, is you can leverage it to build your application template using semantic markups which will make your application more meaningful to screen readers. So instead of using a generic div element for the main content of your application, with the as prop you can render a main element telling screen readers that this is the main content of your application.
Note: Check out the documentation for all props exposed by Chakra UI components. Also, take a closer look at how the brand color in chakra/theme.js was specified. You can see from the snippet above that we’re using it as any of the colors that Chakra UI provides. Another thing to be aware of is the moon icon that we used for the CIconButton on our NavBar. The moon icon is one of the default icons that Chakra UI provides out of the box.
Color Mode
One of the features of Chakra UI is color mode support. And you can tell from the use of the moon icon in Chakra-ui explorer’s navigation, we plan on integrating dark mode. So instead of leaving it for last, let’s get it over with and wire it up right now. To do this, CColorModeProvider using Vue’s provide/inject, provides, $chakraColorMode and $toggleColorMode functions. $chakraColorMode returns the current color mode of your application while $toggleColorMode toggles the color mode from light to dark and vice versa. To use these two functions, we’ll need to inject them into the NavBar.vue component. Let’s do this below in the <script /> section:
<script> <script> import { CBox, CLink, CIconButton } from '@chakra-ui/vue' export default { name: 'NavBar', inject: ['$chakraColorMode', '$toggleColorMode'], components: { CBox, CLink, CIconButton }, } </script>
Let’s create a computed property to return the color mode:
... computed: { colorMode () { return this.$chakraColorMode() } }
Now that we have injected both functions in NavBar.vue let’s modify the toggle color mode button. We’ll start with the icon so that it shows a different icon depending on the color mode. Our CIconButton component now looks like this at this state:
<c-icon-button variant="ghost" variant-color="gray[900]" aria-label="Switch to dark mode" :icon="colorMode == 'light' ? 'moon' : 'sun'" />
Currently, we are using an aria-label attribute to tell screen-readers to Switch to dark mode. Let’s modify this to support both light and dark mode:
<c-icon-button variant="ghost" variant-color="gray[900]" :aria-label="`Switch to ${colorMode == 'light' ? 'dark : 'light'} mode`" :icon="colorMode == 'light' ? 'moon' : 'sun'" />
Lastly, we will add a click event handler on the button to toggle the color mode of our application using the $toggleColorMode function. Like so:
<c-icon-button variant="ghost" variant-color="gray[900]" :aria-label="`Switch to ${colorMode == 'light' ? 'dark' : 'light'} mode`" :icon="colorMode == 'light' ? 'moon' : 'sun'" @click="$toggleColorMode" />
To test if our color mode set up is working, I’ll add an interpolation of the color mode and a text next to the CIconButton toggling our color mode. Like so:
<c-box as="li"> <c-icon-button variant="ghost" variant-color="gray[900]" :aria-label="`Switch to ${colorMode == 'light' ? 'dark' : 'light'} mode`" :icon="colorMode == 'light' ? 'moon' : 'sun'" @click="$toggleColorMode" /> Current mode: </c-box>
Here is what our app currently looks like:
[embedded content]
So we have done the heavy lifting in setting up color mode in Chakra UI. So now we can style our application based on the color mode. Let’s go to default.vue and use the color mode slot prop provided by CColorModeProvider to style our application. Let’s modify our template first in default.vue.
<template> <div class="container"> <c-theme-provider> <c-color-mode-provider #default="{ colorMode }"> <c-box v-bind="mainStyles[colorMode]" w="100vw" h="100vh" as="section" > <c-reset /> <nav-bar /> <nUXt /> </c-box> </c-color-mode-provider> </c-theme-provider> </div> </template>
We are destructuring colorMode from the slot props property provided by CColorModeProvider and then passing it as a dynamic key to a mainStyle object which we will create in a bit. The idea is to use a different set of styles based on the colorMode value. I am also using the width and height with the shorthand props — w and h respectively to set the width and height of our CBox component. Let’s define this mainStyles object in our script section:
<script> import { CThemeProvider, CColorModeProvider, CReset, CBox } from '@chakra-ui/vue' import NavBar from '@/components/NavBar' export default { name: 'DefaultLayout', components: { CThemeProvider, CColorModeProvider, CReset, CBox, NavBar }, data () { return { mainStyles: { dark: { bg: 'gray.900', color: 'whiteAlpha.900' }, light: { bg: 'whiteAlpha.900', color: 'gray.900' } } } } } </script>
Chakra-ui explorer now has dark mode support!
[embedded content]
Now we have our navigation bar and have successfully set up dark mode support for our application, let’s focus on index.vue in our pages/ directory where the meat of our application can be found. We’ll start off with adding a CBox component like so:
<c-box as="main" d="flex" direction="column" align-items="center" p="10" > </c-box>
Then we’ll add the CInput component inside it. Our index.vue page component will then look like this:
<template> <c-box as="main" d="flex" align-items="center" direction="column" w="auto" p="16" > <c-input placeholder="Search components..." size="lg" mb="5" is-full-width /> </c-box> </template> <script> import { CBox, CInput } from '@chakra-ui/vue' export default { components: { CBox, CInput } } </script>
Here is how our application looks like now:
[embedded content]
You can see from the above screencast how the CInput element automatically knows when it’s in dark mode and adjust accordingly even though we didn’t explicitly set that. Also, the user can hit the tab key to focus on that CInput component.
Adding The Components’ List
So the idea of the Chakra-ui explorer (as stated earlier) is to show the user all of the available components in Chakra UI so that we can have a list of those components as well as the links that will take the user to the documentation of the component. To do this, I will create a folder called data at the root of our project’s directory then create a file called index.js. In index.js, I will export an array of objects which will contain the names of the components. Here is how the file should look like:
// ./data/index.js export const components = [ { name: 'Accordion' }, { name: 'Alert' }, { name: 'AlertDialog' }, { name: 'AspectRatioBox' }, { name: 'AspectRatioBox' }, { name: 'Avatar' }, { name: 'Badge' }, { name: 'Box' }, { name: 'Breadcrumb' }, { name: 'Button' }, { name: 'Checkbox' }, { name: 'CircularProgress' }, { name: 'CloseButton' }, { name: 'Code' }, { name: 'Collapse' }, { name: 'ControlBox' }, { name: 'Divider' }, { name: 'Drawer' }, { name: 'Editable' }, { name: 'Flex' }, { name: 'Grid' }, { name: 'Heading' }, { name: 'Icon' }, { name: 'IconButton' }, { name: 'IconButton' }, { name: 'Input' }, { name: 'Link' }, { name: 'List' }, { name: 'Menu' }, { name: 'Modal' }, { name: 'NumberInput' }, { name: 'Popover' }, { name: 'Progress' }, { name: 'PseudoBox' }, { name: 'Radio' }, { name: 'SimpleGrid' }, { name: 'Select' }, { name: 'Slider' }, { name: 'Spinner' }, { name: 'Stat' }, { name: 'Stack' }, { name: 'Switch' }, { name: 'Tabs' }, { name: 'Tag' }, { name: 'Text' }, { name: 'Textarea' }, { name: 'Toast' }, { name: 'Tooltip' } ]
For our implementation to be complete, I will import the above array into pages/index.vue and iterate over it to display all the components. Also, we will give the user the ability to filter the components using the search box. Here is the complete implementation:
// pages/index.vue <template> <c-box as="main" d="flex" align-items="space-between" flex-direction="column" w="auto" p="16" > <c-input v-model="search" placeholder="Search components..." size="lg" mb="10" is-full-width /> <c-grid template-columns="repeat(4, 1fr)" gap="3" p="5"> <c-box v-for="(chakraComponent, index) of filteredComponents" :key="index" h="10"> <c-badge> <c-link is-external :href="lowercase(`https://vue.chakra-ui.com/${chakraComponent.name}`)" > <c-icon name="info" size="18px" /> </c-link> </c-badge> </c-box> </c-grid> </c-box> </template> <script> import { CBox, CInput, CGrid, CLink, CBadge, CIcon } from '@chakra-ui/vue' import { components as chakraComponents } from '../data' export default { components: { CBox, CInput, CGrid, CBadge, CIcon, CLink }, data () { return { search: '' } }, computed: { filteredComponents () { return chakraComponents.filter((component) => { return this.lowercase(component.name).includes(this.lowercase(this.search)) }) } }, methods: { lowercase (value) { return value.toLowerCase() } } } </script>
And now our application looks like this:
[embedded content]
You can now see how dark mode is automatic for the component’s list as well as how the focus management is added for the links (by default) to aid accessibility.
Putting Chakra UI To The Test
Finally, let’s see how our app scores by running the Lighthouse accessibility test on it. Mind you, this test is based on the Axe user impact assessment. Below is a screencast of the test. You can also run the test yourself by following these steps.
[embedded content]
From the screencast above you can see that our Chakra UI app has a score of 85 on the lighthouse accessibility test.
Conclusion
In this article, we have touched on the need for building accessible interfaces and we have also seen how to use Chakra UI to build accessible applications from the ground up by building an explorer (Chakra-ui explorer) for the Chakra UI components.
(ra, yk, il)
Website Design & SEO Delray Beach by DBL07.co
Delray Beach SEO
source http://www.scpie.org/how-to-build-an-accessible-front-end-application-with-chakra-ui-and-nuxt-js/ source https://scpie1.blogspot.com/2020/07/how-to-build-accessible-front-end.html
0 notes
Text
AtomからVSCodeに乗り換えたので使ってる拡張パッケージを対応表にしてみた
年末年始にAtomの使ってるプラグインを列挙して棚卸しをしたけども、ちょっと前のMSのGitHubの買収を機に食わず嫌いしてたVSCodeを使ってみた。
ただし使うにあたってはAtomで使ってる環境と同程度のことができてくれないとダメなので調べてみた。
結果から言って今はVSCodeに乗り換えてしまった。せっかくなので使ってるAtomとVSCodeの拡張パッケージをそれぞれ対応する表にしてみた。ちなみに元々「俺のAtomは環境だ」と笑い話的に言っていたのでややAtom寄りの表になってるのはご容赦いただきたい。
使用感比較
拡張パッケージ表に行くまえに使用感を比較した所感。100%満足はしてないもののパフォーマンスの恩恵が大きく、なんとかAtomでできたことを損なうことなくVSCodeでも許容できるレベルにもっていけたのが乗り換えの決め手。
UI
ほとんどどちらも同じような感じで差異は大きくない。ただ、プロジェクト内から文字列検索した時の結果表示がAtomのほうがエディタ部に表示されるのでわかりやすい。VSCodeだとエクスプローラー部分に表示されるのが小さくてみづらい。
またキーバインドの設定はAtomイベントが発火したのか表示できるけど、VSCodeは表示する機構がないで、コンフリクトしてるキーバインドのデバッグが非常にしづらい。
見た目のカスタマイズ
見ためのカスタマイズは完全にAtomのほうが柔軟。これはDevToolsを開ける上、設定のLESSファイルを自由に編集できる。ということは変更したい箇所のセレクタにCSSを書いてあげることで如何様にもなる。
一方VSCodeは全てではないものの��要箇所はできて、まあ必要十分かな、という感じではある。個人的にはツリービュー(エクスプローラー)の文字サイズや行の高さなどはカスタムしたいけどできないのがもどかしい。
パフォーマンス
よくAtomは遅いと言われるけど、うん、まあ否定できない。それでも一応速くはなったんだけど。あとログファイルみたいに大きなファイルを開くとビーチボールがぐるぐるしてどうしようもなくなることがある。
VSCodeは最初の表示は速い。ウインドウの起動はちょっとかかるけどAtomに比べたら軽い。またファイル表示はキビキビ開く。ただし、これはどうもLinterやシンタックスハイライトなんかは開いた後でやってるような感じ。まず表示を優先する、みたいな挙動っぽい。大きなファイルは大きすぎた時はまず警告出してくれるので助かる。
さて、以下に拡張機能を列挙していくんだけど、自分で探す場合の注意としてはVSCodeのパッケージは検索すると同名のものが出てきたりする。同名のものをフォークして上げただけ、みたいな感じっぽいけどインストールの際はちょっと注意したい。
また、見つからなかったものは[-]とかって書いてあるけど、単に検索力が足りなかったり別のパッケージの一部にその代替機能が含まれてたりする可能性はあるのでご注意されたし。
選択系、変換、入力補助(エディタ操作)
概要詳細Atom PackageVSCode Package矩形選択SublimeText的な矩形選択。見たままの四角の範囲を選択可能。Sublime-Style-Column-Selection-選択範囲を段階ごとに広げる選択範囲を文字、単語、クォートや括弧で囲んだ要素、と順々に大きくできる。expand-regionexpand-regionキャレット列のハイライト-highlight-column-キャレット行のハイライト-highlight-lineビルトイン選択した文字列のハイライト選択してるものと同じ文字列をハイライト。highlight-selected-ブラケットハイライト対応するブラケットをハイライトビルトイン-ブラケットカラーハイライト対応するブラケットごとに色をかえてわかりやすく表示bracket-colorizerBracket Pair Colorizer文字ケースの相互変換キャメルケースとスネークケースだけでなく、ケバブケースもドット記法なども幅広く対応してるのでうれしい。change-casechange-caseクォーテーションマークを相互に変換シングルクォートとダブルクォートのトグルだけでなく、設定でバッククォートも対応できる。toggle-quotesToggle Quotes二元的要素のトグル変換true/falseなどをトグルで変換。設定で対応文字列をカスタマイズ可能。togglertogglerタブ-スペース変換インデントのタブorスペースをトグル変換。tabs-to-spacesビルトインセミコロンやカンマ付与今キャレットがどの列にあろうとも現在の行末にセミコロンとカンマをつける。キーバインドで設定すると捗る。trailing-semicolontoggle semicolon行末スペース制御行末のスペースを目立たせたり自動で削除したり。Atomはスタイルをカスタムすると良い感じtrailing-spacesTrailing Spaces全角スペース制御全角スペースを強調表示。Atomはスタイルをカスタムすると良い感じ。show-ideographic-spaceEvilInspector制御文字の制御BackSpaceなど制御文字を削除するフォーマッタ。不意に紛れこむと思わぬバグを起こすのでありがたい。-Remove backspace control character連番の数字を挿入複数行にわたって一括で連番生成。sequential-numbervscode-input-sequence選択した複数行をソート選択した範囲に含まれる複数行をアルファベット順や逆順などでソートlinesSort linesカラーコードの部分だけカラー表示カラーコードになってる文字列の背景色をその色で表示。CSSとか書くときに便利。StylusやSassの変数も対応してるので重宝する。pigmentsColor Highlight正規表現補助正規表現をビジュアルで表示してくれる。regex-railroad-diagramRegex Railroad DiagramsPath入力補完Path入力補完、でもたまに邪魔なときがある気がする。autocomplete-pathsPath Intellisense列のフォーマッタオブジェクトの定義とか、連続して変数に値を入れるとき、=や:をセパレータとして左右のインデントが揃うようにしてくれるフォーマッタ。言語別のものもある。alignerBetter Alignインデントフォーマットネストした要素のインデントをうまいこと整形してくれるフォーマッタ。JSONとかも良い感じにやってくれたり。けっこういろいろ対応してる。atom-beautifyBeautify高機能マルチカーソルデフォルトより高機能なマルチカーソル。キーバインドがバッティングしやすいので要カスタム。multi-cursor-plus-キャレットの行移動補助設定した行数文だけキャレットを一気に移動する。Emacsのページ送り的な送り用途として使える。line-jumperline-jumper
ファイル、タブ、ペイン操作系
概要詳細Atom PackageVSCode Packageペイン自動最大化複数Paneで分割してる時にアクティブなペインを自動的にほぼ最大化する。フォーカスしたペインを自動的に最大化したりもできる。hey-pane-ツリービューのフィルタツリービューで表示しているファイルをインクリメンタルに絞り込む。tree-view-filter-タブの規制最大タブ数の設定制御。設定数を越えると古いタブから自動的に閉じて入れ変わる挙動になる。設定でピン止めしたファイルや、未コミットファイル除外したりもできる。たくさんファイル開きすぎてわかんなくなっちゃうので。zentabs-メソッド定義などのツリー表示定義されたメソッド、変数などをサイドドロワーにツリー表示symbols-tree-viewビルトインTODOコメントの抽出プロジェクト内に存在するTODOやNOTEなどのコメントを抽出して表示。todo-showTodo TreeGHQ連携CLIリポジトリ管理ツールghqの管理下にあるプロジェクトのショートカット。全てのプロジェクトがGit管理されていれば、プロジェクトマネージャーはこれだけで十分だと思う。douglasvscode-ghq変更ファイルの強調ツリービュー(エクスプローラー)上でGitステータス▽による色分け表示する。追加ファイルや変更したファイルとかが視覚的にわかりやすいし、未コミットのファイルもみつけやすい。tree-view-git-statusビルトインファイルエンコーディング判別エンコーディングの自動判別。auto-encodingビルトインファイルエンコーディング変換マルチバイトのファイルをutf-8に変換。convert-to-utf8-FuzzyGrepファイル検索プロジェクト内をag的なfuzzyGrepしてファイル表示。atom-fuzzy-grep-ディレクトリごとのファイル操作ディレクトリごとに絞り込みでファイルを開ける、フルキーボードで階層ごとに掘っていく場合に便利。advanced-open-file-Expose風タブ操作開いてるタブをmacのexpose的に表示、切り替えできるやつ。expose-
HyperClick系
概要詳細Atom PackageVSCode PackageHyperClickコード中のいろんな要素がクリッカブルになる。キーバインドにも対応していて対象の文字列にキャレットがあるときはキー操作でも動作する。**-hyperclick系のアドオンとかで拡張可能。言語特化のアドオンは後述の言語別のところで。hyperclick-HyperClickのURL対応URLをクリッカブルにしてデフォルトブラウザで開けるようになる。hyperlink-hyperclickビルトイン
ミニマップ
概要詳細Atom PackageVSCode PackageMinimapサイドドロワーにコード全体をざっと単純化して見わたせるようなやつを表示。他のパッケージで拡張可能。minimapビルトインMinimap選択文字列ハイライトMinimap内で選択した文字を全てハイライト。minimap-highlight-selectedselect highlight in minimapMinimapを自動で隠すミニマップをスクロールしてないとき以外は自動的に非表示minimap-autohider-Mimimap内検索文字列ハイライトミニマップ内で検索文字列を全てハイライト。minimap-find-and-replaceビルトインMinimapカラーコード表示ミニマップ内でカラーコード部分をカラー表示。minimap-pigments-
その他、機能拡張
概要詳細Atom PackageVSCode Package多���数同時編集他の人とつなげて同時にシェアしながらコーディングできる。モブプロ、ペアプロなどでものすごい活躍する。teletypeVS Live ShareAtomキーマップコンフィグAtomでデフォルトのキーマップに一括で変更するビルトインAtom Keymapコーディングフォーマットの統一EditorConfigの対応。プロジェクトルートに.editorconfigという設定ファイルを置いて制御。editorconfigEditorConfig for VS Code設定の共有、同期GitHubGist経由でエディタの設定、インストールしているアドオン情報を複数端末で同期する。sync-settingsSettings Syncノートテイキング検索しやすいノートシステムをエディタに組み込み、メモやスニペットなどの一元管理を自分のカスタマイズしたエディタで編集できるのは強み。Atom版はnotational-velocityライクでかなり使いやすい。atom-notesVSNotesブラウザ連携同名のGoogleChrome拡張をブラウザに入れることで、ブラウザで開いてるページのテキストエリアを同期的にエディタで編集できるようになる。例えばPull RequestなどMarkdown対応のテキストエリアをエディタで編集できるのはかなり便利。atomic-chromeGhostTextターミナルエディタ内でターミナルを動作させるplatformio-ide-terminalビルトインCSVエディタエディタからCSVを表計算アプリケーションのように表示、編集できるtablrExcel Viewer拡張パッケージ管理パッケージにアップデートがあったら自動でアップデートする。ちょいちょい自分で確認しなくていいので楽。auto-update-packagesビルトインファイルアイコンツリービュー(エクスプローラー)やタブにファイルのアイコン���表示して視認性を上げる。VSCodeでは各種テーマでさらにカスタム可能。file-iconsビルトインファイルタイプの判別補助自動で判別されるファイルタイプのルールをカスタマイズを楽にする。file-types-差分表示、補助Paneで分割してDiff表示、見やすい。しかも保存してない状態でもDiffとれるので、長大な文字列とか大きめなオブジェクトを一時的に比較するときも重宝する。split-diffPartial Diffコードプリプロセスプリプロセッサ言語から元言語へ変換。preview-ステータスアイコンステータスバーに状況表示アイコンをプラス。確かAtom用のLinterと一緒に入ってくるはず。busy-signal-ウィンドウタイトルのカスタマイズAtomのウィンドウに表示されるタイトルのルールを変更できるようになる。上手く好きなようにファイル名の表示とかにカスタマイズすると地味に便利。custom-title-定義元にジャンプメソッドの定義元にジャンプできるようになる。goto-definition-ステータスバーにファイル名表示現在開いているファイル名とファイルパスをステータスバーに表示ビルトインActive File In StatusBar
Linter系(Atomのみ)
概要詳細Atom PackageVSCode PackageLinterLinter機能。各言語用のPackageを別途追加が必要。各言語用のLintは後述。linter-Linter表示Linter表示用UI。たぶんLinter入れると入ってくるはず。linter-ui-default-
各言語とか用途とか別
Git
概要詳細Atom PackageVSCode PackageGit総合サポートGit周りのこといろいろ-GitLens — Git superchargedGit履歴表示Git logビューアgit-logGit HistoryGit変更内容アイコンAtomにビルトインのステータスバーにGitのファイル変更状況アイコンを表示する-Git Indicatorsgitignoreサポートgitignore用のシンタックスハイライト-gitignoreGistGitHubのGistを編集したりアップロードしたり、挿入したり。Gist系はいくつかあったけどこれが一番使いやすかった。gist-Git Blame表示行ごとにGitで変更した人を表示する。git-blameGitLens — Git superchargedGit操作ショートカットよく使うGit操作をAtomから直でできる、Atomのコマンド補完が効くので便利、基本的なgit操作はこれだけでいける。ビルトインのものでも十分だがあると便利git-plus-コンフリクトのサポートGitでmergeしようとしてコンフリクトしたときの編集サポート。merge-conflictsビルトインホスティングサービス対応GitHubなどのホスティングサービスを開いたり、プルリクエストページを開いたりできる。GitHubだけでなくBitbucketなど他のサービスにも対応しててうれしい-Open in GitHub, Bitbucket, Gitlab, VisualStudio.com
Markdown
概要詳細Atom PackageVSCode PackageMarkdown表示の拡張デフォルトのMarkdownプレビューより高機能なプレビュー、TOCやプレゼンモードもあったりする。目次機能もあったり、いろいろと便利。markdown-preview-enhancedMarkdown Preview Enhanced入力補助Markdownの全般的な入力補助。とりあえず入れてる。markdown-writerMarkdown All in One目次自動生成編集中のMarkdownの目次を自動生成Markdown TOCMarkdown All in Oneテーブル記法補助Markdownのテーブル記法編集補助、うまいこと縦のカラム表示を整えてくれる。markdown-table-editorMarkdown All in Oneテーブル記法補助2別のMarkdownのテーブル記法編集補助Markdown Table FormatterMarkdown All in OneMarkdown目次機能ドロワーやエクスプローラーに編集中のMarkdownの目次をページ内リンク付きで表示。document-outlineビルトインタスク記法のトグルMarkdownのチェックボックス記法のチェック状態のトグル変換。そんなに使わないけどいちいちキャレットを移動するのが面倒なので。toggle-markdown-taskMarkdown Checkboxesフォーマッタ番号付きリスト記法の番号振りなおしなど、フォーマッタ。tidy-markdown-シンタックスハイライトAtomデフォルトのものより高機能なハイライタ。language-markdown-TextLint特に日本語に強い自然言語用のLinter、textlintをAtomで使えるように。Markdown以外でも効く。linter-textlintvscode-textlint
JSON
概要詳細Atom PackageVSCode Packageシンタックスハイライト(階層)JSONファイルを階層によってカラーリングを変えて視認性を上げる。atom-json-color-フォーマッタJSONファイルの整形フォーマッタ。pretty-jsonJSON ToolsLinterJSON用のLinterアドオン。linter-jsonlint-ソートJSONオブジェクトをアルファベット順などでソートできる。-Sort JSON objects
Ruby
概要詳細Atom PackageVSCode Package総合サポート-RubyRubyHamlサポートhaml用の言語ファイル。language-hamlRuby HamlSlimサポートSlim用の言語ファイル。language-slimSlimRspecサポートRspec(Rubyのテストフレームワーク)用の言語ファイル。language-rspecrspec-snippetsRablサポートRabl(RubyOnRails用のJSONやxmlに特化したテンプレートサポートGem)用の言語ファイル。language-rabl-Linter(RuboCop)Rubocop用のLinterアドオン。linter-rubocopruby-rubocopLinter(erb)erb用Linterlinter-erb-Linter(Haml)Haml用Linterlinter-haml-Linter(Slim)Slim用Linterlinter-slim-入力補完Ruby用の入力補完。別途Solagraph Gemのインストールが必要。autocomplete-rubyRuby Solargraph自動修正Rubocopルールに従って自動修正。rubocop-auto-correct-フォーマッタRuby用フォーマッタのrufoをエディタから実行。JSのprettier用のプラグインのほうが主流になりそうな感じ。rufo-atomrufo (Ruby formatter)Railsサポート--Ruby on RailsRailsパーシャルビューサポートRailsのパーシャルビューの自動補完autocomplete-rails-partial-Rspecファイルを開く現在開いてるファイルに対応したRspecのファイルを開く。rails-open-rspec-Rspecの実行エディタからRspecをrun。rspecRails Run Specsブロック文法の補助do,if,begenとendなどの対になるブロック要素をハイライト。ruby-block-i18nサポートRailsのi18n用のAutocompleteとHyperClickアドオンのセットrails-i18n-plus-Rails補助Rails用のスニペット集。rails-snippetsRuby on RailsRails補助(ファイル)Model,View,Controllerなど対応するファイル同士を素早く開けるようにする。rails-transporter-
JavaScript系(Node.jsやメタ言語、フレームワーク含む)
ちなみにPrettier系入れずにプロジェクトにESlintと統合するeslint-plugin-pretteirを使って統合している。
概要詳細Atom PackageVSCode PackageTypeScriptサポートTypeScriptの言語ファイルか補完や便利機能まで、IDE的サポート。atom-typescriptビルトインVue.jsサポートVue.js用の言語ファイル。language-vueVeturVuc.js入力補完Vue.js用Autocompleteアドオン。vue2-autocompleteVeturESlintJavaScript用のLinterであるEslintサポート、prettierと連携も可。linter-eslintESLintJS用HyperClickJavaScript用のHyperClickアドオン。js-hyperclick-Vue.js用HyperClickアドオンVue.js用HyperClickアドオン。vue-hyperclick-JestサポートJS用テストフレームワークJestのサポート-Jest
HTML系(メタ言語含む)
概要詳細Atom PackageVSCode PackagePugサポート-language-pugPug (Jade) snippetsHTML用LinterHTML用Linterアドオン。linter-htmlhint-Pug用LinterPug用Linterアドオン。linter-pug-HTMLタグ補完HTMLの閉じタグのショートカットと補完。Pugで書けばいらないんだけどね。tagAuto Close TagEmmetサポートhtml,css(プリプロセッサ含む)の強力なスニペット集。emmetビルトインインデント記法サポートJade(pug)やStylus,Sassのインデントベース記法の環境で、現在のキャレットの位置がどの要素のネスト中なのかツールチップで表示。indent-tooltip-
CSS系(メタ言語含む)
概要詳細Atom PackageVSCode PackageStylusサポートStylus用の言語ファイルとスニペット集。Styluslanguage-stylusStylus自動補完Stylus用のAutocompleteアドオン。autocomplete-css-with-stylus-support-StylusフォーマッタStylus用フォーマッタSupremacyサポート、かなり柔軟な設定が可能。-Manta’s Stylus SupremacyStylus用LinterStylus用のLinterアドオン。linter-stylintStylintCSS用LinterCSS用のLinterアドオン。linter-stylelintstylelintSass用LinterSCSS(SASS含む)のLinterアドオン。linter-scss-lintSass Lint
PUML
UMLをテキストから表現したもの。 細かいレイアウトは難しいもののテキストならGit管理もできるし素早くかけるので覚えてよかった。
概要詳細Atom PackageVSCode PackagePlantUMLサポートPlantUMLの言語ファイルlanguage-plantumlPlantUMLPlantUMLビューアPlantUML用のUMLを表示plantuml-viewerPlantUML
その他の言語系
概要詳細Atom PackageVSCode PackageApacheApacheのコンフィグ用language-apacheApache Confnginxnginxのコンフィグ用language-nginxnginx.confLispLispサポートlanguage-lispLispenvファイル環境変数を設定するenvファイルのシンタックスハイライトDotENV-
おしまいに
VSCodeに乗り換えたものの、今もAtomは好きだし、なんとなくVSCodeは好きになれない。もしかしたらあるイベントで好きでAtom使ってるところにかなり無理にVSCodeを勧められた経験からかもしれない。(やれ補完がどうとか。それはVSCodeの機能ではなくLanguage Serverだ)
Web上でもVSCode推しみたいのを良く見る。しかもAtomを貶めてまで。エディタは宗派で戦争になるためそういう推し方は好きじゃないんだよなぁ。あ、あれだインド行った時、自分の旅の一部としてとても楽しかったけど、インド推ししてる日本人の方々をどうも好きになれなかった感じと似ている。
なんにせよどんなエディタを使おうにもこういう拡張が充実してきてみんなが平和に好きなエディタを心地良く使う世の中がいいよね。
from Trial and Spiral https://blog.solunita.net/my-favorite-packages-for-atom-and-vscode/
0 notes
Text
Building With Vue.js 2 and Firebase
Introduction
Firebase is Google's mobile platform that helps you develop high-quality apps and grow your business. In this tutorial, you will make good use of one of Firebase's awesome features: the Realtime Database.
You will build a single page application to create books. This book will be saved to your Firebase database, and you will be able to retrieve and delete books you have created.
Let's get started.
Set Up Firebase
Go to Google's Firebase page to create a new account. When done with that, log in to your console. Click on the option to add a project. Enter your project details and click on the button CREATE PROJECT.
This will lead you to your console. The Firebase console helps you manage your Firebase configuration settings.
For this tutorial, you'll need to make access to your database public. From the panel on the left, select Database. Select Realtime Database from the options that show next by clicking GET STARTED. Making your database public involves editing the rules. So click RULES on the page that loads next.
Make your rules look like this.
{ "rules": { ".read": true, ".write": true } }
Click the option to PUBLISH when done.
With this rule, authentication is not required to perform read and write actions on your database. This is needful for the application you will be building in this tutorial.
Set Up a Project Using Vue CLI
Vue CLI allows you to scaffold Vue.js projects. If you do not have it on your machine, you can get it by running:
npm install -g vue-cli
This will install it globally on your machine. Here is how Vue-CLI is used.
vue init <template-name> <project-name>
To learn more about Vue-CLI, check the GitHub page.
For this project you will use webpack templates, so run the command below from your terminal.
vue init webpack vue-book
These are the installation options I used.
? Project name vue-book ? Project description A Vue.js project ? Author izuchukwu1 <[email protected]> ? Vue build standalone ? Install vue-router? No ? Use ESLint to lint your code? Yes ? Pick an ESLint preset Standard ? Setup unit tests with Karma + Mocha? No ? Setup e2e tests with Nightwatch? No vue-cli · Generated "vue-book". To get started: cd vue-book npm install npm run dev Documentation can be found at http://ift.tt/28JYKuJ
Navigate to your project folder. The files and folders generated by Vue-CLI have a tree like this.
├── build │ ├── build.js │ ├── check-versions.js │ ├── dev-client.js │ ├── dev-server.js │ ├── utils.js │ ├── vue-loader.conf.js │ ├── webpack.base.conf.js │ ├── webpack.dev.conf.js │ └── webpack.prod.conf.js ├── config │ ├── dev.env.js │ ├── index.js │ └── prod.env.js ├── index.html ├── package.json ├── README.md ├── src │ ├── App.vue │ ├── assets │ │ └── logo.png │ ├── components │ │ └── HelloWorld.vue │ └── main.js └── static 6 directories, 19 files
Now run the command to install your dependencies.
npm install
When done, you can start your dev server by running:
npm run dev
Add Firebase to the Project
To bind Firebase data to Vue.js data properties, we will make use of the VueFire library. You can check more about it on GitHub.
Run the command below:
npm install firebase vuefire --save
Open up main.js to add VueFire. Make your main.js file look like what I have below.
#src/main.js // The Vue build version to load with the `import` command // (runtime-only or standalone) has been set in webpack.base.conf with an alias. import Vue from 'vue' import App from './App' import VueFire from 'vuefire' Vue.use(VueFire) Vue.config.productionTip = false /* eslint-disable no-new */ new Vue({ el: '#app', template: '<App/>', components: { App } })
Set Up the Firebase Connection
Go to your Firebase console, and click on the Overview link on the left panel. Select the option to add Firebase to your web app. Copy the snippet that pops up in the window to a text file. The snippet contains your apiKey, authDomain, databaseURL, projectId, storageBucket, and messagingSenderId. You need these details to be able to access your Firebase database.
You start by importing Firebase from the core Firebase library. A Firebase instance is created using the initializeApp method. The snippet you copied has to be passed to this method as an object. This has to be done in the script section of your App.vue, like this.
#src/App.vue import Firebase from 'firebase' let config = { apiKey: "...", authDomain: "...", databaseURL: "...", storageBucket: "...", messagingSenderId: "..." }; let app = Firebase.initializeApp(config) let db = app.database() let booksRef = db.ref('books')
After creating the Firebase instance, the database reference is obtained by using app.database().
Book Listing
Since VueFire makes it easy to bind Vue.js data properties to Firebase, implementing the books listing feature requires you to add this.
firebase: { books: booksRef },
You add that below:
name: 'app',
Now you have access to the book items from your database. The template will look like this.
<div class="panel-body"> <table class="table table-striped"> <thead> <tr> <th>Title</th> <th>Author</th> </tr> </thead> <tbody> <tr v-for="book in books"> <td><a v-bind:href="book.url"></a></td> <td></td> </tr> </tbody> </table> </div>
The v-for directive is used to iterate through the available books. Each book will be outputted in a new table row.
Adding a New Book
To put in place the addition of new books, you need to first define the data model that will be used.
data () { return { newBook: { title: '', author: '', url: 'http://', isbn: '' } } }
Next, set up the template to look like this.
<div class="panel panel-default"> <div class="panel-heading"> <h3 class="panel-title">Add New Books</h3> </div> <div class="panel-body"> <form id="form" class="form-inline" v-on:submit.prevent="addBook"> <div class="form-group"> <label for="bookTitle">Title:</label> <input type="text" id="bookTitle" class="form-control" v-model="newBook.title"> </div> <div class="form-group"> <label for="bookAuthor">Author:</label> <input type="text" id="bookAuthor" class="form-control" v-model="newBook.author"> </div> <div class="form-group"> <label for="bookUrl">Url:</label> <input type="text" id="bookUrl" class="form-control" v-model="newBook.url"> </div> <input type="submit" class="btn btn-primary" value="Add Book"> </form> </div> </div>
The v-model directive is used to bind the newBook properties to the corresponding input.
The v-on directive will lead us to create an event handler method that gets called whenever a new book is to be created. Here is what the event handler should look like.
methods: { addBook: function() { booksRef.push(this.newBook) this.newBook.title = '', this.newBook.author = '', this.newBook.url = 'http://', this.newBook.isbn = '' }, },
The addBook method helps insert new book objects into the Firebase database. The data is also synced across all clients.
Deleting Books
Let's add the ability to delete books. Add another column to the book listing.
<td> <span class="glyphicon glyphicon-trash" aria-hidden="true" v-on:click="removeBook(book)"></span> </td>
Let's put in place a method that gets called each time the button is clicked. The method is passed the book you intend to delete, which is actually the key to the book, as you will see soon. The remove() is called on the returned book to delete it from the database.
Here is what the method looks like.
removeBook: function (book) { booksRef.child(book['.key']).remove() }
With that, you are done with App.vue. Putting everything together, here is how your App.vue file should look.
<template> <div id="app" class="container"> <div class="page-header"> <h1>Vue Book</h1> </div> <div class="panel panel-default"> <div class="panel-heading"> <h3>Add Book</h3> </div> <div class="panel-body"> <form id="form" class="form-inline" v-on:submit.prevent="addBook"> <div class="form-group"> <label for="bookTitle">Title:</label> <input type="text" id="bookTitle" class="form-control" v-model="newBook.title"> </div> <div class="form-group"> <label for="bookAuthor">Author:</label> <input type="text" id="bookAuthor" class="form-control" v-model="newBook.author"> </div> <div class="form-group"> <label for="bookUrl">URL:</label> <input type="text" id="bookUrl" class="form-control" v-model="newBook.url"> </div> <div class="form-group"> <label for="bookIsbn">ISBN:</label> <input type="text" id="bookIsbn" class="form-control" v-model="newBook.isbn"> </div> <input type="submit" class="btn btn-primary" value="Add Book"> </form> </div> </div> <div class="panel panel-default"> <div class="panel-heading"> <h3>Books Lists</h3> </div> <div class="panel-body"> <table class="table table-stripped"> <thead> <tr> <th>Title</th> <th>Author</th> <th></th> </tr> </thead> <tbody> <tr v-for="book in books"> <td> <a v-bind:href="book.url"></a> </td> <td> </td> <td> <span class="glyphicon glyphicon-trash" aria-hidden="true" v-on:click="removeBook(book)"></span> </td> </tr> </tbody> </table> </div> </div> </div> </template> <script> import Firebase from 'firebase' let config = { apiKey: "...", authDomain: "...", databaseURL: "...", storageBucket: "...", messagingSenderId: "..." } let app = Firebase.initializeApp(config) let db = app.database() let booksRef = db.ref('books') export default { name: 'app', firebase: { books: booksRef }, data () { return { newBook: { title: '', author: '', url: 'http://', isbn: '' } } }, methods: { addBook: function() { booksRef.push(this.newBook) this.newBook.title = '', this.newBook.author = '', this.newBook.url = 'http://', this.newBook.isbn = '' }, removeBook: function(book) { booksRef.child(book['.key']).remove() } } } </script> <style> #app { font-family: 'Avenir', Helvetica, Arial, sans-serif; -webkit-font-smoothing: antialiased; -moz-osx-font-smoothing: grayscale; color: #2c3e50; margin-top: 60px; } </style>
In the template, I added some Bootstrap classes. For these to work, open your index.html file and make it look like this.
<!DOCTYPE html> <html> <head> <meta charset="utf-8"> <title>vue-book</title> <link rel="stylesheet" href="http://ift.tt/2bUjS7M; integrity="sha384-BVYiiSIFeK1dGmJRAkycuHAHRg32OmUcww7on3RYdg4Va+PmSTsz/K68vbdEjh4u" crossorigin="anonymous"> <link rel="stylesheet" href="http://ift.tt/2iB9WD6; /> </head> <body> <div id="app"></div> <!-- built files will be auto injected --> <script src="http://ift.tt/2qsg3fq; integrity="sha256-hwg4gsxgFZhOsEEamdOYGBf13FyQuiTwlAQgxVSNgt4=" crossorigin="anonymous"></script> <script src="http://ift.tt/2c7Wssx; integrity="sha384-Tc5IQib027qvyjSMfHjOMaLkfuWVxZxUPnCJA7l2mCWNIpG9mGCD8wGNIcPD7Txa" crossorigin="anonymous"></script> </body> </html>
Conclusion
JavaScript has become extremely popular and is now capable of building mature applications (as we've seen above). If you’re looking for additional resources to study or to use in your work, check out what we have available in the Envato Market.
In this tutorial, you learned about Firebase. You were able to connect Vue.js and Firebase using VueFire. Your application can make read and write requests to your Firebase database.
You can go further by adding more features like categories and description.
via Envato Tuts+ Code http://ift.tt/2gDufeR
0 notes
Photo

DockerでNuxt.js(v1.3.0)+TypeScript開発環境を構築する https://ift.tt/2E2weq1
概要
Dockerコンテナ上でNuxt.jsの開発ができるようにする手順です。 前にも同じような記事を書いたのですが、開発環境の構築についてまとめてみました。
Nuxt.jsのバージョン1.3.0を利用した記事となります。Nuxt.jsのバージョン2の利用だと別の方法となるみたいです(未検証
手順
GitHubにソースをアップしていますので、よければご参考ください。 https://github.com/kai-kou/nuxtjs-typescript-with-docker
前提
Dockerがインストールされている前提です。
> docker --version Docker version 18.06.1-ce, build e68fc7a > docker-compose --version docker-compose version 1.22.0, build f46880f
Docker環境の作成
> mkdir 任意のディレクトリ > cd 任意のディレクトリ > touch Dockerfile > touch docker-compose.yml
Node.jsのバージョンや、npm かyarn を利用するかはお好みで。
Dockerfile
FROM node:10.8.0-stretch RUN npm install --global yarn RUN yarn global add @vue/cli RUN yarn global add @vue/cli-init WORKDIR /projects ENV HOST 0.0.0.0 ENV PORT 3000
docker-compose.yml
version: '3' services: app: build: . ports: - "8080:8080" volumes: - ".:/projects" tty: true
Dockerコンテナを立ち上げます。
> docker-compose up -d > docker-compose exec app bash
Nuxtアプリの作成
TypeScriptのプロジェクトテンプレートを利用します。
nuxt-community/typescript-template: Typescript starter with Nuxt.js https://github.com/nuxt-community/typescript-template
コンテナ内
> vue init nuxt-community/typescript-template app > cd app > yarn
SCSS対応
SCSSが利用できるようにします。こちらは任意でOKです。
コンテナ内
> yarn add --dev node-sass sass-loader
ファイル拡張子やタグにscss の指定を追加します。
コンテナ内
# ファイル拡張子の変更 > mv assets/css/main.css assets/css/main.scss # nuxt.config.jsの設定変更 > grep -l 'main.css' ./nuxt.config.js | xargs sed -i -e 's/main.css/main.scss/g' # .vueファイルのstyleタグにscssの指定を追加 > grep -l '<style scoped>' ./**/*.vue | xargs sed -i -e 's/<style scoped>/<style lang="scss" scoped>/g'
動作確認
実行してみます。
コンテナ内
> yarn dev
ブラウザでアクセスしてみます。 http://localhost:3000

やったぜ。
HOST、PORTの指定方法
DockerfileでHOST とPOST を環境変数で指定していますが、環境変数で指定せずに、コマンドパラメータで指定も可能だそうです。
ホストとポート番号 – Nuxt.js https://ja.nuxtjs.org/faq/host-port/
まとめ
TypeScript用のプロジェクトテンプレートが用意されているので、とても簡単に環境構築することができました^^
参考
nuxt-community/typescript-template: Typescript starter with Nuxt.js https://github.com/nuxt-community/typescript-template
Nuxt.js + TypeScript(+ tslint)プロジェクトの作成手順 https://www.h-sakano.net/entry/2018/09/09/131124
Nuxt.js + TypeScript + Sass + ESLint 事始め https://qiita.com/ryota-yamamoto/items/4b06ef51926df1bdbae8
DockerでVue.js+TypeScript開発環境を構築する https://cloudpack.media/43078
複数のファイル内の文字列をまとめて置換するLinuxコマンドhttps://qiita.com/kkyouhei/items/b4ff839a2f36ba194df3
複数ファイルを一気にgrepしたり文字列置換したりする方法 – Nao Minami’s Blog http://south37.hatenablog.com/entry/2014/08/17/%E8%A4%87%E6%95%B0%E3%83%95%E3%82%A1%E3%82%A4%E3%83%AB%E3%82%92%E4%B8%80%E6%B0%97%E3%81%ABgrep%E3%81%97%E3%81%9F%E3%82%8A%E6%96%87%E5%AD%97%E5%88%97%E7%BD%AE%E6%8F%9B%E3%81%97%E3%81%9F%E3%82%8A%E3%81%99
ホストとポート番号 – Nuxt.js https://ja.nuxtjs.org/faq/host-port/
元記事はこちら
「DockerでNuxt.js(v1.3.0)+TypeScript開発環境を構築する」
December 06, 2018 at 12:00PM
0 notes
Photo

The 2019 State of JavaScript survey is here
#465 — November 29, 2019
Read on the Web
JavaScript Weekly
▶ Faster JavaScript Apps with JSON.parse() — Did you know that JSON can be parsed more quickly than JavaScript itself? Here's how and why to consider using JSON.parse instead of normal object literals.
Mathias Bynens / Bram van Damme
It's Time to Take the State of JavaScript 2019 Survey — Now in its fourth year, the popular State of JavaScript survey returns, seeking your responses to help find out “which libraries developers want to learn next, which have the best satisfaction ratings, and much more”. Of course, we’ll share the results once they’re live, as always.
Raphaël Benitte, Sacha Greif and Michael Rambeau
Getting Started Building Apps with JavaScript — CascadiaJS just wrapped up. Take a look at the collection of articles, tutorials and podcast episodes that will help you get started building web applications with JavaScript and JS-related technologies.
Heroku sponsor
ESLint 6.7 Released — The popular linting tool includes a new way for rule authors to make suggestions for non-automatic fixes, plus there are six new rules covering things like duplicate else-ifs and grouping accessor pairs. 6.7.1 quickly followed 6.7.0 fixing a regression.
ESLint
Cockatiel: A Resilience and Transient-Fault-Handling Library — This is for defining common resilience or fault handling techniques like ‘backoff’, retries, circuit breakers, timeouts, etc. and is inspired by .NET’s Polly fault handling library.
Connor Peet
The Epic List of Languages That Compile to JavaScript — JavaScript is as much a compile target as a language in its own right these days, and this extensive list on the CoffeeScript repo has been (and continues to be) updated for years. The latest addition? Fengari, a Lua VM written in JavaScript.
Jeremy Ashkenas et al.
▶ Building Promises From Scratch in a Post-Apocalyptic Future — A 20 minute screencast covering what’s involved in creating a promises implementation from scratch on top of lower level primitives (e.g. callbacks).
Low Level JavaScript
⚡️ Quick Releases
Babel 7.7.4 — The JavaScript transpiler.
Ink 2.6.0 — Like React but for building CLI apps.
GPU.js 2.3.0 — GPU-accelerated JavaScript.
jQuery.Terminal 2.9.0 — Add terminal experiences to your site/app.
💻 Jobs
Senior Front-End Software Engineer (Vue, Nuxt, Apollo) — Join our distributed Front-End functional team in our quest to make doctors more effective using Vue, Nuxt, Apollo and Rails.
Doximity
Vue Front End Lead at Valiant Finance - Sydney, Australia — FinTech based in Surry Hills looking for an experienced Vue Front End Lead to help us build our growing financial marketplace.
Valiant Finance
Find a Job Through Vettery — Make a profile, name your salary, and connect with hiring managers from top employers. Vettery is completely free for job seekers.
Vettery
📘 Articles & Tutorials
An Official Style Guide for Writing Redux Code — Recommended patterns, best practices, and suggested approaches for writing Redux-based apps.
Redux
An Introduction to the Picture-in-Picture Web API — Chrome supports a ‘picture-in-picture’ mechanism for creating floating video windows that continue to play even if a user navigates to a different page. Firefox and Safari have support via proprietary APIs too.
Ayooluwa Isaiah
Black Friday Sale: Quokka.js - Rapid JavaScript Prototyping in Your Editor — Quokka displays execution results in your editor as you type. Get it now with a 50% Black Friday discount.
Wallaby.js sponsor
Understanding Streams in Node.js — Streams continue to be one of the fundamental concepts that power Node applications.
Liz Parody
Outside the Web: Emscripten Now Generating Standalone WebAssembly Binaries — A key part of both asm.js and Emscripten was the idea of compiling binaries for use on the Web using JavaScript, but now Emscripten has support for emitting WebAssembly without relying on JavaScript at all. You can, of course, interact with such output from your JavaScript code, though.
Alon Zakai
Building Animated Draggable Interfaces with Vue.js and Tailwind — Tailwind CSS is an increasingly popular CSS framework.
Cristi Jora
Video Developer Report - Top Trends in Video Technology 2019
Bitmovin sponsor
Using Backreferences in JavaScript Regular Expressions — Backreferences allow you to use matches already made within a regex within that same regex.
stefan judis
For the Sake of Your Event Listeners, Use Web Workers — “Start by identifying notably intense processes and spin up a small Web Worker for them.”
Alex MacArthur
🔧 Code & Tools

litegraph.js: A Graph Node Engine and Editor — This would be useful if you need to create an online system for users to create and manipulate graphs or interconnecting ‘nodes’ for things like graphics, audio or data pipelines, say. Live demo here.
Javi Agenjo
Duktape 2.5: A Compact, Embeddable JavaScript Engine — An ES5.1-compliant JavaScript engine focused on being very compact. If you have a C/C++ project that needs a JS engine, it’s worth a look as the duk binary runs only 350K.
Sami Vaarala
Automate and Standardize Code Reviews for JS and 29 Other Languages — Set standards on coverage, duplication, complexity, and style issues and see real-time feedback in your Git workflow.
Codacy sponsor
Scala.js 1.0.0-RC1: A Scala to JavaScript Compiler — A final 1.0 release is due in early 2020. If this area of using Scala to build front-end apps interests you, you might also like Slinky which makes writing React apps in Scala easier.
Scala Team
Ketting 5.0: A 'Generic' Hypermedia Client for JavaScript — Supports Hypertext Application Language, JSON:API, Siren, and HTTP link headers. Works in both the browser and Node.js.
Evert Pot
WebGLStudio.js: A 3D Graphics Editor in the Browser — It’s not new but its author says it’s now mature, ready to be extended, and can be used in production (although a 1.0 release is still a little way away).
Javi Agenjo
JSONCrush: Compresses JSON Into URI Friendly Strings — The results are shorter than standard URI encoding.
Frank Force
by via JavaScript Weekly https://ift.tt/2R3J6CF
0 notes