#WAF XML-RPC
Explore tagged Tumblr posts
Visit Tumblr Blog
Explore Tumblr blogs with no restrictions, modern design and the best experience.
Last Seen Tumblr Blogs


Fun Fact
There are dozens of funny blogs to kill time on Tumblr.
Text
Wie man Ninja Firewall WP Edition richtig einstellt

Im Bereich der Websicherheit ist die optimale Konfiguration und Einrichtung von Firewallsystemen entscheidend für den Schutz digitaler Daten. Dieser Artikel beschäftigt sich mit den Feinheiten der effektiven Einrichtung der Ninja Firewall WP Edition. Schritt für Schritt wird der Benutzer durch die Aktivierung der Web Application Firewall und die Aktivierung des Schutzes für die wp-login.php Datei geführt. Es werden auch Tipps zur Fehlerbehebung für mögliche Probleme gegeben, die während der Einrichtung auftreten können, um einen reibungslosen Implementierungsprozess zu gewährleisten. Darüber hinaus werden zusätzliche Funktionen und Möglichkeiten dieser Edition erkundet, wobei die Fähigkeit zur Erkennung und Verhinderung von Brute-Force-Angriffen, zur Überwachung von unbefugtem Zugriff oder Änderungen an PHP-Dateien und zur Bereitstellung von Ereignisbenachrichtigungen für kritische Sicherheitsupdates hervorgehoben wird. Die Anforderungen, der Installationsprozess, die FAQs, die Bewertungen und die Verfügbarkeit des Changelogs werden ebenfalls detailliert beschrieben. Dieser Artikel zielt darauf ab, den Lesern ein umfassendes Wissen über die Konfiguration verschiedener Aspekte zu vermitteln, wie z.B. das Anpassen von Sicherheitsregeln, die Konfiguration von Ereignisbenachrichtigungen, das Aktualisieren von NinjaFirewall (Pro Edition), Best Practices für die Nutzung der NinjaFirewall WP Edition unter Berücksichtigung aller Einschränkungen oder Alternativen, die mit der Verwendung der .htninja-Datei verbunden sind.
Aktivieren der vollständigen WAF
Um die volle Web Application Firewall (WAF) in Ninja Firewall zu aktivieren, sollten Benutzer die spezifische Aktivierungsmethode ihres Hosting Panels befolgen und sicherstellen, dass sie vorher ein Backup ihrer WordPress Seite machen. Benutzer mit einem benutzerdefinierten Kontrollpanel müssen die bereitgestellten Zeilen manuell in die .htaccess-Datei einfügen. Benutzer von C-Panel-Hosting hingegen sollten die Datei .user.ini im Home-Verzeichnis bearbeiten. Nach der Aktivierung der vollständigen WAF können die Benutzer die grundlegenden Firewall-Einstellungen vornehmen. Dazu gehört die Einrichtung des Login-Schutzes, indem Sie unter Firewall-Optionen auf die Registerkarte Login-Schutz gehen und den Schutz für wp-login.php aktivieren. Außerdem sollten Benutzer eine separate ID und ein Passwort für die Firewall-Seite festlegen und den Schutz für XML-RPC aktivieren. Ein weiterer wichtiger Aspekt ist die Konfiguration des XML-RPC-Schutzes, der sicherstellt, dass Brute-Force-Angriffe verhindert werden. Durch die Aktivierung des Brute-Force-Angriffsschutzes können Benutzer ihre Website vor mehreren fehlgeschlagenen Anmeldeversuchen schützen. Darüber hinaus ist es wichtig, die Firewall-Protokolle regelmäßig zu überwachen, da sie wertvolle Erkenntnisse über potenzielle Sicherheitsbedrohungen oder verdächtige Aktivitäten liefern.
Aktivieren des Wp-Login.Php-Schutzes
Um den Schutz für wp-login.php zu aktivieren, müssen Sie unter den Firewall-Optionen zur Registerkarte Login-Schutz navigieren. Auf dieser Registerkarte können Benutzer den Schutz für wp-login.php aktivieren und eine separate ID und ein Passwort für die Firewall-Seite festlegen. Es wird auch empfohlen, den Schutz für XML-RPC zu aktivieren. Um die Leistung der Firewall zu optimieren, ist es wichtig, die IP-Blockierung zu konfigurieren. Dies kann durch Hinzufügen bestimmter IP-Adressen oder IP-Bereiche zur Whitelist oder Blacklist in der .htninja-Datei erfolgen. Benutzer von NinjaFirewall (Pro+ Edition) haben Zugriff auf zusätzliche Funktionen wie z.B. die Verwaltung von IP Whitelists oder Blacklists über die Menüoption Zugriffskontrolle IP Zugriffskontrolle. Um Probleme mit dem Login-Schutz zu beheben, sollten Benutzer überprüfen, ob sie während der Aktivierung Fehler erhalten und gegebenenfalls die Seite aktualisieren. Wenn die Probleme weiterhin bestehen, wird empfohlen, den Hosting-Provider zu kontaktieren, um weitere Unterstützung zu erhalten. Das Umbenennen des Ninja Firewall Plugin-Ordners kann ebenfalls helfen, Probleme mit vergessenen Anmeldedaten zu lösen. Um die Effektivität von NinjaFirewall (WP Edition) zu maximieren, ist es wichtig, die Anpassung der Sicherheitsregeln zu verstehen. Benutzer können Servervariablen in der .htninja Datei ändern, spezifische Anfragen basierend auf variablen Bedingungen hinzufügen oder blockieren und spezielle Rückgabewerte wie ALLOW oder BLOCK für Whitelisting oder Blacklisting von IPs verwenden.

Fehlersuche bei der vollständigen WAF-Aktivierung
Wenn während des Aktivierungsprozesses der vollständigen Web Application Firewall (WAF) ein Fehler auftritt, ist es ratsam, die Seite zu aktualisieren und gegebenenfalls den Hosting-Provider um weitere Unterstützung zu bitten. Die Fehlersuche bei der Aktivierung der vollständigen WAF umfasst mehrere Schritte: - Überprüfen Sie, ob auf der Aktivierungsseite Fehlermeldungen oder Benachrichtigungen angezeigt werden. - Überprüfen Sie, ob alle erforderlichen Serveranforderungen erfüllt sind, z. B. die Kompatibilität der PHP-Version und der erforderlichen Erweiterungen. - Vergewissern Sie sich, dass es keine Konflikte mit anderen Plugins oder Themes gibt, die auf der WordPress-Website installiert sind. - Wenn das Problem weiterhin besteht, versuchen Sie, andere Sicherheits-Plugins vorübergehend zu deaktivieren, um etwaige Konflikte zu ermitteln. Wenn eine Fehlerbehebung des wp-login.php-Schutzes erforderlich ist, führen Sie die folgenden Schritte aus: - Überprüfen Sie, ob der wp-login.php-Schutz auf der Registerkarte Login-Schutz unter Firewall-Optionen aktiviert ist. - Überprüfen Sie, ob eine separate ID und ein Passwort für die Firewall-Seite festgelegt wurden. - Stellen Sie sicher, dass der Schutz für XML-RPC ebenfalls aktiviert ist. - Wenn beim Zugriff auf die WordPress-Anmeldeseite keine Anmeldedaten abgefragt werden, überprüfen Sie diese Einstellungen noch einmal. Zusätzlich zur Fehlerbehebung bei Problemen mit der Aktivierung und dem Login-Schutz sind die Konfiguration der grundlegenden Firewall-Einstellungen und die Aktivierung des Schutzes vor Brute-Force-Angriffen wichtige Schritte für eine effektive Einrichtung der Ninja Firewall WP Edition.
Fehlersuche beim Wp-Login.Php Schutz
Die Fehlerbehebung des wp-login.php Schutzes umfasst mehrere Schritte, um das ordnungsgemäße Funktionieren der Sicherheitsmaßnahmen zu gewährleisten. Zunächst ist es wichtig zu prüfen, ob der Schutz für wp-login.php aktiviert ist. Dazu können Sie unter den Firewall-Optionen auf die Registerkarte Login-Schutz zugreifen und überprüfen, ob der Schutz aktiviert ist. Als nächstes ist es wichtig, die eingestellte ID und das Passwort für die Firewall-Seite zu überprüfen. Damit wird sichergestellt, dass nur autorisierte Personen Zugriff auf die Verwaltung und Konfiguration der Firewall-Einstellungen haben. Darüber hinaus sollte der XML-RPC-Schutz aktiviert werden, um potenzielle Brute-Force-Angriffe über dieses Protokoll zu verhindern. Dies kann ebenfalls in den Firewall-Optionen vorgenommen werden. Darüber hinaus ist es wichtig zu bestätigen, dass beim Zugriff auf die WordPress-Anmeldeseite die Eingabe von Anmeldedaten erforderlich ist. Dadurch wird sichergestellt, dass unbefugte Benutzer keinen Zugang zu sensiblen Informationen erhalten oder bösartige Aktivitäten durchführen können. Um die Anmeldeinformationen wirksam zu schützen, ist die Verwaltung der Firewall-Protokolle von entscheidender Bedeutung. Durch regelmäßiges Überprüfen und Analysieren der Firewall-Protokolle können verdächtige Aktivitäten oder potenzielle Sicherheitsverletzungen erkannt und umgehend behoben werden. Schliesslich spielt die Optimierung der NinjaFirewall Leistung eine wichtige Rolle bei der Aufrechterhaltung eines effektiven Sicherheitssystems. Die regelmäßige Aktualisierung und Konfiguration der NinjaFirewall-Einstellungen gewährleistet eine optimale Leistung gegen potentielle Bedrohungen bei gleichzeitiger Minimierung falsch positiver und negativer Ergebnisse.
Zusätzliche Informationen
Der Schutz von xmlrpc.php ist entscheidend für die Sicherheit einer WordPress Webseite. Ein weit verbreiteter Irrglaube über xmlrpc.php ist die Annahme, dass es nicht wichtig ist, diese Datei zu schützen oder zu deaktivieren. Allerdings kann xmlrpc.php von Angreifern ausgenutzt werden, um Brute-Force-Angriffe und andere bösartige Aktivitäten durchzuführen. Die Vorteile einer Firewall wie Ninja Firewall liegen in der erhöhten Sicherheit und dem Schutz vor verschiedenen Arten von Angriffen wie SQL Injection, Cross-Site Scripting (XSS) und Remote Code Execution. Vergleicht man Ninja Firewall mit anderen Sicherheitsplugins, so bietet Ninja Firewall fortschrittliche Funktionen und eine leistungsstarke Filter-Engine, die von Hackern verwendete Umgehungstechniken erkennen kann. Um die Leistung der Firewall zu optimieren, wird empfohlen, den vollständigen Schutz der Web Application Firewall (WAF) zu aktivieren und den Schutz der wp-login.php in den Firewall-Optionen zu aktivieren. Zu den Tipps zur Fehlerbehebung bei der vollständigen WAF-Aktivierung gehören die Aktualisierung, wenn bei der Aktivierung Fehler auftreten, oder die Kontaktaufnahme mit dem Hosting-Provider zur Unterstützung. Für den wp-login.php Schutz kann das Umbenennen des Ninja Firewall Plugin Ordners helfen, Fehler bei fehlenden Dateien zu beheben. Um die Sicherheit einer Webseite zu gewährleisten, ist es wichtig, die verschiedenen Angriffsarten zu verstehen und zu wissen, wie Ninja Firewall vor ihnen schützen kann. Mit seiner Fähigkeit, Brute-Force-Versuche zu erkennen, den Zugriff auf PHP-Dateien zu überwachen und unbefugten Zugriff zu verhindern, bietet Ninja Firewall umfassenden Schutz für WordPress-Websites.
Beschreibung und Funktionen
Die Beschreibung und Funktionen von NinjaFirewall (WP Edition) umfassen eine eigenständige Firewall, die erweiterte Sicherheitsmaßnahmen bietet, die auf WordPress-Ebene normalerweise nicht verfügbar sind. Dieses Plugin benötigt PHP 7.1, MySQLi Erweiterung und ist kompatibel mit Unix-ähnlichen Betriebssystemen wie Linux und BSD. NinjaFirewall kann jede HTTP/HTTPS-Anfrage, die an ein PHP-Skript gesendet wird, abfangen, scannen, säubern oder zurückweisen, bevor sie WordPress erreicht. NinjaFirewall schützt alle Skripte innerhalb der Blog-Installationsverzeichnisse, einschließlich der Nicht-WordPress-Skripte. Eines der Hauptmerkmale von NinjaFirewall ist die leistungsstarke Filter-Engine, die Daten aus eingehenden HTTP-Anfragen normalisieren und transformieren kann. Es erkennt Techniken zur Umgehung der Web Application Firewall und Verschleierungstaktiken, die von Hackern verwendet werden. Das Plugin unterstützt und dekodiert auch eine große Anzahl von Kodierungen. NinjaFirewall bietet einen umfassenden Schutz gegen Brute-Force-Angriffe auf wp-admin, indem es verteilte Angriffe von tausenden von verschiedenen IPs erkennt und behandelt. NinjaFirewall kann auch unbefugten Zugriff auf PHP-Dateien verhindern, indem es Administratoren in Echtzeit über jeden Zugriff auf kürzlich geänderte oder erstellte PHP-Dateien informiert. In Bezug auf die Anmeldesicherheit ermöglicht NinjaFirewall die Konfiguration von Anmeldewarnungen für Ereignisse wie Administratoranmeldungen und Änderungen von Administratorkonten. Es bietet auch Schutz für Plugin- und Themen-Uploads und stellt sicher, dass nur autorisierte Dateien hochgeladen werden. Um die Leistung der Firewall zu optimieren, können Benutzer verschiedene Einstellungen im Optionsmenü des Plugins konfigurieren. Darüber hinaus können Probleme mit blockierten IPs durch die Überprüfung von Serverprotokollen oder die Unterstützung durch den Hosting-Provider behoben werden. Insgesamt ist NinjaFirewall (WP Edition) ein sehr leistungsfähiges Sicherheitsplugin für WordPress, das fortschrittliche Funktionen zum Schutz vor verschiedenen Bedrohungen bietet, mit denen Webseitenbetreiber konfrontiert werden.
Anforderungen und Installation
Die Installation des NinjaFirewall Plugins erfordert das Hochladen des ninjafirewall Ordners in das /wp-content/plugins/ Verzeichnis und die Aktivierung über das Plugins Menü in WordPress. Nach der Installation können Benutzer die Firewall-Einstellungen konfigurieren, IP-Whitelisting verwalten, Probleme bei der Aktivierung beheben, Sicherheitsregeln anpassen und NinjaFirewall aktualisieren. Um Firewall-Einstellungen zu konfigurieren: - Rufen Sie das NinjaFirewall Menü in WordPress auf. - Navigieren Sie zu der Seite Firewall-Richtlinien. - Passen Sie die Sicherheitsregeln an Ihre Bedürfnisse an. - Aktivieren oder deaktivieren Sie verschiedene Funktionen wie den Brute-Force-Schutz und die Beschränkung des Dateiuploads. So verwalten Sie die IP-Whitelist: - Gehen Sie zum Menüpunkt IP Zugriffskontrolle in NinjaFirewall (Pro+ Edition). - Setzen Sie bestimmte IP-Adressen oder Bereiche auf die Whitelist, indem Sie sie zur .htninja-Datei hinzufügen oder die Schnittstelle des Plugins nutzen. - Blacklisting von IPs, die für den Zugriff auf Ihre Website gesperrt werden sollen. Fehlerbehebung bei Aktivierungsproblemen: - Wenn bei der Aktivierung ein Fehler auftritt, aktualisieren Sie die Seite und versuchen Sie es erneut. - Wenden Sie sich bei Bedarf an Ihren Hosting-Provider, um weitere Unterstützung zu erhalten. - Benennen Sie den Ninja Firewall Plugin-Ordner um, wenn Sie die Anmeldedaten vergessen haben, und aktivieren Sie ihn nach der Umbenennung erneut. So passen Sie die Sicherheitsregeln an: - Navigieren Sie zur Seite Firewall Policies in NinjaFirewall. - Ändern Sie bestehende Regeln oder erstellen Sie eigene Regeln basierend auf spezifischen Anforderungen. - Überprüfen und aktualisieren Sie die Sicherheitsregeln regelmäßig, wenn neue Bedrohungen auftauchen. Um NinjaFirewall zu aktualisieren: - Prüfen Sie regelmäßig auf Updates im WordPress Dashboard im Bereich 'Plugins'. - Wenn ein Update verfügbar ist, klicken Sie auf 'Jetzt aktualisieren'. - Vergewissern Sie sich vor der Aktualisierung, dass das Plugin mit der aktuellen Version von WordPress kompatibel ist. - Testen Sie die Funktionalität der Website nach der Aktualisierung der Plugins
FAQ und Bewertungen
Die Sektion FAQ und Bewertungen bietet wertvolle Informationen über häufige Probleme bei der Fehlerbehebung, Erfahrungsberichte von Nutzern und häufig gestellte Fragen zu NinjaFirewall. Dieser Abschnitt zielt darauf ab, alle Bedenken oder Unsicherheiten zu beseitigen, die Nutzer bei der Verwendung des Plugins haben könnten. Benutzer können Antworten auf verschiedene Fragen über die Einzigartigkeit und Leistungsfähigkeit von NinjaFirewall, seine Kompatibilität mit Nginx und Windows, sowie seine Auswirkungen auf die Geschwindigkeit der Website finden. Diese FAQs helfen den Nutzern, ein besseres Verständnis für die Fähigkeiten des Plugins zu erlangen und fundierte Entscheidungen bezüglich seiner Implementierung zu treffen. Außerdem enthält der Abschnitt positive Bewertungen von Nutzern, die ihre Zufriedenheit mit NinjaFirewall zum Ausdruck bringen. Diese Erfahrungsberichte unterstreichen die Effektivität des Plugins beim Schutz von Webseiten vor Malware, Viren und unautorisiertem Zugriff. Durch die Darstellung realer Erfahrungen zufriedener Kunden tragen diese Bewertungen dazu bei, Vertrauen in die Zuverlässigkeit und Leistung von NinjaFirewall zu schaffen. Zusätzlich kann dieser Abschnitt Vergleiche mit anderen auf dem Markt erhältlichen Sicherheitsplugins enthalten. Solche Vergleiche können Nutzern helfen, die Funktionen von NinjaFirewall im Vergleich zu alternativen Lösungen zu bewerten, so dass sie eine fundierte Entscheidung basierend auf ihren spezifischen Anforderungen treffen können.

Changelog und Meta
Im Changelog und Meta Abschnitt finden Benutzer detaillierte Informationen über Updates, Fehlerbehebungen und Kompatibilität der verschiedenen Versionen des NinjaFirewall Plugins. Dieser Abschnitt bietet wertvolle Einblicke in die Entwicklung des Plugins und ermöglicht es Benutzern, über alle Änderungen informiert zu bleiben, die ihre Sicherheitseinrichtung betreffen könnten. Einige wichtige Aspekte, die in diesem Abschnitt behandelt werden, sind: - Anpassen der Sicherheitsregeln: Der Abschnitt Changelog und Meta bietet Informationen darüber, wie Benutzer die Sicherheitsregeln innerhalb des Plugins anpassen können. Dies ermöglicht es ihnen, die Firewall-Einstellungen an ihre spezifischen Bedürfnisse und Vorlieben anzupassen. - Aktivieren des Schutzes vor Brute-Force-Angriffen: Benutzer können lernen, wie man den Schutz vor Brute-Force-Angriffen durch das NinjaFirewall-Plugin aktiviert. Diese Funktion schützt vor böswilligen Anmeldeversuchen, indem der Zugriff nach mehreren fehlgeschlagenen Anmeldeversuchen beschränkt wird. - Einrichten des Anmeldeschutzes: Der Abschnitt Changelog und Meta bietet eine Anleitung zum Einrichten des Login-Schutzes für wp-login.php, einem wichtigen Schritt zur Sicherung von WordPress-Websites. Benutzer können diese Anweisungen befolgen, um den Schutz ihrer Website vor unbefugtem Zugriff zu verbessern. - IP Whitelisting und Blacklisting verwalten: Das NinjaFirewall Plugin ermöglicht es Benutzern, IP Whitelisting und Blacklisting effektiv zu verwalten. Durch die Konfiguration dieser Einstellungen können Benutzer den Zugriff auf bestimmte IP-Adressen oder Bereiche kontrollieren und so die Sicherheitsmaßnahmen erhöhen. - Konfigurieren von Ereignisbenachrichtigungen: Benutzer haben die Möglichkeit, Ereignisbenachrichtigungen innerhalb von NinjaFirewall zu konfigurieren. Diese Funktion benachrichtigt Administratoren über wichtige Ereignisse wie z.B. Administratoranmeldungen, Änderungen von Konten, Plugin/Theme Uploads, WordPress Updates und anstehende Sicherheitsupdates für Plugins/Themes. Wenn diese Benachrichtigungen aktiviert sind, können Administratoren potenzielle Sicherheitsprobleme sofort angehen. Read the full article
0 notes
Text
Experimenting with Cloudflare XML-RPC protections
Experimenting with Cloudflare XML-RPC protections
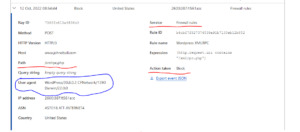
Looking for a way to further protect XML-RPC without letting it flap in the wind or fully disabling it. Up to now, everything that I’ve found online has been “suck it up” or “completely block it”. Got into Cloudflare this morning and fully blocked XML-RPC then tried to access my site using the WordPress app. Snagged some helpful data in the Cloudflare firewall logs then created a quick and dirty…
View On WordPress
0 notes
Text
The ultimate WordPress security guide 2020
The ultimate WordPress security guide 2020
WordPress security is a very important area for all WordPress website owners. More than 10,000 WordPress websites have become victims of hackers and malware per day around the globe. Hence website owners must give first priority to enhance the security in their WordPress websites.
This article will aid to website owners to equip their website with advance WordPress security tips. As a website…
View On WordPress
#Change WordPress Database Prefix#Cloudflare#Disable directory indexing and browsing#disable file edit#Disable PHP file execution#Disable XML-RPC#Enable web application Firewall#Limit login attempts#SSL#Sucuri firewall#two-factor authentication#use strong password#WAF#Website security#WordPress hosting#wordpress security#WordPress security plugin#WordPress update
0 notes
Text
How to Stop and Prevent a DDoS Attack on WordPress
wordpress is certainly one of many predominant in mannequin internet articulate builder on this planet on narrative of it gives extremely environment friendly facets and a win codebase. Nevertheless, that does now not protect wordpress or each different instrument from malicious DDoS assaults, that are basic on the procure.
DDoS assaults can decelerate web sites and at closing perform them inaccessible to customers. These assaults will even be targeted in opposition to every and every minute and astronomical web sites.
Now, you’d additionally very nicely be questioning how can a minute enterprise internet articulate using wordpress stop such DDoS assaults with runt sources?
On this handbook, we will hint you the appropriate map to efficiently stop and forestall a DDoS assault on wordpress. Our purpose is to help you look methods to control your internet articulate safety in opposition to a DDoS assault savor a complete professional.
What’s a DDoS Assault?
DDoS assault, quick for Disbursed Denial of Service assault, is a create of cyber assault that makes expend of compromised computer systems and devices to ship or predict recordsdata from a wordpress webhosting server. The purpose of these requests is to decelerate and at closing wreck the targeted server.
DDoS assaults are an developed create of DoS (Denial of Service) assaults. In inequity to a DoS assault, they draw shut good factor a number of variety of compromised machines or servers unfold throughout diverse areas.
These compromised machines create a community, which is most incessantly generally known as a botnet. Each affected machine acts as a bot and launches assaults on the targeted blueprint or server.
This permits them to sprint omitted for some time and motive most nervousness before they’re being blocked.
Even the most important internet corporations are inclined to DDoS assaults.
In 2018, GitHub, a popular code webhosting platform, witnessed an enormous DDoS assault that despatched 1.Three terabytes per second internet articulate internet articulate guests to their servers.
That you just could be succesful to nicely nicely perhaps additionally merely moreover bear in mind the notorious 2016 assault on DYN (a DNS supplier provider). This assault bought worldwide recordsdata protection because it affected many in mannequin web sites savor Amazon, Netflix, paypal, Visa, AirBnB, The Unique York Circumstances, Reddit, and 1000’s of other web sites.
Why DDoS Assaults Occur?
There are a number of motivations on the succor of DDoS assaults. Underneath are some basic ones:
Technically savvy people that are lovely bored and salvage it adventurous
People and teams attempting to hold out a political stage
Teams targeted on web sites and services and products of a specific nation or purpose
Targeted assaults on a specific enterprise or supplier provider to motive them financial nervousness
To blackmail and achieve ransom money
What is the inequity between a Brute Energy Assault and a DDoS Assault?
Brute Energy Assaults are usually attempting to interrupt right into a blueprint by guessing passwords or making an attempt random mixtures to develop unauthorized win entry to to a blueprint.
DDoS assaults are purely dilapidated to merely wreck the targetted blueprint making it inaccessible or slowing it down.
For information survey our handbook on the appropriate map to dam brute energy assaults on wordpress with step-by-step directions.
What damages will even be triggered by a DDoS assault?
DDoS assaults can perform a space inaccessible or reduce effectivity. This could additionally merely motive opposed particular person journey, lack of enterprise, and the costs of mitigating the assault will even be in 1000’s of bucks.
Proper here is a breakdown of these expenses:
Lack of enterprise ensuing from inaccessibility of internet articulate
Price of purchaser reinforce to decision supplier disruption linked queries
Price of mitigating assault by hiring safety services and products or reinforce
The most important value is the opposed particular person journey and value status
The good map to Discontinuance and Discontinuance DDoS Assault on wordpress
DDoS assaults will even be cleverly disguised and complicated to sort out. Nevertheless, with some basic safety most absorbing practices, you’d stop and easily stop DDoS assaults from affecting your wordpress internet articulate.
Proper listed here are the steps you’d even beget to attract shut to forestall and stop DDoS assaults in your wordpress purpose.
Safe away DDoS / Brute Energy Assault Verticals
Doubtlessly probably the most absorbing ingredient about wordpress is that it is extremely versatile. wordpress allows third-occasion plugins and instruments to mix into your internet articulate and add up to date facets.
To realize that wordpress makes a number of APIs available to programmers. These APIs are methods at some stage of which third-occasion wordpress plugins and services and products can interact with wordpress.
Nevertheless, a majority of these APIs can moreover be exploited at some stage of a DDoS assault by sending a ton of requests. That you just could be succesful to nicely nicely safely disable them to reduce these requests.
Disable XML RPC in wordpress
XML-RPC allows third-occasion apps to beget interaction along with your wordpress internet articulate. Lets educate, you would like XML-RPC to expend the wordpress app in your mobile instrument.
Whilst you’re savor a limiteless majority of customers who don’t expend the mobile app, you then for dawdle can disable XML-RPC by merely together with the next code to your internet articulate’s .htaccess file.
# Block wordpress xmlrpc.php requests bid lisp,enabledeny from all
For alternate methods, survey our handbook on the appropriate map to with out issues disable XML-RPC in wordpress.
Disable REST API in wordpress
The wordpress JSON REST API permit plugins and instruments the ability to win entry to wordpress recordsdata, replace articulate, and/and even delete it. Proper right here is pointers on find out how to disable REST API in wordpress.
First ingredient you’d even beget to attain is set up and activate the Disable WP Leisure API plugin. For extra information, survey our step-by-step handbook on the appropriate map to put in a wordpress plugin.
The plugin works out of the sector, and it will merely disable the REST API for all non-logged in customers.
Prompt WAF (Web site on-line Utility Firewall)
Disabling assault vectors savor REST API and XML-RPC gives runt safety in opposition to DDoS assaults. Your internet articulate is mute inclined to common HTTP requests.
Similtaneously you’d mitigate a minute DOS assault by attempting to take cling of the opposed machine IPs and blockading them manually, this blueprint is now now not very environment friendly when dealing with a astronomical DDoS assault.
Absolutely the top map to dam suspicious requests is by activating a space software program firewall.
An online articulate software program firewall acts as a proxy between your internet articulate and all incoming internet articulate internet articulate guests. It makes expend of aesthetic algorithm to take cling of all suspicious requests and block them before they attain your internet articulate server.
We advocate using Sucuri on narrative of it is miles probably the most absorbing wordpress safety plugin and internet articulate firewall. It runs on a DNS stage which system they could be capable of snatch a DDoS assault before it’s going to perform a predict to your internet articulate.
Pricing for Sucuri begins from $20 month-to-month (paid yearly).
We expend Sucuri on WPBeginner. Behold our case survey on how they help block a whole lot of of 1000’s of assaults on our internet articulate.
Alternately, you’d moreover expend Cloudflare. Nevertheless, Cloudflare’s free supplier handiest gives runt DDoS safety. You’ll should signup for on the least their advertising and marketing blueprint for layer 7 DDoS safety which expenses round $200 month-to-month.
Behold our article on Sucuri vs Cloudflare for an in depth aspect-by-aspect comparability.
Relate: Web site on-line Utility Firewalls (WAFs) that trudge on an software-level are a lot much less environment friendly at some stage of a DDoS assault. They block the net articulate internet articulate guests as quickly because it has already reached your internet server, so it mute impacts your basic internet articulate effectivity.
Discovering Out Whether or not it’s Brute Energy or DDoS Assault
Each brute energy and DDoS assaults intensively expend server sources, which system their signs ogle comparatively linked. Your internet articulate will win slower and may perhaps nicely nicely nicely merely wreck.
That you just could be succesful to nicely nicely with out issues salvage out whether or not it is miles a brute energy assault or a DDoS assault by merely Sucuri plugin’s login tales.
Merely, set up and activate the free Sucuri plugin after which sprint to Sucuri Security » Closing Logins web page.
Whilst you’d additionally very nicely be seeing a astronomical alternative of random login requests, then this suggests your wp-admin is underneath a brute energy assault. To mitigate it, you’d survey our handbook on the appropriate map to dam brute energy assaults in wordpress.
Issues to Manufacture For the size of a DDoS Assault
DDoS assaults can occur even should you’d even beget an online software program firewall and different protections in construct. Firms savor CloudFlare and Sucuri take care of these assaults on common foundation, and extra usually than now now not you are going to by no means hear about it since they could be capable of with out issues mitigate it.
Nevertheless in some situations, when these assaults are astronomical, it’s going to mute have an effect on you. If that’s the case, it’s most absorbing to be able to mitigate the considerations that may additionally merely come up at some stage of and after the DDoS assault.
Following are some points you’d attain to reduce the have an effect on of a DDoS assault.
1. Alert your crew members
Whilst you’d even beget a crew, you then for dawdle also can beget to uncover co-workers referring to the say. It will perhaps help them put together for purchaser reinforce queries, ogle out for conceivable considerations, and help out at some stage of or after the assault.
2. Uncover prospects referring to the inconvience
A DDoS assault can have an effect on particular person journey in your internet articulate. Whilst you trudge a WooCommerce retailer, then your prospects also can merely now now not be able to assemble an bid or login to their narrative.
That you just could be succesful to nicely nicely advise through your social media accounts that your internet articulate is having technical difficulties and all of the items will probably be succor to common quickly.
If the assault is astronomical, you then for dawdle can moreover expend your e-mail advertising and marketing supplier to speak with prospects and demand them to notice your social media updates.
Whilst you’d even beget VIP prospects, you then for dawdle also can merely are attempting to expend your group mobile phone supplier to hold out particular person mobile phone calls and allow them to know the map you’re working to revive the services and products.
Communication at some stage of these complicated conditions perform an enormous inequity in conserving your value’s status stable.
3. Contact Web internet hosting and Security Strengthen
Accumulate fervent along with your wordpress webhosting provider. The assault you’d additionally very nicely be witnessing will likely be part of a elevated assault targetting their methods. If that’s the case, they will be able to invent you latest updates referring to the say.
Contact your Firewall supplier and allow them to know that your internet articulate is underneath a DDoS assault. They’re going to additionally very nicely be able to mitigate the say even sooner and may perhaps nicely nicely nicely provide you with extra recordsdata.
In firewall corporations savor Sucuri, you’d moreover plight your settings to be in Paranoid mode which helps block a type of requests and perform your internet articulate accessible for normal customers.
Sustaining Your wordpress Web site on-line Precise
wordpress is very win out of the sector. Nevertheless, because the realm’s most in mannequin internet articulate builder it is usually targeted by hackers.
Luckily, there are various safety most absorbing practices that you just’d word in your internet articulate to hold out it much more win.
We’ve compiled a complete step-by-step wordpress safety handbook for newcomers. It will perhaps hotfoot you through probably the most absorbing wordpress safety settings to protect your internet articulate, and its recordsdata in opposition to basic threats.
We hope this text helped you look methods to dam and forestall a DDoS assault on wordpress. That you just could be succesful to nicely nicely perhaps additionally merely moreover are attempting to understand our handbook on probably the most basic wordpress errors and the appropriate map to restore them.
Whilst you preferred this text, then please subscribe to our YouTube Channel for wordpress video tutorials. That you just could be succesful to nicely nicely moreover salvage us on Twitter and Fb.
The put up The good map to Discontinuance and Discontinuance a DDoS Assault on wordpress appeared first on WPBeginner.
from WordPress https://ift.tt/2N65R6G via IFTTT
0 notes
Text
The Ultimate WordPress Security Guide (Step by Step)
WordPress security is a topic of huge importance for every website owner. Google blacklists around 10,000+ websites every day for malware and around 50,000 for phishing every week.
If you are serious about your website, then you need to pay attention to the WordPress security best practices. In this guide, we will share all the top WordPress security tips to help you protect your website against hackers and malware.
While WordPress core software is very secure, and it’s audited regularly by hundreds of developers, there is a lot that can be done to keep your site secure.
At WPBeginner, we believe that security is not just about risk elimination. It’s also about risk reduction. As a website owner, there’s a lot that you can do to improve your WordPress security (even if you’re not tech savvy).
We have a number of actionable steps that you can take to protect your website against security vulnerabilities.
To make it easy, we have created a table of content to help you easily navigate through our ultimate WordPress security guide.
Table of Contents
Basics of WordPress Security
Why WordPress Security is Important?
Keeping WordPress Updated
Passwords and User Permissions
The Role of Web Hosting
WordPress Security in Easy Steps (No Coding)
Install a WordPress Backup Solution
Best WordPress Security Plugin
Enable Web Application Firewall (WAF)
Move WordPress Site to SSL/HTTPS
WordPress Security for DIY Users
Change the Default “admin” username
Disable File Editing
Disable PHP File Execution
Limit Login Attempts
Add Two Factor Authentication
Change WordPress Database Prefix
Password Protect WP-Admin and Login
Disable Directory Indexing and Browsing
Disable XML-RPC in WordPress
Automatically log out Idle Users
Add Security Questions to WordPress Login
Scanning WordPress for Malware and Vulnerabilies
Fixing a Hacked WordPress Site
Ready? Let’s get started.
Why Website Security is Important?
A hacked WordPress site can cause serious damage to your business revenue and reputation. Hackers can steal user information, passwords, install malicious software, and can even distribute malware to your users.
Worst, you may find yourself paying ransomware to hackers just to regain access to your website.
In March 2016, Google reported that more than 50 million website users have been warned about a website they’re visiting may contain malware or steal information.
Furthermore, Google blacklists around 20,000 websites for malware and around 50,000 for phishing each week.
If your website is a business, then you need to pay extra attention to your WordPress security.
Similar to how it’s the business owners responsibility to protect their physical store building, as an online business owner it is your responsibility to protect your business website.
[Back to Top ↑]
Keeping WordPress Updated
WordPress is an open source software which is regularly maintained and updated. By default, WordPress automatically installs minor updates. For major releases, you need to manually initiate the update.
WordPress also comes with thousands of plugins and themes that you can install on your website. These plugins and themes are maintained by third-party developers which regularly release updates as well.
These WordPress updates are crucial for the security and stability of your WordPress site. You need to make sure that your WordPress core, plugins, and theme are up to date.
[Back to Top ↑]
Strong Passwords and User Permissions
The most common WordPress hacking attempts use stolen passwords. You can make that difficult by using stronger passwords that are unique for your website. Not just for WordPress admin area, but also for FTP accounts, database, WordPress hosting account, and your custom email addresses which use your site’s domain name.
Many beginners don’t like using strong passwords because they’re hard to remember. The good thing is that you don’t need to remember passwords anymore. You can use a password manager. See our guide on how to manage WordPress passwords.
Another way to reduce the risk is to not give anyone access to your WordPress admin account unless you absolutely have to. If you have a large team or guest authors, then make sure that you understand user roles and capabilities in WordPress before you add new user accounts and authors to your WordPress site.
[Back to Top ↑]
The Role of WordPress Hosting
Your WordPress hosting service plays the most important role in the security of your WordPress site. A good shared hosting provider like Bluehost or Siteground take the extra measures to protect their servers against common threats.
Here is how a good web hosting company works in the background to protect your websites and data.
They continuously monitor their network for suspicious activity.
All good hosting companies have tools in place to prevent large scale DDOS attacks
They keep their server software and hardware up to date to prevent hackers from exploiting a known security vulnerability in an old version.
They have ready to deploy disaster recovery and accidents plans which allows them to protect your data in case of major accident.
On a shared hosting plan, you share the server resources with many other customers. This opens the risk of cross-site contamination where a hacker can use a neighboring site to attack your website.
Using a managed WordPress hosting service provides a more secure platform for your website. Managed WordPress hosting companies offer automatic backups, automatic WordPress updates, and more advanced security configurations to protect your website
We recommend WPEngine as our preferred managed WordPress hosting provider. They’re also the most popular one in the industry. (See our special WPEngine coupon).
[Back to Top ↑]
WordPress Security in Easy Steps (No Coding)
We know that improving WordPress security can be a terrifying thought for beginners. Especially if you’re not techy. Guess what – you’re not alone.
We have helped thousands of WordPress users in hardening their WordPress security.
We will show you how you can improve your WordPress security with just a few clicks (no coding required).
If you can point-and-click, you can do this!
Install a WordPress Backup Solution
Backups are your first defense against any WordPress attack. Remember, nothing is 100% secure. If government websites can be hacked, then so can yours.
Backups allow you to quickly restore your WordPress site in case something bad was to happen.
There are many free and paid WordPress backup plugins that you can use. The most important thing you need to know when it comes to backups is that you must regularly save full-site backups to a remote location (not your hosting account).
We recommend storing it on a cloud service like Amazon, Dropbox, or private clouds like Stash.
Based on how frequently you update your website, the ideal setting might be either once a day or real-time backups.
Thankfully this can be easily done by using plugins like VaultPress or UpdraftPlus. They are both reliable and most importantly easy to use (no coding needed).
[Back to Top ↑]
Best WordPress Security Plugin
After backups, the next thing we need to do is setup an auditing and monitoring system that keeps track of everything that happens on your website.
This includes file integrity monitoring, failed login attempts, malware scanning, etc.
Thankfully, this can be all taken care by the best free WordPress security plugin, Sucuri Scanner.
You need to install and activate the free Sucuri Security plugin. For more details, please see our step by step guide on how to install a WordPress plugin.
Upon activation, you need to go to the Sucuri menu in your WordPress admin. The first thing you will be asked to do is Generate a free API key. This enables audit logging, integrity checking, email alerts, and other important features.
The next thing, you need to do is click on the ‘Hardening�� tab from the settings menu. Go through every option and click on the “Apply Hardening” button.
These options help you lock down the key areas that hackers often use in their attacks. The only hardening option that’s a paid upgrade is the Web Application Firewall which we will explain in the next step, so skip it for now.
We have also covered a lot of these “Hardening” options later in this article for those who want to do it without using a plugin or the ones that require additional steps such as “Database Prefix change” or “Changing the Admin Username”.
After the hardening part, the default plugin settings are good enough for most websites and don’t need any changes. The only thing we recommend customizing is ‘Email Alerts’.
The default alert settings can clutter your inbox with emails. We recommend receiving alerts for key actions like changes in plugins, new user registration, etc. You can configure the alerts by going to Sucuri Settings » Alerts.
This WordPress security plugin is very powerful, so browse through all the tabs and settings to see all that it does such as Malware scanning, Audit logs, Failed Login Attempt tracking, etc.
Enable Web Application Firewall (WAF)
The easiest way to protect your site and be confident about your WordPress security is by using a web application firewall (WAF).
A website firewall blocks all malicious traffic before it even reaches your website.
DNS Level Website Firewall – These firewall route your website traffic through their cloud proxy servers. This allows them to only send genuine traffic to your web server.
Application Level Firewall – These firewall plugins examine the traffic once it reaches your server but before loading most WordPress scripts. This method is not as efficient as the DNS level firewall in reducing the server load.
To learn more, see our list of the best WordPress firewall plugins.
We use and recommend Sucuri as the best web-application firewall for WordPress. You can read about how Sucuri helped us block 450,000 WordPress attacks in a month.
The best part about Sucuri’s firewall is that it also comes with a malware cleanup and blacklist removal guarantee. Basically if you were to be hacked under their watch, they guarantee that they will fix your website (no matter how many pages you have).
This is a pretty strong warranty because repairing hacked websites is expensive. Security experts normally charge $250 per hour. Whereas you can get the entire Sucuri security stack for $199 per year.
Improve your WordPress Security with the Sucuri Firewall »
Sucuri is not the only DNS level firewall provider out there. The other popular competitor is Cloudflare. See our comparison of Sucuri vs Cloudflare (Pros and Cons).
[Back to Top ↑]
Move Your WordPress Site to SSL/HTTPS
SSL (Secure Sockets Layer) is a protocol which encrypts data transfer between your website and users browser. This encryption makes it harder for someone to sniff around and steal information.
Once you enable SSL, your website will use HTTPS instead of HTTP, you will also see a padlock sign next to your website address in the browser.
SSL certificates were typically issued by certificate authorities and their prices start from $80 to hundreds of dollars each year. Due to added cost, most website owners opted to keep using the insecure protocol.
To fix this, a non-profit organization called Let’s Encrypt decided to offer free SSL Certificates to website owners. Their project is supported by Google Chrome, Facebook, Mozilla, and many more companies.
Due to this, it is now easier than ever to start using SSL for all your WordPress websites. For step by step instructions, see our article on how to get a free SSL certificate for your WordPress website.
WordPress Security for DIY Users
If you do everything that we have mentioned thus far, then you’re in a pretty good shape.
But as always, there’s more that you can do to harden your WordPress security.
Some of these steps may require coding knowledge.
Change the Default “admin” username
In the old days, the default WordPress admin username was “admin”. Since usernames make up half of login credentials, this made it easier for hackers to do brute-force attacks.
Thankfully, WordPress has since changed this and now requires you to select a custom username at the time of installing WordPress.
However, some 1-click WordPress installers, still set the default admin username to “admin”. If you notice that to be the case, then it’s probably a good idea to switch your web hosting.
Since WordPress doesn’t allow you to change usernames by default, there are three methods you can use to change the username.
Create a new admin username and delete the old one.
Use the Username Changer plugin
Update username from phpMyAdmin
We have covered all three of these in our detailed guide on how to properly change your WordPress username (step by step).
Note: We’re talking about the username called “admin”, not the administrator role.
[Back to Top ↑]
Disable File Editing
WordPress comes with a built-in code editor which allows you to edit your theme and plugin files right from your WordPress admin area. In the wrong hands, this feature can be a security risk which is why we recommend turning it off.
You can easily do this by adding the following code in your wp-config.php file.
// Disallow file edit define( 'DISALLOW_FILE_EDIT', true );
Alternatively, you can do this with 1-click using the Hardening feature in the free Sucuri plugin that we mentioned above.
[Back to Top ↑]
Disable PHP File Execution in Certain WordPress Directories
Another way to harden your WordPress security is by disabling PHP file execution in directories where it’s not needed such as /wp-content/uploads/.
You can do this by opening a text editor like Notepad and paste this code:
<Files *.php> deny from all </Files>
Next, you need to save this file as .htaccess and upload it to /wp-content/uploads/ folders on your website using an FTP client.
For more detailed explanation, see our guide on how to disable PHP execution in certain WordPress directories
Alternatively, you can do this with 1-click using the Hardening feature in the free Sucuri plugin that we mentioned above.
[Back to Top ↑]
Limit Login Attempts
By default, WordPress allows users to try to login as many time as they want. This leaves your WordPress site vulnerable to brute force attacks. Hackers try to crack passwords by trying to login with different combinations.
This can be easily fixed by limiting the failed login attempts a user can make. If you’re using the web application firewall mentioned earlier, then this is automatically taken care of.
However, if you don’t have the firewall setup, then proceed with the steps below.
First, you need to install and activate the Login LockDown plugin. For more details, see our step by step guide on how to install a WordPress plugin.
Upon activation, visit Settings » Login LockDown page to setup the plugin.
For detailed instructions, take a look at our guide on how and why you should limit login attempts in WordPress.
[Back to Top ↑]
Add Two Factor Authentication
Two-factor authentication technique requires users to log in by using a two-step authentication method. The first one is the username and password, and the second step requires you to authenticate using a separate device or app.
Most top online websites like Google, Facebook, Twitter, allow you to enable it for your accounts. You can also add the same functionality to your WordPress site.
First, you need to install and activate the Two Factor Authentication plugin. Upon activation, you need to click on the ‘Two Factor Auth’ link in WordPress admin sidebar.
Next, you need to install and open an authenticator app on your phone. There are several of them available like Google Authenticator, Authy, and LastPass Authenticator.
We recommend using LastPass Authenticator or Authy because they both allow you to back up your accounts to the cloud. This is very useful in case your phone is lost, reset, or you buy a new phone. All your account logins will be easily restored.
We will be using the LastPass Authenticator for the tutorial. However, instructions are similar for all auth apps. Open your authenticator app, and then click on the Add button.
You will be asked if you’d like to scan a site manually or scan the bar code. Select the scan bar code option and then point your phone’s camera on the QRcode shown on the plugin’s settings page.
That’s all, your authentication app will now save it. Next time you log in to your website, you will be asked for the two-factor auth code after you enter your password.
Simply open the authenticator app on your phone and enter the code you see on it.
[Back to Top ↑]
Change WordPress Database Prefix
By default, WordPress uses wp_ as the prefix for all tables in your WordPress database. If your WordPress site is using the default database prefix, then it makes it easier for hackers to guess what your table name is. This is why we recommend changing it.
You can change your database prefix by following our step by step tutorial on how to change WordPress database prefix to improve security.
Note: This can break your site if it’s not done properly. Only proceed, if you feel comfortable with your coding skills.
[Back to Top ↑]
Password Protect WordPress Admin and Login Page
Normally, hackers can request your wp-admin folder and login page without any restriction. This allows them to try their hacking tricks or run DDoS attacks.
You can add additional password protection on a server-side level, which will effectively block those requests.
Follow our step-by-step instructions on how to password protect your WordPress admin (wp-admin) directory.
[Back to Top ↑]
Disable Directory Indexing and Browsing
Directory browsing can be used by hackers to find out if you have any files with known vulnerabilities, so they can take advantage of these files to gain access.
Directory browsing can also be used by other people to look into your files, copy images, find out your directory structure, and other information. This is why it is highly recommended that you turn off directory indexing and browsing.
You need to connect to your website using FTP or cPanel’s file manager. Next, locate the .htaccess file in your website’s root directory. If you cannot see it there, then refer to our guide on why you can’t see .htaccess file in WordPress.
After that, you need to add the following line at the end of the .htaccess file:
Options -Indexes
Don’t forget to save and upload .htaccess file back to your site. For more on this topic, see our article on how to disable directory browsing in WordPress.
[Back to Top ↑]
Disable XML-RPC in WordPress
XML-RPC was enabled by default in WordPress 3.5 because it helps connecting your WordPress site with web and mobile apps.
Because of its powerful nature, XML-RPC can significantly amplify the brute-force attacks.
For example, traditionally if a hacker wanted to try 500 different passwords on your website, they would have to make 500 separate login attempts which will be caught and blocked by the login lockdown plugin.
But with XML-RPC, a hacker can use the system.multicall function to try thousands of password with say 20 or 50 requests.
This is why if you’re not using XML-RPC, then we recommend that you disable it.
There are 3 ways to disable XML-RPC in WordPress, and we have covered all of them in our step by step tutorial on how to disable XML-RPC in WordPress.
Tip: The .htaccess method is the best one because it’s the least resource intensive.
If you’re using the web-application firewall mentioned earlier, then this can be taken care of by the firewall.
[Back to Top ↑]
Automatically log out Idle Users in WordPress
Logged in users can sometimes wander away from screen, and this poses a security risk. Someone can hijack their session, change passwords, or make changes to their account.
This is why many banking and financial sites automatically log out an inactive user. You can implement similar functionality on your WordPress site as well.
You will need to install and activate the Inactive Logout plugin. Upon activation, visit Settings » Inactive Logout page to configure plugin settings.
Simply set the time duration and add a logout message. Don’t forget to click on the save changes button to store your settings.
[Back to Top ↑]
Add Security Questions to WordPress Login Screen
Adding a security question to your WordPress login screen makes it even harder for someone to get unauthorized access.
You can add security questions by installing the WP Security Questions plugin. Upon activation, you need to visit Settings » Security Questions page to configure the plugin settings.
For more detailed instructions, see our tutorial on how to add security questions to WordPress login screen.
[Back to Top ↑]
Scanning WordPress for Malware and Vulnerabilies
If you have a WordPress security plugin installed, then those plugins will routinely check for malware and signs of security breaches.
However, if you see a sudden drop in website traffic or search rankings, then you may want to manually run a scan. You can use your WordPress security plugin, or use one of these malware and security scanners.
Running these online scans is quite straight forward, you just enter your website URLs and their crawlers go through your website to look for known malware and malicious code.
Now keep in mind that most WordPress security scanners can just scan your website. They cannot remove the malware or clean a hacked WordPress site.
This brings us to the next section, cleaning up malware and hacked WordPress sites.
[Back to Top ↑]
Fixing a Hacked WordPress Site
Many WordPress users don’t realize the importance of backups and website security until their website is hacked.
Cleaning up a WordPress site can be very difficult and time consuming. Our first advice would be to let a professional take care of it.
Hackers install backdoors on affected sites, and if these backdoors are not fixed properly, then your website will likely get hacked again.
Allowing a professional security company like Sucuri to fix your website will ensure that your site is safe to use again. It will also protect you against any future attacks.
For the adventurous and DIY users, we have compiled a step by step guide on fixing a hacked WordPress site.
[Back to Top ↑]
That’s all, we hope this article helped you learn the top WordPress security best practices as well as discover the best WordPress security plugins for your website.
If you liked this article, then please subscribe to our YouTube Channel for WordPress video tutorials. You can also find us on Twitter and Facebook.
The post The Ultimate WordPress Security Guide (Step by Step) appeared first on WPBeginner.
😉SiliconWebX | 🌐WPBeginner
0 notes
Text
The Ultimate WordPress Security Guide (Step by Step)
WordPress security is a topic of huge importance for every website owner. Google blacklists around 10,000+ websites every day for malware and around 50,000 for phishing every week.
If you are serious about your website, then you need to pay attention to the WordPress security best practices. In this guide, we will share all the top WordPress security tips to help you protect your website against hackers and malware.
While WordPress core software is very secure, and it’s audited regularly by hundreds of developers, there is a lot that can be done to keep your site secure.
At WPBeginner, we believe that security is not just about risk elimination. It’s also about risk reduction. As a website owner, there’s a lot that you can do to improve your WordPress security (even if you’re not tech savvy).
We have a number of actionable steps that you can take to protect your website against security vulnerabilities.
To make it easy, we have created a table of content to help you easily navigate through our ultimate WordPress security guide.
Table of Contents
Basics of WordPress Security
Why WordPress Security is Important?
Keeping WordPress Updated
Passwords and User Permissions
The Role of Web Hosting
WordPress Security in Easy Steps (No Coding)
Install a WordPress Backup Solution
Best WordPress Security Plugin
Enable Web Application Firewall (WAF)
Move WordPress Site to SSL/HTTPS
WordPress Security for DIY Users
Change the Default “admin” username
Disable File Editing
Disable PHP File Execution
Limit Login Attempts
Add Two Factor Authentication
Change WordPress Database Prefix
Password Protect WP-Admin and Login
Disable Directory Indexing and Browsing
Disable XML-RPC in WordPress
Automatically log out Idle Users
Add Security Questions to WordPress Login
Scanning WordPress for Malware and Vulnerabilies
Fixing a Hacked WordPress Site
Ready? Let’s get started.
Why Website Security is Important?
A hacked WordPress site can cause serious damage to your business revenue and reputation. Hackers can steal user information, passwords, install malicious software, and can even distribute malware to your users.
Worst, you may find yourself paying ransomware to hackers just to regain access to your website.
In March 2016, Google reported that more than 50 million website users have been warned about a website they’re visiting may contain malware or steal information.
Furthermore, Google blacklists around 20,000 websites for malware and around 50,000 for phishing each week.
If your website is a business, then you need to pay extra attention to your WordPress security.
Similar to how it’s the business owners responsibility to protect their physical store building, as an online business owner it is your responsibility to protect your business website.
[Back to Top ↑]
Keeping WordPress Updated
WordPress is an open source software which is regularly maintained and updated. By default, WordPress automatically installs minor updates. For major releases, you need to manually initiate the update.
WordPress also comes with thousands of plugins and themes that you can install on your website. These plugins and themes are maintained by third-party developers which regularly release updates as well.
These WordPress updates are crucial for the security and stability of your WordPress site. You need to make sure that your WordPress core, plugins, and theme are up to date.
[Back to Top ↑]
Strong Passwords and User Permissions
The most common WordPress hacking attempts use stolen passwords. You can make that difficult by using stronger passwords that are unique for your website. Not just for WordPress admin area, but also for FTP accounts, database, WordPress hosting account, and your custom email addresses which use your site’s domain name.
Many beginners don’t like using strong passwords because they’re hard to remember. The good thing is that you don’t need to remember passwords anymore. You can use a password manager. See our guide on how to manage WordPress passwords.
Another way to reduce the risk is to not give anyone access to your WordPress admin account unless you absolutely have to. If you have a large team or guest authors, then make sure that you understand user roles and capabilities in WordPress before you add new user accounts and authors to your WordPress site.
[Back to Top ↑]
The Role of WordPress Hosting
Your WordPress hosting service plays the most important role in the security of your WordPress site. A good shared hosting provider like Bluehost or Siteground take the extra measures to protect their servers against common threats.
Here is how a good web hosting company works in the background to protect your websites and data.
They continuously monitor their network for suspicious activity.
All good hosting companies have tools in place to prevent large scale DDOS attacks
They keep their server software and hardware up to date to prevent hackers from exploiting a known security vulnerability in an old version.
They have ready to deploy disaster recovery and accidents plans which allows them to protect your data in case of major accident.
On a shared hosting plan, you share the server resources with many other customers. This opens the risk of cross-site contamination where a hacker can use a neighboring site to attack your website.
Using a managed WordPress hosting service provides a more secure platform for your website. Managed WordPress hosting companies offer automatic backups, automatic WordPress updates, and more advanced security configurations to protect your website
We recommend WPEngine as our preferred managed WordPress hosting provider. They’re also the most popular one in the industry. (See our special WPEngine coupon).
[Back to Top ↑]
WordPress Security in Easy Steps (No Coding)
We know that improving WordPress security can be a terrifying thought for beginners. Especially if you’re not techy. Guess what – you’re not alone.
We have helped thousands of WordPress users in hardening their WordPress security.
We will show you how you can improve your WordPress security with just a few clicks (no coding required).
If you can point-and-click, you can do this!
Install a WordPress Backup Solution
Backups are your first defense against any WordPress attack. Remember, nothing is 100% secure. If government websites can be hacked, then so can yours.
Backups allow you to quickly restore your WordPress site in case something bad was to happen.
There are many free and paid WordPress backup plugins that you can use. The most important thing you need to know when it comes to backups is that you must regularly save full-site backups to a remote location (not your hosting account).
We recommend storing it on a cloud service like Amazon, Dropbox, or private clouds like Stash.
Based on how frequently you update your website, the ideal setting might be either once a day or real-time backups.
Thankfully this can be easily done by using plugins like VaultPress or UpdraftPlus. They are both reliable and most importantly easy to use (no coding needed).
[Back to Top ↑]
Best WordPress Security Plugin
After backups, the next thing we need to do is setup an auditing and monitoring system that keeps track of everything that happens on your website.
This includes file integrity monitoring, failed login attempts, malware scanning, etc.
Thankfully, this can be all taken care by the best free WordPress security plugin, Sucuri Scanner.
You need to install and activate the free Sucuri Security plugin. For more details, please see our step by step guide on how to install a WordPress plugin.
Upon activation, you need to go to the Sucuri menu in your WordPress admin. The first thing you will be asked to do is Generate a free API key. This enables audit logging, integrity checking, email alerts, and other important features.
The next thing, you need to do is click on the ‘Hardening’ tab from the settings menu. Go through every option and click on the “Apply Hardening” button.
These options help you lock down the key areas that hackers often use in their attacks. The only hardening option that’s a paid upgrade is the Web Application Firewall which we will explain in the next step, so skip it for now.
We have also covered a lot of these “Hardening” options later in this article for those who want to do it without using a plugin or the ones that require additional steps such as “Database Prefix change” or “Changing the Admin Username”.
After the hardening part, the default plugin settings are good enough for most websites and don’t need any changes. The only thing we recommend customizing is ‘Email Alerts’.
The default alert settings can clutter your inbox with emails. We recommend receiving alerts for key actions like changes in plugins, new user registration, etc. You can configure the alerts by going to Sucuri Settings » Alerts.
This WordPress security plugin is very powerful, so browse through all the tabs and settings to see all that it does such as Malware scanning, Audit logs, Failed Login Attempt tracking, etc.
Enable Web Application Firewall (WAF)
The easiest way to protect your site and be confident about your WordPress security is by using a web application firewall (WAF).
A website firewall blocks all malicious traffic before it even reaches your website.
DNS Level Website Firewall – These firewall route your website traffic through their cloud proxy servers. This allows them to only send genuine traffic to your web server.
Application Level Firewall – These firewall plugins examine the traffic once it reaches your server but before loading most WordPress scripts. This method is not as efficient as the DNS level firewall in reducing the server load.
To learn more, see our list of the best WordPress firewall plugins.
We use and recommend Sucuri as the best web-application firewall for WordPress. You can read about how Sucuri helped us block 450,000 WordPress attacks in a month.
The best part about Sucuri’s firewall is that it also comes with a malware cleanup and blacklist removal guarantee. Basically if you were to be hacked under their watch, they guarantee that they will fix your website (no matter how many pages you have).
This is a pretty strong warranty because repairing hacked websites is expensive. Security experts normally charge $250 per hour. Whereas you can get the entire Sucuri security stack for $199 per year.
Improve your WordPress Security with the Sucuri Firewall »
Sucuri is not the only DNS level firewall provider out there. The other popular competitor is Cloudflare. See our comparison of Sucuri vs Cloudflare (Pros and Cons).
[Back to Top ↑]
Move Your WordPress Site to SSL/HTTPS
SSL (Secure Sockets Layer) is a protocol which encrypts data transfer between your website and users browser. This encryption makes it harder for someone to sniff around and steal information.
Once you enable SSL, your website will use HTTPS instead of HTTP, you will also see a padlock sign next to your website address in the browser.
SSL certificates were typically issued by certificate authorities and their prices start from $80 to hundreds of dollars each year. Due to added cost, most website owners opted to keep using the insecure protocol.
To fix this, a non-profit organization called Let’s Encrypt decided to offer free SSL Certificates to website owners. Their project is supported by Google Chrome, Facebook, Mozilla, and many more companies.
Due to this, it is now easier than ever to start using SSL for all your WordPress websites. For step by step instructions, see our article on how to get a free SSL certificate for your WordPress website.
WordPress Security for DIY Users
If you do everything that we have mentioned thus far, then you’re in a pretty good shape.
But as always, there’s more that you can do to harden your WordPress security.
Some of these steps may require coding knowledge.
Change the Default “admin” username
In the old days, the default WordPress admin username was “admin”. Since usernames make up half of login credentials, this made it easier for hackers to do brute-force attacks.
Thankfully, WordPress has since changed this and now requires you to select a custom username at the time of installing WordPress.
However, some 1-click WordPress installers, still set the default admin username to “admin”. If you notice that to be the case, then it’s probably a good idea to switch your web hosting.
Since WordPress doesn’t allow you to change usernames by default, there are three methods you can use to change the username.
Create a new admin username and delete the old one.
Use the Username Changer plugin
Update username from phpMyAdmin
We have covered all three of these in our detailed guide on how to properly change your WordPress username (step by step).
Note: We’re talking about the username called “admin”, not the administrator role.
[Back to Top ↑]
Disable File Editing
WordPress comes with a built-in code editor which allows you to edit your theme and plugin files right from your WordPress admin area. In the wrong hands, this feature can be a security risk which is why we recommend turning it off.
You can easily do this by adding the following code in your wp-config.php file.
// Disallow file edit define( 'DISALLOW_FILE_EDIT', true );
Alternatively, you can do this with 1-click using the Hardening feature in the free Sucuri plugin that we mentioned above.
[Back to Top ↑]
Disable PHP File Execution in Certain WordPress Directories
Another way to harden your WordPress security is by disabling PHP file execution in directories where it’s not needed such as /wp-content/uploads/.
You can do this by opening a text editor like Notepad and paste this code:
<Files *.php> deny from all </Files>
Next, you need to save this file as .htaccess and upload it to /wp-content/uploads/ folders on your website using an FTP client.
For more detailed explanation, see our guide on how to disable PHP execution in certain WordPress directories
Alternatively, you can do this with 1-click using the Hardening feature in the free Sucuri plugin that we mentioned above.
[Back to Top ↑]
Limit Login Attempts
By default, WordPress allows users to try to login as many time as they want. This leaves your WordPress site vulnerable to brute force attacks. Hackers try to crack passwords by trying to login with different combinations.
This can be easily fixed by limiting the failed login attempts a user can make. If you’re using the web application firewall mentioned earlier, then this is automatically taken care of.
However, if you don’t have the firewall setup, then proceed with the steps below.
First, you need to install and activate the Login LockDown plugin. For more details, see our step by step guide on how to install a WordPress plugin.
Upon activation, visit Settings » Login LockDown page to setup the plugin.
For detailed instructions, take a look at our guide on how and why you should limit login attempts in WordPress.
[Back to Top ↑]
Add Two Factor Authentication
Two-factor authentication technique requires users to log in by using a two-step authentication method. The first one is the username and password, and the second step requires you to authenticate using a separate device or app.
Most top online websites like Google, Facebook, Twitter, allow you to enable it for your accounts. You can also add the same functionality to your WordPress site.
First, you need to install and activate the Two Factor Authentication plugin. Upon activation, you need to click on the ‘Two Factor Auth’ link in WordPress admin sidebar.
Next, you need to install and open an authenticator app on your phone. There are several of them available like Google Authenticator, Authy, and LastPass Authenticator.
We recommend using LastPass Authenticator or Authy because they both allow you to back up your accounts to the cloud. This is very useful in case your phone is lost, reset, or you buy a new phone. All your account logins will be easily restored.
We will be using the LastPass Authenticator for the tutorial. However, instructions are similar for all auth apps. Open your authenticator app, and then click on the Add button.
You will be asked if you’d like to scan a site manually or scan the bar code. Select the scan bar code option and then point your phone’s camera on the QRcode shown on the plugin’s settings page.
That’s all, your authentication app will now save it. Next time you log in to your website, you will be asked for the two-factor auth code after you enter your password.
Simply open the authenticator app on your phone and enter the code you see on it.
[Back to Top ↑]
Change WordPress Database Prefix
By default, WordPress uses wp_ as the prefix for all tables in your WordPress database. If your WordPress site is using the default database prefix, then it makes it easier for hackers to guess what your table name is. This is why we recommend changing it.
You can change your database prefix by following our step by step tutorial on how to change WordPress database prefix to improve security.
Note: This can break your site if it’s not done properly. Only proceed, if you feel comfortable with your coding skills.
[Back to Top ↑]
Password Protect WordPress Admin and Login Page
Normally, hackers can request your wp-admin folder and login page without any restriction. This allows them to try their hacking tricks or run DDoS attacks.
You can add additional password protection on a server-side level, which will effectively block those requests.
Follow our step-by-step instructions on how to password protect your WordPress admin (wp-admin) directory.
[Back to Top ↑]
Disable Directory Indexing and Browsing
Directory browsing can be used by hackers to find out if you have any files with known vulnerabilities, so they can take advantage of these files to gain access.
Directory browsing can also be used by other people to look into your files, copy images, find out your directory structure, and other information. This is why it is highly recommended that you turn off directory indexing and browsing.
You need to connect to your website using FTP or cPanel’s file manager. Next, locate the .htaccess file in your website’s root directory. If you cannot see it there, then refer to our guide on why you can’t see .htaccess file in WordPress.
After that, you need to add the following line at the end of the .htaccess file:
Options -Indexes
Don’t forget to save and upload .htaccess file back to your site. For more on this topic, see our article on how to disable directory browsing in WordPress.
[Back to Top ↑]
Disable XML-RPC in WordPress
XML-RPC was enabled by default in WordPress 3.5 because it helps connecting your WordPress site with web and mobile apps.
Because of its powerful nature, XML-RPC can significantly amplify the brute-force attacks.
For example, traditionally if a hacker wanted to try 500 different passwords on your website, they would have to make 500 separate login attempts which will be caught and blocked by the login lockdown plugin.
But with XML-RPC, a hacker can use the system.multicall function to try thousands of password with say 20 or 50 requests.
This is why if you’re not using XML-RPC, then we recommend that you disable it.
There are 3 ways to disable XML-RPC in WordPress, and we have covered all of them in our step by step tutorial on how to disable XML-RPC in WordPress.
Tip: The .htaccess method is the best one because it’s the least resource intensive.
If you’re using the web-application firewall mentioned earlier, then this can be taken care of by the firewall.
[Back to Top ↑]
Automatically log out Idle Users in WordPress
Logged in users can sometimes wander away from screen, and this poses a security risk. Someone can hijack their session, change passwords, or make changes to their account.
This is why many banking and financial sites automatically log out an inactive user. You can implement similar functionality on your WordPress site as well.
You will need to install and activate the Inactive Logout plugin. Upon activation, visit Settings » Inactive Logout page to configure plugin settings.
Simply set the time duration and add a logout message. Don’t forget to click on the save changes button to store your settings.
[Back to Top ↑]
Add Security Questions to WordPress Login Screen
Adding a security question to your WordPress login screen makes it even harder for someone to get unauthorized access.
You can add security questions by installing the WP Security Questions plugin. Upon activation, you need to visit Settings » Security Questions page to configure the plugin settings.
For more detailed instructions, see our tutorial on how to add security questions to WordPress login screen.
[Back to Top ↑]
Scanning WordPress for Malware and Vulnerabilies
If you have a WordPress security plugin installed, then those plugins will routinely check for malware and signs of security breaches.
However, if you see a sudden drop in website traffic or search rankings, then you may want to manually run a scan. You can use your WordPress security plugin, or use one of these malware and security scanners.
Running these online scans is quite straight forward, you just enter your website URLs and their crawlers go through your website to look for known malware and malicious code.
Now keep in mind that most WordPress security scanners can just scan your website. They cannot remove the malware or clean a hacked WordPress site.
This brings us to the next section, cleaning up malware and hacked WordPress sites.
[Back to Top ↑]
Fixing a Hacked WordPress Site
Many WordPress users don’t realize the importance of backups and website security until their website is hacked.
Cleaning up a WordPress site can be very difficult and time consuming. Our first advice would be to let a professional take care of it.
Hackers install backdoors on affected sites, and if these backdoors are not fixed properly, then your website will likely get hacked again.
Allowing a professional security company like Sucuri to fix your website will ensure that your site is safe to use again. It will also protect you against any future attacks.
For the adventurous and DIY users, we have compiled a step by step guide on fixing a hacked WordPress site.
[Back to Top ↑]
That’s all, we hope this article helped you learn the top WordPress security best practices as well as discover the best WordPress security plugins for your website.
If you liked this article, then please subscribe to our YouTube Channel for WordPress video tutorials. You can also find us on Twitter and Facebook.
The post The Ultimate WordPress Security Guide (Step by Step) appeared first on WPBeginner.
from WPBeginner https://www.wpbeginner.com/beginners-guide/the-ultimate-wordpress-security-guide-step-by-step/
0 notes
Text
The ultimate WordPress security guide 2020
New Post has been published on https://trendyport.com/the-ultimate-wordpress-security-guide-2020/
The ultimate WordPress security guide 2020
#Change WordPress Database Prefix#Cloudflare#Disable directory indexing and browsing#disable file edit#Disable PHP file execution#Disable XML-RPC#Enable web application Firewall#Limit login attempts#SSL#Sucuri firewall#two-factor authentication#use strong password#WAF#Website security#WordPress hosting#wordpress security#WordPress security plugin#WordPress update
0 notes
Text
The ultimate WordPress security guide 2020
New Post has been published on https://trendyport.com/the-ultimate-wordpress-security-guide-2020/
The ultimate WordPress security guide 2020
#Change WordPress Database Prefix#Cloudflare#Disable directory indexing and browsing#disable file edit#Disable PHP file execution#Disable XML-RPC#Enable web application Firewall#Limit login attempts#SSL#Sucuri firewall#two-factor authentication#use strong password#WAF#Website security#WordPress hosting#wordpress security#WordPress security plugin#WordPress update
0 notes