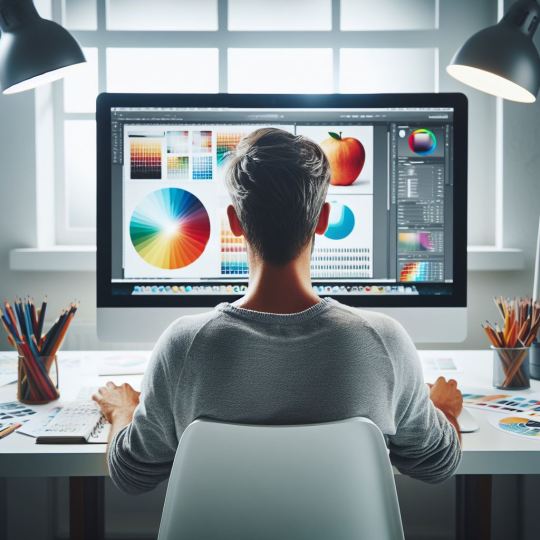
#Which software is best for graphic design for beginners?
Explore tagged Tumblr posts
Visit Tumblr Blog
Explore Tumblr blogs with no restrictions, modern design and the best experience.
Last Seen Tumblr Blogs


Fun Fact
The total number of visits Tumblr.com received during January 2021 is 327 million.
Text
Which software is best for graphic design for beginners?
Starting your journey into graphic design can be exciting, but also overwhelming—especially when it comes to choosing the right software. There are dozens of tools available, each offering different features and functions. If you're a beginner, you might be wondering:
Which software is best for learning and practicing graphic design?
In this blog, we’ll explore the most popular and beginner-friendly graphic design software in 2025, along with their strengths, use cases, pricing, and why each one could be the right fit for you.
Why Software Matters for Beginners
Before we jump into the list, let’s clarify why your choice of software is so important as a beginner:
Ease of Use: You need a tool with a gentle learning curve so you don’t get frustrated early on.
Cost-Effective: Budget matters. Many beginners prefer free or low-cost options.
Community and Resources: A large user base means more tutorials, templates, and support.
Versatility: Good beginner software lets you create a range of designs—from logos to social media posts and print materials.
Top Graphic Design Software for Beginners
Here are the best tools to consider in 2025:
1. Canva (Best for Absolute Beginners)
Platform: Web-based, iOS, Android Price: Free with premium subscription options (Pro at approx. $12.99/month)
Why it’s great:
Canva is arguably the most beginner-friendly graphic design tool available today. With its intuitive drag-and-drop interface, thousands of templates, and ready-to-use elements, it's perfect for non-designers or people just starting out.
Best For:
Social media graphics
Posters and flyers
Presentations
Simple logo and branding design
Pros:
No design experience required
Easy to use with pre-made templates
Large library of stock images and icons
Real-time collaboration
Cons:
Limited advanced design capabilities
Not suitable for complex vector artwork or professional illustration
Verdict: If you're brand new to design and want to create beautiful content quickly, Canva is your go-to.
2. Adobe Express (Formerly Adobe Spark)
Platform: Web-based, iOS, Android Price: Free with optional premium features
Why it’s great:
Adobe Express is Adobe’s answer to Canva, built for quick and easy content creation. It’s ideal for beginners who want the reliability of Adobe but without the complexity of Photoshop or Illustrator.
Best For:
Social media content
Basic video editing
Branded graphics
Flyers and web pages
Pros:
Very beginner-friendly
Auto-resize features for social media
Syncs with Adobe Creative Cloud
Tons of beautiful templates
Cons:
Limited creative freedom compared to full Adobe tools
Templates are highly templated — less room for uniqueness
Verdict: Great choice for beginners who want Adobe’s quality with Canva-like simplicity.
3. Adobe Illustrator (Best for Learning Industry Standards)
Platform: Windows, macOS Price: Subscription-based (~$20.99/month)
Why it’s great:
If you’re serious about graphic design as a career or long-term skill, starting with Adobe Illustrator is a smart move. It’s the industry standard for vector design, used by professionals worldwide for logos, branding, and illustrations.
Best For:
Logo design
Vector illustrations
Icons and infographics
Typography and branding
Pros:
Professional, high-quality output
Widely used in design jobs and agencies
Tons of tutorials and community resources
Supports complex vector editing
Cons:
Steep learning curve
Costly for some beginners
Requires powerful hardware
Verdict: Illustrator is best if you’re ready to commit to learning and want to work professionally in design.
4. Affinity Designer (Great Photoshop/Illustrator Alternative)
Platform: Windows, macOS, iPad Price: One-time purchase (~$69.99)
Why it’s great:
Affinity Designer offers professional-grade tools without the subscription model of Adobe. It’s sleek, fast, and very popular among designers looking for budget-friendly alternatives.
Best For:
Vector and raster design in one app
Logo and print design
UI/UX design
Pros:
One-time purchase — no monthly fees
Powerful vector + pixel editing
Clean, intuitive interface
Affordable
Cons:
Fewer third-party resources and plugins than Adobe
Smaller learning community
Verdict: Perfect for beginners who want advanced features without the Adobe subscription.
5. Gravit Designer (Best Free Vector Tool)
Platform: Web-based, Windows, macOS, Linux, Chrome OS Price: Free (Pro version ~$49/year)
Why it’s great:
Gravit Designer is a free vector design tool that works directly in your browser. It’s a solid Illustrator alternative for beginners who don’t want to download heavy software.
Best For:
Vector graphics
Icons and UI design
Marketing materials
Pros:
Works across platforms and devices
Clean, easy-to-learn interface
Supports export to multiple file types
Cons:
Requires Pro version for full features
Can lag with complex designs
Verdict: Excellent choice for beginners who want free software to start learning vector design.
6. GIMP (Best Free Photoshop Alternative)
Platform: Windows, macOS, Linux Price: Free and open-source
Why it’s great:
GIMP (GNU Image Manipulation Program) is a powerful, free alternative to Photoshop. It’s open-source and offers many of the features you’ll find in premium software.
Best For:
Photo editing
Web graphics
Digital painting
Pros:
Completely free
Strong community support
Plugin-rich and customizable
Cons:
Not as polished as Photoshop
Steeper learning curve than Canva or Express
Verdict: Ideal if you're interested in photo editing and want a free tool with robust features.
How to Choose the Right Software as a Beginner
Here are a few questions to ask yourself: QuestionBest MatchDo I want to make Instagram posts and flyers quickly?Canva / Adobe ExpressDo I want to learn professional design tools?Adobe Illustrator / Affinity DesignerIs budget a major concern?GIMP / Gravit DesignerDo I want to design logos and vector art?Illustrator / Affinity Designer / GravitAm I planning to freelance or get a design job?Illustrator or Affinity Designer
Final Thoughts
Choosing the best graphic design software as a beginner depends on your goals, interests, and budget. If you just want to explore design casually, Canva or Adobe Express will get you started without overwhelming you. But if you're aiming for a design career or professional work, learning Adobe Illustrator or Affinity Designer is a valuable investment.
0 notes
Text

bog tour - countdown to 1 year of games
T MINUS 1 DAY - decide what I write next!
If you've been seeing my posts so far, you may have noticed I started 16 days before April 1st, but only have 15 games. Well, today is a bit of a mix of things! I'll have an overview of stats, overall reflections on my first year of games, future plans and sneak peaks, and, get this, a poll of some current ideas I have, so you, my lovely blog readers can decide what game I write next, so stay tuned till the end of the post for that!
Stats
Gross revenue: $545.38USD Payments: 152 Views: 6,568 Downloads: 1,304 Itch followers: 1,304 8 of my 15 games are wetland themed!
Reflections
Gosh, where do I even start! I think one of the best things this little venture into ttrpg design has given me is community! From the unofficial Wanderhome discord server giving me my very first foray into ttrpg content with prompts for playbooks aaaages ago, to joining KiwiRPG, Aotearoa's collective of ttrpg designers, to the Creekside Community Center, which is the full of the most lovely welcoming cool people (I mostly lurk but when I do post, everyone is so kind?!), to my little tumblr ttrpg design circle. People being excited about my games with me is delightful!!!
I could mention boring things like formatting, layout, graphic design, font, software, art, and more, but eh.
Instead I'll mention the sheer innovation present in indie ttrpgs. I've seen some of the most creative, genius, well-crafted content in my entire life within indie ttrpgs spaces, and sometimes they have 2 comments and have the worst formatting you've ever seen, or are just on a google doc.
Instead I'll mention that way that the community enfolds beginners and people who need assurance.
The themes that I've explored in my ttrpg design, many of which I am not yet ready to explore directly, instead needing the distance but also closeness of the lense of ttrpgs.
Community is such a key part of ttrpg design, at least to me, and I feel so held by these communities. Thank you to every person who's interacted with my games, whether by playing, rbing, liking, or even just looking at them. If you've left a review, or a comment, or an emoji reaction on a discord promo message I wrote, ngā mihi nunui.
I hope, in the next year, I can make more games about being Māori. About being takatāpui. About being queer. About hope. About determination. About endurance. About love. About community care. And yes, about wetlands.
Future plans/sneak peaks
I've got two games in progress right now! One is Star Waka, a game about Māori spaceship crews. I have previously posted some small snippets, but have decided to start fresh so no sneak peaks of that besides what the playbooks will (likely, maybe) be:
Ringatoi - the Artist
Rangatira - the Chief
Kaikaranga - the Caller
Kairarangā - the Weaver
Kaumatua - the Elder
Tohunga - the Expert
Rangatahi - the Youth
Kaitiaki - the Guardian
As well, I've got a whole game finished, which I'll be releasing... tomorrow, on my 1 year anniversary! Here's a sneak peak:

What should I write next?
Thank you if you've made it through these bog tour posts, or even if you've come straight to this poll, thanks too! So, here goes, which should I write next?
16 notes
·
View notes
Note
would you happen to have a flight sim recommendation? Ive seen you post about using them and wondered which one you thought would be best
Depends what you're looking for.
The two big players are Microsoft Flight Simulator and X-Plane.
MSFS is very pretty, it has some decent tutorials built-in, and there's a huge array of content for it, but, at least on my computer, it runs somewhat unstably. It's also very accessible, bordering on hand-holding, which can be good if you're new to flight sims but can also get very old very quickly once you know what you're doing. It's also designed for a gamepad primarily, and you can play it on Xbox. I think its a a little over-designed actually. There's a ton of aftermarket planes available, mostly thru the in-game browser. There might be freeware, i haven't really looked into it.
X-Plane is less pretty, the graphics are maybe a tiny bit more dated, you don't get the photorealistic scenery, but the flight dynamics are much, much more realistic. The difference is hard to explain succinctly but the long and short of it is that, on average, a well designed aircraft for X-Plane will feel "more real" than one in MSFS. X-Plane is also usable on Windows, Mac, and Linux. There's a lot of aftermarket content for it, but less than MSFS, although last i checked there's a larger portion of freeware. It's also a little more persnickty vis-a-vis installation and management. X-Plane also comes with a utility to help you make airplanes for it, though you have to provide the 3D modeling software (like blender) yourself.
Overally, it really boils down to what you want in your flight simulator
MSFS
Pros:
Photorealistic Scenery
Wide variety of assistance
Highly accessible tutorials
Lots of aftermarket content
Available on Windows and Xbox
Cons:
Less realistic flight dynamics
Pretty graphics means higher system requirements
Can be overbearing if you're experienced with flight sims
Designed for a gamepad first and foremost, feels somewhat awkward with the old fashioned joystick, mouse, and keyboard
X-Plane
Pros:
More realistic Flight Dynamics
Built-in plane maker utility
Runs on Windows, Linux, and Mac
Slightly more generous system requirements
Takes up waaaaaaaaaay less space (my install, which has a shitload of aftermarket content in it, takes up 30gb less than my vanilla MSFS install)
Great if you're familiar with flight sims or flying in general
Cons:
Finicky installation and content management compared to MSFS. If you're used to digging in folders and installing mods that way, you won't have any trouble with it, but if you're not experienced with that its got a bit of a learning curve (and you should learn that! it's a great skill!)
Scenery is more generic than MSFS, particularly outside of major cities
Requires a computer, not available on PS5 or Xbox (Imo this is a pro, not a con, but if you don't have a gaming computer its obviously a problem)
Less aftermarket content available
Requires a bit of manual configuration to get going right
Fewer tutorials
Now, I understand it sounds like MSFS is "better" but i really feel that X-Plane is the better choice if you're going to get seriously into this stuff. That being said, i have both, and I play both, but I play X-Plane a whole lot more. If you're brand-new at flight simming, i'd recommend getting MSFS, but don't splurge for the super-deluxe editions. If you've simmed before, i can't recommend X-Plane enough.
TL;DR: MSFS is good for beginners, X-Plane is better for anyone beyond beginner level.
7 notes
·
View notes
Text
5 Free Software Tools to Create Stunning Images for Social Media and Blog Posts
Alright, guys, today we're diving into the world of image creation for social media and featured blog posts. Whether you're a seasoned content creator or just starting out on your blogging journey, having eye-catching images is essential for grabbing your audience's attention and driving engagement. But with so many image editing tools out there, which ones should you use? Well, fear not, because I've rounded up the best free software for creating images that will take your social media game to the next level. Let's dive in!
Canva: First up on our list is Canva – the ultimate graphic design tool for beginners and pros alike. With Canva, you can create stunning images for social media, blog posts, presentations, and more, all with drag-and-drop simplicity. Choose from thousands of pre-designed templates, fonts, and graphics, or start from scratch and let your creativity run wild. Canva's intuitive interface and extensive library of assets make it a must-have tool for any content creator.
Adobe Express: Next up, we have Adobe Express – a powerful design tool from the creators of Photoshop and Illustrator. With Adobe Express, you can create stunning graphics, web pages, and video stories in minutes, right from your browser or mobile device. Choose from a variety of professionally designed templates, customize with your own photos and text, and share your creations across all your social media channels with ease. Plus, its seamless integration with other Adobe products makes it a no-brainer for anyone already using Adobe's creative suite.
PicMonkey: Another great option for creating eye-catching images is PicMonkey. With PicMonkey, you can easily edit photos, create graphics, and design collages without any technical know-how. Choose from a wide range of filters, effects, and overlays to give your images that extra pop, or use PicMonkey's powerful design tools to create custom graphics from scratch. Plus, with PicMonkey's user-friendly interface and intuitive features, you'll be creating stunning images in no time.
Pixlr: If you're looking for a free alternative to Photoshop, look no further than Pixlr. With Pixlr, you can edit photos, create collages, and design graphics with ease, all from your web browser or mobile device. Choose from a variety of editing tools, filters, and effects to enhance your images, or start from scratch and let your creativity run wild. Plus, with Pixlr's cloud-based platform, you can access your projects from anywhere and collaborate with others in real-time.
GIMP: Last but not least, we have GIMP – the GNU Image Manipulation Program. While GIMP may not have the most user-friendly interface, it's a powerful open-source alternative to expensive image editing software like Photoshop. With GIMP, you can retouch photos, create custom graphics, and design stunning visuals for your social media and blog posts. Plus, with a little bit of practice, you'll be amazed at what you can accomplish with this free, feature-packed tool.
In conclusion, creating eye-catching images for social media and featured blog posts doesn't have to break the bank. With these free software options, you can easily design stunning visuals that will grab your audience's attention and drive engagement. So why wait? Start creating today and take your content to the next level!
#SocialMediaMarketing#BloggingTips#GraphicDesign#ContentCreation#VisualContent#DigitalMarketing#FreeTools#Canva#AdobeSpark#PicMonkey#Pixlr#GIMP#ContentCreators#VisualMarketing#SocialMediaImages#BlogGraphics#adobeexpress#photoshop alternatives
9 notes
·
View notes
Text
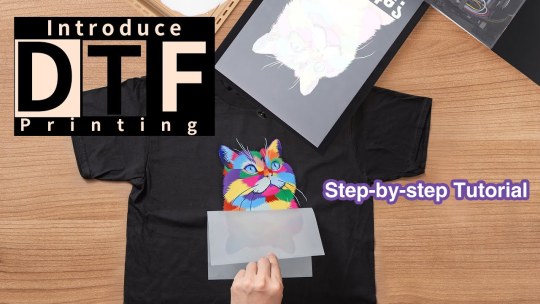
DTF Transfer Printing for Beginners: A Comprehensive Guide to Printing DTF Transfers at Home
As custom apparel and personalized items continue to gain popularity, creative enthusiasts are looking for efficient and affordable ways to produce high-quality prints from the comfort of their homes. Direct-to-Film (DTF) transfer printing has emerged as an accessible and versatile method for producing vibrant designs on various surfaces, especially textiles. DTF printing offers the advantage of application on a range of materials while maintaining exceptional color fidelity and detail. This article will introduce beginners to the DTF printers printing process, the equipment and materials needed, step-by-step instructions for printing transfers at home, tips for successful application, and the benefits of incorporating DTF printing into your crafting repertoire.
Understanding DTF Transfer Printing
DTF transfer printing is a relatively new technology that combines elements from both Direct-to-Garment (DTG) and traditional heat transfer methods. DTF printing involves printing designs onto a special film using specific inks that offer excellent adhesion and durability. The printed film is then coated with a layer of adhesive powder, which, when heated, bonds securely to the fabric. This process differentiates DTF from other transfer methods, providing vibrant prints, the ability to work with a wide variety of fabrics, and ease of application. For beginners, understanding the mechanics of DTF printing is essential for achieving high-quality results and exploring the potential of this versatile printing method.
Equipment and Materials Needed
To embark on your DTF printing journey, you'll need a collection of essential equipment and materials. The primary equipment required is a DTF printer, specifically an inkjet printer that can accommodate DTF transfer films. You’ll also need DTF inks, which are specifically formulated for this printing process, along with adhesive powder that helps form a strong bond between the transfer and fabric. Other necessary items include DTF transfer film, heat press, a weeding tool for removing excess film, and protective sheets to place between the fabric and heat press for safe application. While it may seem like a considerable investment upfront, many of these items can be purchased gradually as you become more comfortable with the process.
Step-by-Step Process for Printing DTF Transfers
Once you have gathered the necessary equipment and materials, the process of printing DTF transfers can begin.
1. Design Creation: Start by creating your design using graphic design software (like Adobe Illustrator or CorelDRAW) or purchasing premade designs. Ensure your design is in a compatible format and sized appropriately for your project.
2. Printing: Load the DTF transfer film into your printer. Print your design, ensuring to set it for "mirror" mode so that the image transfers correctly when applied to the fabric.
3. Adhesive Application: Once printed, sprinkle the adhesive powder evenly onto the wet ink immediately after printing. Gently shake off any excess powder.
4. Curing: Use a heat source, such as a heat press, to cure the transfer. This generally involves setting the heat press to a specific temperature (around 160-180°C) and applying even pressure for roughly 20-30 seconds. This step helps melt the adhesive powder into the print.
5. Weeding: Allow the transfer to cool, then weed out the unwanted areas of the film using a weeding tool, leaving you with your desired design.
6. Pressing on Fabric: Place your fabric on the heat press, position the transfer film (ink side down), apply the heat press again for another 10-15 seconds, and then let it cool before peeling off the film backing.
Tips for Successful DTF Transfers
To achieve the best results with DTF transfer printing, several tips can help ensure success. Begin by investing time in acclimating yourself to the equipment and practicing with various designs and fabrics. Experiment with different print settings, as printing at the right resolution and using suitable profiles for DTF printing can significantly influence the final output. It's also important to use high-quality DTF films and inks, as these will directly affect the vibrancy and durability of your prints. Lastly, always remember to conduct washing tests on fabric after the initial applications; this will provide insight into the longevity and durability of your DTF transfers and help you adjust your processes accordingly.
Benefits of DTF Printing for DIY Enthusiasts
For those interested in custom apparel, DTF transfer printing offers multiple benefits. One significant advantage is its versatility; DTF printing can be applied to a wide range of fabrics, including cotton, polyester, and blends. This flexibility enables crafters to experiment with different materials and styles without being restricted to specific substrates. Additionally, DTF transfers deliver vibrant colors and intricate details, making them ideal for creating striking designs on clothing. The process is also relatively straightforward compared to other printing methods, often requiring less upfront investment and offering rapid turnaround times for small batch production. Overall, DTF printing not only encourages creativity but also offers an efficient way to produce high-quality custom items.
Final Thought
In summary, DTF transfer printing provides an exciting opportunity for beginners and craft enthusiasts to produce professional-quality prints from home. By understanding the mechanics behind the process, gathering the right equipment, and following the steps outlined, you can start your venture into the world of custom printing today. Embrace the versatility and ease of DTF printing to create personalized apparel and accessories that reflect your unique style. As you gain experience and confidence, your creative possibilities will expand, allowing you to explore the full potential of DTF transfer printing. So grab your supplies, start experimenting, and watch your designs come to life through this innovative medium!
6 notes
·
View notes
Text
8 Best Logo Design tips/techniques
Logo design plays a vital role for any brand or company to make or break its business of a company can make or break its business vision. A well-designed logo can establish a new brand and also help a running organization to build rapport with the customers. Other than an imperfectly created logo fails to communicate a brand nature and ultimately harms business.

Avoid using multiple colors use a maximum of 3 Colors
A Logo should always neat and clean as it’s not only a piece of design it is also a brand communicator for the entire media. Using more color can distract your user’s interest also it’s very hard to create its chemistry with other media like printing and web display. Using less color will make your logo more prominent.
Use simple and avoid sharp edges / cursive fonts’ type
Uses of your logo can be in any size from bigger in hoarding to smaller in Ads, especially for the newspaper ads. Sharp edges font type can decrease the visibility of your brand also we shouldn’t use more than 2 font’s type.
Compatible with Black & White Background
Always create a reverse type of your logo (white on black & black on white). It’s better if the colors and font type we use should be in contrast on white & black background. If your logo suffices the given purpose it’s a well created Logo Design.

Stick to two-dimensional design
Your logo can either be two or three dimensional. But it’s recommended creating 2D Logo for beginner always. First, it’s easy to conceptualize if compared with 3D design. Also, it helps us to understand the process of logo designing.
Create a vector logo
The logo should always be in vector format as we discussed earlier that the uses of your logo can be anywhere right from giant size hoarding to a one columns newspaper ad. The best part of vector design is that most of the beginners wouldn’t aware as it doesn’t have a size limitation, means its pixels would not affect if we increase or decrease its size at any level. It will not affect its pixels. Other than bitmap format has a limited size. We will have in length discussion on Vector and raster Graphics in our future topics.

Avoid using shadow, bevel, gradient, or emboss techniques
There are N numbers of techniques which can make our design more beautiful and attractive but it’s hard or sometimes impossible to reproduce it on a various medias like screen printing, foil stamp printing & embroidery as it is unable to support gradient& shadow. Even the premium signages like ACP board doesn’t support it. The only process which supports all kinds of colors and effects is Digital printing but it has its own limitation.
Avoid using photos
As we already discussed the bitmap/ raster images for its limited resolution and photos supports the same format, so we should do avoid using photos in Logo Design. Also, it doesn’t reproduce well in many media like hoarding, many parts of sublimation/heat transfer printing, embroidery for T-shirts, etc.
Best Software for Logo Designing
There are many free tools online and offline to create Logo of your choice. You can take help of them to create some basic designs. But it all has some restricted features which won’t allow you to do experimental design. We Designs recommend Corel Draw (any version) and Adobe Illustrator (any version) as the best vector Logo Designing tool which is capable enough to suffice your entire designing requirement.
3 notes
·
View notes
Text

𝐏𝐨𝐫𝐭𝐟𝐨𝐥𝐢𝐨 𝐌𝐚𝐠𝐚𝐳𝐢𝐧𝐞 𝐓𝐞𝐦𝐩𝐥𝐚𝐭𝐞
A portfolio magazine template offers an easy, professional, and visually compelling way to present your work. These templates come pre-designed with layout structures, typography, and sections tailored to highlight your best pieces, making them a great solution for anyone looking to create an eye-catching portfolio without starting from scratch.
How to Choose the Right Portfolio Magazine Template
Choosing the right portfolio magazine template is key to creating a portfolio that best represents you and your work. Here are a few factors to consider when selecting the perfect template:
1. Industry and Profession
Consider your industry and profession when choosing a template. A photographer's portfolio might need a template with large image spaces and grid layouts, while a writer's portfolio could benefit from a more text-centric template with ample space for articles, essays, or project descriptions. Ensure the template you select aligns with the type of work you do.
2. Aesthetic and Style
The design of your portfolio should reflect your personal style and brand. Choose a template that complements your creative identity, whether it's minimalistic, elegant, vibrant, or avant-garde. Pay attention to the template’s color scheme, typography, and overall layout style to ensure it aligns with the aesthetic you want to communicate.
3. Ease of Customization
Look for a template that is easy to customize. Some templates come with detailed instructions or are specifically designed for beginner designers. Whether you're editing colors, adding your images, or changing fonts, the template should be easy to work with and allow you to make edits quickly and seamlessly.
4. Quality of the Template
When selecting a template, make sure it's high-quality and well-designed. Look for templates that are compatible with industry-standard design software (such as Adobe InDesign or Illustrator) to ensure that they are professional and functional. Be wary of overly simplistic or outdated designs that may not convey a modern or sophisticated aesthetic.
5. File Format
Check that the template is in a format that you’re comfortable working with. If you’re using Adobe InDesign, for example, make sure the template is available in that format. Some templates are also available in Canva, which might be a better option for those who are less familiar with graphic design software.
6. User Reviews and Feedback
Before purchasing or downloading a portfolio magazine template, check user reviews and feedback to ensure that the template is reliable, functional, and effective. Look for templates that have been tested and reviewed by others to get an idea of how it performs in real-world use.
Conclusion
Creating a portfolio doesn't have to be a difficult, time-consuming task. With the help of a portfolio magazine template, you can create a professional, visually compelling presentation of your work in a fraction of the time. By choosing the right template, customizing it to reflect your personal style, and showcasing your best work, you'll be well on your way to making a lasting impression on clients, employers, and collaborators.
#portfolio layout#modeling portfolio#portfolio magazine#portfolio#magazine design#magazine cover#fashion magazine#magazine layout#fashion design#template design#magazine template#print template
2 notes
·
View notes
Text
All about fundamentals of website design and development – A beginner’s handbook

As we all know in today’s world everyone is using websites, apps, social media platforms etc. regularly. Knowing and understanding the fundamentals of website design and development is the first step towards your website journey. We need to understand the basic things behind all these website designs, apps and platforms. There are multiple aspects to be considered in creating a website.
Have you ever came across any website and felt its very user friendly, looks great.
Have you ever thought how these websites will be designed and developed. What kind of design software they use in website designing process?
As a business owner, knowledge on website design and development is a must nowadays. This knowledge give you idea how to market your products or services in a better way.
If you are looking to learn basic of website design or confused with different concepts , this blog is one stop solution for all your learning needs.
In this beginner’s handbook we will cover all the crucial components of web design and development and also highlights key aspects to be considered when looking for the best website design and development agency in India. You can reach out to us as we are the well known website design and development company in Bangalore.
In this article we can cover all about web design and its role in business growth.
What is web design?
It is a part of website design and development includes website layout, colors , typography, user interface and other visual aspects. Web design is crucial as it makes website looks visually appealing, engaging and user friendly.
Web designer is a professional who has a skill of designing websites. Web designer must understand the website’s purpose, visual elements and the target audience.
Web designing is a creative process in which graphic designer creates a visual elements to integrate in the website.
What is website development?
Website development involves technical side of building a Website. It includes coding, server configuration, database management, and make sure the website functions as needed.
Several programming languages are used to convert a web design to a functioning website during the website development process. HTML and CSS are the most popular languages used to design a web pages.
Web developer is a professional who has the skills to develop websites.
Importance of a website in business:
A well designed website assist in multiple purposes such as
First impressions: First impression always create a long lasting impact so as the first impression of any visitors is crucial. A great web design builds trust and encourages users to explore more.
User experience(UX): Good design increases usability which helps to navigate the site and find information.
Search Engine Optimization: Web design integrates SEO best practices, by making sure that the website ranks well in search engines and improving visibility.
Conversion rates: A visually appealing and navigational website increases the rate of conversion, by transforming visitors into customers.
Key elements of Website Design
Layout:
Layout represents how a content is organized in webpage. A good layout gets user attention and will be easier to process information. Most used layout styles are:
Grid layout: This layout style uses grid system to structure content, offering a well organized look.
F-shape layout: This layout helps in enhancing usability as in this design elements align with the reading behavior. Some studies shows that users read in F- pattern.
Color scheme:
Colors evoke emotions by influencing user behavior. Factors to be considered while choosing color:
Brand identity: Select colors that reflects your brand identity
Contrast: Make sure there is contrast variation between text and background to make it readable.
Typography :
Typography has a huge impact on readability and user experience. Consider factors like:
Fonts: Use fonts that are easy to read and to maintain a cohesive look.
Hierarchy: Create a visual hierarchy by using proper size and weight making users to find the important information.
Images and graphics:
Visual elements such as images, videos , graphics and icons helps in improving website appeal. Make sure you work on factors like:
Quality: Use relevant high resolution images that matches with your content.
Loading speed: Optimize images for fast loading speed , as speed plays a major role in improving user experience and SEO
Navigation:
Having a well structured navigation is vital for better usability. Consider the following to achieve it:
Simplicity: Make sure navigation is simple
Accessibility: Ensure your website is accessible on all devices including mobile
Fundamentals of web development:
Front end development:
It refers to everything a user see and interact with website. It includes:
HTML(Hypertext Markup Language) : HTML helps in structuring the content as It is a pillar of webpages.
CSS (Cascading Style Sheets) : It adds styles to HTML, layout , colors and fonts.
Java script : This is a programming language which make web pages interactive, making user experience better.
Back end development:
It focuses on server side functionality. It includes:
Server: It is a place where website’s files and data is stored. Server process requests and serves the web pages to users.
Database: Helps to store and manage data. One of the popular database is MySQL
Server-side languages: We can use languages such as PHP or python for communication between server and database.
Content Management Systems (CMS):
CMS allows users to create the digital content and manage it effortlessly. Most used CMS platform by beginners include WordPress as it is highly user friendly and customizable
Factors to consider when choosing web design and development agency:
When looking for the web design and development agency in India , follow these tips:
Review the agency’s portfolio to understand their work style and capability. Check for their various projects or clients handled which matches with your business style and vision
Check for previous clients reviews , ratings and testimonials . If there is a positive feedback then you can consider that agency.
Go through the list of services the agency offers such as web design , development , SEO , Digital Marketing and Branding.
Consider a agency which maintains transparent communication by being open to any kind of feedback and ready to collaborate and support regularly throughout the project.
We should always choose an agency that fits your budget. Get quotes, compare their services and pricing and finalize the agency that suits you best.
Why choose Synwolf as a web design and development agency?
When it comes to the best agency for web design and development , Synwolf stands high in competition as a premier choice for businesses who are looking for designing a website to take their business next level. We have a team who are creative as well as having technical expertise to design a website as per your business goals. We mainly focus on understanding your business, goals to make sure every aspect of your website from layout to functionality aligns with your vision. By prioritizing user experience we integrate eye catchy visuals that helps in getting engagement and more conversions. We maintain transparent communication over a period of designing website which allows you to collaborate with us and assist us on getting your dream website designed without any flaws and meets your expectations. Contact us today to start your journey of business growth in this online world.
Conclusion:
Understanding the basics and fundamentals included in website design and development is very essential in this digital age. Focusing on key elements like layout, color, typography and navigation you can enhance user experience. Building knowledge on these aspects helps you to navigate the world of web design and development with confidence. Whether you are creating a personal blog, e-commerce site, corporate platform or looking for a professional assistance this handbook will help in laying a foundation for your business success. If you are looking for a professional help from website design and development company make an informed decisions based on your requirements and their expertise.
Today the entire world is becoming digitalized. Most of the people spends time online for all kind of activities. Websites has become common and takes center stage in this time. We can access any kind of information at our fingertips with a website. If a company does not have a user friendly website then it going to losing most of its customers. As a business its mandatory to you to have a well designed and user friendly website. For that you need a very good and well known web design and development services in India for your business growth. Contact our team today.
#website design and development#website#web design#web development#website design#wordpress#digital marketing services#web desgin company#web developing company
2 notes
·
View notes
Text
Top Animation Software for Beginners in 2024
Starting with animation could be fun for the newcomers but at the same time it could be quite challenging. Fortunately, the animation software market of 2024 has quite a bunch of incredible tools designed to be rather friendly for the beginners. Below are the reviews of the best animation software for newbie this year. 1. Blender Blender is a free and open source 3D animation software package with which beginners will have no issues using. It comes with a one-stop package for all modeling and rigging, animation, and simulation, rendering, composite, and motion tracking. It is easy to start with because of friendly interface and there are many lessons and tutorials available. 2. Toon Boom Harmony Toon Boom Harmony is a simple and complex 2D animation tool used by individuals who are new to the field as well as animators. It is famous for having quite an interface and offers plethora of features, as well as traditional frame-by-frame animation this application also works with cut-out type of animation. The community and tutorial offerings are extensive helping new users to easily find what they are looking for. 3. Synfig Studio A other 2D and free and open source software for sociable and multimedia artist is Synfig Studio. It gives a layman an opportunity to produce professional-quality animations mainly because its working environment relies on vector graphics. Hugar has extensive documentation, which can easily be accessed as well as a strong user base, that can help one get started in the right foot. 4. Pencil2D The last one is Pencil 2D which is a basic tool and the best for a beginner interested in animating. It has simple layout and elementary tools for manual drawing; thus, it a perfect option for novices in the field of animation. It is simple, so that an inexperienced user can train himself in the fundamental functions without distractions. 5. Moho Debut Moho Debut (previously known as Anime Studio Debut) is the recommended one for beginners. In its package, there is basic animation toolset, but also features like bone rigging or vector animation. New animators will find the software easy to use due to the guided tutorials every step of the way and clear layout. Thus, 2024 has a vast variety of animation software available for novices, irrespective of whether they want to engage in 2D or 3D animation projects. Gimp, Toon Boom Harmony, Blender, Synfig Studio, Pencil2D, and Moho Debut are good ones because they allow users to have the necessary tools and advises to start animating. Happy animating!
For More Information Visit: TransCurators-The Content Factory
1 note
·
View note
Text
How to Find Safe PC Software Free Download
Using the operating system is impossible without installing additional programs that serve specific purposes. Of course, it is important for each user to get high-quality pc app with full functionality without annoying ads.
In the world of PC software, there are many options available. Some of these programs are free, while others require a subscription or license fee to use. However, some people are not willing to pay for software and instead seek out pirated copies of these programs. This practice is known as “cracking” and can pose a serious security risk for computer users. It can result in malware infections and other issues. In addition, it can lead to data theft and illegal activities.
There are several websites that offer cracked software downloads, but not all of them are safe. Some of them contain adware, spyware, and other malicious software. These sites can be difficult to find and often require multiple steps to access. Some of these sites also contain viruses that can damage a user’s computer. Others can steal personal information and sell it to Chinese websites. This is why it is important to choose a website with a good reputation and one that offers a variety of programs.
One of the best websites for downloading crack software is MajorGeeks. This site features a variety of software for Windows and other operating systems. It is an excellent source for finding high-quality software that is free from virus and other dangerous components. It is also easy to navigate and includes an active community. Another option is the Crackzoom site, which has a huge collection of cracked software. This site is not recommended for beginners, but it does have some useful programs that can be downloaded for free.
Other websites for downloading cracked software include Softpedia, Softonic, and Ninite. These websites are useful for managing the programs on a user’s operating system. These sites can be a convenient alternative to searching for individual applications and can save time. These websites also provide a comprehensive list of available programs and updates.
Another popular website for downloading free programs is Sharewareonsale. This website is based in the United States and offers top-rated programs for both Windows and Mac computers. It also has a section for mobile devices that is updated regularly. In addition, the site offers free iOS and Android applications.
If you are looking for a way to create high-quality graphics without spending money, consider using free design software. There are a number of options available to help you create stunning content for social media, business marketing, and much more. Some of these software programs offer templates that are easy for a novice to use, while others provide more sophisticated tools for experienced designers.
The most popular graphic design software is Adobe Photoshop, but it is not the only option. There are a number of alternatives that are free to use and feature flexible controls for creating a wide range of designs. These programs allow you to customize text and images, create layouts, and add animation to your content. They also come with a number of plugins to improve the appearance of your design.
5 notes
·
View notes
Text
Beginner’s Guide to Animation: Start from Zero and Create Like a Pro

There’s something magical about animation. It can transform simple lines and colors into compelling characters, emotions, and entire worlds. And the best part? You don’t need to be a professional artist or tech wizard to enter the field. In fact, many successful animators today began with nothing more than a fascination for moving images and a willingness to learn. So, if you’re starting from zero, don’t worry—this is your roadmap to begin your animation journey with confidence.
Begin by Understanding What Animation Really Involves
Before jumping into tools or tutorials, it’s important to grasp what animation actually entails. Animation isn't just drawing cartoons—it’s the art of movement, emotion, and timing. It's used in movies, video games, marketing, education, mobile apps, and even UI design.
From traditional hand-drawn styles to computer-generated visuals, the field includes multiple approaches like 2D animation, 3D modeling, stop-motion, and motion graphics. What ties them all together is storytelling—animation at its core is about communicating ideas through motion.
Getting Comfortable with Animation Concepts
You don’t need to master drawing to become an animator. What you really need is an understanding of how things move and behave. Start by studying real-life motion—how people walk, how a ball bounces, how fabric flows in the wind. Observing life closely helps build the animator’s eye.
Alongside this, you’ll encounter the 12 principles of animation. These time-tested rules—like squash and stretch, anticipation, timing, and exaggeration—are essential. Every beginner should spend time learning and experimenting with these concepts, no matter the software or style they aim to pursue.
Start with Simple Software and Hands-On Practice
It’s tempting to dive straight into advanced tools, but that can lead to confusion and burnout. Beginners should start with beginner-friendly animation programs like Pencil2D, Krita, or Adobe Animate. These tools help you focus on timing and movement without being bogged down by 3D complexities.
When you’re ready, you can graduate to platforms like Blender for 3D animation, which is free and used by professionals worldwide. But in the beginning, less is more. Your priority should be creating short animations that help you apply core principles—like bouncing balls, walk cycles, or facial expressions.
The learning curve may feel steep at times, but consistency is key. You’ll be amazed at the progress you can make with just 30 minutes of daily practice.
Learn from Real Animators and Communities
Animation is one of those fields where mentorship—even informal—can make a huge difference. Fortunately, you don’t have to go it alone. The internet is rich with tutorials, courses, and community forums where animators of all levels share their insights.
Following professionals on platforms like YouTube or Instagram can expose you to real workflows. Creators often break down their process, show timelapses, and offer critiques. Sites like ArtStation, Behance, and Reddit threads like r/animation can also serve as a source of feedback and inspiration.
In cities like Bengaluru, where the digital and creative industries are expanding rapidly, animation communities and workshops have become quite accessible. If you’re looking for formal instruction, enrolling in an Animation course in Bengaluru could give you access to mentors, internships, and networking that fast-tracks your learning curve.
Build a Portfolio from Day One
Even when you’re just starting out, think like a creator. Save every mini project—no matter how basic—and slowly build a portfolio that reflects your progress. You don’t need flashy visuals to get noticed; what matters is your understanding of motion and timing.
A simple bouncing ball or a looping animation can demonstrate that you’ve grasped key concepts. Over time, aim for short character animations, facial expressions, or storytelling scenes. These can be used for freelance pitches, internships, or even just sharing on social media to grow your presence.
Don’t wait to become “good enough.” Share your work early and often—it’s the best way to get feedback and grow.
Keep Up With Industry Trends
The animation industry isn’t standing still. From feature films to mobile games, demand for animation is evolving—and fast. In recent months, global streaming platforms like Netflix and Disney+ have ramped up investments in animated content, with particular focus on international stories and culturally rich narratives.
Interestingly, ed-tech platforms are also driving demand for animated learning content in India. Explainer videos, storytelling modules, and gamified apps all rely on smooth, engaging animation. This has led to a surge in job openings not just in media companies but also in startups, SaaS firms, and marketing agencies.
In India, Bengaluru stands out as one of the fastest-growing hubs for digital and creative industries. The city’s ecosystem—rich in tech startups and multimedia agencies—has made animation a sought-after skill. This is particularly true for those trained in 2D and motion design, which are widely used in digital advertising and e-learning products.
Stay Inspired and Trust the Process
Animation is a long game. It’s a craft that rewards patience, experimentation, and a keen eye for detail. You might not get the perfect character rig or walk cycle on your first try—or even your tenth. But each attempt brings you closer to understanding how visual storytelling works.
Set small goals. Create five-second animations before trying full scenes. Watch your favorite animated films and break them down shot by shot. Most importantly, remind yourself that every animator you admire once started where you are—curious and completely new.
Conclusion: Your First Step Is the Most Powerful
Animation is one of the most inclusive creative fields for beginners. Whether you’re a student, a working professional exploring a new hobby, or someone looking to pivot careers, there’s space for you here. The key is to start, stay curious, and stay consistent.
As the animation industry grows across India, Bengaluru in particular has become a destination for learners and creators alike. Opting for a 2D animation course bengaluru can help you bridge the gap between foundational skills and real-world application, especially in a city where storytelling meets technology every day.
So if you’ve ever watched an animated scene and thought, “I wish I could do that,” this is your sign to begin. You don’t need years of art school or expensive gear. You just need curiosity—and a single frame to start.
0 notes
Text
Top 10 FAQ for Beginner's Guide to Metal Textures
Q1: What is a metal texture?
A1: A metal texture is a digital overlay or pattern designed to mimic the appearance of real metal surfaces. These textures are used in digital art, 3D modeling, game design, and graphic projects to add realistic metallic elements.
Q2: How can I create realistic metal textures?
A2: Realistic metal textures can be achieved using graphic design software like Photoshop or Blender. Techniques include using noise filters for grain, adjusting contrast and highlights, and incorporating reflection patterns.
Q3: What are some common types of metal textures?
A3: Common metal textures include brushed metal, shiny chrome, rusted metal, hammered metal, and steel plates. Each has unique visual properties and uses in different design contexts.
Q4: Where can I download free metal textures?
A4: Free metal textures are available on numerous websites like Textures.com, Pexels, and Unsplash. Always check the licensing terms to ensure proper use in your projects.
Q5: What software is best for creating metal textures?
A5: Adobe Photoshop and GIMP are popular for 2D textures, while Blender and Substance Painter are excellent for creating detailed and intricate 3D metal textures.
Q6: Can I use real photos of metal as textures?
A6: Yes, real photos of metal can be converted into digital textures. This involves editing the image to tile seamlessly and ensuring adequate resolution for clarity in your design work.
Q7: How do I avoid repetition in pattern when using metal textures?
A7: To avoid repetition, use high-resolution textures, apply randomization techniques, or overlay multiple textures for variety. Seaming techniques like adding imperfections or color variations can also help.
Q8: What is the importance of lighting in metal textures?
A8: Lighting is crucial as it influences the realism of metal textures. The way light interacts with the surface highlights metal’s reflectivity and depth, enhancing its realistic appearance.
Q9: How do I make metal textures seamless?
A9: To make metal textures seamless, use tools like the Offset function in Photoshop to edit edges so they align perfectly when repeated. Online seamless texture generators can also aid in this process.
Q10: What file formats are best for saving metal textures?
A10: Lossless formats like PNG or TIFF are ideal for maintaining quality. For 3D applications, you may also use formats like DDS, which support mipmaps and compression for efficient use in render engines.
0 notes
Text
Graphic Design Training in Noida That Transforms Beginners into Pros
In today’s fast-paced digital era, graphic design is no longer just about making things look good—it’s about communicating ideas, solving problems, and building brand identities. For aspiring designers, the journey from beginner to professional can feel overwhelming without the right guidance. That’s where Graphic Design Training in Noida steps in, offering a transformative experience that equips learners with the skills, tools, and confidence to thrive in the creative industry.
Why Noida is the Ideal Hub for Graphic Design Training
Noida has quickly become one of India’s leading educational and tech hubs. With a strong presence of design studios, IT companies, and media houses, the city offers a vibrant environment for learners to grow. Graphic design institutes in Noida are known for their updated curriculum, expert mentors, and strong industry connections that give students a real-world edge.
Beginner-Friendly Approach
Whether you’re a student fresh out of school or someone looking to switch careers, the training programs in Noida are designed to accommodate beginners. They start with the fundamentals—color theory, typography, composition, and basic software tools like Adobe Photoshop, Illustrator, and InDesign. These foundations set the stage for more advanced topics as students gain confidence and clarity.
Hands-On Learning with Real Projects
The best part of these programs is their hands-on approach. Students don't just learn concepts—they apply them in real-time projects, from designing logos and posters to creating digital ads and social media creatives. This practical exposure is crucial for building a strong portfolio, which is a must for any aspiring graphic designer.
Industry-Experienced Trainers
Mentorship matters. Graphic design training in Noida is led by industry experts who bring years of real-world experience into the classroom. They don’t just teach—they guide, critique, and inspire. Their feedback helps students avoid common mistakes and develop a designer’s mindset: creative, detail-oriented, and problem-solving.
Tools & Techniques That Matter
From Adobe Creative Suite to Canva and Figma, students are trained on the latest tools used in the design industry. They also learn about UI/UX basics, motion graphics, and even branding strategies—making them versatile professionals ready for diverse roles.
Career Support & Internships
Most reputable institutes in Noida go beyond teaching. They offer placement assistance, resume building, mock interviews, and internship opportunities with real clients. This bridge between training and employment is what truly transforms learners into professionals.
Who Should Join?
Students pursuing careers in design or media
Freelancers and artists looking to upgrade their digital skills
Working professionals planning a career shift into the creative field
Entrepreneurs wanting to create their own visual brand identity
Final Thoughts
Graphic Design Training in Noida is not just a course—it’s a career launchpad. With the right training, mentorship, and dedication, beginners can transform into skilled professionals who are ready to take on the creative challenges of the modern world. So if you’re dreaming of a career that blends creativity with technology, design with purpose—this is your chance to make it real.
0 notes
Text
Boost Your Accounting Career with Practical e-Accounting

INTRODUCTION
In today’s digitally driven financial world, e-Accounting has become an essential skill for anyone looking to build a stable and rewarding career in the accounting and finance sector. From small businesses to large enterprises, companies are shifting towards digital platforms for managing accounts, taxes, payroll, and financial reports. As a result, practical e-Accounting training is now more valuable than ever—especially for students and beginners looking to enter this dynamic field.
If you’re aspiring to work in accounts, taxation, or finance, enrolling in a Complete e-Accounting Training in Yamuna Vihar or Uttam Nagar can be the smartest step towards building a strong foundation.
What is e-Accounting?
e-Accounting refers to the use of electronic tools and accounting software like Tally, BUSY, and Excel to manage financial data, taxation, GST, TDS, payroll, and other business processes. It’s not just about recording transactions—it’s about understanding how finances flow within an organization using technology. That’s why courses like e-Accounting with Practical Software Training in Uttam Nagar are in high demand.
Why Students Should Learn Practical e-Accounting
For students, especially from commerce backgrounds, practical e-Accounting knowledge opens doors to real-time accounting jobs. The theoretical knowledge from textbooks is useful, but what companies really look for is hands-on experience with real software and business scenarios.
By enrolling in Beginner to Advanced e-Accounting Classes in Yamuna Vihar, students gain valuable exposure to:
Tally ERP for GST and financial accounting
Payroll management systems
Income Tax and TDS calculations
Excel-based financial reporting
Invoice and billing software
Banking and reconciliation practices
The focus is not just on concepts but on practical tasks that accountants handle every day in real organizations.
Key Modules That Shape Your Future
Most well-structured courses such as the e-Accounting and Taxation Course in Uttam Nagar cover a blend of accounting fundamentals and modern software tools. These modules typically include:
Basics of accounting and journal entries
Tally ERP with GST and TDS setup
Payroll & salary structure creation
Taxation basics (GST, TDS, ITR filing)
Bank reconciliation
Excel-based MIS reporting
Business-oriented projects for real-world application
This kind of comprehensive curriculum is also offered under the Advanced e-Accounting with Payroll & GST in Yamuna Vihar, which prepares you for entry-level to intermediate roles in the accounting field.
Certification That Makes You Job-Ready
When you complete training from a Certified e-Accounting Institute in Uttam Nagar, you don’t just gain knowledge—you receive certification that adds real weight to your resume. Employers value certified candidates, especially those trained in software like Tally, Excel, and BUSY, along with knowledge of GST, TDS, and payroll compliance.
Being certified from the Top e-Accounting Institute for Beginners in Yamuna Vihar also helps you stand out during interviews and internship applications.
Real-Time Learning with Practical Software
What makes e-Accounting with Financial Reporting Course in Yamuna Vihar truly impactful is the use of real-time software. You don’t just learn theory; you work on projects using actual accounting tools. This prepares you to step into job roles such as:
Junior Accountant
Accounts Executive
GST & TDS Assistant
Payroll Operator
Data Entry Operator with Finance Skills
Moreover, the e-Accounting with GST and TDS Training in Uttam Nagar ensures that you’re updated with current tax rules and compliance practices, making you immediately useful in any financial organization.
Final Thoughts
In a competitive job market, basic knowledge isn’t enough. Students must be job-ready from day one, and practical e-Accounting training provides just that. Whether you choose to study through e-Accounting Classes for Beginners in Uttam Nagar, the focus should be on gaining real, actionable skills that can help you secure stable employment in finance, taxation, or business accounting.So if you're planning to enter the finance world, now is the perfect time to get certified in e-Accounting—and future-proof your career with practical, hands-on knowledge.
Suggested Links:
TallyPrime With GST
BUSY Accounting Software
e Accounting
GST Course with e-Filing
0 notes
Text
Choosing the Right Design Program for Social Media
Social Media Design Tools: Common Questions Answered
1. What is the best design program for social media?
The best design program for social media depends on your needs. Canva is user-friendly for beginners, offering templates and graphics. Adobe Creative Suite (Photoshop, Illustrator) provides advanced features for professionals. For video content, Adobe Premiere Pro or Final Cut Pro are excellent. Ultimately, choose a program that matches your skill level and the type of content you create.
2. What is the best tool for social media?
The best tool for social media depends on your needs. Popular options include for scheduling, Canva for design, and Buffer for analytics. Each has unique features catering to different aspects of social media management. Choose based on your goals, such as content creation, analytics, or engagement. Consider trying a few to see which works best for you.
3. How to design social media content?
To design social media content, define your audience and goals, choose relevant platforms, and create engaging visuals and copy. Use a consistent brand voice, incorporate hashtags, and include calls to action. Plan a content calendar for regular posting, analyze performance metrics to refine your strategy, and stay updated on trends to keep your content fresh and relevant.
4. Can you use Figma to design social media posts?
Yes, you can use Figma to design social media posts. It offers a variety of tools for creating graphics, layouts, and typography. You can also collaborate with others in real-time, use templates, and export your designs in formats suitable for social media platforms. Figma's versatility makes it a great choice for social media design.
5. What are SMM tools?
SMM tools, or Social Media Marketing tools, are software applications designed to help businesses manage, analyze, and optimize their social media presence. They assist with scheduling posts, tracking engagement, analyzing audience insights, and monitoring brand mentions across various platforms.

Visit: VS Website See: VS Portfolio
0 notes
Text
How to Get Started in VFX as a Beginner

Visual Effects (VFX) have revolutionized the film, television, advertising, and gaming industries. From transforming imaginary creatures into believable characters to simulating massive explosions or building entire digital worlds, VFX is the art and science of bringing the impossible to life on screen. If you’re fascinated by movies like Avengers, Avatar, or Inception, and you’ve ever wondered how those stunning effects are created — a career in VFX might be your perfect path.
The good news is that getting started in VFX is more accessible than ever. With the right training, tools, and guidance, even absolute beginners can break into this dynamic industry. Institutes offering VFX Film Making Courses in Udaipur and VFX Prime Courses in Udaipur are opening doors for aspiring artists to learn industry-relevant skills from the ground up.
Let’s walk through a step-by-step guide on how to start your VFX journey.
1. Understand What VFX Is
Before jumping in, it’s important to understand what VFX encompasses. Visual Effects refer to the process of creating or manipulating imagery outside the context of a live-action shot. This includes:
Compositing: Combining multiple visual elements into a single scene.
Motion Tracking: Mapping digital objects to real-world camera movements.
3D Modeling & Animation: Creating lifelike characters and environments.
Green Screen (Chroma Keying): Replacing background footage with digital content.
Rotoscoping: Manually tracing and isolating elements from live footage.
When you enroll in comprehensive VFX Prime Courses in Udaipur, you'll get hands-on training in all these areas.
2. Start with the Basics
As a beginner, your focus should be on learning the fundamentals:
Adobe Photoshop: For creating and editing textures, matte paintings, and image manipulations.
After Effects: Ideal for learning basic motion graphics, keying, and compositing.
Premiere Pro or Final Cut Pro: To understand video editing, which complements VFX work.
Blender or Autodesk Maya: For 3D animation and modeling.
These tools are commonly introduced in foundational VFX Film Making Courses in Udaipur, ensuring that students build strong technical skills from the start.
3. Enroll in a Professional Course
Self-learning is great, but a structured course with expert mentorship is invaluable. A good training program will not only teach you software but also real-world workflows, industry-standard techniques, and project-based learning.
Institutes offering VFX Film Making Courses in Udaipur provide a blend of theory, practical assignments, and industry exposure. More advanced programs, such as VFX Prime Courses in Udaipur, go deeper into specializations like 3D animation, advanced compositing, and live-action integration.
Look for courses that offer:
A well-rounded curriculum
Access to professional software
Industry-relevant projects
Experienced faculty
Placement assistance
4. Build a Strong Portfolio
In the VFX industry, your portfolio (or demo reel) is your resume. As you progress in your course, collect your best work — short VFX sequences, before-and-after breakdowns, and animation tests.
Tips for a strong portfolio:
Keep it short (1–2 minutes)
Focus on quality, not quantity
Show a range of techniques (compositing, tracking, rotoscoping, etc.)
Include project breakdowns to show your process
Many VFX Prime Courses in Udaipur guide students in building a professional reel that stands out to studios and recruiters.
5. Understand the VFX Pipeline
The VFX pipeline is the sequence of steps followed in producing VFX for a film or game. It includes stages such as concept design, pre-visualization, modeling, texturing, animation, rendering, and compositing.
Knowing how each department interacts and contributes to a final shot helps you become a more efficient and collaborative artist — a key factor in career growth.
Institutes offering VFX Film Making Courses in Udaipur often simulate real-world pipelines through team projects and production workflows.
6. Stay Updated and Inspired
VFX is a rapidly evolving field. New software, plugins, and techniques are constantly emerging. Keep learning through:
Online tutorials and forums (e.g., FX Guide, ArtStation, YouTube)
Following VFX studios and professionals on social media
Studying breakdowns of famous VFX scenes
Participating in short film or animation contests
Being active in the VFX community not only keeps you motivated but can also open up networking and job opportunities.
7. Explore Career Paths in VFX
Once you have foundational skills, you can explore different VFX career options, such as:
Compositor
3D Modeler
Matchmove Artist
Lighting Artist
FX Artist (Particles, Fire, Explosions)
Matte Painter
VFX Supervisor (with experience)
Your course instructors at any reputed Animation & VFX Academy in Udaipur can help guide your career based on your strengths and interests.
Conclusion
Starting a career in VFX can seem overwhelming at first, but with the right approach and training, it becomes an exciting and rewarding journey. Whether your dream is to work in Bollywood, Hollywood, or gaming, it all starts with learning the basics and committing to practice.
Institutes offering VFX Film Making Courses in Udaipur and VFX Prime Courses in Udaipur are excellent places to begin this journey. With access to cutting-edge software, industry-expert faculty, and real-world projects, these programs equip you to turn your creative passion into a professional career.
0 notes