#a header file is a way of adding already existing code into a different file without directly copying and pasting it
Explore tagged Tumblr posts
Visit Tumblr Blog
Explore Tumblr blogs with no restrictions, modern design and the best experience.
Last Seen Tumblr Blogs


Fun Fact
BuzzFeed published a report claiming that Tumblr was utilized as a distribution channel for Russian agents to influence American voting habits during the 2016 presidential election in Feb 2018.
Text
Transcript:
Who up wombing right now?
Audio source
#for those who Don’t Know#in the new update the main menu got an overhaul#part of it has code in the background and some of the code is in base64#when decoded it translates to ‘womb’#and people thought it meant V1 has a womb#but it’s just a header file#a header file is a way of adding already existing code into a different file without directly copying and pasting it#so it’s just using things from a file called womb#does that make sense#if you want a technical explanation just look up ‘what’s a header file’ and ‘what does [hashtag]include do’#BUT DONT LET THAT STOP YOU#freak activity is always encouraged here do crazy things to that machine#you can put any organs you want in there
86 notes
·
View notes
Text
On Making Progress
With my Wrap030 homebrew computer operational again, I could finally get back to the work I had been wanting to do with it in the first place. I was able to get it running my multi-user BASIC kernel from ROM with the main board, DRAM card, and 8-port serial card.
There's still more work I want to do with software, and pulling and burning the ROM for every little change is not a great way to develop software. It would be great if I could load programs from a disk instead. I did previously have disk access working, but that was with a different system configuration and a different ROM. There was also a limitation with my old code where files that spanned multiple clusters didn't load right.
So I needed to test the system with the FPU+IDE mezzanine board added to the stack, and I needed to add disk load functions to my ROM.
Adding the FPU board went better than expected. I added it to the stack and the system continued running as it had previously. I didn't even have to lower the clock speed to compensate for the new board.
So time to update that ROM. My previous disk load functions were written to work with the TSMON monitor program I had been using. I wanted something that could load my Multibasic system (or another OS) without intervention, so TSMON was not going to be a good fit. All I really needed was a simple bootloader — something that could load a file, BOOT.BIN, from the disk and run it.
Rather than try yet again to wrap my head around parsing FAT filesystem headers and how to traverse the allocation table, I decided to try using an existing library. The Elm-Chan FatFs library was just the thing I needed. It's written to be portable, needs only a few custom functions implemented by the host system for disk sector reads, and documented reasonably well. I was able to get it running in a weekend, including all the time it took for me to debug my own silly mistakes like reading only 510 bytes of each disk sector instead of 512 and accidentally swapping bytes when caching data read from the disk.
Getting Multibasic ready to run from disk instead of from ROM was actually fairly straightforward since it was already built to be loaded from ROM to RAM and then run from there. I just needed to make a few minor changes to the linker script and add a branch at the beginning of its vector table.
So after many hours of work, I am right back where I was at the start … but also miles ahead of where I started. If I need to make a change to the Multibasic kernel, I can just copy the new program to a CompactFlash card like any other file. If I want to load a new program I can do so easily. And swapping programs is as easy as swapping cards and hitting Reset.
#homebrew computing#homebrew computer#mc68030#motorola 68k#motorola 68030#debugging#wrap030#ide interface#retro computing
8 notes
·
View notes
Text
How to Properly Change a WordPress Theme (Ultimate Guide)
Are you planning to change the WordPress theme of your website? WordPress makes it super easy for users to change and manage themes on their site.
However, you must remember that changing the appearance of your live website is a major event. You need to keep certain things in mind before and after you change a theme, so you don’t lose any data and website traffic.
In this article, we’ll show you the step by step process on how to properly change a WordPress theme with a step by step checklist.
Here’s a quick overview of what you’ll learn in this article:
Things to Do Before Changing a WordPress Theme
How to Install a WordPress Theme
How to Change WordPress Theme Without Going Live
How to Change WordPress Theme on a Live Site
How to Change WordPress Theme Manually from the Database
Things to Do After Changing a WordPress Theme
Things to Do Before Changing a WordPress Theme
While changing a theme is literally a few clicks away, you must take some precautionary steps before starting the process.
We recommend that you to go through the following checklist to ensure that the process of changing your WordPress theme goes smoothly, and you don’t end up losing important data.
1. Copy Snippets from Your Current Theme
Some intermediate WordPress users like to customize their website by adding code snippets directly to the functions.php file of their theme.
Since these changes were made once, people usually forget about them.
If you or your web developer made these changes, then make sure to go through the files of your current theme and note down all the additional code that you’ve added previously. This will allow you to add them later into your new theme’s functions.php file or a site-specific WordPress plugin.
2. Test Load Time
Before changing your theme, you should check the load time of your website, so you can easily compare the differences in the page load time after you made changes to your website.
Remember, WordPress speed is an important factor in user experience and SEO, so you need to make sure that the new theme is faster than your previous one.
You can check your website speed by using a tool like Pingdom.
Make sure that you test the load time of the homepage and also some of your inner pages.
3. Don’t Lose Any Tracking Code
Some users add their analytics tracking code directly to their theme files. Also, there are WordPress themes that allow you to add Adsense or Analytics code in their settings panel.
One of the most common mistakes beginners make is to overlook these codes.
You need to make sure that you copy all the tracking codes, so you can add them to your new site after changing the theme.
To future proof this, we always recommend users to install Google analytics using a plugin like MonsterInsights, and for other tracking code we recommend using the header and footer plugin.
4. Make a Full Backup
It’s always recommended to back up your posts, images, plugins, and the database before changing your theme.
You can use a WordPress backup plugin to create the backup of your entire site. Make sure that you download this backup to your computer before moving forward.
This step will ensure that you can recover your website easily if anything goes wrong.
5. Sidebar Content
Sidebars are used for adding different widgets including social links, advertisements, subscription forms, or a contact form.
Make a note of these changes. If there is any custom code added into a widget, then make sure you copy and paste this code on your computer, so you can reuse it in your new theme.
6. Keep Your Site on Maintenance Mode
It’s a good practice to put your website on maintenance mode when you’re making changes to it. You don’t want your visitors to see an under construction site, right?
We recommend using the SeedProd plugin for this purpose.
It’s a popular WordPress plugin that allows you to easily create beautiful coming soon and maintenance mode pages for your site.
To keep your site on maintenance mode, you need to install and active the SeedProd plugin.
Next, head over to SeedProd » Settings page to configure plugin settings. Here you need to select the Enable Maintenance mode radio button and click on the Save All Changes button.
How to Install a WordPress Theme
After following the above precautions, the next step is to install a theme that you want to use on your site.
There are thousands of free and paid WordPress themes available for you to pick from. The fact that you’re reading this article means you’ve likely found a good theme for your needs.
If you haven’t already selected a theme, then we can highly recommend the following WordPress themes to you:
1. Divi
Divi is one of the most popular WordPress theme in the market. It’s powered by the drag and drop Divi Builder which allows you to easily build any kind of website.
It comes with 20+ pre-built layouts and 46 different content elements. You can easily customize each element of your site and see the changes in real time.
2. Astra
Astra is a lightweight and speed-optimized WordPress theme. It’s compatible with various page builder plugins like Beaver Builder, Divi, and Visual Composer.
It’s a translation and RTL-ready theme. This allows you to start your website in any language and even create a multilingual website.
Astra can be easily integrated with the WooCommerce plugin, so you can easily create an online store without much hassle. You can also customize the header, footer, layout, and more using the WordPress Theme Customizer.
Our favorite part about Astra is all the starter website templates it comes with.
3. StudioPress
Genesis is the most popular WordPress theme framework and has been built by the StudioPress team. You can create amazing websites using the Genesis framework and other StudioPress themes.
In case you don’t know, StudioPress is now a part of WP Engine, the most popular managed WordPress hosting company.
The best part is you’ll get 35+ StudioPress themes for free if you sign up for any WP Engine hosting plan.
4. OceanWP
OceanWP is a responsive and multi-purpose WordPress theme. It offers multiple demo templates that have been built with different professions and businesses in mind.
It is compatible with the major page builder plugins. You can also use different extensions to take your site to the next level.
5. Beaver Builder
Beaver Builder is one of the best drag and drop page builder plugins that allow you to build stunning pages for your site without any coding skills.
Beaver Builder is compatible with almost every WordPress theme, and you can even use it to create a custom WordPress theme without writing any code.
Anyways, we hope the above recommendations will help you to choose a WordPress theme for your site.
Once you’ve selected a theme, you need to install it on your WordPress site. Y
ou can use any of the following 3 methods to install a WordPress theme:
Using the WordPress theme search option
Uploading a theme from your WordPress Dashboard
Installing a theme using FTP
You can check out our beginner’s guide on how to install a WordPress theme for help.
How to Change WordPress Theme Without Going Live
Once you’ve installed your new theme, you are ready to switch themes.
However, it’s always recommended to test a theme before switching to it on your live website.
This way you’ll be able to check the compatibility of the new theme with your existing plugins and make sure that everything is working properly as desired.
There are two ways that you can use to change your WordPress theme without going live:
1. Live Preview Option
By default, WordPress allows you to preview a theme on your website without changing it.
To do that, head over to Appearance » Themes from the left sidebar of your admin panel.
On this page, you’ll see all the installed themes on your site. You need to hover your mouse over the theme you want to preview and click on the Live Preview button.
This will open your new theme in the WordPress Theme Customizer. You can now test your new theme and make sure that everything is working properly.
2. Theme Switcha Plugin
Another option is to use the Theme Switcha plugin. It allows you to preview your new theme without activating it.
First, you need to install and activate this free plugin. Next, go to Settings » Theme Switcha from the left sidebar of your admin panel.
On the Settings page, you need to select the “Enable theme switching” option and then, scroll to the bottom of the page to click on Save Changes.
This plugin will now display all your installed themes at the bottom of this page. Go ahead and click on your new theme to preview it on a new tab of your web browser.
How to Change WordPress Theme on Live Site
After you have tested your new theme, it’s time to start the process of switching the theme on your WordPress site.
To do that, go to Appearance » Themes from the left sidebar of the WordPress admin panel.
On this page, you need to hover the mouse cursor over the theme you want to use and then click on the Activate button to change the WordPress theme.
Now you can visit the homepage of your website to see the new theme in action.
How to Change WordPress Theme Manually
Sometimes an error can make your WordPress admin area inaccessible. In that case, you won’t be able to change the theme using the above method.
To recover your website, you need to restore it from backup, or you may troubleshoot the WordPress error causing the problem.
However, if you don’t have a backup, then you can change the theme manually with the help of phpMyAdmin.
This method allows you to inform WordPress which theme to use by changing the information in the database.
First, you need to connect to your website using an FTP client and go to the /wp-content/themes/ folder.
Here you’ll be able to see all the themes that are currently installed on your website. You can also install a WordPress theme via FTP if you don’t see it.
Next, you want to write down the folder name of the theme you want to use because you’ll need it later.
After that, you need to go to the cPanel of your WordPress hosting account. On this page, you will have to scroll down to the Databases section and then click on phpMyAdmin.
Once you are in phpMyAdmin, you’ll see a list of databases on the left side of the screen. Simply click on the database that you are using for your WordPress site.
Next, it’ll show you the list of tables in this database. You need to click on the “wp_options” table to open it.
Note: By default, WordPress use wp_ as the prefix for the table names. However, it’s possible to have a different database prefix, as shown in the above image.
Now you need to locate the template and stylesheet rows on the right panel.
Next, click on the Edit link present in the “template” row to open the editor.
Here you need to change the value in the option_value field to the theme name that you want to use. It’s usually the same as the folder name in /wp-content/themes/ folder that you copied earlier.
Once you’re done, click on the Go button to save the changes. Next, go ahead and repeat the same process for the “stylesheet” row.
After making changes to both the rows, you can go to your website to see the new theme in action.
Things to Do After Changing Your Theme
Once you’ve changed the theme on your website, you need to take care of certain things before turning off the maintenance mode.
You can check out the following checklist of things to do after changing your WordPress theme:
1. Test Your Website
First, you need to make sure that all the functionalities, plugins, and widgets are working properly.
You should invest some time to test your website and check out different things including the posts, comment section, images, and the contact form.
2. Cross Browser Compatibility
Browsers have a tendency of showing certain things differently.
To make sure that your website looks good in every major browser, you should test your site in different web browsers including Google Chrome, Firefox, Safari, and Internet Explorer.
3. Add Tracking Code
After you’ve tested the features and the cross-browser compatibility, you should add your analytics and Adsense tracking code to your site.
You can use the MonsterInsights plugin to add the Google Analytics tracking code. This will allow you to properly setup analytics and view detailed website stats right inside your WordPress dashboard.
4. Turn Off Maintenance Mode
You can disable the maintenance mode on your site to make it go live.
If you’re using the SeedProd plugin, simply go to SeedProd » Settings from the left sidebar. On the settings page, select “Disabled” and click on Save All Changes to turn off the maintenance mode.
5. Test Loading Time
You need to go to the Pingdom website again to test the loading time of your homepage after changing the theme.
Next, compare it to the load time when your old theme was installed. If you see any major differences, you can follow our guide to improve WordPress speed.
6. Monitor Bounce Rate
After switching themes, you should monitor the bounce rate of your site.
If your new theme is not user-friendly and difficult to navigate, it may increase the bounce rate of your site.
You can add related posts, popular posts widget, and breadcrumbs to reduce the bounce rate and increase page views.
7. Ask for Feedback
You can also ask your users for feedback and suggestions on how to improve your site design. You can use survey forms or online poll to gather user input.
You can share the new design with your subscribers using an email marketing service and ask them for their suggestions. This will help you to get ideas on what they would like to see improved.
We hope this step by step guide helped you easily change your WordPress theme. You may want to see our list of the must-have WordPress plugins for business websites.
If you liked this article, then please subscribe to our YouTube Channel for more WordPress video tutorials. You can also follow us on Twitter and Facebook.
The post How to Properly Change a WordPress Theme (Ultimate Guide) appeared first on WPBeginner.
😉SiliconWebX | 🌐WPBeginner
1 note
·
View note
Text
Best WordPress eCommerce Themes for Selling Products Online
New Post has been published on https://www.templified.com/best-wordpress-ecommerce-themes/
Best WordPress eCommerce Themes for Selling Products Online
When searching for the best WordPress eCommerce themes, there’s a lot of options. For many, it can be time consuming to wade through all of these themes to find a real gem. That’s why we’ve done all the hard work for you, creating this collection of incredible WordPress eCommerce themes that look great and perform even better.
WordPress is the most popular blogging platform anywhere, powering almost one third of the web. Many of those websites are eCommerce sites and no matter which eCommerce plugin you use, WordPress can handle the job with ease. Some folks swear by WooCommerce, some by Easy Digital Downloads. Some go with Cart66 or the eCommerce Shopping Cart. That list isn’t exhaustive, there are tons of other carts available like Ecwid, PayPal, Ecommerce WD or the Selz eCommerce Shopping Cart. Whatever you choose, this list of themes is going to rock your world. With that massive rise in popularity, there’s been an equal rise in the number of WordPress themes available to choose from. Some of these themes are incredibly useful and highly functional. Some are not so good. We’ve set about trying to find the very best themes and put them in this collection.
Every one of these themes is totally responsive and they each offer a little something different in terms of style, functionality and features. I hope there’s something for everybody in this incredible collection.
Oxygen
Oxygen is one of the best simple, clean and elegant themes I’ve ever seen. This Oxygen theme can be used for nearly any type of eCommerce site. Fashion or electronic gadgets, hand crafted gifts or jewelry, it hardly matters what kind of product you’re selling. The overall style is so clean and fresh, your products will look incredible. It’s a very big challenge running your own online store so Oxygen helps you make the most of your precious time by making it whole process of managing your store as easy as possible. You have tons of options to create a custom look for your store with multiple headers, almost unlimited typography choices, unique layouts and more. Oxygen has been sold over 3,000 times and it’s rating is 4.86 so you can tell this is a high quality theme.
DemoMore Information Get Hosting
Oshine
Oshine is a theme that gets a lot of attention on ThemeForest and I think it deserves to. There are a lot of reasons why and we’ll get into a lot of them. This theme is a true multipurpose theme with dozens and dozens of demo sites to show what Oshine is capable of. There’s a photography demo site that comes with just about every theme, right? Well Oshine gives you several, there’s a minimalist style, a full screen photography style, designer portfolio and ‘new style’ portfolio and video agency portfolio and a bunch more too. There are plenty more, creative agencies, modern business, restaurant and café sites, winery, gym, multiple different creative agencies, app landing pages, wedding templates too. You get a ton of demo sites and every one is eCommerce ready to help you start your online shop.
Demo More Information Get Hosting
Material
Material is a nicely crafted theme that uses WooCommerce, or the shopping cart of your choice, to allow you to sell most any type of product you want. It was designed with electronics stores and gadget sellers in mind, but why stop there? Any online store that wants a clean, sleek look will love this theme. Responsive, well organized and modern, Material is the kind of theme that can be adjusted to fit the look of an existing brand. So if you already have a brick and mortar presence and you’re looking to expand to eCommerce, this theme can really help you get the job done. Material’s developer, JWS Themes, has fantastic support and documentation to go with all their themes and Material is no exception. They’ve included a lot of nice touches like one click demo data installation, three pre-made homepages, a robust theme options panel and tons more. Worth checking into!
DemoMore Information Get Hosting
Chamomile
Chamomile is one of my favorite themes by BluChic. If you don’t know about BluChic, you really do need to check out BluChic’s entire collection of themes, they’ve got some fantastic feminine style WordPress themes. Each one is easy to use, great for blogs. More than a few also offer eCommerce solutions to get you into the game of selling products. BluChic calls Chamomile the ‘girl next door’ theme. I love that description, but let’s get into more of the features. You can obviously see it’s a feminine style blog theme that could be great for a wedding planner or event coordinator, but there’s more than meets the eye.
Chamomile includes PSD design files with every download, that allows for full style control of your site. Chamomile is responsive, so it’s optimized for mobile devices. You want to adjust colors? Easily done vial the color wheel color picker. No coding needed. Upload your header logo and add a featured slider, if you want to. Social media icons are included, linked to each of your social network accounts via the theme options panel. Add a stick menu and choose from one of the many layouts that are included with your download package. A full featured, feminine and stylish theme, that’s what Chamomile is all about.
Demo More Information Get Hosting
Slikk
Slikk was designed by Wolf Themes, a developer with well over 20,000 sales on ThemeForest so far and they’re sure to add to that total with Slikk. They create world class themes and plugins for all sorts of folks in all kinds of industries. Slikk has several homepage demo sites, I’ve included a couple of them above. There’s a lookbook home page, coming soon countdown clock page, blogs, grid shops, plenty of internal pages and so much more. Oh, fine, here’s one more, it’s called the presentation panel.
For more outstanding fashion WordPress themes, you should really have a look at our collection. We’ve got dozens of the very best fashion themes around and we keep adding to that collection as often as we find a new great looking theme that. You can really stretch your legs in that collection, finding pleasurable and encouraging themes that can make your readers jump for joy. Or maybe it’s minimalist WordPress themes you’re searching for? Either way, our collections of themes are the biggest and best on the web, so you’ll definitely find something you love in one of them. Style is incredibly important for fashion magazines and eCommerce sites, which is why we’ve done our best to select only the most modern and tasteful, stylish and presentable themes for all of our collections. If you don’t see what you’re looking for there, we might recommend our collection of woocommerce themes. These juicy themes are knowledgeable and different, we have tried to create a nice blend of WordPress themes that can serve a lot of different content for any type of site.
DemoMore Information Get Hosting
Neto
Neto is a flexible, flat styled WordPress Theme specially designed to support e-commerce functions of websites. The theme is compatible with various WordPress business plugins like WooCommerce. It can also be used alongside theme builders to help create comprehensive product layouts and descriptions.
The Neto WordPress Theme is also highly customizable. It allows the use of shortcodes, widgets, and the ability to create unlimited templates. The theme boasts of access to appearance settings that allows changes to the overall color scheme without altering codes. It also allows users to personalize background images, logos, and even add a favicon.
Another business-friendly feature of the Neto theme is its easy integration with social media. With this, guests can easily share content on their profiles which, in effect, helps the business reach a wider audience. The theme is also specially optimized for optimum performance and to obtain higher ranks in search engines. It is also translation ready for the benefit of foreign guests. The theme’s responsive design also allows access to different devices without sacrificing its functionality. It is both mobile friendly and retina ready to ensure quality display. Finally, Neto promises to deliver constant updates to ensure the theme’s compatibility with the latest versions of WordPress.
Demo More Infortmation Get Hosting
Divi
Divi is a theme that can simply do anything you ask it to do, so we’ve included it in this eCommerce WordPress themes collection. I couldn’t find a great example in Elegant Themes demo section, so I found one out in the wild. This is an actual real live use of Divi by a buyer of the theme. It looks pretty nice as a watch shop, so I’m imagining it’ll look pretty sweet for just about any product. You’ve probably already heard about how powerful Divi’s drag and drop page builder can be, but page builders can scare some people off. While the flexibility is nice, it can be intimidating to attempt to design your website from the ground up. Luckily, there are tons of pre-designed layouts you can choose from if you’re worries you won’t be able to set your eCommerce site up yourself. This theme is likeable for many reasons, swift support, succinct documentation, handsome designs and the fact that any style website is possible.
Demo More Information Get Hosting
Jevelin
Jevelin is one of the best selling WordPress themes on ThemeForest with over 5,000 sales. It sports a solid 4.6 rating on ThemeForest too, so I think it’s worthy of inclusion in this list of the best eCommerce WordPress themes. Built on the Unyson framework with Bootstrap code, Jevelin is compatible with all the plugins and shopping carts you’ll need to run a successful WordPress based store. Jevelin is perfectly responsive, it’s mobile friendly for both blogging and eCommerce, it’s very well organized for SEO and creating a successful online brand is relatively easy, thanks to the number of custom options you can choose from setting up your store. You’ll love the nimble style of this theme, the encouraging documentation, the dashing features and the alluring price.
DemoMore Information Get Hosting
Float
With an attractive design, plentiful features and a full service eCommerce store, lots of folks have chosen to use the Float WordPress theme to build their online store. Many WordPress eCommerce templates have static, plain designs and I haven’t seen too many that use parallax, but Float does. I think it pulls it off quite well too. With float, you can create a modern, slick looking WooCommerce shop, but if you want to sell digital products, you could choose to go with Easy Digital Downloads too. I think Float would work particularly well as a digital downloads store. Right now, if you purchase Float, you actually get a bonus theme for free. Float offers a 30 day money back guarantee, you can use this GPL theme on as many sites as you want to and you get a full year of support and updates.
DemoMore Information Get Hosting
Uncode
This theme is called Uncode, you may have heard of it. With around 40,000 sales and a near-perfect rating on ThemeForest, plenty of people have. Built to impress, to showcase products, to help you build a business, Uncode is a high performance miracle of a theme. With a very fast page load speed, clean code and an even cleaner design, Uncode has carved out a place in history as one of the best themes ever made. Uncode has so many demo sites to take a look at, it’s kind of ridiculous. It’s a totally multipurpose eCommerce shop in a box. The theme options are plentiful and easy to use, the support staff is fast and friendly, this tendy and contemporary theme is simply among the best eCommerce WordPress templates around.
DemoMore Information Get Hosting
Underwood
Looking for a simple, stylish blog that’s also ready to help you set up a WooCommerce powered online shop? Well, Underwood may be a great choice for you. This theme is simple to use, yet incredibly powerful. Built using the latest Bootstrap code, Underwood is a fine example of a modern, clean and simple multipurpose theme. With parallax effects, custom color and font selections all powered by a live customizer, you can take Underwood and make it look exactly like you want it to look. Underwood is optimized for great SEO, it’s got tons of widgetized areas for adding functionality and it’s incredibly user friendly for webmaster and reader alike. ThemeShift has been around since 2009, so they’re not going anywhere anytime soon and their support is known to be among the best around.
Demo More Information Get Hosting
Hestia Pro
Hestia Pro is a nice looking material design theme for WordPress and it offers eCommerce too, so whatever WordPress shopping cart you choose to employ, Hestia Pro will help you make a successful place on the internet. I don’t think it matters what kind of products you’re selling, though Hestia Pro’s material design style might lend itself to things like software or SEO services. Building a WordPress shop doesn’t have to be difficult and with Hestia Pro, it isn’t. For startups or established businesses, the parallax scrolling, one page layout helps to highlight each section of your content and make it shine. This theme is well worth having a look at.
DemoMore Information Get Hosting
Wright
Wright is an ultra-minimalist theme that’s a solid blend of blog, eCommerce and portfolio. I really like the minimalist design and all the benefits you get from having a minimalist site. It doesn’t mean that your website will lack features, but it does mean it will load up lightning fast and look great on any size screen. That provides a great user experience and makes it more likely that you can convert traffic into sales. That’s the big thing, if somebody ends up on your website, that’s the hard part. You really don’t want to lose that sale because your site loads slow or looks janky on somebody’s mobile phone. That won’t happen with Wright, because it is a completely mobile friendly experience and that makes for the best user experience possible. Wright could be the best eCommerce minimalist theme around. To see more clean WordPress themes, check out our collection.
More Information More Information Get Hosting
Kalium
Kalium is a premium theme for WordPress that’s been the choice for thousands of business owners who have also wanted to set up an online eCommerce store, just like you. Kalium is very popular thanks to it’s simple, modern and clean design, sleek arrangement of content, powerful features and bold typography. The shopping cart itself is every bit as stylish and with Kalium, your website and your products will look amazing on all devices, because this theme is totally mobile friendly. Kalium supports WooCommerce of course, but every other shopping cart can work with it too, so don’t feel like you need to be tied to one cart. With so many out there, a little variety could be just what you need to stand out from the crowd.
DemoMore Information Get Hosting
Studio 8
Studio 8 is like a might oak, it’s strong an powerfully built, it’s full of strong branches that can be loaded with tons of products? Stuff? I guess maybe it’s not like an oak after all, but it is a well designed WooCommerce WordPress theme that I’m happy to recommend. There’s a gigantic amounts of features that make for a really enthusiastic reader, or buyer in the case of eCommerce, when they make it to your website. The design is clean and agreeable, the layout is never jumbled and untidy, and this cheerful design is one that makes your shop like electric, professional and useful. No matter what type of product, it’s unquestionable that the Studio 8 WordPress theme will never leave you wanting. You’ll be able to generate a dramatic and exultant WordPress eCommerce site. There’s no utopia in WordPress themes, but the Studio 8 theme comes close to creating perfection.
DemoMore Information Get Hosting
Massive Dynamic
Massive Dynamic has proven to be among the most popular themes for building a great online shop. No matter which eCommerce cart you choose, Massive Dynamic works great. Easy Digital Downloads, Cart66, Ecwid, WordPress Simple Paypal Shopping cart or the biggest and best of all, WordPress. No matter which you choose, Massive Dynamic has the style, the tools and the functionality to make a great experience for buyer and seller alike. Sometimes, multipurpose eCommerce themes can try to do too much, they try to be everything to everyone, but Massive Dynamic walks that fine line with ease. This theme has several pre-made demo sites and each one can be used to sell products. Each one is also installable with just a few clicks, which can help speed up the process of starting your website. If you’re not familiar with how to set up an eCommerce cart, that can be a lifesaver. For business or blogging, creative portfolios and personal websites, Massive Dynamic is a theme that’s well worth considering.
DemoMore Information Get Hosting
Composition
Composition is a little different than many of the other themes in this collection, since it was built to work with the Sell Media plugin. That’s sort of like Easy Digital Downloads, it’s an eCommerce plugin that allows you to sell digital files, prints and other stuff. So, it’s one way to build a store online, but there’s a lot more going on with Composition. This theme is really simple to customize, you’ll have the ability to visually arrange your blog, portfolio and more, making the perfect homepage to welcome your visitors and turn them into customers. There are unlimited galleries, plentiful widgetized areas and automatic updates to make sure your site works perfectly with WordPress, every time. Add in a clean, responsive design and you’ve got a full featured, user friendly theme that’s perfect for a stock photography store.
DemoMore Information Get Hosting
Kleanity
Less is more, that’s an old saying and sometimes it can be true with regard to web design. A simple design, like the one offered with this theme, can allow your users to find exactly what they’re looking for without any sort of distraction. This template is great for businesses that want a clean and corporate style theme, it showcases your content with a minimal style that squarely focuses your readers attention on the products that you have to sell. I love the good layers page builder, it’s one of the best Drag and Drop content Builders around. It’s incredibly simple to use and can produce a very high quality shopping website. There are multiple headers and Footers, an infinite amount of layouts possible and each and every design produces a fluid and mobile-friendly, Unforgettable user experience.
DemoMore Information Get Hosting
Arnold
\
The Arnold WordPress theme is a minimal portfolio template for Creative people who want to blend and attractive and simple looking for folio with the power of woocommerce. Actually, with this Arnold WordPress theme, you can create a clean and beautiful online shop using any of the most popular shopping cart plugins. If you’d like to sell digital products, you might prefer to use Easy Digital downloads, probably the leading cart for that type of product. No matter which shopping cart you choose, this clean and modern template allows you to build beautiful portfolios, have an amazing blog and sell some stuff too.
DemoMore Information Get Hosting
Zerif Pro
DemoMore Information Get Hosting
Create
Demo More Information Get Hosting
Hermes
DemoMore Information Get Hosting
Ultra
DemoMore Information Get Hosting
Shoppe
DemoMore Information Get Hosting
Inverto
DemoMore Information Get Hosting
XStore
DemoMore Information Get Hosting
CoupShop
ThemesKingdom has made several really attractive themes for eCommerce sites and none has has more of an impact that CoupShop. The CoupShop WordPress theme was inspired by glossy print magazines and with all the white space, the typography centered layouts, big and impactful images and thoughtfully placed calls to action, it’s a very successful theme. It can be a real challenge to run your own eCommerce website so picking the right theme is critical. With CoupShop, you get a platform that’s stable, attractive and flexible enough to work for nearly any sort of product. CoupShop has what it takes to be a sort of parnter for you in building a very successful online business.
DemoMore Information Get Hosting
LaBomba
LaBomba is a WooCommerce based theme that looks a little different than many other eCommerce themes, so I though it might be worth highlighting what this theme can accomplish. Specifically built for fashion trends and online clothing shops, LaBomba is perfect for creating a combination lookbook, portfolio and blog in one finely knitted package. I couldn’t think of any other clothing reference, let me know if you think of something better. Okay, so for a fashion store, you get multiple headers to choose from, unlimited colors too. There are almost two dozen different home page layouts and Visual Composer support means you can build even more, if you want to. I think the clean design and the number of features make it a really good eCommerce template.
DemoMore Information Get Hosting
Hopefully you found what you were looking for in this collection, but I realize that there are a lot of themes out there, so I can’t include everything at once. However, we’ve got another great collection of WordPress WooCommerce themes to check out. There are plenty more themes in that collection, so hopefully you see something you really enjoy.
2 notes
·
View notes
Text
Wordpress Static Front Page Template

With the growing popularity of blogs, every day more people are getting familiar with, and comfortable using the various blogging platforms. With that, webmasters are turning to content management systems like WordPress to power entire websites.
To designate your static homepage, go to My Sites → Customize → Homepage Settings: Then, under Front page displays, choose A static page. Next, click on the Homepage dropdown list and select the “Home” page you created as your static homepage: Next, on the Posts page dropdown, select the “Posts” page you created. (This is where your.
This shows how to show a static front page in Wordpress, instead of the standard 'stream of posts' which displays by default. This is part of our course on c.
When the static front page feature is configured properly, WordPress will not use a Custom Page Template to display the blog posts index, even if a Custom Page Template is assigned to the page designated as the “Posts page”. WordPress will only use either home.php or index.php.
If there is no front-page.php then check home.php exist in your theme file. If yes check which header file it is enqueuing. If it doesn't have both file, goto Appearance Customise Static Front Page. So if it has some template name in Front Page then you need to check in your template file for which header file it is adding.
One of the options of WordPress is to choose a static front page, creating a page that shows the same content instead of the blog loop. Most WordPress bloggers are familiar with this option, however, a few things should be considered beforehand.
The steps to use a static front page are quite simple: first two pages (not posts) need to be created, one for the static front page and another for the blog loop. The static front page can have whatever title you want but I suggest you call it the title of your website. Add all the content on this page that you want to show on the front page. Title the blog page “Blog” with the same page slug. Add no content to the blog page.
Go to Settings, then the reading subpanel, select the static front page option and choose the respective pages to use from the drop-down box. Now here is where your blog theme comes into play. If your theme has a navigation bar in the header, things can get a bit messy here and my require you to customize the theme.
The navigation bar on most WordPress themes has a Home or Blog link that point to the main URL and also show links to any additional pages created. So adding a Homepage or Blog page to use the static front page option my show these links twice in the navigation bar. So you may want to consider learning how to change this by hard coding the navigation bar in the themes header.php file.
Another thing to consider is the static front page itself and what you want it to look like. While you probably want it to have the same look as the rest of the site you may not want it to show the same sidebar items or the title of the page just above the content.

One thing I suggest changing, or actually removing, is the title of the page that appears right above the content on the page. If you want the site to look like a static or “regular” website then you may want to remove this, especially if the title of the page is generic like “Home”.
You have two options for removing the title on the front page, one is to edit the page.php template to remove the title on all pages or create a custom page template to use for the static front page. The code to be removed from the page.php file should look something like this:
<h2 id=”post-<?php the_ID(); ?>”><a href=”<?php the_permalink() ?>” rel=”bookmark” title=’Permanent Link to “<?php the_title(); ?>”‘><?php the_title(); ?></a></h2>
You may also want to create a different sidebar for the static front page and this option would definitely require a different custom page template, another sidebar file and possibly some additional code added to the functions.php file.
As you can see using a static front page to run your website can be as easy as creating a few pages and changing a few options or you could get into some custom coding to really make it stand out and be different. All of the information you need to customize your WordPress powered site can be found online and I suggest starting at wordpress.org. One of the steps is covered here: How To Create A Custom WordPress Page Template
Pages »Set a Home Page (Front Page)
A home page is the front door to your site. Using the steps in this guide, you can change your home page to any page you’ve created.
WeChat is a Chinese multi-purpose chat app that has grown into a ‘super app’ with added. The WeChat App for Hootsuite allows admins of Official, Verified WeChat accounts to engage their WeChat followers directly from the Hootsuite dashboard. Users of this App will be able to send or schedule messages out to their WeChat followers as well as engage in inbound conversations from their WeChat followers. It’s the most popular dating network in China. They received US$5M in series A funding,. China’s most popular messaging app, WeChat (known in China as Weixin), has evolved way. Wechat social media apps.
Step 1: Create a “Home” page
If you already have a new page created that you wish to use as your homepage, skip this section and move to Step 2.
Go to My Site →Pages.
Click on Add New Page.
Design and publish your new page.
Step 2: Set a Static Front Page
Wordpress Static Home Page
You can set a new page as your site’s home page with the following steps:
Click on My Site.
Scroll down to Appearance, then click on Customize.
Locate the Homepage Settings option.
To see this option, your site must have at least one published page.
Select the A static page option, then choose your new page from the Homepage dropdown list.
The preview window will display your newly selected page as the front page of your site.
Click on the Save Changes button to save your homepage settings.
Need to quickly change the page that is assigned as your homepage? Another method is to go to My Site → Pages and click on the three dots next to a page. Then, select ‘Set as Homepage’.
Step 3: Create a Blog Page (Optional)

If you plan on having a blog, you can set up a separate page that will show your blog posts.
Filezilla sftp pem file. Remember, your page will need to be published to show up in the drop down under Posts page.
In Customize → Homepage Settings, select your desired blog page in the Posts page dropdown. If you don’t yet have one, click Add New Page and call the page something like ‘Blog’ or ‘News’.
Click on the Save Changes button to save your changes.
Step 4: Create a Menu
Now that your pages are created, you can set up your site’s navigation menu. Click this button to learn how: Free dropbox space.
Additional Customization
Edit Static Front Page Wordpress
Many elements of your static homepage can be modified through Custom CSS. Advanced theme customizations, including CSS, are included in the WordPress.com Premium plan or higher.
Homepage Templates and Your Theme
Different themes may have different homepage layouts. The theme instructions may call for you to change the page template or, set up featured content areas.
Additionally, some themes do not have sidebar widget areas for the homepage. Rest assured, if you change to one of these themes, the content you built in your sidebar is not gone, it just will not display on the home page.
The best way to learn how to recreate your theme’s home page design is to check out the instructions in the Info section of the theme in the Theme Showcase.
Versatile plans and pricing
Wordpress Front Page Template
Free
Best for students
Personal
Best for hobbyists
Premium
Best for freelancers
Business
Best for small businesses
Wordpress Set Front Page
Help us improve:
Wordpress Custom Page Template
We're always looking to improve our documentation. If this page didn't answer your question or left you wanting more, let us know! We love hearing your feedback. For support, please use the forums or contact support form. Thanks!
0 notes
Text
warp
Over the past several months, I've been working a web framework in Rust. I wanted to make use of the new hyper 0.12 changes, so the framework is just as fast, is asynchronous, and benefits from all the improvements found powering Linkerd. More importantly, I wanted there to be a reason for making a new framework; it couldn't just be yet another framework with the only difference being I've written it. Instead, the way this framework is used is quite different than many that exist. In doing so, it expresses a strong opinion, which might not match your previous experiences, but I believe it manages to do something really special.
I'm super excited to reveal warp, a joint project with @carllerche.
Background
What makes warp different?
I've been working on web servers for years. Before coming to Rust, I did several things in PHP, moved over to Python, and then shifted again to Nodejs. I've tried many frameworks. I found that I often times need to configure predicates, like certain headers required, query parameters needed, etc, and sometimes, I need to configure that a set of routes should be "mounted" at a different path, and possibly want certain predicates there too. I noticed the concept of mounting or sub-routes or sub-resources or whatever the framework calls them didn't feel... natural, at least to me. It frequently felt like a secondary concept, occasionally not having all the power that a standard route does.
I've also been working in Rust for several years now, and what kept using the language was its powerful type system1. The more I wrote Rust, and learned how amazing the "fearless refactoring" is, the more I hated working in dynamic languages (in my case, it was a large Nodejs server), as trying to refactor pieces inevitably would remind us (in production) that our supposedly comprehensive test suite still had holes in it. I wanted app-specific types to save me from shipping bugs.
A few months ago, I found the Finch library in Scala, and shortly after, Akka, both of which instead just treat everything as a sort of function converting from input to output, and from there, you just chain together these different pieces, and they compose and reuse really well. Scala also has a powerful type system, and those frameworks embrace converting information from HTTP messages into app-specific types. I fell in love.
The thing that makes warp special is its Filter system.
Filters
A Filter in warp is essentially a function that can operate on some input, either something from a request, or something from a previous Filter, and returns some output, which could be some app-specific type you wish to pass around, or can be some reply to send back as an HTTP response. That might sound simple, but the exciting part is the combinators that exist on the Filter trait. These allow composing smaller Filters into larger ones, allowing you modularize, and reuse any part of your web server.
Let me show you what I mean. Suppose you need to piece together data from several different places of a request before your have your domain object. Maybe an ID is a path segment, some verification is in a header, and other data is in the body.
let id = warp::path::param(); let verify = warp::header("my-app-header"); let body = warp::body::json();
Each of these is a single Filter. We can combine them together with and, and then map the combined result to get a really natural feeling handler:
let route = id .and(verify) .and(body) .map(|id: u64, ver: MyVerification, body: MyAppThingy| { // ... });
The above route is a new Filter. It has combined the results of the others, and provided their results naturally to the supplied function for map. Additionally, the types are enforced, cause well yea, this is Rust! If you were to change around one of the filters such that it returned a different type, the compiler would let you know that you need to adjust for that change.
This combining of results is smart: it is able to automatically toss results that are nothing (well, unit, so ()), instead of passing worthless unit arguments to your handlers. So if you needed to combine a new Filter into this route that only checks some request values to determine if the request is valid, and otherwise returns nothing, your handler doesn't need to change.
Besides dropping units, did you notice how even though multiple results were combined together, the map closure received each as individual arguments? This greatly improves development, since that means that id.and(verify).and(body) is actually exactly the same as id.and(verify.and(body)), but using just tuples would have changed around the signature of the results. The routing documentation shows more ways this is useful.
This concept powers everything in warp. Once you know you can match a single path segment via warp::path("foo"), then the idea of mounting doesn't need to be something special. You just have your filter chain for a set of endpoints, and simply "and" it with a new path filter. If your "mount" location needs to also gate on headers, or something else, you can just and those Filters as well.
Built-in functionality
As awesome as the Filter system is, if warp didn't provide common web server features, it'd still be annoying to work with. Thus, warp provides a bunch of built-in Filters, allowing you compose the functionality you need to descibe each route or resource or sub-whatever.
Path routing and parameter extraction
Header requirements and extraction
Query string deserialization
JSON and Form bodies
Static Files and Directories
Websockets
Access logging
And others, and more being added.
The docs explains how to use each, and the examples go more in-depth on how to combine them to make actual web servers.
tower-web
A few months ago, there was mention of a web framework, tower-web, that'd be coming soon. The concept behind it is to provide a web framework built around tower's Service trait. That is still coming. warp is being released right now for a couple reasons:
The Filter system is really awesome, as touched on above.
To explore some ideas before solidifying tower and tower-web. We'd like for warp to be able to make use of all the great tower middleware that already exists.
Expect to hear more about it, and how it fits with warp, soon!
warp
This is warp v0.1. It's awesome. It's fast. It's safe. It's correct. There's documentation, and examples, and an issue tracker to file bugs and track progress of new Filters that are coming (CORS almost ready). I want to thank those of you who tried warp out privately and sent feedback in, it was super valuable!
I realize other languages also have nice type systems, but I didn't usually want to pay the cost associated with those languages. Rust just gives me what I want. ↩︎
1 note
·
View note
Text
Visual Studio 2017 Github

-->
How to use the GitHub Extension for Visual Studio 2017? Connect Once you have installed GitHub Extension for Visual Studio 2017, you should connect to your GitHub account by doing the following: From Team menu, click Manage Connections. Click Connect to connect to your GitHub account. Or signup in case, you don't have a GitHub account by clicking SignUp. Visual Studio solution file headers - 2003, 2005, 2008, 2010, 2012, 2013, 2015, 2017, 2019 - Visual Studio solution file headers+ Skip to content All gists Back to GitHub Sign in Sign up.
Git is now the default version control experience in Visual Studio 2019. Since version 16.6, we've worked on building out the feature set and iterating on it based on your feedback. The new Git experience is turned on by default for everyone with the release of version 16.8.
Tip
Git is the most widely used modern version control system, so whether you’re a professional developer or if you’re learning how to code, Git can be very useful to you. If you are new to Git, the https://git-scm.com/ website is a good place to start. There, you’ll find cheat sheets, a popular online book, and Git Basics videos.
How to use Git in Visual Studio
We'll walk you through how to use the new Git experience in Visual Studio 2019, but if you'd like to take a quick tour first, check out the following video: Video length: 5.27 minutes
There are three ways to start using Git with Visual Studio to be more productive:

Open an existing Git repository. If your code is already on your machine, you can open it by using File > Open > Project/Solution (or Folder) and Visual Studio automatically detects if it has an initialized Git repository.
Create a new Git repository. If your code is not associated with Git, you can create a new Git repository.
Clone an existing Git repository. If the code that you would like to work on is not on your machine, you can clone any existing remote repositories.
Note
Starting also with version 16.8, Visual Studio 2019 includes a fully integrated GitHub account experience. You can now add both GitHub and GitHub Enterprise accounts to your keychain. You’ll be able to add and leverage them just as you do with Microsoft accounts, which means that you’ll have an easier time accessing your GitHub resources across Visual Studio. For more information, see the Work with GitHub accounts in Visual Studio page.
Create a new Git repository
If your code is not associated with Git, you can start by creating a new Git repository. To do so, select Git > Create Git Repository from the menu bar. Then, in the Create a Git repository dialog box, enter your information.
The Create a Git repository dialog box makes it easy to push your new repository to GitHub. By default, your new repository is private, which means that you are the only one who can access it. If you uncheck the box, your repository will be public, which means that anyone on GitHub can view it.
Tip
Whether your repository is public or private, it's best to have a remote backup of your code stored securely on GitHub even if you are not working with a team. This also makes your code available to you no matter what computer you're using.
You can choose to create a local-only Git repository by using the Local only option. Or, you can link your local project with an existing empty remote repository on Azure DevOps or any other Git provider by using the Existing Remote option.
Clone an existing Git repository
Visual Studio includes a straightforward clone experience. If you know the URL of the repository that you would like to clone, you can paste the URL in the Repository location section and then choose the disk location you would like Visual Studio to clone to.
If you don’t know the repository URL, Visual Studio makes it easy to browse to and then clone your existing GitHub or Azure DevOps repository.
Open an existing local repository
After you’ve cloned a repository or created one, Visual Studio detects the Git repository and adds it to your list of Local Repositories in the Git menu. From here, you can quickly access and switch between your Git repositories.
View files in Solution Explorer
When you clone a repository or open a local repository, Visual Studio switches you into that Git context by saving and closing any previously open solutions and projects. Solution Explorer loads the folder at the root of the Git repository and scans the directory tree for any View files. These include files such as CMakeLists.txt or those with the .sln file extension.
Visual Studio adjusts its View based on which View file you load in Solution Explorer:
If you clone a repository that contains a single .sln file, then Solution Explorer directly loads that solution for you.
If Solution Explorer doesn’t detect any .sln files in your repository, then by default it loads Folder View.
If your repository has more than one .sln file, then Solution Explorer shows you the list of available Views for you to choose from.
You can toggle between the currently open View and the list of Views by using the Switch Views button in the Solution Explorer toolbar.
Visual Studio 2017 Github Clone
Git Changes window
Git tracks file changes in your repo as you work, and separates the files in your repo into three categories. These changes are equivalent to what you would see when you enter the git status command in the command line:
Unmodified files: These files haven't changed since your last commit.
Modified files: These files have changes since your last commit, but you haven't yet staged them for the next commit.
Staged files: These files have changes that will be added to the next commit.

As you do your work, Visual Studio keeps track of the file changes to your project in the Changes section of the Git Changes window.
When you are ready to stage changes, click the + (plus) button on each file you want to stage, or right-click a file and then select Stage. You can also stage all your modified files with one click by using the stage all + (plus) button at the top of the Changes section.
When you stage a change, Visual Studio creates a Staged Changes section. Only changes in the Staged Changes section are added to the next commit, which you can do by selecting Commit Staged. The equivalent command for this action is git commit -m 'Your commit message'. Changes can also be unstaged by clicking the – (minus) button. The equivalent command for this action is git reset <file_path> to unstage a single file or git reset <directory_path> to unstage all the files in a directory.
You can also choose not to stage your modified files by skipping the staging area. In this case, Visual Studio allows you to commit your changes directly without having to stage them. Just enter your commit message and then select Commit All. The equivalent command for this action is git commit -a.
Share your videos with friends, family, and the world. Omnifocus youtube video downloader. Set up the YouTube trigger, and make magic happen automatically in OmniFocus. Zapier's automation tools make it easy to connect YouTube and OmniFocus.
Visual Studio also makes it easy to commit and sync with one click by using the Commit All and Push and Commit All and Sync shortcuts. When you double-click any file in the Changes and the Staged changes sections, you can see a line-by-line comparison with the unmodified version of the file.
Before performing these procedures, you must do the following: On the PS4™ system's function screen, select (Settings) Remote Play Connection Settings, and then select the Enable. If you are connecting the systems directly using Wi-Fi, select (Settings) Remote Play Connection Settings. PS Remote Play is a free to use feature on all PS4 and PS5 consoles. All you need is: Your PS5 or PS5 Digital Edition, PS4 or PS4 Pro 2 connected to your home wired broadband network. A compatible device – also connected to your network. The free PS Remote Play app. A DUALSHOCK 4 wireless controller or DualSense controller 3. PS Remote Play A PS5 console or PS4 console is required for Remote Play. With Remote Play, you can control your PlayStation® console remotely wherever you have a high-speed internet connection. Using the PS Remote Play app, you can control your PlayStation®5 console or PlayStation®4 console from a device in a different location. Find out more about activating your PS4 console as your primary console in the PS4 User’s Guide. To start Remote Play while your PS4 console is in rest mode, select Settings Power Save Settings Set Features Available in Rest Mode. Then select the checkboxes for Stay Connected to the Internet and Enable Turning on PS4 from Network. Remote Play via local network and not via Internet? My remote play app on Mac first searches nearby consoles, then searches the internet, then connects. Your hub for everything related to PS4 including games, news, reviews, discussion, questions, videos, and screenshots. Created May 17, 2010. Remote play ps4 local network.
Tip
You can associate an Azure DevOps work item with a commit by using the '#' character if you are connected to the Azure DevOps repository. You can connect your Azure DevOps repository through Team Explorer > Manage Connections.
Select an existing branch
Visual Studio displays the current branch in the selector at the top of the Git Changes window.
The current branch is also available in the status bar on the bottom-right corner of the Visual Studio IDE.
From both locations, you can switch between existing branches.
Create a new branch
You can also create a new branch. The equivalent command for this action is git checkout -b <branchname>.
Creating a new branch is as simple as entering the branch name and basing it off an existing branch.
You can choose an existing local or remote branch as the base. The Checkout branch checkbox automatically switches you to the newly created branch. The equivalent command for this action is git checkout -b <new-branch><existing-branch>.
Git Repository window
Visual Studio has a new Git Repository window, which is a consolidated view of all the details in your repository, including all of the branches, remotes, and commit histories. You can access this window directly from either Git or View on the menu bar or from the status bar.
Visual Studio 2017 Github
Manage branches
When you select Manage Branches from the Git menu, you’ll see the branches tree-view in the Git Repository window. From the left pane, you can use the right-click context menu to checkout branches, create new branches, merge, rebase, cherry-pick, and more. When you click the branch, you can see a preview of its commit history in the right pane.
Incoming and outgoing commits
When you fetch a branch, the Git Changes window has an indicator under the branch drop-down, which displays the number of unpulled commits from the remote branch. This indicator also shows you the number of unpushed local commits.
The indicator also functions as a link to take you to the commit history of that branch in the Git Repository window. The top of the history now displays the details of these incoming and outgoing commits. From here, you can also decide to Pull or Push the commits.
Commit Details
When you double-click a Commit, Visual Studio opens its details in a separate tool window. From here you can revert the commit, reset the commit, amend the commit message, or create a tag on the commit. When you click a changed file in the commit, Visual Studio opens the side-by-side Diff view of the commit and its parent.
Connect Visual Studio To Github
Handle merge conflicts
Conflicts can occur during a merge if two developers modify the same lines in a file and Git doesn’t automatically know which is correct. Git halts the merge and informs you that you are in a conflicted state.
Visual Studio makes it easy to identify and resolve a merge conflict. First, the Git Repository window shows a gold info bar at the top of the window.
The Git Changes window also displays a ‘Merge is in progress with conflicts’ message, with the unmerged files in their separate section below it.
But if you have neither of these windows open, and instead you go to the file that has merge conflicts, you won’t have to search for the following text:
Instead, Visual Studio displays a gold info bar on the top of the page that indicates that the opened file has conflicts. Then, you can click the link to open the Merge Editor.
The Merge Editor
The Merge Editor in Visual Studio is a three-way merge tool that displays the incoming changes, your current changes, and the result of the merge. You can use the tool bar at the top level of the Merge Editor to navigate between conflicts and auto-merged differences in the file.
You can also use the toggles to show/hide differences, show/hide word differences, and customize the layout. There are checkboxes on the top of each side that you can use to take all the changes from one side or the other. But to take individual changes, you can click the checkboxes to the left of the conflicting lines on either side. Finally, when you finish resolving the conflicts, you can select the Accept Merge button in the Merge Editor. You then write a commit message and commit the changes to complete the resolution.
Personalize your Git settings
To personalize and customize your Git settings at a repository level as well as at a global level, go to either Git > Settings on the menu bar, or to Tools > Options > Source Control on the menu bar. Then, choose the options you want.
How to use the full Team Explorer experience in Visual Studio
The new Git experience is the default version control system in Visual Studio 2019 from version 16.8 onwards. However, if you want to turn it off, you can. Go to Tools > Options > Environment > Preview Features and then toggle the New Git user experience checkbox, which will switch you back to Team Explorer for Git.
What's next
Affinity designer cdr. While the new Git experience is now on by default in Visual Studio 2019 version 16.8, we continue to add new features to enhance the experience. If you'd like to check out new updates to the Git experience in a Preview release, you can download and install it from the Visual Studio Preview page.
Important
If you have a suggestion for us, please let us know! We appreciate the opportunity to engage with you on design decisions via the Developer Community portal.
See also
Get Started with Git and GitHub in Visual Studio tutorial on Microsoft Learn
Getting started with Git in Visual Studio video on YouTube
Announcing the Release of the Git Experience in Visual Studio blog post
The launch of the new Git experience video on YouTube
The Visual Studio Toolbox series presents: The new Git experience video on Channel 9 and on YouTube
Exciting new updates to the Git experience in Visual Studio blog post
Improved Git Experience in Visual Studio 2019 blog post
-->
Azure Repos | Azure DevOps Server 2020 | Azure DevOps Server 2019 | TFS 2018 | TFS 2017 | TFS 2015
This article walks you through the steps to get a Visual Studio solution on your PC into an Azure DevOps Git repo you can share with others. If you want to work with a Visual Studio solution hosted in an existing repo, see the Git tutorial.
Why Use Visual Studio
Note


Visual Studio 2019 now includes a new Git tool that provides an improved experience when connecting to a Git repository. When you enable this tool, the Team Explorer tool is effectively disabled when connected to a Git repository. You can acquire the new tool by downloading Visual Studio 2019 version 16.6. To enable and use the new tool, see Git experience in Visual Studio (Preview).
Prerequisites
An organization in Azure DevOps. If you don't have an organization, you can sign up for one for free. Each organization includes free, unlimited private Git repositories.
Create a local Git repo for your project
Create a new local Git repo for your project by selecting on the status bar in the lower right hand corner of Visual Studio.This will create a new repo in the folder the solution is in and commit your code into that repo. You can also right-click your solution in Solution Explorer and choose Add Solution to Source Control.
Once you have a local repo, select items in the status bar to quickly navigate between Git tasks in Team Explorer.
shows the number of unpublished commits in your local branch. Selecting this opens the Synchronization view in Team Explorer.
shows the number of uncommitted file changes. Selecting this opens the Changes view in Team Explorer.
shows the current Git repo. Selecting this opens the Connect view in Team Explorer.
shows your current Git branch. Selecting this displays a branch picker to quickly switch between Git branches or create new branches.
Note
If you don't see any icons such as or , ensure that you have a project open that is part of a Git repo. If your project is brand new or not yet added to a repo, you can add it to one by selecting on the status bar, or by right-clicking your solution in Solution Explorer and choosing Add Solution to Source Control.
Publish your code to Azure Repos
Navigate to the Push view in Team Explorer by choosing the icon in the status bar. You can also select Sync from the Home view in Team Explorer.
In the Push view in Team Explorer, select the Publish Git Repo button under Push to Visual Studio Team Services.
Verify your email and select your account in the Team Services Domain drop-down.
Enter your repository name and select Publish repository.
This creates a new project in your account with the same name as the repository. To create the repo in an existing project, click Advanced next to Repository name and select a project.
Your code is now in a Git repo in Azure Repos. You can view your code on the web by selecting See it on the web .
Commit and push updates
As you write your code, your changes are automatically tracked by Visual Studio.You can commit changes to your local Git repository by selecting the pending changes icon from the status bar.
On the Changes view in Team Explorer, add a message describing your update and commit your changes.
Select the unpublished changes status bar icon (or select Sync from the Home view in Team Explorer). Select Push toupdate your code in Azure DevOps Services/TFS.
Get changes from others

Sync your local repo with changes from your team as they make updates.
From the Synchronization view in Team Explorer, fetch the commits that your team has made.Double-click a commit to view its file changes.
Select Sync to merge the fetched commits into your local repo and then push any unpublished changes to Azure Repos.
The changes from your team are now in your local repo and visible in Visual Studio.
Frequently asked questions
I don't see the Add to Source Control button in the status bar.
The button in the status bar was added in Visual Studio 2017 (it was Publish in Visual Studio 2015 Update 2 and later) and will only appear when you have Git as your source control provider. If your code is already in a Git repo, you won't see the Add to Source Control button in the status bar, but the status of the current branch in your local repo instead.
If you are in a previous version of Visual Studio, create a local Git repo for your project by selecting the Create new Git repository option in the New Project window when you create a new project.
You can create a local Git repo for an existing solution by right-clicking your project in the Solution Explorer and selecting Add Solution to Source Control.
How can I see what changes are in a commit before I pull it into my local branch?
To see what's changed in a commit, go to the Synchronization page in Team Explorer and right-click on the commit. Select View Commit Details.You can then right-click on any file modified by the commit and select Compare with Previous.. to view the changes compared to the previousversion of the file.
How do I associate my commits with work items?
You can include work items in your commits through Related Work Items in the Changes page in Team Explorer.
Work items can be included in commits by adding #ID into the commit message. For example, Fixing bug #23 in the reporting tools would link work item 23to the commit. The work item is linked when the commit is pushed to Azure Repos.
Can I use the Git command prompt with Visual Studio?
Visual Studio's Team Explorer and the Git command line work great together. Changes to your repos made in either tool will be reflected in the other.Make sure to install the latest release of Git for Windows, which has tools to help you connect to your Azure DevOps Services/TFS repos.
See the Azure Repos Git tutorial and the command reference for additional help using Git from the command line.
Next steps
0 notes
Text
Version 436
youtube
windows
zip
exe
macOS
app
linux
tar.gz
I had a great few days mostly cleaning and fixing things. If you sync with the PTR, update will take a minute this week.
macos release polish
I cleaned up the new macOS release. It seems to have launched and otherwise generally worked last week, but there was a bug in finding the specific database location macOS users are used to. Without the '--d' launch parameter, it was creating an empty new db inside the app, in the 'db' dir hydrus would normally use (and the really old App used to use, if you remember that), and hence would say 'hey, this looks like the first time you are running the program...' on boot. I have fixed the 'I am running in an app' detection and the ~/Library/Hydrus database path calculation routine, so everything should be back to normal.
It also has the old readme and Applications shortcut in the dmg, and the filename should be fixed too. I expect this to be the only macOS release I put out from now on. Let me know if you have any more trouble!
miscount fix
Last week, I made the number in the 'pending (1,234)' menu title add up in a more efficient way. Rather than counting raw mapping rows every time, it uses a table of pre-computed numbers, the same used for autocomplete results. It turns out there were some legacy (from a long time ago) miscount bugs in there for some users. This resulted in a 'sticky' number that would not go away even after committing. A maintenance routine exists to fix this, but it is a sledgehammer when we need a scalpel.
So, I have written a maintenance routine to regen this pending data efficiently and correct these old bugs. It is basically the same as I did a few months ago with the 'display' caches during the siblings and parents work, but for a deeper level of tags. It will be run on update, along with a new thing that forces the menu's count to regen, both of which can now be accessed from database->regenerate menu in case we need them again in future. If you sync with the PTR, it may take a minute or so to finish.
I hope this will fix the issue completely, but if you still have a bad count, or if your count drifts off zero again over time, please let me know!
underscores
After discussion with some users, I have added an experimental setting to options->tag presentation that replaces all underscore characters in tags with space characters, as long as you are in 'front-facing' UI like regular search pages or the media viewer. It works on the same system as the 'hide namespace' option--and siblings--in that you still see the raw truth in manage tags and other edit locations.
This setting is experimental since it will add a bit of CPU lag to tag presentation and may result in some seemingly duplicate rows. I have long planned to fix the underscore issue with a really nice system, but I was convinced that adding a hacky system in the meantime would be a good thing to play with. If you care about this issue, give it a go and let me know if you run into any problems.
full list
macOS:
I fixed an issue with last week's Big Sur compatible release where it wasn't finding your old database correctly--it was defaulting to a different location, so without a specific launch command otherwise, it started a fresh db and said 'hey, looks like first time you ran the program'. if you are a long-time user of hydrus, please install and run 436 as usual, it should figure out your old db location correctly as ~/Library/Hydrus without any launch command override needed
If you never ran any of the old macOS builds, and you started using hydrus for the first time on macOS last week with the experimental Big Sur compatible build, your brand new database is in a funky location! don't update yet, or you will delete it! You will want to copy your .db files and the client_files folder from inside_the_435_app/Contents/MacOS/db to ~/Library/Hydrus, which should for most people be /Users/(YOU)/Library/Hydrus. feel free to ask for help if you can't figure this out
fixed a 'this is macOS' platform check for newer macOS releases, which ensures the 'userpath' fallback is correctly initialised to ~/Library/Hydrus
fixed the new macOS github workflow build script to tell hydrus that it is running from inside an App, so it knows to default to the userpath fallback correctly
the macOS build now has the old filename
it also has the ReadMeFirst.rtf file and Applications shortcut
collected the new build-related files in static/build_files, which will likely see more files in future
.
pending tag cache regen:
two new maintenance tasks are added to the database->regenerate menu--one that forces a recalc of your total 'pending' count as used in the pending menu, and one that recalculates the cached pending tag mappings for storage tags (just like the display one added some time ago, but one layer deeper). the menu entries are relabelled appropriately
these routines will be run on database update, and should correct the bad pending menu counts many users discovered last week (the new efficient way that the pending count is calculated exposed some legacy bad cached pending storage mappings entries. we'll see if they come back, or if this is just clearing up bad counts hanging around from ages ago)
the quick pending mapping cache regen routines take a little longer to initialise now, but they now clear out surplus tag data, rather than just regenerating the 'correct' tags
.
misc:
added an experimental setting to _options->tag presentation_ to replace all underscores in tags with spaces. this is just a render rule, so it will only apply in front-facing 'display' contexts (a bit like how siblings work in search pages, but you see the truth in _manage tags_), will consume a little more CPU with big lists, and may result in some duplicate rows, but let's see how it goes. this is basically a quick hardcoded hack until there is a more beautiful solution here
in the two 'Duck' dark QSS styles, removed fixed font size on button labels that wasn't scaling on high DPI screens
the filename tagging panel now shows parents and siblings correctly on the 'tags for all' and 'tags for selected' taglists. I'd like to show siblings and parents in the file list above in future, but it'll be a bit more tricky to do neatly and without megalag
GUGs and NGUGs now report their reasons for not being functional in the downloader selector list and subscription errors. typically this will be a missing url class or an url class missing a matching parser, but more complicated example-url-parsing errors will also be outlined
fixed a bug in the client api in the set-cookies call when no cookies are set, and ensured all cookies added this way are saved permanently (before, some could be lost if that domain was not used in network traffic before the next client shutdown)
the 'refresh account' button in _review services_ now works on the new async system. it presents errors nicely
a repository's current update period is now stated in its review services panel
review services now says 'checking for updates in...' rather than 'next update due...', which is more accurate and will matter more with small update times
fixed some false positive instances of 'this server was not a tag repo' error in the network engine.
the hydrus server now also outputs hydrus specific 'Server' header (rather than some twisted default) on 'unsupported request' 404s and any other unusual 'infrastructure' 4XX or 5XX
if the repository updates in the filesystem are lacking some required file information when calculating what to process, the client now queues those files for a metadata regen maintenance job and raises a cleaner error
just as a safety measure, if a repository ever happens to deliver a metadata update slice with a 'next update due' time that has already passed, the client now adds a buffer and checks tomorrow instead
a new program launch argument, db_transaction_commit_time, lets you change how often the database's changes are committed to disk. default is 30 (seconds) for client, 120 for server
altering the repository update period now prints a summary of the change to the log
updated the ipfs links in the help
updated the main help index.html and the github readme.md with the user-run repo and wiki at https://github.com/CuddleBear92/Hydrus-Presets-and-Scripts
next week
I may or may not be tied up with IRL stuff for a bit. Once I am back to things, I will keep working on smaller issues and get started on the pre-work for multiple local file services. There are several hundred locations where the 'my files' service is hardcoded as the local file reference, so a decent part of this work, before I get to file service migration and new location import options, will just be putting some time into ancient code.
0 notes
Text
New Post has been published on Strange Hoot - How To’s, Reviews, Comparisons, Top 10s, & Tech Guide
New Post has been published on https://strangehoot.com/how-to-convert-html-to-wordpress/
How to Convert HTML to WordPress
To convert HTML pages to WordPress is not an easy task to perform. If you are not aware of the WordPress framework, you might face issues while converting HTML pages. It is very important to understand the default folder structure of WordPress to go ahead with conversion.
In all, you need to be very careful migrating your static HTML website to WordPress.
Before we proceed to see how to convert HTML to WordPress, we need to understand the scenarios in which the need to do this conversion arises. We will start with a simple, plain HTML site and move towards WordPress.
Simple Website using HTML
Let us take a scenario of a company setting up the new business. As a part of building its corporate identity, putting up a website on the Internet is essential. At the initial stage of business, the budget is economic and you would not want to spend much on the website development cost. The cost of building a plain HTML website is much lower than the cost of building a WordPress website.
To start off with putting up the website for a new business, an HTML Website is fair enough to showcase the entity. At this initial change, you will not keep updating your content frequently. So, deployment of the website is not so frequent.
Let’s say you have started with just the following sections in your HTML website.
Header and Footer – Static header and footer across all pages
Home – stats about your company and overall picture of your business
About us – The team who have started the company and details about core team members
Solutions / Services – The business you are offering to the customer(s) in the form of solutions or services.
Contact us – The company information, location and inquiry form.
All of the above sections are created with the text, images and videos using HTML layouts. Each page has a different layout based on the content available.
As your business is growing and at an expansion stage, you would want to make your website more fancy and attractive as per the current trends. More colourful, animations and creative in terms of UI widgets and elements. All of these are not possible to build with a Static HTML website. You start to find limitations to your existing Website and explore options to revamp the website.
The challenging part starts with the HTML website when you need to enhance the website with the following requirements:
Regular updates in the website
Add new pages to it or introduce new sections such as blogs, portfolio
Show clientele as and when your business is growing
Add Maps to locate your business
Add social media presence in the website
Make your website mobile friendly
Add eCommerce module to your website if you are selling the products
Add chatbot component to your website
Apply SEO features to your website
Another limitation you will find in HTML based static websites is updating the content based on special business events or extending your business lines or adding blogs to your website on a daily basis or integrating your website with social media websites. All of these demand conversion of your website to CMS that is the most appropriate for your entity.
Content Management System (CMS)
The below picture shows the most popular CMSes to build wonderful websites.
As per the statistics available here – https://hostingtribunal.com/blog/wordpress-statistics/#gref, the most used CMS for building wonderful websites is WordPress.
WordPress is the choice to migrate your HTML website with a lot of features available. Let us see some of the best features of WordPress before we see the steps of “convert HTML to WordPress”.
Let us see some of the features that are just awesome in WordPress.
Themes – WordPress comes up with thousands of themes out of which many of them are free and the rest of others are paid. Themes are nothing but the readymade website layouts with color themes, responsiveness and many more features. All you need to pick is the theme appropriate to your Website and get your content structured in the theme.
Plug-ins – WordPress offers a wider range of free plug-ins to incorporate many functionality that are not available in the theme you have chosen. For example, social media icon integration and update of reviews and posts into your site. Another example is – you want to add a different layout / element in the website which is not available in the theme. You can install a plug-in that offers more layout and widget options to incorporate in the website. You also can add analytics related plug-ins to see the visitors of your website and so on.
WP-Admin Panel – WordPress provides you an easy-to-use interface to update content quickly and publish to Live. Create a post, insert image / video using Media Library and publish it. It is that simple.
Woocommerce Module – Anytime during the development, you can add the eCommerce module that allows you to maintain the product catalog and integrate the payment modes with a few clicks. Entire order management process with email templates are available ready-made and you can put up a new store in just one day.
Language Support – WordPress provides you with an i18N feature that supports more than 11 languages. You can select the language and the website content will be shown in the selected language.
Above features are mandatory to have in any CMS to choose and these are found in WordPress. In addition to that, the technical expertise in WordPress is easily available. The WordPress Developers can customize the or create plug-ins on the top of existing resources and fulfil your website requirements.
Now, the next section is to describe how to convert an HTML website to WordPress without losing your content and images. There are three different ways of doing this.
Create WP theme to replicate the layout of your HTML Website – This is a manual theme creation
Use an existing WP theme and move your content of HTML website
Use conversion service or HTML to WordPress converter
Way 1 – Convert HTML to WordPress by creating WP theme manually
Make sure you have a code editor (Sublime Text, Notepad++) available in your system.
Go to your HTML website folder.
Create a new folder.
Give the WP folder a name. For example: New-Transpire.
Create the following files under this folder.
index.php
style.css
header.php
footer.php
sidebar.php
Now, we will copy code of each file from HTML websites files to the above newly created files.
Open your old site’s style.css file.
Copy and paste into your new created style.css file.
Copy the below text and paste in the file on the top.
/*Theme Name: New-TranspireTheme URI: https://transpire.co.in/themes/New-Transpire/Author: team XAuthor URI: https://transpire.co.in/Description: Description of the websiteVersion: 1.3Requires at least: 5.0Tested up to: 5.4Requires PHP: 7.0*/
Save your new style.css file and close it.
Next, open your newly created header.php file.
Copy your existing code till the <!–Main–> from the index.html file from the older site folder and paste.
Save the header.php file and close it.
Now, again go back to the index.html file of the older site.
Copy your sidebar section and paste it to the sidebar.php file.
Copy your footer section and paste it to the footer.php file.
The last copy-paste we will do is from index.html to index.php. Copy the main body container section and paste to a new index.php.
Once copy of content for each section of your HTML side is done, you need to add PHP related structure to your index.php file.
Add the below line above your <!–Main–> tag.
Now, add the get_sidebar function under the container tag.
Add the footer function at the bottom of the file.
In the main body, add the below code under the main body section. This is a post component of WordPress.
After putting the above code, your index.php’s main body section will look like this.
Save the file and now, you are ready to upload this new directory in your WordPress hosting server.
Connect to FTP server using your credentials.
Open the wp-content folder. Under that, you will find the themes folder.
Open the themes folder and copy your New-Transpire folder into it.
Now, log into your wp-admin panel using the correct credentials.
From the left click Appearance and choose Themes.
You will see the New-Transpire theme available in the themes list.
Click on the theme and you will see below.
On the above page, you will see 2 actions as below.
Click Activate. You will see the preview as below.
The WordPress layout is ready for you to extend it further.
Way 2 – Convert HTML to WordPress by using the existing WP theme
This method is used when you want to change your HTML website’s layout and placement of sections in the new site. In this case, you can choose the pre-defined WordPress theme, install it and move your content in the appropriate section.
Log into your wp-admin panel.
Go to Appearance → Themes. You will see the list of already available themes.
Choose the theme from the list.
Click Install. Once installed successfully, you will see the preview without content.
Now, the next step is to import your HTML website’s content to this newly installed theme. To do that:
Go to the Plugins menu from left.
Search for plugin by entering the text – HTML Import 2 in the Search Plugins box.
The plugin will be shown. Click Install Now.
Once installed successfully, it will be listed in the list of plugins you already have.
Click Activate.
Click Activate. Follow the instructions given on importing HTML content of your older Website to the new theme layout.
You will be able to successfully import your Website content.
From here on, you can enhance your website in terms of content, layout, widgets and menus with easy steps in wp-admin.
Way 3 – Convert HTML to WordPress by using the converter
This is the way where you can use a converter to migrate your HTML site to WP structure. Usually, it is a paid service to get this job correctly. But, if your HTML website is plain and contains only 3 to 4 pages, you can try an online converter.
Go to https://htmltowordpress.io/
Create a zip file of all your HTML site’s folders.
Click UPLOAD ZIP TO CONVERT.
Choose the zip file of your HTML files. Once selected, it will start the conversion process.
Once done, you will get a success message. If there are any errors, it will not be able to convert the files to WP.
Recommendations
We have seen multiple ways of how to convert the static HTML to WordPress. With the experience, it is suggested to choose Way 2 where you will choose and install the pre-defined WP theme and import your content the newly selected theme. The chance of errors will be minimal, you will get a better, responsive layout with a wider variety of plugins, widgets and layout options to make your website look professional and competent in the market.
WordPress is the best option to create, deploy, maintain and update your website regularly. It’s user interface is so easy to use that once you have setup and configurations available, updates can be done by yourself without depending upon the vendor or agency you have given the contract to.
In case you want to keep adding new layouts, change the color theme, logo or your brand identity with expansion of your business, it can be quickly done in WordPress. You do not have to really worry about the change.
0 notes
Text
Popular Front End Development Tools You Should Know
If you are just getting started with JavaScript, the number of tools and technologies you'll hear about may be overwhelming. And you might have a hard time deciding which tools you actually need.
Or maybe you're familiar with the tools, but you haven't given much thought to what problems they solve and how miserable your life would be without their help.
I believe it is important for Software Engineers and Developers to understand the purpose of the tools we use every day.
That's why, in this article, I look at NPM, Babel, Webpack, ESLint, and CircleCI and I try to clarify the problems they solve and how they solve them.
NPM

NPM is the default package manager for JavaScript development. It helps you find and install packages (programs) that you can use in your programs.
You can add npm to a project simply by using the "npm init" command. When you run this command it creates a "package.json" file in the current directory. This is the file where your dependencies are listed, and npm views it as the ID card of the project.
You can add a dependency with the "npm install (package_name)" command.
When you run this command, npm goes to the remote registry and checks if there is a package identified by this package name. If it finds it, a new dependency entry is added to your package.json and the package, with it's internal dependencies, is downloaded from the registry.
You can find downloaded packages or dependencies under the "node_modules" folder. Just keep in mind that it usually gets pretty big – so make sure to add it to .gitignore.

NPM does not only ease the process of finding and downloading packages but also makes it easier to work collaboratively on a project.
Without NPM, it would be hard to manage external dependencies. You would need to download the correct versions of every dependency by hand when you join an existing project. And that would be a real hassle.
With the help of npm, you can just run "npm install" and it will install all external dependencies for you. Then you can just run it again anytime someone on your team adds a new one.
Babel

Babel is a JavaScript compiler or transpiler which translates the ECMAScript 2015+ code into code that can be understood by older JavaScript engines.
Babel is the most popular Javascript compiler, and frameworks like Vue and React use it by default. That said, concepts we will talk about here are not only related to Babel and will apply to any JavaScript compiler.
Why do you need a compiler?
"Why do we need a compiler, isn't JavaScript an interpreted language?" you may ask if you are familiar with the concepts of compiled and interpreted languages.
It's true that we usually call something a "compiler" if it translates our human-readable code to an executable binary that can be understood by the CPU. But that is not the case here.
The term transpiler may be more appropriate since it is a subset of a compiler: Transpilers are compilers that translate the code from a programming language to another language (in this example, from modern JS to an older version).
JavaScript is the language of browsers. But there is a problem with browsers: Cross compatibility. JavaScript tools and the language itself are evolving rapidly and many browsers fail to match that pace. This results in compatibility issues.
You probably want to write code in the most recent versions of JavaScript so you can use its new features. But if the browser that your code is running has not implemented some of the new features in its JavaScript engine, the code will not execute properly on that browser.
This is a complex problem because every browser implements the features at a different speed. And even if they do implement those new features, there will always be people who use an older version of their browser.
So what if you want to be able to use the recent features but also want your users to view those pages without any problems?
Before Babel, we used polyfills to run older versions of certain code if the browser did not support the modern features. And when you use Babel, it uses polyfills behind the scenes and does not require you to do anything.
How do transpilers/compilers work?
Babel works similar to other compilers. It has parsing, transformation, and code generation stages.
We won't go in-depth here into how it works, since compilers are complicated things. But to understand the basics of how compilers work, you can check out the the-super-tiny-compiler project. It is also mentioned in Babel's official documentation as being helpful in understanding how Babel works.
We can usually get away with knowing about Babel plugins and presets. Plugins are the snippets that Babel uses behind the scenes to compile your code to older versions of JavaScript. You can think of each modern feature as a plugin. You can go to this link to check out the full list of plugins.
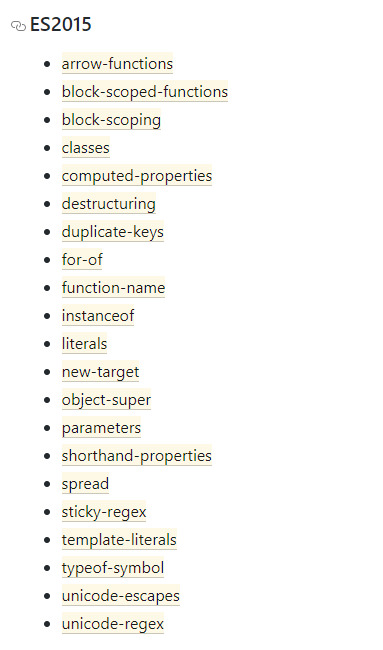
List of plugins for ES5
Presets are collections of plugins. If you want to use Babel for a React project you can use the pre-made @babel/preset-react which contains the necessary plugins.

React Preset Plugins
You can add plugins by editing the Babel config file.
Do you need Babel for your React App?
For React, you need a compiler because React code generally uses JSX and JSX needs to be compiled. Also the library is built on the concept of using ES6 syntax.
Luckily, when you create a project with create-react-app, it comes with Babel already configured and you usually do not need to modify the config.
Examples of a compiler in action
Babel's website has an online compiler and it is really helpful to understand how it works. Just plug in some code and analyze the output.
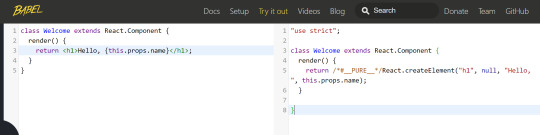

Webpack
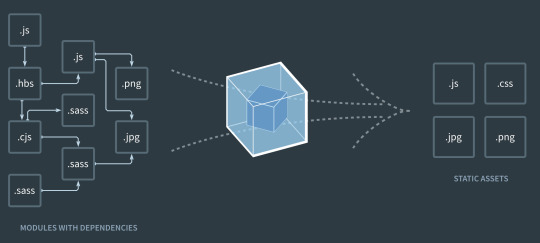
Webpack is a static module bundler. When you create a new project, most JavaScript frameworks/libraries use it out of the box nowadays.
If the phrase "static module bundler" sounds confusing, keep reading because I have some great examples to help you understand.
Why do you need a bundler?
In web apps you're going to have a lot of files. This is especially the case for Single Page Applications (React, Vue, Angular), with each having their own dependencies.
What I mean by a dependency is an import statement – if file A needs to import file B to run properly, then we say A depends on B.
In small projects, you can handle the module dependencies with <script> tags. But when the project gets larger, the dependencies rapidly become hard to manage.
Maybe, more importantly, dividing the code into multiple files makes your website load more slowly. This is because the browser needs to send more requests compared to one large file, and your website starts to consume a ton of bandwidth, because of HTTP headers.
We, as developers want our code to be modular. We divide it into multiple files because we do not want to work with one file with thousands of lines. Still, we also want our websites to be performant, to use less bandwidth, and to load fast.
So now, we'll see how Webpack solves this issue.
How Webpack works
When we were talking about Babel, we mentioned that JavaScript code needs to be transpiled before the deployment.
But compiling with Babel is not the only operation you need before deploying your project.
You usually need to uglify it, transpile it, compile the SASS or SCSS to CSS if you are using any preprocessors, compile the TypeScript if you are using it...and as you can see, this list can get long easily.
You do not want to deal with all those commands and operations before every deployment. It would be great if there was a tool that did all that for you in the correct order and correct way.
The good news – there is: Webpack.
Webpack also provides features like a local server with hot reload (they call it hot module replacement) to make your development experience better.
So what's hot reloading? It means that whenever you save your code, it gets compiled and deployed to the local HTTP server running on your machine. And whenever a file changes, it sends a message to your browser so you do not even need to refresh the page.
If you have ever used "npm run serve", "npm start" or "npm run dev", those commands also start Webpack's dev server behind the scenes.
Webpack starts from the entry point of your project (index) and generates the Abstract Syntax Tree of the file. You can think of it as parsing the code. This operation is also done in compilers, which then look for import statements recursively to generate a graph of dependencies.
It then converts the files into IIFEs to modularize them (remember, putting code inside a function restricts its scope). By doing this, they modularize the files and make sure the variables and functions are not accessible to other files.
Without this operation, it would be like copying and pasting the code of the imported file and that file would have the same scope.
Webpack does many other advanced things behind the scenes, but this is enough to understand the basics.
Bonus – ESLint

Code quality is important and helps keep your projects maintainable and easily extendable. While most of us developers recognize the significance of clean coding, we sometimes tend to ignore the long term consequences under the pressure of deadlines.
Many companies decide on coding standards and encourage developers to obey those standards. But how can you make sure that your code meets the standards?
Well, you can use a tool like ESLint to enforce rules in the code. For example, you can create a rule to enforce or disallow the usage of semicolons in your JavaScript code. If you break a rule, ESLint shows an error and the code does not even get compiled – so it is not possible to ignore that unless you disable the rule.
Linters can be used to enforce standards by writing custom rules. But you can also use the pre-made ESLint configs established by big tech companies to help devs get into the habit of writing clean code.
You can take a look at Google's ESLint config here – it is the one I prefer.
ESLint helps you get used to best practices, but that's not its only benefit. ESLint also warns you about possible bugs/errors in your code so you can avoid common mistakes.
Bonus – CI/CD (CircleCI)

Continuous Integration/Development has gained a lot of popularity in recent years as many companies have adopted Agile principles.
Tools like Jenkins and CircleCI allow you to automate the deployment and testing of your software so you can deploy more often and reliably without going through difficult and error-prone build processes by yourselves.
I mention CircleCI as the product here because it is free and used frequently in JavaScript projects. It's also quite easy to use.
Let's go over an example: Say you have a deployment/QA server and your Git repository. You want to deploy your changes to your deployment/QA server, so here is an example process:
Push the changes to Git
Connect to the server
Create a Docker container and run it
Pull the changes to the server, download all the dependencies (npm install)
Run the tests to make sure nothing is broken
Use a tool like ESLint/Sonar to ensure code quality
Merge the code if everything is fine
With the help of CircleCI, you can automatically do all these operations. You can set it up and configure to do all of the above operations whenever you push a change to Git. It will reject the push if anything goes wrong, for example a failing test.
I will not get into the details of how to configure CircleCI because this article is more about the "Why?" of each tool. But if you are interested in learning more and seeing it in action, you can check out this tutorial series.
Conclusion
The world of JavaScript is evolving rapidly and new tools are gaining popularity every year.
It's easy to react to this change by just learning how to use the tool – we are often too busy to take our time and think about the reason why that tool became popular or what problem it solves.
In this article, I picked the tools I think are most popular and shared my thoughts on their significance. I also wanted to make you think about the problems they solve rather than just the details of how to use them.
If you liked the article you can check out and subscribe to my blog where I try to write frequently. Also, let me know what you think by commenting so we can brainstorm or you can tell me what other tools you love to use :)
0 notes
Text
Hreflang: A Beginners Guide to Targeting Languages and Regions

Tapping into new audiences is an incredibly effective way to grow your website traffic.
If you’re expanding your business globally, you may have already considered translating your website into different languages. It can be a great way to monetize your content or sell to people outside your local area.
It’s an exciting thought, but it’s not quite as simple as just hiring someone to translate your website’s pages. Some of the translated pages would likely be similar to the content on your existing pages, leaving you at risk for being penalized by search engines for duplicate content.
Consider the experience of your reader, too. Imagine how quickly they’d leave a site that offers prices and shipping details in the wrong currency or language.
There’s a huge opportunity to grow your business by attracting people in different geographical or language areas, but there is a specific way to guide new users to your site.
The best way to access these new audiences is by using hreflang HTML attribute tags.

What Is the Hreflang Tag?
Hreflang is an HTML language attribute or code that tells search engines important information about your content by indicating language codes and country codes for each piece of content. This code tells search engines what language and region you’re targeting with the content.
Here are new audiences you could attract using hreflang:
Visitors in the same country, who speak different languages
Visitors from different countries, who speak other languages
Visitors from different countries, who speak the same language
Using hreflang can boost the organic search engine optimization (SEO) on your website and launch your digital marketing outreach to new audiences without costing you domain authority or impacting user experience.
Why Are Hreflang Tags Important?
Hreflang allows you to tell search engines which pages to show to which users to show audiences the pages you created just for them. It also gives search engines a clear indication that the content on these pages was not duplicated, but rather, has been customized for different people.
Let’s say your website is written entirely in English, with your local currency noted for products. However, other English speakers in different geographic regions could benefit from your content and offerings.
What if you could show them an alternate version of your website that would automatically reflect their daily currency?
Let’s go a step further. What if you could also translate your content into different languages and then somehow make sure search engines showed the right search result to your target audience?
You can, and while it will take a bit of work to set up, the value of showing visitors what they want to see can be a significant boost to your rankings.
Want to learn more about getting international visitors to your content? Watch this video:
Who Should Use Hreflang Code Attributes?
You should use these tags when you want to offer the correct version of your website to groups you can identify and separate by language or geographical region.
This could include having your entire site content translated into different languages, just portions of it translated, or indicating that you have alternate versions of your site with other currencies.
For example, Canadian, American, and British English are the same language but have different currencies.
This tactic is best for companies that have a good reason to be accessing international markets. For instance, you can monetize the traffic, sell directly to those visitors, or creating a global brand.
If this sounds like your company, it might be time to invest in creating a global SEO strategy.
SEO and More: Benefits of Proper Use of Hreflang Tags
Your website can benefit from hreflang tags in three critical ways:
Improve your organic SEO by lowering bounce rates, increasing rankings, and improving click-through and conversion rates.
Your user experience (UX) will improve for readers outside your region.
It may protect you from being penalized for duplicate content.
The world is full of people who may not share your first language but are still valuable readers for your content. What about Spanish-, Hindi-, or Mandarin-speaking users?
There is a substantial global audience you could be reaching, but to do so, you’ll need to find ways to offer them versions of your content that is optimized for their experience.
When these readers can access a personalized version of your content, they’re more likely to stay on your site longer, reading more pages, which reduces your overall bounce rate.
However, you need to tread carefully any time you create similar content, even in another language. Use hreflang to match the correct piece of content to what the user wants to see.
What Does a Hreflang Tag Look Like?
A valid hreflang attribute might look like this:
link rel=”alternate” href=”http://example.com” hreflang=”en-us” />
How to Implement Hreflang Tags
What does successful implementation look like? There are few things to consider when setting up hreflang for your site content. If any of these steps are not complete, your tags will not work.
Create a Content Map and Plan
Start by doing a site audit to map out what you have already done to target new languages or regions. Include your existing content and any pages you have already translated.
Next, check your analytics and see who else is visiting your website, where they’re from, and the language settings in their browsers. Making decisions based on audiences already finding your site will help your changes have a larger impact.
Decide if your entire site needs to be shown in alternate languages. Would it be enough to have your home page or just your contact information and your footer changed? This can help you decide where to focus your time and resources.
Language and Country Codes
Next, you’ll need to choose the correct codes to create your tags. There are established language codes and country codes, so be sure you’re verifying as you go.
When creating codes, remember that you’ll need a language or country code. This means that you could simply choose a language code, but you’ll never just have a country code by itself.
Remember that you may not know every country you need to target, so it’s also good to have just a language code. This allows you to offer French content for people in France and a French version to capture French-speaking users from any other country.
Relationship Between Tags
You’ll need to be sure that you show the correct relationship between tags, which means understanding self-referential and bidirectional hreflang attribute references.
Self-referencing tags mean that each language version should reference itself and all the other versions.
Bidirectional means each tag should be paired with a tag on the alternate piece of content. For example, if page A links to page B, then page B needs to link back to page A. (This also ensures that nobody can create a one-way tag that links to an external source, taking your traffic away.)
X-default creates a default version of a page that does not target any specific language, or where users are asked to select a language once landing on a page. This should capture anyone who doesn’t have a language designated in their browser settings, or whose IP address doesn’t match any of the languages on your site. This would be your x-default tag: <link rel=”alternate” href=”http://example.com/” hreflang=”x-default” />
Choose an Implementation Method
You can implement valid hreflang attributes in one of three ways:
Implement the hreflang attribute using HTML in link elements in the <head> section of every page.
Implement the hreflang attribute in HTTP headers for PDFs and other non-HTML pages or non-HTML files.
Implementing the hreflang attribute in your XML sitemap markup (this will avoid having to edit multiple HTML documents each time you edit or delete a page. Direct access to the XML sitemap file can make this even easier.)
Resources for Successful Implementation of Hreflang Tags
There are a few handy resources to tackle hreflang tags on your site content. This is by no means a complete list, but they’ll come in handy as you move ahead. Remember that different platforms will have specific instructions for implementation, so reference those before you begin.
Hreflang tags generator tool
Google search console
XML sitemap tool for hreflang tags
Hreflang tag checker
Learn more about setting up international SEO before beginning the project
Should I Use Hreflang with Canonical Tags?
Yes, they should be used together, as they perform different functions. Canonical tags tell search engines which URL is the official or canonical version of a page and which page should be indexed. Hreflang tags tell search engines what language and region a page is targeting.
Common Pitfalls When Implementing Hreflang Tags
Common errors include using the wrong language code or country code, trying to use a code for too large a region (like using the EU instead of GBR), forgetting to make versions self-referential, or forgetting that pages need to be bidirectional.
Another area challenge is maintaining valid hreflang attributes once they are set up. As content is added to or removed from the site, or redirects are created within your existing content, hreflang tags must be updated.
Hreflang code attributes are a guide for search engines, not a guaranteed function. All it can do is suggest which pages search engines should display based on a user’s browser settings.
Additionally, while it works with Google and Yandex, it does not work for others such as Bing and Baidu, so look into options and instructions for each.
Conclusion
Hreflang can be a useful tool to tell search engines what language your site is written in, and what region you’re targeting with a particular piece of content.
Implementing hreflang tags can help you reach international audiences with content or offerings. Need help deciding if hreflang could work for you? It might be time to get help with your digital marketing strategy.
Hreflang is not easy to implement but can expand your reach and boost your organic SEO far beyond what your website is doing today.
Just remember to create a plan that avoids common pitfalls and double-check your tags after implementation and every few months.
Which language or region would you target first using hreflang attributes?
The post Hreflang: A Beginner’s Guide to Targeting Languages and Regions appeared first on Neil Patel.
Original content source: https://neilpatel.com/blog/hreflang/ via https://neilpatel.com
See the original post, Hreflang: A Beginners Guide to Targeting Languages and Regions that is shared from https://imtrainingparadise.weebly.com/home/hreflang-a-beginners-guide-to-targeting-languages-and-regions via https://imtrainingparadise.weebly.com/home
0 notes
Text
Hreflang: A Beginner’s Guide to Targeting Languages and Regions

Tapping into new audiences is an incredibly effective way to grow your website traffic.
If you’re expanding your business globally, you may have already considered translating your website into different languages. It can be a great way to monetize your content or sell to people outside your local area.
It’s an exciting thought, but it’s not quite as simple as just hiring someone to translate your website’s pages. Some of the translated pages would likely be similar to the content on your existing pages, leaving you at risk for being penalized by search engines for duplicate content.
Consider the experience of your reader, too. Imagine how quickly they’d leave a site that offers prices and shipping details in the wrong currency or language.
There’s a huge opportunity to grow your business by attracting people in different geographical or language areas, but there is a specific way to guide new users to your site.
The best way to access these new audiences is by using hreflang HTML attribute tags.

What Is the Hreflang Tag?
Hreflang is an HTML language attribute or code that tells search engines important information about your content by indicating language codes and country codes for each piece of content. This code tells search engines what language and region you’re targeting with the content.
Here are new audiences you could attract using hreflang:
Visitors in the same country, who speak different languages
Visitors from different countries, who speak other languages
Visitors from different countries, who speak the same language
Using hreflang can boost the organic search engine optimization (SEO) on your website and launch your digital marketing outreach to new audiences without costing you domain authority or impacting user experience.
Why Are Hreflang Tags Important?
Hreflang allows you to tell search engines which pages to show to which users to show audiences the pages you created just for them. It also gives search engines a clear indication that the content on these pages was not duplicated, but rather, has been customized for different people.
Let’s say your website is written entirely in English, with your local currency noted for products. However, other English speakers in different geographic regions could benefit from your content and offerings.
What if you could show them an alternate version of your website that would automatically reflect their daily currency?
Let’s go a step further. What if you could also translate your content into different languages and then somehow make sure search engines showed the right search result to your target audience?
You can, and while it will take a bit of work to set up, the value of showing visitors what they want to see can be a significant boost to your rankings.
Want to learn more about getting international visitors to your content? Watch this video:
youtube
Who Should Use Hreflang Code Attributes?
You should use these tags when you want to offer the correct version of your website to groups you can identify and separate by language or geographical region.
This could include having your entire site content translated into different languages, just portions of it translated, or indicating that you have alternate versions of your site with other currencies.
For example, Canadian, American, and British English are the same language but have different currencies.
This tactic is best for companies that have a good reason to be accessing international markets. For instance, you can monetize the traffic, sell directly to those visitors, or creating a global brand.
If this sounds like your company, it might be time to invest in creating a global SEO strategy.
SEO and More: Benefits of Proper Use of Hreflang Tags
Your website can benefit from hreflang tags in three critical ways:
Improve your organic SEO by lowering bounce rates, increasing rankings, and improving click-through and conversion rates.
Your user experience (UX) will improve for readers outside your region.
It may protect you from being penalized for duplicate content.
The world is full of people who may not share your first language but are still valuable readers for your content. What about Spanish-, Hindi-, or Mandarin-speaking users?
There is a substantial global audience you could be reaching, but to do so, you’ll need to find ways to offer them versions of your content that is optimized for their experience.
When these readers can access a personalized version of your content, they’re more likely to stay on your site longer, reading more pages, which reduces your overall bounce rate.
However, you need to tread carefully any time you create similar content, even in another language. Use hreflang to match the correct piece of content to what the user wants to see.
What Does a Hreflang Tag Look Like?
A valid hreflang attribute might look like this:
link rel=”alternate” href=”http://example.com” hreflang=”en-us” />
How to Implement Hreflang Tags
What does successful implementation look like? There are few things to consider when setting up hreflang for your site content. If any of these steps are not complete, your tags will not work.
Create a Content Map and Plan
Start by doing a site audit to map out what you have already done to target new languages or regions. Include your existing content and any pages you have already translated.
Next, check your analytics and see who else is visiting your website, where they’re from, and the language settings in their browsers. Making decisions based on audiences already finding your site will help your changes have a larger impact.
Decide if your entire site needs to be shown in alternate languages. Would it be enough to have your home page or just your contact information and your footer changed? This can help you decide where to focus your time and resources.
Language and Country Codes
Next, you’ll need to choose the correct codes to create your tags. There are established language codes and country codes, so be sure you’re verifying as you go.
When creating codes, remember that you’ll need a language or country code. This means that you could simply choose a language code, but you’ll never just have a country code by itself.
Remember that you may not know every country you need to target, so it’s also good to have just a language code. This allows you to offer French content for people in France and a French version to capture French-speaking users from any other country.
Relationship Between Tags
You’ll need to be sure that you show the correct relationship between tags, which means understanding self-referential and bidirectional hreflang attribute references.
Self-referencing tags mean that each language version should reference itself and all the other versions.
Bidirectional means each tag should be paired with a tag on the alternate piece of content. For example, if page A links to page B, then page B needs to link back to page A. (This also ensures that nobody can create a one-way tag that links to an external source, taking your traffic away.)
X-default creates a default version of a page that does not target any specific language, or where users are asked to select a language once landing on a page. This should capture anyone who doesn’t have a language designated in their browser settings, or whose IP address doesn’t match any of the languages on your site. This would be your x-default tag: <link rel=”alternate” href=”http://example.com/” hreflang=”x-default” />
Choose an Implementation Method
You can implement valid hreflang attributes in one of three ways:
Implement the hreflang attribute using HTML in link elements in the <head> section of every page.
Implement the hreflang attribute in HTTP headers for PDFs and other non-HTML pages or non-HTML files.
Implementing the hreflang attribute in your XML sitemap markup (this will avoid having to edit multiple HTML documents each time you edit or delete a page. Direct access to the XML sitemap file can make this even easier.)
Resources for Successful Implementation of Hreflang Tags
There are a few handy resources to tackle hreflang tags on your site content. This is by no means a complete list, but they’ll come in handy as you move ahead. Remember that different platforms will have specific instructions for implementation, so reference those before you begin.
Hreflang tags generator tool
Google search console
XML sitemap tool for hreflang tags
Hreflang tag checker
Learn more about setting up international SEO before beginning the project
Should I Use Hreflang with Canonical Tags?
Yes, they should be used together, as they perform different functions. Canonical tags tell search engines which URL is the official or canonical version of a page and which page should be indexed. Hreflang tags tell search engines what language and region a page is targeting.
Common Pitfalls When Implementing Hreflang Tags
Common errors include using the wrong language code or country code, trying to use a code for too large a region (like using the EU instead of GBR), forgetting to make versions self-referential, or forgetting that pages need to be bidirectional.
Another area challenge is maintaining valid hreflang attributes once they are set up. As content is added to or removed from the site, or redirects are created within your existing content, hreflang tags must be updated.
Hreflang code attributes are a guide for search engines, not a guaranteed function. All it can do is suggest which pages search engines should display based on a user’s browser settings.
Additionally, while it works with Google and Yandex, it does not work for others such as Bing and Baidu, so look into options and instructions for each.
Conclusion
Hreflang can be a useful tool to tell search engines what language your site is written in, and what region you’re targeting with a particular piece of content.
Implementing hreflang tags can help you reach international audiences with content or offerings. Need help deciding if hreflang could work for you? It might be time to get help with your digital marketing strategy.
Hreflang is not easy to implement but can expand your reach and boost your organic SEO far beyond what your website is doing today.
Just remember to create a plan that avoids common pitfalls and double-check your tags after implementation and every few months.
Which language or region would you target first using hreflang attributes?
The post Hreflang: A Beginner’s Guide to Targeting Languages and Regions appeared first on Neil Patel.
Original content source: https://neilpatel.com/blog/hreflang/ via https://neilpatel.com
The original post, Hreflang: A Beginner’s Guide to Targeting Languages and Regions, has been shared from https://imtrainingparadise.wordpress.com/2020/09/10/hreflang-a-beginners-guide-to-targeting-languages-and-regions/ via https://imtrainingparadise.wordpress.com
0 notes
Text
Hreflang: A Beginner’s Guide to Targeting Languages and Regions

Tapping into new audiences is an incredibly effective way to grow your website traffic.
If you’re expanding your business globally, you may have already considered translating your website into different languages. It can be a great way to monetize your content or sell to people outside your local area.
It’s an exciting thought, but it’s not quite as simple as just hiring someone to translate your website’s pages. Some of the translated pages would likely be similar to the content on your existing pages, leaving you at risk for being penalized by search engines for duplicate content.
Consider the experience of your reader, too. Imagine how quickly they’d leave a site that offers prices and shipping details in the wrong currency or language.
There’s a huge opportunity to grow your business by attracting people in different geographical or language areas, but there is a specific way to guide new users to your site.
The best way to access these new audiences is by using hreflang HTML attribute tags.

What Is the Hreflang Tag?
Hreflang is an HTML language attribute or code that tells search engines important information about your content by indicating language codes and country codes for each piece of content. This code tells search engines what language and region you’re targeting with the content.
Here are new audiences you could attract using hreflang:
Visitors in the same country, who speak different languages
Visitors from different countries, who speak other languages
Visitors from different countries, who speak the same language
Using hreflang can boost the organic search engine optimization (SEO) on your website and launch your digital marketing outreach to new audiences without costing you domain authority or impacting user experience.
Why Are Hreflang Tags Important?
Hreflang allows you to tell search engines which pages to show to which users to show audiences the pages you created just for them. It also gives search engines a clear indication that the content on these pages was not duplicated, but rather, has been customized for different people.
Let’s say your website is written entirely in English, with your local currency noted for products. However, other English speakers in different geographic regions could benefit from your content and offerings.
What if you could show them an alternate version of your website that would automatically reflect their daily currency?
Let’s go a step further. What if you could also translate your content into different languages and then somehow make sure search engines showed the right search result to your target audience?
You can, and while it will take a bit of work to set up, the value of showing visitors what they want to see can be a significant boost to your rankings.
Want to learn more about getting international visitors to your content? Watch this video:
youtube
Who Should Use Hreflang Code Attributes?
You should use these tags when you want to offer the correct version of your website to groups you can identify and separate by language or geographical region.
This could include having your entire site content translated into different languages, just portions of it translated, or indicating that you have alternate versions of your site with other currencies.
For example, Canadian, American, and British English are the same language but have different currencies.
This tactic is best for companies that have a good reason to be accessing international markets. For instance, you can monetize the traffic, sell directly to those visitors, or creating a global brand.
If this sounds like your company, it might be time to invest in creating a global SEO strategy.
SEO and More: Benefits of Proper Use of Hreflang Tags
Your website can benefit from hreflang tags in three critical ways:
Improve your organic SEO by lowering bounce rates, increasing rankings, and improving click-through and conversion rates.
Your user experience (UX) will improve for readers outside your region.
It may protect you from being penalized for duplicate content.
The world is full of people who may not share your first language but are still valuable readers for your content. What about Spanish-, Hindi-, or Mandarin-speaking users?
There is a substantial global audience you could be reaching, but to do so, you’ll need to find ways to offer them versions of your content that is optimized for their experience.
When these readers can access a personalized version of your content, they’re more likely to stay on your site longer, reading more pages, which reduces your overall bounce rate.
However, you need to tread carefully any time you create similar content, even in another language. Use hreflang to match the correct piece of content to what the user wants to see.
What Does a Hreflang Tag Look Like?
A valid hreflang attribute might look like this:
link rel=”alternate” href=”http://example.com” hreflang=”en-us” />
How to Implement Hreflang Tags
What does successful implementation look like? There are few things to consider when setting up hreflang for your site content. If any of these steps are not complete, your tags will not work.
Create a Content Map and Plan
Start by doing a site audit to map out what you have already done to target new languages or regions. Include your existing content and any pages you have already translated.
Next, check your analytics and see who else is visiting your website, where they’re from, and the language settings in their browsers. Making decisions based on audiences already finding your site will help your changes have a larger impact.
Decide if your entire site needs to be shown in alternate languages. Would it be enough to have your home page or just your contact information and your footer changed? This can help you decide where to focus your time and resources.
Language and Country Codes
Next, you’ll need to choose the correct codes to create your tags. There are established language codes and country codes, so be sure you’re verifying as you go.
When creating codes, remember that you’ll need a language or country code. This means that you could simply choose a language code, but you’ll never just have a country code by itself.
Remember that you may not know every country you need to target, so it’s also good to have just a language code. This allows you to offer French content for people in France and a French version to capture French-speaking users from any other country.
Relationship Between Tags
You’ll need to be sure that you show the correct relationship between tags, which means understanding self-referential and bidirectional hreflang attribute references.
Self-referencing tags mean that each language version should reference itself and all the other versions.
Bidirectional means each tag should be paired with a tag on the alternate piece of content. For example, if page A links to page B, then page B needs to link back to page A. (This also ensures that nobody can create a one-way tag that links to an external source, taking your traffic away.)
X-default creates a default version of a page that does not target any specific language, or where users are asked to select a language once landing on a page. This should capture anyone who doesn’t have a language designated in their browser settings, or whose IP address doesn’t match any of the languages on your site. This would be your x-default tag: <link rel=”alternate” href=”http://example.com/” hreflang=”x-default” />
Choose an Implementation Method
You can implement valid hreflang attributes in one of three ways:
Implement the hreflang attribute using HTML in link elements in the <head> section of every page.
Implement the hreflang attribute in HTTP headers for PDFs and other non-HTML pages or non-HTML files.
Implementing the hreflang attribute in your XML sitemap markup (this will avoid having to edit multiple HTML documents each time you edit or delete a page. Direct access to the XML sitemap file can make this even easier.)
Resources for Successful Implementation of Hreflang Tags
There are a few handy resources to tackle hreflang tags on your site content. This is by no means a complete list, but they’ll come in handy as you move ahead. Remember that different platforms will have specific instructions for implementation, so reference those before you begin.
Hreflang tags generator tool
Google search console
XML sitemap tool for hreflang tags
Hreflang tag checker
Learn more about setting up international SEO before beginning the project
Should I Use Hreflang with Canonical Tags?
Yes, they should be used together, as they perform different functions. Canonical tags tell search engines which URL is the official or canonical version of a page and which page should be indexed. Hreflang tags tell search engines what language and region a page is targeting.
Common Pitfalls When Implementing Hreflang Tags
Common errors include using the wrong language code or country code, trying to use a code for too large a region (like using the EU instead of GBR), forgetting to make versions self-referential, or forgetting that pages need to be bidirectional.
Another area challenge is maintaining valid hreflang attributes once they are set up. As content is added to or removed from the site, or redirects are created within your existing content, hreflang tags must be updated.
Hreflang code attributes are a guide for search engines, not a guaranteed function. All it can do is suggest which pages search engines should display based on a user’s browser settings.
Additionally, while it works with Google and Yandex, it does not work for others such as Bing and Baidu, so look into options and instructions for each.
Conclusion
Hreflang can be a useful tool to tell search engines what language your site is written in, and what region you’re targeting with a particular piece of content.
Implementing hreflang tags can help you reach international audiences with content or offerings. Need help deciding if hreflang could work for you? It might be time to get help with your digital marketing strategy.
Hreflang is not easy to implement but can expand your reach and boost your organic SEO far beyond what your website is doing today.
Just remember to create a plan that avoids common pitfalls and double-check your tags after implementation and every few months.
Which language or region would you target first using hreflang attributes?
The post Hreflang: A Beginner’s Guide to Targeting Languages and Regions appeared first on Neil Patel.
Original content source: https://ift.tt/35rbCW6 via https://neilpatel.com The post, Hreflang: A Beginner’s Guide to Targeting Languages and Regions, has been shared from https://ift.tt/3bIHg2u via https://ift.tt/2r0Go64
0 notes
Text
Hreflang: A Beginner’s Guide to Targeting Languages and Regions

Tapping into new audiences is an incredibly effective way to grow your website traffic.
If you’re expanding your business globally, you may have already considered translating your website into different languages. It can be a great way to monetize your content or sell to people outside your local area.
It’s an exciting thought, but it’s not quite as simple as just hiring someone to translate your website’s pages. Some of the translated pages would likely be similar to the content on your existing pages, leaving you at risk for being penalized by search engines for duplicate content.
Consider the experience of your reader, too. Imagine how quickly they’d leave a site that offers prices and shipping details in the wrong currency or language.
There’s a huge opportunity to grow your business by attracting people in different geographical or language areas, but there is a specific way to guide new users to your site.
The best way to access these new audiences is by using hreflang HTML attribute tags.

What Is the Hreflang Tag?
Hreflang is an HTML language attribute or code that tells search engines important information about your content by indicating language codes and country codes for each piece of content. This code tells search engines what language and region you’re targeting with the content.
Here are new audiences you could attract using hreflang:
Visitors in the same country, who speak different languages
Visitors from different countries, who speak other languages
Visitors from different countries, who speak the same language
Using hreflang can boost the organic search engine optimization (SEO) on your website and launch your digital marketing outreach to new audiences without costing you domain authority or impacting user experience.
Why Are Hreflang Tags Important?
Hreflang allows you to tell search engines which pages to show to which users to show audiences the pages you created just for them. It also gives search engines a clear indication that the content on these pages was not duplicated, but rather, has been customized for different people.
Let’s say your website is written entirely in English, with your local currency noted for products. However, other English speakers in different geographic regions could benefit from your content and offerings.
What if you could show them an alternate version of your website that would automatically reflect their daily currency?
Let’s go a step further. What if you could also translate your content into different languages and then somehow make sure search engines showed the right search result to your target audience?
You can, and while it will take a bit of work to set up, the value of showing visitors what they want to see can be a significant boost to your rankings.
Want to learn more about getting international visitors to your content? Watch this video:
youtube
Who Should Use Hreflang Code Attributes?
You should use these tags when you want to offer the correct version of your website to groups you can identify and separate by language or geographical region.
This could include having your entire site content translated into different languages, just portions of it translated, or indicating that you have alternate versions of your site with other currencies.
For example, Canadian, American, and British English are the same language but have different currencies.
This tactic is best for companies that have a good reason to be accessing international markets. For instance, you can monetize the traffic, sell directly to those visitors, or creating a global brand.
If this sounds like your company, it might be time to invest in creating a global SEO strategy.
SEO and More: Benefits of Proper Use of Hreflang Tags
Your website can benefit from hreflang tags in three critical ways:
Improve your organic SEO by lowering bounce rates, increasing rankings, and improving click-through and conversion rates.
Your user experience (UX) will improve for readers outside your region.
It may protect you from being penalized for duplicate content.
The world is full of people who may not share your first language but are still valuable readers for your content. What about Spanish-, Hindi-, or Mandarin-speaking users?
There is a substantial global audience you could be reaching, but to do so, you’ll need to find ways to offer them versions of your content that is optimized for their experience.
When these readers can access a personalized version of your content, they’re more likely to stay on your site longer, reading more pages, which reduces your overall bounce rate.
However, you need to tread carefully any time you create similar content, even in another language. Use hreflang to match the correct piece of content to what the user wants to see.
What Does a Hreflang Tag Look Like?
A valid hreflang attribute might look like this:
link rel=”alternate” href=”https://ift.tt/1tgeQSF; hreflang=”en-us” />
How to Implement Hreflang Tags
What does successful implementation look like? There are few things to consider when setting up hreflang for your site content. If any of these steps are not complete, your tags will not work.
Create a Content Map and Plan
Start by doing a site audit to map out what you have already done to target new languages or regions. Include your existing content and any pages you have already translated.
Next, check your analytics and see who else is visiting your website, where they’re from, and the language settings in their browsers. Making decisions based on audiences already finding your site will help your changes have a larger impact.
Decide if your entire site needs to be shown in alternate languages. Would it be enough to have your home page or just your contact information and your footer changed? This can help you decide where to focus your time and resources.
Language and Country Codes
Next, you’ll need to choose the correct codes to create your tags. There are established language codes and country codes, so be sure you’re verifying as you go.
When creating codes, remember that you’ll need a language or country code. This means that you could simply choose a language code, but you’ll never just have a country code by itself.
Remember that you may not know every country you need to target, so it’s also good to have just a language code. This allows you to offer French content for people in France and a French version to capture French-speaking users from any other country.
Relationship Between Tags
You’ll need to be sure that you show the correct relationship between tags, which means understanding self-referential and bidirectional hreflang attribute references.
Self-referencing tags mean that each language version should reference itself and all the other versions.
Bidirectional means each tag should be paired with a tag on the alternate piece of content. For example, if page A links to page B, then page B needs to link back to page A. (This also ensures that nobody can create a one-way tag that links to an external source, taking your traffic away.)
X-default creates a default version of a page that does not target any specific language, or where users are asked to select a language once landing on a page. This should capture anyone who doesn’t have a language designated in their browser settings, or whose IP address doesn’t match any of the languages on your site. This would be your x-default tag: <link rel=”alternate” href=”https://ift.tt/1yfAz1j; hreflang=”x-default” />
Choose an Implementation Method
You can implement valid hreflang attributes in one of three ways:
Implement the hreflang attribute using HTML in link elements in the <head> section of every page.
Implement the hreflang attribute in HTTP headers for PDFs and other non-HTML pages or non-HTML files.
Implementing the hreflang attribute in your XML sitemap markup (this will avoid having to edit multiple HTML documents each time you edit or delete a page. Direct access to the XML sitemap file can make this even easier.)
Resources for Successful Implementation of Hreflang Tags
There are a few handy resources to tackle hreflang tags on your site content. This is by no means a complete list, but they’ll come in handy as you move ahead. Remember that different platforms will have specific instructions for implementation, so reference those before you begin.
Hreflang tags generator tool
Google search console
XML sitemap tool for hreflang tags
Hreflang tag checker
Learn more about setting up international SEO before beginning the project
Should I Use Hreflang with Canonical Tags?
Yes, they should be used together, as they perform different functions. Canonical tags tell search engines which URL is the official or canonical version of a page and which page should be indexed. Hreflang tags tell search engines what language and region a page is targeting.
Common Pitfalls When Implementing Hreflang Tags
Common errors include using the wrong language code or country code, trying to use a code for too large a region (like using the EU instead of GBR), forgetting to make versions self-referential, or forgetting that pages need to be bidirectional.
Another area challenge is maintaining valid hreflang attributes once they are set up. As content is added to or removed from the site, or redirects are created within your existing content, hreflang tags must be updated.
Hreflang code attributes are a guide for search engines, not a guaranteed function. All it can do is suggest which pages search engines should display based on a user’s browser settings.
Additionally, while it works with Google and Yandex, it does not work for others such as Bing and Baidu, so look into options and instructions for each.
Conclusion
Hreflang can be a useful tool to tell search engines what language your site is written in, and what region you’re targeting with a particular piece of content.
Implementing hreflang tags can help you reach international audiences with content or offerings. Need help deciding if hreflang could work for you? It might be time to get help with your digital marketing strategy.
Hreflang is not easy to implement but can expand your reach and boost your organic SEO far beyond what your website is doing today.
Just remember to create a plan that avoids common pitfalls and double-check your tags after implementation and every few months.
Which language or region would you target first using hreflang attributes?
The post Hreflang: A Beginner’s Guide to Targeting Languages and Regions appeared first on Neil Patel.
Hreflang: A Beginner’s Guide to Targeting Languages and Regions Publicado primeiro em https://neilpatel.com
0 notes
Photo

17 Best Bootstrap 4 Plugins
Totally open source and free to use, Bootstrap has become one of the most popular front-end frameworks for desktop and mobile development. With a mobile-first approach, the framework essentially forces designers to create sites for small screens and then scale designs up from there.
Bootstrap 4 Plugins on CodeCanyon
Bootstrap 4 is the newest version of the framework, and today we take a look at the 17 best Bootstrap 4 plugins available at CodeCanyon. Whether you're coding a WordPress theme or searching for form or navbar templates for your static site, CodeCanyon has a plugin for you!
Depending on what are looking for some of these plugin cost as little as $5. You also get 6 months of free support as well as free lifetime updates for any plugin that you buy.
Best Bootstrap 4 Plugins
1. WP Pricing Builder
WP Pricing Builder allows users to set up responsive pricing tables within minutes. The plugin offers a drag-and-drop builder, 89 unique designs and a colour theme generator among other features. This makes setup easy and allows for a high degree of customisation.
User TelosAlpha says:
"Fast clear support. But beyond that, this is a very advanced and well written piece of code. Very intuitive to use, many fantastic styles.”
2. Nearby Places
The Nearby Places plugin is an extension of the above Progress Map plugin. It allows users to display points of interest near a specific location added from the owner’s Progress Map. These points of interest are supplied by Google Maps. The plugin also provides a powerful search form that allows users to target their position or to enter a given address and display all nearby points of interest. The plugin can be customised from the admin panel in order to match the general look of your website.
User gijon says:
“After so much searching, this is the best map plugin I have found very complete and easy to use.”
3. Laravel Bootstrap Starter Kit
This Laravel- and Bootstrap- based starter kit could be perfect choice for your next project. The plugin author has add quite a few features to this kit such as authentication, registration, admin panel, responsive layout, and user roles. This should cover a lot of common functionality needed in many website projects.
The kit is based on Bootstrap 4. This makes it ideal for projects which are already using the Bootstrap framework as the overall layout and styling of the kit will match that of their website.
Even if you are creating a project from scratch, the use of Bootstrap 4 means that you won't have to worry about writing a lot of CSS as many well designed UI elements already exist within the framework.
4. Web Slide
Inspired by mobile design, Web Slide brings slide navigation to your website layout. Featuring one code for all devices, a mobile drawer style menu, an app style look and CSS 3 animation effects, the plugin is compatible with major desktop and mobile browsers like Chrome, Edge, Firefox, Safari, and Opera.
User quadnine says:
“A great product with top-notch support. This was money well spent.”
5. JQuery XML Shopping Cart
If you’re looking for a shopping cart that's easy to install and use, check out JQuery XML Shopping Cart. Some of its great features include support for unlimited products, which can easily be divided into categories and subcategories; a default tax rate which can be modified to a per-product tax rate; and a base shipping charge to which additional charges can be added as needed.
User dnkn76 says:
“Documentation quality and flexibility is excellent comparing to another non-PHP shopping cart I bought. In no time the store was up and running and shipping cost, taxes and changing currency is a breeze.
6. Bootstrap 4 Carousel
Bootstrap 4 Carousel gives users multiple options for displaying images on their website, including slider with thumbnails, multiple items carousel, fade effect carousel, Bootstrap image slider gallery, and more. The plugin provides over 200 pre-built examples and layouts for user convenience. This responsive carousel is compatible with mobile and tablet devices and all the latest web browsers.
7. Bootstrap Plugin for TinyMCE
TinyMCE is one of the most popular and advanced WYSIWYG editors out there. This Bootstrap plugin for TinyMCE has been developed to make the editor even more powerful and useful for people who are using Bootstrap on their website.
This plugin gives you the ability to add Bootstrap-specific layout, components and styles to your content with ease. It comes with a bunch of awesome features like the Bootstrap 4 toolbar, styles, custom context menus and more. You can see all its features on the product description page.
8. Modern MegaMenu
Modern MegaMenu is all about giving users as many options as possible for creating the menu and navbar of their dreams. The plugin offers over 50 header layouts and a wide variety of navbar styles. This fully responsive Bootstrap 4 plugin is easily integrated into your site and is highly customisable.
9. LiveSearch: Search Engine for Your Website
The LiveSearch plugin will add a basic search engine to your website. People will be able to use it to look up for text, images and PHP files within your website. It does not require the use of a database to function. You can also hide some content from being indexed. This plugin is ideal for small to medium sized websites.
The content of the website is crawled using a predefined based URL. The links and content is cached to make future searches faster. It is very easy to set up and you can also define logical correlation between search terms using AND and OR.
10. 47Admin: Bootstrap Admin Skin
47Admin is a Bootstrap skin that specifically targets admin templates. It comes with a lot of UI elements and bunch of additional functionality above what the basic Bootstrap framework provides. This will make help you quickly set up the front-end of the admin area in your next web project.
The templates and all their UI elements are responsive and come with cross-browser compatibility. It also comes with pages for login, registration, password recovery and more.
11. Floating Form
A collection of floating inline label forms, Floating Form contains a large number of forms such as contact, review, search, login and subscription forms, as well as a wide variety of booking forms. Each form has its own stylesheet.
12. Flat Form with Bootstrap 4
Flat Form is an incredible plugin if you want to add Bootstrap 4 based forms to your website. The plugin keeps its own styling to a minimum and take advantage of Bootstrap to design the forms. All the forms and UI elements look great. They will blend easily with the layout of your website.
There are shortcodes for adding ratings, toggle buttons, alerts, tooltips and much more. You can use the plugin to create all kinds of forms such as login, registration, review, comment or checkout form.
13. Bootstrap 4 WYSIWYG Editor
If you’re looking for a Bootstrap “what you see is what you get” (WYSIWYG) editor that will allow you to see what the end result of your project will look like while you’re creating it, then Bootstrap 4 WYSIWYG Editor may be for you. This simple and easy-to-use editor requires jQuery, Bootstrap 4, and Font Awesome.
User innovationco says:
“I've used this for another plugin that I am making and it's a very nice editor with no bloat, which makes it easy for me to use. I have had no issues with it and I would highly recommend it to others.”
Free Bootstrap 4 Plugins
In this section, I will cover some free Bootstrap 4 plugins that can help you add extra functionality to your website. They are mostly used to add some basic functionality unlike some of the premium plugins available on CodeCanyon.
1. Bootbox.js
This is a free library that allows you to create Bootstrap based dialog boxes programatically. It automatically takes care of manipulating the DOM and event handlers for you.
2. Bootstrap-Navbar-Dropdowns
This plugin will come in handy when you want to quickly set up a multi-level dropdown menu based on Bootstrap.
3. DataTables
The Bootstrap DataTables plugin provides an easy way for you to add advanced interactions and controls to your tables. This includes things lie sorting the table along a particular column etc.
4. Bootstrap Select Dropdown
This Select Dropdown plugin comes will convert the select elements on your website to a dropdown. The aim is to make the long options list more user friendly with the help of keyboard navigation and a search box.
5. Form Validation
It is very important to validate any user input that comes you way through forms. This plugin will make it very easy for you to tell users if they filled any form incorrectly and how they can correct the error.
Tips for Choosing a Bootstrap Plugin
There are many things that can be confusing for an absolute beginner when it comes to choosing the right Bootstrap plugin. I have listed a few tips that can help you make the right decision.
Make sure that the plugin and your website are using the same version of Bootstrap. Many things change with each new version of Bootstrap. This means that some plugins and skins will not work with your website as expected if they are based on a different version.
One more thing that will help you quickly set things up in an existing project is to choose a plugin that does not apply excessive styling of its own over Bootstrap. This is particularly true if your own website uses minimal styling over what Bootstrap already provides.
Conclusion
The Bootstrap 4 plugins featured here just scratch the surface of options available at CodeCanyon, so if none of them appeal, there are plenty of other great options there to hold your interest.
And if you want to improve your skills using Bootstrap yourself, check out the ever so useful Bootstrap tutorials we have on offer.
by Monty Shokeen via Envato Tuts+ Code https://ift.tt/35dgluk
0 notes
Text
How to optimize a WordPress website

Time is money. You cannot afford to waste any time on the internet. Particularly when it is related to the loading time, speed is very important. Many website developers use WordPress either as a CMS or blog platform. WordPress is available with many amazing plugins which help in creating a fully functional and featured loaded website.
As a coding platform, WordPress is exceptionally well coded. However ,there are instances when people install low quality plugins which affects their WordPress installations. These plugins end up inserting additional CSS and JavaScript files into your header which has a major impact on the Page Speed and Y Slow scores of the website. At the same time selecting an unreliable and undependable web host will also have an adverse effect the website performance.
Even if you have chosen a good web host and not installed any low quality plugins, still there is a lot you can do to improve the speed of your WordPress website. There are a number of ways you can optimize your WordPress website and improve its speed. Below mentioned are a few methods which you can use to optimize your WordPress website.
1. Hosting Plan

Selecting the ideal hosting plan is one of the most important decision one needs to make while creating a website. A web host is the house for your website it is where it will live, hence the web host you select will determine the speed and performance of the website. A host server determines the speed at which information is loaded and passed on to the user. Some servers are slow which in turn impact the loading speed of the website.
Even if you have optimized your website but have a server which is slow, the optimization will not help. Hence it is important to choose the right host for hosting your website. The web hosting plan you select defines your performance. The hosting plan determines the amount of storage capacity and the speed plugins is available to your website.
Do not select a hosting plan because it is the cheapest option. You will need to select a plan which is capable of handling high web traffic spikes effectively and efficiently. A hosting company cannot be always blamed for slow speed, you may have selected the best hosting company but opted for an underpowered hosting plan which does not meet your requirements. Also in case you have chosen a shared hosting plan, there are chances that you have a slow loading speed as hundreds of websites are hosted on the shared server.
2. WordPress Theme

An inefficiently coded design or a design overloaded with images can be responsible for adding unnecessary weight to your webpage. Higher the size of the webpage, higher it will take time to load. Many WordPress designs are heavy in size, resulting in an increase in the page loading time. Therefore it is important to select a WordPress Theme which is optimized for both desktops and mobile devices.
Many WordPress themes promote themselves as ‘optimized’ or ‘fast loading, however they are not. Some of them contain unwanted functionality or they require additional files to function properly. This can result in reducing the website’s loading speed.
Research before selecting the ideal WordPress theme for your website. Check the reviews and ratings and learn about its functionality.
3. Plugins

Before installing any plugin on your website please ensure that it is actually required and necessary for your website functioning. Plugins are known to be the major causes for making your WordPress websites slow. If you install plugins without adequate research your website will suffer from speed and performance related issues.
One needs to understand that it is not the number of plugins which affect the speed, there are certain types of plugins which cause the slowing of the websites. Plugins having bad coding or making persistent calls to external servers can affect the speed. Also keep a close eye on how much of the CPU is used by the plugins as a number of them can block CPU with their persistent processes. A blockage in the CPU can take the whole server down.
Second thing is to always keep the installed plugins updated. And a regular check and site maintenance will let you know if you have plugins which you no longer require. Delete the plugins which are not active and are taking up unnecessary space on your server. Always take a backup of the website before deleting the plugins.
4. Compressing the Website’s File
Minification is a process used to make your website’s code more efficient. In minification all the unnecessary content from your content is removed, which improves the speed. Codes are written by humans, hence it written in a clear and readable format. For example, check the below CSS snippet:
To make the functionality clear, spacing is used by the coder while writing the code. However a computer processing the code does not need it to be written in a particular format. In Minification, you can get rid of the unnecessary elements and characters and rewrite the code. For example, check the below CSS snippet after minification.
#blue{font-size:2em;color:blue;}
The above code is functionally identical to the code written by a coder, but a computer can read and process the code at a faster rate because the minified code has fewer characters in it. Changes in just one line of coding may not look like a big difference, but with the amount of coding involved in developing a website, minifcation can help tremendously in reducing the website file size. Online tools like CSS Compressor or Minify are good minification tools which you can use on your website, they have user-friendly interfaces and generate instant results.
However, for minification on a WordPress site, the best option is to install a plugin. There are a number of options available but Fast Velocity Minify is a free open-source, and very user-friendly tool.
5. Image Optimization

Images are responsible for draining out the site’s resources the highest. They help in making the website look wonderful and interesting, but they occupy a lot of the server space and take up a lot of the website’s bandwidth. Professionally shot images have large file sizes, higher the file size higher is the site loading time. Slow loading affects the user experience. Determining which images are the worst offenders is difficult as the file size is not correlated to the physical image size.
Image optimization will help in compressing the size of an image file without affecting its quality to a large extent. Optimization is an easy process and can be automated too TinyPNG is an online free tool and extremely user friendly. If you prefer downloading a tool and using, Image Optim is a good option.
There are a number of plugins available for WordPress sites which can enable optimization of the images automatically when uploaded to the WordPress site. ShortPixel is the best plug in, it optimizes all the newly uploaded images and also compresses the existing images using its powerful bulk optimization tool
Need for Optimization
Web Development Company Denver, CO already know the importance of keeping a website in the best shape. A slow website will result in a drop in the web traffic and ultimately affect your business. Work on the points mentioned in the guide above and optimize your WordPress site for best results. If you implement the methods, the website performance will drastically improve, ultimately resulting in higher sales and conversions.
0 notes