#aadhar authentication
Explore tagged Tumblr posts
Visit Tumblr Blog
Explore Tumblr blogs with no restrictions, modern design and the best experience.
Last Seen Tumblr Blogs


Fun Fact
Tumblr.com rank in the US is 25.
Text
SSC ने भर्ती परीक्षाओं में आधार-बायोमेट्रिक ऑथेंटिकेशन लागू किया, धोखाधड़ी पर लगेगी लगाम
Highlights: SSC ने UPSC की तर्ज पर उठाया बड़ा कदम आधार-आधारित बायोमेट्रिक ऑथेंटिकेशन होगा लागू परीक्षा केंद्र पर पहचान सत्यापन होगा आसान भर्ती परीक्षाओं में धोखाधड़ी पर लगेगा ब्रेक अगली परीक्षाओं से होगी नई व्यवस्था की शुरुआत Rewrite for BetulHub News Website: SSC ने भर्ती परीक्षाओं में लागू किया आधार-बायोमेट्रिक ऑथेंटिकेशन, UPSC की तर्ज पर उठाया बड़ा कदम BetulHub News: संघ लोक सेवा आयोग…
0 notes
Text
Addressing Aadhaar Grievances: A Case Study
Officer Name N Samay Balan Scientist, The applicant is thankful to the officer because he took the perusal of the contents of the grievance and thereafter submitted his report. Dear Resident, We sincerely apologize for the inconvenience you have experienced. We have carefully reviewed your feedback and have forwarded it to the appropriate team for immediate investigation. We will provide you…
#Fraudulent Aadhar authentication attempt#human rights#india#law#news#politics#public services#UIDAI
3 notes
·
View notes
Text
UIDAI Helpdesk Email Issues: Complainant's Experience
Grievance Status for registration number : GOVUP/E/2025/0001030Grievance Concerns ToName Of ComplainantYogi M. P. SinghDate of Receipt03/01/2025Received By Ministry/DepartmentUttar PradeshGrievance DescriptionMost respected sir the following message sent by the department of unique identification authority of India on the email address of the applicant.Dear Mahesh Pratap Singh,Your Authentication…
#cybersecurity#Fraudulent Aadhar authentication attempt#help desk email issue#india#news#security#technology#Unique identification authority of India
0 notes
Text
Change of Name Ad in The Times of India
Changing your name is a personal and legal step that many individuals take due to marriage, divorce, spiritual belief, or correcting records. One of the mandatory steps to complete the process is publishing a name change classified ad in a reputable newspaper. Among the best choices is The Times of India, known for its massive reach and official credibility. Publishing a Change of Name Ad in The Times of India ensures public notice and legal documentation.
Why Do People Change Their Name? Whether it’s adopting a partner’s surname, returning to a maiden name after divorce, or making corrections to government records due to errors, there are various reasons to initiate a legal name change. Some also change names based on numerology or gender transition. Regardless of the reason, publishing a name change advertisement is a legal formality that cannot be skipped.
Simple Steps to Book a Name Change Classified Ad in The Times of India The process is now digital and user-friendly. Choose the ad type, select the edition, fill in the name change details, and confirm payment. Booking your name change ad in The Times of India online is convenient, especially when done through trusted services like Riyo Advertising.
Step-by-Step Process for Legal Name Change
Step 1: Name Change Affidavit You must first prepare a notarized affidavit that mentions your current name, new name, the reason for the change, address, and ID proofs. This Name Change Affidavit is the foundation of your application.
Step 2: Publish in Newspapers A legal name change requires ads in one English and one regional newspaper. A popular and reliable choice is publishing the name change ad in The Times of India, which adds authenticity and satisfies legal protocols.
Step 3: Gazette Notification The last step is to send your affidavit, ad copies, and relevant documents to the Department of Publication for a Gazette Notification. Once your name is printed in the Gazette, the change becomes legally binding.
Documents Required for Name Change ad
Name Change Affidavit
Identity and address proof (Aadhar, passport, utility bill)
Newspaper publication copies
Gazette application form
Payment draft (as applicable)
Name Change Ad Samples Sample ads help ensure your wording is accurate and legally valid. Whether you are publishing after marriage, due to a spelling error, or for personal reasons, these examples help you frame your message correctly.
Example: "I, Rohan Sharma S/O Vijay Sharma R/O A-17, DLF Phase 2, Gurgaon, Haryana, have changed my name to Rohan Raj Sharma via affidavit dated 03/01/2024, sworn before Notary V.K. Bansal."
Why Choose The Times of India for Your Name Change Ad? With its national circulation and strong reputation, The Times of India is the go-to publication for official notices. Riyo Advertising makes the booking process seamless, offering end-to-end support for your name change ad in The Times of India.
Book Your Name Change Ad Today If you're ready to legally update your name, don’t wait. Start by booking a name change classified ad today through Riyo Advertising to get your Change of Name Ad in The Times of India published without hassle.
0 notes
Text
What Are the Documents Required for Firm Registration
Starting a business is a dream that shares many entrepreneurs, and converting that dream into a legal unit begins with firm registration. Whether you are making a sole ownership, partnership, or limited liability participation (LLP), registering your firm gives your business legal recognition. If you are planning to establish your business in Rajasthan, it is necessary to understand the process and documents required for firm registration in Jaipur.
In this article, we can simplify your journey from the documents, process, and company registration advisors in Jaipur, like the virtual state GST, like the virtual state GST.
Why Firm Registration Matters
Firm registration is the first legal step to start your business. This allows you:
• Open a business bank account
• Apply for GST registration
• Enter legal contracts
• Benefits of loan and financial assistance
• Customer Trust Build Trust
Especially in a growing trade center like Jaipur, your firm is legally registered under government norms and tax systems.
Types of Firms You Can Register
Before we dive into the documents, it is important to understand that requirements differ slightly depending on the type of firm:
• sole proprietorships
• Participation Firm
• Limited liability participation (LLP)
• private Limited company
• One person company (OPC)
If you are uncertain that who fits your business, then the company registration advisor in Jaipur, such as virtual state GST, can help you choose the correct type based on your goals.
Documents Required for Firm Registration in Jaipur
Here in Jaipur, a detailed list of necessary documents is usually given for firm registration. The exact set may vary slightly depending on the firm structure you have chosen.
1. Identity Proof of All Partners/Owners
Everyone in the firm will have to provide an identity document issued by the government. Approved documents include:
• PAN card (mandatory for all business owners)
• Aadhar card
• Voter ID
• Passport
• Driving license
These are necessary to verify the identity of proprietors or partners.
2. Address Proof of All Partners/Owners
This can include:
• Utility Bill (electricity, water, telephone)
• Bank details
• Rent Agreement (if staying in a rented place)
Ensure that the address proof identity matches the name and other details on the document.
3. Passport Size Photographs
Recent passport-shaped photographs of all partners/owners are required for documentation and ID verification purposes.
4. Business Address Proof
You need to provide proof of the location where the business will operate. This is important for compliance with tax and government.
If the office is rented:
• Rent Agreement
• No objection certificate (NOC) from property owner
• Utility Bill of Business Complex
If you are the owner of the property:
• Property deed or ownership letter
• Utility Bill (Latest)
5. Partnership Deed (for Partnership Firms)
If you are registering a partnership firm, a partnership deed is mandatory. It should be mentioned:
• Name and address of firm and partners
• nature of Business
• Profit-sharing ratio
• Duties and responsibilities
• Capital contribution
This deed should be signed and notaryized by all partners.
6. LLP Agreement (for LLP Registration)
An LLP agreement is similar to a partnership deed, but is corresponding to LLP firms. It should be registered with the Ministry of Corporate Affairs (MCA).
7. Declaration and Affidavits
In some cases, especially for new firms, an affidavit may require an affidavit to declare the intention of starting a business and the authenticity of the documents. These are usually prepared by company registration consultants in Jaipur for accuracy.
8. Digital Signature Certificate (DSC)
For LLPS and Private Limited companies, a Digital Signature Certificate (DSC) is required to enter the online registration form with MCA. It is mandatory for any e-filing and verification process.
9. Director Identification Number (DIN)
If you are registering a private limited company, you need DIN for all directors. It is released by MCA and requires identification and address evidence.
10. Certificate of Incorporation (for Company Structure)
If your business is a company (Private Limited or OPC), then the registrar of the companies issues this certificate after verifying your documents and application.
How Virtual State GST Can Help
Gathering and verifying all documents can be a tedious process. This is where experts come under assistance. One of the major company registration advisors in Jaipur provides end-to-end support for firm registration at Virtual State GST, Jaipur.
Helps with his team:
• Identifying the right type of firm for your business
• Drafting of legal documents such as partnership karma or LLP agreements
• Collecting and organizing necessary paperwork
• Applying online for registration
• Ensuring compliance with ROC and GST rules
Whether you are a freelancer, startup founder, or an experienced businessman, the virtual state GST provides cost - effective and timely registration services to help focus on increasing your business.
Conclusion
Legating your business is more than only one formalities - this is a requirement for stability, reliability and development. Knowing the documents required for firm registration in Jaipur, you move one step ahead in this process. From basic identity to legal agreements and evidence of address, registration is rapid and smooth.
Instead of doing paperwork alone, working with reliable company registration advisors in Jaipur, such as virtual state GST, ensures you on the right path from day one.
0 notes
Text
Everything You Need to Know About GST Registration in India

If you are launching or operating a business in India, then you must have heard of GST, which stands for Goods and Services Tax. It is one of the most significant tax reforms in India, aiming to simplify the indirect tax system by combining various broad-based taxes into a single tax. For many entrepreneurs and small business owners, the challenge is not learning what GST is but how to register.
This guide aims to equip you with useful information about GST Registration, how to register, what documents to submit, and what it means once registered. Bluntly, let's put it simply.
What is GST Registration?
GST registration is the method of getting a business recognized under the Goods and Services Tax (GST) regime. You will get a GST registration number (GSTIN- Goods and Services Tax Identification Number) through your business after it has registered its business. The GSTIN is very much like the tax identity of the business; in fact, the GSTIN number is required if you want your customers to pay GST, if you want to claim the input tax credit, or simply if you want to ensure you follow the laws.
Who Has to Register for GST?
Here is the rule of thumb: not all businesses have to register, but many businesses do. You have to register for GST if:
• Your turnover exceeds ₹40 lakhs for goods (₹20 lakhs for services) in most states.
• You are in the interstate business (selling in two different states).
• You operate an e-commerce business.
• You supply through a marketplace such as Amazon or Flipkart.
• You are a casual taxable person (e.g. temporary stall in an exhibition).
• You are a non-resident Indian making a taxable supply in India.
• You are involved in a reverse charge transaction.
There are also situations where you voluntarily register - a business may register under GST even if they are not required to by law due to their annual revenue, just to give them a more professional business front, or so that they can obtain input tax credit, for example.
Advantages of GST Registration
I know what you are thinking - if it is not a requirement for me, why would I ever register?
Well, now you know why you might have to register. Let's look at the upsides:
1. Input Tax Credit (ITC). You can apply for a refund for the GST that you paid on business purchases.
2. Greater Credibility for your business. Many times, a customer or vendor will prefer to trade with GST-registered businesses.
3. Easier to scale. If you are planning to upscale/run any business dealing with any interstate or out-of-state customers, obtaining GST registration makes compliance easier.
4. E-Commerce Business. You can sell your products to consumers without any added compliance or hurdles.
Documents Required for GST Registration
To begin the process of GST registration, you would need to have a few important documents. Here is an outline of documents you will likely need:
For Proprietor:
PAN card and Aadhar card of the proprietor
Proof of address and bank statements, etc.
Picture of the Business Owner
Proof of business address (rent agreement or electricity bill)
For Partnership and LLP:
PAN card of the firm and all partners
Partnership deed
Address proof and ID for all partners
Address proof for the business
Bank statement for payables
For Company:
PAN card of the company
Certificate of Incorporation
Memorandum & Articles of Association (MOA/AOA)
PAN and address proof for all directors
Details of the authorized signatory
Board resolution making the GST registration official
You will also be required to have an authentic email ID and mobile number for OTPs.
The GST Registration Process: An Overview
Alright, now let's get into how to register. The process itself is online, free, and quite simple, though it can become complicated if you are not used to the portal.
Step 1: Go to the GST Portal
Open https://www.gst.gov.in and click 'Register Now' under 'Taxpayers'.
Step 2: Complete Part A of the Form
You will be asked for:
Your PAN number
Email ID
Mobile number
After providing this information you will receive an OTP (one-time password) that will be sent to both your email and your phone for verification. Once you complete the verification, you will receive a Temporary Reference Number (TRN).
Step 3: Complete Part B
You will then sign in using your TRN and complete the remaining portion of the form, which includes:
Business details
Promoter/Partner Information
Address of the business
Details of the Bank account
Upload the required documents
Step 4: Verification
Once you have submitted your application, you may receive a call or a GST officer may visit your premises for physical verification (rare unless your documents are not clear).
Step 5: Receive GSTIN
Once verified, you will receive your GSTIN within 7 working days,, and you will also receive a certificate of registration.
Errors that are common to avoid
Wrong business details: Even minor errors can trigger rejection.
Incorrect HSN/SAC codes: The codes used to classify the goods or services—make certain you get them right.
Late registration: If you surpass the turnover threshold and do not register, you will owe backdated tax and may even face penalties.
Wrong proof of address: Many applications are rejected based on this. Always upload proof of address that is clear and valid.
How can Kanakkupillai help?
It can be a headache to register for GST when you are balancing the needs of a business. We will help take that hassle away from you. Loading the necessary documents to register with GST for your business can be an arduous task because it means we will help gather all the document specifications, file the forms, and even maintain ongoing compliance post-registration!
There are many going into registering for GST, and you are likely to have questions along the way. The rules of the GST portal and practicable filing standards may be confusing. Our team of experts understands everything that goes along with your GST registration, so you can focus on your day-to-day business activities knowing that your GST registration will go through fast and easy, saving you time and hassle.
Final Thoughts
Registering your business under GST is not only a requirement but also a logical move to strengthen the structure of your business and your credibility as a businessperson. Whether you are a freelancer, a start-up business, or an older small or medium enterprise, GST Registration will help build the foundation needed for continued growth and trust as a seller in the marketplace. Getting to know the registration process and what it means for you from a tax compliance perspective will only help you as India transitions into a more organized tax environment.
If you're unsure or looking for assistance, please reach out to professionals in the space. It's far less stressful to get it sorted the first time than to try to get updates and corrections done. And if you feel confident moving forward, Kanakkupillai is ready to support you through the GST registration, return filing, and beyond.
0 notes
Text
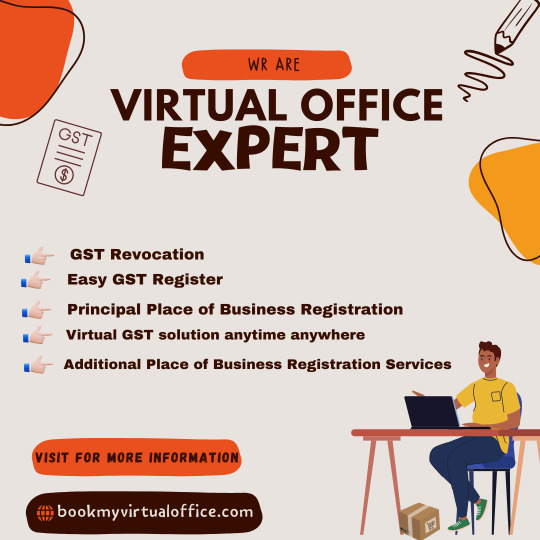
Can a Virtual Office Help You Obtain GST Seeding for PAN or Bank Accounts?
In today's digital economy, the purpose of businesses is to streamline operations by conforming to the rules. Business is providing a major requirement for GST registration providing a valid address. Many startups and small firms now opt for a virtual office for GST registration, providing a legal and professional business address without the cost of the physical office.
This address can be used not only for GST purposes, but can also be done for PAN and bank account Beijing. As long as the virtual office provider supplies the rental agreement and appropriate documents such as NOC, it is accepted by GST authorities. Thus virtual offices provide a flexible, cost -effective way to meet statutory requirements while maintaining a reliable business presence.
What is GST Seeding?
GST Seed is the process of linking GST registrations of companies with important identification documents such as PAN (Permanent Account Number) and bank account details. This integration allows for consistent business information in the state's database and enables smooth compliance with GST laws. Accurate GST sowing helps in faster processing of refunds, input tax credit requirements (ITC), and timely return registration. As a rule, the GST portal will be updated with PAN, bank account, and approved signature information, then confirm your OTP or digital signature. It is important that all details meet the official record to avoid contradictions. GST seeds improve transparency, reduce errors, and build a trusted profile for your company as part of your GST regime.
The Process of GST Seeding
GST (Product and Service Tax) Sowing is the linking or updating of GST registration details with other important ID documents such as PAN (certain account numbers) and bank accounts. This integration ensures seamless compliance and review of business transactions as part of the GST regime. Accurate and current information is important for using input, submitting returns, and avoiding penalties.
The GST -Seeding process includes several steps, including registering with the GST portal, navigation to the "Profile" section, updating required information such as PAN, bank account details, and approved signatures. Reviews are often performed using OTP authentication (one-time password) and digital signatures. It is important that all details match the various documents to prevent discrepancies and delays in the review process.
Important benefits of GST seeds:
Improved conformance: Make sure all financial transactions are registered and verified.
Faster refund: Faster processing of GST refunds.
Reduce errors: Reduce discrepancies in your tax claims.
Better transparency: Increases the company's credibility with tax authorities. Documents required for GST
Documents required for sowing GST:
Bread Card: Essential for identifying business units.
Bank Account Details: Includes account number, IFSC code and bank statement.
GST Registration Certificate: Registration certificate based on the GST system.
Aadhar Card: To verify the identity of an authorized signatory.
GST seed is an important step in ensuring that companies comply with rules, ensure tax benefits, and maintain accurate financial documents as part of the GST system. It also helps you set up a reliable business profile for future banking transactions, funds and government reviews.
Is GST Seeding Possible with Virtual Address?
Yes, GST seeding is possible at the virtual address, provided that all required documents and compliance conditions are met. In a virtual office, businesses can operate without a physical office, while simultaneously meeting GST registration and seed requirements.
1. Legal Use of Virtual Addresses for GST Registration:- Companies can register with virtual addresses as a main or additional office for GST legal registration. This is especially useful for startups, freelancers and remote companies who want to reduce costs.
2. Documentary requirements:- To enable seeding on a virtual address, you typically need to submit a valid document that includes rental agreements, certificates of counter (NOC), and discovery of the owner of the virtual office provider.
3. Bread and banking law compatibility:- As soon as your GST registration to your virtual address is complete, your PAN and bank account details will be available. There are no restrictions as long as the virtual address for the GST registration is accepted.
4. Reviews and compatibility:- GST officials can perform physical reviews. Virtual offices should display business name signs and have documentation for inspections to ensure smooth reviews.
5. ITC and Return Support Support:- GST registered virtual addresses allow businesses to deal with Inputu-Debris (ITC). This appeals to file returns and remains fully compliant with GST rules.
Virtual addresses are supported using PAN and bank accounts using well-documented GST seeds. This is a flexible and inexpensive option for businesses that are observed without traditional office costs.
Challenges in Seeding with Virtual Office
While virtual offices offer flexibility and cost savings, the use of GST seeds offers specific challenges that businesses must carefully navigate. It includes links to GST registration PAN and bank accounts, and requires this via virtual addresses that require strict compliance and documentation.
1. Document verification issues:- Many virtual offices provide general documentation that may not meet the specific requirements of the GST department. The seeding process may be delayed or denied without a valid rental agreement, NOC or proof of ownership.
2. Physical Review Risk:- GST officers have access to the address registered for checking. If the virtual office does not have a proper sign or the company name is not displayed, the application can be placed in a queue or cancelled.
3. Limited control on campus:- Since businesses do not function physically from virtual offices, they rely on third -party providers for timely communication, document handling, and inspection readiness, leading to a leading delay or compliance interval.
4. Difficulty in proving business activity:- Tax officials can seek evidence of commercial activity at a registered address. Virtual offices cannot often support such requests with on-site staff or real-time operations.
5. Bank seeding discrepancies:-Banks sometimes question the validity of the virtual office address during the verification of the account, which delays adding bank details with GST.
It is possible to seed GST with the virtual office, but require complete documentation, proper plan and active coordination with the office provider. Ensuring compliance at each stage can help businesses avoid delay and maintain a smooth registration and seeding process.
Benefits of Using a Virtual Office for GST Seeding
In the developed commercial landscape, virtual office startups have emerged as a practical solution for freelancers and expansion enterprises. One of their major benefits is his compatibility with GST seeding, including the GST registration of business with PAN and bank account details. Here are the five major benefits of using a virtual office for GST seeding:
1. Cheap compliance setup:- Virtual offices reduce the cost significantly by eliminating the requirement of the physical office space. This makes it easy for small businesses and startups to complete seeding without GST registration and heavy investment.
2. Legally acceptable trade address:- A virtual office offers a valid, professional business address that meets GST registration, PAN verification, and requirements for bank account linking, which ensures smooth seeds.
3. Document prepared for fast processing:- Most virtual office providers offer essential documents such as rental agreements, no objection certificate (NOC), and utility bills - to quickly and efficiently complete the GST seeding process.
4. Multi-state GST seeding capacity:- With the virtual offices available across India, businesses can register in many states, which can lead to state-wise GST registration and seedlings without the establishment of material branches.
5. Full GST compliance and ITC claims:- A GST-regulated virtual address allows businesses to claim obedience, file returns and input tax credit (ITC) just like a traditional office setup.
The virtual office provides a flexible, cost -effective and legally obedient method to complete GST seeding. The goal of skilling efficiently for modern businesses, this model ensures professional appearance and streamlining compliance.
Practical Tips for Businesses Using a Virtual Office for GST Seeding
Using a virtual office for GST seeding can be highly efficient by contacting correctly. Five practical suggestions have been made to help in giving maximum benefits to businesses, ensuring compliance:
1. Choose a reliable provider:- Select a virtual office provider with a solid reputation and experience in GST-related services. Check online reviews, ask for references, and ensure that the provider provides quick customer aid and clear documentation.
2. Verify the GST eligibility of the address:- Confirm that the address of the virtual office is valid for GST registration. The provider should have all legal permission and be able to issue essential documents such as rental agreements and NOCs.
3. Complete review of service agreement:- Go carefully through service agreements to understand the scope of services, obligations and duration. Ensure that it clearly defines responsibilities, especially about documentation for GST purposes.
4. Stay organized with records:- Maintain digital and physical copies of all related documents - compromise with the provider, utility bill, NOC, and correspondence - to support your GST application and future audit.
5. Prepare for physical verification:- Proper signage and documentation are available in the virtual office. If GST officials travel for verification, then keep in touch with the provider to coordinate.
FAQs
1. Can I use a virtual office for GST registration and seeding?
Yes, a virtual office can be used for GST registration and Beijing with legitimate documents such as rental agreements and NOC.
2. Has Virtual Office Address Accepted for PAN and Bank Seeding?
Yes, if the virtual address is approved for GST registration, it is generally accepted for linking PAN and bank account.
3. What documents are required for GST seeding through the virtual office?
You will need a rental agreement, NOC, GST certificate, PAN and bank details.
4. Will GST officers verify the virtual office?
Yes, physical verification can occur, so signage and documents should be prepared.
5. Is the ITC virtual office available with GST registration?
Yes, if all GST details are accurate and obedient.
Conclusion
A virtual office can effectively support businesses in completing GST seeding for PAN and bank accounts, provided all the necessary documents are accurate and obedient. By offering legally valid business addresses, a virtual office enables smooth GST registration, making it easier to expand enterprises to maintain compliance without the need for startups, remote teams, and virtual office space. With proper documentation such as rental agreements, NOCs and utility proofs, businesses can successfully combine their GST details with PAN and banking information. In addition, an obedient setup ensures access to benefits such as input tax credit (ITC) and time GST returns. In short, a virtual office is a practical, cost -effective solution for efficient GST seeding and regulatory rearing.
0 notes
Text
Angel One Demat Account Opening Process Guide Step by Step

Step-by-Step Guide to Angel One Demat Account Opening Process
Opening a Demat account has become essential for modern investors, and Angel One provides a seamless experience for anyone looking to invest in the stock market. If you're new to online trading or switching brokers, understanding the angel one demat account opening process is the first step. In this article, we’ll walk you through the entire procedure in a clear, structured, and easy-to-follow format.
Why Choose Angel One?
To begin with, Angel One is a trusted name in the Indian financial sector. It offers advanced tools, zero brokerage on delivery trades, and a user-friendly interface. Moreover, the brand has built a reputation for simplifying the Angel One account opening process, even for first-time users. Their tech-driven platform ensures that most procedures are completed online without any paperwork hassles.
Documents Required for Account Opening
Before you start the angel one demat account opening process, ensure that you have the necessary documents ready. These include:
Aadhar Card linked with your mobile number
PAN Card
A recent passport-size photo
Cancelled cheque or bank statement (for account verification)
Digital signature or live photo (captured during the process)
Although this may sound like a lot, each document plays a role in verifying your identity and enabling a secure trading environment.
How to Start the Angel One Demat Account Opening Process
To get started, visit the official Angel One website or download their app. Then follow these steps:
Sign Up Online: Enter your name, email, and mobile number. You’ll receive an OTP to verify your number.
Provide PAN and Bank Details: Next, enter your PAN card details and banking information for fund transfer purposes.
Complete eKYC Verification: Upload your documents and complete the eKYC by validating your Aadhar via OTP. This is a vital step in the angel one demat account opening process.
In-Person Verification (IPV): You’ll need to record a short video or click a live photo as part of the IPV step. It ensures authenticity and is now mandatory.
E-Sign Application: Finally, digitally sign the application using Aadhaar-linked OTP. Once you submit everything, your application goes into review.
Through each of these steps, Angel One ensures that the Angel One account opening process remains secure, fast, and fully digital.
What Happens After Submission?
After completing the process, you typically receive confirmation within 24–48 hours. You will be granted login credentials to access the Angel One trading platform. At this stage, you can begin trading and investing in stocks, mutual funds, IPOs, and more.
Importantly, the angel one demat account opening process is paperless and can be done from the comfort of your home. Additionally, you can track your application status directly on their portal, making it easy to stay informed.
Key Benefits of the Angel One Platform
Besides the ease of account opening, Angel One offers several features that benefit new and experienced traders alike:
Smart investing tools and real-time analytics
Free Demat account with no annual maintenance charges for the first year
Learning resources and stock market tutorials
Mobile-friendly interface for trading on-the-go
Thus, once you complete the Angel One account opening process, you gain access to a robust investment ecosystem.
Tips for a Smoother Account Opening
Double-check your Aadhaar and PAN details before starting
Make sure your Aadhaar is linked to your mobile number
Keep scanned copies of required documents in JPEG or PDF format
Use a high-speed internet connection for uninterrupted processing
Using these tips, the angel one demat account opening process can be completed even faster without errors or delays.
Conclusion
To summarize, the angel one demat account opening process is simple, fast, and entirely online. With a few documents and guided steps, anyone can begin their trading journey effortlessly. Whether you're a beginner or a seasoned investor, the Angel One account opening process is designed to get you started with minimal effort and maximum security. Take the first step today and unlock the potential of smart investing with Angel One.
#angel one account opening documents#angel one demat account opening process#angel one free demat account#how to open angel one account online#angel one open demat account#angel one pe demat account kaise khole#angel one account opening process
0 notes
Text
How to Self Attest Aadhar Card: A Step-by-Step Guide for Every Indian
The Aadhar card has become an essential identity document for every Indian citizen. Whether you're applying for a new SIM card, opening a bank account, or verifying your identity for government schemes, self-attesting the document is often required. But many people are unsure about how to self attest Aadhar card properly.
In this blog, we explain how to self attest Aadhar card, why it's important, and the best practices to follow—making the process simple and foolproof.
What is Self-Attestation?
Before diving into how to self attest Aadhar card, let’s understand what self-attestation means.
Self-attestation is the process of validating a photocopy of your original document by signing it yourself. It confirms that the copy is genuine and that you’re taking responsibility for its authenticity. It eliminates the need to get a document attested by a gazetted officer or notary in most everyday scenarios.

Why Self-Attest Your Aadhar Card?
Knowing how to self attest Aadhar card is important because it's commonly required for:
Bank KYC updates
SIM card verification
PAN card applications
Government subsidies or welfare programs
Job applications or document submissions
A self-attested Aadhar card copy ensures that your application won’t be rejected due to incomplete documentation.
How to Self Attest Aadhar Card: Step-by-Step Process
Let’s now walk through how to self attest Aadhar card correctly:
Step 1: Take a Clear Photocopy
Make a clear and legible photocopy of your Aadhar card (front and back if needed). Avoid using old, torn, or faded copies.
Step 2: Write "Self-Attested" on the Photocopy
On the front of the copy, write the words “Self-Attested” clearly. This can be written at the top or side, ensuring it doesn’t cover key details like your name, photo, or Aadhar number.
Step 3: Sign Below the Statement
After writing “Self-Attested,” sign with your full signature just below or near the statement. Use the same signature that appears on your official documents or bank records. If required, add the date as well.
🔹 Example: Self-Attested (Signature) Date: 14/06/2025
Step 4: Multiple Copies (If Required)
If you are submitting the Aadhar card to more than one agency, self-attest each photocopy separately. Never reuse the same signed copy.
Common Mistakes to Avoid
When learning how to self attest Aadhar card, be sure to avoid these common errors:
Using initials instead of your full signature
Covering the barcode, photo, or Aadhar number with the signature
Not writing “Self-Attested” clearly
Submitting an unsigned copy
Using someone else’s signature on your document
Each of these mistakes can lead to your application being rejected.
When is Self-Attestation Acceptable?
Now that you know how to self attest Aadhar card, it’s important to know when it is accepted. Self-attested copies are generally accepted by:
Government offices
Banks and financial institutions
Telecom companies
Educational institutions
Employers during document verification
However, some legal and official processes might still require notarized or attested copies by a gazetted officer. Always check the instructions provided by the requesting authority.
Conclusion
Understanding how to self attest Aadhar card is a simple yet important step in ensuring that your document submissions are processed smoothly. By following the right format—writing “Self-Attested,” signing clearly, and dating the document—you avoid unnecessary delays or rejections.
In today’s digital age, many applications still require physical documents, and self-attestation gives you control over your own document verification. So the next time someone asks for an Aadhar copy, you'll know exactly how to self attest Aadhar card confidently and correctly.
FAQs
Q1. Can I use a digital signature to self-attest my Aadhar card? No, a hand-written signature is required unless the platform specifically accepts digital signatures.
Q2. Is it necessary to self-attest both sides of the Aadhar card? Only if the back side contains relevant information. If in doubt, self-attest both sides.
Q3. Can someone else sign the Aadhar copy on my behalf? No. Only the person whose name is on the Aadhar card can self-attest it.
0 notes
Text
The Simple Guide: How to Self-Attest Your Aadhar Card
In India, whether you're applying for a new job, enrolling in an educational institution, opening a bank account, or availing a government service, you'll frequently be asked for a copy of your Aadhar card. More often than not, this copy needs to be "self-attested."
But what exactly does self-attestation mean, and how do you do it correctly? Don't worry, it's a very straightforward process that empowers you to certify your own documents without needing a third party.

What is Self-Attestation?
Self-attestation means that you, as the owner of the original document, personally certify that a photocopy of that document is a true and accurate replica of the original. Essentially, you're vouching for its authenticity with your own signature.
This process was introduced by the Indian government to simplify administrative procedures, reduce bureaucracy, and make it easier for citizens to submit documents without the hassle of finding a gazetted officer or notary public for every photocopy.
Why is Self-Attestation of Aadhar Card So Common?
The Aadhar card has become a universal proof of identity and address across India. Its widespread acceptance means it's required for a multitude of official and personal transactions. Self-attestation makes the process of submitting Aadhar copies quick and efficient for both you and the receiving authority. It’s a trust-based system where your signature carries the weight of authenticity.
You'll typically need to self-attest your Aadhar card photocopy for:
Job Applications: Both in the private and government sectors.
Educational Admissions: For schools, colleges, and universities.
Banking & Financial Services: Opening new accounts, KYC updates, loan applications, etc.
Government Schemes & Services: Applying for various benefits, subsidies, or permits.
Utility Connections: For electricity, water, gas, or internet connections.
Rental Agreements: Often required by landlords as proof of identity and address.
Step-by-Step: How to Self-Attest Your Aadhar Card
The process is incredibly simple and takes less than a minute. Here’s exactly what you need to do:
Obtain a Clear Photocopy of Your Aadhar Card:
Ensure the photocopy is neat, clear, and perfectly legible. All details – your Aadhar number, name, address, photo, and QR code – must be easily readable.
You can photocopy both the front and back of your Aadhar card onto a single page, or use separate pages if preferred by the requesting authority.
Locate a Blank Space on the Photocopy:
Find an empty area on the photocopy where you can write without obscuring any crucial information. The bottom or a side margin is usually ideal.
Write "Self Attested" or "True Copy":
Using a pen (preferably blue or black ink), write the phrase "Self Attested" or "True Copy" on the photocopy. Some people also write "Self-Attested True Copy." Any of these common phrases are generally accepted.
Affix Your Signature:
Directly below or beside the "Self Attested" phrase, sign your full signature.
Make sure your signature is clear and matches your usual signature.
Pro Tip: For added security and commonly accepted practice, try to sign partially across your photograph on the Aadhar card photocopy and partially on the blank paper. This links your signature directly to your identity on the document.
Add the Date (Recommended):
Below your signature, it's good practice to write the current date (DD/MM/YYYY). This indicates when you attested the document, which can
Important Reminders for Self-Attestation:
Only Photocopies: Always self-attest a photocopy, never the original Aadhar card itself.
No Alterations: Do not make any alterations or corrections to the original Aadhar card or its photocopy.
Legibility is Key: Ensure your writing and signature are clear and easy to read.
Carry Original for Verification: While a self-attested copy is widely accepted, always be prepared to show your original Aadhar card for verification purposes if requested by the authority. This is standard procedure to confirm the self-attested copy matches the original.
Digital Self-Attestation: For online applications, some portals might have a feature for digital self-attestation, where you upload a scanned document and apply a digital signature. Follow the specific instructions of the online platform in such cases.
Self-attesting your Aadhar card is a simple yet crucial step in many administrative and personal processes in India. By following these easy guidelines, you can ensure your documents are correctly authenticated, making your interactions smoother and hassle-free.
0 notes
Text
Addressing Aadhaar Grievances: A Case Study
Officer Name N Samay Balan Scientist, The applicant is thankful to the officer because he took the perusal of the contents of the grievance and thereafter submitted his report. Dear Resident, We sincerely apologize for the inconvenience you have experienced. We have carefully reviewed your feedback and have forwarded it to the appropriate team for immediate investigation. We will provide you…
#Fraudulent Aadhar authentication attempt#human rights#india#law#news#politics#public services#UIDAI
3 notes
·
View notes
Text
Udyam Aadhar: Empowering MSMEs Across India
India’s Micro, Small, and Medium Enterprises (MSME) sector plays a vital role in shaping the country's economic future. These businesses contribute significantly to employment, innovation, and exports. However, navigating the formal business landscape can be daunting for small entrepreneurs — which is where udyam aadhar comes in. This initiative from the Government of India simplifies registration and provides businesses with official recognition through a streamlined digital process.
Udyam aadhar is the modern identity system for MSMEs. It links an entrepreneur's Aadhaar number to their business, ensuring authenticity and offering access to government schemes and protections. Registering through the udyam registration portal gives businesses a formal identity, making it easier to access financial services, legal benefits, and government incentives.
One of the key aspects of udyam aadhar registration is its simplicity. The entire process is paperless and can be completed online. Entrepreneurs only need their Aadhaar number, PAN, and basic business information to get started. Once submitted, the system verifies the data in real time, and upon approval, issues a unique udyam registration certificate. This certificate is a digital document that can be used as proof of being a registered MSME. You can view what this certificate looks like here: udyam registration certificate.
Registering under the udyam aadhar framework is crucial for multiple reasons. First, it makes your business eligible for collateral-free loans under government-backed credit schemes. Many small business owners struggle to secure funding due to the lack of documentation or formal recognition. Udyam registration solves this by giving banks the confidence to offer loans to registered MSMEs. This improves working capital flow, enabling business expansion and sustainability.
Second, udyam registration online helps MSMEs benefit from priority sector lending and access to subsidies. Whether it’s assistance for machinery purchases, marketing, or technology upgrades, government schemes prioritize registered businesses. For example, if you're a manufacturer looking to upgrade to energy-efficient machines, you can apply for a subsidy — provided your business holds a valid Udyam certificate.
Another significant benefit lies in legal protection. Under the MSMED Act, registered enterprises can demand interest on delayed payments. Many small business owners face issues with clients or buyers delaying payments. With udyam aadhar registration, the law supports timely payment enforcement, helping businesses maintain healthy cash flow and avoid financial stress.
Udhyam registration also brings credibility to your enterprise. When you present yourself as a registered MSME, it boosts trust with customers, clients, and vendors. Additionally, it makes your business eligible for government tenders, which often require proof of MSME status. In a competitive landscape, this can be a game-changer, opening doors to larger contracts and long-term projects.
One of the common misconceptions is that only manufacturers can register under the Udyam system. In reality, it includes service providers, retailers, and even freelancers. Whether you run a digital marketing agency, a bakery, or a mobile repair shop — as long as your business meets the MSME criteria, you can register. This inclusive approach ensures that businesses of all types and sizes are empowered.
The udyam registration online portal also allows businesses to update their details easily. As your business evolves, you may need to update your investment or turnover data. The self-declaration model allows entrepreneurs to do this without external certification, keeping the process simple and transparent.
Additionally, the Udyam registration system is permanent — there is no need for annual renewals. Once you have your udyam registration certificate, it remains valid as long as the enterprise remains operational and meets the MSME classification. This eliminates unnecessary paperwork and lets you focus on growth rather than compliance.
The Indian government continues to integrate Udyam registration with other initiatives like GeM (Government e-Marketplace), TReDS (Trade Receivables e-Discounting System), and income tax portals, streamlining services and offering cross-platform benefits. This ensures registered MSMEs stay aligned with the digital transformation of the Indian economy.
Conclusion
The udyam aadhar framework is more than a registration process — it is a strategic initiative that empowers small businesses to grow, secure funding, and gain recognition. By completing your udyam registration, you unlock a world of opportunities including access to tenders, subsidies, and legal protection. Holding a valid udyam registration certificate is a mark of credibility and eligibility that no business owner should overlook. As India moves towards a more structured MSME ecosystem, being a part of it ensures your business thrives in a competitive environment.
1 note
·
View note
Text
HOW TO CHECK THE LEGALITY OF A USED LUXURY CAR?

HOW TO CHECK THE LEGALITY OF A USED LUXURY CAR?
Buying a used luxury car is an exciting decision, but it comes with certain risks. One of the biggest concerns is ensuring that the vehicle is legally owned, properly registered, and free from any financial or legal disputes. Many buyers fall into traps due to missing paperwork, outstanding loans, or stolen vehicles.To avoid such issues, it’s crucial to thoroughly check the legal documents before purchasing a second-hand luxury car. This guide will walk you through all the necessary paperwork, ownership verification steps, and red flags to look for when buying a used high-end vehicle.
1. Verify the Seller’s Identity and Ownership Documents
The first step in ensuring a legal purchase is verifying the seller's authenticity and the ownership details.
Ask for the following documents:
A. Original Registration Certificate (RC Book)
The RC book is the primary proof of ownership.
It should be original (not a photocopy) and list the current owner’s name.
Check if the vehicle is registered as a private or commercial vehicle.
Ensure the registration number, chassis number, and engine number match the details on the car.
B. Government-Issued ID of the Seller
Ask for the seller’s government-issued ID (passport, driver’s license, or Aadhar card).
Cross-check the name on the ID with the name on the RC book to ensure the seller is the rightful owner.
C. Sales Receipt or Previous Sale Agreement
If the car was purchased second-hand before, ask for the previous sale agreement to confirm its ownership history.
D. No Objection Certificate (NOC) from the RTO
If the car is registered in a different state, you need an NOC from the Regional Transport Office (RTO) to transfer ownership.
to know more, visit... https://themotorpedia.com/blog/how-to-check-the-legality-of-a-used-luxury-car/8e6042a8218336aefa1f63217a7a3e56
0 notes
Text
How to Open an Online Bank Account for Free and Start Saving Instantly
The ability to open a bank account online has revolutionized the way people manage their finances. Gone are the days of long queues at the bank and mountains of paperwork. Whether you need a simple savings account or a more comprehensive digital banking solution, the process is now faster, easier, and can be done completely online.
In this article, we will guide you through how to open a bank account online for free, the benefits of doing so, and how you can get started with your financial journey without any hassle.
What Does It Mean to Open a Bank Account Online for Free?
When we talk about opening a bank account online for free, it generally means that the account does not require an initial deposit or a minimum balance to be maintained. Additionally, there are no hidden fees or charges for account maintenance, making it an ideal option for anyone who wants to start managing their money with ease.
Once you open an account, you can access it via a mobile banking app or through an online portal, where you can track your spending, transfer funds, and even set up an instant FD account if you're looking to grow your savings.
Why Open a Bank Account Online for Free?
There are several reasons why opening a bank account online for free makes perfect sense. Let’s take a look at some of the top benefits:
1. No Initial Deposit Required
One of the most significant advantages is the zero balance account feature. Unlike traditional savings accounts, you don't need to deposit a lump sum amount upfront. This flexibility is ideal for people who want to start saving without the worry of keeping a minimum balance.
2. Convenience of Online Setup
You can complete the entire account setup process from your smartphone or computer in just a few steps. No need for physical visits to the bank, saving you both time and effort.
3. Access to Digital Banking Tools
With mobile banking apps, you can monitor your account, check your balance, transfer funds, make UPI payments, and even set up automatic payments or bills, all from your phone.
4. Security and Convenience
Banks that offer online account openings have robust security features like two-factor authentication and encrypted data, ensuring that your personal and financial information is safe. Plus, you can do everything from your device, making it an extremely convenient option.
Step-by-Step Guide: How to Open a Bank Account Online for Free
Now, let’s break down the steps involved in opening a bank account online for free. It’s a simple, straightforward process:
Step 1: Choose the Right Bank
Research banks offering free online account openings. Compare their features, such as mobile banking apps, interest rates on savings, instant FD account setup, and other services to determine the best fit for your needs.
Step 2: Download the Mobile Banking App or Visit the Website
Once you’ve selected a bank, download their official mobile banking app or go to their website. Most banks will have a user-friendly portal that guides you through the process.
Step 3: Fill Out the Application Form
Complete the online application form with your basic details, such as your name, contact information, and address. You’ll also need to provide identification documents like:
Aadhar card
PAN card
Passport or voter ID
Step 4: Submit KYC Documents
For verification purposes, you will need to submit your KYC (Know Your Customer) documents online. Many banks allow you to upload scanned copies or photographs of your documents directly on the app or website.
Step 5: Complete the E-KYC Process
E-KYC is an electronic verification process that banks use to confirm your identity. This typically involves receiving an OTP (One Time Password) on your registered mobile number or email. Once you verify it, the process moves forward.
Step 6: Activate Your Account
Once your documents are verified, your account will be activated. You will receive your account details via email or SMS, and you can start managing your finances immediately.
Advantages of Online Bank Account Opening
1. No Hidden Fees
With online bank accounts, most banks offer zero balance accounts with no hidden fees or charges. You only pay for the services you use, like ATM withdrawals or certain premium features.
2. Accessibility
Once your account is set up, you have immediate access to mobile banking, where you can check your balance, transfer money, or even set up automatic savings plans. You’re in full control of your finances.
3. Instant Setup for Fixed Deposits
Many online banks allow you to set up an instant FD account directly from the app. This means you can invest in fixed deposits right after opening your bank account, helping you grow your savings without much effort.
4. Banking on the Go
The convenience of mobile banking means that you don’t have to wait until you get home or visit a branch to complete a transaction. Everything can be done on your smartphone, whether it’s sending money to someone, paying bills, or even checking your FD interest rate.
Security Features for Online Bank Account Opening
While opening an account online is incredibly convenient, security is always a top concern. Fortunately, banks that offer online account opening have implemented several layers of protection:
1. Two-Factor Authentication (2FA)
To secure your transactions, banks require you to verify your identity with an OTP (sent to your phone or email) or through biometric recognition.
2. Data Encryption
Banks use encryption technology to protect your personal and financial information. This ensures that even if someone tries to access your data, they won’t be able to read or misuse it.
3. 24/7 Monitoring
Many banks offer round-the-clock fraud detection systems that monitor your account for any suspicious activity. If any unusual transactions occur, the bank will immediately notify you.
Conclusion
Opening a bank account online for free is a fast, easy, and secure way to start managing your finances. With no initial deposit, easy access to digital tools, and the ability to set up instant FD accounts, online banking offers unparalleled convenience.
So, whether you're a student, a professional, or someone who wants to make managing money easier, opening a bank account online is the first step toward a financially secure future.
#0 account opening bank#0 balance account open online#0 balance account opening#0 balance account opening bank#0 balance bank account open online#0 bank account opening#account balance check#account check karne wala app#account online open#account open 0 balance#account opening#account opening app#account upi payments#application for account opening in bank#application for opening bank account#apply for bank account online#apply for savings account#apply for savings account online#bachat khata#bank account check
0 notes
Text
Gazette Notification for Name Change – Complete Process and Guide
If you're planning to legally change your name, understanding the gazette notification for name change is essential. This official process is recognized by government authorities and is required for updating your identity across various documents. Whether you're doing it for personal, professional, or legal reasons, publishing a gazette notification for name change ensures that your new identity is formally acknowledged. One of the most common updates after a name change is on your Aadhaar card. The gazette notification for name change in Aadhar card is a critical step in ensuring your UIDAI records are updated without any issues. This process involves submitting supporting documents along with your gazette copy to authenticate the change. From drafting an affidavit to submitting the application to the Department of Publication, our guide walks you through every detail of the gazette notification for name change process, helping you avoid delays and mistakes. Whether you're changing your first name, last name, or making corrections, this legal procedure secures your new identity with clarity and credibility.

0 notes
Text
What Are the Legal Benefits of Marriage Registration in India?

Marriage is a beautiful union that not only connects two hearts but also ties two lives legally, socially, and emotionally. While traditional wedding ceremonies are rich in culture and rituals, registering your marriage gives it formal legal recognition. This step might seem like just another document to tick off your wedding to-do list, but it’s much more than that. Legally registering your marriage comes with many long-term benefits and protections that you might not even be aware of.
This is where professional help comes in handy especially if you’re getting married in a city like Chandigarh. If you’re feeling overwhelmed by paperwork or unsure where to begin, Marriage Registrar Consultants in Chandigarh like Gupta Document Centre make the process smooth, fast, and stress-free. Their team guides couples through every legal step, ensuring everything is done correctly and efficiently, without the usual hassle of government procedures.
Why Is Marriage Registration Important?
In India, marriage can be registered under the Hindu Marriage Act, 1955 or the Special Marriage Act, 1954, depending on your religion and the type of marriage ceremony performed. Regardless of the act under which you register, having an official marriage certificate is a legal safeguard for both partners.
Key Legal Benefits of Marriage Registration in India
1. Official Proof of Marriage
The marriage certificate acts as conclusive proof of your relationship. It is required for many legal processes such as applying for a passport, visa, opening a joint bank account, or applying for insurance claims.
2. Protection of Rights
In case of disputes like separation or divorce, a registered marriage can help protect the rights of both spouses. It provides legal clarity regarding property, alimony, and child custody matters.
3. Simplified Visa and Immigration Process
If you’re planning to move abroad or apply for a spousal visa, embassies and consulates typically ask for a government-issued marriage certificate. Without this document, your application might be rejected or delayed.
4. Eligibility for Spousal Benefits
Registered marriages enable spouses to claim legal benefits such as inheritance rights, pension, and insurance benefits. It becomes easier to nominate your partner as a beneficiary in financial instruments or policies.
5. Social and Legal Acceptance
In some cases, especially for inter-religious or inter-caste marriages, registration provides legal security and social legitimacy. It becomes harder for anyone to question the authenticity or validity of your relationship.
How to Register Your Marriage
Registering your marriage might involve multiple visits to the registrar's office, paperwork, and following up on government timelines. This is where services like Gupta Document Centre come in handy. Their team offers end-to-end support for couples who want to make the process easy and error-free.
From checking your eligibility under the right marriage act to ensuring your documents are correct and complete, Marriage Registrar Consultants in Chandigarh help you avoid delays or rejections due to paperwork issues.
Documents Required for Marriage Registration
While the exact list may vary slightly depending on the marriage act, here are the common documents you’ll need:
Address proof of both partners (Aadhar card, passport, voter ID, etc.)
Date of birth proof (birth certificate, 10th mark sheet, passport)
Photographs of the couple
Wedding invitation card or proof of ceremony
Two witnesses with ID proof
Gupta Document Centre ensures you’re not left guessing— they assist in document verification and provide you with a clear checklist tailored to your situation.
When Should You Register Your Marriage?
For Hindu marriages, registration should ideally happen within 60 days after the wedding ceremony. Under the Special Marriage Act, the registration process must begin before the wedding, as it includes a 30-day notice period. Your consultants will guide you on the appropriate timing based on your religion and preferences.
Why Choose a Professional Consultant?
Legal processes can be intimidating, especially if you’re not familiar with bureaucratic requirements. Choosing a trusted name like Gupta Document Centre ensures peace of mind. They help you:
Choose the right legal act for registration
Prepare the documentation properly
Schedule and attend your appointment at the marriage registrar office
Avoid rejections and long wait times
They also maintain transparency in pricing and timelines, so you know what to expect every step of the way.
Final Thoughts
Registering your marriage might not be the most glamorous part of getting married, but it’s definitely one of the most important. It’s a step that protects your relationship, strengthens your legal standing as a couple, and offers numerous practical benefits in both your personal and professional lives.
Whether you’re newlyweds, planning to get married, or even married for years but haven’t registered yet, now is a great time to get it done. And if you’re in or around Chandigarh, trust the experts reach out to Gupta Document Centre and let their experienced Marriage Registrar Consultants in Chandigarh handle the details while you focus on your beautiful journey ahead as a couple.
0 notes