#amd64
Explore tagged Tumblr posts
Visit Tumblr Blog
Explore Tumblr blogs with no restrictions, modern design and the best experience.
Last Seen Tumblr Blogs


Fun Fact
The Tumblr app for Google Glass was released on May 16, 2013.
Text
Razer Nostromo Linux Drivers 1.0
Linux drivers are only but a step in the right direction. With the up and coming Steam client coming and the potential of Electronic Arts (EA) divulging news about Linux support, we are bound to see more hardware support. The Razer Nostromo is a gaming mini-keyboard that provides remapping of keys to any keyboard or mouse event. This is great; however, the drivers are only available for OSX and Windows. Not anymore, the jnostromo project aims to provide GNU/Linux drivers that provides E-Sport legal keymappings for Linux gamers everywhere. The feature set is similar to the official drivers with the elimination of macro’s. Download the amd64 drivers here Note, 32-bit drivers will be available in up-coming releases. Also, the configuration gui is cross platform capable. So check it out!

by Crusader @LinuxGames.com

#32 bit#amd64#download#esport#gaming on linux#gnu#jnostromo#keymapping#linux#linux drivers#linux game news#linux games#linux gaming#nostromo#razer#razor nostromo#news
2 notes
·
View notes
Text
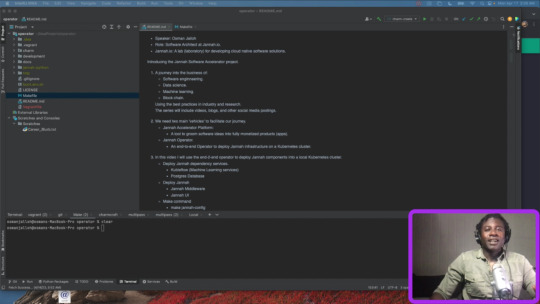
DevOps with Artificial Intelligence, Automation, and Blockchain: Introductory Part 5
This is part 5 of our introductory series.
Video Highlights The operator generally have a way to see what’s deployed. The operator can fire events based upon changes in the deployment. Using Python to manage the overall process. An event hook experiment: Packing the operator code base into a charm bundle (Docker Ubuntu image). Creating a Charmfile, by subclassing the Charmbase class in the ops Python module. Python routines (functions)…

View On WordPress
#AI#algorithms#amd64#android#ansible#application#architecture#arm64#automation#blockchain#boot#cloud#compute#concept#container#databases#deep#design#dev#development#devOps#dive#django#docker#docker-desktop#engineering data#experience#experiment#graphene#intel
1 note
·
View note
Text
New Post has been published on 나만의 세상~!
New Post has been published on https://blog.seabow.pe.kr/?p=8374
ubuntu Local Repository 생성
# sudo apt-get install dpkg-dev
dpkg-dev 패키지 설치 ( 먼저 레포지토리를 작성할 패키지를 먼저 다운받로 dpkg-dev 를 설치 하는것을 권장함. )
# sudo mkdir -p /tmp/repo
로컬 레포지토리를 구성할 디렉토리를 생성
–download-only 옵션을 이용하여 패키지를 다운로드 받는 경우 /var/cache/apt/archives 경로에 다운을 받게됨.
# cp /var/cache/apt/archives/*.deb /tmp/repo
# cd /tmp/repo
### i386 아키텍쳐 레포지토리 생성
# mkdir i386
# dpkg-scanpackages -a i386 . /dev/null | gzip -9c > i386/Packages.gz
### amd64 아키텍쳐 레포지토리 생성
# mkdir amd64
# dpkg-scanpackages -a amd64 . /dev/null | gzip -9c > amd64/Packages.gz
file : /etc/apt/source.list
deb [trusted=yes] file:/tmp/addpkg/ i386/
deb [trusted=yes] file:/tmp/addpkg/ amd64/
참고 :
Link : https://askubuntu.com/questions/170348/how-to-create-a-local-apt-repository
1 note
·
View note
Text
Troubleshooting Steam on Debian Sid 64bit
Note: Following info is potentially dangerous and you might end up removing your entire graphical subsystem and having to install it again.
steam depends on packages from the i386 architecture. Enable i386 repositories if you haven't done so:
sudo dpkg --add-architecture i386 sudo apt-get update
Sid is a quickly evolvin distro and steam might encounter errors when installing its dependencies. In order to solve them, try using a more intelligent apt package manager called aptitude.
When you encounter dependency errors, try installing requirements like this:
sudo apt-get update sudo aptitude install libgl1-mesa-dri:i386 libgl1-mesa-glx:i386 libc6:i386
Be careful! aptitude will probably give you the choice to remove your entire X server. **If it does, Say no! **
The following actions will resolve these dependencies: Remove the following packages: <220 packages listed> Accept this solution? [Y/n/q/?]
If you get such a big software removal question, REJECT IT by pressing n.
Press n until aptitude asks to remove only a few packages and upgrade a few packages. Accept this by pressing Y
Let aptitude do its work, then run steam again. This should fix your dependencies by updating only the necessary packages and deleting only a few old ones.
1 note
·
View note
Photo


AMD K8 'Hammer' microarchitecture - 2003
130 nm, 193 mm² die size, 105.9 million transistors
1 note
·
View note
Link
The contents
Lesson 01. What 64-bit systems are.
Lesson 02. Support of 32-bit applications.
Lesson 03. Porting code to 64-bit systems. The pros and cons.
Lesson 04. Creating the 64-bit configuration.
Lesson 05. Building a 64-bit application.
Lesson 06. Errors in 64-bit code.
Lesson 07. The issues of detecting 64-bit errors.
Lesson 08. Static analysis for detecting 64-bit errors.
Lesson 09. Pattern 01. Magic numbers.
Lesson 10. Pattern 02. Functions with variable number of arguments.
Lesson 11. Pattern 03. Shift operations.
Lesson 12. Pattern 04. Virtual functions.
Lesson 13. Pattern 05. Address arithmetic.
Lesson 14. Pattern 06. Changing an array's type.
Lesson 15. Pattern 07. Pointer packing.
Lesson 16. Pattern 08. Memsize-types in unions.
Lesson 17. Pattern 09. Mixed arithmetic.
Lesson 18. Pattern 10. Storage of integer values in double.
Lesson 19. Pattern 11. Serialization and data interchange.
Lesson 20. Pattern 12. Exceptions.
Lesson 21. Pattern 13. Data alignment.
Lesson 22. Pattern 14. Overloaded functions.
Lesson 23. Pattern 15. Growth of structures' sizes.
Lesson 24. Phantom errors.
Lesson 25. Working with patterns of 64-bit errors in practice.
Lesson 26. Optimization of 64-bit programs.
Lesson 27. Peculiarities of creating installers for a 64-bit environment.
Lesson 28. Estimating the cost of 64-bit migration of C/C++ applications.
3 notes
·
View notes
Text
What is x86-64? | Definition from TechTarget
What is x86-64? x86-64 (also called x86_64, x64, or amd64) is the 64-bit CPU architecture that is used in Intel and AMD processors. It is an extension to the 32-bit x86 (i386) architecture. The x86-64 architecture is used in most CPUs for home computers and servers in use today. It is incompatible with the ARM64 architecture, which is in use in smartphones, Apple computers and some…

View On WordPress
0 notes
Text
DevOps with Artificial Intelligence, Automation, and Blockchain: Introductory Part 4
Video Highlights– The introductory video is based on experiments done as proof of concept (POC) to validate the ‘Operator Idea’ for Jannah infrastructure.– Proofed items include: a) We can use the Juju Python framework to implement Kubernetes operators. b) We can use Python at runtime to trigger Ansible playbooks and/or roles. c) The actual steps executed by the operator can be implemented as…
youtube
View On WordPress
#AI#algorithms#amd64#android#ansible#application#architecture#arm64#automation#blockchain#boot#cloud#compute#concept#container#databases#deep#design#dev#development#devOps#dive#django#docker#docker-desktop#engineering data#experience#experiment#graphene#intel
1 note
·
View note
Text
Ubuntu 19.10 要放掉 i386 架構
Ubuntu 19.10 要放掉 i386 架構
Ubuntu 19.10 版將不再支援 i386 架構了:「i386 architecture will be dropped starting with eoan (Ubuntu 19.10)」。
查了一下 x86-64 條目,AMD 的第一個 x86-64 版本是在 2003 年四月推出的:
The first AMD64-based processor, the Opteron, was released in April 2003.
Intel 則是在 2004 年六月推出:
The first processor to implement Intel 64 was the multi-socket processor Xeon code-named Nocona in June 2004.
但是 mobile 版的是 2006 年七月:
The first Intel…
View On WordPress
0 notes
Link
In this article, I've collected a huge amount of links all of which could prove potentially useful to software developers who are getting acquainted with 64-bit world. In general, we will cover C/C++ languages, but I am sure, that developers from other languages will discover a lot of interesting stuff here as well.
1 note
·
View note
Text
Emulando MacOS X en Windows XP sobre un AMD64
Probablemente la mayoría de usuarios de Windows nunca hemos probado MacOS X, ni siquiera ahora que existe la versión para procesadores Intel del sistema. Sin embargo sin alterar en lo más mínimo nuestro sistema actual es muy simple instalar y ejecutar MacOS X sobre VMWare Workstation, en Windows XP y más encima, corriendo sobre un AMD64
Ingredientes
· Disco de MacOS X 10.4 o superior para procesadores Intel · VMWare Workstation 5.0 o superior · Suficiente ram y disco duro (512MB y 7GB o más)
Preparación paso a paso
En mi caso, usaré mi pc de escritorio para probar este sistema operativo. Por supuesto es de esperar una merma considerable de rendimiento del sistema operativo al ser emulado completamente. 2.1) Primero preparamos el equipo para Mac OS. Lo principal es asignar suficiente memoria para este sistema operativo, yo configuré 384 MB de ram disponible para la máquina virtual y un total de 6 o 7 GB de disco (asignando el espacio fijo para ganar un poco de rendimiento): 2.2) Luego, insertamos el DVD de MacOS X e iniciamos nuestra máquina virtual, desde el lector de DVD claramente. Con un poco de paciencia el instalador inicia en unos minutos: 2.3) Para poder instalar el sistema operativo lo primero es formatear el disco con la utilidad llamada "Disk Utility" la cual invocamos desde el menú herramientas del instalador. En esta herramienta seleccionamos el disco duro correspondiente y creamos un esquema de una partición en formato "Mac OS Extended (Journaled)" utilizando toda la capacidad disponible: 2.4) Luego aceptamos y seleccionamos el disco particionado como destino de la instalación. Antes de iniciar la copia de archivos podemos personalizar los archivos y complementos del sistema, para obtener un rendimiento superior eliminé muchas de las aplicaciones las cuales podemos instalar posteriormente insertando el disco de instalación nuevamente y seleccionando "actualización" como modo de instalación, de manera similar como los instaladores ".msi" en Windows: 2.5) Iniciamos la copia de archivos. Al final del proceso se reiniciará automáticamente: 2.6) Ya estamos casi dentro de nuestro Mac, solo falta completar algunos datos: 2.7) Bienvenido a Mac OS X: http://www.youtube.com/watch?v=DWdF26MigJA 2.8) ¿Protector de pantalla?:
Conclusiones
El rendimiento de Mac OS X es sorprendentemente superior a lo imaginado, me atrevería a decir que en ocasiones al colocar la máquina virtual a pantalla completa uno puede olvidarse de que realmente es una emulación. Respecto a Mac OS X poco se puede decir para las pocas horas que llevo jugando en el sistema. Es estéticamente casi perfecto, muy intuitivo (salvo ciertas combinaciones de teclas) y muy estable. [quote style="boxed"]Destacaría características como Exposé y sus impactantes organizaciones gráficas de ventanas y efectos, y la sorpresiva velocidad de SpotLight que menoscaba totalmente los esfuerzos del nuevo motor de búsqueda del beta de Windows Vista, basado en tópicos similares de indexación de contenido.[/quote]
0 notes
Text
Stack Frames
I was studying a coroutine library, which made me inspect the SysV calling convention. So, without much explanation whatsoever, I will dump this ascii drawing of how the frame of a function looks like.
Assuming you have pushed 'previous' rbp, the n-th memory argument eightbyte is at location [8*n + rbp+16].
The end of argument memory argument area, including the return address, is aligned to 16 byte boundary (unless __m256 is passed, then aligned to 32 bytes)
Locations [rsp .. rbp) holds locals. margs hold arguments passed by memory as opposed to registers, chunked into 8 bytes according to rules in the SysV specification. Ret is the return address. It's always passed via memory. loc1 is just a local variable for example. RED is a 128 byte region and called the 'red zone'. It's a region that the function can use for data that doesn't have to persist across function calls.
+-----+ -------------+ |margN| | +~+~+~+ <--- rbp + 16 + 8*N | | | | +-----+ | |marg0| | Caller's frame +-----+ <--- rbp + 16 | | Ret | | +-----+ <--- rbp + 8 (aligned to 16 bytes) -----+ <---- rsp on entry. | rbp'| | +-----+ <--- rbp | |loc1 | | +-----+ | | | | +~+~+~+ | Callee's frame | | | +-----+ <--- rsp | | | | | RED | | | | | +-----+ <--- rsp - 128 -------------+
Notes -
That push rbp, then mov rbp, rsp, sequence is called the 'prologue'. It's what enables a debugger to step through parent function frames.
If you do not modify rsp on entry i.e push rbp and/or expand the frame by decrementing rsp, then rsp would point to the return address, as you can see. So no need to put an 'epilogue' like
mov rsp, rbp
pop rbp
before the ret instruction.
A leaf function can use the red zone as its entire frame (if size is enough).
0 notes
Link
カーニハンの「ディジタル作法」の05章では、 入力値の足しあわせプログラムを多言語で紹介���ているが、 これはそのamd64アセンブリ版。
05章のC版を64bit化したもので、 main関数をlibcの関数scanfとprintfを使って実装してある。
0 notes
Text
DevOps with Artificial Intelligence, Automation, and Blockchain: Introductory Part 7
Video Highlights: This marks the conclusion of our introductory videos. Watching Jannah’s services come into ‘running’ state with the following command: kubectl get -w pods -A Counting the number of services that are up and running with: kubectl get -w pods -A | wc -l Take home points: We have Ansible Playbooks. The Playbook roles contain tasks to deploy our infrastructure to a K8…
View On WordPress
#AI#algorithms#amd64#android#ansible#application#architecture#arm64#automation#blockchain#boot#cloud#compute#concept#container#databases#deep#design#dev#development#devOps#dive#django#docker#docker-desktop#engineering data#experience#experiment#graphene#intel
0 notes