#and a can of chopped tomatoes let it cook then blitz it with a stick blender spoon it over some pasta and hope its not the worst
Text
It's miscellaneous vegetables pasta sauce time!
#ace tries cooking#truly my least favourite part about moving out for the summer is the bits and bobs meals that come about from trying to use up food#cant really buy anything new so youre just left trying to work with what youve got left#and sometimes its fine! ya know its just things you normally eat thats why you have all those components already#but sometimes its i had too many carrots left over from this recipe and ran out of this usual component typa concoctions#but the worst is when i gotta clear out all the vegetables in my freezer and i just chop em all up throw em in a pot with seasonings#and a can of chopped tomatoes let it cook then blitz it with a stick blender spoon it over some pasta and hope its not the worst#shoulda bought some cheese to top it off but i forgot 😞
4 notes
·
View notes
Text
Lentil and Walnut Bolognese Lasagna

Let’s dive right into a classic favourite – Lasagna. I mean, who doesn’t have a soft spot for those layers of pasta, sauce, and deliciousness?
This isn’t your typical Bolognese Lasagna. This is my plant-based/vegan bolognese version that’s about to give your taste buds a wholesome ride. So, let’s get cooking and create a masterpiece that’s not just delicious but also packed with goodness.
We introduced you to a Lentil and Walnut Bolognese sauce a week back on our website and YouTube channel Did you give it a go? Well, that’s our star player here, and if you missed it, don’t worry – the sauce recipe is repeated here for youalongside this sauce, we’re introducing a creamy Béchamel/Cheesy Sauce that will elevate your lasagna .
To make the Bolognese start by creating a walnut crumb using your blender. Then, gently blend mushrooms to create a mince-like texture that adds a hearty dimension to your sauce.Sauté diced onion and garlic in olive oil until they release their enticing aroma. Add the mushroom-walnut mix and let the flavours develop.Enhance the sauce with white or red wine, a dash of salt, and Italian herbs. Allow the symphony of flavours to deepen for a few minutes.Add cooked lentils to the mix. They bring protein and fibre to the sauce, creating a satisfying and nutritious foundation.Pour in the tomato passata, a concentrated source of lycopene and vitamins. Let the sauce simmer, infusing your kitchen with a tantalizing aroma.Finally, toss your cooked spaghetti in the sauce, ensuring every strand is coated with the rich goodness you’ve created.
Prep time: 30 minutes
Cook time: 1 hour
Total time: 1 hour and 30 minutes
Serves: Enough for 8-10 people
Ingredients
Bolognese Sauce
1 cup walnuts
1 cup chopped white mushrooms
1 onion
4 cloves garlic
3 tablespoons olive oil
1/2 cup white or red wine (optional)
1 teaspoon salt
1 teaspoon Italian herbs
1 cup cooked French lentils/Puy lentils
3 1/2 cups tomato passata (or one bottle)
Ingredients
Bechamel/Cheesy Sauce
1 potato (230 grams)
1 sweet potato (200 grams)
1 onion
½ cup raw cashews
1 teaspoon salt
1 teaspoon garlic powder
3 tablespoons nutritional yeast
¼ to ½ cup water (this will be the water reserved after boiling your vegetables)
Lasagna
24 small size lasagna sheets
200 grams vegan mozzarella (vegan or diary)
½ cup parmesan cheese (vegan or diary)
Method
Bolognese Sauce
Place walnuts in blender and blitz until they form a crumb. About six seconds on high speed should be enough.
Chop mushrooms in half and then blend slowly to form a mince like texture. careful not to over blend and turn it into a paste. Blend together for 6 – 10 seconds. Set aside
Dice onion and garlic finely.
Sauté onion and garlic in saucepan with olive oil until translucent.
Add the mushroom and walnut mince to the onion and garlic. Stir trough and cook until the mushrooms start to soften (probably 2 – 4 minutes) depending on strength of stove. If you mixture is quite dry you can add some extra olive oil (I’m a huge fan of olive oil, especially in Italian dishes)
Add wine, salt and mixed herbs and cook another four minutes
Pour in passata and cook on medium heat for approximately 20 mins. Then add your cooked lentils.
Check the sauce as it cooks and stir frequently so that it doesn’t stick to bottom of the saucepan.
Method
Lasagna
To make the béchamel, peel potatoes and chop into large chunks. Also chop onion in large chunks. Then place potatoes, onion and cashews in a pot of boiling water and boil until soft and tender.
Once boiled, strain (keeping one cup of boiled water aside) then place in a food processor with the salt, garlic powder, nutritional yeast and 1/4 cup of reserved boiling water. Blend until smooth and creamy. Add more reserved water if it's not smooth enough
To build the lasagana, place a thin layer of bolognese sauce on the bottom of your tray, just enough so that the tray is thinly covered. Then place6 lasagna sheets on top of the sauce. Cover your sheets with a layer of bolognese sauce and then about two ladles of bechamel sauce then top with a small amount of vegan mozzarella.
Continue this process and build the lasagna with four layers.
Bake in oven for 30 minutes at 180 degrees.

Equipment you Need
Saucepan for sauce
Second saucepan for cheesy bechamel
Strainer
Wooden spoon
Bender or food processor
Tray for baking the lasagna
Grater for the mozzarella
Now to craft the Béchamel/Cheesy Sauce Let’s start by peeling and chopping a regular potato and a sweet potato into generous sizes. The same goes with theonion – chop it up into large pieces. Boil these potatoes, sweet potato, onion, and some raw cashews until they become tender and soft. Once boiled, strain (reserving a cup of boiled water), and into the food processor they go. Add a teaspoon of salt, a dash of garlic powder, three tablespoons of nutritional yeast for that cheesy flavour and about a quarter cup of water. Blend away until you achieve a smooth, creamy concoction. If the texture isn’t smooth enough, add more of the reserved water until it reaches a smooth, like consistency.
Now comes the fun part – assembling our lasagna. Start with a thin layer of the Lentil and Walnut Bolognese Sauce coating the bottom of your baking tray. Just enough to create a delicious foundation. Then, arrange four to six lasagna sheets on top (depending on the size of your sheets. Often I have to snap some sheets to get them to fit. Top the lasagna sheets with a generous layer of our bolognese sauce and a generous size ladle of the Béchamel/Cheesy sauce. Using a spatula blend these two sauces together to cover the pasta. Add your mozzarella and parmesan cheese. You can opt for vegan options or dairy here.
The layering continues. with another three layers of your pasta sheets bolognese, chesey béchamel sauce and more mozarellaIn total create four layers – I find that to be the perfect amount.
Now, it’s time to let the magic happen. Preheat your oven to a toasty 180 degrees, Let it bake for around 30 minutes, while your kitchen gets wrapped in the Italain aroma .
As you take your pant-based Lasagna out of the oven, let it rest a few minutes before cutting it up – I know that’s the hard part – waiting!
Let’s quickly chat about health benefits these ingredient, because as you know I’m all about health and vitality. Walnuts, offer a dose of heart-healthy fats, omega-3 fatty acids, and antioxidants, enhancing brain health and promoting overall well-being. Mushrooms provide a unique umami flavour and a wealth of nutrients, including vitamin D, selenium, and immune-boosting compounds. With every mouthful of this lasagna, you’re not just indulging – you’re nourishing your body.
youtube
Frequently Asked Questions
Is it freezable?
Absolutely! Freezing your lasagna is a fantastic way to have a convenient and delicious meal ready whenever you need it. Here’s how you can do it:
Prepare your sauce and bechamel.
Assemble your lasagna in a freezer-proof dish, such as ceramic or glass. Cover with a lid or sealed tight with glad wrap or alfoil and place in freezer on flat surface.- When you’re ready to cook, you can either bake the frozen lasagna directly from the oven or thaw it out first.
If baking from frozen, extend the cooking time by an extra 10 t minutes.
Alternatively, consider using disposable foil containers with lids to create individual portions of lasagna that you can freeze and cook whenever you crave it.
Can I use different nuts for the creamy bechamel?
Certainly! If you’re not a fan of cashews, there are other nuts that can work wonders in creating that luxurious creaminess you’re looking for. Some options include:
Almonds without the skin.
Macadamia nuts.
These nuts give it a light and creamy texture that can elevate your bechamel to perfection. However, if you prefer a nut-free version, you can omit the nuts altogether. The sweet potato, potato, and onion in the recipe provide a solid base for a deliciously creamy outcome.
What if I don’t like nuts?
No worries at all! If you’re not a nut enthusiast, you can still enjoy a scrumptious plant-based lasagna. The nuts contribute to the creamy texture of the bechamel, but you can easily remove them from the equation. The combination of sweet potato, potato, onion, and other delightful ingredients will ensure your lasagna remains delectably satisfying.
How do I achieve the perfect lasagna texture?
To achieve that perfectly textured lasagna, ensure that you layer the lasagna sheets, bolognese sauce, and creamy bechamel generously. The moisture from the sauces will help cook the lasagna sheets, resulting in that ideal softness.
Can I use whole wheat lasagna sheets?
Absolutely! Whole wheat lasagna sheets are a fantastic option for those seeking a higher fiber content. They will work wonderfully in this recipe, providing a wholesome twist to your plant-based lasagna experience.
Can I prepare the lasagna in advance?
Definitely! Preparing your lasagna ahead of time can be a time-saving strategy. Once assembled, you can refrigerate it for up to 24 hours before baking. Just remember to adjust the baking time slightly, as a cold lasagna may need a few extra minutes in the oven to heat through.
How do I prevent my lasagna from becoming too watery?
To prevent excess moisture, ensure that your bolognese sauce is well-cooked and not overly watery before assembling the lasagna. To do this simply simmer your sauce longer so that it
thickens. Additionally, be mindful not to oversaturate the lasagna sheets with sauce. This will help maintain the ideal texture as the lasagna bakes.
1 note
·
View note
Photo

What’s up guys! Hope you are all doing well out there and staying safe! Me? I’ve been cooped up at home and I’ve finally got the ball rolling on organizing my kitchen so hopefully this means more cooking posts and streams from me soon!
I don’t really have a thought-out post for this. Basically, I remembered about a pasta dish I had when I was visiting a friend in Vancouver and how I was so moved by the dish that I bought a pasta roller while I was up there. On top of that, I’ve been talking about Italian food on-and-off with my partner.
Realizing how bored I’ve been, and not having the desire to play video games like usual, I thought it would be a good idea to put some good ideas to use.
More to read, and a recipe to follow after the jump.
To be honest, I had some kind of post all thought out in my head, but I completely spaced out and now I can’t remember what I had planned.
Uh, boredom and inspiration just kind of collided with each other and gave me the kinetic energy to get up and do something about it. So I masked up and went to the grocery store to pick up things to make the pasta and ragu.
I thought that maybe trying to make the sauce first before blogging about it just so I can get my memory jogged would be a better way to go, but I thought, “hey this could actually be really fun to stream”
So I streamed myself making the ragu, and the fresh pasta from scratch.
Here’s proof of me making the pasta. One of my friends watching the stream managed to get some screenshots.

Did the well method and mixed everything by hand, and cut them myself. Wanted wide strips, so I went for making papardelle noodles, which are perfect for meat sauces. I had a bit of a battle with the pasta roller, and after ending the stream, I realized I could have just moved my laptop to point at another table where I could have clamped the pasta roller to. Oh well, haha.
As far as the recipe that I used for making the pasta dough, I’ll just link the recipe that I used. Maybe I’ll cover pasta making in a future post since it’s actually super fun, but I had to use a reference to making pasta dough from scratch because I couldn’t remember it. Here’s the link: https://tasty.co/recipe/fresh-pasta-dough
The flour I used for the dough was just some regular ol’ AP flour since the store I usually frequent for fancy things was out of 00 flour and semolina flour. Whoops. Just means I had to use more eggs, which is fine.
(This post is all over the place, I apologize. It’s been a while)

Anyway, the focus of this post is the ragu. I forgot where I learned it, but for some reason, I just remembered about it. So, going off of memory, here’s the recipe I used.
Note: you’ll need a food processor for this.
Ingredients
1 lb. ground beef, 85/15 fat ratio.
1/3 lb. of ground pork
1 medium sized carrot
1 medium white or yellow onion
1 stalk of celery
1/2 cup extra virgin olive oil
24-26 oz. of crushed tomatoes. Plum tomatoes are preferred
3-4 large cloves of garlic, cut into big chunks
1. Chop up your onion, carrot, and celery into large chunks and put them in your food processor. You’ll want to blitz the vegetables until it basically becomes a nice puree.
2. In a large stockpot, pour a little bit of the olive oil into a medium-high pot, then add the blitzed vegetables to the pot. You’ll want to let the vegetables simmer in the oil, until it starts to become really fragrant. About 10 minutes.
3. Once the vegetables become fragrant, add the beef and pork, letting it brown with the mixture. Once the meat becomes brown and starts releasing fat, add the tomatoes, the remaining olive oil, and chopped garlic.
4. Get the pot up to a boil, and then reduce to a low bubbling simmer. Cover the pot with a lid and let it simmer for at least 2-3 hours, stirring occasionally, and adding salt and pepper to taste.
5. Take some of the ragu and heat it up in a separate pan, and mix it with your favorite pasta noodles, like a tagliatelle (because I’m dictating what your favorite noodles are). Mix thoroughly, and plate it and serve it.

While I realize these pictures do not really showcase the ragu, I can tell you that it’s pretty good. The fat collected in the sauce is what really drives home those really strong meaty, hearty flavors for the pasta, and it really helps the sauce stick to the pasta. As far as pasta goes, I used papardelle because I wanted BIG noodles.
I topped mine with some red chili flakes, some shaved Parmesan and Fontina cheese, and a sunny-side up egg, as a homage to the pasta I had at Ask for Luigi, the restaurant I visited in Vancouver.
I’ll have to make another pasta post talking about making fresh pasta, but for now, feast your eyes on these pictures.
See you next time!
#foodporn#food photography#italian#italian food#ragu alla bolognese#meat sauce#pasta#papardelle#home made cooking#egg#can't think of any other tags#cooking#recipes#hello
2 notes
·
View notes
Note
Cold killing soup you say? Would you mind sharing the recipe please?
If you’re one of these people who think that cilantro tastes like soap, keeping scrolling, you’re not going to like this one.
Harira Soup
Ingredients:
- 1 heaped tablespoon of each of these: ground cumin, ground coriander, turmeric powder, sweet paprika, raz el hanout (a Moroccan spice blend, if you can find some)
- A small pinch of saffron (or a big one if you’re using fake saffron)
- 2 teaspoons of ground cinnamon or 2 whole cinnamon sticks
- hot pepper flakes to taste (you can skip this if you don’t like spicy food)
- 2 bay leaves
- 1 tablespoon of freshly grated ginger
- 2-3 garlic cloves crushed
- 1/2 cup of finely chopped parsley
- 3/4 to 1 cup of finely chopped cilantro
- 1 large onion finely choped
- 1 large carrot, grated
- 4 cups (1l) of chicken or vegetable stock
- 1 796ml (26 oz) can of diced tomatoes
- 2 540ml (19 oz) cans of chickpeas drained and rinsed
- 1/2 cup of dry brown or green lentils picked and rinsed (don’t use red lentils)
- 1/2 cup of long grain rice
Instructions:
1) Put some olive oil in a large cooking pot and put on medium heat
2) Put the onions, garlic and carrots and cook until vegetables start to soften
3) Add the spices, bay leaves and ginger and cook for about 30 seconds
4) Add the lentils and stir to cover them in the spice mix
5) Add the tomatoes and stock and bring to a boil
6) Reduce heat to low and add the chickpeas, the parsley and the cilantro ans let it cook for about 30-40 minutes
7) Once the lentils are cooked, add the rice
8) Once the rice is cooked, adjust seasoning
9) Blitz about 2 cups of the soup in a blender or food processor until it forms a smooth paste
10) Put the paste back into the pot and stir well
Serve with some fresh chopped cilantro and a drizzle of lemon juice
And there you have it, my cold killing soup. Eat it with some bread and you’ll have a meal.
1 note
·
View note
Text
THE BEST VEGAN LASAGNE IN THE WORLD
I just wanted to share this recipe while it is still fresh in my mind. I made this lasagne for dinner last night and IT WAS THE BEST THING IVE EVER EATEN and I’m not even exaggerating!
Ingredients for the ragu sauce:
1 large brown onion
10 garlic cloves - don’t you dare let anyone tell you that you put too much garlic in your food because garlic is life
5-6 medium button mushrooms
2 carrots
2 celery sticks
1 small-medium zucchini
Fresh thyme, basil, and parsley - as much as you want, I have a herb garden/veggie patch so I used a lot.
400g of plant-based mince “meat - I like the brand Funky Fields because it has a really meat-like texture
Salt and pepper
Olive oil
1 large jar of Passata
2 cans of diced Italian tomatoes
Ingredients for the bechamel white sauce:
About 1/2 litre of soy milk - any plant or nut milk is fine but soy milk makes it really creamy and delicious
3 Tablespoons vegan butter
2 Tablespoons plain flour
1/2 teaspoon nutmeg
1 teaspoon black pepper
1 teaspoon garlic powder
2 cups grated vegan cheese - I like the brand Bio Cheese cos it gets all melty and oily like regular cheese
Other ingredients:
Another cup of grated vegan cheese for the top of the lasagne
Lasagne sheet pasta
SIDE NOTE: THIS MAKES A FUCK TON OF LASAGNE BUT YOU CAN FREEZE IT, USE IT TO PREP MEALS FOR THE WEEK, SHARE IT WITH YOUR FAMILY OR YOU CAN EAT THE WHOLE THING IN BED WHILST BINGING YOUR FAVE NETFLIX SERIES LIKE I MOST CERTAINLY DID NOT.
Anyways...
Method:
1. Chop onion, carrot, celery, mushrooms, zucchini, and garlic into manageable pieces before adding the whole lot to a food processor and blitz until chopped into chunky yet funky pieces.
2. In a large deep saucepan, fry your plant-based mince in some olive oil, salt, and pepper for about 5-7 mins before adding all your chopped veggies from the food processor and fry for about 10 mins until veggies have softened up a bit.
3. Add passata, canned tomatoes, extra salt and pepper, and fresh chopped herbs and a splash of red wine if you’d like. Stir and reduce heat simmering for about 30 mins until you get the bechamel sauce made and everything is ready to assemble.
4. In a medium saucepan, melt the vegan butter with garlic powder, nutmeg, salt, and pepper on medium-high heat. Add the flour and whisk thoroughly. Cook until smooth and no lumps of flour remain.
5. Slowly add your soy or nut milk whisking as you do so until all the milk is in the pot. Turn heat down to medium and whisk constantly to prevent lumps.
It takes about 10-15 mins for the sauce to begin thickening up. Be patient, don't turn the heat up to make it go faster because you could risk it sticking and burning on the bottom and it tastes super fucking gross when that happens. So just chill, keep whisking and it will get there eventually.
6. Once all your milk is in the pot and your mixture has begun to thicken, take off the heat and add your vegan cheese and whisk until cheese is melted and the bechamel is thick and cheesy.
7. ASSEMBLE YOUR LASAGNE. I don't care what order you assemble your layers in but I always do this: ragu, pasta sheet, ragu, white sauce, pasta sheet, ragu, pasta sheet, then heaps and heaps (the remainder of) white sauce and top with grated cheese and dried chili flakes.
Another side note: I used an 8cm deep 20x40cm glass Pyrex dish and used 1 and a half packets of lasagne pasta sheets for this amount of ragu and bechamel.
8. Bake in a preheated oven on 200 degrees Celsius for 30 mins or until pasta sheets are cooked all the way through and the top is brown and bubbly.
9. For the love of god please let this son of a bitch cool down for about 15 mins before you eat it. It is incredibly hot and will burn the roof of your mouth if you're impatient like me.
I forgot to take a photo of my masterpiece but I’m sure I’ll make it again sometime soon. I’ll try not to forget next time.
I ate my lasagne with some sweet potato fries and a garden salad with balsamic dressing. It was the best dinner I’ve ever eaten. Period.
#vegan#vegetarian#food#yummy#recipe#healthy#ish#family#love#veganuary#veganallday#everyday#delicious#fuckingamazing#foodgasm#sorrytheresnopicture#tumblrvegans#tumblrfood
1 note
·
View note
Photo


ROASTED TOMATO BASIL SOUP
Tomatoes are just going out of season locally, they are cheap, sweet and so readily available. What better way to enjoy them especially during cold nights than with a bowl of hearty tomato soup. Perfect with a side of toasted bread and a spicy rocket, roasted tomatoes and mozzarella salad. A truly wonderful way wind down and usher in the weekend.
This recipe makes 2 bowls of tomato soup in 1 hr 40 minutes to 2 hrs including 15 - 20 minutes of prep, 45 minutes of roasting the tomatoes and 40 - 50 minutes of cooking. It serves 2.
Tools & Ingredients
Ingredients
500g small - medium plum tomatoes, halved -> Around 6 - 8 tomatoes
250g cherry tomatoes, halved -> Around 12 - 18 tomatoes
1 medium onion, peeled and cut into wedges with the root attached
You can use a yellow onion but I like the flavour of the red onion so that is what I used. I left the root on so the onion stays intact as it roasts; you'll cut it later.
3 - 4 garlic cloves, cut in half with the skins still attached
I know this is awkward. Leaving the skins attached keeps the garlic from burning, but peeling roasted garlic cloves is a pain. Halving them makes it easy to squeeze the garlic flesh out of the peels.
1 teaspoon of fresh thyme -> Around 2 - 3 sprigs OR 1/4 teaspoon of dried thyme
2 - 3 tablespoons of olive oil
1 teaspoon of balsamic vinegar
1 cup loosely packed basil
Use the bigger older leaves during cooking and reserve the smaller younger leaves for garnish. The older leaves have a stronger flavour that can withstand cooking.
1 tablespoon of tomato paste
Salt -> A generous pinch or to taste
Freshly ground black pepper -> A generous pinch or to taste
2 - 3 cups of stock (low salt) or water
1 teaspoon of sugar (optional)
Sugar helps round out the flavour of the soup. It is optional.
A tiny pinch of baking soda (optional)
Tomato soup is notorious for heartburn due to the acidity of the tomatoes. A very tiny pinch of baking soda lowers the acidity of the soup by raising the PH. Do not put too much because you still need some acidity for flavour.
A few leaves of basil for garnish
Small younger leaves of basil - the ones found at the very top of the basil plant, have a milder flavour that would disappear during cooking. These add freshness without being too overpowering when added just prior to serving. If the leaves are bigger you can chop or tear them up into smaller pieces.
Whipped Cream / Sour cream / Crème fraîche for serving (optional)
Tools
Baking Dish
Countertop / Immersion Blender
Saucepan
Wooden Spoon (mwiko) / Rubber Spatula
Procedure
Preheat oven to Conventional (without fan) - 425ºF / 220ºC | Convection (with fan) - 400ºF / 200ºC.
Place the tomatoes cut side up on a baking dish. Pick a baking dish that is big enough to hold all the tomatoes in one layer.
Placing the tomatoes cut side up keeps the tomato juices in the tomatoes (mostly though) and not caking on your baking dish and allows the seasoning and flavour to penetrate the tomatoes.
---
Using a mix of plum tomatoes and cherry tomatoes helps get the best of both worlds. Plum tomatoes have more flesh and little water making a thicker soup while cherry tomatoes bring in a tonne of flavour and freshness.
Scatter the onions and garlic on the baking dish trying to nestle them - onions especially - in between the tomatoes. Sprinkle the thyme leaves then season with a generous pinch of salt, pepper and sugar (if using).
Drizzle some of the olive oil reserving a little for later and balsamic vinegar. Try to drizzle evenly so every tomato, garlic and onion gets a little hint of the olive oil and balsamic vinegar.
Roast for 40 - 45 minutes until everything is soft and a little charred.
Let cool for a few minutes then cut off the roots of the onions and squeeze out the flesh of the garlic cloves.
Place a saucepan on medium heat, add the remaining olive oil then dump all the ingredients from the baking dish into the pan. Ensure to scrap all the bits into the pan, this will add to the overall depth of flavour.
Add the tablespoon of tomato paste and stir until it is incorporated.
Add in 2 cups of stock or water, let it come to a boil, then reduce to low and simmer uncovered for 20 - 30 minutes until the tomatoes sort of break down. It will still look watery but that is ok.
Stir in the basil leaves then simmer for a minute or two before blending.
If you are using a countertop blender, dump the simmered soup into the jug of the blender then blitz till smooth. Remember to remove the small blender lid and cover with a clean dish towel so your blender does not explode. Once smooth, return the soup to the pan.
If using a hand/immersion blender, blend right in the pan until smooth.
Simmer again for 10 - 15 minutes uncovered for it to reduce further and the flavours to intensify. Keep tasting and adjusting the seasoning if need be; remember slightly undersalt the soup until the last few minutes, if it tastes perfectly salted way before it's ready, it will be too salty when ready to serve.
Check the seasoning and consistency, if the soup is too thick, thin it out with a bit more stock if too thin cook it down a bit more until you get the consistency you like. Keep tasting for seasoning and adjusting where needed. If it tastes too acidic add a tiny pinch of baking soda; not too much you still need a bit of acidity for flavour.
If you want a finer smoother soup, pass it through a fine mesh sieve prior to serving.
Scatter a few small leaves of basil and optionally top with some whipped cream/sour cream or crème fraîche. Serve with toasted bread or go all in and serve it alongside a grilled cheese sandwich. YUM!
Notes
- Since we are using fresh tomatoes, you do not have to stick to plum and cherry tomatoes. Any garden tomatoes would work great, this combination is just my preference since it is big on flavour and texture plus so easily available.
- You can roast the tomatoes up to an hour to intensify the flavour just keep checking up on them so nothing burns.
1 note
·
View note
Text
- P I C K L I S T -
WINTER SQUASH - LEEKS - LEMONGRASS - RED CABBAGE - CILANTRO - GINGER - HEIRLOOM TOMATOES - BELL PEPPERS - POBLANO PEPPERS - REZHA MACEDONIA (HOTTIE) PEPPER - MINT - BROCCOLI - HABANADA PEPPERS - LETTUCE - POPCORN
BREAD SHARE: APPLE OATMEAL
Finally woke this morning to the world under a blanket of frost. Oh goodness, we keep on talking about the eventual slow down that comes with said frost- but we have yet to really do so. We still have carrots, watermelon radishes, etc in the ground waiting to be pulled and brussel sprout stalks - though I prefer to call them wands- waiting to be cut. We have some greenhouse skins (the plastic over the hoops) needing to be replaced and rolled up, and other greenhouses to be swept and tidied. Onions are waiting to be topped, chipped, and stored and the every-other day co-op pack out needs tending from now til January At this point the only thing that truly brings this farm to an end of day halt is when it’s 30 minutes past sunset and - if harvesting carrots- you can no longer decipher between carrot and stick, and it is so very dark. That's when it's time to go home and call it a day.
In other news this week, Holy smokes Anne Sprague the queen of Edgewater Farm turned 70 this week! Did the math- girlfriend has been growing strawberries, flowers, plants, and a cornucopia of other veg since she was 23 years old. 47 years later, Anne is still pumped to pick and grow flowers every single day (until frost) while keeping this farm afloat. You quite literally would not be getting a CSA from Edgewater without her presence in all of our lives and support of all the things we (the next generation) takes on. Big Cheers to Anne for all she is and all she does! Woot! Woot!
Now go put on one more layer of wool, and come pick up your CSA share!
PRO-TIPS:
A new pumpkin laksa for a cold night by nigel slater from the book TENDER
THE FOLLOWING RECIPE, AND THE POTENTIAL FOR A WOOD FIRED SAUNA SHVITZ, ARE THE ONLY THINGS THAT EXCITE ME ABOUT TEMPS DROPPING
Enough for 4…
Pumpkin (aka winter squash!), unskinned
Cilantro and mint leaves to finish
FOR THE SPICE PASTE:
3-4 hot peps
Garlic- 2 cloves
Ginger- a thumb sized lump
Lemongrass- 2 plump stalks
Cilantro stems+leaves- (a handful)
Sesame oil- 2 tablespoons
FOR THE SOUP:
Chicken or vegetable stock - 2 ½ cups
Coconut milk - 1 ¾ cups
Nam pla (thai fish sauce) - 2 tablespoons
Tamari - 1 to 2 tablespoons, to taste
Juice of a lime
Dried noodles - 3 ½ ounces, cooked as it says on the packet, then drained
Peel and seed the pumpkin (or winter squash) and cut the flesh into large chunks. Cook in a steamer or in a metal colander balanced over a pan of boiling water until tender. Remove from the heat.
For the spice paste, remove the stems from hot peppers, peel the garlic, and peel and roughly chop the ginger and lemongrass. Put them all into a food processor with the cilantro and sesame oil and blitz until you have a rough paste.
Get a large, deep pan hot and add the spice paste. Fry for a minute, then stir in the stock and coconut milk and bring to a boil. Let simmer for seven to ten minutes, then stir in the nam pla (fish sauce), tamari, lime juice, pumpkin, and the cooked drained noodles. Simmer briefly, add the cilantro and mint leaves over the top and serve in deep bowls…
REZHA MACEDONIA PEPPERS:
This pepper is so rad and great for drying- read on for the write up about it in the Baker Creek Seed Catalogue: The name means “engraved.” Another local name, Vezeni Piperki, means “embroidered.” Both names refer to the curious lines on the skins of the tapering, long, thin peppers. The fruit, which ranges from mild to sometimes very pungent, is to be seen hanging in great clusters, drying in North Macedonian warm late autumn sun. This is an old traditional (heirloom!) variety grown almost exclusively in small villages and not on a large scale.
How to Popcorn cobs 2 ways!!
First Way: (pretty much copy and pasted from https://www.bonappetit.com/story/how-to-make-stovetop-popcorn, but this is also the way i do it at home, so i know it checks out)
shuck corn and remove kernels.
You will also need cooking oil (extra-virgin olive oil and coconut oil is my fave, but peanut, canola, grapeseed, and vegetable will all work) and kosher salt. If you want to season it my way—which I highly recommend, though I'm obviously biased—go ahead and pick up a canister of nutritional yeast and some crushed red chili flakes (ideally Aleppo pepper, but you can make it happen with regular ones). The combination of these ingredients adds up to a cheesy-spicy flavor dust for the popcorn that challenges the dominance of Nacho Cheese Doritos.
To make the popcorn, you need a cooking vessel with a lid that offers room to grow. The popcorn is going to multiply in volume dramatically, and it needs empty space to hurtle into. The lid keeps it from ricocheting all over your kitchen, although that is a fun party trick. You also want to use a pot with good heat conductivity. A large Dutch oven is ideal, but a heavy duty stockpot will do in a pinch.
Grab your olive oil/coconut oil. For ½ cup popcorn kernels—a decent amount for 4 normal popcorn people or 2 insane popcorn eaters—add 3 Tbsp. of oil to the pan. Yes, it seems like a lot of oil, but without it, steam won’t build up in the pot, and without steam’s concentrated, moist heat, there will be no popping.
Put the pan over medium heat, pour in ½ cup popcorn kernels, stir to coat with oil and keep stirring occasionally until the kernels start to sizzle. Put the lid on the pan and nudge the dial halfway between medium and medium-high. Don’t go anywhere! Soon, but not too soon, popping noises will emanate from the pot. After that’s been happening for a minute or two, pick up the pot with the lid closed and shake it up and down. This is to prevent the dreaded scourge of unpopped kernels—you’ll hear them clinking around in there. Let the popping continue, but if you see any tendrils of smoke escaping from under the lid, immediately lower heat to medium.
When the pops have subsided to an eruption every couple of seconds, turn off the heat. Set the lid askew so that some steam can escape, because soggy pops are an abomination. After a minute of steam release, pour the popcorn onto a rimmed baking sheet, or your biggest, widest bowl. Immediately drizzle ¼ cup olive oil all over the popcorn. This needs to happen while it’s still hot, and then you have to toss thoroughly and with intention to coat the kernels with oil. When they’re glossed up, sprinkle nutritional yeast, chile flakes, and kosher salt overtop liberally, then toss vigorously to disperse it. If you're more of a melted butter person, or want to add grated cheese or lots of pepper or what have you, you should feel free to do you. The important thing to remember is that you need to add the fat—olive oil, coconut oil, butter—first, then add anything dry—spices, salt—and toss, toss, toss, otherwise the dry bits won't have anything to stick to.
SECOND WAY TO POP: RIGHT ON THE COBB!!
WHAAAAAAT?!? I KNOW, MY MIND IS ALSO BLOWN.
SHUCK CORN
Place the cob in a brown paper lunch bag.
Fold the bag up a couple times to keep the steam in
Cook the cob in the microwave. Set it to a popcorn setting if you have that.
DEVOUR
1 note
·
View note
Link
Butter Chicken Bäco.

Hello everybody, I hope you are having an incredible day today. Today, we're going to prepare a special dish, butter chicken bäco. One of my favorites food recipes. This time, I am going to make it a bit tasty. This is gonna smell and look delicious.
Butter Chicken Bäco is one of the most well liked of current trending meals on earth. It's appreciated by millions daily. It is simple, it is fast, it tastes yummy. Butter Chicken Bäco is something which I have loved my entire life. They are nice and they look wonderful.
To begin with this recipe, we must prepare a few ingredients. You can cook butter chicken bäco using 40 ingredients and 14 steps. Here is how you can achieve it.
The ingredients needed to make Butter Chicken Bäco:
{Get of Raita:.
{Make ready 1/2 Cup of Greek Yogurt,.
{Get 1 of Cucumber Finely Diced,.
{Get 2 of Tomato Peeled Finely Diced,.
{Prepare Pinch of Sea Salt,.
{Take Pinch of Black Pepper,.
{Get of Chicken Rub:.
{Prepare of Chicken Thigh Skinless Boneless Slice Into 8 Equal Portions, 1kg.
{Take of Kashmiri Chili Powder, 1/2 TSP Adjust To Preference.
{Take of Fresh Lime Juice, 1 Lime.
{Take Pinch of Sea Salt,.
{Prepare of Chicken Marinade:.
{Get 1/2 Cup of Greek Yogurt,.
{Get 5 Cloves of Garlic Grated,.
{Take 1 Inch of Ginger Grated,.
{Prepare of Kashmiri Chili Powder, 1/2 TSP Adjust To Preference.
{Get 1/2 TSP of Coriander Powder,.
{Prepare 1/2 TSP of Garam Masala,.
{Prepare 2 TSP of Mustard Oil,.
{Take Pinch of Sea Salt,.
{Make ready of Butter Chicken:.
{Get 3 TBSP of Unsalted Butter,.
{Make ready 1 of Red Onion Finely Minced,.
{Take 5 of Green Cardamom,.
{Prepare 1 Inch of Cinnamon Stick,.
{Make ready 4 of Cloves,.
{Make ready 3 Cloves of Garlic Finely Minced,.
{Prepare 1/2 TSP of Chaat Masala,.
{Get of Green Chili Fresh Coarsely Sliced, 2 Adjust To Preference.
{Get 200 g of Alce Nero's Organic Tomato Passata,.
{Get of Kashmiri Chili Powder, 1/2 TSP Adjust To Preference.
{Take 2 TBSP of Pure Honey,.
{Make ready 1/2 TSP of Garam Masala,.
{Take 1 TBSP of Dried Fenugreek Leaves,.
{Take Pinch of Sea Salt,.
{Take Pinch of White Pepper,.
{Get 1/2 Cup of Heavy Whipping Cream,.
{Take of Bäco Sandwich:.
{Get of Bäco Sandwich, 8 Dough Balls.
{Take 1 Handful of Fresh Coriander Coarsely Chopped,.
Steps to make Butter Chicken Bäco:
Pls visit: https://ift.tt/33867sU for the baco recipe..
Prepare raita. In a bowl, add in all the ingredients. Toss to combine well. *To peel the tomatoes, slice and "X" at the bottom, blanch them in simmering water for 30 secs, plunge them into ice water, the skins will be easily peeled.* Cover with cling film and let rest in the fridge until ready to use. *It can be kept in the fridge for up to 3 days.*.
Prepare the butter chicken. In a small bowl, combine chicken, chili powder, lime juice and salt well. Cover with cling film and let rest in the fridge for at least 30 mins. Add yogurt, garlic, ginger, chili powder, coriander powder, garam masala, mustard oil and salt into another bowl. Stir to combine well. *If you cannot get your hands on mustard oil, heat 1/4 of canola or peanut oil on gentle heat and add in 1 TSP of mustard seeds. Cook for about 15 mins. Discard the mustard seeds.*.
Remove the chicken from the fridge and pour the marinade over the chicken. Toss and coat the chicken well. Cover with cling film and return back to the fridge. Let the chicken marinade overnight..
After marinating, in a skillet over medium heat, add in 1.5 TBSP of butter. As soon as the butter start to melt, gently place the chicken into the skillet. *Make sure to drip off any excess marinade. Do not discard any remaining marinade.*.
Sear the chicken on both sides until lightly charred. Remove from heat and set aside. Repeat the steps for the remaining chicken..
In the same skillet, deglaze with the remaining 1.5 TBSP of butter. As soon as the butter start to melt, add in onion. Saute until translucent. Add in green cardamom, cinnamon stick, cloves and garlic. Saute until aromatic..
Add in green chili, chili powder, garam masala, chaat masala and Alce Nero's tomato passata. Stir to combine well. Add in the remaining marinade and stir to combine well. Remove and discard the green cardamom, cinnamon stick and cloves. Carefully transfer the mixture into a blender as the mixture is piping hot..
Blitz it up until smooth paste form. Pour the mixture back into the skillet. *You can add 1/4 cup of water into the blender and "clean" up all the nooks and crannies, then add the water mixture into the sauce.*.
Add in chicken and any drippings. Stir to combine well. Add in honey and fenugreek. Taste and adjust for seasoning with salt and pepper..
Add in cream. Stir to combine well. Remove from heat and set aside..
Assemble sandwich. After the sandwich dough has been divided, shaped and rolled, place it on a griddle over medium heat. Grill until golden brown, almost charred, on both sides. *If you do not have a griddle, you can use an cast iron skillet. I love the charred marks tho.*.
Spread raita evenly on 1 half of the sandwich. Add the butter chicken the other half. Garnish with coriander..
Close to complete the Bäco sandwich. Repeat the steps for the remaining sandwiches. Serve immediately..
So that's going to wrap it up with this special food butter chicken bäco recipe. Thanks so much for reading. I'm sure you will make this at home. There's gonna be interesting food at home recipes coming up. Don't forget to bookmark this page in your browser, and share it to your family, friends and colleague. Thanks again for reading. Go on get cooking!
0 notes
Link
Keralan style chicken curry. Quick and simple Kerala style chicken curry. An excellent side dish with roti,chapathi,rice,appam ect. Chicken curry well flavored with spices.

Good one for bachelor's and newbies to cooking also. Kerala chicken recipe - A simple & delicious dish made by simmering chicken in fresh ground kerala spice powder & coconut milk. Kerala cuisine is well known for its unique flavors, delicious taste & simplicity.
Hello everybody, it is Jim, welcome to our recipe page. Today, I'm gonna show you how to prepare a special dish, keralan style chicken curry. One of my favorites food recipes. This time, I'm gonna make it a bit unique. This is gonna smell and look delicious.
Keralan style chicken curry is one of the most popular of current trending meals in the world. It is appreciated by millions every day. It's simple, it's fast, it tastes delicious. They're fine and they look fantastic. Keralan style chicken curry is something which I've loved my whole life.
Quick and simple Kerala style chicken curry. An excellent side dish with roti,chapathi,rice,appam ect. Chicken curry well flavored with spices.
To begin with this recipe, we must prepare a few components. You can cook keralan style chicken curry using 28 ingredients and 8 steps. Here is how you cook it.
The ingredients needed to make Keralan style chicken curry:
{Prepare of Chicken marinade.
{Make ready of chicken thigh fillets.
{Prepare of turmeric.
{Make ready of white wine vinegar.
{Take of black pepper.
{Get of salt.
{Get of The sauce.
{Take of garlic.
{Take of shallots.
{Make ready of root ginger.
{Make ready of fennel seeds crushed.
{Prepare of large red onion finely chopped.
{Take of medium tomatoes chopped.
{Prepare of medium potato peeled and chopped.
{Make ready of curry leaves.
{Take of green chilli sliced down the middle.
{Make ready of turmeric.
{Make ready of coriander powder.
{Get of cumin powder.
{Get of Garam Masala.
{Make ready of chilli powder.
{Take of Salt to taste.
{Take of large handfuls of spinach.
{Get of natural yogurt.
{Take of Garnish.
{Take of curry leaves.
{Get of shallots very finely sliced.
{Take of Coconut oil.
This kerala nadan curry is no exception to it. Nadan Khozi is an aromatic chicken dish from Kerala, in southern India. Nadan Khozi is a typical curry in Keralan houses, where the blend of spices differs just a little from home to home. The ingredient list might look long, but don't let it daunt you—once you understand that all Indian food is.
Instructions to make Keralan style chicken curry:
First marinade the chicken by mixing the marinade ingredients into the chicken and setting aside for a minimum of 30 minutes..
Next make a paste by adding the chopped shallots, ginger, garlic and crushed fennel seeds to a dish or pot and blitzing with a stick blender. Then set aside..
Next add 1 tbsp coconut oil a heavy based pot over a medium heat and add the chopped onions, chilli and curry leaves. Fry until soft..
Add the dried spices and fry for another 2 minutes. Then add the garlic / ginger paste. Fry for 3 minutes.
Add the tomatoes and cook until soft. Then add the chicken, potatoes and 175ml water. Cover, then down the heat to medium low and cook for 15 minutes..
Remove the lid and cool for another 7-10 minutes until the sauce starts to thicken..
Meanwhile, In a separate pan, add 1 tbsp coconut oil to a frying pan. Heat over a high heat and quickly fry the curry leaves and shallots for 30 - 60 seconds until golden..
Once the sauce has thickened, stir in the spinach until wilted. Then stir in the yogurt, season to taste and serve with rice..
For preparing Kerala Style Easy Chicken Curry, first cut the chicken into medium sized pieces. Take this Kerala-style curry, for example. It began as my mom's recipe (one that she got from her friend_. While my father's family is originally Add the chicken and salt and stir to coat the chicken in the spices. Nadan kozhi curry is a very popular chicken curry in Kerala and it goes well with Keralan style parotta or any Indian bread, pathiri, appam, plain rice or ghee rice.
So that's going to wrap this up with this special food keralan style chicken curry recipe. Thank you very much for your time. I am sure you can make this at home. There is gonna be more interesting food in home recipes coming up. Don't forget to bookmark this page in your browser, and share it to your loved ones, friends and colleague. Thanks again for reading. Go on get cooking!
0 notes
Text
WIAW + a full day, from start to finish
Sharing a full day of eats.
Hi friends! How’s the week treating you?? I hope everyone is hanging in there, especially since so many schools released their plans over the past week. I have no clue what we’re going to do – we have until next Friday to figure it out – but if you’re spending the week making pro/con lists and frantically pacing around, I feel ya.
Despite the major decisions we’re facing, it’s otherwise been a good week. The kiddos are still living their best summer life and I’m finding more of a groove with juggling everything. (<— I say that this week but it seems like the weeks alternate up and down.) We’ve been focused on making some changes around the house (we bought more paint for bathroom cabinets so here we go) and planning some things in the distant future to look forward to.
For today’s post, I thought I’d do a WIAW post and share a full day of eats. I’m always looking for new ideas, especially during the ‘Rona times when we’ve been cooking at home a lot more often. I love simple, throw-together meals so if you have any new ones you’re loving, please send them my way!
6:30am: My alarm goes off. I’ve been trying to wake up earlier since I realized that we’re in this for the long haul and I’ve been sleeping until around 8am for months now. I don’t like the fact that I have to go to bed earlier (I love the quiet at night!!), but I feel like I accomplish more during the day, especially when I can catch a morning workout.
I chug a large glass of water, eat a couple squares of dark chocolate (I love a little sweet bite in the morning to wake me up) and make the girls breakfast. Liv has sourdough pancakes with berries and P has been into savory foods for breakfast lately (like pizza, turkey sandwich, or leftovers from the night before). She requests a grilled cheese with berries.
7:30am: The girls eat breakfast and watch a show while I head upstairs for a leg workout. It’s a quick circuit with goblet squats, single-leg squats. walking lunges, jump squats, lateral lunges, and clamshells.
8:15am: I take a quick shower (just bun my hair so I don’t have to wash it), get dressed, and make some decaf collagen coffee with almond milk and monk fruit
The girls get dressed and make their beds while I make our bed, run a load of laundry, feed all of the animals, and clean the kitchen.
9:00am: My own breakfast: oatmeal with chia seeds, blueberries, raspberries, cinnamon, Nuttzo and a little maple syrup
+ supplements
9:30-10:30am: P does some art at the table with us while Liv and I work on her summer homework packet from school. (Yes. Summer homework packet.) When Liv finishes up her assignments for the day, I make them a quick snack plate (trail mix, cheese sticks, and sliced apples) let them have a little screen time while I do another 30-45 minute work blitz. I work on pure content creation: brainstorming post ideas and writing as much as possible.
12:30pm: lunch together. The girls have turkey and cheese sandwiches with hummus, carrots, and fruit, while I have leftovers from the night before: coconut chicken curry.
(It’s cauliflower, sweet potato, zucchini, chicken, onion, garlic, ginger, crushed tomatoes, a splash of coconut aminos, sesame oil, and red curry paste with chicken broth. After it cooked in the Instant Pot for 20 minutes, I stirred in a can of coconut milk and topped each bowl with lime juice and chopped cilantro.)
I also eat a giant handful of the best chips ever while I wait for the curry to heat up.
The girls do Perler beads at the table – they’re so into these right now!- and in between ironing the beads together for them, I prep some dinner since I know we’ll be at the pool until dinnertime. We’re having miso-glazed cod, so I make a quick marinade for the fish with chickpea miso, sesame oil, brown sugar, and chicken broth.
Half goes on the fish and into the fridge to marinate, and I save the other half in a jar to pour on the fish in the last few minutes of roasting.
I also boil the potatoes so that they can roast with the fish and be done at the same time!
We head upstairs and I play music for the girls to have a dance party while I clean out P’s closet. I finally pack away the winter stuff and store the too-small clothes so we can give them to Everly when she’s ready.
(P always has a crazy amount of clothes since she gets all of Liv’s hand-me-downs and I inevitably add to the collection…)
3:00pm: the Pilot is home from work early, so he take the kiddos to the pool while I catch up on some work. I have a Beautycounter mentor call, write a blog post, upload a video to YouTube to publish later, and make a couple of graphics.
5:00pm: I meet up with the crew at the pool! This has been such a lifesaver for us this summer. It’s a thousand degrees here in Tucson so I’m thankful for an outdoor activity that enables the kiddos to get out their energy, interact with a couple of close friends, and be in the fresh air.
Also, floating on an inflatable donut with a White Claw isn’t a bad place to be.

6:30pm: We head home and P falls asleep in the car… the dreaded 6pm naptime. She snoozes on the couch while the Pilot, Liv and I eat dinner and play a few intense games of Old Maid.
Miso-glazed cod with garlic roasted potatoes and sautéed snap peas:
P wakes up to have a bit of dinner around 7:30 and somehow still manages to fall asleep at bedtime. She’s zonked from such a full day! While the Pilot does the bedtime routine, I clean the kitchen and fold the laundry.
9pm: The girls are both crashed. I have a Goodpop orange creamsicle while watching Hamilton for the 18th time and finishing up loose ends: scheduling social media posts, uploading my blog post for the following day, and answering comments.
10:15: Head upstairs to read (finishing up City of Girls) until around 10:30 or when I can’t keep my eyes open any longer.
10:45pm: Lights out and ready to do it all over again.
What I liked about this day of eats: I got a good amount of micronutrients and fresh produce and felt energized all day. There weren’t any points where I felt hangry.
What I didn’t like about this day of eats: So.much.cooking. lol. At least everything was simple and quick to put together.
So, tell me, friends: what was the best thing you ate yesterday? Any quick meals or recipes you’re loving?
xo
Gina
The post WIAW + a full day, from start to finish appeared first on The Fitnessista.
WIAW + a full day, from start to finish published first on https://olimpsportnutritionde.tumblr.com/
0 notes
Text
Aloo ki bhujia (potato curry)
This potato curry is a considered a simple dish and often eaten with halwa puri.

For any desi person, it is common knowledge that there aren’t any exact measurements in the recipes. For cooking savory dishes eyeballing is fine. Even when my mom or dad taught me how to cook Pakistani/north Indian dishes, they never had exact measurements. For most people who are used to follow recipes to a tee this would be terrifying when trying out a new dish let alone a different cuisine. However, it does come with a relief that you can’t really mess it up. The recipes are quite forgiving and gives you your own flavor of the dish.
This is actually one the first recipes I learned from my mom. I wrote it down in my first recipe book ever, which is very ugly green hardback, but its easy to find when I need it ;) Also I was trying to impress my parents with my urdu skills back then.

I didn’t list quantities in my recipe because it is supposed to be self-explanatory (not really though!)

The recipe yields 2-3 servings for main course or 4-5 servings as a side dish.
Ingredients:
3-4 large potatoes (~ 350 - 400 grams)
1 large onion
2-3 cloves of garlic
½ thumb of ginger (about 2½-3 cm piece)
1 tomato
200 ml any neutral oil (I use rapeseed oil)
1 tsp salt
½ tsp turmeric
½ tsp chili powder
½ tsp ground coriander powder
½ tsp garam masala
150 - 250 ml water
Fresh coriander (optional)
Spices for “tarka”/ “chonk”:
1 tsp cumin (whole)
½ tsp mustard seeds (whole)
½ tsp Nigella seeds (whole)
½ curry leaves (you can omit them if necessary, i use dried ones)
1-2 whole dried red chilies or ½ tsp flakes
Instructions:
Prepare the ingredients:
Peel and dice the potatoes in small slices (2 x 2 x 0,5 cm) so they cook evenly:
you can chop the onions, garlic, ginger and tomato. I put everything in a blender and blitz everything to a fine paste. It reduces the cooking time significantly.
Making the Tarka/chonk:
Take a large heavy bottom pot, so the ingredients won’t stick too much during cooking.
Put the oil in the pan and set on medium high heat.
Add the cumin, mustard seeds, Nigella seeds, curry leaves and dry chilies to the heated oil. Let them splutter for about 1 minute or until you can smell the released aromatics. Do not burn them.
Making the base masala:
Now add the chopped/blended onion, garlic, ginger, tomatoes and stir them every 15 - 20 seconds.
At this stage this mixture is very raw in both texture and color. You have to fry it until golden brown. It may take about 15 -20 minutes on a medium heat to get to golden brown color.
When the mixture is about golden brown, and sticking a bit to the bottom of the pot, add about 150 ml of water. adding the water here, will allow to almost boil and disintegrate the mixture even more. it will look like a fine mesh in the end.
The aim is to reach a point where the oil separates from the curry. This happens when the water content is almost evaporated. You should be able to scrape the bottom of the pan, creating a clear path and see the mixture close in on the gap with oil getting there before the rest of the mixture.> The finished result is called a base masala or curry. After this part you can add any vegetables or meats along with some water to cook those in the steam.

The masala is essentially what makes or breaks a good dish. This part is taught by every mother or aunty, where they claim the perfect base can only be achieved with low to medium heat, lots of patience and years of experience. To be honest, you will survive nonetheless and be happy they are not dining with you when you make it the first couple of times.
Adding the Potatoes:
Once the masala is ready, you can add in the potatoes. Fry them in the masala for a 2-3 minutes and if they stick too much add about 50 ml water to loosen everything up again. stir the potatoes for 5 minutes. The water will evaporate again so just keep a low heat. Put the lid on to steam the potatoes for 10-15 minutes, stirring occasionally to avoid burning the masala. when the potatoes are cooked through, turn of the heat and add the garam masala and chopped fresh coriander.
You are now ready to serve the dish with roti, naan bread or puri.
1 note
·
View note
Photo

New Post has been published on https://fitnesshealthyoga.com/a-whole-day-from-start-to-finish/
a whole day, from start to finish
It’s been a while since I’ve done one of these posts! When I reviewed survey results earlier this week – I look at them all year, so thank you so much to those of you who chimed in! I truly value all of your feedback and refer back to it often – there were a lot of requests for more posts like this. We had a day this week that was pretty *normal* (what does that even mean?) and I remembered to snap some pics, so here we go!
7:15: I wake up feeling EXTREMELY rested. I reach down for my phone and see that it’s 7:15… an entire hour after I had set my alarm to go off. I had set it for “Every Saturday” so it didn’t go off and I just enjoyed a nice little slumber. We have exactly 30 minutes before we have to be out the door, so I throw on a lulu top and some leggings, some sneakers, run a brush through my hair, and blitz downstairs. The girls are hanging out on the couch watching a show, so I put their piles of clothes next to them to get dressed (feeling very thankful I put out their outfits the night before) and make them a quick breakfast. They have hard-boiled eggs, yogurt, and toast, and I put their lunches into their backpacks, fill water bottles, do their hair, make sure they have their teeth brushed, put sunscreen on them, and we’re out the door. 99% of the time, I make Bulletproof Decaf coffee in my Yeti mug to take with us, but I’m out of coffee.
8:50: I’m done with school drop-offs, so I head to the Starbucks at the grocery store to grab a coffee. Decaf almond milk latte with 1 pump of vanilla.
9:10 Back at home, and I put some sourdough into the oven that I prepped the night before. While the first loaf is baking, I finishing writing my blog post for that day and hit publish before putting the second loaf into the oven. I know it’s kind of a busy day, which works out well since it’s my rest day from the gym. While the second loaf is in the oven, I head upstairs for 7 minutes of meditation, a quick journal exercise, and do some easy stretches and mobility work.
10:20 Bread is done, so I cut a couple of slices for myself and make breakfast: 6 scrambled liquid egg whites, 1 whole egg, sautéed spinach, nutritional yeast, and bread with Kite Hill everything cream cheese spread and Everything But the Bagel seasoning from Trader Joe’s + a side of strawberries.
In between eating, I run the eufy (still my favorite ever), clean up the kitchen from the girls’ breakfast and the bread adventures, throw some laundry into the washer, make the beds, and spray down the countertops. I also take my supplements and fill up my giant water bottle to take for the day’s adventures.
10:50 I pick up Nani to go visit Baby August! She hadn’t met him yet, and I wanted to take Kyle and Meg some bread, so it was perfect timing. I swoop Nani, and we have a wonderful visit with Kyle, Meg, EJ, and August.
How perfect are his little toes???
I hang out outside playing games with EJ and get to hold sweet August again, and we have a lovely visit with them.
12:30 I’m back from picking up P, and I grab her a quick snack (a Perfect bar and a sliced apple). We also play dolls and do a puzzle in the playroom for a bit. She settles down to watch a show – we try to let the girls stick to a “2 shows per day” rule – and I make myself some lunch and answer a couple of quick emails. I eat lunch outside while she swings on the swing set.
This is a frozen chicken burger from Whole Foods with Sir Kensington’s Mayo, roasted red bell pepper, spinach, mustard, on a brown rice tortilla. Notice the bite marks on the outside of the tortilla, courtesy of P, haha.
1:30 We take the dogs for a walk together around the neighborhood. The weather is so gorgeous and P is officially a pro dog walker. It’s crazy to think of how many walks I spent with her in the Ergo or in the stroller and now here she is, walking a dog completely by herself.
I think it’s so cute that Bella lets her hold her, too. She doesn’t mind it at all.
I switch the laundry out, and then P helps me make some cookie dough. I’ve been using this recipe and it’s INSANE (I just make the cookies smaller than the recipe suggests and skip the walnuts).
I wish I could say I just had this tiny bit of cookie dough, but let’s be real here. After scooping spoonfuls onto the cookie sheets, I cleaned the bowl with a spoon. 😉 SO good.
After baking the cookies, we let them cool and head out to pick up Liv.
3:15 We’re back home from picking up Liv. I make the girls a snack plate (bell pepper, carrots, hummus, pepperoni, cheese, and crackers) and they eat it outside playing while I make some dinner to take to Kyle and Meg’s house. While I’m cooking, I have a Larabar and some tea with collagen.
I put rice into the Instant Pot, and chop a quick Greek salad (romaine, spinach, tomatoes, cucumber, roasted red pepper, kalamata olives, and feta), then start on the Chicken Parmesan. Enchiladas are my go-to baby meal, but since I made them enchiladas a couple of weeks ago, I want to switch it up. I make doubles of everything and wrap it in the fridge since that will be the girls’ dinner that night, too.
4:45 Everything is packed up and ready to go,
so we drive down to Kyle and Meg’s. The Pilot is there waiting for us, snuggling with August. <3
I watch the little cousins play outside while Kyle and Meg eat and the Pilot holds August. After a little while, we switch out. Usually we would be driving to gymnastics, but I let the girls skip class since they hadn’t met the baby yet. They loved holding their new little cousin. It’s hard to believe that he’ll be running around with all of them before we know it!
6:00 We’re back at home, so I make the girls their dinner plates, switch the dishes out, and clean up from the enormous mess I made baking cookies and frying chicken. Usually we would just all eat together, but I asked our babysitter to come over that night. (It wasn’t the best planning on my part. Usually when the Pilot and I go out, I make the girls something super easy, like meatballs, pasta, and some chopped fruit or sautéed veggies on the side.) I set out the girls’ pajamas and toothbrushes, and then we get ready to go. 🙂
7:00 Nerd date! The Pilot and I have a date once a week, and quite often they’re something we call “nerd dates.” Basically, we’ll grab a quick snack or glass of wine somewhere, and then head to a coffee shop to catch up on work stuff. We sit there with our computers and headphones on like nerds, but at least we’re together.
We have poke bowls and wine at Ra, and then go to Cartel for tea and nerd time. He’s studying like crazy for airline interviews, and I have a ton of blog stuff to catch up on, especially since I didn’t spend much time working during the day. (Usually when the girls are at school, I blitz on as much work stuff as possible!)
9:30 We’re back home! The Pilot packs Livi’s lunch for the next day – P only stays for lunch at preschool a couple of times each week – and I head upstairs to fold laundry. I used to go to bed super late – easily midnight or 1am – but ever since the girls have been going to sleep at a normal time and staying in their beds (!!!) I’ve felt like I can go to sleep much earlier. I’m tired now by about 10, and ready to wake up around 6 most days. It’s amazing to meditate a little, catch up on work, or even take a Peloton class before we start on the morning chaos. I set out the girls outfits for the next day, set out my clothes and fill up a water bottle for a morning Peloton class, and crawl into bed to read for a few minutes until my eyes start to droop.
10:15 Bed.. and ready to do it all over again.
Source link
0 notes
Text
Roasted Red Pepper Pasta Salad with Tomatoes, Basil and Walnuts
Hello friends and Happy Friday!! Littered with torn basil leaves plucked from my backyard garden, today’s pasta salad recipe is infused with the flavors of a Spanish romesco sauce.
Romesco is one of my favorite sauces to make during the summer months, because the main ingredient is red pepper, a vibrant veg that’s in season mid summer through early fall. You can certainly get bell peppers in all colors throughout the year, but they will taste the best when in season! Romesco pairs beautifully with beef, chicken, fish and veggies, but in this recipe, it takes center stage as a dressing for pasta salad.
To start, blitz up some roasted red peppers with toasted walnuts, garlic, lemon and red chile flakes. Extra virgin olive oil is then streamed in to form a silky sauce. This vibrant red sauce is then tossed with warm pasta, chopped tomatoes and grated Parmesan cheese. The salad is finished with more toasted walnuts, torn basil leaves and golden breadcrumbs infused with lemon zest. The romesco-esque sauce is bold with the flavors of red pepper and garlic. With some bites you’ll get crunch from the breadcrumbs and walnuts while others pack an herbaceous punch from the torn basil. This salad is perfect as a light summer dinner, but you can also serve it as a side at a backyard barbecue or an afternoon picnic. Continue reading for the recipe.
This recipe can be made with fresh roasted red bell peppers or ones from a jar. I would definitely recommend starting with fresh red bell peppers while they are in season, but jarred roasted red peppers can certainly work if you are are short on time. Here’s how I like to roast peppers at home:
Preheat a broiler to high
Place peppers on a foil-lined baking sheet
Slide the baking sheet under the broil and close the oven door
Roast peppers, turning occasionally, until blackened all over
Using tongs, transfer the peppers to a bowl and cover with plastic wrap
Let steam for 10 to 15 minutes
Uncover the bowl and peel the skins from the peppers
Remove stem and seeds as well
At this point, the peppers are ready for this recipe! You can also char the peppers over a grill or over a high flame on your stovetop, but I just find the broiler method to be the easiest.
When I first made this recipe, I devoured it for dinner with a small side salad. Later that week, I enjoyed leftovers beside a simple grilled steak. I’ve also brought this salad to a backyard barbecue and it holds up really well at room temperature. There’s no dairy here, so you don’t have to worry about it sitting out for too long.
The pasta that I used here is called trottole (Italian for spinning tops), and its curved shape is perfect for trapping all of that delicious romesco sauce. If you can’t find trottole, then you can certainly use any curvy pasta (shells, fusilli, rotini, cavatappi).
You toss this salad with part of the sauce while the pasta is still piping hot. This allows the pasta to better absorb the flavors of the sauce. Later, after you finish prepping the breadcrumbs, you toss in the rest of the sauce to amp up all of those delicious romesco flavors.
Author Brandon Matzek
Yield 4 to 8 servings
Ingredients
4 whole roasted red bell peppers, homemade or jarred (see note above on how to make at home)
1 cup toasted walnuts, finely chopped and divided
3 garlic cloves
1 teaspoon crushed red pepper flakes, divided
Zest and juice of 1 lemon
Kosher salt
1/2 cup plus 2 tablespoons extra virgin olive oil, divided
1 pound trottole pasta (or medium shells, fusilli, rotini, cavatappi)
1 1/2 cups fresh breadcrumbs*
1 pound ripe red heirloom tomatoes, cut into bite-sized pieces
2 ounces finely grated Parmesan cheese
1 cup basil leaves, torn if large
Instructions
Add roasted peppers, 1/4 of the walnuts, garlic, 1/2 teaspoon red pepper flakes, lemon juice and a couple of pinches of salt to a food processor, and blitz until smooth. With the motor running, slowly stream in 1/2 cup olive oil. Season sauce to taste with additional salt - it should be very well seasoned. Set aside.
Bring a large pot of salted water to a boil. Cook pasta until al dente according to the package instructions (timing will vary based on the type of pasta you use - about 12 minutes for trottole). Drain and transfer to a large bowl. Toss hot pasta with 1/2 of the romesco sauce and set aside.
Warm 2 tablespoons olive oil in a medium, non-stick skillet over medium heat. Add the breadcrumbs, lemon zest, 1/2 teaspoon red pepper flakes and a pinch of salt, and cook, stirring occasionally until golden (5 to 7 minutes).
Once the breadcrumbs are ready, toss the pasta with the remaining sauce, then fold in tomatoes, Parmesan and remaining walnuts. Season to taste with salt. Finish by topping with breadcrumbs and basil. Enjoy warm or at room temperature.
Notes
*Did you know you can easily make breadcrumbs at home? Start by removing the crusts from a nice loaf of white bread (French, Italian, ciabatta, baguette, rustic for example). Cube up the bread, then add to a food processor. Pulse the bread until coarse crumbs form. And that's it! This is a great way to use up bread that's gone stale. In this recipe, you can simply wipe out the food processor and use it to make the sauce.
7
Source: https://www.kitchenkonfidence.com/2018/07/roasted-red-pepper-pasta-salad-with-tomatoes-basil-and-walnuts

0 notes
Text
Healthy Soul Food Chicken Meatball Soup

There’s nothing like a good chicken soup to whip up if you’re feeling under the weather or in need of some good nourishing comfort soup.
This Soul Food Chicken Meatball Soup is my fun spin on chicken soup with super tasty blender meatballs that take minutes to prepare. It's great if you’re starting out on a low-carb diet and suffering with keto-flu. It's full of electrolytes and gut healing broth that will help starve of symptoms.
This recipe makes 3 to 4 generous servings that can be served as mains, or 6 to 8 appetiser sized servings.
Preparation time
Hands-on: 15 minutes Overall: 20-30 minutes
Nutritional values (per serving, about 2 1/2 cups)
Total Carbs 8.6 grams Fiber 2.5 grams Net Carbs 6.1 grams Protein 32.1 grams Fat 19.2 grams of which Saturated 8.5 grams Energy 334 kcal Magnesium 228 mg (57% RDA) Potassium 1,270 mg (64% EMR)
Macronutrient ratio: Calories from carbs (8%), protein (39%), fat (53%)
Ingredients (makes 4 servings) Chicken meatballs:
2 chicken breasts (450 g/ 1 lb)
1/2 brown onion, cut into wedges (35 g/ 1.2 oz)
2 garlic cloves, roughly chopped
1 tbsp tomato puree (15 g/ 0.5 oz)
2 tbsp chopped parsley
1/2 tsp sea salt
1/4 tsp cracked black pepper
1 tbsp ghee (15 ml)
Soup:
2 tbsp ghee, butter or coconut oil (30 ml)
1/2 brown onion, chopped (35 g/ 1.2 oz)
2 medium celery sticks, chopped (100 g/ 3.5 oz)
2 medium carrots, chopped (120 g/ 4.2 oz)
6 cups chicken stock (1.5 L/ 34 fl oz)
1 tsp dried thyme
1/2 tsp sea salt, or to taste
1/4 tsp cracked black pepper, or to taste
2 cups chopped kale (100 g/ 3.5 oz)
1 tbsp chopped parsley
Optional: few sprigs of fresh thyme
Instructions
Preheat the oven to 180 °C/ 355 °F (fan assisted) or 200 °C/ 390 °F (conventional).
Make the meatballs by placing all the chicken meatball ingredients in a food processor and blitzing until combined.

Roll into small meatballs. The mix should make 16-20 meatballs in total (about 28 g/ 1 oz each).
Place the chicken meatballs on a greaseproof lined baking tray. Brush with 1 tablespoon of melted ghee. Bake in the oven for about 20 minutes until cooked through and golden.
Note: If you are short on time, skip the baking and simply add the raw meatballs to the soup after you pour in the stock (step 6).

Meanwhile, prepare the soup. Melt the butter in a pan and fry the onion, celery and carrot on a medium-low heat for 4–5 minutes, or until they start to soften.

Add the stock, thyme and season. Bring to the boil then reduce the heat to medium-low and simmer for 15 minutes.
Add the kale for 1–2 minutes until it softens.

Taste, adjust seasoning as required. Stir through fresh parsley and top with chicken meatballs.

Enjoy hot or let it cool down. Store in the fridge for up to 4 days, or frozen for 3 months.

https://ift.tt/2uctEHO
0 notes
Text
Yesterday’s show of healthy food thoughts is still sticking to me.. Don’t worry these thoughts do not come often. While my “I should eat healthy, hereafter” thoughts are still there I wanted to post this recipe. Today’s recipe is my health vegetables loaded, gluten free savoury pancakes..
It is flourless, the vegetables and the eggs in them will make you feel light and the sense of accomplishment that you have cooked something so simple, healthy and nutritious is the winning factor here.
Also, it is Saturday morning. Pancakes morning, almost Saturday at our home. So along with the oats banana pancakes(that is a recipe for another day) I was making these savoury pancakes.
Lets get on to the preparation method. And there is no elaborate preparation required if you have a chopper processor. Makes the preparation ultimately easy. But one can use the good old chopping board and knives too.., either way it is easy.
Ingredients required – Makes 6
Onions – 2
Tomato – 1 small or half of a bigger one
Capsicum/Green bell pepper- 1/2 deseeded and cleaned
Coriander leaves – a small bunch
Salt for taste
Pepper and cumin(optional)
Turmeric – a small pinch
Paprika – 1/2tsp
Oil to grease the pan
The above vegetables are just for the basic version, you can add cheese, red/yellow peppers, zucchini and so much more to it.. All will be delicious🙂😍
Steps to make savoury pancakes
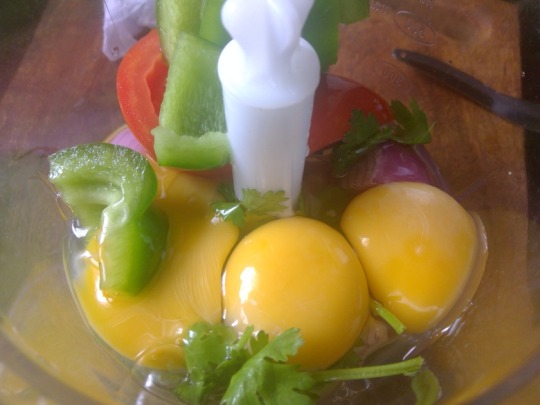
This is much simpler, as mentioned before if you have a chopper processor. Just put all the ingredients(Everything except oil) in it and blitz until you see small colourful vegetable pieces, as shown in my pictures below and the eggs look well beaten.

If you have got no chopper, no worries. Just chop the vegetables, and add the eggs and seasoning and beat well with a whisk..👍
Heat the pan, spray in some olive oil and pour in the batter. Let it get cooked, when you see golden edges, flip them carefully and let the other side cook too.
Server hot. These pancakes will be delicious without any sides, but you can serve with mint chutney or tomato ketchup if you like.

Healthy vegetables savoury pancakes Yesterday's show of healthy food thoughts is still sticking to me.. Don't worry these thoughts do not come often.
0 notes
Text
Blitz: Matched to His Bear
https://ift.tt/3bFNFeU
RELEASE BLITZ
Book Title: Matched to His Bear
Author: Lorelei M. Hart & Colbie Dunbar
Publisher: Surrendered Press
Cover Artist: Megan J. Parker-Squiers
Release Date: September 10, 2020
Genre/s: Contemporary M/M Romance, MM mpreg romance, paranormal romance
Trope/s: Shifters. Fated love. Shifter hero/Human hero. Bond or die
Themes: Blind dates. Dating. Jealous pack member. Losing control of his bear
Heat Rating: 4 flames
Length: approx. 35,000 words
Even though it’s part of a dating app series, each book can be read as a standalone.
This is the second book in the series. Matched to His Wolf was the first.
Buy Links - Available on Kindle Unlimited
Amazon US | Amazon UK
Fate doesn’t use dating apps to pair true mates...except when it does.
Blurb
Fate doesn't use dating apps to pair true mates...except when it does.
Alpha Brad Galway is a hot successful lawyer and Beta of his Den with omegas throwing themselves at his feet. From the outside, it appears as though he has everything he could possibly desire. Inwardly, he has a bear clawing to get out—no longer willing to stand by and let his mate go unclaimed. But there’s a problem with his bear’s plan. Brad doesn’t know who or where he is, just that they crossed paths in an airport over a year ago. If he doesn’t figure out how to control his bear soon, he risks losing everything—including his life.
Human omega Gabe Rafferty is excited to start his new job as a professor of English Lit. Ever since a layover in an airport last year, he’s felt like his luck has changed. He can’t explain how or why...but something happened that day, and everything from that point was onward and upward. He just wishes he had someone to share it with.
When Gabe is talked into using a dating app, he isn’t expecting much until he stumbles onto profiles that are fixated on the TV series, Shifter World. And he definitely isn’t anticipating the smoldering alpha who recaptures that feeling he experienced at the airport. Sparks fly, feelings grow, and their worlds are turned upside down in the very best of ways, but is it too late for Brad’s bear?
Matched to His Bear is the second book in the sweet with knotty heat Dates of Our Lives, an M/M mpreg shifter dating app romance brought to you by the popular co-writing duo of Lorelei M Hart and Colbie Dunbar. It features a human who stumbles into a world he never knew existed thanks to a silly little soap opera, an alpha who is losing his humanity, a stalker bear who turns out to be more trouble than anyone could’ve suspected, and an adorable baby. If you like your shifters hawt, your omegas strong, your mpreg with heart, and your HEAs complete with true mates and a bundle of joy, one-click today
Excerpt
The kitchen island was covered in bowls, pans, and other stuff. “Has the food delivery guy been and gone?”
“Nope. We’re cooking breakfast.” He glanced at his watch. “More like brunch.”
“You cook?” I asked, holding up a bunch of green things and studying it.
“You don’t?”
“No,” I replied.
“I do,” he informed me.
“And about the whole ‘we’ cooking thing…” My voice trailed away as Brad handed me a wooden board, a knife, and an onion. “What do I do with this?”
He grinned and kissed the end of my nose. “Can you chop it, please, Gabe?”
“Okay.” I was game for anything. I placed the onion on the board, and with both hands on the knife, brought it down over my head, and missed. Though I got the board, the knife sticking out of it reminded me of the aftermath of a pirate battle in a swashbuckling book.
“Gabe!”
“Sorry, I’ll try again.”
Brad stood behind me and murmured, “Here lies our dearly departed knife…”
“Did I kill it?”
“Almost. Let’s try again.” He placed his hands on mine, but I wriggled my ass against his crotch. A sharp intake of breath from him had me giggling. He pressed himself against my body and placed his lips on my ear. Food first, and then I’m taking you back to bed.”
“Mmmm.”
“First we have to peel the onion, and then we chop it.” But by the time he cut into it, I was blinking tears from my eyes. “Owww! It hates me.” Brad took over and I sat on a stool. “You watching, Gabe?”
“Mmmm. Yes. Taking it all in,” I said as I leaned sideways and peered at his ass. That wasn’t a fib. I was paying attention, just not to what he was doing.
“Liar.” He held up an oddly shaped red lump. “Know what this is?”
“Something you’re going to cook?” I was quite proud of my answer.
“A pepper. A red pepper.”
“I thought pepper was something that came out of a grinder.”
Brad slapped a hand on his brow. “How is it you’ve managed to survive in the world up until now? And have no idea what you’re putting in your mouth.” And as he said it, his mouth formed the perfect O.
He understood the hole he’d fallen into, and I was going to tease him about it. I tilted my head to the side. “I always know what I’m eating, but I’m not talking about food.” I grabbed a dish cloth and swatted his ass.
He leveled a glowering look in my direction. “Keep distracting me and we’ll never get brunch.”
“Promise?” But my belly grumbled and I bowed, awarding the first round to him.
He made quick work of cutting the pepper, threw oil in a pan, and asked me to stir the red pepper and onions while he assembled herbs and spices, which were all shades of red or brown. I peered at the mixture as I stirred, not sure what it was supposed to be.
“You can leave it for now. We’ll keep an eye on it,” he told me as he turned down the heat and opened a tin of tomatoes.
“Time for extracurricular activities, I asked?”
I swooped under his arms and bobbed up, kissing him on the mouth. “You are a delightful distraction,” he croaked as my tongue flicked over his teeth. “But let’s finish cooking and then you’ll be my prisoner, unable to leave the bed for the rest of the day.”
I clapped my hands. “Are you going to tie me up?
“I wasn't planning on it, but if you behave…”
About the Authors
Lorelei M. Hart
Lorelei M. Hart is the cowriting team of USA Today Bestselling Authors Kate Richards and Ever Coming now joined by their friend, Ophelia Heart. Friends for years, the three decided to come together and write one of their favorite guilty pleasures: Mpreg. There is something that just does it for them about smexy men who love each other enough to start a family together in a world where they can do it the old-fashioned way ;).
Social Media Links
Facebook | Newsletter Sign-up
Colbie Dunbar
My characters are sexy, hot, adorable—and often filthy—alphas and omegas. Feudal lords with dark secrets, lonely omegas running away from their past, and alphas who refuse to commit.
Lurking in the background are kings, mafia dons, undercover agents and highwaymen with a naughty gleam in their eye.
As for me? I dictate my steamy stories with a glass of champagne in one hand. Because why not?
Social Media Links
Blog/Website | Facebook | Twitter | Instagram
Newsletter Sign-up | Pinterest
Hosted by Gay Book Promotions
Follow the tour and check out the other blog posts here
via Blogger https://ift.tt/3jWMzOG
0 notes
Last Seen Blogs

ida-solehhah-blog
My Life

passthesourcream
Pass the Sour Cream

dragstripinthesky
showbiz gifs + edits

authorjyoti
Author Jyoti T. Pandey

idk-bigslappy
Kiki_3D_