#and then into the oven and then i have one of those big chopped garlic things and i put that in the pan w olive oil until the garlic is
Text
i have been making roasted yam & braised arugula and poached eggs for breakfast/lunch and the difference from being overstimulated in the last few moments to how i feel after i have eaten is so major and makes the cooking worth it
#there’s zero cutting involved (bc i cut all the yam into cubes before as like ~prep~) which is why i like it#the recipe is: cubed yam tossed in salt black pepper olive oil crushed chili pepper (the kind w the seeds) & red pepper flakes (gochugaru)#and then into the oven and then i have one of those big chopped garlic things and i put that in the pan w olive oil until the garlic is#aromatic and shit and then i add the arugula to braise it before taking the yams (out of the oven) and putting them in the pan#so the arugula gets some of the salt and spice & the yam gets the garlic and it’s all mixed#and then i add poached eggs on top#w precut yams the prep time is like five minutes and the cook time is 30 which is honestly fine bc mostly i just sit and have coffee while#waiting for the yams to roast#but it’s cheap and involves less standing than frying eggs ime#ive mentioned little to standing several times sorry im just proud of myself
5 notes
·
View notes
Note
Hi! This might end up a super weird question, sorry in advance!
So just came across your twitter today and seeing your profile pic my brain is now convinced that you were the person who years ago shared this one really good bread recipe with oven baked garlic in it? Is it actually you? I tried to look through your tumblr but I didn't find anything so I'm so sorry if it's not you? But man that was the best bread I ever ate so I really want to find the recipe again! Thank you so much in advance... QvQ
No, it's not weird at all! Don't sweat it. :)
I've been baking for a long time, and have posted enough recipes now, here and there, that it's hard to keep track of them all sometimes. So I feel your pain. :)
...That said: I don't think I've done a recipe that involves actually baking garlic in the bread. ...Roasting garlic and then squeezing that into or onto already-baked bread, that I've seen around... though not in any of my own recipes. (Not that it's not a good idea: I just haven't been down that road myself.)
... @petermorwood just sent me this really quite sensual-looking garlic bread TikTok that does involve the roasted and squeezed-out garlic approach. I'll reblog it after this post, as I'm not sure how to pull the embed out of his.
Meanwhile, here's a garlic bread thread I did on Twitter some time back. (Pulling the images and contents into this post, because who knows what's going to happen to Twitter in the medium term...? But the thread starts here for those who want to link to that.)

"Tonight's garlic bread. Method follows. :) "
"...RIGHT. So this is based on many warmed-over/reheated Manhattan-based pizzeria dinners back in the 70s, when I was still doing hospital work and you were glad to either (a) reheat what you had from last night, or (b) make something very like it, but hotter and fresher.
"The basic approach: Buy in small cheap store-baked baguettes. (There is no POSSIBLE point in you using good homebaked bread on these. Buy cheaply made spongy bread that will SOAK UP THE GARLIC BUTTER SOONEST.)
"Slice each one more or less into five or six thickish slices (NOT all the way through, just 5/6 of the way to the back of the loaf.) Warm them a bit in the oven or microwave if they're cold.
"Mix together: Six to eight cloves of freshly chopped garlic: at least 300g but maybe more like 500g of butter. Some coarse-ground pepper: some salt: a little bit of onion powder. Herbs to your preference (oregano, parsley, whatever...).
"Additionally, as we did tonight: brown 6-8 slices of bacon by your preferred method. (I did it in the microwave because I could *not be arsed* to get involved with the frying pan.)
"Set up each sliced baguette in a piece of foil big enough to fold loosely around it (to keep the butter in) and undo without a whole lot of trouble. Pry the bread slices apart and stuff at least a teaspoon of butter or two between each pair of slices. (OR MORE.)
"(In our tonight-variant: Stuff a crumbled slice of bacon into the garlic butter between each slice.) Preheat the oven to sort of 180C/375F. Put each baguette and its foil in a baking tray. Shove the whole business into the oven and give them 10 minutes or so with the foil on.
"Pull the garlic breads out and unfold the foil from around them. Shove them back into the oven and give them another 10 minutes, keeping a close eye on them so they won't burn. (f you want to put some cheese on top of one, this is your time.)
"Pull them out and let them cool enough not to destroy the human beings intending to eat them. After they cool (if anything's left) put a *faintly damp* tea-towel/dishtowel over them to keep them nice. If coming to them again later, heat them gently at first, then FIERCELY.
"...And now the pics. Mine:

"His (with the cheese):

...The roasted-garlic garlic bread follows in the next post. :)
("Why is this shot like a porno?" someone says plaintively in the comments. Well, why indeed? And why not.)
137 notes
·
View notes
Text
Forage's Roasted Cauliflower
Editor's note - I have patch notes for this recipe at the bottom, but I'm leaving the main text mostly alone
Wash and butcher a medium-large cauliflower, then chop into roughly equally sized florets. I tended to cut the big chunks into 3 or 4 florets--some of them would end up having 2 flat sides and one bumpy, and some would be like tiny slabs of cauliflower. The goal is for them to cook mostly at the same rate, but I also tossed in the real tiny pieces :)
Preheat oven to 425 at some point
Mix together 2tbsp melted butter with 3tbsp olive oil (reduce oil if your cauliflower is small), then add your spice mix. Mine was paprika, garlic powder, onion powder, Greek seasoning, MSG, salt, pepper, and a scoop of minced garlic.
**This is what I did because I was riffing off of my mum's garlic butter recipe! You could do basically any mix of spices you want, just measure with your heart and taste the oil mix occasionally to gauge whether it's as flavorful as you want it. Notes on this in the patch notes.
Put the oil-spices over all the florets, toss to coat best you can, then lay them out on a half sheet tray (18x13 inches) with parchment paper. Try to get it into one layer as best as you can. (The parchment paper isn't required, but will help make cleanup much faster.)
Put them into the oven! (It should be at 425F, I did not use convection but I think that would improve texture if you have it)
I put on a timer for 15 minutes and checked/tasted them every couple minutes after that went off. Taste a piece for texture every few minutes after the timer until they're at the doneness you want. Mine ended up going for around 25-30, I'd do a little less personally. "Doneness" in this case will be the cauliflower softening, so it's up to the texture you want.
Best served immediately and shared with a loved one to tell you just how good you did, eating straight from the tray. :)
You can eat the cauliflower leaves too--I haven't learned how to prep them yet, but a couple months back when I roasted broccoli I added some of those leaves to the tray and it was delicious. So I only assume if you roast the leaves, they'd be yummy and crispy. Just use your cauliflower relatively quickly so the leaves are still good, unlike me!
Patch notes after making this again and following my instructions:
-If you want intensely flavorful cauliflower, flavor your oil mixture until it alone tastes way too strong; I went too light this time. Still absolutely delicious because I like cauliflower, but not quite the taste that my mom and I ate a whole tray of.
-Also I'd go with the full amount of oil unless your cauliflower is particularly small, mine definitely needed it
-15 minutes at 450F results in a firmer cauliflower with more tooth and some color, which was great; if you want it softer, I'd probably go lower and slower in temp unless you're okay with a decent amount of char on some pieces
17 notes
·
View notes
Text
Creamy Beet Pasta Sauce with Thyme
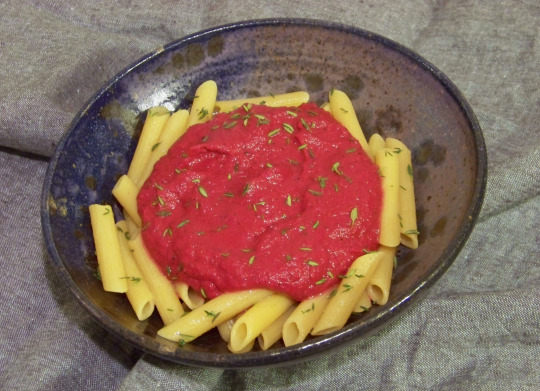
[image ID in ALT]
This recipe just popped into my head a couple of years ago, and it turned out just as good as I imagined it would! You don't have to stick with the amounts listed, it's not a finicky recipe and is easy to adjust to your preferences. I've put a really detailed version under the cut to save your dash. But here's a link to it if you prefer (and a link to the simplified instructions, though I suggest you read the detailed ones at least once since I added a lot of tips). As always, both imperial and metric measurements are included. You do need a blender for this, but it doesn't have to be one of those super fancy, expensive ones.
I know the photo isn't very good, but this is my first attempt at photographing food, and I was getting really hungry and just wanted to eat, lol! Though it shows just how vibrant the color of the pasta sauce is, which was the point.
Creamy Beet Pasta Sauce with Thyme
The recipe yields about 3 cups/750 mL of pasta sauce.
2 cups/500 mL chopped cooked beets (about three medium beets) (directions below – you can cook them ahead of time or use precooked ones, in which case see the note below about reheating it)
1 cup/250 mL raw cashews, soaked and rinsed (directions below)
about 1 teaspoon/5 mL minced or crushed garlic – or 2 to 4 cloves of garlic depending on their size and how garlicy you want it (keep in mind that as the directions are written the garlic is raw)
about 1 tablespoon/15 mL fresh thyme (see note at the end)
2 teaspoons/10 mL apple cider vinegar (see note at the end)
1 to 1 ½ teaspoons/5 to 7.5 mL sea salt or Herbamare
½ to 1 ½ teaspoons/2.5 to 7.5 mL fresh ground black pepper
about 1 ¼ cups/210 mL water
pasta – I generally go with penne for this sauce but this is your meal so follow your heart!
A) Rinse the thyme stems in cool water and place them on a kitchen towel to dry. You can fold the towel over the stems and gently pat down to speed up the drying process, thyme is pretty sturdy so you won’t wilt it.
B) Prepare the cashews. There are two ways to soak them, it doesn’t matter which you choose.
1) Slow method: Place the cashews in a bowl or container with a lot of room, cover them with 2 cups/500 mL water. Let them soak for 10 to 12 hours. They’ve soaked long enough when you can easily break them with your fingers.
Fast method: Place the cashews in a pot and cover with at least 2 cups/500 mL of water. Cook on a low boil for 20 minutes. (If you use this method, pick a pot big enough to cook your pasta in, then you only have one pot to wash!)
2) Drain and rinse the cashews a few times with fresh water.
C) Cook the beets. You can use whatever method you’d like, but I recommend roasting them because it’s easy and retains most of the nutrients. Plus, I haven’t found a faster way to peel them. Though this method seems to work best with fresh beets that still have the greens attached.
1) Preheat your oven to 400℉/200℃.
2) Cut the greens off the beets and rinse off any dirt.
3) Wrap each beet in aluminum foil and place on a baking tray or pan.
4) Bake for 45 to 90 minutes, until a fork can easily be stuck into them all the way to the center.
5) Let them cool long enough to handle, about 10 to 20 minutes, then cut off the ends.
6) Under running cold water push the beet skins off. They should come off really easily without much force or pressure.
7) Chop the beets into smallish cubes – about ¼ inch/0.5 cm – for easier blending.
D) As the beets are cooking (and the cashews if you choose the fast soaking method), destem the thyme until you have around 1 tablespoon/15 mL of thyme leaves.
E) Start cooking your pasta. Of course the timing of this depends on your pasta of choice and how long it takes. But if multitasking is too stressful, cook the pasta once you’re done with the sauce.
F) Throw everything (except maybe the thyme – see #2) in the blender and blend until creamy.
1) Use the smaller amounts of the garlic, thyme, salt, pepper, and water at first. That way you can adjust it to your taste as you go.
2) You might not want to blend the thyme in. If you want stronger thyme flavor, a fully creamy sauce, and a deeper, less vibrant magenta color than blend it in. But if you’d like a lighter thyme flavor, are fine with the texture of the leaves, and want a bright magenta sauce, add the thyme after you’re done blending it. (For reference, the photo shown has the thyme blended in.)
3) Blend until everything is nice and creamy and the seasonings and thickness are adjusted to your preference. You’ll have to stop the blender and scrape down the sides every now and then.
4) That’s it, your sauce is done! Now just plate it up with your pasta of choice! You can sprinkle some of the thyme on top to make it look extra pretty!
This keeps well in the fridge for several days, at least up to four. When you reheat it, make sure you don’t cook it. Just get it warmed up enough to keep it from making your pasta too cold. I find it warms up really well in the microwave, but I’m sure the stovetop works well too. I have no idea if this freezes well or not, because I always eat it up too fast to try, lol!
Note about Thyme: Normally I’m a dried herb person but this recipe just wouldn’t be the same with dried thyme. So do yourself a favor and buy the fresh this time (lol). If you don’t know what to do with the rest of it, just tie the stems up with a bit of string or thread and hang it somewhere out of direct sunlight and let it dry. It should be dry in a few days to a week. You can easily take it off the stem by running your fingers down it, against the direction the leaves grow. Now you can put it in a jar and you have no wasted thyme!
Note about Apple Cider Vinegar: You might be tempted to skip this, but please don’t! When you are using plants to replicate the creaminess of dairy, you need to add a bit of acid since dairy is acidic. You can replace it with other acids but your results may vary. Lemon juice is a poor substitute here in my opinion, and you need to use more of it. You could use balsamic vinegar, but you probably need more of that too, since it’s not quite as tangy as apple cider vinegar. The point isn’t to taste the vinegar, but to add that bit of acidity it really needs to shine.
#here's a very pretty pasta sauce just in time for Valentine's day#it's not a hard recipe but there is a bit of planning involved#make sure you have enough cashews before you start -- because I didn't yesterday and husband had to quickly buy more lol#fingers crossed the formatting doesn't go to hell when I post this#creamy beet pasta sauce with thyme#pasta recipes#recipe#vegan recipes
13 notes
·
View notes
Text
Stuffed like a Turkey (Elucien) 🎁
Summary: When Lucien’s Solstice pranking goes too far, Elain demands his repentance.
A series of fluffy/smutty ACOTAR winter one-shots! 12 stories for the 12 days leading up to Solstice (December 21).
Warnings: Smut, mild brat, vaginal sex
Read: Masterlist | AO3

It was Elain’s first Solstice outside of the Night Court, since she and Lucien had officially moved to the Day Court this past spring. Helion, the former Lady of Autumn (now Lady of Day), Eris, and his pack of hounds were coming to their little house for Solstice dinner. It was going to be packed, and people were going to be hungry.
As Prince of Day, Lucien had court obligations that kept him busy from sunup to sundown. So Elain had cheerfully volunteered to cook Solstice dinner this year.
It would’ve been fine and well, but Feyre’s birthday luncheon had run late, and Elain was frazzled by the time she winnowed back into the Day Court. Dividing time between the courts during the holiday was hard. Still, there was plenty of time before the guests would arrive to get things done.
The turkey went into the oven first. It was a magnificent bird, seasoned thoroughly and brined for the last 24 hours. Plenty of carrots, apples, and beets to rest on, but no onions or garlic—those ingredients were toxic for Eris’s dogs. Elain busied herself around the kitchen as the hours ticked by, chopping vegetables and sautéing with dexterity.
Elain took some time away to lug her present for Lucien downstairs. It was a huge box, wrapped prettily in dusty pink paper. But it was a little prank: there were subsequent boxes of smaller sizes nestled within each other, all of them individually wrapped. The final box, which was about the size of her palm, held a pair of glittering emerald earrings.
There was no time to worry about what her mate’s Solstice prank would be. When Elain rushed back to the dining room to set the table, the jingling of the front door indicated Lucien had returned.
“Lucien!” Elain cried, running over to give him a crushing hug. She hadn’t seen him all day. “How was the Solstice ceremony?”
“Hello, sweet pea,” he murmured, pressing her close and inhaling her scent. The male was draped in a white linen toga, the regalia of the Day Court, despite the frigid temperatures outside. “How was Feyre’s birthday lunch? Did she like our present?”
“She did.” Elain pulled back to admire Lucien’s handsome face. A gold armband circled his bicep, and a small golden crown rested on his brow. His brown skin glowed with good health, smile was equally bright. Lucien was every bit the heir to the Day Court. Her mouth watered at how delicious he looked.
“How’s dinner prep going? Do you need any help?”
“Hmm. I need to set up the dining room table, so could you please take the turkey out of the oven? It should be ready.”
“Gladly, my lady.” Lucien kissed her softly before striding away.
Elain had just finished rearranging the silverware when Lucien called out to her from the kitchen. “Sweet pea? I think you need to see this.”
“What’s wrong?” Elain hurried to the kitchen to find Lucien, still in his Day Court toga, peering into the oven with a perturbed expression. She nearly screamed when she saw the turkey, or at least, what remained of it.
She hadn’t checked on the turkey in the last few hours, fearful of losing precious oven heat. A tiny, golden-brown bird lay on top of the roasted vegetables. Elain could have sworn her arms had strained to heft the turkey into the oven, but this was a bird that couldn’t even be shared between two people, let alone a house full of Solstice guests.
“What the hell?” she shrieked, pushing Lucien out of the way. “What happened?!? How did the turkey shrink?” she wailed, taking the tray out of the oven with thick mitts. She prodded the tiny bird with a fork. It was big breasted, with juicy drumsticks and perfectly spiced…but it was far too small.
“I told you there was something wrong with our oven! The turkey was our main dish of the night! What are Eris’s dogs going to eat now?!? Oh, Lucien, they’re going to go hungry!”
There was no response. Elain whirled around to find Lucien shaking with silent laughter. He brought out a small takeout box from the cupboard with the name Camilla’s Cornish Hen Stand stamped across the front. The male gently floated the bird on the tray back into the box. And with a snap of his fingers, the real turkey, properly sized and still steaming, reappeared on the tray from the pocket of space. Lucien’s Solstice prank, Elain realized.
“You fiend!” Elain pouted, her cheeks burned red with embarrassment.
Lucien was still chortling. “I just can’t believe you thought a cornish hen was our Solstice turkey!”
“Hmph!” Elain turned away crestfallen. “How could you do this to me, Lucien? I’m so stressed out already trying to make everything perfect for your family during our first Day Court Solstice…” her voice shook with tears.
Lucien’s heart cracked. “I’m sorry, my love.” Lucien wrapped his hands around her waist in a back hug. “I only meant for it to be a harmless joke. Tell me how I can make it up to you. I’ll do anything…wait a damn minute. Elain!” He spun his mate around to find her laughing.
“Did I fool you, too?” she giggled.
Lucien sighed with relief. “Gods, Elain. Still have a few tricks up your sleeve, I see.”
“How did you manage to sneak it in? I literally charged at you the moment you came through the door!” she exclaimed.
Lucian grinned. “Oh, I made sure to take that into account. I climbed in through the window—and before you look so alarmed, I made sure to move your plants out of the way—switched out the birds, climbed back out. And then I came in through the door.”
“Clever fox.” Elain leaned in, running her fingers along Lucien’s bare pectoral. She trailed the golden armband on his bicep, appreciating how it gleamed against his burnished skin. “Anyways…I thought I heard you were offering to make it up to me,” she proposed with a sly grin.
“That was when I thought you were upset!” Lucien protested, though his skin was starting to run hot under her nimble fingers wiggling their way over his chest. Elain wearing a frilly pink apron was always a treat, and his russet eye appraised her lithe form with a twinkle.
“But I haven’t seen you all day!” Elain whined, turning her big brown doe eyes up at him. Her perfect pink lips pouted petulantly. Lucien sucked in a breath, grappling with his self-control. “We should do something together before our guests come.”
“Yes, we should, but you’re being such a brat right now with your whining.” Lucien bent down to kiss her, but Elain turned her head.
“I’m your brat. And besides, you know you love it.” She gave him another pout.
“Alright, then. What does the little brat want me to do?”
Elain’s pout melted into a grin. She tip-toed to whisper into Lucien’s ear, “I want you to stuff me like a turkey.”
Lucien nearly choked. His sweet gardening mate always had such a dirty mouth behind closed doors. “Our guests will be here soon, sweet pea. Are you alright with something quick?”
“Yes,” Elain said, impatiently hauling Lucien’s lips towards hers. Lucien hungrily delved his tongue into her mouth, the faint remnants of their Solstice dinner from taste-testing lingering on Elain’s tongue. “Ever since you walked through that door—” she broke off with a gasp when Lucien lifted her effortlessly onto the counter, large hands pushing up her dress.
“Mmm I missed you,” Lucien breathed against her neck as Elain’s bare legs spread wide open for him.
“Close the kitchen blinds.” Elain was barely coherent as her hands fumbled at the cinched knot holding Lucien’s garment in place. The white fabric fell away, revealing his strained erection, the head gleaming with precum. Elain needed to travel back in time and thank whoever created the toga, for it displayed all her favorite parts of Lucien: his broad chest, his muscled calves and thighs, his tanned brown arms…oh yes, and also, the easy access to his cock.
Normally, Lucien would have taken his time removing Elain’s stockings by slowly rolling them down her leg and leaving a trail of kisses, but today, he was in a rush. He disposed of her stockings and damp underwear in a pile before kneeling on his knees to kiss her inner thighs. Elain whined as Lucien’s hot breath ghosted over her most sensitive areas. “You look delicious, my love,” he whispered reverently.
“I don’t want you to taste me, Lucien! I want you to stuff me up,” Elain demanded.
“Bratty as always,” Lucien remarked dryly. But Elain’s hips bucking in his face and her sweet arousal were unbearably tantalizing. Lucien allowed himself to lick a stripe up her pussy, tasting her glistening skin, before getting back on his feet. “But as my lady commands.”
When they’d moved in, Elain and Lucien had requested a new countertop. One that was specifically the perfect height for him to drive himself into her without any further warning. Elain let out a squeak as her mate stuffed her completely, his heavy cock stretching her walls perfectly. She threw her head back, moaning “yes, Lucien” as Lucien began snapping his hips against hers.
Elain pushed the last bit of Lucien’s toga off his shoulder, leaving him bare-chested and beautiful under the faelight. She wrapped her legs around his hips, locking him in so that he could never leave her again. The sight of her mate, with his golden sun crown on his brilliant red hair and his dark gaze as he fucked her had Elain clenching, then cumming in quick succession.
“My bratty chef looks so good with my cock stuffed inside of her.” Elain could only whimper as Lucien found a deeper angle. She was a pretty sight to behold, her warm brown eyes half-lidded with bliss and her cheeks flushed with euphoria. Simple brown dress bunched up around her hips, the top laces loosened revealing soft curves, and that damn pink apron was the cherry on top.
The heir of Day leaned down, his red hair tickling the nape of her neck. “My beautiful mate,” he murmured into her ear. “I couldn’t stop thinking about you, Elain. The Solstice ceremonies were so droll without you there.”
“Were any females throwing themselves on you?” Elain demanded, feeling possessive at the thought of other females eyeing her mate. If she didn’t have Feyre’s birthday luncheon to attend, she would have gone to the Day Court’s Solstice ceremonies.
“Are you jealous?” Lucien muttered darkly. His hands gripped her waist, his russet eye sizzled with desire as she dug her nails into his back in response. Elain latched onto Lucien’s neck with her lips, sucking hard. The wet suction of her lips and the vibration of her little moans on his skin with each thrust had Lucien groaning as he spent himself inside her.
Lucien lay her gently on the counter as he pulled out of her, wiping the apex of her thighs with a clean towel. He walked around their kitchen, his muscled, tall body still naked. Elain blissfully lay back on her elbows, admiring her mate. She blinked.
“Oops,” she gasped. “I may have left something on your neck.”
Lucien’s gold and russet eyes grew wide as he checked his reflection in a small mirror on the wall. A dark, mottled hickey had bloomed on the column of his neck. “Elain! My parents will see this!” he hissed in shock.
Elain blushed bashfully, a completely different female from the one who had boldly ran her hands over him minutes ago. “I’m sorry!” she cried, wringing her hands fretfully. “I got carried away!”
Lucien sighed, shaking his head with a small smile. “You have nothing to be jealous of, Elain. No Day Court female would ever dare provoke your wrath.” A small, animalistic part of him preened at the thought of his mate possessively marking him up as hers…perhaps he could request that from her for their next Court appearance…
There was a loud knock on the front door, and excited yips coming from outside. “It’s Eris!” Elain’s brown eyes widened. “Why is he here early? We are not ready yet!”
“Of course Eris is early,” Lucien said dryly as he handed Elain her stockings from the floor.
“Open up! It’s cold out here!” The High Lord of Autumn barked. “Are you…are you two fucking?”
“No!” Lucien shouted, tugging on his toga hastily. The air was thick with the smell of their arousal, and he had no idea how to clear the scent. Elain grabbed a bottle of perfume on the counter and began spritzing it madly. She coughed as her nostrils were filled with cloying floral essence.
“Don’t lie to me, little brother! My dogs say they can smell—oh wait…maybe it’s just the turkey.”
#elucien#elain archeron#lucien vanserra#elucien fanfic#elucien smut#elain x lucien#lucien x elain#acotar solstice
53 notes
·
View notes
Text
Herbed butter roast chicken
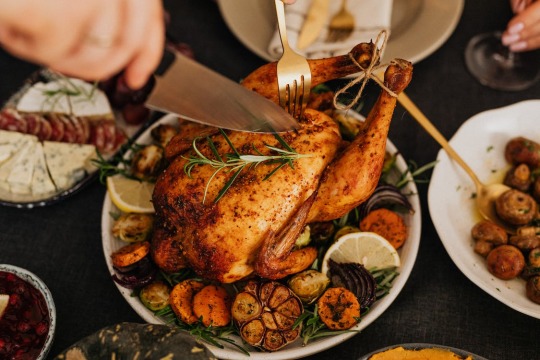
Today, in a bout of yearning for domestic bliss, we’re roasting a chicken. It feels like a roast chicken sits exactly at that junction of cosy homeliness, effortless housewife perfection and nutritious food that you actually want to eat. Just a disclaimer that the above pic is a stock pic because I'm shite at photography. But the end result looks like this.
If you’re looking for the full experience, at this point you’ll cue up the song Mall Rat from the Sims 1 soundtrack to achieve full perfect perky housewife vibes. And no, I won’t be taking questions on why I know the individual track names on the game. If you know, you know.
Ingredients:
1x roasting chicken - free range if you can swing it, otherwise no biggie. Size is going to be up to you, as so few things in life are.
1x Lemon
1x head of garlic
2 medium onions or one large one
Poultry rub (if you want a recipe for home-made DM me, it’s super simple to make at home)
6-8 sprigs of thyme and rosemary
Three generous Tablespoons of butter, or a stick, depending on where in the world you live or regret living as the case may be.
Two big handfuls of baby potatoes
Oven: Set to 200 degrees celsius / 425 Fahrenheit. Roasting time is 20 mins per 400g or little under a pound.
Let’s go.
Method:
Place the chicken on the counter to come up to room temperature. Some chicks just have no chill and roast all the better for it. Remove chicken from packaging and give that as well as the fresh produce a rinse under cool, running water. You thought I was going to say Cool Runnings, didn’t you? It’s okay, so did I.
Washing the chicken is important to get all the butchery gunk off - even if you don’t see it, it’s there. Then pat it dry gently with a kitchen towel. Dry skin crisps up better. Realise that bits of kitchen towel are now stuck on chicken skin. Reevaluate life choices that lead you here.
At this point Mall Rat would have skipped over to a track called Groceries. This is fine. Let it play.
Grab a lemon and your herbs. Slice lemon in half, and stick that along with the thyme, rosemary and garlic into the chicken’s cavity. Marvel at how the chicken is as hollow as your soul but that no amount of herbs and citrus can heal you. Feel sad for a moment until you listen to the music again.
It’s aggressively cheery.
Melt half of the butter in the microwave, or if you shun modern conveniences, the pan. If you’re feeling fancy, chuck a minced clove of garlic in there to subtly flavour the butter. Brush generously over chicken and get so engrossed in the task that you don’t notice that you have not turned the oven on yet. This will be a disappointing discovery once you realise it. Add some of the poultry rub into the remaining butter and mix.
Next bit is a little tricky - stick a sharp knife between the chicken breast and the skin to separate the two. Get under that skin the same way Geoff from Accounting gets under yours. Work spiced butter in there until it covers whole breast area. Might need some massaging.
Take your onions, give it a rough chop. Have a little cry and pretend the onions made you do it. Slice the leftover half lemon into wedges.
Place the onions in the roasting pan along with a halved head of garlic, sprigs of your herbs and those leftover lemon wedges.
Wonder for a moment whether you should have saved one of those wedges for a bit of tequila. Realise it has touched onions so it’s probably too far gone, but make a mental note to do that next time.
Take some twine (or regular non-minty dental floss, don’t judge me) and tie the chicken’s legs together. The official explanation for this is that it will stop the legs from burning while the meat is undercooked. I won’t go into the non-official explanation here but it involves Interpol and the patriarchy.
Take the chicken and gently lay it down on top of the veg and herbs in the roasting tray, breast side up. Check that the oven is the correct temperature. Because you were a numpty and forgot to put it on until way too late, drink some water while you wait. Also, halve those baby potatoes, salt ‘em, and toss it in the pan so it can roast in that delicious chicken fat. They will take around 30 mins max, so if you have a bigger bird, throw them in 30 mins before done.
Finally, slide the roasting pan into the oven. Take out your oven mitts and this point and put them on the counter so you don’t try to touch the pan with bare hands like a certain author once did.
Now leave it alone for an hour, go write some fanfic, come back to check on how things are going. Rudely, it won’t ask how things are going with you but no one’s perfect.
If the skin on the breasts are browning too quickly like a middle-aged, pale English lady on a beach in Ibiza, chuck a little square of foil on it to shield it from the hot rays of the oven.
Take the oven mitts and remove the pan from the oven. Make a lil’ foil tent for it, and let it rest for 20 mins. Take a rest yourself, you deserved it. Decide to disregard this advice and refresh Tumblr again.
Remove chicken from pan once it's rested and place on cutting board.
Take the veggies out of the pan, squeeze the now sodden lemon until the juice drips into the pan too. Mix with whisk to incorporate.
Add a sprinkling of cornflour or potato starch to thicken into gravy. Strain pan juices through a sieve, cheesecloth or your sanity, whichever is thinner at this point. Press down to squish any remaining bits of veg through to maximise flavour.
Dish up, pour a lil gravy on the chicken slices and enjoy. Congratulate self on how awesome you are. You did it!
41 notes
·
View notes
Text
Recipe: Butternut Squash Macaroni Cheese
This is based on a recipe for Brown Butter Sage Butternut Squash Mac & Cheese, by Palestinian home cook Mariam (aka Mxriyum):
I saw it on soothifying-sounds-asmr tumblr: link
Mariam's website with the written recipe: link
Having tried it, it was delicious! These are just my notes on how I would make it next time. The quantities were for 8 servings, in imperial measurements. I cross-checked with a very similar Nigella sweet potato mac & cheese (link) that I love, to create metric quantities for 4 servings.
Shopping List:
300g dry pasta - rigatoni, but I'd like to try it with a little shape like spiralli next time
60g butter
Fresh sage, handful - didn't have fresh, so I used 1/2 tsp dried
400ml warm water - could add a little stock/bouillon/dashi
500g butternut squash (1 small squash)
1 garlic bulb
1 onion
Olive oil, S&P, 1 tsp oregano
I also added some brown sugar
60g grated mild cheddar
60g grated gouda/emmental
75g parmesan or feta
(Plus another 25g of your favourite cheese to sprinkle on top)
Greens to serve (e.g. tenderstem broccoli)
Method:
1. Make the vegetable puree. You could do it in advance, either in the morning or the day before.
Pre-heat oven to Gas 6. On a baking sheet, lay out the vegetables. Squash: I sliced it in halves like in the video, but I think it'd cook more evenly (be softer, easier to mash) if chopped into big chunks. Onion: quartered. Both vegetables should be drizzled with olive oil, S&P, oregano - I also sprinkled some fine brown sugar because the recipe mentioned caramelisation, and I thought sugar might help with that.
Garlic bulb: slice off the top, so the tops of the cloves are exposed. Rub with oil and S&P, then enclose in a square of tinfoil.
Roast the veg for 35-40 mins. When ready, let it cool for 5-10 mins.
Blend all the veg, add splashes of warm water as needed, may need to do in batches.
You can now store the vegetable puree in the fridge until later.
The recipe emphasises saving the pasta water, but this means you can't make the puree until you've cooked the pasta, i.e. you have to do this complex and lengthy recipe all in one session. The only reason to use pasta water is because it contains starch that would thicken the sauce - I reckon the squash already has plenty of starch, and the liquid's purpose is to loosen, not thicken the puree. Therefore I think a jug of warm water would be fine here. You could flavour it with bouillon/dashi, but the veg is already so flavoursome after roasting, it doesn't need it. (If concerned about thickening, just use a little slurry of cornstarch or flour.)
Along with the salted pasta water, the recipe suggests onion powder and garlic powder. Again, if you've roasted an entire bulb of garlic, I'm not sure what garlic powder is adding? Plus, those powders usually contain salt - to reduce salt and keep it simple, I omitted those.
2. Grate all your cheese.
(I bought it ready-grated because I have weak wrists and I hate grating, lol.) Buying more than one kind of cheese is expensive, this would still be delicious with 120g of cheddar, but the Continental cheese adds a fun stretchy texture. The recipe also calls for a lot of parmesan (originally 4 oz / 113g for serving 8). I had some parmesan to use up, so I did use it, but parmesan is salty and expensive! The Nigella recipe uses feta, I think this would be an acceptable substitute, as it adds flavour but is cheaper.
3. Cook the pasta until al dente (1 or 2 minutes less than the cooking time on the packet).
Meanwhile, melt the butter over a medium heat in a light-coloured pan, so you can see when it's browning. When it starts foaming, add the sage. When the butter starts to get brown particles in it, remove to a heatproof container.
Strain the pasta, then add it back into the empty pasta cooking pot. Toss in the brown butter.
(Less washing up this way! Also: the brown butter certainly adds a lot of flavour, however you could do the whole recipe and skip the brown butter and it would still be a very tasty meal. Dairy products in the UK currently cost a small fortune, plus there are the calories - but then if you're worried about those, you probably should make a different dinner.)
4. In a large cooking pot, warm up the vegetable puree and simmer on low. Slowly add the cheese, and splashes of warm water as needed (pasta water here?) Taste and salt as needed.
5. (Step 4 is also a good time to start cooking your side dish of broccoli.)
6. Add the buttery pasta to the puree/sauce. Mix all together. Simmer 1 min.
7. Serve with leftover cheese on top, sage to garnish, broccoli on the side.
2 notes
·
View notes
Text
Take Drumsticks and Make Stew
I'm autistic, I have executive dysfunction, and sometimes I just want to eat the same thing. Sometimes, I want something different but I want the steps to make it to be similar to something I've done before - familiar steps.
Here are three different "easy versions" stews with different flavors and textures, but pretty similar steps.
I am also dyspraxic, so I prefer to avoid chopping by using pre-chopped/frozen/freeze dried where I can.
Chicken Fricassee
Adapted from this (his video is helpful)
(I love this over mashed potatoes)
Ingredients
▢3 ½ pounds chicken thighs or a combination of legs and thighs
▢4 tablespoons butter divided
▢2 tablespoons olive oil
▢ mirepoix mix
▢ sliced mushrooms
▢3 teaspoons minced garlic minced
▢¼ cup flour
▢3 cups low sodium chicken stock
▢1 cup dry white wine
▢1 tablespoons freeze died parsey
▢4 sprigs thyme
▢4 sprigs parsley
▢1 large bay leaf
▢salt and pepper to taste
▢½ cup heavy cream
▢2 large egg yolks at room temperature
Get a Dutch oven or a really big skillet, as long as the ingredients all fit and it has a lid.
Pour in 2 tablespoons of olive oil and turn the heat to medium. Pat the chicken very dry with paper towels and season very well with salt and pepper on both sides. Put the drumsticks in and sear for two minutes, then add a couple tablespoons of butter and turn the chicken to the other side. You're going to do two minutes on each side (the drumsticks have four sides, so two minutes per side, it should be about 8 minutes, the goal is to sear that skin and get some nice brown on the bottom of the cooking vessel)
Take out the chicken and put them in a bowl. Throw in the other two table spoons of butter. Pour in your mirepoix mix (I like the frozen one from my local Kroger variant, whole foods also has a fresh version and a frozen version that's available on Amazon). Cook it until it's no longer frozen, and warm and soft.
Dump in those mushrooms. (I buy pre-sliced, you can get whatever mushrooms and dice them if you want tho)
Cook until the mushrooms release their liquid (about 5 minutes). Season the veggies with a touch of salt. Add the garlic and cook until fragrant (about 1 minute) then add the flour and cook for 1 more minute stirring frequently to thoroughly incorporate.
Add the wine and chicken stock to the pot. (I like to just get a 4-cup measuring cup and put one cup of wine and three cups of chicken stock so I can pour them together). Turn the heat to high and with a wooden spoon dislodge all of the flavor bits from the bottom of the pot. Cook for 1 minute then turn the heat down to medium-high.
Carefully pour the chicken and juices back into the pot and add your flavor sticks and leaves (parsley sprigs, thyme sprigs, and bay leaf). Cook for 5 minutes or until bubbling aggressively.
Turn heat down to medium-low and cover partially with a lid. Cook for approximately 15 minutes then flip that chicken and cook 15 more minutes, or cook until the chicken thighs reach at least a 175f internal temperature. (a stabby thermometer is very helpful).
(If you're making mashed potatoes you can start preparing your potatoes while the chicken cooks).
Once the chicken is fully cooked, move it to a plate. If you want you can shred the chicken meat off the bone so it's easier to eat.
(Start your water boiling for the potatoes if you haven't already)
Turn heat to high and reduce the liquid in the pot by about half. This will take about 5 minutes. Do your best to remove all the flavor sticks and leaves.
Whisk the egg yolks and heavy cream together in a bowl. Add 1 tablespoon of the hot cooking liquid while whisking. Continue to add the liquid 1-2 tablespoons at a time until you have added at least ½ a cup of the hot liquid. (I like to just use a ladle to slowly drip hot soup into my eggy cream as I whisk).
Pour the tempered mixture back into the pot and stir well.
Add the minced parsley into the sauce and stir to combine. Taste test the sauce and season with salt and pepper to taste. For a touch more acid, add lemon juice to your liking, but the wine is normally sufficient. Return the chicken to the pot and cook for 3-5 minutes or until the chicken is hot.
Serve over mashed potatoes when ready, or if you don't want to mess with potatoes it's good over with crust bread.
Paprikas Chicken
Based on a recipe from A La San Francisco
Restaurant recipes
(I like this served over rice)
1 2 - 3 lbs drumsticks (yes, you could just use a whole chicken, but legs and this is things to do with legs)
diced onions
2 Tablespoon Oil
2 Tablespoon Butter
3 Tablespoon Sweet Red Hungarian Paprika (or 2T + 1T hot paprika)
1 1/2 chicken stock
2 teaspoon. Salt
diced onion and pepper mix
1/2 teaspoon. Ground White Pepper
1 rounded tablespoon white flour
1/2 cup sour cream (room temp)
Pour in 2 tablespoons of olive oil and turn the heat to medium. Pat the chicken very dry with paper towels and season very well with salt and pepper on both sides. Put the drumsticks in and sear for two minutes, then add a couple tablespoons of butter and turn the chicken to the other side. You're going to do two minutes on each side (the drumsticks have four sides, so two minutes per side, it should be about 8 minutes, the goal is to sear that skin and get some nice brown on the bottom of the cooking vessel)
Take out the chicken and put them in a bowl. Pour in your chopped onions and chopped pepper (I like the frozen, fresh also works, there are also onion-pepper blends but you want more onions than pepper, so I usually do one bag onion and one bag onion pepper blend). Cook it until it's no longer frozen, and warm and soft.
Take your cooking vessel off the heat, add the paprika and mix well.
Pour the chicken into the paprika mixture and role it around, we are getting it coated.
Put your cooking vessel back on the heat. Cook over low heat for a few minutes stirring constantly making sure the paprika doesn't burn.
Add the chicken stock, salt and pepper.
Turn heat down to medium-low and cover partially with a lid. Cook for approximately 15 minutes then flip that chicken and cook 15 more minutes, or cook until the chicken thighs reach at least a 175f internal temperature. (a stabby thermometer is very helpful).
(start cooking your rice)
Once the chicken is fully cooked, move it to a plate. Shred the chicken meat off the bone so it's easier to eat.
In a bowl mix the flour with one tablespoon of cold water. Add the sour cream to the bowl and mix that in until everything is good and mixed together.
Stir the flour/sour cream mix into the sauce in the pot.
Bring it to a boil stirring constantly until the sauce thickens. Turn that down to a simmer.
Return the chicken to the pot and cook for 3-5 minutes or until the chicken is hot.
Serve over rice
Ajiaco (Colombian Chicken and Potato Soup) Inspired Recipe
Very loosely based on this Serious Eats Recipe (this is a low spoons/low executive function/low coordination/knife skills version that prioritizes using the same method as other stews)
4 cups chicken stock
1 pound chicken drumsticks
Salt, Pepper and Chilli Powder (serrano or jalapeno chill powder is best)
Bag frozen chopped onions
2 bay leaves
5 pounds mixed fingerling potatoes
1/4 cup dried guascas (you'll need to order this)
frozen corn
Chopped freeze dried cilantro
Kosher salt and freshly cracked black pepper
1/2 cup sour cream, thinned with 1 tablespoon milk
1/2 cup capers, rinsed, drained, and roughly chopped
1 ripe avocado, preferably smooth, light-green fuerte variety, sliced into wedges (or just use some frozen)
Get a Dutch oven or a really big skillet, as long as the ingredients all fit and it has a lid.
Pour in 2 tablespoons of olive oil and turn the heat to medium. Pat the chicken very dry with paper towels and season very well with salt and pepper and chili powder on both sides. Put the drumsticks in and sear for two minutes, then add a couple tablespoons of butter and turn the chicken to the other side. You're going to do two minutes on each side (the drumsticks have four sides, so two minutes per side, it should be about 8 minutes, the goal is to sear that skin and get some nice brown on the bottom of the cooking vessel)
Take out the chicken and put them in a bowl. Pour in your chopped onions (again, I like using frozen). Cook it until it's no longer frozen, and warm and soft.
Add chicken stock to the pot. Turn the heat to high and with a wooden spoon dislodge all of the flavor bits from the bottom of the pot. Cook for 1 minute then turn the heat down to medium-high.
Carefully pour the chicken and juices back into the pot, add potatoes, bay leaf, and guascas. Cook for 5 minutes or until bubbling aggressively.
Turn heat down to medium-low and cover partially with a lid. Cook for approximately 15 minutes then flip that chicken and cook 15 more minutes, or cook until the chicken thighs reach at least a 175f internal temperature. (a stabby thermometer is very helpful).
Once the chicken is fully cooked, move it to a plate. Shred the chicken meat off the bone so it's easier to eat.
Continue to simmer potatoes until russets and papas Criollas are completely tender and falling apart, about 15 minutes longer, adding more water as necessary. Discard bay leaves. Using whisk, mash potato pieces against side of pot and stir vigorously to thicken soup. The soup should be thick, with large chunks of potatoes still remaining.
Add the frozen corn and continue to cook, stirring occasionally, until corn is cooked and soup is thickened to the consistency of thick heavy cream, about 15 minutes longer. Remove from heat.
Season soup to taste with salt and pepper. Add the chicken back.
Serve in a bowl with avocado on top and drizzle with sour cream (or Mexican Crema), sprinkle with cilantro, add capers.
Note: Authentic Ajiaco is lots of separate parts, chicken in a serving dish, corn on the cob in the soup, avacado on the side, capers and aji: onion, cilantro, and chile pepper in small serving bowl with water and salt and pepper. You add what you want to your bowl and your bite.
This is inspired by those flavors and easy to eat in bed.
9 notes
·
View notes
Text
ok, so i was in the mood for lamb stew, however I did not have any lamb medallions, just ground lamb meat. so i googled recipes for lamb meatball stew and found this
however i made mine slightly different as i had to use what I had in my pantry
my recipe:
preheat oven to 325
in a large dutch oven, pour in idk about 2-3 tablespoons of olive oil (don't be stingy) on medium heat
then throw in about half an onion roughly chopped and sauté until softened (I use spanish onions)
while sautéing, season generously with salt, pepper, garlic powder, thyme, rosemary, cumin, oregano (it smells so goooooood)
once softened, add a small can of sliced carrots and one small can of mushrooms (add additional seasoning as needed) - i use canned carrots because i hate frozen carrots (they have just an ughhhh texture for me) and I didn't have any fresh carrots
sauté and marry it all together for a few minutes
I also added half can of diced italian seasoned tomatoes (garlic, oregano, basil) - because i had to use up my left overs, but you do you
sauté it a bit more and then add about 1/3 cup of good red wine
let that simmer for a bit to cook off the alcohol
then add about 6-8 cups of beef broth (enough broth to cook meatballs in)
re-season to taste (i added a bit more salt, garlic, & thyme, then added a sprig of fresh oregano from my plant)
add 2 bay leaves
then about 1/3 cup or so of frozen spinach
while that's cooking you make your lamb meatballs
defrosted 1 lb of ground lamb, put in bowl with about 1/4 cup of italian style bread crumbs, salt, pepper, garlic powder, thyme, cumin, shawarma seasoning, oregano
the recipe called for uncooked rice, but I used one of those single serving ready to go rice portions and added about half that container to the meat mixture
i threw the rest of the rice into the soup to cook
While mixing your meat: add 1 egg then mix all your ingredients together by hand and start forming meatballs to drop in your simmering hot soup
once done, put the lid on your dutch oven and throw that bad boy into the oven for about 25 minutes for the meatballs to cook
serve with fresh crusty bread
the soup smells and tastes amazing, absolutely best broth
the only thing i might change going forward is I might bake my meatballs a bit beforehand for a nice crust, then throw them in (i'm italian/sicilian american and grew up baking my meatballs)
this all makes a big pot of soup that could feed 4-6 people, or if it's just your little old self, you can freeze some portions for some other cold day


edit: for anyone who's interested and are able to afford it, I HIGHLY suggest getting some shawarma seasoning in your pantry for cooking lamb or chicken
#recipes#lamb meatball soup#posting it for whoever's interested#the broth is literally just so good#i could glug it#like so good
4 notes
·
View notes
Text
I Lied.
I didn’t mean to, and you’d think that after blogging here for sixteen years I’d know better than to say “back tomorrow!”. That’s just asking for life to get in the way of what you’d rather be doing, right? So life got busy, but in good ways, and now I’m back a couple days later than promised. Oops.
Since the last post we’ve celebrated Father’s Day and this guy was king for a day.

I thanked him for the two babies that look just like him and we all pitched in and gave him a kayak. He enjoys drifting down questionable waterways (think bugs and snakes) and took it out that very afternoon.

There has been no word on the Federalsburg python, so I request proof of life photos when he’s out. The spots where he’s paddling look like python paradise. No thank you.
The night before Father’s Day we’d gathered to celebrate with the Edgewater gang. I have to say that Tyler is the finest father I’ve ever seen. Patient, kind, fun, devoted - he’s the daddy that every little girl deserves. I think our Little Miss knows that she’s got the best daddy in the world. She brought this home from school.

Okay, okay, before I get too emotional, let’s move on.
I thought it was funny when I asked Mickey what he’d like for a special meal on Sunday. He started pondering, then he asked for beef bulgogi with (insert dreamy look and emphasis) “real rice”. Poor guy, I use cauliflower rice in our taco bowls, our lettuce wraps, pretty much anything that involves rice. I strive to make our meals mostly veggie, with lean proteins. I’m trying to keep him alive and he’s dreaming of “real rice”. I laughed and promised him whatever he wanted. He eventually decided he’d rather have steaks on the grill, a baked potato, and some roasted green beans. Talk about a man’s meal! We rarely eat red meat so I figured one day wouldn’t kill him. I even baked an angel food cake and sliced up some enormous fresh strawberries to top it. By sundown I felt like I never wanted to eat again.
BUT...the blog post that I promised a few days ago was about recipes, so here we go.
It’s summer and no one wants to spend a ton of time in the kitchen. Both of these recipes are a one pan, thirty minutes (ish) meal. They both offer big flavor and minimal clean up. What more do you want? Sadly, I failed to take a decent amount of pics while preparing these, so you may have to use your imagination a bit. I normally like to show the process, but since these are quick and easy - no harm done, right?
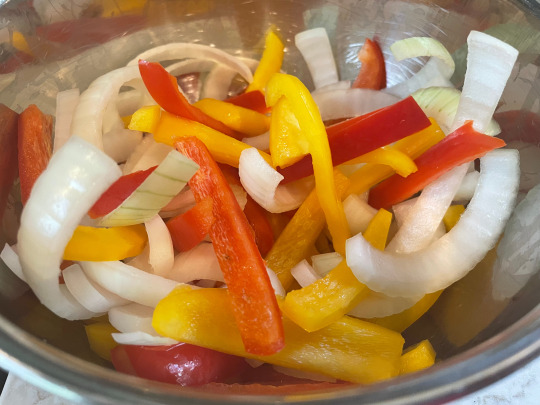
First, Sheet Pan Chicken Fajitas. This honestly couldn’t be easier.
Preheat your oven to 425 and grab some bright peppers and an onion. I used a red, a yellow, and an orange pepper, and I had a Vidalia onion handy. Slice those up.
Next you’ll need about 1.5 pounds of chicken. I used chicken breast. Slice that up as well. Now you could just toss all of this onto the sheet pan, but I put my chicken in a bowl and mixed it with 3 tablespoons of taco seasoning (that’s equal to one packet).
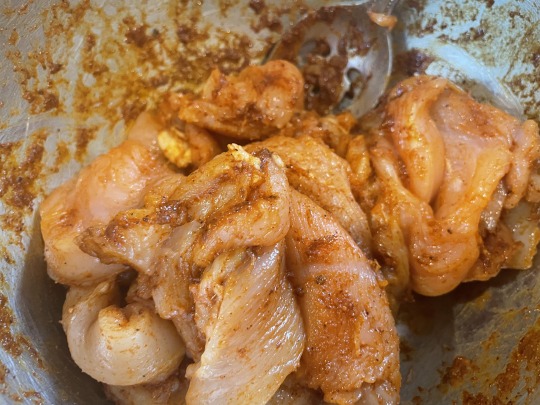
Coat it really well, you want that flavor!
Now spread your sliced veggies on the sheet pan (if you’re not using parchment paper or a silicone mat, lightly oil that sheet pan!) and throw your chicken right on top.


At this point I sprinkled more taco seasoning on the whole thing. I also added some minced garlic. I just use the stuff in a jar, I’d say I used the equivalent to two cloves.
That’s it. Pop that into your hot oven for 15-20 minutes. While it’s cooking wrap some flour tortillas (you didn’t think I was going to make tortillas, did you??) in foil and slide them into the oven for the last five minutes of your cooking time.
EASY PEASEY. When you remove your yummy fajita filling from the oven you could squirt it with lime juice and sprinkle chopped cilantro over it (I didn’t have limes or cilantro handy, but I will the next time!) It really is the perfect finish. Fill your tortillas, top them with whatever you like - sour cream, cheese, pico de gallo, etc. Do it your way. Any way you tweak it, you’re still out of the kitchen in a half hour.
Next, we have Eggroll In a Bowl. I’d seen this recipe all over Pinterest on Keto boards, Weight Watchers boards, and Quick & Easy boards. Those are all tempting to me. It’s basically eggroll filling without the crisp and tasty wrapper. I looked at several versions and then took an inventory of what I had on hand, and did it the easy way. I’m a fan of easy. For example, if a recipe calls for grated ginger, I have a tube of ginger paste in the frig that packs the same punch. Minced garlic? I’ve got a jar in the frig. You get it. This recipe also called for ground pork (more common for eggrolls) but I used ground turkey and it was delicious. Here we go. You’ll need:
1 lb ground turkey
1 sweet onion, diced
1 Tbsp sesame oil
1 Tbsp rice vinegar
2 tsp minced fresh garlic (I used my jar)
1 tsp ground ginger (I used my paste)
1/4 cup low sodium soy sauce
1 16oz bag dry coleslaw mix (shredded cabbage and carrots)
1 Tbsp Hoisin sauce
2 green onions, thinly sliced
You’ll start by browning your ground meat in a large skillet over med-high heat. Once the pink is gone, toss in your diced onion, the sesame oil, and the rice vinegar. The sesame oil is what will give your dish that wonderful, nutty, uniquely Asian flavor. Cook that, stirring, until the onion is tender. Add the garlic, ginger, soy sauce, hoisin, and the coleslaw to the skillet.
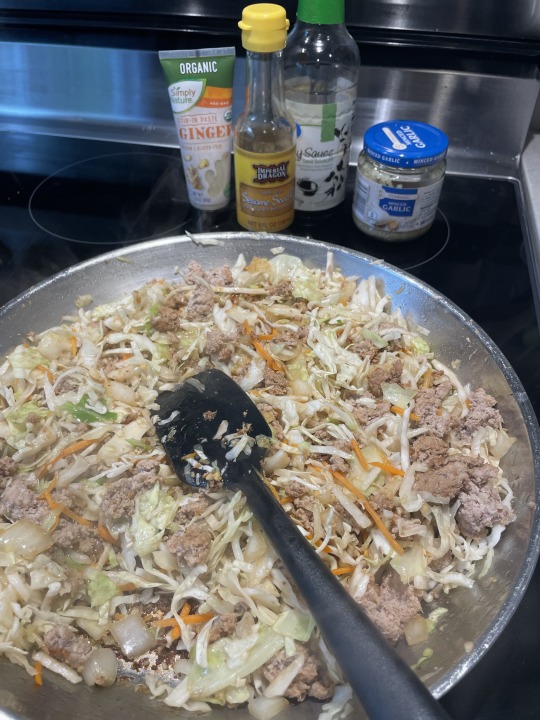
Then just cook for another 5 to 7 minutes until the cabbage is wilted. THAT’S IT.

When it’s ready, you can top with sliced green onions, even a sprinkle of sesame seeds if you’re so inclined. It’s so yummy! I wasn’t sure if the mister would be a fan and he loved it. I failed to take a photo after plating it, but here’s a picture from one of the bazillion Pinterest recipes.

By using the prepared ingredients like I did, the ginger paste, the pre-minced garlic, this dinner comes together fast. Like twenty minutes. I measure my ingredients out before I start and just toss them in as needed and this is a snap. I think the next time I make it I’ll add some extra matchstick carrots. I think it could use more. But it’s still delicious, and so quick and easy.
Serve either of these quick dinners with some cool summer melon chunks and that’s a complete meal.
Last, but not least, have you tried chili crisps yet? I’m addicted. I use them on just about everything, but my favorite way to use them is to start my day with a bang. Scrambled eggs, avocado toast, whatever - add some chili crisp and take it to the next level.
This is the brand I use.

I buy mild because I’m not trying to start a fire, just enjoy a little zip. Here’s the Mr. Bing description of their chili crisp.

I don’t care if they say it’s made with goat toenails and tree bark, it’s delicious. This was my brunch a couple of days ago. One slice of grainy bread, smashed avocado mixed with a shake of Everything Bagel seasoning, a poached egg, and plenty of chili crisp.


I get hungry just looking at those photos. It’s so tasty!
As I was grabbing those pics off my phone I giggled when I saw this one.

That’s just a taco bowl, but there’s that cauliflower rice that apparently makes Mickey feel deprived. It’s one of my favorite things to eat! Guess I could start making a little bowl of “real rice” for him. Or he could adapt. Poor guy.
Another funny capture by the Ring doorbell. I made him stand on the porch so I could snap a pic of him on Father’s Day. We look like a couple old farts. But there he is, just doing as I asked. He knew resistance was futile.

The camera in that doorbell has a sort of fisheye effect and warps things. Or maybe I do have a giant left arm.
Anywho, that’s what’s been shaking around here. I won’t promise to be here tomorrow, but I will try to be. I’ve got a couple of fun things to share and I need to sort through pictures. I’ve been working on a couple of cards too, trying to build an inventory. Here’s one of the latest, I haven’t placed her on a card yet

Isn’t she a hoot? I’ve found a wonderful new resource for my dead people, loads and loads of photos, so I’m having fun picking out winners. I predict long, enjoyable hours spent with my deceased friends. I give them back stories while I work with them. That’s Darla. She’s from Philly, she’s got a heart of gold but runs the deli counter at Wegman’s with an iron fist. Don’t tell her how to slice the meat. She’s a bowling champ and met her second husband, Eddie, at a charity bowling tournament that raised money for at-risk donkeys. Some donkeys never adapt to farm life and Darla thinks they should be able to pursue their dreams.
What? Too much time on my hands? Me?
Probably.
I’ll see you soon. Until then, stay safe, stay well, follow your dreams.
XOXO - Nancy
4 notes
·
View notes
Text
Chorizo Stew Recipe
For @ashen-crest, who expressed interest and anyone else who might want to give this a try.
A general note - this is not something you have to follow by rote. You can adjust virtually everything in this recipe: ingredients, cooking time, method, spices and it will still come out great. It's also a really simple recipe: one pot (less washing up!), about 10 minutes of prep time (great for low spoon and effort days) and doesn't need constant supervision once cooking (so great for getting anything else done in the meantime). It can also be really cheap and most of the ingredients are shelf-stable (chorizo is already a preserved meat and will last longer than you think) so it doesn't need to be planned for especially and it's packed full of vegetables so it's pretty dang healthy.
I suggest using a dutch oven - they hold their heat well, are oven-safe and have a lid - but I've also used Pyrex dishes before. The important thing is an oven-safe vessel that can hold a lot - this is a big meal and you usually wind up with leftovers.
Ingredients:
Chorizo sausage (the whole link if you can find it - apparently it was really difficult to find in my wife's hometown in the States, she made do with a minced version. There's usually both a hot and mild version - feel free to use whichever one speaks to you/the preferences of everyone else eating this)
Tomatoes (tinned - I prefer pre-chopped but follow your heart. If you have a glut of home-grown tomatoes, use those if you want)
Sweetcorn (frozen, canned, whatever you have)
Onions (fresh or frozen - we love the ease of the frozen pre-chopped ones but use what needs using at any given time)
Optional additional vegetables and pulses (whatever you have lurking around in cupboards. This dish is great for using up beans, chickpeas and lentils)
Garlic (fresh, granules, salt...there really isn't a wrong way to garlic)
Paprika (hot or mild, choose your own adventure!)
Pasta
Optional cheese (to serve. A mature/sharp cheddar goes well but really, any 'melty' cheese will be great)
Method:
Chop chorizo, onions and garlic (if using fresh). Add to dutch oven. Add everything except pasta and cheese. Seriously, dump it all in to one pot. I told you this was simple. Also add about a tomato can worth of water (which is a great way to rinse your can and get all the tomato juice into your meal instead of in the bin). At this point it might look like a watery mess - trust the method. You'll need that water later.
With the lid on, cook in an oven at 180°C (Gas Mark 4, Moderate, 350°F) for at least 40 minutes but you can leave this longer to develop more flavor and make chorizo more tender, just make sure it doesn't dry out.
Add pasta 20 minutes before serving and return to oven. Add additional water if needed - all pasta should be underneath the liquid and there should be enough liquid for the pasta to absorb.
Serve in bowls with a topping of cheese if desired.
There are no measurements for ingredients: this dish doesn't really need a strict proportion so I've not included them. It's adjustable for how many vegetables you want, how many people you are feeding, etc. This can also easily be made vegan/vegetarian with simply removing the chorizo and cheese as needed - just adjust with more paprika and garlic to get the same hit of flavor. I've made this dish a lot of different ways (chicken breast instead of chorizo, for example), lots of different beans, no beans, no corn) and it's always really good. I did some quick maths using Tesco prices and this works out at about £2 per very hearty portion including absolutely everything but Aldi/Lidl are much cheaper for most ingredients. If you use gluten free pasta, it's obviously more expensive (add 25p per portion). But for the most part, the ingredients shouldn't need to be bought - this is a way to use up tins of things you'd forgotten about or just have a surplus of on hand.
2 notes
·
View notes
Text
Dutch Oven Cowboy Stew: Easy, Hearty & Delicious One Pot Camping Meal
New Post has been published on https://eazycamping.net/dutch-oven-cowboy-stew-easy-hearty-delicious-one-pot-camping-meal/
Dutch Oven Cowboy Stew: Easy, Hearty & Delicious One Pot Camping Meal

Don’t you love making Dutch oven camping recipes like the cowboys do? This Dutch Oven Cowboy Stew is a really simple one pot dinner that is warm and hearty. Combine beef, beans, potatoes and canned veggies in a pot, simmer the flavors together and dish it out to your hungry crowd for a satisfying meal.
Dutch Oven Cowboy Stew by CampingForFoodies
Psst we’re compensated…see our disclosures.
Prep To Make This Dinner
Most of the veggies in my one pot camping meals are from cans so you won’t have to do much prep work for those other than using a can opener and dumping them in the pot. This one includes diced tomatoes, pinto beans, green beans, whole kernel corn and chopped green chilies, all are undrained.
What you will have to chop: a bit of onion, garlic, potatoes, a couple slices of bacon and smoked andouille sausage.
Methods Of Cooking This Recipe
Camp Cooking Tip: There are several methods for cooking this old fashioned cowboy stew but it requires approximately 1.5 hours of total cooking time so you’ll want to have enough fuel to finish the job.
If you are making this as one of our easy campfire recipes, you’ll need to get your fire going in order to cook over hot coals. You can also use charcoal briquettes but be prepared to light a second batch of charcoal because you’ll probably need two batches for this length of cooking time.
If you are planning to make this as one of our camp stove recipes, get enough propane ready for 1.5 hours of cooking time and prepare for cooking on a level surface.
Steps To Make This Recipe
Step 1. Prepare your ingredients as directed.
Step 2. Prepare your heat source for cooking with bottom heat for about 1.5 hours of total cooking time.
Step 3. Heat a 12-inch cast iron Dutch oven over medium heat and add the bacon to the pot. Stir it so it doesn’t stick. Don’t drain the grease from the pot.
Step 4. Place the onion and garlic in the pot, continually stirring until they are softened.
Step 5. Now, place the ground beef in the pot and use a spoon to break it up as it browns. Don’t drain the grease from the pot.
Step 6. Drop the sausage in the pot and stir it with the rest of the ingredients.
Step 7. Now it is time to thicken the mixture. You’ll do this by adding the flour, salt, and pepper to the pot. Keep stirring so the flour is well incorporated. Cook it for a couple of minutes before adding anything else to the pot.
Step 8. Dump in the canned veggies with all their liquids. It will be the tomatoes, beans, corn and green chilies. You’ll add the potatoes now too and stir everything so it is combined well.

Send me FREE camping tips!
I want “5 Secrets To Successful Camping Trips” plus weekly camping tips & recipes.
Step 9. Now it’s time to let the flavors marry. You’ll bring the mixture to a boil then reduce the heat so the pot is just simmering. Add the lid and let it go, stirring occasionally so nothing sticks to the bottom. You’ll let it cook for about an hour before you serve. This is one of my favorite winter camping recipes I like cooking and eating around the campfire. The flames and food will keep you warm on cold camp trips.
What To Serve With This Stew
When I make camping dinner recipes that contain meat, veggies and some sort of starch, I call it done! But, there are a lot of people (like my husband) who also like bread or rolls on the side which is nice for dipping in the yummy sauce.
Scaling For Bigger Crowds
Stews and chili recipes are easy camping meals for large groups. They are great when you want to make big pots of food to feed more people. You can easily scale this recipe so it feeds as many people as you need to serve. You can double the recipe if you use a 12-inch DEEP Dutch oven (rather than a 12-inch STANDARD depth oven). Just make sure the pot is large enough to handle the quantity as you increase the number of servings.
Similar Recipes
There are so many easy camping meals that are similar to this Cowboy Stew. Here are a few you may want to try:
If you’d rather have soup than stew, try this easy Cowboy Soup Recipe. It uses ground beef, beans, veggies and spices to create a yummy Tex-Mex flavor profile.
My One Pot Creamy Cajun Chicken Camping Pasta starts with pre-cooked chicken. Then you cook the pasta right in the sauce … no extra pot of boiling water is required!
Beef, beans, tomatoes and cheese are combined to make Dutch Oven Chili Mac. This classic comfort food is hearty and budget friendly too!
Try this easy Dutch Oven Shepherd’s Pie for a classic meat & potatoes dinner.
Oh my goodness, this Campfire Stew is so yummy! The beef chuck is fork-tender after simmering in the tomato-based sauce with carrots and potatoes for about 2 hours.
Try this Hobo Casserole when you want simple, classic comfort food.
Print This Recipe
Cowboy Stew Dutch Oven Camping Recipe
Kim Hanna
Camping For Foodies Dinner Camping Recipes: Cowboy Stew Dutch Oven Camping Recipe
Prep Time 5 minutes mins
Cook Time 1 hour hr 30 minutes mins
Total Time 1 hour hr 35 minutes mins
Course Dinner Camping Recipes
Cuisine American
Servings 6 Servings
Calories 354 kcal
2 slices thick bacon chopped into 1/4 inch pieces
1 medium onion chopped
4 garlic cloves minced
1 pound ground beef
1 (14 oz. package) hot smoked andouille sausage, sliced into 1/2 inch pieces
3 tablespoons all-purpose flour
1/2 teaspoon salt
1/4 teaspoon black pepper
1 (15 oz. can) diced tomatoes, undrained
1 (15 oz. can) pinto beans, undrained
1 (15 oz. can) cut green beans, undrained
1 (15 oz. can) whole kernel corn, undrained
1 (4 oz. can) chopped green chilies
4 medium potatoes peeled and cubed into 1/2 inch pieces
Cook ModePrevent your screen from going dark
Heat cast iron 12-inch Dutch oven over medium heat using campfire coals, charcoal briquettes, camp stove or RV stove.
Add bacon, cook stirring until the bacon is slightly browned. Do not drain the grease from the pot.
Add the onion and garlic to the pot, cook stirring until softened.
Add the ground beef, using a spoon to break it up into crumbles as it browns. Do not drain the grease from the pot.
Add the sausage, cook till slightly warmed, stirring occasionally.
Now add the flour, salt, and pepper stirring it into the pot. Make sure the flour is well incorporated and cook it for a couple of minutes before adding the remaining ingredients.
Add the tomatoes, beans, corn, green chilies and potatoes. Stirring until all the ingredients are combined.
Bring to a boil, then reduce heat and simmer, cook covered for about an hour, stirring occasionally to make sure nothing is sticking to the bottom of the pot as it cooks.
Camp Cooking Tip: Make sure you have enough fuel to cook your entire meal before you begin the cooking process. This old fashioned cowboy stew requires approximately 1.5 total hours of cooking time.
Serving: 1gCalories: 354kcalCarbohydrates: 25gProtein: 18gFat: 20gSaturated Fat: 7gPolyunsaturated Fat: 1gMonounsaturated Fat: 9gTrans Fat: 1gCholesterol: 62mgSodium: 335mgPotassium: 747mgFiber: 3gSugar: 2gVitamin A: 8IUVitamin C: 24mgCalcium: 37mgIron: 3mg
More Yummy Meal Ideas
Get some inspiration to make fantastic camp meals for breakfast, lunch and dinner!
Pin it for later!
Cowboy Stew Camping Dutch Oven Recipe by CampingForFoodies
Source
0 notes
Text
Garden Report & Frugal Living 23.07.28
I didn’t have to did around for the peas. I one patch I could clearly see where the rat/skunk dug them up. In a pot, I could see where a few were attempting to make an appearance ... perhaps they stay hidden, trembling below the soil in mortal dread of slugs, bugs & co.
I hope (and pray!) that we can get the grow box maintenance done, up and planted!! I’m struggling in the mental and physical realm surrounding this project. The weather is changing rapidly. There is no doubt that Autumn is getting ready to make an entrance as the maples are now starting to blush up colour in quick anticipation. I need to get that veg garden in and growing before the temps drop too low. If necessary, I will kick the cat off her seeding mat and get some going that way!
We give the hens crumbled oyster shell at will. They have a little tin wired to the side of the aviary and I keep that filled. Last week Rossetti left an egg on the ground and then again just at the coop entrance. Yesterday Alcott had an accident that left a paper egg just inside the coop door. She has been laying five, more often six days so I suspect that they are getting stressed out by the neighbors’ screaming ... the kids start just after their breakfast hour (8-ish) and then continue for twelve hours. Unfortunately, if they don’t stop, I am going to have to talk with their landlord as this has been going on for over three weeks, every, single, day. Its stressing my hens. Its stressing me. Its just not healthy. Not even for the screamers!
The harvest has been scant and not just in my garden. Most of veg is outsourced and that is hard as most looks Bad and very expensive. That leaves a lot to be desired and a lot of time looking at prices. I did purchase four very large viking potatoes (red&purple mottled skin that will cook up to a brown&grey, dense white flesh, not an heirloom but a specialty potato). My plan is to peel thickly as to plant the eyes while still enjoying the potato ... I know! I got them for the nutritional value of the skin but if I can grow them ... I can have many more for next to nothing in cost.
In the warmer months we eat more salades. I got a real good buy on a mondo sized bulk bag of elbow macaroni. Pair that with slim pickings in the garden and ditto in the fridge and we have an opportunity for “loaded” macaroni salade. Very adaptable to what is available/ taste preference! I boiled up a big pot of the macaroni al dente. Threw in colander strainer and rinse in cold water until cooled. I decide to leave the potted meat in the pantry so that left the chicken shreds or some turkey pressed meat/’bacon’ in the refrigerator; I chose the later and cooked in the oven. I snip (with meat shears) as I cook so by the end of the process its like diced meats. I guess you could dice before -- I just prefer this method as it leaves my hands cleaner while I do more prep work and makes me pay attention to the meat so I don’t burn it up in the oven. I was able to find some parsley, salad burnette and few dino kale leaves in the garden and chopped those finely. A few slices of red onion left over from taco night were diced. A lonely carrot in the bottom of the veg drawer also chop-chop-chop. Add threeeeee hard boiled eggs... *chop*! O! then there was some pickled cauliflower that I canned last year *squeeze**chop* and some olives sliced. Mayonnaise! Garlic power! Powdered mustard! Salt! Then massage it all together gently. Its rather chilly in the kitchen so I let it sit on the counter for a little bit to “rest” so the flavours can co-mingle. Now there is enough for all of us for a couple of meals either ‘main’ or ‘side’ or even a snack. It is adaptable: pasta is your base then just tossing things in! If you don’t like mayonnaise then use another salade dressing or something like an oil and vinegar ... very easy, very simple, very tasty, very pocket book friendly!
Hope this finds you enjoying the lingering days of Summer perhaps gardening, and enjoying life!
#catholic gardener#gardening#urban homestead#permaculture#frugal living#hens#eggs#loaded macaroni salade#summer melds into autumn
1 note
·
View note
Text
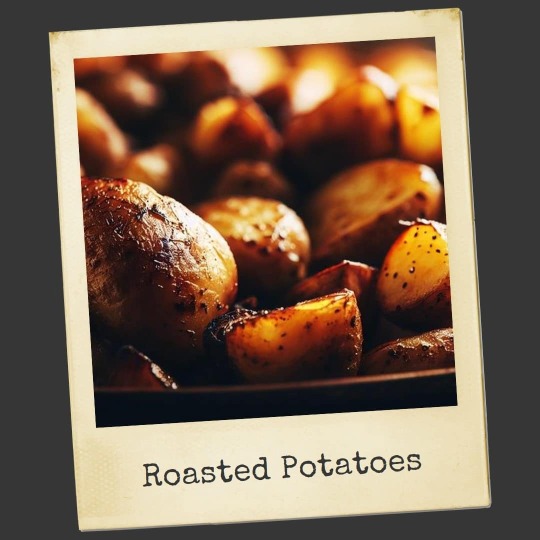
Roasted Potatoes – Tusker House
Am I the only one who’s ever made a recipe and you just know while you’re doing it that you’re doing it wrong? That was this recipe for me… Though I’m not calling it a “recipe blooper” per say, just a case of chef error. As in, my error.
Allow me to explain.
The recipe for these are actually pretty simple. Slice, steam, coat, bake, serve. I mean, who can’t do that? Apparently me. First I over-steamed the potatoes (and the recipe calls for a really long steam to begin with) because I forgot to set the kitchen timer. That’s Ok, it just means the potatoes won’t be pretty, not that they’re inedible.

Then, while I was making the herb coating for the potatoes, I saw it required one tablespoon of salt. I knew when I looked at it that it seemed like a lot of salt for only 2.5 pounds of potatoes. I said to myself, “Self, there’s no way this requires 1 full tablespoon of salt. No way.” So what did I do? I threw in most of a tablespoon of salt anyway. Why? I can’t even really say.
Then, to top it all off, the recipe called for me to put the potatoes in a bowl and stir them in the marinade. Again, when I saw that, I thought “wouldn’t it be easier if I just put it on the sheet pan and drizzled the coating on, then mixed it?”
Yet, for some reason, I slammed it all in the smallest bowl possible and attempted to stir it… With a small spoon. Again, I have no clue why. I knew when I did it that it was dumb, yet I gave it a shot anyway.
Yes, I did think better of it and I poured the mixture onto the pan to finish tossing it, but the damage was done. I slightly mashed some of my overly salted, overly steamed potatoes. My big silver lining was that I looked at the photos of the potatoes I got at Tusker House and I saw that the potatoes as served there when I went were also a little mushed…
So at the very least, some poor sous chef that day tried to make sense of the same recipe I tried and made the same stupid mistakes. It’s nice to feel like some hapless person at the Disney kitchens is prone to the same mistakes I am.
Despite what’s clearly chef-error in these potatoes (I blame the recipe a little, but a whole tablespoon of salt? I knew better), I have to say they were still super good. Yes, they were a bit salty, yes, they were a bit mushed… But with less salt, less mush, more crunch, I have to say the flavor is almost exactly the same.
For those who are obsessed with finding Disney potato recipes, and there are a lot of people who are, this is a definite must-add to the recipe collection. And it smells amazing while it’s baking! Even with the salt issue, my mouth did the “oh my goodness, these are Tusker House potatoes” dance… And a good Disney food memory is one of the best things in the world.
I truly can’t wait to take another stab at these because, despite my issues, these are fast, easy, and are one of those wonderful side dishes that dress up for nicer main dishes, but also dress down for the more hearty meals.
Just please, for the love of Mickey, don’t add an entire tablespoon of salt.
~~~~ °o° ~~~~
Roasted Potatoes (Tusker House Version)
As is served at Tusker House, Disney’s Animal Kingdom
2.5 pounds Yukon Gold Potatoes, sliced into wedges
3 tablespoons of herb infused olive oil (or regular olive oil)
1-2 teaspoons of salt
1/2 teaspoon black pepper
1/2 teaspoon paprika
3 cloves of garlic, chopped fine
1 sprig fresh rosemary, chopped fine
Steam potatoes over water for 15-20 minutes. While the potatoes are steaming, combine the remaining ingredients and preheat oven to 375 degrees.
Remove potatoes from heat and spread on a cookie sheet. Drizzle with the oil mixture. Toss potatoes until evenly coated and spread into a single layer. Bake in oven until golden brown, tossing every 10 minutes or so. Total baking time will vary between 20-30 minutes depending on individual ovens.
Serve immediately. Will store in an airtight container but require an oven for re-heating.
Read the full article
0 notes
Photo

One Pot Rice | Julia Turshen
Heat a little oil in a pot. Just enough to cover the bottom of the pot. The heavier your pot, the better (a Dutch oven is great). This oil can be whatever type you like.
If you want to use meat, add it to the pot — to make roughly four generous servings, you’re going to need about a pound of meat or less (like 1/4 - 1/2 pound) of something more intense like pancetta or bacon. For the meat, this could be a few diced, boneless/skinless chicken thighs, any type of sausage freed from its casing and crumbled into pieces, a pound of ground meat (any type), or a few slices of bacon cut into small pieces…whatever. Cook the meat until it’s mostly browned, or at least cooked through. You can also skip the meat and make this all vegetables or vegetables + beans or vegetables + shrimp or fish (more on those variations in a moment).
Then add a bunch of chopped vegetables — just a big diced onion will do, or a mix of things like carrots, celery, fennel, peppers, peeled squash, whatever. You can also use fermented vegetables like a bunch of sauerkraut or kimchi! Or frozen vegetables like a bag of spinach or kale. Let the vegetables get a bit soft. No need to remove the meat from the pot when you do this.
Season the vegetables. This could just be salt. But it could also be all sorts of ground spices like cumin, coriander, smoked paprika, adobo, gochugaru (or any hot pepper for that matter)…whatever!
Add rice! I usually do 1 cup of long grain white rice for one pot. You can also do brown rice or any grain — just adjust the cooking time as needed. For example, brown rice will need closer to an hour of cooking time. Quinoa would just need about 10 - 15 minutes of cooking time.
Add liquid. This could be water. This could any type of stock. This could be a little coconut milk and water. This could be crushed tomatoes and stock. You get the idea. I usually do two parts liquid to one part rice. So for 1 cup of long grain rice, I do 2 cups of liquid. This ratio for white rice leaves you with a pot of food that isn’t dried out. You can do a little less (more like 1.5 parts liquid to 1 part rice) if you want your rice to be fluffier. If you do another grain, keep the liquid ration in mind — brown rice, for example, will definitely need two parts liquid to one part rice. You can also add drained canned beans at this point or beans or lentils you cooked yourself.
Stir everything well, bring the mixture to a boil, and once it boils, turn it to low, cover it, and let it simmer until the rice is cooked, which will be about 20 to 25 minutes for white rice (again, less or more for other grains).
Let the pot of food sit off of the heat, covered, for at least 10 minutes before serving. If you want to add peeled shrimp or small pieces of skinless/boneless fish, just open the pot quickly, put the seafood on top, cover it and let it sit with the cover on until the seafood gets completely cooked through with the residual heat, about 10 - 15 minutes.
Serve as is or feel free to top your portion with fun toppings…cheese, sour cream, fresh herbs, sliced scallions, crunchy fried onions, hot sauce, tahini dressing…whatever you want!
Here are a few ideas in a chart if that helps get your wheels spinning:

And everything in one place:
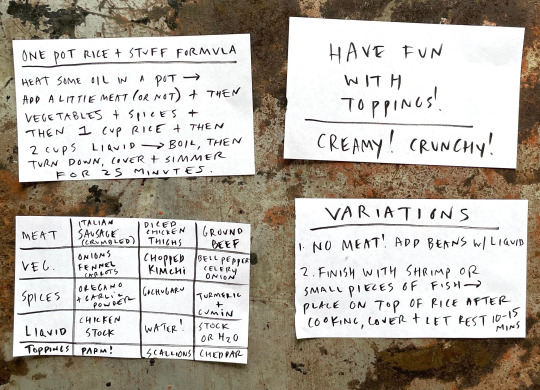
A few more notes…
This is a great thing to make a couple hours ahead and just let it sit covered on the stove (heat off) or make further ahead and just reheat in the microwave or in a pot over low heat.
If you have enough stuff in the pot, you won’t need anything else, but you can always round out the meal with a simple salad or some warm garlic bread.
The possibilities with this one pot rice formula are truly endless.
1 note
·
View note
Text
If you’re cooking the turkey for Thanksgiving and have no idea what you are doing and you’re constantly haunted by the possibility of failure, here’s an easy recipe:
Ingredients:
Turkey (duh)
Salt
Butter
Fresh Thyme
Fresh Rosemary
Garlic
Lemon
Carrot (optional)
Celery (optional)
Measurements are for cowards. You are not a coward.
Day 1-2:
Get yourself a turkey, the size depends on how many people your serving but I recommend about a pound per person give or take. If you buy it frozen get it in the fridge to thaw two or three days before. On the day before, start prepping. Unwrap it, get it into one of those one-time-use pans or a baking sheet.
There might be a plastic thing holding the cavity open, remove that. Untie the legs. Get the guts out, sometimes they’ll be loose in there, sometimes they’ll be in a little bag. Set them aside, you’re gonna need them. If you cut out the wishbone now it makes for easy carving later, do it if you know how but you don’t have to.
Get some paper towels and pat the whole thing dry, be super thorough, get all the folds, inside the cavity, all of that. You want it super dry. Then you’re gonna get some salt. Use the fancy stuff if you want but it doesn’t matter. you’ll need about half a teaspoon per pound, but again, measurements are for cowards and you are not a coward. Rub the whole turkey down with the salt. Again, every inch of that thing. Rub it down like it’s an Egyptian pharaoh being prepared for burial. This is called a dry brine. Put it uncovered in the fridge overnight. Salt is a desiccant, so this will dry out the skin a bit and make it crispy when you cook it. This is also favorable to other brining methods where you have to soak the turkey in a salt water solution, that doesn’t always work out in your favor and it’s also super messy. Thank me for making you dry brine
Day 3:
Happy thanksgiving! This is gonna take a while. Huzzah to you for surviving up to this point. Get that salty boi out of the fridge. Rinse the salt off. Pat it dry again. Get your final pan, this can be a one-time-use thing or just any pan that’s big enough to hold a turkey. If you have a pan with a rack that can yield better results, you don’t need the rack yet but have it on standby.
You want to open the oven every fifteen minutes to baste the turkey? No you don’t. That sucks. Here what you do instead: get about a cup of softened butter, chop your herbs, mince your garlic, mix it all up, congrats you just made herb butter. See that skin on the breast? Get in there with your hands and separate it from the meat. You’re not removing it from the turkey entirely, you’re just getting under there. Also with your hands, spread some of that herb butter under the skin. Be generous. You can do the same with the drumsticks but you don’t have to. Rub the whole thing down with that butter. Every nook and cranny. In the cavity too. Refrain from verbalizing whatever innuendo comes into your mind from doing that. Get your mind out of the gutter. Go see a priest. Thank me when you don’t have to baste your turkey.
If you’re using a roasting rack, now’s the time to use that. Quarter an onion. Put it in the cavity. Put the rest of the onion in the pan. The lemon too. A quarter in the cavity, the rest in the pan. Heck why not throw the herb stems in there. Put whatever other scraps you got in the pan with the turkey. Remember those guts? In the pan. You have some celery and carrots? Put them in the pan. Literally whatever you want. Thank me later.
Throw that thing in the oven. Check the temperature after about two or three hours, the cook time varies depending on the size. When you check the temperature, stick the thermometer into the center of one of the breasts or a thigh. When it reads 165 you won’t get food poisoning. Congrats you just cooked a turkey. Get it on a nice serving plate. Make it look pretty. Use the leftover juice in the pan to make some gravy if you want.
Happy Thanksgiving, my the odds he ever in your favor.
0 notes
Last Seen Blogs

marjsulit
Untitled

kinsbreezy
Sans titre

properplots
Untitled

sreejithsree
Untitled

kawaiipandabanana-blog
Sans titre