#aws fargate cli
Explore tagged Tumblr posts
Visit Tumblr Blog
Explore Tumblr blogs with no restrictions, modern design and the best experience.
Last Seen Tumblr Blogs


Fun Fact
Mobile Tumblr US users spend an average of 4.04 minutes per session on the app.
Text
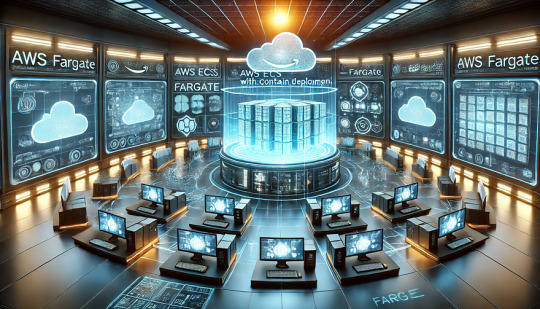
Deploying Containers on AWS ECS with Fargate
Introduction
Amazon Elastic Container Service (ECS) with AWS Fargate enables developers to deploy and manage containers without managing the underlying infrastructure. Fargate eliminates the need to provision or scale EC2 instances, providing a serverless approach to containerized applications.
This guide walks through deploying a containerized application on AWS ECS with Fargate using AWS CLI, Terraform, or the AWS Management Console.
1. Understanding AWS ECS and Fargate
✅ What is AWS ECS?
Amazon ECS (Elastic Container Service) is a fully managed container orchestration service that allows running Docker containers on AWS.
✅ What is AWS Fargate?
AWS Fargate is a serverless compute engine for ECS that removes the need to manage EC2 instances, providing:
Automatic scaling
Per-second billing
Enhanced security (isolation at the task level)
Reduced operational overhead
✅ Why Choose ECS with Fargate?
✔ No need to manage EC2 instances ✔ Pay only for the resources your containers consume ✔ Simplified networking and security ✔ Seamless integration with AWS services (CloudWatch, IAM, ALB)
2. Prerequisites
Before deploying, ensure you have:
AWS Account with permissions for ECS, Fargate, IAM, and VPC
AWS CLI installed and configured
Docker installed to build container images
An existing ECR (Elastic Container Registry) repository
3. Steps to Deploy Containers on AWS ECS with Fargate
Step 1: Create a Dockerized Application
First, create a simple Dockerfile for a Node.js or Python application.
Example: Node.js DockerfiledockerfileFROM node:16-alpine WORKDIR /app COPY package.json . RUN npm install COPY . . CMD ["node", "server.js"] EXPOSE 3000
Build and push the image to AWS ECR:shaws ecr create-repository --repository-name my-app docker build -t my-app . docker tag my-app:latest <AWS_ACCOUNT_ID>.dkr.ecr.<REGION>.amazonaws.com/my-app:latest aws ecr get-login-password --region <REGION> | docker login --username AWS --password-stdin <AWS_ACCOUNT_ID>.dkr.ecr.<REGION>.amazonaws.com docker push <AWS_ACCOUNT_ID>.dkr.ecr.<REGION>.amazonaws.com/my-app:latest
Step 2: Create an ECS Cluster
Use the AWS CLI to create a cluster:shaws ecs create-cluster --cluster-name my-cluster
Or use Terraform:hclresource "aws_ecs_cluster" "my_cluster" { name = "my-cluster" }
Step 3: Define a Task Definition for Fargate
The task definition specifies how the container runs.
Create a task-definition.js{ "family": "my-task", "networkMode": "awsvpc", "executionRoleArn": "arn:aws:iam::<AWS_ACCOUNT_ID>:role/ecsTaskExecutionRole", "cpu": "512", "memory": "1024", "requiresCompatibilities": ["FARGATE"], "containerDefinitions": [ { "name": "my-container", "image": "<AWS_ACCOUNT_ID>.dkr.ecr.<REGION>.amazonaws.com/my-app:latest", "portMappings": [{"containerPort": 3000, "hostPort": 3000}], "essential": true } ] }
Register the task definition:shaws ecs register-task-definition --cli-input-json file://task-definition.json
Step 4: Create an ECS Service
Use AWS CLI:shaws ecs create-service --cluster my-cluster --service-name my-service --task-definition my-task --desired-count 1 --launch-type FARGATE --network-configuration "awsvpcConfiguration={subnets=[subnet-xyz],securityGroups=[sg-xyz],assignPublicIp=\"ENABLED\"}"
Or Terraform:hclresource "aws_ecs_service" "my_service" { name = "my-service" cluster = aws_ecs_cluster.my_cluster.id task_definition = aws_ecs_task_definition.my_task.arn desired_count = 1 launch_type = "FARGATE" network_configuration { subnets = ["subnet-xyz"] security_groups = ["sg-xyz"] assign_public_ip = true } }
Step 5: Configure a Load Balancer (Optional)
If the service needs internet access, configure an Application Load Balancer (ALB).
Create an ALB in your VPC.
Add an ECS service to the target group.
Configure a listener rule for routing traffic.
4. Monitoring & Scaling
🔹 Monitor ECS Service
Use AWS CloudWatch to monitor logs and performance.shaws logs describe-log-groups
🔹 Auto Scaling ECS Tasks
Configure an Auto Scaling Policy:sh aws application-autoscaling register-scalable-target \ --service-namespace ecs \ --scalable-dimension ecs:service:DesiredCount \ --resource-id service/my-cluster/my-service \ --min-capacity 1 \ --max-capacity 5
5. Cleaning Up Resources
After testing, clean up resources to avoid unnecessary charges.shaws ecs delete-service --cluster my-cluster --service my-service --force aws ecs delete-cluster --cluster my-cluster aws ecr delete-repository --repository-name my-app --force
Conclusion
AWS ECS with Fargate simplifies container deployment by eliminating the need to manage servers. By following this guide, you can deploy scalable, cost-efficient, and secure applications using serverless containers.
WEBSITE: https://www.ficusoft.in/aws-training-in-chennai/
0 notes
Text
Amazon CloudFront VPC Origins: Improved CloudFront Security
Introducing the Amazon CloudFront VPC Origin: Improved protection and more efficient use of your apps
I’m happy to inform you that the Amazon CloudFront Virtual Private Cloud (VPC) origins has launched, a new feature that allows businesses to serve content from apps housed in private subnets inside their Amazon VPC. This makes it simple to protect web apps, so you can concentrate on expanding your company while enhancing security and preserving great speed and worldwide scalability with CloudFront.
Origin Access Control is a managed service that allows customers to safeguard their origins and make CloudFront the only front-door to your application when serving content via Amazon Simple Storage service (Amazon S3), AWS Elemental Services, and AWS Lambda Function URLs. For apps that employ load balancers or are hosted on Amazon Elastic Compute Cloud (Amazon EC2), this was more challenging to accomplish because you had to come up with your own method to get the same outcome. To guarantee that the endpoint remained exclusive to CloudFront, you would need to employ a variety of strategies, including monitoring firewall rules, employing logic like header validation, and using access control lists (ACLs).
By providing a managed solution that can be used to send CloudFront distributions to Application Load Balancers (ALBs), Network Load Balancers (NLBs), or EC2 instances inside your private subnets, CloudFront VPC origins eliminates the requirement for this type of undifferentiated effort. Because it also removes the need for public IP addresses, this guarantees that CloudFront will be the only point of entry for those resources with the least amount of configuration work, giving you better performance and the chance to save money.
Setting up CloudFront VPC Origin
The fact that CloudFront VPC origins is free of charge means that any AWS client can use it. Using the AWS Command Line Interface (AWS CLI) or the Amazon CloudFront console, it may be linked with both new and pre-existing CloudFront distributions.
Consider that you have a private AWS Fargate application for Amazon ECS that is fronted by an ALB. Using the ALB directly within the private subnet, let’s build a CloudFront distribution.
To begin, open the CloudFront dashboard and choose the newly added VPC origins menu item.Image credit to AWS
It’s easy to create a new VPC origin. There aren’t many options for you to choose from. You can either input the Origin ARN directly or search for resources hosted in private subnets. You pick the resources you want, give your VPC origin a catchy name, set up some security settings, and then confirm. Although support for resources across all accounts is on the horizon, please take note that the VPC origin resource must be in the same AWS Account as the CloudFront distribution at launch.
Your VPC origin will be deployed and operational after the creation procedure is finished! On the VPC origins page, you can see its current state.
By doing this, it has developed a CloudFront distribution that, with just a few clicks, can serve content straight from a resource hosted on a private subnet! Once your VPC origin has been built, you can go to your Distribution window and copy and paste the ARN or choose it from the dropdown menu to add the VPC origin to your Distribution.
To achieve full-spectrum protection, keep in mind that you should still layer your application’s security using services like AWS Web Application Firewall (WAF) to guard against web vulnerabilities, AWS Shield for managed DDoS protection, and others.
In conclusion
By allowing CloudFront distributions to serve content directly from resources hosted within private subnets, CloudFront VPC Origins provides a new means for enterprises to create high-performance, secure applications. This keeps your application safe while lowering the difficulty and expense of maintaining sources that are visible to the public.
Read more on govindhtech.com
#AmazonCloudFront#VPCOrigins#CloudFrontSecurity#AmazonSimpleStorageservice#AmazonS3#EC2instances#AmazonElasticComputeCloud#AmazonEC2#DDoSprotection#technology#technews#news#govindhtech
0 notes
Text

AWS Certified Solutions Architect - Associate (SAA-C03) Exam Guide by SK Singh
Unlock the potential of your AWS expertise with the "AWS Solutions Architect Associate Exam Guide." This comprehensive book prepares you for the AWS Certified Solutions Architect - Associate exam, ensuring you have the knowledge and skills to succeed.
Chapter 1 covers the evolution from traditional IT infrastructure to cloud computing, highlighting key features, benefits, deployment models, and cloud economics. Chapter 2 introduces AWS services and account setup, teaching access through the Management Console, CLI, SDK, IDE, and Infrastructure as Code (IaC).
In Chapter 3, master AWS Budgets, Cost Explorer, and Billing, along with cost allocation tags, multi-account billing, and cost-optimized architectures. Chapter 4 explores AWS Regions and Availability Zones, their importance, and how to select the right AWS Region, including AWS Outposts and Wavelength Zones.
Chapter 5 delves into IAM, covering users, groups, policies, roles, and best practices. Chapter 6 focuses on EC2, detailing instance types, features, use cases, security, and management exercises.
Chapter 7 explores S3 fundamentals, including buckets, objects, versioning, and security, with practical exercises. Chapter 8 covers advanced EC2 topics, such as instance types, purchasing options, and auto-scaling. Chapter 9 provides insights into scalability, high availability, load balancing, and auto-scaling strategies. Chapter 10 covers S3 storage classes, lifecycle policies, and cost-optimization strategies.
Chapter 11 explains DNS concepts and Route 53 features, including CloudFront and edge locations. Chapter 12 explores EFS, EBS, FSx, and other storage options. Chapter 13 covers CloudWatch, CloudTrail, AWS Config, and monitoring best practices. Chapter 14 dives into Amazon RDS, Aurora, DynamoDB, ElastiCache, and other database services.
Chapter 15 covers serverless computing with AWS Lambda and AWS Batch, and related topics like API Gateway and microservices. Chapter 16 explores Amazon SQS, SNS, AppSync, and other messaging services. Chapter 17 introduces Docker and container management on AWS, ECS, EKS, Fargate, and container orchestration. Chapter 18 covers AWS data analytics services like Athena, EMR, Glue, and Redshift.
Chapter 19 explores AWS AI/ML services such as SageMaker, Rekognition, and Comprehend. Chapter 20 covers AWS security practices, compliance requirements, and encryption techniques. Chapter 21 explains VPC, subnetting, routing, network security, VPN, and Direct Connect. Chapter 22 covers data backup, retention policies, and disaster recovery strategies.
Chapter 23 delves into cloud adoption strategies and AWS migration tools, including database migration and data transfer services. Chapter 24 explores AWS Amplify, AppSync, Device Farm, frontend services, and media services. Finally, Chapter 25 covers the AWS Well-Architected Framework and its pillars, teaching you to use the Well-Architected Tool to improve cloud architectures.
This guide includes practical exercises, review questions, and YouTube URLs for further learning. It is the ultimate resource for anyone aiming to get certified as AWS Certified Solutions Architect - Associate.
Order YOUR Copy NOW: https://amzn.to/3WQWU53 via @amazon
1 note
·
View note
Video
youtube
AWS Live | AWS Fargate Tutorial | AWS Tutorial | AWS Certification Training | #Edureka #Fargate #DataScience #Datalytical #AWS 🔥AWS Training: This Edureka tutorial on AWS Fargate will help you understand how to run containers on Amazon ECS without having to configure & manage underlying virtual machines.
#aws architect training#aws certification training#aws ecs fargate tutorial#aws fargate ci#aws fargate ci cd#aws fargate cli#aws fargate deep dive#aws fargate demo#aws fargate deployment#aws fargate docker#aws fargate example#aws fargate introduction#aws fargate jenkins#aws fargate lambda#aws fargate load balancer#aws fargate overview#aws fargate vs ecs#aws fragate#aws fragate tutorial#aws training#aws tutorial#edureka#yt:cc=on
0 notes
Text
11 Dịch vụ AWS Serverless xịn nên sử dụng trong kiến trúc cloud
Có bài viết h��c luyện thi AWS mới nhất tại https://cloudemind.com/aws-serverless-services/ - Cloudemind.com
11 Dịch vụ AWS Serverless xịn nên sử dụng trong kiến trúc cloud
Serverless services là những dịch vụ thuộc dạng fully managed services có nghĩa là mọi thứ liên quan đến hạ tầng underlying hardware, provision, maintenance, patching, hay thậm chí cao hơn về bảo mật sử dụng cũng được AWS làm sẵn cho mình. Serverless có thể gọi là lý tưởng cho các developer thay vì nỗi lo về máy chủ cấp phát, cấp phát có thừa hay quá thiếu hay không, sau khi đưa vào sử dụng có cần phải update, upgrade patching gì không (Đây thực sự là ác mộng với các bạn developer mà ko rành về hạ tầng, về CLI, shell này nọ).
AWS hiểu được điều này và offer một số dạng dịch vụ gọi là serverless như thế.
Serverless là gì?
Serverless dịch Tiếng Việt là “Phi máy chủ” nhưng dịch ra có vẻ hơi ngớ ngẩn, mình cũng không biết dịch sao cho thoát nghĩa. Serverless không phải là không có máy chủ theo nghĩa đen, bản chất của serverless nằm lớp bên dưới vẫn là các máy chủ, nhưng AWS làm cho việc này một cách mờ đi (transparency hay invisibility) và tự động quản lý vận hành lớp hạ tầng này miễn sao cung cấp đủ capacity như thiết kế cho bạn.
AWS Serverless
Definition of serverless computing: Serverless computing is a cloud computing execution model in which the cloud provider allocates machine resources on demand, taking care of the servers on behalf of the their customers – Wikipedia
Serverless refers to applications where the management and allocation of servers and resources are completely managed by the cloud provider. – Serverless-Stack
Serverless is a cloud-native development model that allows developers to build and run applications without having to manage servers. There are still servers in serverless, but they are abstracted away from app development. – Redhat
Kevin tập trung vào việc phát triển các product sử dụng Cloud Native cho nên luôn ưu tiên các dịch vụ Serverless trong kiến trúc của mình để tăng tốc độ phát triển, dễ dàng scaling, và chi phí cũng rẻ hơn rất nhiều so với cách làm Cloud truyền thống.
Nào, mình cùng điểm qua các dịch vụ AWS Serverless hiện có nào:
1. AWS Lamda
Type: Compute Services
Description: Chạy code không cần quan tâm đến máy chủ, hỗ trợ coding bằng các ngôn ngữ phổ biến như: Python, Node.js, Go, Java. Đặc biệt hơn từ 2020 Lambda mở rộng năng lực tới 6vCPU và 10GB RAM và hỗ trợ chạy docker.
Pricing Model:
Number of requests
Duration of execution
Reference: https://aws.amazon.com/lambda/
2. Amazon API Gateway
Type: API, proxy
Description: Giúp bạn triển khai các API ở quy mô lớn, hỗ trợ Restfull và Websocket APIs,
Pricing Model:
Number of requests
Caching
Reference: https://aws.amazon.com/api-gateway/
3. Amazon DynamoDB
Type: NoSQL DB
Description: Dịch vụ CSDL NoSQL của AWS, hỗ trợ keyvalue-pair và document DB. Đây là loại cơ sở dữ liệu có tốc độ truy xuất rất nhanh tính bằng single-digit-milisecond, nếu kết hợp thêm Cache của DAX nữa sẽ giảm xuống còn micro-milisecond, có thể scale tới 20 triệu request per second.
Pricing Model (on-demand and provisioned):
Write Capacity Unit
Read Capacity Unit
Storage
Data Transfer
etc
Reference: https://aws.amazon.com/dynamodb/
4. Amazon EventBridge
Type: Controller
Description: Amazon EventBridge được xem như event bus là nơi tập trung sự kiện của nhiều loại ứng dụng SaaS và AWS Services. EventBridge thu thập các sự kiện từ nhiều loại ứng dụng như Zendesk, Datadog, Pagerduty và route các dữ liệu này đến AWS Lambda. Mình cũng có thể setup các rule để route dữ liệu này đến các ứng dụng khác nhau. EventBridge giúp bạn build các ứng dụng hướng sự kiện (event-driven-application). EventBridge schema hỗ trợ Python, Typescript, Java giúp developer thuận tiện trong quá trình phát triển ứng dụng.
Pricing Model:
Pay for events to your event bus
Events ingested to Schema Discovery
Event Replay
Reference: https://aws.amazon.com/eventbridge/
5. Amazon SNS (Simple Notification Service)
Type: Messaging
Description: dịch vụ messaging pub/sub hỗ trợ SMS, Email, mobile push notification.
Pricing Model:
Number of requests
Notification deliveries
Data Transfer
Reference: https://aws.amazon.com/sns/
6. Amazon SQS (Simple Queue Service)
Type: Messaging, Queuing
Description: Message queue, xây dựng các hàng chờ cho các thông tin giúp decoupling nhiều nhóm dịch vụ, cũng là cách giúp các ứng dụng triển khai trên cloud tăng tính Reliable. SQS hỗ trợ standard queue để tăng tối đa throughput và FIFO queue để đảm bảo message được delivery chính xác một lần theo thứ tự gởi đi.
Pricing Model:
Number of requests
Data Transfer
Reference: https://aws.amazon.com/sqs/
7. Amazon S3 (Simple Storage Service)
Type: Storage
Description: Dịch vụ lưu trữ file dạng đối tượng (Object). S3 cung cấp khả năng lưu trữ vô hạn trong mỗi bucket, mỗi file lưu trữ có thể tới 5TB, quản lý dễ dàng thông qua AWS Management Console, API và CLI. S3 cũng dễ dàng tích hợp các dịch vụ AWS khác rất sâu như dịch vụ về governance, phân tích dữ liệu, machine learning, web integration…
Pricing Model:
Storage actual usage
Request type (PUT, GET, LIST…)
Data transfer
Retrieving
Reference: https://aws.amazon.com/s3
8. AWS AppSync
Type: API, Mobile service
Description: AppSync là dịch vụ AWS cho phép xây dựng các ứng dụng dạng real-time communication như data-driven mobile app hay web app với sự hỗ trợ của của GraphQL APIs.
Pricing Model:
Query operation
Data modification operation
real-time update data
Reference: https://aws.amazon.com/appsync/
9. AWS Fargate
Type: Compute, container
Description: Serverless compute khi dùng với container. Fargate có thể dùng với cả EKS và ECS (orchestration)
Pricing Model:
Resource vCPU per hour
Resource RAM per hour
10. AWS Step Function
Type: Controller, Cron job
Description: Đã qua cái thời mà viết các cron job ở hệ điều hành rồi rẽ nhánh theo các business logic tương ứng. AWS Step Function là dịch vụ giúp bạn build các ứng dụng xử lý logic theo các bước nhảy thời gian thông qua các state machine. Đây là dịch vụ rất rất đỉnh.
Pricing Model:
State Transition.
Reference: https://aws.amazon.com/step-functions/
11. Amazon RDS Aurora Serverless
Type: Database, SQL
Description: Aurora là một loại engine trong Amazon RDS được đưa ra bởi AWS (AWS Property). Aurora MySQL nhanh 5x so với MySQL thông thường và 3x so với Postgres. Khác với DynamoDB, Aurora là SQL service. Một ứng dụng lớn bạn có thể phải kết hợp nhiều loại DB services để đem lại hiệu năng tốt nhất.
Pricing model:
ACU (Aurora Capacity Unit)
Storage
Reference: https://aws.amazon.com/rds/aurora/serverless/
Conclusion
Kevin tin rằng sẽ ngày càng có nhiều dịch vụ hướng Serverless và chi phí sử dụng cloud ngày càng được tối ưu có lợi cho người dùng. Cảm ơn vì AWS, Azure, GCP đang ngày càng đưa ra nhiều dịch vụ cloud tốt.
Have fun!
Xem thêm: https://cloudemind.com/aws-serverless-services/
0 notes
Text
Collecting, storing, and analyzing your DevOps workloads with open-source Telegraf, Amazon Timestream, and Grafana
Telegraf is an open-source, plugin-driven server agent for collecting and reporting metrics. Telegraf offers over 230 plugins to process a variety of metrics from datastores to message queues, including InfluxDB, Graphite, OpenTSDB, Datadog, and others. Customers asked us to integrate Telegraf with Amazon Timestream, a fast, scalable, serverless time series database service for IoT and operational applications, so we did. Thanks to the Timestream output plugin for Telegraf, you can now ingest metrics from Telegraf agent directly to Timestream. In this post, you will learn how to: Install, configure, and run a Telegraf agent with the Timestream output plugin Collect your host DevOps metrics using Telegraf and write them to Timestream Ingest time series data in InfluxDB line protocol format through Telegraf to Timestream, without changing your application code Use Grafana to visualize the metrics stored in Timestream Architecture overview Before diving deep into our use case, let’s consider a high-level deployment architecture for using a Telegraf agent with the Timestream output plugin. The metrics flow from the source (step 1 in the following diagram), through processing (step 2), to storage, and then they are accessed (step 3). With Telegraf, you can monitor a number of different sources: system stats, networking metrics, application metrics, message queues, and more. You can do that thanks to input plugins. For the full plugin list, see the GitHub repo. The input plugins are responsible for providing metrics from different sources to Telegraf, and can either listen or fetch metrics. You can aggregate and process collected metrics in Telegraf and send them to the Timestream output plugin. The plugin converts the metrics from the Telegraf model to a Timestream model and writes them to Timestream. The agent can be running on-premises or in the AWS Cloud, such as on Amazon Elastic Compute Cloud (Amazon EC2) instances, in Amazon Elastic Container Service (Amazon ECS), AWS Fargate, and more. You can query Timestream directly or by using a tool like Grafana. You can run Grafana yourself (on-premises or in the AWS Cloud), or use Grafana cloud. You configure Grafana to query Timestream through the Timestream datasource. The detailed architecture depends on your use case. In this post, we provide an example deployment fully in the AWS Cloud. Prerequisites Before you begin, you must have the following prerequisites: An AWS account that provides access to Amazon EC2 and Timestream. An AWS Identity and Access Management (IAM) user with an access key and a secret access key. You must be able to configure the AWS Command Line Interface (AWS CLI) and have permissions to create: IAM roles and policies Timestream databases and tables EC2 instances Auto Scaling groups Stacks in AWS CloudFormation An Amazon Virtual Private Cloud (Amazon VPC) with a public subnet. Solution overview For this post, you simulate your fleet of servers by launching five EC2 instances in an Auto Scaling group. Each EC2 instance runs a Telegraf agent and a sample application. The sample application estimates pi number using the Monte Carlo method. It sends it as an application metric in InfluxDB line protocol format to the local Telegraf agent on Amazon EC2. The Telegraf agent, which runs on each Amazon EC2, performs three main roles: Uses its plugins to collect CPU and memory metrics Accepts writes in InfluxDB line protocol format from your application Writes the metrics to the Timestream database Finally, you run Grafana and expose an operational dashboard by launching one more EC2 instance. Grafana queries Timestream and returns the result to the user in a dashboard form. The following diagram illustrates the solution architecture for this use case. Deploying the solution We provide an AWS CloudFormation template in this post as an example, which you can review and customize as needed. Some resources deployed by this stack incur costs when they remain in use. For this post, the resources are installed in a VPC with a public subnet. We recommend installing the resources in a private subnet whenever possible for production. In addition, we recommend enabling TLS connections and password authentication from your applications to Telegraf and for Grafana. To troubleshoot, the CloudFormation template sets up network inbound access to port 22 from a limited IP CIDR scope, enabling you to access EC2 instances remotely. If this is not needed, you can remove the access. To start provisioning your resources, choose Launch Stack: For Amazon Timestream current region availability, see the pricing page. The CloudFormation template does the following: Creates a Timestream database and three tables. Creates an EC2 Auto Scaling group in subnets of your choice, with EC2 instance types of your choice. On each EC2 instance in the Auto Scaling group, the template: Installs and configures Telegraf agent. Downloads and configures a Python sample application as a service, which pushes the metrics in InfluxDB protocol to a local Telegraf agent. Creates a single EC2 instance with Grafana installed and configured as a service that connects to the pre-installed Timestream datasource. Additionally, one sample dashboard is pre-installed to visualize various metrics about the setup. Creates two Amazon EC2 security groups: one for EC2 instances in the Auto Scaling group, and one for the Grafana EC2 instance. You can configure network access to inbound TCP ports 22 (SSH), Grafana (3000) with parameters in the CloudFormation template. This locks down access to the launched EC2 instances to known CIDR scopes and ports. Creates two IAM instance profiles: one associated with the Auto Scaling group instances (with write permissions to Timestream), and one associated with the Grafana instance (with Timestream read permissions). Installing the Telegraf agent with the Timestream output plugin We wrote the Timestream output plugin and contributed to the Telegraf repository. The pull request was merged and as of version 1.16, the Timestream output plugin is available in the official Telegraf release. To install Telegraf on your system, see Telegraf Installation Documentation. You can also use the following script to install Telegraf on an Amazon Linux 2 EC2 instance: yum update -y echo Installing Telegraf cat < sample.conf The generated sample.conf file contains example configuration that you can adjust to your preferences. However, you must adjust the following keys: Under the [[outputs.timestream]] section, set the database_name to the name of the created Timestream database. Under the [[inputs.influxdb_listener]] section, comment out with the # character the following keys: tls_allowed_cacerts, tls_cert, and tls_key. This is to simplify the example. We advise that you use TLS certificates in your production environment. The configuration also defines how the metrics are translated from Telegraf (InfluxDB) to the Timestream model. The plugin offers you two modes, which you can use by changing the mapping_mode key. For more information, see Configuration. Running the Telegraf agent When you have the configuration file, you can run Telegraf with the following command: telegraf --config sample.conf However, if you run Telegraf as a service, it automatically restarts if there are issues. You can run the Telegraf as a service and check the service status with the following commands on Amazon Linux 2 EC2 instance: systemctl start telegraf systemctl status telegraf Using InfluxDB line protocol to write to Timestream through Telegraf For this post, we wrote a Python application that constantly estimates pi number and sends the metric to the InfluxDB database. See the following code: import time import random import math import uuid import sys from influxdb import InfluxDBClient from influxdb import SeriesHelper if len(sys.argv) != 3: print('Usage: {0} influxdb_host influxdb_port'.format(sys.argv[0])) print('Invoked: {0}'.format(sys.argv)) sys.exit(1) # InfluxDB connections settings host = sys.argv[1] port = int(sys.argv[2]) user = '' password = '' dbname = '' myclient = InfluxDBClient(host, port, user, password, dbname) class MySeriesHelper(SeriesHelper): """Instantiate SeriesHelper to write points to the backend.""" class Meta: """Meta class stores time series helper configuration.""" # The client should be an instance of InfluxDBClient. client = myclient series_name = 'sample_app' # Defines all the fields in this time series. fields = ['pi', 'iteration'] # Defines all the tags for the series. tags = ['session_uuid'] # Defines the number of data points to store prior to writing # on the wire. bulk_size = 5 # autocommit must be set to True when using bulk_size autocommit = True session_uuid = str(uuid.uuid4()) inside = 0 total = 0 while True: total += 1 # Generate random x, y in [0, 1]. x2 = random.random()**2 y2 = random.random()**2 # Increment if inside unit circle. if math.sqrt(x2 + y2) < 1.0: inside += 1 # inside / total = pi / 4 pi = (float(inside) / total) * 4 MySeriesHelper(session_uuid=session_uuid, pi=pi, iteration=total) # To manually submit data points which are not yet written, call commit: MySeriesHelper.commit() print('Sent to InfluxDB iteration: {}, pi: {}. Sleeping 1s'.format(total, pi)) time.sleep(1) The sample application connects to the InfluxDB server and sends the pi estimation and iteration number to the InfluxDB every second. Native InfluxDB libraries are used to submit the metrics. With a Telegraf InfluxDB listener, you can use the same code that you’re using now to ingest data to Timestream. All you have to do is change the host and port in your configuration to your Telegraf agent.You can run the sample application with the following code: python3 app.py localhost 8186 You can refer to the setup_sample_application.sh script to download and configure the Python sample application as a Linux service on Amazon Linux 2. The ingestion setup is now complete. Setting up Grafana with a Timestream datasource We have prepared the setup-grafana.sh script to download, install, and configure Grafana with a Timestream datasource and a sample dashboard. You can also set up Grafana with a Timestream datasource manually. For instructions, see Using Timestream with Grafana. Browsing the metrics in Timestream A few minutes after you launch the CloudFormation stack, you should see a new database in Timestream. On the AWS CloudFormation console, choose your stack, and choose the Outputs tab. There, you can see the TimestreamDatabaseName key with the new database name in the value column. On the Timestream console, navigate to the databases view and choose your database. You can see the following tables in your Timestream database: cpu (with host and cpu dimensions, measure_value::double, measure_name, and time) mem (with host dimension, measure_value::bigint, measure_value::double, measure_name, and time) sample_app (with host and session_uuid dimensions, measure_value::bigint, measure_value::double, measure_name, and time) You can choose the three dots near the table name, and choose Show measures to explore what measures are stored in a table. For example, the following screenshot shows the measures from the sample_app table: iteration (data_type bigint, with host and session_uuid dimensions), and pi (data_type double, with host and session_uuid dimensions). Browsing the metrics in Grafana After launching the CloudFormation stack, on the AWS CloudFormation console, choose your stack and choose the Outputs tab to see the GrafanaURL key. Navigate to the URL in the value column. You had to specify your public IP address when launching the stack to be able to access the Grafana URL. Also, keep in mind that your VPN or proxy can block the access to 3000 port. Log in to Grafana using the default admin/admin credentials and open My π Estimation DevOps Dashboard. You should see a view showing you several panels: last average π estimate – Value is 3.14588 π estimate per host graph – Values converging to π value π iteration count per host – Values around 1500 cpu-total: usage_system per host graph – Minimal CPU usage cpu-total: usage_user per host graph – Minimal CPU usage memory: available_percent per host – Values depend on your EC2 instance type memory: free per host – Values depend on your EC2 instance type Choose the panel title and choose Edit to explore the Timestream query for a particular panel. For example, the π estimate per host panel query looks like following code: WITH approximate_datapoints AS ( SELECT BIN(time, $__interval_ms) AS t_bin, host, session_uuid, AVG(measure_value::double) AS m_bin FROM ${timestream_db_name}.sample_app WHERE $__timeFilter AND measure_name = 'pi' GROUP BY BIN(time, $__interval_ms), host, session_uuid ) SELECT host, session_uuid, CREATE_TIME_SERIES(t_bin, m_bin) AS "pi_estimate" FROM approximate_datapoints GROUP BY host, session_uuid ORDER BY host, session_uuid For more information about the Timestream query language, see Query. Cleaning up To avoid incurring future charges, delete the CloudFormation stack that you created. Conclusion In this post, you learned how to use Telegraf to send DevOps metrics to Timestream. You also learned how to use Telegraf as a proxy to translate InfluxDB writes to Timestream without modifying your applications. Check out the Timestream output plugin for Telegraf and try ingesting data from your real applications to Timestream. About the author Piotr Westfalewicz is a NoSQL data architect at AWS. He is passionate about building the right solution for customers. Before working as a data architect, he was a software development engineer at both Amazon and AWS. https://aws.amazon.com/blogs/database/collecting-storing-and-analyzing-your-devops-workloads-with-open-source-telegraf-amazon-timestream-and-grafana/
0 notes
Text
2020/10/26-31
# プログラムのファイル読み書きで「mmap」を使うと速度が向上する理由とは? https://gigazine.net/news/20201031-mmap-system-faster-system-call/ >つまり、通常のシステムコールによる処理の大部分を占める >「copy_user_enhanced_fast_string」とmmapによる処理の多くを >占める「__memmove_avx_unaligned_erms」の効率性の違いが、 >読込速度の違いに大きく影響すると言えます。
>両者の効率性の違いはデータを複数ストリームで扱えるAVXに対応して >いるかどうか。「__memmove_avx_unaligned_erms」はその名前の通り >AVXに対応しておりメモリの帯域を効率的に使用できますが、 >「copy_user_enhanced_fast_string」はAVXに対応しておらず、帯域を >フルに利用できないとのこと。Fedorova氏はこれが通常のシステム >コールよりもmmapの方が高速にファイル操作を行える大きな理由だと >説明しています。
# プログラムの実行時間を99%短縮した「たった1行のコード」とは? https://gigazine.net/news/20201027-pinterest-one-line-faster-99-percent/ >改善後のコードで追加されたのは、処理対象のブランチの範囲などを >指定できる「refspec」オプションです。Gitの仕様上、refspecオプ >ションを指定せずクローンを行うと、リモートリポジトリ内のすべて >のブランチをフェッチしてコミット履歴を取得するとのこと。 >Pinboardリポジトリの場合では、改善前はリポジトリに存在する >2500以上のブランチをすべてフェッチしてからmasterブランチを >クローンするという、効率の悪い状態でした。改善後のコードでは、 >refspecによってフェッチするブランチをmasterブランチに制限しています。
# AWSの負荷テストソリューションを試してみた https://dev.classmethod.jp/articles/distributed-load-testing-on-aws/ >Fargateで1秒あたり選択した数のトランザクションを生成する数千規模の >接続ユーザーを簡単にシミュレートできます。 > >なお、使用するテストシナリオにはJMeterのシナリオを指定できるため、 >既にJMeterを使っている場合は簡単に大規模な負荷テストを行うこともできます。
# ACMで証明書を発行してELBの証明書を入れ替える手順 https://dev.classmethod.jp/articles/acm-certificate-swap-elb/
# Aurora Postgresqlでインスタンスロール(読み込み・書き込み)をクライアントから判別できますか? https://dev.classmethod.jp/articles/aurora-postgresql-determine-instance-roll/ >コネクションプーリングを利用しており、フェイルオーバーが発生すると、 >読み込みインスタンスに書き込みに行ってしまう。 > >Postgresqlに対して、SHOW transaction_read_onlyを実行します。 > >OFF 書き込みノード(プライマリ)です。 >ON 読み込みノード(Auroraレプリカ)です。
# Amazon RDS for PostgreSQLがプライマリ・レプリカを同時にメジャーアップグレードできるようになりました! https://dev.classmethod.jp/articles/amazon-rds-for-postgresql-supports-concurrent-major-version-upgrades-of-primary-and-replicas/ >Primary インスタンス に対して Modify を行い、新しいメジャーバージョン >を指定するだけです。
# AWS CLIがAssumeRoleする際のセッション名を指定する https://dev.classmethod.jp/articles/aws-cli-assume-role-with-session-name/ >さてAssumeRoleをして一時的なクレデンシャルを取得する際には >セッション名の指定が必要です。 > >AWS CLIがプロファイルの設定から自動的にAssumeRoleする際には、 >セッション名はbotocore-session-1609426800のような名前が自動的に >与えられます。 > >実はこのセッション名というのは、APIコールしたユーザー名として >AWS CloudTrailに記録されます。
>上記のようなデフォルトのセッション名では「誰がそのロールを使用して >APIコールをしたのか」の追跡が困難になります。そうい��わけで、 >責任追跡性(Accountability)を担保する必要がある場合、プロファイル >にrole_session_nameを設定すると幸せになれるよ、というお話です。
0 notes
Link
AWSは、AWSのサービスを活用した実践的なハンズオンコンテンツを多数公開しており、 日本語化もされています。 アマゾン ウェブ サービス (AWS) の実践的チュートリアル https://aws.amazon.com/jp/getting-started/hands-on/ 社内向けにコンテナやAPI Gateway初学者向けのハンズオン教材を探していたところ、 ちょうどいいチュートリアルをみつけました。 現代的なウェブアプリケーションの構築 https://aws.amazon.com/jp/getting-started/hands-on/build-modern-app-fargate-lambda-dynamodb-python/ このチュートリアル、 ECS/Fargateを活用したコンテナアプリケーションの公開 Codeサービスを活用したCI/CDパイプラインの構築 Amazon API Gatewayを活用したAPIの公開 データストアとしてDynamoDBの利用 Cognitoを活用した認証処理の追加 Kinesis Firehoseを活用したクリックストリームの分析 などなど、モダンなアプリケーション実行基盤の構築をステップバイステップで体験できる、 非常に良いコンテンツです。 出典:https://aws.amazon.com/jp/getting-started/hands-on/build-modern-app-fargate-lambda-dynamodb-python/ 良いコンテンツ・・非常に良いコンテンツなのですが・・・ チュートリアルの手順どおりに試してもうまく動かないところが何点かありましたので、 メモしておきたいと思います。 .NET、Go、Java用のリソースも用意されていますが、本記事はPythonで試した際のメモとなります。 モジュール 2B: AWS Fargate を使用したサービスのデプロイ ステップ1: Flaskサービスを作成する A: Docker イメージをビルドする Cloud9 IDE上でdocker buildしますが・・ docker build . -t REPLACE_ME_AWS_ACCOUNT_ID.dkr.ecr.REPLACE_ME_REGION.amazonaws.com/mythicalmysfits/service:latest python-pipやpipのインストールでコケます。 Building dependency tree... Reading state information... E: Unable to locate package python-pip The command '/bin/sh -c apt-get install -y python-pip python-dev build-essential' returned a non-zero code: 100 Running in 944121289de0 /bin/sh: 1: pip: not found The command '/bin/sh -c pip install --upgrade pip' returned a non-zero code: 127 2020年8月時点では、ubuntu:latestのPythonはv3系なので、 Dockerfileをpython3対応しましょう。 python-pipはpython3-pinに、 pipはpip3に、 ENTRYPOINTのpythonはpython3に変更します。 FROM ubuntu:latest RUN echo Updating existing packages, installing and upgrading python and pip. RUN apt-get update -y RUN apt-get install -y python3-pip python-dev build-essential RUN pip3 install --upgrade pip RUN echo Copying the Mythical Mysfits Flask service into a service directory. COPY ./service /MythicalMysfitsService WORKDIR /MythicalMysfitsService RUN echo Installing Python packages listed in requirements.txt RUN pip3 install -r ./requirements.txt RUN echo Starting python and starting the Flask service... ENTRYPOINT ["python3"] CMD ["mythicalMysfitsService.py"] module-3以降で用意されているDockerfileについても、同様に修正しましょう。 C: Docker イメージを Amazon ECR にプッシュする ECRへのdocker push前にログインする必要がありますが・・ $(aws ecr get-login --no-include-email) get-loginはdeprecatedしてますので、get-login-passwordを使いましょう。 ※AWS_ACCOUNT_IDはご自身のAWSアカウント番号と置換して下さい。 aws ecr get-login-password --region ap-northeast-1 | docker login --username AWS --password-stdin AWS_ACCOUNT_ID.dkr.ecr.ap-northeast-1.amazonaws.com モジュール 2C: AWS のコードサービスを使用したデプロイの自動化 ステップ1: CI/CDパイプラインを作成する C: CodeBuild プロジェクトを作成する 用意されたAWS CLIを実行するとCodeBuildプロジェクトは作成されますが、 ステップ2でCI/CDパイプラインを動かすとビルドでコケます。 原因は、buildspec.yml中で前述のdeprecatedになったget-loginが使われているためです。 代わりに、aws ecr get-login-passwordを使いましょう。 file://~/environment/aws-modern-application-workshop/module-2/aws-cli/ecr-policy.json を開き、 pre_buildフェーズの - $(aws ecr get-login --no-include-email --region $AWS_DEFAULT_REGION) を - aws ecr get-login-password --region $AWS_DEFAULT_REGION) | docker login --username AWS --password-stdin $AWS_ACCOUNT_ID.dkr.ecr.$AWS_DEFAULT_REGION.amazonaws.com に修正しましょう。 ※\$AWS_ACCOUNT_IDと\$AWS_DEFAULT_REGIONは、環境変数定義でご自身の環境に合った値を設定して下さい。 モジュール 3: Mysfit 情報の保存 ステップ2: 最初の実際のコード変更をコミットする A: 更新されたFlaskサービスコードをコピーする CodeCommitにPushするリソースは予め用意されており、 リポジトリ用のディレクトリにコピーします。 cp -r ~/environment/aws-modern-application-workshop/module-2/app/* ~/environment/MythicalMysfitsService-Repository/ このリソースをCodeCommitにPushするとアプリがECSにデプロイされますが、 タスクが落ちます。 2020-08-30 16:22:28import mysfitsTableClient 2020-08-30 16:22:28File "/MythicalMysfitsService/mysfitsTableClient.py", line 104 2020-08-30 16:22:28print 'filter is '+args.filter 2020-08-30 16:22:28^ 2020-08-30 16:22:28SyntaxError: Missing parentheses in call to 'print'. Did you mean print('filter is '+args.filter)? ECSタスクのログを見ると、mysfitsTableClient.py中のprint関数のところで落ちています。 本チュートリアルは、どうやらPython2.7を使って開発されたようです。 Dockerfileで指定したPython3ではprint関数の記述が異なりますので、 アプリを修正します。 修正前 if args.filter and args.value: print 'filter is '+args.filter print 'value is '+args.value print "Getting filtered values" items = queryMysfitItems(args.filter, args.value) else: print "Getting all values" items = getAllMysfits() print items 修正後 ※print関数の引数は()で囲う if args.filter and args.value: print('filter is '+args.filter) print('value is '+args.value) print("Getting filtered values") items = queryMysfitItems(args.filter, args.value) else: print("Getting all values") items = getAllMysfits() print(items) モジュール4: ユーザー登録の設定 ステップ2: 新しいREST APIとAmazon API Gatewayを追加する B: Swaggerを使用してREST APIを作成する Swagger定義からAPI定義をインポートしてREST APIを作成しようとしますが・・ aws apigateway import-rest-api --parameters endpointConfigurationTypes=REGIONAL --body file://~/environment/aws-modern-application-workshop/module-4/aws-cli/api-swagger.json --fail-on-warnings チュートリアルの手順にあるようなJSONレスポンスが返ってきません。 シェルの戻り値は255、API Gatewayも作成されません。 ��ず、Swagger定義を疑いました。 https://editor.swagger.io/ でもVSCodeのOpenAPI Editorプラグインでもいいですが、 api-swagger.jsonの定義内容を確認すると、 POST /mysfits/{mysfitId}/like 定義、x-amazon-apigateway-integration部分の responsesが重複していることがわかります。 やっぱりねーということで重複しているresponsesを消しますが、 aws apigateway import-rest-apiの結果は変わらず・・なぜなのか。 こういう時は、--debugオプションを付けて実行しましょう。 aws apigateway import-rest-api --parameters endpointConfigurationTypes=REGIONAL --body file://~/environment/aws-modern-application-workshop/module-4/aws-cli/api-swagger.json --fail-on-warnings --debug すると~??? 2020-08-31 06:39:10,907 - MainThread - awscli.clidriver - DEBUG - CLI version: aws-cli/2.0.11 Python/3.7.3 Linux/4.14.181-142.260.amzn2.x86_64 botocore/2.0.0dev15 (中略) 2020-08-31 06:39:10,994 - MainThread - awscli.clidriver - DEBUG - Exception caught in main() Traceback (most recent call last): File "awscli/customizations/binaryformat.py", line 59, in _visit_scalar File "base64.py", line 87, in b64decode binascii.Error: Invalid base64-encoded string: number of data characters (6953) cannot be 1 more than a multiple of 4 (中略) File "awscli/customizations/binaryformat.py", line 34, in base64_decode_input_blobs File "awscli/shorthand.py", line 389, in visit File "awscli/shorthand.py", line 394, in _visit File "awscli/shorthand.py", line 401, in _visit_structure File "awscli/shorthand.py", line 394, in _visit File "awscli/customizations/binaryformat.py", line 61, in _visit_scalar awscli.customizations.binaryformat.InvalidBase64Error: Invalid base64: "{ "swagger": 2.0, "info": { "title": "MysfitsApi" Invalid base64? AWS CLI v1からv2への変更点を確認しましょう。 重要な変更 – AWS CLI バージョン 1 からバージョン 2 への移行 - AWS Command Line Interface https://docs.aws.amazon.com/ja_jp/cli/latest/userguide/cliv2-migration.html#cliv2-migration-binaryparam お!!! AWS CLI バージョン 2 は、デフォルトではすべてのバイナリ入力パラメータとバイナリ出力パラメータを base64 エンコード文字列として渡すようになりました。 (中略) また、コマンドラインにパラメータ --cli-binary-format raw-in-base64-out を含めることで、アクティブなプロファイル設定を上書きして、個々のコマンドの設定を元に戻すこともできます。 なるほど。Swagger定義ファイルは特にbase64エンコードとかしてませんので、 --cli-binary-format raw-in-base64-outパラメータを付けましょう。 aws apigateway import-rest-api --cli-binary-format raw-in-base64-out --parameters endpointConfigurationTypes=REGIONAL --body file://~/environment/aws-modern-application-workshop/module-4/aws-cli/api-swagger.json --fail-on-warnings --debug 通った。 { "id": "6xxxxxxxx3", "name": "MysfitsApi", "createdDate": "2020-08-31T07:29:58+00:00", "version": "2017-04-20T04:08:08Z", "apiKeySource": "HEADER", "endpointConfiguration": { "types": [ "REGIONAL" ] } } 残りの手順については特にはまることなく実行できました。 AWS CLIやDockerfile等の更新が必要な箇所はGithubにissueはあげてみようと思いますが、 チュートリアルのWebサイト(特に日本語版)の方に反映されるのには時間がかかりそうなので、 補助ドキュメントとしてご参照下さい。 ステップバイステップでクラウドネイティブなアプリ構築を体験できますので、 ECSやAPI Gateway、Cognito、Kinesis Firehose等を手を動かしながら学びたいという方、 ぜひお試し下さい!!!
0 notes
Text
Launch Your Own Presto Cluster with Terraform
Launching a distributed system is not an easy task, unlike the simple command-line tools or desktop application. It takes time to install software and prepare the server instances. There are many automation tools to make it easy to launch a complicated system in public cloud services like AWS. Terraform is a tool to enable us to achieve infrastructure as a code on the major cloud services. It accelerates not only the process to provision production servers but also the validation of new features or bug fixes you have created.
I have used docker-presto-cluster for testing purposes. But it is necessary to launch multiple node cluster under the environment close to more real cases. I have found Terraform is capable of provisioning the Presto cluster in AWS quickly. This post will introduce new module I have created to provision out-of-the-box Presto cluster in AWS environment.
terraform-aws-presto
terraform-aws-presto is a module to create all resources to launch a Presto cluster in the AWS environment. It uses Docker images to build and distributed by myself and AWS Fargate to start a cluster in the ECS environment.
All resources created by the module are illustrated as follows.

VPC
Public Subnet
Private Subnet
Application Load Balancer (ALB)
ECS Cluster
Task Definition
ECS Service
It creates a public subnet and private subnet inside the specific VPC. The default CIDR block of VPS is 10.0.0.0/16. ALB connecting to the coordinator is located in public subnet so that anyone can submit a query to the cluster. All services of Presto (coordinator and worker) are running inside the private subnet. No one can access Presto instances directly.
There are two task definitions in ECS service. One is for the coordinator, and the other is for workers. You can control the number of worker instances by using the Terraform variable.
Usage
For example, this is the minimum code to launch a Presto cluster with two worker instances in the default VPC.
module "presto" { source = "github.com/Lewuathe/terraform-aws-presto" cluster_capacity = 2 } output "alb_dns_name" { value = module.presto.alb_dns_name }
As the module returns the coordinator DNS name, you can get access to the coordinator through ALB.
$ ./presto-cli --server http://presto-XXXX.us-east-1.elb.amazonaws.com \ --catalog tpch \ --schema tiny
The module downloads the Docker images distributed in lewuathe/presto-coordinator and lewuathe/presto-worker. You can control the version of Presto installed in the cluster by changing the presto_version input variable.
To create the module, “Terraform: Up and Running: Writing Infrastructure as Code“ was a good reference to learn how Terraform works in general. Take a look if you are interested in Terraform module.

As far as I tried, the module will launch a Presto cluster in a few minutes because it’s minimal and straightforward. You may find something insufficient or not useful. Please give me any feedback or pull requests if you have any requests.
Thanks as usual.
Reference
Lewuathe/terraform-aws-presto
Terraform Registry: Lewuathe/aws/presto
source http://www.lewuathe.com/launch-your-own-presto-cluster-with-terraform.html
0 notes
Text
Nuxt.js(SSR)をLambdaで配信する【個人開発】
from https://qiita.com/kobayashi-m42/items/fbacb46f7603e5a014d7?utm_campaign=popular_items&utm_medium=feed&utm_source=popular_items
概要
Qiitaのストックを整理するためのサービス「Mindexer(ミンデクサー)」のフロントエンドを Vue.jsで構築したSPAのアプリケーションからNuxt.jsでSSRを行うように再構築しました。
LambdaでExpressサーバーを動かし、その上でNuxt.jsを動かしています。 この記事では、今回の開発で得られたNuxt.jsに関するTipsやインフラ構成などについて解説していきたいと思います。
なお、Vue.jsからの移行に関する解説は含みません。
サービスについて
「Mindexer(ミンデクサー)」については、こちらの記事で解説しています。 バックエンドで利用している技術についても解説していますので、合わせてご覧いただけると嬉しいです。

AWS + Laravel + Vue.js でQiitaのストックを整理するサービスを作りました!【個人開発】
個人開発のインフラをEC2からFargateに置き換えました!
ソースコード
ソースコードは全てこちらで公開しています。
Nuxt.js : https://github.com/nekochans/qiita-stocker-frontend Terraform : https://github.com/nekochans/qiita-stocker-terraform
Nuxt.jsへの移行理由
以下のような理由です。
SSRによってページの表示速度を向上させたかった為
BFF層を導入したかった為(認証部分はサーバーサイドで行ったほうが安全)
Nuxtのレイアウト機能を利用したかった為
アーキテクチャ選定理由
Nuxt.jsを実行させる為のアーキテクチャ選定に悩みました。
選択肢としては、AWS FargateやGAE(Google App Engine)等があります。 最初は、GAE(Google App Engine)が簡単そうだなと思ったのですが、ドメインレジストラとしてRoute53、証明書にACMを利用している関係上、このあたりの連携が複雑そうだったので止めました。
最終的にAWS Lambda上でNuxt.jsを動作させるという選択をしました。
理由としては下記の通りです。
アクセス数が相当増えない限り、ランニングコストが安い
AWS上のサービスだけで完結出来る
AWS Lambda上でNuxt.jsを動作させる設定が少々複雑になったので、次項でそれを説明します。
技術要素
Nuxt.js v2.10.0
Vue.js + Vuex
TypeScript
Serverless Framework
インフラ構成
AWS 構成図

フロントエンド
Lambda上でExpressサーバーを動かし、その上でNuxt.jsを動かしています。
まず、CloudFrontによって、S3とAPI Gatewayへのアクセスの振り分けを行います。 画像やJavaScriptファイルなどの静的リソースについてはS3から配信し、SSRやBFFへのアクセスはAPI Gateway経由でLambdaから配信しています。
バックエンド
バックエンドのAPIは、ECS Fargateで配信しています。 ECS Fargateについては、こちらの記事で解説していますので、よろしければこちらをご覧ください。 個人開発のインフラをEC2からFargateに置き換えました!
インフラ構築
AWSのインフラ構成図に登場するリソースの構築は、少しややこしいのですがServerless FrameworkとTerraformの2つによって構築しています。
Serverless Framework
Terraform
まず、AWSのリソース説明の前に、Lambdaで動いているExpressサーバーについて解説し、その後にAWSのリソースについてみていきたいと思います。
Expressサーバー
Nuxt.jsのuniversalモードを選択し、SSRを行うためにExpressサーバーを用意しています。 Nuxt.jsは、Expressサーバーのミドルウェアとして使用しています。 これに加え、ExpressサーバーではBFFの役割を担っています。
Nuxt.jsのrender(SSR)
nuxt.render()を呼ぶことで、Express上でNuxt.jsを動かしています。
API: nuxt.render(req, res) - NuxtJS
BFF(Backends For Frontends)
主に以下のような役割を担います。
複数のWebAPIへのリクエスト処理を1つにまとめる
SSR(サーバーサイドレンダリング)を行う(これはNuxtの仕組みでやってくれる)
普通にサーバーサイドのコードが書ける(Express等のコードが普通に動く)ので、認証周りの処理はここで書いたほうがシンプルに書けます。
また外部APIにアクセスする際に利用するクレデンシャル(APISecret等)もサーバーサイドの環境変数として隠蔽出来るので、セキュリティ的にも安全度が向上します。
今回、Qiitaアカウントを利用してログインを行う部分をこのBFF上で行うように改修しました。
補足となりますが、serverMiddlewareを使用することで、 Nuxt.js内にExpressサーバーの処理を持たせることもできます。 API: serverMiddleware プロパティ - NuxtJS
Serverless
ここまで、Express上のサーバーでNuxt.jsを動かしているという解説をしてきましたが、どのようにLambda上でExpressを動かしているのかを見ていきたいと思います。
Serverless Framework
Serverless Frameworkは、はServerless Applicationを構成管理デプロイするためのCLIツールです。 Serverless Frameworkを使うことで簡単にAWS Lmabdaへのデプロイを行うことができます。
Serverless Frameworkに関する解説は下記の記事が参考になりましたので、掲載させて頂きます。 Serverless Frameworkの使い方まとめ
今回のケースでは、以下のことを行います。
LambdaとAPI Gatewayの作成
Lamndaへのデプロイ
LambdaでNuxt.jsを配信するためには、Lambdaを呼び出すための入り口となるAPI Gatewayが必要となります。 API Gateway用意して、HTTPリクエストをLambdaに送ります。
API Gatewayの設定については、下記をご確認ください。 Serverless Framework - AWS Lambda Events - API Gateway
また、LambdaでNuxt.jsを配信するために、下記のライブラリを使用しています。
aws-serverless-express
serverless-plugin-warmup
aws-serverless-express
AWS Labsによって提供されているaws-serverless-expressを使用することで、Lambda上でExpressサーバーを動かすことができます。
aws-serverless-expressは、API GatewayからのリクエストをNode.jsのHTTPリクエストに変換してくれるので、簡単にLambda上でExpressサーバーを動かすことができます。
serverless-plugin-warmup
Lambdaのコールドスタート対策のために利用しています。 詳細については、下記の記事に詳しく記載されていますので、掲載させて頂きます。 Serverless FrameworkでLambdaのコールドスタート対策を行う
S3、CloudFront
Serverless Frameworkで作成されるAWSリソース以外については、Terraformで管理します。 Vue.jsでSPA配信していた際も、インフラはバックエンド含めて全てTerraformで管理しています。 ここではTerraformには触れずに、S3、CloudFrontの設定内容について解説します。
Serverless Frameworkによって、LambdaとAPI Gatewayが作成されていることを前提とします。
S3
画像やJavaScriptファイルなどの静的リソースを配信するためのS3バケットを用意します。
アクセスポリシーを下記の通り設定し、CloudFrontからのアクセス(GetObject)のみを許可しています。
{ "Version": "2012-10-17", "Statement": [ { "Sid": "", "Effect": "Allow", "Principal": { "AWS": "arn:aws:iam::cloudfront:user/CloudFront Origin Access Identity <CloudFrontのID>" }, "Action": "s3:GetObject", "Resource": "arn:aws:s3:::<S3バケット>/*" } ] }
また、S3バケットのオブジェクトは下記のディレクトリ構成とします。(S3へのデプロイ方法の解説については省略します。)
├── _nuxt # Nuxt.js���クライアントのリソース └── assets # 画像などの静的リソース
nuxt buildを実行すると、.nuxt/dist/clientにクライアントのコードが生成されます。 このクライアントのソースコードは、CDNにアップロード可能なJavaScriptファイルになります。 CDNの設定はnuxt.config.jsのpublicPathで定義されます。デフォルトは_nuxtとなっており、今回はそのまま利用するので、S3のディレクトリも上記のような構成としています。
API: build プロパティ - NuxtJS
CloudFront
インフラ構成の部分で、CloudFrontによって、S3とAPI Gatewayへのアクセスの振り分けを行います。と記載しましたが、どのような設定にしているか詳しく解説したいと思います。
Origins
S3とApiGatewayの両方を登録しています。
S3
項目 設定内容
Origin Domain Name 静的リソースを置いているS3バケットを指定
Origin Path 設定なし
Origin ID 任意のID
Restrict Bucket Access No
Origin Custom Headers 設定なし
Restrict Bucket AccessをNoとしているのは、S3のバケットポリシーを登録しているからです。
ApiGateway
項目 設定内容
Origin Domain Name Severless Frameworkによって作成されたAPI GatewayのAPIエンドポイントを指定
Origin Path /stage(例:/dev)
Origin ID 任意のID
Minimum Origin SSL Protocol TLSv1.2
Origin Protocol Policy HTTPS Only
Origin Response Timeout 任意の値
Origin Keep-alive Timeout 任意の値
HTTP Port 80
HTTPS Port 443
Origin Custom Headers 設定なし
Origin PathはServerlessFrameworkのserverless.ymlで設置しているstageの値になります。 stageを設定しなかった場合、デフォルトはdevです。
Behaviors
パスによるオリジンの振り分けの設定をします。
precedence Path Pattern Origin
0 _nuxt/* 静的リソースを置いているS3バケットを指定
1 assets/* 静的リソースを置いているS3バケットを指定
2 Default (*) API Gatewayを指定
設定の解説をすると、Nuxt.jsのクライアントのコードは/_nuxt/*にアクセスされます。クライアントのコードをS3にデプロイすることで、S3から配信を行います。 また、staticなファイル(faviconなど)もS3バケットに振り分けられるように設定を行っています。 それ以外のリクエストについては、API Gatewayへ振り分けています。
該当するソースコードはこちらです。 https://github.com/nekochans/qiita-stocker-terraform/blob/master/modules/aws/frontend/cloudfront.tf
Nuxt.js Tips
ディレクトリ構成
├── app # Nuxt.jsのコード ├── server # Expressのコード ├── nuxt.config.ts └── serverless.yml
Nuxt.js TypeScript対応
Nuxt.js v2.10では、TypeScriptが公式によりサポートされています。 設定は下記をご確認ください。 Nuxt TypeScript
上記のドキュメント通りの設定を行いましたが、一部エラーとなってしまった箇所があったので記載したいと思います。
@nuxt/typescript-buildをdependenciesに移動
CodeBuild上でビルドする際に、@nuxt/typescript-buildがdevDependenciesに追加されているとエラーとなってしまいました。公式では、 devDependencies に追加するように記載されていますが、エラーを回避するためにdependenciesに移動しています。
developmentモードでのビルドエラーを回避
devモードでは、@nuxt/builderによってBuildしています。その際に、Vuexのモジュールでエラーとなってしまったので、下記の対応をしています。
devモードの場合、config.extensionsに[ts]を追加しています。
server/core/nuxt.ts
import config from '../../nuxt.config' const { Nuxt } = require('nuxt')
config.dev = !(process.env.NODE_ENV === 'production')
if (config.dev) { config.extensions = ['ts'] // 追加 }
export const nuxt = new Nuxt(config)
export default config
これを追加しなかった場合、.nuxt/store.jsが下記の通りになり、tsファイルで定義したVuexのモジュールが認識されずにエラーとなりました。
.nuxt/store.js
function resolveStoreModules (moduleData, filename) { moduleData = moduleData.default || moduleData // Remove store src + extension (./foo/index.js -> foo/index) const namespace = filename.replace(/\.(js|mjs)$/, '') //tsが含まれない
nuxt.ready()を追加 LambdaでNuxt.jsを動かした際に、下記の設定を追加していなかったためエラーとなっていました。 原因は、Nuxt.js 2.5.x から、new Nuxt()をした後に、nuxt.ready()を呼ばないとサーバーがレンダリングしないようになっていたためでした。下記の対応をすることで、解消しました。
server/app.ts
// 変更前 app.use(nuxt.render)
// 変更後 app.use(async (req, res, next) => { await nuxt.ready() nuxt.render(req, res, next) })
エラーページ
エラーページの表示には2つの方法をとっています。
Nuxt.jsのLayoutプロパティを利用
ビュー - NuxtJS (エラーページ)
APIからエラーが返ってきた場合に表示しています。 エラーが発生した場合に、 error()関数を呼び出すことで、Layoutプロパティを利用したエラーページを表示しています。 API: コンテキスト - NuxtJS (error (Function))
ページコンポーネント
app/pages/stocks/all.vue
async fetch({ store, error }: Context) { try { await store.dispatch('qiita/fetchUncategorizedStocks') await store.dispatch('qiita/saveDisplayCategoryId', 0) } catch (e) { error({ statusCode: e.code, message: e.message }) } }
ページコンポーネント以外
app/components/pages/stocks/All.vue
async onClickDestroyCategory(categoryId: number) { try { await this.destroyCategory(categoryId) } catch (error) { return this.$nuxt.error({ statusCode: error.code, message: error.message }) } }
Nuxt.js によって作成されるルーティングを拡張しエラーページに遷移
API: router プロパティ - NuxtJS (extendRoutes)
BFFでエラーが発生した場合、/errorに遷移し、エラーページを表示しています。
Nuxt.js によって作成されるルーティングを拡張し、エラーページを作成。 BFFでエラーが発生した場合は、/errorにリダイレクトし、app/pages/error.vueで定義したエラーページを表示しています。
nuxt.config.tsで定義している、routerプロパティにextendRoutesを追加しルーティングを拡張しています。
nuxt.config.ts
router: { middleware: ['authCookieMiddleware', 'redirectMiddleware'], extendRoutes(routes: any, resolve) { routes.push({ name: 'original_error', path: '/error', props: true, component: resolve(__dirname, 'app/pages/error.vue') }) } },
Middllwere
認証に関連する処理を行うために、Middllwereを利用しています。 API: middleware プロパティ - NuxtJS
authCookieMiddleware.ts:Cookieに保持している認証情報をVuexのStoreに保存する
redirectMiddleware.ts:ユーザの認証状態から、必要に応じてリダイレクトする
Middllwereは、nuxt.config.tsに下記の通り追加��るだけで動作します。 ここで記載した順番で、Middllwereは動作します。(authCookieMiddleware -> redirectMiddleware)
nuxt.config.ts
router: { middleware: ['authCookieMiddleware', 'redirectMiddleware'], }
あとがき
インフラ構築からNuxt.jsのことまで解説したので、内容が盛りだくさんな記事になってしまいました。 最後まで読んで頂きありがとうございます。少しでもお役に立てれば幸いです。
これからも、技術的に参考になるような情報を発信していきたいと思っていますので、よろしくお願いします。
Mindexerは無料で利用できますので、多くの人に使っていただけると嬉しいです😊
Mindexer | Qiitaのストックを整理するためのサービスです
ソースコードもこちらで公開しています! ここにはMindexerのソースコード以外にもサービスのコードを公開しています!
https://github.com/nekochans
0 notes
Text
Exploring AWS Batch for Large-Scale Simulations
Simulations play a precarious role in various industries, containing automotive, robotics, engineering, and scientific research. These simulations allow businesses and researchers to investigate complex systems, train machine learning models, and make expectations without the need for costly physical prototypes or time-consuming real-world experiments. AWS Batch multi-container jobs provide a valuable tool for running significant simulations efficiently and cost-effectively.
What is AWS Batch? AWS Batch is a fully managed batch computing service It dynamically provisions compute resources (such as EC2 instances or Fargate containers) based on the submitted batch jobs. Batch eliminates the need for manual infrastructure management. Users define job dependencies, resource requirements, and priorities, and AWS Batch handles the rest, including scheduling, execution, and monitoring. Why AWS Batch need? Using the AWS Management Console, CLIs, or SDKs, you package the code for your batch jobs, define their dependencies, and then submit your batch job using AWS Batch. AWS Batch makes it easy to integrate with a variety of well-known batch computing workflow engines and languages (such as Pegasus WMS, Luigi, Nextflow, Metaflow, Apache Airflow, and AWS Step Functions) once you provide the execution parameters and task requirements.
With the ability to employ On-Demand or Spot Instances depending on your work requirements, AWS Batch effectively and dynamically prepares and scales Amazon Elastic Container Service (ECS), Amazon Elastic Kubernetes Service (EKS), and AWS Fargate compute resources. To help you get started quickly, AWS Batch provides compute environment specifications and preset job queues.
How AWS Batch Optimizes Your Industries AWS Batch provides a fully managed service for running batch computing jobs at scale. Its dynamic provisioning, resource optimization, and automated scheduling enhance operational efficiency for various industries. Here’s a closer look at how AWS Batch specifically benefits different sectors:
Automotive Accelerating Simulation Development: When working with autonomous vehicles (AV) and advanced driver assistance systems (ADAS), multi-container support allows engineers to develop simulations with modular components representing sensors, traffic, and 3D environments. This simplifies development, speeds up iteration, and eases debugging. Boosted Resource Management: AWS Batch switches the scaling, scheduling, and cost-efficiency parts of consecutively large-scale simulations, releasing automotive engineers to attention on innovation and problem-solving. Finance Rearrangement Operations and Dropping Errors: AWS Batch presets resource allocation and job scheduling for computationally intensive tasks like pricing, market analysis, and risk management. This automation reduces the potential for manual errors and optimizes the decision-making process. Enhanced Post-Trade Analytics: Batch enables the efficient end-of-day processing of massive data sets, providing critical insights for informed trading strategies in the next cycle. Fraud Detection: Batch integrates with AWS machine learning for the automated analysis of large datasets, helping uncover irregular patterns and potential fraud. Life Sciences Accelerating Drug Discovery: AWS Batch aids in streamlining multiple life sciences applications with its efficient job handling, including computational chemistry, modeling, molecular dynamics, and genomic sequencing analysis. This assists research scientists in the drug screening process, potentially leading to the development of more effective therapies. Optimized DNA Sequencing Analysis: Secondary analysis after the initial processing of genomic sequences can be automatically managed and streamlined through AWS Batch, minimizing errors and contributing to faster research results. Digital Media Scalable Content Creation: Batch facilitates the dynamic scaling of media packaging and the automation of media supply chains, reducing resource bottlenecks and manual intervention. Efficient Content Rendering and Transcoding: AWS Batch allows for the automation of content rendering and file-based transcoding workflows, leading to greater efficiency and less manual dependency. Key Takeaways
Across these diverse industries, AWS Batch delivers the following core benefits:
Simplified Management: Batch’s fully managed nature eliminates infrastructure management requirements. Modular Design: Multi-container support allows for flexible and modular simulations structure. Cost Optimization: Batch leverages options like Spot Instances and Savings Plans for optimal cost-efficiency. Focus on Core Business: By handling infrastructure and job scheduling complexities, AWS Batch allows organizations to concentrate on their core areas of expertise. Multi-Container Jobs: Key Benefits Modular Design: Multi-container jobs allow users to break simulations into smaller components—for example, a container representing the environment, one for sensors, and another for monitoring. This eases development and troubleshooting by separating different simulation elements.
Team Collaboration: Teams can work independently on their specific component, reducing bottlenecks and fostering collaboration.
Optimization: AWS Batch handles scaling, scheduling, and cost optimization. Users focus on simulation development rather than infrastructure.
No Additional Cost: This feature is available within AWS Batch without any extra charges.
How to Use AWS Batch Multi-Container Jobs Create Containers: Package simulation components into separate Docker containers.
Define Job: In the AWS Batch console, create a job definition, specifying:
Container images Resource requirements (CPU, memory) Dependencies between containers Submit Jobs: Jobs can be submitted via the console, API, or CLI.
Monitor: AWS Batch provides tools for monitoring job status, resource utilization, and logs.
Cost Optimization with AWS Batch Reserved Instances and Savings Plans: Reduce costs on predictable compute workloads. Spot Instances: Leverage cost-effective surplus compute capacity. Fargate: Pay only for the resources used by your containers. Automatic Scaling Scale your resources to match demand. Additional Considerations Data Management and Transfer: Efficiently manage data used and generated by simulations, potentially using services like Amazon S3.
Networking: Ensure appropriate networking configuration for communication between containers and with external resources.
Security: Implement security best practices (IAM roles, encryption) to protect sensitive data and your AWS environment.
AWS Batch multi-container jobs offer a dominant and flexible clarification for running large-scale simulations on AWS. By combining modularity, ease of management, and cost optimization, this article empowers businesses and researchers to accelerate innovation through simulation-driven development and experimentation.
Read more on Govindhtech.com
0 notes
Photo

DockerコンテナをローカルrunしたときECSと同じ様にSecretsManager/パラメータストアの値を環境変数に展開 https://ift.tt/34Q9mVM
やりたいこと
https://docs.aws.amazon.com/ja_jp/AmazonECS/latest/developerguide/specifying-sensitive-data.html
Amazon ECS を使用すると、AWS Secrets Manager シークレットまたは AWS Systems Manager パラメータストアのパラメータに機密データを保存してコンテナの定義でそれを参照することによって、コンテナに機密データを挿入できます。この機能は、EC2 および Fargate の両方の起動タイプを使用するタスクでサポートされています。
これ、Secrets ManagerやSSMパラメータストアに保存している値をECSで実行するコンテナに環境変数として展開できるので便利です。 ただ、開発中などコンテナをローカルPCで実行(docker run)したいことも多いので、ローカル実行時も同じように展開するシェルを書きました。
やり方
要件
ServiceSettingsというパラメータを、dockerコンテナでSERVICE_SETTINGという環境変数に展開したい
前提条件
aws cliが入っていること
シェル
aws cliで値を引っ張ってきて -e で割り当てる
SecretsManagerの場合
setting=`aws secretsmanager get-secret-value --secret-id ServiceSetting --output text --query 'SecretString'` docker run -it \ -e SERVICE_SETTING=$setting \ ...
--output textにするのがミソ
SSM/ParameterStoreの場合
setting=`aws ssm get-parameter --name ServiceSetting --with-decryption --output text --query Parameter.Value | tr -d ' \n'` docker run -it \ -e SERVICE_SETTING=$setting \ ...
trでスペースと改行削除するのがミソ 暗号化してる前提で –with-decryption つけてます(してなかったらいらない)
これで
ストアの値を環境変数へ展開して利用するアプリケーション(on Docker)のコードを、ECS/ローカル実行で共通にできます。
元記事はこちら
「DockerコンテナをローカルrunしたときECSと同じ様にSecretsManager/パラメータストアの値を環境変数に展開」
September 18, 2019 at 04:00PM
0 notes
Video
youtube
AWS Live – 2 | AWS Fargate Tutorial | AWS Tutorial | AWS Certification Training | Edureka 🔥AWS Training: This Edureka tutorial on AWS Fargate will help you understand how to run containers on Amazon ECS without having to configure & manage underlying virtual machines.
#aws architect training#aws certification training#aws ecs fargate tutorial#aws fargate ci#aws fargate ci cd#aws fargate cli#aws fargate deep dive#aws fargate demo#aws fargate deployment#aws fargate docker#aws fargate example#aws fargate introduction#aws fargate jenkins#aws fargate lambda#aws fargate load balancer#aws fargate overview#aws fargate vs ecs#aws fragate#aws fragate tutorial#aws training#aws tutorial#edureka#yt:cc=on
0 notes
Text
Ultimate AWS Certified Developer Associate 2019 - NEW!

Ultimate AWS Certified Developer Associate 2019 - NEW!
Become an AWS Certified Developer! Learn all AWS Certified Developer Associate topics. PASS the Certified Developer Exam What you'll learn : Pass the AWS Certified Developer Associate Certification (DVA-C01) All 400+ slides available as downloadable PDF Apply the right AWS services for your future real-world AWS projects Deploy an application using Elastic Beanstalk and AWS CICD tools with full automation Understand Serverless API using AWS Lambda, API Gateway, DynamoDB & Cognito Write infrastructure as code using AWS CloudFormation Implement messaging and integration patterns using AWS SQS, SNS & Kinesis Master the CLI, SDK and IAM security best practices in EC2 Monitor, Trace and Audit your microservices using CloudWatch, X-Ray and CloudTrail Secure your entire AWS Cloud using KMS, Encryption SDK, IAM Policies & SSM Requirements : Know the basics of programming (functions, environment variables, CLI & JSON) No AWS cloud experience is necessary, we'll use the AWS Free Tier Windows / Linux / Mac OS X Machine Description : Welcome! I'm here to help you prepare and PASS the newest AWS Certified Developer Associate exam. : Keeping the course updated! Added full section on ECS (1h15m) ----------------------------------- The AWS Certified Developer certification is one of the most challenging exams. It's great at assessing how well you understand not just AWS, but the new cloud paradigms such as Serverless, which makes this certification incredibly valuable to have and pass. Rest assured, I've passed it myself with the score of 984 out of 1000. Yes you read that right, I only made one mistake! Next, I want to help YOU pass the AWS developer certification with flying colors. No need to know anything about AWS, beginners welcome! This is going to be a long journey, but passing the AWS Certified Developer exam will be worth it! This course is different from the other ones you'll find on Udemy. Dare I say, better (but you'll judge!) It covers in depth all the new topics on the AWS Certified Developer DVA-C01 exam It's packed with practical knowledge on how to use AWS inside and out as a developer It teaches you how to prepare for the AWS exam AND how to prepare for the real world It's a logical progression of topics, not a laundry list of random services It's fast paced and to the point It has professional subtitles All 400+ slides available as downloadable PDF Concretely, here's what we'll learn to pass the exam: The AWS Fundamentals: IAM, EC2, Load Balancing, Auto Scaling, EBS, Route 53, RDS, ElastiCache, S3 The AWS CLI: CLI setup, usage on EC2, best practices, SDK, advanced usage Properly deploy an application: AWS Elastic Beanstalk, CICD, CodeCommit, CodePipeline, CodeBuild, CodeDeploy Infrastructure as code with AWS CloudFormation Monitoring, Troubleshooting & Audit: AWS CloudWatch, X-Ray, CloudTrail AWS Integration & Messaging: SQS, SNS, Kinesis AWS Serverless: AWS Lambda, DynamoDB, API Gateway, Cognito, Serverless Application Model (SAM) ECS, ECR & Fargate: Docker in AWS AWS Security best practices: KMS, Encryption SDK, SSM Parameter Store, IAM Policies AWS Other Services Overview: CloudFront, Step Functions, SWF, Redshift Tips to ROCK the exam This course is full of opportunities to apply your knowledge: There are many hands-on lectures in every section There are quizzes at the end of every section There's a practice exam at the end of the course We'll be using the AWS Free Tier most of the time I'll be showing you how to go beyond the AWS Free Tier (you know... real world!) ----------------------------------- Instructor My name is Stephane Maarek, and I'll be your instructor in this course. I am an AWS Certified Solutions Architect & Developer, and the author of highly-rated & best selling courses on AWS Lambda, AWS CloudFormation & AWS EC2. I've already taught 65,000+ students and received 19,000+ reviews. I've decided it's time for students to properly learn how to be AWS Certified Developers. You are in good hands! Take a look at these student reviews: ★★★★★ "I just passed my CDA exam with 96% and this course was extremely helpful in closing the gaps in my own understanding/experience. It was very easy to follow and informative." - Derek C. ★★★★★ "This was a perfect match for what I was seeking. It has been about 8 years since I used AWS cloud frequently (other clouds and hybrids). Seeing a lot of the updates to services with some hands on has been very helpful." – James C. ★★★★★ "Course is presented such way in detailed level with great diagram explanation. It's helps me to clear my DVA exam successfully with 92% pass rate" - Edward K. ★★★★★ "This course was very interesting and full of great information and hands-on examples. Stephane did a very good job of assembling it all together and delivers it with so much knowledge and passion." - Abdennour T. --------------------------------- This course also comes with: ✔ Lifetime access to all future updates ✔ A responsive instructor in the Q&A Section ✔ Udemy Certificate of Completion Ready for Download ✔ A 30 Day "No Questions Asked" Money Back Guarantee! Join me in this course if you want to pass the AWS Certified Developer Associate Exam and master the AWS platform! Who this course is for : Anyone wanting to acquire the knowledge to pass the AWS Certified Developer Associate Certification Developers who want to upskill themselves and understand how to leverage the AWS Cloud for their applications Developers who want to get up to speed with best practices on Serverless and AWS Cloud Download Torrent Read the full article
0 notes
Link
Become an AWS Certified Developer! Learn all AWS Certified Developer Associate topics. PASS the Certified Developer Exam
Created by Stephane Maarek | AWS Certified Solutions Architect & Developer
Last updated 7/2019
English
English
What you’ll learn
Pass the AWS Certified Developer Associate Certification (DVA-C01)
All 400+ slides available as downloadable PDF
Apply the right AWS services for your future real-world AWS projects
Deploy an application using Elastic Beanstalk and AWS CICD tools with full automation
Understand Serverless API using AWS Lambda, API Gateway, DynamoDB & Cognito
Write infrastructure as code using AWS CloudFormation
Implement messaging and integration patterns using AWS SQS, SNS & Kinesis
Master the CLI, SDK and IAM security best practices in EC2
Monitor, Trace and Audit your microservices using CloudWatch, X-Ray and CloudTrail
Secure your entire AWS Cloud using KMS, Encryption SDK, IAM Policies & SSM
Requirements
Know the basics of programming (functions, environment variables, CLI & JSON)
No AWS cloud experience is necessary, we’ll use the AWS Free Tier
Windows / Linux / Mac OS X Machine
Description
Welcome! I’m here to help you prepare and PASS the newest AWS Certified Developer Associate exam.
[July 2019 Update]: Over 30 lectures added and refreshed (~2h of video)! The course is now up to date to the newest exam topics.
[Feb 2019 Update]: Keeping the course updated! Added full section on ECS (1h15m)
———————————–
The AWS Certified Developer certification is one of the most challenging exams. It’s great at assessing how well you understand not just AWS, but the new cloud paradigms such as Serverless, which makes this certification incredibly valuable to have and pass. Rest assured, I’ve passed it myself with the score of 984 out of 1000. Yes you read that right, I only made one mistake! Next, I want to help YOU pass the AWS developer certification with flying colors. No need to know anything about AWS, beginners welcome!
This is going to be a long journey, but passing the AWS Certified Developer exam will be worth it!
This course is different from the other ones you’ll find on Udemy. Dare I say, better (but you’ll judge!)
It covers in depth all the new topics on the AWS Certified Developer DVA-C01 exam
It’s packed with practical knowledge on how to use AWS inside and out as a developer
It teaches you how to prepare for the AWS exam AND how to prepare for the real world
It’s a logical progression of topics, not a laundry list of random services
It’s fast paced and to the point
It has professional subtitles
All 400+ slides available as downloadable PDF
Concretely, here’s what we’ll learn to pass the exam:
The AWS Fundamentals: IAM, EC2, Load Balancing, Auto Scaling, EBS, Route 53, RDS, ElastiCache, S3
The AWS CLI: CLI setup, usage on EC2, best practices, SDK, advanced usage
Properly deploy an application: AWS Elastic Beanstalk, CICD, CodeCommit, CodePipeline, CodeBuild, CodeDeploy
Infrastructure as code with AWS CloudFormation
Monitoring, Troubleshooting & Audit: AWS CloudWatch, X-Ray, CloudTrail
AWS Integration & Messaging: SQS, SNS, Kinesis
AWS Serverless: AWS Lambda, DynamoDB, API Gateway, Cognito, Serverless Application Model (SAM)
ECS, ECR & Fargate: Docker in AWS
AWS Security best practices: KMS, Encryption SDK, SSM Parameter Store, IAM Policies
AWS Other Services Overview: CloudFront, Step Functions, SWF, Redshift
Tips to ROCK the exam
This course is full of opportunities to apply your knowledge:
There are many hands-on lectures in every section
There are quizzes at the end of every section
There’s a practice exam at the end of the course
We’ll be using the AWS Free Tier most of the time
I’ll be showing you how to go beyond the AWS Free Tier (you know… real world!)
———————————–
Instructor
My name is Stephane Maarek, and I’ll be your instructor in this course. I am an AWS Certified Solutions Architect & Developer, and the author of highly-rated & best selling courses on AWS Lambda, AWS CloudFormation & AWS EC2. I’ve already taught 110,000+ students and received 33,000+ reviews.
I’ve decided it’s time for students to properly learn how to be AWS Certified Developers. You are in good hands!
Take a look at these student reviews:
★★★★★ “I just passed my CDA exam with 96% and this course was extremely helpful in closing the gaps in my own understanding/experience. It was very easy to follow and informative.” – Derek C.
★★★★★ “This was a perfect match for what I was seeking. It has been about 8 years since I used AWS cloud frequently (other clouds and hybrids). Seeing a lot of the updates to services with some hands on has been very helpful.” – James C.
★★★★★ “Course is presented such way in detailed level with great diagram explanation. It’s helps me to clear my DVA exam successfully with 92% pass rate” – Edward K.
★★★★★ “This course was very interesting and full of great information and hands-on examples. Stephane did a very good job of assembling it all together and delivers it with so much knowledge and passion.” – Abdennour T.
———————————
This course also comes with:
✔ Lifetime access to all future updates
✔ A responsive instructor in the Q&A Section
✔ Udemy Certificate of Completion Ready for Download
✔ A 30 Day “No Questions Asked” Money Back Guarantee!
Join me in this course if you want to pass the AWS Certified Developer Associate Exam and master the AWS platform!
Who this course is for:
Anyone wanting to acquire the knowledge to pass the AWS Certified Developer Associate Certification
Developers who want to upskill themselves and understand how to leverage the AWS Cloud for their applications
Developers who want to get up to speed with best practices on Serverless and AWS Cloud
Size: 5.4GB
DOWNLOAD TUTORIAL
The post ULTIMATE AWS CERTIFIED DEVELOPER ASSOCIATE 2019 – NEW! appeared first on GetFreeCourses.Me.
0 notes
Text
Điểm mặt những dịch vụ miễn phí của AWS
Có bài viết học luyện thi AWS mới nhất tại https://cloudemind.com/aws-free-services/ - Cloudemind.com
Điểm mặt những dịch vụ miễn phí của AWS
Như các bạn đã biết mô hình tính tiền của các dịch vụ đám mây tiên tiến nói chung và AWS nói riêng đều là chi trả theo thực tế sử dụng (pay as you go). Và để các công ty cung cấp dịch vụ đám mây có thể sống được, phát triển đội ngũ của mình được thì bạn phải trả tiền cho họ khi sử dụng, phần lớn là như thế. Nhưng bên cạnh các dịch vụ trả phí cũng có những dịch vụ miễn phí khi sử dụng giúp công việc mình tiện lợi hơn khi sử dụng Cloud. Bài này Kevin chia sẻ những dịch vụ miễn phí của AWS.
Bài này Kevin sẽ update theo thời gian (living post) vì ở AWS mọi thứ thay đổi hàng ngày và theo chiều hướng có lợi cho người dùng nhiều hơn. Nếu có thiếu xót nào cũng mong nhận được chia sẻ từ mọi người nhé.
Nào chúng ta hãy điểm qua các dịch vụ này nào:
1. AWS Computing Services
EC2 Auto Scaling: Cung cấp khả năng giãn nở (elasticity) trong việc thêm và loại bỏ những tài nguyên EC2 để đáp ứng nhu cầu workload của ứng dụng một cách thông minh và tiết kiệm nhất.
AWS Batch: Là một tiện ích để quản lý các batch chương trình cần chạy (computing jobs). AWS Batch tự động provisioned tài nguyên cho phù hợp các job chạy. AWS là dịch vụ miễn phí, tuy nhiên các tài nguyên mà AWS Batch provisioned thì bạn sẽ tính phí theo mô hình Pay As You Go như: EC2, Lambda, hay Fargate.
AWS Elastic Beanstalk: Là một dịch vụ dễ sử dụng để triển khai các web application trên AWS mà người dùng lại chưa có kiến thức nhiều về AWS. Elastic Beanstalk hỗ trợ nhiều loại nền tảng ứng dụng sử dụng ngôn ngữ như: Python, Go, Ruby, Node.js, Java, .NET, và cả docker. Elastic Beanstalk hỗ trợ những nền tảng server phổ biến như: nginx, apache, Passenger, IIS. Elastic Beanstalk là dịch vụ miễn phí tuy nhiên bạn vẫn trả phí cho các tài nguyên mà ứng dụng bạn sử dụng như EC2, RDS, S3…
AWS Serverless Application Repository: Đây là một dịch vụ quản lý các ứng dụng serverless. Cho phép team quản lý, chia sẻ các ứng dụng serverless.
Developer Tools
CloudShell: Đây xem như là một CLI (Command Line Interface) để truy cập các dịch vụ AWS từ browser thay vì từ terminal trên máy tính của bạn.
AWS CodeStar: cho phép bạn nhanh chóng phát triển, xây dựng và triển khai các ứng dụng trên AWS (Manage software development activities in one place). CodeStar có thể tích hợp với JIRA để tracking các issue trong quá trình dev hay vận hành. Ngoài ra CodeStar còn cung cấp dashboard để theo dõi quy trình triển khai phần mềm trên AWS từ backlog đến những code gần đây mình deploy. Đây là một dịch vụ rất hay ho và này nọ nhưng lại… miễn phí. Thật là diệu kỳ phải ko nào?
Management & Governance
AWS Auto Scaling – Đây là một dịch vụ giúp kiến trúc cloud tăng tính elasticity, có tài nguyên đúng lúc khi cần và tự động lợi bỏ khi workload giảm. AWS Auto Scaling hỗ trợ scaling trên nhiều dịch vụ còn EC2 Auto Scaling sẽ tập trung vào Amazon EC2.
AWS Compute Optimizer – Dịch vụ này sẽ thu thập nhu cầu sử dụng Amazon Ec2, Lambda, EBS thực tế của tài khoản bạn sau đó dùng Machine Learning để đưa ra các recommendation sử dụng tối ưu về compute. Đây là một dịch vụ rất hay và khuyến nghị các bạn dùng thử. Đây cũng là một dịch vụ miễn phí nên cũng ko phải đắn đo gì lắm.
AWS Control Tower (CT) – Đây là dịch vụ thường dành cho các tổ chức lớn khi có rất nhiều AWS Account và muốn triển khai nhanh chóng apply các best practices trên Cloud giúp tiết kiệm thời gian và tối ưu khi sử dụng. CT là dịch vụ miễn phí, bạn sẽ chỉ phải trả những tài nguyên liên quan khi provisioned giải pháp như: AWS Service Catalog, AWS CloudTrail, Amazon CloudWatch, SNS, S3… Có một dịch vụ ra đời trước AWS Control Tower đó là AWS Landing Zone (LZ) hiện đã ngừng phát triển các tính năng mới, khách hàng mới của AWS nếu muốn quản trị đa tài khoản thì khuyến nghị sử dụng AWS Control Tower (AWS Landing Zone is currently in Long-term Support and will not receive any additional features. Customers interested in setting up a new landing zone should check out AWS Control Tower and Customizations for AWS Control Tower)
AWS License Manager – giúp bạn quản lý license từ các nhà cung cấp khác như Microsoft, SAP, Oracle, IBM không chỉ trên AWS mà còn cả trên hạ tầng on-premise của các bạn. ISV company có thể dùng AWS License Manager để quản lý và track các license do phần mềm của mình làm ra.
AWS Organizations – Là dịch vụ giúp quản lý và apply các chính sách theo nhóm tài khoản AWS (SCP) và cũng có lợi ích consolidated billing khi mà các tài khoản AWS con sẽ được chi trả sử dụng và thống nhất bill tại payer account hay master account. Kỳ lại là dịch vụ hay vầy mà cũng miễn phí.
AWS Well-Architected Framework – Đây là công cụ giúp bạn review architect và tương thích với các best practices trên AWS Cloud.
Security, Identity & Compliance
AWS IAM (Identity Access Management) – Đây là cổng chính, chìa khóa quản lý các người dùng và quyền hạn truy xuất AWS Resources. Đây cũng là dịch vụ mang tính toàn cầu (global specified).
AWS Artifact – là một portal để bạn truy xuất các báo cáo về AWS Compliance.
AWS SSO (Sing Sign On) – dịch vụ giúp quản lý tài khoản tập trung giữa nhiều AWS Account và business application từ một chỗ. AWS SSO hỗ trợ các plugin tích hợp với Salesforce, Box, Microsoft 365. AWS SSO cũng dễ dàng kết nối với các identity source như Microsoft AD, Okta Universal Directory, và Azure AD.
Analytics Services
AWS Lake Formation – Dịch vụ có thể triển khai nhanh chóng Data Lake trên AWS. Dịch vụ này build dựa trên AWS Glue và tích hợp với các dịch vụ như CloudTrail, AWS IAM, Amazon CloudWatch, Athena, EMR, Redshift…
Ngoài ra sẽ còn có nhiều dịch vụ / sản phẩm miễn phí khác, trên đây là một số cái phổ biến mà Kevin hay gặp. Chúc các bạn học tập và làm việc vui.
Have fun!
Xem thêm: https://cloudemind.com/aws-free-services/
0 notes