#clamshell box with inlay
Explore tagged Tumblr posts
Visit Tumblr Blog
Explore Tumblr blogs with no restrictions, modern design and the best experience.
Last Seen Tumblr Blogs


Fun Fact
Tumblr has been banned in Indonesia for providing people with access to pornographic content.
Text


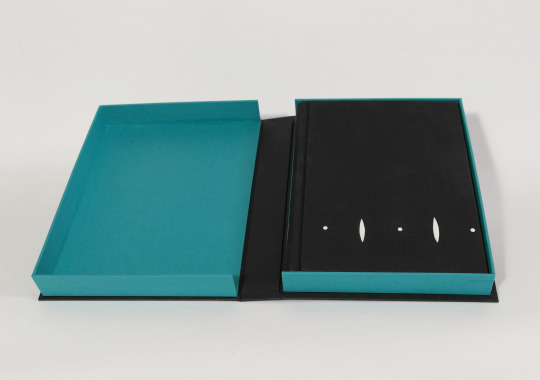
Leather inset/inlay on my clamshell box for Bionic Battle Granny
This was another design I hade in mind for that bind so I used it on the clamshell. (Process and problems I ran into below the break)
I have no clear instruction on how to do a leather inlay or mosaic so I pretty much went with what felt like the thing to do. For this I pared both, the covering leather and the inset to the same thickness. I dressed the case of the clamshell and let it dry completely. With that step on the way I had time to prepare my inlay. I printed the design I had in mind. When I was still considering to print this I set the silhouette with the first note of the author instead of the title. Given that I have neither a font small enough nor the necessary amount of letters all at once and I really did not feel like setting world for word and, if necessary, letting the letters cool to keep working I switched to the title instead.
Now the difficult part was, that I wanted tos tick to the colour scheme and have a multicoloured print. To get that look I cut out a narrow line inside the print. Just enough to see where the colours needed to go, arranged all my differently coloured foils with a lot of tape and went on tooling more or less blindly and cut out the silhouette being very careful to have the colours still where I wanted them to go.


That done I realised... I forgot to upscale the size from the actual book to the cover of the clamshell and now Peggy looked very forlorn on that too large cover.
Given that the title was not as crisp as I would have wanted it to be, I tried for another two times to get it better. (I did not, each new attempt was actually worse XD) But a fellow binder on the @renegadepublishing discord server, suggested a speech bubble to fill up the empty space which turned out to be a great idea. So I went with that and added the authors name there.
To bring the cut on the cover I traced it carefully with the pointed side of my leather bonefolder (which is just a regular, but tiny bonefolder) and cut the the leather inside out with a scalpel before pasting in the silhouette.


I had to re-adjust a bit and cut away some more of the dark leather as well as I ended up with small gaps, but I'm pretty pleased how it turned out (considering I had no idea how to do this 'properly'). Fortunately for me, the white leather does not reveal the gaps too much, but if I had to do it again and the inlay had a different colour I'd probably colour the cut out (after peeling of the leather there) in either the colour of the base leather or the inlay leather to avoid white flashing in the gaps.
Below is one of the fucked up larger versions (left) and the one I ended up doing (right). Here they are not cut out or pasted in, but just put on top of the case to check the look (the finished version has a somehow weirdly angled leg, but it's done now. Nothing to do about that)

and here a detailed shot of the gaps and the leg


#bookbinding#clamshell box#bionic battle granny by ozhawk#leather inlay#leather inset#leather mosaic#and all the first time mistakes I made
16 notes
·
View notes
Photo


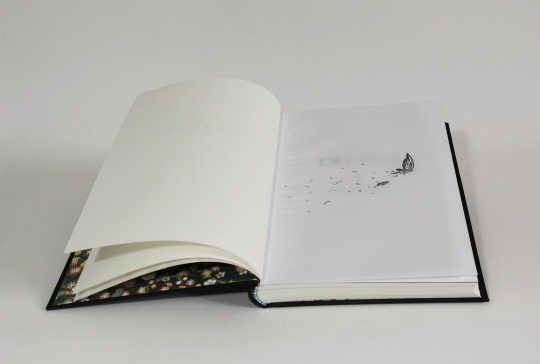

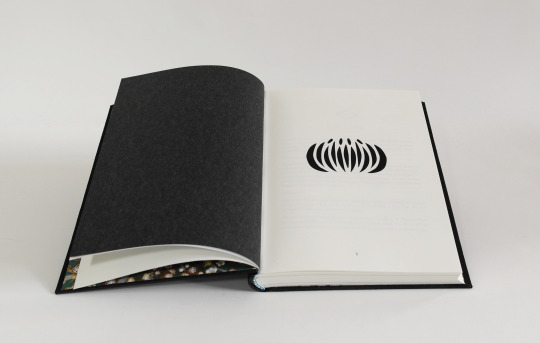
Dry Heat/ Cold Rain/ Green Blade - altersuperego
More detail and what inspired the design here
Format: approx. Din A5 Materials used cover: cardboard (two layers) bookcloth goat parchment
bookbody paper munken polar 100g/m² endpapers: chiyogami endbands: buttonhole silk transparent paper story dividers: satogami
fonts used title: Felix titling (15) text: Garamond (10)
clamshell box cardboard (1mm and 1,5mm) elephanthide paper Efalin
#bookbinding#fanbinding#ficbinding#altersuperego#dry heat#cold rain#green blade#clothbinding#parchment inlay#Bleach#Tite Kubo#bleach fanbinding#clamshell box#headbands#hellbutterfly#jigokuchō#gotei 13
151 notes
·
View notes
Photo


My paintings, illustrations, and design for the Adventure Time - The Complete Series Soundtrack Box Set from Mondo Music. Art direction by Mo Shafeek.
This was a dream job. I was hired to do all of the exterior and interior artwork for this set, including a full wrap clamshell cover and interior inlays. Included artwork is original paintings for the wrap cover, the cover of the booklet, and the 10" 8-bit vinyl record; new illustrations of Prismo's pad for the interior of the clamshell box with inserts for a cassette and CD; and design work of the three 12" vinyl slipcases.
Available now from Mondo or wherever records are sold! This artwork is also featured as the cover art for the digital release on iTunes and Google Play.
#Illustration#art#vinyl#music#Adventure Time#Cartoon network#frederator#mondo#cover art#finn and jake#prismo#cosmic owl#the land of ooo#design
203 notes
·
View notes
Link
Publisher Nighthawk Interactive has announced two Switch-exclusive “Retro Editions” of Disney Classic Games: Aladdin and The Lion King, which will available for $49.99 each, as well as iam8bit-exclusive “Legacy Cartridge” editions of the original games for Sega Gensis and Super Nintendo Entertainment System.
Pre-orders for both the Retro Editions and Legacy Cartridges will open on Ocotber 24 at 10 a.m. PT / 1:00 p.m. ET on Best Buy and iam8bit, respectively.
Get the details below.
Disney Classic Games: Aladdin and The Lion King Retro Edition Box

Two of the most beloved Disney games of all time make their long-awaited return to the Nintendo Switch! This Retro Edition Box is a premium special edition that includes an exclusive poster and retro style manual. The packaging also mimics your favorite 16-bit console and is designed by iam8bit.
-Exclusive Poster: Limited Edition fold out poster featuring characters from both Aladdin and The Lion King.
-Retro Style Manual: Full-color instruction manuals featuring painstakingly restored artwork
-Retro Style Packaging: Custom designed 16-bit era packaging including a foam inlay
-Multiple Game Versions: Play through several different versions of the beloved Aladdin and The Lion King games that have been created over the years, including both console and handheld versions. An all-new “Final Cut” version of Aladdin, developed exclusively for this collection, is also included and features difficulty adjustments, camera refinements, bug fixes, as well as a few additional surprises for fans.
-Display Options and Updated Visuals:
1080P graphics and enhancements for modern HD TVs
Adjustable screen aspect ratios and borders
Custom filter options designed to replicate classic CRT TVs and other popular screen types
-In-Game Rewind: Instantly rewind any of the games in real-time in order to re-try difficult areas
-Interactive Watch Mode: View full game playthroughs, with the ability to skip forward and jump in and start playing at any point
-Save Feature: Quickly save your progress in each of the games and continue your adventure wherever and whenever you want
-Museum Feature: Take a journey behind-the-scenes and learn more about the creation of these incredible games. Watch video interviews with the original development teams or explore numerous galleries containing hundreds of previously unreleased HD concept images and marketing assets.
-Soundtrack: Listen to the entire soundtracks for both games in the included music players. The ability to repeat and shuffle the songs is also supported.
Disney Classic Games: Aladdin and The Lion King Retro Edition Clamshell

Two of the most beloved Disney games of all time make their long-awaited return to the Nintendo Switch! This Retro Edition Clamshell is a premium special edition that includes an exclusive poster and retro style manual. The packaging also mimics your favorite 16-bit console and is designed by iam8bit.
-Exclusive Poster: Limited Edition fold out poster featuring characters from both Aladdin and The Lion King.
-Retro Style Manual: Full-color instruction manuals featuring painstakingly restored artwork
-Retro Style Packaging: Custom designed 16-bit era packaging including a foam inlay
-Multiple Game Versions: Play through several different versions of the beloved Aladdin and The Lion King games that have been created over the years, including both console and handheld versions. An all-new “Final Cut” version of Aladdin, developed exclusively for this collection, is also included and features difficulty adjustments, camera refinements, bug fixes, as well as a few additional surprises for fans.
-Display Options and Updated Visuals:
1080P graphics and enhancements for modern HD TVs
Adjustable screen aspect ratios and borders
Custom filter options designed to replicate classic CRT TVs and other popular screen types
-In-Game Rewind: Instantly rewind any of the games in real-time in order to re-try difficult areas
-Interactive Watch Mode: View full game playthroughs, with the ability to skip forward and jump in and start playing at any point
-Save Feature: Quickly save your progress in each of the games and continue your adventure wherever and whenever you want
-Museum Feature: Take a journey behind-the-scenes and learn more about the creation of these incredible games. Watch video interviews with the original development teams or explore numerous galleries containing hundreds of previously unreleased HD concept images and marketing assets.
-Soundtrack: Listen to the entire soundtracks for both games in the included music players. The ability to repeat and shuffle the songs is also supported.
Aladdin Legacy Cartridge (Genesis)

The Aladdin video game is historically significant for many reasons – from its and groundbreaking approach to character animation to its incredible integration of the film’s beloved songs. It proved, upon its initial release in 1993, that licensed products can also be high art. This Genesis version of Aladdin is presented in true Legacy Cartridge Collection elegance, complete with lovingly restored artwork, gleaming translucent cartridge shells, a full-color premium manual and other retro pack-in surprises. Everything that you’ve come to expect from iam8bit’s definitive series, honoring games that defined retro gaming excellence.
Limited Edition of 4,500
Brand new playable cartridge compatible with NTSC Genesis and EU Mega Drive retro consoles
Translucent Ruby Red and Ultra Limited Magic Carpet Purple Glow-in-the-Dark Cartridges*
Nostalgic Clamshell Packaging w/ Premium Foil and Gloss-Embellished Insert
Full-Color, Premium Instruction Booklet w/ Restored Artwork + Foreword by Mike Mika
Retro Pack-In Surprises
Custom Package Design & Restoration by Jango Snow Art & Design
Manufacturing by Retrotainment Games + Infinite NES Lives
*Cartridge colorways are randomly inserted into sealed, unmarked boxes. The edition of 4,500 is comprised of: Translucent Ruby Red; and Rare Purple Gem Glow-in-the-Dark (1 in 8 odds for an ultra limited cartridge). We cannot guarantee which version you will receive. It truly is completely random.
The Lion King Legacy Cartridge (SNES)

The majesty of The Lion King is cinematic legend, and when it comes to video games, its SNES adaptation truly pushed the limits of what was possible in the 16-bit era. From its nuanced character animation to its epic (and gut-wrenching) Wildebeest stampede, the Serengetti-spanning scope of the film was impressively captured on cartridge in all its glory. This ultimate Legacy Cartridge Collection edition pays tribute to the impossible feats that The Lion King achieved way back in 1994, with painstakingly restoration of all the original artwork and presentation in a premium package fit for royalty, complete with all the retro trappings, including an all-important, custom dust cover.
Limited Edition of 4,500
Brand new playable SNES-compatible cartridge
Opaque Mufasa Marigold and Ultra Limited Translucent Serengeti Sunrise Glow-in-the-Dark Cartridges*
Specialty Fold-Out Foil Box with Gloss and Embellishments
Full-Color, Premium Instruction Booklet w/ Restored Artwork + Foreword by Mike Mika
Custom Dust Cover
Retro Pack-In Surprises
Custom Package Design & Restoration by Jango Snow Art & Design
Manufacturing by Retrotainment Games + Infinite NES Lives
Disney Classic Games: Aladdin and The Lion King is due out for PlayStation 4, Xbox One, Switch, and PC on October 29 for $29.99.
View images of each edition at the gallery.
#Disney Classic Games: Aladdin and The Lion King#Aladdin#The Lion King#Disney#Nighthawk Interactive#Gematsu
10 notes
·
View notes
Text
QuietOn 3 Review: Can These Tiny Earplugs Provide a Perfect Night's Sleep?
QuietOn 3 ANC Earbuds
7.50 / 10
Read Reviews
Read More Reviews
Read More Reviews
Read More Reviews
Read More Reviews
Read More Reviews
Read More Reviews
Read More Reviews
Read More Reviews


Shop Now
The QuietOn 3 Earbuds are ideal if you want to keep sleep-disturbing noise at bay. They have active noise cancellation, so can aid a good night's sleep. In this reviewer's case, they worked as they should. However, calling them earbuds implies they can play music or an external sound source, which they can't.
Key Features
Active Noise Cancelling
Specifications
Brand: QuietOn
Dimensions: Case: 60 x 40 x 25 mm, Earbuds: 20 x 10 x 20 mm
Weight: Case: 59 g, Earbud: 1.8 g
Connectivity: None
Battery Life: 28 hours
Pros
Small
Light
Comfotable to wear
ANC works like a charm
Cons
They're technically not earbuds
You can't transmit sound to them
Buy This Product
QuietOn 3 ANC Earbuds other
Shop
// Bottom var galleryThumbs1 = new Swiper('.gallery-thumbs-1', { spaceBetween: 10, slidesPerView: 10, freeMode: true, watchSlidesVisibility: true, watchSlidesProgress: true, centerInsufficientSlides: true, allowTouchMove: false, preventClicks: false, breakpoints: { 1024: { slidesPerView: 6, } }, }); // Top var galleryTop1 = new Swiper('.gallery-top-1', { spaceBetween: 10, allowTouchMove: false, loop: true, preventClicks: false, breakpoints: { 1024: { allowTouchMove: true, } }, navigation: { nextEl: '.swiper-button-next', prevEl: '.swiper-button-prev', }, thumbs: { swiper: galleryThumbs1 } });
It isn't often you pop a pair of earbuds in your ears to listen to... nothing. But that is exactly what you're intended to do with the QuietOn 3. These new Finnish earbuds apparently help you "enjoy the Nordic quietude", according to the packaging, and that they do, pretty successfully.
So what exactly is the point of these earbuds, which is somewhat of a misnomer in this instance, given that they can't play music or connect to another source for sound? Let's take a look.
What's in the Box?
When you open the QuietOn 3 box, you'll find:
One pair of QuietOn 3 earbuds
One QuietOn 3 charging case
A USB Type-C charging cable
A quick-start guide
Four pairs of foam eartips
And that is it. No fussy, unnecessary extras. The QuietOn 3 are available to buy now via the QuietOn website, at a cost of $199.
A Miniscule Makeup
We'll deal with aesthetics first. These earplugs (which we will call them for the rest of the review) are absolutely tiny. The outer portion of the earplug, that houses the electronic components inside, is only 11 x 6 mm (note these are not the overall dimensions).
They need to be tiny; any larger and they would not be comfortable to wear in bed. This is especially true for side sleepers as the earplug would protrude out of the ear and cause discomfort in the ear canal as your pillow presses them harder into your ears by way of resistance.
The earplugs are white, and come with gray foam eartips of various sizes. The outer face of the earplug houses a microphone vent so the earplugs can gauge what frequencies to cancel out, and a debossed "Q" logo.
Flip the plugs over and you'll see the gold contacts for charging the plugs, as well as the stem which will fit in your ear and houses the tiny speaker that plays sound to counteract any external noise.
Related: Does the Sensate 2 Do Anything Apart From Vibrate Your Ribcage?
The case is also white, with a clamshell design that allows you to pop it open to retrieve or charge your plugs. On top of the case is the QuietOn logo. The front, below the opening, carries the charging indicator LEDs (there are three LED indicators for each headphone).
Round the back of the case we have the Type-C charging port. This charges the case which, in turn, charges the earplugs. Open the case up and you'll find the recesses for the earplugs and the charging pins. There is also an attractive metal inlay that gives the case a more robust feel.
Like the contents of the box, the appearance of the earbuds and case is simple and unfettered, mirroring the Nordic quietude you experience when you pop them in your ears, presumably.
How Do the QuietOn 3 Earplugs Work?
Now for the science. The QuietOn 3 earplugs work by detecting external sound frequencies using the built-in microphone. The ANC electronics inside the plugs then calculate obverse frequencies which, when "played" through the in-ear speaker, cancels out any environmental noise.
So, the process is (as we have experienced so far) incredibly simple.
You place the QuietOn 3 in the charging case in order to fill them with juice. You can also charge the case at the same time, using the USB Type-C cable and any regular charging plug with a USB-A outlet.
Once they are at full charge and you are ready to go to sleep, you place the earplugs in your ears and they will filter out any external noise.
I should point out here that the plugs cancel noise out via a mixture of ANC and passive noise cancellation. The seal created when the foam eartips are in your ears is the passive part, the speakers provide the active noise cancellation.
So, if you have a snoring partner, or a neighbour who won't let up playing techno at 5 am (which actually sounds a bit like me), then these will work a dream. Likewise, if you live near a busy road or your air-con unit is disturbing you with a low hum, the QuietOn 3 should improve your sleep quality.
Do the QuietOn 3 Earplugs Improve Your Sleep Quality?
In a word, yes, they do.
They purport to work best with low-frequency sounds, but I found they could reduce the noise made by the house sparrows nesting in the eves of my house (which make an incredibly high-pitched racket at daybreak) and the sound of my cat David crying outside my bedroom door at 4 am so I can escort him to his still-full bowl of cat food.
I found I couldn't hear very much at all, which is great as I am a very light sleeper. This led to a better quality of sleep; an invaluable commodity in this day and age, when we are all so absorbed in our busy lifestyles that we often forget we need to recharge ourselves as well as our gadgets.
I tested these for a week and found that very little disturbed me in terms of external sound. So, in that sense, the QuietOn 3 earplugs do exactly what their designers intended.
But a good night's sleep isn't just about reducing disturbance from external sound sources. You need to be comfortable, too. So it is a good job you can barely feel the earplugs inside your ears as you wear them in bed.
Related: Fauna Audio Eyewear: A Revolutionary Blend of Sound and Vision?
QuietOn has specifically designed these earbuds so that they don't put any undue pressure on your tragus; a common problem with bulkier earbuds designed to play music. So, when you wear them, you don't feel any aches or pains after prolonged use (i.e. through the night).
Also, as mentioned, because they are so thin, they don't protrude from your ear. So, even the sturdiest of pillows isn't going to make you feel like you're trying to force an apple down your ear canal, which you will experience with normal music 'buds.
I felt rested after sleeping with the QuietOn 3 earplugs in use, which is somewhat of a rarity these days, so I would recommend them if you struggle with sleep because of external noise. Just don't expect them to sing you a lullaby because they can't connect to another source.
In terms of charging, the case takes around 3 hours to charge, and the earplugs lasted four nights before the battery ran out, so the 28 hour battery life rings true.
In all, a great sleep aid that does what it says on the tin.
Can You Use the QuietOn 3 Earplugs for Anything Else?
Obviously QuietOn has designed these earplugs for sleep, and they don't play any music or other sounds from another source. So do they have other applications?
Well, yes, you can use them for other things aside from sleeping.
Given that these earplugs reduce noise, they would make a great device to wear while you work. They will prevent you being distracted by external noise, meaning you can focus on whatever task you have at hand.
Likewise, if you struggle to meditate because next door's dog won't can it with the continuous barking, you can pop these in your ears and astrally project to your hearts content; they remove any sound that may break your meditative state and afford you a more Zen-like experience.
So, an impressive pair of ANC earplugs for both working and wellbeing.
Should You Buy the QuietOn 3 Earplugs?
That all depends on your goals. Do you want a better night's sleep, or to improve meditation, or work without distraction? If you answer yes to one or more of these questions, then I recommend the QuietOn 3 earplugs.
Do you want to listen to music to help you drift off? Well, you'll need to look elsewhere in that case, because you can't play music with these. If only QuietOn had just called them earplugs...
QuietOn 3 Review: Can These Tiny Earplugs Provide a Perfect Night's Sleep? published first on http://droneseco.tumblr.com/
0 notes
Text

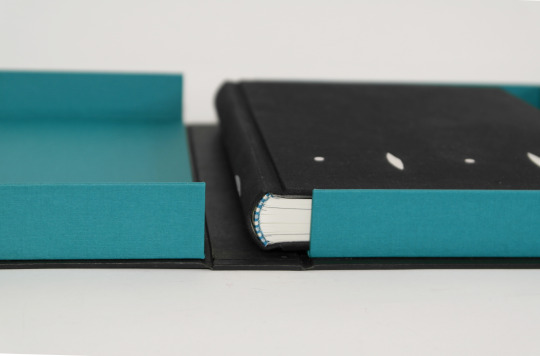
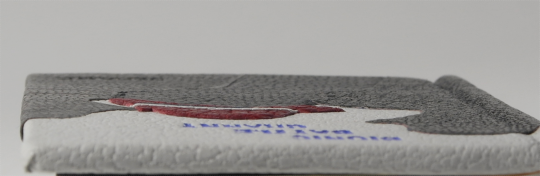
Detail shots of technical differences on Bionic Battle Granny the book and the clamshell box.
First up the inlay on the clamshell vs the onlay on the book.
The inset leather is (almost) even and level with the covering leather.

The onlay, though buffed and slightly rounded a bit along the edges, still adds visibly on the covering material. (Which is not a flaw! it's just the way onlays work.) The onlays were also part of why I decided to make the clamshell, the edges of the onlay could take damage when shoven between other books and in any case they'd be more susceptible to wear. Another reason was light and dust protection.
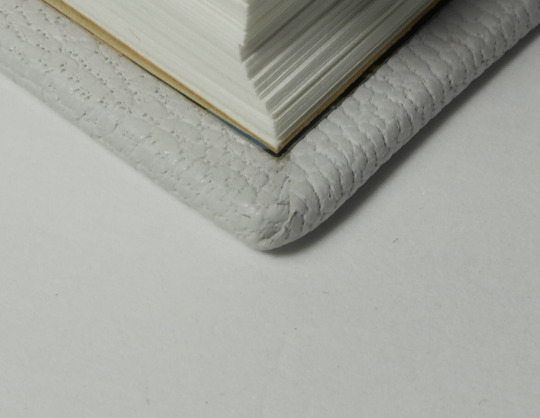
(I have no idea how to translate this, perhaps indrawn corners vs. cut corners would work best. Anyhow... )
Another part that differs are the corners. On the book I cut material off, pared the rest thinly and folded a tiny ledge over to cover the corner thoroughly (see the first two pictures). On the clamshell I cut some of the material off as well, but not closer to the corner. The remaining material of the turn-ins got pulled over the corner so there's only intact leather there. The downside of this is, there is too much material and it will set in folds even if spread as evenly as possible over the board. Those folds can be hammered down though and having the turn-ins pared thin helps too.


#bookbinding#differences between clamshell and book#bionic battle granny#ozhawk#I had no other reason to do things differently than wanting to try them out/ do them again since it's been a while#as usual either way has pros and cons#I also learned that I can actually adjust the dial of my thickness gauge...#I pared the leather thinner than I intended because I hadn't noticed the dial wasn't set to zero when fully closed....
22 notes
·
View notes
Photo


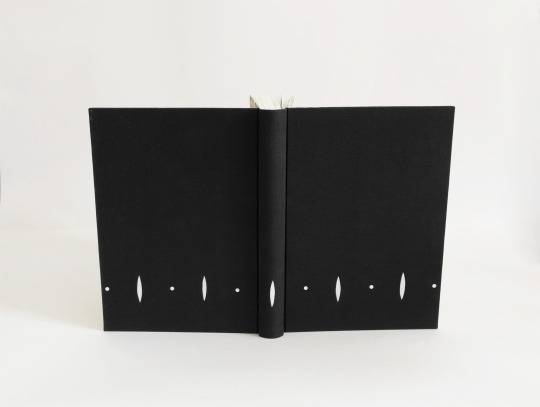
WIP clamshell box with inlay for my binding of Diplomatic Relations
Today a few details on how I made the cover and finished the boxes. I wanted to stay true to the colour code so I went mostly for the same materials. More of the WIP under the cut.
Again I made some last minute decisions. First idea was to keep it really simple, but well, that never lasts long when I do have the time. So instead of full paper cover with an inlay (I really want this inlay XD), I went for leather hinges on the outside, so first thing, as most of the time, was paring leather. I find 0,5mm are a nice thickness to work hinges with. I had them thicker and they felt stiff and clumsy, but at this thickness they move smooth and without much resistance..


Next up was covering the spine outside and the. With the hinges on the inside I took extra care to work the paper thoroughly into the joints. Any crease there would hinder the box opening and closing smoothly later.

The cut outs were not exactly a problem, but I did colour the corners to make sure there was no pale cardboard flashing before I dressed the covers or, in this case, the bottom of the box. I cut away most of the paper inside and only left a small ledge to turn in. The process with the cover was done pretty much the same way.

Finally I glued in the boxes and now it all has to dry. Last time I was a bit unhappy with the edges of the boxes not being glued as firmly to the cover as I had liked. I don’t think this will be a problem this time...

#bookbinding#WIP clamshell box#clamshell box#diplomatic relations#boxmaking#clamshell box with inlay#slate veneer inlay
8 notes
·
View notes
Photo

WIP clamshell box with inlay for my binding of Diplomatic Relations
This time I chose a cut out in the case for the clamshell box to give that translucent slate veneer another chance to shine.
To make this work I had to construct the cover with different cardbaords. A thicker one for the backside that won’t have a cut out, and two thinner ones to create the frontside. One of those needs to be as thick at the slate veneer to get an even surface at the end. the other ones just needs to be thick enough to cover any gaps between the veneer and the cardboard evening out its thickness. The cardboard of the backside was chosen in comparison to the thickness of the frontboard to get as close as possible in thickness and give it an even look. (I hope this explanation makes sense... )
I assembled the cover with only the thin frontcover cardboard, cut both covers to size and picked the size and position of the cut out. When that was done I set the second front cardboard (the thicker one) under the frontcover and traced along the cut out.

Now I had th position and size of the cut out. To keep the veneer in place I cut the second carboard with a bigger cut out (I chose about 5mm larger to each side, but the size depends on the seize of the inlay. Mine turned out pretty much the square that I’d wanted, no curves or weird angles, hooray)

I made the cut out and checked the fit before I glued the thicker cardboard on the inside of the cover.
Last I sanded down the outside edge of the thin cardboard,to give it a smoother transition to the inlay instad of the rather steep step I got on the covers of Diplomatich relations.

That was as far as I got today before the aircon gave out and started leaking water into the room, so I had to do damage control.
#bookbinding#boxmaking#clamshell box#wip clamshell box#diplomatic relations#slate inlay#Why does RL have to interfere with my bookbinding? I had other plans today than moping the floor -_-#but well my wheat paste glue needed replacment anyway so I couldn't have finished anyway.
6 notes
·
View notes
Photo


WIP clamshell box for Diplomatic Relations
(Recreating a position without the actual object to take measurements)
I wanted the second clamshell box looking pretty much the same as the first one, but of course I forgot to take measurements and had the box already at home. Fortunately I keep cut outs and pretty much everything I take measurements with (mostly strips of paper with marks) until I’m completely done and definitely won’t need them again. That’s why I still had the cut out from the first box with its markings.I marked the middle of both sides placed the cut out accordingly and could trace it for the other box. The rest was the same procedure as before. Tracing, size adjustment, cutting, checking for the inlay to fit. Some gluing together, cleaning up the excess glue.
This time I did a better job of beveling the edges of the outer cut out. I’m not sure I’d do it again though. The edge is difficult to dress with the cover material and prone to get dents. With the fibers roughened up from sanding, the very thin edge left and the glue’s moisture it get’s very soft and I couldn’t apply as much pressure as I’d have needed to for a crisp edge. But I do like the slight slope it creates towards the inlay.

2 notes
·
View notes