#communicating between vue instances
Explore tagged Tumblr posts
Visit Tumblr Blog
Explore Tumblr blogs with no restrictions, modern design and the best experience.
Last Seen Tumblr Blogs


Fun Fact
In 2020, 44% of users from Denmark used Tumblr daily.
Text
Design Systems in Web Development: Why Agencies Use Them for UI Consistency
In today’s digital-first world, users expect sleek, intuitive, and consistent interfaces—regardless of the device or platform they’re on. For businesses developing large-scale websites or apps, delivering a consistent experience across teams and pages can be a challenge. That’s where design systems come into play.
Modern Web Development Company teams rely heavily on design systems to ensure that every button, heading, form, and layout element follows unified principles. This not only enhances the user experience (UX) but also streamlines collaboration, speeds up development, and maintains brand identity across all digital touchpoints.
What Is a Design System?
A design system is a comprehensive set of guidelines, reusable components, and tools that define how a digital product should look and behave. It typically includes:
Design Tokens: Standardized values like colors, typography, spacing, and shadows
UI Components: Buttons, cards, modals, forms, and navigation elements
Code Snippets: Ready-to-use HTML/CSS/JS or React/Vue components
Usage Guidelines: Rules on when and how to use each element
Brand Standards: Logos, icons, image styles, and tone of voice
Design systems act as a single source of truth for designers, developers, and content teams—ensuring consistency and efficiency throughout the project lifecycle.
Why UI Consistency Matters
Imagine using a website where buttons look different on every page or where forms behave unpredictably depending on the section you’re in. Inconsistency like this can:
Confuse users
Undermine trust
Increase bounce rates
Slow down development due to repetitive work
Make QA testing more difficult
Design systems eliminate these issues by enforcing visual and functional uniformity across all parts of a website or app.
How Web Development Companies Use Design Systems
Let’s break down how professional web development companies use design systems to deliver high-quality, scalable digital products.
1. Streamlined Collaboration Between Teams
Design systems align developers, designers, product managers, and QA testers. When everyone references the same UI library and brand rules, communication becomes smoother and handoffs are more precise.
Instead of reinventing UI for every page or screen, developers pull from a shared system of reusable components, while designers create mockups using pre-approved assets.
Why it matters: Less ambiguity, faster iterations, and fewer design-to-dev mismatches.
2. Faster Development and Deployment
Reusable code and components mean faster development cycles. Once a UI element like a dropdown or form field is built, it can be reused throughout the project with minimal adjustments.
Many agencies even create component libraries in frameworks like React, Vue, or Angular—reducing redundant work and shortening the time-to-market.
Why it matters: Design systems cut development time significantly, especially for large or growing platforms.
3. Scalability and Maintenance
As websites grow—new pages, new features, additional teams—it becomes harder to maintain design and code consistency. A design system ensures that updates made to a component (like changing button styles) automatically propagate across all instances where that component is used.
Why it matters: Scalability becomes effortless without compromising on consistency or introducing technical debt.
4. Enhanced Accessibility and UX Standards
Most agencies build accessibility guidelines into their design systems, ensuring that components meet WCAG standards for color contrast, focus states, keyboard navigation, and screen reader support.
This makes it easier to build inclusive experiences for all users from the ground up.
Why it matters: Accessibility becomes a built-in feature, not an afterthought—helping both UX and compliance.
5. Brand Consistency Across Digital Products
Whether it's a website, mobile app, microsite, or internal dashboard, using a design system ensures the brand identity stays cohesive. Colors, typography, iconography, and spacing are applied uniformly, reinforcing the brand across every touchpoint.
Why it matters: Consistent branding improves recognition, professionalism, and user trust.
6. Better Testing and QA Processes
When components are standardized, testers can focus on edge cases and workflows, not whether each UI element matches design specs. Automated tests can even be tied to the design system to ensure that no updates break key UI elements.
Why it matters: QA becomes faster and more effective, reducing bugs and UI inconsistencies.
Final Thoughts
In modern web development, delivering a consistent, scalable, and user-friendly interface is no longer optional—it’s expected. That’s why top-performing Web Development Company teams build and maintain robust design systems that unify design and development across every project.
If you’re looking to build a high-quality digital product that scales smoothly and looks polished on every screen, investing in a design system—and working with a team that knows how to implement it—is a smart move. It’s not just about design—it’s about creating a repeatable, maintainable system that accelerates your digital growth.
0 notes
Text
Choosing the Right Headless CMS: Why Strapi Leads the Pack

Headless CMSs are on the rise due to their flexibility to provide businesses with an ecosystem where the backend and front-end teams can independently work while seamlessly exchanging data. In general, even if there are some issues in the backend, the front end remains unaffected, thanks decoupling nature of the headless systems.
In today’s online marketplace, with several digital channels existing beyond just smartphones and laptops, headless CMSs started gaining traction due to their versatile structure. Data reusability is the key factor contributing to their popularity, allowing businesses to leverage their data across multiple channels efficiently.
Furthermore, the flexibility to select different front-end technologies is a notable benefit they offer. It is worth mentioning that nearly all headless solutions provide support for a wide range of front-end technologies.
Traditional (or monolithic) structures provide an inclusive environment well-suited for tasks such as publishing blogs, managing website data, and more. But what they lack is the reusability of the content.
This article explores one of the well-known headless CMS platforms, Strapi, and its key features for developers and users. Additionally, we will discuss the compatible front-end technologies that can be seamlessly integrated with Strapi.
What is Strapi — An Overview

Image source: Strapi
Strapi, a headless CMS, has garnered significant attention from major corporations, including renowned giants Societe Generale, IBM, Discovery Channel, and ASOS. It allows for API-powered content distribution, allowing marketers to provide an omnichannel experience to their end-users.
Furthermore, it incorporates all the crucial features found in its conventional counterpart. Let’s take a glance at these features.
For Developers
Access API from any Client: We can access or (consume) from any client (React, Vue, Angular), mobile apps, IoT, etc., and it supports GraphQL and RESTful — two popular communication protocols.
Multiple database support: It offers compatibility with various database systems, including PostgreSQL, MongoDB, SQLite, MySQL, and MariaDB. You have the freedom to select the database of your choice.
100% Javascript: Entirely built with JavaScript, eliminating the need to switch between different languages to develop apps. You can write apps using JavaScript.
Documentation plugging: It allows for generating documentation with one click by installing the documentation plugin.
TypeScript Support: TypeScript enables developers easily catch errors and fix bugs before shipping the code.
Webhooks: Strapi Webhooks allow you to communicate with third-party tools when a specific event occurs. Webhooks, for instance, are activated whenever you add, edit, or remove content.
Authentication & Permissions: To implement role-based access control for API usage, this means assigning different roles to users, such as admins or marketers, and configuring the system to restrict access to specific APIs based on these roles.
API Token v2: Token-based authentication with custom permissions.
Custom Fields: Strapi allows you to define custom fields associated with components and content.
For Users
An intuitive, minimal editor: It’s 100% open-source, extensible, and allows you to pull in dynamic blocks of content.
Media Library: It enables content developers to store, upload and even optimize the media content without quality loss.
Flexible content management: Strapi allows you to create and design any category and data format that suits your requirements.
Sort and Filter: Effortlessly work with thousands of entries with built-in sorting and filtering capabilities.
User-friendly interface: It encompasses a clean and intuitive UI for technical and non-technical users.
SEO optimized: It features tools to manage SEO metadata and media library to add captions, notes, and custom filenames to optimize the SEO of media assets.
Read more: https://www.brilworks.com/blog/choosing-the-right-headless-cms-why-strapi-leads-the-pack/
0 notes
Photo

Vue JS 2 Tutorial #14 – Multiple Vue Instances Hey gang, in this Vue JS tutorial I'll show you how to create multiple Vue instances and how they can interact with each other. ----- COURSE LINKS: + Repo ... source
#2 vue instances#communicating between vue instances#Instances#Multiple#multiple instances#multiple vue instances#tutorial#vue#vue instance communication#vue js#vue js 2#vue js 2 tutorial#vue js 2 tutorial for beginners#vue js instances#vue js tutorial#vue js tutorial for beginners#vuejs#vuejs 2 tutorial#vuejs tutorial#vujs tutorial for beginners
0 notes
Photo
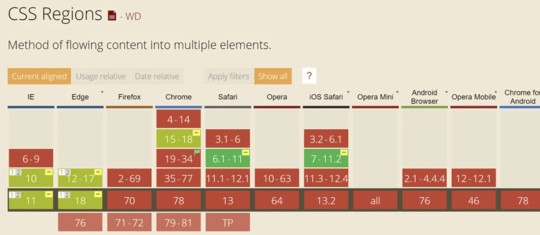
Things you can't do in CSS just yet
#416 — November 6, 2019
Read on the Web
Frontend Focus
Things We Can’t (Yet) Do In CSS — A look at some common layout patterns that aren’t yet achievable in currently widely supported CSS standards and the forthcoming CSS specifications that might enable them in future.
Rachel Andrew
Getting Your Sites Ready for The New Microsoft Edge — Microsoft Edge Beta version 79 is now available. It’s the final beta before the stable release which is expected early next year. Here’s what you need to know to get ready. (Oh, and it’s sporting a new look logo, but more on that below.)
Kyle Pflug and John Jansen (Microsoft)
Become a Full Stack Software Engineer with Flatiron School — Learn the technical skills you need to launch a career in tech as a Software Engineer, Data Scientist, or UX/UI Designer in just 15 weeks. Our dedicated career coaches will work with you one-on-one and help place you in a brand new job, or your money back (see terms).
Flatiron School sponsor
▶ New CSS for Styling Underlines on the Web — Jen Simmons runs through some new CSS properties, including text-decoration-thickness and text-underline-offset. It’s worth noting however that these have limited support right now.
Mozilla Developer
ScrollToTextFragment: A Proposal to Allow Specifying A Text Snippet in A URL Fragment — Proposes adding support for specifying a text snippet in the URL. When navigating to such a URL, the browser will find the first instance of the text snippet in the page and bring it into view.
Web Incubator CG
A Business Case for Dropping Internet Explorer — Still supporting IE11? Ollie Williams puts forward how the distance between it and every other major browser is an increasingly gaping chasm, and that dropping support for it may now be a financially prudent decision.
CSS-Tricks
💻 Jobs
Frontend Developer at X-Team (Remote) — Work with the world's leading brands, from anywhere. Travel the world while being part of the most energizing community of developers.
X-Team
Find a Job Through Vettery — Vettery specializes in tech roles and is completely free for job seekers. Create a profile to get started.
Vettery
📙 News, Tutorials & Opinion

Microsoft Unveils New Edge Browser Logo That No Longer Looks Like Internet Explorer — The new version of Edge will ditch the the blue E logo of old for a new look, which I guess you could sum up as ‘surfing the web’ in logo form. How do you like it?
Tom Warren
A Comparison of Static Form Providers — A high level comparison of several providers who essentially provide the backend for your HTML forms.
Silvestar Bistrović
AirPods Pro Page Performance — When Apple launched their latest earbuds last week, our corner of Twitter was quick to point out the page was rather bloated, making loads of requests. Here’s an expanded critique on the page in question.
Holger Bartel
WebSockets Vs Server-Sent Events (SSE): Which Should You Use When? — When should you use SSE over WebSockets, and vice versa? Check this comprehensive protocol comparison.
Ably sponsor
Creating Online Environments That Work Well For Older Users — A significant part of the Internet-using population is aged 50 or older (including the people who invented it!) Here are some considerations developers need to take into account concerning older users.
Barry Rueger
The Evolution of Material Design’s Text Fields — How user research reshaped the design of Google’s open-source text fields, seeing them move to a more traditional form field design.
Susanna Zaraysky
Signs Your Website Feels More Like A Haunted House Than A Welcoming Home — A look at ‘offputting’ Web design. Admittedly, I have a soft spot for some of these quirky examples(!)
Suzanne Scacca
The Trick to Animating the Dot on the Letter "i" — A neat little technique that combines the Turkish letter “ı” and a period.
Ali Churcher
Microsoft Confirm Their New Chromium-Powered Edge Browser Is Coming to Linux
Liam Dawe
Learn How to Build a Sales Dashboard with React
Progress KendoReact sponsor
Firefox to Discontinue Sideloaded Extensions
Mozilla
The Myths of Color Contrast Accessibility
UX Movement
🔧 Code, Tools & Resources

Pure CSS Oil Painting — Another piece of highly detailed CSS-only art from Diana Smith. This is best viewed in Chrome, but it’s interesting to see how it looks in other browsers.
Diana Smith
Recursive Sans & Mono — This is a new ‘highly-flexible’ type family that takes advantage of variable font tech. It’s due to be available through Google Fonts at some point, but in the mean time you can follow the repo for updates.
Arrow Type
A Web Extension Starter Kit — A kit for building ‘Write Once, Run on Any Browser’ extensions via the Web Extensions API.
Abhijith Vijayan
vue-interactive-paycard: Credit Card Form with Smooth Interactions — This is really slick. Check out the live CodePen demo.
Muhammed Erdem
🗓 Upcoming Events
VueConfTO 2019, November 11-12 — Toronto, Canada — The first ever Vue Conference in Canada.
Chrome Dev Summit, November 11-12 — San Francisco, USA — A two-day summit to learn about the latest from Chrome, plus techniques for building the modern Web. Note: Registrations are now closed, but the event can be joined remotely.
Performance Now, November 21-22 — Amsterdam, Netherlands — A single track conference with fourteen speakers, covering the most important web perf insights.
HalfStack Conf, November 22 — London, UK — A single day event focused on UI-centric JavaScript and web development.
Frontend Con, November 26-27 — Warsaw, Poland — Brings together 30+ experts with over 500 experienced frontend pros from all over the world.
dotCSS, December 4 — Paris, France — The largest CSS conference in Europe.
by via Frontend Focus https://ift.tt/32q6Pz0
2 notes
·
View notes
Text
VueJS vs ReactJS: Which One is the Best for Web Project?

The two most well-liked and commonly utilized JavaScript frameworks for web application development nowadays are React and Vue. With the aid of these frameworks, developers can build several different JavaScript web apps.
It cannot be easy to decide between the two if you want to build a web app. Each one fulfills various business needs and has its unique use case.
The well-known web frameworks Vue.js and React.js both have their advantages and disadvantages. To assist you in choosing which technology to use for web app development, we'll begin by briefly describing the backgrounds of the two technologies. From there, we'll compare the two technologies side by side.
So, without any further ado, let's get started!
What is ReactJS?
A JavaScript package called React JS, also known as React, enables you to build robust user interfaces. React allows you to build intricate user interfaces with "component-based architecture." This indicates that the building blocks of your applications are reusable little pieces of code called components.
Declarative programming and a component-based methodology are both approaches used in React. It offers the most tremendous flexibility and speed for the development of sophisticated web apps.
The most popular web framework in 2021 will be React.js, which is used by 40.14% of all software developers worldwide.
Explore Once: Game development Services
Moving ahead, let's talk about,
Pros and Cons of ReactJS
Firstly, let's discuss,
Pros of ReactJS
Code reusability
SEO friendly
High performance
Uses MVC architecture
Cons of ReactJS
Complex JSX
Not easy to find & hire ReactJS developers
So, these are the pros & cons of ReactJS. Now, let's check some,
Top Companies Using ReactJS
Airbnb
Netflix
Facebook
Instagram
Microsoft
If you want to develop a fluid application and give your idea some direction, then you can hire ReactJS developers in India right away.
Moving ahead, let's talk about,
What is VueJS?
An open-source JavaScript framework for developing SPA is named VueJs. It is used as a framework for web applications with the intention of streamlining web app development projects. In order to create incredible web apps, VueJs application development has attracted a lot of interest from developers all around the world. Virtual DOM is used by Vue.js, which also offers two-way data binding. You can hire developers from India to build your ideas quickly thanks to various capabilities of this trending technology.
Moving ahead, let's talk about,
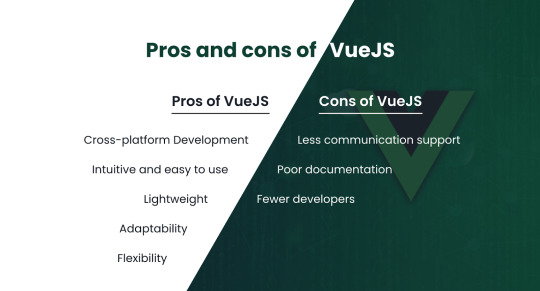
Pros and Cons of VueJS
Firstly, let's discuss,
Pros of VueJS
Cross-platform Development
Flexibility
Lightweight
Adaptability
Intuitive and easy to use
Cons of VueJS
Less communication support
Poor documentation
Fewer developers
So, these are the pros & cons of VueJS. Now, let's check some,
Top Companies Using VueJS
Behance
Dribble
Adobe
Alibaba
Gitlab
As of now, we've discussed a lot of both technologies! Now, let's discuss the core section of this blog. Which is,
ReactJS vs VueJS: which one is best for web app projects?
Performance and other factors between Vue and React differ significantly. We'll study each of these variables separately before determining which JavaScript framework is the best.
#1. ReactJS vs VueJS: Performance
There is no denying that because they both use Virtual DOM, Vue and React technologies deliver comparable performance results. However, this doesn't mean that they are without controversy. For instance, Vue entails less overhead, moves more quickly, and pays more attention to the flaws. Similar to the other two frameworks, this one can handle high frame rates—10 frames per second as opposed to React.js's single frame per second.
#2. ReactJS vs VueJS: Flexibility
Since there will be more components communicating with one another and exchanging the data, state management and data flow require greater consideration when an application is scaled up.
Visit Once: Blockchain Development Company in India
State management is not provided by Reactjs; hence React Redux must be used as a state management solution. Another independent product is React Router. An application can be created using Vuejs' fundamental tooling. Additionally, Vuex for managing states and Vue Router for managing application URLs are provided. Vue is therefore versatile and ideal for small projects.
#3. ReactJS vs VueJS: Size
Size is crucial while discussing the web development framework. It moves more slowly the heavier it is. React is a bit slower than Vue.js because it is a bit heavier. To implement some functionalities, React requires some other libraries. In contrast, Vue.js includes a tonne of built-in capabilities that are simple for both experienced and beginning web developers.
#4. ReactJS vs VueJS: Learning curve
Vue offers more incredible customizability and makes things much simpler to grasp and adapt compared to React technologies. React, on the other side, is a JavaScript framework that is open-source and takes a long time to develop web apps. With features like the utilization of components, Vue.js developers may effortlessly collaborate with one another. Nevertheless, Vue's simplicity and adaptability come with a drawback because it permits shoddy code, which is challenging to debug and test.
#5. ReactJS vs VueJS: Development speed
ReactJS and Vue both perform at the same speed for development, according to an expert review. Both of them come with a tonne of frames, libraries, and extra packages that make it easy to build a web application rapidly. However, the speed of development is based on the developer's experience. The speed of development for both Vue and ReactJs is the same.
#6. ReactJS vs VueJS: State management
When using component-based frameworks like React and Vue, you should focus more on data flow and state management as the application scales. This is due to the several components interacting and exchanging data. As a unique solution in this situation, React provides the Flux/Redux architecture, which represents unidirectional data flow and is a rival to the well-known MVC architecture. When it comes to the Vue.js framework, a more sophisticated design known as Vuex connects with Vue and provides an unrivaled experience.
#7. ReactJS vs VueJS: Data binding
Two-way data binding is used by Vue. This means that if you alter any interface element, your model state also adjusts immediately. Reading about it could make it seem straightforward. However, it is not the case for a big project. React's one-way data binding may be preferred if you want a clear picture of your data and quick debugging. React then renders the modified interface element following the updating of the model state.
#8. ReactJS vs VueJS: Template
Both Vue and React employ very distinct strategies. While React is more functional, Vue takes a more declarative approach. Since markup and logic are treated as one, they are combined. JSX, an abstraction of React, is used to carry it out. Virtual DOM entities are created using the createElement method. With Vue, templates and styles are handled separately—a more traditional approach. The templates are seen as dated HTML components in this instance.
Key takeaways

Attributes
ReactJS
VueJS
Framework size
Large
Small
Architecture
MVC
MVC
Scalability
Highly scalable
Less scalable
Best for
Large & complex apps
Small apps
Conclusion
Both ReactJs and VueJs are equally capable frameworks, and choosing one over the other depends entirely on your project's requirements. You can hire react js developers in India if you want to create a sizable application with simplicity of development. On the other hand, Vue.JS is the ideal option if you want to create a straightforward app with the greatest documentation and simple integration.
Source: ReactJS vs VueJS
0 notes
Photo

What is Xano Xano is among the few no-code backend solutions that include a full database testing environment, allowing it to move between production and test data with ease. It also gives API call history as well as simple techniques to track CPU and database record usage. Xano provides a scalable server, a customizable database, and a No-Code API builder for transforming, filtering, and integrating data from many sources. It facilitates the transition from a spreadsheet to a more complex database. The data is hosted by Xano on PostgreSQL, the world's most powerful open-source database. It combines the power of a relational database with the Big Data requirements of a NoSQL solution. Products Technology: Xano is a complete node without any need to obtain any modules or SDKs. All users have to do is point and click on the safety system. Single-tenant design or deployment. Data isolation, data security, dependability and performance, and fast recovery are all features of instances. The user is the sole tenant on the server (instance) architecture, and server resources and CPU are devoted to the tenant inside that instance. Allow users to choose which areas the instances will be hosted in. Security: Xano realized the meaning of data security. It has implemented the most appropriate security methods, processes, controls, and practices to protect data. Security is critical, and the application's or company's integrity depends on it. To develop confidence in Xano, Xano has taken certain safeguards and implemented security best practices. Solutions from Xano Shopify, Google Analytics, and Segment can connect with Xano to track the customer journey and compute ROI. Xano delivers prototype ideas and assists in the development of software that integrates with third-party applications throughout the web. Xano University: Users who wish to learn about their goods can make use of Xano University's learning resources and courses. The course teaches you how to create a backend with NO CODE. The No-Code API tutorials will assist you in building, transforming, filtering, and integrating data from everywhere. Who use Xano The most prevalent Xano industries are Communications, Services, Government, Healthcare, Insurance, Manufacturing, Public Services, Education, Logistic, etc. Xano's objective is to produce a scalable server, a configurable database, and a NO CODE API builder for modifying, filtering, and integrating data from any source. It aims to allow individuals to validate their ideas without the limits and limitations imposed by current technology. What Xano Offers Without writing a single line of code, users can create business logic and automate activities. • Unlike having to manage servers, businesses can launch a backend in minutes. Scale to millions of users without fear of failure. CRUD operations are generated automatically by Xano, but that's only the beginning. Aids in the creation of API queries ranging from simple to complicated without the need for programming. The Function Stack in Xano is a simple-to-use interface that offers you access to functions like External API queries, loops, functions, conditionals, and more. Xano Documents API endpoints in Swagger automatically, making collaboration with developers and partners a breeze. Create workflows/functions in the API builder and set up CRON tasks to execute them at a predetermined frequency! Xano offers a comprehensive, auto-documented backend that can be integrated with any RESTful API-enabled front-end. This contains anything from Angular, React, VUE, and Flutter Javascript Frameworks to No Code tools like Appgyver, Bilder, Bubble, Clutch, Draftbit, and others. To simply pull data in from any service, use Xano's External API Function. Assists in the transformation of data to meet your specific requirements. Why Xano ISO 27001 is the internationally recognized de facto standard for information security management. It displays to third parties and stakeholders a strong commitment to Information Security Management. It can provide a foundation for ensuring that commercial, contractual, and legal obligations are met. It can essentially be a license to deal with corporations in certain regulated areas to give a considerable competitive advantage. It helps offer conformity with certification against a recognized external standard to demonstrate due diligence.
0 notes
Text
How to Use Tailwind on a Svelte Site
Let’s spin up a basic Svelte site and integrate Tailwind into it for styling. One advantage of working with Tailwind is that there isn’t any context switching going back and forth between HTML and CSS, since you’re applying styles as classes right on the HTML. It’s all the in same file in Svelte anyway, but still, this way you don’t even need a <style> section in your .svelte files.
If you are a Svelte developer or enthusiast, and you’d like to use Tailwind CSS in your Svelte app, this article looks at the easiest, most-straightforward way to install tailwind in your app and hit the ground running in creating a unique, modern UI for your app.
If you like to just see a working example, here’s a working GitHub repo.
Why Svelte?
Performance-wise, Svelte is widely considered to be one of the top JavaScript frameworks on the market right now. Created by Rich Harris in 2016, it has been growing rapidly and becoming popular in the developer community. This is mainly because, while very similar to React (and Vue), Svelte is much faster. When you create an app with React, the final code at build time is a mixture of React and vanilla JavaScript. But browsers only understand vanilla JavaScript. So when a user loads your app in a browser (at runtime), the browser has to download React’s library to help generate the app’s UI. This slows down the process of loading the app significantly. How’s Svelte different? It comes with a compiler that compiles all your app code into vanilla JavaScript at build time. No Svelte code makes it into the final bundle. In this instance, when a user loads your app, their browser downloads only vanilla JavaScript files, which are lighter. No framework UI library is needed. This significantly speeds up the process of loading your app. For this reason, Svelte applications are usually very small and lightning fast. The only downside Svelte currently faces is that since it’s still new and doesn’t have the kind of ecosystem and community backing that more established frameworks like React enjoy.
Why Tailwind?
Tailwind CSS is a CSS framework. It’s somewhat similar to popular frameworks, like Bootstrap and Materialize, in that you apply classes to elements and it styles them. But it is also atomic CSS in that one class name does one thing. While Tailwind does have Tailwind UI for pre-built componentry, generally you customize Tailwind to look how you want it to look, so there is less risk of “looking like a Bootstrap site” (or whatever other framework that is less commonly customized). For example, rather than give you a generic header component that comes with some default font sizes, margins, paddings, and other styling, Tailwind provides you with utility classes for different font sizes, margins, and paddings. You can pick the specific ones you want and create a unique looking header with them. Tailwind has other advantages as well:
It saves you the time and stress of writing custom CSS yourself. With Tailwind, you get thousands of out-of-the-box CSS classes that you just need to apply to your HTML elements.
One thing most users of Tailwind appreciate is the naming convention of the utility classes. The names are simple and they do a good job of telling you what their functions are. For example, text-sm gives your text a small font size**.** This is a breath of fresh air for people that struggle with naming custom CSS classes.
By utilizing a mobile-first approach, responsiveness is at the heart of Tailwind’s design. Making use of the sm, md, and lg prefixes to specify breakpoints, you can control the way styles are rendered across different screen sizes. For example, if you use the md prefix on a style, that style will only be applied to medium-sized screens and larger. Small screens will not be affected.
It prioritizes making your application lightweight by making PurgeCSS easy to set up in your app. PurgeCSS is a tool that runs through your application and optimizes it by removing all unused CSS classes, significantly reducing the size of your style file. We’ll use PurgeCSS in our practice project.
All this said Tailwind might not be your cup of tea. Some people believe that adding lots of CSS classes to your HTML elements makes your HTML code difficult to read. Some developers even think it’s bad practice and makes your code ugly. It’s worth noting that this problem can easily be solved by abstracting many classes into one using the @apply directive, and applying that one class to your HTML, instead of the many. Tailwind might also not be for you if you are someone who prefers ready-made components to avoid stress and save time, or you are working on a project with a short deadline.
Step 1: Scaffold a new Svelte site
Svelte provides us with a starter template we can use. You can get it by either cloning the Svelte GitHub repo, or by using degit. Using degit provides us with certain advantages, like helping us make a copy of the starter template repository without downloading its entire Git history (unlike git clone). This makes the process faster. Note that degit requires Node 8 and above.
Run the following command to clone the starter app template with degit:
npx degit sveltejs/template project-name
Navigate into the directory of the starter project so we can start making changes to it:
cd project-name
The template is mostly empty right now, so we’ll need to install some required npm packages:
npm install
Now that you have your Svelte app ready, you can proceed to combining it with Tailwind CSS to create a fast, light, unique web app.
Step 2: Adding Tailwind CSS
Let’s proceed to adding Tailwind CSS to our Svelte app, along with some dev dependencies that will help with its setup.
npm install tailwindcss@npm:@tailwindcss/postcss7-compat postcss@^7 autoprefixer@^9 # or yarn add tailwindcss@npm:@tailwindcss/postcss7-compat postcss@^7 autoprefixer@^9
The three tools we are downloading with the command above:
Tailwind
PostCSS
Autoprefixer
PostCSS is a tool that uses JavaScript to transform and improve CSS. It comes with a bunch of plugins that perform different functions like polyfilling future CSS features, highlighting errors in your CSS code, controlling the scope of CSS class names, etc.
Autoprefixer is a PostCSS plugin that goes through your code adding vendor prefixes to your CSS rules (Tailwind does not do this automatically), using caniuse as reference. While browsers are choosing to not use prefixing on CSS properties the way they had in years past, some older browsers still rely on them. Autoprefixer helps with that backwards compatibility, while also supporting future compatibility for browsers that might apply a prefix to a property prior to it becoming a standard.
For now, Svelte works with an older version of PostCSS. Its latest version, PostCSS 8, was released September 2020. So, to avoid getting any version-related errors, our command above specifies PostCSS 7 instead of 8. A PostCSS 7 compatibility build of Tailwind is made available under the compat channel on npm.
Step 3: Configuring Tailwind
Now that we have Tailwind installed, let’s create the configuration file needed and do the necessary setup. In the root directory of your project, run this to create a tailwind.config.js file:
npx tailwindcss init tailwind.config.js
Being a highly customizable framework, Tailwind allows us to easily override its default configurations with custom configurations inside this tailwind.config.js file. This is where we can easily customize things like spacing, colors, fonts, etc.
The tailwind.config.js file is provided to prevent ‘fighting the framework’ which is common with other CSS libraries. Rather than struggling to reverse the effect of certain classes, you come here and specify what you want. It’s in this file that we also define the PostCSS plugins used in the project.
The file comes with some default code. Open it in your text editor and add this compatibility code to it:
future: { purgeLayersByDefault: true, removeDeprecatedGapUtilities: true, },
Tailwind 2.0 (the latest version), all layers (e.g., base, components, and utilities) are purged by default. In previous versions, however, just the utilities layer is purged. We can manually configure Tailwind to purge all layers by setting the purgeLayersByDefault flag to true.
Tailwind 2.0 also removes some gap utilities, replacing them with new ones. We can manually remove them from our code by setting removeDeprecatedGapUtilities to true.
These will help you handle deprecations and breaking changes from future updates.
PurgeCSS
The several thousand utility classes that come with Tailwind are added to your project by default. So, even if you don’t use a single Tailwind class in your HTML, your project still carries the entire library, making it rather bulky. We’ll want our files to be as small as possible in production, so we can use purge to remove all of the unused utility classes from our project before pushing the code to production.
Since this is mainly a production problem, we specify that purge should only be enabled in production.
purge: { content: [ "./src/**/*.svelte", ], enabled: production // disable purge in dev },
Now, your tailwind.config.js should look like this:
const production = !process.env.ROLLUP_WATCH; module.exports = { future: { purgeLayersByDefault: true, removeDeprecatedGapUtilities: true, }, plugins: [ ], purge: { content: [ "./src/**/*.svelte", ], enabled: production // disable purge in dev }, };
Rollup.js
Our Svelte app uses Rollup.js, a JavaScript module bundler made by Rich Harris, the creator of Svelte, that is used for compiling multiple source files into one single bundle (similar to webpack). In our app, Rollup performs its function inside a configuration file called rollup.config.js.
With Rollup, We can freely break our project up into small, individual files to make development easier. Rollup also helps to lint, prettify, and syntax-check our source code during bundling.
Step 4: Making Tailwind compatible with Svelte
Navigate to rollup.config.js and import the sveltePreprocess package. This package helps us handle all the CSS processing required with PostCSS and Tailwind.
import sveltePreprocess from "svelte-preprocess";
Under plugins, add sveltePreprocess and require Tailwind and Autoprefixer, as Autoprefixer will be processing the CSS generated by these tools.
preprocess: sveltePreprocess({ sourceMap: !production, postcss: { plugins: [ require("tailwindcss"), require("autoprefixer"), ], }, }),
Since PostCSS is an external tool with a syntax that’s different from Svelte’s framework, we need a preprocessor to process it and make it compatible with our Svelte code. That’s where the sveltePreprocess package comes in. It provides support for PostCSS and its plugins. We specify to the sveltePreprocess package that we are going to require two external plugins from PostCSS, Tailwind and Autoprefixer. sveltePreprocess runs the foreign code from these two plugins through Babel and converts them to code supported by the Svelte compiler (ES6+). Rollup eventually bundles all of the code together.
The next step is to inject Tailwind’s styles into our app using the @tailwind directive. You can think of @tailwind loosely as a function that helps import and access the files containing Tailwind’s styles. We need to import three sets of styles.
The first set of styles is @tailwind base. This injects Tailwind’s base styles—mostly pulled straight from Normalize.css—into our CSS. Think of the styles you commonly see at the top of stylesheets. Tailwind calls these Preflight styles. They are provided to help solve cross-browser inconsistencies. In other words, they remove all the styles that come with different browsers, ensuring that only the styles you employ are rendered. Preflight helps remove default margins, make headings and lists unstyled by default, and a host of other things. Here’s a complete reference of all the Preflight styles.
The second set of styles is @tailwind components. While Tailwind is a utility-first library created to prevent generic designs, it’s almost impossible to not reuse some designs (or components) when working on a large project. Think about it. The fact that you want a unique-looking website doesn’t mean that all the buttons on a page should be designed differently from each other. You’ll likely use a button style throughout the app.
Follow this thought process. We avoid frameworks, like Bootstrap, to prevent using the same kind of button that everyone else uses. Instead, we use Tailwind to create our own unique button. Great! But we might want to use this nice-looking button we just created on different pages. In this case, it should become a component. Same goes for forms, cards, badges etc.
All the components you create will eventually be injected into the position that @tailwind components occupies. Unlike other frameworks, Tailwind doesn’t come with lots of predefined components, but there are a few. If you aren’t creating components and plan to only use the utility styles, then there’s no need to add this directive.
And, lastly, there’s @tailwind utilities. Tailwind’s utility classes are injected here, along with the ones you create.
Step 5: Injecting Tailwind Styles into Your Site
It’s best to inject all of the above into a high-level component so they’re accessible on every page. You can inject them in the App.svelte file:
<style global lang="postcss"> @tailwind base; @tailwind components; @tailwind utilities; </style>
Now that we have Tailwind set up in, let’s create a website header to see how tailwind works with Svelte. We’ll create it in App.svelte, inside the main tag.
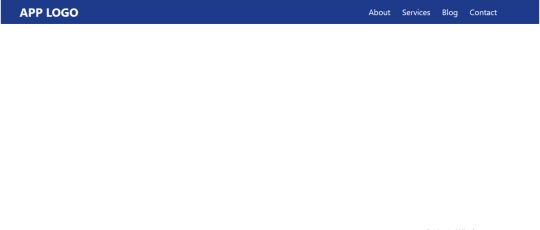
Step 6: Creating A Website Header
Starting with some basic markup:
<nav> <div> <div> <a href="#">APP LOGO</a> <!-- Menus --> <div> <ul> <li> <a href="#">About</a> </li> <li> <a href="#">Services</a> </li> <li> <a href="#">Blog</a> </li> <li> <a href="#">Contact</a> </li> </ul> </div> </div> </div> </nav>
This is the header HTML without any Tailwind CSS styling. Pretty standard stuff. We’ll wind up moving the “APP LOGO” to the left side, and the four navigation links on the right side of it.

Now let’s add some Tailwind CSS to it:
<nav class="bg-blue-900 shadow-lg"> <div class="container mx-auto"> <div class="sm:flex"> <a href="#" class="text-white text-3xl font-bold p-3">APP LOGO</a> <!-- Menus --> <div class="ml-55 mt-4"> <ul class="text-white sm:self-center text-xl"> <li class="sm:inline-block"> <a href="#" class="p-3 hover:text-red-900">About</a> </li> <li class="sm:inline-block"> <a href="#" class="p-3 hover:text-red-900">Services</a> </li> <li class="sm:inline-block"> <a href="#" class="p-3 hover:text-red-900">Blog</a> </li> <li class="sm:inline-block"> <a href="#" class="p-3 hover:text-red-900">Contact</a> </li> </ul> </div> </div> </div> </nav>
OK, let’s break down all those classes we just added to the HTML. First, let’s look at the <nav> element:
<nav class="bg-blue-900 shadow-lg">
We apply the class bg-blue-900 gives our header a blue background with a shade of 900, which is dark. The class shadow-lg class applies a large outer box shadow. The shadow effect this class creates will be 0px at the top, 10px on the right, 15px at the bottom, and -3px on the left.
Next is the first div, our container for the logo and navigation links:
<div class="container mx-auto">
To center it and our navigation links, we use the mx-auto class. It’s equivalent to margin: auto, horizontally centering an element within its container.
Onto the next div:
<div class="sm:flex">
By default, a div is a block-level element. We use the sm:flex class to make our header a block-level flex container, so as to make its children responsive (to enable them shrink and expand easily). We use the sm prefix to ensure that the style is applied to all screen sizes (small and above).
Alright, the logo:
<a href="#" class="text-white text-3xl font-bold p-3">APP LOGO</a>
The text-white class, true to its name, make the text of the logo white. The text-3xl class sets the font size of our logo (which is configured to 1.875rem)and its line height (configured to 2.25rem). From there, p-3 sets a padding of 0.75rem on all sides of the logo.
That takes us to:
<div class="ml-55 mt-4">
We’re giving the navigation links a left margin of 55% to move them to the right. However, there’s no Tailwind class for this, so we’ve created a custom style called ml-55, a name that’s totally made up but stands for “margin-left 55%.”
It’s one thing to name a custom class. We also have to add it to our style tags:
.ml-55 { margin-left: 55%; }
There’s one more class in there: mt-4. Can you guess what it does? If you guessed that it seta a top margin, then you are correct! In this case, it’s configured to 1rem for our navigation links.
Next up, the navigation links are wrapped in an unordered list tag that contains a few classes:
<ul class="text-white sm:self-center text-xl">
We’re using the text-white class again, followed by sm:self-center to center the list—again, we use the sm prefix to ensure that the style is applied to all screen sizes (small and above). Then there’s text-xl which is the extra-large configured font size.
For each list item:
<li class="sm:inline-block">
The sm:inline-block class sets each list item as an inline block-level element, bringing them side-by-side.
And, lastly, the link inside each list item:
<a href="#" class="p-3 hover:text-red-900">
We use the utility class hover:text-red-900 to make each red on hover.
Let’s run our app in the command line:
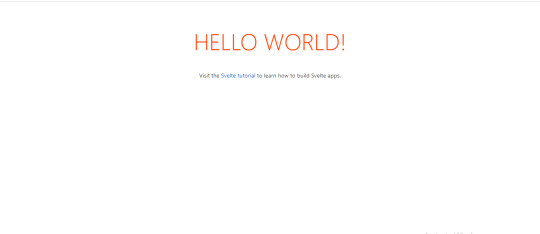
npm run dev
This is what we should get:
And that is how we used Tailwind CSS with Svelte in six little steps!
Conclusion
My hope is that you now know how to integrate Tailwind CSS into our Svelte app and configure it. We covered some pretty basic styling, but there’s always more to learn! Here’s an idea: Try improving the project we worked on by adding a sign-up form and a footer to the page. Tailwind provides comprehensive documentation on all its utility classes. Go through it and familiarize yourself with the classes.
Do you learn better with video? Here are a couple of excellent videos that also go into the process of integrating Tailwind CSS with Svelte.
youtube
youtube
The post How to Use Tailwind on a Svelte Site appeared first on CSS-Tricks.
You can support CSS-Tricks by being an MVP Supporter.
How to Use Tailwind on a Svelte Site published first on https://deskbysnafu.tumblr.com/
0 notes
Link
Nuxt.js provides an Axios module for easy integration with your application. Axios is a promise-based HTTP client that works in the browser and Node.js environment or, in simpler terms, it is a tool for making requests (e.g API calls) in client-side applications and Node.js environment. In this tutorial, we’re going to learn how to use the Axios module and how to make a request on the server-side using asyncData and fetch. These two methods make a request on the server-side but they have some differences which we’re also going to cover. Finally, we’ll learn how to perform authentication and secure pages/routes using the auth module and auth middleware. This article requires basic knowledge of Nuxtjs and Vuejs as we’ll be building on top of that. For those without experience with Vuejs, I recommend you start from their official documentation and the Nuxt official page before continuing with this article.
What Is The Nuxt.js Axios Module?
According to the official Documentation,
“It is a Secure and easy Axios integration with Nuxt.js.”
Here are some of its features:
Automatically set base URL for client-side & server-side.
Proxy request headers in SSR (Useful for auth).
Fetch Style requests.
Integrated with Nuxt.js Progressbar while making requests.
To use the axios module in your application, you will have to first install it by using either npm or yarn. YARN
yarn add @nuxtjs/axios
NPM
npm install @nuxtjs/axios
Add it into your nuxt.config.js file:
modules: [ '@nuxtjs/axios', ], axios: { // extra config e.g // BaseURL: 'https://link-to-API' }
The modules array accepts a list of Nuxt.js modules such as dotenv, auth and in this case, Axios. What we’ve done is to inform our application that we would be using the Axios module, which we reference using @nuxtjs/axios. This is then followed by the axios property which is an object of configurations like the baseURL for both client-side and server-side. Now, you can access Axios from anywhere in your application by calling this.$axios.method or this.$axios.$method. Where method can be get, post, or delete.
Making Your First Request Using Axios
For this tutorial, I’ve put together a simple application on Github. The repository contains two folders, start and finish, the start folder contains all you need to get right into the tutorial. The finish folder contains a completed version of what we would be building. After cloning the repo and opening the start folder, we would need to install all our packages in the package.json file so open your terminal and run the following command:
npm install
Once that is done, we can start our app using the npm run dev command. This is what you should see when you go to localhost:3000.
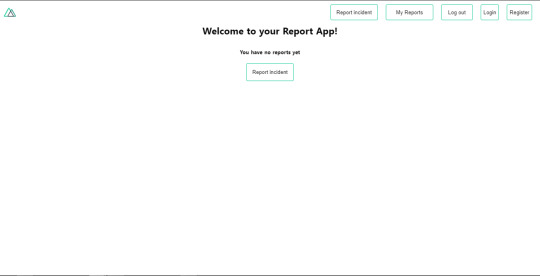
Our application’s landing page. (Large preview)
The next thing we have to do is to create a .env file in the root folder of our application and add our API URL to it. For this tutorial, we’ll be using a sample API built to collect reports from users.
API_URL=https://ireporter-endpoint.herokuapp.com/api/v2/
This way, we do not have to hard code our API into our app which is useful for working with two APIs (development and production). The next step would be to open our nuxt.config.js file and add the environmental variable to our axios config that we added above.
/* ** Axios module configuration */ axios: { // See https://github.com/nuxt-community/axios-module#options baseURL: process.env.API_URL, },
Here, we tell Nuxt.js to use this baseURL for both our client-side and server-side requests whenever we use this Axios module. Now, to fetch a list of reports, let us open the index.vue file and add the following method to the script section.
async getIncidents() { let res = await this.$store.dispatch("getIncidents"); this.incidents = res.data.data.incidents; }
What we have done is to create an async function that we call getIncidents() and we can tell what it does from the name — it fetches a list of incidents using the Vuex store action method this.$store.dispatch. We assign the response from this action to our incidents property so we can be able to make use of it in the component. We want to call the getIncidents() method whenever the component mounts. We can do that using the mounted hook.
mounted() { this.getIncidents() }
mounted() is a lifecycle hook that gets called when the component mounts. That will cause the call to the API to happen when the component mounts. Now, let us go into our index.js file in our store and create this action where we’ll be making our Axios request from.
export const actions = { async getIncidents() { let res = await this.$axios.get('/incidents') return res; } }
Here, we created the action called getIncidents which is an async function, then we await a response from the server and return this response. The response from this action is sent back to our getIncidents() method in our index.vue file. If we refresh our application, we should now be able to see a long list of incidents rendered on the page.
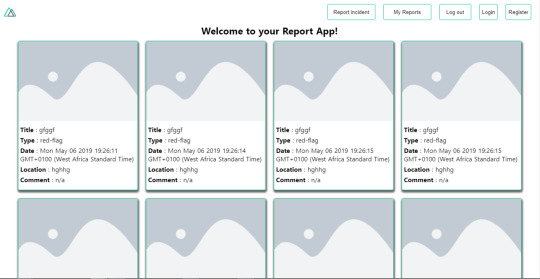
List of incidents on landing page. (Large preview)
We have made our first request using Axios but we won’t stop there, we are going to be trying out asyncData and fetch to see the differences between them and using Axios.
AsyncData
AsyncData fetches data on the server-side and it’s called before loading the page component. It does not have access to this because it is called before your page component data is created. this is only available after the created hook has been called so Nuxt.js automatically merges the returned data into the component’s data. Using asyncData is good for SEO because it fetches your site’s content on the server-side and also helps in loading content faster. Note that asyncData method can only be used in the pages folder of your application as it would not work in the components folder. This is because asyncData hook gets called before your component is created.
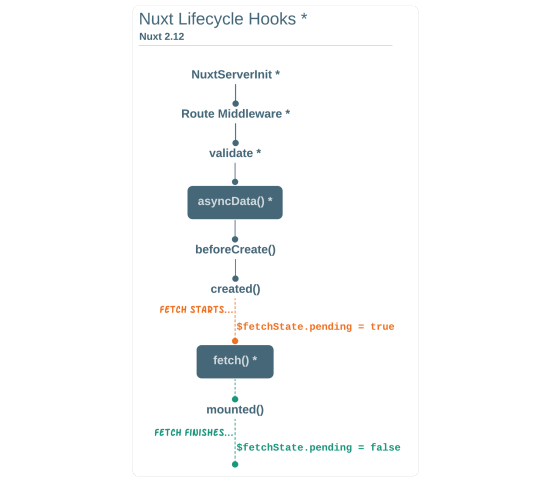
Image from Nuxt blog. (Large preview)
Let us add asyncData to our index.vue file and observe how fast our incidents data loads. Add the following code after our components property and let us get rid of our mounted hook.
async asyncData({ $axios }) { let { data } = await $axios.get("/incidents"); return { incidents: data.data.incidents }; }, // mounted() { // this.getIncidents(); // },
Here, the asyncData method accepts a property from the context $axios. We use this property to fetch the list of incidents and the value is then returned. This value is automatically injected into our component. Now, you can notice how fast your content loads if you refresh the page and at no time is there no incident to render.
Fetch
The Fetch method is also used to make requests on the server-side. It is called after the created hook in the life cycle which means it has access to the component’s data. Unlike the asyncData method, the fetch method can be used in all .vue files and be used with the Vuex store. This means that if you have the following in your data function.
data() { return { incidents: [], id: 5, gender: 'male' }; }
You can easily modify id or gender by calling this.id or this.gender.
Using Axios As A Plugin
During the process of development with Axios, you might find that you need extra configuration like creating instances and interceptors for your request so your application can work as intended and thankfully, we can do that by extending our Axios into a plugin. To extend axios, you have to create a plugin (e.g. axios.js) in your plugins folder.
export default function ({ $axios, store, redirect }) { $axios.onError(error => { if (error.response && error.response.status === 500) { redirect('/login') } }) $axios.interceptors.response.use( response => { if (response.status === 200) { if (response.request.responseURL && response.request.responseURL.includes('login')) { store.dispatch("setUser", response); } } return response } ) }
This is an example of a plugin I wrote for a Nuxt application. Here, your function takes in a context object of $axios, store and redirect which we would use in configuring the plugin. The first thing we do is to listen for an error with a status of 500 using $axios.onError and redirect the user to the login page. We also have an interceptor that intercepts every request response we make in our application checks if the status of the response we get is 200. If that is true we proceed and check that there is a response.request.responseURL and if it includes login. If this checks out to be true, we then send this response using our store’s dispatch method where it then mutated in our state. Add this plugin to your nuxt.config.js file:
plugins: [ '~/plugins/axios' ]
After doing this, your Axios plugin would intercept any request you make and check if you have defined a special case for it.
Introduction To The Auth Module
The auth module is used for performing authentication for your Nuxt application and can be accessed from anywhere in your application using $this.auth. It is also available in fetch, asyncData, middleware and NuxtInitServer from the context object as $auth. The context provides additional objects/params from Nuxt to Vue components and is available in special nuxt lifecycle areas like those mentioned above. To use the auth module in your application, you would have to install it using yarn or npm. YARN
yarn add @nuxtjs/auth
NPM
npm install @nuxtjs/auth
Add it to your nuxt.config.js file.
modules: [ '@nuxtjs/auth' ], auth: { // Options }
The auth property accepts a list of properties such as strategies and redirect. Here, strategies accepts your preferred authentication method which can be:
local For username/email and password-based flow.
facebook For using Facebook accounts as a means of authentication.
Github For authenticating users with Github accounts.
Google For authenticating users with Google accounts.
Auth0
Laravel Passport
The redirect property accepts an object of links for:
login Users would be redirected to this link if login is required.
logout Users would be redirected here if after logout current route is protected.
home Users would be redirected here after login.
Now, let us add the following to our nuxt.config.js file.
/* ** Auth module configuration */ auth: { redirect: { login: '/login', logout: '/', home: '/my-reports' }, strategies: { local: { endpoints: { login: { url: "/user/login", method: "post", propertyName: "data.token", }, logout: false, user: false, }, tokenType: '', tokenName: 'x-auth', autoFetchUser: false }, }, }
Please note that the auth method works best when there is a user endpoint provided in the option above. Inside the auth config object, we have a redirect option in which we set our login route to /login, logout route to / and home route to /my-reports which would all behave as expected. We also have a tokenType property which represents the Authorization type in the header of our Axios request. It is set to Bearer by default and can be changed to work with your API. For our API, there is no token type and this is why we’re going to leave it as an empty string. The tokenName represents the Authorization name (or the header property you want to attach your token to) inside your header in your Axios request. By default, it is set to Authorization but for our API, the Authorization name is x-auth. The autoFetchUser property is used to enable user fetch object using the user endpoint property after login. It is true by default but our API does not have a user endpoint so we have set that to false. For this tutorial, we would be using the local strategy. In our strategies, we have the local option with endpoints for login, user and logout but in our case, we would only use the *login* option because our demo API does not have a *logout* endpoint and our user object is being returned when *login* is successful. Note: The auth module does not have a register endpoint option so that means we’re going to register the traditional way and redirect the user to the login page where we will perform the authentication using this.$auth.loginWith. This is the method used in authenticating your users. It accepts a ‘strategy’ (e.g local) as a first argument and then an object to perform this authentication with. Take a look at the following example.
let data { email: '[email protected]', password: '123456' } this.$auth.loginWith('local', { data })
Using The Auth Module
Now that we have configured our auth module, we can proceed to our registration page. If you visit the /register page, you should see a registration form.
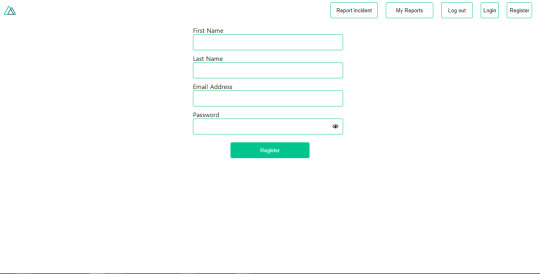
Register page. (Large preview)
Let us make this form functional by adding the following code:
methods: { async registerUser() { this.loading = true; let data = this.register; try { await this.$axios.post("/user/create", data); this.$router.push("/login"); this.loading = false; this.$notify({ group: "success", title: "Success!", text: "Account created successfully" }); } catch (error) { this.loading = false; this.$notify({ group: "error", title: "Error!", text: error.response ? error.response.data.error : "Sorry an error occured, check your internet" }); } } }
Here, we have an async function called registerUser which is tied to a click event in our template and makes an Axios request wrapped in a try/catch block to an endpoint /user/create. This redirects to the /login page and notifies the user of a successful registration. We also have a catch block that alerts the user of any error if the request is not successful. If the registration is successful, you would be redirected to the login page.
Login page with notification component. (Large preview)
Here, we’re going to make use of auth authentication method this.$auth.loginWith('local', loginData) after which we would use the this.$auth.setUser(userObj) to set the user in our auth instance. To get the login page working, let’s add the following code to our login.vue file.
methods: { async logIn() { let data = this.login; this.loading = true; try { let res = await this.$auth.loginWith("local", { data }); this.loading = false; let user = res.data.data.user; this.$auth.setUser(user); this.$notify({ group: "success", title: "Success!", text: "Welcome!" }); } catch (error) { this.loading = false; this.$notify({ group: "error", title: "Error!", text: error.response ? error.response.data.error : "Sorry an error occured, check your internet" }); } } }
We created an async function called logIn using the auth method this.$auth.loginWith('local, loginData). If this login attempt is successful, we then assign the user data to our auth instance using this.$auth.setUser(userInfo) and redirect the user to the /my-report page. You can now get user data using this.$auth.user or with Vuex using this.$store.state.auth.user but that’s not all. The auth instance contains some other properties which you can see if you log in or check your state using your Vue dev tools. If you log this.$store.state.auth to the console, you’ll see this:
{ "auth": { "user": { "id": "d7a5efdf-0c29-48aa-9255-be818301d602", "email": "[email protected]", "lastName": "Xo", "firstName": "Tm", "othernames": null, "isAdmin": false, "phoneNumber": null, "username": null }, "loggedIn": true, "strategy": "local", "busy": false } }
The auth instance contains a loggedIn property that is useful in switching between authenticated links in the nav/header section of your application. It also contains a strategy method that states the type of strategy the instance is running (e.g local). Now, we will make use of this loggedIn property to arrange our nav links. Update your navBar component to the following:
<template> <header class="header"> <div class="logo"> <nuxt-link to="/"> <Logo /> </nuxt-link> </div> <nav class="nav"> <div class="nav__user" v-if="auth.loggedIn"> <p></p> <button class="nav__link nav__link--long"> <nuxt-link to="/report-incident">Report incident</nuxt-link> </button> <button class="nav__link nav__link--long"> <nuxt-link to="/my-reports">My Reports</nuxt-link> </button> <button class="nav__link" @click.prevent="logOut">Log out</button> </div> <button class="nav__link" v-if="!auth.loggedIn"> <nuxt-link to="/login">Login</nuxt-link> </button> <button class="nav__link" v-if="!auth.loggedIn"> <nuxt-link to="/register">Register</nuxt-link> </button> </nav> </header> </template> <script> import { mapState } from "vuex"; import Logo from "@/components/Logo"; export default { name: "nav-bar", data() { return {}; }, computed: { ...mapState(["auth"]) }, methods: { logOut() { this.$store.dispatch("logOut"); this.$router.push("/login"); } }, components: { Logo } }; </script> <style></style>
In our template section, we have several links to different parts of the application in which we are now using auth.loggedIn to display the appropriate links depending on the authentication status. We have a logout button that has a click event with a logOut() function attached to it. We also display the user’s email gotten from the auth property which is accessed from our Vuex store using the mapState method which maps our state auth to the computed property of the nav component. We also have a logout method that calls our Vuex action logOut and redirects the user to the login page. Now, let us go ahead and update our store to have a logOut action.
export const actions = { // .... logOut() { this.$auth.logout(); } }
The logOut action calls the auth logout method which clears user data, deletes tokens from localStorage and sets loggedIn to false. Routes like /my-reports and report-incident should not be visible to guests but at this point in our app, that is not the case. Nuxt does not have a navigation guard that can protect your routes, but it has is the auth middleware. It gives you the freedom to create your own middleware so you can configure it to work the way you want. It can be set in two ways:
Per route.
Globally for the whole app in your nuxt.config.js file.
router: { middleware: ['auth'] }
This auth middleware works with your auth instance so you do not need to create an auth.js file in your middleware folder. Let us now add this middleware to our my-reports.vue and report-incident.vue files. Add the following lines of code to the script section of each file.
middleware: 'auth'
Now, our application would check if the user trying to access these routes has an auth.loggedIn value of true. It’ll redirect them to the login page using our redirect option in our auth config file — if you’re not logged in and you try to visit either /my-report or report-incident, you would be redirected to /login. If you go to /report-incidents, this is what you should see.
Report incident page. (Large preview)
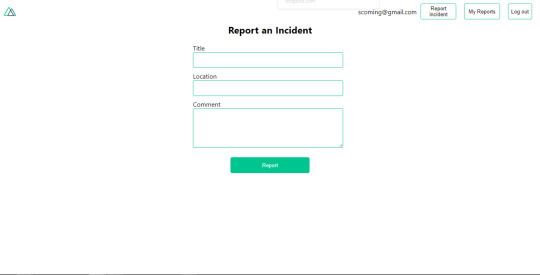
This page is for adding incidents but that right now the form does not send incident to our server because we are not making the call to the server when the user attempts to submit the form. To solve this, we will add a reportIncident method which will be called when the user clicks on Report. We’ll have this in the script section of the component. This method will send the form data to the server. Update your report-incident.vue file with the following:
<template> <section class="report"> <h1 class="report__heading">Report an Incident</h1> <form class="report__form"> <div class="input__container"> <label for="title" class="input__label">Title</label> <input type="text" name="title" id="title" v-model="incident.title" class="input__field" required /> </div> <div class="input__container"> <label for="location" class="input__label">Location</label> <input type="text" name="location" id="location" v-model="incident.location" required class="input__field" /> </div> <div class="input__container"> <label for="comment" class="input__label">Comment</label> <textarea name="comment" id="comment" v-model="incident.comment" class="input__area" cols="30" rows="10" required ></textarea> </div> <input type="submit" value="Report" class="input__button" @click.prevent="reportIncident" /> <p class="loading__indicator" v-if="loading">Please wait....</p> </form> </section> </template> <script> export default { name: "report-incident", middleware: "auth", data() { return { loading: false, incident: { type: "red-flag", title: "", location: "", comment: "" } }; }, methods: { async reportIncident() { let data = this.incident; let formData = new FormData(); formData.append("title", data.title); formData.append("type", data.type); formData.append("location", data.location); formData.append("comment", data.comment); this.loading = true; try { let res = await this.$store.dispatch("reportIncident", formData); this.$notify({ group: "success", title: "Success", text: "Incident reported successfully!" }); this.loading = false; this.$router.push("/my-reports"); } catch (error) { this.loading = false; this.$notify({ group: "error", title: "Error!", text: error.response ? error.response.data.error : "Sorry an error occured, check your internet" }); } } } }; </script> <style> </style>
Here, we have a form with input fields for title, location, and comment with two-way data binding using v-model. We also have a submit button with a click event. In the script section, we have a reportIncident method that collects all the information provided in the form and is sent to our server using FormData because the API is designed to also accept images and videos. This formData is attached to a Vuex action using the dispatch method, if the request is successful, you get redirected to /my-reports with a notification informing you that this request was successful otherwise, you would be notified of an error with the error message. At this point, we don’t have reportIncident action in our store yet so in your browser console, you would see an error if you try to click submit on this page.

Vuex error message. (Large preview)
To fix this, add the reportIncident action your index.js file.
export const actions = { // ... async reportIncident({}, data) { let res = await this.$axios.post('/incident/create', data) return res; } }
Here, we have a reportIncident function that takes in an empty context object and the data we’re sending from our form. This data is then attached to a post request that creates an incident and returns back to our report-incident.vue file. At this point, you should be able to add a report using the form after which you would be redirected to /my-reports page.
My reports page empty. (Large preview)
This page should display a list of incidents created by the user but right now it only shows what we see above, let’s go ahead to fix that. We’re going to be using the fetch method we learned about to get this list. Update your my-reports.vue file with the following:
<script> import incidentCard from "@/components/incidentCard.vue"; export default { middleware: "auth", name: "my-reports", data() { return { incidents: [] }; }, components: { incidentCard }, async fetch() { let { data } = await this.$axios.get("/user/incidents"); this.incidents = data.data; } }; </script>
Here, we use fetch method to get user-specific incidents and assign the response to our incidents array. If you refresh your page after adding an incident, you should see something like this.
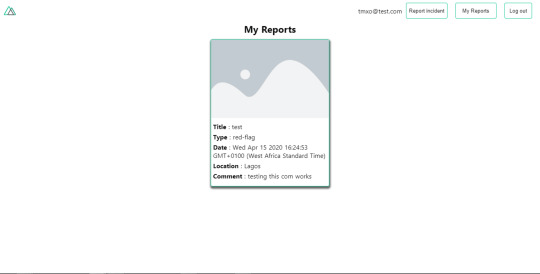
My Reports page with a report. (Large preview)
At this point, we would notice a difference in how fetch method and asyncData loads our data.
Conclusion
So far, we have learned about the Axios module and all of its features. We have also learned more about asyncData, and how we can fetch both of them together despite their differences. We’ve also learned how to perform authentication in our application using the auth module and how to use the auth middleware to protect our routes. Here are some useful resources that talk more about all we’ve covered.
Getting started with meta tags in Nuxjs.
Using the dotenv module in Nuxt.
Using Fetch in your Nuxt app.
Getting started with asyncData.
0 notes
Link
10 Useful Things That Front End Developers Should Learn In 2020
Front end developers are in high demand, find out what skills leading front end web design and development experts use the most.
2020 is here with us and from the look of things, it is going to be a great year for front end web design and everything to do with front end development. Unlike the recent times where front end developers in their space just had to something on jQuery, HTML or CSS, front end developers need to take the bull by its horns and face the dynamic ecosystem of skills necessary for developing libraries, tools and frameworks so that they can master the craft.
Delving into the past, it is evident that the past couple of years has blessed individuals in the front end development space with some amazing new frameworks and libraries including VueJS, Svelte and ReactJS that make use of JavaScript for powering up to major web applications. As a developer, you will find this article quite interesting while it sheds more light on some of the few core things you should strive to focus on to up your developing game in case you are an entry-level front end developer or already have a grip of things. Nowadays, there are many IT job opportunities for those who want to apply.
Here are the top 10 things to get you started this year.
JAMstack
This is a combination of JavaScript, API and markup. This combination is an interesting approach of developing apps and websites for purposes of bettering their performance and at the same time scaling down the costs involved. It functions to offer a developer a better experience while providing higher security. This makes learning this an interesting objective because all of them don’t depend on a webserver to function. For instance, if you take a look at a monolithic app that has some reliance on Node.js or Ruby back end or any site that is developed with such a server-side CMS as WordPress or Drupal, you will realise that all of them are not JAMstack developed. However, to learn working with JAMstack, some of the following best practices are crucial:
Automated builds: The use of automated builds is near perfect because every instance of markup is prebuilt with programs like cloud services or webhooks.
Instant cache validation: You definitely have to find a way of learning anything to do with instant cache validation because at that point any site goes live, it should be your responsibility to ensure that your CDN has the capacity to handle any form of instant cache purges for any kind of change to get visible.
Serving your project on a CDN: Since there is no need for a server, you can serve the whole of your project on a CDN, which gives you the ability to unlock performance and speeds that are unbeatable.
Atomic deploys: It would be in your best interest to avoid any case of inconsistent states by redeploying a large number of files in a large project. This practice will come in handy since it waits for every file to be uploaded just before any changes finally go live.
GraphQL
2020 should not pass before you get your way around working with GraphQL. This is despite the fact that for a long time now many people have considered REST as the effective measure for the design of web APIs since it offers concepts like stateless servers. This is because RESTful APIs are seemingly inflexible because they do not easily adapt to any changing clients wishing to access them. That is why Facebook developed GraphQL to fight the challenges that many developers face while dealing with RESTful APIs in the process of web development. The program will enable developers to send a query to its server with the data requirements, which would then return corresponding data with JSON object.
Testing
As an entry-level front end web developer, you should learn on the importance of testing because no code that is untested should go into production since they are mandatory in commercial projects. There are different tests you should keep in mind including:
Integration tests, which test any form of interaction between components.
End-to-end tests, which are instrumental in testing full-blown user flows in browsers.
Unit tests, which are essential in testing functions in isolation or a single component.
Soft Skills
As a front end developer, you might e tempted into overlooking the acquisition of skills but mark you they are just as important because they help in not only communication with team members but also help in the understanding of the technicalities of things. The most common soft skills you should learn to acquire in 2020 include:
Patience.
Problem-solving.
Teamwork.
Empathy.
Open-mindedness.
Communication.
Time management.
Creativity
Accountability
Git
This a form of a standardized version of control in web development. Therefore, it is only necessary that as a front end developer you strive to know and understand some of the basic concepts and workflows in order to effectively work in all sizes of teams plus understanding the underlying concepts. Some of the popular commands to know include:
git add
git config
git clone
git commit
git init
git branch
git push
git pull
Frameworks
There is a need for developers, especially those making use of JavaScript frameworks to focus on Vue and React since, in the recent years, these two have seen tremendous growth, especially in enterprise projects because the past year has sen two giants, VueJS and ReactJS starring a number of stars as compared to Svelte and Angular.
Progressive Web Apps (PWA)
PWA will soon catch up since more and more businesses and companies are choosing to go the PWA way over choosing native apps because they get a richer mobile experience from them. This has been mainly bolstered by the fact that PWAs are becoming more reliable because they can work without an internet connection with instant loading capabilities. These PWAs are also engaging in terms of user experience with that native-app feeling. This means that users can easily utilise the use of service workers for functionalities offline plus a full-screen experience that is enabled by a web-app manifest.
Code Editors/IDEs
VS Code by Microsoft will seemingly continue prevailing in 2020 as the go-to editor just as it did in 2019 for most front end developers. This is because the editor offers developers such IDE-like features as highlighting and code completion with the ability to extend infinitely through its extension marketplace, which is what makes the editor more appealing. Therefore, some great extensions to take note of include:
Prettier.
ESLint.
npm.
Vetur.
Live Sass Compiler.
JavaScript (ES6) code snippets.
Beautify.
Liver Server.
CSS Peek.
Debugger for Chrome.
Static Site Generators
These generators effectively combine the power of single-page applications and that of server-side rendering, which is very instrumental in initial load time and SEO. Therefore, if you believe you are serious in the front end developing, then you should consider projects like Gridsome and Nuxt which are Vue-based and Next and Gatsby, which are React-based. These projects will definitely draw some heat in 2020 since they come with such features as module bundlers, markdown support, integrated test runners and more.
Clean Code
The ability to write clean code is increasingly becoming more desirable and in high demand in many organisations. This means that learning the fundamentals of clean coding in order to strategically place yourself in 2020. Clean code should not only be pleasing to read and elegant but also focused. This means, as a clean coder, you will have to learn to:
Create codes that speak for themselves without the need for comments.
Create codes with functions that have few arguments and small in nature.
Create names for classes, methods, functions and variables that are meaningful.
All these things should have you encouraged to get busy to see to it that you have successful developing in 2020.
#10 useful things that front end developers should learn in 2020#website design#front end developers
0 notes
Text
The (Upcoming) WordPress Renaissance
The (Upcoming) WordPress Renaissance
Leonardo Losoviz
2019-08-15T13:00:59+02:002019-08-15T11:20:22+00:00
It has been 8 months since Gutenberg was launched as the default content editor in WordPress. Depending who you ask, you may hear that Gutenberg is the worst or the best thing that has happened to WordPress (or anything in between). But something that most people seem to agree with, is that Gutenberg has been steadily improving. At the current pace of development, it’s only a matter of time until its most outstanding issues have been dealt with and the user experience becomes truly pleasant.
Gutenberg is an ongoing work in progress. While using it, I experience maddening nuisances, such as floating options that I can’t click on because the block placed below gets selected instead, unintuitive grouping of blocks, columns with so much gap that make them useless, and the “+” element calling for my attention all over the page. However, the problems I encounter are still relatively manageable (which is an improvement from the previous versions) and, moreover, Gutenberg has started making its potential benefits become a reality: Many of its most pressing bugs have been ironed out, its accessibility issues are being solved, and new and exciting features are continuously being made available. What we have so far is pretty decent, and it will only get better and better.
Let’s review the new developments which have taken place since Gutenberg’s launch, and where it is heading to.
Note: For more information about this topic, I recommend watching WordPress founder Matt Mullenweg’s talk during the recent WordCamp Europe 2019.
Why Gutenberg Was Needed
Gutenberg arrived just in time to kick-start the rejuvenation of WordPress, to attempt to make WordPress appealing to developers once again (and reverse its current status of being the most dreaded platform). WordPress had stopped looking attractive because of its focus on not breaking backwards compatibility, which prevented WordPress from incorporating modern code, making it look pale in comparison with newer, shinier frameworks.
Many people argue that WordPress was in no peril of dying (after all, it powers more than 1/3rd of the web), so that Gutenberg was not really needed, and they may be right. However, even if WordPress was in no immediate danger, by being disconnected from modern development trends it was headed towards obsolescence, possibly not in the short-term but certainly in the mid to long-term. Let’s review how Gutenberg improves the experience for different WordPress stakeholders: developers, website admins, and website users.
Developers have recently embraced building websites through JavaScript libraries Vue and React because (among other reasons) of the power and convenience of components, which translates into a satisfying developer-experience. By jumping into the bandwagon and adopting this technique, Gutenberg enables WordPress to attract developers once again, allowing them to code in a manner they find gratifying.
Website admins can manage their content more easily, improve their productivity, and achieve things that couldn’t be done before. For instance, placing a Youtube video through a block is easier than through the TinyMCE Textarea, blocks can serve optimal images (compressed, resized according to the device, converted to a different format, and so on) removing the need to do it manually, and the WYSIWYG (What You See Is What You Get) capabilities are decent enough to provide a real-time preview of how the content will look like in the website.
By giving them access to powerful functionality, website users will have a higher satisfaction when browsing our sites, as experienced when using highly-dynamic, user-friendly web applications such as Facebook or Twitter.
In addition, Gutenberg is slowly but surely modernizing the whole process of creating the website. While currently it can be used only as the content editor, some time in the future it will become a full-fledged site builder, allowing to place components (called blocks) anywhere on a page, including the header, footer, sidebar, etc. (Automattic, the company behind WordPress.com, has already started work on a plugin adding full site editing capabilities for its commercial site, from which it could be adapted for the open-source WordPress software.) Through the site-building feature, non-techy users will be able to add very powerful functionality to their sites very easily, so WordPress will keep welcoming the greater community of people working on the web (and not just developers).
Fast Pace Of Development
One of the reasons why Gutenberg has seen such a fast pace of development is because it is hosted on GitHub, which simplifies the management of code, issues and communication as compared to Trac (which handles WordPress core), and which makes it easy for first-time contributors to become involved since they may already have experience working with Git.
Being decoupled from WordPress core, Gutenberg can benefit from rapid iteration. Even though a new version of WordPress is released every 3 months or so, Gutenberg is also available as a standalone plugin, which sees a new release every two weeks (while the latest release of WordPress contains Gutenberg version 5.5, the latest plugin version is 6.2). Having access to powerful new functionality for our sites every two weeks is very impressive indeed, and it enables to unlock further functionality from the broader ecosystem (for instance, the AMP plugin requires Gutenberg 5.8+ for several features).
Headless WordPress To Power Multiple Stacks
One of the side effects of Gutenberg is that WordPress has increasingly become “headless”, further decoupling the rendering of the application from the management of the content. This is because Gutenberg is a front-end client that interacts with the WordPress back-end through APIs (the WP REST API), and the development of Gutenberg has demanded a consistent expansion of the available APIs. These APIs are not restricted to Gutenberg; they can be used together with any client-side framework, to render the site using any stack.
An example of a stack we can leverage for our WordPress application is the JAMstack, which champions an architecture based on static sites augmented through 3rd party services (APIs) to become dynamic (indeed, Smashing Magazine is a JAMstack site!). This way, we can host our content in WordPress (leveraging it as a Content Management System, which is what it is truly good at), build an application that accesses the content through APIs, generate a static site, and deploy it on a Content Delivery Network, providing for lower costs and greater access speed.
New Functionality
Let’s play with Gutenberg (the plugin, not the one included in WordPress core, which is available here) and see what functionality has been added in the last few months.
Block Manager
Through the block manager, we can decide what blocks will be available on the content editor; all others will be disabled. Removing access to unwanted blocks can be useful in several situations, such as:
Many plugins are bundles of blocks; when installing such a plugin, all their blocks will be added to the content editor, even if we need only one
As many as 40 embed providers are implemented in WordPress core, yet we may need just a few of them for the application, such as Vimeo and Youtube
Having a large amount of blocks available can overwhelm us, impairing our workflow by adding extra layers that the user needs to navigate, leading to suboptimal use of the time; hence, temporarily disabling unneeded blocks can help us be more effective
Similarly, having only the blocks we need avoids potential errors caused by using the wrong blocks; in particular, establishing which blocks are needed can be done in a top-down manner, with the website admin analyzing all available blocks and deciding which ones to use, and imposing the decision on the content managers, who are then relieved from this task and can concentrate on their own duties.

Enabling/disabling blocks through the manager (Large preview)
Cover Block With Nesting Elements
The cover block (which allows us to add a title over a background image, generally useful for creating hero headers) now defines its inner elements (i.e. the heading and buttons, which can be added for creating a call to action) as nested elements, allowing us to modify its properties in a uniform way across blocks (for instance, we can make the heading bold and add a link to it, place one or more buttons and change their background color, and others).

The cover block accepts nested elements (Large preview)
Block Grouping And Nesting
Please beware: These features are still buggy! However, plenty of time and energy is being devoted to them, so we can expect them to work smoothly soon.
Block grouping allows to group several blocks together, so when moving them up or down on the page, all of them move together. Block nesting means placing a block inside of a block, and there is no limit to the nesting depth, so we can have blocks inside of blocks inside of blocks inside of… (you’ve got me by now). Block nesting is especially useful for adding columns on the layout, through a column block, and then each column can contain inside any kind of block, such as images, text, videos, etc.

Blocks can be grouped together, and nested inside each other (Large preview)
Migration Of Pre-Existing Widgets
Whereas in the past there were several methods for adding content on the page (TinyMCE content, shortcodes, widgets, menus, etc.), the blocks attempt to unify all of them into a single method. Currently, newly-considered legacy code, such as widgets, is being migrated to the block format.
Recently, the “Latest Posts” widget has been re-implemented as a block, supporting real-time preview of how the layout looks when configuring it (changing the number of words to display, showing an excerpt or the full post, displaying the date or not, etc).

The “Latest posts” widget includes several options to customize its appearance (Large preview)
Motion Animation
Moving blocks up or down the page used to involve an abrupt transition, sometimes making it difficult to understand how blocks were re-ordered. Since Gutenberg 6.1, a new feature of motion animation solves this problem by adding a realistic movement to block changes, such as when creating, removing or reordering a block, giving a greatly improved visual cue of the actions taken to re-order blocks. In addition, the overall concept of motion animation can be applied throughout Gutenberg to express change and thus improve the user experience and provide better accessibility support.
Blocks have a smooth effect when being re-ordered. (Large preview)
Functionality (Hopefully) Coming Soon
According to WordPress founder Matt Mullenweg, only 10% of Gutenberg’s complete roadmap has been implemented by now, so there is plenty of exciting new stuff in store for us. Work on the new features listed below has either already started, or the team is currently experimenting with them.
Block directory A new top-level item in wp-admin which will provide block discovery. This way, blocks can be independently installed, without having to ship them through a plugin.
Navigation blocks Currently, navigation menus must be created through their own interface. However, soon we will be able to create these through blocks and place them anywhere on the page.
Inline installation of blocks Being able to discover blocks, the next logical step is to be able to install a new block on-the-fly, where is needed the most: On the post editor. We will be able to install a block while writing a post, use the new block to generate its HTML, save its output on the post, and remove the block, all without ever browsing to a different admin page.
Snap to grid when resizing images When we place several images on our post, resizing them to the same width or height can prove to be a painful process of trying and failing repeatedly until getting it right, which is far from ideal. Soon, it will be possible to snap the image to a virtual grid layer which appears on the background as the image is being resized.
WordPress Is Becoming Attractive (Once Again)
Several reasons support the idea that WordPress will soon become an attractive platform to code for, as it used to be once upon a time. Let’s see a couple of them.
PHP Modernization
WordPress’s quest to modernize does not end with incorporating modern JavaScript libraries and tooling (React, webpack, Babel): It also extends to the server-side language: PHP. WordPress’s minimum version of PHP was recently bumped up to 5.6, and should be bumped to version 7.0 as early as December 2019. PHP 7 offers remarkable advantages over PHP 5, most notably it more than doubles its speed, and later versions of PHP (7.1, 7.2 and 7.3) have each become even faster.
Even though there seems to be no official plans to further upgrade from PHP 7.0 to its later versions, once the momentum is there it is easier to keep it going. And PHP is itself being improved relentlessly too. The upcoming PHP 7.4, to be released in November 2019, will include plenty of new improvements, including arrow functions and the spread operator inside of arrays (as used for modern JavaScript), and a mechanism to preload libraries and frameworks into the OPCache to further boost performance, among several other exciting features.
Reusability Of Code Across Platforms
A great side effect of Gutenberg being decoupled from WordPress is that it can be integrated with other frameworks too. And that is exactly what has happened! Gutenberg is now available for Drupal, and Laraberg (for Laravel) will soon be officially released (currently testing the release candidate). The beauty of this phenomenon is that, through Gutenberg, all these different frameworks can now share/reuse code!
Conclusion
There has never been a better time to be a web developer. The pace of development for all concerned languages and technologies (JavaScript, CSS, image optimization, variable fonts, cloud services, etc) is staggering. Until recently, WordPress was looking at this development trend from the outside, and developers may have felt that they were missing the modernization train. But now, through Gutenberg, WordPress is riding the train too, and keeping up with its history of steering the web in a positive direction.
Gutenberg may not be fully functional yet, since it has plenty of issues to resolve, and it may still be some time until it truly delivers on its promises. However, so far it is looking good, and it looks better and better with each new release: Gutenberg is steadily bringing new possibilities to WordPress. As such, this is a great time to reconsider giving Gutenberg a try (that is, if you haven’t done so yet). Anyone somehow dealing with WordPress (website admins, developers, content managers, website users) can benefit from this new normal. I’d say this is something to be excited about, wouldn’t you?

(dm, il)
0 notes
Text
An Introduction To Stimulus.js
About The Author
Mike is a Ruby on Rails Developer based in the south of the UK, who is currently bootstrapping his own startup. He loves crafting blazing fast applications, … More about Mike …
In this article, Mike Rogers will introduce you to Stimulus, a modest JavaScript framework that compliments your existing HTML. By the end, you’ll have an understanding of the premise of Stimulus and why it’s a useful tool to have in your backpack.
The web moves pretty fast and picking an approach for your frontend that will feel sensible in a year’s time is tricky. My biggest fear as a developer is picking up a project that hasn’t been touched for a while, and finding the documentation for whatever approach they used is either non-existent or is not easily found online.
About a year ago, I started using Stimulus and I felt really happy about the code I was shipping. It’s a ~30kb library which encourages small reusable sprinkles of JavaScript within your app, organized in such a way that it leaves little hints in your accessible HTML as to where to find the JavaScript it’s connected to. It makes understanding how a piece of JavaScript will interact with your page almost like reading pseudocode.
Stimulus was created by the team at Basecamp — they recently released the HEY email service — to help maintain the JavaScript they write for their web applications. Historically, Basecamp has been quite good around maintaining their open-source projects, so I feel quite confident that Stimulus has been tested thoroughly, and will be maintained for the next few years.
Stimulus has allowed me to build applications in a way that feels reusable and approachable. While I don’t think Stimulus will take over the web like React and Vue have, I think it is a worthwhile tool to learn.
Terminology
Like all frameworks, Stimulus has preferred terms for describing certain things. Luckily (and one of the main reasons I’ve taken to liking Stimulus), there are only two you’ll need to know about:
Controller This refers to instances of JavaScript classes which are the building blocks of your application. It’s safe to say that when we talk about Stimulus Controllers, we’re talking about JavaScript classes.
Identifier This is the name we’ll use to reference our controller in our HTML using a data attribute that is common to Stimulus codebases.
Let’s Jump Into Stimulus!
In the following few examples, I’m going to use code you can drop into the browser to get started right away via the library distributed via unpkg.com. Later on, I’ll cover the webpack approach which is highly encouraged as it allows for improved organization of your code and is the approach used in the Stimulus Handbook.
The Boilerplate
See the Pen [The Boilerplate – Stimulus](https://codepen.io/smashingmag/pen/abdjXvP) by Mike Rogers.
See the Pen The Boilerplate – Stimulus by Mike Rogers.
Once you understand the gist of the above snippet, you’ll have the knowledge to be comfortable picking up a project that uses Stimulus.
Pretty awesome, right? Let’s jump into what everything is doing!
application.start
This line tells Stimulus to add the listeners to the page. If you call it just once at the top of your page before you add any Stimulus code, it’ll return an instance of the main Stimulus controller which includes the method register that is used to tell Stimulus about the classes you’d like to connect to it.
Controllers
The data-controller attribute connects our HTML element to an instance of our JavaScript class. In this case, we used the identifier “counter” to hook up an instance of the CounterController JavaScript class to our div element. We told Stimulus about the connection between this identifier and the controller via the application.register method.
Stimulus will continuously monitor your page for when elements with this attribute are added and removed. When a new piece of HTML is added to the page with a data-controller attribute, it’ll initialize a new instance of the relevant controller class, then connect the HTML element. If you remove that element from the page, it’ll call the disconnect method on the controller class.
Actions
Stimulus uses a data attribute data-action to clearly define which function of the controller will be run. Using the syntax event->controller#function anyone reading the HTML will be able to see what it does. This is especially useful as it reduces the risk of unexpected code from other files, making it easier to navigate the codebase. When I first saw the approach Stimulus encourages, it felt almost like reading pseudocode.
In the above example, when the button fires the “click” event, it will be passed onto the addOne function within our “counter” controller.
Targets
Targets are a way to explicitly define which elements are going to be available to your controller. Historically I’ve used a mix of ID, CSS class names and data attributes to achieve this, so having a single “This is the way to do it” which is so explicit makes the code a lot more consistent.
This requires defining your target names within your controller class via the targets function and adding the name to an element via the data-target.
Once you’ve got those two pieces setup, your element will be available in your controller. In this case, I’ve set up the target with the name “output” and it can be accessed by this.outputTarget within the functions in our controller.
Duplicate Targets
See the Pen [Duplicate Targets – Stimulus](https://codepen.io/smashingmag/pen/ExPprPG) by Mike Rogers.
See the Pen Duplicate Targets – Stimulus by Mike Rogers.
If you have multiple targets with the same name, you can access them by using the plural version of the target method, in this case when I call this.outputTargets, it’ll return an array containing both my divs with the attribute data-target="hello.output".
Event Types
You listen for any of the events you’d commonly be able to attach via the JavaScript method addEventListener. So for example, you could listen for when a button is clicked, a form is submitted or an input is changed.
See the Pen [Event types – Stimulus](https://codepen.io/smashingmag/pen/wvMxNGJ) by Mike Rogers.
See the Pen Event types – Stimulus by Mike Rogers.
To listen to window or document events (such as resizing, or the user going offline), you’ll need to append “@window” or “@document” to the event type (e.g. resize@window->console#logEvent will call the function logEvent) on the console controller when the window is resized.
There is a shorthand way to attach common events, where you are able to omit the event type and it has a default action for the element type. However, I strongly discourage using the event shorthand, as it increases the amount of assumptions someone who is less familiar with Stimulus needs to make about your code.
Uses Multiple Controllers In The Same Element
Quite often you may want to break out two pieces of logic into separate classes, but have them appear close to each other within the HTML. Stimulus allows you to connect elements to multiple classes by placing references to both within your HTML.
See the Pen [Multiple Controllers – Stimulus](https://codepen.io/smashingmag/pen/XWXBOjy) by Mike Rogers.
See the Pen Multiple Controllers – Stimulus by Mike Rogers.
In the above example, I’ve set up a basket object which only concerns itself with counting the total number of items in the basket, but also added a child object that shows the amount of bags per item.
Passing Data To Your Object
See the Pen [Passing Data – Stimulus](https://codepen.io/smashingmag/pen/mdVjvOP) by Mike Rogers.
See the Pen Passing Data – Stimulus by Mike Rogers.
Stimulus provides the methods this.data.get and this.data.set within the controller class, this will allow you to change data attributes which are within the same namespace as the identifier. By this I mean if you want to pass data to your stimulus controller from your HTML, just add an attribute like data-[identifier]-a-variable to your HTML element.
When calling this.data.set, it will update the value in your HTML so you can see the value change when you inspect the element using your browser development tools.
Using namespaced data attributes is a really nice way to help make it really clear which data attribute is for what piece of code.
Initialize, Connected, Disconnected
As your application grows, you’ll probably need to hook into ‘lifecycle events’ to set defaults, fetch data, or handle real-time communication. Stimulus has three build-in methods which are called throughout the lifecycle of a Stimulus class.
See the Pen [Initialize, Connected, Disconnected – Stimulus ](https://codepen.io/smashingmag/pen/ZEQjwBj) by Mike Rogers.
See the Pen Initialize, Connected, Disconnected – Stimulus by Mike Rogers.
When Stimulus sees an element with a matching data-controller attribute, it will create a new version of your controller and call the initialize function. This will often run when you first load the page, but will also be run if you were to append new HTML to your page (e.g. via AJAX) containing a reference to your controller. It will not run when you move an element to a new position within your DOM.
After a class has been initialized, Stimulus will connect it to the HTML element and call the connect function. It’ll also call connect if you were to move an element within your DOM. So if you were to take an element, remove it from one element, then append it somewhere else, you’d notice only connect will be called.
The disconnect function will be run when you remove an element from your page, so for example, if you were to replace the body of your HTML, you could tear down any code which might need to be rerun if the element isn’t in the same position. For example, if you had a fancy WYSIWYG editor which adds lots of extra HTML to an element, you could revert it to its original state when disconnect was called.
Inheriting Functionality
On occasion, you may want to share a little common functionality between your Stimulus controllers. The cool thing about Stimulus is that (under the hood) you’re connecting somewhat vanilla JavaScript classes to HTML elements, so sharing functionality should feel familiar.
See the Pen [Inheriting functionality – Stimulus](https://codepen.io/smashingmag/pen/JjGBxbq) by Mike Rogers.
See the Pen Inheriting functionality – Stimulus by Mike Rogers.
In this example, I set up a parent class named ParentController, which is then extended by a child class named ChildController. This let me inherit methods from the ParentController so I didn’t have to duplicate code within my ChildController.
Using It In Production
I demonstrated some fairly stand-alone examples of how to use Stimulus above, which should give you a taste of what you can achieve. I also thought I should touch on how I use it in production and how it has worked out for me.
Webpack
If you’re using Webpack, you’re in for a treat! Stimulus was totally made to be used with Webpack. Their documentation even has a lovely starter kit for Webpack. It’ll allow you to break your controllers into separate files and Stimulus will decide on the correct name to use as an identifier.
You don’t have to use webpack if you want to use Stimulus, but it cleans up the experience a bunch. Personally, Stimulus was the library that helped introduce me to Webpack and really feel the value it offered.
Filename Conventions
I mentioned in the introduction of this article that I enjoyed using Stimulus because it felt organized. This really becomes apparent when you are combining it with Webpack, which enables auto loading and registration of controllers.
Once you’ve set up Stimulus in Webpack, it’ll encourage you to name your files like [identifier]_controller.js, where the identifier is what you’ll pass into your HTMLs data-controller attribute.
As your project grows, you may also want to move your Stimulus controllers into subfolders. In a magical way, Stimulus will convert underscores into dashes, and folder forward slashes into two dashes, which will then become your identifier. So for example, the filename chat/conversation_item_controller.js will have the identifier chat--conversation-item.
Maintaining Less JavaScript
One of my favorite quotes is “The Best Code is No Code At All”, I try to apply this approach to all my projects.
Web browsers are evolving a lot, I’m pretty convinced that most of the things I need to write JavaScript for today will become standardized and baked into the browser within the next 5 years. A good example of this is the details element, when I first started in development it was super common to have to manually code that functionality by hand using jQuery.
As a result of this, if I can write accessible HTML with a sprinkling of JavaScript to achieve my needs, with the mindset of “This does the job today, but in 5 years I want to replace this easily” I’ll be a happy developer. This is much more achievable when you’ve written less code to start with, which Stimulus lends itself to.
HTML First, Then JavaScript
One aspect I really like about the approach Stimulus encourages, is I can focus on sending HTML down the wire to my users, which is then jazzed up a little with JavaScript.
I’ve always been a fan of using the first few milliseconds of a user’s attention getting what I have to share with them — in front of them. Then worrying setting up the interaction layer while the user can start processing what they’re seeing.
Furthermore, if the JavaScript were to fail for whatever reason, the user can still see the content and interact with it without JavaScript. For example, instead of a form being submitted via AJAX, it’ll submit via a traditional form request which reloads the page.
Conclusion
I love building sites that need just small sprinkles of maintainable JavaScript to enhance the user experience, sometimes it’s nice to just build something which feels simpler. Having something lightweight is great, I really love that without too much cognitive load it’s pretty clear how to organize your files, and set up little breadcrumbs that hint about how the JavaScript will run with a piece of HTML.
I’ve really enjoyed working with Stimulus. There isn’t too much to it, so the learning curve is fairly gentle. I feel pretty confident that if I was to pass my code onto someone else they’ll be happy developers. I’d highly recommend giving it a try, even if it’s just out of pure curiosity.
The elephant in the room is how does it stack up compared to the likes of React and Vue, but in my mind, they’re different tools for a different requirement. In my case, I’m often rendering out HTML from my server and I’m adding a little JavaScript to improve the experience. If I was doing something more complex, I’d consider a different approach (or push back on the requirements to help keep my code feeling simple).
Further Reading
Stimulus Homepage They have a fantastic handbook that goes into the concepts I’ve outlined above into a lot more depth.
Stimulus GitHub Repository I’ve learned so much about how Stimulus works by exploring their code.
Stimulus Cheatsheet The handbook summarized on a single page.
Stimulus Forum Seeing other people working with Stimulus has made me really feel like it’s being used in the wild.
(sh, ra, yk, il)
Website Design & SEO Delray Beach by DBL07.co
Delray Beach SEO
source http://www.scpie.org/an-introduction-to-stimulus-js/ source https://scpie.tumblr.com/post/623788476392996864
0 notes
Text
An Introduction To Stimulus.js
About The Author
Mike is a Ruby on Rails Developer based in the south of the UK, who is currently bootstrapping his own startup. He loves crafting blazing fast applications, … More about Mike …
In this article, Mike Rogers will introduce you to Stimulus, a modest JavaScript framework that compliments your existing HTML. By the end, you’ll have an understanding of the premise of Stimulus and why it’s a useful tool to have in your backpack.
The web moves pretty fast and picking an approach for your frontend that will feel sensible in a year’s time is tricky. My biggest fear as a developer is picking up a project that hasn’t been touched for a while, and finding the documentation for whatever approach they used is either non-existent or is not easily found online.
About a year ago, I started using Stimulus and I felt really happy about the code I was shipping. It’s a ~30kb library which encourages small reusable sprinkles of JavaScript within your app, organized in such a way that it leaves little hints in your accessible HTML as to where to find the JavaScript it’s connected to. It makes understanding how a piece of JavaScript will interact with your page almost like reading pseudocode.
Stimulus was created by the team at Basecamp — they recently released the HEY email service — to help maintain the JavaScript they write for their web applications. Historically, Basecamp has been quite good around maintaining their open-source projects, so I feel quite confident that Stimulus has been tested thoroughly, and will be maintained for the next few years.
Stimulus has allowed me to build applications in a way that feels reusable and approachable. While I don’t think Stimulus will take over the web like React and Vue have, I think it is a worthwhile tool to learn.
Terminology
Like all frameworks, Stimulus has preferred terms for describing certain things. Luckily (and one of the main reasons I’ve taken to liking Stimulus), there are only two you’ll need to know about:
Controller This refers to instances of JavaScript classes which are the building blocks of your application. It’s safe to say that when we talk about Stimulus Controllers, we’re talking about JavaScript classes.
Identifier This is the name we’ll use to reference our controller in our HTML using a data attribute that is common to Stimulus codebases.
Let’s Jump Into Stimulus!
In the following few examples, I’m going to use code you can drop into the browser to get started right away via the library distributed via unpkg.com. Later on, I’ll cover the webpack approach which is highly encouraged as it allows for improved organization of your code and is the approach used in the Stimulus Handbook.
The Boilerplate
See the Pen [The Boilerplate – Stimulus](https://codepen.io/smashingmag/pen/abdjXvP) by Mike Rogers.
See the Pen The Boilerplate – Stimulus by Mike Rogers.
Once you understand the gist of the above snippet, you’ll have the knowledge to be comfortable picking up a project that uses Stimulus.
Pretty awesome, right? Let’s jump into what everything is doing!
application.start
This line tells Stimulus to add the listeners to the page. If you call it just once at the top of your page before you add any Stimulus code, it’ll return an instance of the main Stimulus controller which includes the method register that is used to tell Stimulus about the classes you’d like to connect to it.
Controllers
The data-controller attribute connects our HTML element to an instance of our JavaScript class. In this case, we used the identifier “counter” to hook up an instance of the CounterController JavaScript class to our div element. We told Stimulus about the connection between this identifier and the controller via the application.register method.
Stimulus will continuously monitor your page for when elements with this attribute are added and removed. When a new piece of HTML is added to the page with a data-controller attribute, it’ll initialize a new instance of the relevant controller class, then connect the HTML element. If you remove that element from the page, it’ll call the disconnect method on the controller class.
Actions
Stimulus uses a data attribute data-action to clearly define which function of the controller will be run. Using the syntax event->controller#function anyone reading the HTML will be able to see what it does. This is especially useful as it reduces the risk of unexpected code from other files, making it easier to navigate the codebase. When I first saw the approach Stimulus encourages, it felt almost like reading pseudocode.
In the above example, when the button fires the “click” event, it will be passed onto the addOne function within our “counter” controller.
Targets
Targets are a way to explicitly define which elements are going to be available to your controller. Historically I’ve used a mix of ID, CSS class names and data attributes to achieve this, so having a single “This is the way to do it” which is so explicit makes the code a lot more consistent.
This requires defining your target names within your controller class via the targets function and adding the name to an element via the data-target.
Once you’ve got those two pieces setup, your element will be available in your controller. In this case, I’ve set up the target with the name “output” and it can be accessed by this.outputTarget within the functions in our controller.
Duplicate Targets
See the Pen [Duplicate Targets – Stimulus](https://codepen.io/smashingmag/pen/ExPprPG) by Mike Rogers.
See the Pen Duplicate Targets – Stimulus by Mike Rogers.
If you have multiple targets with the same name, you can access them by using the plural version of the target method, in this case when I call this.outputTargets, it’ll return an array containing both my divs with the attribute data-target="hello.output".
Event Types
You listen for any of the events you’d commonly be able to attach via the JavaScript method addEventListener. So for example, you could listen for when a button is clicked, a form is submitted or an input is changed.
See the Pen [Event types – Stimulus](https://codepen.io/smashingmag/pen/wvMxNGJ) by Mike Rogers.
See the Pen Event types – Stimulus by Mike Rogers.
To listen to window or document events (such as resizing, or the user going offline), you’ll need to append “@window” or “@document” to the event type (e.g. resize@window->console#logEvent will call the function logEvent) on the console controller when the window is resized.
There is a shorthand way to attach common events, where you are able to omit the event type and it has a default action for the element type. However, I strongly discourage using the event shorthand, as it increases the amount of assumptions someone who is less familiar with Stimulus needs to make about your code.
Uses Multiple Controllers In The Same Element
Quite often you may want to break out two pieces of logic into separate classes, but have them appear close to each other within the HTML. Stimulus allows you to connect elements to multiple classes by placing references to both within your HTML.
See the Pen [Multiple Controllers – Stimulus](https://codepen.io/smashingmag/pen/XWXBOjy) by Mike Rogers.
See the Pen Multiple Controllers – Stimulus by Mike Rogers.
In the above example, I’ve set up a basket object which only concerns itself with counting the total number of items in the basket, but also added a child object that shows the amount of bags per item.
Passing Data To Your Object
See the Pen [Passing Data – Stimulus](https://codepen.io/smashingmag/pen/mdVjvOP) by Mike Rogers.
See the Pen Passing Data – Stimulus by Mike Rogers.
Stimulus provides the methods this.data.get and this.data.set within the controller class, this will allow you to change data attributes which are within the same namespace as the identifier. By this I mean if you want to pass data to your stimulus controller from your HTML, just add an attribute like data-[identifier]-a-variable to your HTML element.
When calling this.data.set, it will update the value in your HTML so you can see the value change when you inspect the element using your browser development tools.
Using namespaced data attributes is a really nice way to help make it really clear which data attribute is for what piece of code.
Initialize, Connected, Disconnected
As your application grows, you’ll probably need to hook into ‘lifecycle events’ to set defaults, fetch data, or handle real-time communication. Stimulus has three build-in methods which are called throughout the lifecycle of a Stimulus class.
See the Pen [Initialize, Connected, Disconnected – Stimulus ](https://codepen.io/smashingmag/pen/ZEQjwBj) by Mike Rogers.
See the Pen Initialize, Connected, Disconnected – Stimulus by Mike Rogers.
When Stimulus sees an element with a matching data-controller attribute, it will create a new version of your controller and call the initialize function. This will often run when you first load the page, but will also be run if you were to append new HTML to your page (e.g. via AJAX) containing a reference to your controller. It will not run when you move an element to a new position within your DOM.
After a class has been initialized, Stimulus will connect it to the HTML element and call the connect function. It’ll also call connect if you were to move an element within your DOM. So if you were to take an element, remove it from one element, then append it somewhere else, you’d notice only connect will be called.
The disconnect function will be run when you remove an element from your page, so for example, if you were to replace the body of your HTML, you could tear down any code which might need to be rerun if the element isn’t in the same position. For example, if you had a fancy WYSIWYG editor which adds lots of extra HTML to an element, you could revert it to its original state when disconnect was called.
Inheriting Functionality
On occasion, you may want to share a little common functionality between your Stimulus controllers. The cool thing about Stimulus is that (under the hood) you’re connecting somewhat vanilla JavaScript classes to HTML elements, so sharing functionality should feel familiar.
See the Pen [Inheriting functionality – Stimulus](https://codepen.io/smashingmag/pen/JjGBxbq) by Mike Rogers.
See the Pen Inheriting functionality – Stimulus by Mike Rogers.
In this example, I set up a parent class named ParentController, which is then extended by a child class named ChildController. This let me inherit methods from the ParentController so I didn’t have to duplicate code within my ChildController.
Using It In Production
I demonstrated some fairly stand-alone examples of how to use Stimulus above, which should give you a taste of what you can achieve. I also thought I should touch on how I use it in production and how it has worked out for me.
Webpack
If you’re using Webpack, you’re in for a treat! Stimulus was totally made to be used with Webpack. Their documentation even has a lovely starter kit for Webpack. It’ll allow you to break your controllers into separate files and Stimulus will decide on the correct name to use as an identifier.
You don’t have to use webpack if you want to use Stimulus, but it cleans up the experience a bunch. Personally, Stimulus was the library that helped introduce me to Webpack and really feel the value it offered.
Filename Conventions
I mentioned in the introduction of this article that I enjoyed using Stimulus because it felt organized. This really becomes apparent when you are combining it with Webpack, which enables auto loading and registration of controllers.
Once you’ve set up Stimulus in Webpack, it’ll encourage you to name your files like [identifier]_controller.js, where the identifier is what you’ll pass into your HTMLs data-controller attribute.
As your project grows, you may also want to move your Stimulus controllers into subfolders. In a magical way, Stimulus will convert underscores into dashes, and folder forward slashes into two dashes, which will then become your identifier. So for example, the filename chat/conversation_item_controller.js will have the identifier chat--conversation-item.
Maintaining Less JavaScript
One of my favorite quotes is “The Best Code is No Code At All”, I try to apply this approach to all my projects.
Web browsers are evolving a lot, I’m pretty convinced that most of the things I need to write JavaScript for today will become standardized and baked into the browser within the next 5 years. A good example of this is the details element, when I first started in development it was super common to have to manually code that functionality by hand using jQuery.
As a result of this, if I can write accessible HTML with a sprinkling of JavaScript to achieve my needs, with the mindset of “This does the job today, but in 5 years I want to replace this easily” I’ll be a happy developer. This is much more achievable when you’ve written less code to start with, which Stimulus lends itself to.
HTML First, Then JavaScript
One aspect I really like about the approach Stimulus encourages, is I can focus on sending HTML down the wire to my users, which is then jazzed up a little with JavaScript.
I’ve always been a fan of using the first few milliseconds of a user’s attention getting what I have to share with them — in front of them. Then worrying setting up the interaction layer while the user can start processing what they’re seeing.
Furthermore, if the JavaScript were to fail for whatever reason, the user can still see the content and interact with it without JavaScript. For example, instead of a form being submitted via AJAX, it’ll submit via a traditional form request which reloads the page.
Conclusion
I love building sites that need just small sprinkles of maintainable JavaScript to enhance the user experience, sometimes it’s nice to just build something which feels simpler. Having something lightweight is great, I really love that without too much cognitive load it’s pretty clear how to organize your files, and set up little breadcrumbs that hint about how the JavaScript will run with a piece of HTML.
I’ve really enjoyed working with Stimulus. There isn’t too much to it, so the learning curve is fairly gentle. I feel pretty confident that if I was to pass my code onto someone else they’ll be happy developers. I’d highly recommend giving it a try, even if it’s just out of pure curiosity.
The elephant in the room is how does it stack up compared to the likes of React and Vue, but in my mind, they’re different tools for a different requirement. In my case, I’m often rendering out HTML from my server and I’m adding a little JavaScript to improve the experience. If I was doing something more complex, I’d consider a different approach (or push back on the requirements to help keep my code feeling simple).
Further Reading
Stimulus Homepage They have a fantastic handbook that goes into the concepts I’ve outlined above into a lot more depth.
Stimulus GitHub Repository I’ve learned so much about how Stimulus works by exploring their code.
Stimulus Cheatsheet The handbook summarized on a single page.
Stimulus Forum Seeing other people working with Stimulus has made me really feel like it’s being used in the wild.
(sh, ra, yk, il)
Website Design & SEO Delray Beach by DBL07.co
Delray Beach SEO
source http://www.scpie.org/an-introduction-to-stimulus-js/
0 notes
Photo

Build a Real-time Chat App with Pusher and Vue.js
Apps that communicate in real time are becoming more and more popular nowadays, as they make for a smoother, more natural user experience.
In this tutorial, we’re going to build a real-time chat application using Vue.js powered by ChatKit, a service provided by Pusher. The ChatKit service will provide us with a complete back end necessary for building a chat application on any device, leaving us to focus on building a front-end user interface that connects to the ChatKit service via the ChatKit client package.
Prerequisites
This is an intermediate- to advanced-level tutorial. You’ll need to be familiar with the following concepts to follow along:
Vue.js basics
Vuex fundamentals
employing a CSS framework
You’ll also need Node installed on your machine. You can do this by downloading the binaries from the official website, or by using a version manager. This is probably the easiest way, as it allows you to manage multiple versions of Node on the same machine.
Finally, you’ll need to install Vue CLI globally with the following command:
npm install -g @vue/cli
At the time of writing, Node 10.14.1 and Vue CLI 3.2.1 are the latest versions.
About the Project
We’re going to build a rudimentary chat application similar to Slack or Discord. The app will do the following:
have multiple channels and rooms
list room members and detect presence status
detect when other users start typing
As mentioned earlier, we’re just building the front end. The ChatKit service has a back-end interface that will allows us to manage users, permissions and rooms.
You can find the complete code for this project on GitHub.
Setting up a ChatKit Instance
Let’s create our ChatKit instance, which is similar to a server instance if you’re familiar with Discord.
Go to the ChatKit page on Pusher’s website and click the Sign Up button. You’ll be prompted for an email address and password, as well as the option to sign in with GitHub or Google.
Select which option suits you best, then on the next screen fill out some details such as Name, Account type, User role etc.
Click Complete Onboarding and you’ll be taken to the main Pusher dashboard. Here, you should click the ChatKit Product.

Click the Create button to create a new ChatKit Instance. I’m going to call mine VueChatTut.

We’ll be using the free plan for this tutorial. It supports up to 1,000 unique users, which is more than sufficient for our needs. Head over to the Console tab. You’ll need to create a new user to get started. Go ahead and click the Create User button.

I’m going to call mine “john” (User Identifier) and “John Wick” (Display Name), but you can name yours however you want. The next part is easy: create the two or more users. For example:
salt, Evelyn Salt
hunt, Ethan Hunt
Create three or more rooms and assign users. For example:
General (john, salt, hunt)
Weapons (john, salt)
Combat (john, hunt)
Here’s a snapshot of what your Console interface should like.

Next, you can go to the Rooms tab and create a message using a selected user for each room. This is for testing purposes. Then go to the Credentials tab and take note of the Instance Locator. We’ll need to activate the Test Token Provider, which is used for generating our HTTP endpoint, and take a note of that, too.

Our ChatKit back end is now ready. Let’s start building our Vue.js front end.
Scaffolding the Vue.js Project
Open your terminal and create the project as follows:
vue create vue-chatkit
Select Manually select features and answer the questions as shown below.

Make doubly sure you’ve selected Babel, Vuex and Vue Router as additional features. Next, create the following folders and files as follows:

Make sure to create all the folders and files as demonstrated. Delete any unnecessary files that don’t appear in the above illustration.
For those of you that are at home in the console, here are the commands to do all that:
mkdir src/assets/css mkdir src/store touch src/assets/css/{loading.css,loading-btn.css} touch src/components/{ChatNavBar.vue,LoginForm.vue,MessageForm.vue,MessageList.vue,RoomList.vue,UserList.vue} touch src/store/{actions.js,index.js,mutations.js} touch src/views/{ChatDashboard.vue,Login.vue} touch src/chatkit.js rm src/components/HelloWorld.vue rm src/views/{About.vue,Home.vue} rm src/store.js
When you’re finished, the contents of the src folder should look like so:
. ├── App.vue ├── assets │ ├── css │ │ ├── loading-btn.css │ │ └── loading.css │ └── logo.png ├── chatkit.js ├── components │ ├── ChatNavBar.vue │ ├── LoginForm.vue │ ├── MessageForm.vue │ ├── MessageList.vue │ ├── RoomList.vue │ └── UserList.vue ├── main.js ├── router.js ├── store │ ├── actions.js │ ├── index.js │ └── mutations.js └── views ├── ChatDashboard.vue └── Login.vue
For the loading-btn.css and the loading.css files, you can find them on the loading.io website. These files are not available in the npm repository, so you need to manually download them and place them in your project. Do make sure to read the documentation to get an idea on what they are and how to use the customizable loaders.
Next, we’re going to install the following dependencies:
@pusher/chatkit-client, a real-time client interface for the ChatKit service
bootstrap-vue, a CSS framework
moment, a date and time formatting utility
vue-chat-scroll, which scrolls to the bottom automatically when new content is added
vuex-persist, which saves Vuex state in browser’s local storage
npm i @pusher/chatkit-client bootstrap-vue moment vue-chat-scroll vuex-persist
Do check out the links to learn more about what each package does, and how it can be configured.
Now, let’s configure our Vue.js project. Open src/main.js and update the code as follows:
import Vue from 'vue' import BootstrapVue from 'bootstrap-vue' import VueChatScroll from 'vue-chat-scroll' import App from './App.vue' import router from './router' import store from './store/index' import 'bootstrap/dist/css/bootstrap.css' import 'bootstrap-vue/dist/bootstrap-vue.css' import './assets/css/loading.css' import './assets/css/loading-btn.css' Vue.config.productionTip = false Vue.use(BootstrapVue) Vue.use(VueChatScroll) new Vue({ router, store, render: h => h(App) }).$mount('#app')
Update src/router.js as follows:
import Vue from 'vue' import Router from 'vue-router' import Login from './views/Login.vue' import ChatDashboard from './views/ChatDashboard.vue' Vue.use(Router) export default new Router({ mode: 'history', base: process.env.BASE_URL, routes: [ { path: '/', name: 'login', component: Login }, { path: '/chat', name: 'chat', component: ChatDashboard, } ] })
Update src/store/index.js:
import Vue from 'vue' import Vuex from 'vuex' import VuexPersistence from 'vuex-persist' import mutations from './mutations' import actions from './actions' Vue.use(Vuex) const debug = process.env.NODE_ENV !== 'production' const vuexLocal = new VuexPersistence({ storage: window.localStorage }) export default new Vuex.Store({ state: { }, mutations, actions, getters: { }, plugins: [vuexLocal.plugin], strict: debug })
The vuex-persist package ensures that our Vuex state is saved between page reloads or refreshes.
Our project should be able to compile now without errors. However, don’t run it just yet, as we need to build the user interface.
The post Build a Real-time Chat App with Pusher and Vue.js appeared first on SitePoint.
by Michael Wanyoike via SitePoint https://ift.tt/2YtinR8
0 notes
Text
An Introduction To Stimulus.js
About The Author
Mike is a Ruby on Rails Developer based in the south of the UK, who is currently bootstrapping his own startup. He loves crafting blazing fast applications, … More about Mike …
In this article, Mike Rogers will introduce you to Stimulus, a modest JavaScript framework that compliments your existing HTML. By the end, you’ll have an understanding of the premise of Stimulus and why it’s a useful tool to have in your backpack.
The web moves pretty fast and picking an approach for your frontend that will feel sensible in a year’s time is tricky. My biggest fear as a developer is picking up a project that hasn’t been touched for a while, and finding the documentation for whatever approach they used is either non-existent or is not easily found online.
About a year ago, I started using Stimulus and I felt really happy about the code I was shipping. It’s a ~30kb library which encourages small reusable sprinkles of JavaScript within your app, organized in such a way that it leaves little hints in your accessible HTML as to where to find the JavaScript it’s connected to. It makes understanding how a piece of JavaScript will interact with your page almost like reading pseudocode.
Stimulus was created by the team at Basecamp — they recently released the HEY email service — to help maintain the JavaScript they write for their web applications. Historically, Basecamp has been quite good around maintaining their open-source projects, so I feel quite confident that Stimulus has been tested thoroughly, and will be maintained for the next few years.
Stimulus has allowed me to build applications in a way that feels reusable and approachable. While I don’t think Stimulus will take over the web like React and Vue have, I think it is a worthwhile tool to learn.
Terminology
Like all frameworks, Stimulus has preferred terms for describing certain things. Luckily (and one of the main reasons I’ve taken to liking Stimulus), there are only two you’ll need to know about:
Controller This refers to instances of JavaScript classes which are the building blocks of your application. It’s safe to say that when we talk about Stimulus Controllers, we’re talking about JavaScript classes.
Identifier This is the name we’ll use to reference our controller in our HTML using a data attribute that is common to Stimulus codebases.
Let’s Jump Into Stimulus!
In the following few examples, I’m going to use code you can drop into the browser to get started right away via the library distributed via unpkg.com. Later on, I’ll cover the webpack approach which is highly encouraged as it allows for improved organization of your code and is the approach used in the Stimulus Handbook.
The Boilerplate
See the Pen [The Boilerplate – Stimulus](https://codepen.io/smashingmag/pen/abdjXvP) by Mike Rogers.
See the Pen The Boilerplate – Stimulus by Mike Rogers.
Once you understand the gist of the above snippet, you’ll have the knowledge to be comfortable picking up a project that uses Stimulus.
Pretty awesome, right? Let’s jump into what everything is doing!
application.start
This line tells Stimulus to add the listeners to the page. If you call it just once at the top of your page before you add any Stimulus code, it’ll return an instance of the main Stimulus controller which includes the method register that is used to tell Stimulus about the classes you’d like to connect to it.
Controllers
The data-controller attribute connects our HTML element to an instance of our JavaScript class. In this case, we used the identifier “counter” to hook up an instance of the CounterController JavaScript class to our div element. We told Stimulus about the connection between this identifier and the controller via the application.register method.
Stimulus will continuously monitor your page for when elements with this attribute are added and removed. When a new piece of HTML is added to the page with a data-controller attribute, it’ll initialize a new instance of the relevant controller class, then connect the HTML element. If you remove that element from the page, it’ll call the disconnect method on the controller class.
Actions
Stimulus uses a data attribute data-action to clearly define which function of the controller will be run. Using the syntax event->controller#function anyone reading the HTML will be able to see what it does. This is especially useful as it reduces the risk of unexpected code from other files, making it easier to navigate the codebase. When I first saw the approach Stimulus encourages, it felt almost like reading pseudocode.
In the above example, when the button fires the “click” event, it will be passed onto the addOne function within our “counter” controller.
Targets
Targets are a way to explicitly define which elements are going to be available to your controller. Historically I’ve used a mix of ID, CSS class names and data attributes to achieve this, so having a single “This is the way to do it” which is so explicit makes the code a lot more consistent.
This requires defining your target names within your controller class via the targets function and adding the name to an element via the data-target.
Once you’ve got those two pieces setup, your element will be available in your controller. In this case, I’ve set up the target with the name “output” and it can be accessed by this.outputTarget within the functions in our controller.
Duplicate Targets
See the Pen [Duplicate Targets – Stimulus](https://codepen.io/smashingmag/pen/ExPprPG) by Mike Rogers.
See the Pen Duplicate Targets – Stimulus by Mike Rogers.
If you have multiple targets with the same name, you can access them by using the plural version of the target method, in this case when I call this.outputTargets, it’ll return an array containing both my divs with the attribute data-target="hello.output".
Event Types
You listen for any of the events you’d commonly be able to attach via the JavaScript method addEventListener. So for example, you could listen for when a button is clicked, a form is submitted or an input is changed.
See the Pen [Event types – Stimulus](https://codepen.io/smashingmag/pen/wvMxNGJ) by Mike Rogers.
See the Pen Event types – Stimulus by Mike Rogers.
To listen to window or document events (such as resizing, or the user going offline), you’ll need to append “@window” or “@document” to the event type (e.g. resize@window->console#logEvent will call the function logEvent) on the console controller when the window is resized.
There is a shorthand way to attach common events, where you are able to omit the event type and it has a default action for the element type. However, I strongly discourage using the event shorthand, as it increases the amount of assumptions someone who is less familiar with Stimulus needs to make about your code.
Uses Multiple Controllers In The Same Element
Quite often you may want to break out two pieces of logic into separate classes, but have them appear close to each other within the HTML. Stimulus allows you to connect elements to multiple classes by placing references to both within your HTML.
See the Pen [Multiple Controllers – Stimulus](https://codepen.io/smashingmag/pen/XWXBOjy) by Mike Rogers.
See the Pen Multiple Controllers – Stimulus by Mike Rogers.
In the above example, I’ve set up a basket object which only concerns itself with counting the total number of items in the basket, but also added a child object that shows the amount of bags per item.
Passing Data To Your Object
See the Pen [Passing Data – Stimulus](https://codepen.io/smashingmag/pen/mdVjvOP) by Mike Rogers.
See the Pen Passing Data – Stimulus by Mike Rogers.
Stimulus provides the methods this.data.get and this.data.set within the controller class, this will allow you to change data attributes which are within the same namespace as the identifier. By this I mean if you want to pass data to your stimulus controller from your HTML, just add an attribute like data-[identifier]-a-variable to your HTML element.
When calling this.data.set, it will update the value in your HTML so you can see the value change when you inspect the element using your browser development tools.
Using namespaced data attributes is a really nice way to help make it really clear which data attribute is for what piece of code.
Initialize, Connected, Disconnected
As your application grows, you’ll probably need to hook into ‘lifecycle events’ to set defaults, fetch data, or handle real-time communication. Stimulus has three build-in methods which are called throughout the lifecycle of a Stimulus class.
See the Pen [Initialize, Connected, Disconnected – Stimulus ](https://codepen.io/smashingmag/pen/ZEQjwBj) by Mike Rogers.
See the Pen Initialize, Connected, Disconnected – Stimulus by Mike Rogers.
When Stimulus sees an element with a matching data-controller attribute, it will create a new version of your controller and call the initialize function. This will often run when you first load the page, but will also be run if you were to append new HTML to your page (e.g. via AJAX) containing a reference to your controller. It will not run when you move an element to a new position within your DOM.
After a class has been initialized, Stimulus will connect it to the HTML element and call the connect function. It’ll also call connect if you were to move an element within your DOM. So if you were to take an element, remove it from one element, then append it somewhere else, you’d notice only connect will be called.
The disconnect function will be run when you remove an element from your page, so for example, if you were to replace the body of your HTML, you could tear down any code which might need to be rerun if the element isn’t in the same position. For example, if you had a fancy WYSIWYG editor which adds lots of extra HTML to an element, you could revert it to its original state when disconnect was called.
Inheriting Functionality
On occasion, you may want to share a little common functionality between your Stimulus controllers. The cool thing about Stimulus is that (under the hood) you’re connecting somewhat vanilla JavaScript classes to HTML elements, so sharing functionality should feel familiar.
See the Pen [Inheriting functionality – Stimulus](https://codepen.io/smashingmag/pen/JjGBxbq) by Mike Rogers.
See the Pen Inheriting functionality – Stimulus by Mike Rogers.
In this example, I set up a parent class named ParentController, which is then extended by a child class named ChildController. This let me inherit methods from the ParentController so I didn’t have to duplicate code within my ChildController.
Using It In Production
I demonstrated some fairly stand-alone examples of how to use Stimulus above, which should give you a taste of what you can achieve. I also thought I should touch on how I use it in production and how it has worked out for me.
Webpack
If you’re using Webpack, you’re in for a treat! Stimulus was totally made to be used with Webpack. Their documentation even has a lovely starter kit for Webpack. It’ll allow you to break your controllers into separate files and Stimulus will decide on the correct name to use as an identifier.
You don’t have to use webpack if you want to use Stimulus, but it cleans up the experience a bunch. Personally, Stimulus was the library that helped introduce me to Webpack and really feel the value it offered.
Filename Conventions
I mentioned in the introduction of this article that I enjoyed using Stimulus because it felt organized. This really becomes apparent when you are combining it with Webpack, which enables auto loading and registration of controllers.
Once you’ve set up Stimulus in Webpack, it’ll encourage you to name your files like [identifier]_controller.js, where the identifier is what you’ll pass into your HTMLs data-controller attribute.
As your project grows, you may also want to move your Stimulus controllers into subfolders. In a magical way, Stimulus will convert underscores into dashes, and folder forward slashes into two dashes, which will then become your identifier. So for example, the filename chat/conversation_item_controller.js will have the identifier chat--conversation-item.
Maintaining Less JavaScript
One of my favorite quotes is “The Best Code is No Code At All”, I try to apply this approach to all my projects.
Web browsers are evolving a lot, I’m pretty convinced that most of the things I need to write JavaScript for today will become standardized and baked into the browser within the next 5 years. A good example of this is the details element, when I first started in development it was super common to have to manually code that functionality by hand using jQuery.
As a result of this, if I can write accessible HTML with a sprinkling of JavaScript to achieve my needs, with the mindset of “This does the job today, but in 5 years I want to replace this easily” I’ll be a happy developer. This is much more achievable when you’ve written less code to start with, which Stimulus lends itself to.
HTML First, Then JavaScript
One aspect I really like about the approach Stimulus encourages, is I can focus on sending HTML down the wire to my users, which is then jazzed up a little with JavaScript.
I’ve always been a fan of using the first few milliseconds of a user’s attention getting what I have to share with them — in front of them. Then worrying setting up the interaction layer while the user can start processing what they’re seeing.
Furthermore, if the JavaScript were to fail for whatever reason, the user can still see the content and interact with it without JavaScript. For example, instead of a form being submitted via AJAX, it’ll submit via a traditional form request which reloads the page.
Conclusion
I love building sites that need just small sprinkles of maintainable JavaScript to enhance the user experience, sometimes it’s nice to just build something which feels simpler. Having something lightweight is great, I really love that without too much cognitive load it’s pretty clear how to organize your files, and set up little breadcrumbs that hint about how the JavaScript will run with a piece of HTML.
I’ve really enjoyed working with Stimulus. There isn’t too much to it, so the learning curve is fairly gentle. I feel pretty confident that if I was to pass my code onto someone else they’ll be happy developers. I’d highly recommend giving it a try, even if it’s just out of pure curiosity.
The elephant in the room is how does it stack up compared to the likes of React and Vue, but in my mind, they’re different tools for a different requirement. In my case, I’m often rendering out HTML from my server and I’m adding a little JavaScript to improve the experience. If I was doing something more complex, I’d consider a different approach (or push back on the requirements to help keep my code feeling simple).
Further Reading
Stimulus Homepage They have a fantastic handbook that goes into the concepts I’ve outlined above into a lot more depth.
Stimulus GitHub Repository I’ve learned so much about how Stimulus works by exploring their code.
Stimulus Cheatsheet The handbook summarized on a single page.
Stimulus Forum Seeing other people working with Stimulus has made me really feel like it’s being used in the wild.
(sh, ra, yk, il)
Website Design & SEO Delray Beach by DBL07.co
Delray Beach SEO
source http://www.scpie.org/an-introduction-to-stimulus-js/ source https://scpie1.blogspot.com/2020/07/an-introduction-to-stimulusjs.html
0 notes
Text
Getting Started With Axios In Nuxt
About The Author
Front-end developer based in Lagos, Nigeria. He enjoys converting designs into code and building things for the web. More about Timi …
In this tutorial, we will learn how to make a request in our NUXt.js applications using the Axios module. We will also learn how to use the ayncData and fetch methods to fetch data on the server-side using Axios and the differences between the two methods. Finally, we will learn how to add authentication to our application using the Auth module.
NUXt.js provides an Axios module for easy integration with your application. Axios is a promise-based HTTP client that works in the browser and Node.js environment or, in simpler terms, it is a tool for making requests (e.g API calls) in client-side applications and Node.js environment.
In this tutorial, we’re going to learn how to use the Axios module and how to make a request on the server-side using asyncData and fetch. These two methods make a request on the server-side but they have some differences which we’re also going to cover. Finally, we’ll learn how to perform authentication and secure pages/routes using the auth module and auth middleware.
This article requires basic knowledge of NUXtjs and Vuejs as we’ll be building on top of that. For those without experience with Vuejs, I recommend you start from their official documentation and the Nuxt official page before continuing with this article.
What Is The Nuxt.js Axios Module?
According to the official Documentation,
“It is a Secure and easy Axios integration with NUXt.js.”
Here are some of its features:
Automatically set base URL for client-side & server-side.
Proxy request headers in SSR (Useful for auth).
Fetch Style requests.
Integrated with NUXt.js Progressbar while making requests.
To use the axios module in your application, you will have to first install it by using either npm or yarn.
YARN
yarn add @nUXtjs/axios
NPM
npm install @nUXtjs/axios
Add it into your nUXt.config.js file:
modules: [ '@nUXtjs/axios', ], axios: { // extra config e.g // BaseURL: 'https://link-to-API' }
The modules array accepts a list of NUXt.js modules such as dotenv, auth and in this case, Axios. What we’ve done is to inform our application that we would be using the Axios module, which we reference using @nUXtjs/axios. This is then followed by the axios property which is an object of configurations like the baseURL for both client-side and server-side.
Now, you can access Axios from anywhere in your application by calling this.$axios.method or this.$axios.$method. Where method can be get, post, or delete.
Making Your First Request Using Axios
For this tutorial, I’ve put together a simple application on Github. The repository contains two folders, start and finish, the start folder contains all you need to get right into the tutorial. The finish folder contains a completed version of what we would be building.
After cloning the repo and opening the start folder, we would need to install all our packages in the package.json file so open your terminal and run the following command:
npm install
Once that is done, we can start our app using the npm run dev command. This is what you should see when you go to localhost:3000.
Our application’s landing page. (Large preview)
The next thing we have to do is to create a .env file in the root folder of our application and add our API URL to it. For this tutorial, we’ll be using a sample API built to collect reports from users.
API_URL=https://ireporter-endpoint.herokuapp.com/api/v2/
This way, we do not have to hard code our API into our app which is useful for working with two APIs (development and production).
The next step would be to open our nUXt.config.js file and add the environmental variable to our axios config that we added above.
/* ** Axios module configuration */ axios: { // See https://github.com/nUXt-community/axios-module#options baseURL: process.env.API_URL, },
Here, we tell NUXt.js to use this baseURL for both our client-side and server-side requests whenever we use this Axios module.
Now, to fetch a list of reports, let us open the index.vue file and add the following method to the script section.
async getIncidents() { let res = await this.$store.dispatch("getIncidents"); this.incidents = res.data.data.incidents;}
What we have done is to create an async function that we call getIncidents() and we can tell what it does from the name — it fetches a list of incidents using the Vuex store action method this.$store.dispatch. We assign the response from this action to our incidents property so we can be able to make use of it in the component.
We want to call the getIncidents() method whenever the component mounts. We can do that using the mounted hook.
mounted() { this.getIncidents() }
mounted() is a lifecycle hook that gets called when the component mounts. That will cause the call to the API to happen when the component mounts. Now, let us go into our index.js file in our store and create this action where we’ll be making our Axios request from.
export const actions = { async getIncidents() { let res = await this.$axios.get('/incidents') return res; }}
Here, we created the action called getIncidents which is an async function, then we await a response from the server and return this response. The response from this action is sent back to our getIncidents() method in our index.vue file.
If we refresh our application, we should now be able to see a long list of incidents rendered on the page.
List of incidents on landing page. (Large preview)
We have made our first request using Axios but we won’t stop there, we are going to be trying out asyncData and fetch to see the differences between them and using Axios.
AsyncData
AsyncData fetches data on the server-side and it’s called before loading the page component. It does not have access to this because it is called before your page component data is created. this is only available after the created hook has been called so NUXt.js automatically merges the returned data into the component’s data.
Using asyncData is good for SEO Company because it fetches your site’s content on the server-side and also helps in loading content faster. Note that asyncData method can only be used in the pages folder of your application as it would not work in the components folder. This is because asyncData hook gets called before your component is created.
Image from NUXt blog. (Large preview)
Let us add asyncData to our index.vue file and observe how fast our incidents data loads. Add the following code after our components property and let us get rid of our mounted hook.
async asyncData({ $axios }) { let { data } = await $axios.get("/incidents"); return { incidents: data.data.incidents }; }, // mounted() { // this.getIncidents(); // },
Here, the asyncData method accepts a property from the context $axios. We use this property to fetch the list of incidents and the value is then returned. This value is automatically injected into our component. Now, you can notice how fast your content loads if you refresh the page and at no time is there no incident to render.
Fetch
The Fetch method is also used to make requests on the server-side. It is called after the created hook in the life cycle which means it has access to the component’s data. Unlike the asyncData method, the fetch method can be used in all .vue files and be used with the Vuex store. This means that if you have the following in your data function.
data() { return { incidents: [], id: 5, gender: 'male' };}
You can easily modify id or gender by calling this.id or this.gender.
Using Axios As A Plugin
During the process of development with Axios, you might find that you need extra configuration like creating instances and interceptors for your request so your application can work as intended and thankfully, we can do that by extending our Axios into a plugin.
To extend axios, you have to create a plugin (e.g. axios.js) in your plugins folder.
export default function ({ $axios, store, redirect}) { $axios.onError(error => { if (error.response && error.response.status === 500) { redirect('/login') } }) $axios.interceptors.response.use( response => { if (response.status === 200) { if (response.request.responseURL && response.request.responseURL.includes('login')) { store.dispatch("setUser", response); } } return response } )}
This is an example of a plugin I wrote for a NUXt application. Here, your function takes in a context object of $axios, store and redirect which we would use in configuring the plugin. The first thing we do is to listen for an error with a status of 500 using $axios.onError and redirect the user to the login page.
We also have an interceptor that intercepts every request response we make in our application checks if the status of the response we get is 200. If that is true we proceed and check that there is a response.request.responseURL and if it includes login. If this checks out to be true, we then send this response using our store’s dispatch method where it then mutated in our state.
Add this plugin to your nUXt.config.js file:
plugins: [ '~/plugins/axios' ]
After doing this, your Axios plugin would intercept any request you make and check if you have defined a special case for it.
Introduction To The Auth Module
The auth module is used for performing authentication for your NUXt application and can be accessed from anywhere in your application using $this.auth. It is also available in fetch, asyncData, middleware and NUXtInitServer from the context object as $auth.
The context provides additional objects/params from NUXt to Vue components and is available in special nUXt lifecycle areas like those mentioned above.
To use the auth module in your application, you would have to install it using yarn or npm.
YARN
yarn add @nUXtjs/auth
NPM
npm install @nUXtjs/auth
Add it to your nUXt.config.js file.
modules: [ '@nUXtjs/auth'],auth: { // Options}
The auth property accepts a list of properties such as strategies and redirect. Here, strategies accepts your preferred authentication method which can be:
local For username/email and password-based flow.
Facebook For using Facebook accounts as a means of authentication.
Github For authenticating users with Github accounts.
Google For authenticating users with Google accounts.
Auth0
Laravel Passport
The redirect property accepts an object of links for:
login Users would be redirected to this link if login is required.
logout Users would be redirected here if after logout current route is protected.
home Users would be redirected here after login.
Now, let us add the following to our nUXt.config.js file.
/* ** Auth module configuration */auth: { redirect: { login: '/login', logout: '/', home: '/my-reports' }, strategies: { local: { endpoints: { login: { url: "/user/login", method: "post", propertyName: "data.token", }, logout: false, user: false, }, tokenType: '', tokenName: 'x-auth', autoFetchUser: false }, },}
Please note that the auth method works best when there is a user endpoint provided in the option above.
Inside the auth config object, we have a redirect option in which we set our login route to /login, logout route to / and home route to /my-reports which would all behave as expected. We also have a tokenType property which represents the Authorization type in the header of our Axios request. It is set to Bearer by default and can be changed to work with your API.
For our API, there is no token type and this is why we’re going to leave it as an empty string. The tokenName represents the Authorization name (or the header property you want to attach your token to) inside your header in your Axios request.
By default, it is set to Authorization but for our API, the Authorization name is x-auth. The autoFetchUser property is used to enable user fetch object using the user endpoint property after login. It is true by default but our API does not have a user endpoint so we have set that to false.
For this tutorial, we would be using the local strategy. In our strategies, we have the local option with endpoints for login, user and logout but in our case, we would only use the *login* option because our demo API does not have a *logout* endpoint and our user object is being returned when *login* is successful.
Note: The auth module does not have a register endpoint option so that means we’re going to register the traditional way and redirect the user to the login page where we will perform the authentication using this.$auth.loginWith. This is the method used in authenticating your users. It accepts a ‘strategy’ (e.g local) as a first argument and then an object to perform this authentication with. Take a look at the following example.
let data { email: '[email protected]', password: '123456'}this.$auth.loginWith('local', { data })
Using The Auth Module
Now that we have configured our auth module, we can proceed to our registration page. If you visit the /register page, you should see a registration form.
Register page. (Large preview)
Let us make this form functional by adding the following code:
methods: { async registerUser() { this.loading = true; let data = this.register; try { await this.$axios.post("/user/create", data); this.$router.push("/login"); this.loading = false; this.$notify({ group: "success", title: "Success!", text: "Account created successfully" }); } catch (error) { this.loading = false; this.$notify({ group: "error", title: "Error!", text: error.response ? error.response.data.error : "Sorry an error occured, check your internet" }); } }}
Here, we have an async function called registerUser which is tied to a click event in our template and makes an Axios request wrapped in a try/catch block to an endpoint /user/create. This redirects to the /login page and notifies the user of a successful registration. We also have a catch block that alerts the user of any error if the request is not successful.
If the registration is successful, you would be redirected to the login page.
Login page with notification component. (Large preview)
Here, we’re going to make use of auth authentication method this.$auth.loginWith('local', loginData) after which we would use the this.$auth.setUser(userObj) to set the user in our auth instance.
To get the login page working, let’s add the following code to our login.vue file.
methods: { async logIn() { let data = this.login; this.loading = true; try { let res = await this.$auth.loginWith("local", { data }); this.loading = false; let user = res.data.data.user; this.$auth.setUser(user); this.$notify({ group: "success", title: "Success!", text: "Welcome!" }); } catch (error) { this.loading = false; this.$notify({ group: "error", title: "Error!", text: error.response ? error.response.data.error : "Sorry an error occured, check your internet" }); } }}
We created an async function called logIn using the auth method this.$auth.loginWith('local, loginData). If this login attempt is successful, we then assign the user data to our auth instance using this.$auth.setUser(userInfo) and redirect the user to the /my-report page.
You can now get user data using this.$auth.user or with Vuex using this.$store.state.auth.user but that’s not all. The auth instance contains some other properties which you can see if you log in or check your state using your Vue dev tools.
If you log this.$store.state.auth to the console, you’ll see this:
{ "auth": { "user": { "id": "d7a5efdf-0c29-48aa-9255-be818301d602", "email": "[email protected]", "lastName": "Xo", "firstName": "Tm", "othernames": null, "isAdmin": false, "phoneNumber": null, "username": null }, "loggedIn": true, "strategy": "local", "busy": false }}
The auth instance contains a loggedIn property that is useful in switching between authenticated links in the nav/header section of your application. It also contains a strategy method that states the type of strategy the instance is running (e.g local).
Now, we will make use of this loggedIn property to arrange our nav links. Update your navBar component to the following:
<template> <header class="header"> <div class="logo"> <nUXt-link to="/"> <Logo /> </nUXt-link> </div> <nav class="nav"> <div class="nav__user" v-if="auth.loggedIn"> <p></p> <button class="nav__link nav__link--long"> <nUXt-link to="/report-incident">Report incident</nUXt-link> </button> <button class="nav__link nav__link--long"> <nUXt-link to="/my-reports">My Reports</nUXt-link> </button> <button class="nav__link" @click.prevent="logOut">Log out</button> </div> <button class="nav__link" v-if="!auth.loggedIn"> <nUXt-link to="/login">Login</nUXt-link> </button> <button class="nav__link" v-if="!auth.loggedIn"> <nUXt-link to="/register">Register</nUXt-link> </button> </nav> </header></template><script>import { mapState } from "vuex";import Logo from "@/components/Logo";export default { name: "nav-bar", data() { return {}; }, computed: { ...mapState(["auth"]) }, methods: { logOut() { this.$store.dispatch("logOut"); this.$router.push("/login"); } }, components: { Logo }};</script><style></style>
In our template section, we have several links to different parts of the application in which we are now using auth.loggedIn to display the appropriate links depending on the authentication status. We have a logout button that has a click event with a logOut() function attached to it. We also display the user’s email gotten from the auth property which is accessed from our Vuex store using the mapState method which maps our state auth to the computed property of the nav component. We also have a logout method that calls our Vuex action logOut and redirects the user to the login page.
Now, let us go ahead and update our store to have a logOut action.
export const actions = { // .... logOut() { this.$auth.logout(); }}
The logOut action calls the auth logout method which clears user data, deletes tokens from localStorage and sets loggedIn to false.
Routes like /my-reports and report-incident should not be visible to guests but at this point in our app, that is not the case. NUXt does not have a navigation guard that can protect your routes, but it has is the auth middleware. It gives you the freedom to create your own middleware so you can configure it to work the way you want.
It can be set in two ways:
Per route.
Globally for the whole app in your nUXt.config.js file.
router: { middleware: ['auth']}
This auth middleware works with your auth instance so you do not need to create an auth.js file in your middleware folder.
Let us now add this middleware to our my-reports.vue and report-incident.vue files. Add the following lines of code to the script section of each file.
middleware: 'auth'
Now, our application would check if the user trying to access these routes has an auth.loggedIn value of true. It’ll redirect them to the login page using our redirect option in our auth config file — if you’re not logged in and you try to visit either /my-report or report-incident, you would be redirected to /login.
If you go to /report-incidents, this is what you should see.
Report incident page. (Large preview)
This page is for adding incidents but that right now the form does not send incident to our server because we are not making the call to the server when the user attempts to submit the form. To solve this, we will add a reportIncident method which will be called when the user clicks on Report. We’ll have this in the script section of the component. This method will send the form data to the server. Update your report-incident.vue file with the following:
<template> <section class="report"> <h1 class="report__heading">Report an Incident</h1> <form class="report__form"> <div class="input__container"> <label for="title" class="input__label">Title</label> <input type="text" name="title" id="title" v-model="incident.title" class="input__field" required /> </div> <div class="input__container"> <label for="location" class="input__label">Location</label> <input type="text" name="location" id="location" v-model="incident.location" required class="input__field" /> </div> <div class="input__container"> <label for="comment" class="input__label">Comment</label> <textarea name="comment" id="comment" v-model="incident.comment" class="input__area" cols="30" rows="10" required ></textarea> </div> <input type="submit" value="Report" class="input__button" @click.prevent="reportIncident" /> <p class="loading__indicator" v-if="loading">Please wait....</p> </form> </section></template><script>export default { name: "report-incident", middleware: "auth", data() { return { loading: false, incident: { type: "red-flag", title: "", location: "", comment: "" } }; }, methods: { async reportIncident() { let data = this.incident; let formData = new FormData(); formData.append("title", data.title); formData.append("type", data.type); formData.append("location", data.location); formData.append("comment", data.comment); this.loading = true; try { let res = await this.$store.dispatch("reportIncident", formData); this.$notify({ group: "success", title: "Success", text: "Incident reported successfully!" }); this.loading = false; this.$router.push("/my-reports"); } catch (error) { this.loading = false; this.$notify({ group: "error", title: "Error!", text: error.response ? error.response.data.error : "Sorry an error occured, check your internet" }); } } }};</script><style></style>
Here, we have a form with input fields for title, location, and comment with two-way data binding using v-model. We also have a submit button with a click event. In the script section, we have a reportIncident method that collects all the information provided in the form and is sent to our server using FormData because the API is designed to also accept images and videos.
This formData is attached to a Vuex action using the dispatch method, if the request is successful, you get redirected to /my-reports with a notification informing you that this request was successful otherwise, you would be notified of an error with the error message.
At this point, we don’t have reportIncident action in our store yet so in your browser console, you would see an error if you try to click submit on this page.
Vuex error message. (Large preview)
To fix this, add the reportIncident action your index.js file.
export const actions = { // ... async reportIncident({}, data) { let res = await this.$axios.post('/incident/create', data) return res; }}
Here, we have a reportIncident function that takes in an empty context object and the data we’re sending from our form. This data is then attached to a post request that creates an incident and returns back to our report-incident.vue file.
At this point, you should be able to add a report using the form after which you would be redirected to /my-reports page.
My reports page empty. (Large preview)
This page should display a list of incidents created by the user but right now it only shows what we see above, let’s go ahead to fix that.
We’re going to be using the fetch method we learned about to get this list. Update your my-reports.vue file with the following:
<script>import incidentCard from "@/components/incidentCard.vue";export default { middleware: "auth", name: "my-reports", data() { return { incidents: [] }; }, components: { incidentCard }, async fetch() { let { data } = await this.$axios.get("/user/incidents"); this.incidents = data.data; }};</script>
Here, we use fetch method to get user-specific incidents and assign the response to our incidents array.
If you refresh your page after adding an incident, you should see something like this.
My Reports page with a report. (Large preview)
At this point, we would notice a difference in how fetch method and asyncData loads our data.
Conclusion
So far, we have learned about the Axios module and all of its features. We have also learned more about asyncData, and how we can fetch both of them together despite their differences. We’ve also learned how to perform authentication in our application using the auth module and how to use the auth middleware to protect our routes. Here are some useful resources that talk more about all we’ve covered.
Resources
“Auth Module,” NUXtJS.org
“Axios Module: Introduction,” NUXtJS.org
FormData, MDN web docs
“API: The asyncData Method,” NUXtJS.org
“The Vue Instance: Lifecycle Diagram,” VueJS.org
“Understanding How fetch Works In Nuxt 2.12,” NUXtJS.org
(ks, ra, yk, il)
Website Design & SEO Delray Beach by DBL07.co
Delray Beach SEO
Via http://www.scpie.org/getting-started-with-axios-in-nuxt/
source https://scpie.weebly.com/blog/getting-started-with-axios-in-nuxt
0 notes
Text
Linking Vuex State Machines Across Your Vue Client Applications with Solace PubSub+
Vue.js is a JavaScript framework developed by Evan You that’s making significant inroads as the framework of choice for modern single-page applications. One reason it has become so popular is that it comes with components any single-page-application is expected to have, such as a router, a developer UI to manage your application, and a state management library called Vuex. To learn more about Vue.js, visit the Getting Started with Vue site.
What is Vuex?
According to the official web site for Vuex, it is a state management pattern and library for Vue.js applications. It serves as a centralized store for all the components in an application, with rules ensuring that the state can only be mutated in a predictable fashion. It also integrates with Vue’s official devtools extension to provide advanced features such as zero-config time-travel debugging and state snapshot export / import.
Key to the architecture of Vuex are the concepts of state, views, and actions:
State serves as the source of truth that drives our applications
The view is a declarative mapping of the state
Actions are the ways the state could change in reaction to user inputs from the view
A simplistic illustration of a Vuex workflow
The Vuex store is instantiated within your application as a singleton, which means there is a single instance of the store that lives within your Vue application, and your various components look to it as the source of truth.
What makes Vuex even more powerful and easier to use is its deep integration into the Vue.Js DevTool Chrome Extension, which allows you to look at the sequence of state mutations and even replay state changes.
Example of the Vuex view in the Vuex DevTool browser extension
Why are state machines important for your JavaScript applications?
State machines are becoming an increasingly important part of any modern application framework. With the pervasiveness of single-page application frameworks, it is also becoming a de facto part of front-end applications.
Depending on the JavaScript framework you are using, there are a variety of choices such as Vuex for Vue and Redux for React. There is also a JavaScript framework-agnostic library called XState.
If you are building an application, it will almost have ‘state’ associated with it. For front-end applications, your application state may include whether the user is logged in or whether the user is an admin. Compared to sprinkling and checking the logic for these transitions throughout your application, handling these states from a single location in your codebase is easier and less prone to errors. This is where a state machine library comes into play – typically exposed as a ‘singleton’ and accessed from within your application, it provides a single source of truth for the state of your applications.
Implementing Vuex for a turn-based game
Now let’s implement a basic Vuex container (state, actions, and mutations) for a turn-based game. Here are the key components we will need to implement:
State
player – The ID of the player (Player1or Player2 )
isTurn – Boolean value that represents whether it is the player’s turn
Actions
logIn – sets the player’s id
makeMove – Sends the move to the other player and swaps the turn off for the current player
receiveMove – Receives a move from the other player and activates the current player’s turn
Here is the bare-bones implementation:
export default new Vuex.Store({ state: { player: '', isTurn: false }, mutations: { LOGIN(state, player) { state.player = player if (state.player === 'Player1') state.isTurn = true }, TOGGLE_TURN(state) { state.isTurn = !state.isTurn } }, actions: { login({ commit }, player) { console.log('Attempting to login with ' + player) commit('LOGIN', player) }, makeMove({ commit, getters }, move) { if (getters.isTurn()) { //TODO: Send a move to the other player } }, receiveMove({ commit, getters }, otherPlayerMove) { if (!getters.isTurn()) { console.log( `Received move from other player ${JSON.stringify(otherPlayerMove)}` ) commit('TOGGLE_TURN') } } }, getters: { isTurn: state => () => { return state.isTurn }, getPlayer: state => () => { return state.player } } })
Implementation gaps
Now you’ve implemented a bare-bones skeleton of your Vuex store, but you may have noticed there are a few gaps.
You aren’t sending the ‘move’ object anywhere.
How do you get notified if another player made a move?
Suppose this was a two-player game, the sequence expected would be as follows:
Player1 and Player2 log in.
Player1 has his isTurn flag set to true and Player2 has his isTurn flag set to false.
Player1 sends his move over to Player2.
Player1’s isTurn flag is set to false.
Player2 receives the move and sets his isTurn flag to true.
We need a mechanism to establish communication between two different Vuex instances
Using Solace PubSub+ Event Broker to distribute your Vuex state
Solace PubSub+ Event Broker is a multi-protocol, fully featured and free-to-use event broker. One of the many transports that it supports is WebSocket for both Node.js and a browser, which makes it ideal for solving this particular problem.
The APIs and protocols that Solace PubSub+ Event Broker natively supports
The APIs and protocols that Solace PubSub+ Event Broker natively supports
Getting started with the PubSub+ Event Broker
To get started with PubSub+ Event Broker, you create a new Solace cloud messaging service (for FREE!). If you need help with creating a messaging service, refer to this guide.
Publish events from your Vuex store
Now in your makeMove(…) action, we can change the code as follows:
makeMove({ commit, getters }, move) { if (getters.isTurn()) { console.log( `Sending ${JSON.stringify(move)} to ${getters.getPlayer()}/Move` ) mqttClient.publish(`${getters.getPlayer()}/Move`, move).then(() => { commit('SWAP_TURN') }) } }
Note you are now sending a message on a well-defined topic ‘Player1/Move’ or ‘Player2/Move’ with the move payload.
Subscribing to move events from the other player
Now how do you get notified when another player, connected from another browser, makes a move?
In your view (in the beforeMount() lifecycle hook, for example) you will simply make use of a subscription function which may look something like this:
//Subscribe to the other player's move message this.$mqttClient .subscribe( 'Player2/Move', ({ topic, message }) => { store.dispatch('receiveMove', message) //rest of your business logic } ) .then(() => { console.log('Succesfully subscribed') }) })
You are adding a subscription to the topic ‘Player2/Move’ if you are ‘Player1’ or ‘Player1/Move’ if you are ‘Player2’. Your callback will instantaneously be triggered once you get a message with the event on the topic.
Your finished product will look something like this across two browser windows:
GitHub Repo
To take a look at a fully built out sample implementation, navigate to this linking-vuex-stores repo .
Conclusion
In this post, I showed you how easy it is to link different Vuex stores together using simple publish/subscribe semantics via Solace PubSub+ Event Broker.
While this works, you may realize that state is being distributed and controlled on the client side. Ideally you would want state to be validated and distributed from the server side. In a future post, we will show you how easy it is to add a node.js server using XState (a popular JavaScript state machine library) to this architecture to control and validate state on the server side while continuing to use Vuex on the client side.
The post Linking Vuex State Machines Across Your Vue Client Applications with Solace PubSub+ appeared first on Solace.
Linking Vuex State Machines Across Your Vue Client Applications with Solace PubSub+ published first on https://jiohow.tumblr.com/
0 notes