#coreldraw file menu
Explore tagged Tumblr posts
Visit Tumblr Blog
Explore Tumblr blogs with no restrictions, modern design and the best experience.
Last Seen Tumblr Blogs


Fun Fact
130K people were victims of a chain letter scam that affected Tumblr in May 2011.
Text
Mastering CorelDRAW: A Beginner's Guide to Navigating the Basics
Are you a newcomer to the world of graphic design, tentatively dipping your toes into the vast expanse of CorelDRAW? If so, fear not, for you've stumbled upon just the right guide to set you on the path to proficiency. In this article, we'll embark on a journey through the fundamental features of CorelDRAW, ensuring that you not only understand the layout of the software but also gain insight into its essential functions.
Before we delve into the nitty-gritty, make sure to hit that subscribe button to stay updated with all the latest tutorials and tips. Now, let's dive straight into business.
Welcome to CorelDRAW! As you launch the software, the first thing that greets you is the user interface. Familiarizing yourself with this interface is key to navigating CorelDRAW efficiently. Let's break it down:
Menu Bar: This is your control center, housing various dropdown menus such as File, Edit, View, Layout, Object, Effect, Bitmap, Text, Table, Tools, Window, and Help.
Standard Bar: Next in line, the Standard Bar provides quick access to commonly used tools and functions.
Property Bar: Situated conveniently below the Standard Bar, the Property Bar displays contextual options and settings based on the selected tool or object.
Tools Bar: Located to the left of the workspace, the Tools Bar is where you'll find an array of tools for creating and editing your designs.
Status Bar: Lastly, at the bottom of the interface, the Status Bar offers valuable information and updates on your current workspace and tasks.
Now, let's shift our focus to the right side of the interface:
Color Palettes: Here lies a spectrum of colors, ready to breathe life into your creations.
Workspace: The blank canvas before you is your workspace, where imagination meets reality.
Now that we've acquainted ourselves with the layout, let's explore some essential functions:
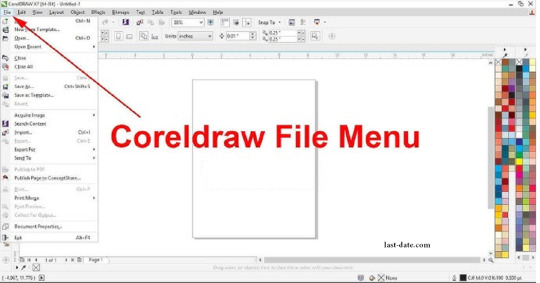
File Menu: Starting with the basics, the File menu offers options such as New (Ctrl + N) for creating a new document. Customize your document settings, including page size, orientation, and color mode, to suit your project requirements.
Page Sizing and Resolution: Select from a range of standard page sizes or customize your dimensions. Ensure optimal resolution for high-quality output, typically set at 300 DPI (dots per inch).
Color Modes: Choose between CMYK and RGB color modes depending on your intended output, whether for print or digital media.
Orientation: Decide between landscape and portrait orientations to best showcase your designs.
Resolution: Maintain a high resolution (300 DPI) for crisp and clear images, especially for print projects.
By mastering these fundamental functions, you're well on your way to unleashing your creativity within the realm of CorelDRAW. Remember, practice makes perfect, so don't hesitate to experiment and explore the myriad possibilities that this powerful software offers.
Stay tuned for more tutorials and advanced tips to elevate your CorelDRAW skills to new heights. Until next time, happy designing!
🌸 Attention all creatives and designers! 🌸
Are you ready to take your designs to the next level? I've got something special just for you: a collection of over 1000+ beautifully crafted floral elements in CorelDRAW format, absolutely FREE! 🎨💐
Imagine the endless possibilities: use them to enhance your logos, create stunning graphics, or add a touch of elegance to your projects. These florals are versatile, customizable, and ready to elevate your designs to new heights.
But here's the catch: to get your hands on this exclusive collection, all you need to do is subscribe to my channel, give this post a like, and share it with your fellow designers. It's that simple!
Don't miss out on this incredible opportunity to supercharge your creativity. Subscribe, like, and share now to unlock your access to over 100 florals in CorelDRAW format. Let's blossom together! 🌼✨ #DesignInspiration #FreebieAlert #CreativeCommunity
Get over 1000+ beautifully crafted floral elements in CorelDRAW format, absolutely FREE!
2 notes
·
View notes
Text
How to Convert an Image to Grayscale
Transforming an photo to grayscale is a way which can dramatically alter its visual effect. Whether you're a photographer trying to deliver your images a classic contact or a fashion designer wanting to emphasize form and comparison, learning how to convert to grayscale can be invaluable. This manner entails reducing an photograph to its black and white components, getting rid of all coloration facts. By the usage of a grayscale converter, you could successfully spotlight textures and patterns that is probably omitted in a coloured version. Grayscale photographs are in particular effective in directing focus to the problem be counted and can add a timeless exceptional to any visible work.
Selecting the Best Tool for Grayscale Conversion
When deciding on a tool to transform pix to grayscale, take into account both your desires and the available features. For quick and simple conversions, online tools like Pixlr, LunaPic, and Adobe Express are outstanding selections. These platforms let you upload your image and transform it to grayscale in only some clicks. They support more than one file formats and are convenient for occasional use.
For extra control over the conversion process, computing device software program alternatives like Adobe Photoshop, GIMP, and CorelDRAW offer advanced talents. These programs will let you best-track the grayscale conversion, modify unique photograph attributes, and maintain better high-quality outputs. Professional photographers and designers who often work with grayscale pictures will benefit from the sizeable capabilities these software alternatives offer.
Detailed Instructions for Changing an Image to Grayscale
Before you start, make sure your photo is properly prepared by means of checking its resolution and layout. If you're the usage of Photoshop, open your photo and go to the 'Image' menu. From there, pick 'Mode' and choose 'Grayscale.' This will rework your photograph into black and white. In GIMP, the method is comparable: open the picture, navigate to the 'Image' menu, then 'Mode,' and select 'Grayscale.'
Both Photoshop and GIMP provide additional options to high-quality-song your grayscale conversion. You can adjust contrast, brightness, and other settings to obtain the favored effect. For the ones the usage of on line tools like Pixlr or Adobe Express, upload your photo, discover the grayscale option, and observe it. These platforms are truthful and consumer-pleasant, making them ideal for brief edits.
Advantages of Grayscale Imagery
Grayscale images offer awesome benefits in both pictures and photograph layout. For photographers, convert a picture to black and whitecan draw interest to textures, shapes, and patterns, enhancing the general composition. Without the distraction of shade, visitors are more likely to note the tricky information and emotional intensity of the photo.
In photograph layout, grayscale imagery is quite flexible. It may be used efficaciously in branding, emblems, and courses, presenting a easy and fashionable appearance that complements various design elements. Grayscale pix often integrate seamlessly with different visual additives, making them a dependable choice for cohesive design tasks.
Solving Typical Problems
When convert image to grayscale to grayscale, you might come across troubles like lack of detail, especially in regions with subtle color differences. To mitigate this, start with a notable picture and recollect enhancing it earlier than conversion. Tools like Photoshop provide superior settings to regulate comparison and brightness, preserving as an awful lot detail as feasible.
Another trouble you can face is an unsatisfactory grayscale conversion, in which the result would not align together with your expectations. This can frequently be remedied by using experimenting with diverse conversion settings and modifications. Using software program that offers greater manage over the technique can result in better consequences.
0 notes
Text
Professional Profile Creative Box is a total service provider based in Indore. Experts in graphic design, branding, printing services, and digital marketing. I am a versatile and innovative graphic designer with 15+ years of experience working in the commercial design industry. Proficient in Adobe Photoshop, CorelDRAW branding, and identity design packages, with demonstrated expertise in driving social media engagement. I am experienced in managing design projects from start to finish, including client communication, and have a keen eye for detail. will provide you with sure high-quality and fast service. What we specialise in: Logo, Infographic Design, UI Design, Thumbnails Design, Brochure, Flyers, Leaflets, Pamphlet, Paper Ad, Magazine Ad, Business Cards, Bill Book, Letterhead, Envelope, Product Packaging, Sweet Box, Cake Box, Docter File, Line Art Design, Photo Editing, Photo Retouching, Background Remove, Background Change, Crop/Resize, Image to text Convert, JPG to PDF Convert, Animated GIF Maker, Template Design, Icon Design, Paper Bag, D-Cut Bag, Tag Cards, Label Print, Booklets, Sticker Print, Menu Cards, Catalogue Design, Book Cover, Annual Report, Book Cover Design, Poster Design, Certificate, Invitation, Customised Wedding Cards, Wedding Branding, Biodata, Social Media Post, Facebook Banner, Instagram Post Design, PPT Presentation, Dangler Design, Calendar Design, Customised Diary, Planner, T-Shirt Printing, Cap and Pan Printing, ID Cards, Canopy Design, Standee Design, Glow Sign Board, LED Board, Flex, Vinyal, One-way Vision, Sunpack Sheet, Iron or Wooden Frame, Forex Sheet, Outdoor Branding, Event Branding, Shop Branding, Backdrop Design, Offset Printing, Screen Printing, Lamination, Foil, Digital Marketing, Photo & Videography, Cinematography, Pre & Post Wedding, Wedding Photography, Candid & Traditional, Portfolio, WhatsApp Video, Promotional Video, Invitation Video, Product Photography, Documentary Films, Commercial & Corporate Films, Maternity Shoot, Album Songs, Youtube Video Making, Image & Film Editing, All Solutions for Video & Photography, Web Design, Social Media Marketing and much more.
https://www.linkedin.com/in/nitin-pathak-746927267/

0 notes
Text
What Is the Current State of the Design Industry?
Designing is an art. It is also a profession that requires creativity and precision. With the advancement of technology, the design industry has undergone drastic changes. Design automation is one of the most apparent changes in this industry. It is essential to know the current state of the design industry these days.
Design automation is an umbrella term for the software used to automate design processes. It eliminates tasks that are repetitive and laborious to human designers. They help create designs at scale, saving time and effort for designers working on many projects. Designers can either use a general-purpose design automation tool or a specialized one for their specific needs.
For example, Adobe XD allows designers to create interactive prototypes. For using this tool, no coding knowledge is required. In contrast, tools like Framer need developers’ skill sets for using them.

Types of designers:
1. Web designers:
The designers plan the website, create different web pages for it, and design the layout, visual appearance, and website usability with the help of advanced Technology and non-technical skills. They can do it if they are familiar with various coding and techniques. They can use free vector icons for designing the web page.
2. Front-end designers:
Front-end designers combine the essential aspects of both jobs and live in the worlds of pixels and engineering. The designers, also known as front-end developers, are in charge of coding a website’s front end. Web designing and coding languages ranging from HTML to C++ are used to create user-friendly web designs. The main work of front-end designers is website navigation, internal links, buttons, audio/video files, multimedia tools, and the functionality of websites and creating fixes for problems and bugs.
3. User Interface (UI):
They design the visual content of the web as well as mobile applications. Some tools to enhance their work like wireframes, Sketch, Adobe XD, Photoshop, Illustrator, HTML5, CSS, and JavaScript are used. A blueprint of the interface based on the research of various aspects is prepared. The process consists of elements like wireframing, prototyping, and testing in the company with visual elements that consist of color, images, menus, etc.
4. User experience (UX) designer:
UX designers are responsible for the physical aspects of the device in addition to the user experience in the website and mobile applications. The tools used are similar to UI ones; the only difference is that they focus on the experience of these designs.
5. Graphic designer:
They are accountable for creating illustrations, logos, and layouts, with the help of computer software. Some of the tools used to create visually appealing designs are CorelDraw, Adobe products like Photoshop, and Illustrator. Their designs are used for websites, logos, magazines, infographics, marketing brochures, manuals, books, and more. The applications they have designed can have all free vector icons for making the logos and other designs more attractive and appealing.
6. Animation designers:
These are the designers behind all the creations like 2D and 3D images, video games, websites, and mobile application effects. Taking a turn the tools commonly used are Cinema 4D, Adobe InDesign, Adobe After Effects, Adobe Illustrator and Photoshop, and so on.
7. Art and illustration designers:
These people convey the written text in visual elements. To do so, specific tools needed are pencil sketches, ink drawings, or digital tools like Adobe Illustrator and Photoshop, Vectornator (for illustrators using Apple products), etc. These artworks are available on book covers, infographics, and other materials.
8. Industrial designer:
It is a combined art of engineering and business that develops concepts for manufactured devices and objects. Tools used are Key shots, Solid Works, Autodesk ideation, and communicating design intent and aesthetics.
9. Brand and product designer:
They combine product design and marketing skills that focus on product function and user experience. This leads to an impact that helps make the connection between the brand and the target audience.
Read rest of the article here
0 notes
Text
Làm bảng hiệu quảng cáo
Bảng hiệu chữ nổi khung sắc (còn được gọi là bảng hiệu chữ nổi khung viền) là loại bảng hiệu được làm bằng chất liệu chữ nổi (thường là nhựa hay kim loại) và có khung sắc xung quanh.
Khung sắc thường được làm bằng kim loại như nhôm, thép không gỉ hoặc sắt, và có thể được sơn phủ màu để tạo cảm giác ác sang trọng và bền đẹp.

Bảng hiệu khung chữ nổi sắc nét thường được ứng dụng trong quảng cáo, định danh cửa hàng, nhà hàng, khách sạn, công ty và các doanh nghiệp khác. Chúng có thể được gắn trên tường hoặc treo từ trần nhà, và thông thường có thể thay đổi nội dung bằng cách thay thế các chữ nổi hoặc bằng cách thay đổi các bảng thông tin khác nhau.
Cậu tạo bảng hiệu chữ nổi khung sắc
Để tạo một bảng hiệu chữ nổi khung sắc, bạn có thể làm theo các bước sau:
1. Chọn văn bản hoặc câu chữ mà bạn muốn chuyển thành chữ nổi.
2. Sử dụng một phần mềm thiết kế đồ họa như Adobe Photoshop, Illustrator hoặc CorelDRAW để tạo chữ nổi.
3. Tạo một hộp chữ vuông hoặc hình chữ nhật bao quanh văn bản của bạn.
4. Thiết kế các chữ nổi bên trong hộp chữ vuông hoặc hình chữ nhật.
5. Để tạo hiệu ứng khung sắc, bạn có thể sử dụng đường viền, gradient hoặc màu nền khác biệt cho hộp chữ vuông hoặc hình chữ nhật.

6. Đảm bảo chữ nổi và hiệu ứng khung sắc phù hợp với mục đích và phong cách của bạn.
7. Xuất bảng hiệu chữ nổi khung sắc thành file hình ảnh hoặc in nó ra nếu cần thiết.
Nếu bạn không quen sử dụng các phần mềm thiết kế đồ họa, bạn cũng có thể tìm các công cụ trực tuyến hoặc ứng dụng di động để tạo bảng hiệu chữ nổi khung sắc một cách tốn nhất.
Ưu điểm của bảng hiệu chữ nổi khung sắc:
Một số ưu điểm của bảng hiệu chữ nổi khung sắc bao gồm:
1. Tạo ấn tượng mạnh: Bảng hiệu chữ nổi khung sắc được thiết kế với chữ nổi trên nền khung sắc, tạo ra một hiệu ứng nổi bật và thu hút sự chú ý của người đi qua. Điều này giúp tăng khả năng gây ấn tượng và ghi nhớ thông tin.

2. Dễ nhìn và đọc: Chữ nổi trên nền khung sắc giúp tạo ra sự tương phản rõ ràng và làm nổi bật thông điệp. Người nhìn có thể dễ dàng nhìn thấy và đọc thông tin trên bảng hiệu mà không mỏi mắt hay gặp khó khăn trong việc hiểu nội dung.
3. Khả năng tồn tại lâu dài: Bảng hiệu chữ nổi khung sắc thường được làm từ các vật liệu bền vững như nhôm, thép không gỉ hoặc acrylic. Điều này đảm bảo rằng bảng hiệu có khả năng chịu được thời tiết khắc nghiệt và không bị phai màu hay hư hỏng sau một thời gian sử dụng.
4. Dễ dàng tuỳ chỉnh và thay đổi
"Quảng cáo Nguyễn Long kính chào quý khách! Công ty chúng tôi chuyên Thiết kế, In ấn, Gia công sản xuất làm bảng hiệu, làm hộp đèn, chữ mica, chữ inox, bảng đèn led, hộp đèn siêu mỏng, bảng số nhà, bảng công ty, khắc dấu các loại lấy liền. chuyên cung cấp phôi hộp đèn hút nổi, hộp đèn mica tròn vuông elip các loại, Nhận gia công bảng hiệu alu, mặt dựng alu. làm bảng hiệu neon sight, sản xuất hộp đèn ly trà sữa. Thi công lắp đặt bảng led ma trận, led màn hình. Nhận gia công bảng hiệu, hộp đèn gửi đi nước ngoài. SỨ MỆNH: Tôn trọng và cam kết mang đến sản phẩm chất lượng, dịch vụ đỉnh cao cùng sự an tâm và hiệu quả lâu dài. Đối với đối tác: Tập trung xây dựng mối quan hệ uy tín, tin cậy, hợp tác cùng phát triển.
----------------------------------------------
Vậy vì sao bạn còn chưa gọi ngay để đặt hàng cho mình một bảng hiệu quảng cáo?
Nhanh tay gọi ngay cho chúng tôi với số điện thoại này nhé!
Là cơ sở dịch vụ uy tín, vì vậy địa chỉ công ty của chúng tôi nằm tại:
Bạn có thể tham khảo nhiều mẫu tại website: https://nguyenlongidea.com/.../lam-hop-den-sieu-mong.../
#Thiết_kế_theo_yêu_cầu, #logo, #menu, #catalog, #video, #bảng_inox, #bảng_phòng_ban, #bảng_tên, #hộp_đèn_hút_nổi, #ly_trà_sữa, #khắc_dấu #bảng_huỳnh_quang, #Ledneonsign, #bảng _đóng_mở_cửa_khách_sạn #GiớiThiệuQuảngBáSảnPhẩm #InDecalLưới #BảngHiệuHộpĐèn #InUVPhẳng #InUVCuộn #MặtDựngALU #InBếTemNhãnCácLoại #InTờRơi #InTờGấp
0 notes
Text
Corel Draw File Menu
Corel Draw File Menu
Corel Draw File Menu Option: Corel Draw File Menu File Menu :- New (Ctrl+N) – यह New Page लेने के लिए Use करते हैं। New From Template – इसके जरिये हम Corel Draw में By Defualt जो Company हमें पहले से Design दी रहती है उसे लेने के लिए Use करते हैं। Open (Ctrl+O)– जो भी cdr File हम बना चुके हैं उसे Open करने के लिए Use करते है आप चाहे तो कुछ Changes भी कर सकते है। Close- इसके जरिये हम Current…
View On WordPress
#corel#corel draw#corel draw 11 file menu#corel draw 12 file menu in hindi#corel draw 12 view menu in hindi#corel draw file menu#corel draw file menu in hindi#corel draw file menu tutorial#corel draw me file menu#corel draw menu bar not visible#corel draw menu not showing#corel draw x3 file menu#corel draw x7#corel draw x7 edit menu#corel draw x7 file menu in hindi#corel view menu#coreldraw#coreldraw file menu#coreldraw in hindi#coreldraw menu bar#coreldraw menu bar problem in windows10#coreldraw tutorial#coreldraw tutorial in hindi#coreldraw x5#coreldraw x7#coreldraw x8 tutorial for beginners in hindi#file menu in coreldraw#file menu in coreldraw in hindi#file menu in coreldraw x5#food menu design in coreldraw
0 notes
Text
Các bước thực hiện thiết kế catalogue bằng phần mềm CorelDRAW
Bước 1: Vẽ trang bìa cho catalogue Tạo một tài liệu mới bằng cách chọn các File-menu/New. Chỉnh sửa kích thước trang trong Property Bar. Tạo một hình chữ nhật bao gồm toàn bộ trang, bằng cách nhấp đúp công cụ Rectangle Tool. Tiếp tục tạo ra những ảo ảnh của một bề mặt kim loại với công cụ Fill Tool. Sau đó, kéo theo chiều ngang trên hình chữ nhật với các tương tác Fill Tool, và bạn tạo ra một gradient điền mà cần phải được chỉnh sửa. Theo mặc định nó sẽ có màu đen và trắng, và tuyến tính. Bạn có thể chỉnh sửa các loại điền vào Bar tài sản. Chọn Interactive Fill Tool một lần nữa, và bạn sẽ thấy một nửa vòng tròn với đường chấm trong hình chữ nhật.

"QC" Chuyên in khổ lớn quảng cáo CÔNG TY TNHH IN ẤN QUẢNG CÁO SONG PHÁT..., in khổ lớn, công ty in khổ lớn, in song phát, in hiflex khổ lớn, thi công bảng hiệu khổ lớn, công ty in tphcm, in ấn quảng cáo khổ lớn, xưởng in khổ lớn, xưởng in song phát, in hiflex song phát, in hiflex giá rẻ.
Địa chỉ : Số 307/7 Bình Quới, P.28, Q.Bình Thạnh, TP.HCM
Hotline : 0908.837.032
Điện thoại: 0908.837.032
Mail : [email protected]
Website: https://inkholon.com.vn
https://www.heytv.vn
https://www.listpaint.com
1 note
·
View note
Text
Thanks to My Mistakes (uhuk)
Berawal dari kesalahan yang saat itu gue rasa cukup fatal, ketika gue lupa menggunakan mode warna RGB instead of CMYK, sejak awal bikin desain sampai saat-saat terakhir batas upload (batas unofficial sih). Kenapa gue merasa fatal? Karena gue saat itu masih belum tau cara memperbaikinya. Ya, orang bodoh cenderung mudah panik, itulah fungsinya nuntut ilmu (jadi ceramah). Jadi ceritanya, gue nguli (kata kerja ‘kuli’ + awalan “ng-”) bikin poster ilmiah untuk suatu keperluan yang bisa dibilang cukup penting heheh, gaya sedikit bolehlah ya gue.. Karena poster tersebut nantinya akan dicetak, maka seharusnya gue pakai mode CMYK sejak awal pembuatan. Btw gue buatnya di CorelDraw, yeah it’s a bit jadul but i’m okay :D
Sampai saat-saat terakhir batas upload yang ditetapkan kampus, gue baru nyadar kalau gue sudah mewarnai seluruh objek dalam satu bidang itu pakai warna-warna RGB. Karena gue sebenarnya memang bukan yang expert banget dengan cara kerja Corel, gue pikir mati dah gue harus ubah satu-satu setiap objek di bidang itu menjadi mode warna CMYK. Tidaaakkkk! Gue tanya temen gue, katanya emang ubah satu-satu, dan sepertinya dia jawab cukup asal. Sebenernya gue ngerasa kagak mungkin sih sebuah software ‘sebesar’ itu gak punya mekanisme untuk memperbaiki suatu keteledoran penggunanya secara efisien. Hm, tapi baiklah karena saat itu gue udah dikejar waktu, kami (gue dan tim peserta yang posternya gue pegang) memutuskan untuk membiarkan saja sementara warnya. Toh file yang diupload bukanlah yang akan dicetak. Oh iya, gue tau bahwa gue salah warna juga cukup konyol sih. Jadi, batas maksimal besar file yang diupload adalah maksimal 5 MB, dan oleh karena itu harus di’kompres’ saat proses pengeksporannya. Saat itu temen-temen gue bilang untuk mengurangi aja besaran DPI-nya, tapi gue ngotot bahwa lebih baik merendahkan kualitasnya ke ‘lower atau lowest’. Dan petaka dimulai. Ketika gue ubah kualitas ekspornya ke lowest, warnanya berubah. Gue pikir perubahan warna itu karena mode warna yang gue gunakan adalah RGB, tapi belakangan gue tau, mau warna CMYK atau RGB, ketika diturunkan kualitasnya sampai lowest, maka warna akan tetap berubah. Lain halnya kalau yang diturunkan adalah DPI-nya. Warnanya gak akan berubah, gak peduli lu pake CMYK atau RGB. Hahaha.
Malam itu setelah upload untuk formalitas, kami semua pulang dari tempat karantina yang memang disediakan untuk memfasilitasi para peserta demi mengharumkan nama kampus di tingkat nasional (ceileh..). Sampai kosan, waktu udah menunjukkan hampir jam setengah dua belas malam. Gue masih kepikiran PR gue untuk memperbaiki warna poster yang gue buat, disamping karena besoknya gue gak mau masih ada kerjaan yang berkaitan dengan poster. Ada hal lain yang kudu banget gue kerjakan di besok hari itu, jadi gue memutuskan langsung buka lagi netbook gue yang capeknya udah na’udzubillah karena gue paksa dia kerja lembur bagai kuda selama dua hari-an. Sambil ngantuk, gue coba gugling cara mengubah mode warna di Corel, dan sungguh sangat mengharukan bahwa hal itu sangat mudah dilakukan hahahaha (ketawa setan).
Di menu bar CorelDraw, ada Tab Edit, nah klik disitu terus pilih “find and replace”. Ajaib deh, jadi fungsi itu punya pilihan untuk menemukan berbagai objek dan menggantinya dengan kebutuhan kita. Bayangkan selama ini gue kalau mau seleksi seluruh teks, maka gue klik-in satu-satu tuh teks sampe mata gue kelilipan hahaha.

Kesalahan itu kadang bukan sepenuhnya ‘musibah’, di baliknya adalah metode paling unik yang telah Tuhan rancang untuk mengajarkan kita satu atau bahkan beberapa hal.
Kuncinya adalah mau ngakuin kesalahan, evaluasi diri, dan berusaha nyari jalan keluar. Sumfeeh gue merasa hal sesederhana kesalahan milih warna ini bukan cuma sedangkal kesalahan teknis terus akhirnya gue tahu hal yang sebelumnya gak gue tahu. Ini tuh jauh lebih dalam artinya, karena gue juga diberi kesadaran tentang begitu bergunanya ‘kesalahan-kesalahan’ ada dalam hidup kita. Tanpa kesalahan, kita seperti hanya memakai kacamata kuda, tidak tau apapun di luar jangkauan pandangan kita. Kadang kita merasa sudah baik, padahal itu hanya karena kita nggak tau kelemahan kita. Dan malam itu, kesalahan sekecil mengubah mode warna telah membuat gue lebih menerima ‘kesalahan besar’ yang bisa dibilang, masih menghantui gue sampai saat ini. Bahwa kesalahan besar itu, terlepas dari fakta bahwa benar-benar menyiksa gue, di baliknya ada pelajaran sangat berharga. Memang Tuhan sudah siapkan apapun yang terbaik buat gue. Adapun hikmah yang belum bisa gue lihat dari kesalahan itu, bukan berarti nggak ada artinya. Hanya belum terlihat oleh diri gue. Gue sebenernya ingin nulis yang terkesan bijak-bijak begitu tapi kok malah jatohnya terlalu teknis begini ya? Hahaha...
1 note
·
View note
Text
How to Extract Image from PDF together with your Browser

You downloaded a PDF file over the internet therefore you discovered some fabulous illustrations or photos inside. You thought of making use of a few of all those pictures for uses like references, submitting on social websites, web putting up and other rational conclusions https://altoextractpdf.com/. Great, you might have taken a serious action by defining your require. What remains is how you can complete it.
This report reveals a step-by-step strategy on how to extract an image from PDF with all your browser https://www.rebeccavandenberg.com/5-ways-extract-images-pdfs/. You are likely to get to know two free of charge on-line equipment you should use to extract photographs from PDF files.
Using PDFaid To extract PDF photographs, abide by these measures.
Visit the web site: Open up your browser, and sort inside URL PDFaid.
Select 'Extract Images': Scroll down a little bit over the homepage, and also you will see the url 'Extract Images'. Click on on it. A whole new web site might be shown.
Upload Your PDF file: About the new page, click on in the prompt to select a PDF file. Your home pc or smartphone documents will probably be exhibited. Head to the listing the right PDF document is and select it. Your file will likely be uploaded. Your file measurement can't exceed 20MB.
Pick a picture Structure: To the similar website page as action three, you've got the selection to apply JPG, PNG, GIF or BMP as your picture structure. Know, then again, that jpg is usually recommended via the web page. Click for the impression structure of your respective choice.
On precisely the same page as techniques three and 4, simply click on 'Extract Image'. All the photos around the file will likely be extracted.
Download the pictures: You will end up prompted to down load the extracted photographs on your computer system. Click within the download website link.
The downloaded illustrations or photos will probably be in zip sort. This implies you will want to unzip to see it. You may simply do this by utilizing an inbuilt or third-party zip program in your laptop or computer.
Using altoextractpdf.com Stick to these measures to extract JPEG from PDF working with this resource
Visit altoextractpdf.com employing your browser.
Upload your file: On the homepage, click on in the prompt to 'choose file'. You can be directed for your personal pc database. Decide on the file you choose to extract. Be certain the file dimension won't exceed 14MB. PDF information earlier mentioned that happen to be not acknowledged.
Select 'Start': On the similar homepage, click on 'Start'. The add operation complete time depends in your PDF file sizing. Subsequent a prosperous add, the latest website page might be displayed.
Download Impression: All pictures are in PNG format. You won't have to down load the photographs. Just choose the ones you really feel you should have. Your career is finished!
You'll be able to extract JPEG from PDF files offline working with resources like Adobe Acrobat, Adobe Acrobat Professional, and Adobe Photoshop. Let us focus on briefly on Adobe Acrobat since it is free of charge.
Using Adobe Acrobat To extract PDF image
youtube
Open the PDF file working with the program.
Select Impression: Simply click on the 'Edit Menu'. For the drop-down listing, simply click on 'Take Snapshot'. Click for the 'Edit Menu' once more. For the drop-down checklist, select 'Select All'.
Extract Impression: Head over to the image you would like to extract. Right-click the picture. Around the pop-up record, simply click on 'Copy Chosen Graphics'.
Save the Impression: Open up any graphic modifying packages like CorelDraw. Paste the impression in the application. Last of all, help you save it.
1 note
·
View note
Text
Creative Box I Nitin Pathak I Graphic Designer I Printing
Professional Profile Creative Box is a total service provider based in Indore. Experts in graphic design, branding, printing services, and digital marketing. I am a versatile and innovative graphic designer with 15+ years of experience working in the commercial design industry. Proficient in Adobe Photoshop, CorelDRAW branding, and identity design packages, with demonstrated expertise in driving social media engagement. I am experienced in managing design projects from start to finish, including client communication, and have a keen eye for detail. will provide you with sure high-quality and fast service.
Career Summary Self-employed: Creative Box Freelance Graphic Designer Deliver comprehensive design solutions on a freelance basis.
We Have Our Hands Well Versed on: Corel Draw, Adobe Photoshop, MS Word and PowerPoint.
Available: 24 hours/7 days
What we specialise in: Logo, Infographic, UI Design, Thumbnails Design, Brochure, Flyers, Leaflets, Pamphlet, Paper Ad, Magazine Ad, Business Cards, Bill Book, Letterhead, Envelope, Product Packaging, Sweet Box, Cake Box, Docter File, Line Art Design, Photo Editing, Photo Retouching, Background Remove, Background Change, Crop/Resize, Image to text Convert, JPG to PDF Convert, Animated GIF Maker, Template Design, Icon Design, Paper Bag, D-Cut Bag, Tag Cards, Label Print, Booklets, Sticker Print, Menu Cards, Catalogue Design, Book Cover, Annual Report, Book Cover Design, Poster Design, Certificate, Invitation, Customised Wedding Cards, Wedding Branding, Biodata, Social Media Post, Facebook Banner, Instagram Post Design, PPT Presentation, Dangler Design, Calendar Design, Customised Diary, Planner, T-Shirt Printing, Cap and Pan Printing, ID Cards, Canopy Design, Standee Design, Glow Sign Board, LED Board, Flex, Vinyal, One-way Vision, Sunpack Sheet, Iron or Wooden Frame, Forex Sheet, Outdoor Branding, Event Branding, Shop Branding, Backdrop Design, Offset Printing, Screen Printing, Lamination, Foil, Digital Marketing, Photo & Videography, Cinematography, Pre & Post Wedding, Wedding Photography, Candid & Traditional, Portfolio, WhatsApp Video, Promotional Video, Invitation Video, Product Photography, Documentary Films, Commercial & Corporate Films, Maternity Shoot, Album Songs, Youtube Video Making, Image & Film Editing, All Solutions for Video & Photography, Web Design, Social Media Marketing and much more.
Why choose us?
We understand your requirements precisely to deliver creative designs.
100% client satisfaction is guaranteed.
Provide help even after the project has been marked as closed.
Work six days a week and be available online on CHAT 24x7 for any queries.
Proper understanding of projects to ensure delivery within the desired time frame.
Conceptualise and design digital and print-based assets such as websites, logos, brochures, and social media graphics.
Manage projects from concept to delivery, ensuring they are completed on time and within budget. Collaborate with clients and internal teams to understand their needs and develop design solutions that meet those needs. •Incorporating feedback and making revisions as necessary. Collaborate with clients and stakeholders to understand their needs and deliver design solutions that meet their requirements.
Build and maintain an active client base, managing multiple projects at once while attracting new clients.
1 note
·
View note
Text
How to Extract Impression from PDF with the Browser

You downloaded a PDF file internet and you also found some great illustrations or photos inside of. You imagined of making use of many of all those illustrations or photos for reasons like references, submitting on social networking, world-wide-web posting and various sensible conclusions https://altoextractpdf.com/. Fantastic, you have got taken a serious phase by defining your demand. What continues to be is the way to attain it.
This write-up reveals a step-by-step approach regarding how to extract a picture from PDF together with your browser https://www.rebeccavandenberg.com/5-ways-extract-images-pdfs/. You are likely to reach know two 100 % free over the internet instruments you should utilize to extract images from PDF documents.
Using PDFaid To extract PDF photographs, carry out these measures.
Visit the web site: Open your browser, and sort with the URL PDFaid.
Select 'Extract Images': Scroll down a bit for the homepage, and also you will discover the url 'Extract Images'. Click on it. A different site can be displayed.
Upload Your PDF file: Over the new website page, simply click on the prompt to pick out a PDF file. Your laptop or smartphone data files shall be displayed. Look at the listing the best PDF doc is and select it. Your file will probably be uploaded. Your file measurement cannot exceed 20MB.
Pick an image Structure: On the exact webpage as phase 3, you might have the selection to employ JPG, PNG, GIF or BMP as your image format. Know, however, that jpg is usually recommended with the blog. Click in the graphic structure of your respective decision.
On precisely the same webpage as methods three and 4, simply click on 'Extract Image'. Most of the images around the file can be extracted.
Download the images: You will be prompted to down load the extracted pictures in your laptop or computer. Click within the download website link.
The downloaded photos will probably be in zip type. This means you should have to unzip to look at it. You'll be able to merely try this by making use of an inbuilt or third-party zip program on your own personal computer.
Using altoextractpdf.com Carry out these strategies to extract JPEG from PDF working with this device
Visit altoextractpdf.com employing your browser.
Upload your file: For the homepage, click on around the prompt to 'choose file'. You can be directed in your home pc database. Pick the file you desire to extract. Ensure the file sizing does not exceed 14MB. PDF documents earlier mentioned which might be not acknowledged.
Select 'Start': About the same homepage, simply click on 'Start'. The add operation finish time is dependent on your PDF file sizing. Adhering to a prosperous upload, a fresh website page can be shown.
Download Graphic: All photographs are in PNG format. It's not necessary to obtain all of the illustrations or photos. Just decide on those you are feeling you should have. Your employment is done!
You are able to extract JPEG from PDF files offline applying instruments like Adobe Acrobat, Adobe Acrobat Professional, and Adobe Photoshop. Permit us talk about briefly on Adobe Acrobat since it is no cost.
Using Adobe Acrobat To extract PDF image
youtube
Open the PDF file utilizing the software package.
Select Impression: Click on over the 'Edit Menu'. On the drop-down listing, click on 'Take Snapshot'. Click for the 'Edit Menu' again. Within the drop-down record, decide upon 'Select All'.
Extract Picture: Look at the graphic you desire to extract. Right-click the impression. Around the pop-up record, click on 'Copy Chosen Graphics'.
Save the Picture: Open up any image enhancing packages like CorelDraw. Paste the impression about the software programs. Ultimately, conserve it.
1 note
·
View note
Text
Corel Draw Window Menu | COREL DRAW KEYBOARD SHORT CUT
Corel Draw Window Menu | COREL DRAW KEYBOARD SHORT CUT
Corel Draw Window Menu Corel Draw Window Menu New Window इसका Use किसी Current Page को दो Window में करने के लिए Use करते है। इसे use करने से Page से कुछ Delete नहीं बल्कि दोनों एक ही रहता है। Cascade / Tile Horizontally / Tile Vertically इन तीनो का Use एक या एक से अधिक, लिए हुए Page को देखने के लिए किया जाता है जिसमे आपको तीनो का अलग-अलग Preview देखने को मिलेगा। Color Palettes इसका Use Color…

View On WordPress
#computer shortcuts#coral draw shortcut key#corel#corel and windows#corel draw#corel draw file menu#corel draw me menu bar#corel draw shortcut key#corel draw window menu#corel draw window menu docker color palette option#corel draw window menu dockers object style#corel draw x5#corel draw x7#corel menu windows#corel menu windows 10#corel no windows 10#corel shortcuts#corel tutorial hindi#coreldaw hidden shortcut key#coreldraw#coreldraw 12#coreldraw 2020#coreldraw 2020 shortcuts#coreldraw hindi#coreldraw hindi tutorial#coreldraw keyboard shortcuts#coreldraw keyboard shortcuts hindi#coreldraw ki shortcut key#coreldraw shortcut key#coreldraw shortcut key in hindi
0 notes
Text
How to Extract Impression from PDF with all your Browser

You downloaded a PDF file on the web therefore you observed some excellent photos inside. You imagined of using some of those people photographs for functions like references, posting on social media, web putting up and various other sensible conclusions https://altoextractpdf.com/. Amazing, you will have taken an important action by defining your will need. What stays is the right way to attain it.
This piece of writing reveals a step-by-step method on how to extract a picture from PDF with all your browser https://www.rebeccavandenberg.com/5-ways-extract-images-pdfs/. You might get to know two totally free on the internet instruments you should use to extract photographs from PDF information.
Using PDFaid To extract PDF photographs, observe these steps.
Visit the web site: Open your browser, and kind inside URL PDFaid.
Select 'Extract Images': Scroll down a bit over the homepage, and you simply will see the hyperlink 'Extract Images'. Simply click on it. A brand new site will likely be shown.
Upload Your PDF file: On the new page, click within the prompt to pick a PDF file. Your personal pc or smartphone information will probably be displayed. Go to the listing the proper PDF doc is and select it. Your file is going to be uploaded. Your file size can not exceed 20MB.
Pick an image Structure: For the same exact site as phase 3, you have the choice to apply JPG, PNG, GIF or BMP as your impression structure. Know, however, that jpg is suggested from the web-site. Click about the picture format of your respective solution.
On a similar web page as procedures three and four, click on 'Extract Image'. Many of the illustrations or photos to the file will likely be extracted.
Download the images: You're going to be prompted to down load the extracted images for your computer system. Click about the down load connection.
The downloaded illustrations or photos can be in zip type. This suggests you'll need to unzip to check out it. It is possible to simply do that by using an inbuilt or third-party zip software system on your own home pc.
Using altoextractpdf.com Follow these methods to extract JPEG from PDF using this software
Visit altoextractpdf.com using your browser.
Upload your file: Over the homepage, click to the prompt to 'choose file'. You may be directed for your personal computer database. Decide on the file you desire to extract. Make sure the file sizing doesn't exceed 14MB. PDF information above which might be not acknowledged.
Select 'Start': About the same homepage, simply click on 'Start'. The add procedure finish time is dependent on your PDF file measurement. Subsequent an effective upload, a fresh site will probably be exhibited.
Download Impression: All visuals are in PNG format. There's no need to obtain many of the pictures. Just select those you really feel you'll need. Your occupation is done!
You possibly can extract JPEG from PDF information offline utilizing resources like Adobe Acrobat, Adobe Acrobat Professional, and Adobe Photoshop. Allow us look at briefly on Adobe Acrobat as it is 100 % free.
Using Adobe Acrobat To extract PDF image
youtube
Open the PDF file using the software package.
Select Picture: Click about the 'Edit Menu'. In the drop-down record, click on 'Take Snapshot'. Simply click in the 'Edit Menu' again. Over the drop-down checklist, select 'Select All'.
Extract Image: Visit the picture you wish to extract. Right-click the picture. On the pop-up list, click on on 'Copy Chosen Graphics'.
Save the Image: Open any graphic enhancing packages like CorelDraw. Paste the graphic for the computer software. Finally, conserve it.
1 note
·
View note
Text
CorelDraw के File Menu के सभी Option के बारे में Details में जानकारी
http://dlvr.it/Skqjlc
0 notes
Text
Toast dvd ripping

#Toast dvd ripping pro#
#Toast dvd ripping software#
#Toast dvd ripping plus#
#Toast dvd ripping mac#
We disclaim any proprietary interest in such third-party information, imagery, materials, marks and names of others.When you’re ready to start your copy, put the master DVD into the drive and click on the red record button. Use of any brands, names, logos or any other information, imagery or materials pertaining to a third party does not imply endorsement. All other company, product and service names, logos, brands and any registered or unregistered trademarks mentioned are used for identification purposes only and remain the exclusive property of their respective owners. Parallels is a trademark or registered trademark of Parallels International GmbH in Canada, the U.S. ClearSlide is a trademark or registered trademark of ClearSlide Inc. Roxio, the Roxio logo, Toast, Corel, AfterShot, CorelDRAW, Essentials, MindManager, Natural-Media, Painter, SmartStroke, and WinZip are trademarks or registered trademarks of Corel Corporation in Canada, the U.S. To learn more about Corel, please visit ©2020 Corel Corporation. Our success is driven by an unwavering commitment to deliver a broad portfolio of innovative applications – including CorelDRAW ®, ClearSlide ®, MindManager ®, Parallels ®, and WinZip ® – to inspire users and help them achieve their goals.
#Toast dvd ripping software#
Offering some of the industry's best-known software brands, we give individuals and teams the power to create, collaborate, and deliver impressive results. For more information, visit About CorelĬorel products enable millions of connected knowledge workers around the world to do great work faster. Whether you're working with audio, photo, or video, Roxio gives you the power to create, enhance, preserve, and share your digital creations. Information on volume licensing for commercial and educational organizations is available at or by contacting Roxioīrought to you by Corel, Roxio products enable consumers and businesses to make the most of their digital media and disc burning projects.
#Toast dvd ripping pro#
Roxio Toast 19 Titanium and Roxio Toast 19 Pro are available now in English, French, German, Italian, Japanese, and Spanish as electronic downloads directly from Roxio Toast 19 Titanium is available at the suggested retail price (SRP) of $99.99 (USD & CAD)/ £89.99/ EUR 89.99. Produce amazing photo art by converting photos into paintings using leading-edge AI and SmartStroke™ technology.ĪfterShot ™ 3 – Efficiently correct and enhance your photos and apply adjustments to one or thousands of photos at once.īlu-ray Disc Authoring – Burn your video to high-definition Blu-ray Disc. NEW! Painter ® Essentials™ 7 – Sketch, draw, or paint with highly realistic Natural-Media™ brushes.
#Toast dvd ripping mac#
NEW! WinZip ® Mac 8 – Securely manage, store and share files on your Mac with support for iCloud Drive, Dropbox, Google Drive, and ZipShare. Take advantage of enhanced editing with up to four multi-cam streams. Add creative flair to your DVD or Blu-ray movies with a variety of t hemed menu template s, and customizable titles and chapters.
#Toast dvd ripping plus#
Toast 19 Pro gives users all the power of Toast 1 9 Titanium, plus digital media must-haves worth over $200. Ensure audio recordings fit the length of your projects with new time-stretching capabilities and easily adjust the length of a recording while preserving its original pitch. Plus, new drop-down action options allow you to make the most of Toast’s comprehensive toolset and fast-track any project.Įnhance your audio files, reduce distracting background noise, adjust sound, and get creative with audio effects using Toast’s new audio tools. The updated media browser makes it easier than ever to find, preview, and drag and drop files to your projects with automatic filtering that indicates which files are compatible with your project type. A new stylized menu helps you find and launch any type of project with ease. Work more efficiently with a redesigned UI that enables you to pin up to eight of your most-used workflows to the all-new Home tab for quick access when Toast launches. “Knowing that each of our users has their own unique workflow and favorite tasks, we’re excited to give you the power to create the personalized environment that feels most intuitive to you.”Ĭompatible with macOS Catalina, Toast 19 Titanium is a complete digital media management suite that delivers an exceptional CD and DVD burning experience. Now you can pin go-to tools on the new Home tab, easily look up the features and files you need on the fly, and breeze through projects with drop-down action options,” said Prakash Channagiri, Director of Product Management for Video at Corel. “Boosting productivity as you tackle all your digital media and disc burning projects, our new Toast 19 suites feature a customizable UI and improved workflow.
0 notes