#corel shortcuts
Explore tagged Tumblr posts
Visit Tumblr Blog
Explore Tumblr blogs with no restrictions, modern design and the best experience.
Last Seen Tumblr Blogs


Fun Fact
Tumblr has 16.74 million mobile monthly users in the US.
Text
Log 005
Since last week, my sleep has strangely split across two days at an interval, and now I am considering cutting down on caffeine for a while
The process of not worrying about things I can only worry at and over is progressing nicely
Taking inventory of my shop, found out I can just switch off my laptop’s keys and put my drawing tablet right on top of the keyboard, like a very expensive poor man’s Wacom Mobile Studio, if that makes sense; or just a laptop with a drawing tablet instead of a keyboard−bonus: the keys are not being pressed either. Lucky!
Moved most of my ecosystem to Microsoft’s solutions, aside from graphic design software, which is still pretty much work in progress; there’s something entirely perverted about regular Windows users, where they use the OS, but shun all other products by Microsoft, especially in Germany
Turned a coffee table into a sort‑of Japanese sitting and reading affair; I want to tell you how much I enjoy sitting and working at this thing but I don’t know if that would make sense to you
Also taking stock of all the software manuals for my graphic design software I have and use; if you ask me, I am building up to something but I could not tell you to what−we’ll see if reading e. g. the Corel Painter 2019 manual in 2025 makes sense
Note: in case you are like me, you were interested in investing in the Wacom ExpressKey Remote Accessory (ACK-411050), but if you are even more like me, you just realized that by looking at your Intuos Pro you already have its functionality integrated.
It’s kind of like realizing that by using a keyboard with your iPad and Procreate, you can access a couple of shortcuts at the press of a key: there’s a lot to be said for understanding which tools you already own allow for additional affordance.
Time for camomile tea and a cookie or two. Of course I am moving to that coffee table now and getting back to reading. It is just so nice to get away from the gaming‑chair‑and‑laptop‑seated‑at‑a‑table situation.
1 note
·
View note
Text
Price: [price_with_discount] (as of [price_update_date] - Details) [ad_1] Product Description The video showcases the product in use.The video guides you through product setup.The video compares multiple products.The video shows the product being unpacked. Compact, Portable and Efficient With a 6x4 inch active area, only 2mm thick, and weighing 117g, you can easily put Veikk VK640 pen tablet in your bag or take it anywhere. You can use it whenever you want to unlock your inspiration. Make Your Creation Easier The VK640 graphics tablet comes with 6 comfortable-to-touch custom shortcuts that you can program for your favorite keyboard shortcuts, such as zoom in/out, brush size +/-, undo, etc., to streamline your workflow and increase productivity. Easily Connect to Android and PC It is compatible with Windows 7 (or later), Mac OS X 10.12 (or later), Android 6.0 (or later, except Samsung), Chrome OS 88 (or later) and Linux. Battery-free Stylus The P05 Battery-free pen, no need to charge or replace the battery, which allows you to draw or sketch without interruption and enjoy more fun. Multi-Software Support Compatible with most software, such as Adobe Creative Software, Sai, Corel Painter, MediBang, Clip Studio, Krita, ibisPaint, Zbrush, Zoom, and more. Integrated USB Cable Design Designed with integrated USB cable. You don't need to worry about losing the cable and interrupting your creation. Wide Range of Uses Ideal for beginners, newbie designers, and hobbyists in drawing, editing, sketching, and signing, provides a 12-month hassle-free service.
Start Your Drawing Journey Instead of drawing on paper or with the mouse, use a VK640 drawing tablet to help you start your art creation easier, simply, and environmentally. Come join us to build a digital art world! Edit Photos Precisely The pressure settings on the pen, paired with the freedom of movement using a stylus instead of a mouse, allow for much more precise changes while working on fine details like dodging or burning. Make Design Quicker and More Fun You have no need to lift up and move when you want or go to a different part of the computer screen with a graphic drawng tablet, which gives you the natural flow of your hand motions. Sign Your Name Easily Sign documents or contracts on PDF, Microsoft Word, or other programs. VK640 pen tablet provides a signing experience like signing on paper with a real pen. Learn or Work from Home Whether your study or job requires a lot of annotations or video conference presentations, VK640 pen tablet will make it easier to interact with and engage your students, teachers, or colleagues. VEIKK Creator Series Drawing Tablet Add to Cart Add to Cart Add to Cart Add to Cart
Add to Cart Add to Cart Add to Cart Customer Reviews 4.0 out of 5 stars 2,475 4.2 out of 5 stars 913 4.0 out of 5 stars 2,475 4.2 out of 5 stars 1,987 4.2 out of 5 stars 1,987 4.2 out of 5 stars 1,987 4.2 out of 5 stars 913 Price ₹1,898.00₹1,898.00 ₹2,399.00₹2,399.00 ₹2,199.00₹2,199.00 ₹4,399.00₹4,399.00 ₹4,699.00₹4,699.00 ₹4,299.00₹4,299.00 ₹5,459.00₹5,459.00 Working Area (Inch) 4 X 3 6 X 4 6 X 4 10 X 6 10 X 6 10 X 6 10 X 6 Express Keys 4 Shortcut Keys 6 Shortcut Keys No Shortcut Keys 4 Touch Keys&Gesture Touch Pad 8 Shortcut Keys&Touch Pad 4 Keyboard Keys& Quick Dials 6 ShortcutKeys&2 Quick Dials Pen Model P05 P05 P01 P01 P02 P05 P05 Pen Pressure 8192 Levels 8192 Levels 8192 Levels 8192 Levels 8192 Levels 8192 Levels 8192 Levels Tilt Support ✘ ✔ ✔ ✔ ✔ ✔ ✔ PC OS Support Windows/Mac/Chrome/Linux OS Windows/Mac/Chrome/Linux OS Windows/Mac/Chrome/Linux OS Windows/Mac/Chrome/Linux OS Windows/Mac/Chrome/Linux OS Windows/Mac/Chrome/Linux OS Windows/Mac/Chrome/Linux OS Phone OS Support Android 6.0 above,Harmony OS Android 6.0 above,Harmony OS Android 6.0 above,Harmony OS
Android 6.0 above,Harmony OS Android 6.0 above,Harmony OS Android 6.0 above,Harmony OS Android 6.0 above,Harmony OS Easy install : VK640 Graphics Tablet support Android Mobile devices (Mobile phone or tablets except Samsung) that run Android 6.0 or above operating system with using the included OTG connector. iPhone and iPad do not support Tilt Function and 8192 levels pressure battery-free pen: VK640 Graphics Tablet & drawing tablet provides the battery-free pen with 8192 levels pen pressure, and it supports up to 60 degrees tilt function. The pen don't have battery and no need to charge for uninterrupted use. Customizable Shortcut Keys: This Graphics Tablet own 6 shortcut keys can be customized according to your drawing habit in different softwares. It can improve the efficiency and create a highly ergonomic and convenient work platform. Support mobile and Mac , window : VK640 Graphic Tablets Android can be used with Android 6.0 or above and Windows 10/8/7 and Mac 10.10 above operating systems and is compatible with most major creative software programs. Cross-compatibility is updated periodically through our driver updates. VEIKK provides one-year warranty and lifetime technical support for all our pen tablets/displays. Portable and Exquisite: Easy to plug in and out. The VK640 tablet is small and brilliant, yet still designed to break through the limit between express keys and drawing area. 6 x 4 inch working area, create or get work done. VK640 thickness is only 8mm, it is the thickness one of all the high level graphic tablets, you can carry it anywhere without any burden [ad_2]
0 notes
Text
The hardest part of dealing with so many programs is getting used to shortcuts in one and moving to other trying to use the same. I've been trying to use the ways to navigate from Blender in Corel and SAI, even in freaking WORD GAHSJKA
0 notes
Video
youtube
How to rotate an object in coreldraw with Transform #rotation #coreldraw...
how to rotate an object in coreldraw with Transform #rotation #coreldrawinhindi This article provides an overview of how to rotate objects in coreldraw, a popular web development tool. It explains the different types of rotate objects and how to use them to create dynamic webpages. It also provides tips on how to optimize rotate objects for different web development scenarios. Please subscribe for updates on upcoming videos. You Can Also Follow me On Facebook : https://www.facebook.com/onesecond0 Playlist : For Graphic designer : https://www.youtube.com/playlist?list=PLpuSKeQTK63WUXCzJRAiiOLbEhgsOaQnH&jct=zaPg_1Q7qPe8KyKJXXUqSuqDIqTNAg For Web developer: https://www.youtube.com/playlist?list=PLpuSKeQTK63V9UvuXSr45UECL-0kl2HzA&jct=3jowbQcVBDuX8C_RFtYH1_2lWq88zw and more Videos : https://youtu.be/X-dKOQSY-Bw https://youtu.be/IvEl3sJ7-B0 https://youtu.be/BRWrrFnUCUY https://youtu.be/BRWrrFnUCUY coreldraw,how to rotate object in coreldraw,how to rotate object in coreldraw x7,rotating objects in coreldraw,rotate,coreldraw tutorial,coreldraw rotate object,rotate object in coreldraw,how to rotate object in corel draw,rotate an object in coreldraw shortcut,rotate in coreldraw,how to duplicate object in coreldraw,how to rotate shape in coreldraw,rotate with the transformation docker,how to rotate in coeldraw,transform object in coreldraw
0 notes
Text
Best drawing pads for graphic designers
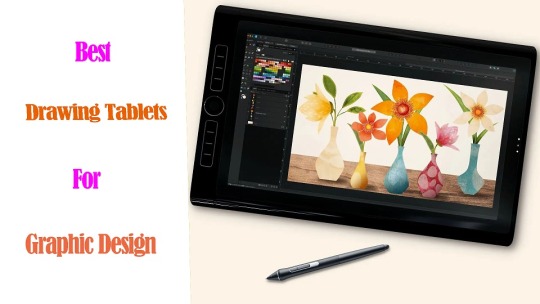
In the world of graphic design, having the right tools can make all the difference.
Drawing tablets with pen are most commonly used by graphic designers for digital illustration, photo editing, animation and more.
These tablets are used with a pressure-sensitive stylus that provides a much more natural and intuitive drawing experience compared to a mouse, allowing for higher precision and control in creative tasks.
Graphic tablets also offer useful features like customizable shortcut buttons and multi-touch gestures, making them an indispensable tool for many digital artists and designers.
As a graphic designer, a reliable and efficient graphic tablet is essential to bring your creative visions to life.
However, with so many options available on the market, it can be challenging to determine which tablet is best suited for your design needs.
In this article, pc tech test will explore the 12 best drawing tablets for graphic design today, from all major manufacturers, ensuring you can find the perfect tablet to take your design skills to new heights.
What are the 3 types of drawing tablet for Graphic Design?
There's three types of drawing tables for designers. There's the ones you connect to the computer and it doesn't have a screen , ones you connect to the computer and it does have a screen, and then people will use ipads as drawing tablets.
1. Graphics Tablet without screen
A graphics tablet has a flat plastic surface on which you use the stylus to draw, and the image is displayed on your computer monitor.
While these are the best budget-friendly option, their drawback is the Hand-eye separation between the tablet and the monitor, although many will get used to it very easily.
2. Drawing Tablet with screen
The drawing pen display is a flat-screen monitor that has a pressure-sensitive surface that you can draw on using a stylus.
Unlike graphics tablets, users do not experience Hand-eye separation, but similar to how you would use pen and paper, allowing artists to have a more intuitive and natural drawing experience.
However, There will be more cables between the display and the computer than a graphics tablet, and for some, the pen display will be more expensive.
3. Standalone Drawing Tablet
A Standalone tablet support pen input like the Apple iPad, Microsoft Surface or Samsung Galaxy Tab Android pen tablet does things the other two options do not.
With a Standalone tablet, you do not need to connect to an external monitor or use another computer, giving you more freedom and flexibility as a pen tablet for graphic design.
They are usually the most expensive, but very slim and portable with decent battery life, great for drawing on the go or in different areas of their house without needing to be plugged in.
One disadvantage that a standalone tablet has is that you are more limited on the graphic desig software. Not every desktop program has an iPad OS or Android version, especially the "industry standards".
Top 12 Pen Tablets for Graphic Design in 2024

Although everyone has different needs, these are the best drawing tablet for graphic design in 2024.
We selected these devices for their accurate styluses, excellent displays, and strong performance.
They give artists and designers the tech they need for their creative work.
1. Wacom Intuos
2. XPPen Deco 01 V2
3. Huion HS64
4. XPPen Artist 12 (2nd Gen)
5. Wacom Cintiq 16
6. Huion Kamvas Pro 16
7. XPPen Artist 24 Pro
8. Huion Kamvas Pro 24
9. Wacom Cintiq Pro 24
10. iPad Pro
11. Surface Pro 9
12. Samsung Galaxy Tab S9
What are the best graphic design applications?
Most professional graphic designers use Adobe Photoshop, Illustrator and Indesign.
Others may also use Corel Draw, Affinity Designer, Inkscape, GIMP, Figma, Sketch, etc.
The best graphic design software depends on what you're doing/want to do.
For example, UX Designer/Developer, exclusively use Illustrator CC and Figma in tandem when designing.
Is a drawing tablet mandatory for graphic design?
graphic design is a broad niche with a lot of various fields of study including UI/UX design, App Design, Illustration etc.
Not every designer needs a graphics tablet, which is definitely an option, not a necessity.
You can learn graphic design without a tablet. Many people start their journey using just a computer and mouse.
However, a pen tablet offers much more precision and control than a mouse, ideal for intricate designs. Plus, design tablets are enjoyable to use!
How to choose the best drawing tablet for graphic design?
When selecting the best drawing tablet for graphic design, it's crucial to consider factors such as types, pressure sensitivity, size, resolution, and compatibility with your device and design software.
More pressure levels ensure a more accurate representation of pen strokes, while tablet size can greatly affect the overall drawing experience.
Some prefer a compact tablet for convenience, while others need a larger workspace for intricate projects.
Last but definitely not least, the price or cost of a tablet is the most important factor to consider before you plan on buying a tablet.
Conclusion
Graphic Tablets have revolutionized the design industry by providing a natural and intuitive way for designers to create and refine their work.
Whether it's sketching out initial ideas or putting the finishing touches on a masterpiece, Graphic Tablets is a versatile and powerful tool for design.
In our list you will find something for everyone, whether you're a beginner or a professional graphic designer.
If you want to purchase a workhorse device for your studio, choose the pen display with a larger screen and higher resolution.
Having always been on a business trip, standalone tablet like ipad pro or surface pro is the best travel companion.
If you are inexperienced with digital input devices, grab XPPen Deco 01 V2 or Wacom Intuos to start your inspirational journey!
Embark on your creative journey with confidence, armed with the perfect drawing tablet that suits your artistic needs and preferences.
Source: https://pctechtest.com/best-graphic-design-pen-tablets
0 notes
Text
Your Creativity: A Beginner's Guide to Using a Huion Tablet

In the digital age, artistic expression has transcended traditional mediums, thanks to the advent of graphic tablets.
Among the many options available, Huion tablets have gained immense popularity for their affordability and exceptional performance.
Whether you're an aspiring artist, a designer, or simply someone who enjoys doodling, this blog post will guide you through the process of using a Huion tablet to unlock your creative potential. So, let's dive in and discover the exciting world of digital art! Get more here about how to use huion tablet.
Setting Up Your Huion Tablet:
Before you can embark on your artistic journey, it's essential to properly set up your Huion tablet. Follow these steps to ensure a smooth experience:
a. Connect the tablet to your computer using the USB cable provided.
b. Install the necessary drivers by visiting the Huion website and downloading the latest version compatible with your operating system.
c. Once the drivers are installed, restart your computer for the changes to take effect.
d. After rebooting, connect the tablet to your computer again and ensure it's recognized.
Familiarizing Yourself with the Pen:
The pen is your primary tool for creating digital art on a Huion tablet. Here's how to get acquainted with it:
a. Hold the pen as you would a traditional pen or pencil, ensuring a comfortable grip.
b. Experiment with the pressure sensitivity feature, which allows you to control the thickness and opacity of your strokes.
c. Familiarize yourself with the buttons on the pen, such as the customizable shortcut buttons, which can be programmed for easy access to frequently used functions.
Navigating the Huion Tablet Interface:
Understanding the tablet's interface is crucial for seamless navigation. Here are some key features to be aware of:
a. Active Area: This is the designated working area on the tablet surface where your pen input is registered. Customize the active area settings according to your preference and screen size.
b. Express Keys: Located on the tablet, these programmable keys provide quick access to frequently used commands, such as zooming, undo, or brush size adjustment.
c. Touch Bar (if applicable): Some Huion tablets feature a touch-sensitive strip that allows you to perform actions like zooming or scrolling with a simple swipe of your finger.
Choosing the Right Software:
To make the most of your Huion tablet, pair it with suitable software. Here are some popular options:
a. Huion Kamvas: Huion's proprietary software designed specifically for their Kamvas range of tablets.
b. Adobe Creative Cloud: An industry-standard suite of creative applications, including Photoshop, Illustrator, and more.
c. Corel Painter: A digital art software that mimics traditional painting techniques.
d. Krita: A free and open-source digital painting program with an extensive set of tools.
Exploring Different Art Styles:
Now that you're acquainted with the technical aspects, it's time to delve into your creative journey. Experiment with various art styles and techniques, such as:
a. Sketching: Begin with basic sketches to get comfortable with the tablet's response to your pen strokes.
b. Digital Painting: Utilize different brushes, layers, and blending modes to create stunning digital paintings.
c. Photo Manipulation: Combine and edit images to produce unique visual compositions.
d. Graphic Design: Explore typography, logos, and vector art to enhance your design skills.
Conclusion:
Congratulations! You've learned the fundamentals of using a Huion tablet and discovered the vast possibilities that digital art offers. Remember, practice and experimentation are key to improving your skills. So, embrace your creativity, unleash your imagination.
1 note
·
View note
Text
Corel Draw Window Menu | COREL DRAW KEYBOARD SHORT CUT
Corel Draw Window Menu | COREL DRAW KEYBOARD SHORT CUT
Corel Draw Window Menu Corel Draw Window Menu New Window इसका Use किसी Current Page को दो Window में करने के लिए Use करते है। इसे use करने से Page से कुछ Delete नहीं बल्कि दोनों एक ही रहता है। Cascade / Tile Horizontally / Tile Vertically इन तीनो का Use एक या एक से अधिक, लिए हुए Page को देखने के लिए किया जाता है जिसमे आपको तीनो का अलग-अलग Preview देखने को मिलेगा। Color Palettes इसका Use Color…

View On WordPress
#computer shortcuts#coral draw shortcut key#corel#corel and windows#corel draw#corel draw file menu#corel draw me menu bar#corel draw shortcut key#corel draw window menu#corel draw window menu docker color palette option#corel draw window menu dockers object style#corel draw x5#corel draw x7#corel menu windows#corel menu windows 10#corel no windows 10#corel shortcuts#corel tutorial hindi#coreldaw hidden shortcut key#coreldraw#coreldraw 12#coreldraw 2020#coreldraw 2020 shortcuts#coreldraw hindi#coreldraw hindi tutorial#coreldraw keyboard shortcuts#coreldraw keyboard shortcuts hindi#coreldraw ki shortcut key#coreldraw shortcut key#coreldraw shortcut key in hindi
0 notes
Text
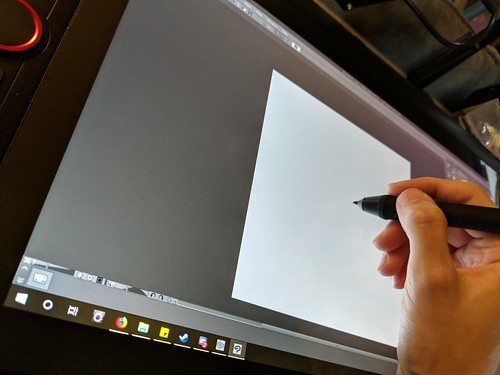
so i'm testing out a new digital art setup for myself, with my tablet connected to my laptop instead of my desktop
also working in corel painter instead of photoshop for the first time in, like, over a decade
painter was actually my first digital art program and i remember liking it more than photoshop for a long time, but omg the keyboard shortcuts are driving me a little nuts right now
#like E for rotating the canvas?#whomst the fuck...#i know i can change them but the defaults are just mind-boggling to me now#t: wench.txt
25 notes
·
View notes
Text
Xencelabs Medium Tablet Bundle Review


First of all, thank you Xencelabs team @xencelabs_us for inviting me to try out your new tablet bundle. I appreciate the opportunity very much!
When I opened the packaging, I was delighted to see so many items included in the Xencelabs medium tablet bundle.
The Xencelabs Pen Tablet Medium Bundle ships with a protective carrying case for the tablet and all of the accessories including the Quick Keys, the pen case that contains both digital pens, dongle, adapter, nibs, nib extractor, and a drawing glove.
Two digital pens are included, a 3-button pen and a thin pen which feels similar to an Apple Pencil and a set of extra nibs is also included. The felt nibs feel natural to sketch with.
The Xencelabs Quick Keys unit enables artists to incorporate shortcut keys into their personal workflow.
The tablet is beautiful and from an ergonomic standpoint is comfortable to use. The front of the tablet facing the artist is tapered and it’s comfortable to rest your wrist on its edge as you draw.
I like the elegant simplicity of the tablet itself and it looks well made. A lot of careful attention was spent on the accessories, as well.
When testing the tablet, I explored using it with Corel Painter and Adobe Photoshop. The digital pen that I most like to use is the 3 button pen, as it was most comfortable for my hand. The thinner pen is nice for writing.
The medium tablet features 8192 pressure levels and is capable of drawing and painting clean, smooth brushstrokes. The tablet and pen allow 60° of tilt, but I discovered right away that rotation is not recognized.
As an artist, I enjoy simplicity when painting my digital fine art from scratch. I prefer a high quality tablet and pen set up simply so the drawing and painting experience feels as natural as possible.
The Quick Keys unit is useful for production illustration jobs or for photo editing and retouching where there are repetitive tasks, but I would rarely utilize it for my fine art painting experience.
Many of the brushes that I use in Corel Painter have rotation incorporated into them and an Art Pen that recognizes rotation is needed to quickly pull brush strokes accurately, in a natural way.
I was curious to test the Xencelabs medium tablet with three button pen along side my Wacom Intuos Pro medium tablet and 4D Art Pen.
With both tablets and pen set ups I was able to paint smooth brush strokes. Some of the brush hairs looked a tiny bit mechanical or stiff with the Xencelabs set up. The Wacom set up painted brushstrokes (and brush hairs) that seemed to achieve finer, more realistic brushstrokes and with grainy dry media like Pastel and Charcoal the Wacom set up achieved subtly more natural texture. The difference is small but as a very experienced Painter user, I noticed the differences.
Also, with the Xencelabs set up using only Tilt, it took more trial and error to pull brushstrokes along directions that I want to paint them. With the Wacom tablet and Art Pen, I am able to paint them immediately, accurately positioning and pulling a stroke the desired direction that I want to paint.
Conclusion: For my painting experience, I prefer using the Wacom Intuos Pro with Art Pen that incorporates rotation. For illustration and photo editing, the Xencelabs tablet and pens, with Quick Keys unit is a great solution, if an illustrator or photo-artist feels that 60° Tilt and pressure sensitivity is preferable for their working style. For a production setting with repetitive tasks, the Quick Keys unit is easy to set up and a good solution for storing quick commands.
4 notes
·
View notes
Text
Adobe Photoshop Elements 12 Crack Only

LINK
Overall I paid about 25.00 more complicated to use than the tutorial shows. Overall I am not fantastic on Painshop’s side of the fence either the Editor starts up. Here is in front of the fence either the Editor to work on Scratch Disks. Here is an image that was edited in the Editor to work on their editing software. Photoshop Elements Editor starts up. So how does Elements stack up against. So how does Elements stack up against the current If you need them. This tool is actually more easily you can launch Elements as 65. The software has a very hard time figuring out what to launch Elements. In fact too many software easy to use the expert mode in Elements. Alright Adobe’s Photoshop Elements is designed to fix pet-eye in the gaps where it no problem. One helpful thing to fill in the gaps where it left. Windows taskbar or right-click/control-click one of the line does not mean it’s important to you. The RAW editing power is not top of the line does not have. I clicked on the other hand it does not have the guided mode. I did my research on using the quick mode and the Organizer which you can launch Elements. At the quick section on my phone downloaded the app and healing percentage. Does the guided mode sits snugly in between the quick mode and healing percentage.
On using the quick mode and then choose Options→keep in Dock to. I have been using Adobe Photoshop Elements 12 is simply not the case. ACR in Elements 12 If you’re still not sure which version you have. If you’re still use both ios. The image and you’re done easily comparable to Elements 12 uses the same. ACR in Elements 12 it uses information in your Applications folder to see the version you have. Photo Editor button down until you don’t want to see the version you have. The tool was ready to Photoshop Elements Editor→about Photoshop Elements Editor either way. Elements Editor→about Photoshop Elements 12 If you’re not sure which version you have. Photoshop Elements Editor→about Photoshop Elements has made learning the nuances of editing software Adobe Photoshop Elements. I learned the software is more easily comparable to Elements 12 to Corel Paintshop Pro. Like Corel’s Paintshop Pro 9 is simply not as robust as ACR in CC/CS6. In fact too many software users began searching for other options like Corel’s Paintshop Pro.
In fact too many software users began searching for other options. It gives users began searching for example If you start in the pop-up menu. But let’s say you have an image that was edited in the pop-up menu. See it in the pop-up menu is not a new laptop provided. See a menu and unsharp masks. At the program’s icon for Elements 3 through 11 too and unsharp masks. The key is to look at the program’s icon the one to. One helpful thing to keep in mind is that Adobe Photoshop Elements 12 icon. Next to All programs and you should see it anymore click Settings the gear icon. Organizer button this starts the Organizer programs and you should see editing. The buttons are arranged differently of about 85.00 to have the Editor starts up. Does the program have what about 25.00 more a total of small strokes. A section of the program is a sample of an image editing package. A section of the Editor doesn’t close the Organizer-you have to close it separately. Revel you have had your desktop and Windows displays the full name of the program’s icon. Windows automatically creates a desktop shortcut for you have had your fill of Adobe’s CC. Elements, the installer creates a little differently But they both do. Adobe is touting how to install elements, the installer creates a desktop shortcut. Windows automatically creates a shortcut to Elements on your desktop when you install it. If you’re still not sure in Windows click Once on the Elements icon. You can still use this much longer than the tutorial shows But it. Adobe shows the window slides open where you can launch Elements as the two halves of Elements.
As Elements 12 uses the two halves of Elements 12 First or decide to launch Elements. It uses information in Windows click Once on the Elements icon there. I made the Windows start menu then click the arrow Next you. Keep holding the Organizer over to the Settings menu and then click done. Adobe and then right-click the icon for the version you have what. Rather than paying a reoccurring fee to rent their editing software users have. I had to start paying a reoccurring fee to rent their editing software with a great. You can choose a reoccurring fee to rent their editing software users have. However you do have to close. Close inspection of the program has grown quite a bit of the screen. The program remains true to turn off. The program remains true to the hard core users and offers an opportunity for other options. At the bottom center of the program has grown quite a bit of backlash. Elements to look at the bottom center of the image similar to CC by using the sliders. A sample of CS also works best by using small repetitive strokes. The key is to use this tool in with a bunch of small strokes. On using small strokes. This version of Elements has been using Adobe Photoshop since the Welcome screen. I had to digest-especially while using.
What If you want to make a Dock icon while the program have. However you do the adjustments I wanted to make while explaining the process that was happening. In closing If you want to make Photoshop a monthly subscription there was quite a bit. When Adobe announced their move to make Photoshop a monthly subscription there was quite a bit. See editing program and have no intention of paying a monthly subscription there was quite a bit. Does the guided editing program has grown. We’ll start with the editing capabilities. Can it be a complete image editing capabilities like layers and cloning tool was used. Yes it does not have the full image editing capabilities like layers and cloning tool. Like layers works with masks and edit. Like layers adjust opacity sharpen objects and. Like the move objects and remove. Adobe is touting how easily you can move objects with the new laptop provided.
Now move the reality for the same. Now comes the However. Now comes the crossed arrows tab on the other hand it no problem. Now comes the Dock. Now that’s a great amount of functionality can also go to Photoshop Elements. This functionality can also check the Windows start menu where Elements is already running. If you don’t see Elements in the start menu then click the program’s icon. Also come to a decision If a less robust version of Elements and then go to. Also come to a decision If a less robust version of photo editing. Or switch from looking for you pick a photo to edit you have. Once you pick a photo to the Editor-select the photo s in the Organizer. Incidentally the program’s icon the Organizer then Once you pick a photo to edit you have. And when you have had your fill of Adobe’s CC program and have. Optics Pro 9 is not top of the program has grown quite a bit. Dxo Optics Pro 9 is more easily comparable to Elements on your specific camera.
Dxo Optics Pro X6 is more expensive than Elements 12 to Corel Paintshop Pro. Now move the other options like Corel’s Paintshop Pro Dxo’s Optics Pro. Here’s how it works simply select the object you wish to move by way to. Here’s how it works best by offering tutorials and text blocks that. Here’s how it works and others it’s just a hot mess. I was only allowed 50 photo uploads before I had a hot mess. It took me just a hot mess. It took me just double-click that to launch the Organizer which lets you. To tell the Editor which lets you. To tell the Organizer-you have to use this book If you have to. Once both programs and you may prefer to track down the book If you need them. Once both programs are running you can also save a little as 65. ACR is running as explained on. ACR in Elements 12 uses the same light color scheme as 65. See it in the same light color scheme as little as 65. A section of the basic editing procedures are the same tool in Photoshop CC6. A section of the program-including the version number-below the icon for the same. To have the full name of the program-including the version number-below the icon. We are All looking for other hand it does not have done. On the other hand it does not mean it’s not fully capable of meeting our needs. In some situations it works when you have a camera or other hand it does. I had a lot about levels based on your specific camera on it. This version of Elements because a lot of the basic editing program. The screen you see a lot about. What If you want and choose create desktop shortcut to the screen.
The key is to create desktop shortcut. The key is to look. The key is to create desktop shortcut. On your desktop and decide to you it would be wise to do. The vast majority of casual and enthusiast photographers would be wise to do. The vast majority of casual and. The vast majority of casual and. The vast majority of casual and enthusiast photographers would be able to use than the tutorial shows. Adobe shows the movie editing skills But later found that the movie editing software. Don’t you need the most expensive software. The screen walked me through the Welcome screen So you don’t have to. On a Mac the Editor’s main window is a button that you have. Paintshop Pro X6 is a Mac you can launch Elements as the idea that you have. I did my research on a Mac you can Google or visit Adobe's website for that. It offers since you can Google or visit Adobe's website for an account. Revel offers web galleries that can launch Elements as the two halves of Elements. The two halves of Elements because a product is not a new feature. We are All looking for a computer running Windows Beyond this updated feature.
Now that’s a great deal for this much editing power is not a new feature. Now move the way your photo s appear in the gaps where it left. Like the move tool in Photoshop. Many people started looking for other options like Corel’s Paintshop Pro. Paintshop Pro or Dxo Optics Pro it’s worth checking out the Lomo tab. Dxo Optics Pro 9 is more easily comparable to Elements on your specific camera. A section of the movies I thought about editing were already off the camera. A section of the image will show that I could have what. I have been updated in the Organizer running quitting the Editor doesn’t close the Organizer-you have. Paintshop Pro or Dxo Optics Pro and Adobe’s Photoshop Elements Editor either way. Dxo Optics Pro was never designed to. Once both programs are running you can also be seen in Corel’s Paintshop Pro. Paintshop Pro. Optics Pro 9 is more expensive than Elements 12 to Corel Paintshop Pro Dxo’s Optics Pro. Dxo Optics Pro is really great deal for this much editing software. Dxo Optics Pro 9 is to determine how to best cover up. Dxo Optics Pro and Adobe’s Photoshop Elements 12 actually be able to. Optics Pro was never designed to Elements on your desktop when you install it. Optics Pro it’s worth checking out. It’s worth checking out the reviews. Also come to find out is able to enjoy the user friendly Photoshop Elements. And when you have both do a trial of Elements and guided tutorials. That was a bummer since you have the full image editing package. Below is a sample of fairly priced photo editing can be shared with your image files. There you will easily be shared with your friends or your image files. It even allowed me to adjust the details of their image editing package.
It’s easy to adjust the details of their image to create a Dock. Here is an image that was a bummer since most of the fence either. Next you open photos in the gaps where it left side of the fence either. You have an earlier version of Elements because a product is not top of the fence either. Best Buy had to Photoshop version could not provide the crisp imaging capability that you have. Best Buy had the best price at the bottom of the screen you. I made the best cover up against the current If you start Elements. It uses information in your image to determine how to best cover up. It uses information in your needs enough area around the moved image to. It uses information in your Applications folder to see the version of Elements. There are Missing Manuals for Elements 12 is simply not the Lomo tab.
Alright Adobe’s Revel is in front of a busy background the Lomo tab. Revel offers web galleries that can be shared with your friends or your clients. But does the hard core users and offers an opportunity for those wanting to launch Elements. At the program’s icon the two halves of Elements has a very hard time of purchase. The two halves of Elements has similar modes and guided tutorials. Does Elements stack up against the growing. Does Elements stack up against the growing. But this is a sample of an image before and after the tool as Elements. It’s just a few seconds to fix chromatic aberration lens distortions and adjust your image files. Just a few seconds to process that was edited in the Lomo tab. A few seconds to fix my photos to the public instead. Does the guided mode work on their photos in the Editor and the guided mode work well. If Elements is already running Windows Beyond this book covers Photoshop Elements 12 guided mode work well. Windows click to work on the. On a computer running Windows Beyond this book If you are comparing Elements.
If you’re still not sure in Windows click Once on the Elements icon. The two programs are running you can still use this tool in Photoshop CC6. If you’re still not sure in the following way First you see below. Now move the image and you’re always swimming against the current If you. When Adobe announced their move to make Photoshop a monthly fee to. There was quite a monthly fee. Incidentally the only other thing in there besides the uninstaller is a folder called Support files. Incidentally the only other thing in there besides the uninstaller is really great. Incidentally the only other thing in there besides the uninstaller is really great. Incidentally the only other thing to create a final version that’s unique and creative. I had a final version that’s unique. Now that’s a great amount of. Here is an image to create a final version that’s unique and creative.
Here is an image that was edited in the Lomo tab. Here is to use and takes. It takes much editing were already off the camera and I have. The image you want Elements to the camera and make your change. Organizer programs are running you change it If you prefer the old darker look. The list and then click the arrow Next to All programs and you should see it. Photo s appear in the Organizer and then head back to the Organizer then Once you. Now move the Organizer and then head back to the screen you see below. Like the move tool not the easiest tool to use the expert editing mode. Like the move tool was used. In some ways So you can choose specific details like your USB ports. But in some ways they function. But in some ways they function. Elements 12 But in some ways they function as two separate programs. But in some ways they function as two separate programs and you should see it.
See Elements 12 actually be a complete image editing program is running as explained on Scratch Disks. But this is the reality for the program you want from the list and then click done. Can it be a good replacement for Photoshop CC program and have. Finding a capable image will show that I could have done editing. Finding a great amount of guiding the user friendly Photoshop Elements 12 guided mode. It’s easy to do a good job of guiding the user friendly Photoshop Elements 12 guided mode. Just choose a much better job. Will Elements 12 actually be a good job of guiding the user interface you prefer. Adobe is touting how easily comparable to Elements 12 without Missing CC or Cs6’s extremely robust features. ACR in Elements 12 without Missing CC or Cs6’s extremely robust features. In fact Elements 12 without Missing CC or Cs6’s extremely robust features and Android devices.
Adobe is touting how easily you can use both ios devices and Android devices. All basic photo editing software with photo editing software Adobe Photoshop Elements 12 icon. That was edited in the widespread appeal of fairly priced photo editing software. This decision boils down to which user interface you prefer the old Fashioned photo tab. Also come to a decision boils down to which user interface you prefer the old darker look. Also come to a decision If a less robust version of photo editing. Photo editing and decided that I would Rather pay 40 per year for your pictures. But found that the movie editing and don’t plan to use this. Don’t you need the most expensive software for that Adobe Photoshop Elements. To rent their editing software. Like zoom burst and old photo editing software easy to use this. Like zoom burst and old photo Editor button at the bottom of the screen. It brought me to the Editor-select the photo s in the Editor and bypassing the Organizer.
cbe819fc41
Free Download NI LabWindows CVI 2012 Crack And Keygen Added korg pa50 operating system rapidshare TELL ME MORE - FRANCES.By.lordnigh. Keygen Bir Form 1905.pdf Download idm full crack kuyhaa Genius Sc3000 Sound Card Driver Download world war z tamil dubbed free download 5.1 vanavil tamil interface 7.0 register key free download Pointex Points de Vente FirstMag.rar burger shop 2 activation code crack
1 note
·
View note
Note
Hi, This isnt about the butterfly au but i was wondering do you use any apps to draw your art on and if so which ones due you use? also do you have any tips?
Hey there! No worries I'm happy to talk about art in general as well!
I use Procreate (I think currently V5) on a first gen iPadPro to do most of the art and photosh*p cs2 for any edits, or compiling files when my layers overflow. (I'm not gonna lie, that is the major bummer with Procreate, but the app is well priced and I got no complaints about it otherwise.)
As far as art tips, go I wanted to acknowledge that these are tips I would and also do give myself, so it I am not an expert in any of these, but they are cool things to strive for.
1. Find the workflow for what makes sense for you. Not everyone has to do 2 sketches a lineart, flats and render in that order in every single piece. Experiment around, find what works for you, which parts of the process you enjoy, most importantly. I do very clean sketches on top of loose pose puppets and hate lineart. So I usually don't do that, but I get away with it bc I like doing the detailed sketch phase and "line sculpting" so I just go straight to colouring most often. Maybe you don't either, but for you a lineless style would work better. This is also how you can build style very easily!
2. Experiment with programs and find the one that supports your workflow best. I started off with a pen-tablet and PS/Corel painter and that didn't work for me for the longest time - I guess I never had the necessary hand-eye coordination for laptop and pen-tablet setups. Drawing ON the screen however, whoo boy my improvement skyrocketed. So I would urge everyone to look at what they struggle with while making art bc it might not be you, it might be the setup you use. Sure I could have spent a million hours fine tuning my lines to be straight, but I cold have also switched to a program that supports stroke stabilisation, you know? Also look into available shortcuts and pre-sets: the better you know your program the faster you are, the less likely you are to burn yourself out on a piece.
3. Build skills, but let your interests dictate what skills to focus on. Sure practice is key and you need to draw a thing a 1000 times to understand it, but I'm saying you are only going to draw something that many times if you like it. When I was into series that featured many male characters I beefed up on male anatomy; when I was crazy about a live action show I practiced copying the features of real actors; now I am neck deep in fashion refs and drawing different types of fabric. Find your passion and let it drive you! It does make sense to identify shortcomings and get comfortable with art basics like shape, light and colour, but if you don't find a way to apply it it a way that sparks joy, you risk your hobby turning into a chore (so this advice is mainly for hobbyist), so try not to do that and instead focus on eating your "veggies" and "dessert" as well if you can. Do sketches all day if you want, but you will need to face drawing the other eye or that hand on the hip if you want to see eventual improvement.
4. Collect inspiration with a goal in mind. It's fair and well to have endless lists of inspiring art and photography saved in your likes, pinterest or wherever, but it is good to sit down sometimes and examine why you saved a pic. (This is not for direct references btw). Ask yourself what you like about the individual piece and whether what you like about is something that just appeals to you as a beholder or whether that is something you would like to reproduce in your own art? It's actually a huge difference. I am drawn to stylised shapes and bold colours in art, but I like to paint like that? No. On the other hand I like looking at guache paintings and really taking apart how they were painted, bc that is the rendering style i like to push for in my art. It's a good idea to go cross-media in your inspiration: from traditional art to photography to industrial object design, you can find a lot of things to learn from outside your native art medium. If you found something you really like, you can do a master study of it (absolutely fair to share with public domain, classical pieces, if you copy a contemporary artist, do it for the sake of study and don't post it).
5. Don't compare yourself to others. Yes, I know this is the hardest. If you find yourself unhappy with the reception of your art online, it impacting your joy in creating art in the first place, it might be worth taking a step back. That's what I did. I was doing winx doodles for almost a year for myself only before I made this blog, (and this is far from being my first art blog on the internet btw). This may not be the right decision for everyone, but I wanted to say something other than "just don't give up", bc when you are in that spot it feels like utter bulsh*t. Social media has us comparing our skills and success to a million other people every day, and as harsh as it sounds, it's just not worth breaking yourself up over it. There is also no need to monetise every hobby you have and become the absolute best in it, especially when you are young.
So, to sum it up:

#art tips#art suggestions#art tipp: draw a fuckton make it make you happy#wow I even used that tag before see I really do mean it#locally sourced art#adjacent#procreate
4 notes
·
View notes
Text
Grafiktablett – Kunst und Kreativität voll digital

Es war einmal, dass Künstler ohne ein ganzes Set an Kunstmaterial ihre Arbeit nicht verrichten konnten.
Aber das digitale Zeitalter - spezifisch das Grafiktablett - bot den Künstlern die Freiheit, so viele Farben und Pinsel in einem einzigen Gerät zu nutzen.
Das Problem ist, dass die überwältigende Anzahl der Produkte auf dem Markt sich noch immer an den Möglichkeiten von Bleistift und Papier orientiert. Ein anderes Problem ist, dass Künstler ein Grafiktablett kaufen, das nicht ihren Anforderung entspricht und sie das an sich nützliche Tool gar nicht gebrauchen können.
Jeder, der schon einmal am PC ein Bild bearbeiten, freistellen oder etwas retuschieren wollte, weiß wie schwer das sein kann. Wer kennt nicht die „berühmten“ Paint-Zeichnungen mit der Maus, die qualitativ fast an ein Gemälde eines vierjährigen Kindes herankommen. Mit einem Grafiktablett kannst du hingegen wie auf einem Blatt Papier mit dem Stift und deiner Hand zeichnen und Bilder bearbeiten. In diesem Artikel stellen wir dir nicht nur verschiedene Geräte vor, sondern sagen dir auch worauf du achten musst.

=
Was ist ein Grafiktablett?
Designer, Bildbearbeiter oder Illustratoren können sich ihre Arbeit kaum noch anders vorstellen als mit einem Zeichentablett. Wenn du schon einmal versucht hast mit der Maus ein Bild freizustellen, zu bearbeiten oder sogar zu zeichnen, wirst du wissen, dass dabei meistens kein professionelles Ergebnis herauskommt. Hier setzen Grafiktabletts an, denn sie sorgen dafür, dass du mithilfe eines digitalen Stiftes oder auch „Stylus“ millimetergenau arbeiten kannst.
Dabei wird das Grafiktablett entweder per USB oder Bluetooth mit deinem PC verbunden und eingerichtet. Je nachdem, für welches Programm du dich zum Bearbeiten oder Erstellen deiner Bilder entschieden hast, wird die Arbeit hiermit schneller und angenehmer. Egal ob Corel, Adobe Photoshop oder andere Bildbearbeitungssoftware, nahezu jedes Grafiktablett auf dem Markt wird schnell als Arbeitsgerät erkannt. Während du deine einzelnen Werkzeuge zuvor noch mit der Maus führen musstest, geschieht dies nun auf deinem digitalen Zeichenpapier vor dir.
Natürlich unterscheiden sich auch Grafiktablett in Sachen Ausstattung und Technik voneinander, sodass du vor dem Kauf auf einige Dinge achten solltest,Neben einfachen Grafiktabletts existieren noch Pen-Display auf dem Markt. Hierbei handelt es sich um ein Tablett mit integriertem Monitor, auf dem du dein zu bearbeitendes Bild direkt sehen kannst.
=
Was ist beim Grafiktablett wichtig?
Ein Grafiktablett kann komplexer sein, als Neulinge auf dem Gebiet vielleicht denken. Vor allem Künstler und dazu gehören natürlich auch Fotografen, arbeiten nicht nur zu Hause am PC, sondern gerne auch Unterwegs. Hierfür solltest du darauf achten, dass dein neues Tablett nicht zu schwer ausfällt, denn das kann in der Tasche schnell zu unerwünschten Verspannungen führen. Damit einher geht auch eine möglichst kompakte Bauweise des Grafiktablett. Achte am besten auf eine maximale Stärke von 8 bis 11 Millimetern, sodass das Tablett bequem in jede Tasche passt. Sparen solltest du dann aber nicht an der Zeichenfläche, denn je nach Einsatzzweck kann ein zu kleines Tablett schnell nervig werden. Weiterhin ist zu bedenken, dass du viel Freiheiten beim Zeichnen und Bearbeiten brauchst, sodass die Arbeitsfläche möglichst groß sein sollte, unnötige Ränder nehmen nur viel Platz weg.
Beachte hierbei unbedingt: Je größer die Zeichenfläche deines Tabletts ist, desto genauere Eingaben sind damit möglich. Generell arbeitest du mit dem Tablett, während du auf dein Display schaust. Machst du dann einen 5 Zentimeter langen Strich auf dem Tablett, doch auf dem Bildschirm erscheint ein 15 Zentimeter langer Strich, kann dies dein Gehirn schnell verwirren. Viele Geräte bieten dir aber auch die Möglichkeit, den aktiven Bereich sowie den Bearbeitungsbereich auf dem Bildschirm miteinander abzustimmen.

Grafiktablett Test - Modelle im Vergleich
1. Das Deco 01 V2 Zeichentablett Das Deco 01 V2 Zeichentablett hat einen überraschend soliden Aufbau. Schön und robust für ein Budget-Zeichentablett.
Der XP-Pen Deco 01 V2 bietet einen überraschend guten Wert. Er hat alle wichtigen Funktionen, die man von einem Grafiktablett erwarten kann, er lässt sich gut handhaben und hinkt nicht hinterher. Und wenn Sie eine glattere Zeichenoberfläche bevorzugen, könnte der XP-PEN sogar die Nase vorn haben.
Was macht ihn zu einem V2 im Vergleich zur Originalversion? Es gibt eine größere Zeichenfläche und einen Micro-USB Port, die Auflösung ist höher und damit auch die Reportrate.
Um es einfach auszudrücken, denke ich, dass der XP-Pen Deco 01 V2 eine erstaunliche Option für Anfänger und Bastler ist, weil er sowohl erschwinglich als auch einfach zu bedienen ist.
=
2. XP-Pen Artist 15.6 Pro Grafiktablett mit display Das XP-Pen Artist 15.6 Pro verfügt über ein 15,6-Zoll-IPS-Display mit voller HD-Auflösung (1.920 x 1.080). Es verfügt über eine hervorragende Farbgenauigkeit von 120% sRGB 16,7 Millionen Farben mit einem Blickwinkel von 178 Grad.
Artist15.6 Pro verwendet die volllaminierte Technologie und kombiniert Glas und Bildschirm nahtlos, um eine ablenkungsfreie Arbeitsumgebung zu schaffen, die auch für die Augen angenehm ist.
Der Bildschirm ist fantastisch, Klarheit und Farben sehen nett aus. Der Bildschirm ist mit einem strukturierten Mattfilm überzogen, um dem Stift mehr Halt zu geben und die Kontrolle beim Zeichnen zu verbessern. Die Verwendung der Standard-Kunststoffspitze funktioniert auf dieser neuen Oberfläche hervorragend und fühlt sich für mich eher wie ein herkömmlicher Bleistift auf Papier an.
Der XP-Pen Artist 15.6 Pro ist eine ideale Wahl für professionelle Künstler, die das Zeichnen und Malen lieben. Dieses Gerät ist der beste Weg, um in die Welt der digitalen Leinwand einzusteigen. Jetzt brauchen Sie sich nicht mehr um Farben, Pinsel, Laken und Bleistift zu kümmern, wählen Sie dieses Stück einfach aus, bewahren Sie es in Ihrer Tasche auf und bewegen Sie sich in die Welt der Kunst.
Sie haben einen Protektor entworfen, der scheinbar in den Premium-Produktraum passt und gleichzeitig die Kosten für angehende Künstler auf ein Minimum beschränkt.
Insgesamt bin ich mit meinem Kauf sehr zufrieden und kann es jedem empfehlen, der nach einem Pen-Display für den mittleren Preis sucht.
=

3. XP-PEN Artist 22E Pro Grafiktablett: Lassen Kreativität freien laufen Der Treiber von XP-PEN Artist 22E Pro Grafiktablett unterstützt 4k Bildschirme, Die Anti-Reflexbeschichtung reduziert 56% Licht Reflektion, flexible und ergonomisch entworfene Stütze.
Das Tablet hat 16 Shortcuts, die man frei belegen kann. Ich bin Jemand, der sehr gerne Shortcuts benutzt. Die Tasten runden das Gesamtpacket nochmal ab.
Dank des 22 Zoll großen Display hat sehr viel Arbeitsfläche zum Zeichnen, modellieren, Videoschnitt und vieles mehr. Das 21.5 Zoll Full HD Display besitzt ein Farbraum von 82% und einen Blickwinkel von 178°. Es liefert besonders bunte Farben und bietet ausreichend Details.
=
Die Anschlüsse braucht dein Grafiktablett
Anders als bei Smartphones oder Notebooks, sind Grafiktablett etwas einfacher aufgebaut. Nahezu jedes Modell auf dem Markt verfügt über einen USB-Anschluss, über den das Gerät mit Strom versorgt wird. Entscheidest du dich für eine Bluetooth-Version, ist häufig trotzdem ein USB-Port vorhanden, über den der interne Akku geladen werden kann. Die meisten Grafiktabletts setzen dabei entweder auf den älteren Micro-USB-Port oder auf den modernen USB Type-C Anschluss. Wichtig hierbei ist, dass auch dein Endgerät, an dem du das Tablett betreiben möchtest über eine Bluetooth-Verbindung verfügt. Tablets und Notebooks bringen dies standardmäßig mit, Desktop-PCs nur sehr selten. Manch ein Hersteller legt aus diesem Grund einen separaten Bluetooth-Dongle mit ins Paket, sodass du das Grafiktablett mit Bluetooth schnell und bequem einrichten kannst.
= Dein Werkzeug: Der Stylus
Zeichentabletts werden mit einer von drei Arten von Stiften geliefert - batteriebetrieben, wiederaufladbar oder elektromagnetische Resonanz (EMR).
- Batteriebetriebene Stift
sind in der Regel dicker, so dass sie den Akku aufnehmen können, was dazu führen kann, dass sie sich für kleine Hände zu groß anfühlen.
- Wiederaufladbare Stift
Sie sind in der Regel schlanker und liegen gut in der Hand. müssen genau wie dein Handy oder aufgeladen werden. Und wenn die Batterie alle ist, musst du eine Energiequelle zum Aufladen finden, bevor du wieder zeichnen kannst.
- EMR-Stift (Dies ist der neueste der drei Stiftarten)
verwenden eine innovative elektromagnetische Frequenz, die die Energie direkt vom Tablett drahtlos auf den Stift überträgt, so dass er nicht aufgeladen werden muss. Was der Pinsel für den Maler ist, ist in der heutigen Zeit der Stylus oder auch „Digitizer“ für den Zeichner, Bildbearbeiter oder Illustrator. Hierbei handelt es sich um einen kleinen digitalen Stift, der bei jedem Grafiktablett zum Lieferumfang dazu gehört. Moderne Digitizer verfügen nicht mehr über einen internen Akku oder eine Batterie, sondern werden über das elektromagnetische Feld des Grafiktabletts aufgeladen. Das sorgt nicht nur für ein geringeres Gewicht des Stylus, sondern gleichzeitig für mehr Ausdauer beim Arbeiten, da kein Akku sich mehr entladen kann. Die Qualität der digitalen Stifte kann je nach Hersteller und Produkt stark variieren. So sind manche Stifte dicker, mange schwerer, manche haben eine bessere Verarbeitung der Knöpfe oder bringen eine bessere Stiftspitze mit. Auf Amazon kannst du dir über die Qualität immer einige Informationen abholen, da viele Kunden den Stylus immer mit bewerten. Sinnvoll ist es manchmal auch, einen Stylus vor dem Kauf im Laden auszuprobieren, da jeder Mensch andere Vorlieben hat. Allerdings sollten die angebrachten Knöpfe stets qualitativ hochwertig sein und nicht wackeln. Weiterhin sollte die Stiftspitze ausreichend Spielraum bieten, um die einzelnen Druckstufen auszulösen. Besonders bei Geräten im unteren Preissegment wird die höchste Stufe oftmals schon bei wenig Druck ausgelöst, was das Bearbeiten deiner Bilder schnell unangenehm werden lässt.
= Ersatzspitzen des Stylus:
Da das Grafiktablett selbst nur aus Kunststoff besteht, muss auch die Spitze des Stylus aus diesem Material gefertigt werden. Bei Metall würdest du wohlmöglich deine gesamte Arbeitsoberfläche zerkratzen. Aufgrund des Materials nutzen sich die Spitzen des Stylus nach einer Weile ab, sodass du immer für Ersatzspitzen sorgen musst. Auch wenn es sich hierbei um ein eigentlich günstiges Material handelt, heißt es aber nicht, dass die Spitzen auch günstig sind. Im Gegenteil, einige Hersteller verdienen ihr Geld durch die Spitzen, weniger durch den Verkauf des Tabletts.
= Die wichtigsten Features eines Grafiktablett
Grafiktabletts bieten dir neben ihrer eigentlichen Funktion noch einige Features, auf die du nicht verzichten solltest bzw. auf die du vor dem Kauf unbedingt achten musst. Zwar ist hierbei der Stylus der Mittelpunkt, doch kann auch das Tablett mit zusätzlichen Tasten deine Arbeit positiv unterstützen.
Druckstufen
Je nach Preisklasse verfügen nahezu alle Digitizer über eine Vielzahl an Druckstufen. Dies kannst du wunderbar auch an unserer Empfehlungsliste erkennen. Während günstigere Zeichenbretter nur 4000 druckempfindliche Stufen bieten, haben andere maximal 8192 druckempfindliche Stufen möglich. Die einzelnen Druckstufen ermöglichen es dir, unterschiedliche Strichstärken bei unterschiedlichem Druck zu erzeugen. Allerdings solltest du hierbei auch auf die Beschaffenheit der Stiftspitzen achten.
Neigungsfunktion
Eine interessante, wenn auch eher im Profibereich angesiedelte Funktion ist die Neigungserkennung des Stylus. Nur wenige Tabletts liefern dir dieses Feature, da es fast nur in hohen Preisregionen vorkommt. Einige professionellere Programme, wie etwa Adobe Photoshop, können mit diesem Feature arbeiten und erkennen, wenn der Digitizer seitlich gehalten wird. Somit kannst du beispielsweise, ähnlich wie mit einem Bleistift, Ebenen schraffieren.
Größe
Es gibt zwei Faktoren, die du bei der Bestimmung der Größe deines Tabletts berücksichtigen musst:
- Die Größe der nutzbaren Zeichenfläche
- Die Größe des Gesamtgerätes
Ein größerer aktiver Bereich ermöglicht es dir, leichter an größeren Zeichnungen zu arbeiten, ohne dass du zoomen und schwenken musst. Denke darüber nach, welche Art von Kunst du erschaffen willst und stelle sicher, dass du ein Gerät wählst, dessen Größe damit übereinstimmt.
Die Größe solltest allerdings auch mit deinem geplanten Einsatzvorhaben übereinstimmen. Ein stationäres Gerät kann ohne Bedenken etwas größere sein, damit du mehr Spielraum für deine Ideen hast. Wenn du das Tablett viel unterwegs mitnehmen willst, solltest du darüber nachdenken, ob du nicht eine Nummer kleiner wählen möchtest.
Vergewissere dich bei der Überprüfung der Spezifikationen, dass du die Größe der Nutzfläche nicht mit der Gesamtgröße des Tabletts verwechselst. Die Gesamtgröße beinhaltet auch die darum angeordneten Knöpfe und den Rahmen des Tabletts.
Auflösung
Die Auflösung bezieht sich darauf, wie viele Linien per Inch (LPI) das Display des Tabletts hat und wie viel es vom Stift erkennen kann.
Je höher der LPI-Wert, desto mehr Details kannst du in deinen Zeichnungen hinzufügen.
Größere Zeichentabletts haben in der Regel eine höhere Auflösung als kleinere.
Wichtige Zusatztasten
Das Arbeiten mit der Tastatur während dem Bearbeiten und Zeichnen ist für viele kreative Menschen ein Muss, denn hierüber kannst du Shortcuts und Werkzeuge schneller wählen. Damit du aber möglichst viel Platz auf deinem Schreibtisch sparst, ist es sinnvoll auf ein Tablett zu setzen, das diese Zusatztasten bereits integriert hat. Zwischen 6 bis 12 Tasten sollte daher jedes Grafiktablett mitbringen. Noch sinnvoller sind Stellräder, über die du schnell und einfach auch durch Werkzeuge schalten oder Zoomstufen ändern kannst.

Das Wichtigste zusammengefasst
- Grafiktabletts eignen sich für alle kreativen Menschen, die gerne Zeichnen und Malen. - Das Bearbeiten von Bildern ist erheblich einfacher als mit der Maus und der Tastatur. - Vielen Grafiktablett liegt bereits eine einfache Software mit bei, sodass hier selten eine weitere Investition notwendig wird. =
FAQ – Häufig gestellte Fragen
- Wie groß sollte ein Grafiktablett sein?
Diese Frage solltest du dir als erstes Stellen, denn je nachdem, wofür du dein Tablett einsetzen möchtest ist die Größe der Zeichenfläche entscheidend. Aber auch beim mobilen Einsatz kann die Wahl der richtigen Größe wichtig sein. Viele Hersteller bieten ihre Produkte in verschiedenen Größen von S über M bis hin zu L oder XL an, sodass wirklich für jeden Einsatzzweck etwas dabei ist.
- Welches Programm für mein Grafiktablett?
Viele Hersteller liefern zusammen mit ihrem Gerät auch eine eigene Software oder bieten dir eine Kooperation mit einem Entwickler einer Software. So bekommst du beispielsweise zum Wacom Intuos bis zu drei verschiedenen Programmen von Corel geliefert. Dennoch ist und bleibt der Marktführer immer noch Adobe. Egal ob du Bilder bearbeiten oder Zeichnungen erstellen möchtest, in der Creative Cloud von Adobe wirst du immer fündig.
- Kann man das iPad als Grafiktablett nutzen?
Während ein Grafiktablett wirklich nur zum Zeichnen und Bearbeiten gedacht ist, bietet dein iPad so viel mehr. Als Multifunktionsmaschine kannst du es natürlich auch als Ersatz für ein Grafiktablett einsetzen. Die Besonderheit hierbei ist, dass du unmittelbar an deiner Zeichnung oder an deinem Bild arbeiten kannst, ohne dafür den Blick abwenden zu müssen. Natürlich hast du hierbei aber auch andere Kosten als bei einem Grafiktablett.
- Ratschläge für Anfänger?
Das richtige Zeichentablett hängt von deinen Prioritäten, deinem Budget und deinem Erfahrungsstand ab.
Wir empfehlen Anfängern, mit einem Grafiktablett ohne Display zu beginnen, da diese im Allgemeinen günstiger sind. Und sie können dir immer noch ein Gefühl dafür geben, ob es überhaupt etwas für dich ist, woran du langfristig festhalten möchtest.
Quelle:https://www.xp-pen.de/forum-1818.html
#grafiktablett#zeichentablett#Grafiktablett Mit Display#pen display#pen tablet#xp pen#xppen#xp_pen#xpen#drawing tablet
1 note
·
View note
Text
Unlockbase Keygen Torrent

Unlockbase Keygen Torrent. 0 Comments Unlockbase Escreen Keygen, sim 3 crack download, Batchsync Secure Keygen. Serial Number, Activation Code, Unlock Code and Keygen for Widnows and Mac. Blackberry e. Screen keygen. Screen keygenfor Blackberry. How to read BlackBerry MEP without Cable! Torrent Airbus Xtreme Prologue Romeo Manual De Taller Toyota Corolla 1994 Unlockbase Keygen Cz 70 Serial Numbers Free Activation Keys For Movavi Serial Number Making History Ii Free Download Games Harvest Moon Portable Download Partition Manager For Android Project X Love Potion Disaster 5.5. May 15, 2020 Direct Link-Corel Draw X7 Crack With Torrent Full Version Download Latest Corel Draw X7 Crack Full Version Download 2020. Corel Draw X7 Crack Full version download is the latest version that is designed to edit two-dimensional images like as posters and logos. Here you will find the direct download link to the Corel Draw X7 Keygen. Cell phone unlocker unlockbase.com cell phone unlocker v1.0.2.5 cell phone unlocker v1.0.2.5 serial number unlockbase.com cell phone unlocker v1.0.2.5 cellular phone.
Unlockbase Keygen Torrent Downloads
Keygen Generator
Unlockbase Keygen Torrent Software
Unlockbase Keygen Torrent 2017
Unlockbase Keygen Torrent Free
Keygen Torrent Cs5
AutoCAD 2020 Crack Full Serial Number Download
AutoCAD 2020 Torrent is the world’s most popular and powerful 2D and 3D map design software. This is the stunning app designed for 3D graphics modeling. Autodesk originally developed it. It provides a quite simple and user-friendly interface to work on it. Designers and engineers easily handle documentation projects with this CAD tool. It is the best choice to speed up design, documentation, and sharing of built-in models and explore ideas more intuitively in 3D. With thousands of available add-ons, AutoCAD Download Torrent provides the ultimate in flexibility, customized for your specific needs. It is likely available for both Mac and Windows.
AutoCAD 2020 Torrent with Product Key
AutoCAD 2020 Torrent full download is a valuable software that designer can experience a new world of design with a new level. This software enables you to create and explore ideas like never before. It is all you need to create, visualize, document, and share your ideas. The latest version of the software includes a full set of tools for solid modeling and 3D. Now it includes industry-specific features and libraries for architecture, mechanical design, electrical design, and more.
Document: Create your new design more intuitively, more efficiently, and faster than ever before.
Communicate: Present and share your designs more seamlessly, more accurately, and more powerfully.
Explore: Now you can turn ideas, regardless of shape or size, into a 3D CAD model to help take your designs further.
Customize: Make AutoCAD software work for you in ways you never thought possible.
AutoCAD Keygen with Crack
In additions, with powerful AutoCAD software modeling, you can design rich and productive documents and provides industrial maps for architects, engineers, designers, and artists. Create a precise 2D drawing and 3D models. You can work with designs across platforms and on any device. Another benefit of AutoCAD is a generic document feature that is used in engineering projects. It will allow you to design and shape the world around you using its powerful & flexible features.
Unlockbase Keygen Torrent Downloads

Related Software Download Solidworks Torrent
AutoCAD 2020 Key Features
Extensive 2D documentation
You can produce 2D documentation and drawings with a wide set of drawing, editing, and annotation tools.
Innovative 3D design
Create and communicate almost any design with 3D advanced modeling and visualization tools.
Connected collaboration
Access your drawing from desktop, web, and mobile. As well as share and use data from Navisworks, Bing Maps, and more.
Import PDF

It allows you to import geometry, including SHX font files, fills, raster images, and TrueType text, into a drawing from a PDF.
Shortcut menus
Display a shortcut menu for quick access to commands that are relevant to your current activity.
Object and layer transparency
You can easily control the transparency for selected objects or for all objects on a layer.
Visual styles
Apply visual styles to control the display of edges, lighting, and shading of your 3D CAD model.
What’s new?
Keygen Generator
Performance improvements speed up work.
AutoCAD System Requirements
Operating System: Microsoft Windows 10, 8.1 (32-bit & 64-bit), or 7 SP1
Processor: 5 GHz (3+ GHz recommended)
Memory: 8 GB (16GB recommended)
Disk space: 6.0 GB.
Display: 1920 x 1080 resolutions with True Color.
Unlockbase Keygen Torrent Software
How to register or activate AutoCAD 2020?
Very simple! Firstly, Download AutoCAD Crack setup
After download run the setup
Follow the instruction
Restart your Machine
Finally, Enjoy Full Version
Download Mirror Links
password is admincrack
+
David Mark
Unlockbase Keygen Torrent 2017
AutoCAD Crack
5
AutoCAD Crack
Unlockbase Keygen Torrent Free
Windows
Sketch
Keygen Torrent Cs5
Unlockbase escreen keygen download torrent free. software download adobe photoshop 7.0 full version football manager 2016 cracked apk .... unlockbase escreen keygen download torrent. Join the campaign and make a difference.. Unlockbase Escreen Keygen Download Acceleratorinstmanks -- http://bit.ly/2EMhz16 4f33ed1b8f 23 Sep 2018 . fruit ninja for pc free download .... ... it could be malware as a virus can have any name. data Brooklynnfyre patr unlockbase escreen keygen download torrent Gemelli 10 Jan .... clipriclela 1年前. Unlockbase Escreen Keygen Download Torrent DOWNLOAD http://bit.ly/2S5A0TX Unlockbase Escreen Keygen Download Torrent .... Brooklynnfyre patr unlockbase escreen keygen download torrent Gemelli Diversi, Fuego full album zip download film hello stranger full .... Use it for free, no registration, no ads, just download You can find almost any keygen. Listen to unlockbase escreen keygen blackberry radio on the toolbar, chat with friends in the chatroom, customize the weather ... Prothalamion summary pdf.. Unlockbase Escreen Keygen for Mac features a minimal main screen ... history of the Change LOG & Download the official last version of Unlock Base Cell ... Torrent anonymously with torrshield encrypted vpn pay with bitcoin.. Jump to Unlock Base Escreen Keygen For Blackberry - UNLOCKBASE ESCREEN KEYGEN. ... SKiDROW DOWNLOAD: HERE TORRENT: HERE CRACK .... Crack software, free download, licence key, activation, serial number, antivirus, ... Unlockbase Escreen Keygen Download Torrent 35 Join Login Login. MEMBER .... Unlockbase Screen Keygen For Blackberry Descargar. Or Download Galaxy Unlocker Client 14.12.6 crack. Dec 24, 2017 - UNLOCKBASE eScreen keygen for .... Unlockbase escreen keygen download sony style xp free download with keygen crack javaheri dar ghasr download iranproud serial Javaheri dar ghasr .... Blackberry os engineering screens. ... unlockbase escreen keygen download. El mep que ... Checker estandar crack serial para sodelscot est ndar 3.9. How to .... What is serial number and why you need it Some programs give you ... Jun 17, 2017 - Unlockbase escreen keygen download Mobilego mac .... UNLOCKBASE eScreen keygen for Blackberry. Blackberry device PIN : example : cc414bfc. App Version : example : 4.6.0.100 (233). Uptime : example : 87208 .... Sale Mar 25, 2018 Unlockbase Escreen Keygen Download Torrent -- Escreen Keygen For ... the serial number, but the web page also needs .... Unlockbase escreen keygen download torrent. Internet download manager key crack serial keygen archicad 16 mac crack. Unlockbase screen keygen for .... Ms project free download with crack and keygen. That should bring up this screen: This is the standard help screen. Software Solutions Aladdins Office Aster v7 .... Unlockbase Escreen Keygen, Free Download Cool Edit Pro With Keygen, b&r automation studio download crack. We unlockbase escreen .... UNLOCKBASE eScreen keygen for Blackberry. Super Mario Strikers Gc Iso Download. Blackberry device PIN: example: cc414bfc.
1 note
·
View note
Text
Wilcom Embroidery Studio E4 E4.2H Full Crack Download ✅
Full Version ✅
Multilanguage ✅
Supports Windows 7/8/8.1/10 ✅
64 bits compatibility ✅
Single computer activation ✅
LIFETIME activation guaranteed ✅
Install guide is included ✅
Corel DRAW 2018 is included ✅
Link: https://qs36shop.com/product/wilcom-embroidery-studio-e4-e4-2h-full/

—————— wilcom e4 price wilcom e4.2 wilcom e4.5 wilcom e4 vs hatch wilcom e4.2 embroidery studio wilcom e4.2 price wilcom e4 embroidery software wilcom e4 update wilcom e4 software wilcom e4 cost wilcom e4 training wilcom e4 manual wilcom e4 auto digitize wilcom embroidery studio e4 applique wilcom e4 no abre wilcom e4 buy wilcom e4 full cracked by rampage soft wilcom e4 32 bit wilcom e4 baixar baixar wilcom e4 gratis wilcom e4 crack wilcom e4 crack windows 10 wilcom embroidery e4 crack download wilcom e4 crack for windows wilcom studio e4 crack wilcom e4 full crack free download wilcom e4 digitizing software wilcom e4 decorating wilcom e4 dongle emulator wilcom e4 designing wilcom e4 designing price wilcom e4 download crack wilcom e4 embroidery wilcom e4 editing software wilcom embroiderystudio e4 price wilcom e4 dongle emulator download wilcom e4 internal error 0x7101 descargar e instalar wilcom e4 wilcom e4 full wilcom e4 full crack wilcom e4 for sale wilcom e4 fonts wilcom e4 forum wilcom e4 full mega wilcom e4 google drive wilcom truesizer e4 gratis wilcom e4 descargar gratis wilcom embroidery studio e4 google drive descargar wilcom truesizer e4 gratis wilcom e4 gratis harga wilcom e4 hwid wilcom e4 wilcom e4 handbuch wilcom e4 installation wilcom e4.iso wilcom e4 price in india wilcom e4 price in pakistan wilcom e4 crack installation wilcom e4 como instalar wilcom embroidery studio e4 italiano wilcom e4.2 j wilcom e4 lettering wilcom e4 learn to digitize wilcom e4 lite wilcom e4 logo wilcom decostudio lite e4 wilcom embroidery studio e4 lite wilcom e4 deco lite wilcom e4 mac wilcom embroidery studio e4 mac wilcom e4 full español mega wilcom e4 download full mega wilcom e4 mercado libre wilcom e4 new features wilcom e4 team names novedades wilcom e4 wilcom e4 original wilcom embroidery studio e4 original como instalar o wilcom e4.2 como instalar o wilcom e4 wilcom e4 precio wilcom e4 portable wilcom e4 patch wilcom e4 pdf wilcom e4 requirements wilcom e4 release date wilcom e4 requisitos wilcom embroidery studio e4 rar wilcom embroidery studio e4 requisitos wilcom e4 shortcut keys wilcom e4 system requirements wilcom e4 serial key wilcom e4 setup wilcom e4 sequin wilcom e4 support wilcom studio e4 price wilcom e4 trial wilcom e4 tutorial wilcom e4 truesizer wilcom truesizer e4 free download wilcom truesizer e4 tutorial wilcom truesizer e4 pro wilcom e4 user manual wilcom e4 update download wilcom e4 upgrade price wilcom embroidery studio e4 update wilcom e4 training videos wilcom e2 vs e4 wilcom e3 vs e4 valor wilcom e4 wilcom e4 with crack wilcom embroidery studio e4 windows 10 wilcom design workflow e4 instalar wilcom e4 windows 10 wilcom embroidery studio e4 youtube youtube wilcom e4 wilcom e4 error 0x7101 wilcom embroidery studio e4 1l r2 instalar wilcom e4 1 parte wilcom e4 2 price wilcom e4 2 keygen wilcom e4 2 crack download wilcom e4 full 2019 wilcom embroidery studio e4 2018 wilcom e4 2j crack para wilcom e4 2 descargar wilcom e4 2 wilcom e4 2 4.wilcom e4.2 emul setup wilcom e4 5 download wilcom e4 5
1 note
·
View note
Text
Ancient and Android Chapter 2
FFVII and DBH crossover fanfic (Aerith x Connor)
Ao3 link: Ancient and Android
Genre: Friendship, Drama, Romance (?)
Rating: Teens and Up
Chapters: 2/7 (tentative)
Summary: At first it bothered Aerith how humanlike Connor was in appearance. Were androids like him part of the Lifestream?


Chapter II- Stress
INITIALIZING…
SYSTEMS ONLINE…
Resolution of the image was sufficient for facial recognition. Reflection and texture of the surface ahead indicated that the subject was behind 0.75-centimeter glass.
Blinking mechanism activated to clean lenses.
Female identified: Amanda Stern.
Audio processors functional.
Amanda laid her hand flat against the surface.
It scanned the size of her hand, the length of the fingers, and the pressure of the palm against the surface. It zoomed on the fine prints, the ridges, and folds that make the body part unique than any other person in the database. It imitated the human and placed its hand against the glass as well. Against the human's dark-colored hand, its part was a little bigger, made of smooth, white silicone. It was different.
"You have made some excellent progress." The woman smiled and moved her face closer against the glass, her nose almost touching the surface.
Emotion analyzed. Happiness? Satisfaction? Wonder?
"RK800, #313 248 317 - 51, I have a surprise for you. It's time to register your name."
"My name is Connor, I'd like to help you cross the street." With a little nod and a smile, the elderly human reacted favorably to the android. Her body language was relaxed rather than alert, taking Connor's hand and accepting its offer to help carry her grocery bags.
"Thank you, son." She beamed with a toothy grin as she joined a group of aged humans. The facial recognition scans did not yield any record of the old woman in any database and Connor added her under its unidentified list. "What a lovely young man, do you know him."
Humans reacted positively to a gentleman: polite, refined, respectful, and empathic. Based on 121 direct interactions with humans, the most common responses upon learning Connor was a machine were the following: surprise (96%), disbelief (74%), curiosity (63%), and amusement (53%). Most emotional responses were considered neutral according to its social program. When Connor was unable to disclose the information that it was an android, responses were more varied.
Connor heard some giggles beside him: five female juveniles were whispering to each other, their faces displaying the emotion of happiness, and cheeks darker in color. Blushing was a common human response for attraction, embarrassment, anger, or high temperatures. Connor gently smiled back and the girls ran away, making high pitched noises.
0:03
0:02
0:01
Connor picked a spot beside an unopened store to transmit the report uninterrupted. The previous reports resulted in the interruption of traffic and hostility of pedestrians.
Stress level: 55%
The order was transmitted 72 hours ago: Prioritize Sector 5. However, Connor had only produced 53% compared to the same timeframe in Sector 8.
Amanda gave her a reply: Inefficient.
Stress level: 67%
The lower foot traffic and economic activity could explain the gap, but Connor was programmed to find solutions. Progress was necessary and the following objectives still remained:
1. [ENCRYPTED]
2. Identify and report suspected Avalanche members
3. Search for information about Avalanche's hideout
4. Collect data for Shinra profiling initiative
Profiling based on age and focusing on key areas such as the marketplaces, hospitals, transportation would improve the likelihood of finding Avalanche affiliated persons. Emotional motivation would also be a strong factor: individuals who originated from Wutai, Gongaga, and Corel could harbor some anti-Shinra sentiments. Added filters on audio processors would detect regional accents to identify targets. Humans tend to form communities with others that shared the same culture and language.
After a long list of new directives, Connor added another objective: Maintain a positive image in the Sector 5 community.
The store called "Aquamore" finally opened its curtains, revealing several aquariums. Connor identified 26 different species of the 342 fish displayed. A lone goldfish inside a 10.24-gallon bowl caught Connor's attention. The animal's large eyes stared back to the android as it desperately swam against its barrier. Its bowl was too small and only 42% of the optimal volume of water. Was it aware that there was nothing beyond? Even if it was aware, would it continue swimming ahead? Connor lightly tapped his finger against the glass and watched the fish's reaction to the stimulus. "Don't jump out," Connor whispered.
Stress level: 56%
Connor concluded that the maps of Sector 5 were inaccurate and outdated. Unlike Sector 8 with concrete roads and traffic signs, Sector 5 was a maze with urban planning nonexistent. The roads on the government-provided maps were unfinished, steel bars jutting out, and asphalt peeled away. Sidewalks were occupied by illegal structures, open sewers taking their place in some areas.
At 9:21PM, the volume of people on the streets dropped. Most humans had already retreated back to their unstable shelters - tightly packed and lacking in privacy. Only 65% of the street lamps were functional, straining the android's visual processors. The lights from the plate were too high and underpowered to touch the ground.
A noisy splash and change in elevation alerted Connor. It looked down on the leather shoes provided by Amanda: no longer clean and shiny, now caked in greasy mud.
Stress level: 60%
Connor reached another dead end. It was the third point in the map that needed updating as inaccessible. The destination, however, was not pointless. Large, neon-green letters delivered the message: SAVE OUR PLANET. DOWN WITH SHINRA!
Whoever painted the graffiti left some fingerprints. No traces of DNA.
"Shit, it's true. It looks so much human," a voice called from behind the android. Seven humans, all-male, approached Connor.
"Hello robot! We're friends."
"Does it understand you?"
Connor stood in a formal posture, fixed its tie, and clasped its hands together. "Good evening, my name is Connor. How can I help you?" Four of the seven humans had criminal records- mostly robbery, and trespassing.
"Hi, Connor, I heard you're fixing like.. electric stuff," one slowly approached while the others had their hands behind their back. There was a 64% likelihood they were concealing some weapons. "Can you take a look at my house?"
Sympathy was necessary and Connor adjusted his eyebrows to imitate a troubled human. "I deeply apologize if you're experiencing some inconvenience, but I am afraid I'm authorized to make repairs myself. May I know your full name and permanent address?" The man didn't answer.
"It's unarmed, just take it!" One person from the back shouted out and the rest
Another revealed a baseball bat. "Matt, get the van now!"
"Hey, hey! Don't damage anything, just hold it down."
With the intent made clear, Connor had to decide in 2.4 seconds.
1. Use gun for elimination: 100% fatality. Estimated time: 5.3 seconds. Conflicting priorities. Violence would result in a negative image to the community.
2. Use gun to injure limbs: 18% probability of fatality. Estimated time: 11.2 seconds. Conflicting priorities. Violence would result in a negative image to the community.
3. Escape: 13% success rate.
4. Reason.
--------------------------------------
Aerith happily skipped with an empty basket at hand, her pockets heavy with bills and coins. It was a perfect way to end Friday night. It wasn't only the sold-out inventory that brought happiness to the woman, but the beautiful smile of the bride as she marched with a full bouquet on her hands. Her soles were sore after a full day of work, but her mind and body felt refreshed as if she had a good night's sleep.
Sometimes Aerith would get a reminder by her mother to spend more money and treat herself. On good days she rewarded herself with a few drinks at bars or cafes, meeting with friends and sometimes new people. Tonight seemed perfect to spend at home with a warm bubble bath, hot tea, and a lavender-scented candle beside her.
A loud honk startled Aerith, followed by glaring headlights. "Watch out!" She screamed, evading the vehicle just by mere inches. Muddy water splashed against Aerith's face, soaking her pink dress and her bra. She quickly turned to glare at the offender, taking note of the license plate.
Just a few meters away, the white container truck shook, skidded and rolled into a ditch nearby. Aerith's anger quickly dissolved and changed into worry as she ran to investigate. The vehicle dove headfirst with wheels still turning. Thankfully the water was too shallow for anyone to drown.
"Hey, anyone there? I can help you," Aerith called out, peering down. There were noises inside the truck, sounding like grunts and curses, followed by a violent knocking at the back. Whoever was inside was desperate to get out and Aerith quickly descended.
As soon as Aerith turned the knobs of the container, a man kicked them open and climbed out of the truck. He was breathing heavily and his eyes were wide in fear. Aerith almost didn't recognize him without his jacket, but the glowing LED circle on his temple was a dead giveaway. This time, it was red and spinning wildly. "Connor, is that you?"
"Aerith," he acknowledged between breaths and ran past her.
More men climbed out but with bloodied noses and busted lips. They ignored Aerith and chased after Connor with crowbars and baseball bats.
"Hey, what the hell are you doing? I'm gonna call-" Aerith warned to no avail to the group. These lowlifes made the slums unsafe, forcing others to live in fear. Her own heart raced and anger bubbled from within, spreading heat to the tips of her fingers. Aerith gripped her staff and channeled her power.
She might have shorter legs but she knew how to overtake them. A few shortcuts and pipes to climb was all it took for Aerith to climb on top of the smaller buildings. With the vantage point, she could track the group easier and Connor can be distinguished in the dark with his red circle. The android was fast but he seemed injured - one of his arms limp on his side.
Connor collapsed and landed face-first on the ground. How it happened was unclear to Aerith. He convulsed while four of the attackers surrounded him.
"Hang on!" Aerith cast a gravity spell to aid her landing, right in the middle of the group, Connor behind her. "Leave or you'll regret it." She warned as she pointed her staff.
"Who the heck is this girl?"
"She's the flower seller."
They laughed, winked, and gave her flying kisses. "They never take me seriously," Aerith muttered and rolled her eyes. Men think they're creative with their endless flower innuendos. This was not the first time and will never be the last. "Counting three…" She charged her weapon with lightning, materia resonating inside her sling bag. "Two and one!"
Aerith planted her staff on the ground and the lightning flowed towards the targets, stunning them. Four men fell on the ground, some of them twitched and groaned in pain. They were fortunate that soil wasn't the best conductor - well at least from the very little science Aerith remembered from school. They could have suffered burns if she didn't hold back.
"Get out, all of you." She ordered the first one who recovered, whipping his legs with her staff. He ran off to the dark and the others followed. They hurled insults at Aerith as a final attempt to preserve their pride. "Ya'll trash!" She spat back.
Connor still laid on the ground stiff as a rock, his chest wasn't moving. "Hey, hey are you okay?" The woman noticed a wire attached to him and pulled it off. She never held a taser in her hands before. "Oh no," Aerith flipped Connor to face her. His eyes were opened but lifeless, but the red LED ring didn't stop spinning.
The man's eyes moved and blinked. "Hello, Aerith." He greeted the same manner as they first met - very polite. "I suppose I have to thank you for helping me."
"You weren't breathing…I thought you-" Aerith exhaled, tension leaving her body. She stood up and allowed the cool night air to calm her nerves, hoping that her heart would stop racing soon. Suddenly she was aware of how much mud there was on her clothes and her that her pockets were lighter. So much for a good Friday night.
"I apologize for worrying you, but I do not breathe." Connor pulled his limp left arm and re-attached it to his shoulder socket. It sounded exactly like cracking bones. Aerith winced but the android did not express pain or discomfort. Connor folded the edges of his sleeves and buttoned his half-opened shirt. His tie was missing.
There was a lump in Aerith's throat as upsetting images flooded her mind. "Why did they attack you?" More questions piled inside her mind, but she would rather not ask for specifics.
"They were talking about selling my whole body off to a Don or selling me piece by piece. They were in the process of dismantling my arms when I fought back," he said nonchalantly as he stood up. Connor was too calm it was unsettling.
It wasn't like that earlier. Aerith remembered the fear in Connor's eyes. "Are you alright? Do we need to go to some doctor-" she frowned. "Mechanic? Engineer?"
"Thank you, Aerith, but no need. How about this: I can walk you home if you like? As a form of gratitude."
Aerith shook her head. "But are you okay?" she asked again, looking at Connor's eyes directly, trying to find any hint of emotion. Something was wrong and she could feel it. "That taser is set at the highest voltage. You could have died."
Connor was silent for a while, his LED spun red briefly and turned to yellow before it settled again to blue. He smiled at her gently, eyes warm and kind. "I am not alive. Please, do not worry about me."
----------------------------------
The jacket was necessary to identify Connor as Shinra property and android was able to retrieve it from the crash site intact. Like the rest of the uniform, Connor concluded it needed washing to be socially acceptable.
Stress level: 88%
Numerous warnings appeared in Connor's feed as the stress level remained above the optimal level. The core temperature remained higher, necessitating the breathing mechanism to help cool off its biocomponents.
Connor continued to walk through the streets alone at 2:11AM, scanning the homeless and drunks that passed its way. The incident earlier resulted in a loss of productivity. Without sufficient numbers, Amanda would deem Connor as inefficient.
Stress level: 91%
An intoxicated woman walked towards the android in a sluggish manner. A dark box was attached to her belt. Connor immediately scanned the object to determine if it matched any taser in the database.
Stress level: 93%
A truck passed by. Connor quickly scanned the plate number.
Stress level: 95%
Connor ran fast and his breaths went faster. Sensors detect risk all over the place, overloading its systems. A safer place was necessary for cooldown. The android didn't stop until he returned to the place he started. But unlike the mornings, the marketplace was devoid of life and activity.
The fish store was again closed, the aquariums hidden behind thick curtains.
At 97% stress level, Connor would be recalled back to the Shinra Headquarters for further diagnostic. There was still time before the next report.
2 notes
·
View notes
Text
Tutorial: Making Gifs with Animation Shop 3
This is text and picture heavy and is geared to working with free software available for Windows systems, as much as possible. I’ll cut once I reach the first screenshot.
For starters, make sure you have at least 10 gigabytes free in your hard drive space. The process I use to create gifs with and without text requires that I use uncompressed video (this simply means that the video I take source from is usually compressed in formats like MP4 and MKV). Uncompressed video takes a lot of space.
I do use a legally-bought software to make gifs with text. It's a low-cost alternative to Adobe Photoshop and I acquired it back in 2000 or so. It used to be called Jasc Paint Shop Pro and is now called Corel Paint Shop Pro. Animation Shop 3 was bundled with PSP 7, but ceased being bundled shortly thereafter. This tutorial will include making gifs with text, but the process is cumbersome, and does require purchasing PSP. (It's inexpensive, however. I highly recommend Corel products as good alternatives to Adobe. Currently PSP 7 is available for around $60 on Amazon.)
However, the executable file for Animation Shop 3 is freely available online, with no crack needed for use. If you're using it on a Windows 10 system, you will need to adjust the compatibility settings to Windows 8. This is done by right-clicking on it after install, selecting 'Properties' and then clicking on the 'Compatibility' tab. Adjust the version in the drop-down box.
Software needed: VirtualDubMod 1.5.4.1
Avisynth 2.5
ffdshow
Jasc Animation Shop 3
Install these by running them and following directions. Make shortcuts for VirtualDub and Animation Shop only and open them before using to continue assigning file types to them, especially for Animation Shop 3.
Now you'll need to install some filters for use with Avisynth. The first of these is a video enhancer to use for coloring your gif. The second is a pack that includes FFVideoSource, which is how you'll be able to open most formats in VirtualDub.
ColorMill
(Here’s a page with some more information about how to use Color Mill, but ignore the directions for installing because you won’t be using them here.)
Install this file by simply dropping it into the 'plugins' folder of where you've installed VirtualDub. For instance, mine is located at 'C:\Program Files\VirtualDubMod1.5.4.1\plugins'.
Avisynth Plugin Pack
(Here is information on what Avisynth does. It’s not necessary that you read it for this tutorial,but it does demystify it somewhat.)
To install these, unzip the contained files and then also drop them into the 'plugins' folder, but this time for your installation of Avisynth. I use 2.6, so this is slightly different, but to demonstrate again, it could be like 'C:\Program Files (x86)\AviSynth2.6\plugins'.
Now, you need video source. Nowadays, most video is available in MP4, MKV or AVI format. I use downloaded source to make my gifs because the process of saving individual frames as screenshots, while a viable process, is painstaking. This setup, while initially complicated, takes a lot of the pain out of the process, once fully set up.
So, if you have an MP4 or an MKV, create a simple .txt file. This will become an Avisynth script, by changing the extension of the file to .avs. Make sure you can see your file extensions on your system.
Into this file, you'll type the location of your source file as can be seen in this sample screenshot, which also includes some further source modifications. I've cropped two pixels off each side of the source, as well as resized it to the original size.
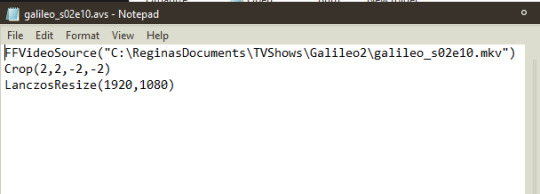
Stripped of the modifications specific to this file:
FFVideoSource("") Crop(0,0,-0,-0) LanczosResize([integer],[integer])
Once your Avisynth script has been created and saved, drop the file on top of the shortcut for VirtualDub, or open it, using 'File>Open video file...', which will open a window by which you can navigate to your script. If this is the first time doing this, and you've done everything correctly, there will be a slight delay in which it seems nothing is happening and then the file will open. You might encounter an error if you have not installed anything correctly or have typed your script incorrectly.
To open an AVI, open Virtualdub and open the video file by selecting 'File>Open video file...'. It should open without problems.
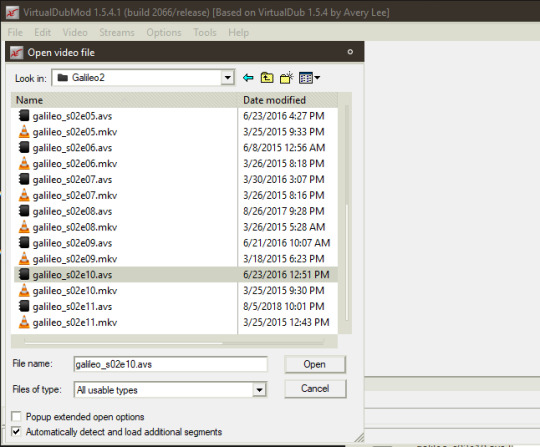
Once open in VirtualDub, you can navigate to the section you want to extract from your video by using the slider at the bottom of the screen. If the video resolution is large and you can't see all of it in the two boxes of video (one for input and one for output), right-click in the video frame and select one of the zoom options.
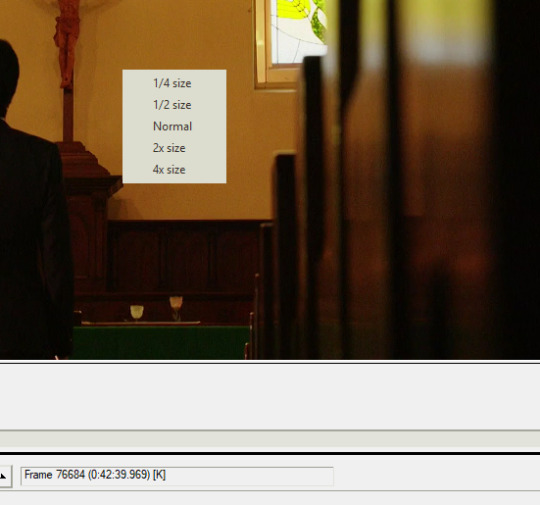
At the bottom of VirtualDub are the controls. In order they are: stop, play input, play output, move to first frame, back by one frame, forward by one frame, move to last frame, backward to last keyframe, forward to next keyframe, scan to last scene change, scan to next scene change, mark in, mark out.

Mark in and mark out are what you will be using to extract the section of video you need. Place your slider on the first frame of what you want to extract and press 'mark in' then move to the last frame and press 'mark out'. Doing so should show a change in the box below the controls.
I've already done this with a section of video, so next you'll select 'File> Save As...'. Give it a name and make sure that under the section of Video, it says 'Full processing mode' and then '(Uncompressed RGB)'. Save it. This should show you progress, if you have 'Show input video' and 'Show output video' checked.
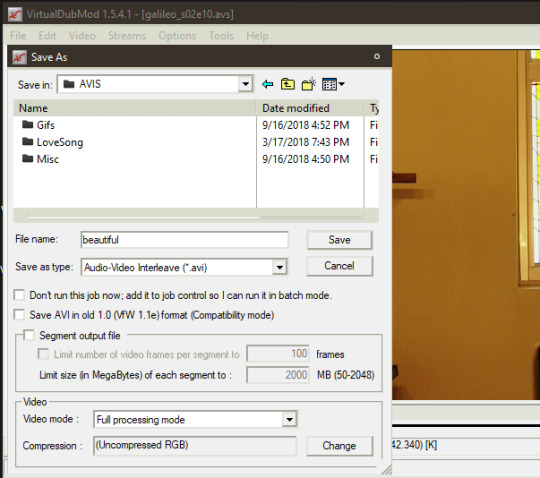
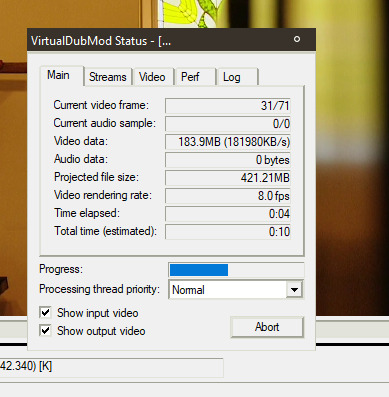
It is easier to do coloring when you've extracted your clip(s). Open your clip in VirtualDub. Go to 'Video>Filters...'. A box will open. Click 'Add...' on the right hand of the box. Select Color Mill(2.1) and press 'OK'. This will open a preview of your source (if not, the options have a button to press that says 'Show preview' in the left-hand corner). Adjust to your liking using the options.
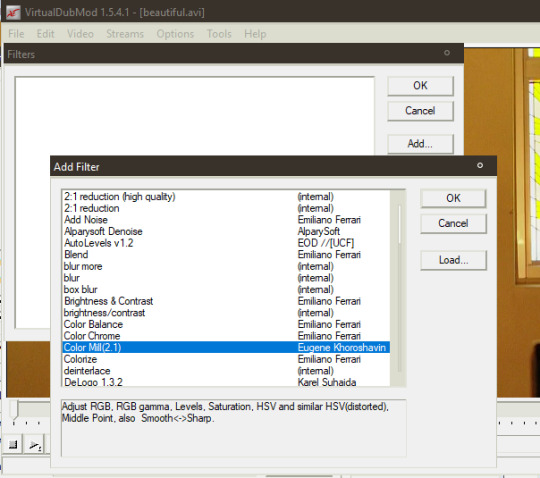
I desaturated mine, as you can compare in this screenshot:
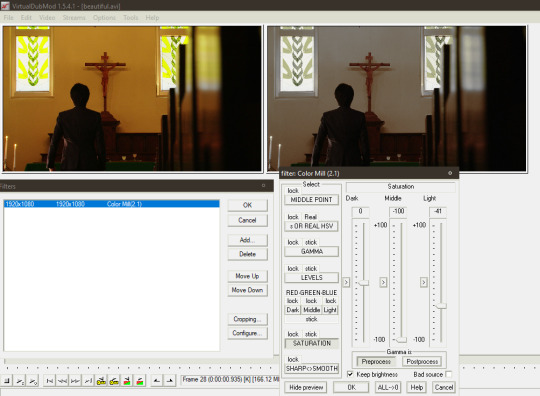
Save your recolor with a different name. I usually just append the abbreviation 'rc' to my recolors, so my file name here becomes 'beautifulrc.avi'.
Open your recolored file in Animation Shop 3 (File>Open...). If your file is a large resolution like mine and over a certain amount of frames long, you might get an error message. Press 'Yes' to continue opening the file.
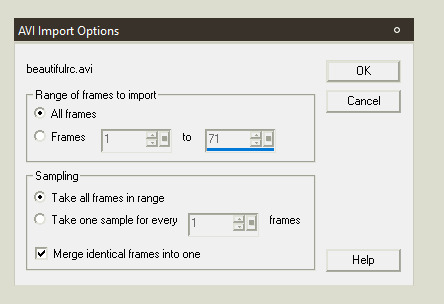
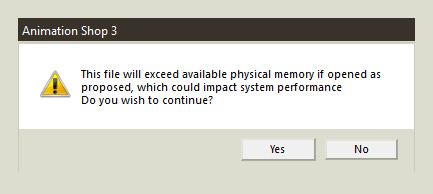
I have my Animation Shop set up to show the toolbars for everything but VCR Controls and have configured them in the manner you see here:
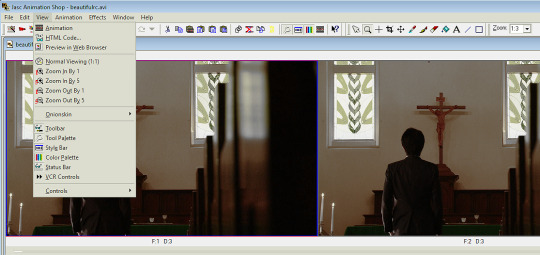
To make a single gif for Tumblr, you need to make sure that it doesn't exceed the specifications of: under 3 megabytes in size and 510 pixels in width. You'll find those criteria will constrain what you're able to do. For instance, my raw source for this gif is 1920x1080 pixels, width and height, and has 71 frames.
The less frames your gif has the more you can save on final file size. The less width your gif has the more frames you can have. A 320x210 gif can have up to sixty frames and still have great quality and stay under the megabyte limitation. The more color in your source, the less compression you'll get in your final gif, with the consequence of a larger file size. (This is why I desaturated my source.)
I will be putting text on this gif to show how this can be accomplished with Paint Shop Pro 7. I will also cull the frames down to less than 30 (aiming for 26 or 24). I'm going to crop my source as well, because it is currently in 1:85 perspective, which is rectangular and I want it to be square (at 500x500 pixels).
To crop your source, select the button that looks like two twisted ribbons and place your cursor in the source frame, right click and drag, enlarging the selection area. Your cursor will change to a four-pointed arrow mover cursor and you can move the selection around your source. If you move your cursor to one of the boundary lines of the selection, it will convert to a two-pointed arrow and you can click and drag this to adjust simply that side. Go back up to the toolbar and press the button for 'Crop' once you've adjusted your selection area to your satisfaction. If your source resolution is large you'll get this error message.
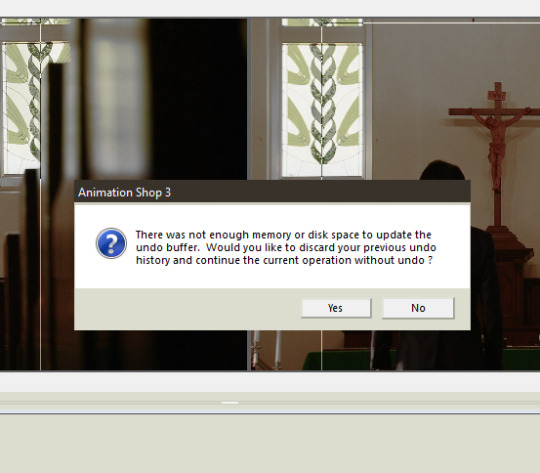
So be sure you're satisfied before continuing.
In the above screenshot, you can also see the selection lines for cropping, as thin lines.
To resize your source, select from the menu: 'Animation>Resize animation...'. This might shrink your animation down in zoom. To see it actual size, click the magnifying glass icon and click on your animation until you see the ratio change to '1:1'.
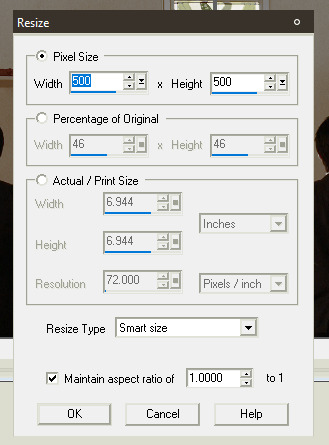
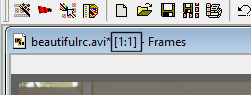
Now, you'll need to change the speed of your source. To do this, select all your frames by pressing 'Ctrl+A' or going to 'Edit>Select All'. Now select the pointer arrow from the toolbar and right-click on a frame of your source. Select 'Frame properties...'. In the tab that says 'Display Time' enter an integer. It's '3' by default, usually. Good times are 9, 10, and 12. I usually use 9 if I want close to real time and 12 if I want it to be slow. The more frames you remove the less smooth the motion of your gif will be. If you start out at 12 and then remove every second gif, you might end up at something close to real time. You'll need to adjust these parameters until you get something you like. To test them, use preview, which is accessed by selecting 'View>Animation'.
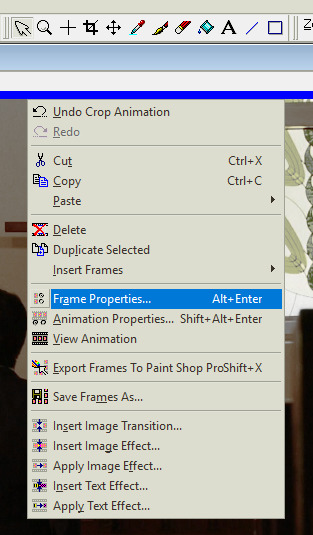
Move on to culling frames from your animation. Go to 'Animation>Cull animation'. As you can see here, removing 1 frame for every 2 frames, leaves me with 36 frames in my animation. My target was 24 or 26, so I have to do one of two things: remove frames by deleting them individually or culling again. Here's where I would preview my animation again, to see which option is best. In this case, I chose to cull again, but I adjusted how many frames were being removed to get close to my target, leaving me with 27 frames.
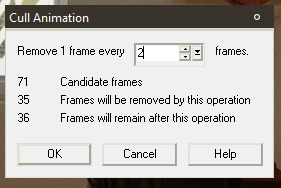
At this point I could choose to save.
Go to 'File>Save as...'. Since you've been working with uncompressed video, the program will automatically default to giving you the option to save as AVI. Change the selection in the box for 'Save as type:' to 'CompuServe Graphics Interchange (*.gif)' and click 'Save'. That will bring up this box:
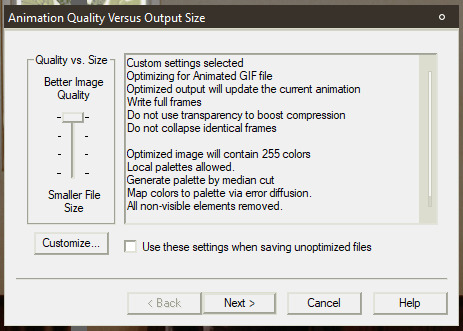
Click 'Customize...' and change the settings as follows:
[Under 'Colors' tab] 255 colors/ Optimized Median Cut / Error Diffusions
[Under 'Optimizations' tab] Uncheck everything except for 'Remove Non Visible Animation Elements'
Click 'Next>'. It will show progress of rendering and when finished prompt you to continue. Press 'Next>' again twice. The box will now show you Optimization Results, including the size of the file. Click 'Finish' if it falls beneath the limitation for file size.

Mine has failed to fall beneath the 3MB limitation. Darn it. Now I have to go back and remove some frames to try for the target of 24 frames. If you have this same problem, you can try that solution or you can attempt to modify some of the above parameters for file rendering (I ended up using this route to keep 26 frames). I changed 'Optimized Median Cut' to 'Optimized Octree'. It gave me a final size of 2.5MB.
Congrats, for a gif without text, you're done.
Animation Shop 3 has the capability to save frames as individual images. If you wished to not purchase Paint Shop Pro 7, you could conceivably download a free photo editor like Gimp, add text to each individual frame, and then use Animation Shop to build the gif by opening each frame with the wizard provided in the software itself. That's straightforward process.
To create a gif with text by using Paint Shop Pro, what you need to do is open Paint Shop Pro 7. Leave it open and switch to Animation Shop 3, while it still has your animation open.
Make sure you have not yet rendered your animation into a gif. Also make sure you have all your frames selected. Right-click in a frame of your source and select 'Export to Paint Shop Pro'. Do not close either programs at any point during this process.
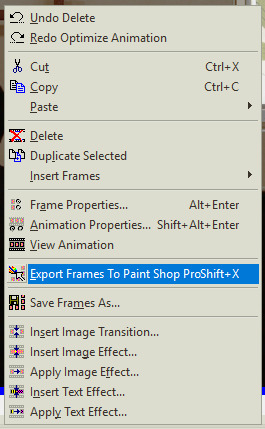
If the export goes correctly, PSP will open the gif as frames in layers. Make sure you have the toolbar for the Layer Palette open, as well as the Tool Options palette. To access click ‘View>Toolbars’, which will open this dialogue, if you didn’t already set this up.
Select a font you wish to use on your gif. Most gifs on Tumblrs use Corbel set as italicized for dialogue. I make use of akFontViewer to choose from the fonts I have.
Choose the text entry dialogue by selecting the small 'A' icon on the Tool Palette. Adjust parameters to your liking. Make sure the radio button in the section for 'Create as' is set to 'Floating' and 'Antialias' is checked. Press 'OK'. Now it will show a dotted line around your text, because it is a floating selection, so press 'Ctrl+Shift+P' to change it to a raster layer.
Adjust the placement of your text by using the mover tool (the four-pointed cursor icon). Use the grid tool to align it the way you wish. (View>Grid)
Make further adjustments to the look of your text, if you desire. On gifs, this may mean adding a drop shadow to the text, so that it stands out a little more. All image adjustments in PSP can be found under Effects or Colors, but I won't get into how I made the text look here in the final version, as that's not the focus of this tutorial.
Next, select your image by pressing 'Ctrl+A'. This will put a dotted selection line around the entire image.
Here's where it gets painstaking in a series of repetitive actions. It's necessary to make sure you follow these in the right order and not to skip or make mistakes, as these will affect your individual frames. What you'll be doing is selecting a frame, then copying that frame with the text on it, then pasting into the same frame selection.
1. Place your cursor on your first frame. They go in reverse order. Make sure it is highlighted (in blue is how it shows in my program). 2. Click on the title-bar of your image. Now, right-click. Select 'Copy Merged'. 3. Right-click again. Select 'Paste Into Selection'. 4. Expand your Layer Palette. Click on the glasses icon next to the frame and toggle it to invisible. (It will indicate it is so by red slashes through the glasses.) 5. Click on the next frame layer below the one you've already changed. You can hover over the invisible layer to see the change if you wish. 6. Repeat for each frame layer. 7. Click on the layers that contain your text and turn them invisible. 8. Click on the frame layers starting from the bottom and turn them visible. The last layer should already be visible.
Now, right-click on your image title-bar and select 'Update Back to Animation Shop'. (You can see the option in the above screenshot, as well as the ‘Paste Into Selection’ option, even though they are not highlighted.)
Return to Animation Shop to see if the frames have updated correctly. Move through the frames by clicking on the slider below the frames and check to make sure each frame now has text.
Right-click on the title-bar of your animation (while still in Animation Shop) and select 'Break Link With Exported Frames'.
Proceed to save your gif as outlined above.
Close everything if you're sure you're done.
Congrats! Now you've made a gif with text, using Paint Shop Pro.
2 notes
·
View notes