#crontab -l
Explore tagged Tumblr posts
Visit Tumblr Blog
Explore Tumblr blogs with no restrictions, modern design and the best experience.
Last Seen Tumblr Blogs


Fun Fact
Premium Tumblr themes are available from anywhere between $9 to $49.
Text
Cron Job là gì? Cách thiết lập và quản lý Cron Job

Trong thế giới quản lý hệ thống và tự động hóa, cron job là một công cụ không thể thiếu, việc hiểu rõ cron job là gì cũng như cách thức hoạt động của nó sẽ giúp bạn tiết kiệm thời gian và tối ưu hóa công việc hàng ngày. Hãy cùng khám phá cách hoạt động của cron job và cách sử dụng nó trong quản lý hệ thống của bạn!
1. Cron Job là gì?
Cron job là một khái niệm quan trọng trong quản lý hệ thống và lập lịch tự động hóa các tác vụ trên hệ điều hành Linux. Đây là một công cụ mạnh mẽ cho phép người dùng lên lịch để chạy các lệnh hoặc script vào những thời điểm cụ thể hoặc định kỳ mà không cần sự can thiệp thủ công.
Cron job đặc biệt hữu ích trong các kịch bản như tự động sao lưu dữ liệu, gửi email thông báo, kiểm tra hệ thống hoặc chạy các báo cáo định kỳ. Đối với các quản trị viên hệ thống, lập trình viên và DevOps, hiểu rõ về cron job là một kỹ năng cần thiết.
2. Cấu trúc của Cron Job
Cron job được định nghĩa trong một file gọi là crontab (viết tắt của "cron table"). Mỗi dòng trong crontab đại diện cho một cron job và có cấu trúc như sau:
* * * * * command_to_be_executed
Cấu trúc này được chia thành 5 trường đại diện cho phút, giờ, ngày trong tháng, tháng và ngày trong tuần. Mỗi trường có thể nhận các giá trị cụ thể hoặc ký tự đại diện để biểu thị sự lặp lại.
Phút (* * * * *) - Từ 0 đến 59
Giờ (* * * * *) - Từ 0 đến 23
Ngày trong tháng (* * * * *) - Từ 1 đến 31
Tháng (* * * * *) - Từ 1 đến 12
Ngày trong tuần (* * * * *) - Từ 0 đến 6 (với 0 là Chủ Nhật)
Ví dụ, cron job sau sẽ chạy một script vào lúc 3 giờ 15 phút mỗi ngày:
15 3 * * * /path/to/script.sh
3. Thiết lập và quản lý Cron Job
Đầu tiên bạn cần có một máy chủ chạy hệ điều hành Linux để bắt đầu thiết lập. Bạn có thể trải nghiệm dịch vụ máy chủ ảo VPS Linux miễn phí của chúng tôi tại đây.
3.1. Truy cập và chỉnh sửa crontab
Để tạo hoặc chỉnh sửa cron job, bạn sử dụng lệnh crontab:
Mở crontab để chỉnh sửa:
crontab -e
Xem các cron job hiện tại:
crontab -l
Xóa tất cả các cron job:
crontab -r
3.2. Ví dụ về Cron Job
Chạy một script mỗi ngày vào lúc 0h00:
0 0 * * * /path/to/backup.sh
Chạy một lệnh mỗi thứ Hai vào lúc 9 giờ sáng:
0 9 * * 1 /path/to/weekly_report.sh
Chạy một script mỗi 15 phút:
*/15 * * * * /path/to/check_status.sh
3.3. Các ký tự đặc biệt trong cron job
Ký tự *: Biểu thị mọi giá trị có thể, chẳng hạn như * * * * * nghĩa là mọi phút, mọi giờ, mọi ngày.
Ký tự ,: Sử dụng để tách các giá trị, ví dụ 0 12,18 * * * chạy vào 12 giờ v�� 18 giờ.
Ký tự -: Dùng để biểu thị một khoảng giá trị, ví dụ 0 9-17 * * 1-5 chạy mỗi giờ từ 9 giờ đến 17 giờ từ thứ Hai đến thứ Sáu.
Ký tự /: Biểu thị khoảng thời gian, ví dụ */10 * * * * nghĩa là chạy mỗi 10 phút.
4. Ưu điểm và hạn chế của Cron Job là gì?
Khi sử dụng cron job sẽ mang lại những lợi ích vượt trội, tuy nhiên vẫn còn những hạn chế nhất định.
Ưu điểm
Tự động hóa mạnh mẽ: Cron job giúp tự động hóa nhiều tác vụ lặp đi lặp lại mà không cần can thiệp thủ công.
Linh hoạt: Với khả năng tùy chỉnh thời gian và ngày chạy, cron job có thể đáp ứng hầu hết các yêu cầu về lập lịch.
Hiệu quả: Giảm thiểu sai sót và tối ưu hóa thời gian làm việc của con người, đặc biệt trong quản lý hệ thống.
Hạn chế
Cấu hình phức tạp: Cấu trúc cú pháp của cron có thể gây khó khăn cho người mới bắt đầu.
Thiếu khả năng quản lý trực quan: Không có giao diện đồ họa mặc định, việc quản lý cron job hoàn toàn thông qua dòng lệnh.
Giới hạn trong việc xử lý lỗi: Nếu một cron job gặp lỗi khi chạy, hệ thống không có cơ chế tự động xử lý hoặc cảnh báo trừ khi được cấu hình riêng.
5. Câu hỏi thường gặp về Cron Job
Cron Job có thể chạy nếu hệ thống bị tắt không?
Trả lời: Không, Cron Job chỉ chạy khi hệ thống đang hoạt động. Nếu hệ thống bị tắt tại thời điểm lịch trình, Cron Job sẽ không chạy và sẽ không tự động chạy khi hệ thống được bật lại.
Làm thế nào để xóa một cron job?
Trả lời: Để xóa một Cron Job, bạn có thể mở tệp crontab bằng lệnh crontab -e, sau đó xóa dòng tương ứng với công việc mà bạn muốn loại bỏ.
Tôi có thể chạy một cron job mỗi giây không?
Trả lời: Không, Cron không hỗ trợ việc chạy các tác vụ mỗi giây. Thời gian nhỏ nhất mà Cron có thể lên lịch là mỗi phút.
Cron job có thể chạy một lệnh phức tạp không?
Trả lời: Cron Job có thể chạy các lệnh phức tạp, nhưng nếu lệnh cần xử lý nhiều bước hoặc yêu cầu quản lý trạng thái, bạn nên viết một kịch bản (script) và chạy kịch bản đó thông qua Cron Job.
Tổng kết
Cron job là một công cụ quan trọng trong việc tự động hóa các tác vụ định kỳ trên hệ thống Linux. Hiểu rõ cron job là gì, cách cấu hình và quản lý cron job sẽ giúp bạn tiết kiệm thời gian, giảm thiểu lỗi và tối ưu hóa hoạt động của hệ thống. Mặc dù có một số hạn chế, nhưng với sự hỗ trợ của các công cụ bổ sung, cron job vẫn là một phần không thể thiếu trong quản lý hệ thống hiện đại.
Hy vọng bài viết này đã cung cấp cho bạn những thông tin cơ bản và kỹ thuật cần thiết để bắt đầu với cron job. Hãy thử áp dụng và tối ưu hóa công việc của bạn với công cụ mạnh mẽ này!
Nguồn: https://suncloud.vn/cron-job-la-gi
0 notes
Text
QnapのNextcloudその後その後
Qnapヘルプデスクで解決
Qnapのcronは普通に
・crontab -u httpdusr -e
・*/15 * * * * /mnt/ext/opt/apache/bin/php -f /share/Web/nextcloud/cron.php
・crontab -u httpdusr -l
とやれば、とりあえず動作するのですが、Qnapのアップデートや再起動のたびに設定が消えてしまいます。
再起動しても設定が消えないようにするには
再起動後��元となる/etc/config/crontabファイルに追記する必要があるが、特定のユーザーとして設定する方法がいまいちわからなかった。ヘルプデスクに質問をしたら、当日返信があり、解決。
「sudo -i」でadministrator権限に
「vi /etc/config/crontab」でエディターを開く
「i」で挿入モードに
「*/15 * * * * httpdusr /mnt/ext/opt/apache/bin/php -f /share/Web/nextcloud/cron.php」を追記する
「esc」キー押して、「:wq!」で書き込み終了
「crontab /etc/config/crontab && /etc/init.d/crond.sh restart」で設定ファイルの反映とcronの再起動
「crontab -l -u httpdusr」で設定されていることを確認
「exit」でadministrator権限を終了
エディターで追記する際に特定のユーザー名(httpdusr)を実行するコマンドの前に書き込むだけでした。
これがなかなかWeb検索では出てこないで困ってました。
0 リアクション
0 notes
Text
Shell
Manpage
Most of Unix systems are managed by using Shell. Just as you need to know a minimum number of words to have a discussion in a language, you need to know a minimum number of commands to be able to easily interact with a system. Unix systems all have, sometimes with slight differences, the same set of commands. While it is not too hard to remember commands, it might be hard to remember all of their options and how exactly to use them. The solution to this is the man command. Let’s go through a part of the ssh one, as there are few elements to know to be able to read a man page:
NAME ssh — OpenSSH SSH client (remote login program) SYNOPSIS ssh [-1246AaCfgKkMNnqsTtVvXxYy] [-b bind_address] [-c cipher_spec] [-D [bind_address:]port] [-E log_file] [-e escape_char] [-F configfile] [-I pkcs11] [-i identity_file] [-L [bind_address:]port:host:hostport] [-l login_name] [-m mac_spec] [-O ctl_cmd] [-o option] [-p port] [-Q cipher | cipher-auth | mac | kex | key] [-R [bind_address:]port:host:hostport] [-S ctl_path] [-W host:port] [-w local_tun[:remote_tun]] [user@]hostname [command] DESCRIPTION ssh (SSH client) is a program for logging into a remote machine and for executing commands on a remote machine. It is intended to replace rlogin and rsh, and provide secure encrypted communications between two untrusted hosts over an insecure network. X11 connections and arbitrary TCP ports can also be forwarded over the secure channel.
Some tips:
The NAME will summarize what the command is doing. As it is usually super short, you might want to look at DESCRIPTION (bellow) if ever it does not gives clear enough information
The SYNOPSIS will help you to understand the structure of the command:
A shell command usually have this format: command options parameters
Options inside [] are optional
The string without [] are mandatory
ssh [-1246AaCfgKkMNnqsTtVvXxYy] [-D [bind_address:]port]
ssh is mandatory
-1246AaCfgKkMNnqsTtVvXxYy is optional
-D [bind_address:]port is optional (with bind_address: being itself optional within -D [bind_address:]port
Commands
Here is the (non-exhaustive) list of commands & concepts you should master to be verbose with Unix systems:
awk # pattern scanning and processing language basename # strip directory and suffix from filenames bg # resumes suspended jobs without bringing them to the foreground cat # print files cd # change the shell working directory. chmod # change file mode chown # change file owner and group crontab # maintain crontab files curl # transfer a URL cut # remove sections from each line of files date # display or set date and time dig # DNS lookup utility df # report file system disk space usage diff # compare files line by line du # estimate file space usage echo # display a line of text find # search for files in a directory hierarchy fg # resumes suspended jobs and bring them to the foreground grep # print lines matching a pattern kill # send a signal to a process less # read file with pagination ln # create links ls # list directory contents lsb_release # print distribution-specific information lsof # list open files mkdir # create mv # move files nc # arbitrary TCP and UDP connections and listens netstat # print network connections, routing tables, interface statistics... nice # execute a utility with an altered scheduling priority nproc # print the number of processing units available passwd # change user password pgrep # look up processes based on name and other attributes pkill # send signal to processes based on name and other attributes printenv # print all or part of environment pwd # print name of current/working directory top # display Linux processes tr # translate or delete characters ps # report a snapshot of the current processes rm # remove files or directories rmdir # remove directories rsync # remote file copy scp # secure copy (remote file copy program) sed # stream editor for filtering and transforming text sleep # suspend execution for an interval of time sort # sort lines of text file ssh # OpenSSH SSH client (remote login program) ssh-keygen # SSH key generation, management and conversion su # substitute user identity sudo # execute a command as another user tail # output the last part of files tar # manipulate archives files tr # translate or delete characters uname # Print operating system name uniq # report or omit repeated lines uptime # show how long system has been running w # Show who is logged on and what they are doing whereis # locate the binary, source, and manual page files for a command which # locate a command wc # print newline, word, and byte counts for each file xargs # build and execute command lines from standard input | # redirect standard output to another command > # redirect standard output < # redirect standard input & # send process to background
Shortcuts
Some handy shortcuts:
CTRL+A # go to beginning of line CTRL+B # moves backward one character CTRL+C # stops the current command CTRL+D # deletes one character backward or logs out of current session CTRL+E # go to end of line CTRL+F # moves forward one character CTRL+G # aborts the current editing command and ring the terminal bell CTRL+K # deletes (kill) forward to end of line CTRL+L # clears screen and redisplay the line CTRL+N # next line in command history CTRL+R # searches in your command history CTRL+T # transposes two characters CTRL+U # kills backward to the beginning of line CTRL+W # kills the word behind the cursor CTRL+Y # retrieves last deleted string CTRL+Z # stops the current command, resume with fg in the foreground or bg in the background
0 notes
Text
在 Ubuntu 20.04 透過 crontab 設定工作排程範例教學
在 Ubuntu 20.04 透過 crontab 設定工作排程範例教學
電腦能幫人類做許多工作, 除了這些工作由電腦代勞以外, 有週期性的例行工作也可以交由電腦來處理, 今天就來教大家 在 Ubuntu 20.04 透過 crontab 設定工作排程範例教學 在 Ubuntu 20.04 使用 crontab 來設定排程工作,使用命令crontab -l 就能夠觀看目前的排程工作有哪些。 若要新增修改排程工作,則使用命令:crontab -e進入之後系統會在上方顯示一個簡單的說明,最後一行的m h dom mon dow command每個欄位都代表著不同的意義 m:分, 0 ~ 59h :時, 0 ~ 23dom: 日期, 1 ~ 31mon: 月份, 1 ~ 12dow: 星期幾, 1 ~ 7command 要執行的排程工作 除了指定的時間點以外,可以透過特殊字元來簡化設定的方式,例如 星號 ( * ): 表示任意時間點。逗號 (,):…

View On WordPress
#crontab -e#crontab -l#crontab 設定工作排程#daily#m h dom mon dow command#monthly#Ubuntu 20.04排程工作#Ubuntu工作排程#weekly#排程工作範例
0 notes
Link
0 notes
Text
Cómo listar las tareas cron programadas en linux

Cómo listar las tareas cron programadas en linux. Cron es un demonio que nos permite programar la ejecución de tareas a intervalos definidos. Más conocidas como tareas cron, las podemos planificar por minuto, hora, día del mes, mes, día de la semana y cualquiera de sus combinaciones posibles. Las tareas Cron son especialmente útiles en operaciones relativas al mantenimiento del sistema. Por ejemplo... automatizar las copias de seguridad, enviar correos, verificar actualizaciones, limpiar el sistema, etc. Más o menos todos sabemos como operar con estas tareas, lo que tal vez no conoces es cómo listar las tareas cron que tienes programadas en linux. Hoy vemos como imprimir en pantalla esos listados.
Listar las tareas cron programadas en linux
La ubicación y forma de visualizar los archivos, puede variar dependiendo del sistema y del tipo de usuario. Así que vemos la formula para los usuarios, y como ver las tareas propietarias del sistema. Listar las tareas cron de usuario La ubicación de los archivos de tareas es diferente si es un derivado de RHEL o de Debian, las vemos. Ubicación en Rhel, CentOS, Fedora y derivados /var/spool/cron Ubicación en Debian, Ubuntu, Linux Mint y derivados /var/spool/cron/crontabs Listar tareas cron de usuario Para poder visualizar todas las tareas cron del usuario actual, ejecutamos lo siguiente. crontab -l Si aplicamos la opción "-u", podemos listar las tareas de otro usuario. Pero debes tener en cuenta que los archivos son propiedad del usuario que los creo, y solo si eres root o tienes privilegios sudo podrás ver las tareas del resto de usuarios. sudo crontab -u usuario -l También puedes saber que usuarios del sistema han creado sus propias tareas cron, para ello nos aprovechamos de spool. sudo ls -1 /var/spool/cron # o sudo ls -1 /var/spool/cron/crontabs

Tareas Cron Listar las tareas cron del sistema Las tareas cron del sistema las podemos encontrar en "/etc/crontab", y en el directorio "/etc/cron.d". Para imprimir todas en pantalla usamos el comando cat. cat /etc/crontab /etc/cron.d/* Cron permite otros tipos de programación "predefinidos" que puedes encontrar en "/etc": cron.daily cron.hourly cron.monthly cron.weekly Por ejemplo, para ver las tareas programadas semanalmente puedes ejecutar el siguiente comando. ls -l /etc/cron.weekly/ Si no hay ninguna salida es, porque no existe ninguna tarea cron semanal. Temporizador de Systemd Si tu distribución linux usa Systemd como sistema init, también tienes unos archivos temporizadores que se utilizan como alternativa al demonio cron estándar. Normalmente son propiedades del sistema, pero puedes verlos al ejecutar el siguiente comando. systemctl list-timers imagen de ejemplo...

Tareas programadas por Systemd Canales de Telegram: Canal SoloLinux – Canal SoloWordpress Espero que este articulo te sea de utilidad, puedes ayudarnos a mantener el servidor con una donación (paypal), o también colaborar con el simple gesto de compartir nuestros artículos en tu sitio web, blog, foro o redes sociales. Read the full article
0 notes
Text
WSLのインストールから、外部からのSSH環境構築までの備忘録
インストール
ここを参考にした。 以前WSL1を触った時はMicrosoftストアからイメージをDLする感じだったと記憶しているが、コマンドだけでインストールできた。 Powershellでのコマンド:
wsl --install
これだけでUbuntu20.04が自動でインストールされた。
イメージの移動
デフォルトではCドライブにインストールされる。 しかし後々ディスク容量を逼迫することが目に見えたので、別ドライブにイメージを移動させた。 ここを参考にした。 Fドライブに1TBのSSDを増設したので、基本ここの直下を使うことにした。 Powershellでのコマンド:
wsl --shutdown wsl --export Ubuntu F:Ubuntu.tar wsl --unregister Ubuntu wsl --import Ubuntu F:Ubuntu D:Ubuntu.tar --version 2
これを行うことで、デフォルトユーザーがrootになってしまう問題がある。 基本vscodeのremote sshで接続する予定なのであまり問題はないが、リンクを参考にしてユーザー権限で起動するショートカットを作成した。
また、後々明らかになったのだが、デフォルトのイメージはディスク容量が256GBを最大値として作られるようだった。 容量を拡張するために、ここに従ってコマンドを実行した。
同一LANからWSLにSSHする
Ubuntu内でsshサービスを立ち上げておく必要がある。 いろいろ試行錯誤したため記憶が定かでないが、open-sshは初めからインストールされていた。 なので鍵がうまく設定されていさえすれば、同一LANの外部から接続できそうだが、問題が2つある。
WSLではsystemdが動いておらず、サービスを自動で起動することができない。
WSL2ではホストであるWindowsと異なるIPが使用されており、直接外部から接続することが難しい。
このうち1. はWSLを起動するときにオプションでシェルスクリプトを実行できるので、それで解決した。 具体的にはWSL内でinit-wsl.shとかの名前のスクリプトを作成しておき、WSL起動時に
wsl -d Ubuntu -u root exec /home/user/init-wsl.sh
とすればよい。init-wsl.shの中身として
#!/bin/sh service ssh restart service cron restart
などと、起動したいサービスの名前を書いておく。 これでsshやcronなどのコマンドを実行できる。
つぎに2. は、Windowsポート22に来たパケットをwslのポート22に転送する設定を実施した。
for /F %%i in ('wsl -d Ubuntu exec hostname -I') do set ip=%%i netsh interface portproxy delete v4tov4 listenport=22 netsh interface portproxy add v4tov4 listenport=22 connectaddress=%ip%
この設定はここを真似した。 これらがWindowsが起動されるたびに自動で実施するために、
wsl -d Ubuntu -u root exec /home/user/init-wsl.sh for /F %%i in ('wsl -d Ubuntu exec hostname -I') do set ip=%%i netsh interface portproxy delete v4tov4 listenport=22 netsh interface portproxy add v4tov4 listenport=22 connectaddress=%ip%
とまとめたstart-wsl.batなるファイルを作成し、windowsのタスクスケジューラに設定した。
全般
最上位の特権で実行する: on
トリガー
タスクの開始: ログオン時
遅延時間を指定する: 30秒間
操作
操作: プログラムの開始
プログラム/スクリプト: 上記のファイルを置いたパス という感じ。
別LANから接続したい
GCEの無料枠の作成
別LANから接続する際の問題は
グローバルIPが固定されていないこと
である。 プロバイダのオプションで固定してくれるサービスもあったが、課金制だったため、無料で行う方法を探していたら、 ここを見つけた。 つまりsshのリモートフォワードを利用して、VPSを経由した接続を実現するというもの。 VPSの調達先として、Googleが提供しているCompute Engineをうまく使えば、課金なしで踏み台用の固定IPが手に入る。 設定はここが参考になった。
一点、GCEで作成するイメージとして、無料枠のマシンの名前が、2021年7月まではf1-microだったのが、8月以降e2-microに変わっている。 古い記事だけを参考にすると、誤って課金されてしまうので注意。 こことかに変更のあらましが述べられている。
もう一点、GCEのアドレスは外部に公開されるため、ssh用のポートは変更しておくことが望ましい。 これも確か上の記事の中でやり方が書かれていたはずなので説明割愛。
リモートフォワード設定
GCEのsshのポートは11111とする。 Windows��シンのsshのポートは22とする。 このとき、WSL側で実行するコマンドは
autossh -f -N gce -p 11111 -R 22222:localhost:22
となる。 22222は別に空いていればなんでもよい。 接続先のgceの部分はWSL側の.ssh/configで良しなに設定されているとする。 sshでなくautosshとしているのは、接続が切れたとき再接続してほしいからである(aptでインストール可能)。 -f -Nなどのオプションは検索されたい。 -Rがリモートフォワードを指定するオプションで、gceマシンの22222ポートをlocalhost、つまりwslの22番ポートにリモートフォワードしている。
つぎに外部PC(ここではmacbookとする)で実行するコマンドは
ssh gce -p 11111 -L 33333:localhost:22222 ssh localhost -p 33333
となる。 もちろんmacbook側からも、gceを./ssh/configで設定しておく必要がある。 ポート33333も、空いていればなんでもよい。 また、1行目と2行目は、それぞれ別ターミナルから実行することに注意。 1行目でmacbookの33333ポートをgceマシンのlocalhost:22222にローカルフォワードしている。 この状態でmacbookのlocalhostの33333にsshでログインすると、macbook->gceマシン->wslというログインが可能になる。
もちろん、それぞれのsshコマンドでは、鍵が良しなに設定されていなければならない。
WSLでのssh自動実行
これでリモートで作業する環境が整ったのだが、
autossh -f -N gce -p 11111 -R 22222:localhost:22
のコマンドは、できればwsl開始時に自動で起動させたい。 ここでふたたび問題になるのが、WSLでsystemdが動いていない問題である。 さきほどのinit-wsl.shの下のほうにコマンドを追記しても、うまく動かなかった。 また、どうやら最近導入されたWSLのバージョンで、/etc/wsl.confの中で起動時に実行するコマンドを指定できるようになったらしいのだが、自分の環境��はうまく動かなかった。
いろいろ調べると、genieなるソフトを使えばsystemdを強制的に動かすこともできると書かれていたが、CPU使用率を上げてしまうという情報もあったので、避けることにした。
そこで、多少強引だがcronを使うことにした。 具体的には、上記のautosshのコマンド1行からなるtunnel_to_gce.shという名前のスクリプトを作成し、crontabに下記を追記した。
*/1 * * * * user pidof -x tunnel_to_gce.sh >/dev/null || /home/user/tunnel_to_gce.sh
1分ごとに実行されるので、かなり冗長だが、一応前半のpidof -x tunnel_to_gce.sh >/dev/null ||あたりの記述で、重複実行は避けられるらしい(シェルスクリプトよくわかってない…)
余談
とりあえず以上で
windowsが起動->wsl起動->ssh, cronサービス起動->autosshでgceにリモートフォワード
まで自動化できた。 したがってwindowsマシンが起動さえすれば、いつでも外部からssh可能になった。
あとはWake on LANまでできたら最高だが、Switchbotのスイッチが使えるという情報をみつけ、確かにそうだなと思ったので、早速ぽちった。 今日届いてPCの電源ボタンにつけてみたが、簡単に使えた。 いざという時の強制再起動に役立てられそう。
最後に、時にはGUI環境でWindowsに接続したい時もある。 これは普通にWindowsのRDP機能を使えばよい。 …のだが、なんとRDPサーバーの機能はWindows Proでなければ使えないことがわかった。
このため先ほどMicrosoft Storeから泣く泣くProライセンスを購入したところ。 ~~狡い商売しやがって、Microsoft許さん~~
以上です。 研究頑張ります。
3 notes
·
View notes
Text
CRONJOB COMMANDS
I noticed that the Apache is very slow on it's first handshake, so I decided to run a cron job that will run every 12:01 am so the cron job will become the Apache's first handshake.
Creating a cron
crontab -e
For testing, I tried to echo the words 'kwenwashere' and save it to /tmp/sample.txt
* * * * * echo 'kwenwashere' >> /tmp/sample.txt
The first 5 * denotes the following:
The minute (0 – 59)
The hour (0 – 23)
The day of the month (1 – 31)
The month (1 – 12)
Day of the week (0 – 6)
Let's say I want the cron job to run every 12:01 am so the syntax will be as follows.
1 0 * * * ping -c 50 yourwebsite.com
The line above will ping yourwebsite.com 50 times everyday during 12:01 am
30 10 * * 5 curl --request GET 'https://yourwebsite.com/area/'
The line above will visit yourwebsite.com every friday at 10:30 in the morning
Below are the following common syntaxes for cron job operations
systemctl start crond.service (start cron service)
sysctemctl status crond -l (check cron status)
sysctemctl restart crond (restart cron service)
sysctemctl stop crond (stop cron service)
sudo nano /var/log/cron (check cron log)
When I checked the sample.txt file it showed something like this:

1 note
·
View note
Text
my WordPress Linux account has a crontab entry "echo hello"
$ ssh -A … $ crontab -l … * * * * * echo hello I certainly did not create this weird entry, so who did this? Did somebody illegally take over my WordPress?
View On WordPress
0 notes
Text
Grsync chron

#Grsync chron install#
#Grsync chron software#
#Grsync chron software#
Z-Cron 6.0 is available to all software users as a freeload for Windows. This download is licensed as freeware for the Windows (32-bit and 64-bit) operating system on a laptop or desktop PC from scheduling software without restrictions. Z-Cron (Crontab for Windows) 6.0 on 32-bit and 64-bit PCs Grsync is a bit outdated but still supports.
#Grsync chron install#
We don’t have to install Gnome libraries on Windows in order to use GRsync. Grsync makes use of the GTK libraries and is released under the GPL license. It mainly used for sync and backup files. The scheduling tool allows you to set the time and day for a task to be executed once the tasks are setup, they appear in the main user interface which can be accessed from the system tray.Īll in all, Z-Cron is a simple and free task scheduling application that takes its name from the Linux program which does the same thing. It comes with a simple interface and yet easy to use. The design of this scheduling software is straightforward and features a few different types of built-in tasks that can be easily created. If you regularly perform backups without automation, this task scheduler might just be the tool you need to save time and stress. This tool is fast and efficient, copying only the changes from the source and offering customization options. Rsync is used for mirroring, performing backups, or migrating data to other servers. Z-Cron contains a lot of built in functions and can show you message logs, shut down the computer, perform system maintenance and more. Rsync, or Remote Sync, is a free command-line tool that lets you transfer files and directories to local and remote destinations. Edit the current user's cron jobs using command crontab -e. Does not create an unwieldy metadata directory you can delete files directly. You can use cron scheduler to schedule file transfering at a particular time on a particular day. Can delete extraneous files on the destination. Works great for local backup (different drives/directories on 1 computer), as well as remote backup. It is basically a tool for people who want to add some automation and can monitor computer systems either on or off the network. Checkboxes for common/uncommon rsync options text boxes for custom command-line tweaks. To do this, use the max-size option: rsync -av -max-size10k original/ duplicate/. Using Rsync, you can also specify the file size that can be synced. It can create scheduled tasks on Windows and execute them when the time comes. The example below will include files beginning with the letter L and exclude all the other files: rsync -av -includeL -exclude original/ duplicate/. Z-Cron is a crontab-like scheduler for Windows.
0 notes
Text
Cron Job là gì? Cách thiết lập và quản lý Cron Job

Trong thế giới quản lý hệ thống và tự động hóa, cron job là một công cụ không thể thiếu, việc hiểu rõ cron job là gì cũng như cách thức hoạt động của nó sẽ giúp bạn tiết kiệm thời gian và tối ưu hóa công việc hàng ngày. Hãy cùng khám phá cách hoạt động của cron job và cách sử dụng nó trong quản lý hệ thống của bạn!
1. Cron Job là gì?
Cron job là một khái niệm quan trọng trong quản lý hệ thống và lập lịch tự động hóa các tác vụ trên hệ điều hành Linux. Đây là một công cụ mạnh mẽ cho phép người dùng lên lịch để chạy các lệnh hoặc script vào những thời điểm cụ thể hoặc định kỳ mà không cần sự can thiệp thủ công.
Cron job đặc biệt hữu ích trong các kịch bản như tự động sao lưu dữ liệu, gửi email thông báo, kiểm tra hệ thống hoặc chạy các báo cáo định kỳ. Đối với các quản trị viên hệ thống, lập trình viên và DevOps, hiểu rõ về cron job là một kỹ năng cần thiết.
2. Cấu trúc của Cron Job
Cron job được định nghĩa trong một file gọi là crontab (viết tắt của "cron table"). Mỗi dòng trong crontab đại diện cho một cron job và có cấu trúc như sau:
* * * * * command_to_be_executed
Cấu trúc này được chia thành 5 trường đại diện cho phút, giờ, ngày trong tháng, tháng và ngày trong tuần. Mỗi trường có thể nhận các giá trị cụ thể hoặc ký tự đại diện để biểu thị sự lặp lại.
Phút (* * * * *) - Từ 0 đến 59
Giờ (* * * * *) - Từ 0 đến 23
Ngày trong tháng (* * * * *) - Từ 1 đến 31
Tháng (* * * * *) - Từ 1 đến 12
Ngày trong tuần (* * * * *) - Từ 0 đến 6 (với 0 là Chủ Nhật)
Ví dụ, cron job sau sẽ chạy một script vào lúc 3 giờ 15 phút mỗi ngày:
15 3 * * * /path/to/script.sh
3. Thiết lập và quản lý Cron Job
Đầu tiên bạn cần có một máy chủ chạy hệ điều hành Linux để bắt đầu thiết lập. Bạn có thể trải nghiệm dịch vụ máy chủ ảo VPS Linux miễn phí của chúng tôi tại đây.
3.1. Truy cập và chỉnh sửa crontab
Để tạo hoặc chỉnh sửa cron job, bạn sử dụng lệnh crontab:
Mở crontab để chỉnh sửa:
crontab -e
Xem các cron job hiện tại:
crontab -l
Xóa tất cả các cron job:
crontab -r
3.2. Ví dụ về Cron Job
Chạy một script mỗi ngày vào lúc 0h00:
0 0 * * * /path/to/backup.sh
Chạy một lệnh mỗi thứ Hai vào lúc 9 giờ sáng:
0 9 * * 1 /path/to/weekly_report.sh
Chạy một script mỗi 15 phút:
*/15 * * * * /path/to/check_status.sh
3.3. Các ký tự đặc biệt trong cron job
Ký tự *: Biểu thị mọi giá trị có thể, chẳng hạn như * * * * * nghĩa là mọi phút, mọi giờ, mọi ngày.
Ký tự ,: Sử dụng để tách các giá trị, ví dụ 0 12,18 * * * chạy vào 12 giờ và 18 giờ.
Ký tự -: Dùng để biểu thị một khoảng giá trị, ví dụ 0 9-17 * * 1-5 chạy mỗi giờ từ 9 giờ đến 17 giờ từ thứ Hai đến thứ Sáu.
Ký tự /: Biểu thị khoảng thời gian, ví dụ */10 * * * * nghĩa là chạy mỗi 10 phút.
4. Ưu điểm và hạn chế của Cron Job là gì?
Khi sử dụng cron job sẽ mang lại những lợi ích vượt trội, tuy nhiên vẫn còn những hạn chế nhất định.
Ưu điểm
Tự động hóa mạnh mẽ: Cron job giúp tự động hóa nhiều tác vụ lặp đi lặp lại mà không cần can thiệp thủ công.
Linh hoạt: Với khả năng tùy chỉnh thời gian và ngày chạy, cron job có thể đáp ứng hầu hết các yêu cầu về lập lịch.
Hiệu quả: Giảm thiểu sai sót và tối ưu hóa thời gian làm việc của con người, đặc biệt trong quản lý hệ thống.
Hạn chế
Cấu hình phức tạp: Cấu trúc cú pháp của cron có thể gây khó khăn cho người mới bắt đầu.
Thiếu khả năng quản lý trực quan: Không có giao diện đồ họa mặc định, việc quản lý cron job hoàn toàn thông qua dòng lệnh.
Giới hạn trong việc xử lý lỗi: Nếu một cron job gặp lỗi khi chạy, hệ thống không có cơ chế tự động xử lý hoặc cảnh báo trừ khi được cấu hình riêng.
5. Câu hỏi thường gặp về Cron Job
Cron Job có thể chạy nếu hệ thống bị tắt không?
Trả lời: Không, Cron Job chỉ chạy khi hệ thống đang hoạt động. Nếu hệ thống bị tắt tại thời điểm lịch trình, Cron Job sẽ không chạy và sẽ không tự động chạy khi hệ thống được bật lại.
Làm thế nào để xóa một cron job?
Trả lời: Để xóa một Cron Job, bạn có thể mở tệp crontab bằng lệnh crontab -e, sau đó xóa dòng tương ứng với công việc mà bạn muốn loại bỏ.
Tôi có thể chạy một cron job mỗi giây không?
Trả lời: Không, Cron không hỗ trợ việc chạy các tác vụ mỗi giây. Thời gian nhỏ nhất mà Cron có thể lên lịch là mỗi phút.
Cron job có thể chạy một lệnh phức tạp không?
Trả lời: Cron Job có thể chạy các lệnh phức tạp, nhưng nếu lệnh cần xử lý nhiều bước hoặc yêu cầu quản lý trạng thái, bạn nên viết một kịch bản (script) và chạy kịch bản đó thông qua Cron Job.
Tổng kết
Cron job là một công cụ quan trọng trong việc tự động hóa các tác vụ định kỳ trên hệ thống Linux. Hiểu rõ cron job là gì, cách cấu hình và quản lý cron job sẽ giúp bạn tiết kiệm thời gian, giảm thiểu lỗi và tối ưu hóa hoạt động của hệ thống. Mặc dù có một số hạn chế, nhưng với sự hỗ trợ của các công cụ bổ sung, cron job vẫn là một phần không thể thiếu trong quản lý hệ thống hiện đại.
Hy vọng bài viết này đã cung cấp cho bạn những thông tin cơ bản và kỹ thuật cần thiết để bắt đầu với cron job. Hãy thử áp dụng và tối ưu hóa công việc của bạn với công cụ mạnh mẽ này!
Nguồn: https://suncloud.vn/cron-job-la-gi
0 notes
Text
Cron Jobs - An Outstanding Energy For UNIX
The cron PHP power is located on Linux/UNIX. Cron is a way to run frequently scheduled tasks. A cron schedule is created by putting a listing of directions and their schedules in an ordinary text file. The record is then named the cron table.
The cron will let you schedule jobs for unique times, even though you are maybe not around. Some machines provide a cPanel with the cron work interface that allows you to manage the changing times it will execute.
Your cron access ought to be included with your crontab file. Work crontab -e, save and then exit. Programs with productivity will generate an e-mail. The cron table record should really be transferred to your crontab generator server. Following adding this, telnet (which you can create in the terminal) to your server. After the machine answers you type crontab'filename ', that will be wherever you alternative the name of your distinct declare'filename'as it will be here, thereby joining your cron table.
To examine that the cron program has listed your cron desk type crontab -l. This can provide a show of most presently listed cron schedules. If there is no accessible software you've to manually develop crontab instances with a order line terminal. In cases like this, start a system window and run crontab -e.
When persuaded for an email, enter a straightforward email like Google send and a order point text editor should pop-up in the window you just started. You can find automatic cron option that can be used to induce automated delivery of projects from companies like ChangeDetect.
The Unix/Linux cron can be used for automated e-mails at a specified time on a given time, for a computerized database upgrades each evening at a slow time, for giving robots to websites to verifying specific links, for sending regular studies back suggesting just how much host space that you use each week.
There are six areas allowed with sometimes Telnet or with a cron get a grip on panel to define which are the minute, time, time of the month, month, day of the week and ultimately, the order you would like done for you. Each price must focus on a 0, except the values of 11 or 12 in hours or months. The permitted subject values are 0 to 59 for second, 0-23 for time, 1-31 for the day of the month, 1-12 or three-letter abbreviations for the month, 0-7 or three-letter abbreviations for the day of the week. By putting an asterisk (*) the cron need all prices in any of the provided fields such as all the occasions in a week, or every one of the days in a month.
1 note
·
View note
Text
Comando cron no Linux (agendamento de tarefas) [Guia Básico]

O comando cron no Linux é um serviço que provê o serviço de agendamento de tarefas para os usuários e o sistema. Ele permite que um comando, programa ou script seja agendado para um determinado dia, mês, ano e hora. É muito usado em tarefas que precisam ser executadas a cada hora, dia ou qualquer outro período, de forma recorrente. Geralmente o cron é utilizado para executar arquivamento de logs e checagem da integridade do sistema e outras manutenções periódicas. As tarefas do sistema que serão executadas são definidas no arquivo /etc/crontab. Cada usuário também pode ter suas tarefas, configuradas em arquivos individuais no diretório /var/spool/cron/ com o login da conta do usuário. O cron possui um utilitário chamado crontab que facilita a visualização e edição dos arquivos do cron. Para agendar uma nova tarefa, podemos utilizar o comando crontab ou editarmos o arquivo /etc/crontab com qualquer editor de texto e definir quando a tarefa será executada. O formato que o arquivo de cron usa é: MINUTOS HORAS DIA MES SEMANA USUARIO COMANDO Formato do Crontab Não é necessário reiniciar o serviço do cron porque ele verifica seus arquivos a cada minuto. O formato de um arquivo crontab segue a seguinte ordem: Os valores para cada campo podem ser: Minuto: Valor entre 0 e 59;Hora: Valor entre 0 e 23; Dia do Mês: Valor entre 1 e 31; Mês: Valor entre 1 e 12 (identificando os meses de janeiro a dezembro); Dia da Semana: Valor entre 0 e 7, sendo que zero ou sete são usados para identificar o domingo. Login do Usuário: O usuário que será usado para executar o comando;Comando: Programa que será executado, mais seus parâmetros normais. Cada campo deve ser separado por um ou mais espaços ou tabulações. O símbolo asterisco “*” pode ser usado para indicar que qualquer data ou hora são válidas. Também é possível especificar intervalos de tempo usando a barra "/". Exemplo "*/5" no campo minutos indica que o comando deve rodar a cada 5 minutos. É possível especificar intervalos para que o comando seja executado através do hífen “-”, indicando os períodos de execução incluindo o número inicial e final. Uma lista de horas e datas pode ser feita utilizando a vírgula “,” para separar os valores. Veja alguns exemplos de cron: Executa o comando sync todo o dia as 10:00: 0 10 * * * root sync Executa o comando updatedb toda segunda-feira às 06:00: 0 6 * * 1 root updatedb Executa o comando runq todos os dias a cada vinte minutos: 0,20,40 * * * * root runq Envia um e-mail as 0:15 todos os natais para a carla: 15 0 25 12 * root mail carla Executa o comando poff às 5:30 de segunda à sábado: 30 5 * * 1-6 root poff Executa um script PHP a cada 5 minutos: */5 * * * * root /usr/bin/php -c /etc/php.ini /home/script.php Arquivo crontab O comando crontab comando facilita a edição dos arquivos de configuração do cron. Ele é útil para edição dos arquivos dos usuários localizados em /var/spool/cron/ O crontab salva o arquivo individual do cron com o nome do login do usuário. Este arquivo tem o mesmo formato do /etc/crontab exceto por não possuir o campo usuário (UID), uma vez que nome do arquivo já tem esta identificação. # ls –l /var/spool/cron/tabs-rw——— 1 root root 264 Jun 20 14:36 root-rw——— 1 root users 199 Jun 20 15:58 uira As opções mais frequentes do crontab são: - -e: Edita o arquivo de cron utilizando o editor vi. - -l: Lista o conteúdo do arquivo de cron do usuário corrente - -r: Remove o arquivo de cron. - -u usuário: Realiza uma das operações como se fosse um determinado usuário. Deve ser usada em conjunto com as outras opções e somente o root pode alterar o cron de outros usuários. Veja os exemplos: Neste exemplo o comando “/usr/bin/mrtg /etc/mrtg.cfg” é executado a cada 5 minutos e o “/bin/sendip.sh” todos os dias à 01:00am: $ crontab –l*/5 * * * * /usr/bin/mrtg /etc/mrtg.cfg0 1 * * * /bin/sendip.sh Para agendar alguma tarefa no cron, utilize o "crontab –e" para editar o arquivo com o vi: $ crontab -e Inclua uma linha em branco no final do arquivo, caso contrário o último comando não será executado. Permissões do Cron O cron possui dois arquivos que habilitam ou desabilitam o seu uso pelos usuários. Dependendo da distribuição, eles podem ter nomes e lugares diferentes. São eles: /etc/cron.allow Se o arquivo cron.allow existir, um determinado usuário precisa ter seu login listado no seu conteúdo para ter permissões expressas para o uso do cron. /etc/cron.deny Se o arquivo cron.deny existir, os logins listados em seu conteúdo são proibidos de utilizar o cron. Os demais usuários poderão usar o cron. Se nenhum dos dois arquivos existirem, o uso do cron será permitido para todos os usuários. Se o arquivo cron.deny estiver vazio, todos os usuários terão permissão de usar o cron. Diretórios Especiais do Cron /etc/cron.d O cron também conta com um diretório especial em /etc/cron.d. Este diretório pode conter os arquivos: - daily: especifica quais comandos são executados diariamente; - hourly: especifica quais comandos são executados de hora em hora; - weekly: especifica quais comandos são executados toda semana; - monthly: especifica quais comandos são executados todos os meses. Os arquivos contidos neste diretório deve seguir o formado do /etc/crontab: # cat /etc/cron.d/sysstat */10 * * * * root /usr/lib64/sa/sa1 1 153 23 * * * root /usr/lib64/sa/sa2 -A Todos os scripts ou comandos executados são sob a permissão do usuário root. Os arquivos em /etc/cron.d costumam ter seu nome precedido de um número inteiro maior que zero para ordenar a sua execução /etc/cron.{daily, hourly, weekly, monthly} Outras possibilidades que o cron examina são os diretórios /etc/cron.daily, /etc/cron.hourly, /etc/cron.weekly e /etc/cron.monthly. Estes diretórios podem conter scripts que serão executados nos intervalos de tempo que cada nome de arquivo especifica. # ls -l /etc/cron.daily/-rwx------. 1 root root 219 Apr 10 2018 logrotate-rwxr-xr-x. 1 root root 618 Mar 17 2014 man-db.cron-rwx------. 1 root root 208 Apr 10 2018 mlocate Nestes diretórios os arquivos devem conter scripts com comandos que serão executados, e não um agendamento do que será executado como no crontab. Veja o exemplo do script logrotate: $ cat /etc/cron.daily/logrotate #!/bin/sh/usr/sbin/logrotate /etc/logrotate.confexit 0 Outro detalhe importante: os scripts em /etc/cron.{daily, hourly, weekly, monthly} precisam estar com a permissão executável "X" habilitada. https://youtu.be/I7M_rfLc2C8 Aprenda muito mais sobre Linux em nosso curso online. Você pode efetuar a matrícula aqui. Se você já tem uma conta, ou quer criar uma, basta entrar ou criar seu usuário aqui. Gostou? Compartilhe Read the full article
0 notes
Text
A Cron lelki világa
A telepítési leírásokban sokszor említettem a Cron feladatokat. Ebben a posztban végre kifejtem, hogy mire való, és hogyan lehet több féle módon használni.
A Cron egy olyan eszköz a Unix alapú rendszereken ami segítségével különböző futtatható feladatokat tudunk ütemezni, hogy milyen gyakran hajtsa végre a rendszer őket. Például egy szkript futtatása periodikusan, log vezetése automatikusan, és számtalan más ütemezhető feladat végrehajtható ennek segítségével. A rendszer minden felhasználójának van saját fájlja, ami tartalmazza az általa futtatni kívánt feladatok listáját. Ezeket hívjuk crontab-nak. A crontab = cron table, azaz cron tábla.
A crontab megnyitása a következő sorral lehetséges (-e opció az edit, mint szerkesztés):
crontab -e
A root (gyökér) felhasználóét más felhasználóval bejelentkezve (pl. pi) a sudo használatával a következőképpen tudjuk megnyitni:
sudo crontab -e
Ha a bejelentkezett felhasználóval másik felhasználó crontab-ját akarjuk megnyitni, és van superuser jogunk (mint a pi-nek), akkor a -u opció megadásával és a felhasználó nevével így tudjuk megnyitni:
sudo crontab -u www-data -e
Az első alkalommal megkérdezi a rendszer, hogy melyik szövegszerkesztővel kívánjuk megnyitni a fájlt. Válasszuk ki a kedvenc applikációnkat, és nyomjuk meg az Entert. Én a nano szövegszerkesztőt használom és javaslom is.
A megnyílt fájlok mind rövid leírással kezdődnek. Lépjünk egy üres sorhoz, és írjuk be az elvégzendő feladatot. A sorok szerkezete a következő hat opcióból áll össze:
m h dom mon dow futtatható_utasítás ┬ ┬ ┬ ┬ ┬ │ │ │ │ │ │ │ │ │ │ │ │ │ │ └── a hét egy napja (0 - 7) (0-tól 6-ig a Vasárnaptól Szombatig, vagy az angol név is használható; a 7 pedig szintén Vasárnap, mint a 0) │ │ │ └────── hónap (1 - 12) │ │ └────────── a hónap egy napja (1 - 31) │ └───────────── óra (0 - 23) └─────────────── perc (0 - 59)
Tehát gyakorlatilag meg tudjuk adni, hogy mikor futtassa, és mi az az utasítás amit futtasson. A csillag (*) karakterrel tudjuk azt megadni, hogy az adott opcióból mindegyiken érvényesüljön, a számokkal pedig pontosan tudjuk definiálni.
Konkrét példa:
* * * * * /home/pi/valamiszkript.sh
Ez a sor minden percben, minden órában, minden napján egy hónapnak, minden hónapban és a hét mindegyik napján, összefoglalva percenként lefuttatja a “valamiszkript.sh” kódunkat.
A * karakterek helyett a fentebb megadott értékeket is beírhatjuk, például:
5 0 * * * /home/pi/valamiszkript.sh
A kódunk 5 perccel éjfél után fog lefutni minden nap.
Az értékek mellett használhatunk intervallumokat is a “-” segítségével, például:
0 9-14 * * * /home/pi/valamiszkript.sh
Ekkor a kód futtatása minden nap reggel 9 és délután 14 óra között óránként egyszer fut le.
Az intervallum helyett felsorolással is megadhatjuk vesszővel (,) elválasztva így:
0 8,12,16 * * * /home/pi/valamiszkript.sh
Ez a kód minden nap reggel 8-kor, délben és délután 4-kor hajtódik végre.
A hét napjait, valamint a hónapokat számok helyett az angol nevükkel, vagy azok három betűs rövidítésével is megadhatjuk. Mint például Monday vagy Mon; February vagy Feb.
15 * * Nov Monday,Wednesday,Friday /home/pi/valamiszkript.sh
Ebben a formában a kódunk minden év novemberében, hétfő, szerda és pénteki napokon, minden óra 15. percében fog lefutni.
Az utolsó mód amit sokszor használunk, az a lépésenkénti érték megadás. Ezt a per jellel (/) tudjuk megadni, mint például ha 5 percenként szeretnénk végre hajtani, akkor */5 kerül a perc opció helyére, ilyen módon:
*/5 * * * * /home/pi/valamiszkript.sh
Ha kitaláltunk egy intervallumot vagy időpontot a feladat végrehajtásához, de nem vagyunk biztosak benne, hogy jól adtuk meg ez a crontab-ban, akkor javaslom, hogy a https://crontab.guru/ honlapon pötyögjük be, és ellenőrizzük. Ez egy nagyon hasznos weblap, leírja szépen szavakkal, hogy mit írtunk be valójában.
Miután most szépen megtanultuk, hogy hogyan használjuk az opciókat, mutatok egy egyszerűsítést. Noha sok cifra időpontot ilyen módon nem tudunk megadni, de egyszerű óránkénti, vagy újraindításkor történő végrehajtásra a kukac (@) karaktert is használhatjuk a következőképpen:
@hourly home/pi/valamiszkript.sh
Így a szkript óránként fut le, ami megegyezik a 0 * * * * opcióval. A további lehetőségek:
@hourly - óránként
@daily vagy @midnight - naponta éjfélkor
@weekly - hetente egyszer, vasárnap éjfélkor
@monthly - havonta egyszer a hónap első napján, éjfélkor
@yearly - évente egyszer Január elsején éjfélkor
@reboot - újraindításkor (nagyon hasznos, ha olyan felhasználó akar újraindításkor valamilyen programot indítani, aki a rendszer inicializáláshoz nem tud hozzányúlni, így ott nem tudja automatikusra állítani a program indítását)
További crontab példákat láthattok a telepítési leírásokban az oldalon, de még egy bonyolultabbat megmutatok, hogy ne csak nagyon egyszerűekkel példálózzak. A Letsencrypt SSL tanusítványa 90 napig érvényes, de csak 30 nappal a lejárat előtti időszakon belül lehet megújítani. Erre mi magunk is írhatnánk cron feladatot, de certbot ezt megteszi helyettünk. Erről a Nextcloud telepítési leírásában is szót ejtettem. Ez a fájl így néz ki:

Az eddig leírtak alapján ki tudjuk számolni, hogy 12 óránként fut le, napi kétszer. Délben és éjfélkor. Az utasítás ami lefut, rengeteg opcióval rendelkezik. Lényegében megnézi, hogy a megújítási periódusban vagyunk-e már, és ha igen, akkor megújítja, mindezt a -q opcióval, ami a quit = csendes opció. Lényegében bármi észrevehető jelzés nélkül, szépen csendben.
Ha csak meg szeretnénk nézni, hogy éppen milyen soraink vannak a cron táblában, akkor a -l mint list opcióval tudjuk ekképp:
crontab -l
Ellenőrzésképpen azt is meg tudjuk nézni, hogy az utóbbi időben milyen feladatokat és mikor hajtott végre a cron a háttérben:
grep CRON /var/log/syslog
Valami ilyesmit láthatunk:
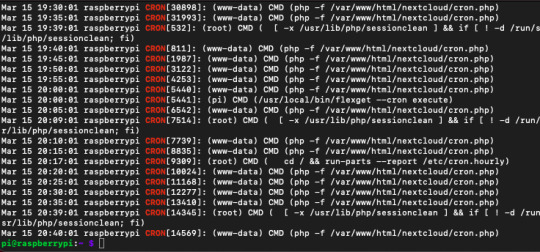
A cron nagyon hasznos eszköz, sok teendőnket tudjuk vele automatikusan végrehajtani. Nagyon jól használható biztonsági mentések időszakos futtatására is, de ahogy láttuk csak a szükség és a fantáziánk szab határt annak, hogy miként használjuk.
VISZLÁT
0 notes
Text
New Post has been published on Strange Hoot - How To’s, Reviews, Comparisons, Top 10s, & Tech Guide
New Post has been published on https://strangehoot.com/how-to-set-cron-job-on-linux-server-cron-job-working-scheduling/
How to Set Cron Job on Linux Server - Cron Job Working & Scheduling

Set Cron Job
IT operations or DevOps team usually works on roasters to give users 100% uptime services. They need to do a lot of tasks that need to be done continuously, on certain time intervals and keep the data up-to-date. Manually performing these tasks at regular time intervals or for the specified period is not always possible. These tasks can be automated using jobs or automated processes.
Task Automation
What does it take to automate tasks? Set up a cron job. Cron is a set of commands that are given/written in a crontab file to be executed as per schedule. There are tasks such as sending up the reminders to a set of users daily at 8am, taking data backup at night 2:00am everyday or setting alerts to the user if the server is running out of space at a specified threshold or performing system scans every Sunday of the week.
Writing the cron job makes all the above tasks possible via scheduling. The cron job can be written on the server on which your whole IT environment is set up. The Linux service is the most used server platform where all the services are hosted and can be administered.

Difference between Cron Job and Batch Job
Cron Job is executing one or more tasks at a specified time one or more times. Batch Job is executing multiple tasks at a go.
You can also schedule a batch job that can be executed simultaneously or sequentially. As it comprises multiple tasks, you can define a sequence of the tasks to be processed one after another or all the specified tasks to be processed simultaneously. You can set up a cron job for batch processes.
Difference between Cron Job and At Job
Cron Job can be scheduled with multiple time parameters and executed based on the schedule. The cron job can be edited, deleted and re-scheduled as per requirements.
At Job is scheduled to execute a specific task only once. Once created, it cannot be edited once scheduled. It can be deleted the same as Cron Job.
Crontab file
Crontab is the file in which cron job commands are written. The command line is made up of 2 parts –

Part 1 – specify the time parameter(s) for scheduling the job. Time parameters are:
minute – the value is between 0-59.
If you put an asterisk sign, it will be considered as “every minute”. The job will be executed every minute.
If you put 10, it will be considered as “every 10 minutes”.
hour – the value range is 0-23.
If you put the value as 18, it will be considered as 6pm.
If you put the value as 0, it will be considered as midnight.
day of the month – the value range is 1-12.
If you put the value as 1, it will be considered as the month of January.
If you put the value as 3, it will be considered as the month of March.
day of the week – the value range is 0-7.
If you put the value as 3, Wednesday is considered
If you put the value as 7, Sunday is considered. 0 is also considered as Sunday.
Part 2 – specify the command and the directory of the file or folder on which you are scheduling the job
rm /home/tinas/tmp/* – removes the temporary files from the “tmp” folder
rm is the “remove” command
“tmp” is referred to as temporary folder
/home/tinas/scriptname.sh – run the script available in this folder path specified
Now, let us see some examples of the entire command in the crontab file.
CommandDescription0 23 * * 3 * /bin/shRun a backup job every Wednesday night at 11pm. 0 7 3 */3 * /home/tinas/script.shRun the job quarterly on the 3rd day at 7am. Slash (/) is used to specify intervals.0 11,19 * * * /bin/sh backup.shRun the backup job 2 times a day at 11am and 7pm. Comma (,) is used to execute the job at intervals specified. 0 */3 * * * /scripts/script-monitor.shRun the job every 3 hours. * * * * * /bin/shRun the job every minute* * * 10,11,12 * /script/script.shRun the job in October, November, December months.0 * 1 7 * /bin/sh script.shRun the job every 1st of July.
Setup the Cron job on Linux Server – Step by Step Guide
Open the terminal on the Linux server where all the services are configured.
Type sudo su.
Enter the password for the admin user. You will be able to enter crontab commands.
To edit another user’s crontab file, use the below command.

– u is used for username
– e is used for edit
– l is used to list the crontab files
e is used to create and edit the file
-a <filename> is used to install the <filename> as a crontab file.
To remove the crontab file from the user. Use the below command.

To view contents of the crontab file, use -l after the crontab command.

To view contents of the crontab file, use -l after the crontab command.
Enter the command to specify the job schedule. (Refer to the Crontab file section for commands.)
Save the file. The job will be executed at specified time and intervals.
File Permissions
You can set permissions for the users in the DevOps team who can use the cron jobs. There are two types of permissions given – Allow and Deny.
cron.allow – This file contains the list of users who are allowed to use the crontab files created on the server.
cron.deny – This file contains the list of users who are restricted from using the crontab files created on the server.
Conclusion
You as Linux administrator can use the cron jobs for so many events and tasks such as setting up monitoring alerts for broken links, send out email notifications to the users on specific events, deactivate user accounts and so on.
There is another set of tasks on the administration side that can be executed using the cron jobs. System maintenance automation tasks such as database backup, disk space monitoring, alerts when the service goes down, network is down or any one of the servers is down.
Cron jobs help manage the server administrator’s tasks efficiently and help the team to take the appropriate actions on alerts that are being sent by the cron jobs. Automating tasks with the cron jobs prevents the customers or end users from multiple failures. The only thing to take care of setting up the cron job is to use the right command with the correct time specified.
Read: Why Home Automation is needed in 21st Century
0 notes