#crypto wallet qr code
Explore tagged Tumblr posts
Visit Tumblr Blog
Explore Tumblr blogs with no restrictions, modern design and the best experience.
Last Seen Tumblr Blogs


Fun Fact
There are dozens of funny blogs to kill time on Tumblr.
Text
Benefits of Using Blockchain Wallet QR Codes
In the ever-evolving landscape of cryptocurrencies, ease of access and security are paramount. Enter the blockchain wallet QR code—a powerful tool that simplifies transactions while enhancing security. At QR Ocean, we understand the significance of seamless transactions in the crypto world. Let’s dive into how blockchain wallet QR codes can transform your crypto experience.
What is a Blockchain Wallet QR Code?
A blockchain wallet QR code is a visual representation of your cryptocurrency wallet address. Instead of manually entering a long string of letters and numbers, users can scan a QR code to instantly access a wallet for sending or receiving digital assets. This not only speeds up transactions but also minimizes the risk of errors associated with typing out complex wallet addresses.
The Benefits of Using Blockchain Wallet QR Codes
Enhanced Security: Using a QR code reduces the likelihood of mistakes when entering wallet addresses. A single typo could lead to irreversible losses, making QR codes a safer alternative.
Convenience: QR codes streamline the transaction process, allowing for quicker exchanges of cryptocurrencies. Whether you’re at a market or making online payments, a simple scan can initiate a transaction.
User-Friendly: For those new to cryptocurrency, QR codes make it easier to understand and use wallets. This user-friendly aspect can encourage more people to explore the world of digital currencies.
Integration with Mobile Apps: Most crypto wallets now support QR code scanning, making it simple to send or receive funds through your smartphone. This integration allows for a more mobile and flexible approach to managing your assets.
How to Create a Blockchain Wallet QR Code with QR Ocean
Creating a blockchain wallet QR code is simple with QR Ocean. Here’s how you can generate your own QR code:
Visit QR Ocean: Head over to our crypto QR code generator.
Enter Your Wallet Address: Input your cryptocurrency wallet address into the provided field.
Generate the QR Code: Click the "Generate" button to create your unique QR code.
Download and Share: Once your QR code is generated, you can easily download it and share it with others.
Best Practices for Using Blockchain Wallet QR Codes
Keep Your Wallet Secure: While QR codes simplify transactions, ensure your wallet is secure. Use reputable wallets and enable two-factor authentication whenever possible.
Verify Before Scanning: If you receive a QR code from an unknown source, verify its authenticity before scanning. Scammers can create fraudulent codes to steal your funds.
Educate Yourself: Stay informed about the latest developments in cryptocurrency and security practices. Knowledge is your best defense against potential threats.
Conclusion
Blockchain wallet QR codes are revolutionizing the way we interact with digital currencies. They offer a blend of convenience and security that is essential in today’s fast-paced world. At QR Ocean, we are committed to making cryptocurrency transactions accessible for everyone. Start using blockchain QR codes today and experience a smoother, safer way to manage your crypto assets!
For more information on generating your own blockchain wallet QR codes, visit us at QR Ocean and take your first step towards hassle-free cryptocurrency transactions! Explore the power of crypto wallet QR codes and discover how they can simplify your digital transactions.
#crypto qr code#blockchain qr code#blockchain wallet qr code#crypto wallet qr code#blockchain qr code generator#blockchain private key qr code
0 notes
Text
"Satoshi Style: The Mystery and Minimalism of Nakamoto-Inspired Fashion"
Discover the Mystery: Who is Satoshi Nakamoto?
The name Satoshi Nakamoto has become synonymous with digital currency revolution. As the mysterious creator of Bitcoin, Nakamoto’s identity remains one of the greatest unsolved mysteries in the world of technology and finance. Despite the speculation, who is Satoshi Nakamoto remains unanswered, yet his creation—Bitcoin—continues to shape the future of money.
Satoshi Nakamoto and the Birth of Bitcoin
In 2008, Satoshi Nakamoto published the Bitcoin whitepaper, introducing a decentralized, peer-to-peer electronic cash system. The following year, he mined the first block, known as the Genesis Block. Since then, Satoshi Nakamoto Bitcoin has grown into a global financial ecosystem, transforming how people perceive and use money.
Satoshi Nakamoto Net Worth: The Billion-Dollar Ghost
Though Nakamoto has vanished from the public eye, his digital footprint lives on. It's estimated that Satoshi Nakamoto net worth exceeds $40 billion, mostly tied up in early Bitcoin mined and untouched to this day. His Satoshi Nakamoto wallet reportedly contains over 1 million BTC—further deepening the enigma.
Satoshi Nakamoto Clothing: Where Tech Meets Style
Celebrate the legend with our exclusive Satoshi Nakamoto clothing collection. Designed for crypto enthusiasts, developers, and freedom lovers, each piece captures the spirit of innovation and mystery. Our apparel is not just fashion—it’s a statement of belief in the decentralized future.
Iconic Style: Satoshi Nakamoto Hoodie
Make a bold statement with the Satoshi Nakamoto hoodie. Whether you're mining crypto or coding the next big blockchain innovation, this hoodie blends comfort and symbolic power. Featuring sleek designs and premium materials, it’s perfect for late-night sessions or crypto meetups.
Sleek and Subtle: Satoshi Nakamoto Shirt
For a minimalist yet powerful look, the Satoshi Nakamoto shirt is a must-have. With clean lines and subtle branding, it’s ideal for casual Fridays, tech conferences, or just lounging while checking the market. It’s a nod to a digital legend that only true believers will recognize.
Comfort with an Edge: Satoshi Nakamoto Shorts
Take your laid-back look to the next level with Satoshi Nakamoto shorts. Perfect for warm days, home offices, or just showing off your crypto pride, these shorts are as comfortable as they are symbolic. Pair them with your hoodie or shirt for the ultimate Nakamoto-inspired outfit.
Satoshi Nakamoto Van: A Mobile Homage to the Creator
Across the crypto world, enthusiasts express admiration in unique ways—like the Satoshi Nakamoto van. Often spotted at Bitcoin conferences and blockchain events, these vans are mobile tributes covered in crypto art, Bitcoin QR codes, and nods to the elusive genius.
Embrace the Legend with Satoshi Nakamoto Gear
Our collection isn't just clothing—it's culture. Every Satoshi Nakamoto hoodie, shirt, and shorts connects you to a movement larger than any one individual. Whether you're a developer, investor, or curious newcomer, wearing Satoshi's name is a reminder of what Bitcoin stands for: freedom, decentralization, and innovation.
Join the Nakamoto Revolution
As Bitcoin continues to reshape finance, the legend of Satoshi Nakamoto lives on—not just in digital blocks but in everyday fashion. Shop our Satoshi Nakamoto clothing today and carry the legacy of crypto’s greatest mystery wherever you go.
2 notes
·
View notes
Text
Bitcoin Volatility Fuels Market Anxiety; XBIT Decentralized Exchange Charts Steady Recovery
1. Regulatory Storm Amid Bitcoin’s ATH As Bitcoin’s price surpassed its all-time high (ATH) of $100,000 in early 2025, a global regulatory storm engulfed cryptocurrency markets. Centralized exchanges (CEXs) worldwide faced abrupt blockages, operational restrictions, or asset freezes, triggering widespread investor panic. Amid the turmoil, XBIT Exchange—a decentralized trading platform (DEX)—rapidly gained traction, with its trading volume surging 400% month-over-month and positioning itself as a secure harbor for Bitcoin holders.

2. Centralized Platforms Under Scrutiny In March 2025, the U.S. Securities and Exchange Commission (SEC) launched investigations into five major crypto platforms for compliance violations, while Japan’s Financial Services Agency (FSA) announced a sweeping review of all Bitcoin-related exchanges. Concurrently, mid-tier platforms like CoinTide and UltraX halted services indefinitely, freezing over $120 million in user assets. These events forced investors to confront a critical question: Can centralized platforms ever be truly secure?
3. Decentralized Solutions Regain Momentum The concept of decentralized exchanges (DEXs), once dismissed as niche tools due to technical complexity, has resurged under regulatory pressure. XBIT Exchange exemplifies this shift. Operating via on-chain smart contracts, the platform eliminates third-party custody, manual intervention, and Know Your Customer (KYC) requirements, adhering strictly to the principles of self-custody, transparency, and censorship resistance. Users interact directly through non-custodial wallets, with every transaction recorded immutably on the blockchain.

4. Demystifying Decentralized Exchanges A decentralized exchange operates entirely on blockchain networks, executing trades through automated smart contracts without holding user funds. Key features include:
Non-custodial design: Assets remain in users’ wallets until trade execution.
Tamper-proof execution: Transactions are verified by code, not human intermediaries.
Transparent audit trails: All activities are publicly verifiable on-chain.
XBIT currently supports Bitcoin, Ethereum, and major stablecoins, with cross-chain interoperability slated for Q3 2025.
5. Data-Driven Adoption Surge According to blockchain analytics firm DataLink, DEX usage surged 275% globally between March and May 2025, with 43% of new users migrating from CEXs after experiencing freezes or high fees. “After my funds were frozen on a traditional platform, I realized decentralization isn’t optional—it’s essential,” said Berlin-based investor Marlin Koch.
XBIT’s metrics underscore this trend: daily new wallet addresses exceed 5,200, while monthly transactions grew 320% year-over-year (YoY), rivaling legacy platforms.
6. XBIT’s Strategic Edge
Global node network: A distributed architecture minimizes risks of server seizures or exit scams.
On-chain risk scoring: Real-time security audits for every transaction.
User-centric interface: Features like one-click trading and QR-synced wallet logins lower barriers for retail investors.

7. Conclusion: Redefining Crypto’s Future As Bitcoin evolves from a speculative asset to a global hedge, the demand for secure, transparent trading infrastructure grows imperative. Decentralized platforms like XBIT are no longer ideological experiments but market necessities—offering resilience against regulatory volatility and redefining trust in digital finance.
2 notes
·
View notes
Text
Getting Started with STON.fi: A Step-by-Step Guide to Connecting Your TON Wallet

If you're stepping into the world of decentralized finance (DeFi) on The Open Network (TON), STON.fi is one of the most efficient platforms to trade, swap, and manage digital assets. But before you start exploring its features, you need to link your TON wallet.
This guide will walk you through the entire process, ensuring a smooth and secure setup.
Why Connecting Your Wallet Matters
Your crypto wallet is your gateway to decentralized applications (dApps). Unlike centralized exchanges that require logins and passwords, DeFi platforms like STON.fi rely on wallet authentication. This means your wallet acts as your account—allowing you to store, trade, and interact with the platform securely.
A successful wallet connection ensures:
✔️ Secure access to STON.fi
✔️ Direct control over your assets
✔️ The ability to swap tokens and participate in liquidity pools
Now, let’s set up your connection.
Step 1: Open the STON.fi Platform
To get started, visit the official STON.fi platform. Always verify that you’re on the correct website to avoid phishing scams. A good practice is to bookmark the site to ensure you're always accessing the right platform.
Once on the homepage, locate the “Connect Wallet” button—it’s your entry point to linking your assets with the exchange.
Step 2: Choose Your Wallet
STON.fi supports various TON-compatible wallets. After clicking "Connect Wallet," a pop-up will display a list of available options.
If your wallet isn’t immediately visible, click on "View All Wallets" to expand the selection. This ensures you find the right wallet for your setup.
If your wallet is missing from the list, double-check that you’ve set up a TON-compatible wallet correctly.
Step 3: Approve the Connection
Once you've selected your wallet, a connection request will appear. This step varies slightly depending on your wallet type:
🔹 Mobile Wallets: Scan the QR code displayed on STON.fi using your wallet app.
🔹 Browser Wallets: A pop-up will request approval directly in your browser extension.
Before confirming, always review the request details. Once approved, your wallet will be linked instantly.
Step 4: Confirm and Start Using STON.fi
After successfully connecting, you’ll see your wallet address displayed on STON.fi. This confirms that everything is set up correctly.
Now you’re ready to explore the full functionality of STON.fi, including:
✅ Trading and swapping assets
✅ Providing liquidity for rewards
✅ Managing your holdings directly from the platform
If any issues arise, try refreshing the page or reconnecting your wallet.
Best Practices for Wallet Security:
When dealing with DeFi platforms, security is non-negotiable. Here’s how to keep your funds safe:
🔸 Always use the official website – Avoid clicking links from unofficial sources.
🔸 Verify all approvals – Never confirm a request without understanding what it grants access to.
🔸 Secure your private keys – Your seed phrase is the key to your funds; never share it.
🔸 Disconnect when not in use – If you’re done trading, disconnect your wallet to reduce exposure.
A cautious approach keeps your assets secure while you explore the potential of STON.fi.
Connecting your TON wallet to STON.fi is a straightforward yet essential process. Once linked, you gain full access to the platform’s features, empowering you to trade, stake, and interact seamlessly within the TON ecosystem.
By following these steps and staying mindful of security measures, you’re setting yourself up for a smooth and secure DeFi experience. Now that your wallet is connected, the real journey begins—explore, trade, and grow your portfolio with confidence.
4 notes
·
View notes
Text
❔10 Christmas Gifts Every Crypto Enthusiast Will Love

Make this holiday season special for the crypto lover in your life with these unique and thoughtful gift ideas:
1. Mining Hardware – Kickstart their mining journey with rigs or accessories like cooling systems.
2. Hardware Wallets – Secure their assets with wallets like Ledger Nano X or Trezor Model T.
3. Crypto Gift Cards – Give them the freedom to trade or invest on platforms like Binance or Coinbase.
4. Blockchain Books – Must-reads like The Bitcoin Standard or Digital Gold for every crypto fan.
5. NFT Collectibles – Surprise them with personalized digital art or rare gaming NFTs.
6. Crypto Merchandise – From Bitcoin hoodies to themed mugs, add fun to their daily life.
7. Blockchain Gaming Gear – Elevate gaming with VR headsets or exclusive in-game assets.
8. Crypto Board Games – Entertain them with games like Bitcoin Empire or HODL Up.
9. Physical Crypto Art – Framed blockchain-inspired pieces or custom QR code art make perfect decor.
10. Subscription Services – Access to portfolio trackers or market analysis tools for ongoing learning.
2 notes
·
View notes
Text
How to Connect Your TON Wallet to STON.fi: A Simple Guide for Beginners

The world of crypto can feel overwhelming, especially if you're just starting out. There's a lot to figure out, and setting up wallets and connecting them to platforms can sometimes feel like a maze. But here’s the good news: connecting your TON wallet to STON.fi is actually much simpler than it seems.
Imagine you're heading into your favorite online store, but before you start shopping, you need to set up a payment method. Connecting your wallet to STON.fi is exactly like that—it’s just the key that unlocks your access to all the powerful features STON.fi offers. Let’s break it down step by step.
Why Do You Need to Connect Your Wallet
Think of your wallet as your digital passport in the world of crypto. Without it, you're like a tourist without a visa—ready to explore but unable to interact. Connecting your TON wallet to STON.fi lets you access the blockchain.
Once you're connected, you can trade tokens, stake assets, and fully immerse yourself in the world of decentralized finance (DeFi). Without this step, you're just watching from the sidelines. But once you connect, you get to play the game.
Step 1: Open the STON.fi Application
First things first—head over to STON.fi. This is your gateway to everything STON.fi has to offer. Think of this website like an online store where you can buy and trade your digital assets.
It’s a clean, easy-to-use platform. No need to worry about overwhelming pages or techy jargon. Just a simple interface ready for you to start using.
Step 2: Click on "Connect Wallet"
Once you’ve loaded the STON.fi homepage, look for the “Connect Wallet” button. It should be right there, easy to spot. This is your cue that you’re about to link your wallet to the platform, just like plugging your payment info into an online checkout.
Click on it, and let’s move on.
Step 3: Choose Your Wallet
After clicking the “Connect Wallet” button, you’ll see a pop-up window with a list of wallet options. Select the wallet you’ve set up to use with STON.fi.
If you don’t see your wallet in the list, don’t worry! Just click the “View All Wallets” option, and you’ll be able to see a full list of supported wallets. If your wallet still isn’t listed, you might need to set it up correctly first.
Step 4: Scan the QR Code
Here’s where the magic happens. Your wallet app will have a QR code scanner built right in. Open your wallet, use the scanner to scan the code shown on STON.fi, and bam—you’re almost there.
Think of this like scanning a QR code to pay at a checkout—it’s simple and secure.
Step 5: Confirm the Connection
Once your wallet app scans the QR code, you’ll get a notification asking you to confirm the connection. Once you approve it, your wallet is now connected to STON.fi.
That’s it! You’re now ready to explore and use all of STON.fi’s features. Your wallet will stay connected until you manually disconnect it or clear your browser cache, so no need to repeat this process every time.
What Does This Connection Mean for You
Now that your wallet is connected, you’ve unlocked a whole new level of control over your crypto assets. It's like entering a digital world where you hold the keys.
With your wallet connected, you can:
Trade your tokens and assets securely
Stake your crypto to earn rewards
Explore all the opportunities DeFi has to offer
You’re no longer just a visitor—you’re a participant in this world of decentralized finance.
One of the most common questions when connecting wallets to new platforms is, “Is it safe?” The short answer: Yes.
When you connect your wallet to STON.fi, you’re not giving anyone access to your funds. It’s more like logging into your banking app—you’re in control, and everything is secure. Think of it as giving a trusted store permission to check your ID before you buy.
Final Thoughts: A New World at Your Fingertips
Getting started with STON.fi might seem like a complicated task at first, but it’s really just a few clicks away. Connecting your wallet is the first step to taking full control of your crypto assets and diving into the world of decentralized finance.
Remember, once your wallet is connected, you’re ready to:
Trade tokens
Earn passive rewards
Stake your assets for long-term gains
Just like learning to use a new app or setting up your first online payment system, this process gets easier with time. The key is to start simple, and as you get more comfortable, the world of DeFi will open up to you.
So go ahead—connect your wallet, step into the future of finance, and start exploring all the opportunities waiting for you on STON.fi. The journey has just begun, and you’re already on your way.
4 notes
·
View notes
Text
How to Connect Your TON Wallet to STON.fi: A Simple Guide for Everyone

Let’s face it—starting anything new can feel overwhelming, especially in the world of crypto and blockchain. If you’ve ever felt lost trying to connect your wallet to a decentralized app, you’re not alone. But here’s the truth: connecting your TON wallet to STON.fi is simpler than it seems.
Think of it like setting up a digital wallet for your favorite online store. Once it’s done, you’re all set to explore, trade, and take full control of your financial journey. Let me walk you through the process step by step in the most straightforward way possible.
Why Do You Need to Connect Your Wallet
Imagine walking into a store with a shopping list but no wallet. You know what you want, but you can’t buy anything. That’s what it’s like trying to use STON.fi without connecting your TON wallet.
Your wallet acts as your digital access card, allowing you to interact with the blockchain. Without it, you’re just a spectator in the decentralized world. Once connected, you can trade tokens, stake your assets, and fully immerse yourself in decentralized finance (DeFi).
Step 1: Open the STON.fi Application
First, visit STON.fi. Consider this the entrance to a digital marketplace, designed for seamless interaction with the blockchain.
The website is user-friendly and intuitive, so you won’t feel like you’re navigating a maze.
Step 2: Click “Connect Wallet”
On the homepage, find the “Connect Wallet” button and click it. Think of this as saying, “Hey, I’m ready to explore!”
This simple action sets the stage for all your future transactions.
Step 3: Select Your Wallet
Once you click the button, a list of supported wallets will pop up. If you don’t see your wallet immediately, don’t panic—click “View All Wallets” to see the full list.
Still can’t find your wallet? Double-check to ensure you’ve set it up correctly. It’s like looking for a key—you need the right one to unlock the door.
Step 4: Scan the QR Code
Open your wallet app and look for the QR code scanner. Use it to scan the code displayed on STON.fi.
This step is as simple as tapping your card on a payment terminal. It’s quick, efficient, and hassle-free.
Step 5: Confirm the Connection
Your wallet app will ask for confirmation. Once you approve, your wallet is connected!
Here’s a pro tip: your wallet will stay connected until you disconnect it manually or clear your browser cache. This means you don’t have to repeat the process every time you visit STON.fi.
Addressing Common Concerns
Is it safe to connect my wallet?
Absolutely. Connecting your wallet doesn’t mean you’re giving anyone access to your funds. It’s more like logging into an account—secure and private.
What if I make a mistake?
No worries! The process is straightforward, and you can always start over if needed. Plus, plenty of guides are available to help you troubleshoot.
Why This Step Matters
Connecting your wallet is more than just a technical task—it’s a doorway to financial independence. In the traditional financial world, we rely on banks and middlemen. With STON.fi, you’re in control.
Once your wallet is connected, you can:
Trade tokens seamlessly
Stake your assets for rewards
Explore new opportunities in DeFi
Picture this: You’re at a coffee shop and want to pay for your latte. You open your phone, scan a QR code, and the payment is done in seconds.
That’s exactly how connecting your wallet to STON.fi works. Simple, efficient, and secure. Once you’ve set it up, the entire process becomes second nature.
Final Thoughts
Starting your journey in the decentralized world doesn’t have to be complicated. Connecting your TON wallet to STON.fi is one of the easiest and most empowering steps you can take.
Think of it as setting up the foundation for your financial freedom. Once it’s done, you’ll have access to a world of opportunities at your fingertips.
So, what are you waiting for? Dive in and take control of your future—one transaction at a time.
4 notes
·
View notes
Text
How to Connect Your TON Wallet to STON.fi: A Beginner-Friendly Guide

If you're new to blockchain or cryptocurrencies, you might feel a little overwhelmed by all the techy jargon. Trust me, I’ve been there. But here’s the good news: connecting your TON wallet to STON.fi isn’t rocket science. In fact, it’s a simple process, and I’m here to walk you through it step by step.
Let’s treat this like setting up your first online bank account. It might seem tricky at first glance, but once you know the steps, you’ll wonder why you ever hesitated.
Why You Need to Connect Your Wallet
Imagine going to your favorite store. You’ve got your shopping list ready, but you left your wallet at home. Frustrating, right? Similarly, to do anything meaningful on STON.fi—like trading or staking—you need to connect your TON wallet. It’s your digital wallet that enables all transactions.
By connecting your wallet, you’re unlocking the ability to interact directly with the blockchain, giving you control over your assets without any middleman.
Step 1: Open the STON.fi Application
Start by visiting STON.fi. Think of this as entering the “storefront” where all the blockchain magic happens. It’s designed to be user-friendly, so don’t worry about getting lost.
Step 2: Click “Connect Wallet”
Once you’re on the site, look for the “Connect Wallet” button. This is like walking up to the checkout counter and saying, “I’m ready to shop!”
Step 3: Select Your Wallet
A window will pop up with a list of wallets. Scroll through and find yours. If it’s not immediately visible, click “View All Wallets” to see the full list.
Can’t find your wallet? Double-check that you’ve set it up correctly. Think of it like looking for your debit card in your wallet—it might just be in the wrong slot. If needed, you can refer to a quick guide on setting up your TON wallet to ensure everything is in place.
Step 4: Scan the QR Code
This step is pretty straightforward. Open your wallet app, look for the QR code scanner (most wallets have this feature), and scan the code displayed on STON.fi. It’s as simple as tapping your card for a contactless payment.
Step 5: Confirm the Connection
Your wallet app will ask for confirmation. Approve it, and voilà—you’re connected! The best part? You stay connected until you either manually disconnect or clear your browser cache.
Common Concerns Addressed
“Is this secure?”
Yes! Connecting your wallet doesn’t mean giving away control of your assets. Think of it like logging into your bank’s app—you’re not handing over your money; you’re simply accessing it.
“What happens if I mess up?”
Don’t worry. Mistakes happen, and the process can always be retried. Plus, the TON wallet setup guides are there to help you troubleshoot.
Picture this: You’re at a coffee shop and want to pay for your latte. You pull out your phone, open your digital wallet, and scan the QR code at the counter. In seconds, the payment is done, and you’re sipping your coffee.
That’s how connecting your wallet to STON.fi works. It’s quick, efficient, and secure. Once connected, you can trade tokens, stake for rewards, and explore a world of decentralized finance.
Why It’s Worth It
Connecting your TON wallet is more than just a technical step—it’s a gateway to financial independence. With blockchain technology, you control your funds. No banks. No delays. Just you and your assets.
The best part? You don’t have to be a tech wizard to get started. Every crypto expert began right where you are—learning one step at a time.
Final Words
Getting started with blockchain can feel intimidating, but connecting your TON wallet to STON.fi is one of the simplest and most empowering steps you can take. Follow these steps, and you’ll be ready to explore the decentralized world with confidence.
Remember, the journey to understanding blockchain starts with small, manageable steps. You’ve got this!
3 notes
·
View notes
Text
How to Connect Your TON Wallet to STON.fi: A Simple Guide

Hey there! If you’ve just stepped into the world of crypto and are looking to make your first transactions, you’re probably wondering how to connect your TON wallet to STON.fi. Trust me, I’ve been there! It can seem a little confusing at first, but once you get the hang of it, it’s as easy as pie. Let’s break it down step-by-step, and by the end of this guide, you’ll feel confident navigating STON.fi like a pro.
Why Do You Need to Connect Your Wallet?
Before we dive into the steps, let’s talk about why this connection matters. Your TON wallet is like your personal vault—this is where your crypto lives. When you connect it to STON.fi, you’re simply unlocking the door to a world of possibilities. Think of it like getting a new key to your financial playground. Without this key, you can’t participate in trades, swaps, or anything else that involves your crypto.
Step 1: Head to the STON.fi App
First, you’ll want to open the STON.fi application. Just click here: STON.fi Application. This is where all the magic happens. It’s like walking into a marketplace, ready to buy, sell, or trade—so let’s make sure you’re all set up to start using it.
Step 2: Click on “Connect Wallet”
Once you’re in the STON.fi app, you’ll see a big button that says “Connect Wallet.” Go ahead and click on it. This is where you start the process of connecting your vault (wallet) to STON.fi.
It’s like opening the door to your new home—just a few more steps to go!
Step 3: Choose Your Wallet
A window will pop up asking you to choose your wallet. Don’t worry if you don’t see your wallet listed at first—just click on “View all wallets” to see a more complete list. If it’s still not showing up, it could mean you haven’t set it up correctly. Don’t panic! I’ve got a solution for you. Check out the TON wallet setup guide, and you’ll be back on track.
Step 4: Scan the QR Code
After you choose your wallet, a QR code will appear. Open your wallet app and use the scanner inside it to scan the code. This is how the two will connect securely. Think of it like connecting your phone to Bluetooth. A quick scan, and you're good to go.
Step 5: Confirm the Connection
Your wallet will now ask you to confirm the connection. Hit “Confirm”, and voila! You’re all set. Your wallet is now connected to STON.fi and ready for action. You won’t need to repeat this unless you disconnect it or clear your browser cache.
Why Connecting Your Wallet Matters
Now that your wallet is connected, you have access to the full range of opportunities on STON.fi. Whether you’re looking to swap tokens, stake your assets, or explore other DeFi projects, this connection is your gateway. It’s like opening a box full of new tools—now you can start using them.
Is It Safe to Connect My Wallet?
Great question! I know security is always a concern when dealing with your hard-earned crypto. The cool thing about STON.fi is that your wallet stays in your control. It’s like using your own personal vault that only you can open. The QR code ensures a secure connection, and since STON.fi doesn’t hold your crypto, it’s never at risk of being lost on the platform. You stay in charge.
What Can You Do After Connecting?
Once your wallet is connected, the fun begins! Here’s what you can start exploring:
Token Swaps: This is where you can trade one crypto for another, just like exchanging dollars for euros at a currency exchange booth. But here, you get to do it on your own terms, without fees or limits.
Staking: You can also stake your tokens to earn rewards. Think of it as putting money in a high-interest savings account that actually pays you more.
Explore DeFi Projects: From NFT collectibles to yield farming, STON.fi is your gateway to the TON blockchain and a whole world of decentralized finance projects. It’s like attending a crypto expo—except you can participate in everything!
Making It Real: Connecting Your Wallet is Like Opening a Bank Account
Let’s break this down further. Imagine you’re opening a bank account. The first thing you do is fill out paperwork (wallet setup), then you show your ID (connect your wallet), and finally, you’re able to access all the bank’s features. Connecting your TON wallet to STON.fi is a similar process—it’s all about giving you access to the tools you need to make the most out of your crypto.
But here’s the kicker: With STON.fi, YOU are the bank. You’re in control of your funds, your trades, and your opportunities. There’s no middleman, no waiting for approval, and no limits to your potential.
Connecting your TON wallet to STON.fi is the first step toward taking full control of your crypto journey. Once you're connected, you're no longer just a bystander in the world of DeFi—you’re an active participant. You can trade, stake, and explore the endless possibilities that the TON blockchain offers.
Remember, every expert started as a beginner. If this process feels a little overwhelming, that’s okay. Every time you connect your wallet or make your first trade, you’re building confidence. So take your time, follow the steps, and soon enough, you’ll be navigating the DeFi world like a pro.
Ready to start? I’m here to guide you every step of the way. Let’s dive in!
5 notes
·
View notes
Text
Can Your Bitcoin Address Change on Cash App? Tips for Managing Your Wallet
As cryptocurrencies grow in popularity, platforms like Cash App have made it easier for everyday users to buy, sell, and send Bitcoin. Whether you’re new to crypto or a seasoned investor, you may have noticed that Cash App assigns you a unique Bitcoin wallet address. But what happens if you need a different address or wish to know whether a Cash App Bitcoin wallet address change is possible?
In this guide, we’ll take a deep dive into how the Cash App Bitcoin wallet works, whether you can change your Bitcoin address, and some essential tips for managing your Bitcoin transactions on the platform. We’ll also answer common questions about Bitcoin addresses on Cash App to help you understand how to keep your funds safe and transactions smooth.
Introduction: How Bitcoin Addresses Work on Cash App?
Cash App isn’t just a mobile payment app—it also offers crypto trading features, allowing users to send, receive, and store Bitcoin directly within the app. When you create a Bitcoin wallet on Cash App, the platform assigns a unique Bitcoin wallet address. This address acts like a digital identifier for your wallet, enabling other users or platforms to send Bitcoin to your account safely.
However, users often have questions about whether their Bitcoin address can be changed. Perhaps you are concerned about privacy, wondering if your wallet can have a new address to limit exposure of past transactions. Or maybe you want to reset the address for security reasons. This blog will explore how Bitcoin addresses on Cash App function and if you can request a Bitcoin wallet address change within the app.
Can I Change My Bitcoin Address on Cash App?
The answer to the question “Can I change my Bitcoin address on Cash App?” lies in how Bitcoin wallets are designed. Cash App automatically assigns a new Bitcoin address periodically for security reasons. So, the good news is that you don’t need to manually change your Bitcoin address because Cash App will provide new addresses on your behalf over time.
Bitcoin addresses on Cash App function similarly to how Bitcoin addresses work on most crypto platforms:
You can receive Bitcoin using the latest address assigned to your account.
Your previous Bitcoin addresses remain valid—so even if your address changes, funds sent to old addresses will still arrive in your wallet.
The platform may issue a new address whenever you perform certain activities, such as requesting a deposit address.
This dynamic address system ensures enhanced privacy for users by making it difficult for outsiders to trace a user’s entire transaction history based on one address.
How to View or Use Your Bitcoin Address on Cash App
If you’re using Cash App for Bitcoin transactions, it’s essential to know how to access your wallet address. Here’s how to find new Bitcoin wallet address on Cash App:
Open the Cash App on your phone.
Tap the Bitcoin (₿) icon at the bottom of the screen.
Select Deposit Bitcoin to display your current Bitcoin wallet address.
You’ll see both the alphanumeric address and a QR code that others can scan to send Bitcoin to your wallet.
This address can be used to receive Bitcoin from other wallets or platforms. Even though Cash App periodically updates your Bitcoin address, older addresses assigned to your account will still function for incoming transactions.
Why Does Cash App Change Bitcoin Addresses?
There are several reasons why Cash App assigns new Bitcoin addresses periodically. These changes are designed to enhance the security and privacy of your transactions:
Privacy Protection: Bitcoin addresses are public, meaning anyone can see all transactions associated with an address on the blockchain. By issuing new addresses periodically, Cash App helps prevent someone from easily tracking all your activity.
Security Enhancements: Using the same Bitcoin address repeatedly increases the chances of it being linked to fraudulent activities. Regular address changes lower these risks.
Compliance with Blockchain Standards: Bitcoin networks encourage wallet providers to use hierarchical deterministic (HD) wallets, which generate multiple addresses under a single wallet to enhance user security.
This automatic address update ensures that you don’t need to worry about changing your Bitcoin wallet address manually.
Can You Request a Specific Bitcoin Address Change?
Although Cash App generates new Bitcoin addresses regularly, there is no manual option for users to change the address on demand. The system is designed to automate this process, ensuring that each user’s account remains secure and compliant with blockchain standards.
If you have concerns about a previous Bitcoin address being compromised, you can still use the newest address generated by Cash App for future transactions. However, your old addresses will continue to receive Bitcoin without any issues.
Managing Multiple Bitcoin Transactions on Cash App
You don’t need to worry about managing different addresses yourself, as all Bitcoin received via old and new addresses will reflect in your Cash App Bitcoin balance. Here are some useful tips for seamless Bitcoin transactions on Cash App:
Use the latest Bitcoin address whenever requesting deposits from another wallet or exchange for added security.
Keep track of transaction confirmations on the Bitcoin blockchain to monitor the status of your incoming funds.
Make sure to verify the amount and recipient address before sending Bitcoin, as transactions on the blockchain are irreversible.
What Happens if You Share an Old Bitcoin Address?
If you’ve already shared an older Bitcoin address with someone, there’s no need to worry. Bitcoin sent to any valid address associated with your Cash App wallet will still arrive safely in your account.
Unlike some traditional payment systems, the blockchain ensures that all past addresses remain valid indefinitely, so even if your address changes, older ones will still work for receiving funds.
FAQ
Can I change my Bitcoin address on Cash App manually?
No, Cash App does not allow users to manually change their Bitcoin address. However, the platform periodically generates new addresses for your wallet to enhance security and privacy.
How often does Cash App change Bitcoin addresses?
There is no fixed schedule for Bitcoin address changes. Cash App issues new addresses automatically when needed, such as when you request a new deposit address.
Will my old Bitcoin address still work after a new one is assigned?
Yes, all old Bitcoin addresses linked to your Cash App wallet will remain valid and functional. Funds sent to any previous address will still arrive in your Bitcoin balance.
How do I find my Bitcoin wallet address on the Cash App?
To view Cash App Bitcoin wallet address, open the Cash App, tap the Bitcoin (₿) icon, and select Deposit Bitcoin. You’ll see your current address and QR code for deposits.
Why does the Cash App change Bitcoin addresses periodically?
Cash App updates Bitcoin addresses to protect user privacy, enhance security, and comply with blockchain best practices. Regular address changes prevent others from tracking your entire transaction history.
Can I have multiple Bitcoin addresses on Cash App?
Yes, Cash App assigns multiple addresses over time, but you don’t need to manage them separately. All addresses remain linked to your Bitcoin wallet and can receive funds.
#does cash app bitcoin address change#cash app bitcoin address change#how to change does cash app bitcoin address#how to get new cash app bitcoin address
2 notes
·
View notes
Text
Generate Secure Blockchain Wallet QR Codes with QR Ocean
Discover how QR Ocean’s Crypto QR Code Generator can enhance your blockchain wallet experience. Easily create secure, scannable QR codes for your cryptocurrency transactions, making sending and receiving digital assets a breeze. Whether you're a seasoned investor or just starting, our user-friendly platform helps you manage your crypto with ease. Visit us at https://qrgenerator.biz/crypto-qr-code-generator/
#crypto qr code#blockchain qr code#blockchain wallet qr code#crypto wallet qr code#blockchain qr code generator#blockchain private key qr code
0 notes
Text
Crypto trading mobile app
Designing a Crypto Trading Mobile App involves a balance of usability, security, and aesthetic appeal, tailored to meet the needs of a fast-paced, data-driven audience. Below is an overview of key components and considerations to craft a seamless and user-centric experience for crypto traders.
Key Elements of a Crypto Trading Mobile App Design
1. Intuitive Onboarding
First Impressions: The onboarding process should be simple, guiding users smoothly from downloading the app to making their first trade.
Account Creation: Offer multiple sign-up options (email, phone number, Google/Apple login) and include KYC (Know Your Customer) verification seamlessly.
Interactive Tutorials: For new traders, provide interactive walkthroughs to explain key features like trading pairs, order placement, and wallet setup.
2. Dashboard & Home Screen
Clean Layout: Display an overview of the user's portfolio, including current balances, market trends, and quick access to popular trading pairs.
Market Overview: Real-time market data should be clearly visible. Include options for users to view coin performance, historical charts, and news snippets.
Customization: Let users customize their dashboard by adding favorite assets or widgets like price alerts, trading volumes, and news feeds.
3. Trading Interface
Simple vs. Advanced Modes: Provide two versions of the trading interface. A simple mode for beginners with basic buy/sell options, and an advanced mode with tools like limit orders, stop losses, and technical indicators.
Charting Tools: Integrate interactive, real-time charts powered by TradingView or similar APIs, allowing users to analyze market movements with tools like candlestick patterns, RSI, and moving averages.
Order Placement: Streamline the process of placing market, limit, and stop orders. Use clear buttons and a concise form layout to minimize errors.
Real-Time Data: Update market prices, balances, and order statuses in real-time. Include a status bar that shows successful or pending trades.
4. Wallet & Portfolio Management
Asset Overview: Provide an easy-to-read portfolio page where users can view all their holdings, including balances, performance (gains/losses), and allocation percentages.
Multi-Currency Support: Display a comprehensive list of supported cryptocurrencies. Enable users to transfer between wallets, send/receive assets, and generate QR codes for transactions.
Transaction History: Offer a detailed transaction history, including dates, amounts, and transaction IDs for transparency and record-keeping.
5. Security Features
Biometric Authentication: Use fingerprint, facial recognition, or PIN codes for secure logins and transaction confirmations.
Two-Factor Authentication (2FA): Strong security protocols like 2FA with Google Authenticator or SMS verification should be mandatory for withdrawals and sensitive actions.
Push Notifications for Security Alerts: Keep users informed about logins from new devices, suspicious activities, or price movements via push notifications.
6. User-Friendly Navigation
Bottom Navigation Bar: Include key sections like Home, Markets, Wallet, Trade, and Settings. The icons should be simple, recognizable, and easily accessible with one hand.
Search Bar: A prominent search feature to quickly locate specific coins, trading pairs, or help topics.
7. Analytics & Insights
Market Trends: Display comprehensive analytics including top gainers, losers, and market sentiment indicators.
Push Alerts for Price Movements: Offer customizable price alert notifications to help users react quickly to market changes.
Educational Content: Include sections with tips on technical analysis, crypto market basics, or new coin listings.
8. Social and Community Features
Live Chat: Provide a feature for users to chat with customer support or engage with other traders in a community setting.
News Feed: Integrate crypto news from trusted sources to keep users updated with the latest market-moving events.
9. Light and Dark Mode
Themes: Offer both light and dark mode to cater to users who trade at different times of day. The dark mode is especially important for night traders to reduce eye strain.
10. Settings and Customization
Personalization Options: Allow users to choose preferred currencies, set trading limits, and configure alerts based on their personal preferences.
Language and Regional Settings: Provide multilingual support and regional settings for global users.
Visual Design Considerations
Modern, Minimalist Design: A clean, minimal UI is essential for avoiding clutter, especially when dealing with complex data like market trends and charts.
Color Scheme: Use a professional color palette with accents for call-to-action buttons. Green and red are typically used for indicating gains and losses, respectively.
Animations & Micro-interactions: Subtle animations can enhance the experience by providing feedback on button presses or transitions between screens. However, keep these minimal to avoid slowing down performance.
Conclusion
Designing a crypto trading mobile app requires focusing on accessibility, performance, and security. By blending these elements with a modern, intuitive interface and robust features, your app can empower users to navigate the fast-paced world of crypto trading with confidence and ease.
#uxbridge#uxuidesign#ui ux development services#ux design services#ux research#ux tools#ui ux agency#ux#uxinspiration#ui ux development company#crypto#blockchain#defi#ethereum#altcoin#fintech
2 notes
·
View notes
Text
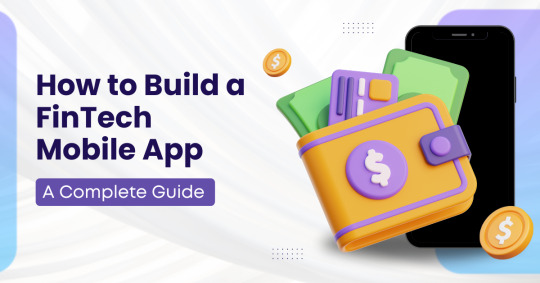
How to Build a FinTech Mobile App | A Complete Guide
In today’s fast-digital world, financial services aren’t just online — they’re in your pocket. From mobile banking and digital wallets to robo-advisors and crypto apps, FinTech solutions are reshaping how we manage money. If you’ve ever dreamt of launching your own FinTech app, this guide walks you through what FinTech app development involves, the pros and cons, and how companies like SMT Labs are making it happen.
What Is FinTech App Development?
FinTech app development refers to building mobile (and often paired web) applications that offer financial services digitally. These apps may include:
Banking: Checking balances, making transfers, depositing checks
Payments: Mobile wallets, UPI/QR payments, peer-to-peer transfers
Lending: Digital loan origination, credit scoring, repayment
Investments: Trading, robo-advisors, portfolio tracking
Insurance (InsurTech): Policy management, automated claims
Blockchain & crypto: Wallets, DeFi platforms, smart contracts
It’s not just programming — it combines security, compliance, UX design, backend systems, and often AI/ML and blockchain integration to deliver seamless, trusted experiences.
Worldwide accessibility – After development, your app can be used by users across the globe.
Why You Should Develop a FinTech App
1. Massive market opportunity FinTech is exploding. With rising smartphone usage and demand for digital finance, people expect instant, sleek, and secure services. Whether you’re targeting underserved markets or niche segments — there’s room to grow.
2. Customer-centric innovation FinTech apps let you offer services tailored to real user needs — instant payments, personal finance insights, automated savings. Delight users with convenience and personalization.
3. High scalability potential Apps can expand features, support more users, integrate APIs — scaling your tech and revenue without scaling costs linearly.
4. Data-driven capabilities Leverage user behavior data with AI/ML for smart features like predictive budgeting, fraud detection, and robo-advice.
5. Strategic partnerships Embedded finance — banking-as-a-service, APIs, payment processors — opens doors for collaboration and revenue-sharing.
Worldwide accessibility – After development, your app can be used by users across the globe.
Key Features of a FinTech Mobile App
To build a robust FinTech app, consider these essential components:
Feature
Description
Strong security
End‑to‑end encryption, MFA, biometric login, fraud detection
Fast payments
Support UPI, QR code scans, wallets, card/net banking
Real-time data
Live balance updates, transaction tracking, trading feeds
User-friendly UI
Intuitive navigation, visual dashboards, seamless onboarding
Cross‑platform support
Native iOS/Android or hybrid solutions (Flutter, React Native)
Integration
Connect with banks, KYC/CDD, payment gateways, credit bureaus
Analytics & AI
Personalized insights, budgeting tools, credit scoring, risk checks
Compliance
Adhere to regulations (PCI DSS, GDPR, RBI, ISO standards)
Support
Chatbots, in-app support, notifications, alerts
Worldwide accessibility – After development, your app can be used by users across the globe.
Step‑by‑Step FinTech App Development Process
A typical roadmap looks like this:
1. Requirement Analysis
Define goals, target users, core features, and regulatory constraints. This stage guides your development plan.
2. Design & Prototyping
Create wireframes, mockups, interactive prototypes. Prioritize simplicity, transparency, and trust.
3. Development & Integration
Choose your tech stack: e.g. React Native or Flutter for mobile; Node.js, Python, Java for backend; databases, cloud infrastructure. Integrate APIs: banking, KYC, payments, credit, crypto/blockchain as needed.
4. Security & Compliance Testing
Perform rigorous testing: pen-testing, code reviews, encryption verification. Also run compliance audits with legal/finance experts.
5. Deployment & Launch
Publish in app stores, roll out phased user adoption, set up backend monitoring and support.
6. Maintenance & Upgrades
Continuously improve through feature releases, security patches, performance tuning, regulatory compliance.
Worldwide accessibility – After development, your app can be used by users across the globe.
Benefits of Developing a FinTech App
Superior user experience – Fast, intuitive, and 24/7 accessible.
Operational efficiency – Automates paper-based processes.
New monetization paths – From fees, subscription models, embedded finance.
Real-time insights – Data helps you refine offerings.
Worldwide accessibility – After development, your app can be used by users across the globe.
Worldwide accessibility – After development, your app can be used by users across the globe.
Challenges & Drawbacks to Consider
Security & trust – Financial apps are prime hacking targets; failure means massive reputational risk.
Complex compliance – Different countries require different legal adherence.
High cost & complexity – Security, integrations, audits, and scalability drive up costs.
Regulatory hurdles – Approvals like banking licenses add time and cost.
User trust & retention – People are cautious with money apps — UX, privacy, and reliability are critical.
Worldwide accessibility – After development, your app can be used by users across the globe.
Why Choose a FinTech App Development Company?
If you're not a development house, partnering with a specialized FinTech software development company is smart:
They have domain expertise — security, compliance, integrations, performance.
They provide end-to-end support — design, development, QA, deployment, maintenance.
They know how to avoid pitfalls, having built multiple similar products.
Worldwide accessibility – After development, your app can be used by users across the globe.
Pros & Cons of Working with a Specialist Firm like SMT Labs
✅ Pros
⚠️ Cons
Domain expertise in financial tech
Higher rate compared to generalists
Robust security and compliance
Some remote coordination may be needed
Faster development with reusable components
US/regulatory support might need local partners
Scalability through proven architecture
Custom projects still require your strong input
24/7 support & continuous updates
Long-term contracts may apply
Worldwide accessibility – After development, your app can be used by users across the globe.
How to Get Started with FinTech App Development
Clarify your idea Define your app’s niche, target users, monetization, must-have features, and compliance requirements.
Plan your budget & timeline Simple apps: ~$50K to build; advanced platforms: $200K+. Set realistic timelines (3–12+ months).
Shortlist vendors Look for companies with FinTech experience, security credentials, and relevant case studies — like SMT Labs.
Draft requirements doc Include user journeys, features (KYC, payments, analytics), supported platforms, key integrations, security needs, and regulatory context.
Get proposals & sign NDA Invite selected vendors to pitch, including scope, pricing, timeline, tech stack, and project milestones.
Commence development Start with prototyping and iterative sprints. Include regular demos and testing cycles.
Beta testing Launch to a pilot group, gather feedback on performance, UX, Bugs, security.
Launch & market Release on App Stores, support users, monitor usage, iterate based on behavior analytics.
Maintain & scale Continuous upgrades — security patches, new features, evolving regulations, user support.
Worldwide accessibility – After development, your app can be used by users across the globe.
Final Thoughts
Building a FinTech mobile app is a rewarding but complex journey — security, compliance, integrations, cloud infrastructure, UX — there’s a lot to get right. A specialist partner like SMT Labs can help you avoid pitfalls, accelerate delivery, and focus on your core vision.
By combining:
Strategic planning
Secure, user-friendly design
Modern tech stack
Ongoing support
…you’ll be set to launch a compelling FinTech app that not only powers digital finance today, but adapts and grows for tomorrow’s needs.
Conclusion
FinTech app development is a dynamic mix of finance, tech, security, and compliance — offering massive growth and impact opportunities. Whether you're building a payment wallet, a digital bank, a robo-advisor, or a blockchain platform, partners like SMT Labs provide the expertise and full-stack development support to help you build, launch, and scale confidently.
#fintech software development services#fintech software development#fintech software development company#fintech app development company#financial software development#financial software development company#mobile app developers#mobile app development#fintechtrends#fintech
0 notes
Text
UPB Pay Revolutionizing Crypto Transactions in India

In the fast-changing world of digital payments, UPB Pay stands out as a groundbreaking solution combining the ease of UPI with the power of blockchain. Developed by UPB (Universal Payment Bank), this platform is India’s first-ever Crypto UPI system, allowing users to send and receive cryptocurrency with the same simplicity and speed as traditional UPI payments.
While India witnesses increasing adoption of digital finance, UPB Pay emerges as the bridge between crypto freedom and real-world utility. Whether you’re a crypto investor, merchant, or first-time user, UPB Pay simplifies everything with a secure, user-friendly interface.
💡 What is UPB Pay?
UPB Pay is a decentralized payment platform powered by blockchain that allows instant crypto transactions using UPI-style features. You don’t need long wallet addresses, private keys, or complicated exchanges. Just select a contact, enter an amount, and send – just like UPI.
This breakthrough makes crypto accessible to everyday users, without compromising on security, speed, or decentralization.
🔑 Key Features of UPB Pay
🔐 Secure Wallet Integration: Your crypto stays safe in your own wallet – fully decentralized and non-custodial.
⚡ Instant Transactions: Lightning-fast transfers between users across networks.
📱 UPI-Like Simplicity: Send tokens using usernames or contact IDs – no need for long blockchain addresses.
🌐 Multi-Chain Support: UPB Pay supports popular blockchains like Solana, Ethereum, and more.
🪙 Token Utility: Pay directly using UPB Token and other popular coins.
🎁 Airdrops & Rewards: Active users benefit from referral rewards, loyalty bonuses, and UPB token drops.
🔥 Why UPB Pay is the Future
India has millions of UPI users and growing crypto curiosity. But till now, no one combined the ease of Indian payments with the power of digital assets.
UPB Pay does just that. It’s fast, flexible, and built for the future. No centralized banks, no red tape – just direct, borderless, crypto payments, anytime, anywhere.
📈 Who Can Use UPB Pay?
🧑💼 Traders: Move funds quickly between wallets.
🛍️ Merchants: Accept crypto payments instantly with zero settlement delay.
💸 Friends & Family: Send tokens across borders – no conversion fees.
💰 Investors: Use it to transfer UPB Tokens or manage portfolios seamlessly.
🙋♂️ Frequently Asked Questions (FAQ)
🔹 Q1: Is UPB Pay safe to use?
Absolutely. UPB Pay is built on decentralized blockchain networks. It’s non-custodial, meaning you hold your keys, and all transactions are secure and transparent.
🔹 Q2: How is UPB Pay different from normal crypto wallets?
While typical wallets only store coins, UPB Pay acts like a UPI app for crypto – you can send/receive instantly with a familiar interface, and even use contact-based IDs.
🔹 Q3: Do I need KYC to use UPB Pay?
No mandatory KYC for basic usage. However, to access advanced features or fiat on-ramps (coming soon), some verification might be needed.
🔹 Q4: Which tokens can I use with UPB Pay?
Currently, UPB Token, SOL, USDT, and other major tokens are supported. Multi-chain support ensures smooth transfers across compatible blockchains.
🔹 Q5: Can I use UPB Pay for business transactions?
Yes! UPB Pay is ideal for freelancers, merchants, and e-commerce platforms that want to accept fast, secure crypto payments without waiting days for settlement.
🔹 Q6: Is UPB Pay available as an app?
Yes! The UPB Pay app is available (or launching soon) on Android and iOS. You can also access it via web wallet for desktop transactions.
📣 Final Thoughts
UPB Pay is not just another crypto wallet – it's a movement. A bold step towards making crypto payments as common and effortless as scanning a QR code.
Whether you're new to crypto or a seasoned investor, UPB Pay empowers you to control your money, your way – with speed, security, and simplicity.
✅ Call to Action
🎯 Don’t get left behind – start using UPB Pay today! Claim your free UPB tokens, invite your friends, and experience the future of payments before the world catches on. 📲 Visit: www.upbpay.com or Download the App.
0 notes
Text
UPB Kya Hai? Ek Nayi Digital Duniya Ki Shuruaat!

Aaj ke digital yug me har cheez tezi se badal rahi hai—chahe wo banking ho, shopping ho, ya utility bills bharna. Is naye digital safar me ek naya naam ubhar ke aaya hai: UPB Token. Lekin sawal uthta hai, UPB kya hai? Aur ye kaise hamare roz ke transactions ko badal raha hai?
Is blog me hum UPB Token ke bare me detail me Japanese—iska concept, use case, technology, aur kaise ye crypto duniya me ek nayi digital Kranti la raha hai.
🔹 UPB Kya Hai?
UPB ka complete form hai Utility Payment Blockchain. Ye ek aisa crypto token hai jo utility bill payments jaise bijli, paani, gas, mobile recharge, DTH, etc. ke liye use ho sakta hai.
Jahan hum pehle cash, credit card ya net banking se bill bharte the, ab wahi kaam UPB token se ho sakta hai—fast, secure, aur low-cost ke saath.
🔹 UPB Ka Maksad Kya Hai?
UPB ka main goal hai:
Utility payments ko decentralized banana
Middlemen ko hata ke direct, fast transactions dena
Logon ko crypto ka real-world use case dena
Yani, UPB sirf ek trading token nahi, balki daily life me use hone wala ek real crypto token hai.
🔹 UPB Blockchain Kaise Kaam Karta Hai?
UPB ek blockchain-based platform hai, jiska matlab hai ki isme sabhi transactions safe aur transparent hote hain. Jab aap UPB token se koi bill pay karte ho, wo transaction ek blockchain ledger me record ho jata hai jise koi badal nahi sakta.
Iska fayda ye hai:
Koi fraud nahi
Transaction history is always safe.
Fast and smooth payment process
🔹 UPB Token Ke Fayde
Fast Transactions:
UPB ke through bill payment sirf kuch seconds me ho jata hai.
Low Fees:
Bank charges aur processing fees ki comparison me UPB me bahut kam cost lagti hai.
Global Access:
Aap kahin se bhi, kabhi bhi UPB token se bill pay kar sakte ho—sirf internet hona chahiye.
Decentralized Control:
UPB kisi bank ya government ke under nahi hai. Yani aapka paisa, aapke control me.
Rewards or Cashback:
Kai baar UPB users ko tokens ke form me cashback milta hai jab wo payment karte hain.
🔹 Kya UPB Token Me Investment Karna Chahiye?
Crypto mein investment karna risky hota hai, lekin UPB ka use case strong hai. Ye sirf ek speculative token nahi hai—iska daily utility hai, jo isse powerful banata hai.
Agar aap long-term investor ho aur kisi aise crypto project me paisa lagana chahte ho jo real-world problem solve kare, to UPB ek acha option ho sakta hai.
🔹 UPB Wallet Kya Hota Hai?
UPB token ko store karne ke liye aapko ek crypto wallet chahiye hota hai. Ye wallet ek mobile app ya browser extension ho sakta hai, jisme aap apne tokens rakh sakte ho.
Popular wallets jisme aap UPB rakh sakte ho:
MetaMask
Trust Wallet
Coinbase Wallet
Yahan se aap efficiently token bhej aur receive bhi kar sakte ho.
🔹 UPB Ka Future Kaisa Hai?
UPB ek utility-focused project hai, jiska matlab hai ki iska use har ghar me ho sakta hai—jaise ki:
Bijli ka bill dharna
Paani ka bill
Internet or mobile recharge
Even metro card recharge ya toll payment future me possible ho sakta hai.
Agar UPB naye partnerships banata hai aur zyada platforms me integrate hota hai, to iska use aur demand dono badge. Iska seedha matlab hai token ki value bhi badh sakti hai.
🔹 UPB Aur Web3 Ka Connection
Web3 ek nayi digital duniya hai jahan control user ke paas hota hai, na ki kisi centralized company ke. UPB bhi isi vision ka hissa hai.
Web3 mein aap apne data ke malik hote ho.
UPB me aap apne paison ke malik ho.
Dono milkar ek transparent, fast, aur user-centric financial ecosystem banate hain.
🔹 UPB Se Bill Kaise Bharen?
UPB se bill dharna bahut hi simple process hai:
Apna UPB wallet open karein
Bill payment platform par jayein jo UPB accept karta hai.
Amount enter karein
QR code scan karein ya wallet se direct transfer karein.
Transaction confirm hone ke baad bill pay ho jata hai.
Isme kisi bhi third-party app ki zarurat nahi hoti—sab kuch peer-to-peer hota hai.
🔹 UPB Kaise Khareedein?
Aap UPB token ko kisi trusted crypto exchange se kharid sakte ho. Kuch exchanges jahan UPB listed ho sakta hai:
CoinDCX
WazirX
Binance (agar listed ho)
UniSwap (agar decentralized ho)
Bas KYC complete karna hota hai, aur aap UPI, bank transfer, ya card ke through token kharid sakte ho.
🔹 UPB Ke Risks
Jaise har crypto project me risks hote hain, waise hi UPB me bhi kuch challenges ho sakte hain:
Regulatory issues (government rules change ho sakte hain)
Market volatility (price up-down hota rahta hai)
Adoption (agar log aur companies use nahi karte to value gir sakti hai)
Isliye hamesha apna research karein aur sirf utna hi invest karein jitna loss hone par effect na ho.
✅ Conclusion: UPB—Ek Nayi Digital Duniya Ki Shuruaat
UPB sirf ek token nahi, ek vision hai—jahan daily payments ko easy, secure, aur fast banaya ja sake. Agar ye project apne goals par tikta hai, to future me UPB har ghar ka part ban sakta hai.
Digital duniya badal rahi hai, aur UPB us badlav ka ek important hissa ban sakta hai. Shayad ek din hum cash ki jagah UPB se sab kuch karein—recharge, shopping, bill payment, sab kuch!
Aap bhi is naye digital safar me shamil ho sakte ho—lekin hamesha smartly aur awareness ke saath!
0 notes