#ux tools
Explore tagged Tumblr posts
Visit Tumblr Blog
Explore Tumblr blogs with no restrictions, modern design and the best experience.
Last Seen Tumblr Blogs


Fun Fact
In 2020, 44% of users from Denmark used Tumblr daily.
Text
Crypto trading mobile app
Designing a Crypto Trading Mobile App involves a balance of usability, security, and aesthetic appeal, tailored to meet the needs of a fast-paced, data-driven audience. Below is an overview of key components and considerations to craft a seamless and user-centric experience for crypto traders.
Key Elements of a Crypto Trading Mobile App Design
1. Intuitive Onboarding
First Impressions: The onboarding process should be simple, guiding users smoothly from downloading the app to making their first trade.
Account Creation: Offer multiple sign-up options (email, phone number, Google/Apple login) and include KYC (Know Your Customer) verification seamlessly.
Interactive Tutorials: For new traders, provide interactive walkthroughs to explain key features like trading pairs, order placement, and wallet setup.
2. Dashboard & Home Screen
Clean Layout: Display an overview of the user's portfolio, including current balances, market trends, and quick access to popular trading pairs.
Market Overview: Real-time market data should be clearly visible. Include options for users to view coin performance, historical charts, and news snippets.
Customization: Let users customize their dashboard by adding favorite assets or widgets like price alerts, trading volumes, and news feeds.
3. Trading Interface
Simple vs. Advanced Modes: Provide two versions of the trading interface. A simple mode for beginners with basic buy/sell options, and an advanced mode with tools like limit orders, stop losses, and technical indicators.
Charting Tools: Integrate interactive, real-time charts powered by TradingView or similar APIs, allowing users to analyze market movements with tools like candlestick patterns, RSI, and moving averages.
Order Placement: Streamline the process of placing market, limit, and stop orders. Use clear buttons and a concise form layout to minimize errors.
Real-Time Data: Update market prices, balances, and order statuses in real-time. Include a status bar that shows successful or pending trades.
4. Wallet & Portfolio Management
Asset Overview: Provide an easy-to-read portfolio page where users can view all their holdings, including balances, performance (gains/losses), and allocation percentages.
Multi-Currency Support: Display a comprehensive list of supported cryptocurrencies. Enable users to transfer between wallets, send/receive assets, and generate QR codes for transactions.
Transaction History: Offer a detailed transaction history, including dates, amounts, and transaction IDs for transparency and record-keeping.
5. Security Features
Biometric Authentication: Use fingerprint, facial recognition, or PIN codes for secure logins and transaction confirmations.
Two-Factor Authentication (2FA): Strong security protocols like 2FA with Google Authenticator or SMS verification should be mandatory for withdrawals and sensitive actions.
Push Notifications for Security Alerts: Keep users informed about logins from new devices, suspicious activities, or price movements via push notifications.
6. User-Friendly Navigation
Bottom Navigation Bar: Include key sections like Home, Markets, Wallet, Trade, and Settings. The icons should be simple, recognizable, and easily accessible with one hand.
Search Bar: A prominent search feature to quickly locate specific coins, trading pairs, or help topics.
7. Analytics & Insights
Market Trends: Display comprehensive analytics including top gainers, losers, and market sentiment indicators.
Push Alerts for Price Movements: Offer customizable price alert notifications to help users react quickly to market changes.
Educational Content: Include sections with tips on technical analysis, crypto market basics, or new coin listings.
8. Social and Community Features
Live Chat: Provide a feature for users to chat with customer support or engage with other traders in a community setting.
News Feed: Integrate crypto news from trusted sources to keep users updated with the latest market-moving events.
9. Light and Dark Mode
Themes: Offer both light and dark mode to cater to users who trade at different times of day. The dark mode is especially important for night traders to reduce eye strain.
10. Settings and Customization
Personalization Options: Allow users to choose preferred currencies, set trading limits, and configure alerts based on their personal preferences.
Language and Regional Settings: Provide multilingual support and regional settings for global users.
Visual Design Considerations
Modern, Minimalist Design: A clean, minimal UI is essential for avoiding clutter, especially when dealing with complex data like market trends and charts.
Color Scheme: Use a professional color palette with accents for call-to-action buttons. Green and red are typically used for indicating gains and losses, respectively.
Animations & Micro-interactions: Subtle animations can enhance the experience by providing feedback on button presses or transitions between screens. However, keep these minimal to avoid slowing down performance.
Conclusion
Designing a crypto trading mobile app requires focusing on accessibility, performance, and security. By blending these elements with a modern, intuitive interface and robust features, your app can empower users to navigate the fast-paced world of crypto trading with confidence and ease.
#uxbridge#uxuidesign#ui ux development services#ux design services#ux research#ux tools#ui ux agency#ux#uxinspiration#ui ux development company#crypto#blockchain#defi#ethereum#altcoin#fintech
2 notes
·
View notes
Text
UI/UX Designs Services By Rambee Softech
Transform your digital experience with Rambee Softech's expert UI/UX design services. Elevate usability, enhance engagement, and captivate users with our innovative design solutions.
Elevate your brand's online presence today!
To contact us, visit the site: https://www.rambeesoftech.com/serv.../design-services/ui-ux/
#rambee softech#uidesign#ux design#website designing#appdevelopoment#digital marketing services#softwaredevelopment#ux research#ux tools#userexperience#ux development#design#ux desgin#ui#graphic design#advertising
1 note
·
View note
Text
Yeah ok low-key pretty pleased with how this is turning out so far. :3
youtube
Watch this space for further updates. :D
#bjk talks#bg3 modding#bg3 script extender#bg3 tools#bg3#not only does the first tool seem to be working pretty well#and it seems like overall my ideas i had in mind for this will work#but the whole thing doesn't look completely like crap#historically i am not very good at UX design on my side projects XD#i mean it doesn't look great but it's serviceable XD#Youtube
14 notes
·
View notes
Text
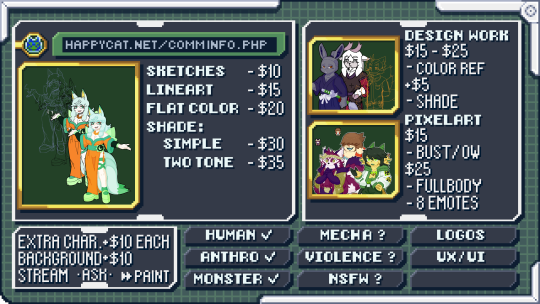
Hello all, I ended up needing a little bit of help this month so I decided to open this account to advertise commissions! I'm able to do pixel art, reference images, and more. Just ask and I'll most likely be okay with what you want!
#art#my art#anime#video games#manga#commission#commissions open#art commissions#art commissions open#old internet#early 2000s#kemono#kemonomimi#kemono art#character design#pixel art#pixel graphics#digital#furry#furry art#reference art#ux ui design#paint tool sai#artwork#game design#game dev#game development#design work#manga style#lineart
6 notes
·
View notes
Text
Which tools every UIUX designer must master?
Gaining proficiency with the appropriate tools can greatly improve your workflow and design quality as a UI/UX designer. The following are some tools that any UI/UX designer has to know how to use:
1. Design Tools:
Figma: One of the most popular and versatile design tools today. It’s web-based, allowing real-time collaboration, and great for designing interfaces, creating prototypes, and sharing feedback.
Sketch: A vector-based design tool that's been the go-to for many UI designers. It's particularly useful for macOS users and has extensive plugins to extend its capabilities.
Adobe XD: Part of Adobe's Creative Cloud, this tool offers robust prototyping features along with design functionalities. It’s ideal for those already using other Adobe products like Photoshop or Illustrator.
2. Prototyping & Wireframing:
InVision: Great for creating interactive prototypes from static designs. It’s widely used for testing design ideas with stakeholders and users before development.
Balsamiq: A simple wireframing tool that helps you quickly sketch out low-fidelity designs. It’s great for initial brainstorming and wireframing ideas.
3. User Research & Testing:
UserTesting: A platform that allows you to get user feedback on your designs quickly by testing with real users.
Lookback: This tool enables live user testing and allows you to watch users interact with your designs, capturing their thoughts and reactions in real time.
Hotjar: Useful for heatmaps and recording user sessions to analyze how people interact with your live website or app.
4. Collaboration & Handoff Tools:
Zeplin: A tool that helps bridge the gap between design and development by providing detailed specs and assets to developers in an easy-to-follow format.
Abstract: A version control system for design files, Abstract is essential for teams working on large projects, helping manage and merge multiple design versions.
5. Illustration & Icon Design:
Adobe Illustrator: The industry standard for creating scalable vector illustrations and icons. If your design requires custom illustrations or complex vector work, mastering Illustrator is a must.
Affinity Designer: An alternative to Illustrator with many of the same capabilities, but with a one-time payment model instead of a subscription.
6. Typography & Color Tools:
FontBase: A robust font management tool that helps designers preview, organize, and activate fonts for their projects.
Coolors: A color scheme generator that helps designers create harmonious color palettes, which can be exported directly into your design software.
7. Project Management & Communication:
Trello: A simple project management tool that helps you organize your tasks, collaborate with team members, and track progress.
Slack: Essential for team communication, Slack integrates with many design tools and streamlines feedback, updates, and discussion.
8 notes
·
View notes
Text
How AI & Machine Learning Are Changing UI/UX Design

Artificial Intelligence (AI) and Machine Learning (ML) are revolutionizing UI/UX design by making digital experiences more intelligent, adaptive, and user-centric. From personalized interfaces to automated design processes, AI is reshaping how designers create and enhance user experiences. In this blog, we explore the key ways AI and ML are transforming UI/UX design and what the future holds.
For more UI/UX trends and insights, visit Pixelizes Blog.
AI-Driven Personalization
One of the biggest changes AI has brought to UI/UX design is hyper-personalization. By analyzing user behavior, AI can tailor content, recommendations, and layouts to individual preferences, creating a more engaging experience.
How It Works:
AI analyzes user interactions, including clicks, time spent, and preferences.
Dynamic UI adjustments ensure users see what’s most relevant to them.
Personalized recommendations, like Netflix suggesting shows or e-commerce platforms curating product lists.
Smart Chatbots & Conversational UI
AI-powered chatbots have revolutionized customer interactions by offering real-time, intelligent responses. They enhance UX by providing 24/7 support, answering FAQs, and guiding users seamlessly through applications or websites.
Examples:
Virtual assistants like Siri, Alexa, and Google Assistant.
AI chatbots in banking, e-commerce, and healthcare.
NLP-powered bots that understand user intent and sentiment.
Predictive UX: Anticipating User Needs
Predictive UX leverages ML algorithms to anticipate user actions before they happen, streamlining interactions and reducing friction.
Real-World Applications:
Smart search suggestions (e.g., Google, Amazon, Spotify).
AI-powered auto-fill forms that reduce typing effort.
Anticipatory design like Google Maps estimating destinations.
AI-Powered UI Design Automation
AI is streamlining design workflows by automating repetitive tasks, allowing designers to focus on creativity and innovation.
Key AI-Powered Tools:
Adobe Sensei: Automates image editing, tagging, and design suggestions.
Figma AI Plugins & Sketch: Generate elements based on user input.
UX Writing Assistants that enhance microcopy with NLP.
Voice & Gesture-Based Interactions
With AI advancements, voice and gesture control are becoming standard features in UI/UX design, offering more intuitive, hands-free interactions.
Examples:
Voice commands via Google Assistant, Siri, Alexa.
Gesture-based UI on smart TVs, AR/VR devices.
Facial recognition & biometric authentication for secure logins.
AI in Accessibility & Inclusive Design
AI is making digital products more accessible to users with disabilities by enabling assistive technologies and improving UX for all.
How AI Enhances Accessibility:
Voice-to-text and text-to-speech via Google Accessibility.
Alt-text generation for visually impaired users.
Automated color contrast adjustments for better readability.
Sentiment Analysis for Improved UX
AI-powered sentiment analysis tools track user emotions through feedback, reviews, and interactions, helping designers refine UX strategies.
Uses of Sentiment Analysis:
Detecting frustration points in customer feedback.
Optimizing UI elements based on emotional responses.
Enhancing A/B testing insights with AI-driven analytics.
Future of AI in UI/UX: What’s Next?
As AI and ML continue to evolve, UI/UX design will become more intuitive, adaptive, and human-centric. Future trends include:
AI-generated UI designs with minimal manual input.
Real-time, emotion-based UX adaptations.
Brain-computer interface (BCI) integrations for immersive experiences.
Final Thoughts
AI and ML are not replacing designers—they are empowering them to deliver smarter, faster, and more engaging experiences. As we move into a future dominated by intelligent interfaces, UI/UX designers must embrace AI-powered design methodologies to create more personalized, accessible, and user-friendly digital products.
Explore more at Pixelizes.com for cutting-edge design insights, AI tools, and UX trends.
#AI in UX Design#Machine Learning UX#UX Personalization#Conversational UI#Predictive UX#AI Chatbots#Smart UX Tools#UI Automation#Voice UI Design#Inclusive UX Design#Sentiment Analysis in UX#Future of UX#AI UX Trends 2025#Figma AI Plugins#Accessibility with AI#Adaptive UI Design#UX Innovation#Human-Centered AI#Pixelizes Blog#UX Strategy
2 notes
·
View notes
Text
Finally figured out which zodiac badge is the Virgo one, so now it’s up there too. You’re welcome/condolences
#hellsite#as far as I can tell the actual name of the zodiac sign is written nowhere on the site or app for the badge#ux is my passion#sorry for not knowing the little drawing for my sign#I used browser dev tools to figure it out
2 notes
·
View notes
Note
29. How do you think they would be as a parent?—Ephemer
Ooh, okay, I do spend quite a bit of time thinking about this.
So, I think Ephemer would be a really fun dad overall, but he’s also not entirely stable.
He’d mask a lot of his pain with his cheery demeanour but sometimes his kid(s) will come home and just see him completely broken on the couch or something. Ephemer has a lot of trauma and I very much doubt Scala in general, let alone early Scala, has a good grasp on or ways to help treat mental health issues.
Speaking of that trauma though, I don’t think he’d want his kid(s) to be Keyblade wielders. I’ve talked about this before, but Daybreak Town certainly had a lot of kids dying… all the time. I can’t imagine that anyone, let alone someone as social as Ephemer, could’ve avoided that. I feel that Ephemer would be against kids wielding Keyblades similarly to how Skuld was against Shift Pride, with the compromise being the education system. Even still though, I can’t imagine Ephemer would be too comfortable with the idea.
I also think for similar reasons that he’d be a bit of a helicopter parent lol. All up in his kid(s) business, always checking in to make sure they’re okay, can’t let them out of sight for too long. Like people who had too much freedom when they were younger tend to not give their kids enough freedom and Ephemer certainly had quite a bit of freedom when he was younger.
I feel like his partner would try and rein him in a bit, to moderate success. The anxiety wins over quite often, but it gets better as the kid(s) get older.
I’m trying to think if I have any other headcannons about this but I think that’s it
#I love speculating about this because I think it’s a fun way to contrast him and Brain#like I tried to keep this post about Ephemer because that was the question but I love comparing my ideas of how the two would be as parents#I’m gonna talk about that here because this is the tags and I can do what I want lol#like I think Ephemer wanted to be a parent whereas Brain most definitely didn’t#and I think part of that is that Ephemer would have more tools to deal with his trauma than Brain because I think he’d be more open to talk#talking about it*#anyways while I feel Ephemer would be smothering his kids I think Brain would be more absent#like he’d dive into work all the way and not really spend time with them#(not that he doesn’t care he just can’t handle being responsible for a child’s life due to you know how UX end)#ends*#there’s so much more I could say about this subject but I’ll save that for another post#on to the next ask!#kh ephemer#khux#sometimes i think about khux
12 notes
·
View notes
Text
UX UI là gì? Tại sao website cần thiết kế chuẩn UX/UI?
Khi bắt đầu tìm hiểu về dịch vụ thiết kế website, bạn thường hay nghe về website chuẩn UX/UI. Thuật ngữ UX/UI đã được xuất phát từ những năm 1970 và đến hiện nay, nó vẫn luôn được phát triển và cải tiến để phù hợp với thời đại. “UX, UI là gì? Liệu website có cần thiết phải thiết kế chuẩn UX, UI không?” là hai câu hỏi không chỉ thu hút sự quan tâm của khách hàng mà cả những người mới bắt đầu học hỏi trong lĩnh vực website. Đừng lo, bạn sẽ biết rõ câu trả lời ngay trong bài này thôi! Click vào link bên dưới ngay nhé!
#business#design#web series#website#công ty thiết kế website#software#thiết kế web#thiết kế website#userexperience#web design#puramu#ux#ui ux design#ux desgin#ui ux company#ui ux development services#ui#uidesign#css#uxui#uxuidesign#uxuitips#ui ux agency#ui ux development company#webdevelopment#web development#webcore#websites#computer#tools
1 note
·
View note
Text
Key Elements of a Sleep Monitoring App Design
Designing a Sleep Monitoring App involves creating a user-friendly interface that provides insights into sleep patterns, offers actionable feedback, and helps improve sleep quality through personalization. Below is a breakdown of the key components and considerations when designing such an app.
Key Elements of a Sleep Monitoring App Design
1. Onboarding & Setup
Seamless Onboarding: A guided setup for first-time users, explaining key features of the app. Make it clear how the app tracks sleep, collects data (e.g., through a wearable device or phone sensors), and how users can benefit from it.
Personalization: Gather initial data like age, sleep goals, and lifestyle factors (work shifts, fitness level, health concerns) to offer a personalized experience.
Integrations: Provide integration options with health apps (e.g., Apple Health, Google Fit) and wearable devices (smartwatches, fitness bands) to synchronize sleep data automatically.
2. Home Screen & Dashboard
Daily Sleep Summary: Display a visual overview of the user’s last sleep session, including total sleep time, sleep stages (light, deep, REM), and interruptions.
Sleep Score: Offer a clear, simple score (out of 100) based on various metrics like sleep duration, quality, and efficiency.
Trends & Insights: Include a scrollable section where users can view recent sleep trends over days, weeks, or months. Offer visual graphs that show changes in sleep patterns, and highlight potential issues such as sleep debt or irregular sleep schedules.
3. Sleep Tracking & Recording
Sleep Tracker Screen: Provide a "Start Sleep Tracking" button with an intuitive interface that allows users to initiate and end sleep tracking easily. If using sensors, keep the interface clean while tracking happens in the background.
Smart Alarm: Include an option for users to set a smart alarm that wakes them up at the optimal time during their sleep cycle (e.g., during light sleep).
Ambient Features: Offer calming sounds or white noise options that can help users fall asleep more quickly. Add settings for automatic shutdown once the app detects that the user has fallen asleep.
4. Sleep Analysis & Reports
Sleep Cycle Breakdown: Visualize data about sleep stages—light, deep, REM, and awake times. A circular or bar graph design works well to showcase this breakdown.
Detailed Metrics: Provide key metrics such as time to fall asleep, sleep efficiency (time asleep vs. time in bed), heart rate, and oxygen levels (if available through wearables).
Sleep Diary: Enable users to log subjective information like how refreshed they feel upon waking, any dreams they remember, or notable factors that affected their sleep (e.g., caffeine intake, stress).
5. Personalized Feedback & Recommendations
AI-Powered Insights: Use data analysis to provide users with actionable insights. For example, “Your average REM sleep has decreased by 10% over the past week. Try to go to bed 30 minutes earlier to improve sleep quality.”
Sleep Tips: Offer expert advice based on sleep data, such as bedtime routines, relaxation exercises, or ideal sleeping environments (temperature, lighting).
Goal Setting: Allow users to set specific goals (e.g., "sleep 8 hours each night" or "reduce wake-up times") and provide reminders or motivational prompts to help achieve them.
6. Night Mode & Minimal Distractions
Dark UI for Night Use: Include a dark mode or night-friendly interface with minimal brightness to reduce eye strain during bedtime usage.
Reduced Notifications: Offer a "Do Not Disturb" mode for nighttime, disabling unnecessary alerts and minimizing distractions.
7. Weekly & Monthly Trends
Weekly Overview: Provide a weekly summary with average sleep time, consistency, and patterns. Highlight any anomalies or improvements in sleep quality.
Monthly Trends: Use longer-term data to show trends that may influence sleep (e.g., stress periods, lifestyle changes). Include comparative graphs for month-over-month analysis.
Sleep Efficiency Score: Offer a consistent sleep score to reflect how well users are adhering to their goals, based on various factors like sleep regularity, wake times, and restfulness.
8. Sleep Environment Monitoring
Environmental Data: If possible, include sensors or integration with smart home devices to monitor the sleeping environment (e.g., temperature, humidity, noise levels) and provide insights into how these factors impact sleep.
Snoring & Movement Detection: For users with wearables or phone-based sensors, offer insights into disturbances like snoring or excessive movement during sleep, which may indicate restlessness or poor sleep quality.
9. Calming Sleep Aids
Guided Meditations & Breathing Exercises: Include audio-guided sleep meditations or breathing exercises to help users unwind before bed.
Soundscapes: Offer relaxing ambient sounds like rain, ocean waves, or forest sounds. Allow users to customize the length and type of sounds.
Sleep Ritual Reminders: Include personalized reminders based on user behavior, like suggesting a calming routine if the app detects poor sleep patterns.
10. Social & Sharing Features
Sleep Challenges: Introduce gamified elements where users can set challenges (e.g., “Improve sleep score by 10 points in the next week”) or participate in community-wide sleep challenges.
Shareable Reports: Allow users to share their sleep reports with family members or health professionals directly from the app, in case they need advice or medical consultation.
11. Settings & Customization
Alarm Customization: Let users set custom alarm tones, snooze intervals, and wake-up light features (if integrated with smart home devices).
Notifications & Reminders: Users can enable reminders for bedtime, hydration, or evening wind-down routines. Ensure these are fully customizable to suit each individual’s schedule.
Integration with Other Apps: For users with fitness goals, sync sleep data with fitness apps to provide a holistic health analysis. This can also connect with mental health apps to identify the correlation between stress and sleep.
Visual Design Considerations
Minimalist & Clean Design: Sleep monitoring apps should have a calming, minimalistic interface. Soft tones like blues, purples, and pastels help create a relaxing environment conducive to sleep.
Typography & Icons: Use soft, rounded typography and iconography to maintain a gentle and inviting visual tone. Avoid harsh lines or overly bold fonts.
Animations & Micro-interactions: Subtle animations, such as a moon icon slowly dimming as the user approaches bedtime, can make the experience more engaging without disrupting the overall calming experience.
Conclusion
Designing a Sleep Monitoring App requires balancing functionality and ease of use, all while ensuring that the app is calming and conducive to improving sleep quality. By focusing on key features such as personalized insights, clear data visualization, and user-centric design, you can create a comprehensive tool to help users track and improve their sleep habits, resulting in a better, healthier lifestyle.
#uxbridge#uxuidesign#ui ux development services#ui ux agency#ux#uxinspiration#ui ux development company#ux tools#ux design services#ux research#i need sleep#bambi sleep#rest#dreams#problems
0 notes
Text
Unveiling Illustrator's Secrets: My Journey to Perfecting the Pen Tool with Advanced Tips
Mastering the Pen Tool in Adobe Illustrator is a fundamental skill that every designer strives to achieve. As a professional copywriter with a passion for creating visually stunning designs, I embarked on a personal journey to explore the advanced techniques of the Pen Tool. In this blog post, I will share my experience and motivation for delving into the intricacies of this powerful tool, as well as provide valuable insights and tips for those who are eager to enhance their own skills. Join me on this journey and discover the secrets of mastering the Pen Tool.

The Power of the Pen Tool
The Pen Tool in Adobe Illustrator is a true powerhouse when it comes to vector design. Its versatility allows designers to create precise and intricate paths, resulting in smooth and scalable graphics. However, for beginners, the Pen Tool can be quite daunting. Many struggle with understanding its functionality and feel overwhelmed by the complexities of manipulating anchor points and Bezier handles. But fear not, for with practice and patience, you too can master this indispensable tool.
Starting the Journey
My initial encounters with the Pen Tool were met with a mixture of excitement and frustration. Like many beginners, I found myself struggling to create smooth and accurate curves, often resulting in jagged lines and awkward shapes. However, these setbacks only fueled my determination to conquer the Pen Tool once and for all. With each failed attempt, I learned valuable lessons that shaped my understanding of its mechanics and propelled me towards improvement.
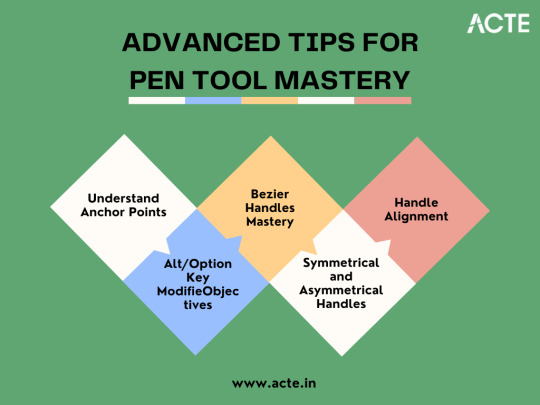
Advanced Tips for Pen Tool Mastery
To truly master the Pen Tool, an understanding of advanced techniques is essential. Let's dive into some of these techniques and explore step-by-step instructions to perfect your path creation skills.
Anchor Point Manipulation
One key technique in leveraging the full potential of the Pen Tool is mastering anchor point manipulation. By strategically placing and adjusting anchor points, you can create precise shapes and curves. Start by selecting the Pen Tool and click on the canvas to create an anchor point. To manipulate the anchor point, use the Direct Selection Tool to select and drag it to the desired position. Practice manipulating anchor points to create clean lines and curves that define your design.
Creating Smooth Curves
Achieving smooth curves is a hallmark of a skilled designer. Thankfully, the Pen Tool offers a solution in the form of Bezier handles. To create a smooth curve, click and drag the Bezier handle attached to an anchor point. The length and direction of the handle determine the shape of the curve. Try out several handle placements to get the curve you like. Remember, practice makes perfect, and refining your control over Bezier handles will greatly enhance your design capabilities.
Mastering the Bezier Handles
Understanding the intricacies of Bezier handles is crucial in mastering the Pen Tool. By mastering the techniques of symmetrical and asymmetrical handle placement, you can manipulate the curvature and direction of your paths. To create symmetrical handles, simply click and drag the handle in a direction that aligns with the angle of the curve. For asymmetrical handles, hold down the Alt/Option key and drag the handle to create a varied curve. Experiment with these techniques and witness the magic of the Pen Tool unfold.
Real-World Applications
Now that we've explored the advanced techniques of the Pen Tool, let's delve into its real-world applications. By mastering the Pen Tool, you can elevate the quality of your design projects across various industries. Whether it's creating intricate logos, designing visually appealing typography, or crafting beautiful illustrations, the Pen Tool will become your trusted ally in bringing your creative vision to life. To showcase its power, here are some before-and-after images that illustrate the transformation achieved through the mastery of the Pen Tool.
Overcoming Challenges
During my own journey to Pen Tool mastery, I encountered numerous challenges that tested my patience and determination. One common obstacle was the struggle to maintain a steady hand while creating paths and curves. To overcome this challenge, it is important to practice regularly and gain muscle memory. Additionally, understanding the principles of anchor point manipulation and Bezier handles will aid in overcoming the initial difficulties. Don't be discouraged by setbacks, for each mistake is an opportunity to learn and grow as a designer.
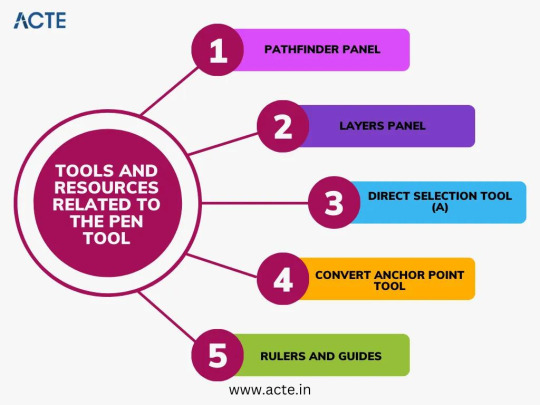
Tools and Resources
To complement your Pen Tool journey, Adobe Illustrator offers a plethora of features and tools that enhance its functionality. Take advantage of the Pathfinder panel to unite, divide, and intersect multiple paths. The Shape Builder Tool enables you to create and merge shapes effortlessly. Furthermore, external resources such as online tutorials and books can provide invaluable insights and guidance. Explore these tools and resources to accelerate your path to Pen Tool perfection.
Personal Insights and Reflections
Throughout my journey to mastering the Pen Tool, I witnessed a remarkable evolution in my skills. The countless hours spent practicing and experimenting culminated in several "aha" moments that fundamentally transformed my understanding of the tool. One breakthrough was the discovery of the delicate balance between precision and artistic expression. The Pen Tool is not merely a mechanical tool for creating paths; it is a gateway to limitless creativity.
Showcasing Your Work
As a testament to the power of the Pen Tool, I would like to showcase some of my own artwork and design projects where I have applied the advanced techniques discussed in this article. By harnessing the full potential of the Pen Tool, I was able to achieve intricate details and flawless curves, elevating the quality of my designs. Witness the transformation and unleash your own creativity with the Pen Tool.
Encouragement for Aspiring Designers
To all aspiring designers who may be struggling with the Pen Tool, I offer words of encouragement. Remember that mastery takes time, practice, and patience. The Pen Tool may seem daunting at first, but with perseverance and continuous learning, you can unlock its full potential. Embrace each challenge as an opportunity to grow, and never lose sight of the passion that drives you. You have the ability to create extraordinary designs – all it takes is a little faith in your own abilities.
In conclusion, my journey to Pen Tool perfection in Adobe Illustrator has been one of personal growth and discovery. From the initial frustrations to the remarkable breakthroughs, I have come to realize the importance of persistence and dedication in advancing my skills. The Pen Tool is a remarkable instrument capable of transforming mere lines into works of art. Embrace this tool, practice its techniques, and unleash your creativity like never before. if you need help with Adobe Illustrator or have questions about its features. These sources include official Adobe Illustrator training programs, discussion boards, and websites like ACTE Institute that provide Adobe Illustrator classes. All of these sources provide helpful advice and insights. Happy designing! Happy designing!
6 notes
·
View notes
Text
Unlock your Magento store’s full potential with EVRIG’s comprehensive audit services. Our expert team evaluates performance, security, and code quality to detect issues and recommend improvements. From identifying bottlenecks to enhancing overall efficiency, we ensure your Magento store runs at its best. Optimize user experience, boost speed, and secure your store with a detailed Magento audit tailored to your business needs. Trust EVRIG for reliable, in-depth analysis and expert solutions.
#magento development company#magento development services#magento security audit#magento performance audit#Magento UI/UX Audit#magento code audit#magento code audit tool#magento 2 code audit tool#magento 2 code audit
0 notes
Text
🎨 Wanna Design Like a Pro? Start with Figma — It’s Free, It’s Fun, It’s 2025.
If you’ve ever looked at a clean app or beautiful website and thought, "How do they even make this?" — you’re not alone. And the answer? Figma.
This free guide walks you through everything you need to start designing with Figma in 2025 — no expensive courses, no gatekeeping. Just a clear, beginner-friendly path to master UI/UX (and maybe even start freelancing 👀).
💡 Dive in: 🔗 How to Master UI/UX Design with Figma in 2025 (Free Step-by-Step Tutorial)
Mockups. Wireframes. Prototypes. This is your creative era. 💻🧠

#UI UX design#Figma tutorial#Learn design free#UX 2025#Design tools for beginners#Web design tips#Product design learning#Free Figma course#Creative tech tools#Digital design skills
0 notes
Text
FREE Step-by-Step Website Audit Checklist
Your website is one of your most valuable digital assets. But as algorithms, user expectations, and technology continue to evolve, regular audits are essential to stay competitive. This 2025 website audit checklist is designed to help you thoroughly evaluate and optimize your website for SEO, security, speed, and user experience. Let’s dive in step-by-step. 1️⃣ Technical SEO Audit ✅ Check for…
#Content Audit#Core Web Vitals#digital marketing#Google Analytics#mobile optimization#On-page SEO#SEO Audit#SEO Tools#site optimization#site speed#Technical SEO#UX audit#web development#website audit 2025#website audit checklist#website checklist#website health check#Website Performance#Website Security#WordPress SEO
0 notes
Text
youtube
Have an awesome app idea but don’t know how to code? No worries! Learn how to bring your concept to life using Figma — the ultimate tool for visually designing app interfaces. Whether you’re a startup founder, product manager, or creative thinker, Figma lets you design interactive screens, create navigation flows, and collaborate with your team in real time. Design smarter, faster, and clearer before development even begins. 👉 Let’s connect on LinkedIn and start building your vision today!
#No-code app design#Figma app prototype#UI/UX design tools#App design without coding#Visual app builder#Figma tutorial#Startup tools#App wireframe#Mobile app design#Collaborative design tools#Youtube
0 notes