#elementor shortcodes
Explore tagged Tumblr posts
Visit Tumblr Blog
Explore Tumblr blogs with no restrictions, modern design and the best experience.
Last Seen Tumblr Blogs


Fun Fact
Tumblr has a low social media market share in South America.
Text

Work Smarter, Not Harder Use Dropbox As WordPress Hosting
Running a WordPress site often means juggling increasing hosting costs as your content grows. Many website owners find themselves paying premium prices for storage space, especially when their sites become media-heavy with images, videos, and documents.
Maximize Efficiency and Minimize Hosting Costs with Our Integrate Dropbox Plugin for WordPress
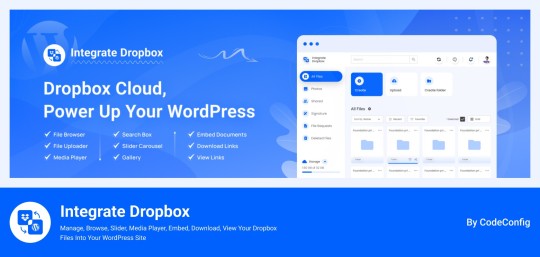
Integrate Dropbox best plugin for WordPress. Our Dropbox integration plugin reimagines how WordPress handles media storage. Instead of relying solely on your hosting server's storage, your media library seamlessly connects with Dropbox's robust infrastructure.
In the digital age, managing media files and optimizing website performance are top priorities for businesses and content creators. The balance between delivering rich media content and maintaining hosting efficiency can be challenging. That’s where Dropbox Integration Plugin comes in, providing a seamless bridge between Dropbox and WordPress to help you streamline file management, save on hosting costs, and enhance your user experience—all without coding hassles.
Why Hosting Optimization Matters
Every media file, video, or high-quality image hosted directly on your WordPress site consumes hosting resources. For companies scaling their content, this can quickly lead to higher hosting costs, slower load times, and potential website downtime. By integrating Dropbox with WordPress, CodeConfig’s plugin allows users to manage, display, and play Dropbox-hosted files directly on their site, significantly reducing the hosting load.
Integrate Dropbox Key Features To Solve Real Problems
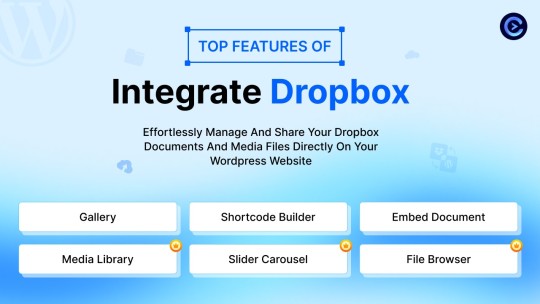
Our plugin is packed with features designed to make Dropbox integration simple, secure, and efficient:
Media Library Integration Directly access Dropbox files from your WordPress Media Library. Upload files, use high-quality images for featured posts, and seamlessly add media to your content without overloading your hosting.
Elementor and Gutenberg Integration Designed to work with popular page builders, our plugin offers 7 customizable blocks for Gutenberg and over 7 Elementor widgets. Effortlessly add Dropbox-hosted media, galleries, sliders, and file browsers to your pages without coding.
WooCommerce Compatibility For e-commerce sites, our plugin provides a unique solution for downloadable products. Upload product files to Dropbox and offer them as downloadable products in WooCommerce. This ensures smooth delivery and saves precious server space.
Dynamic File Browser, Gallery, and Media Player Add Dropbox files as interactive elements, such as galleries or media players, directly into your content. This feature is ideal for course creators and content-heavy websites. Our Slider Carousel and Media Player are customizable to fit your brand’s aesthetic, offering both style and function.
Shortcode Builder and Custom Embeds With our intuitive Shortcode Builder, users can quickly generate and customize modules like media players, sliders, and file browsers. Embed files, set view-only permissions, and create download links—all with simple shortcodes. This means less reliance on heavy plugins and more control over your content display.
Saving Costs Without Sacrificing Quality
Using CodeConfig’s Dropbox Integration Plugin not only reduces hosting expenses but also delivers a faster, more reliable user experience. By offloading storage to Dropbox, your website can handle more traffic and richer content without performance dips.
Our responsive design ensures that these features look great on both desktop and mobile, providing a seamless experience across devices.
Lightning-Fast Media Management
WordPress users can now upload media directly through the familiar WordPress interface while the plugin automatically syncs it to Dropbox. No need to learn new tools or change your workflow - everything happens behind the scenes.
Enhanced Website Performance
By offloading media storage to Dropbox, your WordPress site becomes significantly lighter and faster. Your server resources focus on running core WordPress functions rather than handling heavy media requests.
4 notes
·
View notes
Text
How to Review Assignment Deadlines from Frontend in LearnDash

If you're using LearnDash to run your eLearning platform, keeping track of assignment deadlines is critical—for both learners and instructors. While LearnDash offers robust backend features, many users want to review assignment deadlines directly from the frontend for better visibility and user experience.
Here’s a simple guide to help students and instructors review assignment deadlines from the frontend in LearnDash.
Why Frontend Access to Assignment Deadlines Matters
By default, LearnDash manages assignments through the WordPress dashboard. But let’s be honest—not all students or even instructors are comfortable navigating the backend. Having deadline information available on the course frontend makes the process:
More user-friendly
Transparent
Better for tracking and planning
Less reliant on admin support
Method 1: Use the LearnDash Assignment Feature Wisely
LearnDash allows assignments to be attached to lessons or topics. When you create an assignment, use the lesson description or content area to communicate the deadline clearly.
Steps:
Go to the Lesson or Topic editor.
Add assignment instructions along with the submission deadline in the content editor.
Students will see this when viewing the lesson on the frontend.
While this method doesn’t automate deadline display, it's a quick and effective workaround.
Method 2: Use a Frontend Plugin or Page Builder
To enhance visibility, use a page builder (like Elementor) along with a dynamic content plugin such as:
Advanced Custom Fields (ACF)
WPFront User Role Editor
Uncanny LearnDash Toolkit
With these tools, you can create a custom frontend dashboard for students and instructors that includes:
Assignment titles
Submission status
Deadlines
Download/view links
Bonus: The Uncanny LearnDash Toolkit Pro offers a shortcode to list assignments with custom columns—perfect for displaying deadlines.
Method 3: Use Third-Party Add-Ons
There are LearnDash-compatible plugins like:
BuddyBoss for LearnDash
WISDM Reports for LearnDash
LearnDash Dashboard by Wbcom Designs
These tools offer custom frontend dashboards where students and instructors can view assignment statuses, deadlines, and feedback—all in one place.
With these plugins, you can:
Display assignment due dates on the course page
Show reminders or countdowns
Add filters for pending/completed assignments
Final Thoughts
LearnDash doesn’t show assignment deadlines on the frontend by default, but there are several practical ways to make it happen:
Manually add deadlines to lesson content
Use page builders and shortcodes for dynamic displays
Integrate third-party tools for a complete dashboard view
Making assignment deadlines visible from the frontend improves student accountability, reduces confusion, and streamlines communication.
Looking to customize LearnDash further? Consider hiring a LearnDash expert to set up automated reminders, custom dashboards, or deadline tracking features.
Source URL: http://saffiretech.com/blog/how-to-review-assignment-deadlines-from-front-end
#CourseCreators#TeachOnline#LearnDashTips#OnlineEducation#EdTechTools#DigitalLearning#InstructorTools
0 notes
Text

Boost Trust & Engagement on Your WordPress Site!
Build trust, boost credibility, and enhance user experience on your WordPress website with ZealousWeb Technologies’ powerful plugin — the Smart Showcase for Google Reviews.
Smart Showcase for Google Reviews is a powerful WordPress plugin designed to seamlessly display customer reviews from Google My Business on your website. With a variety of display options, including grids, lists, sliders, badges, and popups, this plugin helps businesses build trust and increase credibility. It offers customization through custom CSS and shortcodes for easy placement on any page. You can filter reviews by rating, keyword, and location, as well as reply to reviews directly from the admin interface.
The plugin supports multilingual websites and complies with GDPR, ensuring a secure and accessible user experience. It integrates effortlessly with popular page builders like Elementor, WPBakery, and Divi, allowing for easy customization. Additionally, it includes advanced features such as admin notifications, review reply forms, and widget designs for sidebars and footers. Whether you want to showcase reviews to improve SEO or add a “Review Us on G” button, Smart Showcase for Google Reviews enhances both the functionality and the appearance of your site.
Why it stands out: ✅ Display reviews by rating, keywords, or location ✅ Customize appearance with shortcodes and custom CSS ✅ Admin reply functionality with email notifications ✅ Multi-language and GDPR-compliant ✅ Includes widgets for footers and sidebars ✅ "Review us on G" button to encourage new reviews
Plus, it keeps all reviews stored in your WordPress database (CPT) and allows you to moderate and manage them easily from the backend. Whether you're a small business or a large enterprise, the Smart Showcase for Google Reviews plugin is your go-to tool for turning satisfied customers into powerful social proof.
Add this plugin to your site today and let your happy clients do the marketing for you!
0 notes
Text
youtube
How to create Contact Us Page in Wordpress Astra theme 2025 ?
Creating a Contact Us page in WordPress using the Astra theme is simple and can be done in multiple ways. Here's a step-by-step guide using both native WordPress tools and the Astra-compatible page builder (Elementor).
✅ Method 1: Create Contact Us Page Using WordPress Block Editor (Gutenberg)
Step 1: Create a New Page
Go to your WordPress dashboard.
Navigate to Pages > Add New.
Title it Contact Us.
Step 2: Add Contact Information
Use blocks like:
Paragraph for address
Heading for section titles
List for phone/email
Google Maps block (or use shortcode/plugin for embedding)
✅ Method 2: Add a Contact Form Using Plugin
Use a form plugin like WPForms (recommended), Contact Form 7, or Forminator.
Step 1: Install WPForms
Go to Plugins > Add New
Search WPForms
Install and activate
Step 2: Create a Form
Go to WPForms > Add New
Choose Simple Contact Form
Customize fields if needed
Click Save
Step 3: Embed the Form
Copy the shortcode of your form (e.g., [wpforms id="123"])
Paste it into the Contact Us page.
✅ Method 3: Use Elementor (if you use Elementor with Astra)
Step 1: Install Elementor
Go to Plugins > Add New
Search for Elementor
Install and activate
Step 2: Edit Contact Us Page with Elementor
Go to Pages > Contact Us > Edit with Elementor
Use drag-and-drop widgets:
Heading (for page title)
Text Editor (for address)
Google Maps widget
Form widget (if using Elementor Pro or integrate WPForms shortcode)
0 notes
Text
Avis ✨ Elementor Pro : La Solution Idéale pour Créer un Site Web ? Mon Avis ! ✨

Aujourd’hui, je vais vous donner mon avis sur Elementor Pro, l’un des constructeurs de sites WordPress les plus populaires. Est-ce la meilleure solution pour votre projet ? Quels sont ses avantages et inconvénients ? Suivez le guide ! 🚀
✅ Les Avantages d’Elementor Pro
1. Facilité d’utilisation 🖱️
Elementor Pro permet de créer un site Web en glisser-déposer, sans aucune connaissance en codage. Son interface est intuitive, ce qui en fait un excellent choix pour les débutants !
2. Des Fonctionnalités Avanc��es 🎨
Avec plus de 100 widgets puissants, Elementor Pro offre tout ce dont vous avez besoin pour personnaliser votre site :
Constructeur de thème
Contenu dynamique
Formulaires personnalisés
Fonctionnalités e-commerce complètes (WooCommerce)
Popups et Mega Menu
3. Optimisation SEO 📈
Un site rapide et bien structuré est essentiel pour le référencement. Elementor Pro optimise automatiquement votre code, ce qui améliore la vitesse et le SEO.
4. Assistance 24/7 🤝
Besoin d’aide ? L’équipe Elementor propose un support client réactif et disponible 24h/24, 7j/7.
❌ Les Inconvénients d’Elementor Pro
1. Prix 💰
Bien qu’Elementor propose une version gratuite, les plans payants commencent à 60€/an pour un seul site, ce qui peut être un frein pour certains.
2. Consommation de ressources 📉
Elementor peut ralentir votre site si vous utilisez trop de widgets et d’effets visuels. Un bon hébergement est recommandé pour compenser cela.
3. Dépendance au Plugin 🔄
Si vous décidez d’arrêter d’utiliser Elementor, migrer vers un autre constructeur peut être compliqué, car vos pages seront codées en shortcodes.
🎯 Mon Verdict : Elementor Pro, Un Bon Investissement ?
Si vous cherchez une solution puissante, intuitive et complète pour créer un site Web professionnel sans coder, Elementor Pro est un excellent choix ! Cependant, assurez-vous que son prix et ses performances correspondent à vos besoins.
👉 Découvrez Elementor Pro ici : Elementor Pro 🔥
0 notes
Text
Build SEO Recommended WordPress Development in Hyderabad
Know the Ultimate Guide to Building Custom WordPress Themes
The world is trending and loving to go with WordPress Development for static, dynamic and eCommerce businesses. WordPress Theme and Plugins are SEO friendly and help in quick rankings in Google and other search engines. These Web Templates are responsive and browser compatibility and supports the customization of web pages as per client business which connects easily to the right audiences.
Being a WordPress Development Company in Hyderabad, we at DigitalGYB Technologies located Hi-tech city has been successfully developing WordPress business websites and continuously upgrading its skills to better serve as per the client needs. With over Decade years of experience in custom WordPress Development Applications, our expert frontend and backend developers have successfully executed and delivered more than 300+ projects from Local to Global Market.
Our In-house WordPress Developers are well-versed with the latest WordPress plugins and theme updates, releases and follow the community updates regularly. Our expert developer’s team always take an agile approach in every project, we work in order to deliver responsive and fully functional WordPress websites. Our graphic designers and developers follow a creative and responsive workflow with all our customised WordPress theme development projects to ensure successful completion of the work on the stipulated time frame and delivered the project in the given time period.

Getting Started with WordPress Development
Introduction to WordPress Development: Overview of WordPress, why it’s a popular choice, and what to expect as a developer.
Setting Up a Local Development Environment: Guide to using tools like Local by Flywheel, XAMPP, or MAMP for local development.
Understanding WordPress Themes and Plugins: Basic introduction to creating custom themes and plugins.
WordPress Themes Development
Building Your First WordPress Theme: Step-by-step tutorial from scratch.
Child Themes: Why and How to Use Them: Best practices for creating and customizing themes safely.
Template Hierarchy in WordPress: Understanding the template structure and how to override templates for custom designs.
Customizing Theme with the WordPress Customizer: How to use the Customizer API for building theme options.
WordPress Plugin Development
Creating a Simple Plugin: How to develop your first plugin from the ground up.
Understanding Hooks (Actions & Filters): How to extend functionality and interact with WordPress core features.
Building Shortcodes: Introduction to creating custom shortcodes for easy content management.
Working with the REST API in WordPress: How to interact with WordPress via the REST API for custom integrations.
Advanced WordPress Development Topics
Custom Post Types and Taxonomies: Create and manage custom post types for unique content types.
Building an E-commerce Website with WooCommerce: Guide on customizing WooCommerce to meet specific business needs.
Building a Multilingual WordPress Site: Using plugins like WPML or Polylang for multilingual content.
WordPress Security Best Practices: Implementing security measures for a robust website.
Optimizing WordPress for Speed: Best practices for improving performance, including caching, image optimization, and script loading strategies.
WordPress Design and User Experience
Creating a Responsive WordPress Site: How to make themes that adapt to all screen sizes.
Best Practices for WordPress Accessibility: Making sure your WordPress site is accessible to all users.
Using Page Builders vs. Custom Themes: Comparison of popular page builders like Elementor, Gutenberg, and traditional theme development.
Performance Optimization and SEO for WordPress
Speeding Up WordPress: Techniques like lazy loading images, using a CDN, and database optimization.
SEO Best Practices for WordPress: How to optimize WordPress for search engines with plugins like Yoast SEO.
Using Structured Data in WordPress: How to implement rich snippets and schema markup to improve SEO.
Troubleshooting and Debugging in WordPress
Common WordPress Errors and Fixes: 404 errors, white screen of death, etc., and how to resolve them.
How to Use Debugging Tools in WordPress: Enabling WP_DEBUG and using logging to track issues.
Fixing WordPress Plugin and Theme Conflicts: How to diagnose and fix compatibility issues.
WordPress Site Maintenance and Updates
Best Practices for WordPress Updates: Keeping themes, plugins, and WordPress core updated safely.
Backup Solutions for WordPress: How to back up your website and avoid data loss.
WordPress Staging Sites: Why You Need One: How to test updates on a staging environment before applying them to live sites.
Advanced WordPress Integrations
Integrating WordPress with External APIs: How to pull data from external sources and display it in WordPress.
Integrating WordPress with CRMs (Customer Relationship Management): Techniques for connecting WordPress to platforms like HubSpot, Salesforce, or Mailchimp.
WordPress Development Tools and Resources
Must-Have Tools for WordPress Developers: Code editors, version control systems (Git), and WordPress-specific plugins.
WordPress Developer Community: Best places to learn and connect with other WordPress developers.
Using Composer in WordPress Development: Introduction to using Composer for dependency management in WordPress projects.

We have expert WordPress development team who can customize the business websites as per client recommendations. DigitalGYB Technologies are experts in developing innovative solutions for clients in a vast variety of industries and verticals. We have world-class development team who undertakes website develop for various businesses verticals in the healthcare, education, travel, hotel & restaurant, supply chain, manufacturing, and real-estate industries who are getting qualified leads, business conversions, and became loyal customers. We also undertake all digital promotions and we are well known Digital Marketing Services Company in Hyderabad, enrol for SEO Services, Social Media Promotions Paid Ads, PPC Services, Creative Content, Graphic and Motion Designs.
0 notes
Text
How to Create a Travel Booking Website with WordPress – A Step-by-Step Guide
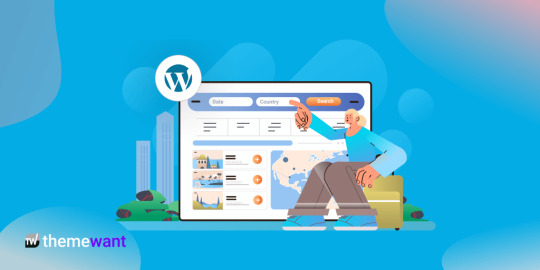
Have you ever dreamed of turning your passion for travel into a thriving online business? With the global travel booking market exceeding $700 billion, there's a huge opportunity to create a travel booking website that helps travelers find their perfect destination. The best part? You don’t need to be a web developer to build one!
WordPress offers a flexible and beginner-friendly platform for launching a professional travel booking website. In this guide, we’ll walk you through every step of the process, from choosing a domain to integrating booking features and optimizing for success.
Step 1: Choose a Domain and Hosting
Before you start building your website, you need a strong foundation:
Domain Name: Pick a catchy, travel-related name like DreamGetaways.com or HotelHavenBookings.com.
Hosting Provider: Choose a reliable WordPress hosting service like Bluehost or SiteGround. Look for plans with SSL certificates to ensure secure transactions and fast performance.
Step 2: Install WordPress
Most hosting providers offer one-click WordPress installation. Once installed, configure the basic settings:
Go to Settings > General to set your site title, tagline, and time zone.
Step 3: Select a Travel Booking WordPress Theme
Your theme determines the design and functionality of your website. Consider using a specialized travel theme like:
Travelfic: A lightweight, customizable theme built for travel and hotel booking websites.
To install your theme:
Go to WordPress Dashboard > Appearance > Themes > Add New
Search for the theme and click Install
Activate the theme to apply it to your website
Step 4: Install Essential Plugins
Plugins add important functionalities to your travel website. Here are some must-have plugins:
Easy Hotel Booking – WordPress Hotel Booking Plugin: Allows users to book hotels, view availability calendars, and make secure payments.
WooCommerce: To handle payments and transactions seamlessly.
Yoast SEO: Helps optimize your site for search engines.
Contact Form 7: For managing customer inquiries easily.
To install plugins:
Navigate to Dashboard > Plugins > Add New
Search for the plugin
Click Install Now, then Activate
Step 5: Configure Booking Features with Easy Hotel Booking Plugin
The Easy Hotel Booking plugin simplifies hotel reservations with features like room management, pricing, and payment integration.
Steps to Set Up:
Install and activate the plugin via Plugins > Add New
Configure room types, pricing, and availability
Enable payment gateways like PayPal or Stripe
Add a booking calendar using the provided shortcode
Step 6: Design Your Website
A visually appealing and easy-to-navigate website is key to attracting travelers. Focus on:
Home Page: Highlight destinations, accommodations, and search functionality.
Booking Pages: Display room details, pricing, and availability.
Mobile Optimization: Ensure your site looks great on all devices.
Use Elementor or other page builders for easy drag-and-drop customization.
Step 7: Add Key Pages
A successful travel website needs essential pages:
About Us: Share your story and build trust.
Accommodations: Showcase available rooms, pricing, and amenities.
Contact Us: Provide a contact form and social media links.
Blog: Publish travel-related content to attract visitors.
Create these pages under Pages > Add New in your WordPress dashboard.
Step 8: Test and Launch
Before making your site live:
Test the full booking process
Verify payment gateway functionality
Check for mobile responsiveness
Once everything runs smoothly, it’s time to launch your travel booking website!
How to Promote Your Travel Booking Website
Creating a travel website is just the beginning. Here’s how to drive traffic and increase bookings:
Optimize for SEO
Research and use travel-related keywords
Write detailed destination guides and travel tips
Implement local SEO strategies to target specific locations
Leverage Social Media
Share stunning travel photos and user experiences
Collaborate with travel influencers for promotions
Use Facebook and Instagram ads to target potential travelers
Run Paid Advertising Campaigns
Use Google Ads to target travelers searching for hotel bookings
Retarget website visitors with special offers
Start a Travel Blog
Content marketing is a powerful way to attract visitors. Write about:
Top travel destinations
Budget travel tips
Seasonal travel guides
Partner with Travel Industry Players
Collaborate with hotels, airlines, and tour operators
Launch an affiliate program to get bloggers and influencers to promote your site
Encourage User Reviews
Collect and showcase testimonials
Offer incentives for customers to leave reviews
Use Email Marketing
Send exclusive travel deals and destination insights
Keep your audience engaged with weekly newsletters
Monitor Performance
Use Google Analytics and SEMrush to track website traffic, conversions, and user behavior. Optimize your strategies based on insights.
Conclusion
Building a travel booking website with WordPress is easier than ever. By choosing the right domain, installing essential plugins, and optimizing your site for search engines, you can create a platform that attracts travelers and drives bookings.
Whether you’re starting a hotel business, a travel agency, or an online booking service, WordPress provides the perfect tools to help you succeed. So, take action today and turn your travel business dream into reality!
🚀 Ready to launch your travel website? Let’s get started!
0 notes
Text
Eduma Theme v5.5.7 – Education WordPress Theme
https://themesfores.com/product/eduma-theme-education-wordpress-theme/ Eduma Theme – Education WordPress Theme v5.5.7 Education WordPress Theme – Eduma is made for Education Websites, LMS, Training Centers, Course hubs, colleges, academies, Universities, Schools, Kindergartens, etc. Features: Drag & Drop Course Builder Selling courses with or without WooCommerce Compatible with WordPress 6.0. Compatible with Elementor. Mobile-Friendly WordPress Education Theme GDPR Ready. 26+ Demos and more Sorting Choice Question Type. Content Drip. myCRED Integration. Random Quiz. Co-instructors. Paid Membership Pro Integration. bbPress Forum Integration. BuddyPress Integration. WooCommerce Integration. Stripe Integration. Authorize.Net Integration. 2Checkout Integration. Certificate. Collections. Gradebook. With 20+ different and unique demo homepages, this education WordPress theme gives you options to build your own, one-off site. More demos will be coming soon, for every educational purposes, including: Courses Learning Hub, Training Center, Languages School, University, College, School, Kindergarten Whats New On Eduma Theme (Changelog) Fixed: js in file custom-script-v2.js Fixed: some minor bugs Fixed: shortcode Thim: Counters Box not working in version 4.5.5 Fixed: style button add to cart of add-on LearnPress – WooCommerce Payment Methods Integration version 4.0.3 Fixed: button View all of shortcode Thim: List Posts with style 02 not work Fixed: show duplicator curriculum with demo new edu Version 5.1.0 – 20-Sep-2022 BUG FIXES Fixed video vimeo of widget portfolio not show Update out of date file WooCommerce Fixed: some minor bugs CSS Please note that any digital products presented on the themesfores website do not contain malicious code, viruses, or advertising. https://themesfores.com/product/eduma-theme-education-wordpress-theme/ #EducationTheme #WordpressTheme
0 notes
Text
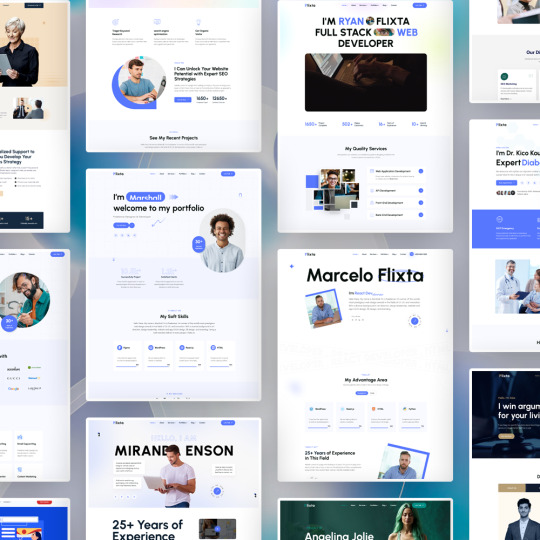
Flixta is a Modern Responsive Personal Portfolio WordPress theme. This theme is specifically designed to showcase personal portfolios such as Web Designers, Graphic Designers, Photographers, Gym Trainers, Yoga Instructors, Freelancers, UX designers, Web developers, Media agencies, Small businesses and creatives, etc. This theme was built with 04+ Pre-made Demo Homepages (02 Multipages + 02 Onepages) and more innerpages.
The stunning and distinctive design of the Flixta theme is ideal for your online presence. It has been tested on all popular handheld devices and has a responsive design. This theme includes all the features you need for your online presence, including team pages, blogs, projects, and testimonials. Flixta is a fantastic option for your web presence.
Flixta is a simple and minimalist WordPress theme for personal portfolios and CVs. You can showcase your knowledge, service, skilled staff, and details to your esteemed clientele with this elegant and simple theme. This theme is designed to help you advertise your company and attract more customers in your field.
With the help of this highly configurable WordPress theme, you can easily create a distinctive and elegant factory website without knowing any code. Anyone can create their website with this theme—no coding experience is necessary. From these settings, anyone can alter the colors of the website and other configurations.
Installing demo data only requires one click. If there are any problems during installation, our trustworthy support staff is always available to help.
This WordPress theme for personal portfolio is highly customizable and very easy to set up. This WordPress theme is completely responsive and optimized for retina displays on a wide range of devices, including tablets, smartphones, and PCs. Consequently, your website will look fantastic at any screen resolution.
The theme options panel that comes with the Flixta – Personal Portfolio WordPress Theme enables you to customize the appearance and feel of the website. It provides an infinite number of color choices so you can select the color scheme that works best for your website. It is a WordPress theme with a clean code base that loads quickly and is optimized for search engines.
Beautiful homepage layouts with slider images, parallax-enabled sections, an engineers team, the most recent news, testimonials, and a photo gallery are all included in this portfolio and CV template. It has specific pages for contacts, blogs, and engineer profiles.
For simple customization, this WordPress theme includes an abundance of widgets, page templates, shortcodes, and limitless color choices. We also used Elementor, the best WordPress page builder in the world. A live page builder with no design restrictions is long overdue. a page builder that offers WordPress users cutting-edge features and exquisite page designs never seen before.
#Flixta#PersonalPortfolio#WordPressTheme#TimeToShine#ShowcaseYourTalent#OnlinePortfolio#CreativeDesign#WebDeveloper#FreelancerLife#BuildYourBrand#DigitalAgency#PortfolioWebsite#OnlineResume#PortfolioDesign#WebDesigners#CreativeProfessionals#DreamJob#OnlineShowcase#PersonalBrand#VisualPortfolio#OnlinePresence
0 notes
Text
How to Set Up a Restaurant Menu on Your WordPress Website

Enhancing your restaurant’s online presence with a digital menu can attract more customers and provide a seamless experience. Here’s how to add a restaurant menu in WordPress using the Best WordPress restaurant menu plugin.
Step 1: Choose the Right WordPress Restaurant Menu Plugin
Selecting a reliable plugin is the first step. Here are some top best WordPress restaurant menu plugins:
Five Star Restaurant Menu plugin: User-friendly with versatile features.
Restaurant Menu by PriceListo: Offers highly customizable templates.
Elementor restaurant menu: Ideal for Elementor users.
Step 2: Install and Activate Your Chosen Plugin
Follow these steps to install the plugin:
Access your WordPress dashboard.
Navigate to Plugins > Add New.
Search for the plugin you want to install (e.g., Five Star Restaurant Menu plugin).
Click Install Now, then Activate.
Step 3: Create Your Restaurant Menu
Once the plugin is activated, start adding your menu items:
Go to the plugin’s settings page.
Click on Add New Menu.
Enter details for each menu item, such as names, descriptions, and prices. Adding images can make your menu more attractive.
Step 4: Customize Your Menu Design
Adjust the appearance to fit your website’s style:
Use the plugin’s customization options to modify the layout, fonts, and colors.
Ensure the menu is easy to read and visually appealing.
Step 5: Display Your Menu on Your Website
To showcase your menu on your site, insert it into a page:
Create a new page or edit an existing one.
Add a new block and select the plugin’s block (e.g., Five Star Restaurant Menu).
Insert the shortcode or block, and your menu will appear on the page.
Additional Tips and Resources
For further features and customization, explore additional resources. Consider the Best WordPress restaurant menu plugin free download options or specific themes like the Restaurant Menu WordPress Theme.
By following these steps and utilizing the recommended plugins, you can create an engaging and functional menu that enhances your restaurant’s online presence. This guide ensures a smooth setup process, helping you get your restaurant menu live quickly.
0 notes
Text


🤯Start your 7-day free trial of Integrate Dropbox today! wordpress.org/plugins/integrate-dropbox
🚀 Attention WordPress users! Revolutionize your media management with the ultimate Dropbox integration plugin! 📂💻
Key features of Integrate Dropbox🔥🤯
1️⃣ Seamless Media Library Integration
2️⃣ Elementor Widgets for easy design
3️⃣ Full support for Classic & Block/Gutenberg Editor
4️⃣ Create & Upload folders/files (syncs with Dropbox)
5️⃣ Intuitive Shortcode Builder
6️⃣ WooCommerce support for downloadable products
7️⃣ Stunning Slider Carousel for showcasing media
8️⃣ Convenient File Browser
9️⃣ Beautiful Gallery display options
🔟 Built-in Media Player
Extra perks:
Embed, Download & View Links
Powerful Search for Files and Folders
MasterStudy LMS compatibility
Say goodbye to hosting space worries and hello to effortless media management! 💪
3 notes
·
View notes
Text
Top 5 WooCommerce Auction Plugins for Enhanced Bidding Experiences

In the competitive e-commerce landscape, keeping customers engaged requires more than just simple product pages. To truly stand out and build loyalty, your store needs to offer something more exciting.
That's where auctions come in. They bring competition and thrill to the shopping experience. WooCommerce auction plugins transform standard product listings into interactive bidding events, making your store more engaging and driving sales. Let's explore how these plugins can turn your store into a dynamic auction hub.
What Are WooCommerce Auction Plugins?
WooCommerce auction plugins allow store owners to host auctions directly on their WooCommerce sites. Instead of selling products at fixed prices, you can create dynamic auction listings. These plugins typically include features like auto-bidding, soft-close to prevent last-minute bids, reserve prices, and bid alerts, making online auctions just as thrilling as their real-life counterparts.
5 Best WooCommerce Auction Plugins for Your Store
Now, let's explore the top WooCommerce auction plugins that offer everything you need to boost engagement and maximize auction returns, tailored to meet your store's specific needs.
1. YITH WooCommerce Auctions
YITH WooCommerce Auctions is a leading plugin for running auctions in your online store, offering a similar experience to eBay where customers can bid on unique or special items, creating excitement and competition.
The plugin supports various auction formats, including standard, sealed bids, and Dutch auctions. It allows you to set starting prices, reserve prices, and even a “buy now” option. With features like modern countdowns and real-time notifications, it provides an excellent experience for both sellers and buyers. Easy to set up and seamlessly integrating with your store, YITH WooCommerce Auctions is a top choice for creating a profitable auction system.
2. WC Vendors
WC Vendors
WC Vendors is an excellent choice for building a multi-vendor marketplace on WooCommerce, suitable for physical products like Etsy, digital downloads like Envato, or services like TripAdvisor. It handles everything from vendor registration to payment processing.
What sets WC Vendors apart is its flexibility and ease of use, making it ideal for various types of marketplaces. Add-ons like WC Vendors Pro and Stripe Connect help marketplace owners manage vendor payments and generate ongoing income streams. WooCommerce plugin developers can also extend its functionality by adding new features and optimizing performance for an even better marketplace experience.
3. Ultimate Auction Pro
Ultimate Auction Pro is one of the top WooCommerce auction plugins, providing store owners with the tools to set up efficient auction systems for both physical and digital products. It supports over 100 payment gateways, enabling seamless global transactions, and includes a robust notification system.
With features like auto-relisting auctions, bid deletion, and a watchlist, the plugin enhances the user experience while giving administrators greater control. It also offers customizable email notifications, shortcodes, and widgets for added flexibility, making it a powerful choice for WooCommerce auction sites.
4. WooCommerce Auctions
WPGenie’s WooCommerce Auctions plugin provides a flexible and user-friendly solution for creating professional auction websites with WordPress and WooCommerce. It supports various auction styles, including standard, proxy, sealed, reverse, and penny auctions, and integrates seamlessly with WooCommerce stores.
The plugin also supports multi-vendor setups with plugins like Dokan. Additional features like email notifications, widgets, shortcodes, and Elementor compatibility make it easy to manage and customize auctions. Whether you're auctioning virtual products, physical goods, or downloads, WPGenie WooCommerce Auctions offers a comprehensive and advanced solution for your auction needs.
Conclusion
WooCommerce auction plugins can add a fresh and exciting element to your online store. They create a competitive and engaging shopping experience that keeps customers involved and can increase your sales. With features like preventing last-minute bids and adjusting bid amounts, these plugins offer a dynamic shopping environment. They also integrate seamlessly with popular payment methods.
Auctions present new opportunities to spark customer interest, differentiate your store, and boost your sales. The right WooCommerce auction plugin can transform your store into a lively auction hub, providing customers with an exciting new way to shop. Explore the options we've discussed, choose the one that best suits your needs, and elevate your WooCommerce store today!
#TopWooCommerceAuctionPlugins#EnhancedBidding#WooCommerceAuctions#AuctionExperience#WooCommercePlugins#OnlineAuctions#BiddingFun
0 notes
Text
Building a Strong Online Presence with the Gym WordPress Theme

In today's competitive fitness industry, having an online presence is no longer optional—it's essential. For gym owners and personal trainers looking to distinguish themselves, the Gym WordPress Theme provides an exceptional solution. This user-friendly theme is designed to help you create a compelling website that showcases your services and attracts more clients without requiring advanced coding skills.
User-Friendly Design
The Gym WordPress Theme is perfect for users with any level of technical expertise. Even those with little to no coding knowledge can easily design their website by following the comprehensive documentation provided. Additionally, free installation support ensures that you can get your site up and running smoothly.
Customizable Elements
One of the standout features of the Gym WordPress Theme is its high level of customization. You can tweak various elements such as colors, layouts, and more to align with your brand identity and keep pace with changing market conditions. The theme's interface is built to adapt, ensuring your website remains fresh and relevant.
Extensive Plugin Compatibility
The Gym WordPress Theme is compatible with popular page builder plugins like Gutenberg, Elementor, Divi, Visual Composer, Beaver Builder, and Live Composer. This flexibility allows you to create stunning page layouts with ease. Furthermore, the theme adheres to WordPress codex theme review standards, ensuring high-quality coding practices.
Cross-Browser and Device Compatibility
Your gym website will be accessible on both old and new browsers, thanks to the theme's flat and material design approach. It has been tested across various browsers, including Chrome, Safari, and Opera, ensuring a seamless experience for all users. Additionally, the theme is responsive and compatible with all devices, providing an optimal viewing experience on smartphones, tablets, and desktops.
Enhanced Loading Speed
Website loading speed is crucial for maintaining visitor interest and boosting traffic. The Gym WordPress Theme supports cache plugins to enhance your site's loading speed, making it faster and more efficient.
Engaging Blog and Media Integration
The theme includes a blog section designed to keep visitors engaged with your content for longer durations. You can choose from four different layout variations to create an elegant blog section. Additionally, the theme supports a mix of images, videos, and banners to present your content in an alluring and aesthetic format.
Multilingual and High-Resolution Ready
The Gym WordPress Theme supports various RTL languages like Hebrew and Arabic, making it versatile for global use. It is also high-resolution ready, ensuring your website looks sharp and professional on all devices.
Security and SEO
Security is paramount, and this theme supports various security plugins to protect your website from malicious attacks and hackers. Moreover, it is SEO and social media-friendly, helping you to enhance your online visibility and reach a broader audience.
Additional Features
Full color-changing options with a color picker
Over 580 social icons and other icons available
A dedicated bio area to showcase your gym trainers
Theme options for various buttons, info boxes, and accordions
Multilingual support with qTranslate X compatibility
PO file for easy translation into other languages
Over 600 Google fonts to choose from
Shortcodes plugin compatibility for better content setup
WooCommerce compatibility for setting up an online shop
Contact form and Google Map integration
Gallery area for displaying images of your gym
Widgetized sidebar, footer, and header
HTML5 & CSS3 coding standards
Conclusion
The Gym WordPress Theme is an ideal choice for gym owners and personal trainers aiming to build a strong online presence. Its comprehensive features and user-friendly design make it easy to create an attractive and functional website that stands out in the competitive fitness industry. Start building your fitness website today with the Gym WordPress Theme and make a lasting impact in the fitness world.
By leveraging the Gym WordPress Theme, you can effectively showcase your training services, attract more clients, and maintain a competitive edge. Don't miss out on the opportunity to enhance your online presence—take the first step towards building your compelling fitness website now.
#BestWordPressThemes#BestPaidWordPressThemes#TopWordPressWebsitesinIndia#PurchaseWordPressTemplates#BestWordPressThemesToBuy#PremiumWordPresstemplates#BuyResponsiveWordPressTheme#WordPressThemes#BuyWordPressThemes#PurchaseWordPressThemes#DownloadWordPressThemes#WordPressThemesIndia#IndianWordPressThemes
0 notes
Text
Top 5 WordPress Page Builders to Design Your Website – Infographic
Choosing the right page builder can transform your WordPress website design experience, making it easier, faster, and more customised.
With countless options available, we’ve narrowed down the top 5 WordPress page builders that offer unique features, from drag-and-drop editors to advanced customisation tools.

Whether you’re a beginner or an experienced web developer, these builders provide a range of capabilities suited for any design project.
Dive in to find the perfect tool to bring your vision to life!

1. Elementor Pro
Features:
Drag-and-Drop Editor: No coding required, making website creation fast and easy.
Theme Builder: Design custom headers, footers, and page layouts with full control.
WooCommerce Integration: Easily build custom product pages and shop layouts.
Advanced Widgets: Access 50+ widgets for professional features like forms, sliders, and more.
Popup Builder: Create high-converting popups for lead generation or promotions.
Why Choose It? Elementor Pro combines ease of use with powerful design options, making it perfect for beginners and professional WordPress web designers alike.
2. Divi

Divi
Features:
Visual Drag-and-Drop Editor: See your changes in real-time with Divi’s intuitive interface.
Premade Layouts: Access 800+ pre-designed templates to jumpstart your website design.
Custom CSS Control: For advanced users, add custom CSS directly to individual elements.
Responsive Editing: Easily tweak your designs for mobile, tablet, and desktop views.
Split Testing: Built-in A/B testing tools to optimise conversions and design choices.
Why Choose It? Divi is known for its flexibility and vast library of templates, making it ideal for any WordPress web design project.
3. Visual Composer
Features:
Frontend and Backend Editor: Build pages visually from the front or backend of your website.
Element Hub: Access hundreds of content elements, templates, and integrations through Visual Composer Hub.
Custom Layouts: Create custom layouts, including headers, footers, and sidebars.
SEO-Friendly: Built-in optimisation for faster page loading and better search engine ranking.
Flexibility: Works with any WordPress theme, offering total design freedom.
Why Choose It? Visual Composer is a versatile tool, offering both frontend and backend editing for web developers and casual users.
4. WPBakery Page Builder
Features:
Intuitive Drag-and-Drop Editor: Easily create responsive pages without coding knowledge.
Content Elements: Access 50+ predefined content elements like text blocks, buttons, and image galleries.
Template Library: Pre-made templates available for quick page creation and customisation.
Custom Shortcodes: Add extra functionality and control with shortcodes for developers.
Compatibility: Works with most themes and integrates well with popular WordPress plugins.
Why Choose It? WPBakery is a long-standing and trusted page builder, known for its simplicity and compatibility with a wide range of themes.
5. Oxygen
Features:
Lightweight and Fast: Oxygen is designed for performance, creating clean code that results in faster load times.
Advanced Builder: Offers granular control over design elements, including headers, footers, and even WooCommerce pages.
Custom Breakpoints: Easily create custom breakpoints for responsive design on any device.
Developer-Friendly: Built with developers in mind, Oxygen allows you to add custom code and CSS effortlessly.
No Theme Required: Oxygen replaces the need for a theme, giving you complete design freedom.
Why Choose It? Oxygen is perfect for web designers and users who need more control over site performance and custom coding.
Conclusion:
Whether you’re looking for ease of use, advanced customisation, or performance optimisation, these 5 WordPress page builders offer something for everyone.
Choose the one that best fits your design needs and technical skills.
#Top 5 WordPress Page Builders#WordPress Page Builders#Design Your Website#dcpwebdesigners#dcpweb#webdesign#wordpress#webdeveloper#wordpresswebdesign#webdesigners#webdevelopment
1 note
·
View note
Text
youtube
How to Cutomize Home Page in Astra Theme 2025 ?
Customizing the home page in the Astra theme (2025 version) involves using a variety of tools that Astra offers, including the WordPress Customizer, Elementor (if you're using it), or the Block Editor. Here’s a step-by-step guide to help you customize the home page:
1. Access the WordPress Customizer:
Go to Dashboard > Appearance > Customize.
This will open the WordPress Customizer where you can make changes to your home page layout, colors, typography, and more.
2. Change the Homepage Settings:
Set a Static Front Page:
In the Customizer, go to Settings > Reading.
Under the “Your homepage displays” section, select A static page.
Choose a page you want to set as the homepage (either an existing page or create a new one).
Save the changes.
If You Want a Blog as Homepage:
In the same Reading section, select Your latest posts instead of a static page if you prefer the blog-style homepage.
3. Customize the Layout:
Go to the Astra Theme Customizer (or Astra Options if your version has it).
Navigate to Layout > Header to modify the header (logo, menu, etc.).
You can also modify the Layout > Footer to adjust footer settings.
Astra gives you flexible options to change the layout for both header and footer, including width, margins, and content.
4. Edit the Content of the Home Page:
If you created a static page for the homepage, you can edit it by going to Pages > All Pages and then clicking Edit on your homepage.
If you're using Elementor or another page builder, you can edit your home page using the drag-and-drop interface. Astra integrates seamlessly with Elementor to create a more visually dynamic homepage.
Just click on Edit with Elementor when editing the page.
5. Customize Sections on the Homepage:
For a more advanced customization, you can edit and add content sections like:
Hero section (big intro section at the top of your homepage)
Call-to-action buttons
Image galleries or sliders
Testimonials
These sections are typically added either through the block editor or Elementor widgets.
For example, in Elementor:
You can add sections by clicking the + sign and choosing from a range of premade templates or designing your own.
6. Typography, Colors & Buttons:
In the WordPress Customizer, go to the Typography and Colors sections to modify your site's text, heading fonts, button styles, link colors, and more. This allows you to match your brand’s color scheme and typography style.
Astra also offers settings like Global Colors and Typography that affect the entire website.
7. Widgets and Sidebars:
If you want widgets (such as recent posts, social icons, or search bars), go to Appearance > Widgets.
You can add widgets to any sidebar or widgetized area that appears on your homepage.
8. Use Astra Hooks (For Developers):
If you want to place custom code or content in specific areas, Astra provides hooks that allow you to add content at strategic points of the page (e.g., before or after the header, or before the footer).
You can use Astra's hooks with custom HTML, shortcodes, or widgets.
9. Preview and Publish:
After making all the changes, you can preview them in real-time.
Once satisfied, click Publish to save your customizations.
10. Advanced Customization (Custom Code):
If you want to further customize your homepage (CSS, HTML, or JavaScript), you can use:
Customizer > Additional CSS to add custom styles.
Theme Editor (under Appearance > Theme Editor) to directly modify theme files (note: only do this if you're comfortable with coding).
0 notes
Text
Difference Between Astra Theme and BeTheme
Introduction
When creating a website, one of the first decisions you need to make is choosing the right theme. Two popular themes that many people use are Astra and BeTheme. In this blog, we will explore the differences between these two themes to help you decide which one might be the best fit for your website.
What is a Theme?
Before we dive into the details, let’s understand what a theme is. A theme is like the clothes for your website. It decides how your website looks and feels. Different themes can make your website look elegant, fun, professional, or creative. Now, let's look at Astra and BeTheme and see what makes each one special.
Astra Theme
Overview
Astra is a lightweight and fast theme. It is designed to be simple and easy to use. Many people like Astra because it makes their websites load quickly. A fast website is important because it makes visitors happy and helps your site rank higher on search engines like Google.

Features
Speed: Astra is known for being very fast. It does not have a lot of extra features that can slow your website down.
Customization: Even though Astra is simple, you can still change many things to make your website look just how you want. You can change colors, fonts, and layouts easily.
Page Builder Friendly: Astra works well with popular page builders like Elementor, Beaver Builder, and others. These tools let you drag and drop elements to create your website without needing to know any coding.
Pre-made Templates: Astra offers many pre-made website templates. You can choose one you like and then change it to fit your needs. This makes creating a website much faster.
WooCommerce Support: If you want to create an online store, Astra supports WooCommerce. WooCommerce is a plugin that helps you sell products online.
SEO Friendly: Astra is designed to be good for SEO (Search Engine Optimization). This means it helps your website show up in search engine results.
Pros and Cons
Pros:
Very fast and lightweight
Easy to use and customize
Works well with page builders
Lots of pre-made templates
Good for SEO
Cons:
Might be too simple for very complex websites
Some advanced features require the pro version
BeTheme
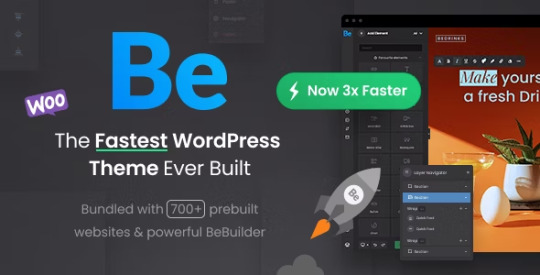
Overview
BeTheme is a more feature-rich theme. It comes with many tools and options, making it suitable for almost any kind of website. If you like having lots of choices and don’t mind a bit of complexity, BeTheme might be a good option for you.
Features
Design Options: BeTheme offers over 600 pre-made website designs. This means you can find a design for almost any type of website you want to create.
Customization: BeTheme has a powerful customization tool. You can change almost every aspect of your website’s design. This includes layouts, colors, fonts, and more.
Built-in Features: BeTheme comes with many built-in features like sliders, menus, and forms. You don’t need to add extra plugins for these features, which can make your website faster and easier to manage.
Shortcodes: Shortcodes are little pieces of code that let you add different elements to your website easily. BeTheme has many shortcodes for things like buttons, columns, and galleries.
Responsive Design: BeTheme makes sure your website looks good on all devices, whether it's a computer, tablet, or smartphone.
SEO Friendly: Like Astra, BeTheme is also designed to be good for SEO.
Pros and Cons
Pros:
Lots of design options and pre-made templates
Powerful customization tools
Many built-in features
Good for complex websites
SEO friendly
Cons:
Can be overwhelming due to many options
Might be slower than lightweight themes
More complex, which means a steeper learning curve
Detailed Comparison
Speed
Astra: Known for its speed and lightweight nature. It doesn’t have many built-in features that can slow it down.
BeTheme: While still fast, BeTheme has more built-in features and options, which can make it a bit slower than Astra.
Ease of Use
Astra: Very easy to use, especially for beginners. Its simplicity makes it a great choice for those who are new to website building.
BeTheme: Offers more options and features, which can be overwhelming for beginners. It might take more time to learn how to use all its features.
Customization
Astra: Allows for a good amount of customization, but it keeps things simple. If you need more advanced customization, you might need to get the pro version.
BeTheme: Extremely customizable with a powerful tool to change almost every aspect of your website. Great for those who want complete control over their website’s design.
Pre-made Templates
Astra: Offers a variety of pre-made templates that are easy to use and customize.
BeTheme: Provides over 600 pre-made designs, covering almost any type of website you can think of.
Built-in Features
Astra: Keeps built-in features to a minimum to maintain speed and simplicity.
BeTheme: Comes with many built-in features like sliders, forms, and shortcodes, reducing the need for additional plugins.
WooCommerce Support
Astra: Fully supports WooCommerce and is a great choice for creating online stores.
BeTheme: Also supports WooCommerce and provides many design options for online stores.
SEO
Astra: Designed to be SEO friendly, helping your website rank well on search engines.
BeTheme: Also SEO friendly, with features that help improve your website’s visibility on search engines.
Which One Should You Choose?
Choosing between Astra and BeTheme depends on your needs and preferences:
If you want a fast, lightweight, and easy-to-use theme, Astra is a great choice. It’s perfect for beginners and those who want a simple website without too many bells and whistles.
If you need a highly customizable theme with many design options and built-in features, BeTheme is the way to go. It’s ideal for those who don’t mind spending extra time learning how to use all its features and want complete control over their website’s design.
Conclusion
Both Astra and BeTheme are excellent themes with their own strengths and weaknesses. Astra is great for simplicity and speed, while BeTheme offers more customization and built-in features. Consider what’s most important for your website and choose the theme that best fits your needs.
Remember, you can’t go wrong with either theme. They both have large communities and plenty of support available, so you can get help if you need it. Happy website building!
Want to read more about WordPress Themes and Plugins, Click Here
0 notes