#freehanding pen is the best
Text
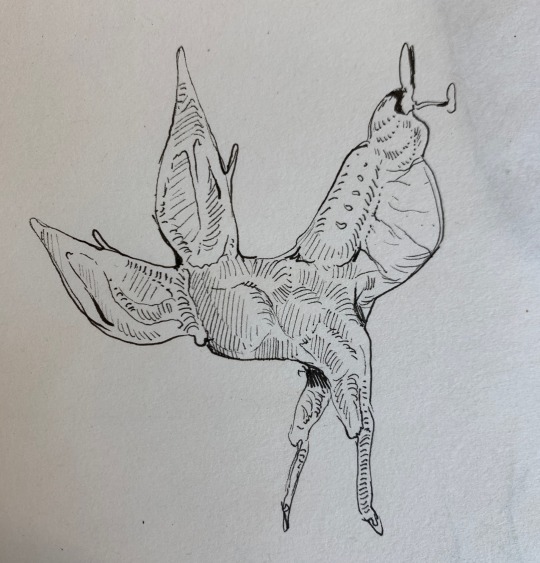

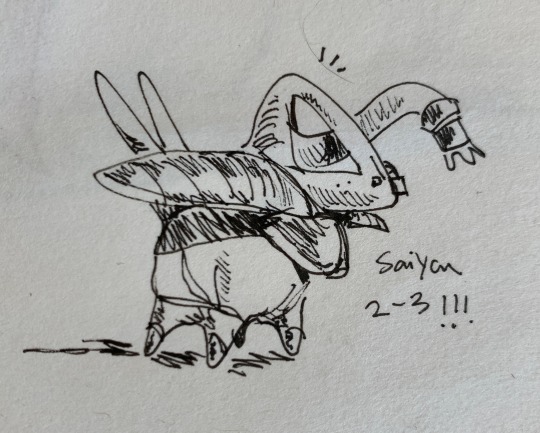

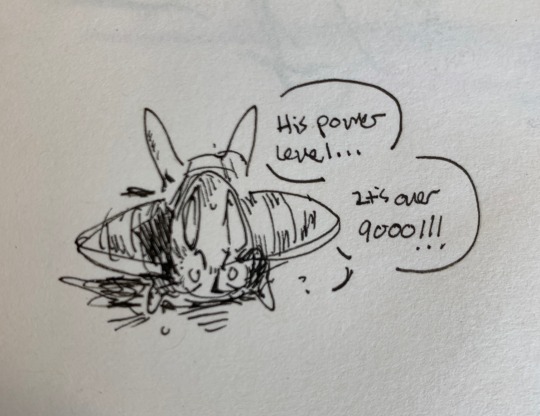
Ink funnies
#I miss you microns#freehanding pen is the best#sketch#art#my art#creature#crescents#dragon ball#dbz#haha yes#cathchicken
28 notes
·
View notes
Text
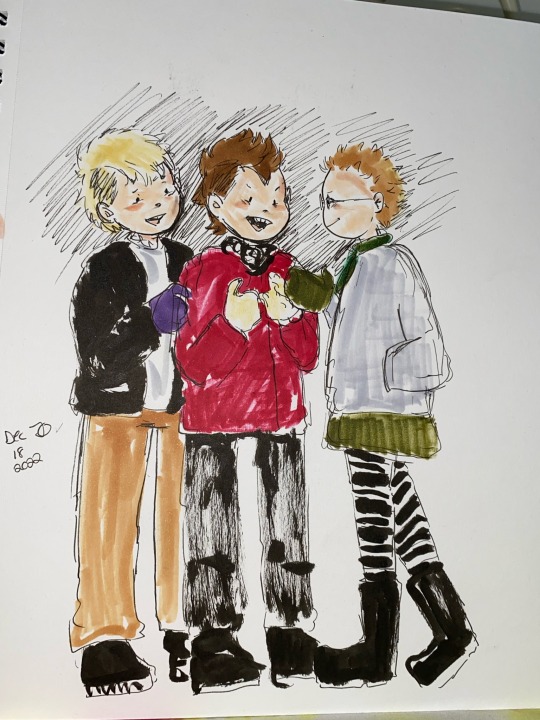
i can’t sleep so here’s a messy drawing of the main trio from one of my favorite movies :-)
#vi är bäst!#we are the best#sketchbook#late night drawing#i watched this movie when it got released with english subtitles#and it’s remained a favorite of mine since#it’s so late and this is so sloppy lol#complete freehand with pen and marker
11 notes
·
View notes
Text
⪼ 10.01 KINKTOBER DAY 1, MIGUEL O'HARA X FEM READER
power play, dumbification, unintentionally slutty reader, dubcon
click link for kinktober mlist c: not proofread!!!

miguel hated you for some reason unknown to anybody. every time you even walked pass him he would shoot you a glare.
maybe because he was against jessicas idea to bring you into hq and have you become part of the spider society.. or maybe it was because the first mission you had you fucked it up. hard.
nobody really knows. but it's probably because of the way you prance around in your skimpy spider suit, acting oblivious to the wide eyes and open jaws as you passed by the other spiders. probably because of the way you add a bit more sway to your hips as you walk past o'hara.
clearly you were teasing him on purpose. so you can't blame him when he gets fed up with your antics, blasting over the speakers that they needed to find you stat.
barely a minute later you were shoved into his office by another spider, a confused expression on your face as you stared up at him with those same doe eyes you always look at him with— those same doe eyes that make his dick throb.
"i know you're doing it on purpose." he says, eyes narrowed as he tapped his foot. he watched your face contort into an even more lost expression, your lashes fluttering each time you blinked.
"i don't know what you mean, boss." you said innocently. there you go again, putting up that same ol' innocent act. his eyebrows furrowed together, a scowl on his face.
"don't act oblivious, y/n," he spat, taking a step closer and closing the distance— now you had to crane your neck up to look at him. "walking around and swaying your hips like some.. some slut."
you were taken aback. how could miguel possibly think that about you? you've been on your best behavior, never referring to him as anything less than boss or sir. you were quick to bite back, scoffing and cursing him out.
you both bickered back and forth, an angry expression etched onto both of your faces. yet the way he glared down at you— calling you all of these degrading names somehow sparked an unfamiliar feeling in your core; hidden deep beneath the humiliation you felt.
halfway through scolding him for being a 'perverted asshole', you blinked and he had you wrenched over his shoulder, a look of confusion on your face and a look of pride on his.
"put me down, miguel!" you demanded like a child stubbornly pleading for candy; thrashing and scratching at his back until he placed you on his desk. pens and documents scattered and tipped off the table, cluttering on the floor as miguel glared down at you.
"alguien tiene que enseñarte una lección puta." he mumbled beneath his breath, shaking his head. his hand snaked up your thigh as he watched your expression contort from anger to arousal, blush creeping onto your face as he squeezed the fat of your thighs.
you muttered his name quietly. a triumphant smirk formed on miguel's face, his fangs poking out from his lips. he took your wrists between his large hand and pinned them above your head.
his freehand trailed down your body, exploring it and making sure every curve and contour was engraved into his brain. talons extending simply for the purpose to rip your spidersuit to shreds.
you complained and whined about how that was your only one. "this is what you wanted it, isn't it?" he shushed you with a claw up to your neck, eyeing you hungrily like a wolf and it's prey.
you yelped when he flipped you onto your stomach harshly, your lacy panties and the clasp of your bra on display for him. his hand ran up the curve of your back before getting rid of your bra, tossing it to the side.
he pressed his bulge against your clothed, sopping pussy, grinding slightly as he leaned down to leave kisses and bites on your neck.
you grinded your hips against his only to be stopped harshly by calloused hands. you turned around and began to complain until he shushed you. "beg, mi vida." he demanded, leaving no room for refusal.
"w- wha?.." you stuttered, cheeks lit up with humiliation and lust. you immediately shook your head, the thought sending shivers of embarassment down your spine.
he tch'd, before ripping off your panties in one swift motion. his nanotech suit slowly dissipated away; leaving him only in his boxers. and good lord, he was fucking fit, chiseled abs and veins running along his arms.
but the thing that really caught your eye was the tuft of brown hair peeking out of the waistband and the large bulge.
he made you turn your head around, not facing him. you felt a heavy weight on your cunt, his tip prodding at your entrance. there was no foreplay except for the fact that you were soaking wet, "w- wait. miguel—"
he was ramming into you before you could even finish your sentence, broken and choked out moans being punched out of you with each thrust.
you revelled in pleasure and a sting of pain as you adjusted to his size. "fu.. fuck! miguel, s- ah! slow down-" you managed to let out in between whimpers, eyes rolling back as the sound of his hips slapping against yours filled the room yet his pace didnt falter.
the way his balls slapped against your clit with each thrust was fucking divine, making you grip the edges of the table as he fucked you raw.
groans from him and moans from you echoed off the walls, the smell of sex filling your senses, "m- miguel.. s' too hard~.." you complained, biting your lip.
but the second his tip thrusted into that spot that made your mind go numb you forgot whatever you were begging for; all logical thoughts blocked out by pleasure as you gripped anything for purchase; trying to prevent the loud moan that eventually escaped and bounced off the walls, clenching around him tightly and making him groan.
"c- calláte.. making too much fucking noise." he grunted out, wrapping a hand around your throat as he continously thrusted up into your gspot, your eyes rolling back and tongue lolling out.
raspy whimpers and pleads for him to keep hitting that spot barely made it out with his large hand around your throat. black spots littered your vision as your breaths became shallow, yet he still continued to thrust.
you felt the knot in your stomach snap as you cried out in pleasure, squeezing around him as he let go of your neck; his thrusts becoming sloppy. your vision went blank, only miguel and the shape of his cock on your mind as your orgasm washed over you in waves.
your release left a ring of cream at the base of his cock. you could tell miguel was close too, his pace erratic before he burried himself deep inside of you, tip nestled comfortably in your cervix.
"c- cum in me please.." you begged pathetically, eyes rolling back in satisfaction as he emptied his load inside of you.
after what felt like hours with his dick balls deep in you, he pulled out, your clit twitching and your hole aching as some of his cum leaked out and onto his desk. you could hear him tut in disapproval.
"perra dejó un desastre en mi escritorio.." he scoffed before spitting on your pussy, admiring the mess he made of you before turning his suit back on.
"clean yourself and my desk up, ¿comprende?"
#miguel#miguel ohara#miguel x reader#miguel o'hara x reader#miguel o'hara#miguel o'hara x reader smut#miguel o'hara smut#astv#kinktober#october#smut#miguel smut
1K notes
·
View notes
Text
1 - Long Time No See

Part 2
The Sheriff’s Daughter
Tag list ( send an ask to be added ) @child-of-of-the-sunshine @hcwthewestwaswcn
Pushing the main door opened that belonged to the Sheriff’s department of Montana. I walked past the front desk to my fathers office door lightly kicking it open rather than knocking. “Morning daddy, so what cases do we have to work on today?”
“Nothing too serious for now, honey. I mostly just have paperwork needing to be filled out.” My father said leaning forward in his chair at his wooden desk. A stack of papers was in front of him from previous cases needing to be documented.
I sit down in the seat on the other side of his desk. “Well I can help you with some of the paperwork.”
“You don’t have to do that. Trust me you do enough here already. Much more than your mother or sister care for.” He raised a hand grabbing a pen beginning to fill them out.
From my junior year of high school I knew that I wanted to help my father and be in the police department like he was. My sister Debbie and our mother weren’t big fans of the concept and still aren’t to this day. Only difference is now I am old enough to do whatever I want regardless of their approval. “Daddy, from the day I turned 16 I knew I wanted to be like you. Let me help you please.”
“Honey, I just don’t want you to be missing out on life cause of this job. You’re a great help but remember to live your life outside of work too.” My father removed his hat, sending me a smile.
Sending him a smile back. “I know that, daddy.”
“Excuse me, sir.” We both turned our heads seeing his front desk assistant standing in the doorway. “Sorry to interrupt your conversation. But Mr. Dutton is here to pick up his updated gun permit paperwork.”
My father Donnie raised a brow. “John?”
“No, sir. It’s his son Kayce.” She answered his question.
I nearly jumped up where my head hit the ceiling and I knocked the wooden chair down where it clattered to the floor. “Kayce’s back in town.” She stepped out of the way when I bolted past her down the short hallway.
“The boss should have everything already filled out for you.” The other front desk assistant spoke towards someone.
I rounded the corner halting in my tracks and the boots I was wearing shrieked against the ground. I gasped slapping my hands on the sides of my hips not expecting to see him back here. “Well I’ll be. Look who the horses and cattle dragged in.”
“Y/n! Hey, long time no see.” The younger Dutton turned his head in the direction of my voice, noticing me standing there in some ripped blue jeans and a deputy jacket.
I pushed part of the hair of my ponytail out of my line of sight. “I thought you’d skipped town years ago, Dutton.”
“And leave you permanently to entertain yourself, that'd be a crappy friend of me.” Kayce strides over to me holding open his arms and we embrace the other in a warm hug. Kayce and I had been ready close back in school. Not exactly what you would call a best friend but we were almost close to being that until he got a girl pregnant and we lost touch after that.
I remember the last time we were really close with one another…I’ll always remember it.
The school bell rang and everyone came rushing out of the local Montana high school with me heading outside looking for my father’s truck. That afternoon was very important for my father since he would find out if he had become the new sheriff or not. Sitting down on the metal bench outside I put my backpack down at my feet. “Y/n, what are you still doing here?”
“Waitin’ for my father to pick me up.” Whipping my head around I saw Kayce come out of the back door of the school carrying his duffel bag on his left shoulder.
He gestured with his freehand to the side of the bench that I wasn’t using. “Can I sit?”
“Sure.” Scooting over I made room for him where we sat down next to each other.
He leans back on the seat. “I’m surprised to not see Bridget or Marlowe with you.”
“Marlowe is at home sick and Bridget has cheerleading practice. What about you, cowboy. What are you doing?” I asked him with a curious look on my face.
The son of a rancher answered. “I was heading home. My father and I need to talk about something…something that might change quite a few things depending on how he reacts.”
“Hopefully your father won’t be too angry with whatever you did. And don’t worry if things go south I’ll have your back.” I nudged his shoulder with mine chuckling lightly at him.
Kayce ran a hand through his curly brown hair. “So you’re really gonna work for the sheriff’s department?”
“If I’m lucky enough, yes.” Clasping my hands together in front of me, shifting my gaze up to meet his deep brown eyes feeling my face turning red. “Kayce, can I tell you something?”
He nodded his head simply yes. “Anything.”
“Kayce, I have been thinking lately and I…I think I might be starting to have feelings for y-” I get cut off short when a truck horn honked and we both turned our heads towards the sound.
My father’s truck was parked there with him rolling down the window. “Y/n!, are you ready to go?”
“Uh coming dad.” Snatching my bag off the ground and on my back I waved bye to the rancher. “I'll see you later, Dutton.”
Kayce waved bye to me. “Bye Haskell.” Shutting the passenger truck door I slumped down in my seat glancing back at him outside my window as we drove off considering that was the day I realized I should have told him how I felt sooner.
Kayce and I separated from each other still holding the same familiar smile after seeing the other years later. Kayce stared down at me about to say something before someone came around the front desk. “Dad, when are we going back to the ranch?”
“Dad. You have a kid?” Knitting my brows together I couldn't fathom the words.
He nodded seeing a boy that had similar hair color to him but his eyes were a darker brown. “Hi, I’m Tate. What’s your name?” The kid waved standing beside his father’s hip.
“I’m Y/n. It’s nice to meet you.” I waved to the little boy.
Tate moved his head up tugging his father’s sleeve. “Do you want to come see the ranch with us?”
“Oh Tate, I don't think she’s free. She’ll probably have to get back to work.” Kayce trailed off sending me a half smile.
Shrugging my shoulders I cut him off. “I’m not busy at the moment. My father - the sheriff is just filling out paperwork for the afternoon. If he needs me he’ll call me through my radio.”
“Okay then let’s go.” Tate spun around on his feet, he grabbed my wrist trying to drag me outside the door with him.
I gently yanked my wrist from his gesturing my head down the hallway I had come from. “I’ll just double check with my boss and I’ll meet you two out at your dads truck okay.”
“Sounds good. Come on, kid.” Kayce pushed Tate towards the door, sparing a glance at me before I went around the corner back to my father’s office.
Knocking on the sheriff office door, creaking it open slightly, seeing my father was still working on his paperwork. “Dad, I’ll be back later. Heading to the Dutton ranch.”
“Be careful out there. The Dutton’s are known to be trouble.” He sent me a look.
I sent him a military salute without another word to him. “Don’t I know it.” We had to cover up more of their problems then any other ranch family, but I respected what they did to keep their land.
Comments really appreciated ❤️
#the sheriff’s daughter#kayce dutton fanfic#kayce dutton x reader#kayce dutton x fem!reader#kayce dutton#kayce dutton fluff#kayce dutton smut#tate dutton#hugh dillon#ask box is open for anything#yellowstone#wattpad fanfiction#luke grimes#comments really appreciated#beth dutton#rip wheeler#yellowstone tv#yellowstone fic#yellowstone x reader#yellowstone fanfic#yellowstone series#montana#john dutton#dutton ranch#donnie haskell#yellowstone masterlist#dutton family#livestock#police#sheriff’s department
27 notes
·
View notes
Note
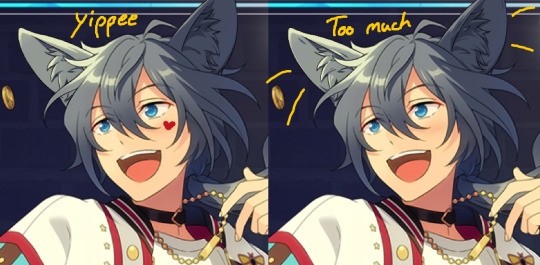
(If you're comfortable with this) could you make a tutorial on how you make your creations??? It'd okay if not, thank you for making them :D
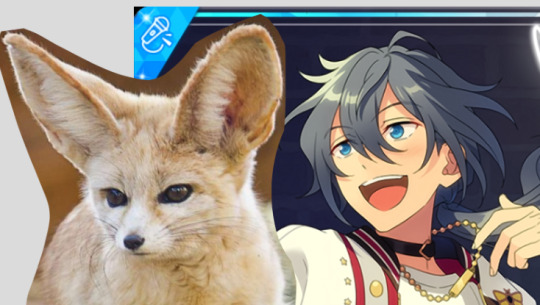
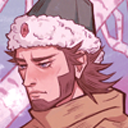
WAA i can try!! baby's first tutorial ft. this guy

🐾 first, a picture of your blorbo
i use waifu2x to up the quality, not always neccessary but it makes everything a bit easier and prettier. i use firealpaca to edit but you can use whatever you like, im not your mom
🐾 probably get a reference
yeah i dont always do this. but you should! i should! so google whatever creature you want to turn blorbo into and maybe scroll for a bit to get a feel for what they look like :3
try to find one at a similar angle to your blorbo picture and paste it/open as a layer. look this is close enough ↓
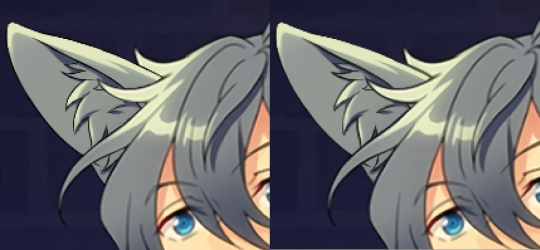
🐾 onto the actual editing! human ear surgery
in case you prefer just one pair of ears. you have to understand the style so you can imitate it.... so look at their hair, maybe theres more colors or gradients than you can see at a glance or something ! i colorpick a bunch of them and put them over their ears, then blend them together with a low opacity watercolor brush
ALSO, notice the.. lighter glowy aura thing around his ear in the og? i try to imitate details like that too, used watercolor for this again
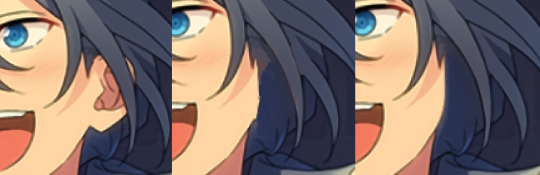
now maybe you wanna make it look like theres something covering that spot, since theres kinda nothing there now. soo if that looks weird to you, (open a new layer and) put some hair over it. i cant tell u how to imitate Any style so just. study it and keep trying
with enstars here the lines are pretty soft, so i go over it with watercolor brush after doing the general shape. with a higher opacity you could probably just use a softer brush from the start, i just like starting with the basic pen
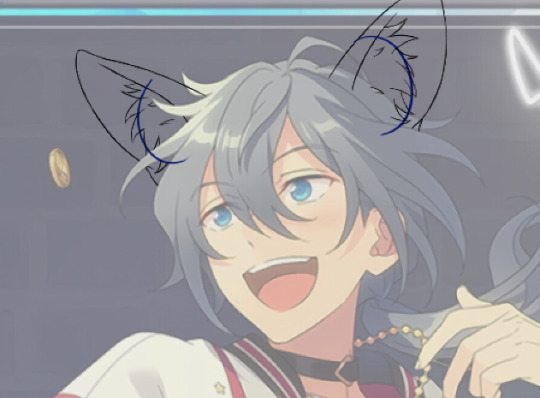
🐾 the lines!!!
nowww i lower the blorbos opacity to around 50%, bring the reference somewhere i can see and just kinda... start sketching. lot of redrawing and transform tooling here sometimes
TIPS 1. you can clean the lines up at the end so dont stress
2. think of your blorbos new ears as a real tangible part of their body and how they fit on their head since you dont wanna make it look too flat !
3. and for the placement i always end up at roughly one human ear length above their og ears if that makes sense. tried to visualize it

as for inner ear fluffs phew i dont know either. draw a circle and start from there? maybe there are actual animal ears in blorbo artstyle out there you could reference
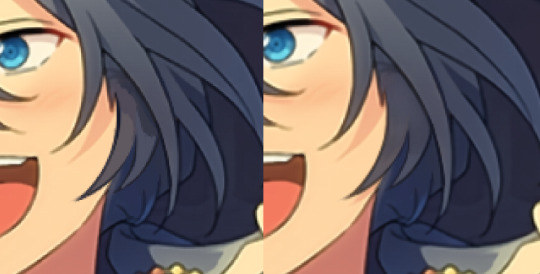
🐾 coloring 🏳️🌈
finally some progress huh. i color the lines in a contrasting color first so i see the lines properly and dont miss anything, then fill it in with the actual color :3 OH and for gradients i just use the airbrush at the ear tips or sides
noww shading! new layer, basic pen brush and try to follow the shapes in the og art. it's best if you pick the colors from the actual picture!!! take notes mentally and just do your best i dont know how to explain this more
taking this as an example, the shading is mostly in pretty simple wider areas, so not a lot of seperate strands in there. and its again pretty soft around the edges of shades and highlights, so i'll go over it with my beloved watercolor. keep things like that in mind so the creaturing blends in well :3
if you like more detail better you can still go with that. or less detail on a complex artstyle. the world is your oyster
🐾 and the rest
what else could there be???? making the lineart more cohesive for example ★ oftentimes it's not one solid color, thicker or thinner than yours, things like that.
for things like piercings or fangs you can just draw them on top i believe in you <3 if its like an intricate earring use the lasso? magic wand? the one that lets you select an area to copy and move on top of your ear layers
+ remember details like shadows, if you put a tail on top of say blorbos leg there's gonna be a shadow under it! put a layer under the tail ones and freehand draw the shadow, OR copy the tail layer, put the copy under the og one and change color/opacity until it fits
30 notes
·
View notes
Note
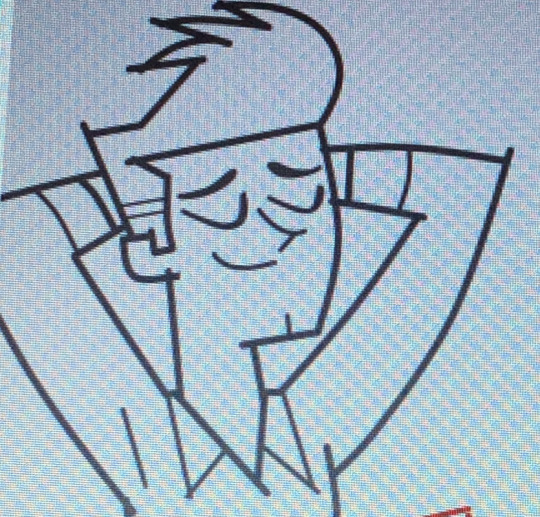
how do you make your oc screencap edits?? i also have a td oc and i dont really know where to start 😭
ok so!!! i use firealpaca which is just my usual drawing program. so i'll keep using it as a reference for my steps but of course im sure whatever similar program u use should have similar features
i'll be long winded for funsies as usual 💕
FINDING YOUR SCREENSHOTS
the key to decent td edits is to flat out trace screenshots whenever possible. stock pics will do, but of course itll be a lot more fun and less obvious if u use a screenshot from the show and put it into your new context
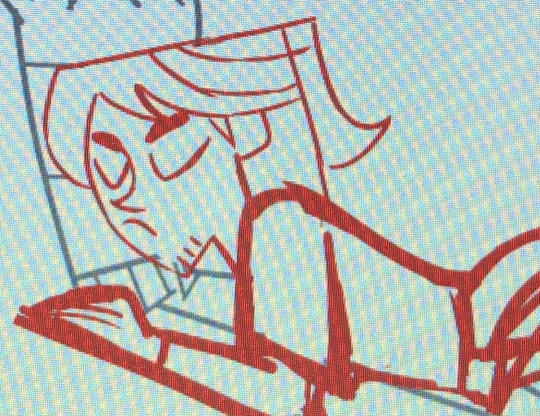
in terms of making your ocs, you will likely have to do what someone once called "frankensteining" your pics. this is where you use pics of other characters for their specific features and put them together since your oc doesnt have official screenshots to trace. this also absolutely comes in handy w canon characters! maybe you have a pose but u need them to be sitting. so try to stitch together two different pics to get what u need
it will look very scary but just trust the process. here is a random example i made using a dawn screenshot (where i removed the background), gwens eyes and eyebrows, and kittys hair

the sketching part is semi-optional. if you think you can freehand the lineart then go ahead but i assume your oc wont be a complete copy of something found in canon and therefore you will have to draw the newer/different features (such as the hair or the outfit) at least a little bit. and sometimes when i frankenstein the pics, my brain gets all overwhelmed so sketching makes me feel better jfbdjdnd
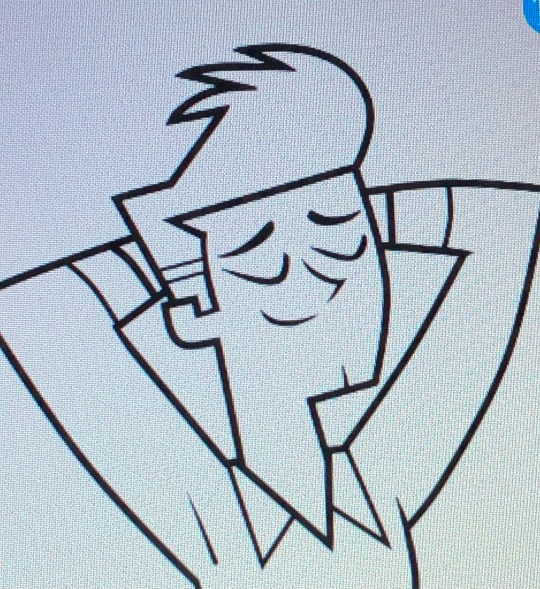
(in terms of my own oc, i screwed myself over bc his body type is so unique i gotta freehand it like all the time 😭
you can see i traced his head from his render (ALWAYS DO THIS BTW!!! TRACE CONSTANTLY), but then the body was freehanded using a canon pic as reference because tracing the pic wouldve been inaccurate)
THE LINEART
yes the iconic td thick, sharp, flat lineart. i achieve this by using a normal pen tool, turning off the pen pressure, and then turning up my pen stability to 40-60 (very high). you could use a curve tool if that works for you! but i would suggest against that for ALL of it bc the tool just wont respond well to rly drastic curves and such
the pen size varies on the pic. if the characters are close-up, itll likely be a bigger one. and then the characters' little details and facial features are usually a slightly but definitely noticeable smaller size. for the most part, ive had the bigger pen size at 13 while the details are around 9. or big size 10 and smaller size 7.
heres my technique:
as u can see, all of my lines go a bit too far. this is so that when im done drawing them, i can go back in and slowly erase where they meet and get them all sharp and pointy. this is just how i personally do it lmao. when it comes to facial features and other stuff that doesnt connect to anything, just get a close look at your reference to see how thick or how thin the edges get and do ur best to erase the edges to the point where they should be
THE COLORING
not much to it! the bucket tool is the best way to go. again just get a good look at your references just in case any parts have the lineart also colored in
THE BACKGROUND
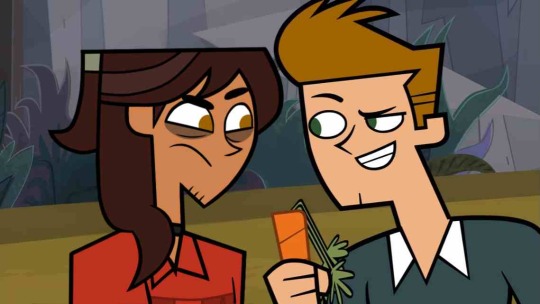
you can find some generic td background pics on google or u could get them from the show and try to erase any character in the way lmao. if ur recreating something like, say, a dunc/ney scene w a different ship, then its very tedious but youll have to do your best to erase the canon characters and piece the background back together.
i like using the smudge tool a lot for this!!! just kinda pulling whats already there towards the characters. to save time, put your drawing visible on a top layer as you do this so that you dont have to edit the ENTIRE background, just what you need
THE RENDERING
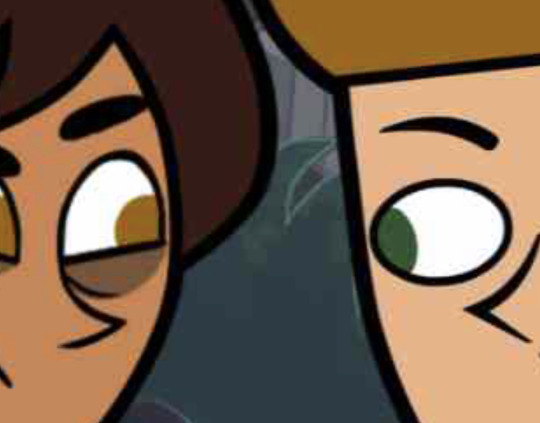
ok so heres a big one imo. after youre done, youre gonna have to fuck up the quality at least a little. well not that u HAVE to but like..... to match the standard quality of a td screenshot? ive never seen a td screenshot in perfect hd quality outside of stock art. so u could blur ur drawing just a little bit. maybe add in the teeniest bit of chromatic aberration (just set it to 1 or -1). not ALL of them together but u do whatever u gotta do
my personal favorite is blurring just a little and then saving it as a jpeg (around 65-80%) so that its pretty crunchy and looks all the more real
obviously not a NECESSARY step but just something to point out. especially if ur background isnt the best quality so the characters have to match it
this one from yesterday i didnt even redraw topher bc i was lazy and he looks fine enough. i just put danny onto the pic to cover the other character. so i blurred danny a little bit and then saved it in a pretty low quality so that they match one another. look at those pixels. that crunch.
SO THE TLDR IS just trace and copy your references as close as possible. if you cant find a reference for your character, try finding another character w something close enough
26 notes
·
View notes
Note
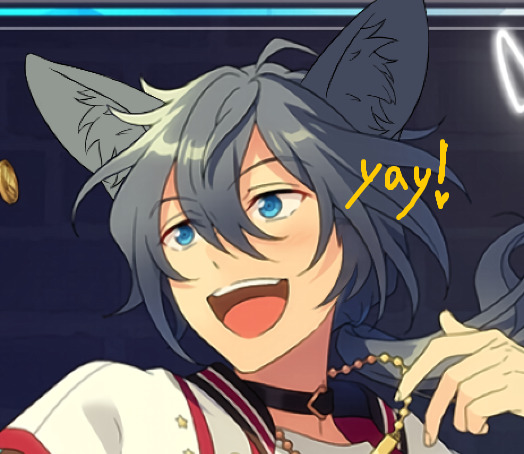
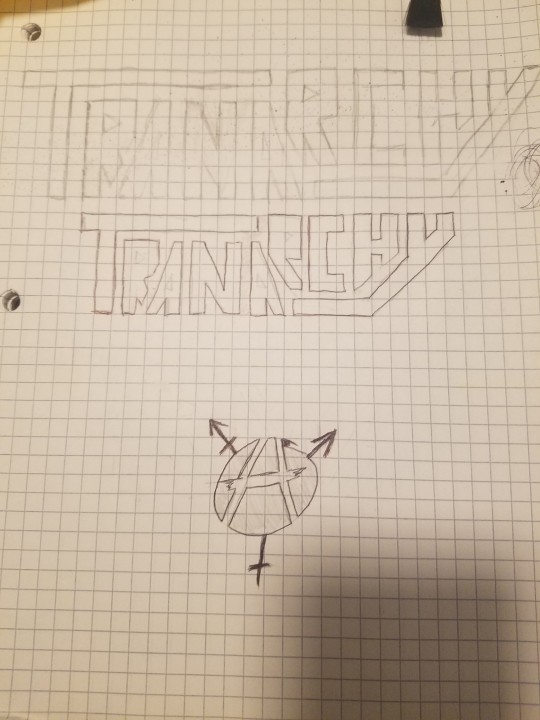
Hello there! I have followed you for a while and I was wondering, how do you do the graphics on your art? Like the symbols and stuff? :0
it varies depending on the Thing i'm making!
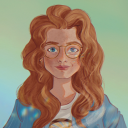
for small things that are just for myself - like for social media graphics / blog headers - i may use Canva to plop in some small flair. for example, the four icons i used here under my sona portraits are Canva assets.

as for my Weird Vaguely Dog-Shaped art symbols, nearly all the triangles and circles and shapes you see are done with the basic default shape tools in Clip Studio. i do use a couple brushes here and there in my work if i need dashed lines for something, but the majority are always freehand. the radiating rim around the outermost circle here is a halo brush from the Clip assets shop.
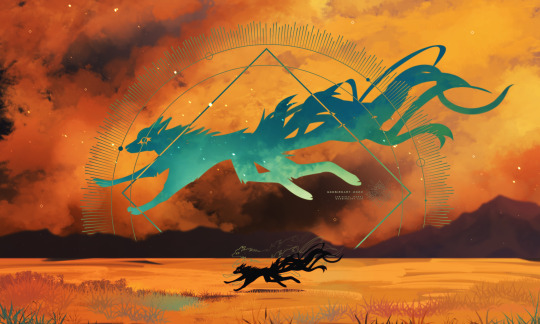
now if you mean symbols like the one below here, these are also done with the default shape tools and the plain default pen brush. the circle and polygon shape tools are my best friends, i use them for a LOT in my work!!

honestly you can go REALLY far with just the shape tools alone.
#hope these help aaaa#i'm answering this just as i wake up so bear with me if my adhd brain missed smethin
112 notes
·
View notes
Note
hi habs!! your art is AMAZING like it's soo gorgeous!! really got me into drawing again! your art looks so simple and clean yet is somehow very nuanced and and it looks like every single line and shape is exactly where it's supposed to be. i sometimes have the impression that you just picked up a pen and started drawing like you do now, but i remember you mentioning that you put a lot of effort in your art. Still how is it so clean!!!!!
anyway i wanted to ask if you maybe have some advice on how to practice and actually improve?? i practice every day and i try to study the basics, i also try to analyze art that i like, but it feels like i'm not improving at all. Maybe there was something that helped you? What do you think is the best way to improve? Thanks again! Keep up the great work!!!!! <3
Thank you so much :’)) !! That’s so sweet ! I wish I had better words to express myself but your message made me super happy
For improving, personally what I do is I try and focus on getting better at one thing, it’s hard to work on everything at once, so putting my effort into one part I want to get better at helps make the work less overwhelming.
Last year, I really wanted to improve perspective and backgrounds, so I did a lot to challenge myself with that. It shows up more in my personal work tbh but taking the time to understand different ways to draw perspective, honing in my freehand skills, and learning how to compose and use line weight to make my backgrounds more interesting was really beneficial, and what I learned translated into my personal work and the silly goofy stuff I make here.
I also did a lot of stuff where I’d say I bit off more than I could chew, that might not work for you, but for me even if the work wasn’t perfect, I found I learnt so much and improved overall. One of the more challenging things I did was map a cityscape freehand in 3 point perspective. I’m not fully pleased with the outcome but it gave me so much more understanding for perspective and city environments as a whole.
So my best advice is to focus on just one thing at a time! Improvement will happen whether you see it or not. You learn from everything you create and every bit of knowledge you acquire, even if your growth feels stagnant, it’s not.
My other bit of advice is to try different things! From testing out different brush to a whole different medium, I find that that helps get me out of funks when I’m not sure where my art’s going. I think that helps me cause there’s less expectations with something new.
Last, I think taking breaks is also really good for improvement! Keeping up with drawing as much as you can is great, but resting and taking a step back is important too. It gives you time to rest your eyes and brain, and you can approach art again with a fresh perspective after!
I hope some of that helps ! Take care!
53 notes
·
View notes
Note
I'm a baby goth who really wants to get better at makeup and more specifically eyeliner similar to what you do. Do you have any products or tips you reccomend for getting started? I try to look up advice online but it's overwhelming and it's kinda embarrassing to ask for advice irl.. ty in advance if you decide to answer this.
hi !! idk how good my advice will be but ill do my best to answer as well as i can !
as a heads up i freehand everything but i have seen people use the tape method to keep their liner/eyeshadow straight (which is just putting a piece of scotchtape on the side of ur eye where u plan to have a straight area of liner)
i found using water activated liner helped me a Lot when i started doing more graphic looks at the end of last year (since its water activated u can easily just wipe it off with a makeup wipe or wet tissue) but there is a difference in feel when applying it compared to using a liner pen (to me at least) ie the brush length makes it easier for me to do the smaller details as it gives me more control, but once i got a good feel for doing stuff like that it made using the pen easier. water activated is also much better if u plan on more colorful looks; liner pens do come in colors but they dont pop as well or as bright as the water liners.
as for making ur liner symmetrical… not sure how to give the best advice for that 🤔 the way i do it is ill line out one eye with the outline of what i want to do & try to match the other eye best i can. i have shakey hands but ive found planting my elbow on my desk table & my lining hand on my cheek really helps to stabilize myself so my lines come out straight. to straighten out my lines (like if i made one side to thick) ill just wipe a smidge of it with a wet cotton pad with water liners, but when i use a liner thats waterproof i use micellar water or a make up wipe to fix it.
as for my lids i use a mehron skin prep toner (its the only product ive found that works for my Very oily lids, but its definitely not for everyone… stings like SHIT if its in ur eye especially since i am… not supposed to use it for what i have been 😬. adding that bc if i do t use it sometimes the oil will denature the liner & smear it all over my lids lol. on top of that i put foundation & whatever eyeshadow i want on top of that when the foundation is dry enough it wont smear. putting liner over whatever u layered on ur lids is a commitment & a little hard to fix if u want to put the liner on in 1 go which is why i recommend practice & playing around !!
dont be scared about it not looking nice at that start, just start with something simple to get that feel for it so u can work up to what u want 👍
as for products, i got my water inks from bymelolops (latina owned, based in puerto rico !) i bought this liner brush (and a few water inks as well) from gavissi. my eyeshadow is mostly sugarpill (i only buy when its on sale, its a little pricey but worth it) but if ur on more of a budget colourpop has good options. as for liner pens, ive been using the last of my nyx liner, but am looking for a good alternative (loreal supports isr*el) so im unfortunately not much help here as im Also on the look out 😮💨
i definitely suggest getting some cheap stuff to play around with !! many places like sephora & ulta also sell small sample sizes of liners so u can get one of those to try out before u commit to something. a lot of what i started with years ago came from the dollar store bc that was all i could afford at the time lolll
10 notes
·
View notes
Note
Oh my God, Rikerssexblouse! That salamander embroidery is just stunning!
Did you do it freehand? Or did you have some kind of instruction because if I wanted to take up embroidery before - I now need to do it! 😂🦎💕
Thank you! It was not freehand, and this was actually my first attempt doing one that wasn’t out of a kit. Before this I’d only bought kits on amazon or Etsy, which is nice because you get everything you need, plus instructions. But for a while I’ve wanted to do something of my own design, but I hadn’t quite figured out how. So since it would have been useful for me when I was trying to figure this out, I’m going to explain the whole process. And to be clear, I’m just figuring this out, so maybe people have other strategies, but it worked for me.
First, I took a screenshot of the salamander babies poking out of the hole and opened it up in Procreate. I am not at all experienced with Procreate (my 9 year old is better with Procreate than I am), but I created a second layer, and then drew on the second layer to outline the image. That looked like this:

Then I hid the layer with the screenshot, so you only saw the outline. It looked like this:

Then I printed it out.
Michaels has little squares of fabric for embroidery, so I bought two of those, one white and one purple.
It’s probably overpriced for the amount of fabric you get? But it’s a very convenient size for one embroidery project and it’s just two bucks.
But then I had to transfer the pattern to the fabric. This meant that I had to lay the fabric on the printoff and trace it with a special pen. I used this one.
It’s water soluble, so you can rinse the marks right out when you are done.
The problem I ran into, was that the purple was much too dark to see through to be able to trace, so I had to use the white (I just thought the purple would be more fun but dark colors won’t work well with this strategy). Then I was just filling in the shapes from my pattern. After I was done, I took it out of the hoop, rinsed it in water to rinse away the blue pen marks, pressed it between towels overnight, then put it back on the hoop and tied it up the back.


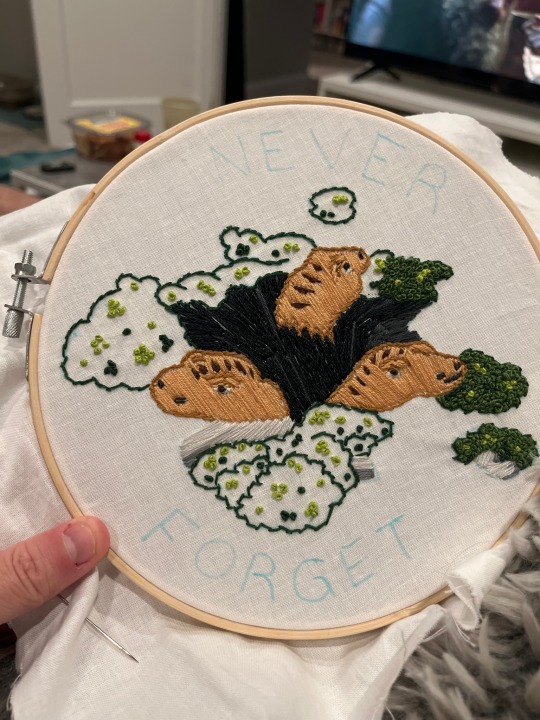

I think figuring out what stitches to use were might actually be the hardest part. It’s a combination of your vision/creativity and just enough experience with the stitches that you can visualize what they will look like. I used satin stitches (to fill in the big spaces like the salamander babies’ faces and the rocks), lazy daisy stitches (the nostrils), stem stitches (for the outlines), and about a thousand million french knots (the moss). Oh and straight stitches for the letters.

The salamander babies’ heads were hard, because I had to work around the spots and eyes and everything. The hole might be the part I’m most proud of, because my plan to give it depth actually worked. Instead of doing a satin stitch to fill it in smooth, I did straight stitches and arranged them directionally (into the middle and then down) to try to give it shape so you could see how the the hole goes down into the ground. I also used a little gray in between the black to give it some dimension.
The french knots that made up the knots aren’t particularly hard (although I do suggest finding a YouTube video to see how to do it, I could NOT figure it out from written instructions when I first started) but it used up SO MUCH more thread than I ever anticipated. Doing a kit, you get everything you need, but I didn’t know what I needed. Whoops. So I had some last minute panic about running out of thread (literally the night before Threshold Day). So a lot of the color variation is a matter of necessarily rather than my plan. But it worked out well.
If you look closely, the moss on the left has a lot more color variation than the moss on the right, and that is because I was running out of thread. But it’s not too noticeable (hopefully). I do love how the moss looks though! French knots are usually used for little details, but the mass of them gives it so much texture. I love it.
I will say, if you are trying it for the first time, don’t start by doing your own design. Follow a kit and figure out what you are doing first. And don’t be afraid to look up YouTube videos when you can’t figure out how to do something. Video is a MUCH better teacher than words can ever be, in this context. But at the same time, there really isn’t anything that difficult about embroidery. You mostly just have to be patient. I find it quite relaxing.
10 notes
·
View notes
Note
hey this is kinda random but I was wondering if you had any advice about making patches? I’ve been wanting to make some of my own but idk what kind(s) of fabric & fabric paint would be good to use for it
YESSSS MY TIME HAS COME I LOVE GIVING PPL PATCH MAKING TIPS!!! im actually working one a zine abt this rn so ive totally got you covered
so pretty much any fabric you can get your hands on will work. i mostly use fabric from shirts ive cut into tank tops or crop tops, and denim from old jeans. both work just as well, but the tshirt fabric is thin and stretchy so i usually find it easier to paint less detailed designs on that. if i want a detailed design and im using tshirt material ill usually use a stencil bc it helps me keep the lines cleaner. using something like an embroidery hoop or some cardboard and safety pins to keep the fabric taught and hold it in place works wonders too
as for paint, i use a mix of fabric paint and regular acrylics. usually ill do a three base layers of white fabric paint, then go over top with a layer or so of whatever color acrylic bc the acrylics tend to be more vibrant and more opaque
using just straight up acrylic on fabric will work, but it may crack a bit and will probably fade in a wash a little. if ur just doing acrylic, try and limit the number of layers you do bc the thicker the paint is, the easier it will be to crack. personally, ive found acrylic tends to crack more on denim than on tshirt fabric- i think because the shirt fabric is thinner so the paint soaks all the way through instead of just sitting on top like with the denim. if im using shirt fabric and the design is simple ill usually just go right in with the acrylics and not even bother with the base layers bc of that
fabric paint is more flexible than acrylic bc its literally made for fabric. i use the tulip brand MATTE white paint, and im specifying matte here bc they have a fucking glossy version called "slick" that goes on soooooo fucking think when you paint it with a brush it just. its horrible it takes so many fucking layers to get any possible color the matte is so much better it only needs two or three to really pop
ANYWAYS- i use that most often bc my local craft store has it for cheap and like i said i literally only use the white stuff for base layers and shit. they have other colors but ive never tried them bc acrylic over the white works out just fine for me so. idk maybe using the colored fabric paint would save time in the long run- less layers and shit- but ive never tried to myself so who knows
you can make a pretty damn good fabric paint substitute yourself though too!! its like the middle ground between the store bought fabric paint and the acrylics in terms of flexibility. mix equal parts fabric softener with acrylic paint. ivr used this method a fee times and it works well. its definitely less cracky than regular acrylics but depending on the ratio it might take a few more layers and a bit longer to dry. its not as flexible as the fabric paint but its a bit more opaque so depending on how you want ur patches to look it might require less layers
uhhhh other things. stencil are my best friend when im trying to copy a specific logo or do a more complex design. i never fucking freehand letters- use chalk or a pen to get letter placement done first bc the grief of painting half a patch and realized the rest of the work doesnt fit is REAL. thrift stores have a lot of cool fabric with little designs and patters which i personally think are super fun to paint over and use as patches. if you have access to an iron ik some people like to heat set their patches by ironing them when theyre dry (ig it helps the paint stick to the fabric? ive done it a few times but im too lazy to commit to it regularly. might be good if ur just using acrylics tho). pretty much any fabric you have access to will work (hoodies, old socks, old bedsheets, ANYTHING) but knitted fabrics are hell to paint on and so id recommend avoiding those
thats everything i can think of off the top of my head!! sorry this turned into a whole fucking novel. i really like making patches and telling other people abt how i make patches :p
#asks#THANK YOU SM FOR ASKING ME AGAIN SORRY THIS TURNED OUT SO LONG I HOPE THIS WAS HELPFUL#i seriously love talking abt this sm god i need to finish that zine-#save#<bc im totally stealing parts of this for the zine later lmao#OH! and you should totally absolutely send me oics of whatever patches you make iyw :]
9 notes
·
View notes
Note
Hi! I saw your binding of "clear and muddy loss of love". And listen I'm not familiar with the work and all that, but how did you do that fantastic foiling if you don't mind me asking? Is it hot foil, or glued foil? And how did you get it to be so even! Did you maybe use the method with a laminator? Because I didn't know you could do that onto bookcloth, thought it was paper only? I have only a single line tool and its really difficult to get thicker text/patterns
It's no problem at all!!! So, almost all of the foil work I've done in bookbinding is through a medium of a cricut and a hot iron. I've got a foil pen as well that I'm trying to improve with, but I think I've done only one color there so far, and I don't know if it'll ever reach the crispness of what the cricut is able to do for me (though I'm not so sure about that after seeing some of the other work people have done with it!), but I'll elaborate on what I know about options really quick.
I'm not sure if the cricut foil exaaaactly fits into either the hot foil or the glued foil categories, because it's not just foil, it's foil with a heavy vinyl injection. It does have a heat-activated adhesive binding, but at one point, I tried using it to foil the edge of a book, just to see what would happen, and it FUSED the edges of that sucker together. It had definite stretch to it as I attempted to pull the thing apart, and was generally stronger and held its shape more aggressively than the true foils I've tried.
The cricut method is really easy for getting that crisp effect, but it is a bit tricky in terms of expense, if you don't have access to one. I usually use my system fonts to determine the shape of the letters I want it to cut out. For the front covers on this binding, I arranged the chinese characters for the title, volume, and author in a space the size of the measured covers, and was able to tell my machine to cut it out of the foil. Then I weeded out the bits I didn't want, and ironed the rest onto my bookcloth. I did a similar thing for the spines. It means everything was precisely shaped according to the nice vectors on the computer, all I had to do was remove the bits that I didn't want and iron it on in the right place.
It's not totally foolproof! I have some early books where I went WAY overboard with the heat and melted some of the plastic cover into my bookcloth. If you don't fully iron everything and move too quickly, you can stretch or twist half-ironed characters or leave awkward marks. And it's not a problem I've had, but I hearrrrr some people have had trouble getting the foil to stick to certain bookcloths.
It's expensive to purchase a cricut, but the silhouette is a comparable brand of 2-d cutting machine that runs a bit cheaper (but has basically the same functionality), and the cricut joy is smaller and cheaper than the big maker models. If you have a friend with a cricut, they might be able to letting you use it if you bring your own foil, maker spaces frequently stock cricuts, and at least some libraries in the us have started carrying them.
And I can't speak to laminators at all (some people print on bookcloth, so using toner-activated foil, it... might work? but i'd be worried about how evenly it would adhere). But foil pens! Part of what intimidated me bad about these was the prospect of using them to freehand what I wanted to draw. But when I went to scope out some demo videos on youtube, it turns out that the bible journaling community specifically has a lot of interesting content on their capabilities. Bible rebinders are also the best resource i've found for yapp edges, so i don't know what it is about these places that fills them with niche information useful to me specifically XD
But if you check out this video where I've started it (shortly after the three minute mark)
youtube
It works PRETTY well to use these heat-activated foils through a layer of printer paper for tracing. That's how I did the cover for 'i'm gonna love you with my hands tied,' which was... basically my first time using the foil pen for anything! It's not super crisp, partly because I picked a VERY detailed image with zero experience, and partly because I was lazy and didn't glue my layers in place well, but I've seen people get MUCH more striking results than mine with a little more practice and patience. It takes some time to fill in big surface areas, but for something like titling, printing the layout on a piece of paper and tracing it with the foil pen can take you to some good places!
With my equipment options, the cricut is usually the easiest by far, which is why I've made very little progress with the foil pen or gold tooling. But there are other choices without having to plonk down money for a big fancy machine! Hopefully something in all that rambling is useful to you, haha. Best of luck!!
30 notes
·
View notes
Text
More Pen Practice
I found a pen on the ground earlier today, and it looked like it needed a new home, so... 👀
Anyway, I wanted to test it, so I did some more pen sketches. This time, they're entirely freehand and entirely pen-based--no rough pencil draft. And of course, I'm also featuring my awesome ten-color pen from my museum trip last month.
Anyway, who did I choose to sketch?
Some of pole-bear's FNAF human designs. The classic four, of course. :)
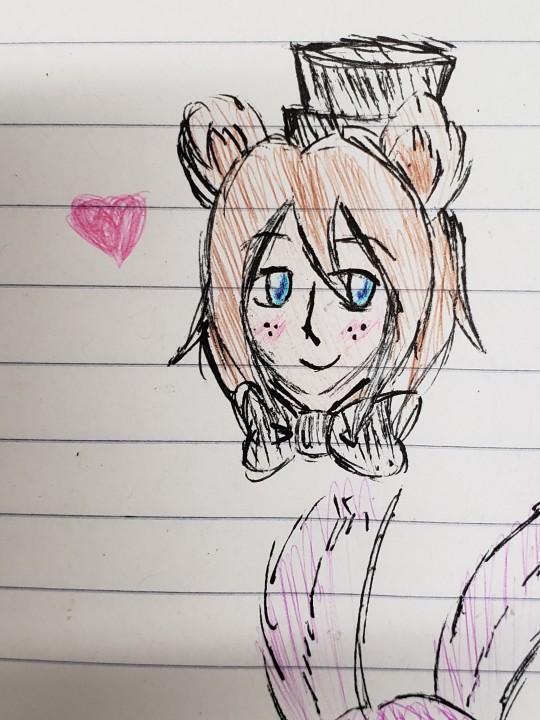
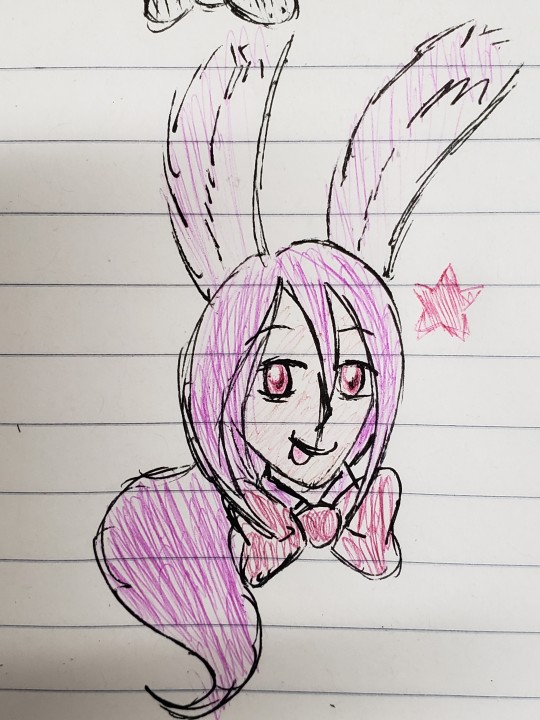

The pen writes really smoothly (I just have a very rough/sketchy style). I like it a lot!
So yeah. This is just a little tribute to some of the most important fanart in the early days of the FNAF fandom. (I'm not kidding. These designs were everywhere back in the day.) It may be a bygone era, and there are some things that are definitely best left forgotten, but I'll always have these guys with me. They're really special to me.
#full disclosure#please don't make fun of me#this specific freddy is my all time comfort character#as in fictional other#it's been that way for a bit over eight years#i know#i'm cringe#i still consider myself aroace since i just don't feel anything like that for real people#but mr. fazbear here hits different#so thank you pole-bear#i guess#i dunno#fnaf#five nights at freddy's#fnaf pole bear#pole bear fnaf#fnaf human#human fnaf#freddy fazbear#bonnie#chica#foxy#fnaf freddy#fnaf bonnie#fnaf chica#fnaf foxy#art#pen sketch#comfort character#fictional other
24 notes
·
View notes
Text

How to make badass patches when you can't paint or freehand a straight line to save your life
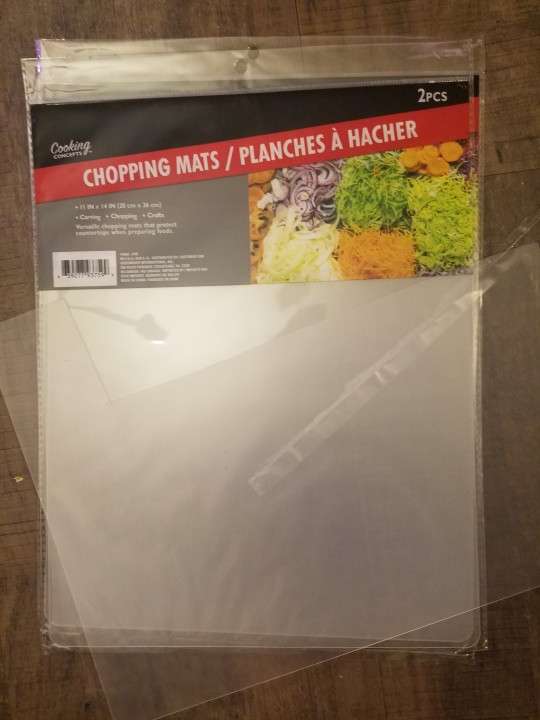
Materials:
Thin but rigid clear pastic sheets like the ones pictured below
Washi or masking tape
Fine tip permanent marker
Graphing paper
Pen (optional)
Pencil
Scissors
Exacto/ razor knife
Fabric for patches
Acrylic paint
Sponge (make sure it is a small grained foam)
Safety pins (to attach the patch to clothes if so desired)
Step 1: draw in pencil on graph paper, making a really cool design. Know where your positive space and negative space is, and think in your head what will happen when you cut it out. Make sure you will not have any islands that'll fall out of your stencil, or be prepared to mimic those spaces with masking tape
Step 2: outline darker with pen
Step 3: cut out a size of plastic that is equal to your design
Step 4: attach plastic to paper with your tape
Step 5: trace your design with your permanent marker

Step 6: detach tape (pulling it along its line as close to the paper as possible, peeling, can usually save your paper)
Step 7: gently carve along the lines with a razor knife until they are loose (it is best to do this on top of something you do not care about, such as garbage cardboard)
Step 8: carefully carve the corners of your design with your knife until the shape can be removed. You now have a stencil.
Step 9: secure stencil to fabric
Step 10: cut a piece of your sponge so it is a good size for blotting (I prefer 1" by 1" by 2" shapes), and prepare a quarter sized puddle 9f paint to blot from
Step 11: blot the design, using as little paint and as little force as possible. It takes awhile to get a solid coverage, but you will. You do it this way because a large amount of paint or paint pressed in too forcefully will slip under your stencil and produce strange blobs
Step 12 (optional): outline patch with permanent marker to cover up any blotches
Final product:


Don't be discouraged if any of these steps do not turn out as you envisioned them: I've been refining my technique here for awhile. It's something that takes a lot of practice to be good at.
Happy crafting!
88 notes
·
View notes
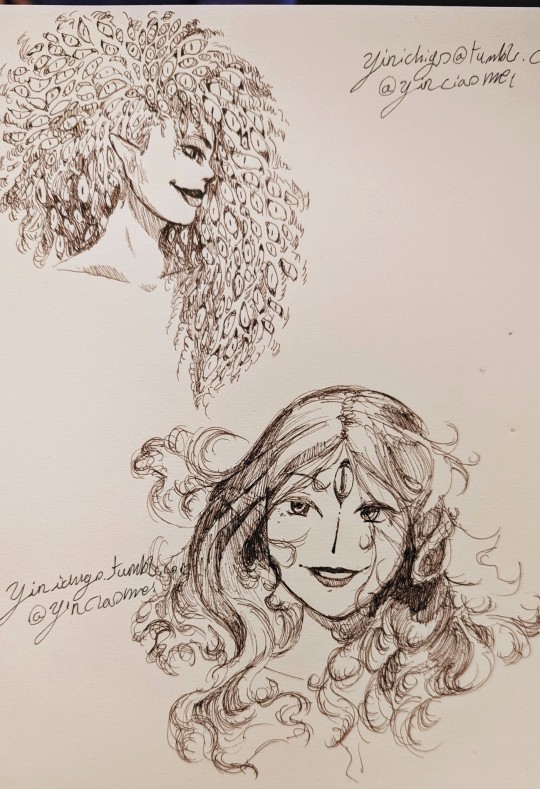
Text
Hi tumblr, here’s a sketchbook drawing:

Stuff I used: pentel brush sign pen (fuchsia), art talens sketchbook
+ The anatomy ain’t the best but I’m practicing freehanding a lot more (so this was done without a sketch).
#art#artists on tumblr#dark art#cutecore#sketchbook#dark kawaii#sketch#dark#sketching#traditional art#artistsupport#traditional artist#underrated artist#small artist#sketchbook drawing#pink aesthetic#I felt like a male version of this for the longest time#art page#line art#lineart#brush pen#inking#ink art#ink sketch#original art#artwork#my art#alternative art#semirealism
13 notes
·
View notes
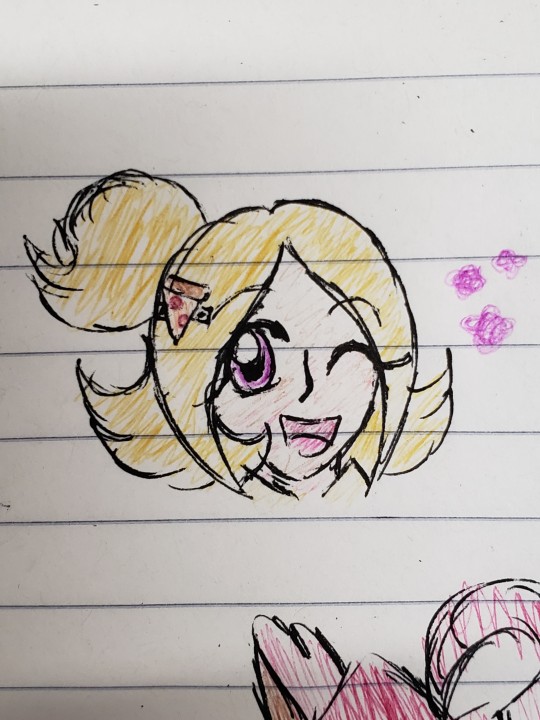
Text
Some stuff I sketched in pen in my sketchbook. Not perfect as I don't usually freehand pen without pencil sketching first but still my best pen only art so far!!
...ignore the @ I put in my Tumblr URL in the upper left. Sometimes I just heck up man.
4 notes
·
View notes
Last Seen Blogs

norwaysexualpoliticsmiranda
Untitled
zippermar
unzipped
artistantlers
needs floor time

sleepyy11037
sleepyy..

dmitrypro77
Dmitrypro77