#freesound <3< /div>
Explore tagged Tumblr posts
Visit Tumblr Blog
Explore Tumblr blogs with no restrictions, modern design and the best experience.
Last Seen Tumblr Blogs


Fun Fact
There are dozens of funny blogs to kill time on Tumblr.
Text
Hey! I never talk about this because it's technical and not the most interesting thing in the world, but are you keeping track of your sound effects and leaving proper attributions?
When you're on freesound TUCKED away into the corner is this thing

It's the deed!
Basically this baby comes in 3 flavors (there are more but you'll have to google them)
Creative Commons 0: You can copy, modify, distribute and perform the sound, even for commercial purposes, all without the need of asking permission to the author. [Basically free reign]
Attribution: You are free to share (to copy, distribute and transmit) and to remix (to adapt and modify) as long as you credit the author of the sound. [Free reign so long as you attribute]
Non-commercial: You are free to share (to copy, distribute and transmit) and to remix (to adapt and modify) as long as you credit the author of the sound and do not use the sound for commercial purposes. [If you wanna sell your stuff you will likely have to buy this one, otherwise AVOID]
THIS LAST ONE UP HERE ^^^ Is the reason I can't sell InCo. I have so many of these sounds in there under this agreement!
Some deeds do not allow you to modify sounds, others allow you to modify so long as you leave a detailed description on how it was modified.
An Attribution should look something like this:
Warm acoustic guitar by finnskog -- https://freesound.org/s/795725/ -- License: Attribution NonCommercial 4.0
Freesound.org auto generates them for you!! I think ZapSplat might too.
Attributions should be easily accessible wherever you distribute your show. I put mine at the end of my show notes under the transcript link. But I've also put it in my transcript in the past.
#Will you get in trouble for your tiny show using this and failing to properly attribute... probably not?? (costs) But I feel like it's#More about form than function. Like someone made that sound and uploaded it and clicked something that said pretty please let my name stay#With it and honestly? Yeah without their work Ylelmore and InCo wouldn't sound the way they do so it's probably the least I could do
46 notes
·
View notes
Note
Hello Vylet, I find your music inspiring to me. as I am beginning to get into music production myself. With that being said I find it very difficult to find a place to start and I don't really have a direction. Is there any advice that you could give beginners like me on trying to get a foothold in music? Like sources, or things that should have a higher priority in learning?
the thing i tell most ppl is to start learning with whatever interests you the most first. for example, if you rlly like drums and rhythms, start by experimenting with drum beats and programming stuff and performing things like that. if you really like the idea of arranging things into a song, get some loops and shit and just feel out how to arrange things. as you get proficient in one aspect, start throwing in more things that you're interested in.
for me, i really liked composing and arranging when i started. so i didnt care about how good the instruments were or how to mix anything or how to refine anything. i just focused on taking instruments, composing things with them, and arranging on a timeline. then i got super interested in sound design so i started to learn more about how synths ACTUALLy worked, and how to use effects to change things.
—
whats cool is you can actually find lots of old sample cd's archived on archive .org [just google archive . org sample cds]. so tons of free samples there. looperman is another classic sample resource. freesound also. you can pay splice for sample credits and u can have a certain amount of sounds for a monthly fee. but u can also just sample songs too. hey! you can sample my songs. that's always safe :3
—
i always find andrew huang's videos to be great for beginners
fact magazine has a great series called against the clock where you can watch ppl make a song in a few mins and observe workflows and ideas
even if u dont use live, ableton has some great videos and seminars on making music and stuff.
—
if you need a DAW, bitwig is available on rent-to-own so you dont need to commit to smth
and if you need some third party plugins, check out vital , ob-xd , klanghelm , and analog obsession for some cheap and free stuff. i say this everytime ppl ask for software recommendations but Vital is such an awesome free synth. i use it on almost every single song i make!!!!
also sylenth is one of my fav synths after over 10 years of using it and it's also on rent-to-own
everything on kilohearts is rent-to-own and i love all their shit too.
hope this helps a little bit!
144 notes
·
View notes
Text
VERITAS - Episode 1 coming in 2025 !
Synopsis for ep 1: Solace
In the deep underground, Akeru lives a ‘regular’ day through layer 3’s apocalypse. Although,’normal’ is nothing more than a chase for what once was, with drawings and pictures on the wall & puddles of tears and blood stains.. But with resources running out, the deafening sound of never ending death, everyday is a struggle. And when the wishes and drawings fade away, the reality of everything becomes clear.
Ep 1 is set to hopefully release somewhere in the summer or fall of 2025! More info will be shared in the future about the series, such as future episodes, plans for future seasons, etc.
Until then, stay tuned!
Card w. Socials: https://samsandwichs.carrd.co/
Email: [email protected]
Sound fx: freesound
music: made in garageband (VERITAS teaser music)
animation/art: procreate
#artists on tumblr#animation news#indie animation#animation portfolio#character animation#2d animation#animation#indie animated pilot#indie project#indie#indie series#indie animated series#indie animator#teaser#trailer#veritas
3 notes
·
View notes
Text
CW: unpleasant sounds, eye strain
Oh great Mother of Plague, deliver us from suffering, for you are our only guiding light.
Figured I'd also post this cursed thing. A short animation I made during Chroma Corps this summer. The prompt for that day was "Mother marmot" for creature/character design, but I decided to do something fun. Really enjoyed messing around with audio. I took all of the sounds from freesound, I honestly don't remember which ones I used, but here are all the links I found: 1 2 3 4
10 notes
·
View notes
Text
This trailer idea has been knocking around my head for a couple years now, and now I have the means and skills to do so. I love The Thing to death, and while it's a paranoid, dread-inducing movie, it's also quite frequently a goofy one, and I wanted a trailer to reflect that beautiful paradox.
Made in Reaper
Film and song credits:
The Thing, dir. John Carpenter, 1982
"Superstition," Stevie Wonder, 1972
"Humanity, Pt. 2," Ennio Morricone, 1972
Freesound credits:
Ratachewy remix of strangehorizon's freesound #668381.flac by Timbre -- License Creative Commons 0
Squelching SFX [5] by SoundDesignForYou -- License: Creative Commons 0
walking and running through harsh snow 3 different speeds sound effect by Garuda1982 -- License: Attribution 4.0
Windy Window.wav by Pedaling Prince -- License: Attribution 3.0
A ruger 10/22LR rifle being shot further away w/ forest reverb by serøtōnin -- License: Creative Commons 0
#the thing#john carpenter's the thing#john carpenter#who goes there?#john w. campbell#rj maccready#kurt russell#wilford brimley#keith david#david clennon#thomas waites#donald moffat#t.k. carter#richard dysart#peter maloney#charles hallahan#joel polis#richard masur#stevie wonder#trailer#movie trailer#fan trailer#stevie wonder superstition#custom trailers#video editing#film edit#horror#sci fi#science fiction
3 notes
·
View notes
Text

some old pixel sprites i made like 2-3 years ago for an assignment. the video is a "mock-up" of what it'd look like as a game (I edited it together in after effects bc i cant program/code lmao)
the lil black and white guy is a floating jester-creature thing, and the big blob was originally going to be just a slime but i thought making it a clown would be funny
i played a lot of snes/gbc/gba/sega genesis games as a kid (w/ consoles or emu.), so when i got the chance i used to mess with pixel sprites in super mario world (snes) using this one program, and eventually learned to make pixel sprites/animations as a kid. i think in the future, i would want to design a lil video game for fun :)
(i got the music freesound (i think?) but dont have the old link atm)
0 notes
Text
Audio Addition
I'd been talking to Ollie after he playtested the game, and we both agreed that the game needs some audio added to it just so that the game is a bit less flat - I had a few ideas of sounds in mind that could really just polish the game that little bit more:
Rumbling from the enemy moving
Footsteps from the player
Wind/General ambient sounds
Mechanical whirring/hydraulics
Some noise to tell the player that they've been spotted by the enemy.
Death sounds
I think that these would not only give the game that polish, but can also be useful for the player too, with the rumbling giving the player an idea of where the monster is, and how far away too, and the ambient sounds stopping the game from being completely boring silence.
For now, I've just added 1, 2 and 3, but it'll be nice to add some more later on to make the game a bit more dynamic:
I picked these out from a website called Freesound, choosing them based on clarity and making sure there wasn't any echoes or other background noises. Then I ran them through Adobe Audition to alter the sounds a little, making the rumbling deeper, the wind quieter, and cutting out some of the empty space so that it'd sound more like the player was running rather than walking.
0 notes
Text
Adding Sound Effects Part 1
It's finally time to add some sounds to my game. I've been putting this off for probably too long - most of my games get some sounds at least 2/3 of the way through development, and I have a week left. It's no matter though. Just for my own use, here's a list of things that will need sounds.
Gravel sliding when the player enters the first level onto the rubble
Floor breaking beneath the player
Possible whistling wind when they fall down the hole
Water splash when they hit the bottom
Robot select sounds (some sort of power up sound)
Robot move sounds (confirmation beep)
Robot move fail sound (negative beep)
Possible robot moving generally sound (electric hum)
Recall Point place sound (some sort of electric beep)
Recall Point move sound (confirmation beep but different)
Button press sound (click)
Door moving sound (pistons whirring)
Propellevator ambient sound (buzzing)
Escape Pad fail sound (loud, deeper beep perhaps)
Escape Pad confirm sound (confirmation beep again)
Teleport sound (some sort of warbling)
PDA reading sound (electronic sound of some kind)
Getting these sounds will be a combination of searching YouTube or Freesound for effects, or somehow producing them myself for the more specific ones. In this blog post, I will attempt to find generic atmospheric sounds (clicking buttons, opening doors, etc), and do the more personalised sounds in a separate post, to make things easier.

I found this gravel sliding effect on Freesound, which works well for my purposes.
I already had a 'concrete destruction' sound on my computer (I have a sound library for my own projects), so I didn't need to find one for that.
For whistling wind when you fall down the hole, I was struggling to find a good effect on Freesound. Most of the ones they had included traffic sounds in the background, or were too harsh-sounding. I decided to just record myself whistling into my mic, and then doubled up the sound byte and reversed it to make a seamless loop.
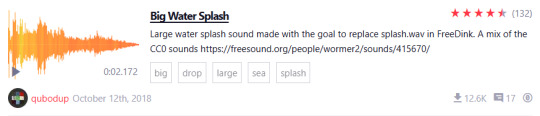
I had trouble finding a good water splash sound for when the player abruptly ends their descent - most of the ones I found were just small splashes. As it happens, searching up "big water splash" got the results I was looking for.
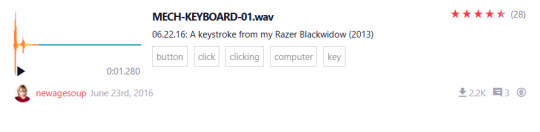
For the buttons, I decided to use a single sound of a mechanical keyboard.

Finding a good door sound also took a while. Many of them had too much of a windup, or sounded too loud and industrial - I needed a quick whirring sound. Eventually I found this one, which is good and brief.
I wanted the Propellevators to have a looping whirr ambience when nearby, and found this one which does the trick. To make it properly loop, I edited it in WavePad, using the same "duplicate section and reverse" technique to make it seamless.

For using the PDA, I found this sound, which sounds somewhat like a hi-tech notification sound.
This brings me to the end of my "generic sound effects" section. The other sounds on the list will likely need to be created by myself, due to their specific nature.

All the sounds I chose had Creative Commons 0, meaning I don't need a license to use them. I found this spectrum on Wikipedia that explains the different licenses, going from most free to most restricting. As you can see, CC0 is near the top, which is useful for me. I will probably still credit the authors of these sounds, perhaps in a menu, out of goodwill.
0 notes
Text
Live project - final
this is the final output for the live project.
texture and background reference:
Freepik. (2017). Grunge vintage old paper background | Free Photo. [online] Available at: https://www.freepik.com/free-photo/grunge-vintage-old-paper-background_1273370.htm#fromView=keyword&page=1&position=3&uuid=45a57f13-5563-401b-9f89-ec483759c469&query=Old+Paper [Accessed 28 Apr. 2025].
Freepik. (2020). Hand painted watercolor background | Free Photo. [online] Available at: https://www.freepik.com/free-photo/hand-painted-watercolor-background_10264328.htm [Accessed 28 Apr. 2025].
sound references:
www.youtube.com. (n.d.). Kitchen Ambience Sound Effect. [online] Available at: https://www.youtube.com/watch?v=0MfObJCnK04.
Freesound. (2017). Blowing Out Candle_fast speed.wav by tlcolbe. [online] Available at: https://freesound.org/people/tlcolbe/sounds/406644/ [Accessed 28 Apr. 2025].
Freesound. (2019). Pull switch by TiesWijnen. [online] Available at: https://freesound.org/people/TiesWijnen/sounds/456033/ [Accessed 28 Apr. 2025].
0 notes
Text
What is WebXR and How Do You Start Building Browser-Based VR Without Coding?
Virtual reality is no longer confined to specialized apps and high-end headsets. Thanks to WebXR, immersive experiences can now live right in your web browser, making VR more accessible than ever before. Even better news? You don't need to be a coding expert to create these experiences. Let's explore what WebXR is and how you can start building browser-based VR without writing a single line of code.

Understanding WebXR: VR in Your Browser
WebXR is a set of standards that allows creators to build virtual reality (VR) and augmented reality (AR) experiences that run directly in web browsers. It's the evolution of earlier technologies like WebVR, providing a unified approach to creating immersive content for the web.
The beauty of WebXR is its accessibility – users don't need to download separate apps or software. If they have a compatible browser and a VR headset (or even just a smartphone), they can immediately jump into your VR experience with a simple URL.
Why WebXR Matters for VR Development
For creators, WebXR offers several compelling advantages:
Cross-platform compatibility: Create once, run everywhere – from high-end VR headsets to mobile phone-based solutions
Instant distribution: No app store approvals or installation processes
Lower barrier to entry: Users can experience VR content with just a click
No-code options: Several platforms now allow you to create WebXR experiences without programming knowledge
Getting Started with No-Code WebXR Development
Ready to build your first browser-based VR experience without coding? Here's how to begin your WebXR journey:
1. Choose a No-Code WebXR Platform
Several platforms now offer drag-and-drop interfaces for creating WebXR content:
VRMaker lets you build virtual tours and interactive 3D spaces with a simple interface. Upload 360° photos or 3D models, add interactive hotspots, and publish directly to the web. Perfect for virtual property tours or interactive museum exhibits.
Spoke by Mozilla allows you to create 3D scenes for Mozilla Hubs without coding. Import 3D models, arrange them in a scene, and publish to a room where people can gather in VR.
A-Frame Builder provides a visual editor for the popular A-Frame WebXR framework. Add objects from a library, position them visually, and export ready-to-use HTML that runs WebXR experiences.
Frame.io VR specializes in turning 360° videos and photos into interactive VR experiences. Add interactive elements, text overlays, and navigation points without touching code.
Wonder offers a simple drag-and-drop interface for creating interactive 3D and VR content for educational and training purposes, with no coding required.
For beginners, I recommend starting with VRMaker or Spoke, as they offer the most straightforward path to creating something impressive quickly.
2. Gather Your Assets
Before diving into creation, you'll want to gather the media assets for your VR experience:
360° photos and videos: Capture these with 360° cameras like the Insta360, Ricoh Theta, or even smartphone apps
3D models: Find free or premium models on sites like Sketchfab, TurboSquid, or the Poly Library
Audio: Background sounds, narration, or interactive sound effects from sites like Freesound
Textures and images: For decorating 3D environments from resources like Textures.com
Most no-code platforms accept common file formats like .jpg for images, .mp4 for videos, .glb/.gltf for 3D models, and .mp3 for audio.
3. Build Your First WebXR Project
Let's walk through creating a simple virtual gallery using a no-code approach:
Sign up for a platform like VRMaker and create a new project
Choose a template that matches your needs (like "VR Gallery" or "Virtual Tour")
Upload your 360° background image or select from the platform's library
Add interactive elements:
Information points with text
Image displays
Clickable objects that trigger actions
Navigation points to move between scenes
Customize the user interface with your branding elements
Test your experience in the preview mode, making adjustments as needed
Publish your WebXR experience to get a shareable URL
Even without coding, you can create an impressive virtual space where viewers can move around, interact with objects, and learn information—all within their web browser.
4. Enhance with Interactive Elements
Make your VR experience engaging by adding interactive elements:
Hotspots: Clickable areas that reveal information or media
Gaze-based interactions: Elements that activate when users look at them
Virtual guides: Automated tours through your 3D space
Quizzes or challenges: Interactive elements that test knowledge or provide gamification
Audio triggers: Sounds that play when entering certain areas
Most no-code platforms offer these features through simple dropdown menus or drag-and-drop interfaces.
Taking Your No-Code WebXR Development Further
Once you've mastered the basics, here are some ways to enhance your WebXR experiences:
Collaborative Spaces
Platforms like Mozilla Hubs let you create social VR experiences where multiple users can interact:
Host virtual meetings in 3D spaces you design
Create collaborative art galleries where visitors can leave comments
Design educational environments where groups can learn together
Integrating Analytics
Most no-code WebXR platforms offer analytics integration so you can:
Track how users navigate your virtual spaces
See which interactive elements get the most engagement
Understand how long users stay in different areas
Optimize your experience based on real user data
Publishing and Monetization
Your WebXR experiences can be more than just personal projects:
Embed them on your website as interactive features
Offer premium virtual tours for real estate or tourism
Create educational VR content for schools or training programs
Develop brand experiences for marketing campaigns
Overcoming Common Challenges
Even with no-code tools, you might face some challenges:
Performance issues: Keep your scenes optimized by:
Using compressed images and videos
Limiting the number of interactive elements per scene
Breaking complex experiences into multiple interconnected scenes
Compatibility concerns: Ensure your experience works across devices by:
Testing on multiple browsers (Chrome, Firefox, Safari)
Creating fallback experiences for non-VR devices
Providing clear instructions for users
Resources to Keep Learning
As you grow more comfortable with no-code WebXR development, these resources can help you expand your skills:
YouTube tutorials for your specific no-code platform
Online communities like the WebXR Discord channel or Reddit's r/WebVR
Webinars and workshops often hosted by platform developers
Template libraries to jumpstart your projects
Conclusion
WebXR represents the democratization of VR development, bringing immersive experiences within reach of creators at all technical levels. With no-code tools, anyone with creative vision can build virtual worlds accessible through any web browser.
The best way to learn is by experimenting—start with a simple project today, and before you know it, you'll be creating rich, interactive VR experiences that work across devices. The web has always been about accessibility and connectivity, and WebXR extends those principles into three-dimensional space.
What will you build in your browser-based virtual reality?
#mobile game development#gaming#metaverse#multiplayer games#nft#game#blockchain#unity game development#vr games
0 notes
Text
10 Tips for Creating Amazing Music Remixes Online
Remixing music has become an accessible and enjoyable art form, thanks to the abundance of free tools and platforms available online. Whether you’re a beginner experimenting with sounds or an aspiring DJ looking to make your mark, creating music remixes online for free is easier than ever. With the right techniques and platforms, you can transform existing tracks into something fresh and uniquely yours. Here are ten actionable tips to help you craft impressive remixes while leveraging the best tools and music brands available.
1. Choose the Right Free Remix Platform
The foundation of any great remix lies in the platform you choose. Free tools like Audacity, Soundation, and BandLab provide user-friendly interfaces for remixing music. Platforms like Looplabs and Splice Sounds are also great for accessing samples and creating loops. By exploring these tools, you can fully embrace the concept of make music remix online free without compromising on quality.
2. Understand the Original Song
Before diving into remixing, take time to understand the structure, melody, and rhythm of the original track. Identify the key elements you want to retain and which parts you’d like to tweak. This helps in preserving the soul of the song while adding your creative spin, ensuring your remix resonates with the audience.
3. Experiment with Tempo and Pitch
Changing the tempo or pitch can completely transform a song. Speeding up a ballad can give it a dance vibe, while slowing down an upbeat track can create a more emotional tone. Most music brands that offer free tools, like FL Studio's trial version or GarageBand, have built-in features for tempo and pitch adjustments, making it simple to experiment.
4. Incorporate Unique Samples and Sounds
Adding unique samples is a great way to make your remix stand out. Websites like FreeSound and Splice offer free sound libraries that you can integrate into your track. Whether it’s a quirky beat, a funky bassline, or atmospheric effects, unique samples can add depth and character to your remix.
5. Master the Art of Layering
Layering involves combining multiple tracks or sounds to create a fuller, richer experience. For instance, you can overlay a subtle drum pattern on a vocal track or blend two melodies for a more dynamic sound. Platforms that promote make music remix online free, like BandLab, allow for seamless layering, even for beginners.
6. Leverage Automation Tools
Automation tools help in fine-tuning elements like volume, panning, and effects over time. These tools are often included in free music software provided by reputable music brands. For instance, Audacity allows for smooth volume fades, while Soundation offers real-time automation features, giving you control over your remix’s flow.
7. Pay Attention to EQ and Compression
Equalization (EQ) and compression are essential for balancing the various elements of your remix. EQ helps in enhancing specific frequencies, while compression ensures a consistent volume throughout the track. Tools like TDR Nova and OTT Compressor are free and can elevate your remix quality significantly.
8. Experiment with Effects
Effects like reverb, delay, and distortion can add a professional touch to your remix. For example, adding reverb to vocals can create a dreamy ambiance, while distortion can give instruments a gritty edge. Many free platforms promoting make music remix online free offer a range of effects, allowing you to experiment with different styles.
9. Seek Feedback from Peers
Sharing your work with friends or online communities can provide valuable insights. Websites like Reddit and SoundCloud groups are excellent for receiving constructive feedback. Many aspiring artists also collaborate on remixes using tools from trusted music brands, which foster a sense of community and learning.
10. Polish Your Remix with Free Mastering Tools
Once your remix is complete, use free mastering tools to ensure it sounds polished and professional. Platforms like LANDR and BandLab’s mastering feature can help you refine your track’s overall sound. This final step is crucial in creating a remix that stands out among others made using make music remix online free resources.
Bonus Tip: Stay Inspired by Exploring Music Trends
Keeping up with trending music styles and popular remixes can fuel your creativity. Study the work of renowned DJs and explore how they utilize tools from well-known music brands. Understanding what works in the industry can guide you in producing remixes that appeal to a wider audience.
Final Thoughts
Creating a music remix doesn’t require expensive equipment or advanced skills. By leveraging free platforms, experimenting with techniques, and incorporating sounds creatively, you can produce remarkable remixes that showcase your talent. Embrace the concept of make music remix online free by diving into the tools and resources available, and let your imagination lead the way.
Start small, stay consistent, and most importantly, have fun with your music remixing journey!
0 notes
Text
Adding Sound to my game
I went on freesound and downloaded some sounds to add to my game.
Shooting sound:

I opened my player characters blueprints and after where we spawn the projectile in and do this code (i did this code as i have 3 different shoot sounds). Essentially this code just randomly selects 1/3 and plays them.
Engine sounds:

This is code from inside the player character so open it and find the event tick code and do as shown. This code just basically makes it so the engine sounds volume and pitch changes due to the velocity of the tanks movement so it isnt just constantly playing a flat engine noise.
0 notes
Text
How to Add Voice Overs and Sound Effects to Your Animated Videos
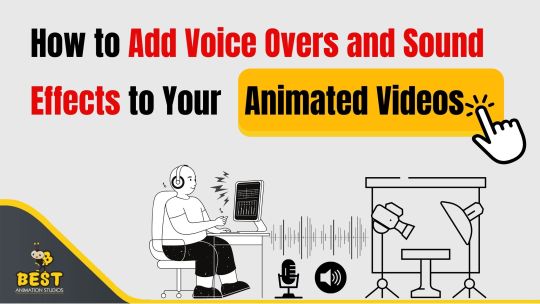
Digital graphics, drawings, and motion design are used to make animated videos, which are dynamic visual presentations. They are an effective technique for engrossing audiences and explaining difficult concepts because they use movement and storytelling to bring concepts to life. Animated videos are a great way to grab viewers' attention and deliver messages, whether they are used for marketing, training, or amusement.
Although making an animated video is an exciting process, you need more than just eye-catching graphics to fully capture your audience. Sound effects and voice overs are essential for making your animation come to life and making an even bigger impression. This short article will assist you in efficiently incorporating these components into your animated projects.
1. Plan Your Voiceover Script
Think about your voice-over script before pressing the record button. Ensure that your script aligns with the visual narrative of your animation and highlight the key points. Make it interesting and brief as good communication is important.
2. Choose the Right Voice Talent
Choosing the right voice talent is crucial. Whether you're using a professional actor to do the voice over or recording your own voice, make sure the tone and manner corresponds with the tone and target audience of your animation. For a better sound quality, consider recording in a soundproof area.
3. Record the Voiceover
It is necessary to use an excellent set of headphones and recording software in order to perform the voiceover. At the same time, it should be heard loud and crystal clear. Audacity or Adobe Audition software can be used for audio recording as well as editing works.
4. Sync the Voiceover with Your Animation
After having recorded your voiceover, bring it into the animation program used for creating the animations. Fix the audio vis-a-vis the animation to ascertain that they are in harmony with each other. As an example, you can adjust the timing from there so as to ensure that graphics correspond with the narration in Adobe After Effects.
5. Add Sound Effects
Your animated film can have a more real feel if you include sound effects. Choose audio effects that go well with your animation without drawing it. Websites like Freesound or SoundBible offer a huge variety of free sound effects. After importing them, position these sounds in such a way that they will do more good than harm in your animation work.
6. Mix and Balance Your Audio
Keep the voiceover and sound effects in harmony for better performance. Ensure that you can still hear the voice above the background noise. Employ audio editing tools to insert filters and change the levels of volume in order to achieve a perfect compact disc.
7. Review and Refine
Before completing your animation, watch the movie to check that sound effects and voice overs go along properly. Make any necessary improvements for better quality.
Conclusion
Your animated movies' interest and efficacy can be greatly increased by adding voice overs and sound effects. You may make animations that genuinely connect with your audience by carefully drafting your script, selecting the best voice actors, and harmonizing audio components.
Don't forget to share this post!
#animation#voiceover#artist#animationstudio#bestanimationstudios#explore#voiceoverartist#soundeffects
0 notes
Text
I've ran into a few problems when gathering sounds for my re-sounding experiment, I went outside and tried to capture forest sounds in my town but you can hear cars in the distance making the audio not suitable for the re-sounding, the other problem is creating the sound of smashed glass, this can be a hazard in my home as broken glass on the floor can be dangerous. so to avoid these problems I went onto a website called Free Sounds and collected 3 audio clips to replace the audio clips I couldn't obtain.
Freesound
0 notes
Text
Live Brief - VII
This post introduces week 3, which is the period of production where we gradually began constructing the cinematic cutscene.
At the beginning of week 3, and after our regular meeting as a group, I began by researching sound design, specifically for cinematic pieces. One resource in particular that I found useful as a guide for the task is Aidin Robbin's "My Process for Cinematic SOUND DESIGN" video on YouTube. It conveniently showcased a breakdown of his process as well as explained what makes good sound design by coordinating visual and auditory elements together. I also learned how to create ambience through sound to indicate shifts in the atmosphere in between and throughout main actions.
A big part of sound design is the active gathering of audio files and effects, thus, I dissected the storyline into segments that will affect sound. This allowed me to make a list of possible sounds that I would need later on such as main soundtracks, footsteps, slamming sounds, etc... I hopped on YouTube where I found my two main soundtracks "Thebes" and "War Music", and the rest of the mp3 files were collected from websites like Freesound and Pixabay.
References:
Aidin Robbins. (2021). My Process for Cinematic SOUND DESIGN - Adobe Premiere Pro Tutorial. YouTube. [online video] Available at: https://youtu.be/MQ4kYSyBgcc
World Music OFCL. (2018). Epic Middle Eastern War Music- The Last One. Youtube. [online video] Available at: https://youtu.be/b0AAavXlVos
Fantasy Meditations. (2023). Thebes - Ancient Fantasy Journey Music - Beautiful Ambient Duduk for Study, Reading and Focus. Youtube. [online video] Available at: https://youtu.be/ARHH8kYYOho
0 notes