#graphic tutorials
Explore tagged Tumblr posts
Note
How do you make your stamps? :0
Disclaimer: this is an obscenely long explanation, with pictures. Efficiency is stupid
So, for the static ones, I make a 99x56 px file on ibis paint x. Other programs are probably available online but I don't use them.
After that, I either upload an image I want to make into a stamp, or I draw one.
Then, I find a frame I want to use. Ill upload them here but let it be known I stole all of these right from deviantart


Most of them are from Lil-Devil-Melii on deviantart. The rest i have no idea. They're not all 99x56px but you can crop the canvas it's fine
Make sure to erase the edges of the picture , so they're transparent. It's not as cute otherwise
Upload those frames over your image in whatever art program you're using and viola, stamp.
For moving ones, it's a lot harder. Mostly because I refuse to download Photoshop.
There are a couple ways to do this. Some are simple animations, like with flashing text and whatnot. For these, you download the individual animation frames from your art program. Make sure it's transparent.
Then, upload each frame to ezgif.com under the option "GIF maker." You can play around with how fast each frame goes and whatnot but in the end, it'll be a stamp with some rad text that moves. This is easy, and doesn't make me want to shit my pants and cry. If you're new, do this. This is fun. This is good. This does not kill me inside
I made that↓ stamp with this method :)

this next one is how we turn gifs into stamps. This one makes me sad. It involves math and sucks. But we gotta do it. For the vibe
First, grab your gif. I'm using this cow gif because it's awesome

Then, I resize it using ezgif. Literally everything for this will be using ezgif. I am a simple man
At this point you should decide what frame to use. I'm using this one because its the first one I clicked

Figured out what size the inside of the frame is. That's what I resize the gif to, so the edges can be transparent. The inside of this one is 93x50 px, so those are the dimensions I'm making the gif.
Figure it out by putting the frame into ibis paint and realizing the canvas to fit just the inside of the frame, then seeing what the dimensions are. But there could be easier ways

Woah it's so small now
Then, still on ezgif, I go to the "crop" option.
Make sureeee to upload the smaller gif
press the button that says "extend canvas size", and then put the "width" and "height" as the dimensions for your FRAME. This'll put a bit of a transparent border around the gif. For this frame, I did 99px and 56px.
The "left" and "top" boxes show how many pixels the cropping happens from the edges of the canvas. The formula for finding that is
(width of gif / 2) - (difference between gif width and frame width / 2) = left box
For me it's (93 / 2) - (6 / 2) = 43.5
Then you do the same.for the height, which for me ends up being 22 from the top
This is reallyyy touchy and annoying though
Here's my result , with no visible difference

Okay so THEN you go to the "overlay" option, under "effects." And upload your frame. If the cropping was done right, you shouldn't have to move the frame at all and can just download it
Here's my result:

if you don't care about transparency, you can resize your gif to be the same size as the frame, and then put the frame over it. But I'm a slut for transparency
Anyways. I'm sorry if anything was unclear, it's two am. And I hope this was helpful :) these really are fun to make once you get it down
also if anyone has an easier way to make stamps from gifs, please god tell me
#web graphics#old web#neocities#custom#custom blinkies#stamps#page decor#web resources#da stamps#deviantart stamps#blinking gif#How to#tutorial#How to make stamps#Spacehey#deviantart#rentry graphics#old internet#early internet#stamp collecting#ezgif#stamp making#stamp template#Stamp frames#blinkies
7K notes
·
View notes
Text


easy tutorial for how i made this simple stylized "nebula" from my 'head full of stars' piece. note that this is not the only way, or the best way to do it, it's just the way i did it (and i made it up). enjoy
btw this was made with my 8 colour palette 'supernova' which you can download free here. eyestrain warning maybe
30% off pixquare pixelart app with code 'tofu' 💕
pixelart guide | support me | commission me | buy a print | buy a sticker
#pixel art#pixelart#artists on tumblr#art#dark art#dark aesthetic#pixel#illustration#pixel illustration#pixel aesthetic#pixel graphics#pixel art tutorial#tutorial#stars#space#nebula#eyes#cw#eyestrain#scopophobia#art tutorial
4K notes
·
View notes
Note
how does one make graphics (i need to . improve)

Well, the Princess' methods are very simple! She would be glad to teach you.
A bit long graphic tutorial under cut ^_^ (all art by Iinquint on twitter)

First, we import the frame or mask you will use. You can find these by searching "rentry frame".

Then, we will import our picture and erase any excess outside of the frame.

Then we usually add a chibi, You can do this by finding chibi art and erasing the background.

And now we will add any PNGs to the graphic. We chose circle laces for this.

Now we will duplicate the layer of our chibi.

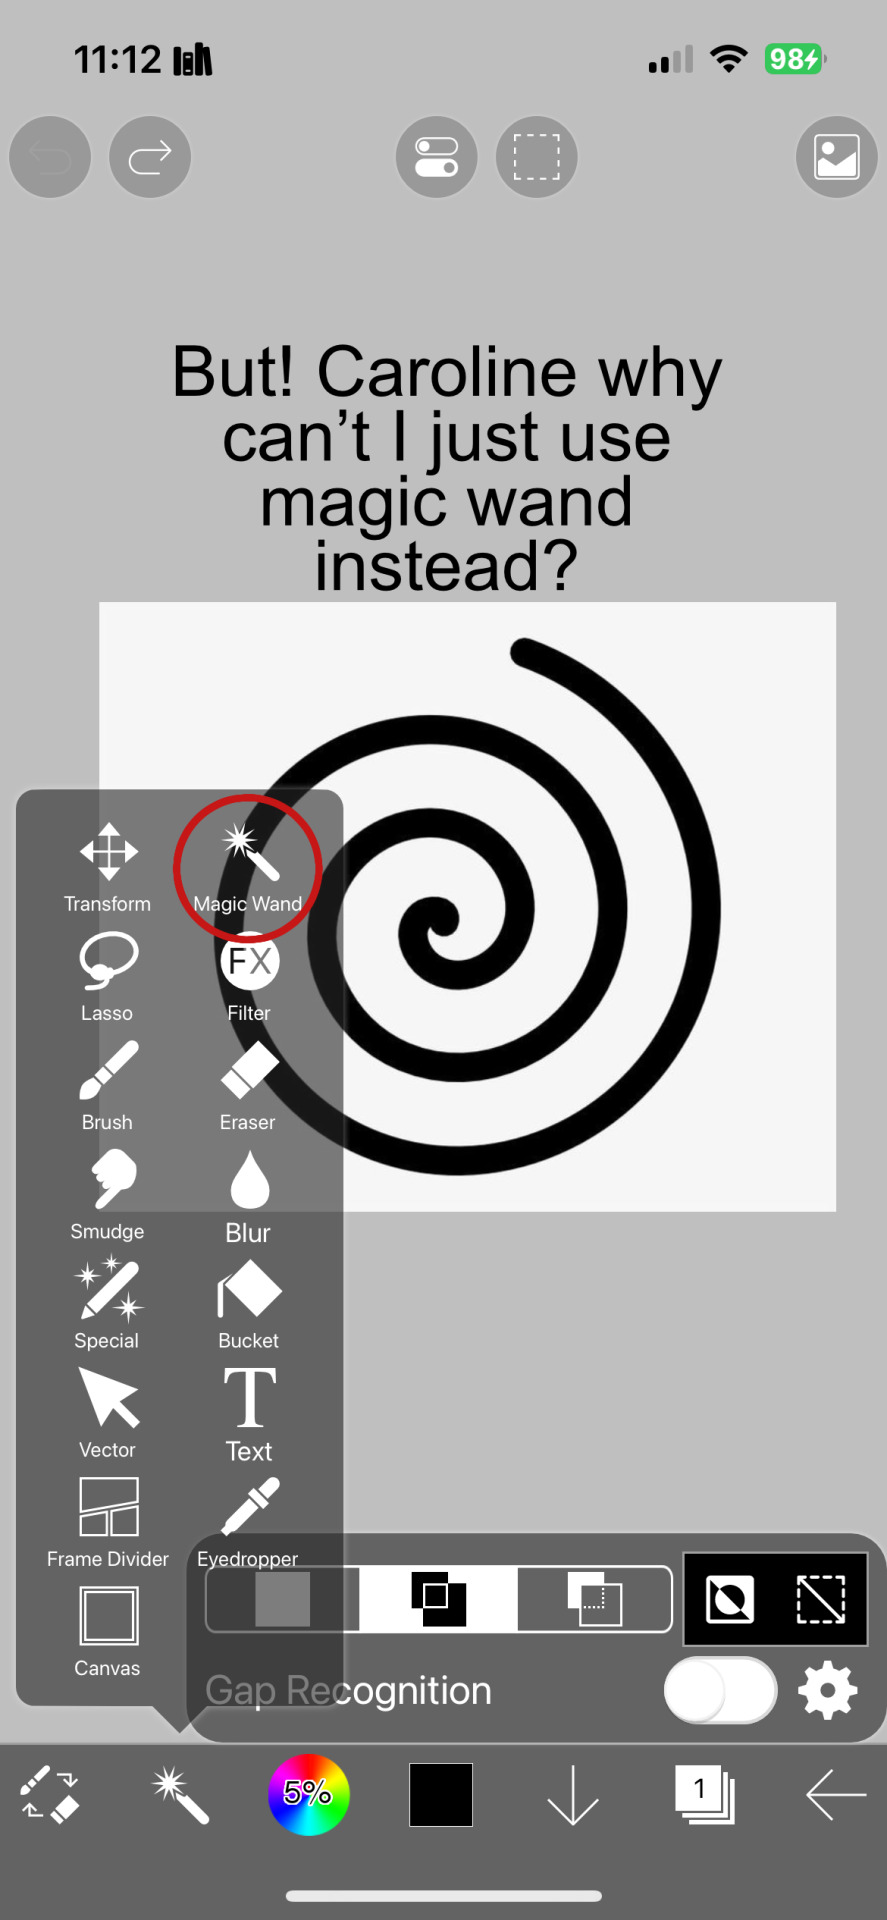
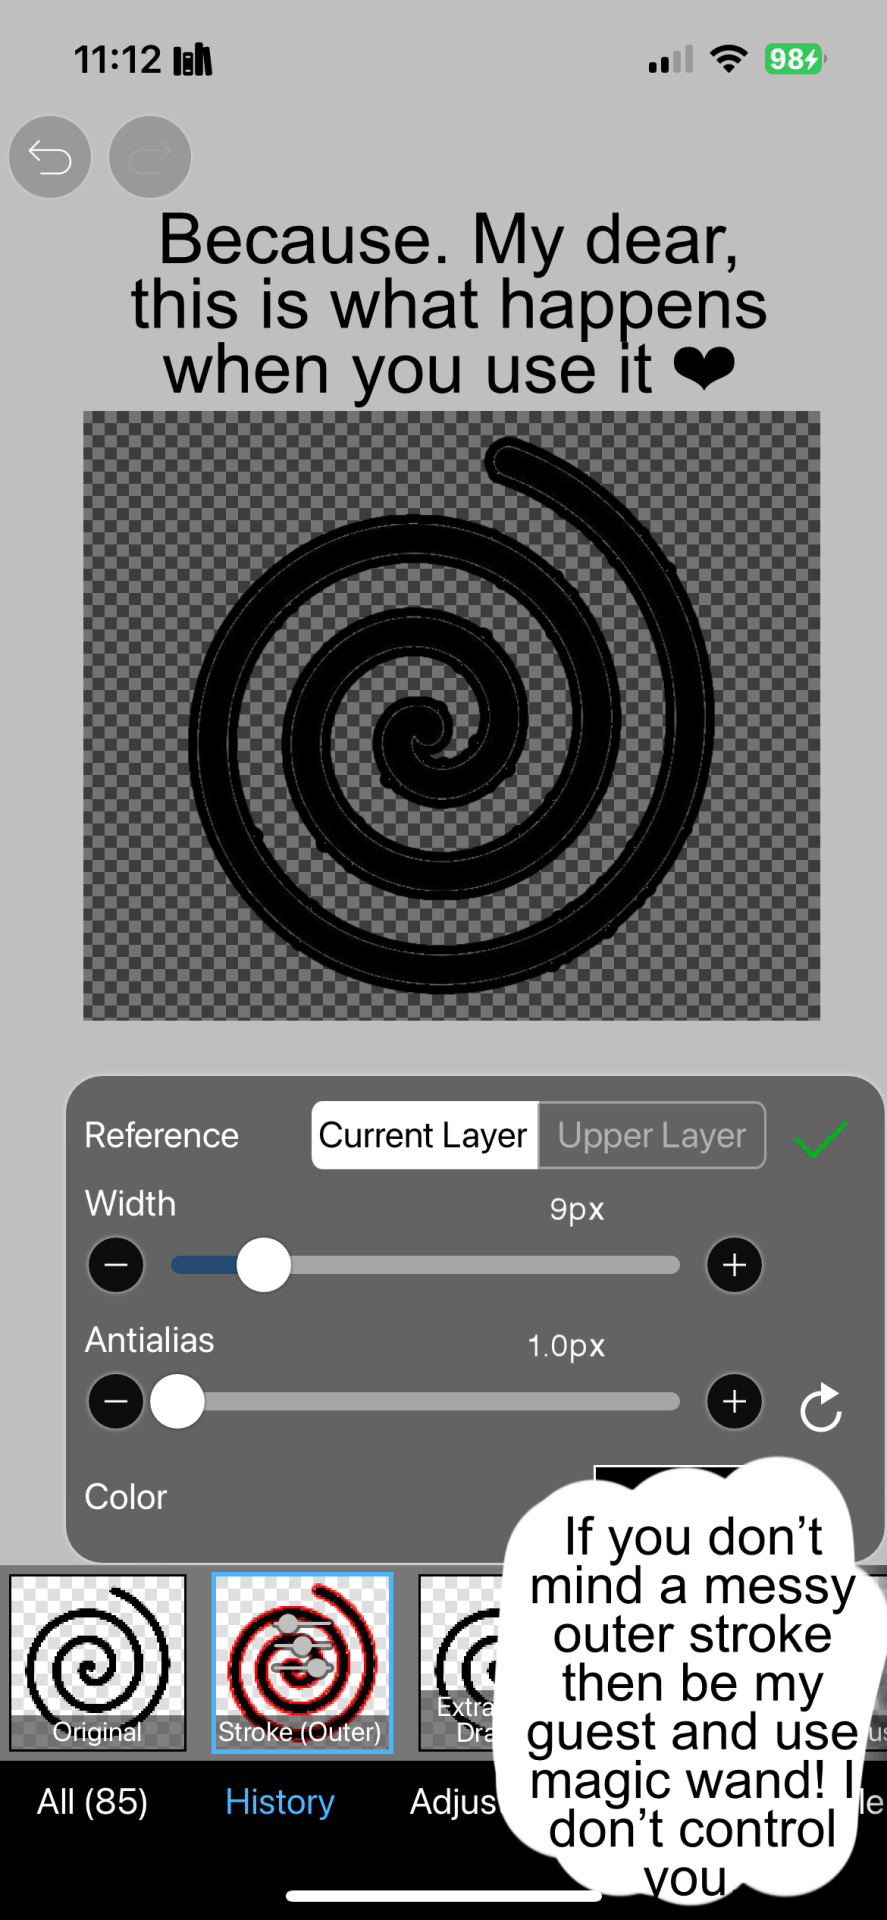
We then use the Stroke Outer filter to find dots that weren't erased, we will go to the top original later and erase where all the exposed dots are.

After that, we delete the layer & reduplicate it. Then we use stroke outer for a white outline, and then a black one. If the chibi or whatever you are using is white or very light already, feel free to reverse the white & black.

Then we add glow outer (usually around 1-2px)

Continue this process for everything

Save it

And then we will import it into a new canvas through 'import picture' & then use the grayscale.

Now, We do not always use a gradient map. But feel free to try out gradients to see if it looks nice on the graphic. Either of the 2 top sites work.

Find a gradient that looks nice. If none fit your vision, feel free to skip it.


Now, import the new image and then add textures. Play around with blending modes & opacity until it looks right.

Boom! You've made your very own graphic.
Now for animated graphics...
(No visuals) If you'd like one where the small chibi moves, move it to be angle -5, save it, and then angle 5 and save it. (Also adjust angles if the 5 looks weird.)
Import the images into ezgif gif maker and turn on "Don't stack frames" and adjust delay time. (I usually use 80ish)
--
Animated graphics 2

Import your graphic into capcut. Add a green background or whatever color is not present on your graphic at all. Add the gif you want on the graphic. Adjust for all the images to go on for equal times so it works.


Ezgif > Mp4 to gif > Remove Background > Select hex code of background > "Replace hex with transparency" > Adjust Fuzz > Optimize

And voila, your graphic is completed! Feel free to adjust in ezgif effects if needed.

#ᛝ a chat with the lady spawn .ᐟ#rentry decor#rentry inspo#rentry resources#rentry#rentry stuff#rentry graphics#rentry banner#rentry coloring#ibis paint colorings#graphic tutorial#rentry tutorial#editblr#pr3typriincess#pr3ttypriincess forsaken#pretty princess forsaken#forsaken roblox#roblox forsaken#roblox#forsaken rentry
403 notes
·
View notes
Note
HIIIIIII!!!! sorry if this is like a stupid ask lol, but could you do a stamp tutorial? your stamps are always so high quality oml, how do you resize your gifs and images???


HIIII and no worries, I can totally make a stamp tutorial! (⌒▽⌒)
I’ll be going through on how to make a normal image stamp and then a gif stamp. By following these two tutorials, you’ll be able to make stamps just like these!


PROGRAM USED ★ Ibispaint
STAMP TEMPLATE BY ★ AHMED-ART on Deviantart.
To start off, you must find an image you’d like to make into a stamp. Then, find a stamp template you think would pair well with your image. There are many different types of stamp templates out there and you can find a lot of them on Deviantart.
Make sure to read the terms of use for the template before using though! Here is the template I will be using for this tutorial.

Making stagnant stamps is easy once you got the steps down. You can use any art program and follow a similar process, but I only use Ibispaint to create mine.
First, create a canvas that is the same width and height as your stamp template. This one is 97x57. Most stamp templates have super similar proportions. If you are unsure of your stamps dimensions, you can create a 100x100 canvas then crop it around the stamp template once you have inserted it.
(Brush icon -> Canvas button -> Trim)
To get higher quality on the image inside your stamps: the closer the better! For example:


See how the first stamp’s image is rather far away? This makes the quality appear much lower. However, once you zoom in, it becomes higher! So I recommend finding images to create stamps out of that you are able to zoom in on so the quality can pop.
You’ll need to erase the parts of the image that don’t fit inside the stamp so it remains transparent around the border.
If you want to change the border color of the stamp, fill in the canvas with the color you want. Then, clip it to the stamp border. Lastly, go and set it on multiply. This will change the stamp borders color!

If you want to put a line texture on your stamp, you can utilize the ruler tool in Ibispaint to draw lines over your stamp.

I’ll add these every once and awhile to my stamps for fun. If you set the opacity of the lines to 10%, it’ll end up looking something like this.

And that’s the completed stamp!
Changing the border color and adding the line texture is completely optional, though it’s always fun to customize stamps!

PROGRAMS USED: Ibispaint, Ezgif
GIF stamps are a little trickier, but the process is not too difficult once you got it down!
First, find a gif that you would like to make into a stamp. I’ll be using this one!

if you want to have a different colored or customized stamp border, you must edit it on Ibispaint before like explained above.
You can combine the layers and save them transparently so it’ll end up looking something like this.

I made this one blue and added a gradient to it to match the gif I want to make into a stamp! You can add a gradient to the border by adding a darker color onto the multiply layer then using an airbrush to blend both colors together in the middle on both sides of the template.
Now, open up Ezgif and click the tab called Crop. Then, insert your stamp template there. The way I find the dimensions of the inside of the stamp is by cropping my way around the inside of the template.
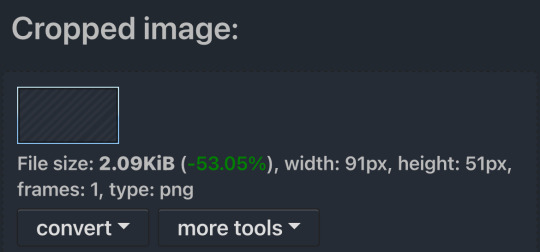
The dimensions inside this template in particular are 91x51. This is what we will resize our gif to! Before we can do that, click the crop tab again at the top of the page to refresh it and then insert your gif. This isn’t required to do, but I like to crop my gifs a bit so they focus more on what is going on inside my stamp. Like I said before, the closer the better, as it will make the quality higher!

Now that we have our cropped gif, click the tab called resize at the bottom of the page. The dimensions of the inside of this stamp are 91x51, so insert those numbers in the width and height boxes to then resize the gif.

Next step is to click the overlay tab at the bottom. You will need to click the button that says “extend canvas size” so we have room to overlay the stamp template on top of the gif. After extending the size, upload the stamp template as an overlay where it says choose file.

On computer, after clicking upload image, you can just drag the stamp template over the gif and situate it. However, you can also figure out the number coordinations to fix the template ontop of the gif by messing around with it a bit. I make my graphics on my phone so I use the numbers instead of dragging.

Left means to move the template left or right depending on the numbers you insert. Top moves the template up or down. The left for this template is 42 and the top is 21. It takes a bit of messing around to find the exact numbers.
Now that the template is ontop of the gif, all that is left to do is to crop the space around it. Click the crop tab again at the bottom of the page and then click where it says “trim transparent pixels around the image.” This will easily crop the extra space around the stamp.

Click download to save your gif and that’s it! Here is the finished product!

The whole process for making gif stamps is always the same, the only things that can vary or change are the dimensions of the gif (so it can fit inside different templates) and the left/right.
I hope you find this tutorial helpful and if anyone needs anything else explained, let me know. These stamps are free to use if anyone would also like to use them.
Happy stamp making everyone! 🩷
Dividers (c) @coco-coquette

#tutorial#web graphics#graphics#webcore#old web#rentry#stamps#web decor#gif stamps#alien stage#alien stage till#strawpage#spacehey#ᯓ ᡣ𐭩🐚asks
710 notes
·
View notes
Text

— how to recolor gifs ( easy ) tutorial
website used :
https://ezgif.com/instagif

#૮ ´ ཀ `𓏼 ა#rentry#rentry resources#rentry stuff#rentry graphics#rentry decor#rentry inspo#rentry divider#rentry pixels#rentry dividers#rentry frame#rentry icons#rentry mask#rentry template#rentry tutorial#tutorial#nahida#genshin impact
810 notes
·
View notes
Text
========================================================
[tutorial: build your own neocities/nekoweb page]
========================================================
a beginner's guide for making your very own home on the indie web—retro, personal, weird, and 100% yours.
this ain’t an average wix, squarespace, or tiktok aesthetic.
we’re talking full html/css with soul and attitude.
[ prerequisites ]
------------------
> an idea
> basic text editor (vscode, notepad++, or even notepad)
> account on https://neocities.org or https://nekoweb.org
> some gifs or tiles you love (dig deep or make your own)
> optional: image host or gif repo (or self-host everything)
[ feeling overwhelmed? read this. ]
-----------------------------------
you do *not* need to know everything.
html is not a mountain. it's a garden.
you plant one tag. then another. then a style. then a button.
you can build your site piece by piece.
and every piece is a portal to somewhere personal.
you are allowed to make broken pages.
you are allowed to use templates.
you are allowed to start over as many times as you want.
this is *your* world. you control the weird.
[ step 1: create an account ]
-----------------------------
> neocities: https://neocities.org
> nekoweb: https://nekoweb.org
register a name, log in, and enter your file manager.
this is where you upload your files and see your site live.
[ step 2: your first file - index.html ]
----------------------------------------
make a new file: `index.html`
basic starter:
<html>
<head>
<title>my weird little corner</title>
<link rel="stylesheet" href="style.css">
</head>
<body>
<h1>welcome to the void</h1>
<p>this is my page. it’s strange. like me.</p>
<img src="mygif.gif">
</body>
</html>
> upload to the dashboard
> boom. you’re live at
https://yoursite.neocities.org
or https://nekoweb.org/u/yoursite
[ step 3: add a style sheet - style.css ]
-----------------------------------------
create a file called `style.css` and upload it.
here’s some nostalgic magic:
body {
background: url('tile.gif');
color: lime;
font-family: "Courier New", monospace;
text-shadow: 1px 1px 0 black;
}
img {
image-rendering: pixelated;
}
marquee {
font-size: 20px;
color: magenta;
}
link it in your html and the vibes activate.
[ step 4: decorate it like a haunted usb ]
------------------------------------------
> use <marquee> for chaos scrolls
> embed gifs from https://gifcities.org/
> steal buttons from https://cyber.dabamos.de/88x31/
> set up a guestbook at https://www.smartgb.com/
> loop audio with <audio autoplay loop>
> add fake errors, 90s web lore, random link lists
[ step 5: resources, themes, and comfort ]
------------------------------------------
> templates & layouts: https://numbpilled-themes.tumblr.com
> glitchy gifs & buttons: https://glitchcat.neocities.org/resources
> layout builder: https://sadgrl.online/projects/layout-builder/
> free tiled backgrounds: https://backgrounds.neocities.org/
> beginner html intro: https://www.w3schools.com/html/
> pixel fonts & cyber assets: https://fontstruct.com/
remember:
you don't need to know js. you don't need to be a coder.
you just need a mood, a direction, a dream.
the html will follow.
[ bonus concept: shrine pages ]
-------------------------------
> a page just for one character you love
> a room to house digital fragments of your identity
> embed quotes, music, images like altars
> call it shrine.html and link it from your homepage
[ closing mantra ]
------------------
you are not here to be optimized.
you are not a brand.
you are a ghost inside the machine,
carving your initials into the silicon void.
welcome to Your website.
========================================================
#webcore#old web graphics#neocities#web graphics#carrd graphics#carrd resources#rentry decor#rentry graphics#carrd moodboard#carrd inspo#neopets#indie#indie web#early web#webdevelopment#web development#web resources#web design#old internet#old web#oldweb#nekoweb#transparent gif#tiny pixels#pixel gif#moodboard#tutorial#html page#html theme#htmlcoding
433 notes
·
View notes
Note
can u do a tut for sizing borders bc im rlly bad at coding in rentry


This is the code that I usually start out with, and it works most of the time without tweaking much. The thing I still tweak the most though is the CONTAINER_BORDER_IMAGE_OUTSET. I usually set it anywhere from 10px to 20px, and sometimes I will set two values to it if I want the outset to be diff for top+bottom and left+right
I prefer a more like bigger(?) Look to how my border are cut, so I do that by making the slice smaller (15% to 20%) or I make the width bigger (25px to 30px)
There are a lot of ways to playe around with the coding though like down below I set slice to 30% which I think I see a lot of people do idk. But to keep the bigger cut look I like I make the width 30px. I like to keep my widths at 20px to 25px though because of how much my outset is. My outset sometimes clips under the edit button when you save the code and view it normally, so I keep the width a bit smaller and use a smaller or equal slice. But there are a lot of ways to play around with this because it depends a lot on your rentry and what border you're using becuase there are out(?) Borders and in(?) Borders. Basically just play around with CONTAINER_BORDER_IMAGE_SLICE + CONTAINER_BORDER_IMAGE_WIDTH You can also have fun with the repeat options (round, repeat, space, and stretch iirc). I'll leave my code and examples below. I hope this helps Anon! I'm not sure if it's comprehensible or if I'm just yapping BS..


Above big slice big width, below big slice small width


Down below are what I call 'In borders' cause they're facing inwards. I usually have the outset on these a little bigger


CONTAINER_MAX_WIDTH = 300px
CONTAINER_BORDER_IMAGE = Your border image
CONTAINER_BORDER_IMAGE_SLICE = 20%
CONTAINER_BORDER_IMAGE_WIDTH = 25px
CONTAINER_BORDER_IMAGE_OUTSET = 10px
CONTAINER_BORDER_IMAGE_REPEAT = round
#rentry#rentry stuff#rentry decor#rentry inspo#rentry resources#rentry graphics#rentry pixels#sntry#stelluar#aesthetic#rentry tutorial#rentry metadata#metadata#tutorial#rentry border#borders#metadata border#rentry code#code#rentry help
701 notes
·
View notes
Text

the ultimate beginner metadata tutorial !! by a dummy :3


HEY PALS AND PEOPLE doing some tips and tutorials ,,,, kinda explaining the metadata that people do in rentry
the site already have a "tutorial" on the "how" window, these on the post are the ones who need further explanation
i will put in topics and try to do my best on this, its a long read!

• the border i will be using for example its by @/suturical on this post
• now, how to understand this and make the magic happen?
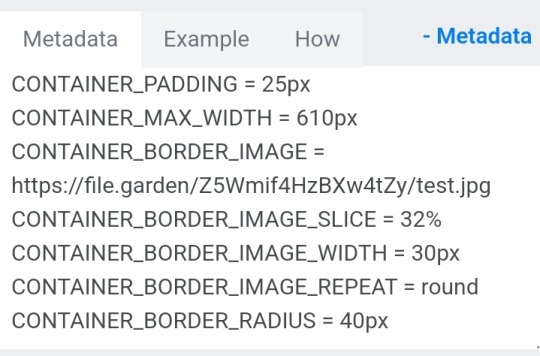
GOTCHA!!!
1. Borders: container adjustements
• the least important thing is the container width, you can put as you please but i use it on 400px — 610px, its just my recommendation
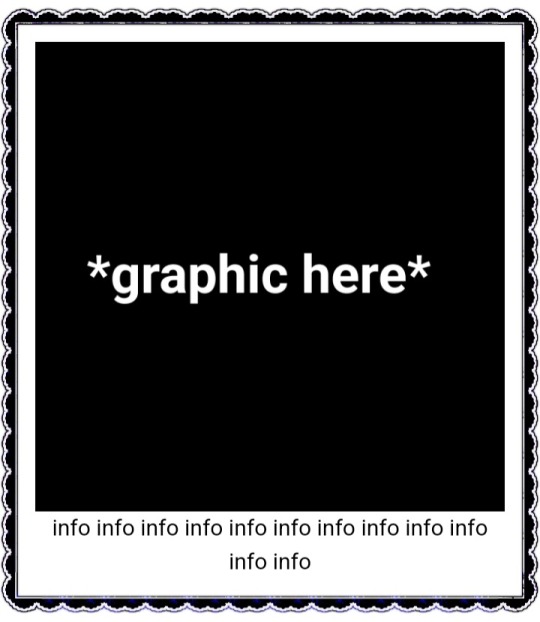
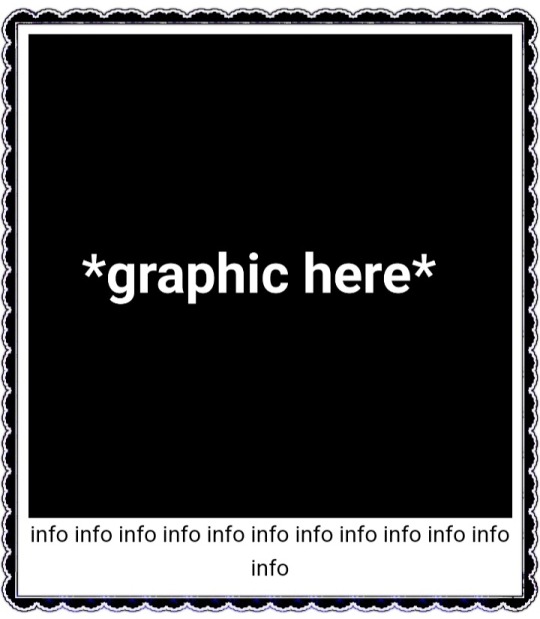
• now the padding is important, its basically the distance between the border and the elements of your rentry
• example: padding on 25px
• example: padding 20px
2. Borders: slice
• the image slice is basically how much it will slice your border and repeat it, i recommend using it 20% – 40%, however adjust as you please!
• example: slice 37%

• example: slice 23%
big difference isnt it? and i only changed the slice part, nothing else!
3. Borders: width
• basically the width of the border, adjust as you please but i also recommend to put on 30px as its the maximum size you can put
• example: width 30px

• example: 15px width

4. Borders: repeat
• this is another thing that dont have much secret and explanation about, there are 4 repeating types for borders, they are:
• stretch: will stretch the original size of the border across the entire container

• round: most used, 'normal', will make your border get around the container

• repeat: will repeat a certain part of the graphic image across the sides

• space: will give space between the repetitions

• onto the next part, text!

2. Text: font applying
• ngl its pretty simple, first catch ANY font of the google fonts site and do like the screenshot above, detail, if you font name has a space between the name (example: playfair display) you MUST put the _ to substitute the space, or it won't work
• but if the font name doesn't have any spaces, write it normally
2. Text: text size
• also really simple, explore the sizes on the rentry, i use it 10px – 25px, adjust to your liking!
2. Text: coloring
• tired of coloring all sentences manually? just do the code from screenshot and input your color! it can be written like i did or the hex code/whatever!
• you can still color things manually even when using this
• final with all these changes:


SO THATS IT! the most important actually :33
hope it isnt confusing, any questions please send an ask!
tagging oomfie @chokingonchairs bc finally got the courage to make this and yu asked for hehe ^___^
THANKS FOR READING!

# giftᧉd from 𐓟bove … ⟡#rentry tutorial#tutorial#rentry#rentry decor#rentry graphics#graphics tips#graphic tutorial#icon pack#icons#random headers#twitter icons#headers#icon#random icons#twitter header pack#twitter headers
635 notes
·
View notes
Text
Digital Stamp Making Tutorial
Hello, and welcome to the long-awaited(at least on my part) digital stamp-making tutorial from neosprites! I’d like to preface that I learned what I was doing from this tutorial so it may be a bit redundant, but if anything I get a bit more specific. Thank you so much to @graphic--horde for your work, it changed me as a graphic maker. This is gunna be a long post so feel free to bookmark it for later. Now, onto the show!

The frame I will be using for this tutorial (which is the frame I use on 99.9% of my stamps) I found from the above linked post, which I believe is from a creator that OP lost track of. Its inner dimensions are 94x50 pixels and its outer dimensions are 99x56 pixels. Here it is!

Find your material! - I recommend using websites like Tumblr and searching with the “GIF” filter only on, or alternatives such as Giphy or Tenor. Your browser may let you directly save the .gif file; if not and you are noticing it restricts you to save it as a .webp file you can try an extension like “Save webp as PNG or JPEG” (for Firefox but I image other browsers have similar functions, but I really recommend you switch to Firefox). To use this you will right click on your source .gif like normal but instead of clicking on “Save image as…” click “Save webP as…” and then click “GIF”. You should be redirected to the website ezgif.com where we will actually be doing all of our editing! Here’s the .gif we’ll be working with.

Convert to GIF (optional) - if you used the extension from the above step you should already be ready to click the blue “Convert to GIF” button. If not, go ahead and open ezgif.com and click on “webP” and then “WebP to GIF”; then convert to a gif with the blue button.

Resize the GIF - now that we have a gif ready to edit, let’s make it the right size. The easiest method I have found is to change it directly to the frame’s inner dimensions, 94x50 pixels. [EDIT: Make sure in the aspect ratio drop drop menu you select "stretch to fit" and not "center and crop to fit" like I did in the photo example.] Click “resize” and then type [94] in for the width and [50] for the height. Next press the blue “resize image” button.


Add the frame - next click “overlay” then click the thin blue button that says “Extend canvas size(use if overlay exceeds GIF sizes)”. This will give us some extra room to add the frame onto the design. Next click “Browse…” and find the frame you have saved onto your device, then click the blue “Upload image” button.


After that it’s going to be misaligned, that’s normal! It will say you have the option to drag it into place, but don’t bother. That’s one of the reasons my old stamps look wack, it’s just harder to do. Instead type [44] in for the Left box and [22] in for the Right box. It took me a while to figure out these dimensions to be honest, and I’ve only tested it with this frame so I don't know if it works with others. Then click the blue “Generate image” button.


Crop the transparent edges - click on “crop”. You will have the option to check a box that says “trim transparent pixels around the image” however, I don’t recommend this as it tends to crop a few of the frame’s pixels with it sometimes. Next, set the Left position to [44] and the Right position to [22]. For the other dimensions we will use the outer dimensions of the frame which are 99x56 pixels, this will trim everything except the tiny spaces in between the stamp frame’s spikes. Type the width as [99] and the height as [56] and click the tiny blue button that says “set”. After that click the blue “Crop image” button.


Save and use! - all that's left is to click “save” and upload the graphic to your liking. (best seen on dark mode obviously)


If you’d like to tag me in stamps you’ve made using my tutorial I would love to see them, but it’s not required!! Make sure to always give credit for pictures/gifs when you can and try not to make stuff out of personal/fan art. Thank you to the person in my inbox who requested this tutorial, I had been meaning to for a while but it was just the kick I needed. :)
#carrd graphics#carrd resources#carrd stuff#rentry graphics#rentry resources#rentry decor#rentry pixels#rentry stuff#rentry inspo#deviantart#neocities#mine#my graphics#my tutorials#resources#tutorials#tutorial#how to#stamps#blinkies#graphics#web graphic#old internet#early internet#spacehey#da stamps#page decor#custom#old web#frames
416 notes
·
View notes
Text

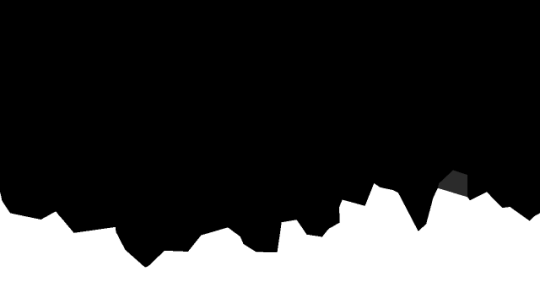


jagged, crystalized and pixelated tumblr banner masks!
for the 2 anons that asked!
okay to repost, just dont claim as yours. and free to use (its what they were made for, duh!)
keep in mind gifs dont mesh well with translucent colors if youd like to use these with them :0
#🌫️ i know what you dread | creations#anonymous#carrd resources#rentry resources#rentry#web graphics#rentry tutorial#rentry inspo#rentry gif#rentry decor#rentry graphics#rentry template#image masks#edit resources#editing resources
1K notes
·
View notes
Text

Tutorial on how I cutout my PNGs!!
I use Ibis paint X for this entire process and get all of my images off of Pinterest.
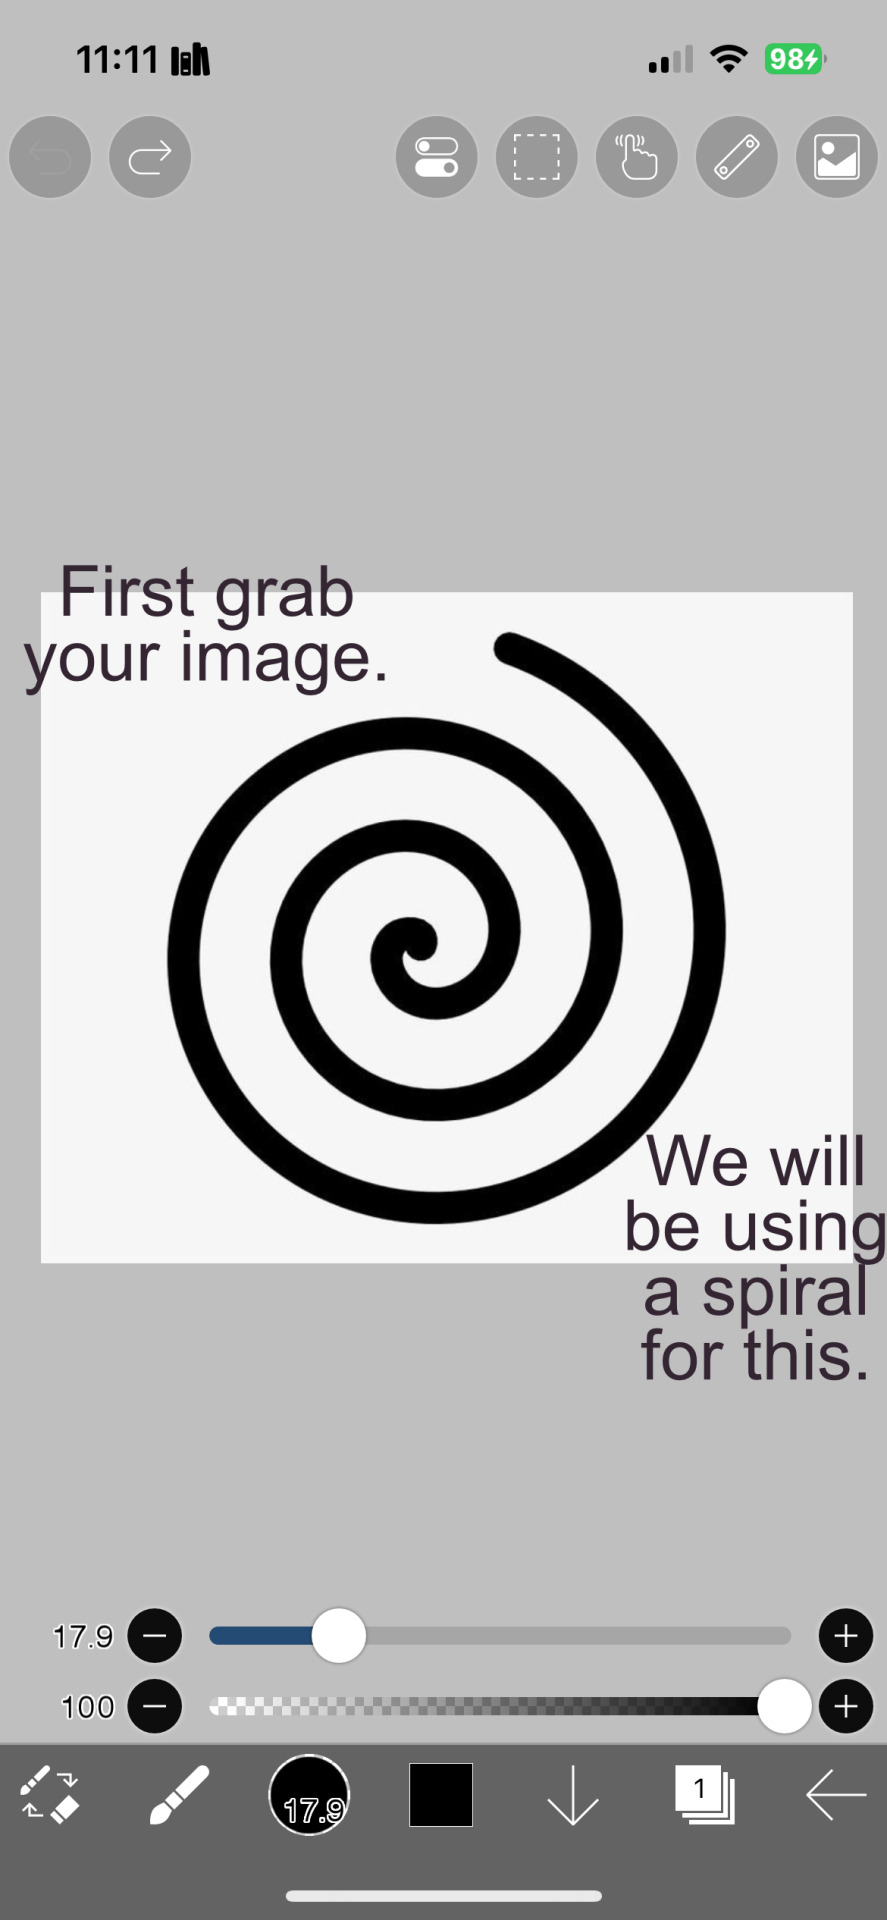
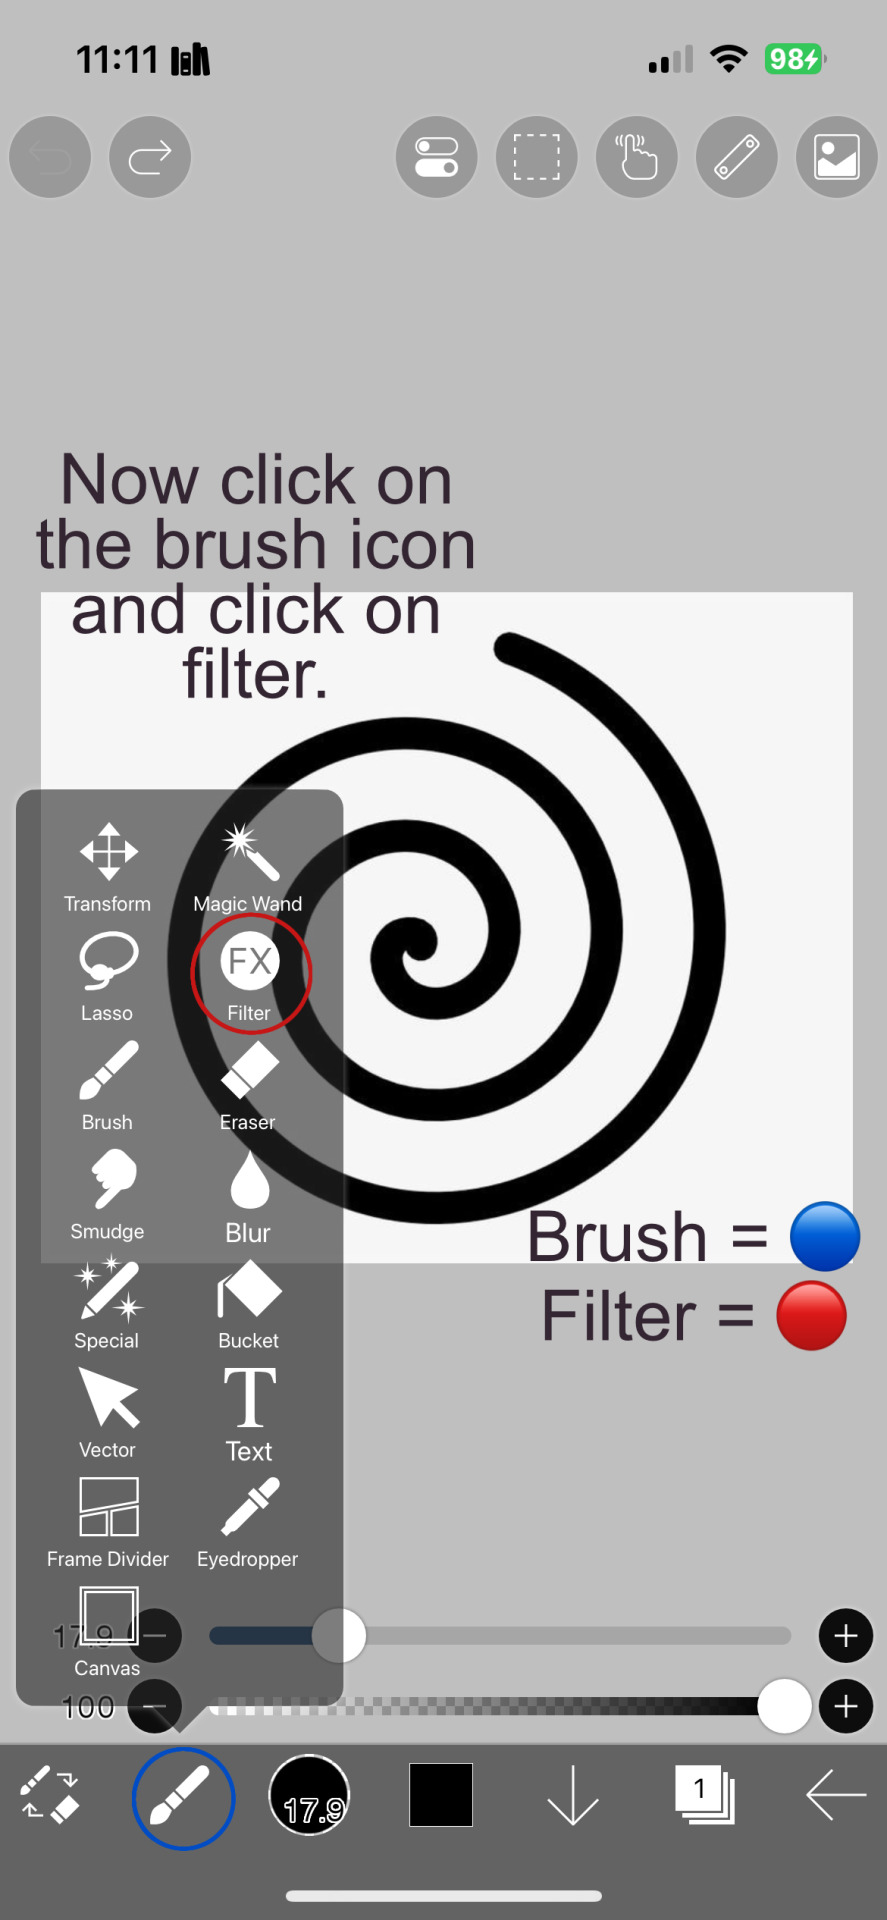
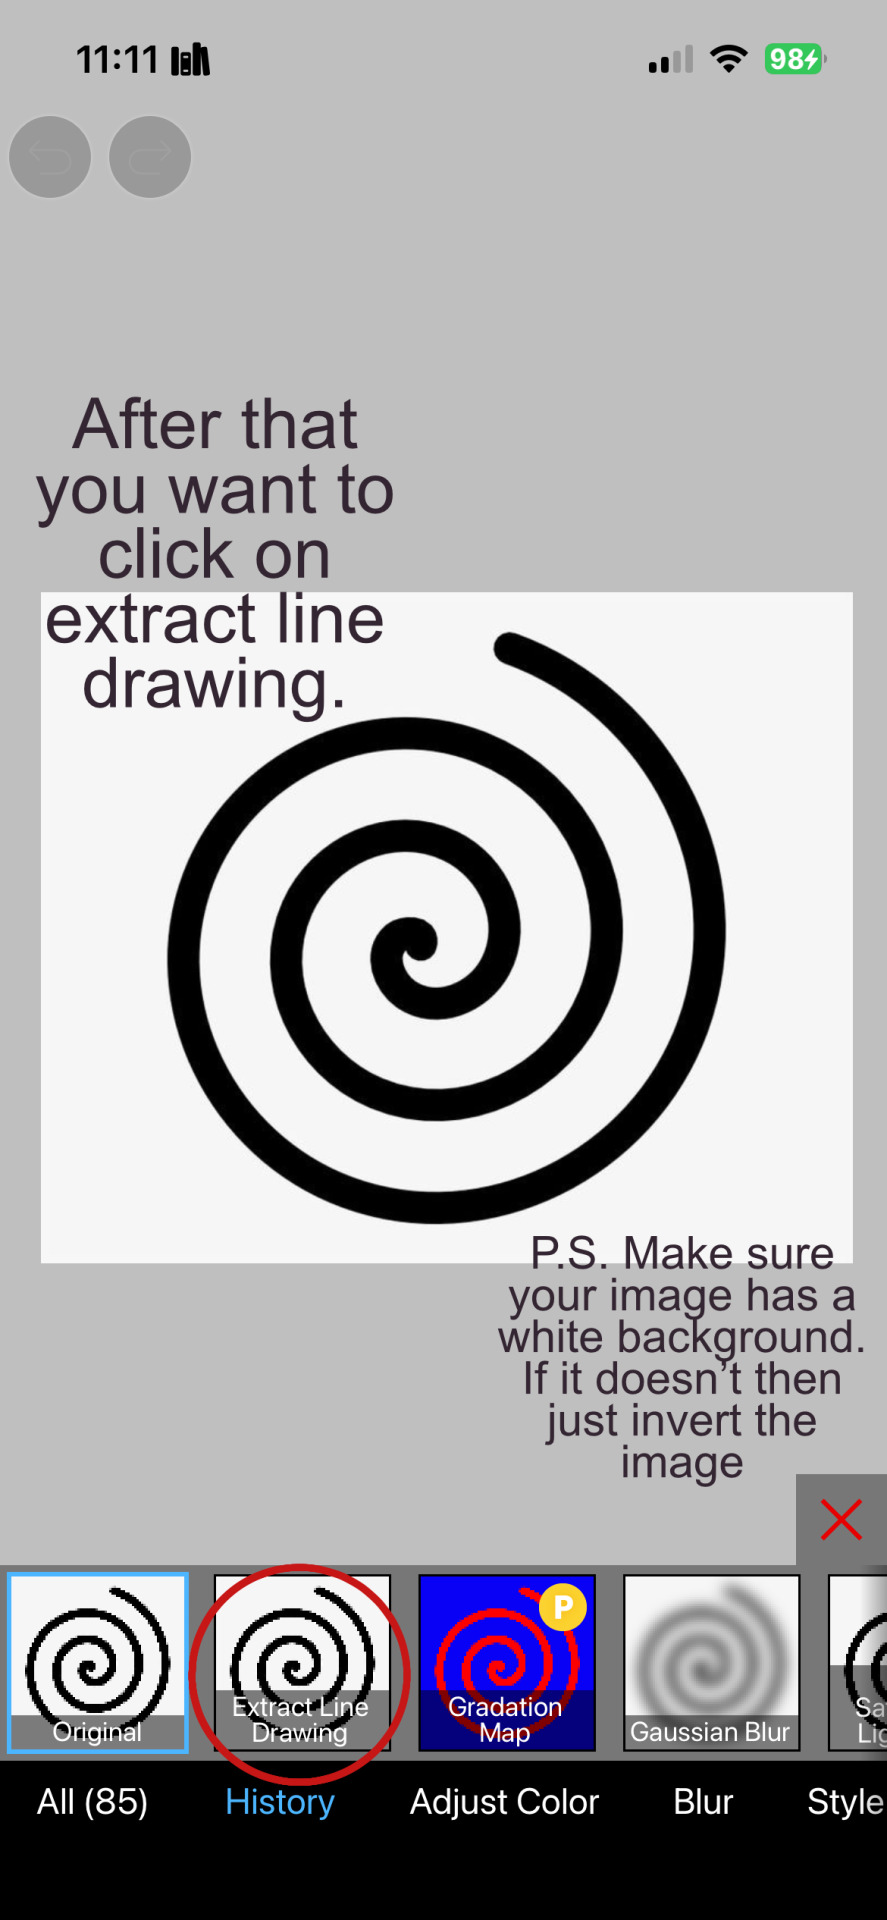
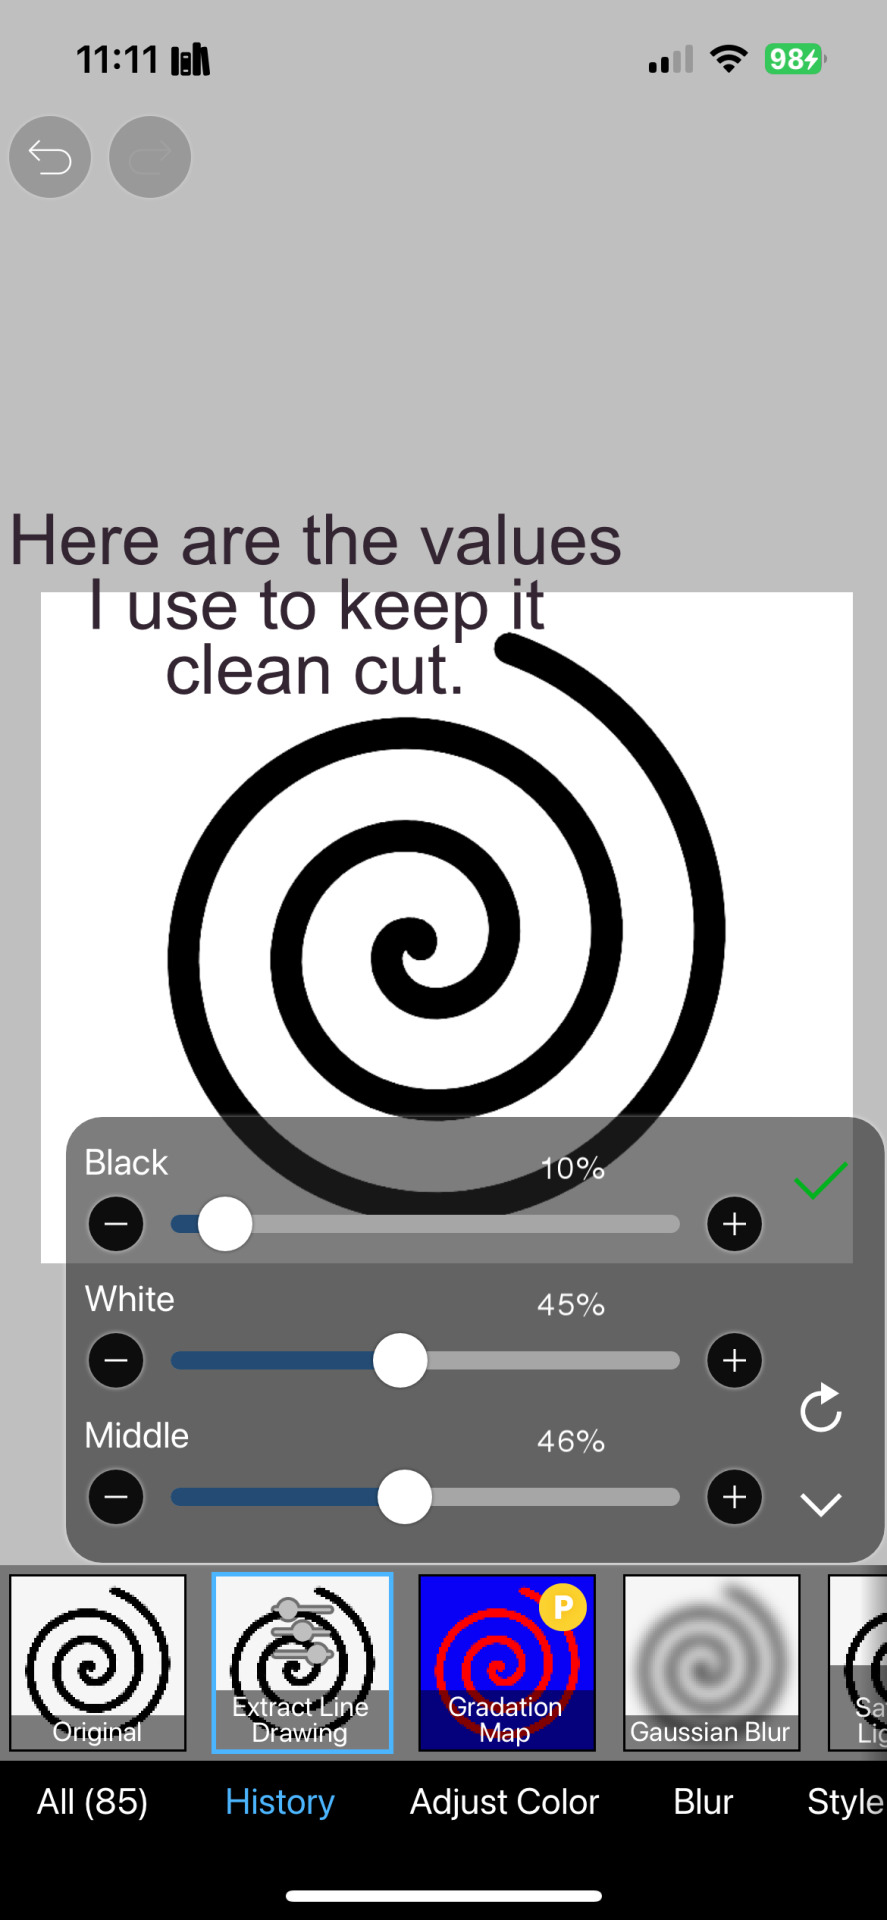
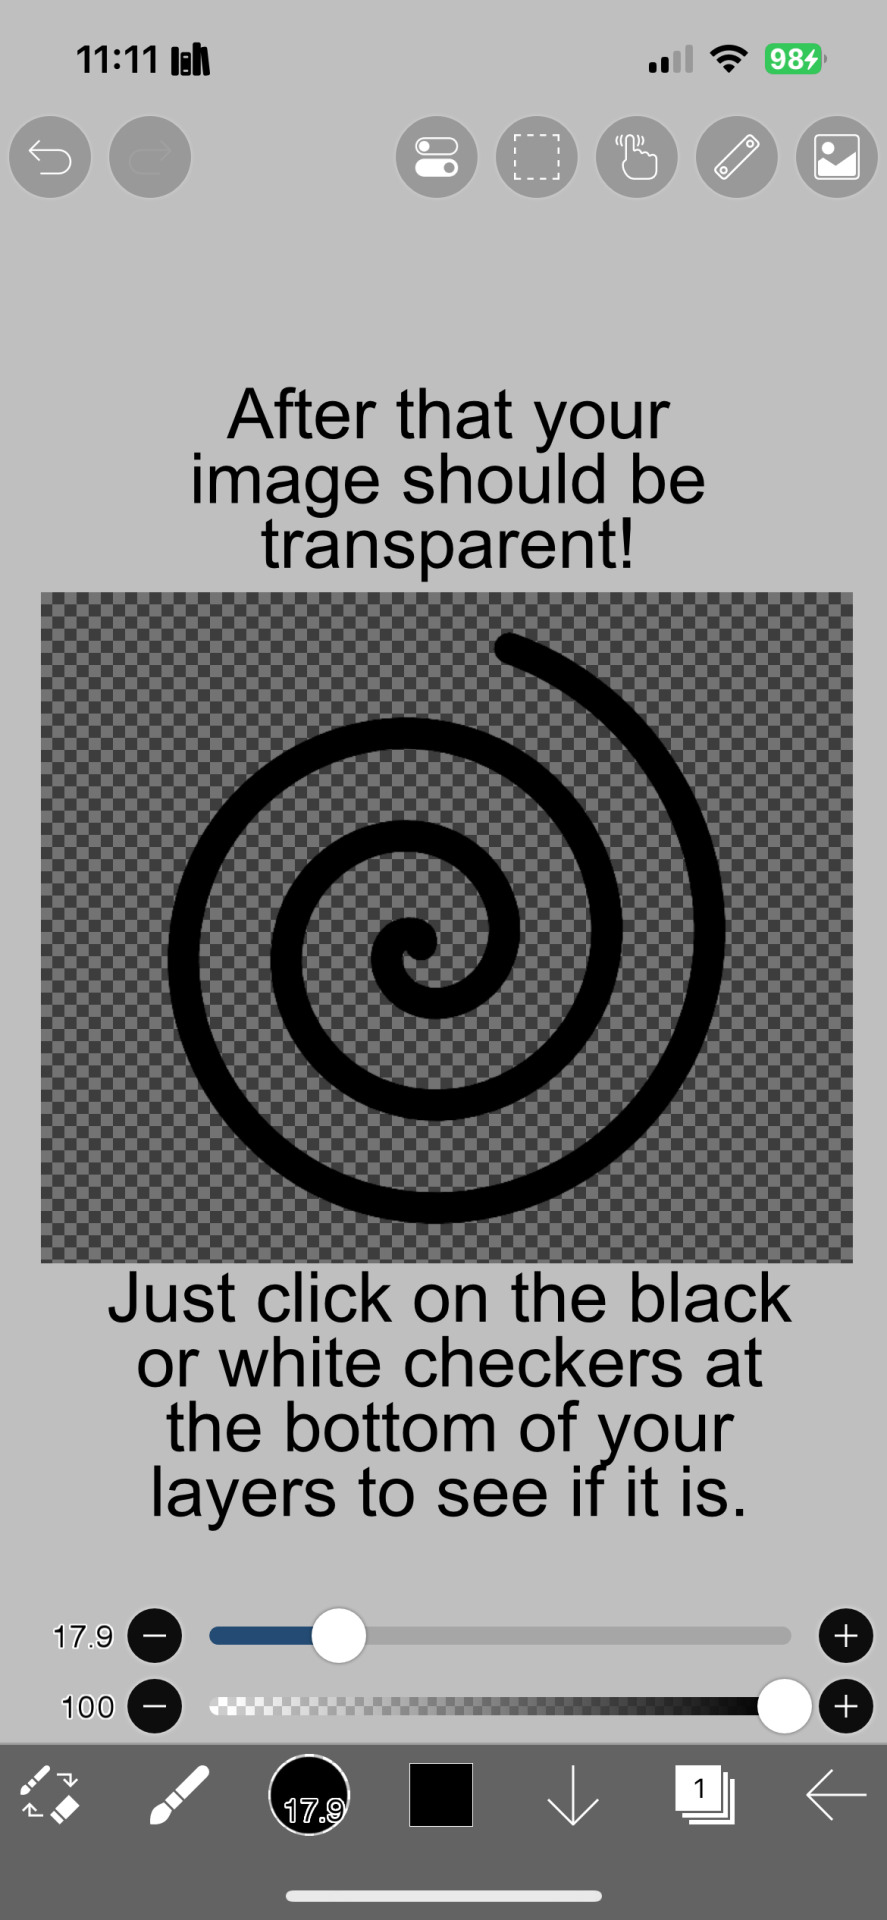
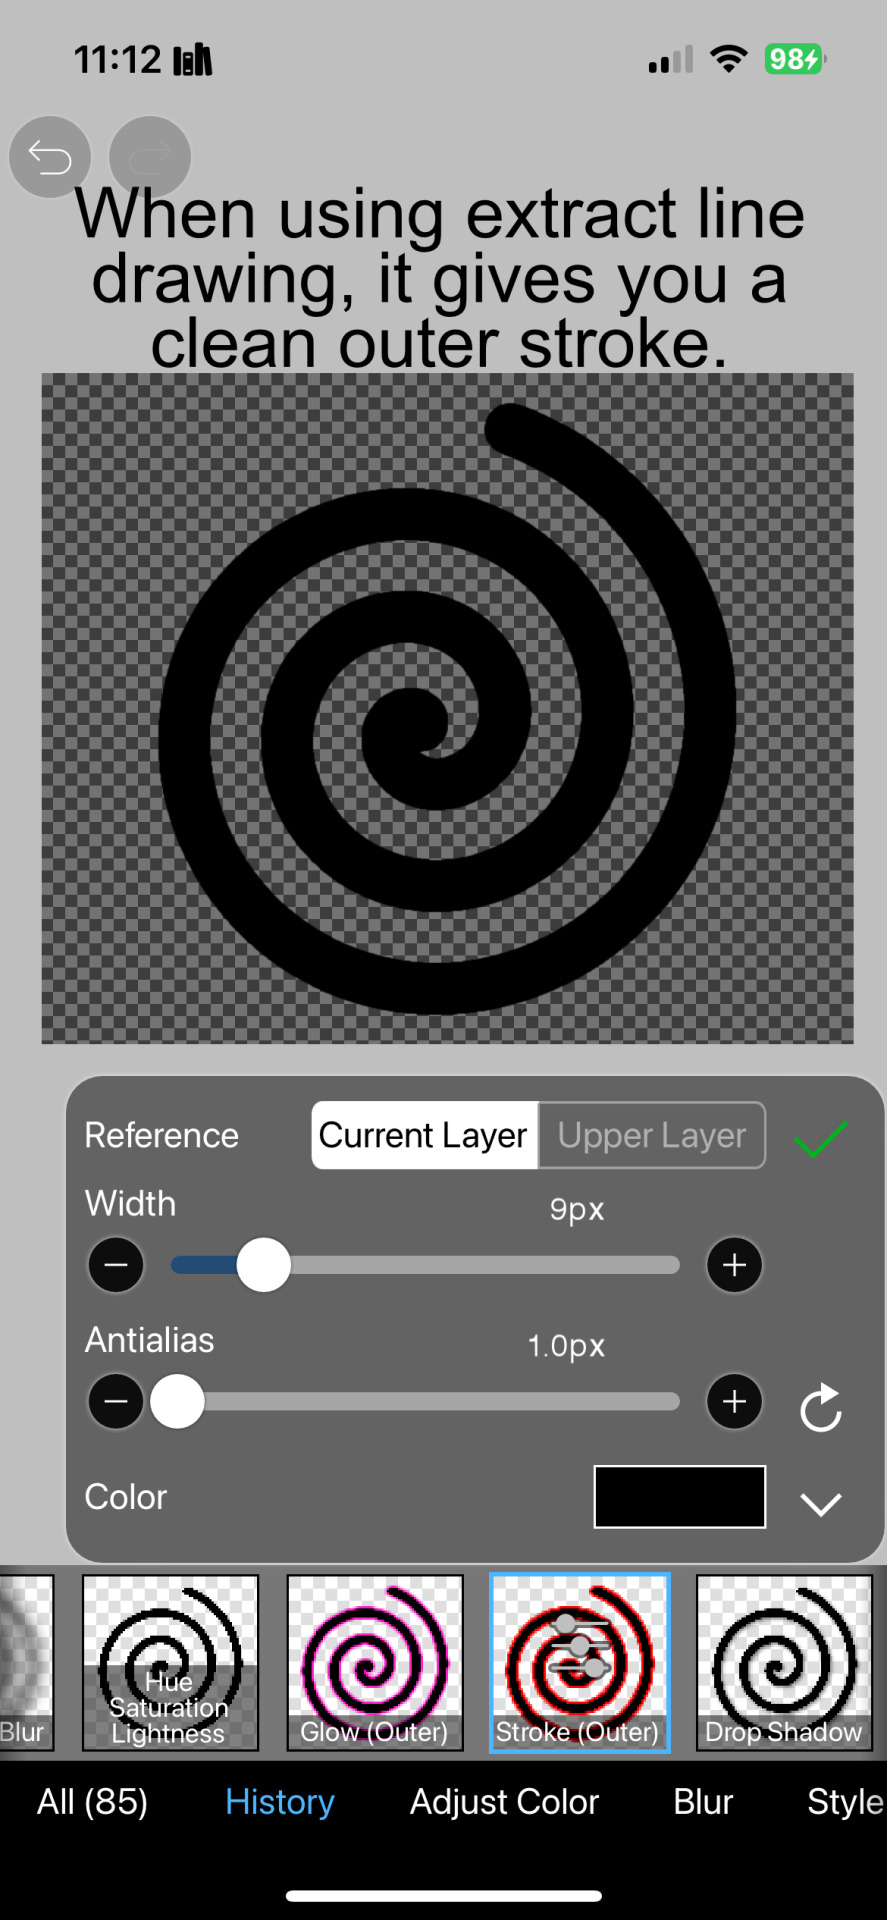

And hopefully this helps! Sorry if I didn't explain certain things well enough or the image ID text is confusing. I don't include it all too often.
#png#answers#rentry decor#rentry#puerileds#transparents#tutorials#talking#my stuff#decor#carrd decor#carrd resources#rentry resources#carrd png#rentry png#gfx#vector#vectors#graphic design#design#pinterest png#ibis paint#carrd stuff#rentry stuff#editblr#Is this enough tags
229 notes
·
View notes
Text
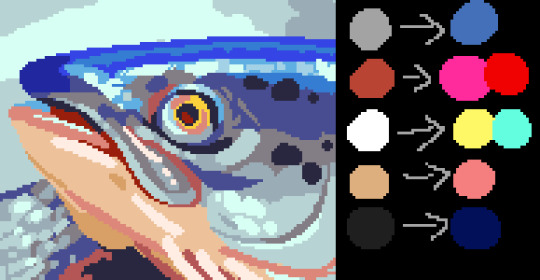
how tofu colour
#colour theory#“theory”#no theory just vibes#pixel art#artists on tumblr#pixel artist#pixel illustration#pixel aesthetic#art study#pixel art study#pixel#illustration#pixel graphics#tutorial
3K notes
·
View notes
Text


Hey look it's my first manga animation. Digging these out from 2020 for @marshmallowgoop!
Fun fact I made the top gif as part of my first semester learning after effects. Immediately decided against making an MMV for my 30 second final. Just the prep work is so time consuming.
#dcmk#motion graphics#my gif#my edit#I honestly don't know why the white in the first gif is darker#and why I'm just noticing it now#I'm 99% sure this was the first time I animated an ink splatter with shape layers#that tutorial is ingrained in my soul I've made so many ink animations
185 notes
·
View notes
Note
if its alright how did you make the status boxes? i.e. in your gyaru/gyaruo post >_<
Hiya!! My BF created the IMVU status boxes / buttons from that post so he made a tutorial detailing how to make them as well!
📖Programs/sites used ☆ Clip studio paint & ezgif (I use ibispaint to make shiny buttons and the process is the same).
⭐️This button doesn’t include these but if you want to have a symbol (like the star from the gyaru buttons) at the front of yours, find an imvu status button (one from the game to use as a base) that includes the symbol you want and in the backgrounds layer recolor it along with the background so they are the same color.
Here’s the finished button from the video with a few alternate color schemes if anyone would like to use them!


I hope this helps & let me know if you have any questions! ♪
#web graphics#graphics#tutorial#rentry graphics#rentry#imvu#buttons#blinkies#old web#pixels#graphic resources#oceancore#starfish#imvu status#gif#decor#shiny buttons#ᯓ ᡣ𐭩🐚asks
473 notes
·
View notes
Text
EXPLAINING HOW I MAKE BLINKIES :3
like these guys


websites / apps: blinkies.cafe , ibis paint x , ezgif.com !
STEP ONE !! go to blinkies.cafe and select a blinkie. i reccomend going to old and selecting one of the very simple ones !! DO NOT SELECT THE GRADIENT ONE YOU WILL SUFFER
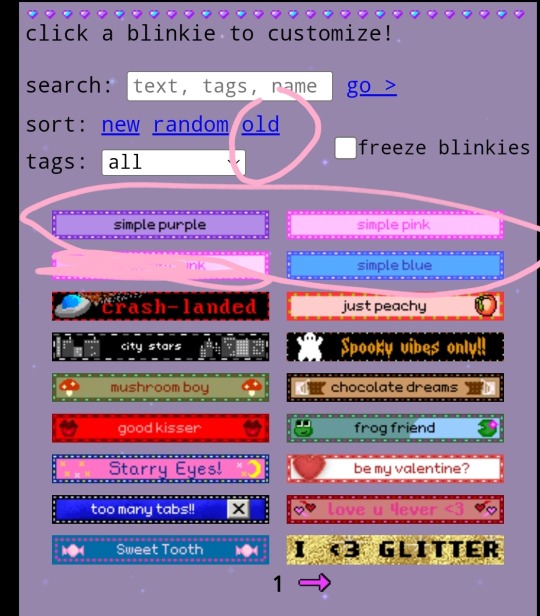
STEP TWO !! click on it btw. anyways, since spaces won't work, put " " !! it will register !! this is also how to make videos on yt title-less i think... anyways, choose the biggest size
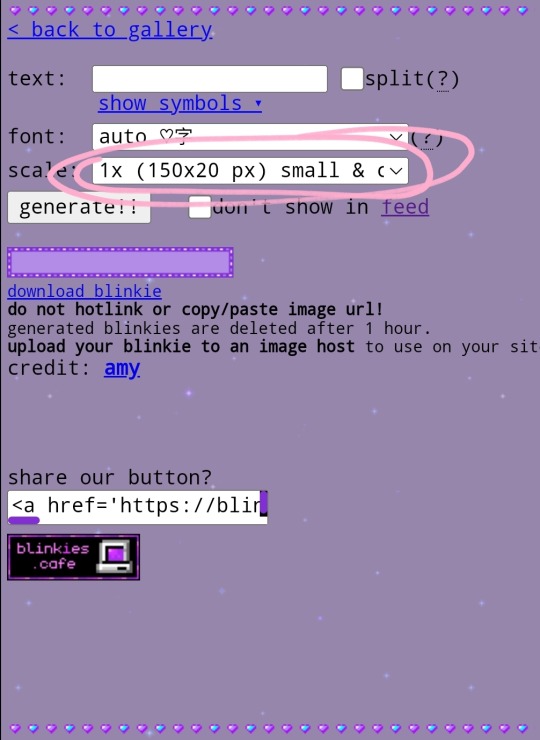
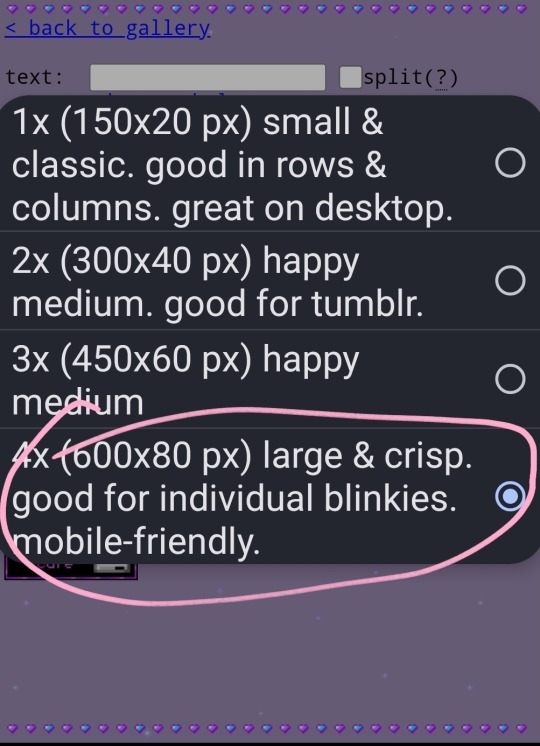
then click generate and download the blinkie!!
STEP THREE !! import into ibis paint !!
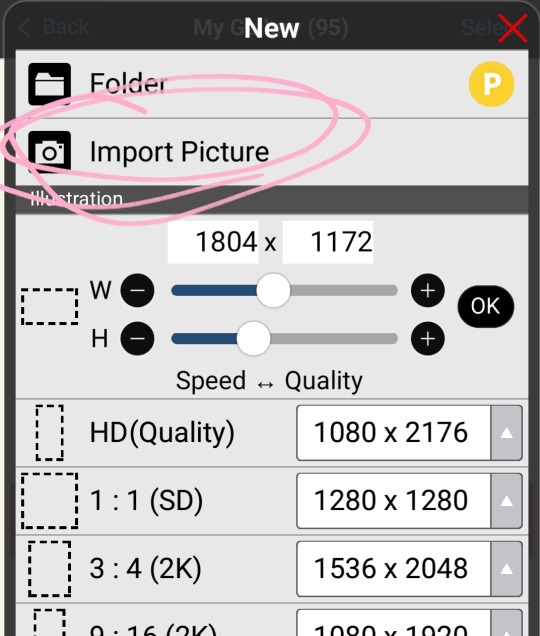
now i reccomend putting a reference of whatever character in your ref window. won't explain that, look it up.
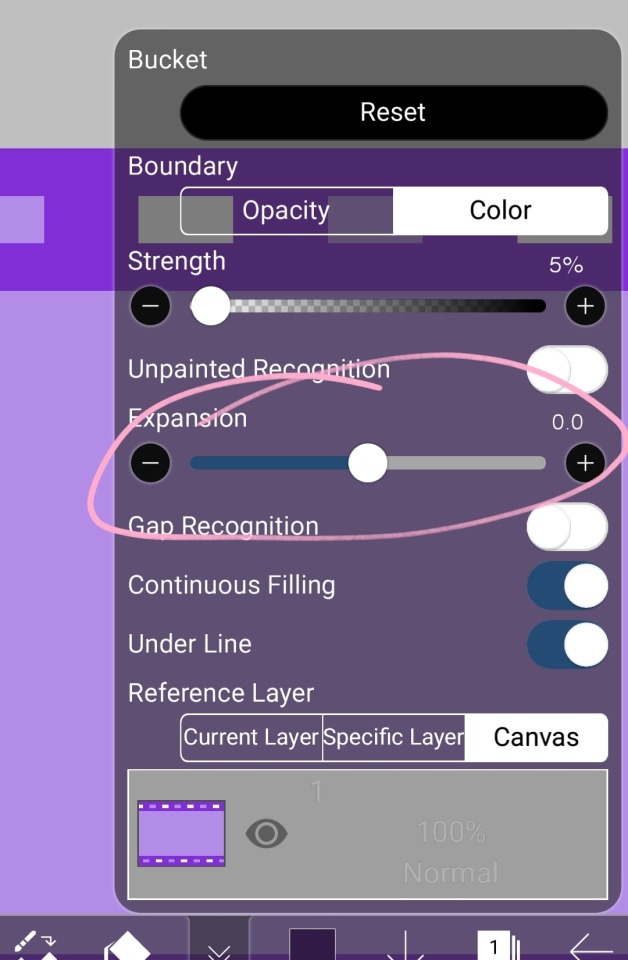
STEP FOUR !! choose colors and recolor with bucket tool on 0
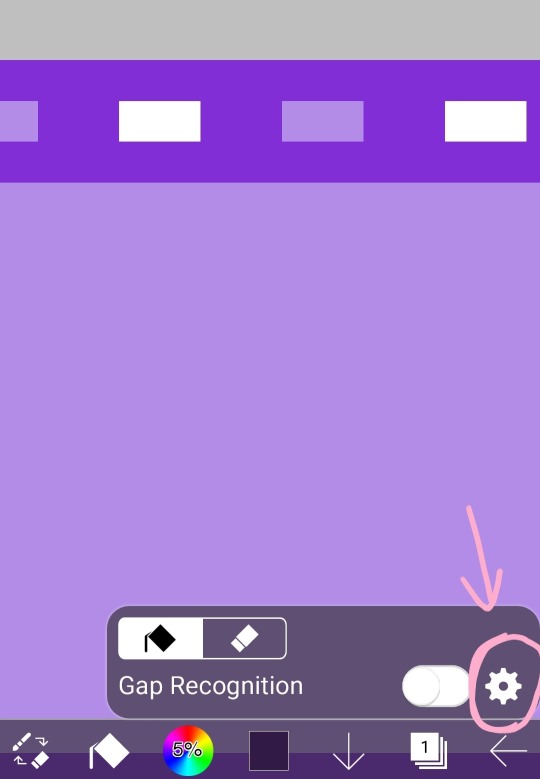
wow, look at that !!

STEP FIVE !! import a transparent image of your character and put the text of your choice.
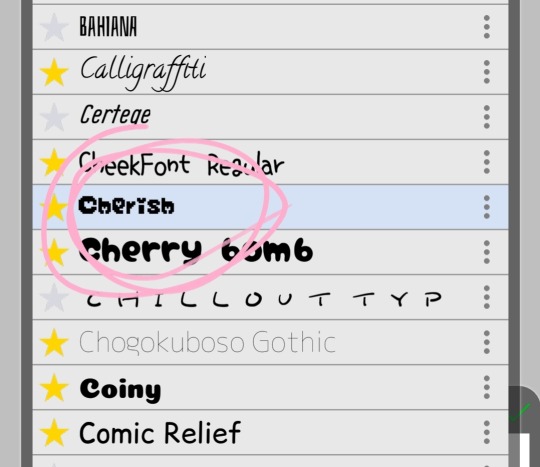
heres the font i use !!

advice for choosing colors of the text: make the body the color of the blinkies border and the outside the brightest light !!
STEP FIVE AND A HALF !! this is optional, but i make a very small border around the text. duplicate layer and bring it on top, make all other layers invisible, alpha lock, make it the color of the border, turn off alpha lock, use bucket tool on expand 0.5 or 1 and tap a few times on the blob, turn other layers back on, put the duplicate under the original thing and merge so it's a small border. it's very subtle but i like it.
see the difference?


STEP SIX !! download it, then flip ONLY THE BLINKIE LAYER horizontal and vertical then save again
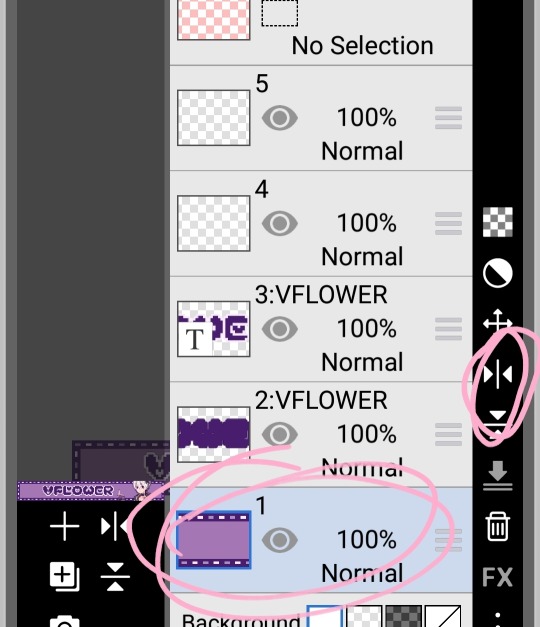
if you want another set of words, add them now!!
STEP SEVEN !! go to ezgif.com and imput them
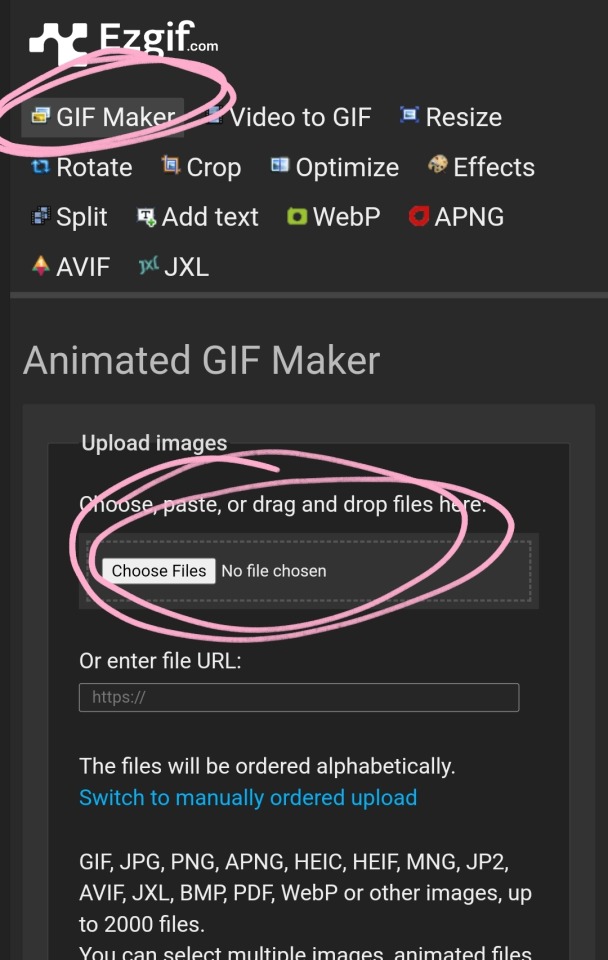
the click upload files. then click make a gif :3

the end (≡・x・≡)
#🧁 sweet shenanigans#jiraiblr#vflower#blinkie#blinkie tutorial#web graphics#web resources#blinkies#tutorial
187 notes
·
View notes
Note
plzzzz how do u make ur rentry backgrounds like this one im so lost im crashing fr :((((

Hello!! 😊 I make these on ibispaint and ezgif. I make these frame by frame actually and compile it on ezgif. For ones like these specifically where the frame switching is different (crossfade on the imgs in the frame and the simple '2' frame up and down on the bottom right,) I make the crossfade first, and then I make the simple '2' frame gif, and then I combine them together. It's a decent amount of trial and error. I hope this helps you!!
#rentry#rentry stuff#rentry decor#rentry inspo#rentry resources#rentry graphics#rentry pixels#sntry#stelluar#aesthetic#rentry tutorial#rentry help#background#rentry backgrounds#rentry gif#gif
175 notes
·
View notes