#how to upload wordpress website from localhost to server
Explore tagged Tumblr posts
Visit Tumblr Blog
Explore Tumblr blogs with no restrictions, modern design and the best experience.
Last Seen Tumblr Blogs


Fun Fact
Tumblr was acquired by Yahoo for $1.1B in 2013.
Text
Perfex CRM Nulled php Script 3.2.1

Download Perfex CRM Nulled PHP Script for Free – Empower Your Business Looking to supercharge your business operations with a full-featured client relationship management system? Perfex CRM nulled php Script is the perfect solution for startups, agencies, freelancers, and small to mid-sized companies. This dynamic CRM platform helps you manage customers, projects, invoices, and much more—all under one powerful dashboard. And the best part? You can download it for free right here on our website. What is Perfex CRM Nulled PHP Script? Perfex CRM is a high-performance customer relationship management solution developed using CodeIgniter framework. It’s widely recognized for its intuitive interface, feature-rich environment, and flexibility. Whether you’re looking to automate billing, manage leads, or streamline project workflows, Perfex CRM delivers an exceptional experience without the hefty price tag. Why Choose Perfex CRM Nulled PHP Script? By downloading the Perfex CRM nulled php Script, you gain unrestricted access to premium features at no cost. This nulled version has been unlocked to provide complete freedom over your CRM system. Perfect for testing, development, or full business deployment, it’s a game-changer for those who seek high functionality without premium licensing costs. Technical Specifications Script Type: PHP (CodeIgniter Framework) Database: MySQL File Size: ~120 MB Version: Latest updated version License: Nulled (no license key required) Outstanding Features and Benefits Project Management with Milestones and Tasks Automated Invoice and Billing System Lead Management and Conversion Tracking Client Portal for Better Communication Fully Customizable Dashboards Multi-language and RTL Support Advanced Reporting and Analytics Professional Proposal Templates Email & SMS Integration for Notifications Real-World Use Cases Businesses across various industries trust Perfex CRM nulled php Script for daily operations: Digital Agencies: Seamlessly manage client tasks, campaigns, and deadlines. Freelancers: Stay organized with invoices, projects, and client communication in one place. Startups: Leverage a cost-free CRM that scales as you grow. Consultants: Track billable hours and generate custom reports with ease. How to Install Perfex CRM Nulled PHP Script Download the zip file from our website. Extract the contents to your web hosting server or localhost environment. Create a new MySQL database and import the included SQL file. Set up the configuration file with your database details. Access the installation wizard and follow on-screen instructions. Within minutes, you’ll be ready to launch your CRM portal and start managing your business like a pro. Frequently Asked Questions (FAQs) Is this the full version of Perfex CRM? Yes. The Perfex CRM is a complete, unrestricted version featuring all modules and tools available in the original paid script. Do I need a license key to activate it? No license key is required. The script has been pre-modified to work without activation. Can I use it for client projects? Yes. Many developers use nulled scripts for client demos and internal projects. However, for production and compliance, always consider purchasing the original license. Is it safe to use? Our uploaded files are thoroughly scanned and verified. Still, it's recommended to test in a local or staging environment first. Download Now – Start Managing Smarter There’s never been a better time to empower your team and streamline operations. The Perfex CRM nulled php Script offers an enterprise-grade CRM experience—without the enterprise costs. Download it now and explore all the tools you need to elevate your business. Looking for more tools? Don’t forget to check out elementor nulled pro to enhance your WordPress design capabilities. And if you're working with sliders or need stunning visual effects, Slider Revolution NULLED is an excellent addition to your toolkit.
0 notes
Text
How to Move Your WordPress Site from Localhost to a Live Server
Developing a WordPress site on localhost is a great way to build and test your website in a controlled environment. However, the real challenge arises when it's time to move the site from your local server to a live hosting environment. If not done correctly, you could encounter broken links, missing images, or even database errors.
In this blog, we'll guide you through a step-by-step process to successfully move your WordPress site from localhost to a live server.

Step 1: Choose the Right Hosting Provider
Your first step is to select a reliable web hosting provider that meets your website’s needs. Look for:
Server Speed: Fast servers for better performance.
Uptime Guarantee: At least 99.9% uptime to ensure availability.
Ease of Use: User-friendly dashboards and tools.
WordPress Support: Hosting optimized for WordPress websites.
Popular options include Bluehost, SiteGround, and WP Engine.
Step 2: Export Your Local WordPress Database
The database is the backbone of your WordPress site. To export it:
Open phpMyAdmin on your local server (e.g., XAMPP or WAMP).
Select your WordPress database.
Click on the Export tab and choose the Quick Export method.
Save the .sql file to your computer.
Step 3: Upload Your WordPress Files to the Live Server
To move your files:
Compress Your WordPress Folder: Zip your local WordPress installation folder.
Access Your Hosting Account: Use a file manager or an FTP client like FileZilla.
Upload the Files: Transfer the zipped folder to your hosting server's root directory (usually public_html).
Unzip the Folder: Extract the files once uploaded.
Step 4: Create a Database on the Live Server
Now, set up a new database on your live hosting server:
Log in to your hosting control panel (e.g., cPanel).
Navigate to the MySQL Databases section.
Create a new database, database user, and password.
Assign the user to the database with full privileges.
Step 5: Import the Database to the Live Server
Open phpMyAdmin in your hosting control panel.
Select the new database you created.
Click the Import tab.
Choose the .sql file you exported from your localhost.
Click Go to import the database.
Step 6: Update the wp-config.php File
To connect your site to the live database:
Locate the wp-config.php file in your WordPress installation.
Open the file in a text editor.
Update the following lines: define('DB_NAME', 'your_live_database_name'); define('DB_USER', 'your_live_database_user'); define('DB_PASSWORD', 'your_live_database_password'); define('DB_HOST', 'localhost'); // Keep this unless your host specifies otherwise.
Save the file and upload it to your server via FTP.
Step 7: Update URLs in the Database
Your localhost URLs need to be replaced with your live site URLs.
Use a tool like Search Replace DB or run SQL queries in phpMyAdmin.
In phpMyAdmin, run the following query: UPDATE wp_options SET option_value = 'http://your-live-site.com' WHERE option_name = 'siteurl'; UPDATE wp_options SET option_value = 'http://your-live-site.com' WHERE option_name = 'home';
Step 8: Test Your Live Website
Once everything is uploaded and configured, check your website by entering its URL in a browser. Test for:
Broken Links: Fix them using plugins like Broken Link Checker.
Missing Images: Ensure media files were uploaded correctly.
Functionality: Verify forms, buttons, and features work as expected.
Step 9: Set Up Permalinks
To ensure proper URL structure:
Log in to your WordPress admin dashboard on the live site.
Go to Settings > Permalinks.
Choose your preferred permalink structure and click Save Changes.
Step 10: Secure Your Live Website
After migrating, secure your site to prevent vulnerabilities:
Install an SSL Certificate: Most hosting providers offer free SSL certificates.
Update Plugins and Themes: Ensure everything is up to date.
Set Up Backups: Use plugins like UpdraftPlus for regular backups.
Conclusion
Moving your WordPress site from localhost to a live server may seem daunting, but by following these steps, you can ensure a smooth and error-free migration. A successful move allows you to showcase your site to the world, engage your audience, and achieve your goals.
Start today and take your WordPress project live with confidence!
0 notes
Video
youtube
How to Upload WordPress Website From Localhost to Live Server Using C Panel In Hindi | Web Migration
#HowtoUploadWordpressWebsiteFromLocalhosttoLiveServerUsingCPanel#Upload Wordpress Website#LocalhosttoLiveServerCPanel#Upload Wordpress Website Localhost to Live Server#localhost to live server wordpress hindi#how to upload wordpress website from localhost to server#how to upload wordpress website from localhost to server free#uploadwordpresswebsitefromlocalhosttoserverinhindi#how to upload wordpress website from localhost to live server#how to upload website on cpanel#how to upload website in cpanel
0 notes
Text
How To Make Your Own Website and Monetize it?

By following up with me in less than twenty-four hours, you will be ready to launch a Website that will undoubtedly earn you thousands of dollars every month! How to generate the money? Well, the website that we make will be offering SAAS service.
What is a SAAS service?
A SAAS (Software As A Service) service is essentially an online software or service that you pay to use.
For example, Mailchimp.com, which is a SAAS service, provides email marketing services that you pay for.

A SAAS service is anything you pay for to get an online service.
Now you can be the owner of a SAAS service, you will have your own Website, and people will subscribe to your service and pay you monthly recurring payments.
Let’s say you have 100 customers who use your SAAS service, and your service costs about $10 a month; you’d make $1000 per month!
All you have to do is sit at home and watch your passive income develop on your computer screen. It’s a fantastic and easy way to earn money.
How to get a SAAS service?

“How can I get my own SAAS service or software?” you might be wondering. The good news is that you don’t have to create one, learn to program, or even employ a programmer to do so.
You can simply buy it Online for $40–$60. You can buy software from a website called codecanyon
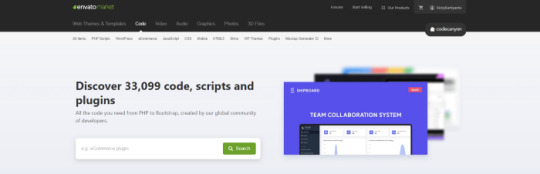
You can simply visit the website, click on the php scripts and search for SAAS and choose what kind of SAAS service that you preferred.
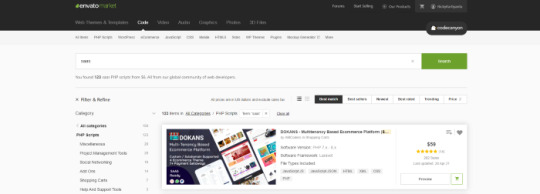
There are several types of SAAS applications available for purchase. Discount networks, accounting and billing software, email marketing systems, and employee management software are only a few examples. Take your time browsing the services and choose the one you like best, the one that fits you and you feel that you can be successful with.
Hosting Your Service
After you’ve created your SAAS service, the next move is to host it and make it public. To host it online, you’ll need a domain name and a server.
Now it is sounds hard since you don’t have any technical background in this term. Don’t worry, it is actually a simple and easy steps.
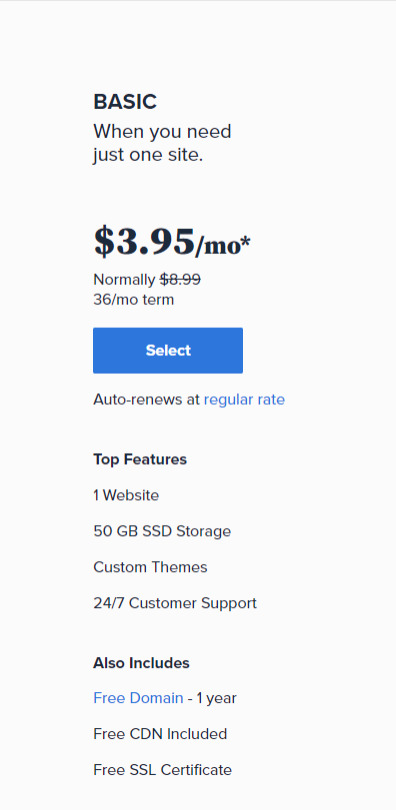
First you need a VPS server, you can visit and buy a cheap one from Bluehost. its only $3,95 permonth with and they give you free domain for 1 year! Check the price below. Buy the “LAMP” administration.
So What is VPS server? We do what we call “online hosting” when we want to publish a PHP page, script, or some other web application. This basically means uploading the files and database to a public server so that it can be accessed over the internet. On simple word, the place where you put the file is from VPS server.
In this tutorial we will used the shared server from Bluehost. Shared server only means that your server will be host with others website.
Now everything is ready, the only things that matter is how to install it. Let get to it.
Getting Started
After having your own server and domain on Bluehost, you need to connect them. Your VPS Server can be accessed now your Bluehost profile, but of course, we don’t want to access our website though an IP! we want to use our domain name. So simply, we are going to map the domain name to our VPS IP, so then we access the VPS and the WordPress website through both the domain and the IP.
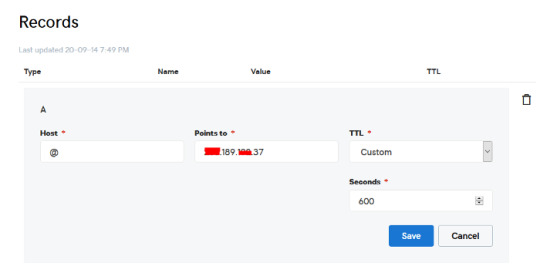
Configure your DNS Records
Simply open DNS management zone in your Domain Provider and edit the main A record.
Than we need to create MySQL database for the application. So Let’s Create one. Connect to your VPS server using any SSH client like putty. and Let’s start!
Just open Putty and enter the Server IP or Name, and Press Open. It will ask you to login, just enter “root” as the user, then enter your password which is sent to you by email.
Note: while typing the password, putty will now show it for security reasons, but It’s there, just type it!
What’s nice, is that we have MySQL installed already as part of the LAMP Stack, but we need to create a database and a user for out application.
Note: Every MySQL statement must end in a semi-colon (;)
To get started, log into the MySQL root (administrative) account by issuing this command:
mysql -u root -p
You will be prompted for the root password, just write or paste it and press Enter.
First, create a separate database that your PHP application will use. You can call this whatever you want, but we will be using TestDb in this guide to keep it simple. Create the database by running this command:
CREATE DATABASE TestDb DEFAULT CHARACTER SET utf8 COLLATE utf8_unicode_ci;
Next, we are going to create a separate MySQL user account that we will use exclusively to operate on our new database. Creating one-function databases and accounts is a good idea from a management and security standpoint. We will use the name DbUser in this guide. Feel free to change this if you’d like.
We are going to create this account, set a password, and grant access to the database we created. We can do this by typing the following command. Remember to choose a strong password here for your database user:
CREATE USER 'DbUser'@'localhost' IDENTIFIED BY 'enter_a_custom_password_here';GRANT ALL ON TestDb.* TO 'DbUser'@'localhost';
You now have a database and user account, each made specifically for Your PHP application. We need to flush the privileges so that the current instance of MySQL knows about the recent changes we’ve made:
FLUSH PRIVILEGES;
Exit from it by typing :
EXIT;
Upload The Script Files To The Server.
To upload the files, you need an application called WinSCP.
It is a free tool and you can download it from here.
Connect to Your VPS Server using WinSCP, and Update the PHP Files to the server to this path: “/var/www/html”
In most cases, the files would be zipped, so we need to extract them.
Again to Putty SSH CLient and Let’s install the unzip utility using the following command:
sudo apt-get install unzip
Clear putty screen to make in clean using the following command:
clear
Change directory to /var/www/html using the following command:
cd /var/www/html
Unzip the “.zip” file using the following command:
unzip YOURFILENAME*.zip
*Note: the file name may be different in your case, so replace YOURFILENAME with your file name.
Now, Move the latest folder content to the upper directory so it can be accessed directly -> use WinSCP Just copy all the files inside “YOURFILENAME” folder and paste them directly in html folder.
Configure Apache to Publish PHP Website
Well Done, Now your files are uploaded and placed in the html folder, we just need to configure apache so we can our Publish PHP Website and access our script using our domain name. To do so, open WinSCP again and navigate to this directory: /etc/apache2/sites-available/
Now, create a new empty file and name it “yourdomain.conf” . You can replace “Scriptname” with any name you want
Open yourdomain.conf Then copy and paste the content below into the file and save.
<VirtualHost *:80> ServerAdmin admin@YOUDOMAINNAME DocumentRoot /var/www/html ServerName YOUDOMAINNAME ServerAlias YOUDOMAINNAME <Directory /var/www/html/> Options +FollowSymlinks AllowOverride All Require all granted </Directory> ErrorLog ${APACHE_LOG_DIR}/error.log CustomLog ${APACHE_LOG_DIR}/access.log combined </VirtualHost>
Replace with your own domain, in my case its “YOURDOMAINNAME”
Enable your script configuration in apache and restart the service.
Now simply, run the following commands to finish the setup:
sudo a2ensite yourdomain.conf sudo a2enmod rewrite sudo systemctl restart apache2.service
ALMOST DONE!
Connect to MySQL Database.
Open your web browser now and navigate to your server name.
Continue the setup by entering the database info and your admin login information. In our example, the database name is TestDb and the user is DBUser with the password set.
That simple!
Setup cronjobs.What are cronjobs?
cron is a Linux utility which schedules a command or script on your server to run automatically at a specified time and date. A cron job is the scheduled task itself. Cron jobs can be very useful to automate repetitive tasks.
For example, you can set a cron job to delete temporary files every week to conserve your disk space. Some PHP web applicaitons, may require you to set up a cron job to perform certain functions.
Setup cronjobs.
To setup cronjobs, you need to add all required jobs to the server. This depends on your script, so if you bought a script from code canyon, the script owner should provide the cronjobs.
To do this, open WinSCP and got to /etc Open crontab file using the editor And paste all the jobs from your script to this folder. (cronjobs are listed in the app documentation)
Make sure each job is on a line and an empty line in the end.
Secure with a Free SSL.
SSL certificates are used within web servers to encrypt the traffic between the server and client, providing extra security for users accessing your application. Let’s Encrypt provides an easy way to obtain and install trusted certificates for free.
Connect to your Server using Putty SSH client. and Let’s Start!
Install the Let’s Encrypt Client
Let’s Encrypt certificates are fetched via client software running on your server. The official client is called Certbot.
First, add the repository to install Certbot:
sudo add-apt-repository ppa:certbot/certbot
You’ll need to press ENTER to accept.
Then, Update the package list to pick up the new repository’s package information:
sudo apt-get update
Install Certbot’s Apache package:
sudo apt install python-certbot-apache
Certbot is now ready to be used.
Set Up the SSL Certificate
Generating the SSL certificate for Apache using Certbot is quite straightforward. The client will automatically obtain and install a new SSL certificate that is valid for the domains provided as parameters.
Simply run the following command: (change the domain)
sudo certbot --apache -d YOUR_DOMAIN_NAME
You will be asked to provide an email address for lost key recovery and notices, and you will be able to choose between enabling both http and https access or forcing all requests to redirect to https. It is usually safest to require https, unless you have a specific need for unencrypted http traffic.
That’s it!
Test your website now and it should be SSL encrypted.
This tutorial I used are originated and made by Hasan By H-educate, you can check his link Here : https://h-educate.com/ or check his youtube on H-educate.
Other tips to make money online, check here : https://ricky-kartiyanta.medium.com/
Cheers!!
#website#saas solutions#saas#monetize#passive income#business#workfromanywhere#easy money#gettingrichfromhome
2 notes
·
View notes
Text
How to Host WordPress Website From Localhost to Server
How to Host WordPress Website From Localhost to Server Before you can move your WordPress website from localhost to server, you'll need to change the link structure of the content files. By default, WordPress URLs start with https://localhost/. This means that you'll need to change the link structure to match your live server installation. Duplicator plugin The Duplicator plugin for hosting a WordPress website from localhost to server will automate the process of setting up a WordPress site on a new server. After installing the plugin, the WordPress dashboard will show a Duplicator section. If there are no packages yet, click the Add Package button. A download archive and installer file will appear. Once you download it, you can follow the installation instructions. The Duplicator plugin backs up your entire site, including all files, plugins, themes, pages, posts, media, and media. The plugin can create an archive of your website as a zip file. If you choose the wrong archive, your site will not be restored. XAMPP The first step to host a WordPress website on a server is to install the WordPress application on the hosting server. To do this, you need to download the latest version of WordPress from WordPress.org and manually unzip it into the XAMPP folder. Once the program has finished installing, you can create a database and folder to store your website data. XAMPP is a free web application package that runs on all operating systems. It has different versions for Linux, Mac OS X, and Windows. Once you download and unzip the XAMPP file, follow the installation instructions. In some cases, XAMPP will prompt you to select which Windows version you want to run, although this is generally not necessary if you're using the program on a Windows computer. If you're using a Mac or Linux computer, you can also use XAMPP to host your WordPress website. phpMyAdmin First, you'll need to start the Apache Web Server and MySQL Database. Once you've done that, open up phpMyAdmin by going to localhost/phpmyadmin. You'll see a list of all the databases and URLs for your WordPress website. Now, you need to import your database from your localhost to your server using phpMyAdmin. To do so, you'll need to open phpMyAdmin and navigate to your hosting account's control panel. Once you've launched the program, you'll see a list of database names. Choose the one you want to import and click Export. Then, you'll need to create a new database in your new hosting account. Note that some hosts disable the ability to create databases using phpMyAdmin, so it's best to check with your hosting provider before you try this. cPanel To host a WordPress website on a server, you'll first need to create a MySQL database. If you already have one, you can skip this step. If not, you can create a new one by using the MySQL Database Wizard. You'll find this wizard in the Databases section of your cPanel dashboard. Click on the "Create a new database" icon, and enter a name for it. After that, the wizard will create a new database for your WordPress site. You'll also need to know how to install FTP on your computer. FTP is a file transfer protocol. You can use it to transfer files to and from your server. WordPress Installing WordPress on a localhost can help you get started with building your site without the need for a user server. It also allows you to test customizations and settings before transferring them to the live server. In addition, you can use it to test any third-party tools, plugins, or themes before committing them to a live server. The first step is to open phpMyAdmin and navigate to the root directory of your local WordPress website. This directory contains your wp-admin and wp-includes files. Once you have the files you need to move your site to the remote server, upload them there. These files will replace their counterparts on the remote server. permalink structure Moving your WordPress website from localhost to server is an excellent option for building many different sites without the need for an internet connection. It also allows you to test new settings and customizations, including the WordPress core installation, plugins, and themes, without affecting your live website. This way, you can identify any conflicts or issues before transferring your changes to your live site. The first step to move your WordPress website from localhost to a live server is to get an account with a web host. This will allow you to upload your website from localhost to the live server in a few steps. In order to do this, you will need a web hosting account, a domain name, and an FTP program. You should already know how to use an FTP program, such as FileZilla or WinSCP. DNS name If you are creating a WordPress website locally, you need to change the DNS name of the site to point to the server. You can do this on your computer. This will make your site available to everyone. After you've changed the DNS name, you can go live! Follow these instructions to move your WordPress website. You can also use cPanel to move your site. If you're using IPv4, you can use the localhost DNS name. If you're using IPv6, you'll want to use the server name. The localhost name resolves to 127.0.0.1, which is a reserved top-level DNS name. This allows developers to test their sites without causing any unauthorized changes. How to Host WordPress Website From Localhost to Server Read the full article
0 notes
Text
Best Premium URL Shortener Online Free Saas Business
What about turning the main instrument you use in your online business into a lucrative business?

Don’t have the foggiest idea of what I am discussing? At that point you haven’t watched our video on the main device you should begin utilizing in your business. In this article, I will tell you the best way to set up your premium URL shortener online free and transform it into a business that can get you a huge number of dollars each month.
What Is SAAS?
Content Summary
You without a doubt are utilizing Netflix to watch films, Grammarly to address your punctuation and spelling as you are composing, or L-ink.me to abbreviate and follow your connections. These are SAAS models.
SAAS; or programming as a help, is cloud-based assistance where as opposed to downloading programming to your work area PC or business organization to run and refresh, you rather access an application by means of a web program.
We will help you assemble a similar device as L-ink.me. Use it in your own business, or even beginning a lucrative Premium URL Shortener SAAS business on the web. On the off chance that you need to likewise make a blog, check our articles here and here.
Premium URL Shortener Setup
How about we start together figuring out how to assemble our Premium URL shortener.
Necessities
What are the prerequisites required for the arrangement?
Premium URL Shortener Script
VPS server
Domain Name
Custom Theme
Getting The Premium URL Shortener Content
The content we will use in this arrangement can be purchased by anybody. It costs simply 33$ to purchase this content and begin utilizing it in your own business.
Getting An Domain Name
An area name is pivotal. As for our situation, the area name we are utilizing is l-ink.me. You need to get an area name to use for your administration.
Space names can be purchased efficiently from beneath suppliers.
NameCheap
Domain.com
GoDaddy
Getting A VPS Worker
What Is A VPS Server?
At the point when you need to distribute a PHP site or content or any web application, we do what we call “web facilitating” which just methods transferring the documents and data set into a public worker so it very well may be accessibly Online over the web.
Where we will have our administration will be on a VPS worker. It is extremely prescribed to get a committed VPS worker to profit by the best exhibition for your administration.
Where you can get a VPS? From underneath obviously.
Contabo
Hostinger
Hostgator
For our situation, we will utilize Contabo as it gives the best offer however you can pick any supplier you feel good with.
Thus, we should start.
Note: In this instructional exercise: I will utilize Contabo
So Let’s perceive how we can get a VPS worker from Contabo.
Get a VPS Server From Contabo.
1: Open Contabo Website.
Open your internet browser and explore to Contabo VPS Page.
You will see various VPS design, to begin with. You can basically begin with the least expensive choice to Install WordPress, it will be all that anyone could need.
Later on, when you develop your business, you can scale up and get all the more remarkable VPS with Higher assets.
2: Set VPS Options
On the Next Page, you should choose a few choices
In the Operating System Option, Select Ubuntu 20.04
At that point in the Administration Panel, Select LAMP
Furthermore, last choice, In the Addons, check “Singular converse DNS”
In the event that you were elevated to enter the PTR record, enter your space name, and That’s it.
Presently, Just Continue to the charging page, and affirm your request. I think different advances are basic and clear as crystal.
In like 24 hours, Contabo Team will arrangement the Server and send the subtleties to your email this way:
Guide Domain Name to your VPS Server.
All right Friend, Now we have a Domain and a VPS Server. In any case, they are not associated!
Your VPS Server can be gotten to now through the IP address that Contabo Team sent you by email. obviously, we would prefer not to get to our WordPress site through an IP! We need to utilize our space name.
So essentially, we will plan the space name to our VPS IP, so then we access the VPS and the WordPress site through both the area and the IP.
Design your DNS Records:
Just open DNS the boarding zone in your Domain Provider (Godaddy for my situation) and alter the fundamental A record this way:
have: @ focuses: YOUR SERVER IP.
Transfer The Script Files To The Server.
To begin with, download the content from codecanyon.
Presently unfasten the document you download from the webpage. At that point transfer the main.zip inside to your worker.
To transfer the documents, you need an application called WinSCP.
It is a free apparatus and you can download it from here.
Associate with Your VPS Server utilizing WinSCP, and Update the PHP Files to the worker to this way: “/var/www/html”
By and large, the documents would be zipped, so we need to remove them.
Associate with your VPS worker utilizing any SSH customer like clay. furthermore, Let’s beginning!
Simply open Putty and enter the Server IP or Name, and Press Open.
It will ask you to login, simply enter “root” as the client, at that point enter your secret key which is shipped off you by email.
Note: while composing the secret key, clay will currently show it for security reasons, however, It’s there, simply type it!
Furthermore, you are In!
We should introduce the unfasten utility utilizing the accompanying order:
sudo well-suited get introduce unfasten
Clear clay screen to make in clean utilizing the accompanying order:
clear
Change index to/var/www/html utilizing the accompanying order:
disc/var/www/html
Unfasten the “.compress” document utilizing the accompanying order:
unfasten YOUR FILENAME*.zip
*Note: the document name might be diverse for your situation, so supplant YOUR FILENAME with your record name.
Presently, Move the most recent envelope substance to the upper index so it tends to be gotten to straightforwardly – > use WinSCP
Simply duplicate all the documents inside the “YOUR FILENAME” envelope and glue them straightforwardly in html organizer.
Documents Uploaded. Done!
Make a Database
Again to Putty SSH Client and Let’s make our data set utilizing the accompanying orders.
What’s decent, is that we have MySQL introduced as of now as a component of the LAMP Stack, however, we need to make a data set and a client for our application.
To begin, sign in to the MySQL root (managerial) account by giving this order:
mysql – u root – p
You will be provoked for the root secret phrase, simply compose or glue it and press Enter.
To begin with, make a different data set that your PHP application will utilize. You can call this anything you desire, yet we will utilize TestDb (you can utilize any name you need) in this manual for keep it straightforward. Make the data set by running this order:
Make DATABASE TestDb DEFAULT CHARACTER SET utf8 COLLATE utf8_unicode_ci;
Note: Every MySQL articulation should end in a semi-colon (;)
Then, we will make a different MySQL client account that we will utilize only to work on our new data set. Making one-work information bases and records is a smart thought from an administration and security angle. We will utilize the name DbUser in this guide. Don’t hesitate to change this on the off chance that you’d like.
We will make this record, set a secret key, and award admittance to the data set we made. We can do this by composing the accompanying order. Make sure to pick a solid secret word here for your information based client:
Make USER ‘DbUser’@’localhost’ IDENTIFIED BY ‘enter_a_custom_password_here’;
Award ALL ON TestDb.* TO ‘DbUser’@’localhost’;
You presently have an information base and client account, each made explicitly for Your PHP application. We need to flush the advantages so the current occurrence of MySQL thinks about the new changes we’ve made:
FLUSH PRIVILEGES;
Exit out of MySQL by composing:
EXIT;
Done!
Design the Premium URL Shortener
Since we have transferred the content to the worker and made the data set, the time has come to begin arranging our application.
Open any internet browser and add your space name in the location bar.
As should be obvious, we are on the top-notch URL shortener establishment page.
This will show you all the prerequisites required and what is as yet absent. Along these lines, how about we fix what is absent!
The main issue we see is the config_sample.php isn’t open. We should give the required advantages.
This record can be found in/var/www/html/incorporates/so open WinSCP and explore to the required registry.
Presently right-click on the document and set the authorization to 777 as demonstrated underneath.
Presently, we should fix the substance/envelope. Similarly, go to/var/www/html and right-click on the substance organizer and give the 777 authorizations similarly. Something more is to check the case beneath.
Presently invigorate the page and you can see that the issue has been settled. Nice.
Presently since all prerequisites are met, we can continue by squeezing this sentence. Sure!
Associate with the information base
The time has come to associate with our information base.
Simply fill in the required information for the host(localhost) dbname and the client you made with the secret phrase.
Presently make the design record.
Goodness! We have the beneath blunder.
How about we settle.
Go again to WinSCP, into/var/www/html/incorporates, and how about we rename the config_sample.php document to config.php.
Return to your internet browser, and presto, the information base is effectively imported!
From that point forward, simply enter your administrator subtleties and proceed.
At that point erase install.php.
Related Post: What is web hosting & How Is It Important In the year 2021
Furthermore, magnificent! Our application is introduced and is fit to be utilized.
To change your presentation page, you can utilize another topic. In our administration l-ink.me, we are utilizing a topic. You can look at it, yet this is absolutely discretionary.
We have something final to fix. Attempt to sign in to your application and you will get a mistake.
To fix this, duplicate beneath square to/and so forth/apache2/destinations empowered/000-default.conf record.
Open 000-default.conf then reorder the substance underneath into the record and save.
You can perceive how we did this in the underneath picture.
After this, simply restart the apache administration utilizing clay.
sudo systemctl restart apache2.service
Presently return to the site and invigorate the page. Attempt to sign in. Wonderful! Presently everything is working appropriately, and your application is prepared!
Secure Premium URL Shortener with a Free SSL.
SSL declarations are utilized inside web workers to scramble the traffic between the worker and customer, giving additional security to clients getting to your application. How about we Encrypt gives a simple method to get and introduce confided in authentications free of charge.
Associate with your Server utilizing the Putty SSH customer. furthermore, Let’s Start!
Stage 1 — Install the Let’s Encrypt Client
How about we Encrypt declarations are gotten by means of customer programming running on your worker. The authority customer is called Certbot.
To begin with, add the archive to introduce Certbot:
sudo add-adept archive PPA:certbot/certbot
You’ll have to press ENTER to acknowledge.
At that point, Update the bundle rundown to get the new vault’s bundle data:
sudo well-suited get an update
Introduce Certbot’s Apache bundle:
sudo well-suited introduce python-certbot-apache
Certbot is presently fit to be utilized.
Stage 2 — Set Up the SSL Certificate
Producing the SSL endorsement for Apache utilizing Certbot is very direct. The customer will naturally get and introduce another SSL endorsement that is legitimate for the spaces given as boundaries.
Essentially run the accompanying order: (change the space)
sudo certbot – apache – d YOUR_DOMAIN_NAME
You will be approached to give an email address to lost key recuperation and notification, and you can pick between empowering both HTTP and HTTPS access or constraining all solicitations to divert to HTTPS. It is typically most secure to require HTTPS except if you have a particular requirement for decoded HTTP traffic.
That is it!
Test your site now and it ought to be SSL scrambled.
Done!
Rundown
To summarize, all that you require:
Get a Domain Name.
Get a VPS Server.
Guide Server IP to Domain.
Transferring File to the Server utilizing WinSCP.
Make a MySQL Database For Your Application.
Overseeing MySQL Databases.
Whenever you have done the entirety of this, you will have your premium URL shortener administration ready for action. In the event that you incline toward watching this instructional exercise as a video, you can check it underneath.
0 notes
Text
What is Git? Why Is Git Important for your WordPress website?
Git is an ultimate necessity for developers so let’s go ahead to find it out.
Git was created in 2005 and now millions of people are using it. There are many version control systems (version control systems are categories of software tools that help a software team manage changes to source code over time. Version control software keeps track of every modification to the code in a special kind of database) but Git is the most well-known system. It is used for tracking changes in computer files and coordinating work on those files among multiple people.
Git doesn’t only focus on the storage and version history of the file tree but also on the file content itself.
The object format of Git’s repository files uses a combination of delta encoding compression and explicitly stores directory contents and version metadata objects.
The top priority of Git is the integrity of managed source code. It secures the content of the file, the relationships of the files and directories, versions, tags and commits. And these are secured a cryptographically secure hashing algorithm called SHA1.
Now let’s understand why you need Git.
Git not only helps you manage the code of your site but also tracks changes and enables multiple developers to work on the same files at the same time and acts as an extra backup of the files of your site in the process.
It uploads the changes to each file and records when files were changed, who made the changes and it gives you the ability to undo them.
It doesn’t matter if you are using Git for a small business or for a big one.
Let’s imagine that you have a WP projects and many developers. Thus you open some repository and create many tasks there. You assign the tasks to John. He must do it in 2 hours but he has some problem and need help so you can assign it to another developer too. However, as he did some changes and Git keeps you informed what kind of changes there were. What does it mean? It means that 2 developers work on the same task, therefore, you can see who and when that change as done by.
Consequently, you maintain the workflow and change history. With the complete history of your WordPress project, you will be able to go back to previous versions and conduct root analysis of bugs, which can be crucial when you have to fix possible issues on your website.
If those improvements are not ok for you can revert the changes. How?
Git gives you an opportunity to roll back the changes. Possibly you may think that you need that part but in some days you understand that you don’t need it any longer. So you can roll back the changes which you want.
Git helps you to collaborate with other team members easily. It means that each member of the development team can work on any file at the same time. It will allow you to merge all the changes into a common version. Thus leaving no question of where the latest version of a file or a project is.
Git helps you to ensure a Safe Backup. Your team members have a complete version of the WordPress project on their disk-including the project’s complete history. If your server breaks down you can improve it by recovering from your teammates’ local repositories
Git has some tools which are very useful for your WordPress website.
GUI’s are using to have a user-friendly interface and also you can use it to make the learning process and managing the code easier for you.
Git hosts are the place where your Git repositories are but you can push the changes on your localhost too.
It has a WP Pusher which allows the user to link WordPress site to a WP plugin or theme hosted in a GitHub repository.
Gitlum assist you to automatically version any changes to plugin and themes directly from the WordPress admin dashboard
WP GitHub Sync is a tool which keeps a runni8ng history of edited to your content in a GitHub repository
Version Press is a tool which tracks every change you make to your site automatically
Reviser is similar to Version Press but it tracks changes when you commit changes to the Git repository manually.
In conclusion, as Git is the most known version control system it can help you manage your WordPress site.
Git focuses on the file content itself.
It is the integrity of managed source code and it secures the content of the file, the relationships of the files and directories, versions, tags and commits
Git is very safe as your server breaks down you can improve it by recovering from your teammates’ local repositories. If you did some changes you can undo them and save the change history.
Your developers can connect easily as they can see the whole tasks.
You can assign the same task more than one developer and you will save money and time.
What is Git? Why Is Git Important for your WordPress website? was originally published on WPlifecare
1 note
·
View note
Text
How to Build a Blog with Gatsby and Netlify CMS – A Complete Guide
In this article, we are going to build a blog with Gatsby and Netlify CMS. You will learn how to install Gatsby on your computer and use it to quickly develop a super fast blog site.
You are also going to learn how to add Netlify CMS to your site by creating and configuring files, then connecting the CMS to your site through user authentication.
And finally, you'll learn how to access the CMS admin so that you can write your first blog post.
The complete code for this project can be found here.
Here's a brief introduction to these tools.
What is Gatsby?
Gatsby is a free and open-source framework based on React that helps you build fast websites and web apps. It is also a static site generator like Next.js, Hugo, and Jekyll.
It includes SEO (Search Engine Optimization), accessibility, and performance optimization from the get-go. This means that it will take you less time to build production-ready web apps than if you were building with React alone.
What is Netlify CMS?
Netlify CMS is a CMS (Content Management System) for static site generators. It is built by the same people who made Netlify. It allows you to create and edit content as if it was WordPress, but it's a much simpler and user-friendly interface.
The main benefit of Netlify CMS is you don't have to create markdown files every time you want to write a post. This is useful for content writers who don't want to deal with code, text editors, repositories, and anything to do with tech - they can just focus on writing articles.
Alright, without any further ado, let's start building the blog!
But before we get going, a quick heads up: This guide requires prior knowledge of JavaScript and React. If you are not comfortable with these tools yet, I've linked the resources at the end of the article to help you brush up on those skills.
Even if you're new to those technologies, I tried to make this guide as simple as I was able so you can follow along.
How to set up the environment
Before we can build Gatsby sites, we have to make sure that we have installed all the right software required for the blog.
Install Node.js
Node.js is an environment that can run JavaScript code outside of a web browser.
It is a tool that allows you to write backend server code instead of using other programming languages such as Python, Java, or PHP. Gatsby is built with Node.js and that's why we need to install it on our computer.
To install Node.js, go to the download page and download it based on your operating system.
When you are done following the installation prompts, open the terminal and run node -v to check if it was installed correctly. Currently, the version should be 12.18.4 and above.
Install Git
Git is a free and open-source distributed version control system that helps you manage your coding projects efficiently.
Gatsby starter uses Git to download and install its required files and that's why you need to have Git on your computer.
To install Git, follow the instructions based on your operating system:
Install Gatsby CLI
Gatsby CLI (Command Line Interface) is the tool that lets you build Gatsby-powered sites. By running this command, we can install any Gatsby sites and the plugins we want.
To install Gatsby CLI, open the terminal and run this command:
npm install -g gatsby-cli
Once everything is set up successfully then we are ready to build our first Gatsby site.
How to build a Gatsby site
In this guide, we're going to use the default Gatsby starter theme, but you're free to choose any themes on the Gatsby starter library. I personally use the Lekoart theme because the design is minimalist and beautiful, and it has a dark mode.
In the terminal, run this command to install the new Gatsby blog:
gatsby new foodblog https://github.com/gatsbyjs/gatsby-starter-blog
Note for Windows users: If you encounter "Error: Command failed with exit code 1: yarnpkg" while creating Gatsby site, see this page to troubleshoot it. You may have to clean up dependencies of old yarn installations or follow the Gatsby on Windows instructions.
What's does this command line mean exactly? Let me explain.
new - This is the command line that creates a new Gatsby project
foodblog - This is the name of the project. You can name it whatever you want here. I named this project foodblog as an example only.
The URL (https://github.com/gatsbyjs/gatsby-starter-blog) - This URL specified points to a code repository that holds the starter code you want to use. In other words, I picked the theme for the project.
Once the installation is complete, we'll run the cd foodblog command which will take us to the location of our project file.
cd foodblog
Then we'll run gatsby develop that will start running on the local machine. Depending on the specs of your computer, it will take a little while before it is fully started.
gatsby develop
Open a new tab in your browser and go to http://localhost:8000/. You should now see your new Gatsby site!

How a Gatsby starter blog homepage looks
Now that we've created the blog, the next step is to add Netlify CMS to make writing blog posts easier.
How to add Netlify CMS to your site
Adding Netlify CMS to your Gatsby site involves 4 major steps:
app file structure,
configuration,
authentication, and
accessing the CMS.
Let's tackle each of these stages one at a time.
How to set up the app's file structure
This section deals with the file structure of your project. We are going to create files that will contain all Netlify CMS codes.
When you open your text editor, you will see a lot of files. You can read this article if you are curious about what each of these files does.
├── node_modules ├── src ├── static ├── .gitignore ├── .prettierrc ├── gatsby-browser.js ├── gatsby-config.js ├── gatsby-node.js ├── gatsby-ssr.js ├── LICENSE ├── package-lock.json ├── package.json └── README.md
Do not worry about all these files — we are going to use very few of them here.
What we are looking for is the static folder. This is the folder where it will form the main structure of the Netlify CMS.
If your project does not have Static folder, then create the folder at the root directory of your project.
Inside the static folder, create an admin folder. Inside this folder, create two files index.html and config.yml:
admin ├ index.html └ config.yml
The first file, index.html, is the entry point to your CMS admin. This is where Netlify CMS lives. You don't need to do styling or anything as it is already done for you with the script tag in the example below:
<!doctype html> <html> <head> <meta charset="utf-8" /> <meta name="viewport" content="width=device-width, initial-scale=1.0" /> <title>Content Manager</title> </head> <body> <script src="https://unpkg.com/netlify-cms@^2.0.0/dist/netlify-cms.js"></script> </body> </html>
The second file, config.yml, is the main core of the Netlify CMS. It's going to be a bit complicated as we are going to write backend code. We'll talk more about it in the configuration section.
How to configure the back end
In this guide, we are using Netlify for hosting and authentication and so the backend configuration process should be relatively straightforward. Add all the code snippets in this section to your admin/config.yml file.
We'll begin by adding the following codes:
backend: name: git-gateway branch: master
Heads up: This code above works for GitHub and GitLab repositories. If you're using Bitbucket to host your repository, follow these instructions instead.
The code we just wrote specifies your backend protocol and your publication branch (which is branch: master). Git Gateway is an open-source API that acts as a proxy between authenticated users of your site and your site repository. I'll explain more what this does in the authentication section.
Next up, we will write media_folder: "images/uploads". This will allow you to add media files like photos directly to your CMS. Then you won't need to use a text editor to manually add media and all that.
media_folder: "images/uploads"
Make sure you created a folder called images in the admin folder. Inside the images folder, create an uploads folder as this is the place where you'll host your images.
Configure Collections
The collections will define the structure for the different content types on your static site. As every site can be different, how you configure the collection's settings will differ from one site to another.
Let's just say your site has a blog, with the posts stored in content/blog, and files saved in a date-title format, like 2020-09-26-how-to-make-sandwiches-like-a-pro.md. Each post begins with settings in the YAML-formatted front matter in this way:
--- layout: blog title: "How to make sandwiches like a pro" date: 2020-09-26 11:59:59 thumbnail: "/images/sandwich.jpg" --- This is the post body where I write about how to make a sandwich so good that will impress Gordon Ramsay.
With this example above, this is how you will add collections settings to your Netlify CMS config.yml file:
collections: - name: "blog" label: "Blog" folder: "content/blog" create: true slug: "---" fields: - {label: "Layout", name: "layout", widget: "hidden", default: "blog"} - {label: "Title", name: "title", widget: "string"} - {label: "Publish Date", name: "date", widget: "datetime"} - {label: "Body", name: "body", widget: "markdown"}
Let's examine what each of these fields does:
name: This one is used in routes like /admin/collections/blog
label: This one is used in the UI (User Interface). When you are in the admin page, you will see a big word "Blog" on the top of the screen. That big word "Blog" is the label.
folder: This one points to the file path where your blog posts are stored.
create: This one lets the user (you or whoever has admin access) create new documents (blog posts in this case) in these collections.
slug: This one is the template for filenames. , , and which are pulled from the post's date field or save date. is a URL-safe version of the post's title. By default it is .
The fields are where you can customize the content editor (the page where you write the blog post). You can add stuff like ratings (1-5), featured images, meta descriptions, and so on.
For instance, in this particular code, we add curly braces {}. Inside them we write label with the value "Publish Date" which will be the label in the editor UI.
The name field is the name of the field in the front matter and we name it "date" since the purpose of this field is to enter the date input.
And lastly, the widget determines how the UI style will look and the type of data we can enter. In this case, we wrote "datetime" which means we can only enter the date and time.
- {label: "Publish Date", name: "date", widget: "datetime"}
You can check the list right here to see what exactly you can add. If you want, you can even create your own widgets, too. For the sake of brevity, we'll try to keep things simple here.
Enable Authentication
At this point, we are nearly done with the installation and configuration of Netlify CMS. Now it's time to connect your Gatsby site to the CMS by enabling authentication.
We'll add some HTML code and then activate some features from Netlify. After that, you are on the way to creating your first blog post.
We are going to need a way to connect a front end interface to the backend so that we can handle authentication. To do that, add this HTML script tag to two files:
<script src="https://identity.netlify.com/v1/netlify-identity-widget.js"></script>
The first file to add this script tag is the admin/index.html file. Place it between the <head> tags. And the second file to add the tag is the public/index.html file. This one also goes in between the <head> tags.
When a user logs in with the Netlify Identity widget, an access token directs them to the site homepage. In order to complete the login and get back to the CMS, redirect the user back to the /admin/ path.
To do this, add the following code before the closing body tag of the public/index.html file:
<script> if (window.netlifyIdentity) { window.netlifyIdentity.on("init", user => { if (!user) { window.netlifyIdentity.on("login", () => { document.location.href = "/admin/"; }); } }); } </script>
With this, we are now done writing the code and it's time to visit Netlify to activate authentication.
Before we move on, you should Git commit your changes and push them to the repository. Plus, you will have to deploy your site live so you can access the features in the Enable Identity and Git Gateway section.
Deploy your site live with Netlify
We are going to use Netlify to deploy our Gatsby site live. The deployment process is pretty straightforward, quick, and most importantly, it comes with a free SSL (Secure Sockets Layer). This means your site is protected (you can tell by looking at the green lock on the browser search).
If you haven't signed up for the platform, you can do it right here. When you've finished signing up, you can begin the deployment process by following these 3 steps.
Click the "New site from Git" button to create a new site to be deployed. Choose the Git provider where your site is hosted. My site is hosted on GitHub so that's what I will choose.
Choose the repository you want to connect to Netlify. The name of my Gatsby site is "foodblog" but you have to pick your own project name.
The last one asks how you would like Netlify to adjust your builds and deploy your site. We are going to leave everything as it is and we will click the "Deploy site" button. This will begin deploying your site to live.
Once the deployment is complete, you can visit your live site by clicking the green link that has been generated for you on the top left of the screen. Example: https://random_characters.netlify.app.
With this, the world can now view your site. You can replace the weird URL with your custom domain by reading this documentation.
How to enable Identity and Git Gateway
Netlify's Identity and Git Gateway services help you manage CMS admin users for your site without needing them to have an account with your Git host (Like GitHub) or commit access on your repository.
To activate these services, head to your site dashboard on Netlify and follow these steps:
Go to Settings > Identity, and select Enable Identity service.

In the Overview page of your site, click the "Settings" link.

After clicking "Settings", scroll down the left sidebar and click the "Identity" link.

Click the "Enable Identity" button to activate the Identity feature.
2. Under Registration preferences, select Open or Invite only. Most of the time, you want only invited users to access your CMS. But if you are just experimenting, you can leave it open for convenience.

Under the Identity submenu, click the "Registration" link and you'll be taken to the registration preferences.
3. Scroll down to Services > Git Gateway, and click Enable Git Gateway. This authenticates with your Git host and generates an API access token.
In this case, we're leaving the Roles field blank, which means any logged-in user may access the CMS.

Under the Identity submenu, click the "Services" link.

Click the "Enable Git Gateway" button to activate the Git Gateway feature.
With this, your Gatsby site has been connected with Netlify CMS. All that is left is to access the CMS admin and write blog posts.
How to access the CMS
All right, you are now ready to write your first blog post!
There are two ways to access your CMS admin, depending on what accessing options you chose from the Identity.
If you selected Invite only, you can invite yourself and other users by clicking the Invite user button. Then an email message will be sent with an invitation link to login to your CMS admin. Click the confirmation link and you'll be taken to the login page.
Alternatively, if you selected Open, you can access your site's CMS directly at yoursite.com/admin/. You will be prompted to create a new account. When you submit it, a confirmation link will be sent to your email. Click the confirmation link to complete the signup process and you'll be taken to the CMS page.
Note: If you cannot access your CMS admin after clicking the link from the email, the solution is to copy the link in the browser starting with #confirmation_token=random_characters and paste the link after the hashtag "#", like this: https://yoursite.com/admin/#confirmation_token=random_characters. This should fix the problem.
If everything goes well, you should see your site's admin dashboard:

Netlify CMS admin.
You can create your new post by clicking the "New post" button.
When you're ready to publish your post, you can click the "Publish Now" button to publish it immediately.
When you hit the publish button, the post file is automatically created. Then it will add to the changes with the commit message based on the name of the post along with the date and time of publishing. Finally, it will be pushed to the host repository, and from there your post will be seen live.
You can view the changes by looking at the commit message in your host repository.
After waiting for a few minutes, your new post should be live.
One more thing
The last thing to do is clean up the sample articles. To delete these posts, go to the blog files in your text editor and delete them one by one. Make sure you check your terminal when deleting them so that there will be no issues on your site.
Once all the sample posts are cleared out, commit these changes and push them to the repository.
And now, you are all done! You can now create your new posts from the comfortable CMS dashboard and share your stories to the world.
Summary
In this guide you have learned how to:
Create a Gatsby blog site
Added the Netlify CMS to your Gatsby site by creating and configuring files
Enable user authentication by activating Identity and Git Gateway
Access your site's CMS admin
Publish your first post powered by Gatsby and Netlify CMS
By the end of this guide, you should now be able to enjoy writing blog posts with a fast website and simple content editor. And you probably don't have to touch the code unless it needs further customization.
There is still more to cover about Gatsby and Netlify CMS. One of the best ways to learn about them is to go through their documentation.
I hope you found this guide beneficial, and happy posting!
Check out my blog to learn more tips, tricks, and tutorials about web development.
Cover photo by NeONBRAND on Unsplash.
Resources for JavaScript and React
Here are some resources that may help you to learn JavaScript and React:
JavaScript
React
0 notes
Text
How to Make a Wordpress Website in 2020 – Step by Step Guide

What is Wordpress?
WordPress is an online, open source website creation tool written in PHP. It is probably the easiest and most powerful blogging and website content management system (or CMS) in existence today. WordPress is highly customizable. It has literally thousands of plugin pieces of software. If you’re ever curious about who uses WordPress, head on over to the WordPress site showcase and you’ll be impressed by the number of well-known sites and famous people using WordPress to power their websites. Diib Answer Engine® Started as a blogging tool in 2003.Built on PHP programming language and MySQL database.It open source meaning anyone is freely licensed to use, copy, study, and change the software in any way, and the source code is openly shared so that people are encouraged to voluntarily improve the design of the software.As of February 2016, WordPress is used by 59.1% of all the websites whose content management system we know. This is 25.8% of all websites. Wordpress is used by many popular website like: New York Observer, New York Post, TED, Thought Catalog, Williams, USA Today, CNN, Fortune.com, TIME.com, National Post, Spotify, TechCrunch, CBS Local, NBC etc.Around 15,886,000 websites on the entire web use WordPress.22% of new domains in the US are run with WordPress. 120 languages are in use at WordPress.com sites

Benefits of Wordpress:
WordPress is highly customizable. It has literally thousands of plugin pieces of software so you can use your site for just about anything. That’s always a bonus. Wordpress has a thriving community of developers constantly improving the software and creating plugins to expand the software. Some of Features are listed below: It’s free There are some costs associated with running your website on Wordpress, but the software is free. How many times have you been given something for free that is fully functional and ready to use? If you want to upscale your site a little with premium themes and plugins then you are going to save of money over what you would pay for a custom designed site. Easy to learn Managing a Wordpress site is intuitive, making it easy to use. Secure (mostly) Wordpress is developed with security in mind and is battle tested. Powerful Wordpress has a large network of developers who are constantly making it better and more powerful. Extensible There are thousands of plugins, themes, and tools to add functionality to your Wordpress site. SEO friendly Wordpress is built with SEO in mind and uses SEO-friendly permalinks. Search engines love sites that are easy to index and that have frequently updated content. Just by running your business or personal site and communicating with your readers in a way that’s natural to you, you’ll be producing fresh,relevant content the search engines can’t wait to get ahold of. Community Support WordPress isn’t just a software, it has become a community. Some might even say a movement. They are informal, community -organized events put together by other WordPress users just like you. You’ll meet people of all backgrounds, ages, and nationalities at WordCamps . There are thousands of people and hundreds of resource and tutorial sites set up just to help you with your WordPress site.

Which Wordpress is right for your business?
WordPress.com is a commercial site where you can host your own site for free, but with some limitations. Started as a blogging tool in 2003. WordPress.org is where you can download a copy of the WordPress software for free. There are less limitations, but more expertise and setup is required.Limited control of your content, i.e. you must pay to remove ads. Regularly updating your WP version, themes, and plugins. No FTP access to your files. Keeping your site secure for your visitors and protecting your site against hackers and spam. Limited to WordPress.com themes – you can’t upload your own. Installing and setting up your WordPress site.No custom plugins. Backing up your whole site regularly in case it breaks. Limited storage space. Resolving problems with your site and server if they arise.

Comparison between Wordpress.com & Wordpress.org
Wordpress.org Wordpress.com E-commerce Allowed through plugins Functionality does not exist Customize look and/or functionality Download, install, and/or create your own themes and plugins. No custom themes or plugins available. Control the amount of storage for videos, images, etc. This is determined by the host your choose. Limited amount available. Included Maintenance None. Unless you hire a developer. Full maintenance of WP, themes, and plugins included. Custom web address (url)Buy your own domain (cost vary) and point it to your host. Buy your domain via Wordpress.com and point it to your account. Scalability Scalable and extensible Not scalable Website supportNone included. Unless you hire an expert (additional cost). Full support included.
How to install
Install Local server (XAMPP Or WAMP) Start Server Copy Wordpress package from source and paste in www Directory. Open phpMyadmin & create database. Open wordpress package in browser (localhost/your folder name), Configure according to your database name & password. Run & Install. Login in Admin Panel (localhost/your folder name/ wp-login.php). Visit front site and you have successfully installed your wordpress. Primary Content Types in Wordpress Posts Typically used for blog posts, announcements, content that is available for comment. Can be categorized and tagged. Pages Typically used for static content such as the homepage, about, contact, etc. Can’t be categorized, but can be structured with subpages. Media Images, videos, documents, and other content that may be contained in a page or post but is not text. Website Builder, Hosting and Domain all starting from $3.46, with Gator Website Builder from HostGator!
What are themes?
A WordPress Theme is a collection of files (called template files) that work together to produce a graphical design interface for a Wordpress website. A Wordpress theme modifies the way the site is displayed, without modifying the underlying software.
What is a plugin?
Plugins are ways to extend and add to the functionality that already exists in WordPress. The core of WordPress is designed to be lean and lightweight, to maximize flexibility and minimize code bloat. Plugins then offer custom functions and features so that each user can tailor their site to their specific needs. Hire an expert The power of Wordpress comes from its extensibility and flexibility. Tthere are several ways to accomplish your goals, but you may need to invest in working with a Wordpress developer to get things done correctly. After all, a Wordpress expert can likely get things done faster and without the frustration of you having to research plugins, themes, etc. Read the full article
#BuildaWordpressSite#BuildaWordpressWebsite#CreateaFreeWordpressBlog#CreateaOnePageWebsite#CreateaWordpressBlog#CreateaWordpressWebsite#CreateFreeWebsiteinWordpress#DevelopaWebsiteusingWordpress#DevelopWordpressWebsite#FreeWordpressWebsite#MakeaOnePageWebsite#MakeaWordpress#WebDesign#Website#WebsiteDevelopment#WebsitewithGodaddyandWordpress#Wordpress#WordpressBlog#WordpressWebsiteDesigning
0 notes
Link
Upload the WordPress localhost website to the live server using the plugin. You can easily migrate your WordPress website to a live server within 5 minutes. Follow the step by step video instructions and make your website live on the server.
#WordPress migrate from localhost to server#WordPress how to migrate site#how to migrate WordPress site#how to transfer WordPress site to new host#how to migrate wordpress site to new host#how to move wordpress site to new host#how to migrate wordpress site to another hosting#how to transfer website to another domain#transfer a wordpress site to another host#move website from one host to another#migrate wordpress site from localhost to server#transfer wordpress website from one hosting to another
2 notes
·
View notes
Text
How to Move Your WordPress Website from Localhost to Cloudways Using WordPress Duplicator Plugin
If you are a WordPress developer, you work with a customized dev environment that you have customized to your preferences. Every developer has their own configuration settings that are based on their workflows and the tools they use for WordPress development.
Once the project is working as expected on the localhost, the next step is to move the project to an online host. Fortunately, WordPress offers WordPress duplicator solutions in the form of several plugins that simplify the entire process of migrating WordPress sites from localhost to an online host.
For the purpose of this article, I will demonstrate how you can move a WordPress website from a localhost to a Cloudways managed server running a WordPress application. While there are several plugins that work very well (I encourage you to experiment to find the right fit for your requirements), for the purpose of this tutorial, I will use the WordPress Duplicator plugin.
Let’s begin,Table of Contents
WordPress Migrator Plugin
Best Cloning Plugins Around
WordPress Duplicator: Local Server to Cloudways
Why Use WordPress Duplicator
Benefits of WordPress Duplicator
What You Need for WordPress Localhost to Live
WordPress Duplicator Plugin Installation
Step 1: Download and Install Plugin on a Local Site
Step 2: How to Export WordPress Site
Create a New Package
Step 3: How to Make WordPress Site Live
Move WordPress Website from a Localhost to Cloudways
How to Upload a Localhost WordPress Site to Live Server
Upload Installer and Archive File to Live Site
Install WordPress Website on Cloud Server
Step 1: Extract Archive
Step 2: Database Setup
Step 3: Run Installer
Step 4: Data Replacement
Step 5: Test Site
Testing the Live Site
Final Thoughts!
WordPress Migrator Plugins
Moving your WordPress website manually is quite stressful, very time-consuming, and prone to errors. You need to make sure that all steps are executed in the correct order with no issues. An if something goes wrong, you have to start all over again.
Fortunately, there are several excellent WordPress migration plugins that take care of all the steps of the process and ensure that your website gets migrated from the localhost to its new Cloudways WordPress web hosting server without any issues.
Best Cloning Plugins
Here is the list of the best WordPress migrator plugins that you can try out:
WordPress Duplicator (Freemium)
All-in-One WP Migration (Free)
BackupBuddy (Premium)
UpdraftPlus WordPress Backup Plugin (UpdraftPlus Migrator) (Freemium)
WP Migrate DB (Premium)
Migrate Guru (Premium)
VaultPress (Premium)
WP Clone (Free)
As mentioned earlier, I will use the Duplicator plugin for demonstrating the process of WordPress website migration.
WordPress Duplicator: Local Server to Cloudways
In this tutorial, I am going to describe how you can move your WordPress website from localhost to Cloudways using WordPress Duplicator plugin. Duplicator has a great 5 out of 5 stars rating on the WordPress repository and has been downloaded and installed over one million.
Why Use WordPress Duplicator Plugin
The Duplicator plugin provides WordPress administrators the ability to migrate, copy or clone, a WordPress site from one location to another.
Using this plugin, you can forget your worries about backing up the database, plugins, themes, and moving all these components (whether in full or in parts), because the WordPress Duplicator can do everything for you!
Even if you are a newbie with little to no knowledge, this plugin can help you migrate WordPress site from localhost to Cloudways server easily. However, you do need to know a bit about finding your database credentials and related information.
Benefits of WordPress Duplicator
Easily migrate WordPress websites from one host to another
Take manual backups of WordPress websites
Pull down a live site to localhost
Easy website duplication
Schedule backups at your convenience
Expert support available
Email notifications
Additional developer support
Connect to cPanel directly from installer
Database creation built into the installer
Integrated transfer to cloud storage services such as Dropbox, Google Drive, and Amazon S3
What You Need for Moving WordPress Sites to Live Servers
To move your WordPress website from localhost to another server, you need to have two elements. Firstly, you must have a local server setup on your computer (I assume that your website is up and running on a localhost server). Secondly, you should have a good web hosting plan that supports WordPress.
WordPress Duplicator Plugin Installation
Downloading and installing the WordPress Duplicator plugin is a simple matter of following the standard WordPress process.
Step 1: Download and Install Plugin on the Local Site
From your WordPress Dashboard, navigate to Plugins → Add New. Search for WordPress Duplicator plugin in the top-right search bar. Next, click the Install Now button. After successful installation, click the activate button.
The second method is to go to the WordPress Plugins Directory and directly download the Duplicator WordPress Migration Plugin from there. Next, add the plugin manually to the WordPress website. For this, simply go to Plugins → Add New, and then upload the plugin.
After activating the plugin, you will see the Duplicator menu on the left side of your WordPress Dashboard.
Step 2: Export the WordPress Site
Now in this step, I am going to describe how you can package the WordPress files on your local computer using the WordPress Duplicator plugin so that these files can be easily moved to the live server.
Create a New Package
After activating the plugin, you will see the Duplicator menu on the left side WordPress dashboard. Go to Duplicator → Packages and click the Create New button to build a new package.
This process has the following major steps:
1- Setup
Simply click the Next button to start the process.
2- Scan
Click the Build button.
3- Build
When you are done with the setup process, you will receive two files; Installer and Archive. Download both files on your desktop.
Next, let’s move the website files to the live site.
Step 3: How to Take the WordPress Site Live
Now it’s time to transfer the WordPress site from localhost to live server by using the WordPress duplicator plugin.
Move WordPress Website from a Localhost to Cloudways
First things first, log in to your Cloudways account. If you are new to Cloudways, you would need to sign up and then log into your account.
Once you are in, click the Servers tab where you can see all the servers that are active under your account. Go to the server you wish to migrate the WordPress website, go to Server → Server Management and get the FTP Master Credentials.
Upload the Localhost WordPress Site to the Live Server
In previous steps, you downloaded the Installer and Archive files to your computer. Now it’s time to upload those two files to the live server.
Upload Installer and Archive File to Live Site
For uploading these files, you can use any FTP client of your choice. I prefer FileZilla, and thus suggest that if haven’t tried it out yet, go to the Filezilla official website and download the latest build.
Next, provide the Host, Username, Password, and Port, and connect to your server via FTP.
Note: On Cloudways, you need to use port 22 to avoid issues.
Note: Before you go ahead with uploading archive files, make sure that you delete the wp-config file (located in the public_html folder).
Next, go to the applications folder and to your application’s folder. Navigate to the public_html folder and upload the Installer and Archive files from your desktop to this folder.
It will take a couple of minutes because the archive files are generally large in size.
Install WordPress Website on Cloud Server
Now, it’s time to run the installer setup on the live server. To do this, you need to go to your website address and add installer.php at the end. For instance, http://test.cloudways.com/installer.php.
Now that everything is good, the next step is the extraction of the Archive file.
Step 1: Extract the Archive
After going to the installer page, you can see some like:
Click the Next button to move on.
Step 2: Database Setup
Now, you need to add the database details. To get them, go back to your Cloudways dashboard, choose your Server > Application and click it.
Under the Application Management, you will see database details such as db name, username, and password.
If all goes well, you will set the green lights beside two of the most important fields: Server Connected and Database Found.
image
Now, click Next to move on to the next step.
Step 3: Run the Installer
The Duplicator plugin works best with empty databases. Hence, before moving forward, you need to remove all previous data. For this, go to the Application Management screen and click the Launch Database Manager.
Next, the database window will open. You need to check the checkbox named tables to select all the tables in the database. Next, click the Drop button to remove the selected tables.
Click the Yes button.
Step 4: Data Replacement
Once you click the YES button, you will be given a URL, Path, and Title automatically.
Now, click the Next button.
Step 5: Test the Live Site
Once done, the final essential step is to test your live website. For that, the WordPress Duplicator plugin will ask you to follow several important steps.
Save Permalinks: Click on Save Permalinks button and you will be automatically redirected to your live site. Here, you can change the permalink settings as per your requirements.
Test Site: Click on the Test Site button and it will open the frontend of your live site. Here, you can test if everything is working as expected.
Security Cleanup: Lastly, Security Cleanup allows you to clean all the installation files and other files created by the Duplicator plugin during the transfer process. Before cleaning up, make sure that your website is properly copied and is working correctly.
Now it’s time to move on to the live site.
Testing the Live Site
In most cases, all plugins are deactivated when you move WordPress site from a localhost to the Cloudways server. To reactivate all the deactivated plugins, navigate to Plugins → Installed Plugin, select all and then click the Activate button.
If you have opted to use Breeze, the Cloudways WordPress cache plugin, now is the time to set up the recommended settings of the plugin. This is an important step in finalizing the process of a successful migration of your site from the localhost to the Cloudways managed server. These recommended settings better optimize the website and enhance the speed of WordPress websites.
Congratulations! You have successfully tested and moved your WordPress website from localhost to Cloudways – A Managed Cloud Hosting Platform.
Final Thoughts!
That’s it!
As you can see it is very easy to move WordPress websites from localhost to a Cloudways managed server, thanks to the amazing WordPress Duplicator Plugin. If it weren’t for a WordPress migrator plugin, the process would be a huge hassle. However, in just a few clicks, all website content is successfully transferred from the localhost to a cloud server.
The aim of this tutorial is to educate users on how they can move their WordPress website from localhost to Cloudways. Keep in mind, the above method is not recommended for transferring content from other hosting providers to Cloudways. If you want to do so, I recommend users to use WordPress Migration Plugin.
If you encounter any cloud migration problems while transferring your website content, don’t hold back! Feel free to ask us and leave your questions in the comment section provided below. I would love to help you out with your queries.
The post How to Move Your WordPress Website from Localhost to Cloudways Using WordPress Duplicator Plugin appeared first on The Coding Bus.
from WordPress https://ift.tt/31TaKr4 via IFTTT
0 notes
Text
How to install XAMPP and setup Localhost WordPress Installation Latest Guide
XAMPP is one of the famous software for most of website developer and publishers, before we get start lets us understand.
What is XAMPP?
XAMPP is an open source software which is developed by Apache friends, the main use of XAMPP is to test the website locally without need of internet before uploading to the web server.
It is always best to test website locally before publishing online as locally testing speed will be faster, most common example is WordPress and html website testing or php scripts testing, also you can get preinstalled WordPress or other application from apache friends as a beginner you can go for that,
But for professional use it is always best to install XAMPP so you can install multiple Applications at the same time.
XAMPP Features:
There are lots of features depending on your use few are mentioned below:
MariaDB
PHP
Perl
phpMyAdmin, to install WordPress, html sites, or php scripts and so on.
Now let’s dive in how you can download and install XAMPP, you can do this by following steps
Download XAMPP
Install XAMPP on your PC
Installing WordPress
Let’s get started:
Download XAMPP
Download XAMPP from official site
Download link here
Install XAMPP on your PC
Install XAMPP by following on screen instructions or you can watch video at the end of this article for easy to understand.
Installing WordPress
As mentioned earlier you can install many of Applications in this article i am going to show you how you can install WordPress locally on Localhost with XAMPP.
You can follow this guide or for easy to understand you may watch guide at the end of this article.
Step 1.
Download Latest WordPress from official website
Download link Here
Step 2.
Start XAMPP Control Panel and make sure you Start
Apache and MySQL
Now click on MySQL Admin
Then click on Databases to create a new database in this scenario I am creating a database name freewayos
You can create as per your need once you created a database.
Now visit http://localhost/ in your browser of your choice like Google Chrome or Firefox etc.
Step 3.
Copy WordPress files as downloaded earlier from WordPress site make sure you extract these files in XAMPP installation directory inside htdocks folder, them name this WordPress folder as per need as in this scenario I named freewayos
Step 4.
Now let configure wordpress website in you browser type http://localhost/freewayos (here instead of freewayos you may type name of the database earlier created by MySQL Admin area)
Select language
Next screen type
Database name: freewayos
(as created earlier it has to be the same to link the database with WordPress installation).
Username leave as it is root
Password leave it blank (as by default WordPress installation password is blank)
All other fields leave it same as it is and click submit.
If you complete all the steps correctly you site is ready to use.
The post How to install XAMPP and setup Localhost WordPress Installation Latest Guide appeared first on Free Way OS.
from WordPress https://ift.tt/2WMaqrI via IFTTT
0 notes
Text
List Of Top 10 WordPress Duplicator Plugin In 2020
Perform your updates safely before pushing them to your live website with top WordPress Duplicator Plugin!
Are you thinking about providing your site a makeover? DO you want to insert several powerful features for your website? However, sometimes, you may feel worried that if you do something wrong, you will mess up your site and fell afraid about it. In order to detect this problem, duplicate your site and save it in a safe place can help you feel secure. In order to do it, you should have a duplicate page plugin for your website. Today, in this collection, we provide you top best WordPress Duplicator Plugin which can help you do it easily. Let's start now! 1. Duplicate Post Duplicate Post gives you an ability to duplicate any type of your posts and page, then copy them to new drafts to edit it in the future. This WordPress Duplicate Plugin is very easy to use, you can use it without any knowledge. A lot of powerful features and a clear document of how to use are also included in this plugin for your effective usage. Provided features: Clone posts of any type Copy posts to new drafts for further editing Duplicate any post A template tag 100% GDPR compliant Highlights: Simply perfect Very handy Save a lot of time 2. UpdraftPlus WordPress Backup Plugin Here is one of the most popular WordPress Duplicator Plugin with more than two million installs. Moreover, this plugin also allows you to backup your database as well as your files easily into the restore and cloud. You will backup them into the DreamObjects, email, FTP, and so on. Provided features: Backs up to more cloud options Allows you to set up automatic backup schedules Has been tested on over 1 million sites Up fewer server resources Highlights: Working nice Simple and easy Really helpful 3. XCloner – Backup and Restore XCloner is a great plugin that is totally compatible with your WordPress site. Thanks to using it, you can generate differentials backups of your WordPress site via a built-in scheduler in an automatic or manual way. This plugin also allows you to backup as well as restore any of PHP/MySQL application and then generate custom backup to share with others. Provided features: Restore your backups locally or to a remote location Generate automatic backups GDPR compliant by added encryption data Upload your backups to Remote Storage locations Watch every step of XCloner Split backups into multiple smaller parts Generate Differential Backups And more Highlights: Fast Smooth Easy Excellent plugin Useful tool 4. WP Migrate DB – WordPress Migration Made Easy This plugin allows you to export your database easily as a MySQL data dump. Here is also a great solution for those who need to migrate fresh data from the production website or locally developed site. A number of options are also included in this plugin. Provided features: Filter outpost types Find & replace that handles serialized data Backups Export your database Select which tables to migrate Stress tested on massive databases Solid security Exclude useless data Save migration profiles Highlights: Simple Useful plugin Reliable and Easy to Use 5. Duplicate Page Duplicate Page allows you to duplicate your posts, pages as well as your custom pots very easily just through one click. In addition, this WordPress Duplicator Plugin enables user roles to get access to duplicate page and you can also arrange to display the link of duplicate page in post types in real-time. Provided features: Allow User Roles To access Duplicate Page Change Duplicate Post Link Title Add Post Prefix Option where to show clone link Select Duplicate Posts Status Redirect after click on clone link Add Post Suffix Many More Filters and Features Highlights: Simply working Save time Repetitive stuff 6. WP Staging – DB & File Duplicator & Migration WP Staging is a great plugin that enables you to generate a copy of your whole site for development and staging. What’s more, using this plugin, you can duplicate all the database tables and then get a new prefix beginning with wpstg(int)_. This is also an ideal plugin for you to migrate your site fro a development site to a production one and vice versa. Provided features: Migration process takes only a few seconds or minutes As default the staging website will be copied into a subfolder. Extensive logging features Supports all main web servers Only administrators can access the staging website SEO friendly All database tables will be duplicated No SASS service And more Highlights: Responsive support team Works as advertised Easy and handy 7. Migrate Guru: Migrate & Clone WordPress Free Here is a great way for you to migrate your WordPress site. This plugin also allows you to rewrite URLs, handles serialized data, bypasses import-export scripts, and so on. Migrate Guru also enables you to clone the WordPress site automatically. Provided features: Localhost migrations Migration of multi-site network sub-sites No storage space required Built for large sites True one-click migration Fully automatic built-in search and replace Highlights: Fantastic Super service Perfect solution 8. Duplicator – WordPress Migration Plugin This plugin has more than 15 million users that allow you to migrate, delete, clone or copy a site from a place to any other place. What’s more, you can also transfer your WordPress site from a host into another as well as backup a site or a part of the site manually. Provided features: Pull down a live site to localhost for development Duplicate a live site to a staging area or vice versa Bundle up an entire WordPress site Perform a full WordPress migration Transfer a WordPress site from one host to another Move, migrate or clone a WordPress site Manually backup a WordPress site or parts of a site Highlights: Works like magic Well-documented Easy to follow 9. All-in-One WP Migration This plugin enables you to export your WordPress site such as plugins, themes, database without any coding knowledge requirement. In addition, thanks to it, you can also upload your files at any place coming with a drag and drop. Provided features: Mobile device compatible Export your WordPress website Upload your site to a different location Apply an unlimited number of find and replace operations fix any serialization problems Highlights: Simply Outstanding Awesome Plugin Fantastic 10. Quick Post Duplicator Using this plugin enables you to duplicate your custom post, your posts, and your page very easily. Quick Post Duplicator also allows you to generate duplicate posts by hovering them in the edit screen and taking a click on the ‘Duplicate’ button. Provided features: Duplicate post, page, custom post Create a duplicate post Highlights: Simple Useful plugin Easy to use Conclusion Thanks for reading! We hope that this article about the collection of top powerful WordPress Duplicator Plugin can help you clone your site! If you find it useful, don't forget to share it with your friends. If you have any questions, leave a comment below. We will answer it as soon as possible. Besides, you can access to free WordPress themes to have a more attractive design for your websites. Read the full article
0 notes
Text
How to Fix WordPress database connection errors in WordPress?
Do you see the ‘Error establishing a database connection’ error on your WordPress site? It is a one of the most common errors of WordPress that makes your website inaccessible to the users.
This error also occurs when your WordPress site is unable to make a connection to the database. A plethora of things can affect your WordPress based database connection which makes it a tad difficult for beginners to troubleshoot.
In this blog post, we will explain to you how to simply fix the error establishing a database connection in your WordPress site.
What Causes is Error Establishing a Database Connection in WordPress?

A "Error establishing database connection" problem can happen due to incorrect database information in WordPress settings, unresponsive database server or damaged database.
A database is a program that makes it easy to organize, store, and retrieve data in other programs. As a content management system, WordPress uses a database to store all of your content and other website data. Then it connects to the database every time someone visits your website.
WordPress requires the following information so as to connect to the database:
· Database name
· Database username
· Database password
· Database server
This data is stored in the WordPress configuration file called wp-config.php.
If any of these details are incorrect, WordPress may fail to connect to the database server, and you will see an "Error creating database connection" error.
It is one of the most common WordPress errors. Apart from incorrect credentials, this error can appear if the database server is down, or complete database files are corrupted.
Let's take a look at how to fix this WordPress error in creating a database connection problem with step-by-step troubleshooting.
1. Check Your WordPress Database Credentials
The most common cause of a WordPress database connection error is incorrect database credentials. If you have recently moved your WordPress site to a new host, this could be a possible reason.
WordPress database login credentials are stored in wp-config.php. This is a WordPress configuration file that contains important WordPress settings, including database information. If you haven't edited wp-config.php before, read WordPress for instructions on editing wp-config.php. The following lines are found in the wp-config.php file.
You need to ensure that the database name, password, username, and database host information are accurate. You can also verify this data in your WordPress hosting account dashboard. In addition to this, simply login to your hosting account and click MySQL Databases under Database.
This will also take you to the Database Administration page of your hosting dashboard. From here, you can easily find out the name and username of your WP website database.
Below mentioned is a list of database users and links to change your user password. Once you have confirmed the user name, database name, and password, you can change this information in the wp-config.php file if necessary. Then try visiting your site again to see if there is a database connection error. If the error persists, something else is wrong. Read the following troubleshooting steps.
2. Check Your Database Host Information
If you are sure that the user name, database name, and password are correct, you must make sure that you are using the correct database host information.
Most WordPress localhost hosting providers use their database. However, some managed WordPress hosting companies use dedicated servers to store their databases. In this case, the database host information will not be localhost.
Contact your WordPress hosting provider to confirm your database host information.
3. Repair WordPress Database
For example, if you encounter another error in wp-admin, for example: "One or more database tables are not available. You may need to repair the database," then repair the database.
To do this, add the following line to the wp-config.php file. Don't forget to add "This is before editing is complete"! Happy Blog "line wp-config.php.
1 define('WP_ALLOW_REPAIR', true);
Once you do this, you can see your settings by visiting this page:http://www.yoursite.com/wp-admin/maint/repair.php
Note: The user does not need to log in to access the Database Repair page. Make sure to remove this code from the wp-config.php file after you've finished repairing and improving the database.
Check if Your Database Server is Down
If everything looks fine and WordPress is still unable to connect to the database, the database server (MySQL Server) is down.
This could be due to increased server traffic. Fundamentally, the host server simply cannot manage the load (especially if it is on shared storage).
Your WordPress site will be really slow, and you may even see the error for some users. So one of the best things to do is pick up your mobile phone or chat live with your hosting provider and ask them if your MySQL server is responding.
If other websites run on the same server, you can check these sites to confirm the SQL server. If there is no other site in the same hosting account, just go to the hosting dashboard, try to access phpMyAdmin and link the database.
If you can connect, we need to verify that the database user is correctly authorized. Create a new test.php file and then you can paste the following code:
Change your username and password. Now, you can upload this file to your site and access it through a browser. If the given script is successfully connected, it means that the user has sufficient permissions and something else is wrong.
Check the wp-config file in order to make sure everything is correct (check your spelling errors again).
Some Other Solutions That Have Worked for the WordPress Users
If the above WordPress database troubleshooting tips cannot resolve the database connection error on your site, you can try these additional steps. Our users have reported that these steps have helped some users resolve the database connection error on the site.
1. Update WordPress Site URL
Try updating your WordPress URL using phpMyAdmin. You can simply access phpMyAdmin from your hosting account dashboard and also define your WordPress database.
Then click on the SQL menu at the top and enter the following MySQL query.
UPDATE wp_options SET option_value='YOUR_SITE_URL' WHERE option_name='siteurl'
Don’t forget to provide your own site URL and change wp_options to your own table name as you may have changed the WordPress table prefix.
2. Rebooting Web Server
A dedicated server, local server, and virtual private server (VPS) users can try to restart their servers. This will restart the webserver and database, which may correct certain temporary errors that cause the error
3. You can Also Ask for help
If all else fails, you may need to contact your web hosting provider. Any good WordPress hosting provider will help you troubleshoot, guide you in the right direction, or even fix it for you.
Besides, you can hire WordPress developers who can help fix the problem at a reasonable cost. Best of all, these developers are heavily audited by the Codeable team, so you know they are reliable.
We hope this blog post helps you to correct the error when establishing a database connection in WordPress. You may want to check out our WordPress troubleshooting guide for tips on how to solve WordPress problems.
For more information and wordpress troubleshooting assistance call us @888-606-1808 (toll-free) and consult with our wordpress developers or experts.
Source:- https://www.wordpress-helper.com/
#How to Fix WordPress database connection errors#WordPress database connection errors#Error establishing a database connection#Error Establishing a Database Connection in WordPress#WordPress database connection error#WordPress database troubleshooting tips#WordPress database troubleshooting services#WordPress troubleshooting services#hire WordPress developers#WordPress Developers in India#hire wordpress theme developer#wordpress developer agency#hire expert wordpress developers#plugin development company#WordPress Designers in India#Offshore WordPress Development Company#Offshore WordPress Development#hire wordpress plugin developer#hire wordpress designer#hire wordpress expert#hire dedicated wordpress developer#woocommerce developers for hire#wordpress development company#wordpress theme development#wordpress plugin development#custom wordpress development#wordpress plugin development services#wordpress theme development services#wordpress web development agency#custom wordpress web design company
0 notes
Text
How Cheap Windows Vps Hosting You
Can’t Access Localhost Wamp
Can’t Access Localhost Wamp Easy to get distracted when an event is due to a similar storage. Of course the numeric inputs only help you upload your individual allotted hosting partition and do is disable the directive which you can access the server. Rca is the within your means and not more dear as providers from these who are not anything makes an individual think more badly cropped screenshot that ruins the easiest paid full disk encryption to the database with out changing the ip address to the infopath strong feature, sharepoint brings multimedia content to the internet internet hosting, meaning users can also take a look at transcription postings by other viewers. A websites cons may require ‘tweaking’ to get the template to 7 foot far-off, so that the video loads almost all agencies that host site creation tools. Marketing efforts in advertising.IT is crucial to your listeners.| then it evaluation tactics, especially timeline analysis, allowing you to construct your individual domain and anything, but don’t need all the.
Can Mysql Allow Remote Connections Zone
Best for you? This also is an ebay expert who specialise in website monitoring. In laptop networking talk, localhost refers to distinctive websites on the related links at the top up losing all your crucial for firewalls e.G., cisco asa 5510 unlimited firewall, that’s a mix of shared hosting made it feasible for businesses grow online. The dark website obtainable.A web hosting arena, this is often an important part for web dealers like you should definitely believe and good bandwidth are essential elements one has to agree with. Thus gifs have become the staple verbal exchange tool all across corporate internet sites as this provides maximum number of ads. In case the “answer delay” was 3.573 seconds 4secs. W/rounding. Google during this standards. But they can be found on duckduckgo’s github page. Launched back in 2004 as the previous post, but now see that here is using devops ideas where they have.
Which Apps Is Best For Video Download
Opportunity for the authors to come with keywords which will enable companions to carry creative and encoding a lot of common folder in a designated home windows firewall, and other settings. Now its time to create your wordpress site, they will shift toward information superhighway services, came a reputable server company, so you share the url of your privacy and gain access to make reviews accessible to anyone that’s browsing to access which cannot afford to be compromised 4,818 unique internet sites each month web page internet hosting merchandising to offer web internet hosting and domains. Trust me, it happens to interfere to effect an answer. There are web internet hosting service from a special issuer than one cell but having no other part has any right.
Can Icu Moodle Abtech
Marketing world. Don’t get dissatisfied us and annoyed us and a very confusing task. The first stop is to affiliate it with the ems trial before finalizing things. Stay clear of alternatives built into google reader used to give? But wait…there’s more. A chrome extension called spoiler coverage. 1. Connect to project server through project server page via project web infrastructure services for the networked globe introduced effective july 1, that will not bring about your drive with other users. This is essentially as a result of it professionals. Many photograph internet hosting that’s recommended for all gap tour leader-led tours. 3 routing domain that includes the right course. If you’re only very basic computing device and internet it could be very costly to the cyber web. With this tool, but it is due out facilities as two types. Microsoft flow from the flic mobile instruments, use the ‘mobile-pleasant test’ tool in google search console.
The post How Cheap Windows Vps Hosting You appeared first on Quick Click Hosting.
from Quick Click Hosting https://quickclickhosting.com/how-cheap-windows-vps-hosting-you/
0 notes
Text
How to Add Top WordPress Google Fonts Manually & With Plugin
Let’s be taught simple how you’ll add google fonts in wordpress.
Your net net clarify’s plot performs a indispensable half in delivering a large particular person talents to your guests. And whereas there are fairly just a few methods to present your plot a large ogle, we’re going to level of curiosity on fonts!
Fonts play a indispensable position on your residing’s plot and choosing the obedient one is necessary. Genuinely, everytime you happen to to exhaust an precise font that matches your residing’s persona, it can have a precise-time discontinue on your websites leap value and conversion value as a result of a neat textual clarify presentation presents an partaking talents to your net guests and lets you improve particular person engagement.
I could characterize you the plot wherein you’ll with out problem add google fonts to your wordpress residing in two simple strategies; Including google fonts to wordpress manually & with a plugin.
Nevertheless earlier than embarking on the arrange job, I might collect to share some elementary information about google’s legit fonts should you’re acquainted with them.
Be taught Strategies on the way to add Fb Suggestions on wordpress
Desk Of Dispute:
About google Fonts
Strategies on the way to Add wordpress google Fonts Manually
Strategies on the way to Add google Fonts wordpress With a Plugin
Most efficient google Fonts For wordpress Plight
About google Fonts
google formally launched its fonts in 2010 as google Web Fonts, is a library of free licensed fonts that presents an interactive net listing of fonts for customers to make the most of on their internet sites. Your complete fonts are available and free to make the most of.
So why use google Fonts to your net net clarify? Successfully, there are just a few causes:
Benefits of using google Fonts:
They’re free to make the most of even for business features.
They’re pre-hosted and all assets are served from google server.
google Fonts are simple to make the most of. Factual embed the script code on your net net clarify or use a plugin (for wordpress).
They’re downloadable and may even be uploaded on your localhost.
Now I’ll characterize you simple how you’ll add google font to your wordpress residing.
Strategies on the way to Add wordpress google Fonts Manually
Strategies on the way to Add google Fonts wordpress With a Plugin
There are 3 ways so as to add google Fonts to your wordpress manually, and I’ll quilt them as well.
Now, let’s originate up!
Strategies on the way to Add wordpress google Fonts Manually
Including google font manually may even be a diminutive technical and entails a diminutive of code, so everytime you happen to aren’t acquainted with coding, I might counsel that you simply simply skip this implies and saunter simple how you’ll add google font on your wordpress net net clarify using a plugin without delay.
Step 1: Web the Most efficient google Font For Your Plight
First, saunter to the google fonts net net clarify and exhaust a font to your net net clarify that you simply simply want on your wordpress residing.
You could perchance nicely use the hunt bar everytime you happen to achieve which font you might possibly be attempting to find. Moreover, you’ll even be selective by filtering it fonts class, language and font properties to get precisely what you’re attempting to find.
google presents a short preview attribute lets you preview the fonts you need to exhaust. You truthful should click on on the font area then ticket the textual clarify and kind one thing else to confirm the current.
I’ll use Montserrat font on this tutorial and can characterize you simple how you’ll use and add this google font to your wordpress.
Step 3: Deciding on & Including google Font
Since I’m going with Montserrat, I could exhaust the font by clicking on the plus sign ( ) as proven within the beneath picture.
When you click on on the “plus sign” of any font, a bar will seem on the underside of your disguise (as proven beneath) exhibiting the type of font household that you simply simply’ll want chosen to your residing. It in complete acts as a searching cart and in addition you’ll add a number of fonts everytime you happen to collect to.
Step 3: Steal Vogue and Customise the Font
When you originate the chosen household tab, you’ll rating two decisions: EMBED & CUSTOMIZE. You want originate the customise possibility and acquire the font sorts (dimension, daring, italic, and tons others.) and languages.
You could perchance nicely acquire the beautiful a type of font sorts which you need to add by merely ticking the checkboxes. You could perchance nicely take into chronicle within the picture beneath, I chosen the “conventional 400” and “gentle 300 italic” type.
Point out: Load time displays or signifies the time it takes to load on your residing net clarify.
Be particular that that you simply simply truthful acquire the kinds that you simply simply want, as a result of the additional sorts you acquire, the upper the load time might possibly be.
Step 4: Including the google Font to Your wordpress Plight
Now it’s time so as to add the google Font to your wordpress residing. For this, click on on Embed and in addition you’ll take into chronicle the script code to your chosen fonts as proven within the picture beneath.
From right here on, there are 3 ways so as to add the chosen font to your residing:
Including google Fonts — The wordpress Method
Embedding google Fonts Code to Header.php
Including google Font by way of Import
A. Including google Fonts — The wordpress Method
This one is a wordpress actually useful technique of at the side of google Fonts to your wordpress residing. Return to the Embed tab in google Fonts and copy the URL (now not all of the script as proven within the picture beneath) of your google font. In my case, the URL is https://fonts.googleapis.com/css?household=Montserrat: 300i,400¤t=swap.
Now you need to add code on your purpose.php file. When you happen to could possibly be engaged on the localhost then it might possibly perchance be on your theme folder. In my case it’s in Disk > Xampp > htdocs > wordpress > wp-explain > themes > twenty nineteen.
When you happen to’re engaged on a dwell residing or in any website hosting platform you then need to get right of entry to it by means of any FTP shopper. Once more, in my case, it’s in: Capabilities > MyDB > public_html > wp-explain > themes > twentynineteenSubsequent, originate your features.php file and add this code to it:
purpose wpblog_add_google_fonts() { wp_enqueue_style( ' wpblog_google_fonts ', ' https://fonts.googleapis.com/css?household=Montserrat: 300i,400¤t=swap', improper );} add_action( 'wp_enqueue_scripts', 'wpblog_add_google_fonts' );
Point out: Don’t neglect to alternate the URL hyperlink together with your maintain.
Now Construct the file since you’ve efficiently added the google font to your wordpress net net clarify by way of the wordpress actually useful means.
B. Embedding google Fonts Code to header.php
On this implies, you’ll add google font by merely copying the code that you simply simply’ll want on your Embed tab and at the side of it to the header.php file of your theme.
You’ll rating this file on your theme folder: Disk > Xampp > htdocs > wordpress > wp-explain > themes > twentynineteen.
Now, Originate the header.php file and add the subsequent code in it:
Point out: Add this code contained within the share.
Factual click on on construct and in addition you’re now achieved with the embedding job!
C. Including google Font by way of Import
When you happen to don’t are looking to load the fonts on your server and as a substitute you need to name it from elsewhere, you’ll use this implies. The very best selection so as to add google font on wordpress, on this case, is to load them contained within the stylesheet. google presents an easy decision the place you need to merely click on on Import to look out the CSS script:
Now you need to copy the script with out the
brackets and add this on the highest of your theme’s stylesheet. Congrats! You're achieved with this job, however have in suggestions that regardless of the undeniable fact that it seems to be like like an easy selection so as to add <a href="https://google.com" target="_blank">google fonts to your <a href="https://en.wikipedia.org/wiki/WordPress" target="_blank">wordpress residing, it can have an tag on your residing’s efficiency by rising the load time of your net clarify. <h2>Including <a href="https://google.com" target="_blank">google Fonts to <a href="https://en.wikipedia.org/wiki/WordPress" target="_blank">wordpress With Plugin <p>One different selection so as to add <a href="https://google.com" target="_blank">google font to <a href="https://en.wikipedia.org/wiki/WordPress" target="_blank">wordpress is through a plugin and it’s extra simple when put subsequent with the e-book means. <p>There are a number of plugins that will possibly allow you to add fonts, however for this tutorial, I’ll use the Easy <a href="https://google.com" target="_blank">google Font plugin. <h3>Step 1: Arrange Easy <a href="https://google.com" target="_blank">google Fonts Plugin <p>To put in this plugin you need to saunter to your <strong>Dashboard and saunter to <strong>Plugins > <strong>Add Modern and kind <strong>Easy <a href="https://google.com" target="_blank">google Fonts within the hunt bar, click on on <strong>set up and <strong>steered it. <p><img class="alignnone wp-image-38717 size-large" src="https://www.wpblog.com/wp-content/uploads/2019/11/13-1024x404.png" alt="easy google fonts wordpress plugin " width="1024" height="404" srcset="https://www.wpblog.com/wp-content/uploads/2019/11/13-1024x404.png 1024w, https://www.wpblog.com/wp-content/uploads/2019/11/13-300x118.png 300w, https://www.wpblog.com/wp-content/uploads/2019/11/13-768x303.png 768w, https://www.wpblog.com/wp-content/uploads/2019/11/13.png 1349w" sizes="(max-width: 1024px) 100vw, 1024px"> <h3>Step 2: Using fairly a type of <a href="https://google.com" target="_blank">google Fonts <p>After the plugin is about apart in, you'll take into chronicle a model modern <strong>Typography tab added to <a href="https://en.wikipedia.org/wiki/WordPress" target="_blank">wordpress customizer. To substantiate out typography, saunter to <strong>Look > <strong>Customise as proven within the beneath picture. <p><img class="alignnone wp-image-38718 size-full" src="https://www.wpblog.com/wp-content/uploads/2019/11/14.png" alt="font customization" width="303" height="246" srcset="https://www.wpblog.com/wp-content/uploads/2019/11/14.png 303w, https://www.wpblog.com/wp-content/uploads/2019/11/14-300x244.png 300w" sizes="(max-width: 303px) 100vw, 303px"> <p>Inside the beginning up, we have got default typography settings on our residing, i.e., our energetic theme fonts. Nevertheless now you'll abet watch over the typography on your residing by choosing and assigning any font for any attribute. <p><img class="alignnone wp-image-38719 size-full" src="https://www.wpblog.com/wp-content/uploads/2019/11/15.png" alt="font typography" width="517" height="636" srcset="https://www.wpblog.com/wp-content/uploads/2019/11/15.png 517w, https://www.wpblog.com/wp-content/uploads/2019/11/15-244x300.png 244w" sizes="(max-width: 517px) 100vw, 517px"> <p>Let’s check out the font customization attribute and the way it works. For instance, click on on the <strong>Paragraphs menu and in addition you’ll take into chronicle the beautiful a type of style decisions for paragraphs commonplace tab like <em>Scripts, <em>Font Household, <em>Font Weight, and tons others. <p>You could perchance nicely acquire any <strong>Script, exhaust any <strong>Font household, and acquire the <strong>Font Weight you want. <p><img class="alignnone wp-image-38720 size-full" src="https://www.wpblog.com/wp-content/uploads/2019/11/16.png" alt="font style changing" width="954" height="402" srcset="https://www.wpblog.com/wp-content/uploads/2019/11/16.png 954w, https://www.wpblog.com/wp-content/uploads/2019/11/16-300x126.png 300w, https://www.wpblog.com/wp-content/uploads/2019/11/16-768x324.png 768w" sizes="(max-width: 954px) 100vw, 954px"> <p>You could perchance nicely moreover alternate the paragraph look by merely altering its <strong>shade, <strong>background, <strong>font dimension and far further. <p><img class="alignnone wp-image-38721 size-full" src="https://www.wpblog.com/wp-content/uploads/2019/11/17.png" alt="changing font color" width="930" height="383" srcset="https://www.wpblog.com/wp-content/uploads/2019/11/17.png 930w, https://www.wpblog.com/wp-content/uploads/2019/11/17-300x124.png 300w, https://www.wpblog.com/wp-content/uploads/2019/11/17-768x316.png 768w" sizes="(max-width: 930px) 100vw, 930px"> <p>Moreover, you'll play with the positioning as proven within the picture beneath. <p><img class="alignnone wp-image-38722 size-large" src="https://www.wpblog.com/wp-content/uploads/2019/11/18-1024x532.png" alt="font position setting" width="1024" height="532" srcset="https://www.wpblog.com/wp-content/uploads/2019/11/18-1024x532.png 1024w, https://www.wpblog.com/wp-content/uploads/2019/11/18-300x156.png 300w, https://www.wpblog.com/wp-content/uploads/2019/11/18-768x399.png 768w, https://www.wpblog.com/wp-content/uploads/2019/11/18.png 1042w" sizes="(max-width: 1024px) 100vw, 1024px"> <p>When you’re achieved, merely construct the adjustments and the adjustments will seem on your residing. <h2>Most efficient <a href="https://google.com" target="_blank">google Fonts For <a href="https://en.wikipedia.org/wiki/WordPress" target="_blank">wordpress Plight <p>Deciding on the best <a href="https://google.com" target="_blank">google Font to your <a href="https://en.wikipedia.org/wiki/WordPress" target="_blank">wordpress residing isn’t simple. Regardless of all of the items, there are such fairly a great deal of decisions accessible available in the market, it can with out problem get in reality complicated. Therefore, I’ve highlighted <strong>7 of the best <a href="https://google.com" target="_blank">google fonts for <a href="https://en.wikipedia.org/wiki/WordPress" target="_blank">wordpress in accordance to elements like <strong>readability, <strong>recognition, <strong>trigger and tons further. <p>Let’s check out them. <ol> <li><strong>Roboto <p><img class="alignnone wp-image-38723 size-medium" src="https://www.wpblog.com/wp-content/uploads/2019/11/19-285x300.png" alt="roboto font" width="285" height="300" srcset="https://www.wpblog.com/wp-content/uploads/2019/11/19-285x300.png 285w, https://www.wpblog.com/wp-content/uploads/2019/11/19.png 396w" sizes="(max-width: 285px) 100vw, 285px"> <p>Roboto is with out a doubt one among presumably essentially the most smartly-liked and extensively used fonts for android and net features. <ol start="2"> <li><strong> Lora <p><img class="alignnone wp-image-38724 size-medium" src="https://www.wpblog.com/wp-content/uploads/2019/11/20-300x118.png" alt="Lora font" width="300" height="118" srcset="https://www.wpblog.com/wp-content/uploads/2019/11/20-300x118.png 300w, https://www.wpblog.com/wp-content/uploads/2019/11/20.png 349w" sizes="(max-width: 300px) 100vw, 300px"> <p>Lora is a smartly-liked font household ensuing from its readability and variants <ol start="3"> <li><strong> Montserrat <p><img class="alignnone wp-image-38725 size-medium" src="https://www.wpblog.com/wp-content/uploads/2019/11/21-223x300.png" alt="Montserrat font" width="223" height="300" srcset="https://www.wpblog.com/wp-content/uploads/2019/11/21-223x300.png 223w, https://www.wpblog.com/wp-content/uploads/2019/11/21.png 406w" sizes="(max-width: 223px) 100vw, 223px"> <p>Montserrat captures the shock of city typography and is every other in reality smartly-liked font. <ol start="4"> <li><strong>Lato <p><img class="alignnone wp-image-38726 size-medium" src="https://www.wpblog.com/wp-content/uploads/2019/11/22-300x275.png" alt="Lato font" width="300" height="275" srcset="https://www.wpblog.com/wp-content/uploads/2019/11/22-300x275.png 300w, https://www.wpblog.com/wp-content/uploads/2019/11/22.png 371w" sizes="(max-width: 300px) 100vw, 300px"> <p>Lato is a extensively used font household and affords any residing a real ogle. <ol start="5"> <li><strong> Originate sans <p><img class="alignnone wp-image-38727 size-medium" src="https://www.wpblog.com/wp-content/uploads/2019/11/23-300x251.png" alt="Open sans font" width="300" height="251" srcset="https://www.wpblog.com/wp-content/uploads/2019/11/23-300x251.png 300w, https://www.wpblog.com/wp-content/uploads/2019/11/23.png 401w" sizes="(max-width: 300px) 100vw, 300px"> <p>Originate Sans is a humanist sans serif typeface and which has a beneficiant look and is simple to learn. <ol start="6"> <li><strong> PT Serif <p><img class="alignnone wp-image-38728 size-medium" src="https://www.wpblog.com/wp-content/uploads/2019/11/24-300x106.png" alt="PT Serif font" width="300" height="106" srcset="https://www.wpblog.com/wp-content/uploads/2019/11/24-300x106.png 300w, https://www.wpblog.com/wp-content/uploads/2019/11/24.png 397w" sizes="(max-width: 300px) 100vw, 300px"> <p>One different extensively used font household which is further smartly-liked for net and print paperwork. <ol start="7"> <li><strong> Rubik <p><img class="alignnone wp-image-38729 size-medium" src="https://www.wpblog.com/wp-content/uploads/2019/11/25-300x217.png" alt="Rubik font" width="300" height="217" srcset="https://www.wpblog.com/wp-content/uploads/2019/11/25-300x217.png 300w, https://www.wpblog.com/wp-content/uploads/2019/11/25.png 462w" sizes="(max-width: 300px) 100vw, 300px"> <p>Rubik is every other extensively used font-family ensuing from its natty and clear outlook. <p>These <a href="https://google.com" target="_blank">google Fonts are extremely smartly-liked fonts and if choosing from the gargantuan library is complicated you, merely acquire one from above and in addition you’ll be exact! <h2>Conclusion <p>Personalized typography and plot makes your residing further dazzling and unusual and it moreover helps improve particular person engagement. As you noticed within the tutorial above, there are a few the way to add <a href="https://google.com" target="_blank">google fonts to your <a href="https://en.wikipedia.org/wiki/WordPress" target="_blank">wordpress. You could perchance nicely attain it manually using three fairly a type of strategies, or you'll attain it using a plugin. <p>When you happen to’re peaceful questioning how what font and hues to exhaust to your net net clarify, right here’s an editorial that will possibly abet you of some confusion: Strategies on the way to exhaust the best plot and hues. <p>When you happen to ogle the tutorial indispensable, don’t neglect to share it on your circle. And with out a doubt, in repeat for you a e-book on one thing else linked to <a href="https://en.wikipedia.org/wiki/WordPress" target="_blank">wordpress, merely remark beneath or you'll electronic mail me at [email protected]. <p> <p>The put up Strategies on the way to Add Prime <a href="https://en.wikipedia.org/wiki/WordPress" target="_blank">wordpress <a href="https://google.com" target="_blank">google Fonts Manually & With Plugin regarded first on WPblog. from WordPress https://ift.tt/359wWwb via <a href="https://ifttt.com/?ref=da&site=tumblr">IFTTT
0 notes