#how to use Cricut transfer tape
Explore tagged Tumblr posts
Visit Tumblr Blog
Explore Tumblr blogs with no restrictions, modern design and the best experience.
Last Seen Tumblr Blogs


Fun Fact
The “We are the 99%” Tumblr blog became the slogan for the Occupy Wall Street movement.
Text
How to Use Cricut Transfer Tape to Create a DIY Project?

If you wonder about using your Cricut transfer tape, this blog is just for you. Here, I’ll cover the basics of how to use Cricut transfer tape. I’ll cover the main steps in this guide. If you want this method to be easier, keep following my tips and tricks to create a crafting project.
I can teach you its use based on my experience and help you create your first project with your transfer tape and vinyl. Hence, get ready and continue following this post, where you’ll find many informative things.
Introduction to Transfer Tape
As you know, Cricut machines help you design things using different types of materials. They offer certain accessories and tools to reduce your extra effort in using transfer tape. I want to introduce this new accessory under Cricut and reveal its use.
Its basic use is to transfer the vinyl design onto the blank, for instance a coffee mug or tumbler. With this amazing accessory, you can create multiple projects easily without hassle. If I talk about myself, I have explored this accessory many times to create customized items.
How to Use Cricut Transfer Tape With Vinyl?
Finally, you’ll be learning about using a transfer tape for your upcoming projects. In this section, you’ll get some easy steps to get started with your transfer tape project. Let’s explore together.
Step 1: Design a Project on Design Space Canvas
Your first step should be to design your favorite design on the Cricut Design Space canvas. Utilize all the features and tools under the Cricut Design Space. Now, cut that design through your machine using vinyl as a material. Then, remove the excess vinyl with the weeding tool.
Step 2: Cut a Transfer Tape

Once you’ve cut the design on vinyl, start cutting your transfer tape in a slightly bigger size than your design. A transfer tape is reusable; you should always cut it in a bigger size, even if your design is small. This is how you can sustain your accessories for longer.
Step 3: Take off the Backing Paper from the Transfer Tape
In this step, remove the backing or your transfer tape. After use, you can again stick your transfer tape to the backing paper for reuse. Let’s move ahead and learn how to use Cricut transfer tape.
Step 4: Apply Design to Your Transfer Tape

In this step, apply your transfer paper to the design and scrape it well with a scraper. Otherwise, you can use your old cards.
Step 5: Peel off the Backing Paper from Your Design

When you’ve burnished the design on the backing paper, it’s time to peel the backing paper off to get the final design on the tape. Please lift it slowly upside down to avoid ruining the design. Use a weeding tool to do it better.
Step 6: Apply the Design to Your Project

This is the correct time to fix your design on the project and press it gently to let the design stick well to the surface.
Step 7: Remove the Transfer Tape
Once your design is set on the project, you can remove the transfer tape. Before removing it, burn it down on the surface well. Do it again and again until you’re sure that the design stuck well. That’s how to use Cricut transfer tape.
What Else Can I Use Instead of a Transfer Tape?
Yes, there are a few alternatives to using a transfer tape. If you find your transfer tape too sticky or unsuitable for your project type, you can use some other things.
For instance, you can try using painter’s tape. Moreover, contact paper is another good option. Besides, seal saran wrap is also a good option in place of the transfer tape.
Conclusion
So, are you ready to use transfer tape for your projects? I have tried my best to tell you each step, and now it’s your turn to implement everything you’ve learned. This way of DIYing is super easy and cost-effective. As you can save your transfer tape for the next project, you will stay stress-free for the next purchase. As an expert, I will definitely come up with some new tips and tricks to excite all of you who are on this creative journey. Keep exploring new DIY ways till then.
Frequently Asked Questions (FAQs)
Why Choose Cricut Transfer Tape?
Transfer tape is an excellent accessory from Cricut. It helps you apply your cut designs onto the final project’s surface, providing an easy way to transfer the design to the desired blank. Also, it is reusable and sustainable for longer.
Can I Iron the Transfer Tape?
Yes, you can iron-transfer tape. You need a heat press or iron to apply heat to the transfer tape. It works best when you use a heat press to put the design on the blank. However, don’t directly apply the heat to the tape; use a towel instead.
Can I Use Regular Tape Instead of Cricut’s Transfer Tape?
You can use painter’s tape instead of transfer tape. This tape is lightly adhesive, making it ideal for temporary use.
Source: How to Use Cricut Transfer Tape
#how to use Cricut transfer tape#Cricut transfer tape#cricut design space app#cricut design space software#Cricut.com/setup#cricut setup
1 note
·
View note
Text
How to Use Transfer Tape Cricut? [Types and Methods]

What are Different Types of Cricut Transfer Tapes?
Currently, there are both liners less & Strong Grip Transfer tapes accessible for the DIYers designing their crafts in the industry. With the help of the liner less transfer tape, an individual can move their custom vinyl to any type of surface easily and accurately. However, this supply creates glitter mobile covers, labels, and many more. On the contrary, the Strong Grip Transfer tape chops down the provided material within a few minutes. In addition, it is specially designed to cut heavier vinyl such as Glitter vinyl. Additionally, both these items are compatible with all smart cutting machines.
How to Use Transfer Tape Cricut for Projects?
Transfer Tape Cricut is easy to use among the rest of the materials, even for beginners. DIYers need to come across the steps while using this electric cutting machine product. Study the upcoming pointers for the steps needed while using these items for projects.
The first step to be taken includes cutting down the Vinyl with a Cricut kiss cut and removing the loaded material from the mat.
Moreover, cut a large portion of transfer tape and secure the entire area by rolling over the tape across the item.
Gently remove the backing and use the tape grid pattern to line up things over the whole design in a straight line.
After that, take out the transfer tape sticky side on the top of the vinyl design.
Take out the scraper tool for polishing the vinyl stuck on the transfer tape.

With the backing sheet at a 45-degree angle, gently remove the vinyl. However, if the material is stuck to the tape, polish it with the scraper tool.
Following this, slowly carry the item on the project surface and use the grid for perfect placement.

Lastly, slowly peel off the Cricut product from the vinyl, dropping the cutouts on its finish place.

Apart from learning about these craft plotter items’ uses, let us introduce you to some transfer tape Cricut tips & tricks. They will help them successfully complete the transfer process without any serious damage.
What is Common Transfer Tape Cricut Tips?
If you are a Cricut beginner, then this section belongs to you. Are you facing regular issues while using the transfer tape? Then we will be sharing with you some of the basic tips whose details are explained below:
At first, you need to apply the Cricut transfer tape starting at once and slowly pace it down. Slow is the key in this path, as you can apply everything evenly without having any kinks on the tape and vinyl.

After getting the tape on the respective design, ensure that you polish the front & back of the material with the scraper tool. Don’t try to put any pressure on the tool, and carry it with your free hand.

Select a corner and start removing the Cricut product at the 45-degree angle. You are advised not to change the angle; otherwise, your craft will be destroyed within seconds.

If you are a beginner and planning to work on the transfer tape, save the scrap pieces and keep practicing for future reference. It’ll benefit them as they become experts after completing a few projects.
In addition, do not throw away a large margin of the item after the project comes to an end. You can keep reusing the material until it starts using its stickiness, as it will save your expenses.
Also, you are guided to try new models launched in the past few years. Trying something new will help the users know about their abilities and increase their creativity skills.
Frequently Asked Questions
Question: How to Apply Transfer Tape with Liner?
Answer: Intending to apply transfer tape with Liner, study the steps given below:
Firstly, peel off a liner from the transfer tape Cricut.
Attach a small area of the tape to the created design (center or back of the design).
Take the scraper tool and start burning it on the surface.
You can cover from the outward side to the inner side, covering the whole area of the design.
Lastly, turn on the vinyl and start polishing the project’s backside.
Question: What is the Best Way to Use liner less Transfer Tape on Small Projects?
Answer: The best method via which you can use the liner less transfer tape for small projects can be collected from the steps available below:
Begin your process by weeding out the design and unrolling an inch of Transfer Tape.
Following this, stick the unrolled section onto the workspace and align it beneath the Transfer Tape.
Keep your fingers inside the roll and unroll enough tape to cover the entire design.
Start burning, cut the tape off the roll, and flip it to the backside.
Remove the Liner from the material and apply the design to the surface.
Question: What Can I Use Instead of Transfer Tape Cricut?
Answer: Under any circumstances, if the craft plotter material gets over, you might choose Printer’s tape as one of the alternatives. You just have to overlap the pieces to make them large enough to cover up the design. Apart from that, you can also use Contact Paper as another option. However, you can also choose Press & Seal to complete the design process.
#how to use transfer tape Cricut#cricut.com/setup pc#cricut.com/setup mac#cricut.com/setup#cricut design space#www.cricut.com/setup#cricut explore air 2#design.cricut.com#cricut design space login
0 notes
Text
(Re)Bound: Polar Night/Midnight Sun by me (@toomuchplor)


It’s been nearly a year since I started bookbinding, so I decided it was time to revisit the first fic I ever set.
I'll do a post with side-by-side photos another time but suffice it to say, it's not so clear to me that it's like 'first book bad, this book good'.
And if you're like, wow, Plor is posting a lot of binds this week -- you are correct. I'm on vacation this week, but also I'm wrapping up a few things that were WIPs for weeks. Lots of victory laps, but this is the last one!


I did my first typeset in Word before quickly switching to InDesign (which I have for work reasons anyway) so I wound up designing from scratch. (By the way, I’m very happy to share typesets if anyone is ever interested — for personal use only, of course!)
I used Canva to create the cover page and chapter headers in this cute watercolour style. And the end papers are pretty chiyogami from a paper store in Toronto.


I rounded the spine, but it didn’t need backing as the swell wasn’t much. I am still figuring out rounding for sure — the hardest part is getting the text block and spine stable enough to trim the head and tail straight afterwards, at least for me!

Sewn faux double core silk endbands on a 2 mm leather cord core.
I dithered about the case cover art for weeks while I did a million other projects. I knew I wanted to try something new but couldn’t find the right approach or technique to inspire me. Then I randomly tried a paper onlay for a blank book I was making and had my eureka moment.
The cover design is drawn by me in Illustrator, then cut from chiyogami by my cricut. I used a PVA/corn starch paste 50-50 mix to glue on the paper directly to the cover before the gold HTV outline was applied. The gold is partly decorative and partly to protect the edge of the onlay from friction/wear.
I am obsessed with how this looks. It’s quilting and paper art and mosaic all together? I can see myself doing this style more for sure.
One challenge is that once it’s glued up, you have exactly one chance to place the paper onlay on the cover — you can’t pick it up and try again because even with mix, the glue marks the fabric. So you need steady hands and good planning. I’m wondering about transfer tape or maybe even post it flags to help guide me in future projects? I'm pleased with the result but it could be better.
After all that sweating and work, I was paranoid about wear and tear on the paper, so I made a dust jacket. (Shout out to @citrusses for advice and emotional support during lamination time, and to lately for chatting with me and advising me as I did the paper onlay design and work!)
#bookbinding#fanbinding#case binding#drarry fanbinding#sewn endbands#hp fanbinding#drarry#toomuchplor#polar night midnight sun#legal quarto binding#rounded spine#dust jacket
103 notes
·
View notes
Text
Book No. 27
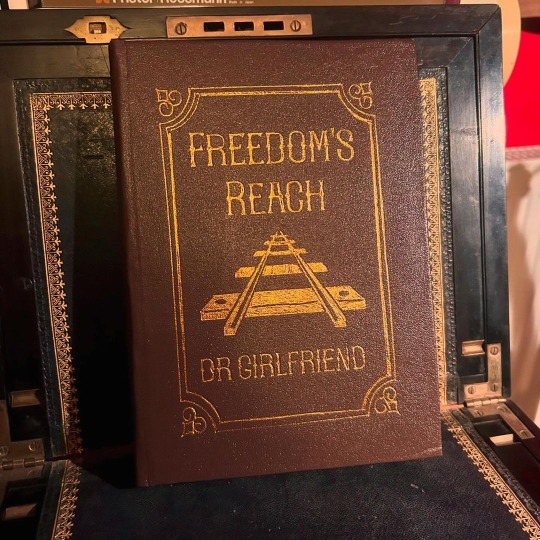
A charity bind for @dr-girlfriend, and coincidentally a fic I adore, which is a lovely bit of fortuitousness.
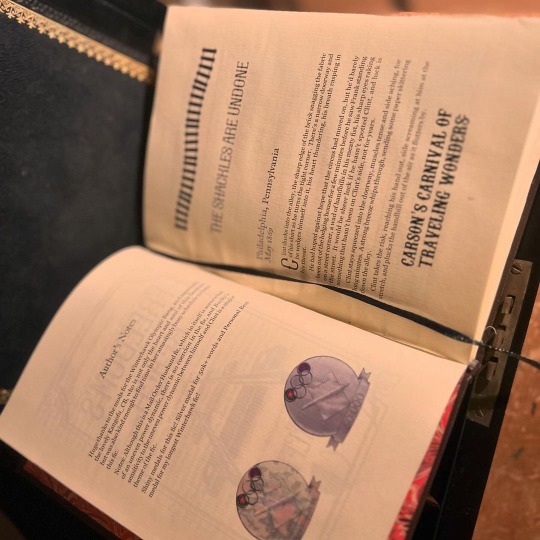
Finished on the 20th of October, according to my binding journal, but only reached the lovely Dr. G today! I was so delighted when she reached out and asked if I would consider binding a copy of this fic for her — it’s a longtime favourite of mine, and it was a fun work to typeset. I wanted to lean into the setting as far as I could without tipping over into outright cheesiness, and while I don’t know that I fully succeeded, it was fun to try.

The foiling on this was a pain, mostly because I wasn’t very clever how I went about it - the sheets of heat-transfer foil I was using weren’t big enough to cover the whole design, and I when I tried to use the cricut, it didn’t take where I used tape to cover the join in strips of foil. Stencil vinyl, my beloved for foiling, also didn’t work as the design was too big to place on the foil without buckling.
I ended up cutting templates out of sticker card and using those on top of the foil, and used a heated pen tool into the crevices of the stencil. It’s still not 100% but it’s better than previous attempts.
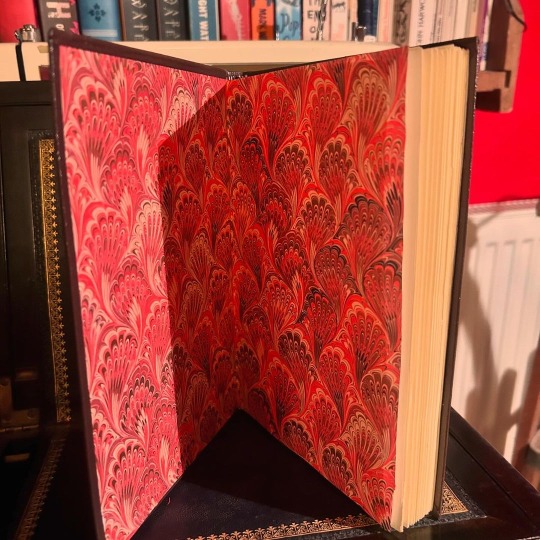
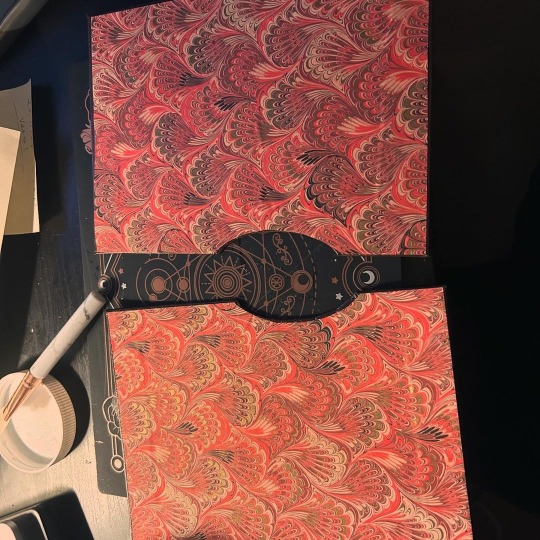
My favourite thing is probably the endpapers — the gold touches in them are really shimmery in person, if not in photos. I also used it to line the slipcase I made, which was a last-minute addition made when I was panicking that the cover was a little too floppy for this book. (The cover ended up firming up compin the press, and the case apparently got a little damaged in transport and is protecting nothing 😅, but I still think it’s a fun touch.)
28 notes
·
View notes
Note
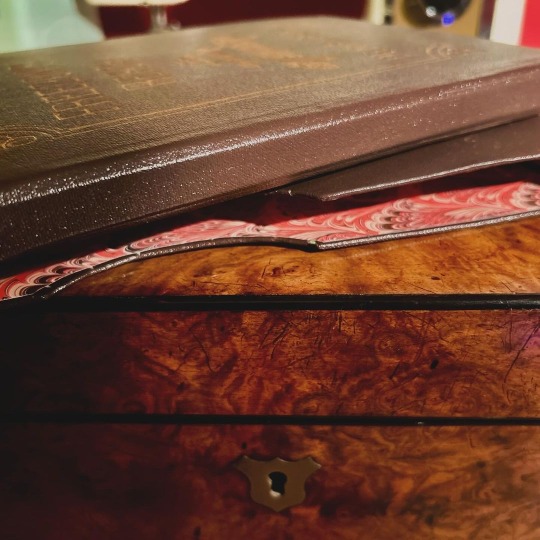
Hi, just wanted to say your binding of "Faces In The Dust" looks gorgeous!!! Could I ask, how did you make the title + decoration and apply it to the front cover? :O
Hello! The cover designs are cut from vinyl with a cricut machine. In this book's case I used permanent vinyl. Which is essentially very sticky vinyl. There is also HTV(heat transfer vinyl) which you cut out and then adhere to the material via heat (such as an iron). I tend to use cricut to design and then cut most of my covers. The cricut is a cutting (and other things) machine that has a digital design space I run on the computer to help me design covers.
I typically like to start by 'making the case' out of colored blocks in the space that are the size of my actual cover so I can know what things will look like when I put it all together. I also color my items to match as close as possible to the colors I plan to cut them from as well. I mostly do this because I have aphantasia so I need the literal imagery in order to see what the design will look like. These steps are by no means necessary and if you can visualize what you want then you can just add the images/text in however you like.
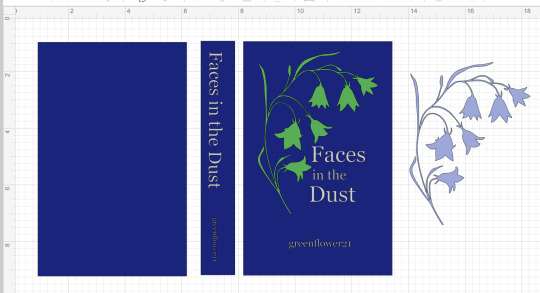
The vinyl is a plastic-y sheet or roll of vinyl in a given color. Because I wanted to have the flowers be one color(lavender) and the stem (green) another I needed to cut two sections and take the parts I wanted from each. I could have also edited the images so that each of the two only had the parts I wanted from it so it would only cut them. But it wasn't that much of a difference and if I just copy pasted a second one of the same image and changed the color then I would know they were the same size and everything would fit together.
Once the design is done I move to the cutting phase. The colors you pick determine which pieces are cut together.
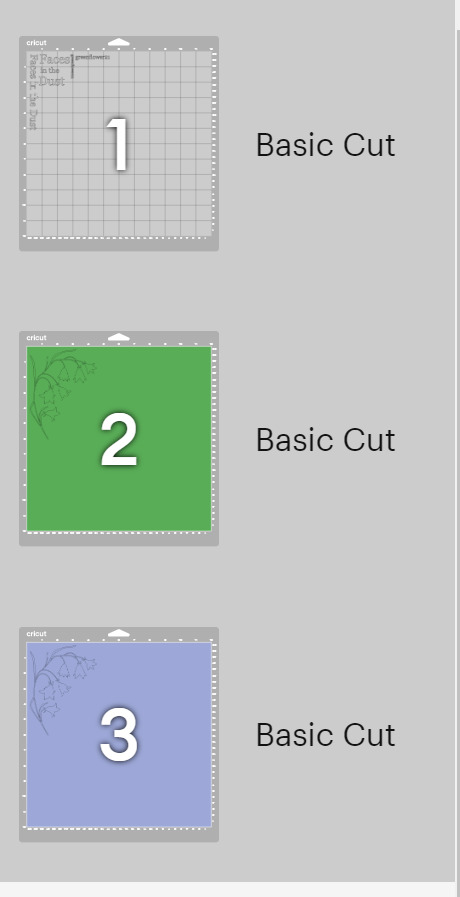
You load each sheet of vinyl in on a mat and it cuts the image out. When it is done you cut out around the section you just cut the image on and then use tweezers to remove the vinyl you aren't using around the image. This is called weeding. In the flowers & stem's case I also then used an exacto blade to cut off the flower heads from each of the cut outs so I could combine the two colors of vinyl to create my final version of the image.
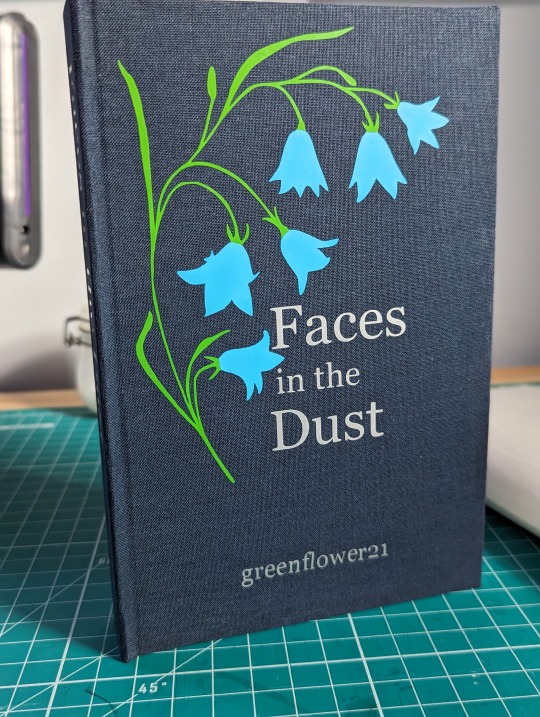
Once it is all weeded you are ready to transfer it to the book case. You do this with transfer tape. It is a clear plastic sticky sheet that you place on your vinyl to 'pick it up' off of the backing it started out on.
Again in this instance to combine the colors I picked up the green vinyl on the tape and then lined up the purple flowers and pressed down to get them stuck to the tape as well. With it all now collected I placed the transfer tape on my book and pressed the vinyl into the case of the book. Smoothing it down with my bonefolder or anything else that helps make sure it is flat so it is really adhered and there are no air bubbles.
I do the same with all the titling and ta-da! A Book!
There are tons of ways you can title/design your book covers. I just got my hands on foil quills this past weekend so I hope to try making a cover with them in the not too distance future. Some folks I know use paint pens, or cut out stencils and use regular paint, or just free hand paint if you want to show off your skills of an artist. Hope this was helpful and not too rambling. Sorry I don't have pictures for all the steps, I can make a point to take pictures the next time I make a cover in cricut if that is something folks would want to have. Feel free to reach out if you have any more questions.
45 notes
·
View notes
Text
Bookbinding for Beginners by a Beginner Part 2
Am back there were some things that I missed stating in my last post. And starting up where I mean to continue. I may add things as I go, fair warning, but there is a lot to cover and sometimes I walk away and go "Welp.... forgot that thing". But for the sake of things not being overwhelming I tried to get the most "Up front" stuff done and out of the way in part one.
And I would like to take this time to say: Take it slow, pace yourself. There is no race. And the learning curve is steep in areas. You have to be ok with making mistakes because it WILL happen. Accept that you've made a mistake but don't get upset with lost time or materials. Make a note of what happened and have a journal on hand if you'd like to see how far you've come and the "OK so.... that didn't work. Don't do that again." At the end of the day we're here to line our shelves with lovely wonderful stories and have the pride of "I did this ain't that cool?"
There are a few optional things you might want to consider.
A paper guillotine this is to make the pages of your bind more tidy, but there is nothing wrong with a deckled edge.
example of deckled edges. It's just a fancy way of saying 'uneven'. There are ways to trim your project with a crafting knife / box cutter and a ruler but my experiments have yielded not so great results. Likely, it's due to several factors: One I don't know my own strength half the time, Two "light but firm pressure" means exactly "Well which is it cause for me those are two different things". Three See one. So deckled edges it is. But if you splurge on a paper guillotine, I salute you. You can also take it slower with a more traditional paper cutter but I recommend measuring twice before committing to a tape marker of where to line your pages up. It is up to you.

Optional but fun: Scrap book paper for decorative end pages. It's fun hunting around a craft store and finding what suits the vibe of the fic you're binding. My only note is aim for something that's not too stiff aim for something fairly easily folded and thin. Card stock like paper won't lay nicely in your book.
End bands these will go on the edge of the spine of your fic but over top of the mull (What is mull? That's coming up)
Mull which is essentially stiff cheese cloth this will add extra structure to your bind
Another option is a Subscription to Canva I only say this because you can sign up for free, but some of the options are locked behind a pay wall. It's fun to play with but the Pro version of Canva also lets you resize your canvas and do custom sizes. I have also done my binders logo in Canva (I actually have two as variants). I also use it to make decorative cover pages.
For your viewing pleasure this is what I came up with. Fun fact about me, I'm a thalassophile (I love the sea and everything about it) since I was consciously aware of the sea. The primary reason WHY I got into book binding is because I am going to be eventually moving onto and living and working off of a boat.


Lucky Seas Bookbinding one and two. Depending on what I feel like using.
Cricut all cricut accessories- there is a mini cricut if you want to dip your toe in. IF you go this route you'll need "HTV" or "Heat Transfer Vinyl"
You can also build your covers in canva and get as cost saving options
Printable sticker paper. OR Heat transfer paper
But this is stuff for covers. I'll get into what you need for covering the chipboard in a minute and give you a "Recipe" for book cloth (Cause I ain't got time nor the funds for some of the book cloth that is out there) but if you want to splurge for your project by all means look and see what is out there. But make note of this- you can just cover your book case in paper and just use sticker paper. I will recommend getting some sort of transparent contact paper to protect your cover (I will go through all of this in future just make a mental note of this)
Now for I promised:
I will be using Celestial Navigation as my example fic of how to down load a fic.

You're going to go to AO3 and go alllll the way over to "Download" and hit "HTML" you can either have it pop open right away or you can go to your downloads and open it up along with your word processor of choice.
You're going to hit Control A (PC) or Command A (Mac), Control/Command C, and then go to your word processor and hit Control/Command V. And listen to the take off noise your computer brand of choice inevitably wants to do while the fic makes it's way from the HTML over to the word processor.
What this all did was copy EVERYTHING and plop EVERYTHING (Save for comments) onto your document. Feel free to save what you have this far and pat yourself on the back you're about to start type facing.
I'm a minimalist in my designs but I have expanded a touch in terms of what I'm doing just to know and experiment for what works for me and what doesn't.
I will reiterate that I will be using Microsoft Word but I'm sure there's away to do this on other processors I just don't know how to do the other one's. I know Mac has something called "Pages". I never worked with it. I will try to add as many visuals as possible but some of my instructions will be "Go to this tab, click X Y and Z to make a thing happen".
Just know that this is what works for me and this is how I've managed to bumble through thus far. This is hardly perfect and I'm still very much experimenting with EVERYTHING. IF you find a better simpler way of doing things- by all means do so.
There's even a way to set up a template when you fire up Word but I've yet to figure it out.
But for now the fun begins- there is some tedium with this but it's best done with music or something on in the background that you can easily listen too but not watch.
First and foremost what you need to do is make the formatting into "Booklet" How to get there is:
Next up hit command A again. Yes... trust me. There might be a lot of this going on for a little bit while you fiddle and fart your way into a typeset you like.
Indent first line and line spacing is found here: Home Tab, Paragraph section hit the arrow pointing down towards the document- next to that is Line and Breaks- hit that if widow and orphan control is clicked unclick it what that does is allows paragraphs to be broken up and will flow into the next page.

Widow/Orphan control example:
Font: For me personally I do Garamond at 11 or 12 depending on my mood. I just like how it looks but find a font type that pleases your eye.
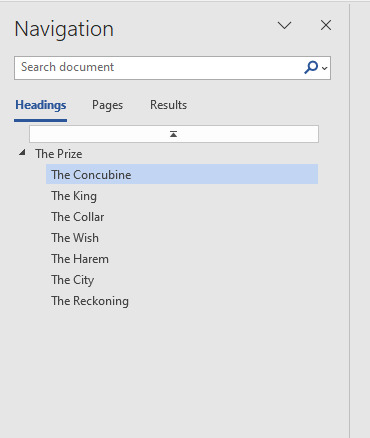
To get rid of hyperlinks:
Line spacing I set mine to 1.5 lines for easier reading. You can keep it to 1 or bump it up to two but the more space between lines means the larger the text block (AKA the book itself) will be.
Now I go back and highlight all of the fic information, and go to the popup menu after highlighting and take the line spacing down to 1 and remove the indents.
I also like to go to the headings section and get rid of the indents one by one on the chapter headings and then center them in the page. Go in front of the Chapter title EX "Chapter 1" and hit backspace until the indent is gone Highlight, there should be a pop up that allows you to change formatting, font and where the indent is.
This is all in the Layout Tab of Word:
Margins- I keep my margins at 1" all directions just because of how it looks on the page but you can have that as narrow as you please.
Next Page- separating the document to make type facing easier. What this does is make the document have "Chapters" within the document. Do this between Chapter one and the first few pages- the opening blank pages, title page ECT.
Double click on the header and footer on the document itself and click "link to previous"
What this does is make sure headers and footers (page numbers and the like) do NOT go up to the "Section" above the area you're working.
Word of note- I like having Chapters start at the beginning of a fresh page so I will go to the beginning of the Chapter Title "Chapter One" and hit "Next Section" and it will jump automatically to a new page.
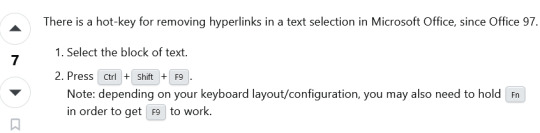
You might also want to open up the navigation panel so you can hit the headings tab (I have mine set with Navigation Panel already open I don't recall how to get there, play around BUT the Navigation Panel will look akin to this on the Left Hand side of the document:
I downloaded "The Prize" to continue the examples as best I can sometimes it's hard to screen grab what I need on an already done document.
You can also add section breaks but leave it linked to previous to continue page number flow.
So you know selecting "Different odd and even pages" means that if you set a fun or different font for the page numbers you will have to go to ex page 2 and unlink the section from the previous.
Do this for headers as well. But that this does is give you the option to put the author's name and fic title alternating on odd and even pages:

Headers and footers:
With headers and footers section still highlighted hit "Page Number" "Format Page Numbers" Hit "Start at" and hit "One" for the section with the main text body.
This... I will admit took some fiddling for me to figure out. There were some frustrated noises and some choice words at times. But if you hit Layout, Next Page it should prevent you some heart ache instead of just constantly hitting the Enter Key and hoping for the best.
Different Odd and Even Pages what this means and how it works:
In my experience you will have to go to the first 1-3 pages to unlink everything from the Previous Section so it doesn't show up on the beginning pages of the document- but if you like the look of it, more power too you. It's your fic. It's going to be on your shelf at the end of the day. Follow your joy. I'm just letting you know what I do.
You will also have to unlink to previous section with the footers as well, and if you choose a different font and you want the numbers to match through the whole text you will have to input that. Hit the "Pages" Navigation and use that to scroll through things quickly so you can check your work and see if you're happy.
I'm kinda a fan of leaving the headers with the author's name and fic title alternating on pages OFF but I have experimented with it a little bit just to know what it looks like and what it does.
But here is an example of alternating Headers for Sabrecmc's "The Prize" (It was on my To Bind List and since Sabrecmc has given their blessing I'm hoping they don't mind me going "Alright people need visuals.... and this is what I'm working on."
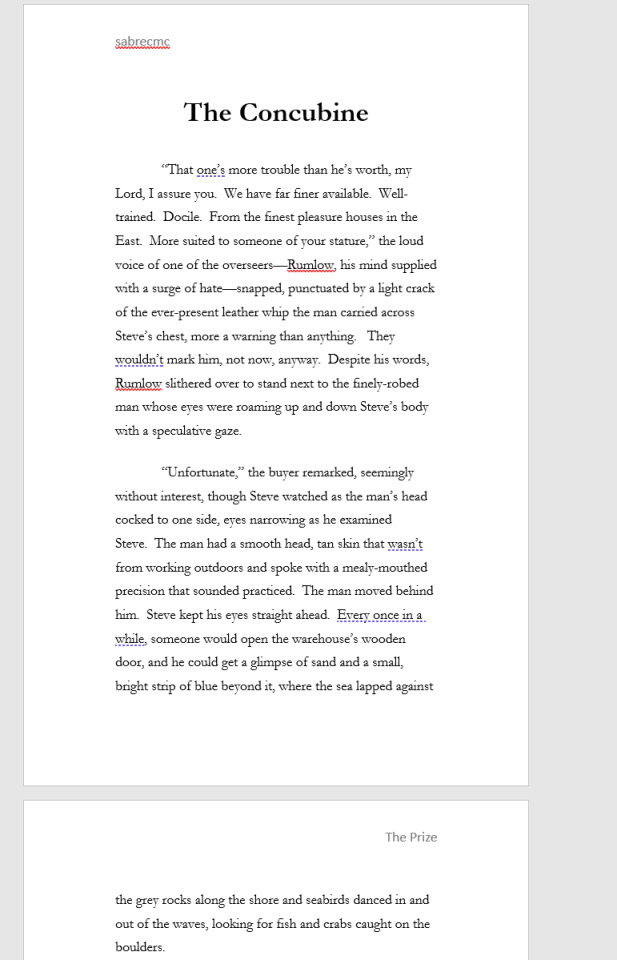
To get the header from the left to the right side- hit tab and type what you please you can also highlight and set colour and font type. This is just Garamond for now for ease of example and reading for now.
Choices choices choices.
Some fic binders like to keep everything including author's comments at the beginning and ends of fics. Personally, I remove them just to keep the flow of everything. You can have a section at the back of the fic if you'd like with all of the comments but that is entirely up to your own personal preference. This is the fic for your shelf make it in a way that makes you happy.
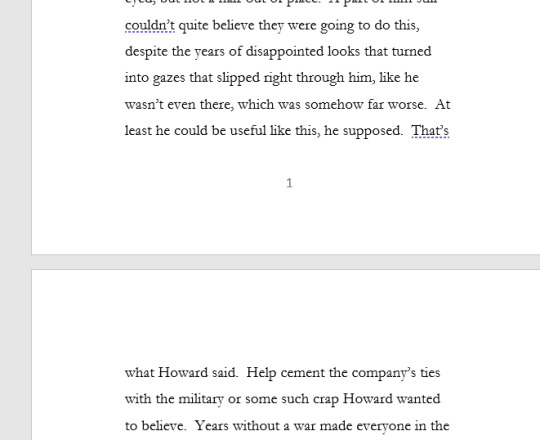
Now all the way at the top of the fic I want you to insert 6 blank pages. But keep in mind this is front and back of pages in a book. Two blank pages on the document equals one page. Some binders go more than that depending on what all they like to do. You'll figure out what you like and what works for your project. Think Bob Ross- Happy little trees and do what you want.
But for me in the document: Pages 1 and 2 are blank as a sort of buffer page, 3 is the title page with the fic name and author and likely some simple design, 4 is all of the fic information- I keep the pairing, chapters, any additional or important tags or warnings, rating and a QR code to link back to the original fic. Page 5 is either left blank but I have added images as something fun for the hell of it that fits the fic, page 6 is my logo. In earlier experiments I played with where my logo goes this works for me I think but it may change in the future. IF you want to have a table of contents by all means add some pages to do so. I don't find it necessary so I don't do it.
To insert an image- for QR codes or title pages:
QR codes can also be just dragged and dropped I've been lazy and dragged and dropped and resized them from there.
I also put a disclaimer in red font: "This is for personal use only and is not intended to be sold! Retail value is estimated 25$" That is to cover the cost of the materials you have used or made in the process of your book that way if your fic somehow ends up in a donation bin it can't be sold for very much.
This is what the info section of a completed fic looks like for me:

To insert an image:
Insert Tab (Next to Home Tab) , Picture- next to the "Table" section, hit the drop down menu and hit "Upload from this device" and select where you have saved the QR Code to, desktop downloads what have you.
It should appear on your document and you can resize it as you please, if you click on the image there should be a pop up with a grey looking rainbow with lines- that's important for QR codes I have it "in line with text"
for fun headers "Have image behind text"
This is.... getting LONG as hell... so I'm going to stop here. But this should give you a jumping off point to start with your fan binding. Play around! Have fun.
Last few Tips:
Home Tab- in the paragraph section- if you need to know what the nitty gritty of what's going on in the document is- hit the backwards looking "P" with the line that's the sign for "Enter" on your keyboard. So you can see what that looks like I don't use it cause it clutters everything for my eyes, but it won't show on the final product. You can turn that on and off at your leisure
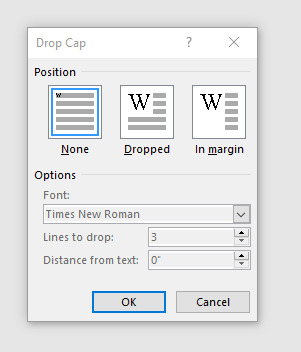
Insert Section: Scroll along the top until you see "Word art" one more over "Drop Cap", That's how you can get fancy letters at the beginning of the chapter. Sometimes you DO need to add some spaces between the Letter you're Drop capping and the rest BUT what that window looks like is this When you hit "Drop Cap Options" you can set whatever font you please for however many lines I typically do 3 but the more lines you drop the larger the letter. Tinker with it have fun.
There will likely be more type facing goodies next post... but after I get done type facing I'll get into getting the document ready for printing, how to print and what to do with that shopping list I gave you in that previous post.
REFERENCES, LINKS AND HELPFUL PEOPLE!
Some links for your consideration you will need this for future reference so book mark these:
French Link Stitch
Perfect bound books (AKA Paper backs)
Fun Fonts to spice up the document body itself, you can also import them into Canva.
Da font
1001 Free Fonts
Another resource to keep in mind for ink is this site here if you have cartridge printers see if you can't get a refillable set for your printer so you don't have to sell your arms, your legs, your first born and your house to keep printing your fic projects.
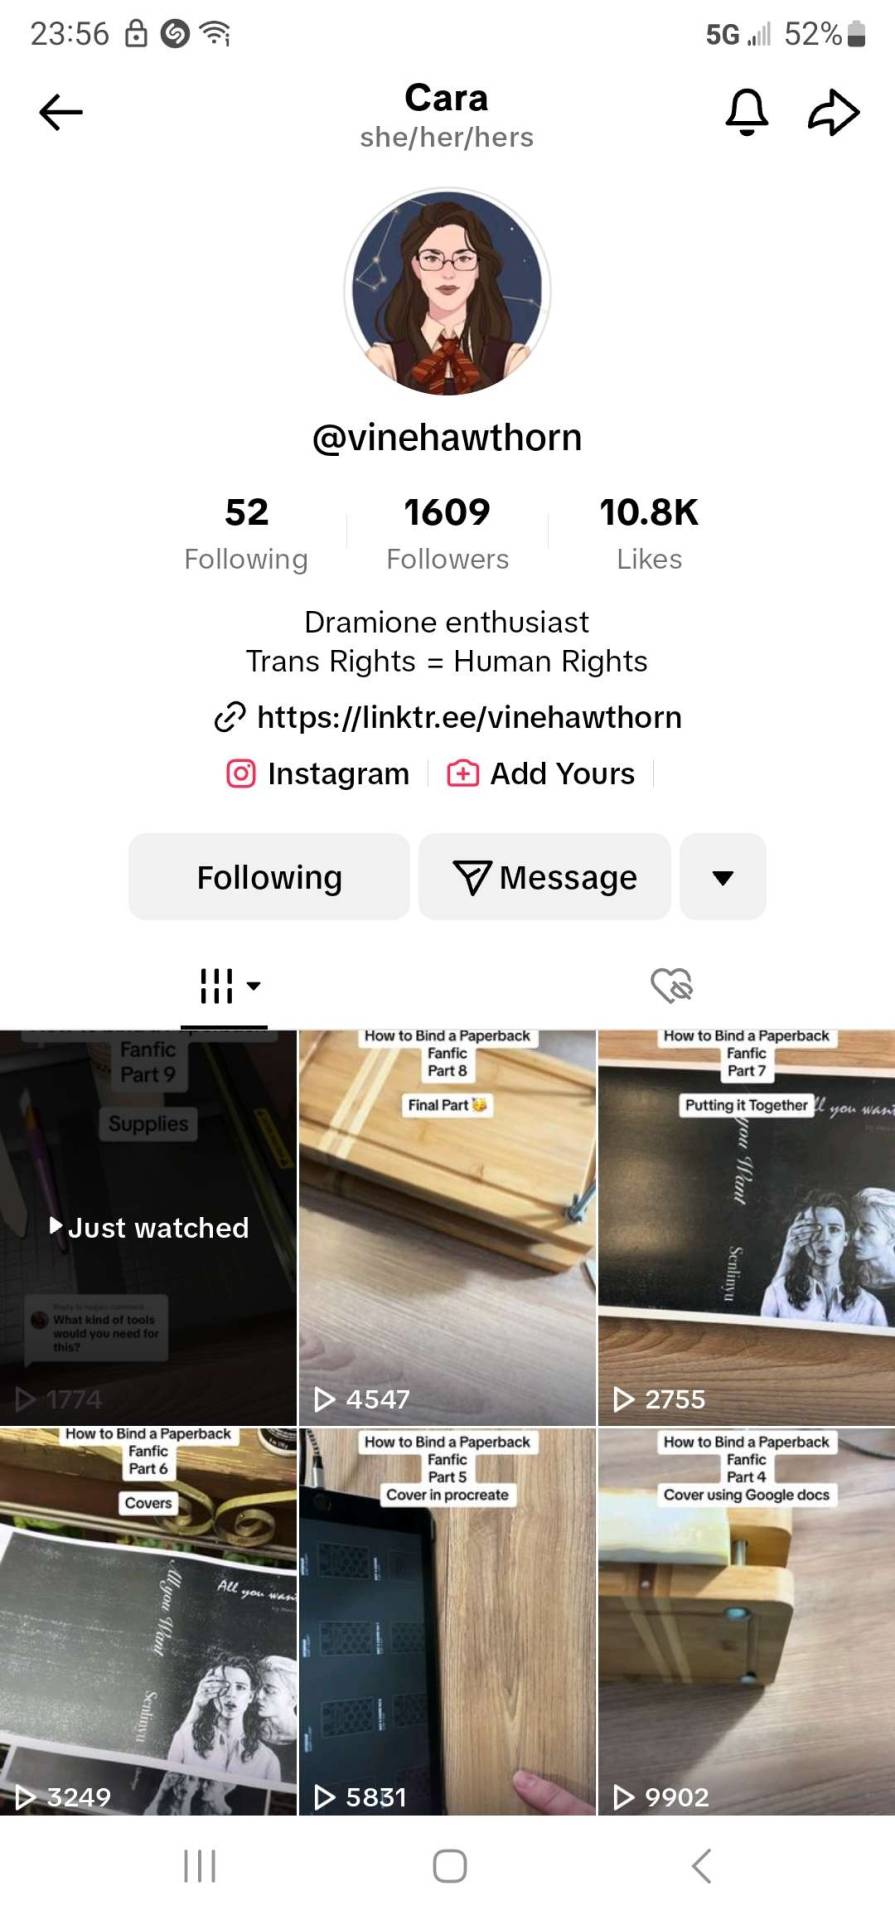
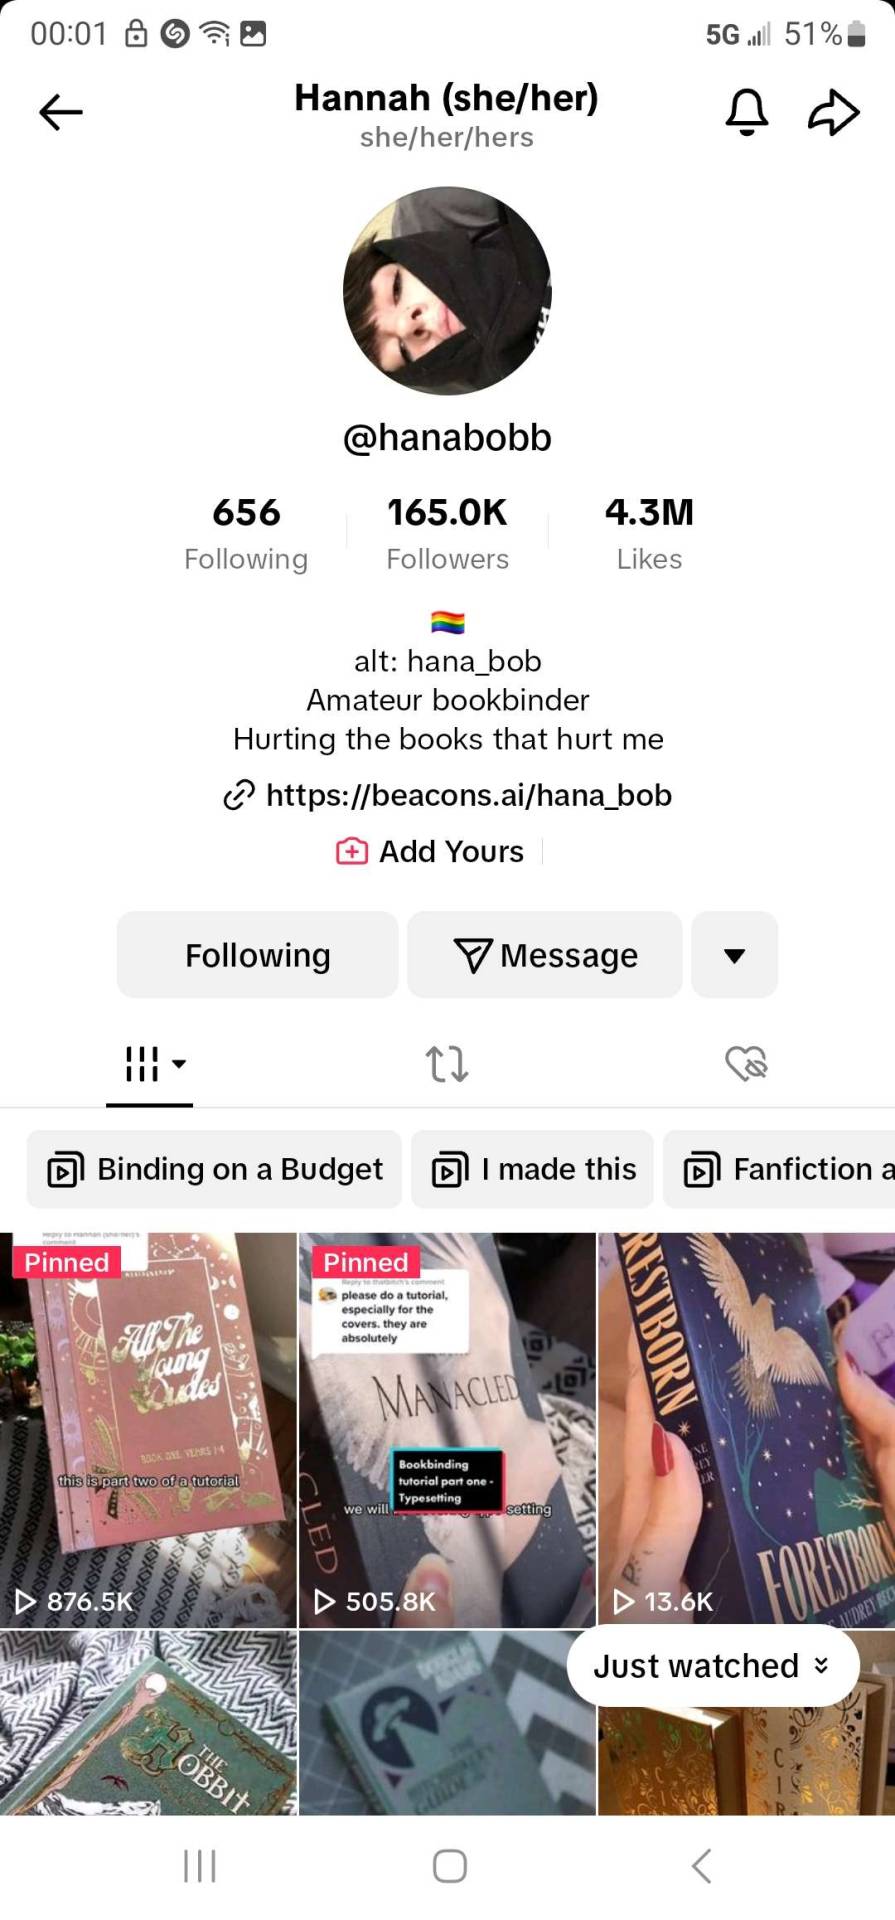
These two tiktokers right here explained everything the best, they are worth checking out even if you don't have Tik Tok. They've been going at this longer than me and don't go "OH SHIT I FORGOT A THING" constantly.
EDIT ONE! This is the punch cradle I have it makes it easy for french links for me
HoneyMinCo Sea Lemon
16 notes
·
View notes
Note
How do cricuts work for the love of god I can NOT figure it out like do you have to get a new type of material for every color on ur sticker or what please help
there’s people that cut each area of colour on a piece of material and then layer all of them, using transfer tape, to create a single item. to be honest that feels too complicated for me so I just print out my designs and laminate them with vinyl, so the cricut cuts the outline of the stickers and that’s about it

like this
3 notes
·
View notes
Text
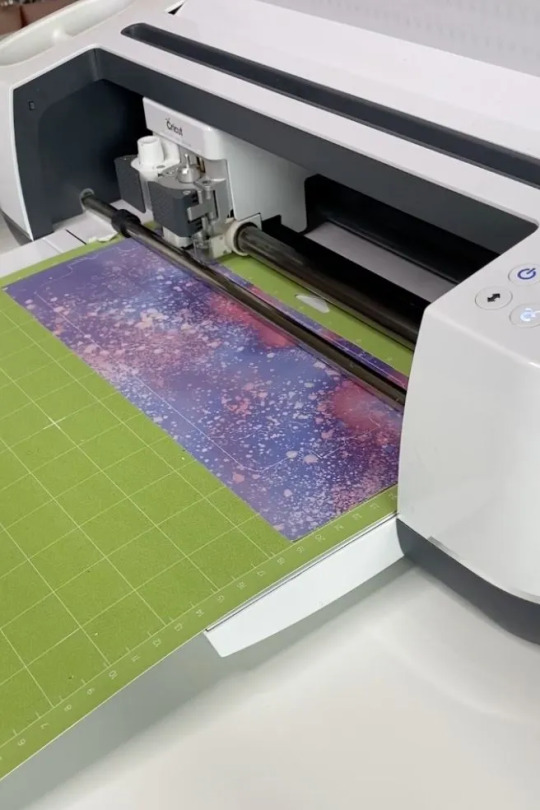
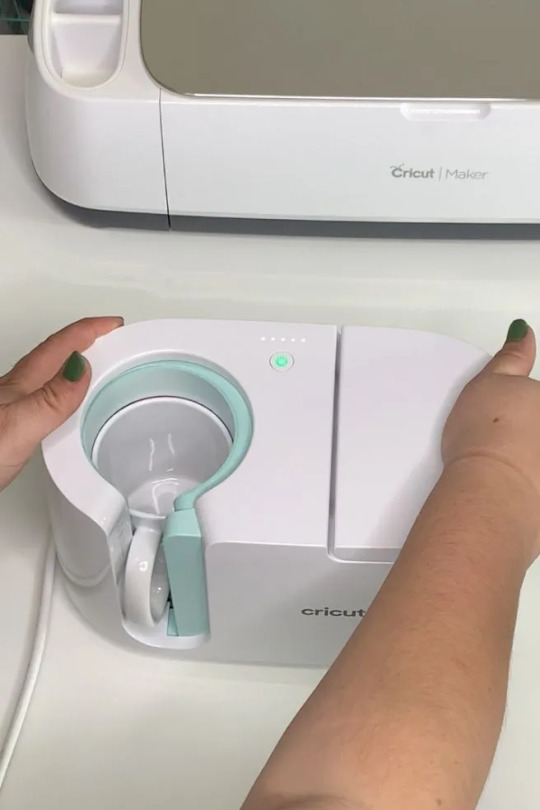
How to Use a Cricut Mug Press: A Step-by-Step Guide
When I first bought my Cricut Mug Press, I was quite nervous about learning how to use a Cricut Mug Press. It took some time to read many articles and gather all the essential information. Now that I have gained experience using it, I want to share all the basic instructions for using this Cricut machine. If you are uncertain about using it, make sure to read this post to the end.
The Cricut Mug Press is a small yet impressive tool that transforms plain mugs into stylish designer pieces. Despite its compact size, it is incredibly capable and essential for crafting custom mugs for personal use or as gifts for loved ones. So, let’s start with the materials you will need for your project.
Tools and Supplies You Need to Create a Personalized Mug
Before learning how to use a Cricut Mug Press, it is important to know the necessary materials you are going to need. Here is a detailed list:
Cricut cutting machine: You will have to use this machine to cut designs from the infusible ink sheet. Suitable Cricut models are Cricut Maker 3, Explore 3, or Joy.
Cricut Mug Press: This is the machine used to transfer the infusible ink design onto your mug.
Sublimation mug: Specific mugs made for the Mug Press machine are necessary because they fit perfectly and ensure the best results. Using other mugs of different shapes and sizes may not fit or work well with the machine.
Infusible ink sheet: This material is basic as it is where you will cut your designs, which will later be transferred onto the mug using heat in the machine.
Heat-resistant tape: It is essential for securing the infusible ink sheet onto the mug during the pressing process.
Lint roller: Used to ensure the surface of the mug is clean and free of debris before applying the infusible ink design.
Weeding tools: These are used to remove excess or unwanted material from the design before transferring it to the mug.
Once you have assembled all these supplies and tools, ensure your setup is ready. Connect your Cricut machine to power and turn it on. Establish a connection between the machine and your device using Bluetooth or USB. Download the Design Space app on your device and log in with your account. This setup is essential before proceeding with the Mug Press.
Before beginning to use the Mug Press, ensure it is on and heating up properly. Following these steps ensures you are ready to create custom mugs with your Cricut machine.
How to Use a Cricut Mug Press in 4 Simple Steps?
When you have assembled all the necessary tools and completed the setup, you can start working on your project. Here are the 4 steps you need to follow to use the Mug Press:
Step 1: Create a Design on Cricut Software

Step 2: Cut and Weed Out the Excess Material

After completing the design, insert the material into the machine and press the Load button. The design will be cut quickly. Once the cutting is done, unload the material and use a weeding tool to peel away any unwanted parts from the design.
Step 3: Transfer the Design to Your Mug

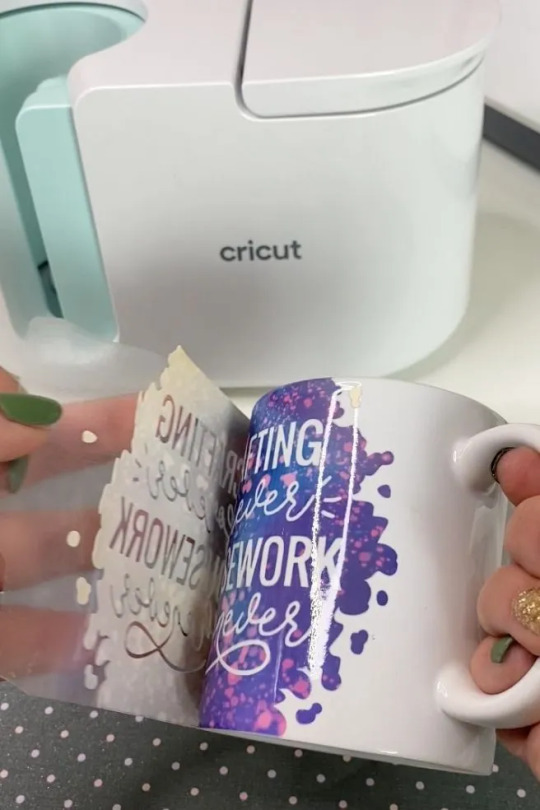
Step 4: Reveal the Final Result

When the pressing is complete, carefully remove the mug from the machine, handling it by the handle to avoid burns. Allow the mug to cool for 20–30 minutes. During this time, it’s important to avoid touching the heated areas to prevent injury. Once the mug has cooled down completely, it will be ready for use, showing your newly transferred design beautifully.
Conclusion
In short, learning how to use a Cricut Mug Press is quite easy. As you can see, the process is simple. First, gather all the necessary tools and accessories and set them up. Once the setup is done, create a design on the Design Space app, cut it on the Cricut cutting machine, and press the design onto the mug using the Mug Press machine. Once the pressing is finished, you will have a beautiful mug ready to use however you like.
FAQs
What Are the Supplies Required for Cricut Mug Press?
To work with a Cricut machine and create designer mugs, you will need some essential supplies:
Cricut cutting machine
Cricut Mug Press
Infusible Ink
Heat-resistant tape
Weeding tool
Lint roller
Sublimation Ink
These tools are important to prepare and execute projects with Cricut effectively.
Do I Need a Computer to Use Cricut Mug Press?
No, not necessarily! You can download the Cricut Design Space app on your computer or any device. If you don’t have a computer, you can use your Android or iOS mobile instead. However, using a computer for the app allows you to work on projects more effectively. Just ensure your computer runs on either Windows or macOS, as Chromebooks do not support the software.
Can I Use Any Mug in Cricut Mug Press?
No, you cannot! The mug used in the Cricut Mug Press must meet specific criteria. It should have a maximum height of 4.72 inches and a diameter between 3.2 to 3.4 inches, with a capacity of 10 to 16 ounces (295 to 450 ml). Also, the mug’s surface should be plain; textured or rough mug surfaces are not suitable for the machine. Ideally, the mug should be white for best results.
Source: how to use a Cricut Mug Press
Visit here to Know More: Cricut Easy Press
Pinterest
2 notes
·
View notes
Note
❄️🍉💖
🍉 Are you a planner, or are you more of a “eh we’ll see how this one goes” -type of crafter?
I’m more of a “how hard can it be” type of crafter. I think of something and go “well, how hard could that be?” and then I either crush it or learn “much harder than expected, actually”. I have done that for literally EVERYTHING I currently make. Cricut? How hard can it be? Punch needle? How hard can it be? Resin? How hard can it be? Polymer clay? How hard can it be? Stained glass? [I am forcibly yanked off the stage]
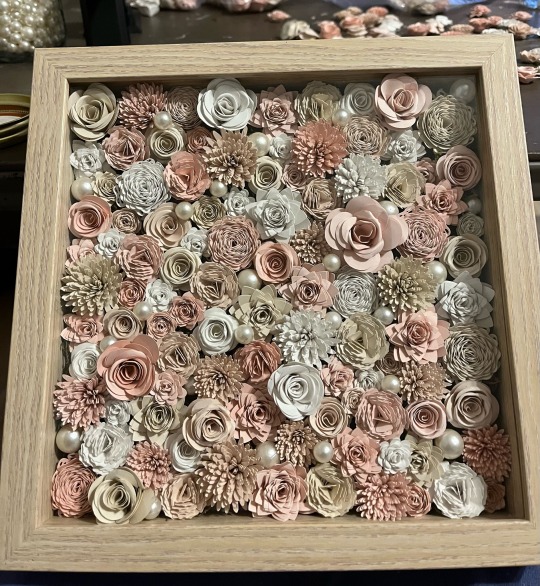
💖 Which one of your creations are you the proudest of? Show off!
This fucking shadow box from hell that took like 20 working hours to make and STILL hasn’t sold but is one of THE most gorgeous pieces I’ve ever made in my entire life
❄️ Do you have any crafting (either craft or community related) pet peeves?
(Saving the best because im a petty bitch and have Many)
- This is really vendor specific but I HATE event vendor group chats So Fucking Much. They are full of the absolute dumbest people on God’s green earth made specifically to annoy ME. Just a laundry list of “your reading comprehension is piss poor / how dare you say I piss on the poor” ass people. I have so many examples but the worst most recent one was the day before Easter we had an event in town that had been discussed for MONTHS beforehand. The event coordinator had sent us the set up info on multiple occasions, like I’ve actually never done a more organized event. So we’ve been told many times the set up time was 9am, show time was 11am, okay? The night before the event coordinator sends a message saying basically “hey yall I need you to park on x side of the building and at 10:30am we’re gonna lock the x side entrance doors” and people fucking LOST IT. Like there were IMMEDIATELY ten messages being like “so we only have thirty minutes of set up??????” I hate vendor chats. These people are so fucking stupid.
- I’m in a bunch of Facebook groups for beginners to ask questions in and the thing that just drives me insane is when people are like “hey I bought x thing at the store, how do i decorate it?” like????? However you want?? It’s for you?? What are you even talking about
- Also Facebook related but anyone who can’t read directions on shit and then asks why their resin piece fucked up make me so annoyed
- Also also people who just post a picture and then say “what’d i do wrong” with no further elaboration?? Idk man, what am I looking at??
- craft specific: pet peeve when I get poked by wire when making ribbon wreaths
- also when I misjudge where my finger is when deburring resin and nick my finger 😠
- when fabric won’t lay flat for a fucking iron on
- when the transfer tape gets a crinkle on top of a decal and makes the decal go a little wonky is my fucking 9/11
#ask games#statement ends#spyderinej#((thank you tori 🥺❤️🥺❤️🥺❤️))#((i have so many pet peeves and annoyances actually i could talk shit about Facebook groups for hours))#((if i see one more post that’s like ‘i want to start a business what should i sell’ my head is going to fucking explode))#((idk man make whatever you want?? see what the markets around you look like and what’s selling there??))#((ive added like ten different new things to my set up since starting just for variation at shows))#((no one can do this for you like you have to do it because you want to and it’s something you love))#((and i promise you are not going to make money from it for the first couple of years))#((like it’s a completely different ballgame from just selling to friends and family man))#((doing shows sucks))#((people don’t give a shit about handmade anymore))#((no one appreciates art because everyone thinks they can make it))#((the don’t see the 100s of hours and 1000s of dollars that go into learning craft making))#((anyway can you tell im at a show rn lmao))
4 notes
·
View notes
Text
Lots of progress this weekend.
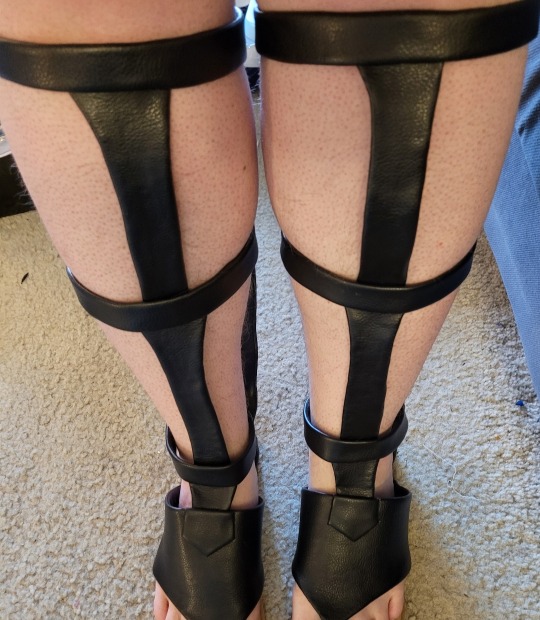
Firstly, the shoes are finished. I'd love it if I never have to make gladiator sandals again, personally. I had to redo the top of each one several times for fit, and I completely depleted the scrap fabric I was using to make these.
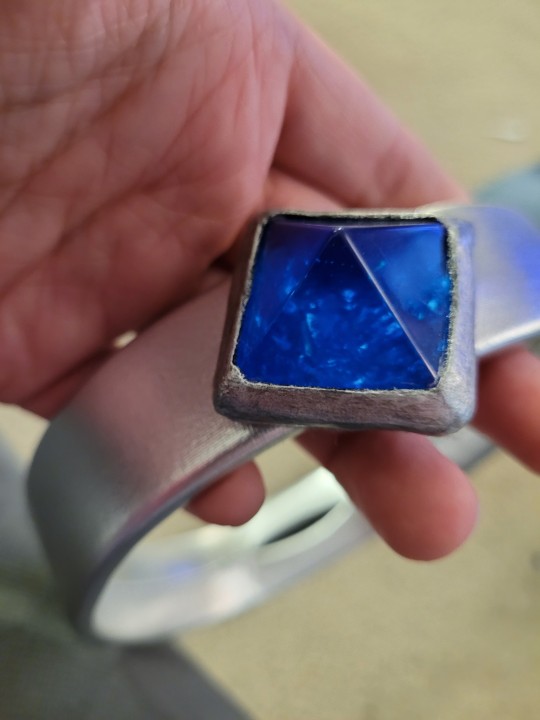
I also went ahead and finished the necklace. I've have the prism part done since about November or so but I was putting off doing the necklace because I hate foamwork. I really love the resin gem. I added glitter to the bottom when I cast it which creates a nice depth when the light hits it.
I managed to get it to work as a solid band around the back of the neck - not particularly important for Dimitri, who has hair that will cover that spot, but important for Felix, who my wife is cosplaying and who has a ponytail and will continue to have a ponytail as a genderbend.

Ugly seam is ugly, but it can be because it's hidden. The closure is magnetic and nestles behind the gem. The 5 mm foam is thick enough to hold its shape when pressed together, so I didn't need another stabilization point. Ideally, I would have liked to match the color on this for the felt, but it's hidden anyway and that was the closest color I had on hand that wouldn't give me an allergic reaction (I have wool felt in that color, but it would cause me trouble on my neck).

I got a chunk of beading done on the tabard sides, and added the last of the trim that it needed. Hopefully I can finish the beading on the tabard today. I also want to go in on the silver part of the skirt and add some silver preciosa bicones at some point.
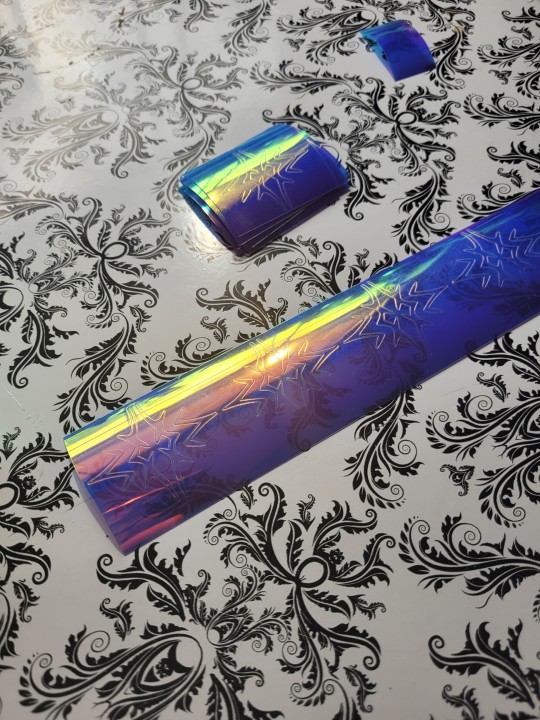
I think I finished everything that I wanted to do with my Cricut Maker as well. I cut 12+ crests for each of us in holographic vinyl (blue for me, transparent blue for her... they're both blue and transparent though). These will be on our dangles as an embellishment.
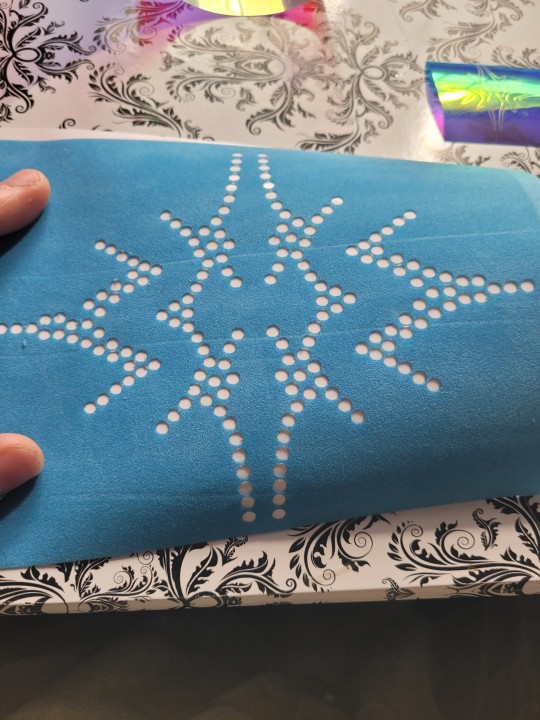
I also cut my rhinestone flock template. This will be used to add hotfix rhinestones to the bottom of the skirt. I'm planning to color match so it should be subtle.
In case you also have a Maker, I cut this flock without the paper backing, flock side up on a standard grip mat with the bonded wool felt setting, and ran it through twice. Once probably would have worked fine but I wanted to make sure it would work.
If you want to do anything with rhinestone templates, I can't recommend flock enough. It was pretty easy to design (I just went over the Blaiddyd Crest with dots the right size), mirrored and flipped pieces as needed, and cut it in my cricut. It worked on the first try with how I'd spaced everything. This is so much faster and precise than placing everything by hand would have been.
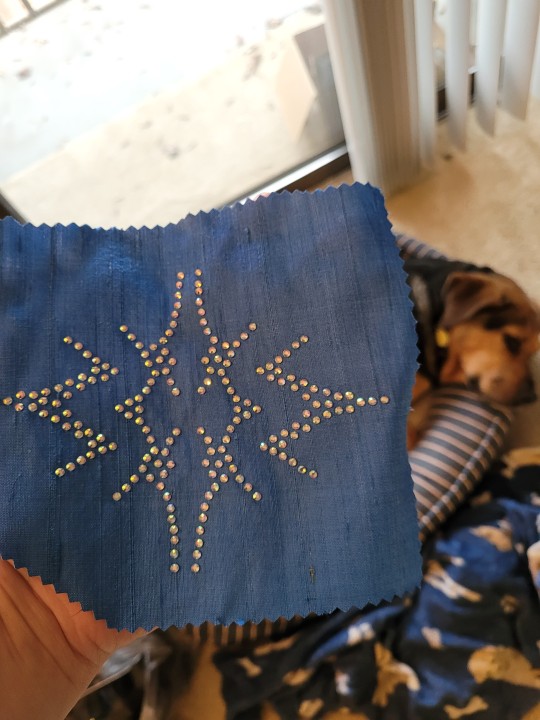
And here's the test on a scrap piece of dupioni with scrap rhinestones in the same size that came with my rhinestone brush. Unimpressed dog in background is unimpressed. 20 seconds at 320 F with my heat press at about 30 lbs of pressure did the job and caused no problem with the silk. Only one rhinestone of the entire design got displaced, which I adhered with gem tac (I didn't want to get my hotfix tool out).
👀 And not because I know from experience or anything, but don't use cricut transfer tape for rhinestone transfers. It isn't heat resistant and will try to melt on your heat press (I got it off in time).
Thankfully I figured out my rhinestone flock came with transfer tape so I'm all set tor doing this on my actual costume.
I won't be getting as much done this coming weekend because I'm going out of town Thursday night - Friday midday, then I have a friend coming in that afternoon from out of town, and on Saturday, I get my Byleth tattoo on my leg so I won't really feel like doing much after that.
2 notes
·
View notes
Text
What are Smart Materials for Cricut? [Top 5 DIY Craft Tools]
Since the latest versions of Maker & Explore have been launched, all the crafters are looking for one question, “what are smart materials for Cricut?” However, the answer to this question can be easily understood. These clever cutting materials are designed and are directly fed inside the Maker & Explore machine without requiring a mat. Various versions of these cutting machine materials exist, such as Smart Vinyl, Iron-On & Smart Paper Sticker Cardstock.

Apart from that, they have allowed the creators to dream outside by cutting a single image or repeated image up to 12 ft (3.6m) in one go. It means no slicing and dicing the extra-long banners, wall decals, etc. The Cricut roll holder also keeps these materials organized for precise cuts. Learn the best smart materials for creating customized projects from this blog.
1. Matte Metallic Smart Vinyl- Permanent (3 ft)
Equally important, you can add immediate sophistication to big or small projects through this metallic effect. In the presence of this permanent smart vinyl, it isn’t a big task to create some sort of fashion decal for a mug. As per the designers, this permanent smart vinyl is ideal for all outdoor projects.
2. Smart Iron-On (3 ft)
Under the catalog of what are smart materials for Cricut, with the smart iron-on, you can carry your creativity along with you anywhere. This substance works perfectly on a wide array of materials and lasts up to 50+ washes. Moreover, the crafters prefer this material by giving little personality to T-shirts, jeans and other garments.
3. Smart Vinyl-Permanent (3 ft)
Furthermore, with smart vinyl, you can quickly make your personalized craft with the load & go button. Moreover, creating birthday banners or other labels has become quite easy, leaving a big impact. On the contrary, this vinyl comes with a matte finish look and a weather-resistant outdoor facility.
4. Transfer Tape (21 ft)
Among the smart materials for Cricut, the transfer tape has its individual importance. Through this, the user can shift the customized vinyl to various surfaces easily and precisely. Other than that, it is specially designed for some important materials for creating crafts, such as custom decals, labels, decor etc. Moreover, this isn’t recommended for glitter or shimmer vinyl.
5. Smart Iron-On Holographic (9 ft)
Besides what are smart materials for Cricut, these holographic materials permit crafters to add glimmer and shine to the existing project. This material operates without the cutting mat during the cutting process. In addition, you can add more shine to projects compared to earlier times.
Frequently Asked Questions
Question: How to Prepare Smart Materials for Cutting?
Answer: Read the steps to know about the preparation process:
Align the loaded materials to the machine with the left material guide and slide under the mat guides and up against the rollers.
After that, press the Load button, trim the excess material and save it for future uses.
Try to trim the material straight across rather than at an angle if you plan to load it without the mat.
Question: How Do Cutting Machine Smart Materials Work?
Answer: The existing software will prompt you when it is time to load the respective materials and how much quantity. Followed by this, your machine will measure, ensuring the materials loaded are enough for the project. After that, the machine sensors will cross-check the materials fed inside it and will ask for the allowance. You’ve to wait till the trimming process comes to an end.
Question: What are Smart Vinyl and Its Types?
Answer: The brand-new smart vinyl comes in a huge range of colors, effects and material lengths from 3 ft to 75 ft. However, it has been categorized into two types: Permanent & Removable variables. If you want vinyl that lasts for many years indoors & outdoors, then choose permanent vinyl, as it has a longer time duration. However, if you love to display your creativity, then opt for removable vinyl, which can be easily removed and doesn’t damage the wall.
#What are smart materials for Cricut#Cricut.com/setup#design.cricut.com#cricut explore air 2#cricut design space login#cricut design space#cricut setup
2 notes
·
View notes
Text
Everything You Want To Know About Vinyl Stickers
As creativity, customization, and branding play a bigger role, vinyl stickers have become helpful. Vinyl sticker printing gives both artists and business owners a great way to share their work and stand out.
What Do Vinyl Stickers Mean?
Vinyl Stickers are small plastic labels used for whatever purpose you need them for. It’s not hard to stand out with interesting accessories, alter how your car looks or personalize your laptop.
More than likely, this is a vinyl sticker you have found. Sheets are more than basic materials; instead, they act as mini canvases that offer plenty of durability, flexibility and options. Has anyone ever wondered about how these incredible animals develop? Let’s examine vinyl and find out what is in each record.

Why Are Vinyl Stickers Strong?
Thanks to PVC, vinyl stickers are known for being lasting and strong.
Rain, sun, scratches, or abrasion rarely cause vinyl stickers to come off your car, unlike paper ones that often separate or fade.
Cacti can grow comfortably in your home or in your garden.
Because of its detailing capabilities, graphic designers tend to use vinyl when they work on their pieces.
Why Using Printed Vinyl Stickers Is a Fantastic Idea
Turning a design into vibrant vinyl is enjoyable, and I feel it’s now done better than ever. Here’s how it usually works:
Coming up with an idea is what makes everything begin. Whether you use a basic tagline, a detailed graphic, or a made-to-order brand logo, you still need to use design software to produce them.
Vinyl sheets or rolls are placed in an Ink Meets Vinyl printer which moves your design onto them. The ink used with these printers greatly sticks to vinyl and is not easily damaged.
A Strong Shield is consistently a big help! A top layer on most vinyl stickers prevents them from getting scratched and makes them more resistant to sunlight. Treat it like your sticker’s powerful invisibility cover!
After being placed onto a work platform and the design uploaded, special machines are used to cut the printed vinyl into its final shape. Classics and one-of-kind looks are available, as well as options with symmetrical or specially shaped contours.
The final thing to do is ensure there’s no excess vinyl where the transfer lies. You can easily place every sticker with one side of the tape using transfer tapes.
Vinyl Logo Stickers: The Greatest Friend for Your Brand
We’ve seen for a long time that a Strengthened Shield is useful. Most stickers for vinyl are coated with clear material to help them stay in good shape. Consider your sticker’s sticker paper as the outfit its superhero would wear.
When you’re happy with the design, the vinyl is fitted on a plate, the layout is sent to printing, and it is cut with the proper tools.
After that, remove the leftover sections of vinyl from the borders of your design. Making designs with complicated stickers is much simpler when you use transfer tape.
Bring Out Your Creative Vinyl Sticker Sides
Using the latest tools, making vinyl stickers is now very simple! At home, just have a Cricut or Silhouette, an appropriate program, and plain vinyl, and you can make stickers. With it, business owners and creatives can design things to give away.
Make sure customers find something attractive when they visit your online store.
Individuals can select and order the stickers they want straight from you.
Offer your children fun ways to use what they can create.
This means that vinyl stickers are perfect for companies of all kinds, for adding excitement to equipment, or for indulging your imagination. What makes them popular isn’t a passing trend; they are truly valuable and allow us to tell lots of meaningful stories.
Do you want to begin with a basic, sport, or personalisation sticker?
What picture or message would you like to turn into a sticker first?
0 notes
Text
Word Play: Crafts That Come Alive with Fonts & Lettering
Today’s lesson is a love letter to letters. Whether you're printing out bold block text for a home sign or hand-lettering a dreamy quote on a canvas, fonts aren't just visual tools—they’re personality with punctuation.
Fonts make crafts speak—literally. So, let's explore fun, beginner-friendly projects where choosing the right typeface is part of the magic.
Why Fonts Are a Crafty Game-Changer
Instant emotion. Serif says classy, sans-serif says modern, script says “I own scented candles.”
Customizable text. Names, quotes, phrases—you’re in charge.
Perfect for gifts. Nothing says “I care” like your friend’s name in glitter vinyl.
Lettering is meditative. Seriously, ask any calligrapher—they vibe hard.
Your Typo-Toolbox (aka Crafting with Fonts Starter Kit)
Whether digital or analog, you’ll want:
Printable letter stencils or font templates
Transfer paper or carbon paper (for tracing)
Paint pens, brush markers, acrylic paint + fine brushes
Cricut or Silhouette (if you're fancy)
X-Acto knife (for DIY stencils)
Ruler, pencil, and eraser
Your favorite fonts downloaded and ready to roll!
And of course—a surface to letter on! Think canvas, wood, paper, jars, fabric banners, even plant pots. (Yes, your ficus wants a name tag.)
Project 1: Custom Canvas Quote Art
Perfect for wall décor or gifts, this is modern-day embroidery for your brain.
What You’ll Need:
Blank canvas or thick paper
Chosen quote or word
Printer + font (or hand-lettering skills)
Transfer paper or lightbox
Paint pen or brush
Steps:
Choose your favorite short quote.
Select a font (script + serif combos are trendy).
Print it out, place it over your canvas with transfer paper underneath.
Trace lightly with pencil.
Go over it with a paint pen or brush.
Add background color, doodles, or washi tape flair.
Font suggestion:
Bold & Friendly? Try Fredoka One
Elegant Script? Try Great Vibes
Rustic Modern? Go Playfair Display + Raleway combo
Project 2: Personalized Wooden Name Signs
These are great for doors, desks, weddings, or bedroom walls. Level-up points if you’re making them as gifts!
Materials:
Wooden board or plaque
Chosen name or word
Cricut (or print-and-trace method)
Acrylic paint or vinyl
Sandpaper (for prep)
Optional: embellishments like flowers, rope borders, mini lights
How-To:
Sand the board for a smooth base.
Either cut the word out with a Cricut or print and trace it using transfer paper.
Paint the letters or apply vinyl.
Add decorations to match your theme.
Font Mood Tip: Want something whimsical? Try Pacifico. Want sleek modern? Use Montserrat Extra Bold.
Project 3: Hand-Lettered Glass Jar Labels
Cute and functional? Now you’re talking.
You’ll Need:
Empty glass jars (mason jars work great)
Paint pens (oil-based for glass)
Rubbing alcohol (clean the surface first!)
Printed font or handwritten labels
Steps:
Clean jar surface thoroughly.
Use printed font as a guide (trace on paper and tape inside the jar for guidance).
Letter your labels on the outside.
Let dry fully and cure if needed.
Now your pantry screams “organized adult” instead of “where’s the sugar?”
Crafting Mindset: Fonts Are Feelings
Don’t overthink your font choice—but do consider the vibe.
Balance readability with personality.
If you make a typo, well… now it’s an abstract art piece.
Mixing fonts = spice of life, just don’t use 5 at once unless you’re going full chaos goblin (in which case, I respect it).
Unique Fact of the Day:
Comic Sans was designed to mimic comic book lettering— but get this: it was originally meant for a Microsoft dog assistant program in the '90s. So the next time you see it in a serious memo, just remember—it was never supposed to be serious in the first place.
https://letterhanna.com/word-play-crafts-that-come-alive-with-fonts-lettering/
0 notes
Text
How to Use Cricut Transfer Tape? Tips & Tricks
Are you a crafter looking for a material that allows you to apply your design to the desired surface? If yes, then this blog is for you! Transfer tape is a great material for transferring any design and vinyl pattern to your project’s surface. It is helpful for applying designs to curved surfaces. But ‘how to use Cricut Transfer Tape‘ to transfer your designs?
When you buy a Cricut machine and start using the Cricut Design Space app, you might not realize how important transfer tape is. Basically, transfer tape is a material that helps you transfer your design and can be removed once you’ve applied it to your chosen surface. This surface can be anything from a mug to a wall or frame. Also, it helps prevent your decal from getting damaged or sticking to the wrong areas.
This write-up outlines tips and basic steps for using transfer tape in your DIY projects. Let’s start by reading this blog to understand it better.
Types of Cricut Transfer Tape
If you don’t know, Cricut has two types of transfer tape. You should know about them before starting your project, and if you choose the wrong material, you can ruin your project. Here, we will explain the two different transfer tapes:
Cricut Transfer Tape
It is mostly known and commonly used for crafting projects. This material is also used for everyday vinyl projects, such as premium and permanent vinyl, foil vinyl, etc.
Cricut Strong Grip Transfer Tape
It is a strong transfer tape mainly used for glitter vinyl. Because glitter is a thick material, you will need a sturdy, strong grip transfer tape is essential for transferring it to your project.
How to Use Cricut Transfer Tape: Simple Steps
Transfer tape is necessary to transfer your vinyl projects. When you cut a vinyl design with your machine, the design is printed on the back paper. Here are the instructions which you need to follow to use transfer tape:
Step 1: Create a Design
The very first step is to create a design in the Cricut Design Space. You can make a design in the app or add your image and upload your SVG file. When you’ve finished generating your design, submit it to the machine for precise cutting.
Step 2: Cutting Your Design
When your design is ready after cutting, take off the extra parts using the weeding tool. After that, it is time to place your design with transfer tape.
Step 3: Use the Transfer Tape
Now, it is time to use the transfer tape. Simply cut a piece of transfer paper larger than your design. After cutting the tape, you need to peel off the back layer and put it on a sticky side on top of your vinyl design. But if your project is too large, you should start peeling off from the corner of the transfer tape and then place the design. Continue peeling until the vinyl is completely coated in transfer tape.
Step 4: Applying Your Design
Once you have a design on your transfer tape, and place it wherever you want it on your project. Before you apply the design with your transfer tape, make sure to clean the surface area. When applying your design, use the scraper tool to smooth out and prevent bubble formation, and then peel back your transfer paper. After placing your design, press down and smooth it with the scraper tool. Finally, you are done placing your design on your desired surface.
Basic Tips for Using Transfer Tape
Now you know there are two types of transfer paper and how to use them for your project. By following these tips, you can make sure that you are using it in the right way:
Before placing your design on the surface, clean the area to remove dust; otherwise, the design will not adhere smoothly.
Frequently Asked Questions (FAQs)
Why Is Cricut Transfer Tape Necessary?
This material is important for transferring vinyl designs smoothly to various surfaces which protects complex details during the procedure. Its adhesive strength allows for easy lifting without residue that ensures precise alignment and simplifies the application, making it perfect for newbies and pro crafters.
Why does your vinyl peel off slowly?
If your transfer tape is new, it may be very sticky, which can make it hard for the vinyl to release. If this happens, try pressing the tape onto a clean, flat surface to reduce its stickiness before applying your design. You can also use a hair dryer to help release the vinyl with gentle heat.
Can you reuse Cricut Transfer Tape?
You can reuse your Cricut transfer tape as long as it is sticky. Roll and store it; this will save you a lot of money. There is no need to throw it away after you use it each time. If you transfer paper that has to be back on it, you can reapply the tape to the paperback, and by doing this, you can minimize dust and lint particles sticking to your tape.
Visit: cricut.com/setup www.cricut.com/setup login
Source: https://cricutsetjoy.com/how-to-use-cricut-transfer-tape-tips-tricks/
#CricutTransferTape#cricutcomsetup#cricutdesignspace#wwwcricutcomsetuplogin#cricutexploreair2setup#designcricutcomsetup#installcricutexploreair2#cricutsetup#cricutsetupforpc#cricutdesignspacesetup#designcricutcomdownload#cricutdesignspacedownload#cricutdesignspaceonline#cricutdesignspaceapp#cricutdesignspacedesktop#cricutaccountsubscription#cricutaccess#Cricutexploreair2setuppdf#cricutexploreair2download#howtousecricutexploreair2withphone#howtosetupcricutexploreair2oniphone#cricutexploreair2bluetooth#cricutcomsetupmac#cricutcomsetupforwindow#supportcricutcom#cricutnewmachinesetup#cricutaccountlogin#cricutdesignspacelogin#cricutsoftwareapp#cricutdesignspacefree
0 notes
Text
How to Start a Successful Business with Cricut
Starting a business with Cricut can be an exciting and rewarding venture, especially for those who are passionate about DIY crafts. While the idea of turning a hobby into a profitable business may seem daunting, the right tools, creativity, and planning can set you on the path to success. This guide will walk you through the essential steps to start and grow your Cricut-based business.
Deciding What to Create
The first step in starting your Cricut business is deciding what products you will create and sell. The possibilities with Cricut are vast, ranging from custom t-shirts and banners to home decor and personalized gifts. Consider what you enjoy making and where your skills lie. For example, if you love doodling, you might turn your designs into decals or stickers. If home decor is your passion, creating custom wood signs or wall art could be your niche. By identifying your product offerings early on, you can focus on the specific tools and supplies needed for your business.
Finding Your Niche
It’s important to find a niche that not only aligns with your interests but also fills a gap in the market. Research what other Cricut creators are offering and think about how you can differentiate your products. Perhaps there’s a demand for personalized items for local events, or maybe unique wedding favors are popular in your area. Finding a specific market can help you stand out and attract a dedicated customer base.
Gathering Essential Supplies
Your Cricut machine will be the cornerstone of your business, so choosing the right one is crucial. Cricut offers a variety of machines, each with different capabilities. Whether you opt for the Cricut Explore, Maker, or Joy, make sure it aligns with the products you plan to create. Additionally, gather the necessary materials such as vinyl, iron-on, transfer tape, and hand tools. Starting with the basics and gradually expanding your inventory as your business grows is a smart strategy.
Investing in Quality Tools
Investing in quality tools and supplies is essential to producing high-quality products. Consider purchasing machine bundles that include essential tools, or use the Cricut Materials Cheat Sheet to guide your purchases. As your business expands, you can explore more specialized tools and materials that allow you to diversify your product offerings.
Establishing Your Brand
Creating a strong brand is key to building a successful business. Your brand should reflect your personality, style, and the unique qualities that set your products apart. Think about your target audience and what they value in a product. Whether it’s sustainability, creativity, or personalization, your brand should communicate these attributes clearly.
Building a Brand Identity
Start by designing a logo, choosing brand colors, and creating a tagline that resonates with your audience. Your brand identity should be consistent across all platforms, including your website, social media, and packaging. This consistency helps build trust and recognition among your customers, making them more likely to return and recommend your products to others.
Creating High-Quality Content
In today’s digital age, high-quality content is essential for promoting your business. Photos and videos that showcase your products can make a significant impact on potential customers. Invest time in learning basic photography and video techniques, paying attention to lighting, composition, and background. While professional equipment can enhance your content, a smartphone camera can often do the job just as well, especially with the right lighting and setup.
Utilizing Social Media
Social media platforms like Instagram, TikTok, and Pinterest are powerful tools for reaching a wide audience. Regularly posting high-quality images and videos of your products can help you build a following and drive sales. Consider creating time-lapse videos of your crafting process or sharing behind-the-scenes glimpses of your workspace to engage your audience. Hashtags and collaborations with influencers can also increase your visibility and attract new customers.
Pricing Your Products
Pricing your products can be one of the most challenging aspects of running a business. It’s important to set prices that reflect the value of your work while remaining competitive. Consider the cost of materials, the time spent on each project, and any additional expenses such as packaging or shipping. Don’t forget to factor in your desired profit margin. Researching similar products in the market can give you a sense of what customers are willing to pay and help you set fair prices.
Offering Discounts and Promotions
To attract customers and encourage sales, consider offering discounts or promotions, especially when launching your business. Limited-time offers, bundle deals, or referral discounts can incentivize purchases and help spread the word about your products. Just be sure to balance promotions with maintaining profitability.
Promoting Your Business
Once your Cricut business is up and running, effective promotion is essential to attracting customers. In addition to social media, consider other marketing strategies such as participating in local craft fairs, creating an online store, or collaborating with local businesses. Word-of-mouth can also be a powerful tool, so encourage satisfied customers to leave reviews and share their experiences with others.
Expanding Your Reach
As your business grows, explore opportunities to expand your reach. This might include setting up an Etsy shop, creating your own website, or even selling your products in local stores. Diversifying your sales channels can help you reach a broader audience and increase your revenue.
Conclusion
Starting a business with Cricut requires creativity, dedication, and strategic planning. By choosing the right products, investing in quality tools, establishing a strong brand, and promoting your business effectively, you can turn your passion for crafting into a successful and profitable venture. Remember, building a business takes time, so be patient and stay committed to your goals. With the right approach, your Cricut business can flourish and bring your creative dreams to life.
Cricut business cards , Mega SVG Bundle , Cricut cartridges
#custombeerlabels#custombeerlabelprinting#custombeerstickers#custombeerbottlestickers#buybeerlabels#beerstickers#beerlabelsprintathome#beerlabelsprintable#beerlabelcreator#beerlabelprinting
0 notes
Text
How to Use Foil on Cricut: Ultimate Guide for Beginners
Do you ever wonder about Cricut foil and how to use foil on Cricut? If yes, then you are in the right place! Having used Cricut for years, I have made multiple foil projects and will guide you through everything you need to know. Whether you are interested in foil transfer tool projects or simply want to explore Cricut foil abilities, this blog covers it all.
Cricut foil is a versatile tool for making amazing projects, like greeting cards, wall art, bookmarks, candle sleeves, coasters, jewelry, invitations, and more. Explore the full possibilities with foil and then unlock your creative skills!
What Is a Cricut Foil?
Before learning how to use foil on Cricut, you should first know what foil is. This tool allows you to easily include multicolor foil accents on your crafted projects, giving them a metallic finish. Whether making calendars, art prints, or cards, Cricut foil adds sparkling details to your designs that elevate the final look of your DIY projects.
How Does Cricut Foil Transfer Work?
Now that you know what foil is, let’s continue to learn how to use foil on Cricut. Foil transfer depends on pressure rather than heat to create designs. The foil transfer tool applies high pressure to transfer the foil onto your project wherever it touches. This method is compatible with all Cricut Maker and Explore series machines, allowing you to achieve complex foil details easily.
Supplies and Tools for Your Cricut Foil Project
You will need specific tools and supplies for Cricut foil transfer. Here is what you will require for your project:
Cricut Design Space app
Cricut Maker or Explore machine
Cricut foil sheet
Foil transfer tool
Sticky foil tape
Blank sheet to apply foil to
Cricut mat
Important Note: The new foil transfer tool works only with the desktop or laptop version of the Design Space software; it does not currently support phones or tablets.
How to Use Foil on Cricut to Get Started Effortlessly?
Now that you have all the essential info for starting DIY projects, like what foil is, how it works, and the materials, it is time to learn how to use a foil transfer tool with your Cricut machine.
First, you have to open the Cricut Design app and then find a design suitable for foiling in the image library. Look for designs marked specifically for foiling.
Next, insert the design onto the canvas and set it to the “Foil” type.
After that, prepare your blank material by attaching it to a cutting mat.
Now, properly place the foil sheet over the material with the colored side facing up.
Do not let the mat’s adhesive touch the foil directly, as this could damage it.
Then, use sticky foil tape to secure the foil sheet to the blank material firmly, ensuring the tape sticks to the material and not the mat.
Also, insert the mat into your Cricut machine and make sure it aligns with the blade tool.
In the Cricut app, click on the “Make” button and then follow the prompts to start the foiling process.
Once the design is finished, take off the mat from the machine and peel away the foil to reveal your design.
Conclusion
In short, Cricut foil transfer is a fantastic tool for making DIY projects, but you need to know how to use foil on Cricut to get started. You will need a foil sheet, a blank project, and other essential Cricut tools and supplies. Once you have everything ready, you have to choose a draw-only design from the Cricut Design Space software and then apply it to your blank project. For this, any Cricut Maker or Explore machine will work well, as they provide high-pressure power for good foil transfer.
FAQs
Can I Cut Aluminum Foil on a Cricut Machine?
Yes, you can use aluminum foil with a Cricut machine to create craft projects. In order to transfer aluminum foil onto a blank project, start by selecting a design in the Design Space app. After that, insert the aluminum foil and then blank project onto a cutting mat for stability inside the machine.
How Can I Print on a Foil?
The process of printing on Cricut foil includes applying pressure using the Cricut machine. After selecting the design in the Cricut software, then use the foil transfer tool with a foil sheet and a blank project. When the project is loaded into your Cricut machine, pressure is applied, and then the foil onto the blank sheet. Lastly, take off the project from your Cricut cutting machine and peel off the design.
What Supplies Do I Need for Foil Transfer Tool?
If you want to make a foil project, then there are some tools and supplies you are going to need. Here is the list of all the materials you will need:
Cricut Design Space app
Foil sheet
Cricut Maker or Explore machine
Sticky foil tape
Blank sheet for applying foil
Foil transfer tool
Cutting mat
Source :- https://cricuthelpcenter.wordpress.com/2024/07/19/how-to-use-foil-on-cricut-ultimate-guide-for-beginners/
0 notes