#i should really try doing these in aseprite
Text

* Ho Ho
* You May Have Defeated Me So Far
* But
* I Have A Trick Up My Sleeve
* My Final Attack
* AKA
* Detatchable Hands
#more#umbrashard#umbrashard fanart#because i am very normal about this au and definitely have not decided i will do a redraw after every major ost drop from now on#yes i did listen to world domination on loop for 3 hours while making this#but it's a banger so it was good background music#deltarune au#deltarune#deltaswap#qwertia umbrashard#queen deltarune#i should really try doing these in aseprite#ms paint exports them poorly but i like the default color palette#i'm unsure if aseprite would do a better job at keeping all the pixels intact#probably it would
48 notes
·
View notes
Note
Do you have any tips for people trying to start learning pixel art and animation?
I really love your work, it all looks so alive!
Hey thank you very much!
And yes! I can give a few tips!
Firstly, don't worry about making things absolutely perfect! Figure things out, mess around with colors, take it easy!
I'd say on top of the basic stuff, figure out and get used to keybinds and shortcuts on your program of choice. Aseprite (which is my go-to) has a lot of shortcuts and the ability to make more depending on preference.
From there, start out small, this'll help a lot in the start, since each pixel makes more of a difference when on a smaller canvas like 16x16 compared to something like 512x512. You should also take in as much info as you can, watch video tutorials, ask around, join communities, etc. (Cafe Dot Discord is a good place for that.)
If you have a preference on what you'd like to work on, like characters, items, weapons, etc. Start there. It's so much easier getting into things if you're starting with something you love. Colors aren't anything you need to specifically worry about right out the gate. One thing to get into a good habit of is using grayscale to work with the values, and then if your program of choice allows it, go over it with a color layer and the colors you want and see the magic happen!
Animation is a little more complex, but when you're ready for it, there's the principles of animation that I'd recommend looking into. Learning how the fundamentals work is necessary for things to go by smoother. I started out making an animation of a slime bouncing up and down, one of the earliest animations I made. Afterwards I went and started making waterfalls, that got me into the mindset of how to loop animations. Once you get the hang of it, animations (looping ones specifically) is just a lot of small parts moving at the same time, that little bit of movement to follow does a lot to a piece comparatively to a still image.
Overall, like I said in the beginning, don't worry about things, and it'll come with time. Expecting yourself to get something on the first try will only make things harder for yourself, you have to allow mistakes and messing up, experimentation and accidents are how a lot of people make things look as good as they do.
If all of this is a bit much, it's cause it is. Take it bit by bit and pretty soon you'll be impressing yourself so much you'll be shocked at the amount of improvement you've made.
(pssst, here's a playlist I made for starting pixel art, and its in order of complexity, so as you go down the list, your ability will improve)
Playlist
29 notes
·
View notes
Note
Hello!
I know you are not currently open for commission, but I was curious about what your prices are like and if you have any illustration experience.
I'm really into the look and feel of your realism style of pixel art- the celebrity portraits you have done and the clothing practices. I like the mood you are able to convey.
Do you find that when drawing people's portraits from a photo that you must follow the photo religiously in order to capture a likeness? Or do you feel confident you can draw new poses and facial expressions from photo references?
I ask because if I am able to commission you in the future it would probably require that. I am an artist as well, so for me I find this kind of thing challenging- I have to draw a character/person a lot in order to be able to 'move them around' so to speak and create art that still captures their likeness.
I feel a little awkward asking for information as the project I'm working on isn't done yet and wont be for some time, but I wanted to get a rough idea so I can start saving some money for when I am at that step in the process.
Any and all information is welcome! I really do adore your art and it's inspired me to get back into pixel art. I picked up Aseprite and am trying to do some dailies just to get back into the swing of it.
Hope you have a really nice day!
thank you. yes a good reference really helps but i don't think it's necessary to study it exactly. my portraits don't look exactly like the reference, but nobody would really know that unless i posted them side by side. expressions is something i need to work on as well and representing them in a tiny space
i honestly don't know if i would open comms for the realism portraits because i'm still just practising it...!! and it's stressful and takes me a while to get the likeness
i hope you get back into pixels, you should join us in the weekly portrait club in my server cafe dot!!
29 notes
·
View notes
Note
hi ! I have to learn pixel art for a game development class im taking.... do you have any tips to perhaps get started? (i have aseprite alr :3) thank u!!!!!!!!
Hi! I'm not the best person to ask this (my only projects for game dev were unfinished projects very early on), but I'll try to help
There's 3 important things that I'd say you should know about pixel art for game development specifically: Tiles/Tilesets, Character Animation, and Consistent Sizing
Let's go for one by one
Tiles/Tilesets
While you can make completely hand-drawn scenes for games, it's certainly way harder to do, as it requires a lot more time to achieve, and with things like deadlines on the way, you'll probably have to crunch yourself to achieve it on time, which I wouldn't recommend, especially if you're just starting out
This is where the Tiles/Tilesets come in handy. To put it simply, a Tile is a pattern that can either repeat horizontally/vertically/in all sides, or also a pattern that doesn't exactly repeat in any direction, but can be used to give a smoother end to something, like a corner. There's way more uses for Tiles, but these two are the most common types you'll see
A tileset is a collection of tiles, commonly with the tiles being together with those they work well with
Below is an example of a (messy) tileset along with how the tiles work together!
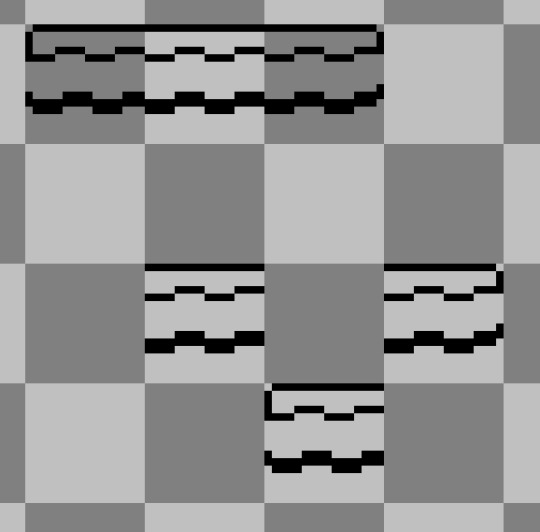
Basically these two allow you to make scenes quickier and easier, which is a lifesaver most of the time
Below is the most common type of tileset (for platformers and side-view games)!

There's a variant of this which adds slopes and smoother cornes on the insides, but this is still a good starting point
Basically these tiles allow you to cover most sizes regarding ground/wall tiles, which work well in things like gameboy games for example
As for Aseprite, in the latest update they added tileset layers, which makes it way easier to reorganize tiles, along with the existing Tiled mode, which duplicates your current canvas in all axis (or a specific one, depending on which one you pick) to see how the tile connects with their surroundings
You can enable Tiled mode by going into View > Tiled Mode and picking the best option that suits your tile. As for the tileset layers, there's this video that goes far more into detail on how it works:
youtube
Character Animation
I want you to look at this set of animations

How many frames do you think were used for each one?
The answer is 4 or less!
The idle animation has 3 frames, the walking/running animation has 4, and the sliding animation has 2! (which technically is the exact same image, but slightly moved left and right between each frame)
If you're starting out with pixel art, I'd really recommend to minimize the amount of frames you use in total, as it'll make it way easier to work with if you don't know much about pixel art/animation, plus you can still manage to add tons of personality into each frame
In Aseprite, you can add tags (by clicking the frame number and "Add Tag"), which helps to separate specific animations. Also, depending on your game engine/tool, it'll pick animations either by a sprite-sheet or by separate png files. I'll cover spritesheets here as that's the most common method
In Aseprite, if you go to File > Export, you can choose to export a Spritesheet, which is essentialy a set of frames connected into a single image, which can then be imported into a game engine/tool and be tweaked there
There's 4 buttons in the Export Spritesheet prompt, "Layout", "Sprite", "Borders" and "Output"
In "Layout" you can select how the frames should be arranged, along with setting constraints on them
In "Sprite", you can select the source of these frames, along with specifying if you want to export a specific layer/tag or all of them
in "Borders" you can specify if you want to add padding or remove space from your exported file
and in "Output" you can enable the option to export the spritesheet (in "Output file") along with a JSON data file if you want
Tweak these options depending on how your game engine/tool handles spritesheets, and you should be good to go!
Consistent Sizing
if you do art with backgrounds already, this shouldn't be hard to do, but it's still important!
This one should be straightforward; Keep the sizes of the characters and scenarios around the same size! Unless you're making something like Grounded, a character will look out of place with a normal house 20 times it's size
Work between the sizes of the tiles and characters to make consistent sizes all around
You can break this rule somewhat if it helps portray better your idea, like here:

but don't go too over the top with it!
I hope this helped a bit ^^
(sorry for the delay with this btw)
17 notes
·
View notes
Text
(Main Story) Next Part Update Part 2


Just wanted to give another update on this (which is also the last one) because it felt like the thing I should do, but I've gotten a bit more progress done on the rooms!
Progress wise I'd say I'm... 60%-70% done?
There's really not that many rooms, and I'm mainly just editing them in Aseprite manually, but it still takes a while
Also a few things from the concept I showed are most likely not to make it in due to... reasons...
Like the school being different (on the outside, anyway), just because I feel like it'd fit a lot more with the story I have in my head for the next part
I'd also like to say that this part might be quite long, probably the longest part yet, since I want it to happen in the span of an entire day in the comic, will I end up doing that though? Who knows!! The world is a mystery, but I'd like to introduce characters a lot faster like this, there's still a few I have yet to introduce, and ones that people have been asking me about for quite some time
I'm not trying to have fan-service though...
Well... maybe a LITTLE...
I'm just trying to tell a story that I have in my head, so if I want the next part to be long, it'll be long, but if I change my mind, I change my mind... that's kind of how it goes...
Whatever, we'll see it when it happens!
Now time to go back to working on those rooms.....
13 notes
·
View notes
Text
Vaporeon Timelapse (Sort of)

I saved what I had of my Vaporeon timelapse from the recycle bin and I managed to get it to work! I gave up on using the script at some point because it didn't seem like it was working and I didn't have much faith that I could get it to work, so instead of "Vaporeon Postmortem" this is more "Vaporeon Autopsy." (synonyms, but a little more visceral sounding, imo).
So, what happened?:
my palette is always 4 colors with no transparent because the Gameboy could not do transparency and we're being ✨authentic✨ and ✨professional✨.
white is treated as the "transparent" color.
no layer can have that color.
except the background.
the aseprite-record script flattens all layers to a single layer for export.
there is no longer a background layer.
everything that should be white appears transparent.
I just had to add back that background layer and it automatically applies to all existing animation cells. Also, white was removed from the palette all together, so I just had to switch back to my normal palettes that use white as transparent.
also any other palettes used in the timelapse had to be changed to one of my normal palettes (automatically changing all cells in that palette) and any cells that used other palettes also had to be changed (which would have fixed my Mienfoo animation, I might go back and fix that, maybe)
So there's some things I think are cool in this timelapse:
The head took forever to get done and I remember the body (except for the spine) came together much faster, so you're not really missing much here. I usually spend the longest on the head (or some small detail that's difficult to get right) cuz that's da moneymaker :3, imo.
Example: I draw the tail here and it looks so good that it keeps that shape even when the entire pose changed course.
Man, I wish I had the patience to figure this out earlier. It would've been cool to see my stuff from Vaporeon forward come together after this esp. the Halloween piece. Oh well, best time to plant a tree was yesterday and such.
The pose was originally standing. I didn't have a strong vision, but I knew I wanted to be able to swap it out for the Dissy alt head, so somewhat sleepy, but not asleep for the default Vaporeon so I ultimately settled on a sitting pose. That was my logic at least, I think maybe any pose would've worked, lol.
You kinda see the head pop in after I try to get it right and that's cuz I started working on it in a different file and then cut/pasted it into the main piece cuz I wasn't comfortable focusing on a piece at a time and it didn't occur to me that you can just turn off certain layers (like you see me doing in the Mienfoo timelapse).
Here's me workshopping the neck ruff and spine on a couple "scratchsheets" and you can see I was too sentimental to get rid of the rotated head fin that was ultimately scrapped in the final piece:


Actually, the head popping in might just be some steps I forgot to record because I think it's missing a lot of stuff from making the head fins as well and I remember forgetting to record some stuff, but idk where.
Idk, is this interesting to anybody, lol, or is this just kinda rambly? Maybe both! It's interesting stuff to me, but I really oughta be working on my next piece for Wednesday and sorting out… other stuff. So goodbye for now!
6 notes
·
View notes
Note
Do you have any tips if someone wanted to start making and selling cross stitch patterns? Making them, pricing, etc?
Yeah absolutely! No deep wisdom, but I've got some tips--
(this got a little long, cont'd after the cut ✂️)
Step one is head's up! There's not a lot of money to be made selling patterns, and it is a bit of a hassle proofreading PDFs and fussing with Etsy and all. So the selling part is kind of a wash. The making part kicks ass tho! So step one is to try and make things you really, really like, and to have some fun with everything. :)
If you've ever tried making pixel art, I'd stick with whatever program you're already comfortable with-- I use GIMP (open source!), a lot of people use Photoshop, Aseprite, etc. There are a bunch of programs for making cross-stitch, specifically, but IMHO none of them are all that great for actually designing in (with layers, no zoom lag, etc.), so I'd recommend making your art in your favorite art program and then transferring it to a specialty program to actually create the pattern.
Here's a good list of pixel art programs. Photoshop is the most popular for art in general, but head's up, they're gonna try and bleed you dry if they can. Back in the day all the cool kids used to pass around ways to crack the program and get it for free, but I'm a good and lawful blogger 👼 so I will tell you don't do that! I ask that all my followers always follow every law. 🙏
Once you have your design the easiest way to make a pattern out of it is to load it up into a specialty cross-stitch program, and my guy Lord Libidan has you covered there! He's got a great list of pros and cons for all the software out there, and he updates it regularly as new programs come out. I'd say start with a free one, and if you need more features try a demo for a paid program.
As for pricing… what I did and do was to look at what other, more established designers charged for similar patterns (specifically similar size & detail level, fully stitched & colors tested) and matched theirs.
Last thing: I won't say you have to fully stitch every design you make, but definitely don't sell a pattern until you've at least gotten out actual, physical thread and checked to make sure the colors match what they should be! Pattern-making programs are notorious for recommending thread colors that are close-ish but not quite right. I prefer to always stitch my patterns before selling a pattern of them-- it helps me catch small errors and make sure the colors work together right-- but so long as you are careful it is okay to have only made a digital version, too.
I hope this helps! Sorry it's so long. And uhh if you have any more specific q's let me know and I'll let you know what I know!
#ask#anon#oooh and if you're specifically hoping to convert photos into patterns#check out 'the Mr X Stitch Guide to Cross Stitch'#it's got a whole chapter on how to fine-tune things to get a nice looking result
51 notes
·
View notes
Text
Devlog 6: About the lingering dread over the horizon + game summary

Oh, no, no, no. I think we're about to go to the 2nd act of game devving... The scary part -- oh, yes, we're going to bug fix. Sooner than later, apparently.
But before that, happy holidays and a merry new year to all of you. As expected, I spent this time slaving away in the game dev mines and, of course, here's the story on how I did so/what I did. January's a busy month! Both IRL and in the coding sphere of things in this project.
(Also, a very late addition on the summary of Descent to Negative Zero is because I didn't add one):
Descent to Negative Zero follows our protagonists, Josh Lorenzo and Rex De Los Santos in a reunion/birthday road trip gone awry. After pulling up to a motel to close in for the night, instead of seeing their room, however, they both wake up locked in prison cells. As the two work their way out, they slowly uncover the underlying reason on why they're both there and maybe even personal secrets between them.
Maps, sprites & assets
As I'm writing this, we currently have around 45 parallax maps done in the game's folder! While overlays and all that fancy lighting stuff is pushed to the side, a majority of the maps needed in the main game itself are finished. A couple of extra Rexosh (AKA Rex/Josh) face/in-world sprites have also been taken care of, specifically for a section in the opening cutscene itself.

On that note, now that we're here, may I reveal to you an old (as in... Very old) screenshot I tested with when I was trying to figure out a face style for the portraits (painted vs pixeled). In the end, pixeled won.
Now that most of the game's maps have been taken care of, I've also made more maps that're specific to the end game itself.
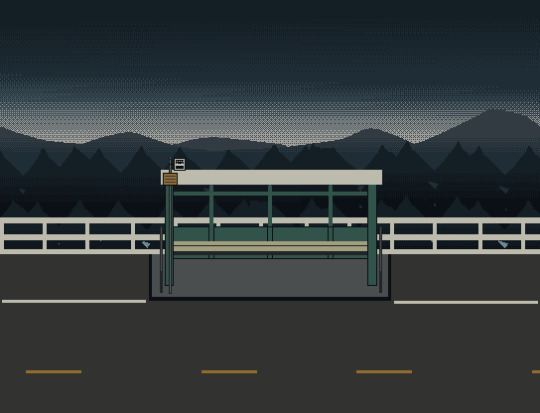
I especially had fun making this map, even if it's simple (just a road with a bus stop and nature in the BG) because I loved the way it turned out. The sky is my favorite part of this thing.
I've also been bogging down on making individual assets on things such as lore letters scattered all over the game that'll lead to an ending. While I do know that I could've gone the easy way and made it so that the important things get conveyed through solely message windows and nothing more, I wanted to do something a bit more fun (even if it's to future me's detriment).
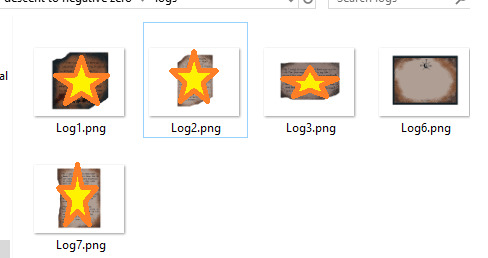
Albeit, that element is highly inspired by ZENO -- the whole main setting of this game is, really -- but I adored the tiny story telling techniques the custom assets gave me if I were to go that route instead. Yes, I know the text in the screenshot is inherently illegible, but you can't go wrong with a bit of extra censoring. Typesetting is a pain to do, especially on Aseprite, where I make the majority of the assets for this game on, but if I made that phone section in angel care possible, I know damn well I can do this, too. The visual puzzle hints are also on their way to completion.
1/27/24 update: most of the logs have been type-setted and done! It's only log 6 that still needs text, but I'm sure it won't be long until all of those assets are done.
End branches/puzzles galore
In the month of January, I have successfully coded in the 4 main end branches of the game! Woohoo! While the number "4" is questionable because I technically didn't code in the rest of the that end branch's dialogue + still have a bit of writing work to get done before I can be really satisfied with it, the main mechanics of how you get there is already in game. Writing down the dialogue doc before copy pasting the hell out of them into the game engine really helped me out in not getting lost in what I should do next. I also started to hunt down some ending music in freemusicarchive.com for the different credit rolls -- just to add a little more spice/impact once you reach the end.
Speaking of mechanics, the main semi-complicated/not-find-key-to-unlock-door puzzles have also been coded in! A specific wire puzzle did chop off a bit of my sanity last month, but, after a bit of tinkering and script hunting, I got it down. Turns out, it wasn't that complicated at all -- I just didn't know what the hell I was looking for, exactly. The core chase mechanic have also been added in the end game. While the chase itself still needs pizzazz like visual changes whenever you reach a certain point, chase music to set the mood and etc., I got that element done within this month.
What next?
In terms of what I'm doing right now, it's just directing the cutscenes, making custom assets for sprite interaction along with checking whether or not the variables line up with the events corresponding to them. Yep, it's bug fixing time. Right now, I'm trying to fix up a bit of code from the early game and took a break around the 2nd puzzle floor you encounter. It's, as usual, a bit tedious and frustrating at times because I kinda changed the way you solve puzzles by actually pulling up the inventory and using the item itself (sorry, future me), but either way, the good thing is that the core game -- up to the different endings are set in stone and just need detangling, polishing, and what have you.
Bug fixing Dt-Z compared to AC will certainly be a different experience because unlike AC, this game isn't a walking sim. However, if I went through the headache of bug fixing that game, then I'm sure that I'll do just fine with Dt-Z... Even if I hate doing it right now.
3 notes
·
View notes
Text
Asks Compilation 27/6
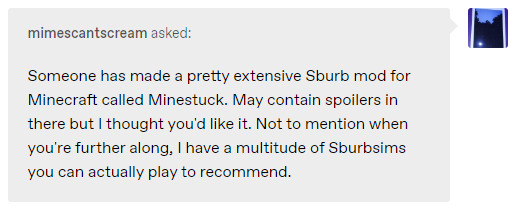
I’ve heard about this! They’re both games about building up your house, so they’re a natural fit. Do send those games along when I get to the point when you can!

It’s just like being a furry - sure, it seems weird, but many subcultures do. There’s not really anything wrong with weirdness, after all.
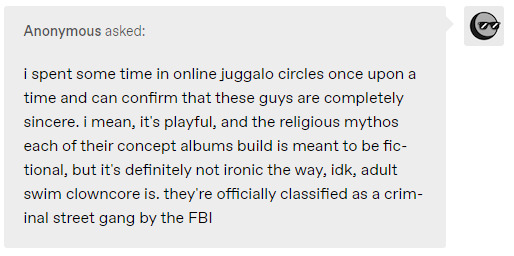
They’re a street gang, and they’re led by Gamzee himself.
Watch out, Markiplier.
The whole thesis of the music video is a celebration of everyday miracles.
Sure, it’s presented in a pretty bizarre way, but there is a good point there - life is full of things that, by rights, should never stop impressing us.

Jade + AC = future Juggalos?

Look. All I’m saying is: have you memorized Maxwell’s equations?
Jokes aside, I guess it’s pretty easy not to know how magnets work when you explicitly don’t listen to scientists...
I didn’t even know there was one, to be honest.
It’s not unrealistic to see these thirteen-year-olds from 2009 dropping slurs, but I try not to include them in the commentary.
Bec is the invincible Super Dog, and he will help her complete the level. He’s even white!
Blue-bloods scoff at the low-brow Daedric, and Red-bloods think anyone who uses original script is stuffy and boring.


Thanks!! I’m finding I’m enjoying this project more with every Act. There’s just so much to get into with this comic!
It occurs to me that the later you find this blog, the more of a backlog you have to catch up on. Which, depending on your perspective, can be another positive!
As for the ‘sona.. to be honest, it’s taken a lot of willpower not to pause the liveblog and make a full fanfiction for her Sburb adventures. 🤣 Guess I need all the Sburb lore to do that, though, and it’s fun to slowly develop her session as we slowly learn how sessions work.
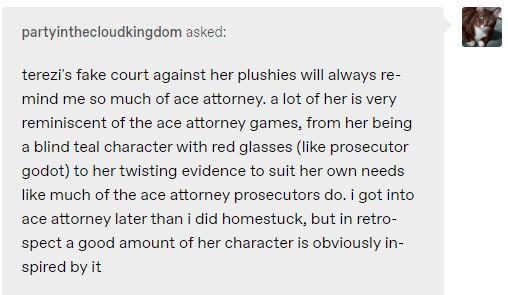
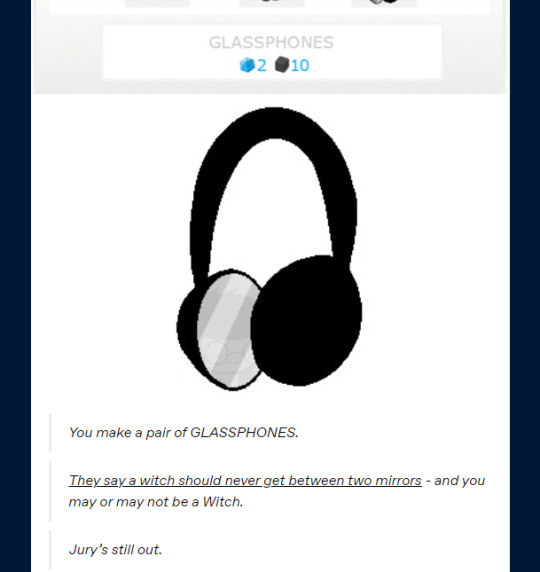
Aw, shucks. Honestly, I haven’t really done any sprite art in years, but when I was answering the Alchemy ask, I realized I just had to depict these items I was coming up with!
Btdubs, I used Aseprite for all the art, including the gifs. Highly recommend it.
Oh, dang it, I didn’t even notice! Gotta amend the script a little, because that might cause some problems with interpreting the text down the line.

He kind of is that, isn’t he?

This was my full prediction for Gamzee’s personality, based solely on his username. The guy isn’t exactly a thrill-seeker, but he is a sopor addict with little concern for his health. Once again, these usernames really say a lot.
Yeah, if you actually think about what’s happening in John’s case, you can make an argument that his entry was the most stressful of all. He was the first in, and understood his situation the least, while Rose and Dave at least had the benefit of knowing what an Entry was.
I didn’t think to interpret John’s hesitation to bite the apple as a deer-in-headlights response, but, now that I think about it, that may have been exactly what was happening.
No, but now I wish it was.


Sally official title CONFIRMED as Chef of Food.

Since it’s not Terezi, I don’t think any of the trolls we’ve seen so far are Vriska - the vibes aren’t right. I think it’s one of the five trolls we haven’t heard from yet...
Dimple, eh? I hope he doesn’t start possessing people, like some other Dimples I know...

* Smells like SC4L3M4T3S.
That’s one of my favorite Undertale quotes, and it’s only fitting that it be a Terezi reference.
I actually don’t remember fighting that dude in Undertale, but yep, apparently it’s a Hotland spawn. The references never end!


Thank you! Had a ton of fun making those items.
I’ll hopefully be making more of them, down the line - maybe next time my Kidsona will try to make meta-items incorporating the Alchemiter, Kernelsprites, etc?
Act 5 has been a great demonstration of dramatic irony. We know all the trolls will end up in the same session, and we know the session is doomed - the only thing we don’t know is how we got to that point.
Why does this feel like something Terezi would actually do?
And yeah, the gradual reveal that all of Terezi’s bizarre behavior with the kids was her actual personality is one of the best and most understated bits in the comic so far.
Terezi would fit really well in the Ace Attorney universe - either as one of the many unhinged human lawyers, or as a straight-up alien in a crossover game.
I honestly feel like Terezi would make a really good lawyer irl, with the proper training. Her mannerisms wouldn’t be a problem if she had talent - and I think she has talent.

Heh. To be honest, the Witch class has always been the one that sounds the coolest to me. Bard and Maid are in joint second place, but I just love the irony of a technically-minded Player getting a mystically-flavored class - just like Jade did, I suppose!
67 notes
·
View notes
Text
Short Tutorial On Exporting Pixelart As Icons In Aseprite
Do note this tutorial is Old and is not up to my standard now-a-days
This Tutorial is also On, Newgrounds & Steamguides!
"A little basic guide on how to Export your Pixelart as icons for use on your home computer! goes into Exporting the Icon from Aseprite and as Extra how to Change an icon on your Windows Computer"
Intro and infomation
I remember being really confused on how you'd export your pixelart and make it into icons.
so i thought i'd write down my know how on what i know about doing it!
see this more as a little walkthrough'ish guide with a little bit of into about .ico files sprinkled in over. hope you enjoy :>
Note: This guide is Also on Newgrounds[grat-grottenberg.newgrounds.com]
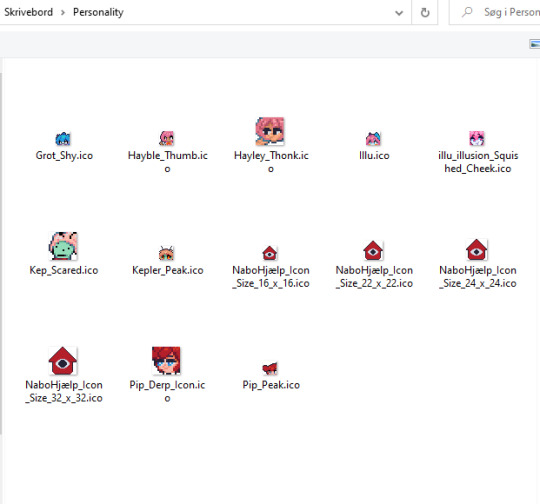
First and formost Make your icons! something like this ↓

.ico Files comes in a few different sizes, i'll list them bellow
(only inportent for older Windows Vista, 7 and Older says: Google atleast)
Standard Icon sizes (all has 24bit color, 8bit transparency)
- 256 x 256
- 48 x 48
- 32 x 32
- 16 x 16
Extra icon sizes
- 180 x 180
- 128 x 128
- 96 x 96
- 72 x 72
- 64 x 64
- 24 x 24
Though as the good reader you've already noticed that theres a 22 x 22 in the picture above and That size is not on the list
well thats because the sizes seem only to be importent for computers running windows Vista, 7 and Older. so if you're not on one of those OS..'es[?] then you should just be fine exporting at any size :>
Welp that was the info part done! Now to export your pixelart as an icon!
Exporting From Aseprite
Go to your Export Screen like you would any other time you've exported pixelart.

But in your Export settings, Change the file type to be .ico and set the resize value to 100% aka the default size
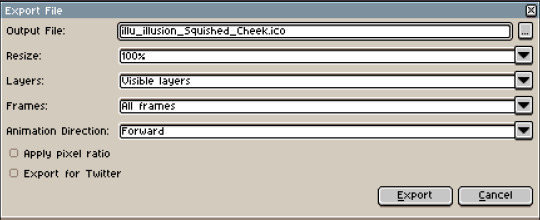
Clicking export it should just export without any problems.
Then you should just find a little .ico file where the export place is located like this

(picture resized by 600% for your viewing pleasure)
Thats basicly it. i hope this was helpful, i sure needed some help on this, i remember using like 4 hours trying every "How to make png into Icon Tutorial" on youtube and still not having it work out. so hope this helps :>
but for people who havent ever changed an icon on their computer yet, i'll explain how to do that aswell
How to change icons on stuff 101 (Windows)
So to change an icon on something, like a folder, program. we first need to go to the files Properties
(Note: "Egenskaber" is "Properties" in Danish)

After clicking the Properties tab
A new menu should open up, in that you need to go Customize aka the last one
(Note No2: "Tilpas" Means "Customize" in Danish)

You need to click on the Change Icon button at the bottom of the menu,
(Note No3: "Skift Icon means Change Icon in Danish")
it should open up the menu bellow
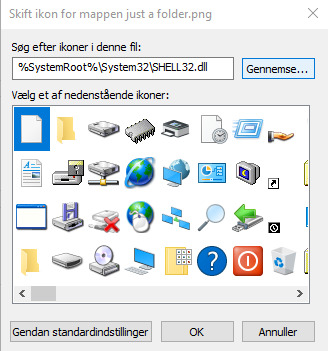
You'll wanna click on the Browse button and find your icon on your Computer
(Note No4: "Gennemse" means "Browse" in Danish")
i Have all my Icons in they're own Folder for easy access sence the Browse button remembers where you last found a Custom Icon.

finding and clicking and clicking the OK button, the icon should change the Icon of the Folder / Program / File
Then Remember to click the Apply button

Then it should end up looking like this !
And thats it! now you have your own Pixelart as an Icon on your home computer!
More Reading / Resources
Wikipedia on .Ico files and .cur files (.cur files are for Cursors)
I hope this helped you! you can as always check out me on Twitter! and dont fear to DM me i'd love to see what you guys make! or if you guys have an idea on how to word something more clearly - @GratGrottenberg
10 notes
·
View notes
Text
Week 3
I simultaneously feel like I did a lot this week and nothing at all. I started off the week not really feeling it, to be honest. I didn't start on the second floor yet, but I did end up doing some small(?) essential things.
First, a new logo! I made a simple thing in Aseprite to use as a splash screen and ended up using some stuff I learned today to make this thingamajig.
I'm only allowed to upload one video per post, so I'll try to talk about everything in order, and maybe I'll do some screenshots.
First up, this proof of concept thing I've been wanting to try for a little while. It is very sloppily put together and not meant to be like a professional level thing. But, basically, I used the 3D space in Godot to make a little logo thing and record it with Godot 4's built-in moviemaker. I will be thinking of ways to use this in the future, probably. I do a lot of graphic design type stuff like that for my steam. I don't know if Godot is easier for this kind of work, but I feel like I can make anything with it. So, I'll probably continue to do just that.
The second part of the video is a Sage Wall ability that I made for practice. Like I said, I wasn't really feeling the project a lot this week and I wanted to just do something adjacent. I don't remember where, but I remember someone saying you should just steal mechanics for practice, so I opened up Valorant and picked one out. Most of the abilities in Valorant are meant to be used on another player, so the wall made the most sense. Also, I think my ultimate goal is to work on an immsim so making random abilities is good practice.

Along with the wall, on this day, I ended up working toward making a sort of modular character controller. I can add abilities to it and all that stuff. I'm pretty happy with it as a start. I'll probably start my controller from scratch at some point, but it is good practice and I really enjoyed this work.
One practical thing I accomplished this week is a working vault system. Previously my system relied on Areas and Signals, which was a super janky solution IMO. And required me to designate vault-able areas and the player was phasing through walls and stuff, it was bad. I was just doing some work in a call with the boys when I started working on using RayCast nodes for the vaulting system. I couldn't figure it out on this night and ended up just really optimizing the previous version (It still wasn't great). So later on in the week I sat down and really worked out the RayCast version, and I'm happy to say, I actually got it working how I wanted. Movement feels a million times better now.
The first thing that I did this week: I didn't feel like doing anything this day and just opened the project to see what I could poke at. Next thing I knew I had a working safe system with a randomly generated code and figured out how to include the code in a note. Very cool. I wanted to kinda scope my way around this, but I think it is necessary for the game, despite how short it is going to be. It adds a small bit of variety to the game, IMO.
I also messed with lighting for like 2 days straight. I practiced baked lighting, which is something I actually haven't messed with since I first started learning game dev on UE5. It looked pretty good and brightened up a lot of dark areas that have been frustrating me. I know how to solve these issues when it is time to finalize lighting, and that's a weight off my shoulders.
I think I'm ready to just build out these levels. It honestly doesn't feel like a lot of work, but all the fun programming stuff is basically done, and I kinda want to move on to doing other things. I feel like I learned a lot this week despite not really feeling like doing anything, and I'm looking forward to applying them to something new. I woke up in the middle of the night to piss and while I was pissing I was thinking of ways to make X mechanic. It is a blessing and a curse. After this project, I think I'll be ready for another Game Jam.
I may start posting more frequently to chip away at this long weekly post. I could probably even be more detailed but at the same time I feel like I'm constantly busy these days so who knows.
0 notes
Text
Why make your own game assets?
There was a game asset humble bundle not too long ago. Then Jeff Vogel wrote this: https://jeff-vogel.blogspot.com/2019/08/why-all-of-our-games-look-like-crap.html
The response on twitter quickly turned into a flame war. We’ll ignore that. The blog readily acknowledged that many Spiderweb RPGs look ugly, and made many good points about game art. I’ll quote the relevant bits:
2. Queen's Wish uses art made by a lot of different artists. That means that the style is not quite consistent. We've done our best to make it blend well, but it's a little off.
Suppose I get half a game-worth of really neat, funky art, and then my freelancer gets a real job for big bucks. I then have to find a new artist who can match the style of that art and make a lot of it, which is very difficult.
And then suppose I write a sequel, and I want to reuse that art and need more art made in that style. Then it is even more likely that my freelancer (and any replacements) will have moved on, and then I either have to throw everything away and get it redone (expensive in time and money) or find a new artist who will try to match that art's style and probably not do a great job at it.
Now imagine instead of commissioning a freelancer, you download free game assets from OpenGameArt, or buy game assets on the Unity3D asset store, or buy a pixel tileset on itch.io. It’s the same problem, but worse.
What if you want to add one tile to the tileset? What if you want to use a 3D model, but scaled own? What if the pixel art you want o use has the wrong size? What if the model you want to use has no normal map?
The more stylized the art assets are, the harder it becomes to modify them or create your own in the same style.
Go look at the old Frogatto tilesets on OpenGameArt (here and here). I’m sure you could make a cool level out of them. But if you want to add your own set piece to these tile sets, like a stagecoach complete with horses, you have to pull it off consistent with the Frogatto style. If you take a photo of something and pixellate it, you won’t get pixel art. There can be big incompatibilities even between similar-looking pixel art games. Assets from a point-and-click adventure will be tailored to a certain game feel and perspective, while platformer assets won’t, even if both look similar.
The same is true for high-res 2D art. The hand-drawn aesthetic of Chook & Sosig is great, but it’s not the same as Braid, or Incredipede.
With 3D assets, you have to keep track of scale and polycount. Even though you scale models easily, a toy firetruck with a high level of detail can look out of place in your game. 3D assets might not look the same in your game as they look in the editor, if you have custom lighting or shaders. Or maybe you have no lighting in your game, but your 3D model editor does! 3D art can be stylised (World of WarCraft), cartoony (Lovely Planet), abstract (Deceiver), or realistic. Even “realistic” looking 3D games can be stylised to different degrees.
Here’s a list of things you might need to keep consistent:
scale/level of detail
colour palette (for pixel art)
saturation/brightness contrast between objects and environment
outline colour and thickness
light/shading style and direction
dithering patterns (for pixel art)
light/specular/normal maps (for 3D)
topology/rigging (for 3D)
animation style/speed (I wrote two whole post about that: ONE, TWO)
So why should you care? As far as I know, you, my audience, are mostly either getting started making games or making games for game jams.
If you are doing game jams: Talk to your team about the points in the list above, and make sure you are using the same tools (Blender, Aseprite, Flash, Photoshop, Cinema4D, Inkscape), and working to the same specs. If possible, make some rough concept art, or just to an image search on the web and pick out some pictures to make sure you are all ont he same page.
If you are starting out making games as a hobby: Try making your own graphics assets for a change. It might not look app-store-ready, but it will give you the freedom to make what you want. If you start with Kenney’s Platformer assets, you will make another platformer. If you draw your own graphics, you can make something that’s unique and different, with a consistent look.
But most importantly, if you’re just starting out learning to code and making games, don’t spend lots of money on game assets.
4 notes
·
View notes
Text
Visual art is hard but I'm harder
I spent the last few days working on my drawing skills. Currently my art is --as the french say-- "really bad", and someday I'd like for it to be passable-to-great. I really enjoy drawing, and while I get a lot out of it it's just not something I'm good enough at to be willing to put out into the world disclaimer-free. So, in the interest of someday being a control freak GameDev who designs every aspect of her game, I figure I should start working on these skills now rather than be an expert programmer and ready to ship my game suddenly realizing it looks like doodoo.
"But Percy," you ask, lip trembling feebly, "how do you plan on doing this? What steps are you taking to summit this next great artistic peak? How can you, a subpar drawm'n possibly garner this remaining skill to toil Wagner-like and create your masterpiece???" Your voice breaks slightly and I turn in my chair. As I stand, your gaze scrolls up as though searching apartment windows for your greatest fear. All of a sudden, I tower before you, and I squat down into a frog pose to meet your eye level. Creaking forward, I whisper in your ear: "Y o u T u b e t u t o r i a l s."
So far I've done Saultoon's Aseprite Beginner's Tutorial which was super helpful, and I made these lovely little donuts :)

The process involved using all the main tools in Aseprite, as well as changing colour palettes. I did my first batch in the default palette, the second one as Minecraft colours, and to challenge myself I did the third one with GameBoy colours. In the end, Saultoon requested that I shade the big donut? which meant I had to break out of the GB's four colours and also I have no idea how to shade so that made it tricky. I'm proud of the donuts though I think they're cute! Pixel art is great because my hand motor skills are poopy bad and that's not a barrier here. Oh, I also bought Aseprite. I made this decision bc after much research I concluded that it was the cheapest and had the cutest logo.
I do want to get better at art theory stuff though, which is why I also started working my way through Drawing on the Right Side of the Brain, a book that I bought probably six years ago and cracked open twice. Holy shoot though it's such a good book. The writing is really engaging, if somewhat pretentious, and the content is succinct and inspiring. The first exercise was to draw a self portrait which I'm actually quite proud of. I showed it to two of the best visual artists I know and both said it looks "recognizably like me" which is huge tbh that's what I was going for. I'm not gonna post it here just because I don't feel like putting my recognizable mug on the internet today, but I probably will someday to show the improvement working through the book. Oh, also, the self portrait was apparently supposed to take half an hour, but I accidentally spent 3+ hours on it. This ate into my learning-code time, but it's all good bc I learned I really enjoyed trying to nail the details. The next exercises I'm definitely gonna set a timer for, because I think it's important to churn out lots of product when you're learning a new skill rather than being a perfectionist, but it wasn't wasted time and it made me really really excited for the day I'm good at this stuff. I genuinely think that once it's not such a chore I'll be drawing constantly. I love drawing bro oh my god lemme at em as soon as my hands do what my brain says to do and my brain can focus on understanding even the most basic principles of shading. Shading so hard y'all. I did an art class in high school and I've had art friends explain it to me like a thousand times and I just, , , , do not understand how to visualize light.
Anyways I'm off! I think today I'm gonna work on another project that requires me to draw and call that my art practice, and then either write a little music or do the next coding module. I haven't written music in ages and it fills me with such churning, freezer-burning anxiety and I'd really like to combat that considering it's the thing in my life that brings me the most fulfillment. This is sounding like another post rn though, so I'm gonna save my thoughts for when I write an update involving composition. I'm feeling good today, and I'm not gonna let my anxious little brain take up my precious time worrying about wasting my creative/productive potential when instead I could, idk, be creative and productive. Or do LITERALLY anything else. Get outta here you squirrely little guilt-soaked meat sponge, thanks for your concern but you're squandering my valuable minutes. I love you. Mwah <3
0 notes
Text
A deep dive into my NES toolchain
Status update
I haven’t posted much lately but I’ve been working steadily on the game. With most of the major engine systems in place I’ve been focusing on writing and building out levels.
Months ago I did a full pass on the game in a graph paper notebook and blocked out all of the major areas for the facility. I highlighted key item locations, characters, major plot points, and more or less designed the structure of the game.
Now I am spending most of my time actually building the rooms I designed months ago. Art, story, and gameplay are all starting to come together. To that end, I now have to be very specific with regards to what characters appear in each room, how the rooms connect, what the dialog is for characters and item descriptions, and so on.
A heavy stick
The toolchain I have in place for building levels is really complicated. It requires me to use a mix of Windows and Mac tools on different physical machines. I have one tool for creating the art, another for building level graphics, another (custom) editor for building level collision and entity placement. Then, all of that gets complied into the game code which has to be updated with dialog and any custom code required to make the level do stuff. It’s a bad environment for creative work as making small changes can require a whole round trip through the pipeline.
So, to help the situation, I’ve been using Twine as the main tool for writing the game:

I can treat each in-game room as a passage in a twine story. Passages have connections which match the room connections in the game. I arrange the passages in the Twine editor in a way that mirrors the physical layout of the in-game rooms.
This let’s me write some dialog then run through a sequence of rooms and see if the dialog flows properly. What happens if a player skips a room or visits characters in a different order? Does the dialog still make sense? Does the tone fit?
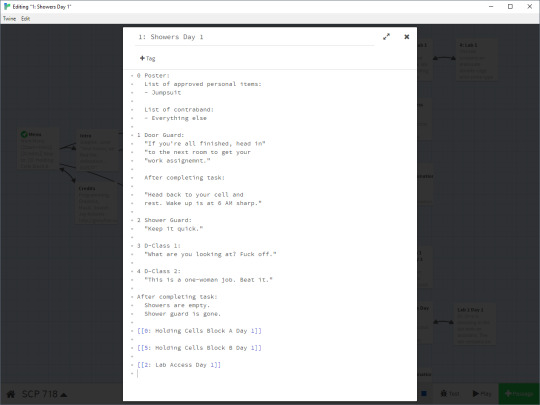
I can write and edit and delete quickly without fear of messing up a bunch of work. Then, when I’m happy with how things feel I can start doing the level layout knowing I shouldn’t need to make many big changes.
Designing level art
Level builds typically start in Aseprite and are really fluid. At this stage things are still really flexible.
This is the initial concept for the Shower level:
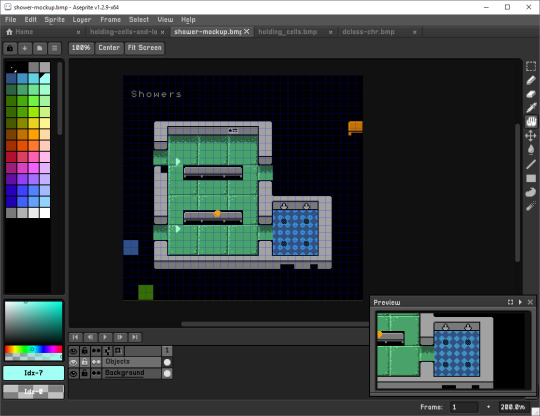
I need to make sure that for any given room the choices I make here need to:
Be renderable with a maximum of 13 colors
Use only tiles from one of my tilesets
Any new tiles added here have to fit within the available space of my chosen tileset
When I have something here that is starting to work I usually try to get it in game as soon as possible. Palette colors on the NES can be wonky and inconsistent depending on what is doing the rendering so a choice that looks great using Aseprite’s NES palette might look meh in Fceux and eye-scorching in Nintendulator or real hardware. It’s common to make a lot of round trips at this stage to find a good balance without just using the same palettes everywhere.
Laying out NES background data
The next step is to rebuild the level in NES Screen Tool using tiles from the tileset. This tool generates data which the NES uses to load background graphics which make up the level you walk around in.
Here’s what the Shower level above looks like when built out in NES Screen Tool with some palette adjustments:

You can see the tileset used to build this level on the right. That is the holding_cells tileset. It still has a lot of room for cool new art.
At this stage I will usually do a lot of tweaking to the position of various items in the level. I may add or remove props or inspiration might strike and I’ll create all new sprite art to include in the level.
I will also try lots of palette variations here as it’s very fast to do.
When the level layout is more or less complete, I export a bunch of things:
A .map file for the level which I use when making edits
The background data for the level as a C header file
The updated CHR data for the tileset
The palette for the level as a C header file
A bitmap file of the tileset in case I want to edit it in Aseprite
A bitmap file of the level layout to use as a reference in my custom map editor
(If I could make only one change to my current process it would be to make the above steps scriptable.)
Adding map data
Next I add the level to my SCP project in my custom map editor. I import the bitmap I generated previously and use that as a guide to mark up the level with collision information, NPCs, and triggers for dialog and game events:

That data gets exported into the game as C code which looks like:
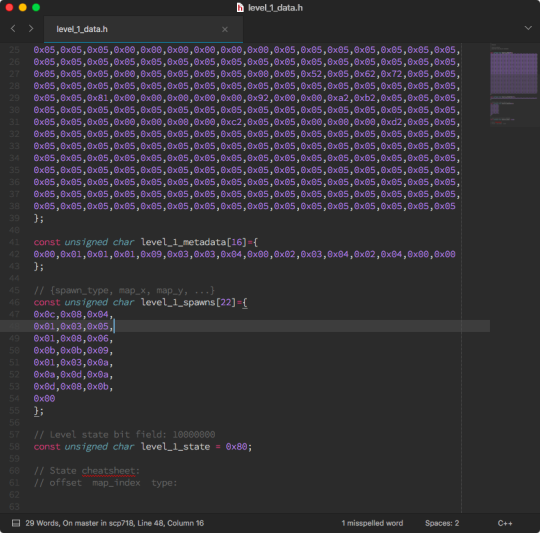
The big block at the top defines the type of every tile in the level (e.g. walkable, non-walkable, trigger, exit, etc.).
Some tiles (up to 16) can also have 8 bits of extra metadata. This is used so exits can define where they link to and so triggers can indicate what procedure should run when they are activated.
The spawns define the type and location of entities and pickups in each level.
Finally the level state is 8 bits of persistent data which is kept in memory for every level in the game. The level editor uses this to mark which doors are closed and which are opened but game code can use those bits to keep track of pretty much anything. Those bits can be read even if the player is in a completely different level. Simply put, this allows a switch in one level to open a door in another level.
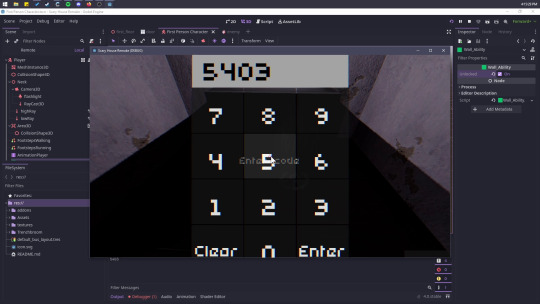
With just the above done I can load the level in game, walk around, and check the art.
Hooking it up
To get the dialog and triggers working I need to add two files. The first is the dialog definition for the level:

The dialog is all hand-written and is based on the dialog in the Twine passage for the level. Here is where I make sure that each line actually fits in the dialog box. I also add markers for quotes (\x26), line breaks (\x01), and page breaks (\x02).
This is where Twine is such a life-saver. Making changes to dialog in C code with all of the control characters is a giant pain in the ass.
The second file I add contains the scripting for the level:

The details of this are destined for another overly-long technical post. For now, the important thing is this is where we hook up the dialog lines from the previous file to the triggers we defined in the map editor.
This all has to be done by hand because dialog can change based on the game state and activating a dialog will, in some cases, trigger actions to happen in the world. This is the code that ties all of that together.
The result
When you put all of that together you get a finished game level:

It can take several days to go through all of the writing, design, and art for a small simple level like this. Then, the technical buildout and revisions typically take one or two evenings of head-down work.
It is a lot of effort but I’m pleased with the results so far.
If you read all this, wow, thanks for sticking it out. I’m happy to answer any questions you might have.
8 notes
·
View notes
Text
And now, a moment for reflection…
Feel free to scroll past this post, for I will be ranting (slightly) about work, art, people and life in general.
I’m steadily trying to get back into pixel art after so long. I feel like I forgot everything. I’m starting over at practically 0 and what sucks even more is that I can’t use Aseprite anymore. Although I’m not even sure if I liked Aseprite or if I was just used to it because it was my introduction to pixel art. Regardless, I learned a lot from the software and now I’m wondering how doing pixel art will fair on procreate. Oh where is this pixel art journey going. *sigh*
I haven’t been posting on my tiktok account, Anotherfloatinghead, mostly because I haven’t created anything worth showing (in my opinion). I have been really dry on inspiration. Maybe it’s because working retail zaps out all my emotions and leaves me indifferent. But it could also be that I am my worst critique. I want to show more and do more, but god, it gets so hard to think when you have so many things on your mind. Sometimes I just wanna scribble on the page and create disgusting blobs of anxiety but that’s just a waste a materials.
I bought a few art books. Which, for those of you who have continued reading and know a few things about art books, I’m wondering how to use. What I mean is, do I use it according to what I think I personally need to improve on or should I read it from start to finish, following the chapters and prompts in sequence?? I have a feeling the answer is, do what feels right. Which, doesn’t help as much as people think it does. What if I don’t know what feels right? What if what feels right isn’t necessarily helpful? (This is how my brain works. I blame school and university for my overthinking and desire for perfection)
I’ve been living life on auto pilot and wondering if I’m doing the right thing, while trying to pursue what I think will work for me. Even at work, I’m one foot in one foot out. Recently I asked to do overnight shifts but just the other day I was getting excited about being let go after seasonal. I just need more time. For what? Idunnooo.
0 notes
Text
Coloring Pixels - Spring Pack For Mac

Unlocks the Vistas themed book for Coloring Pixels. Includes 20 new large landscape levels to complete! Expect images of urban skylines, volcanic eruptions, thick forests, and inhospitable but staggering terrain. Price: $15 Platforms: Mac, Windows, Linux. Aseprite is a very popular and highly recommended program designed for pixel art. It’s well worth the $15 price tag for the final software. But those with some tech skills will be happy to learn that Aseprite is available for free if you’re willing to compile it yourself. Now Aseprite is popular for good reason. & Coloring Pixels v1.16.2 5 Write a comment. Dev Blog - Week 12 1 Write a comment. Read More ©2020 by ToastieLabs!
Disclosure: This post may contain affiliate links. That means if you buy something we get a small commission at no extra cost to you(learn more)
Pixel art has seen a big resurgence in popularity. New generations of artists and designers have taken up the digital brush to create modern pixel art masterpieces.
And as popularity for the pixel has grown, so has the number of tools for making it.
Choosing which tools you want to learn can be a challenge. So to help you decide which program to pick we’ve compiled a list of the best software for creating pixel art.
Whether you’re just starting out or looking to expand your skills, our guide will help you find the best pixel art software to fit with your needs.
Photoshop
Price: $9.99/mo
Platforms: Mac, Windows
Adobe Photoshop is the leading software for graphics editing & digital painting.
It should come as no surprise that it’s also a popular choice among pixel artists. While not made specifically for pixel art, Photoshop contains all the tools necessary to create professional quality pixel art and animations(and so much more).
Photoshop can be somewhat cumbersome for beginners as it is feature-heavy.
But there are plenty of tutorials available on setting up the program for making pixel art.
If you plan to create high resolution images or textures then it’s worth it to start in Photoshop so your skills are concentrated in one program. This is much better than having to learn multiple workflows for many different programs.
One of the biggest benefits to Photoshop is the volume of resources available.
There’s a tutorial for pretty much anything you could image as well as free scripts and plugins for even more flexibility.
If you’re working towards a career in game development or design then it’s worth noting Photoshop is an industry standard. Having knowledge of the software will be a big help in landing a gig at a studio.
But this is also nice if you just want to make your own indie pixel art for fun. Photoshop really is the bee’s knees for brilliant pixel art.
Krita
Price: Free
Platforms: Mac, Windows, Linux
Krita is a free and open source professional painting program aimed at digital painters, cartoonists, illustrators, and concept artists.
With some minor configuration changes Krita can be used for beautiful & professional pixel art.
Because the program is tailor-made for painters, many artists will find the workflow is very natural and easy to learn.
Krita is perfect for those with a traditional background in painting who want to transition into digital art. In 2015 the Krita community crowdfunded for an animation feature making it fully capable of adding motion into your pixel artwork.
While not as feature-rich as Photoshop or GIMP, Krita has many tools that you won’t find in programs dedicated to pixel art creation alone.
Depending on your needs this may be a benefit.
If you’re looking for a program that can handle both pixel art and high-resolution illustration work, and even animation, then Krita might be exactly what you’re looking for.

When it comes to a digital painting program Krita is hard to match—especially for the price of free.
On the other hand, Krita’s documentation is lackluster or missing in some areas, especially those features that have been recently added. Although you can find plenty of great tutorials online for free.
As a niche tool it also lacks the robust communities that you’ll find around some other software.
But with its easy-to-use and customizable layout Krita is solid choice for beginners and experienced artists alike.
GIMP
Price: Free
Platforms: Mac, Windows, Linux
GIMP is an open source image editor probably best known as the “free alternative” to Photoshop.
It boasts a powerful set of general image editing tools and painting tools.
Because of the easy-to-use layout and highly customizable interface, GIMP is a popular choice for artists of all backgrounds and styles.
GIMP comes with all the tools you’ll need to make professional pixel art. There’s even a built-in timeline and animation player much like Photoshop.
This makes it a great choice for those who are looking for a one-size-fits-all solution to image editing. It will be easy to transfer your pixel art skills to photo manipulation and graphic design if you choose to do so.
Because of its popularity GIMP enjoys the support of a large community of creators and you’ll find plenty of tutorials for the program as well as a plethora of plugins to suit your needs.
It’s a great choice for those on a budget looking for something that can handle pixel art along with image editing, painting, graphics design, and more.
Aseprite
Price: $15
Platforms: Mac, Windows, Linux
Aseprite is a very popular and highly recommended program designed for pixel art.
It’s well worth the $15 price tag for the final software. But those with some tech skills will be happy to learn that Aseprite is available for free if you’re willing to compile it yourself.
Now Aseprite is popular for good reason.
Many artists love the streamlined interface and pixel art aesthetic. It’s a lightweight but fully capable program that is extremely easy to learn.
It comes with features like onion skinning – the ability to overlay frames before and after the one you’re working on – that make animation a breeze. And the timeline itself is very accessible for beginners.
Aseprite can also automatically convert fonts to pixel art which is very handy for game development and user interface design.
There is a wrapping tool that makes it crazy easy to design tiles so that they repeat on the edges. This is a big deal in pixel art.
Aseprite has some of the best sprite sheet exporting tools I’ve seen in any software, making it a must-try for those who are serious about creating pixel art for video games.
Pyxel Edit
Price: $9
Platforms: Mac,Windows
Pyxel Edit is another popular program beloved by pixel artists worldwide.
It’s known for its ease-of-use and user-friendly interface. While there is a free version available out there, it lacks many of the features that make Pyxel Edit a worthy choice.
The elegant interface is a big selling point for Pyxel Edit.
The program contains all the features necessary for creating static and animated images, including animation onion skinning which lets you overlay sequential frames in your pixel art.
At only $9 Pyxel Edit may be the perfect choice for those working with a low budget.
Pyxel Edit is best known for its powerful tileset creation tools.

Working with tilemaps can be a tedious process for any artist, but Pyxel Edit is here to help with a set of tools designed to speed up the workflow. Tilesets can be easily imported and exported or converted to XML or JSON filetypes for use in game engines.
Game designers working on multiple tilemaps might find that Pyxel Edit saves them a lot of time and hassle. It’s just a great tool for anyone serious about(or getting into) pixel art.
GraphicsGale
Price: Free
Platforms: Windows
GraphicsGale has an old-school aesthetic to the GUI. But don’t let that fool you since it packs quite a punch!
Not only is it available for free, but it comes with all the features you’d expect from a program dedicated to pixel art.
It supports drawing, animation, layering, palette control, and much more.
GraphicsGale can export to several file formats too. It can handle both GIFs and sprite sheets making the program flexible enough to fit most workflows.
With GraphicsGale you can preview your animations in real time, which can greatly speed up the animation process if you’re into that kinda thing.
Another great feature is the ability to import images directly from a scanner or a camera using TWAIN imaging. This is great for artists who prefer to lay out their ideas on paper and then digitize them.
Unfortunately GraphicsGale is only available on Windows. It’s also missing some hotkey support compared to other programs.
This could be a problem for some artists but if you’re on a Windows machine then GraphicsGale is worth checking out.
Paint.NET
Price: Free
Platforms: Windows
Paint.NET is widely used as an alternative to Photoshop and GIMP by the Windows crowd. It should run on all versions of Windows from XP to Win10 and beyond with frequent updates from the team.
While not as robust as either GIMP or Photoshop, I do think Paint.NET is easy to use once you get past the interface.
It’ll also handle basic image editing so it’s a good choice for pixel artist who are looking for a lightweight program that can handle more than pixel art.
Paint.NET has a great community with plenty of tutorials and an active user base that can help you get started making your own sprites and other images.
Support for advanced features are available through plugins making the program more flexible than some of its competitors.
Compared to Photoshop and GIMP, Paint.NET is very easy to learn and will not require much time to pick up.
There are, however, a few major limitations.
For one, Paint.NET is only available on Windows. In addition Paint.NET doesn’t support multi-image editing, meaning you can only have one image open at a time.
This can be a big hindrance no matter what you’re using this for.
Despite these drawbacks Paint.NET is still a fun choice to try for budding pixel artists working in the Microsoft ecosystem.
Piskel
Price: Free
Platforms: Mac, Windows, Linux, Online
Piskel is a streamlined program dedicated to creating pixel art and animation.
It’s an excellent choice for artists looking for a free, bare-bones solution to their pixel art needs.
Not only is it offered as a free download, but there’s a web version available so you can try it out in your browser!
The clean interface means you can get up and running with Piskel in no time. There’s an animation previewer that provides real time playback which makes animating your sprites a breeze.
It packs enough features to meet most of your needs while being simple enough that beginners can easily learn the tools.
Piskel can export static images, GIF animations, and Spritesheets. Or all three!
I’ve seen some artist complain that Piskel is a little too limited.
And while it does lack certain advanced features, I think that may be part of the appeal for many of its fans. Sometimes minimalism is exactly what you’re looking for.
Piskel is a fantastic tool for those artists looking for a no-clutter program that puts nothing between them and their art.
Pixie Engine Editor
Price: Free
Platforms: Online
The Pixie Engine Editor is a free online tool that offers the very basic features necessary for making pixel art.
Most artists will find this program too limited for professional work. But beginners might enjoy it as a hassle free starting point for learning pixel art.
Unfortunately you can’t do much more than draw static images, but it does have a full color palette and the ability to save and open images.
There’s a community gallery on the site for browsing the work of other artists which is a great way to study others and learn.
Coloring Pixels - Spring Pack For Macbook
The Pixie Engine Editor also comes with a Tune composer which is handy for game developers looking to make some music or sound effects for their games.
As it stands I could see this editor being useful for game jams or prototypes where speed is more important than beauty.
The source code for the Pixie Engine is also available for free on GitHub if you’d like to fork the repository and use it as a base for your own pixel art creator.
GrafX2
Price: Free
Platforms: Mac, Windows, Linux
GrafX2 is a bitmap image editor inspired by Amiga Deluxe Paint. The original version was released over 20 years ago but the source code was later released as an open source project.
It has since been rebooted for contemporary machines and updated with brand new features.
GrafX2 is a fan favorite not only because of its retro origins, but because it boasts a powerful toolset and an intuitive interface.
It has everything you’d expect in a drawing program plus many unique features that make it a popular choice for artists.
There’s a “Spline” tool which allows for drawing perfect curves and a “Merge” tool which merges colors based on averages.
The “Histogram” tool will show a pallet of all colors used in an image and how many pixels they populate.
GrafX2 is scriptable in Lua which allows for automation and custom functionality. It also has features for working with repeat tilesets.
Because of its age, GrafX2 also has a large community and plenty of learning resources on sites like YouTube.
Not only does GrafX2 have a wide set of tools and effects, but its supports frame animation as well.
And despite having so many features GrafX2 is very easy to learn. Beginners can be up and running in a matter of hours. The software is also totally open sourced meaning it’s free to use, copy, and modify on all platforms.
The only complaints I’ve seen of GrafX2 is that the user interface looks ancient.
Personally I find the retro aesthetic charming and suitable to the art of pixel design, but that’s just me. Even with that drawback, the amount of features you get with this free program make it a must-try for any pixel artist.
iDraw
Price: Free
Platforms: Windows
iDraw is another simple pixel art editor that is mostly used by the RPG Maker community.
It comes with all the basic features you’d expect: selection tools, drawing tools, a customizable palette, etc. iDraw is popular among pixel artist who work mainly in the JRPG style that was popular in the 90’s.
Many years ago it was not unusual to see people using pirated copies of RPG Maker 2003 and iDraw to create their own RPG’s with custom sprites.
Now that RPG Maker 2003 has been revamped and released on Steam for $5 bucks, I suspect some users will want to download iDraw to complete their nostalgia.
As far as pixel art editors go, iDraw isn’t bad. But it lacks modern features for animation and the user interface is clearly dated.
This will probably turn off a lot of newcomers looking for a more contemporary program.
On the plus side, the RPG Maker community is alive and still going strong. So you’ll find tutorials for using these programs together all over YouTube.
I expect to see a bunch of these old-school RPG’s as people rediscover the joys of RPG Maker with iDraw.
Tile Studio
Price: Free
Platforms: Windows
Tile Studio is a graphics editor made for tile-based game art.
It contains a bitmap editor for creating tiles as well as a level editor for designing tile maps. Tile Studio will work with just about any programming language and can be customized to output maps, animation sequences, bitmaps, and color palettes to use with your own code.
This makes Tile Studio especially useful for level designers and game studios.
The program is open source and available for free on Windows.
With Tile Studio you can import tiles for existing images making it possible to reuse tiles from other programs. While the level editor is the main draw here, it also contains a fully capable bitmap editor complete with drawing tools and special effects.
Creating animations is easy and intuitive although it lacks some features compared to bigger programs.
After creating your frames you have the options of exporting them as either a sprite sheet or a tile sequence, which can be super handy for game developers.
While most of Tile Studio’s features are easy to use, some of the advanced tools can be difficult for beginners. Luckily the documentation is detailed and complete with tutorials to get you up to speed.

If you’re looking for a program designed to make tile-based level design as painless as possible then Tile Studio may be just what you’re looking for.
PikoPixel
Price: Free
Platforms: Mac, Linux
Piko Pixel is a free and open source application for creating pixel art on Mac and Linux.
The program is both easy to use and offers several features including a customizable canvas, unlimited undos, hotkey-activated popup panels, and layering.
It’s a good alternative to some of the Windows-only programs in the pixel art world.
While there are a few demos available to help you get started, the interface is so simple that I doubt you’ll need them.
Everything is self-explanatory and uncomplicated. This is very common with Mac programs but I’m surprised how well it works on Linux too.
While it lacks the advanced features of other pixel art programs, Piko can produce quality graphics in the right hands. Decent for beginners but maybe a little better for semi-experienced pixel artists.
Pixilart
Price: Free
Platforms: Online
Coloring Pixels - Spring Pack For Mac Os
Pixilart is much more than a drawing app. It/s marketed as a free online social platform for creative minds and game enthusiasts who want to learn about creating digital art.
It boasts over 10,000 new users a month, offers art contests, and provides a strong community geared toward getting young people involved in game design.
Founded in 2013, Pixilart set out to become THE social networking site for pixel art enthusiasts.
Even without the social aspect, Pixilart is worth checking out.
The drawing app is a delight to use with a sleek and modern interface. It packs all the basic features you’d expect from a pixel art program as well as some advanced tools like pixel-perfect drawing, easy dithering, frame animation, pixel text support, full screen mode, an autosave feature, and so much more.
With a plethora of settings and options Pixelart is highly customizable to suit any workflow.
Despite being geared to children and beginners, Pixelart is capable of professional work too.
In fact some pro artists will love the simplicity of the design. And because of the social aspect of the application it’s easy to find help others.
Also there’s tooltips you can toggle to guide your learning in case you’re having trouble.
Overall I found Pixelart to be one of the most impressive web-based pixel art apps available. I highly recommend it to beginners and advanced users alike.
Lospec Pixel Editor
Price: Free
Platforms: Online
Lospec is a relatively new web-based pixel editor designed to be accessible, pixel-perfect, and intuitive for all users.
Its goal is to be simple enough for the first time pixel artist while still being powerful enough for veterans.
As of writing this article the application is still in the early stages of development, but it already shows promise with a solid interface and an easy to understand toolset.
While currently lacking many of the top features necessary for serious professional work, Lospec is a good starting point considering the price and easy access(it all works online!)
It’s definitely worth keeping an eye on as the developers continue to update the app.
Related Posts:
Showing 12 coloring pages related to - Mac.
Pixel Coloring Sheet
Some of the coloring page names are A big macintosh my little pony coloring, Mack from disney cars 2 coloring, Picture of macaroni and cheese clipart images at, Esquire clipart 20 cliparts images on, Clipart of a cartoon cup of macaroni and cheese character, Lightning mcqueen coloring large, Mack clipart 20 cliparts images on, Test the iphone 6 screen size yourself with these paper models, The big apple coloring, Macally 7 color rgb backlit usb keyboard large led, Mac portefeuille trois volets en cuir pour homme, Mac portefeuille trois volets en cuir pour homme.
Pixel Coloring Pages
click on the coloring page to open in a new window and print. In case you don't find what you are looking for, use the top search bar to search again!
0 notes
Last Seen Blogs
nebulilli
Lilli

gamervenezolano24-blog
Ven y descubre algo nuevo ;)
protoformicestreak-blog
Mysterious Protoform

dokidobe
yellow.dr.monv

laurajdt
General Vagaries.