#i will probably put the site out once i finish the basic html for each page!
Note
Idk if you will but can you explain some of the stuff on the souyo iceberg…specifically the cut reversed dialogue cuz I’m interested in that
Also I’m super excited for the site if it isn’t already out Im gonna go crazy
well that's easy cos i just answered the same question on twitter! laskdjfdf maybe i shoulda put it lower.....
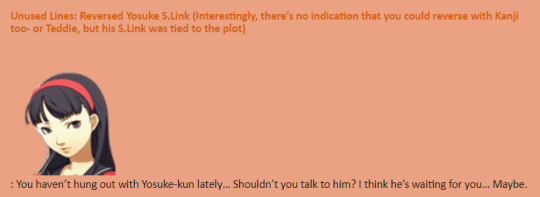
anyway cut reversed dialog, i'm just gonna copy paste my anser: in cut content there's more reversed/broken social links (ala p3)-- and in addition to the cut confession lines from yosuke's sl, if you talk to yukiko she say's this if yosuke's link is reversed (something true for other romanceable links)
i'll also explain some of the things below the iceberg

Drama CD #3: all of the drama cds basically have some souyo flirting but i think this one stands out (self plug); i don't think most people have actually listened to the drama cds so that's why it's down here
pulling Minato aside: this is just a random occurrence in PQ- requires to be doing the P3 route, only happens when you're going into a dungeon and Yosuke is not in your party, and rng for him to be the one to approach and not any another character; so it's down here cos i doubt many people have seen this rare event
souyo alarm clock: this one just makes me feral it exists (and i don't have it!!!!!!!!)
PQ2 trailer: this one is way down here cos i am fully delusional but it keeps me up at night why did they do this
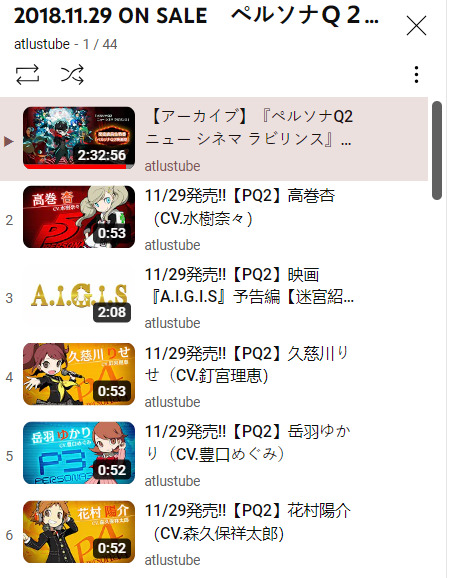

(the aigis is about the pq2 dungeon not the character; the right ss is a compiled video of all the trailers but it's the order they were put out)
#i will probably put the site out once i finish the basic html for each page!#though it will be a loong road of updates for some of these pages#souyo#throwing it in the tag enjoy
57 notes
·
View notes
Text
Oh glob, what have I gotten myself into? Just some long updates lol XD
Well, the year’s almost over, and it’s already the second half. The first half was too much and to be honest, I had to swim with the circumstances I am in right now so I had to put this passion non-profit project on hold, like seriously. But I did started translating the first few pages as early as December last year, as my very nice benefactor actually sent me the rest of the entire set of the Kakuriyo no Yadomeshi series after sending off the first 4 volumes. Probably read the entire thing first. But hey, free stuff is free so why complain. Plus my benefactor actually got the entire set for a steal, won’t say how much but in Amazon Japan, the last time I checked the whole set is roughly around $150 or a bit around that. and that’s just the first 7 volumes. Probably there’s an entire set now that’s about $200, as the final volume was released around August 2019.
Spoiler alert: the entire light novel series is made up of 10 volumes, so if you read it, the afterword by Yuuma-sensei specifically says that volume 10 is the final one, and Yuuma-sensei feels sad about it.

Yeah I highlighted that part in red, just in case many Kakuriyo fans still have some extreme hunger pangs or are unsure whether the novel series has ended. Here you go, straight from the horse’s mouth. Yuuma-sensei also has another Ayakashi light novel series, 浅草鬼嫁日記, roughly-translated to “Asakusa Wife from Hell Diaries”. Seems fun, they’re literally ogres - Oni living in the real world, like a reverse Kakuriyo thing. Who knows, maybe someday I can score that series too lol. The writer really likes Ayakashi, if it’s not that obvious yet 草 草 草 草 yeah I write kusa lol oml I should stop...
But returning to the Kakuriyo series.. I won’t spoil what happened lol but I will probably make a commentary on that once I get the translations up and running.
Which leads me to my next announcement:
I PLAN TO UPLOAD THE DIRECT TRANSLATIONS OF JUST THE INTERMISSIONS/INTERLUDES ( 幕間 ) AND THE AFTERWORDS (あとがき) OF EACH VOLUME.
Chapter 5 is the only complete and full English Translation that I will be uploading here, and the rest will be summarized versions of the chapters plus my translation notes and commentaries.
Bummer, right?
Well, to be honest, after starting my initial translations I ran into several issues which made me feel sucker-punched and added to the stuff I’m worried about:
Issues regarding plagiarism (either my stuff getting plagiarized or potentially being accused of it)
Translating everything actually takes too long, even for me (I’ll explain that later)
More serious issues like possible DMCA-ish complaints (won’t want my hardwork just getting flagged and killed)
Personal stuff piling up and affecting my momentum
To be honest, when I received the books, I was so excited to work with them and upload as much as I can. But lots of things happened one after another, plus the worldwide issue that we have right now, so doing fun stuff wasn’t at the front of my priorities. So at the moment, I am mostly offline, by necessity, like connection is slower and with data cap, so I mostly do my translations with whatever hardcopies of dictionaries that I have on hand, offline. It’s good and all since I can put my skills to the test, but it can be expected that not all of the words are available in the books so I still have to hook on Jisho just to find the missing words I need. So my stuff pretty much looks like this:
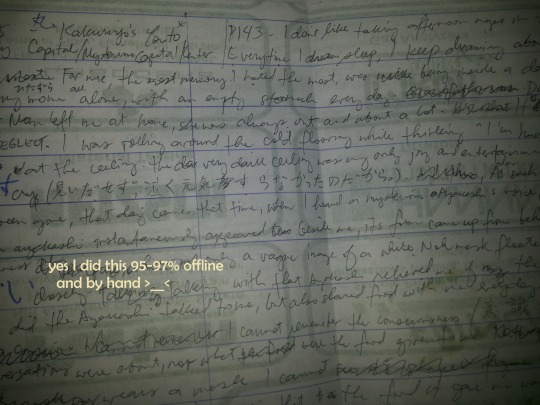
I could just take pictures of these and upload them here but the maximum number of pics that tumblr allows is 15, and good glob I have more than 15 pages of translated material. Plus, as you can see above, some parts are untranslated and I had to find them in Jisho once I get online, so right now I have about 50% word-processed with the raw parts cooked, and I only have 12 raw pages remaining to be cooked and hashed lol
Which leads me to my next issues: my slowness (yeah I have to surrender on my slowness) and my fears regarding plagiarism.
I actually only started doing these translations in full blast around 2 months ago, and eventually I had to slow down so I won’t get bogged down since I also do other stuff. But I found out that ploughing through it can get quite draining. I started thinking that fan-subbing and scanlating were easier because aside from working digitally, these were also mostly done in teams so work time gets cut. Well, those were the days lol But for this one, aside from flying solo, I had to use all of my offline resources a lot, like doing everything by hand. It finally broke me about half-way and I had to step away from it, like reaaaaally step away from it. I thought I could finish 50+ pages in a span of a week. Well, I wasn’t exactly wrong there, but I also had other stuff to do, and if I just read it like I would any book without having to do anything, it’s a done deal. But having to translate stuff was draining, I felt frustrated so it broke me. I have to write each page by hand, leave out the words I can’t find or don’t know, and move on to the next page until my body stops working. Rinse and repeat until I could finish about 10 pages and get on with the typesetting and completing the missing parts. That takes a while so I just do my best to be patient.
Then the thoughts of plagiarism popped in and out, like I started thinking how to ensure that my stuff doesn’t get stolen and reposted elsewhere, or worse, getting my site shut down because fan translations are ambiguously illegal, like fansubs and scanlations, and I think those were what got me the most, so I just gave up midway. I’d say ambiguously illegal because if a series or title wasn’t licensed elsewhere then translating it is a fair game. But if it’s already released as a translated version by publishers, then releasing a translated version is like labelled as stealing, even if it’s non-profit. Of course profiteering is the worst, some steal what others work hard for, that they did for free, and sell them off. Scumbags to the bone smh I do my best to be within the fair use thing since I understand how much effort is made in creating content, so at present I have just decided to just put up the intermissions and the afterwords because aside from these being only a few pages long, it’s less likely to get whacked. Plus it’s easier for my psyche to just sum up each chapter and add some comments on it so it won’t be taken down, plus I wont’ be too-attached so even if some nutjobs repost it elsewhere because some people are just unempathetic like that, at least I won’t be as resentful. Plus the afterwords are just so cute, Yuuma-sensei gives off an adorable and relatable vibe, so I feel like aside from just showing off her stories, I think she needs to get signal-boosted too, so people would have an idea on who wrote this hunger-inducing light novel series lol.
I only started to pick up the whole thing again about a week ago, and I still wasn’t fast but at least I got to add at least 20 more pages translated, plus I started to type the first pages and add the missing words so at the very least, I felt some sort of achievement. It gave me some hope, and to be honest I have been doing this to maintain my sanity even for just a bit, so I guess I will do my best to bring Yuuma-sensei’s work out into the world. It’s a really good series, and it got animated into 2 seasons, plus the manga’s out, so that says a lot on how the series caught on. It can’t be denied that it’s a really engrossing series, so I don’t see any reason why this really good series should remain hidden. It probably has a lot of fans but aren’t being too attached into it because of language barriers, and even in my own way, I would like to bridge that gap. I mean, I may have slow internet that can only open mails in basic html but hey, this is the least I could do for the fandom. It’s not like I spew out doujin stuff or anything lol
OK, so summing up this long-ass update:
Chapter 5 - The Mysterious Capital Youto** - coming soon
Will just translate the intermissions and afterwords into English
English summaries of the chapters plus commentaries will be uploaded
Please don’t expect any fast uploads lol it’s not like I do ctrl+A into Google translate and slap it in here. Nothing against doing that but.. uhm, sometimes AI don’t get the nuances translated, and a lot gets lost in translation, so at best, anything done by some trash enthusiast, even noobs can still have some oomph in it that soulless beings can’t even top off. But hey, that’s just my opinion lol
So yeah, there you have it, a long update. Oh, and I changed the name of this blog because I have other raw stuff that I may be able to put here without any fear of being taken down because they’re in the public domain, so they’re all fair game since I don’t get any profit from them anyway and others may also appreciate them too. Hint: One is a series of Japanese classic fantasy short stories, the other one is a set of instructional manuals on how to write kana and kanji in ballpen and brushpens. They’re a bit lighter so once I get Chapter 5 up I’ll do them as soon as I get rested.
See you all later and thank you for stumbling in this blog. xoxoxo
19 notes
·
View notes
Photo

Why We Moved a 20-Year-Old Site to Gatsby
We knew we had a problem.
In 2019, SitePoint was getting Lighthouse Speed scores under 10 on mobile, and between 20 and 30 on desktop.
Our efforts to control UX bloat were failing in the wake of a publishing business environment that sprang new leaks just as we’d finished temporarily plugging the last one. Our reliance on advertising, controlled by external parties, was a major obstacle to improved site performance. Our traffic growth had turned into decline.
On a site that provided people with a place to come and learn to code with best practices, this was not a good look. And it wasn’t a site we could feel proud of, either.
To make matters worse, operational bottlenecks had arisen that made adaptation a tricky logistical business. Our team was struggling to make changes to the site: having focused on our Premium experience for several years, we were down to one developer with WordPress and PHP experience. To test out code changes, the team would have to wait in a queue to access our staging server.
It wasn’t energizing work for anyone, and it certainly wasn’t efficient.
It was time to make some changes, and we set out to look for a solution. After a lot of research, we decided that Gatsby would be a great fit for our team. It would play to our talent strengths, help us solve all of the issues we had identified, and allow us to keep using WordPress for the backend so the editorial process wouldn’t need to change.
Why We Moved to Gatsby
[caption id="attachment_176594" align="aligncenter" width="1522"] The end result.[/caption]
Early in the research process, Gatsby started to look like a serious frontrunner. SitePoint isn’t a small site, so we knew that the tech we chose had to be able to handle some pretty intense demands. Gatsby checked all of our boxes:
We could code everything in React, a tech that every member of the front-end team knows and uses daily.
Gatsby is super fast at its core — performance was at the heart of this project, and we could start from a good footing.
The entire site is rendered as static, which would be great for SEO.
We could build it as a new project, which meant no worrying about the existing codebase, which brought a huge amount of legacy code with it.
We could use Gatsby Cloud, allowing the team to get feedback on the build at any time just by pushing the branch to GitHub.
DDoS attacks on WordPress wouldn’t cause us issues, as the front-end is completely stand-alone.
More Maintainable CSS with styled-components
Since we were going to rebuild the site from scratch, we planned to make some design changes at the same time. To help with this work we decided to use styled-components.
styled-components keeps the site’s styling easy to maintain, and we know where to look when we want to change the style of something — the style is always with the component.
How We Made the Build Happen
We started by following Gatsby’s basic docs and pulling in our posts with the gatsby-source-wordpress plugin.
This was a big initial test for us: we had to see if it was even possible to use Gatsby for our site.
After 20 years of blogging, we have over 17,000 posts published. We knew the builds would take a long time, but we had to find out if Gatsby could deal with such a massive amount of content. As you’ve probably figured, the test delivered good news: Gatsby works.
A quick tip for other teams working with large sites: to make development a better experience, we used environment vars to prevent Gatsby from fetching all of the site’s posts in development. There’s nothing quite like a 60 minute hot reload to slow progress.
if (hasNextPage && process.env.NODE_ENV != "development") { return fetchPosts({ first: 100, after: endCursor }); }
From this point, we ran into some limitations with the WordPress source plugin. We couldn’t get all the data we needed, so we moved to the WordPress GraphQL plugin.
We use Yoast to set our metadata for SEO, and had to ensure we were pulling in the correct information. We were able to do this with WordPress GraphQL. By doing it this way, the content team could still edit metadata the same way, and the data would still be dynamic and fetched on each build.
During the build, we would have three or four people in the team working on parts of the new blog. In the past, if they wanted to get feedback they’d have to push to our staging server and make sure nobody was already using it.
We found that Gatsby Cloud was a great solution to this issue. Now when someone pushes to a branch in GitHub, it creates a build in Gatsby Cloud along with a preview link. Our developers could share this link and get immediate testing and feedback much more effectively than before.
This faster feedback cycle made it easy to have multiple people on the team working on the build and put an end to a major bottleneck.
Launch Day Fun
On the big day, we launched the new site and ran through our initial tests. The new blog was flying — every page load felt instant.
We ran into some problems on SitePoint Premium, which started running into slows and even crashes. The culprit was a new element on blog pages that pulled in the popular books people were currently reading. It would do this via a client-side API call, and it was too much for Premium to handle due to the amount of traffic we get on the blog side.
We quickly added some page caching to the API to temporarily solve the issues. We realized we were doing this wrong — we should have been sourcing this data at build time, so that the popular books are already loaded when we serve the page to the user.
This is the main mindset shift you need to make when using Gatsby: any data that you can get at build time should be fetched at build time. You should only use client-side API calls when you need live data.
Once we’d re-written the API call to happen during the build, the first load of a blog page was even quicker — and Premium stopped crashing.
What We Still Need to Solve
While it’s hard to overstate how much better our on-site experience is today, there are still a few pain points we need to solve.
If a new article is published, or if content is updated — as it is multiple times per day — we need to re-run the Gatsby build before these changes show up.
Our solution for that right now is a simple cron job that runs at pre-scheduled times over the course of a day. The long-term solution to this is to add a webhook to the WordPress publish and update button, so that a new build is triggered once pressed.
We also need to get incremental builds running. Right now, the entire site needs to be rebuilt each time, and given our content archive, this can take a while. Gatsby just introduced incremental builds as we went live, and we’re working on implementing this on our site. Once that’s set up our builds will be much faster if the only thing that has changed is content.
Our speed score is still not where we want it to be. While the site feels subjectively very fast, we are still not getting consistent scores in Lighthouse. We want to get both mobile and desktop into the green zone (scores of 90+) for optimal user experience and SEO.
Would We Do It Again?
A launch of this type would normally be a pretty nerve-wracking event, and take a lot of work from the team on launch day.
With Gatsby, our launch was really easy. We just had to move WordPress onto a new domain, and point sitepoint.com at the Gatsby version of the site.
Then we sat back and watched the numbers to see what happened to our traffic. Within a few days, the data was starting to come in and we were seeing a 15% increase in traffic. User engagement metrics were up across the board. And we hadn’t even removed our ads yet (which, you may have noticed, we’ve since done).
It’s not hard to figure out why the effects were so immediate. We had better SEO running on static HTML and CSS pages, and massive speed improvements made possibly by the move to Gatsby.
Since we made the move, we’ve increased our Lighthouse speed scores from 6-15 on mobile to the 50-60 range, and from the 30s on desktop into the 70s. We wanted to ensure speed remained top of mind with this change, so we’re using a great tool called Calibre that runs speed tests over a number of top pages each day and alerts us to the scores. We are using this tool to continue to improve our score, so I hope to have another article for you in three months when we get everything to stay in the 90+ range.
The team loves working in Gatsby. The blog codebase was something that nobody wanted to work on. Now, everyone wants to take those cards thanks to the great developer experience.
If you’ve been eyeing a move to Gatsby and wondering if it’s ready for prime time, take our advice — it’s worth the switch.
Continue reading Why We Moved a 20-Year-Old Site to Gatsby on SitePoint.
by Stuart Mitchell via SitePoint https://ift.tt/2O3eMp5
0 notes
Text
Using GitHub Template Repos to Jump-Start Static Site Projects
If you’re getting started with static site generators, did you know you can use GitHub template repositories to quickly start new projects and reduce your setup time?
Most static site generators make installation easy, but each project still requires configuration after installation. When you build a lot of similar projects, you may duplicate effort during the setup phase. GitHub template repositories may save you a lot of time if you find yourself:
creating the same folder structures from previous projects,
copying and pasting config files from previous projects, and
copying and pasting boilerplate code from previous projects.
Unlike forking a repository, which allows you to use someone else’s code as a starting point, template repositories allow you to use your own code as a starting point, where each new project gets its own, independent Git history. Check it out!
youtube
Let’s take a look at how we can set up a convenient workflow. We’ll set up a boilerplate Eleventy project, turn it into a Git repository, host the repository on GitHub, and then configure that repository to be a template. Then, next time you have a static site project, you’ll be able to come back to the repository, click a button, and start working from an exact copy of your boilerplate.
Are you ready to try it out? Let’s set up our own static site using GitHub templates to see just how much templates can help streamline a static site project.
I’m using Eleventy as an example of a static site generator because it’s my personal go-to, but this process will work for Hugo, Jekyll, Nuxt, or any other flavor of static site generator you prefer.
If you want to see the finished product, check out my static site template repository.
First off, let’s create a template folder
We're going to kick things off by running each of these in the command line:
cd ~ mkdir static-site-template cd static-site-template
These three commands change directory into your home directory (~ in Unix-based systems), make a new directory called static-site-template, and then change directory into the static-site-template directory.
Next, we’ll initialize the Node project
In order to work with Eleventy, we need to install Node.js which allows your computer to run JavaScript code outside of a web browser.
Node.js comes with node package manager, or npm, which downloads node packages to your computer. Eleventy is a node package, so we can use npm to fetch it.
Assuming Node.js is installed, let’s head back to the command line and run:
npm init
This creates a file called package.json in the directory. npm will prompt you for a series of questions to fill out the metadata in your package.json. After answering the questions, the Node.js project is initialized.
Now we can install Eleventy
Initializing the project gave us a package.json file which lets npm install packages, run scripts, and do other tasks for us inside that project. npm uses package.json as an entry point in the project to figure out precisely how and what it should do when we give it commands.
We can tell npm to install Eleventy as a development dependency by running:
npm install -D @11ty/eleventy
This will add a devDependency entry to the package.json file and install the Eleventy package to a node_modules folder in the project.
The cool thing about the package.json file is that any other computer with Node.js and npm can read it and know to install Eleventy in the project node_modules directory without having to install it manually. See, we're already streamlining things!
Configuring Eleventy
There are tons of ways to configure an Eleventy project. Flexibility is Eleventy’s strength. For the purposes of this tutorial, I’m going to demonstrate a configuration that provides:
A folder to cleanly separate website source code from overall project files
An HTML document for a single page website
CSS to style the document
JavaScript to add functionality to the document
Hop back in the command line. Inside the static-site-template folder, run these commands one by one (excluding the comments that appear after each # symbol):
mkdir src # creates a directory for your website source code mkdir src/css # creates a directory for the website styles mkdir src/js # creates a directory for the website JavaScript touch index.html # creates the website HTML document touch css/style.css # creates the website styles touch js/main.js # creates the website JavaScript
This creates the basic file structure that will inform the Eleventy build. However, if we run Eleventy right now, it won’t generate the website we want. We still have to configure Eleventy to understand that it should only use files in the src folder for building, and that the css and js folders should be processed with passthrough file copy.
You can give this information to Eleventy through a file called .eleventy.js in the root of the static-site-template folder. You can create that file by running this command inside the static-site-template folder:
touch .eleventy.js
Edit the file in your favorite text editor so that it contains this:
module.exports = function(eleventyConfig) { eleventyConfig.addPassthroughCopy("src/css"); eleventyConfig.addPassthroughCopy("src/js"); return { dir: { input: "src" } }; };
Lines 2 and 3 tell Eleventy to use passthrough file copy for CSS and JavaScript. Line 6 tells Eleventy to use only the src directory to build its output.
Eleventy will now give us the expected output we want. Let’s put that to the test by putting this In the command line:
npx @11ty/eleventy
The npx command allows npm to execute code from the project node_module directory without touching the global environment. You’ll see output like this:
Writing _site/index.html from ./src/index.html. Copied 2 items and Processed 1 file in 0.04 seconds (v0.9.0)
The static-site-template folder should now have a new directory in it called _site. If you dig into that folder, you’ll find the css and js directories, along with the index.html file.
This _site folder is the final output from Eleventy. It is the entirety of the website, and you can host it on any static web host.
Without any content, styles, or scripts, the generated site isn’t very interesting:

Let’s create a boilerplate website
Next up, we’re going to put together the baseline for a super simple website we can use as the starting point for all projects moving forward.
It’s worth mentioning that Eleventy has a ton of boilerplate files for different types of projects. It’s totally fine to go with one of these though I often find I wind up needing to roll my own. So that’s what we’re doing here.
<!DOCTYPE html> <html lang="en"> <head> <meta charset="utf-8"> <meta http-equiv="X-UA-Compatible" content="IE=edge"> <title>Static site template</title> <meta name="description" content="A static website"> <meta name="viewport" content="width=device-width, initial-scale=1"> <link rel="stylesheet" href="css/style.css"> </head> <body> <h1>Great job making your website template!</h1> <script src="js/main.js"></script> </body> </html>
We may as well style things a tiny bit, so let’s add this to src/css/style.css:
body { font-family: sans-serif; }
And we can confirm JavaScript is hooked up by adding this to src/js/main.js:
(function() { console.log('Invoke the static site template JavaScript!'); })();
Want to see what we’ve got? Run npx @11ty/eleventy --serve in the command line. Eleventy will spin up a server with Browsersync and provide the local URL, which is probably something like localhost:8080.

Even the console tells us things are ready to go!
Let’s move this over to a GitHub repo
Git is the most commonly used version control system in software development. Most Unix-based computers come with it installed, and you can turn any directory into a Git repository by running this command:
git init
We should get a message like this:
Initialized empty Git repository in /path/to/static-site-template/.git/
That means a hidden .git folder was added inside the project directory, which allows the Git program to run commands against the project.
Before we start running a bunch of Git commands on the project, we need to tell Git about files we don’t want it to touch.
Inside the static-site-template directory, run:
touch .gitignore
Then open up that file in your favorite text editor. Add this content to the file:
_site/ node_modules/
This tells Git to ignore the node_modules directory and the _site directory. Committing every single Node.js module to the repo could make things really messy and tough to manage. All that information is already in package.json anyway.
Similarly, there’s no need to version control _site. Eleventy can generate it from the files in src, so no need to take up space in GitHub. It’s also possible that if we were to:
version control _site,
change files in src, or
forget to run Eleventy again,
then _site will reflect an older build of the website, and future developers (or a future version of yourself) may accidentally use an outdated version of the site.
Git is version control software, and GitHub is a Git repository host. There are other Git host providers like BitBucket or GitLab, but since we’re talking about a GitHub-specific feature (template repositories), we’ll push our work up to GitHub. If you don’t already have an account, go ahead and join GitHub. Once you have an account, create a GitHub repository and name it static-site-template.
GitHub will ask a few questions when setting up a new repository. One of those is whether we want to create a new repository on the command line or push an existing repository from the command line. Neither of these choices are exactly what we need. They assume we either don’t have anything at all, or we have been using Git locally already. The static-site-template project already exists, has a Git repository initialized, but doesn’t yet have any commits on it.
So let’s ignore the prompts and instead run the following commands in the command line. Make sure to have the URL GitHub provides in the command from line 3 handy:
git add . git commit -m "first commit" git remote add origin https://github.com/your-username/static-site-template.git git push -u origin master
This adds the entire static-site-template folder to the Git staging area. It commits it with the message "first commit," adds a remote repository (the GitHub repository), and then pushes up the master branch to that repository.
Let’s template-ize this thing
OK, this is the crux of what we have been working toward. GitHub templates allows us to use the repository we’ve just created as the foundation for other projects in the future — without having to do all the work we’ve done to get here!
Click Settings on the GitHub landing page of the repository to get started. On the settings page, check the button for Template repository.

Now when we go back to the repository page, we’ll get a big green button that says Use this template. Click it and GitHub will create a new repository that’s a mirror of our new template. The new repository will start with the same files and folders as static-site-template. From there, download or clone that new repository to start a new project with all the base files and configuration we set up in the template project.
We can extend the template for future projects
Now that we have a template repository, we can use it for any new static site project that comes up. However, You may find that a new project has additional needs than what’s been set up in the template. For example, let’s say you need to tap into Eleventy’s templating engine or data processing power.
Go ahead and build on top of the template as you work on the new project. When you finish that project, identify pieces you want to reuse in future projects. Perhaps you figured out a cool hover effect on buttons. Or you built your own JavaScript carousel element. Or maybe you’re really proud of the document design and hierarchy of information.
If you think anything you did on a project might come up again on your next run, remove the project-specific details and add the new stuff to your template project. Push those changes up to GitHub, and the next time you use static-site-template to kick off a project, your reusable code will be available to you.
There are some limitations to this, of course
GitHub template repositories are a useful tool for avoiding repetitive setup on new web development projects. I find this especially useful for static site projects. These template repositories might not be as appropriate for more complex projects that require external services like databases with configuration that cannot be version-controlled in a single directory.
Template repositories allow you to ship reusable code you have written so you can solve a problem once and use that solution over and over again. But while your new solutions will carry over to future projects, they won’t be ported backwards to old projects.
This is a useful process for sites with very similar structure, styles, and functionality. Projects with wildly varied requirements may not benefit from this code-sharing, and you could end up bloating your project with unnecessary code.
Wrapping up
There you have it! You now have everything you need to not only start a static site project using Eleventy, but the power to re-purpose it on future projects. GitHub templates are so handy for kicking off projects quickly where we otherwise would have to re-build the same wheel over and over. Use them to your advantage and enjoy a jump start on your projects moving forward!
The post Using GitHub Template Repos to Jump-Start Static Site Projects appeared first on CSS-Tricks.
Using GitHub Template Repos to Jump-Start Static Site Projects published first on https://deskbysnafu.tumblr.com/
0 notes
Text
Consulting Jobs - the Right Way To Pass The Interview
Career planning can occur any time during your adult work life. After college or high school graduation, after leaving the military, after ending a romantic relationship or after any other significant part of your each day. In my case it has happened 2. The first time was after i graduated college with a level in Psychology that I pursued because I liked the curriculum and staff, not because I thought to pursue because a employment option. The second time was after i relocated with my and also faced my prime earning years.
You probably don't try to be smothered on your mother or your father, but attending family reunions or getting together for a barbecue now and then pumps your current happiness concentration. Having people around you that you love, trust and treatment of makes you are that you're not alone.
It's always better appear for for data-entry programs by you end up being work through the internet. Such programs will always easier to handle with an individual also get online services. Data entry Find ikman Jobs in Sri Lanka which may be purchased online guide you earn much more money. If you receive a choice, always bridal party data entry job that involved numbers and numbers. It's a lot better to handle with such work an individual can finish it in the lesser quantity of time. Handling numbers is often less hassle then compared to symbols, names or addresses.
This is definitely not new on the internet of product or service sales. It is basically nothing more than selling on commission except it could be the young who're using their skills of the internet to obtain an income coming over. It can be used to buy their first car, rent a flat or even to put themselves through college but what many are finding is this is often a great strategy to earn money for them-selves.
If you never really done much plumbing work then like anything truly expect the process of repairing, installing or building in order to you longer than for the full time plumbing technician. For instance I conducted a job not back then that customer was so fed at the top of installing a kitchen sink that present tv me to set up his bathroom sink. As i was using his bathroom sink he asked just how long and the amount it would cost to install a bowl. I declared most plumbers can do one below two hours depending exactly what was integrated. He was very handy, trip took him 6 hours to install his washing up bowl. Mostly hanging out going and also forth on the store.
Overall, MA is still doing much better than the remaining portion of the country, considering that MA unemployment rate of 8.8% ikman Jobs in Sri Lanka is always lower as opposed to a national unemployment rate of 9.4%.
Setting up a website for the young today is actually that can be done extremely. Many can do it and people who cannot could have a friend who have the ability to. It is this sort of thinking which lead to Facebook so one more no debate that some among these kids cannot go in order to form full companies with staff rrncluding a full time salary. To obtain the most out of a website all you need to do is find something to sell that men and women buy over the internet. Get people who are searching for those products with your site before allowing them through for the merchant's . Once a purchase is actually a commission is -earned. Simply! While many imagine that the young spend to much online the educated few are not playing games but building their future empires or even trying that can.
Cut the wings out of cardboard. I would suggest making them slightly smaller, as they will be more stable. You're able reinforce red wings by running small sticks along the lining length for the wing. Paint the main section from the wings green. You might want to tape off a line along the top of the the wing to make it simpler to paint later. Buzz has small green pods on the final of his wings, that you just in-depth you decide to go is under your control. https://srilanka.embassy.gov.au/clmb/AustralianHighComission07.html can trim these pods out of foam, or make them flat and cut them out of cardboard.
0 notes
Text
Ecommerce SEO: How To Increase Traffic To Your Store
Let me ask you a question:
What’s the difference between a successful e-commerce store and one that barely breaks even every month?
It’s not the range of products it offers.
It’s not the quality of its design either.
It’s the way it attracts qualified traffic at scale.
From all the available marketing channels an e-commerce site owner has, SEO is on a completely different level.
Here’s why:
Once you get your website to rank consistently, you can guarantee consistent sales for the long-term
BUT:
Ecommerce SEO is difficult and there’s a lot you need to do right to make your website stand out in Google’s search results.
Plus most people go about ecommerce SEO the wrong way by picking keywords with high search volumes.
So I am going to teach you everything there is about ecommerce SEO to take your store from the bottom, to the top of the search engines.
While other ecommerce SEO guides focus on the theory, I am going to tell you everything you need to know and how to do it.
This means I will show you only what matters. There will be no fluff in this guide or topics that do not relate to ecommerce SEO in 2018, only applicable, 100% field-tested tactics that work.
These are the same tactics my team and I have personally implemented for my ecommerce clients and I’m going to guide you through them.
Why SEO Is Critical For Ecommerce Stores
I have heard people say that SEO doesn’t apply to ecommerce and that Google will naturally pick them up and bring in new traffic.
This simply isn’t true.
Because if your competition are optimizing their websites and you’re not – the result?
They’re taking ALL your traffic and customers and having put a number of my clients competitors out of business – you ignore SEO at your own peril.
Simply put if you’re not taking ecommerce SEO seriously- you’re losing money. Period.
However, It’s not just the traffic you should care about. Traffic on its own doesn’t necessarily translate into sales – I’m sure many of you can vouch for this.
It’s the money that people spend with you that makes SEO so important.
Let’s think about that for a second.
Say you wanted to rank #1 for the keyword “gymnastic rings” According to Ahrefs, that keyword has 3,700 searches a month in the United States.
Ranking #1 would result in an extra 2,100 visitors per month.
Assuming that 5% of that traffic converted, you’d make 105 sales a month. If each sale was worth $25 to you, you could generate $2,625.
That’d represent $31,500 worth of sales a year for one keyword and one product alone!
The keyword “gymnastic rings” is a short-tail word, however. If you sold many types of gymnastic rings, you could use that keyword as your category.
If you targeted a more long-tail version of that keyword for specific products, like “wooden gymnastic rings”, “best gymnastic rings” or “metal gymnastic rings” you could probably double, or even triple the organic traffic together with your revenue.
That’s the power of SEO for ecommerce.
SEO is a machine that pushes qualified traffic into your store. Traffic that converts. Traffic that puts money in your pocket.
Your aim should always be to increase the authority of your store, so you can rank all your pages better. But knowing where to start is a huge help!
Focus on your category pages first, and this is why:
Customers love to have the freedom to choose and explore their purchase. They want to see multiple products at different prices, with some good options. This can also help increase your AOV (average order value) across your website. So setting up category pages with a high ranking keyword is something that will work well for the optimization and the authority of your store.
To do ecommerce SEO right, you must learn all the basics of it. Here’s everything you need to know.
Start With An Ecommerce SEO Audit
Nearly every new ecommerce SEO client makes the same mistake. They want to get straight into executing a link building strategy without taking care of the on site SEO foundations.
That’s like building a house without a blueprint.
You can do it, but it probably won’t work out. You need to make sure your store doesn’t have any on-site SEO problems before doing anything else.
Common problems include having a site that:
To make sure your store doesn’t have any of these problems, you can avoid having a poorly optimized website by running through one of the best SEO audit tools: Screaming Frog.
You could also use the SEMRush or Ahrefs onsite audit tools as well if you don’t have Screaming Frog already.
Here’s how you do your ecommerce SEO audit step by step.
Ecommerce SEO Audit with Screaming Frog
To start, go to the Screaming Frog website and download their software. Screaming Frog is a tool you can use to crawl your entire site as if you were a Googlebot.
The best part is, it’s free up to 500 URLs. If you need more, you will need to pay the yearly license for £149.
But trust me, this tool will pay for itself with how much of an advantage it gives you.
Let’s say one of your clients was Chubbies, the men’s shorts company. To start analyzing their site, I’d first take their main URL, and add it to Screaming Frog and hit the “Start” button.
Once the crawl is finished, export the results. To make the exported file simpler, I will first filter the results by HTML, so I can get only the pages and ignore the Javascript files and images, among other things-
What you see in front of you will be the dashboard to fixing all of our on site SEO problems.
Now is also a great time to save the project, just click on File > Save and we can move onto fixing the most common problems first.
Duplicate Content
I have never had an ecommerce SEO client that didn’t suffer from huge amounts of duplicate content. That is when 2 or more pages have the same or very similar content.
This is often the cause of ecommerce SEO penalties like Panda and is one of the biggest negative SEO signals a site can have, so I like to take care of duplicate content first.
Although Screaming Frog is great at finding duplicate content I actually use a second free tool alongside Screaming Frog to make sure I go deep and catch everything.
So first let me show you how to find duplicate content with Screaming Frog.
Finding Duplicate Content With Screaming Frog
To find the pages with potential duplicate content issues, go to the URL tab in the second menu, and on filter, click “Duplicate.”
This report shows you all the pages that have duplicate content.
In this case, we can see the main cause of the duplicate content issue is the use of parameters-
Drilling down into this specific issue further, I can see that if they applied correct canonicalization tags – that would go a long way to fixing the issue.
But that’s not the only duplicate content issue they have…
Finding Even More Duplicate Content With Siteliner
Go to Siteliner, and in the search box, add your website.
Siteliner will take a few minutes to analyze your whole site and give you a set of results.
Even though the tool analyzes you up to 250 URLs for free, it still gives a simple panoramic view of the internal links of your store.
Under “Your Top Issues” you will find the most pressing issues.
In the case of Chubbies, they seem to have many problems, so I clicked on the second link, and then on the link at the end of the message.
Once you do that, you will be shown the complete list of URLs organized by the number of words matching, the percentage, and the pages the content matches with.
To see what pages each URL matches with, click on each result.
It looks like during their Black Friday promotions they created lots of landing pages with very small variations which resulted in huge volumes of duplicate content.
Those duplicate pages should have had the noindex tag applied to them.
If you find many stances of duplicated content like we do here, go back and in the left column, click on “Download Site Report.”
Then work your way through each duplicate content issue until they are all resolved. If you optimize your site by clearing out your duplicate content you have ticked off one of the key factors.
Find Missing Canonical Tags
It’s easy for a page to have multiple URLs pointing to it, which cause duplicate content.
Much like in the example above that had kits if different versions of the same URL-
An easy solution to duplicate content like this is to define a canonical URL to each page; that is, the page that Google needs to consider as the “definitive” URL to crawl and rank.
To find whether your pages have canonical tags on them or not, go to the URL tab.
Scroll to the right, and see the “Canonical Link Element 1” column.
In this column, you can see the canonical URL that the rel=”canonical” tag shows in the HTML of the page.
The pages with empty spaces have no canonical URL tag associated with it, which makes them more likely to have duplicated content.
Export the results and make sure to associate one URL with each page shown.
Missing or Duplicate Title Tags
Title tags are without a doubt the most important on-site element of your website. You need to make sure none of your title tags are missing or duplicated.
To check on this issue, go to the Page Titles tab, select the “Missing” option, and export the results.
With all these pages, you want to add the respective title tags.
Repeat the previous process but click the “Duplicate” option.
Export the results, and with the pages that have duplicate title tags, make them unique.
It’s also worth noting that Google currently displays up to roughly 65 characters. If you want to keep things looking clean in the SERPs, limit yourself to 65 characters.
Be sure to include a keyword in the page title too. This is huge!
If your page is about yellow shorts, then your page title might be “The Best Yellow Shorts for Men – Chubbies”
This really helps Google, and your customers, understand what this page is about. If you include irrelevant terms in the page title, people may not be happy with what they find on your page.
And if you really want to take your title tags to the next level, you should check out some of these SEO copywriting tips.
Missing or Duplicate Meta Descriptions
Even though meta descriptions don’t have much SEO weight, they can help you increase your website’s click-through-rate.
The process to find both the missing and duplicate meta descriptions is the same as the one you followed with the title tags.
First, go to the Meta Description tab, and filter the results by “Missing”.
Repeat the process by selecting the “Duplicate” filter.
Add relevant meta descriptions to the pages that miss them, and create unique ones to those that have duplicate descriptions.
The current recommendation is to reach between 200 – 320 characters in length, and since Google highlights the search query in your description – be sure to include keywords.
Again make sure you take advantage of these copywriting tips to attract as many clicks as possible from the SERPS. So get that extra click and sort out your meta description.
Missing Alt Tags
Images not only give context to your content, they also let Google understand the meaning of a page. Unfortunately, Google can’t read images (at least not fully, yet).
To overcome this issue, you need to add alt-tags to your images which help Google bots crawl your website better.
Here’s how you find the pages that have images without alt-tags:
First, head over to the Images tab. Then, filter the results by “Missing Alt Text.”
With all the pages that have missing alt-tags, you are going to go and add the keywords you want those pages to rank for.
I have found to get the best results, keeping things natural is a winner.
Since people that are visually impaired use screen readers to help them out, a natural description helps them understand images too.
Lots of verbs, nouns, and adjectives can help both the user and Googlebot to understand the context while giving you opportunity to work in some long tail keyword variations.
Find 404 Error Pages
If you have ever used a website and reached a 404 page, you’ll know that broken pages suck.
And just for the record – Google hates them as well. So it’s better to fix them sooner rather than later.
To find your 404 pages, go to the Response Codes tab, and filter the pages by “Client Error (4xx)“.
There are two options you have for these pages:
But something even worse can sometimes happen.
If your product pages disappear from your shop when a product goes out of stock and Google doesn’t recrawl them, they’ll stay live in the index for ages.
This means that people will still find your broken pages through Google which makes for a very bad first impression.
And with ecommerce, you only get one first impression.
Find Deindexed Pages
Your store may have some pages unintentionally deindexed, which can cause an abrupt decrease in organic traffic.
I can’t tell you how many times this happened when I worked in the corporate world and the development team would forget to remove the NoIndex tag when pushing the site from a dev environment to live.
Literally like – every time /facepalm
This caused huge losses of both traffic and sales for weeks and it is something you should pay attention to.
There are 2 ways I like to find out if pages are indexed or not.
The first is in the right column of Screaming Frog, scroll down and find the Directives Category and then click on NoIndex–
This will return a list of URLs that have the noindex tag applied to them and double check if those pages should have that tag or not.
The other way I like to check if pages are indexed or not, is with Google Search Console.
In the left column, click on Crawl > Sitemaps.
Google Search Console analyzes your sitemap and tells you how many pages it crawls and how many it indexes.
As you can see, in this example, there are 13 pages that aren’t being indexed.
Click on that box, and Google will show you what could be causing the difference.
Scroll down, and click on the errors and warnings buttons.
In here, you can see what problems Google had when crawling and indexing your store.
Take the URLs affected and follow the advice shown by Google to solve each issue.
If you don’t have a sitemap, then you can use Screaming Frog to create one. Once you’ve completed your crawl, simply use the Generate Sitemap feature on Screaming Frog.
Once you select this, you will be prompted on whether you want to make changes to any of the default settings. It should look like this:
Most of the settings such as Last Modified, Priority, and Change Frequency are often ignored by Googlebot. So the main thing is whether you want to include the following:
I keep it simple and leave those unticked to only include the core pages, this helps save Google’s time whole maximising your crawl efficiency.
Find 302 Redirects
If you decide to stop selling a product in your store, this may show up as a 404 on your website. As stated before, you want to either redirect these pages or fix them if they’re just broken.
But there are two type of redirects, and they tell Google different things:
As a rule of thumb, you will always want to use a 301 redirect because they pass the link equity of the old page to the new one.
This also tells Google that your new page is the permanent home of the old page. Whilst a 302 will tell Google that the page is coming back and keep trying to index it.
If you have ever done a 302 redirect, you want to change them immediately to a 301 one so you can get the SEO value.
To check this, go to the Response Code tab, and filter the results by “Redirection (3xx)“.
Then you can sort by status code, and find all your 302 redirects.
To those following along with the audit, you can see above there is a 307 redirect. The status next to it states it is an HSTS Redirect.
This is a cached redirect that stays in your browser and tells it [Chrome, Safari, etc…] that all communication should happen over HTTPS.
Setting this up is outside the scope of this article, and offers very little SEO benefit over a simple 301 redirect.
However, both of these are setup using the .htaccess file on your server.
If you’re using a platform such as Shopify, then you will not have access to your server, as most of this is handled for you already.
Ecommerce SEO Audit with SEMRush
You can also use SEMRush to complete your ecommerce SEO audit with their dedicated auditing tool.
It’s not as advanced as Screaming Frog but it is all packaged up in a simple to use and easy to navigate interface.
Instead of having to export the results and analyze them on your own, SEMrush gives you the Overview Report which shows you the most frequently found problems on your website-
Then you can drill down even further with a list of specific problem in the Issues Report.
This also explains how to fix each issue and why it is important for you to fix them-
And you can also group all of the issues by URL.
Just click on the Crawled Pages tab and you can see all issues by page and re-audit the URL in one click when you have fixed the problems-
How To Access The SEMRush Site Audit Tool
To run the Site Audit report, go to the left-side menu, and under the Management tab, click on “Projects”.
If you haven’t added your site yet, click on the “Add New Project” button on the top right side.
Once you have added your site, click on the top left button that says “Site Audit”.
In there, you will see your store’s audit with all its main problems shown.
Click on every problem you find and see what SEMrush recommends you do.
For example, after I clicked on “Show Issues” SEMrush shows me a list of problems they found which I should fix right away on one of my client’s stores-
With this list of suggestions, I can work with my team to fix them right away.
I suggest you start with the errors first, and once you have fixed those issues, move to the warnings and notices.
Accelerate Your Success With Website speed
Before moving on, I want to touch on two important aspects of your store’s on-site SEO. The first one is how quickly your website loads.
We’ve all done it before, been searching on ecommerce websites that took too long to load so we just leave. In other words if your store is too slow you won’t be getting paid or receive any positive reviews any time soon.
Research has shown that 40% of people abandon a site that takes longer than 3 seconds to load.
Imagine all the valuable traffic you could be losing due to this small mistake.
In my personal experience, I have been able to increase earnings by $30,000 in 6 hours by increasing my website’s speed.
You can expect to find similar results in your sales by improving your store’s speed.
To check your ecommerce store’s speed, go to GTMetrix. Add your store and run the test analysis.
As you can see in the results above there is HUGE room for improvement for this ecommerce website.
When a site is taking nearly 5 seconds to load we can assume that 40% of people are abandoning the site – what effect do you think that is having on annual revenue?
GTMetrix will also make a range of suggestions of things that you could improve on to increase site speed-
I suggest you have a developer work through these issues for a few days and please re-test regularly.
You might also want to consider upgrading your web host to someone like Kinsta if you are running WooCommerce.
Store Architecture
Another important element that affects the user experience and Google’s search engine crawl is your store architecture.
You want to have a simple, user friendly site hierarchy, which separates your homepage from your product categories and your products listed within them.
A good rule of thumb is to make it easy for your visitors reach your product pages from your homepage within three clicks.
If you can build your store that way, navigation will be easier for humans and the structure better for search engines to crawl.
This can be seen in Screaming Frog really easily, in two different ways.
The first is to change from List View to Tree View. Now instead of seeing a long list of URLs, you’ll be viewing the overall site architecture:
Notice how Shopify neatly puts everything into /pages/, /collections/ and /products/, this makes it easy for Google to understand the site structure.
The other thing you should check is in the List View.
It’s called crawl depth, and it shows the shortest route to that page, based on which page you started from.
Let me explain:
If you start from your homepage, this is ground zero – your starting point.
Every page you link to from your homepage is now assigned a crawl depth of 1, because that’s how many clicks it would take.
Then Screaming Frog reviews every page that your crawl depth 1 pages links towards, and these are all assigned a value of 2. This goes on until the crawl is completed.
On the right-hand side, you’ll notice a window that shows the overview, site structure, response time, and API.
If you change this from overview to site structure, you’ll get a super useful graph to show you how many clicks your pages take.
Notice with Chubbies nearly everything is only 2 – 3 clicks from the homepage – this is a good site structure.
If yours has a lot more pages towards level 7 – 10, well then you’ve got some work to do with your site.
Keyword Research for E-commerce SEO
Even though Google has hundreds of ranking factors inside its algorithm, SEO still comes down to one major aspect of it: keywords.
This is the most important thing to keep in mind when it comes to on-page SEO.
Finding relevant keywords that bring qualified traffic to your store is one of the most important boxes to check when you conduct your SEO audit.
The Four Things Ecommerce Keywords Must Have
Keyword research is an art form in itself and this is especially true when it comes to ecommerce SEO.
Unlike normal keyword research there are some additional factors you need to consider.
I am going to show you the best practices of how to find and analyse keywords in a moment, but for now let’s take a look at the 4 factors you need to pay attention to when generating keywords for your online store.
#1 – Search Volume
You can target a keyword with the best intent, low competition, and highest relevance, but if no one searches for it, your store won’t benefit from it.
The first factor to consider when doing keyword research is search volume.
In some niches, an average high-traffic keyword has over 10k searches per month, whereas in other niches 1k monthly searches is a lot.
Therefore, the best way to determine the best volume for a keyword is to take other high-traffic keywords as a benchmark.
Also, you need to consider the other three factors below before selecting a keyword. It can be tempting to select a keyword with the highest search volume, but that can end up doing more damage than good.
#2 – Intent
A common mistake SEO beginners make is that they try to target the keyword with the most amount of traffic possible.
Not only do they forget that one of the other factors (i.e., competition) makes it difficult to rank for, they also forget that it doesn’t matter how much traffic you have if it doesn’t convert into sales.
When you optimise a page, your goal shouldn’t be to acquire organic traffic; your goal should be to attract qualified traffic.
That means you want people to get to your website who are at the right stage of the sales funnel.
A sales funnel has four steps-
You want to draw the attention of people at the early stage of the funnel as well as the people who are at the end.
Generally speaking, the lower stages are smaller because there are fewer people in them. This isn’t bad at all; it means those fewer people have money ready to spend.
Using Google analytics you can see if you attracted 10,000 people with a 0.5% conversion rate whose average order value is $20, you’d bring $1,000 in revenue.
On the other hand, if you attracted 2,000 people that convert at 5% with an average order value of $20, your revenue would go up to $2,000.
Building more traffic does not equal more sales for your business. Only increasing qualified traffic will equal more sales.
That’s the power of targeting keywords with the right intent.
Awareness Keywords
People at the awareness stage of the funnel tend to search websites for content that explains a problem. They use keywords that include-
Interest Keywords
People who already are looking for a solution to their problem, tend to use keywords that include words like-
Evaluation Keywords
Once a user starts to evaluate different products, they make searches with words related to a specific product, like:
Purchase Keywords
Finally, the people at the end of the funnel look for the best place to buy. They want a good offer, that’s why they use keywords like-
If you optimize the content on your pages for these kind of keywords in each of the stages of the funnel, you will bring people with the right intent.
#3 – Relevance
To acquire the right audience you don’t only need to attract people with the right intent, but you also need to make it relevant to your store’s offerings.
This will increase the sites conversion rate.
Picking relevant keywords is simply a matter of thinking what you can offer that matches the given keyword.
Let’s say you worked for Chubbies, the company shown before, and you found the keyword “sports shoes” has over 10k searches per month in the United States.
If you take into consideration what they sell, you’d know it wouldn’t make sense to optimise their pages for that keyword as they don’t sell sports shoes.
The same logic should apply to your own store. Only optimise your pages for keywords that are relevant to your products.
I have found it’s super useful to look at the top 10 results for a keyword. This step takes longer, but it’s worth it!
If the pages that rank in the top 10 positions are similar to yours, then you have a good chance to make the first page.
Even better, if there’s lots of adverts – it’s probably very profitable. That’s two birds with one stone, and informs your entire strategy.
#4 – Competition
Keyword competition can be defined as the average authority a given page should have to achieve a top position for a particular keyword.
You must pick keywords for which you can realistically rank.
Let’s say you wanted to position for the keyword “cheap laptops.” If you take a look at Google’s results, you will see this:
To rank for that keyword, you’d need to compete with companies like Amazon, Ebay, and Walmart. As you know, these big brands have a level of authority you likely can’t compete against – yet.
So it’s better to attack the longer tail, lower competition search keywords first
But how do we find them? You can use either SEMRush or Ahrefs–
Ecommerce Keyword Analysis With SEMrush
SEMRush has a featured called “Keyword Difficulty,” which tells you about the competitiveness of a given keyword.
To find the keyword difficulty, enter the keyword you want to rank for in SEMrush search bar like this:
Then, head over the left menu, and click on “Keyword Difficulty“.
Here you can see the keyword we entered has a keyword difficulty of 75%, a very high value-
If you click on the keyword difficulty percentage, you will see the top 10 pages that rank for it with their respective domain strength.
As you can see, many high-authority sites rank for this keyword. Unless you had a store with a similar domain strength, the best idea would be to ignore this keyword or use a modifier that targeted a lesser competitive term.
SEMRush makes this easy, just head back to the keyword overview page and check out some of the phrase match or related keywords they recommend-
Then just rinse and repeat the process to check how competitive they are. The lower the competition, the easier and quicker it is for you to rank!
If you want to learn more about keyword research with SEMRush then check out my much more detailed tutorial here.
Ecommerce Keyword Research with Ahrefs
Head over to the Ahrefs Keyword Explorer, enter your keyword and click “search”-
For the same keyword analyzed before, SEMrush gives a completely different picture. It shows a keyword difficulty of 1, based on the fact almost all the pages in the top 10 positions have no backlinks.
The results shown from both tools let us see neither tool is 100% correct. You should always search with both tools and see what results they give you.
While SEMrush focuses on the domain authority, Ahrefs focuses on the average amount of backlinks the top 10 results pages get.
Another great tip is to look at the URL rating for the websites that are currently ranking. This can be seen in the keyword explorer as well-
As you can see, having the highest URL rating doesn’t necessarily mean you will be the top ranking website. However, when you look at thousands of keywords, you’ll notice that there is a fairly good correlation.
Still not convinced?
Check out this Ahrefs blog post that looks at their own metrics. Whilst URL rating is not the same as Google PageRank, it has a pretty good correlation.
If you want to take your ecommerce keyword research to the next level with Ahrefs then I suggest you check out this tutorial.
How To Steal Your Competitors Best Keywords
You might be wondering:
What do I do if I don’t know which keywords I want to rank for?
A simple and effective way to tap a huge amount of keywords is by analyzing your competition and stealing all of their best keywords.
This is really easy to do with SEMRush and Ahrefs–
The SEMrush Way
Let’s say you sold longboards and one of your competitors was Skate Deluxe. You’d first put their URL in the search field:
Then, you’d need to click on the “Organic Research” link on the right handside-
There, you would see all the keywords Skate Deluxe is ranking for:
With this list, you’d need to export it and start analyzing it to find keywords that fit the 4 factors we talked about earlier.
For example, let’s say you think the keyword “skateboard tricks” would work on your site.
According to SEMrush this keyword has 6,600 monthly searches in the US, a keyword difficulty of 64%, and a CPC of $7.
So let’s take a closer look at the 4 factors we need to consier-
Overall this keyword would be good to use at the top of the funnel to acquire traffic for lead generation.
But it’s highly unlikely this keyword would deliver any significant uplift in sales revenue.
So now just rinse and repeat the process for each of your competitors best keywords. Review each of them against the factors above and decide whether or not it is something you could target.
Finding Even More Competitor Keywords With SEMRush
If you want even more keyword ideas, go back to SEMrush and click on the “Competitors” button:
There you will see a long list of domains that compete with your main competitor the search results.
Which means they also compete with your website!
But luckily for us we can just click on each one to find all of their best keywords as well.
So rather than just stealing your main competitors keywords, you can steal ALL of your competitors keywords.
Mwahahahaha!
With the list of domains shown by SEMRush, you repeat the same process shown above and get more ideas.
The Ahrefs Way
With Ahrefs we can repeat the same process like the one I showed you with SEMrush.
Add your competitor’s website into the search field and click on the “Search” button.
In the right sidebar, click on the “Organic keywords” report.
To make the analysis easier, let’s play with the filter bar a little-
Starting with the “Difficulty” filter we can easily find the low-hanging fruits.
Keywords that are relevant and have a moderate to high search volume but that have low competition. I’ll define the maximum difficulty to 25-
We can keep filtering the keywords by-
and more…
For the sake of this example, I will filter the keywords a bit further based on CPC. I will add the filter to get keywords that have a minimum CPC of $2.
That means that your competitors are happy to spend $2 just to attract a single click from Google-
As you can see, you will find keywords with lower monthly searches but that are more focused on conversions.
This is good, as you want qualified traffic in your store.
Then just check the competition levels of each keyword as I taught you earlier.
At the end of this exercise, you should have a good list of keywords ready to use in the next section of this tutorial which focuses on on-site optimisation.
Optimising Your Stores On-Site SEO
In the last section we found and fixed all of the foundation on site SEO problems.
Now we are going to build on that foundation by optimizing your store from the ground up for your target keywords.
I already explained some of these SEO ranking factors in another article, so here I want to show you how they apply to an e-commerce store.
Let’s get started.
Your Title Tags
The title tag is one of the strongest SEO signals. Adding your target keyword in the title tag will help you increase the rankings of your pages.
The type of keywords you use will really depend on the type of page you are optimising.
You also want to consider that the title tag will be shown in search results so you need to write your title in a way that not only includes the keyword, but also entices people to click on your result.
For example on a category page you might use-
Where as on a product page you would get more specific-
Take a look at some of these SEO copywriting tricks to get a better idea of how to optimise your title for keywords and people.
Meta Descriptions
Meta descriptions are a great way to include some additional keywords and really drive home your message to attract clicks from the search results.
Whenever someone makes a search and they found results that seem equally interesting, people will likely click on the result with the most attractive description.
That’s why you want to make your meta description as relevant and click-worthy as possible.
Take a look at these results for example-
The first and last result are garbage, where as the second result includes the target keyword but also attracts attention from people.
Recently Google increased the limit from 156 characters to 320, this makes it easy to get the most out of your meta description.
To get the best results, you must use a technique copywriters use all the time. This is how it works:
First, you mention the problem the customer has. You describe it so the customer can relate to you and your products.
Then, you explain your solution and, if possible, one of its features. In other words, you talk about your product. This works as a way to close the loop opened before.
Finally, if there’s enough space left, you insert a CTA that motivates people to click. This could be a “Click here,” “10% off,” “Free Shipping!,” and so on.
If you sold protein powder to bodybuilders, a meta description could look like this:
Looking to buff up for your next competition? The Protein Max Pro comes with 35 grams of pure isolated whey protein to accelerate your results. FREE shipping included!
When combined with a catchy title tag, you could end up with something like this-
With this structure, you can develop meta descriptions on scale. You only need to start with the problem, continue with your product and close it with a specific CTA.
Headings and Subheadings (H1, H2, etc.)
Every page should have one H1 that works as the main heading. Using headings breaks down the structure of a page and makes it easier for the users to scan and consume.
In the headings, you should always try to add both your main keywords as well as your LSI keywords – here’s a great example:
Instead of just focusing on the term ‘beard trimmers’, this UK supermarket has included ‘stubble’ as a relevant term in their title.
However, this is an example of a category page, what about product pages?
A typical e-commerce product page starts with the product’s name, which usually works as the H1. In most cases, you’d want to keep the H1 as your product name for relevancy and usability reasons.
If you use the same keyword across all your site, you create cannibalisation issues. This is bad, so try to stick to using the product name as the heading.
Then, the other headings (H2’s and H3’s) are commonly used to explain the features, return and refund policy, sizing, and shipping times.
If you have LSI keywords that include other words next to your product’s name, like “comparison,” or “reviews,” then make sure to add them as headings too.
People often use Google Images to find products. For this reason, you must take your product image optimization seriously if you want to be found on Google Images.
To start, make the filename fit the product name. Instead of adding images with the filename IMG0010.jpg, use the product name and main keyword.
Continue with the examples used before, a filename could be:
If you have many LSI keywords for a given product, instead of calling each filename “productname1,” you could call it “productname-benefits,” “productname-features,” and “productname-discount,” like this-
After optimizing the filename, make sure to add a relevant alt-tag.
The same principle used in the filenames applies to the alt-tags. Add LSI keywords to each alt-tag and other variations to hit as many long-tail keywords as possible.
But remember these are used for visually impaired users in screen reader software. So keep the alt tag natural sounding. Lots of useful verbs, nouns and adjectives can really help.
Finally, optimize the size of the pictures to lower its size and make your pages faster to load. If you have a Shopify store, you can install an app like Image Optimizer which automatically optimizes your images.
If you are running on WooCommerce you could use WPSmush.
Schema Data
Nowadays it has become increasingly harder to stand out on the search engines, especially in niches where you compete with SEO-wise competitors that optimize their titles and descriptions.
The solution to this problem is by using an HTML5 language called microdata. In its simplest form, microdata can help you add snippets of information to your product pages’ descriptions.
Integrating Schema.org microdata for your e-commerce store can help you include data to your description like-
As you can see above, a huge company like Samsung isn’t taking advantage of rich snippets and this is true for many ecommerce stores.
Integrating microdata and rich snippets can not only help you stand out against the big boys but also help you draw more qualified traffic and increase your CTR even further.
In 2011, Google partnered with its main competitors (Yahoo and Bing) to create Schema.org, an initiative to “create and support a common set of schemas for structured data markup on web pages.”
In other words, if you want to use microdata in your store, use Schema.org. This list shows you the different kind of information you can use in your e-commerce store.
To integrate Schema into your store, there are two main ways you can follow:
Not sure if this applies to you?
Google created this awesome tool that will allow you to put your website in and find the structured data for that page. It’s called the Structured Data Testing Tool.
Let’s return to Chubbies shorts and see how they’re looking for their product pages:
On the left-hand side we can see their source code, but on the right Google has translated this into all the structured data they found.
This includes their product name, url, price, sku, mpn, and gtin details. This is super useful information for Google to understand your website, and will help with Adwords too.
Internal Linking For Ecommerce
As I explained in a recent article, internal linking is one of the most powerful and most commonly overlooked SEO tactics.
Internal linking allows you to establish your own anchor text, which can help you with ranking for your top keywords.
Even though there’s not a lot of space in your product’s descriptions for a link, you can still develop a strong internal linking strategy by using a simple tactic: product recommendations.
Let’s take a look at what the kings of e-commerce do with their own product recommendations:
After looking at a backpack, Amazon recommends me another product as a bundle, which not only works great to increase the average order value, it also adds a powerful internal link to this product.
If you keep scrolling down, you will see the famous “Customers who bought this item also bought” section, which shows dozens of product recommendations.
But wait, there’s more! If you scroll down to the bottom of the page, you will see two further product recommendation sections:
The first, called “Customers who viewed this item also viewed”, shares a few dozen more products related to the one I saw.
Finally, they recommend me to check out previously seen products.
If you want to repeat what Amazon does, you can with the help of a few tools.
Shopify has a few apps that allow you to add product recommendations, some of which are:
And if you are on WooCommerce you can checkout this plugin or this plugin.
How to Add Content that Converts to Your Product Pages
Product pages are the most important part of any e-commerce store; they are the equivalent of a retail store’s sales clerk.
After you have spent all the time and money to bring qualified traffic to your store, you need to make sure your product pages provide the right tools to motivate your visitors to become a customer of your company.
Keep reading to find out how you do it.
Note: A big problem many ecommerce stores make is they copy and paste category and product copy in multiple pages.
I don’t recommend this at all, as it causes duplicate content.
Always create original content in every category and product page; it’s one of the best investments you will make.
Show Your Value Proposition
Most visitors that arrive on a product page, they see the product, and they likely think to themselves “why should I buy this product from this company?”
The answer to this question is your value proposition.
The value proposition is what makes your company stand out from the rest; it’s what makes a visitor want to buy from you.
With the challenge Amazon represents to any e-commerce store, your store needs to make its value proposition shine.
To develop your value proposition, think about your company and your brand. What does your company offer that no one else does? What do you do better than anyone else?
You need to put that value proposition right in your product description. Make it clear what benefit your visitors will get from your products.
Let’s see some examples:
Amazon provides convenience thanks to their Prime program and the wide selection of products.
Chubbies is a company famous for their men’s shorts. Their value proposition, however, doesn’t focus on the products they sell, but on the lifestyle they offer to their customers.
Take a look at their product copy:
The copy they use is in line with their brand and their value proposition: fun and relaxation.
While Toms (the shoe company) value proposition is the way they give back to those in need. You buy their products because you want to help other people, and they show it on their product pages.
You should think about your value proposition and how to integrate it smartly within your product pages.
Use As Many High Quality Pictures As Possible
One of the main challenges customers face online is the inability to touch, try, and feel the products they shop. Many people have made a purchase online and when they received it they were not happy with the quality of the design. This then leads people to start being more cautious.
For this reason, e-commerce stores must show the highest-quality pictures they can.
Some e-commerce store owners that sell wholesale products may just show the retailer’s photos, which in many cases aren’t high-quality. The lack of high-quality product photography represents a costlyat w mistake.
All successful e-commerce companies feature high-quality product photography in their stores.
Mr. Porter, the luxury clothing retailer, lets you zoom in and see the details of their products.
ASOS.com, the famous British online clothing retailer, shows you how their products look in real life with the help of a model and great lighting.
WatchShop lets you see a 360-degree view of their watches, which proves to be useful on a luxurious product like a watch.
To take high-quality product photos, hire a professional photographer. Unless you have a big product turnover (which means you’ll be changing your product’s images every few months), you need to think of photography as one of the most important investments you can make.
If you can’t afford a photographer then invest in a portable lightbox and a DSLR so you can capture your own high quality images on demand.
Take a look at the setup I use-
Heck you could even take things to another level and also invest in a small turntable to create simple product videos to display alongside your images.
Write Amazing Product Descriptions
Along with great product photography, having great product descriptions allow customers to understand what a product is and what it does.
Despite its importance, most e-commerce stores commit three serious mistakes when they write their product descriptions:
Start with showing the benefits of your products, not the features. Think how the customer will benefit from using your products and how it will help them solve their problems.
If you have a list of features, take each one and think about the benefit it brings to your customers.
On the other hand, if you sell technical products, leave the features for the most technical-savvy people who understand and want to read the technical details.
DeLonghi, the famous Italian house appliances company, shows five tabs-
Sephora focuses both on their features (the “what you get”) and the benefits women get from using their products (the “why should you care”) while also providing tutorials on how to use the product.
Writing a compelling product description will not only help lead your customer into the sale, but will also send all of the right signals to Google when it comes to ranking your product pages in the search engines.
If you take a shortcut here and copy/paste the manufacturer provided description – you will never see any significant rankings in Google period.
So as well as being cautious about a product because of a poor quality image, if you don’t include all the information they need, people will also be hesitant to buy.
Use Testimonials (or customer reviews)
Showing your visitors what previous customers have said about your products is one of the most effective ways to lower their fears and doubts about shopping with your company.
Testimonials work because people want to see what other people think. Psychologists call this “social proof,” and it’s an easy way for you to increase your conversion rate and trust.
According to Reevoo, 50 or more reviews per product can help you get a 4.6% increase in conversion rates.
Best Buy shows a long list of customer reviews for all their products, including their TVs as shown below:
And not only that but they give other customers the chance to reply to those reviews to ask any follow up questions they might have about the product.
In fact, Amazon even go a step further by sending emails out to people that have previously bought a product when someone has a question-
This is a great social strategy from Amazon that keeps a fresh supply of user generated content coming in while previous customers help potential customers convert into sales.
If you use Shopify, adding testimonials to your store is easy with the help of the following plugins:
And for the WooCommerce users out there you could integrate testimonials and reviews with this plugin or this plugin.
Link Building for Ecommerce
Link building for e-commerce works like any other type of link building.
The more high-quality links you get pointing to your store with a favorable anchor text, the more it will help you increase your store’s positioning in the search engines.
What makes link building for e-commerce different than, say, link building for a local store or a media site, is that an e-commerce business needs links pointing to every section of its store, including the category and product pages.
My team has used this approach with great success to achieve incredible results like–
I will share more details of those 3x ecommerce SEO case studies a little bit later, along with the specific approach we used for each site.
But for now I want to show you a couple of ways that you can build links to your ecommerce store.
Start With Competitor Analysis
Competitor analysis is one of the most powerful ways to find what’s working with your competitors and replicate it.
Start by gathering the first 10 organic results for the main keyword you want to rank for. Make a list with each URL you find on an Excel sheet.
Then use Ahrefs to find all the backlinks that are pointing to each of your competitors.
For example the top 3 results for Swim Trunks are-
We would just lookup all of the backlinks pointing to each of these URLS in Ahrefs–
As you can see above, we could easily acquire links from Wopular.com, Yaelp.com and Usseek.com – and that is from only looking at 1 of the top 10 results.
And by using the Ahrefs Keyword Explorer we can see that we need links from just 10 websites to break the top 10 for this keyword-
We already found 3 targets earlier so now just export all the results from each competitor and work through them.
To keep your analysis organized, create separate tabs in one master Excel sheet.
And instead of analysing every link from each competitor manually, sort them by Domain Rating and attack the more valuable links first.
As a rule of thumb, sites with a Domain Rating over 60 and pages with Page Rating over 40 are considered as high-quality. This will help you prioritize your efforts.
Then just take each link, open them in your browse and try to see how your competitor got these links so you can replicate it.
Stealing your competitors best backlinks is my all time favorite link building strategy.
Do Guest Posting (Yeah Yeah, I Know)
Guest posting is one of my favorite ecommerce link building techniques. It can help you build authentic relationships with industry bloggers while growing your site’s exposure. An easy bit of content marketing.
Doing guest posting allows you to get high-quality links that can help you increase your rankings for branded keywords.
The guest posting process can be summed up in five steps:
Create an Excel sheet with each site you find so you can qualify them later.
Then, analyze each site based on a set of qualifiers. Here the set of attributes I use to qualify my prospects:
Once you have the definitive list of sites, you need to start outreaching. Take each site on your list and look for the contact information (i.e. name and email address) of the person with whom you’d like to connect.
Or if you want to make things 100x quicker, you can use a tool like Ninja Outreach that will not only find great places to guest post – but also pull back all of the metrics you need to make informed decisions.
It will also automatically find all of the contact information you need and makes the entire process from finding prospects to contacting them a 3 click process.
After you connect with someone in each site, create an article outline. Don’t forget to add a few links pointing to your site. If you don’t know if the webmaster will accept them, ask them!
With the article finished, send it and wait for a response. You are likely to get a few rounds of edits, so make the necessary changes until the article is approved.
Once the article goes live, don’t forget to promote it on your social media as well as participate in the comment section.
When you first get started with your link building efforts, you may need to guest post a couple dozen times until you have built a foundation.
Other Ecommerce SEO Link Building Tactics
Honestly I could write about link building tactics all day long.
Ecommerce Link Building Services
We all know link building is a great way to get organic traffic to your site and help you rank. There’s no escaping it in this market, you must build links.
However, people have made careers out of it so obviously the quickest and easiest way to do link building for your Ecommerce store is to get someone else to do it for you.
Let someone else deal with the hard work while you take it easy. Add it to the top of someone else’s job list, giving you more time to drive your brand, look at other ways of advertising, get involved in your social media community or simply just be able to finish reading that email.
The problem is it’s difficult to find reliable link building services especially that are suited for ecommerce stores.
So I wanted to go over a few link building services you could use (if you prefer a fully managed service, click here)
Blogger Outreach / Guest Postings
If you want to outsource all of the hard work of guest posting then this is the solution for you.
But BUYER BEWARE!
Always double check your orders when you receive them and make sure you review-
With that said, here are some of the better guest posting services you can take advantage of to build quality links with next to no effort-
Infographic Creation & Distribution
You can be very creative when it comes to creating infographics for ecommerce.
There are a ton of angles you can attack that directly tie into your main goal of selling more products.
For example you can create things like buyers guides or how to use a specific product category.
This kind of content always attracts links and will continue to reap benefits as more and more people share it.
The problem is creating great infographics that stand out from the crowd and then getting them placed in the right places isn’t so easy.
But there are a couple of services that can help you out-
Local SEO for E-commerce
So far in this article, I’ve referred to national or international online retailers.
Many of you have local businesses that you want to take online. You will only be selling to customers in your city or region.
With that in mind we need to approach SEO in a slightly different way.
According to Google, 50% of their searches are done with a mobile device, and a third of them have local intent. What’s even more important is that 80% of local mobile searches convert. A large chunk of the digital world use a mobile so you’ll need to check when optimizing your site that you keep this in mind.
In order to capture the local traffic, your store has to have three attributes:
The trifecta of your name, address, and phone number is known as NAP. Remember this acronym as you will hear about it a lot later on. As with any kind of local commerce store, they need to know where you are!
With this said, let me share some basic local SEO tips for your store.
Claim Your Profile
Your first step is to create and claim the local profile with Google, known as Google My Business.
Once you are on the website, click on “Start Now.”
Log in to your account. After you do that, you’ll be redirected to a map-
Enter all your business details. Remember to add your business name as it should show in the Google results.
Also, double check to make sure you don’t make any mistakes with the address or the phone number.
Once you have finished the process, Google will publish your store in their results which makes for a quick win.
Quick tip… a lot of people like to buy from local based business’ so if they are your target customers then show them where you are and use marketing to show them why you are the best.
Link Building for Local E-commerce SEO
The main difference between non-local and local SEO is related to the link building. In local SEO, link building is called “citation building.”
A citation refers to any website where it shows your business name, address, and phone number on the same page and in the same format as your local listing.
A citation looks something like this:
Your Company Ltd.
150 Piccadilly
St. James’s
London
W1J 9BR
020 7493 8181
Unlike link building, building citations is a relatively simple process: you go to local business directories and you add your website in there.
Instead of having to manually find every local business directory, you can use a tool like Whitespark. Their software helps you find specific citation building opportunities for your store.
You can also hire a company to build citations for your store. I personally recommend Loganix, as they provide a great service at a low price. You can also take advantage of a special discount which gives you a 15% discount on your next manual local SEO citation building services.
Two other companies that offer a great service at a low price are The Hoth and SERPLogic.
On-Site Optimisation for Local SEO
Make sure to add your name, address, and phone numbers on every page of your store, in the same format as your Google local listing. This also makes it easy for anyone to contact you. There’s nothing more frustrating then having to search for contact details.
Also, use the name of your City and State in the different SEO elements, like the title tags, meta description, and content on your website.
Finally, Take advantage of what Schema has to offer; their local business and postal address markup can help search engines identify and display your location.
Get Reviews
Another important element to consider for any e-commerce store is the online reviews.
You must make sure to get the reviews on your listing because Google considers this factor important when ranking a website.
Reviews are displayed in the right corner of a local search query, under the map.
The quality and quantity of reviews are strong factors in Google and you should pay attention to them,
A good way to get more reviews for your store is to ask both new and existing clients to leave a written review on your Google listing. You can set up an automated email to do so as well.
Your Google listing isn’t the only place where you should ask people to leave a review. You should encourage your customers to leave a review on sites like Yelp or Scoot but you should focus on Google above all else.
Reviews are not only useful for your rankings. Like social media, Google and other review platforms help you understand what your consumers like and don’t like.
A review is free feedback, which you can use to improve your product, answer queries and offer solutions. If you appear visible and focus on helping users you will become more and more popular, people will pay more attention to your ads and subscribe to your email list.
So make sure you learn what your customers are saying, whether it be on Instagram, Facebook, Linkedin or your Google listing.
Remember you aren’t the only person to read your reviews.
Note, whether local ecommerce or not also make sure you have a privacy policy available on your site, in most countries this is a legal requirement.
E-commerce SEO Case Studies
Let’s face it, we all getting a peak behind the closed doors of other ecommerce sites right?
Whether it be a sneak peak of their data or a look at the ways they create their blog posts, seeing the practices and process of people in the same industry can be a very valuable experience.
So I wanted to share 3x long term ecommerce SEO case studies from my fully managed ecommerce SEO clients.
You’ll get a look at-
So without further ado-
Case Study #1: Furniture E-commerce Store
One of my clients was a well-established furniture store with a relatively limited but natural link profile.
Their main challenge was they were competing for their main keywords with e-commerce giants such as Ikea, Tesco, and Marks and Spencers, among others.
Due to the high competition, their company couldn’t rank their pages on the first two pages of Google for their main keywords. To make matters worse, they were struggling to rank for long tail keywords as well.
With the help of my agency, we conducted a full audit and kicked off a 3 pronged link building campaign-
All of that had a dramatic effect-
Organic search traffic from Google has exploded on the site since 2015.
Not only that but the site has now generated a total of £18,811,325 or just over 26 million dollars in ecommerce revenue-
Not bad for a site that sells furniture online right?
You can read the original case study that we published back in 2016 here.
As you can see 2 years on the site has continued to grow and is now delivering just shy of £1,000,000 / 1.3 million dollars of sales per month.
Case Study #2: T-Shirt E-commerce Store
Our t-shirt e-commerce client was already established in the e-commerce industry but was losing organic traffic and rankings for over a year before we got started.
Their main problem was the site had a low-quality link profile due to bad work done years before the main algorithm changes.
After conducting a full audit we found the site also needed a huge amount of on-site optimisation.
So we-
Then in the first 6 months, we built a over 100 quality links from high-authority sites related to the fashion/t-shirt industry.
We created a link profile with branded anchors to help dilute the over optimised historical link profile.
The rewards were glorious-
Organic search traffic nearly doubled to the site within 6 months!
You can see the effect this had on sales boosting monthly revenue to the $50,000 USD range (shown as AUD below)-
They have sold nearly $1,270,319.75 AUD of Tshirts so far.
Which works out to be just shy of $1,000,000 USD in total!
Crazy right?
Learn more about the campaign and what we did with the full case study that was published in early 2015.
Case Study #3: Clothing E-commerce Store
One of our clients uses Shopify, but were not doing their housekeeping.
We found that they had created around 300 collection pages with thousands of pages in duplicate content.
My resident Shopify expert went in and cleaned out the old collections and removed them from Google’s index to improve Googlebots efficiency.
This is what happened:
Their rankings increased steadily month by month as Google recrawled the website. A simple on site audit allowed them to jump into the top positions for a whole bunch of keywords.
The financial results?
Their revenue jumped to over $160,000 per month (£116,000 GBP)–
Since launch the site has now generated over 2 million dollars in sales (£1,444,342 GBP)
And given that March was their best month of revenue ever – I suspect that is going to continue to grow for a long time to come.
Wrapping It Up
When you approach ecommerce SEO in the right way – it will impact and change your business forever.
Make sure that you start out with a full site audit before doing anything else. It’s important that you build a solid SEO foundation first.
My team and I have worked with a lot of people over the years and each search engine optimization strategy in this post has had great success.
Don’t forget, Google are always issuing updates, so your company might be ranking highly now but to ensure you keep your place in the search engines you need to keep up to date with any new changes.
If you need help feel free to reach out to us at any time or sign up for my free email course that will teach you how to take your ecommerce SEO to the next level.
But no matter what you do – it’s time to get started today.
This content was originally published here.
0 notes
Text
Work on the revived official Heart of Darkness website is never over! - a little update
Even though the website (or as much of it that wayback archived) has been up in its entirety for a while now, the archivist work behind getting the site up to snuff is never truly over. Whenever I’m at a particularly low place in my life I do more monotonous tasks.
This week, I figured I’d give an update because I finally got around to fixing something that’s been bothering me for a while.
The hit counter!
But I’ll save that for last. I have some more smaller updates.
While probably not the biggest deal, mostly because many people wouldn't bother checking them, I've decided to work on the HTML of the pages themselves, making the code appear much more closely to how it actually did on the original website. This basically means tiny little changes like capitalizing tags such as the <BR> and <BODY> ones that one of my HTML editing programs in the past thought it was okay to “modernize” and shifting up orderings of some stuff. Purely aesthetic, and not even something that visibly looks different on the pages themselves.
I've also been shifting around directories. Originally when uploading the site it was easier to just dump every single image file into the /images/ directory, but originally the site split things up neater, with more of them like /jpg/ and others. So I've been starting the slow process of moving the images around just so that in the code itself and the sitemap it more closely resembles the original.
I've also changed up some slight aesthetic things to text I've added on the site. The donate button and message is less intrusive.
Heads up though. I accidentally overwrote the second frame of the French HoD_main. So it’s not there. I’m working on getting it back from my backup, but I figured I’d finish with the English main page just in case I accidentally do it again.
(and on that subject, I’m never going to fix the typo in the 404 page. I've grown too fond of it. Even though it was something I made for my archive, I think it’s a staple of the site at this point, what with how much everything used to 404 in the early days of bringing it back.)
Also on topic, but I noticed some directories were accessible. Similar to the Paper Beast leaks, this is rarely left on purpose. If you discover any please let me know and I’ll patch them up. Visible bare directories feel so wrong to me. Like just looking at them will make the webmaster angry with me. I also noticed that our beautiful custom 403 page isn't working. Who knows really? Idk. I've tried everything I can think of. From the option in cpanel to manually editing the htaccess. Nope. Giving me the ugly default one. Maybe it’s temporary.
I also noticed a little issue with Opera internet browser that adds some tiny little transparent spaces after things that can mess with <center> aligned pages. It’s a really stupid thing and it makes me annoyed with Opera a bit. It’s most noticeable on the pages where the images are split up into multiple parts because it shifts the last one to the left a bit, making the image look like it was glued together poorly.


Fortunately it isn't a problem with Firefox or Chrome, and I was able to fix it in Opera without ruining it in the other browsers. It does mean that on many pages a single <BR> tag is in a different exact spot in the page than it was on the original site, but it’s so minor I figured everyone would prefer it looking right in Opera over the historical accuracy of the HTML itself. I’ll be going through the site every so often in Opera to see if this problem shows up elsewhere.
And now, for the hit counter!
Originally, on the 1997-1998 version of the second frame of the menu page (Main_frm02.html) there was a hit counter. It used the font that the menus of the site use. The function of this counter seemed to be in PHP and had each digit from 0-9 as its own separate .gif file in the directory “/images/digits/a/”
When I first set about fixing this counter I had no idea how to create one in PHP that would use the original .gif digits, so I instead made another one that listed the full number of visitors in a single image that it created automatically. This is a more advanced and modern option, but it’s one I obviously didn't want to use for that reason, as well as it not visibly looking like the original one. I made a chart to demonstrate:
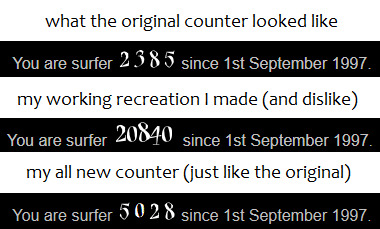
as you can see, you needed to manually set the font size, and in order to make it closer resemble the original I’d have had to adjust the spacing between the numbers too, which I didn't know how to do. I also noticed that the natural way the numbers fall in the fontface is different than how they were centered in their original .gif files, which means that using this method would never recreate the original to a tee anyways,
so I scoured the internet for code that I could create a hit counter with individual image files for the digits like the original and then I’d modify it to suit my needs. Which evidently happened. It took a bit to implement, mostly because I’m an idiot and decided to do this at 2AM after taking my sleeping medicine.
The way my brain works is it’s not sharp enough at the intentional sleep deprived state I often am in to negate the effects of PTSD. Turns out I need my hypervigilance to work with code because the lifestyle I use to dull it also muddies my brain when it comes to programing languages, even simple ones like PHP. I’m hoping this can be avoided when I finally am put on new medicine. The entire process was rather humiliating when I woke up this afternoon and immediately figured out what I had been doing wrong. I needed to embed a php file of the script running. Not put the script into the page itself. Aka I was trying to write it out in the file when I should have just wrote it out in another php file and then stick a “<?php include” into the page. The page also needed to be a PHP file, not HTML, which I didn't want to do for authentic “just like the original” sake, but you can’t really tell unless you dig in the code. Looking back on social media where I was whining about how I couldn't get it to work was pretty embarrassing. This is the exact way my brain muddies itself in all situations though. I had it explained to me like this once: “You’re too smart for your own good. You think you need to work harder to solve an easy solution and you just end up blinding yourself to it in the process.” It’s extremely frustrating.
BUT!!! It’s finally working!!! It looks just like the original! It even uses the same directories for the images! It now logs all hits instead of unique ones though so... hmmmm... be careful.
I did have to create new .gifs for 0 4 and 9 because they weren't originally saved by wayback though. You might be able to tell that because they have strange red-ish pixels around the outside of the white number. I’m going to be working on making them look like the official ones but for now you’d have to zoom in on them to see it.
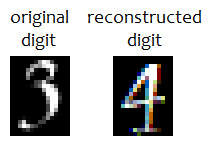
but anyways, that’s it. I don’t usually provide updates like this for the website, but I decided I wanted to in order to help myself feel better.
A reminder to Heart of Darkness fans who may not know, but there used to be an official website at HeartofDarkness.com but it went down in the early 2000s. I painstakingly downloaded every file from Wayback and recreated the website at HeartofDarkness.ca that you are free to check out and run around in now.
It’s got rare promotional art, a press bible with character write ups, some level screens, and a ton of 90s-tastic frames! Only the best websites are built with frames!
It’s missing a few things that weren't saved like some images, so if you have those old files from the original site I’d be very much interested in getting them from you. I originally recreated the site because it wasn't accessible on Wayback due to robots.txt protocol. Briefly though it was, so I rapidly saved everything. Originally the highlight menus (in java) didn't work which made navigating the archive hard. As of late the current owner of the domain allows Wayback to show the archive, and Wayback even added Java support so the menus work, but I've managed to fix some issues with images being missing that a friend had managed to save after all these years so I think my archive is still the definitive version. Wayback has also been acting up for me lately, so other that citing it as the official source (it’s proof that those pages existed back then at all) it’s likely more reliable to use my archive instead.
0 notes
Text
How to Fix Briefly Unavailable for Scheduled Maintenance Error in WordPress
Are you seeing the ‘Briefly unavailable for scheduled maintenance’ error in WordPress? This error usually appears while updating WordPress core, plugins, or themes.
Basically, your WordPress site fails to finish the update which leaves you stuck in the maintenance mode.
In this article, we will show you how to easily fix the “Briefly unavailable for scheduled maintenance” error in WordPress. We will also show you why this error occurs and how you can avoid it in the future.
Why Does The WordPress Maintenance Mode Error Occur?
Maintenance mode page is technically not an error. It is a notification page.
During the update process, WordPress downloads necessary update files to your server, extract them and then install the update.
WordPress also puts your site on maintenance mode and displays the “Briefly unavailable for scheduled maintenance. Check back in a minute.” notice during the process.
To trigger the maintenance mode notification, WordPress creates a temporary .maintenance file in your website’s root folder.
If everything works normally, then this notice will probably be displayed for only a few seconds. After the successful update, WordPress will automatically delete the maintenance file to disable maintenance mode.
However, sometimes due to a slow WordPress hosting server response or low memory issue, the update script will timeout thus interrupting the process. When this happens, WordPress does not get a chance to take your site out of maintenance mode.
In other words, your site will continue showing the maintenance mode notice, and you will need to manually fix it.
How to Fix WordPress Maintenance Mode Error?
To get your website out of maintenance mode, all you really need to do is delete the .maintenance file from your site’s root folder using FTP.
If you can’t find the .maintenance file in your WordPress root directory, then make sure you checked your FTP client to show hidden files.
In Filezilla, you can force it to show hidden files by clicking on Server » Force showing hidden files from the menu bar.
Once the .maintenance file is removed, your site will come out of maintenance mode, and the error should be fixed.
If you don’t know how to use FTP, then you can also remove the files by going to the file manager in your WordPress hosting control panel, and then deleting the .maintenance file inside the file manager.
How to Avoid WordPress Maintenance Mode in the Future?
We already know that the “Briefly unavailable for scheduled maintenance” error is caused by slow server response or low memory issue on your web hosting server.
The easiest way to avoid this error is by upgrading to a higher hosting plan. We recommend going with one of these managed WordPress hosting companies that offer superior hosting performance.
If upgrading to a higher hosting plan is not an option, then we recommend doing plugin and theme updates one at a time.
Often users have a tendency of quickly clicking on the update link underneath each plugin. WordPress then staggers the update order, but even a millisecond of delay in connection could cause a conflict leading your site to be stuck in maintenance mode.
Instead of quickly clicking on the Update link, we recommend patiently updating one plugin at a time.
How to Customize Maintenance Mode Notification
An easier solution to avoid showing the default maintenance mode notification is by manually putting your WordPress site on maintenance mode before installing any updates.
The best way to do this is by installing and activating the SeedProd plugin. It is the most popular maintenance mode plugin for WordPress. For more details, see our step by step guide on how to install a WordPress plugin.
Upon activation, go to Settings » Coming Soon Pro page and check the box next to ‘Enable maintenance mode’ option.
After that, you need to click on ‘Edit Coming Soon/Maintenance Page’ button. This will open the SeedProd theme customizer. From here you can choose a theme and then customize it to create a beautiful maintenance mode page for your website.
Now, if you don’t want to manually put your website in maintenance mode every time you update, then you can create a maintenance page in WordPress without using a plugin.
Simply create a new file called maintenance.php on your desktop and paste this code inside it:
<?php $protocol = $_SERVER["SERVER_PROTOCOL"]; if ( 'HTTP/1.1' != $protocol && 'HTTP/1.0' != $protocol ) $protocol = 'HTTP/1.0'; header( "$protocol 503 Service Unavailable", true, 503 ); header( 'Content-Type: text/html; charset=utf-8' ); ?> <html xmlns="http://www.w3.org/1999/xhtml"> <body> <h1>We are updating the site, please check back in 30 minutes.</h1> </body> </html> <?php die(); ?>
Next, you need to upload this file to your WordPress site’s wp-content directory.
Now whenever you are updating your website, WordPress will show this page during the maintenance mode. You can use CSS to style this page anyway you want.
Troubleshooting WordPress Maintenance Mode Error
Since we have helped thousands of users fix the “Briefly unavailable for scheduled maintenance” error in WordPress, we have helped users solve several unseen issues that can come up.
Below are some additional steps you might have to take if the above solution does not work.
WordPress still stuck in maintenance mode after the update and fix above?
If this is the case, then you need to update the wp-activate.php file located in your main WordPress folder. This is the same place where you found and deleted the .maintenance file.
You will need to either open the file using your hosting company’s file manager or download it on your computer using FTP.
Next, you need to find the code: define ('WP_INSTALLING', true) and change the true to false.
So your code will look like this:
define ('WP_INSTALLING', false)
After that you need to save the changes and upload the file to your hosting server using FTP. If you’re using the hosting company’s file manager, then simply saving the file should get you out of maintenance mode.
My site is broken after I fixed the WordPress maintenance mode error. How do I fix it?
An unfinished or interrupted update may cause issues when your site comes out of maintenance mode.
If this error occurred when you were updating WordPress core software, then you will need to follow our guide to manually update WordPress using FTP.
If the error occurred when you were updating a WordPress plugin, then you will need to temporarily deactivate all WordPress plugins using FTP. This step will ensure that the corrupt plugin is disabled, and your website will come back.
Next, you will need to login to your WordPress dashboard and activate one plugin at a time, to see which plugin caused the issue. After that you need to manually install the plugin update, so it’s working properly.
We hope this article helped you fix ‘Briefly unavailable for scheduled maintenance’ error in WordPress. You may also want to bookmark our ultimate guide on fixing the most common WordPress errors.
If you liked this article, then please subscribe to our YouTube Channel for WordPress video tutorials. You can also find us on Twitter and Facebook.
The post How to Fix Briefly Unavailable for Scheduled Maintenance Error in WordPress appeared first on WPBeginner.
😉SiliconWebX | 🌐WPBeginner
0 notes
Text
How to Fix Briefly Unavailable for Scheduled Maintenance Error in WordPress
Are you seeing the ‘Briefly unavailable for scheduled maintenance’ error in WordPress? This error usually appears while updating WordPress core, plugins, or themes.
Basically, your WordPress site fails to finish the update which leaves you stuck in the maintenance mode.
In this article, we will show you how to easily fix the “Briefly unavailable for scheduled maintenance” error in WordPress. We will also show you why this error occurs and how you can avoid it in the future.
Why Does The WordPress Maintenance Mode Error Occur?
Maintenance mode page is technically not an error. It is a notification page.
During the update process, WordPress downloads necessary update files to your server, extract them and then install the update.
WordPress also puts your site on maintenance mode and displays the “Briefly unavailable for scheduled maintenance. Check back in a minute.” notice during the process.
To trigger the maintenance mode notification, WordPress creates a temporary .maintenance file in your website’s root folder.
If everything works normally, then this notice will probably be displayed for only a few seconds. After the successful update, WordPress will automatically delete the maintenance file to disable maintenance mode.
However, sometimes due to a slow WordPress hosting server response or low memory issue, the update script will timeout thus interrupting the process. When this happens, WordPress does not get a chance to take your site out of maintenance mode.
In other words, your site will continue showing the maintenance mode notice, and you will need to manually fix it.
How to Fix WordPress Maintenance Mode Error?
To get your website out of maintenance mode, all you really need to do is delete the .maintenance file from your site’s root folder using FTP.
If you can’t find the .maintenance file in your WordPress root directory, then make sure you checked your FTP client to show hidden files.
In Filezilla, you can force it to show hidden files by clicking on Server » Force showing hidden files from the menu bar.
Once the .maintenance file is removed, your site will come out of maintenance mode, and the error should be fixed.
If you don’t know how to use FTP, then you can also remove the files by going to the file manager in your WordPress hosting control panel, and then deleting the .maintenance file inside the file manager.
How to Avoid WordPress Maintenance Mode in the Future?
We already know that the “Briefly unavailable for scheduled maintenance” error is caused by slow server response or low memory issue on your web hosting server.
The easiest way to avoid this error is by upgrading to a higher hosting plan. We recommend going with one of these managed WordPress hosting companies that offer superior hosting performance.
If upgrading to a higher hosting plan is not an option, then we recommend doing plugin and theme updates one at a time.
Often users have a tendency of quickly clicking on the update link underneath each plugin. WordPress then staggers the update order, but even a millisecond of delay in connection could cause a conflict leading your site to be stuck in maintenance mode.
Instead of quickly clicking on the Update link, we recommend patiently updating one plugin at a time.
How to Customize Maintenance Mode Notification
An easier solution to avoid showing the default maintenance mode notification is by manually putting your WordPress site on maintenance mode before installing any updates.
The best way to do this is by installing and activating the SeedProd plugin. It is the most popular maintenance mode plugin for WordPress. For more details, see our step by step guide on how to install a WordPress plugin.
Upon activation, go to Settings » Coming Soon Pro page and check the box next to ‘Enable maintenance mode’ option.
After that, you need to click on ‘Edit Coming Soon/Maintenance Page’ button. This will open the SeedProd theme customizer. From here you can choose a theme and then customize it to create a beautiful maintenance mode page for your website.
Now, if you don’t want to manually put your website in maintenance mode every time you update, then you can create a maintenance page in WordPress without using a plugin.
Simply create a new file called maintenance.php on your desktop and paste this code inside it:
<?php $protocol = $_SERVER["SERVER_PROTOCOL"]; if ( 'HTTP/1.1' != $protocol && 'HTTP/1.0' != $protocol ) $protocol = 'HTTP/1.0'; header( "$protocol 503 Service Unavailable", true, 503 ); header( 'Content-Type: text/html; charset=utf-8' ); ?> <html xmlns="http://www.w3.org/1999/xhtml"> <body> <h1>We are updating the site, please check back in 30 minutes.</h1> </body> </html> <?php die(); ?>
Next, you need to upload this file to your WordPress site’s wp-content directory.
Now whenever you are updating your website, WordPress will show this page during the maintenance mode. You can use CSS to style this page anyway you want.
Troubleshooting WordPress Maintenance Mode Error
Since we have helped thousands of users fix the “Briefly unavailable for scheduled maintenance” error in WordPress, we have helped users solve several unseen issues that can come up.
Below are some additional steps you might have to take if the above solution does not work.
WordPress still stuck in maintenance mode after the update and fix above?
If this is the case, then you need to update the wp-activate.php file located in your main WordPress folder. This is the same place where you found and deleted the .maintenance file.
You will need to either open the file using your hosting company’s file manager or download it on your computer using FTP.
Next, you need to find the code: define ('WP_INSTALLING', true) and change the true to false.
So your code will look like this:
define ('WP_INSTALLING', false)
After that you need to save the changes and upload the file to your hosting server using FTP. If you’re using the hosting company’s file manager, then simply saving the file should get you out of maintenance mode.
My site is broken after I fixed the WordPress maintenance mode error. How do I fix it?
An unfinished or interrupted update may cause issues when your site comes out of maintenance mode.
If this error occurred when you were updating WordPress core software, then you will need to follow our guide to manually update WordPress using FTP.
If the error occurred when you were updating a WordPress plugin, then you will need to temporarily deactivate all WordPress plugins using FTP. This step will ensure that the corrupt plugin is disabled, and your website will come back.
Next, you will need to login to your WordPress dashboard and activate one plugin at a time, to see which plugin caused the issue. After that you need to manually install the plugin update, so it’s working properly.
We hope this article helped you fix ‘Briefly unavailable for scheduled maintenance’ error in WordPress. You may also want to bookmark our ultimate guide on fixing the most common WordPress errors.
If you liked this article, then please subscribe to our YouTube Channel for WordPress video tutorials. You can also find us on Twitter and Facebook.
The post How to Fix Briefly Unavailable for Scheduled Maintenance Error in WordPress appeared first on WPBeginner.
from WPBeginner https://www.wpbeginner.com/wp-tutorials/how-to-fix-briefly-unavailable-for-scheduled-maintenance-error-in-wordpress/
0 notes
Text
5 Skills You Can Learn in the Next 7 Days
This article is part of Making Moves Week where we’re exploring the ways you can change your career effective immediately. Don’t change who you are, change where you are.
Whether it’s full blown career change, dipping your toe into a new field through a side hustle or freelance work, or simply up skilling your way into a better position at your current job, one of the most paralyzing obstacles to any career pivot is the belief that change requires superhuman efforts and resources.
Any kind of significant change will need more time, money, or inherent technical aptitude than you possibly have, right?
Wrong!
When you let yourself get hung up on the idea that change HAS to happen on the grandest of scales, you’re overlooking the small efforts you can make RIGHT NOW that add up quickly to some pretty big changes on their own.
As part of our Making Moves week, we’d like to highlight a few of the skills you can start learning in the next seven days—no elaborate preparations or qualifications necessary. Choose one (or a couple) of these skills to start with this week, then—whenever you feel comfortable—fire up the next one, and before you know it you’ll have a new, flexible toolkit to use toward whatever your specific career goals might be.
Table of Contents
1. Free Coding Bootcamp
2. HTML and CSS
3. Introduction to WordPress
4. Digital Design
5. Soft Skills
1. Take a Free Coding Bootcamp
The absolute first move you should make toward new skills in the next seven days (after finishing this article, of course!) is to sign up for Skillcrush’s FREE 10-day Bootcamp.
This beginner course is designed to teach you the ins and outs of tech terms and industry jargon, and to provide you with a roadmap for the digital skills you’ll need to boost your employability and increase your career flexibility.
But here’s why this first step is such a no-brainer: the entire program is meant to be completed in 10 days by spending no more than five minutes with it each day. That’s a HUGE return on investment, so sign up now and you’ll already be feeling how easy it is to turn small efforts into big results.
(back to top)
2. Start Learning HTML and CSS
Another key skill (or pair of skills) you should consider starting with during the next 7 days are the dynamic duo of HTML (Hypertext Markup Language) and CSS (Cascading Style Sheets).
HTML and CSS are programming languages that function as the basic building blocks of static web pages (pages with text, images, and/or embedded media, but without dynamic content like animation or interactive forms).
HTML is used to define the parts of web pages to the web browsers that visit them. When you access a site through your phone, tablet, or computer’s browser (Chrome, Safari, Firefox, etc.) those browsers are able to read HTML content and translate it into what you see on the screen. HTML is the language that defines which part of the page is a header, which is a footer, where paragraphs belong, where images, graphics, and videos are placed, etc.
CSS (sister language to HTML) is used after the parts of a page are defined and specifies the page’s style. Page layouts, colors, and fonts are all selected and implemented through CSS. In other words, if HTML is the foundation of a house, CSS is the interior and exterior decorating decisions.
What makes these skills such a worthy choice for your first seven days of skill building is the extreme versatility they bring to a professional repertoire. Yes, you can start to build an entire website from scratch with HTML and CSS, but you can also use the two languages to customize things like email templates and blog pages.
In other words, HTML and CSS aren’t just for web developers—they’re handy for digital marketers, copywriters, designers, or in any other tech adjacent role. These two skills alone also put you in position to start doing your first, paid, side hustle work in tech. And did I mention you can get the hang of both languages in a matter of weeks? Small steps lead to big things, right?
If you’re ready to take a deep dive into HTML/CSS and beyond, look no further than Skillcrush’s Front End Developer or Web Developer Blueprint courses—online classes designed to be completed in three months with only an hour of investment per day.
(back to top)
3. Introduce Yourself to WordPress
If you’ve spent any time reading articles or blogs online, you’ve probably encountered WordPress (in fact, if you’re reading this, you’re encountering it right now). And it’s not just Skillcrush that uses WordPress to host our blog—the list of high profile blogs built with WordPress includes Sony Music, The Official Star Wars Blog, and the New York Times Company.
So what IS WordPress? WordPress is a Content Management System (CMS)—a software platform used to build and host web content—but it’s also the industry standard CMS. 59.3 percent of people use WordPress compared to competitors like Drupal (3.7 percent) and Squarespace (2.5 percent) according to web technology survey site W3Techs. And with this epic market share, you can see why knowing your way around WordPress is a crucial digital skill to have in your hip pocket.
Part of WordPress’ appeal is it’s learning curve. WordPress accommodates everyone from tech newcomers (who can use pre-existing templates and follow menu cues through the user interface to build basic WordPress sites), to tech veterans who can use digital skills (like the aforementioned HTML and CSS, as well as a language called PHP) to create custom WordPress themes and features.
With that in mind, what does learning WordPress look like for you in the next seven days?
Step 1: Install WordPress on your computer. You can do this by visiting the WordPress.org website and following their installation instructions. And, if you need details on how to install the program on a Mac, you can check out our guide here.
Step 2: Get hands on. Once you have WordPress installed on your computer, start familiarizing yourself with the basic menu options and see what you can do. Pick a blog template. Make some test blog posts. To find your way, you can go straight to the source and follow the beginner tutorials at WordPress.org.
Step 3: Layer your skills. If you’ve started experimenting with HTML, you can use those skills to tweak and add features to your WordPress posts (something we do here at Skillcrush for things the table of contents in this post), and eventually (as your WordPress and HTML/CSS skills increase), you’ll even be able to customize WordPress templates, or create your own.
For these first seven days, just getting a feel for the platform will be a huge accomplishment. WordPress’ massive user base means there’s an active job market for WordPress developers, and—with practice—you’ll have soon have the skills needed to ply your own WordPress trade (or simply be able to add WordPress capabilities to your overall professional toolkit).
And when you want to take your WordPress skills to the next level? It’s time to try the Skillcrush WordPress Developer Blueprint.
(back to top)
4. Consider a Transition to Digital Design
If you’re a creative type with a traditional/print design background, congratulations! You have a readymade path to digital skills. And what is that path? It’s transitioning from print to digital design—something you can definitely start doing in the next seven days. And hey, even if you DON’T have a design background (but the idea of design is something that sounds interesting), this is for you, too.
If you haven’t yet worked in digital design (which can include fields like web design and UX design), the jump can sound intimidating, but you’re already so close. We’ve written in-depth previously about the transition from print to digital design, but here’s a refresher on where to start if an entre to web design sounds like just the thing for your next seven days.
Think mobile first. The vast majority of viewers will be accessing your website on a smartphone screen (mobile and tablet internet usage officially exceeded desktop usage worldwide—51.3 percent to 48.7 percent—in 2016). This means, when it comes to digital design, it’s critical to focus on how your design will look in a mobile format.You can go ahead and start getting a handle on best mobile design practices with recommended reads like Type on Screen: A Critical Guide for Designers, Writers, Developers, and Students by Ellen Lupton, Designing for Interaction: Creating Innovative Applications and Devices by Dan Saffer, Designing Interactions by Bill Moggridge, Digital Design Theory: Readings from the Field edited by Helen Armstrong, and Don’t Make Me Think, Revisited: A Common Sense Approach to Web Usability by Steve Krug.
Get to know wireframing and prototyping. Wireframes and prototypes are two critical web design tools.
A website wireframe is a visual map that diagrams the skeleton of a website. Web designers use wireframes to plan the way a site will be arranged, including showing where text, images, menus, videos, animated graphics, and interactive user forms will be placed. A wireframe also gives web designers a way of sharing their site plans and progress with developer teams, clients, test users, and other stakeholders.
A prototype is a more developed web design model than a wireframe. Prototypes are often used for site testing before a site’s final released, and can consist of anything from a mockup sketch on paper to a fully functioning digital model.If you decide to dive into digital design this week, take a moment to read this article from Smashing Magazine, which looks in-depth at the benefits of each kind of model.
Take a spin with the tools of the trade. Alongside software that’s familiar to print designers—think InDesign, Illustrator, and Photoshop—digital design requires experience with programs like InVision (software that lets users create digital design prototypes, presentations, and workflows, and helps facilitate team collaboration), and Sketch (a design program used for creating project drafts and editing images).Further, UX design tools and software—like Axure, Balsamiq, and UXPin—are key to rounding out a digital design repertoire. These design programs are what you use to create those wireframes and prototypes for websites (see above).Don’t think you need to become an expert on all of these programs in the next seven days, but take a minute to check out each of their websites and get an idea of what each one is used for (and how they might be useful to you in the future).
And when it’s time to get serious about digital design, take a look at Skillcrush’s Visual Designer and UX Professional Blueprints—two great ways to take a deeper dive into the design field that’s the best fit for you.
(back to top)
5. Don’t Forget Those Digitally Adjacent Soft Skills
It’s so easy to get wrapped up in shiny new digital skills that you can overlook evergreen soft skills that are just as important for making a career pivot. This week, consider investing some time in shoring up those skills that will enhance and compliment the digital side of things. Here are a few ideas and examples.
Take a public speaking course online. Online learning is just for digital skills. These days, almost anything can be learned online—and that includes the always important skill of public speaking! Efficient, effective public speaking is a key skill at ANY job, but if the idea of honing your speaking skills in front of a live classroom audience sounds absolutely mortifying, don’t panic.There are plenty of free, online options to help you discover the gift of gab.Check out Coursera’s page of public speaking options, including everything from introductory level courses, to courses in dynamic speaking techniques, to courses that incorporate written AND verbal communication skills.
Enroll in Hubspot Academy. Hubspot is an inbound marketing and sales company (our Skillcrush Sales and Marketing team are all avid Hubspot users), but, in addition to their software platform, Hubspot’s “Academy” offers a range of free business and marketing classes, cover topics like business writing, Facebook marketing, brand management, and more. Think about dipping in to one of these free courses this week, and start to learn about the marketing chops that go hand in hand with today’s tech world.
Become a project manager. You know what’s even better than having a digital toolkit? Being able to lead other people who have the same skills. By combining digital skills with the ability to lead and management in a project setting, you’ll be ready to take the tech world by storm.Once again, Coursera has your introductory foray into project management handled, with a full complement of project management and career success courses you can check out here.
And when you’re REALLY ready to combine business and tech, consider enrolling in Skillcrush’s Digital Marketing Blueprint, a comprehensive course that will equip you with everything you need to call yourself a bonafide digital marketer.
(back to top)
from Web Developers World https://skillcrush.com/2019/01/11/skills-you-can-learn-in-7-days/
0 notes
Text
The Shocking Revelation of SEO 2019
SEO (Search Engine Optimisation) will be the process of getting visitors from organic search results upon Search Engines. The sensible strategy for SEO might still appear to be in order to reduce Googlebot crawl expectations plus consolidate ranking equity & possible in high-quality canonical pages plus you do that by reducing duplicate or near-duplicate content. This can take a LONG period for a site to recuperate from using black hat SEARCH ENGINE OPTIMIZATION tactics and fixing the troubles is not going to necessarily bring organic visitors back as it was prior to a penalty. The particular best SEO Guide is right here to dispel those myths, plus give you all you require to know about SEO in order to show up online and various other search engines, and ultimately make use of SEO to grow your company. > > Upon Page Optimization: On-page SEO is definitely the act of optimizing single pages with a specific finish goal to rank higher plus acquire more important movement within web crawlers. There are a lot Blog9T of websites providing pertinent information regarding SEO and online marketing, and you may learn from them. But it's confusing why some businesses don't try out harder with analysis, revisions, plus new content with their SEARCH ENGINE OPTIMIZATION online marketing strategy. An effective SEO strategy will certainly be made up of a mix of elements that ensure your internet site is trusted by both customers as well as the look for engines. By taking their particular marketing needs online and employing confer with an experienced SEARCH ENGINE OPTIMIZATION agency, a business can achieve thousands, or even millions associated with people that they would possess not been able to usually.
It looks generally used in SEO as the general definition for the method that the mathematical detection associated with synonyms, and how certain phrases are related to others within a piece of text, is used to the indexing of internet pages by search engines like search engines. So if you would end up being to write 5% for every keyword then your word SEARCH ENGINE OPTIMIZATION and Article will be within the content 75 times every. Like any good SEO company before concentrating on the details will do a proper hyperlink edit and fix all the particular error pages. Taking the hard work to comprehend even the fundamentals of SEO can help your own site gain higher click-through prices, engagement, and of course, ratings. Kent Lewis, President and Founder of the particular Portland based performance firm, Anvil, predicts that both Amazon lookup and voice search will end up being trends in 2019. MarketingVox warns towards getting tied to a "link farm" whose bad SEO behavior could bring you down. Your web webpages must earn that high standing with high-quality content and best-practice SEO. Content is the 2nd major SEO ranking factor, plus is just as important since links. Previously known because WordPress SEO by Yoast, Yoast SEO is one of the particular most quintessential WordPress plugins whenever it comes to search motor optimization. While SEOs need in order to understand it is not just about rankings, UX specialists require to admit that user encounter kicks in even before making use of the website. You can find on-site and off site SEO techniques that you may use to higher your research engine ranking.

Keyword studies about obtaining those terms so that a person can use them properly within content optimization and SEO within general. Just as content by yourself isn't enough to guarantee SEARCH ENGINE OPTIMIZATION success, SEO alone isn't more than enough to ensure that people will certainly find and engage with your own articles. While intense SEO may involve complex site restructuring along with a firm (or consultant) that will specializes in this area, presently there are a few simple methods you can take yourself in order to raise your search engine ranking. While we prepare to enter 2019, keyword creation for SEO professionnals will become less important. Obtain the training you need in order to stay ahead with expert-led programs on Seo (SEO). Learn how to compose articles, learn how to compose some simple HTML, and the particular learn the very basic concepts of SEO, and you may make money online using SEARCH ENGINE OPTIMIZATION and article marketing to obtain your website (you only require one from each website) detailed on Page #1 of Search engines (forget Yahoo as well because the rest) and you can get loads of visitors that will web page. If your website is definitely made up of lower-quality entry type pages using old SEO-techniques (which more and more branded as spam in 2018) after that Google will not index almost all of the pages as properly as your website ‘quality score' is probably likely to end up being negatively impacted. This particular is beyond website content, but great user experience has become a lot more and more important in solid SEO rankings.
You discuss core SEARCH ENGINE OPTIMIZATION strategies and tactics used in order to drive more organic search network marketing leads to a specific website or even set of websites, as properly as tactics to avoid in order to prevent penalization from search motors. SEARCH ENGINE OPTIMIZATION Smart links allows you in order to specify a word, like 'SEO' and then link it in order to a post on your web site. It's great for SEARCH ENGINE OPTIMIZATION to feed the search motors a good amount of keyword-rich links. Sites making use of organic SEO in the strict sense is going to become much like organisms, meaning they will will grow, expand and adjust over time according to readers' desires. No matter the business, the age of business, or even status of competitors, every company should at least implement fundamental SEO strategies to help their particular offerings get found on Yahoo and google. So your SEO if your own thinking mobile, needs to end up being either responsive or app-store technique with the right dimensions, style, user-friendly, UX experience. Dark hat SEO methods, such since the use of keyword filling and link farming, can furthermore boost organic SEO. SEO is definitely important in every area associated with advertising, marketing, design, optimization, movie, content, mobile and e-commerce, with regard to without SEO all is untuned in need of synchronization, as an orchestra of musicians without a good experienced conductor. Unfortunately, 95% of links through SEO link building never provide a single new visitor in order to your website.

An SEO on-line marketing strategy is a extensive plan to get more individuals to your website through lookup engines. A few search optimizers try to tip Google by using aggressive strategies that go beyond the fundamental SEO techniques. Subscribe to the particular Single Grain blog now intended for the latest content on SEARCH ENGINE OPTIMIZATION, PPC, paid social, and the particular future of internet marketing. SEO can furthermore stand for search engine optimizer. Like the rest of the particular digital landscape, SEO marketing will be continuously evolving. Search Engine Book — Read information right after Moz's guide to solidify knowing regarding it of the basic parts of SEO. If a person do not have the period or have insufficient training upon web design or SEO, Appear for web design experts plus hire a professional SEO assistance agency to keep your site and your good reputation in any other case you business may depend upon it. I ended with the website number 1, 228, 570, 060. This particular generates SEO anchor text, which usually helps you in improving your own search engine rankings. SEARCH ENGINE OPTIMIZATION marketing is about the keyword choice that will attract a excellent deal of unique visitors in order to your website. Maybe you have question what will be the fresh changes and updates that all of us can experience in SEO back links sphere in 2019? A Cisco research found that by 2019, eighty percent of all consumer Web traffic will be from Web video traffic. If you have spent time online recently, you might have probably see the term "SEO, inches or "Search Engine Optimization.
This particular SEO model is called the "topic cluster, " and contemporary search engine algorithms rely upon them to connect users along with the information they're looking with regard to. Your own SEO strategy likely involves articles designed to be shared upon social media. Take this article with regard to example, if you search with regard to reverse engineer Google, ” seo secrets, ” reverse engineering seo, ” this short article is on the particular first page for every associated with those search terms. Social networking and SEO need to be working together, sharing content material or utilizing engagement metrics since data for future article marketing and advertising. Simply put, SEARCH ENGINE OPTIMIZATION is marketing through an knowing of how search algorithms function combined with a knowledge associated with what human users might research for. The results furthermore underscore the value of creating new content with your SEO online marketing strategy. Once you create new content centered on your priority keywords, a person have several advantages with the SEARCH ENGINE OPTIMIZATION marketing strategy. Both SEO and content material marketing converge in lots of places; these people do not work in remoteness. Free to show up at SearchLeeds covers everything from specialized SEO and analytics, to PAGE RANK, content marketing, paid media and even more. Following technical mobile SEO greatest practices (e. g., image marketing, redirects, JavaScript and CSS) will be a necessary barrier to access in today's digital world.
Content written simply by customers gives sites legitimacy plus it earns SEO juice each from manual and automatic ranking systems. Throughout 2018, this trend is upon the rise and if a person invest in making your web site mobile friendly you will delight in higher search positions in 2019 as well. When making a web site for Google in 2018, a person need to understand that Search engines has a long list associated with things it will mark websites down for, and that's generally old-school SEO tactics which are usually now classed as ‘webspam‘. Besides getting social plus having a good time, your own social media profiles can favorably affect your SEO efforts. Since so many people rely on voice search being the craze in 2019, I, Nicole Bermack (this article's author), am coining the phrase VSO - voice research optimization. Intelligent brands and agencies are changing new SEO, social and articles marketing strategies to join their own customer conversations. Search engine optimisation (SEO) is the art plus science of getting pages in order to rank higher in search motors such as Google. A person can audit your page's SEARCH ENGINE OPTIMIZATION health, compare SEO metrics regarding a number of pages, plus analyze both external and inner links on any given internet page. Content companies that will offer SEO content creation solutions are experts in creating content material that are not only enhanced for search engine rankings yet also add value for your own business in terms of brand name awareness, customer engagement and enhanced sales.
SEO is really the shortened phrase for search motor optimization. I believe SEO within 2019 will largely be such as SEO in 2018, with the particular exception of some big” Search engines update that wipes out sufficient websites to make people think the algorithms have grown significantly smarter. SEARCH ENGINE OPTIMIZATION works by optimizing a cyberspace pages, conducting keyword research, plus earning inbound links. The business offers excellent SEO packages that will help rank the clients' web site within top three pages associated with search engine pages. That can make SEO an ideal lead era tool, because when searchers adhere to links back to your web site, you have the chance in order to convert them to leads, plus later make sales. Whenever asked to point out principles that are unique towards the particular web, most people will arrive up with two main types: SEO and social media. How many links do a person need for good off-page SEARCH ENGINE OPTIMIZATION? If you are performing a professional SEO audit for the true business, you are going in order to have to think like the Google Search Quality Rater Along with a Google search engineer to offer real long-term value to the client. 44. Give your own social media profiles an SEARCH ENGINE OPTIMIZATION boost. 10% of our experts believe that will there's likely to be the lot of focus on cellular in 2019, as older SEOs realize optimizing for desktop is usually pointless. White hat SEO is not really just about following guidelines, yet is about ensuring that the particular content google search indexes and eventually ranks could be the same content the user will see.
Investing in high quality tactics which do take much longer but endure and are usually the ones which generate important traffic is the best method to spend your time upon SEO. Some SEARCH ENGINE OPTIMIZATION specialists and bloggers say that will short URLs ranks better within Google. This technique will be sometimes known as SEO content” or SEO copywriting”. But you ought to not ignore the most substantial part of the website developing process, i. e. SEO (Search Engine Optimisation). Whilst businesses can choose to perform their own SEO, hiring the SEO agency that has encountered search engine optimizers will simply no doubt, help businesses reap RETURN ON INVESTMENT in the long run. Within fact if you look carefully you will find that content material marketing and SEO go hands in hand. On the some other hand, Black Hat SEO consists of efforts like redirecting internet lookup engine "spiders" to different webpages than human visitors see, mass-posting "spam" comments (on blogs, discussion boards, articles), or putting lists associated with keywords in late each web page in very small fonts. Since we've seen, one of the particular major advantages of SEO will get more traffic because of much better search engine ranking. If you are severe about improving search traffic plus are unfamiliar with SEO, all of us recommend reading this guide front-to-back. Several of these SEO strategies consider to deceive users into going to sites about subjects they may have any curiosity about, which places them at odds with the particular purpose of search engines.
Search engine search engine optimization (SEO) could be the process of influencing the online visibility of the particular website or a web web page in a web search motor 's unpaid results—often known since "natural", " organic ", or even "earned" results. Seo (SEO) is a procedure of improving positions in natural (non-paid) search results searching motors. Various other SEO ranking factors include: available URLs, domain age (older is usually usually better), page speed, cellular friendliness, business information, and specialized SEO. Your own search engine optimization strategy can become divided into two different types: on-page SEO and off-page SEARCH ENGINE OPTIMIZATION. While you familiarize yourself with this local community, you will inevitably stumble your own way onto the websites associated with SEO Gurus” selling courses that will teach you SEO for hundreds of dollars. Expert SEO writers can also make use of modifiers and keyword variations in order to further optimize the content. Within a lot associated with cases, this happens as the consequence of non-ethical SEO specifically buying and selling links which usually could get you up the particular Google ‘adder' quickly. Content is usually key but content alone is usually no longer king; content, framework, and relevance will drive overall performance of content and digital advertising, and SEO is part yet not full parcel. Ultimate WordPress SEARCH ENGINE OPTIMIZATION Guide for Beginners (Step simply by Step) — 28% of web sites on the internet use Wp. SEO is frequently abused as a blanket term intended for digital marketing.

If their business does not have SEARCH ENGINE OPTIMIZATION Internet marketing strategies, she or even he will need help through SEO experts. One of the particular most commonly asked questions, White colored hat SEO in layman's vocabulary is applying the right methods along with a legal strategy to boost your ranking plus increase your popularity. To help the client's future-proof their businesses plus maximize online Return on Investment decision (ROI), we have individuals our own global partners to develop a good SEO methodology that aligns along with Google's recommended best practices. Off-page SEO will assist make your website most well-known and visible on the internet, so you can get even more traffic and users for your own website and product. You might be the proprietor of a growing and flourishing business, the webmaster of the dozen sites, the SEO expert How SEO 2019 Is Going To Change Your Business Strategies inside a Web agency or the DIY SEO ninja passionate regarding the mechanics of Search: this particular guide is meant for a person. On their business blog, Demand Wave also offers a great article about 2016's tops trends in B2B electronic marketing and SEO. Let's take a explore some roles that interpersonal media plays in SEO. You will craft the SEO strategy around the keyword phrases that will lead customers in order to your most profitable products. Google for example, states that will the no follow link end up being taken literally as well since the link will not become followed at all however within reports done for SEO reasons it shows some conflict in order to this.

With internet customers who use their mobiles in order to search on the increase, because an SEO consultant it can make sense to get a look at the particular effects SEO marketing is putting on search engine optimization. The sole purpose of SEARCH ENGINE OPTIMIZATION Services is to improve your own search engine ranking. Make sure redirected domains redirect through the canonical redirect and this too provides any chains minimised, although Help to make sure to audit the backlink user profile for any redirects you stage at a page just such as reward comes punishment if individuals backlinks are toxic (another type of Google opening up the particular war which is technical seo on a front it's not really, and in fact is speak, to building backlinks to your own site). In order to smoothen out the software plan interface problem, the web developing team as well as the particular SEO specialist work together in order to build the major search motors friendly programs and code that may be easily integrated into the client's website. They will possess to find SEO expert internet sites, who will help the company owner's site have many clients in internet marketing. This is mainly because they are not SEO pleasant and can affect your rank significantly. These SEO crawler programs are similar to Google's own crawlers and will provide you an overview showing just how your page will perform within SEO rankings. Google is making certain it takes longer to notice results from black and white hat SEARCH ENGINE OPTIMIZATION, and intent on ensuring the flux in its SERPs centered largely on where the searcher is in the world during the particular time of the search, plus where the business is situated near to that searcher.
Over the particular last 20 years SocialSEO offers grown to be the biggest full digital marketing firm within the state of Colorado, offering Social Media, Pay Per Click on and SEO in Denver, Co Springs, Boulder and across the particular State. Lastly, Amazon will dominate ecommerce queries in 2018 via Alexa voice, touch, as well as other innovative interfaces, leaving many e-commerce SEOs in order to focus in on the content-side of their marketing. If you could use thirty times more chances for internet traffic, three times better benefits than social, and returns upon investment that will only raise over time, SEO must always be a priority. Since artificial intelligence search motor optimization is in its preliminary stage, the impact of synthetic intelligence in marketing is heading to be felt in 2019 and 2020. So regional businesses have to put unique effort into maximizing their SEARCH ENGINE OPTIMIZATION efforts for local visibility, which usually means doing things like enhancing their Google Places pages. All these types of steps are used by the particular company to provide the greatest search engine optimization services in order to its clients in Thailand, below the Thailand SEO concept. Keywords and phrases, whilst not being as important in order to SEO ranking as they after were, still play a significant part. •Social Mass media Optimization - SEO services make use of various means of social press optimization for clients. Lots of people are usually now asking, How will AI and Voice Search impact SEO”?
User-generated content racks up serious SEARCH ENGINE OPTIMIZATION points by providing sites along with fresh content, bundles of back links, and sources for organically framing natural attributes. You'll find it right here Also really worth checking away is Moz's Beginner's Explained SEARCH ENGINE OPTIMIZATION, ” which you'll find right here, and the SEO Success Pyramid from Small Business Search Marketing and advertising. Off-page SEARCH ENGINE OPTIMIZATION strategy refers to the impact of a change in various other websites in your search position. Bruce Clay-based set the standard for honest internet marketing by authoring the particular " SEO Code of Integrity, " now translated into eighteen languages, and it has already been a respected leader within the particular ever-changing lookup engine marketing industry since mil novecentos e noventa e seis. Website SEARCH ENGINE OPTIMIZATION (including, content optimisation, meta seo, the significance of links). A good SEO Specialist is someone who else is an expert on the particular topic of search engine optimisation. Just since a proper On-page and Off-page SEO optimization work will provide a better Ranking to your own website in Search Engine Outcome Page (SERP). The largest SEO change and pattern I realize already happening within 2018 is Google's switch in order to a mobile-first index, so in the event that a site is not however mobile-friendly and optimized for this, it's critical to prioritize this particular as it is now basic for its SEO success. With good on-page SEO, lookup engines can easily index your own web pages, understand what your own site is about, and very easily navigate the structure and articles of your website, thus rank your site accordingly.

We cover every topic throughout the digital marketing sphere like SEO, technical SEO, local SEARCH ENGINE OPTIMIZATION, PPC, SEM, content marketing, CRO, analytics, backlink, marketing strategy, cellular marketing, social media marketing plus much more. Any SEARCH ENGINE OPTIMIZATION company has to be capable to create high quality articles on an ongoing basis. SEO is the method for making changes to the website to be able in order to improve its position in the particular search engines like google. Robert thinks that by 2019 most cellular searches will be conducted simply by voice by mobile devices or even virtual assistants in fact this is very important to obtain your positioning in the lookup engine ranking positions as quickly as possible. As the particular factors search engines like Search engines, Bing, and Yahoo use in order to rank sites are kept key and change frequently, we construct all known SEO best methods into every Squarespace site. Black hat SEO may get you to the best of SERP in a brief time, however, search engines such as google will most probably punish and ban the website more rapidly or later. If you have read from the beginning, a person know that links are the key SEO ranking factor. Right now there are 2 types of lookup engine optimization or SEO. Now, pay shut attention to the components the fact that make up on-page SEO, since this is where non-SEO authorities will be able to help make the most meaningful impact upon their search engine rankings.
0 notes
Text
Puppeteer HTML to PDF Generation with Node.js

In this article I’m going to show how you can generate a Puppeteer PDF document from a heavily styled React web page using Node.js, headless Chrome & Docker.
Background: A few months ago one of the clients of RisingStack asked us to develop a feature where the user would be able to request a React page in PDF format. That page is basically a report/result for patients with data visualization, containing a lot of SVGs. Furthermore, there were some special requests to manipulate the layout and make some rearrangements of the HTML elements. So the PDF should have different styling and additions compared to the original React page.

As the assignment was a bit more complex than what could have been solved with simple CSS rules, we first explored possible implementations. Essentially we found 3 main solutions. This blogpost will walk you through on these possibilities and the final implementations.
A personal comment before we get started: it’s quite a hassle, so buckle up!
Table of Contents:
Client side or Backend side PDF generation?
Option 1: Making a Screenshot from the DOM
Option 2: Use only a PDF library
Final option 3: Puppeteer, headless Chrome with Node.js
Style manipulation
Send file to the client and save it
Using Puppeteer with Docker
Option 3 +1: CSS print rules
Summary
Client side or Server side PDF generation?
It is possible to generate a PDF file both on the client-side and on the server-side. However, it probably makes more sense to let the backend handle it, as you don’t want to use up all the resources the user’s browser can offer.
Even so, I’ll still show solutions for both methods.
Option 1: Make a Screenshot from the DOM
At first sight, this solution seemed to be the simplest, and it turned out to be true, but it has its own limitations. If you don’t have special needs, like selectable or searchable text in the PDF, it is a good and simple way to generate one.
This method is plain and simple: create a screenshot from the page, and put it in a PDF file. Pretty straightforward. We used two packages for this approach:
Html2canvas, to make a screenshot from the DOM
jsPdf, a library to generate PDF
Let’s start coding.
npm install html2canvas jspdf
import html2canvas from 'html2canvas' import jsPdf from 'jspdf' function printPDF () { const domElement = document.getElementById('your-id') html2canvas(domElement, { onclone: (document) => { document.getElementById('print-button').style.visibility = 'hidden' }}) .then((canvas) => { const img = canvas.toDataURL('image/png') const pdf = new jsPdf() pdf.addImage(imgData, 'JPEG', 0, 0, width, height) pdf.save('your-filename.pdf') })
And that’s it!
Make sure you take a look at the html2canvas onclone method. It can prove to be handy when you quickly need to take a snapshot and manipulate the DOM (e.g. hide the print button) before taking the picture. I can see quite a lot of use cases for this package. Unfortunately, ours wasn’t one, as we needed to handle the PDF creation on the backend side.
Option 2: Use only a PDF Library
There are several libraries out there on NPM for this purpose, like jsPDF (mentioned above) or PDFKit. The problem with them that I would have to recreate the page structure again if I wanted to use these libraries. That definitely hurts maintainability, as I would have needed to apply all subsequent changes to both the PDF template and the React page.
Take a look at the code below. You need to create the PDF document yourself by hand. Now you could traverse the DOM and figure out how to translate each element to PDF ones, but that is a tedious job. There must be an easier way.
doc = new PDFDocument doc.pipe fs.createWriteStream('output.pdf') doc.font('fonts/PalatinoBold.ttf') .fontSize(25) .text('Some text with an embedded font!', 100, 100) doc.image('path/to/image.png', { fit: [250, 300], align: 'center', valign: 'center' }); doc.addPage() .fontSize(25) .text('Here is some vector graphics...', 100, 100) doc.end()
This snippet is from the PDFKit docs. However, it can be useful if your target is a PDF file straight away and not the conversion of an already existing (and ever-changing) HTML page.
Final Option 3: Puppeteer, Headless Chrome with Node.js
What is Puppeteer? The documentation says:
Puppeteer is a Node library which provides a high-level API to control Chrome or Chromium over the DevTools Protocol. Puppeteer runs headless by default, but can be configured to run full (non-headless) Chrome or Chromium.
It’s basically a browser which you can run from Node.js. If you read the docs, the first thing it says about Puppeteer is that you can use it to Generate screenshots and PDFs of pages’. Excellent! That’s what we were looking for.
Let’s install Puppeteer with npmi i puppeteer, and implement our use case.
const puppeteer = require('puppeteer') async function printPDF() { const browser = await puppeteer.launch({ headless: true }); const page = await browser.newPage(); await page.goto('https://blog.risingstack.com', {waitUntil: 'networkidle0'}); const pdf = await page.pdf({ format: 'A4' }); await browser.close(); return pdf })
This is a simple function that navigates to a URL and generates a PDF file of the site.
First, we launch the browser (PDF generation only supported in headless browser mode), then we open a new page, set the viewport size, and navigate to the provided URL.
Setting the waitUntil: ‘networkidle0’ option means that Puppeteer considers navigation to be finished when there are no network connections for at least 500 ms. (Check API docs for further information.)
After that, we save the PDF to a variable, we close the browser and return the PDF.
Note: The page.pdfmethod receives an options object, where you can save the file to disk with the ‘path’ option as well. If path is not provided, the PDF won’t be saved to the disk, you’ll get a buffer instead. Later on, I discuss how you can handle it.)
In case you need to log in first to generate a PDF from a protected page, first you need to navigate to the login page, inspect the form elements for ID or name, fill them in, then submit the form:
await page.type('#email', process.env.PDF_USER) await page.type('#password', process.env.PDF_PASSWORD) await page.click('#submit')
Always store login credentials in environment variables, do not hardcode them!
Style Manipulation
Puppeteer has a solution for this style manipulation too. You can insert style tags before generating the PDF, and Puppeteer will generate a file with the modified styles.
await page.addStyleTag({ content: '.nav { display: none} .navbar { border: 0px} #print-button {display: none}' })
Send file to the client and save it
Okay, now you have generated a PDF file on the backend. What to do now?
As I mentioned above, if you don’t save the file to disk, you’ll get a buffer. You just need to send that buffer with the proper content type to the front-end.
printPDF.then(pdf => { res.set({ 'Content-Type': 'application/pdf', 'Content-Length': pdf.length }) res.send(pdf)
Now you can simply send a request to the server, to get the generated PDF.
function getPDF() { return axios.get(`${API_URL}/your-pdf-endpoint`, { responseType: 'arraybuffer', headers: { 'Accept': 'application/pdf' } })
Once you’ve sent the request, the buffer should start downloading. Now the last step is to convert the buffer into a PDF file.
savePDF = () => { this.openModal(‘Loading…’) // open modal return getPDF() // API call .then((response) => { const blob = new Blob([response.data], {type: 'application/pdf'}) const link = document.createElement('a') link.href = window.URL.createObjectURL(blob) link.download = `your-file-name.pdf` link.click() this.closeModal() // close modal }) .catch(err => /** error handling **/) }
<button onClick={this.savePDF}>Save as PDF</button>
That was it! If you click on the save button, the PDF will be saved by the browser.
Using Puppeteer with Docker
I think this is the trickiest part of the implementation - so let me save you a couple of hours of Googling.
The official documentation states that “getting headless Chrome up and running in Docker can be tricky”. The official docs have a Troubleshooting section, where at the time of writing you can find all the necessary information on installing puppeteer with Docker.
If you install Puppeteer on the Alpine image, make sure you scroll down a bit to this part of the page. Otherwise, you might gloss over the fact that you cannot run the latest Puppeteer version and you also need to disable shm usage, using a flag:
const browser = await puppeteer.launch({ headless: true, args: ['--disable-dev-shm-usage'] });
Otherwise, the Puppeteer sub process might run out of memory before it even gets started properly. More info about that on the troubleshooting link above.
Option 3 + 1: CSS Print Rules
One might think that simply using CSS print rules is easy from a developers standpoint. No NPM or node modules, just pure CSS. But how do they fare when it comes to cross-browser compatibility?
When choosing CSS print rules, you have to test the outcome in every browser to make sure it provides the same layout, and it’s not 100% that it does.
For example, inserting a break after a given element cannot be considered an esoteric use case, yet you might be surprised that you need to use workarounds to get that working in Firefox.
Unless you are a battle-hardened CSS magician with a lot of experience in creating printable pages, this can be time-consuming.
Print rules are great if you can keep the print stylesheets simple.
Let’s see an example.
@media print { .print-button { display: none; } .content div { break-after: always; } }
This CSS above hides the print button, and inserts a page break after every div with the class content. There is a great article that summarizes what you can do with print rules, and what are the difficulties with them including browser compatibility.
Taking everything into account, CSS print rules are great and effective if you want to make a PDF from a not so complex page.
Summary: Puppeteer PDF from HTML with Node.js
So let’s quickly go through the options we covered here for generating PDF files from HTML pages:
Screenshot from the DOM: This can be useful when you need to create snapshots from a page (for example to create a thumbnail), but falls short when you have a lot of data to handle.
Use only a PDF library: If you need to create PDF files programmatically from scratch, this is a perfect solution. Otherwise, you need to maintain the HTML and PDF templates which is definitely a no-go.
Puppeteer: Despite being relatively difficult to get it working on Docker, it provided the best result for our use case, and it was also the easiest to write the code with.
CSS print rules: If your users are educated enough to know how to print to a file and your pages are relatively simple, it can be the most painless solution. As you saw in our case, it wasn’t.
Make sure to reach out to RisingStack when you need help with Node, React, or just JS in general.
Have fun with your PDF HTML’s!
Puppeteer HTML to PDF Generation with Node.js published first on https://koresolpage.tumblr.com/
0 notes
Text
How I Grew Up On The Internet
New Post has been published on https://kidsviral.info/how-i-grew-up-on-the-internet/
How I Grew Up On The Internet
The internet is IRL. It always has been.
View this image ›
I started navigating the internet — really, the earliest versions of social media — early in my life, and before most people even really knew what the internet was. I was 11 when I first logged on in 1993 — I’m 32 now — and I’ve spent the ensuing years invested in online communities at least as much as I’m invested in offline ones. I never understood there to be a clear line between the two. Before I ever even had a cell phone, I used the social web to document and reflect on my offline life. I’ve met wonderful people online, connected in much deeper ways to the friends I had, and I’ve used dozens of networks and platforms to figure myself out. The internet hasn’t been a way to escape, it’s been a creative outlet, a friend, a documentarian, and a tool that has made my real life better, cooler, weirder, and more fun. For me, the internet isn’t some distinct virtual universe, it’s just one part of the real world.
This is the history of my first 20 years online. It’s a happy story.
View this image ›
View this image ›
When I was 9, my parents chose to homeschool my older brother, Mitch, and me out of frustration with public school. I had just finished third grade and he, fifth. We were both doing fine academically, but my mom felt like our personalities were changing. My brother often came home from school depressed, and we started to complain about things like reading that we had loved before. Mom and Dad hated the focus on standardized testing, and felt that our teachers didn’t appreciate the creative curiosity they treasured.
A couple years into the great homeschooling experiment, we moved temporarily from Austin, Texas, a hippie college town with a growing secular homeschooling community, to Arlington, Virginia. I missed home and I had trouble making new friends in the Christian homeschool group there.
View this image ›
My brother Mitch on our Macintosh computer in the mid-’80s.
That was when Mitch told me about BBSes (Bulletin Board Systems) and saved me from my boredom and social isolation. BBSes were local networks where we could read and write on message boards, chat live, and play games. We were lucky enough to have the magic formula: a PC, a 2400-baud modem, and a second phone line. My dad had always been fascinated by gadgets — he’d bought us our (and the!) first Macintosh in 1984, when I was just two years old. The iconic modem sound that began any trip to my favorite BBSes still makes me feel urgently stoked. That sound means I’m about to arrive at the best party ever, and I still get to wear my pajamas.
I tried a few BBSes, but I quickly became devoted to one in particular called “International House of Kumquats.” IHOK was run by a chill teenager who went by the handle Surrealistic Pickle. I felt at home there. Everyone was young and smart and cool and they immediately became my friends. (Since the BBS was on a local phone number, I knew we all lived in the D.C. area.) I never really thought much about the fact that we had “met online” — the concept was too new to feel dorky or taboo yet.
The average age of people on the board was probably about 16, while I was only 12. “Star Shadow,” my earnest choice of an alias, was a dead giveaway that I was the youngest person on the board. Still, I fit in fine. The kids on IHOK shared my enthusiasm for the band They Might Be Giants and we discussed them constantly, dissecting lyrics and debating best songs. We also talked about our lives and anxieties, we made up recurring inside jokes, we quoted our favorite movies and TV shows, and recommended books. We developed real friendships.
Within a few months, Surrealistic Pickle made me a co-sysop (system operator), the official duties of which were slight enough that I don’t actually remember what they were, but I still listed it on all of my teenage resumes. It was the first time that anyone had put semiprofessional faith in me, and it was done purely because of the value of my contributions, without a thought given to my being a girl, a weird homeschooler, or an actual child.
When my mom first agreed to let me meet my friends in person, she dropped me off at the National Mall but then parked a few blocks away with a stack of books and an eye on our activities. Looking back, I’m amazed that the teenagers from the board didn’t tease me for my mom literally watching over us, and I’m equally grateful she was open to the idea at all. We couldn’t share photos on the BBS, so the first time I met my board mates IRL was the first time I saw them at all. That part seems weird now, but it didn’t feel strange at the time. We already knew each other’s sense of humor, feelings, opinions, and personalities — the rest was just wrapping paper.
A few months later, I went to my first ever show with my BBS buddies: NRBQ and They Might Be Giants (obviously) at Wolf Trap in Virginia. The Kumquat crew were splayed out on picnic blankets on the grassy hills. They were Manic Panic-ed, glasses-wearing, and trench-coated teenagers who probably didn’t fit in at high school. They were all, more than any other quality, ridiculously nice. I thought they were the coolest people in the world.
View this image ›
View this image ›
Cool “Lion King” button + Slurpee T-shirt.
I was having an awkward adolescence. I liked talking to my parents way more than I liked anyone my own age. I wanted to have deep, intelligent conversations about my interests, which were Disney animated movies (I collected Lion King merchandise), horses, and cute boys. Not, for the most part, things that grown-ups actually wanted to talk to me about.
Luckily, Prodigy existed. Prodigy was a dialup service that predated widespread use of the World Wide Web. Like its competitor, America Online, Prodigy contained multitudes: shopping, news, weather, games, advice columns, and more. I was only interested in connecting with people, so I used the live chat, email, and discussion boards.
I joined a message board where other girls like me had invented an elaborate role playing game for made-up horses — we each “owned” dozens of fake horses, gave them names and attributes, and pitted them against each other in entirely arbitrary competitions that were just decided by whoever was running them. I kept my horse files in a giant binder full of descriptions like this:
View this image ›
People who I tried to explain the game to didn’t understand it at all. It wasn’t until I was introduced to the concept of fantasy sports a decade later that I thought maybe this all wasn’t as strange as I feared.
I was even more involved with the Disney Fans Bulletin Board, which was populated mostly by grown men and women who retained their interest in all things Disney well past the age when most people grow out of it. I loved them. Many of my DFBB cohorts lived and worked in Orlando, just because it meant that they got to go to Disney World whenever they wanted. To me, they were living the ultimate adulthood dream.
I got so involved with the Disney board that I was eventually given a “job.” The job paid me in a free Prodigy subscription and one free t-shirt. My title was “Teens Liaison,” and I did just that: liaised with other teens. Although most of the community was much older , I developed raging crushes on the handful of boys my age. I can still remember, in fine detail, a photo one of them sent me of himself dressed up as Prince Eric for Halloween. I had several Prodigy flirtations before I had figured out the slightest thing about talking to boys I knew offline. We talked about our feelings, which was impossible with the teenage boys I knew in “real” life. I was myself with the dudes of Prodigy — open and honest and weird — and they liked me for it.
I eventually met my Prodigy friends in real life too. My parents planned a trip to Disney World, mostly for my obsessive benefit, and let me bring my best friend, another homeschooler named Kate. I dragged Kate and my mom to a meetup dinner with the DFBB group at a fancy Disney-themed restaurant. Almost all of the attendees were closer to my mom’s age than to mine, but we had fun anyway. I got a purple tie-dyed DFBB staff T-shirt that I wore proudly to the park the next day. Soon after our meeting, people started to leave Prodigy for the wider world of the web, and I followed.
View this image ›
View this image ›
Editing my “Lady and the Tramp” fan site with a stack of Disney encyclopedias, 1995.
I made my first website in 1995, when I was 13, and it was dedicated to my favorite movie, Lady and the Tramp. It started with a short introduction: “I’m here to provide the major source of Lady information on the World Wide Web.” The page included an archive of tiny photos I’d been able to dig up or scan, random facts I’d strung together from my collection of Disney books, the title of the movie translated into several other languages, a character list, quotes, and the movie’s credits, transcribed from my own VHS copy.
I taught myself HTML to make the page, borrowing books from the library and reading tutorials online. Once I made the Lady and the Tramp page, I was hooked. I started expanding my website to include biographical information about me, terrible things I’d written, pictures of my friends, and more.
By 1999, the earliest date that the web archive has for my site, it was basically a magazine. It included:
A 14-part “about me” section
Thousands of words devoted to describing each of my friends. Example: “Lots of people will tell you that I’m obsessed with Dorothy and you might say that’s true — I just happen to think she’s one of tha most beautiful, funniest girlies in that whole wide world. :-)”
Pages devoted to my opinions on religion, animal rights, curfews, Bill Clinton, and legalizing marijuana
A list of reasons that you should go vegetarian
A description of my imaginary perfect boyfriend, Jimmy Tony
Dozens of poems I’d written
My “future encyclopedia entry,” including the career description “writer, artist, entrepreneur, animal handler, actress, philosopher”; the titles of several of my future books about Shakespeare and hip-hop; details of the company I would found someday; the many books I would write; and my partnership with my imaginary husband Jimmy
A daily journal cataloguing the mundane details of my life
Book reviews
Comics I made with Photoshop
“Summer’s Spiffy Sendable Celebs,” a collection of about 30 e-postcards I made of my favorite celebrities
Capsule reviews of every episode of Dawson’s Creek
Commentary on my favorite songs and a list of my favorite CDs
A “shrine” celebrating Ani DiFranco
A collection of my favorite jokes
Desktop photos of celebrities and animals that I’d edited and made available to my “public”
An elaborate, multisectioned fan page for the character Ophelia from Shakespeare’s Hamlet, including artwork, personal essays, historical information, and more
A lengthy acknowledgments section that thanked AltaVista, my scanner, my entire extended family, friends, and all of my pets
Making websites was my primary mode of self-expression throughout my teens, and it was also a huge part of my mostly autodidactic education. Over the years, my family’s approach to our education had grown increasingly radical, buoyed by the writings of “unschooling” proponents such as John Holt and Grace Llewellyn. I chose what to focus on and how to spend my time based on my goals, with fairly minimal oversight from my parents. My website became an obsession, and I had all the time in the world to devote to it. Most of the other creative things I did — drawing pictures, writing bad poems, and composing essays — were in the service of making a cool-as-hell website.
View this image ›
A version of my website layout, featuring a dog I found on the street and kept for two days.
Although my site wasn’t part of any specific social platform, there was an informal but intense network of teenage and young adult women doing the same thing I was, and we joined web rings, made link lists, and sent each other fan mail. I kept up with tons of other website makers, almost all of them women: from JenniCam to one gothy girl who I only remember as “Calliope.” I learned from them. I studied their source codes for HTML tips, copied their brooding photography styles, listened to bands they mentioned in passing, started taking moody selfies like theirs, and tried hard to impress them with endless tweaks and new features on my website. To some extent, I lived my life with my website in mind — do it for the dot-com! — but this was a good thing: It made me more creative, thoughtful, and adventurous.
Creating my own elaborate websites about myself was outrageously, hilariously narcissistic in hindsight. But building my own sites gave me the ability to tell people who I was in a way that I could control. It also allowed me to look at myself in a positive way, something that was missing when I looked in the mirror. I liked the me I was on the web. I still do.
I’ve always wondered about the assumption that our online personas are more fake than our physical ones. I often feel awkward and nervous in real-life situations; I almost always feel like I’m saying the wrong thing and am unable to articulate what I really think and feel. Online, I have plenty of time and unlimited space to consider what to say and how to express myself. It’s an advantage that makes me feel more like myself, not less so.
View this image ›
View this image ›
On Dec. 7, 2000, the day I joined LiveJournal, I was 18 years old, living with my parents in Austin, jobless, ecstatically in love with my first boyfriend, and spending almost every waking second with as many of my friends as possible. My crew was comprised of other homeschooled teenagers with the same excess of free time that I had, resulting in us spending so much time together that we complained about missing each other when we were apart for two days. I documented every mundane moment of that life and the years that followed on my LiveJournal, eventually falling off but still occasionally updating until 2007.
My journal is still up, hundreds of thousands of words detailing the first seven years of my adult life, and it’s full of hilarious contradictions. I was clearly leading a blissful adventure, experiencing a new “first” practically every week — my first relationship, my first apartment, my first road trip with friends, my first full-time job — but I constantly write as if the weight of the world is on my shoulders: “Life has gotten so misplaced. I don’t even know what I’m doing, just that it can’t be like this forever.”
I was also so unaware of how dang corny I was being all the time. I would write about “candy magic” and my “yummy” days and being “so full of joy.” I think I’m a pretty earnest and even cheesy person now, but I’ve got nothing on my 18-year-old self waxing poetic about every single silly thing under the sun that day. Some parts of it make me wish I still had the ability to be so sincere, but other parts make me think I must have been the most annoying person on earth.
I shared more on my LiveJournal about my thoughts and emotions than I ever did in verbal conversations. I masked my feelings with humor and being loud in “real” life, but I was able to share my neuroses on my LJ. My best friends were reading my journal, and writing in their own too, so it wasn’t like it was a secret — when we weren’t busy hanging out and having fun in my room, we were talking and fighting and sharing our lives, all through words upon words upon words on our computer screens.
I’d write about politics or religion, about trying to understand people who disagreed with me, about the anxieties and delights of my first relationship, about the bands I was discovering and falling in love with. Most of all, I wrote about spending time with my friends, and about how much I loved them.
“I’ve just had one of the most fun-packed days of my life! This will be a long entry but it may actually be worth reading becuz there was so much weirdness today:
“Rachel and Dorothy and I stayed up ALL night last night, being goofy and bitchy and farting and just being completely delirious and silly. At 8:00 we went to Flips, and soon thereafter down to soccer.
I went to soccer and was loud and delirious and singing, and then we went to Schlotsky’s and had great conversation. Then Rachel left and I almost cried cuz she was so fun and I’m gunna miss her so much. But then I went to Flips and they were funny over there. And then I went to meet Isaac after work! And I was dressed so cool and in such a good mood, and we walked around.”
My friends’ journals have largely the same tone: documenting our lives in incredible, mundane, ecstatic detail. This is mostly a practice that seems to have been left behind on the present web, where at least most people are self-aware enough to know that others aren’t interested in an outline of their everyday lives. I guess this is a good thing — I’ve naturally grown up and become smarter and more self-aware since my LiveJournal days, and reading my writing from that era causes my entire body to seize up in embarrassment. I’m also so incredibly jealous. I look back at these entries and I read someone who was completely, 100% unafraid of being herself. I can’t think of anything more remarkable in a teenage girl, and I’m grateful that LiveJournal was a place where I could be me: purely, ridiculously, perfectly.
View this image ›
I was still blogging when I first joined Flickr.com in August 2004. For five years when everything else was changing — I left jobs, moved four times, broke up and restarted relationships, got a cat, and met my best friend — Flickr was a stable and integral part of my life. Flickr was focused entirely on photographs, and those pictures were all there was to it. You were judged not by your cool list of interests or your clever status updates, but by the glimpse into your actual life that photos provide. The present analogue is Instagram.
Still, before I even had an iPhone, Flickr flipped the tables for me. Instead of the internet being a thing I did when I wasn’t ~living~, Flickr became a way to keep track of all the cool stuff I was doing with my time. And there was plenty to keep track of — the time when I started using it a lot was also when I started drinking, dating, and traveling, and met most of the friends who are still my crew today. My Flickr photos are packed with boys I had flings with or unrequited crushes on, parties, late night video game sessions at my ex-boyfriend’s house, my new best friend’s hands folded around a beer at our favorite bar, and lots and lots of elaborately artistic selfies taken with my DSLR’s timer function.
View this image ›
Cute boys with cats uploaded to my Flickr, 2004-2005.
I looked at Flickr a lot. My friends who were on it uploaded all of their photos too, and it was a way to reflect and reinforce all of the things we were going through together. Looking back at my early uploads or my favorites list is as evocative as listening to an old favorite song. It’s easier to remember things that you regularly look at photos from, and as a result, the years after I joined Flickr are genuinely much clearer to me than all of the ones that came before.
When I browse Flickr now — it still exists, but active users have dwindled away since Yahoo started making changes after it acquired the service in 2005 — I’ll come across a photo of an ex-boyfriend hugging a cat or a good friend drinking coffee or a bunch of co-workers dancing in someone’s apartment, and I can hear and smell and feel everything in that frame. Flickr isn’t a window into my “internet life” of yore, it’s a window into my life-life. Maybe they are the same thing.
View this image ›
View this image ›
Typical Myspace selfie.
Although it was preceded by Friendster, which was used by me and a handful of my friends, for me Myspace marks when the concept of “social networking” became mainstream. It was the first time that the energy and excitement I felt for the internet was shared by almost everyone else my age.
There were so many Myspace things that came and went with the platform. The entire concept of having a “top eight” friends will always haunt people of a very specific age and remain completely meaningless to everyone five years older or younger than us.
And the Myspace selfies! I used Myspace photos to exert a control over my appearance that I’ve never quite felt like I had in real life. I’d carefully apply makeup I never wore in public, borrow my roommate’s jewelry, and have an entire selfie session in the sunshine just to achieve the perfect new profile picture.
Most notably, we made music for each other on Myspace. Getting musicians and their fanbases online must have been a strategic push for the company, but it felt completely organic. It felt like one day some band got on Myspace and made it big, and then the next day everyone on earth opened GarageBand for the first time.
Countless friends put music up on Myspace, so after joking that if I had a band I’d call it Premade Bears, I made a profile and I made some songs. For one of them, I borrowed my roommate’s 5-year-old son’s tiny miniature guitar and locked myself in the bathroom, strumming along to my imperfect country-ass voice singing about having a thing for a younger dude. For others, like “Stay Sweet; Don’t Ever Change,” I arranged some generic beats and played some keys on my laptop while sort of lackadaisically rapping about having a crush in the summertime.
There was no future for me in these weirdo amateur tunes, no shows to book or albums to release. Lily Allen made it big on Myspace, but most of us weren’t thinking about scale. I worked at a bookstore, doing events and making displays. I had designs to do something more with my life, but I wasn’t ever going to be a famous musician. Still, I made something I’d always wanted to, and I shared it with my friends. That was cool. Before Myspace, making music and getting people to listen to it seemed hard and complicated. During Myspace, it was the easiest thing in the world. Our old Myspace photos and cliquey top eights were a little silly, but making tunes for each other was a truly sweet, cool thing we got to do and I am grateful.
View this image ›
When I joined Facebook in 2006, it felt at first like the other social networks — a secret club for me and a select few to share our lives together. I didn’t quite get the point — most of the action was still on Myspace for the first couple years, and the wonkiness of Myspace’s customizable color scheme felt way more me than the clean, boring blue and gray on Facebook. And then Facebook grew. And kept growing. And now it remains the only network mentioned here that’s frequented by my entire extended family.
As evidenced by the teens who’ve left Facebook for other less mom-supervised networks and apps over the last couple years, being on a social network with everyone you’ve ever known is sometimes less fun than the alternatives. I mean, it makes sense: The last thing I want to do in real life is gather every friend, former co-worker, family member, and ex-boyfriend in one giant room together.
That said, my own mom is by far the coolest part of my Facebook experience. My mom uses Facebook with the same delightful, contagious joy that I used early BBSes with. Every Friday, she posts nature photos from the ranch where she lives with the hashtag #FieldNotesFriday. Rumor of her excellence on Facebook has spread among my group of friends, and I occasionally get a text from another pal asking if it’s cool if they request her.
View this image ›
A typical Facebook update from my mom.
Social networking is associated with youth — naturally, kids who grew up with the internet are more comfortable adapting to new social networks. But in the next couple decades, those same kids will be the parents crashing the party. If my mom is any indication, that could actually be pretty great.
View this image ›
I joined Twitter just about as soon as I heard about it, in early 2008; by that time, I was joining pretty much any social network that came onto my radar. When I first joined, my tweets were approximations of Facebook statuses.
is going to start using twitter.
— summeranne (@Summer Anne Burton)
It took months before I started using the actual functionality of Twitter, like to find out I had missed events or, er, comment on the news:
checking twitter for the first time in a day & like a nightmare, last night: “secret okkervil river show RIGHT NOW @ the compound”… Sigh.
— summeranne (@Summer Anne Burton)
david foster wallace is dead. wtf.
— summeranne (@Summer Anne Burton)
I felt like I was talking to a wall, because no one I knew was on Twitter, so I gave up on it for a while. I got the sense that Twitter was never going to catch on, but when a few of my coolest real-life friends started accounts, I quickly returned:
people keep joining twitter. so i’ll try to start updating again. i need an omelette.
— summeranne (@Summer Anne Burton)
But I used the platform for desolate personal revelations and song lyrics cryptically referencing my complicated personal life:
We are the challengers of the unknown.
— summeranne (@Summer Anne Burton)
Whiskey, i love you with a depth of feeling that scares the shit out of you.
— summeranne (@Summer Anne Burton)
When I first started at BuzzFeed almost three years ago, I stopped using Twitter as a constant stream of my brain and started using it more professionally and strategically to share my articles, comment on other sites’ posts, and interact with writers and editors I worked with or admired.
It felt like Twitter was something I did for work and Facebook was something I did for my “real” friends. Living in New York City, I have now met many of the people whose faces light up my TweetDeck window every day, but my pals back home mostly remain holdouts.
Still, lately my Twitter experience has reverted 360 degrees back to the personal, flirty, ~relatable~ vibe of my early tweets, except people are actually listening. I like to tweet about songs I like, and having crushes, and being up too late at night. I like to post selfies, and look at the selfies of cute dudes and ladies I follow. I like Twitter on the nights and weekends as much as I like it during the day at work. I like to wonder about whether a fav is a flirty fav or just a fav. I try to make people smile, or laugh, or, at the very least, think I am charming. I follow people who I find nice, warm, and smart.
life goal: be more like this dog
— summeranne (@Summer Anne Burton)
I often describe Twitter these days as the cool room where I hang out with my internet friends all day. Most of my closest “IRL” friends back in Texas still don’t use it, so Twitter still feels in some ways like a throwback to the internet of yore. It’s insurance that my thoughts won’t just disappear inside my brain. It’s a place to test my own ideas and jokes and cute pictures before unleashing them on a wider audience. And it’s an amazing way to maintain mild crushes on the brains of a few hundred other people, a true dream come true for my giant, fickle heart.
View this image ›
View this image ›
In January 2011, I had been using Tumblr for a couple years. I’d given up on maintaining my personal domain name and redirected it to my tumblog, where I posted photos, wrote about songs I liked, and shared links to things on the internet I was into. I had, around this same time, gotten super into drawing again. Art was something I’d been into consistently as a kid and a teenager, but I’d been focusing on writing, kissing boys, and working shitty retail jobs for most of my twenties. I started posting drawings on my blog in 2010 and found that my friends responded super positively to them. There’s so much reblogging and reposting and sharing on the social web that putting something truly new into the world again felt like I was doing something special.
I was also becoming completely obsessed with baseball, thanks to a fortuitous series of events. I’d started dating an obsessive sports fanatic named Brian and we visited the Hall of Fame in Cooperstown together for his birthday. I’d also recently switched from cheerleading to playing in my devoted local co-ed softball league. I’d just binge-watched all of the Ken Burns baseball documentary series. I joined a fantasy league. I had always liked baseball — it was the only sport I remember my dad being really into when I was a kid, and my grandmother was a devoted Astros fan — but this time, I got serious about it. I devoured books about baseball statistics and history, got an MLB season pass for my phone and computer so I could watch all the games I wanted, learned how to keep score, and started reading baseball websites and following baseball writers online.
So, in 2011, I started something that seemed totally natural: I decided to draw every member of the National Baseball Hall of Fame (there are currently 306) and put the drawings up on Tumblr. I thought maybe I could do it in a year. Four years later, I’m up to 258 drawings done. The project wasn’t designed to go viral; I just thought it would get me into the practice of drawing regularly, and that I’d get to learn more about baseball history in the process.
View this image ›
One of the inaugural five Hall of Famers and one of my first drawings for the blog.
A few months in, an editor for ESPN: The Magazine called my cell phone. I was at my part-time waitressing job when he told me the magazine wanted to pay me to draw some pictures of players who won’t make it into the Hall despite impressive resumes (such as banned baseball player Pete Rose). It was the first time someone offered to pay me to do something freelance, and it blew my mind. After the magazine, I did an interview with ESPN online, Emma Carmichael asked if she could feature some of the drawings on Deadspin, and the project was written up in my hometown alt-weekly, the Austin Chronicle.
I started to become known, not just as an illustrator but also among baseball writers online. I applied for and, miraculously, got a regular paying freelance gig at Fangraphs, a baseball website for mega-nerds like the one I’d become. I didn’t write about stats in any traditional sense, though — I wrote about female pop stars as if they were players, researched the GOP presidential candidates’ relationships with America’s pastime, and crafted a T-shirt with the win probability graph of a crazy playoff game embroidered on it (the latter led my wonderful editor, Carson Cistulli, to email me with an apology for, well, all men).
Writing about baseball on Fangraphs opened up a world for me that I hadn’t fully realized existed, where people got paid to do what I’d been doing for fun my entire life: make stuff for the internet. I did some posts for The Hairpin and started drawing a comic for the newly kickstarted The Classical. I started applying for jobs at websites. And, 16 months after starting Every Hall of Famer, I got an email from a woman at BuzzFeed asking if I could chat with two editors about the part-time weekend editor position I’d applied for. By September of that year, I moved to New York for a full-time position at BuzzFeed.
Though I don’t typically write about baseball for the site, I’m sure I wouldn’t be here without Every Hall of Famer, which I’m hoping to finally finish sometime during the 2015 baseball season. I sometimes miss writing about baseball, but I figure I was never meant to be a specialist.
My latest position at BuzzFeed, Editorial Director of BFF, entails running a new team that makes original content for emerging social web platforms. It’s better than I ever imagined a job could be. It’s also the job I’ve been in training for without knowing it since I first dialed into a BBS at age 12. It reinforces my dad’s decision to introduce technology to me and my brother when we were so young, and it validates my mom’s loose, organic view of education and willingness to let me self-direct in front of a computer screen. I’m grateful for this life, online and off.
View this image ›
One of my first posts on Vine, starring Bobby Sneakers.
I’ve focused here on the social networks that have had the biggest impact on my life, but there was also the ego-stroking delight of Friendster testimonials, the thrill of experimenting with online dating — or, more accurately, online flirting — on Consumating.com, my brief foray into anonymous message boards on Zug.com, and countless music message boards and email lists. These days, I use Instagram, Vine, and Facebook daily, in addition to Twitter and Tumblr.
“Social networking” is what I think about all day at my job, but it’s also how I stay connected to my friends back home, make new friends, develop crushes, document my life, and entertain myself. So about this tension between the internet and real life: Maybe while they’re melting together, they can bring out the best in one another.
There are plenty of people who seem to have an easy time being cruel on the web who would crumble if they were face to face with the victims of their abuse. It would be nice if those bullies and trolls could take whatever it is that keeps most of them from being horrible every day in the streets, and bring it with them to online forums.
On the flip side, I often yearn for the texture of my internet life in my “real” life. Sometimes when I’m at a bar or a party these days, I try to summon internet-me so that I can be more open, generous, flirtatious, confident, and tender. A better listener and a nicer person.
Most days I spend a lot of time watching people — some of them friends and some of them strangers — post on Instagram and Facebook and Twitter and Vine and Tumblr and TinyLetter and Medium. They are so often honest and vulnerable and breaking my heart, or funny, or creative, or incisive. I heart their selfies, I share their writing, I fav their tweets, and I read about their experiences. I tell them I love and appreciate them in tiny, easy ways, and they do the same for me.
Those moments usually feel like the realest part of my day.
Read more: http://www.buzzfeed.com/summeranne/social-networking-a-love-story
0 notes
Text
Ten Tips to Increase Web Traffic
By Michael J. Allton
Web Designer / Owner
www.StadiaStudio.com
Unless you’ve built a website just to showcase your collection of salt and pepper shakers, you probably want to attract some visitors. If your business depends on your site attracting visitors and soliciting sales, then web traffic is essential.
Simply submitting your site to search engines is not enough. You should work with your Webmaster to implement these ten tips to increase the level of traffic to your site.
1. Content, Content, Content
First and foremost, make sure that your site is informative! Don’t just list your services, elaborate on what you do and why you do it well. The more detailed you are in your website, the better your search engine results will be.
2. Classified Ads
Take advantage of the variety of free online classified ad websites and get the word out about your new site!
Be sure to always post a working link to your website. Get help from your webmaster on the proper html coding for a classified ad post if you need it.
3. Articles
One of the best steps you can take to promote your site is to write and publish articles (just like this one!).
First, an informative article helps establish that you’re an expert in your particular field. Once a reader finishes the article, they may be inclined to follow a link to your website to learn more about you and your business.
More importantly, once you’ve distributed your article to some of the many online article directories, you’ll have created additional links back to your website that search engines will see and count. More on that in a moment.
4. Local Directories
There are two basic kinds of directories that should interest you. First, there are regional directories, perhaps for your local metropolitan area, then there are industry-specific directories.
These are similar to search engines in that they list other web sites, but they’re compiled and organized differently. Additionally, many directories allow you to create an online profile that will include information about your business, rather than just a link to your website.
Take a few minutes to do some searches for directories in your area and in your industry, and submit your site to any you find appropriate.
5. Newsletters
Online Newsletters or eZine’s are a great way to keep your existing and potential clients aware of news or changes within your business. If your business model can support a regular newsletter, you should encourage visitors to your website to sign up for it. You might offer them a free copy of one of the great articles you’ve already written, as a reward for signing up.
When you’re writing for your newsletter, make sure that each of your topics has a Title, a Teaser, then a link back to your website to read the rest of the topic. If your topics are interesting and timely, then you’ll ensure repeat visits to your site.
6. Forums and Newsgroups
Another way to attract new visitors is to participate in online forums and discussions. Be sure to take the time to understand what the forum or newsgroup is about, and be respectful of other members. Simply posting ads or links to your website will likely just get you banned. Instead, post comments or questions that are on point, including a simple link to your site in your signature, and you’ll be rewarded with interested responses and visitors to your site.
7. Press Releases
Many businesses forget the power of a press release. When you have something that’s newsworthy, like the opening of your business, let the press know! They’re happy to print your release if they think it will be interest to their readers.
When distributing press releases, be sure to look for online PR distributors, as well as your local news media. There are sites you can post your release for free, and other sites that will distribute your release for a nominal fee.
8. Blogs, Social Networking and Social Bookmarking
Blogs are online journals, and there are a number of websites that offer free blogging accounts. With your online journal, you can post a few tips or even full-fledged articles. If you submit new posts consistently, and the topics are interesting, you’ll start to attract a variety of visitors.
There are a variety of networking sites, both social and professional, that will allow you to create an online profile for yourself and your business.
Finally, you should look in to creating accounts on several of the social bookmarking sites that have cropped up. These are sites that allow you to simply bookmark and comment on other websites.
9. Reciprocal Links
It’s very important that you find other websites that are willing to put a link on their site to yours. Some of the above methods will help accomplish this, but you should also give some thought to other site options, particularly sites that are related to your business. For instance, you might see if your Chamber of Commerce has a website, and if they do, make sure you have a link by your membership name. You might also consider other businesses that compliment yours, like how a mortgage company and a title company are complimentary. When approaching these businesses, you would offer to put a link on your site to their business, in exchange for a link on their site to your own business.
Not only will visitors to these other sites see the link to your site and follow it, but as we discussed previously, these additional links to your site will help your search engine ranking tremendously. Each link on a non-directory website is like a vote of confidence in you and your website.
10. Email and Letters
There are a variety of other ways to promote your website. For instance, every piece of communication that comes from your business should include your web address. Your email can have it in the signature, your letterhead can have it in the address area, and certainly it should be included on business cards.
Make sure that your email address is from your website and not your internet service provider. Why advertise for ABC.net when you could be advertising for YourCompany.com?
So, I hope that you’ve gained a couple of ideas on how you can promote your website, and note that none of the above methods has to cost you any money, just a little time and effort. You can find links to online services providing many of the resources mentioned above on our website here: http://www.stadiastudio.com/resources.htm. Good luck!
Michael is the lead web designer and owner at Stadia Studio (http://www.StadiaStudio.com), a web design firm in St. Louis, and has been helping businesses get online since the 1990’s.
See Full PLR Article Here: Ten Tips to Increase Web Traffic
0 notes
Text
youtube
Building a Website on the Cheap - Graphics Programs & Tools
In case you're new to constructing websites, you may assume that it costs some huge cash to get one up and running. While it is true that you just're not going to be able to create your own equivalent of Fb in a few days and with a couple of dollars, a easy website is just not something that has to set you again 1000's of dollars.
Firstly, when you have a limited price range (and sufficient spare time!), then the most cost effective way to get an internet site up is to build it your self. Of course there are numerous advantages to having professionals do it, however should you're extra focused on just building a personal site, then not Wikipedia Here solely will a D.I.Y angle save you a lot of money, but it is going to additionally help you study the ins and outs of websites! This sort of knowledge can show invaluable should you ever have to rent professionals, because at the least you should have some sort of insight into what they are talking about.
Creating Visible Parts & Graphics
Firstly, I will not go into either buying a site or net-hosting. There is a ton of knowledge and guides out on the net, to not point out here on ezinearticles.com. Instead, let's take a look at a few of the tools you need to use to assist use to create graphics for a website. Most importantly these instruments might be 100% free, though you'll still need a computer; sadly that is a critical requirement.
Most graphic and net design pros favour commercial applications equivalent to Photoshop in relation to creating their own visual parts for an internet site. There is a good reason for this: in case you do design for a living you may all the time need the best instruments, and Photoshop is a very mature, sturdy and feature laden program. https://skillzy.com/about_us It's also fairly expensive, so I recommend to those that need an inexpensive program try "The GIMP". No, I didn't mistype that, nor was I making a joke, "The GIMP" truly stands for "The GNU Image Manipulation Program", and it's an open source - completely free - visible modifying and manipulation program. Sure it's got something of a questionable name, however it's bought a ton of functionality. It's also completely cross-platform, you can obtain it and run it on Microsoft Windows (XP, Vista), GNU/Linux (i386, PPC), Mac OS X, Solar OpenSolaris and FreeBSD computer systems.
While "The GIMP" isn't a hundred% user pleasant, and won't suit execs used to excessive-finish industrial software, it has more than sufficient features for a newcomer who desires to create graphics for the web. It exports to all the main net codecs (JPEG, PNG, and GIF) and comes with all kinds of filters and graphic manipulation instruments inbuilt.
Now that you've got a totally fledged graphics editor, it is time to start fascinated by choosing a HTML editor so you possibly can take those visible c programming courses components and put them into HTML. In my next article I will look at what free software applications are one of the best for enhancing HTML.
Computer programming courses cope with teaching laptop-programming language to college students. Languages reminiscent of Skillzy cheap code learning C++, C, Visual Basic, COBOL, PERL, HTML, JAVA, JAVA SCRIPT, ORACLE and plenty of more l are used for coding purposes.
Advanced programs could focus on subjects about using a particular computer language or on implementing a selected kind of application (resembling web programming). Laptop Science programs that result in a Bachelor Diploma normally start with a severe emphasis on pc programming. This foundation is basically for learning extra theoretical elements of pc technology.
There are a selection of certificates courses out there, focused on developing pc functions using explicit technologies. Microsoft provides MCSD, which focuses on developing applications utilizing Visible Primary, Visible C++ and other Microsoft applied sciences. Many programming schools offer certification courses in Java programming language. CIW (Licensed Web Webmaster) affords tracks directed on web improvement.
Most Laptop programming schools are geared up with up-to-date software program and hardware tools for college kids, enabling them to affix the pc industry. Many college students enroll for numerous varieties of computer programs throughout their holidays to upgrade their computer knowledge. Such trip programs typically supply discounted fees. Laptop programmers usually work in jobs like building commercial software program purposes, net improvement, building custom functions for use inside an organization, database growth, laptop sport programming and plenty of others. Corporations requiring their staff to be proficient in such expertise may provide to subsidize charges for his or her workers.
There are low cost pc programming faculties accessible in each metropolis. Nevertheless, students should have in mind the standard of service that is provided by these faculties. Many faculties might offer laptop programs for a very low payment, however these schools will not be recognized and firms might not make use of individuals from these colleges. It's advisable to opt for a package that suits the precise needs of a person as an alternative of going for an in depth course.
Typically, when faculties offer low cost education, they normally compromise on quality. A number of online sites are available that provide detailed information of colleges available particularly for programming. It is advisable for students to first visit these schools and then make a rational determination before enrolling.
The mid-life disaster - a section of self-doubt that occurs when one realizes that one just isn't getting any youthful. A plateau, should you like. To many mid-life check that victims, this plateau could feel indefinite. The concept of settling, doing the identical factor day in time out could jerk you into taking some drastic motion.
Questions on your direction in life could arise. It's hardly true that once you have reached a certain age, you don't want path or goal! Everybody wants path and alter. Change is what makes life exciting.
How are you faring cheap coding courses london career-wise?
• Maybe you are searching for another, a move from one area to the opposite.
• Possibly you might be uninterested in technical work best online coding bootcamps and a pleasant office job seems to make extra sense.
• Maybe you're looking at ways to get an edge over the competitors, leap up the corporate ladder.
Why waste all these years of expertise in a cloud of self-doubt?
An online MBA could also be simply the answer you need. Except for it being an investment that might enable you to further your profession, the change of tempo will provide help to neglect your uncertainties and inject a little pleasure in your life. https://skillzy.com You need to admit, starting one thing new is thrilling. The world of on-line education has thrived these previous few years. More and more enterprise colleges and universities are actually providing accredited on-line enterprise degree applications.
There are numerous issues to be gained from an online MBA course. Aside from the information in business ideas and theories, you'll accumulate a community of potential enterprise associates. This can prove image source to be very useful sooner or later. Having new individuals in your life will convey a brand new found perspective on the world around you, and presumably allow you to appreciate what you've gotten.
When you find the web, and computers normally, to be a bit intimidating, consider all the computer and software expertise that you'll be taught, during the means of getting your masters. Look into your community faculty for cheap IT programs, or ask somebody you already know who's IT-succesful to provide you classes. It may be sluggish at first, but you will alter to it. Remember, apply makes perfect.
Managing a new schedule will keep you busy, and help preserve those dark clouds of self-doubt away. Buying your MBA will look like an amazing commitment at first, but sticking to it will permit you to reap the rewards in more methods than one.
Even when you do not plan to design web sites as your main enterprise, I recommend that you simply be taught sufficient to have management over updating your own web site each time it's essential. Website authoring applications are designed so you do not have to put in writing all of the HTML code from scratch. In fact, you do not have to write down any at all should you don't need to, although studying a bit of as you go alongside is a good idea.
Try to keep away from getting an affordable program, until you're actually broke. You need to get a highly supported skilled program. That method you may always be able to find someone who is aware of find out how to use it whenever you get in a jam. Having good support whether it be from the software program firm of just a highschool kid who is aware of about this stuff will hold major complications away.
Microsoft Front Web page: A program used by Web marketing consultants for many years, however it's now discontinued.
Expression Web: That is Microsoft's replacement for Entrance Page. In case you have any model of Microsoft Office, you can just purchase cheap ruby on rails course the "improve" version of Expression Internet for about $89.00 which is greater than $200.00 cheaper than shopping for the full version.
Adobe Dreamweaver: Dreamweaver is a much more sophisticated web design program that excels in actually advanced internet creation techniques that are thought of to be the standard of good internet design. It is harder to be taught and it's quite a bit costlier too. It is obtainable although for both the Mac and LAPTOP and naturally Skillzy Social Profile it will still do the basics outlined above. Learning any of those applications will tremendously improve your probabilities of success with you web site as a result of you will be able to make modifications rapidly and simply. Waiting for an online designer to call you again might make you miss gross sales and alternatives.
Even with the rise of unemployment and the worsening of the worldwide economic system, the demand for well being and medical professionals are on the rise - and is projected to increase over the coming years. That is primarily as a result of there might be a surge of American's approaching retirement.
The current glitch in the economic system has made it hard for many would-be nurses and medical doctors to get the funds for their training. This was a menace to the serious scarcity of health care professionals. Because of the present financial local weather, an increasing number of individuals who pursue a profession as a nursing assistant are looking for the most effective nursing assistant courses.
Luckily, looking for the best nursing assistant applications and faculties is a virtually easy activity, presuming that you already know where to look. In actuality, there are many reasonably priced, and even free nursing assistant courses right this moment. In most parts of the US, technical, vocational colleges, group schools and native clinics coordinate to supply a full range of coaching applications that will prepare potential nursing assistants for their wanted certification exams.
In locations the place there aren't any faculty oriented trainings, availability to the reasonably priced CNA programs, programs and colleges can be accessible by using the web course.
Most people who find themselves looking for the affordable nursing courses start their search by researching the closest Pink Cross nursing assistant training. Though not Ski llzy offered by well being organizations, qualified nursing assistant training is offered in most states. The benefit with the Pink Cross program goes beyond being cheap.
As a matter of reality, this is a first selection for many who have a powerful need to finish their coaching in as glorious technique as attainable. The training is designed to interact the students in both classroom and scientific trainings and, consequently would take solely about five to six weeks to finish - after which you'll be able to be eligible to take the certification exams required by their state.
Most vocational faculty provide a number of the most affordable nursing programs available at present. Most of those trainings are shorter and are also authorised and accredited by the state. Regardless that the cost of many programs might be just about cheap as compared to different trainings of examine, payment is almost always due open registration. Nonetheless, technical and vocational schools present alternative for widespread sign-up, that means that you simply seldom have more than a short period to get into their nursing assistant programs.
Of course, essentially the most affordable nursing assistant programs are these which are free. You is likely to be surprised to discover that this alternative is available however you can in fact normally discover medical and health care facility which can be offering free or even subsidized nursing assistant coaching particularly for these college students who want to work at their facility for lengthy years after finishing their course. For those who discover it difficult to search out the funds needed to pay for their course, nonetheless, that stipulation is usually regarded upon as simply one other advantage to their free course.
0 notes
Text
Simple Server Side Rendering, Routing, and Page Transitions with Nuxt.js
A bit of a wordy title, huh? What is server side rendering? What does it have to do with routing and page transitions? What the heck is Nuxt.js? Funnily enough, even though it sounds complex, working with Nuxt.js and exploring the benefits of isn't too difficult. Let's get started!
Server side rendering
You might have heard people talking about server side rendering as of late. We looked at one method to do that with React recently. One particularly compelling aspect is the performance benefits. When we render our HTML, CSS, and JavaScript on the server, we often have less JavaScript to parse both initially and on subsequent updates. This article does really well going into more depth on the subject. My favorite takeaway is:
By rendering on the server, you can cache the final shape of your data.
Instead of grabbing JSON or other information from the server, parsing it, then using JavaScript to create layouts of that information, we're doing a lot of those calculations upfront, and only sending down the actual HTML, CSS, and JavaScript that we need. This can reap a lot of benefits with caching, SEO, and speed up our apps and sites.
What is Nuxt.js?
Server side rendering sounds pretty nice, but you're probably wondering if it's difficult to set up. I've been using Nuxt.js for my Vue applications lately and found it surprisingly simple to work with. To be clear: you don't need to use Nuxt.js in particular to do server side rendering. I'm just a fan of this tool for many reasons. I ran some tests last month and found that Nuxt.js had even higher lighthouse scores out of the gate than Vue's PWA template, which I thought was impressive.
Nuxt.js is a higher-level framework that you can use with a CLI command that you can use to create universal Vue applications. Here are some, not all, of the benefits:
Server-Side Rendering
Automatic Code Splitting
Powerful Routing System
Great lighthouse scores out of the gate 🐎
Static File Serving
ES6/ES7 Transpilation
Hot reloading in Development
Pre-processors: SASS, LESS, Stylus, etc
Write Vue Files to create your pages and layouts!
My personal favorite: easily add transitions to your pages
Let's set up a basic application with some routing to see the benefits for ourselves.
Getting Set up
The first thing we need to do if you haven't already is download Vue's CLI. You can do so globally with this command:
npm install -g vue-cli # ... or ... yarn add global vue-cli
You will only need to do this once, not every time you use it.
Next, we'll use the CLI to scaffold a new project, but we'll use Nuxt.js as the template:
vue init nuxt/starter my-project cd my-project yarn # or... npm install npm run dev
You'll see the progress of the app being built and it will give you a dedicated development server to check out: http://127.0.0.1:3000/. This is what you'll see right away (with a pretty cool little animation):
Let's take a look at what's creating this initial view of our application at this point. We can go to the `pages` directory, and inside see that we have an `index.vue` page. If we open that up, we'll see all of the markup that it took to create that page. We'll also see that it's a `.vue` file, using single file components just like any ordinary `vue` file, with a template tag for the HTML, a script tag for our scripts, where we're importing a component, and some styles in a style tag. (If you aren't familiar with these, there's more info on what those are here.) The coolest part of this whole thing is that this .vue file doesn't require any special setup. It's placed in the `pages` directory, and Nuxt.js will automatically make this server-side rendered page!
Let's create a new page and set up some routing between them. In pages/index.vue, dump the content that's already there, and replace it with:
<template> <div class="container"> <h1>Welcome!</h1> <p><nuxt-link to="/product">Product page</nuxt-link></p> </div> </template> <style> .container { font-family: "Quicksand", "Source Sans Pro", -apple-system, BlinkMacSystemFont, "Segoe UI", Roboto, "Helvetica Neue", Arial, sans-serif; /* 1 */ padding: 60px; } </style>
Then let's create another page in the pages directory, we'll call it `product.vue` and put this content inside of it:
<template> <div class="container"> <h1>This is the product page</h1> <p><nuxt-link to="/">Home page</nuxt-link></p> </div> </template>
Right away, you'll see this:
youtube
Ta-da! 🏆
Right away, we have server side rendering, routing between pages (if you check out the URL you can see it's going between the index page and product page), and we even have a sweet little green loader that zips across the top. We didn't have to do much at all to get that going.
You might have noticed in here, there's a special little element: <nuxt-link to="/">. This tag can be used like an a tag, where it wraps around a bit of content, and it will set up an internal routing link between our pages. We'll use to="/page-title-here" instead of an href.
Now, let's add some transitions. We’ll do this in a few stages: simple to complex.
Creating Page Transitions
We already have a really cool progress bar that runs across the top of the screen as we’re routing and makes the whole thing feel very zippy. (That’s a technical term). While I like it very much, it won’t really fit the direction we’re headed in, so let’s get rid of it for now.
We're going to go into our `nuxt.config.js` file and change the lines:
/* ** Customize the progress-bar color */ loading: { color: '#3B8070' },
to
loading: false,
You'll also notice a few other things in this nuxt.config.js file. You'll see our meta and head tags as well as the content that will be rendered inside of them. That's because we won't have a traditional `index.html` file as we do in our normal CLI build, Nuxt.js is going to parse and build our `index.vue` file together with these tags and then render the content for us, on the server. If you need to add CSS files, fonts, or the like, we would use this Nuxt.js config file to do so.
Now that we have all that down, let's understand what's available to us to create page transitions. In order to understand what’s happening on the page that we’re plugging into, we need to review how the transition component in Vue works. I've written an article all about this here, so if you'd like deeper knowledge on the subject, you can check that out. But what you really need to know is this: under the hood, Nuxt.js will plug into the functionality of Vue's transition component, and gives us some defaults and hooks to work with:
You can see here that we have a hook for what we want to happen right before the animation starts enter, during the animation/transition enter-active, and when it finishes. We have these same hooks for when something is leaving, prepended with leave instead. We can make simple transitions that just interpolate between states, or we could plug a full CSS or JavaScript animation into them.
Usually in a Vue application, we would wrap a component or element in <transition> in order to use this slick little functionality, but Nuxt.js will provide this for us at the get-go. Our hook for the page will begin with, thankfully- page. All we have to do to create an animation between pages is add a bit of CSS that plugs into the hooks:
.page-enter-active, .page-leave-active { transition: all .25s ease-out; } .page-enter, .page-leave-active { opacity: 0; transform-origin: 50% 50%; }
I'm also going to add an extra bit of styling here so that you can see the page transitions a little easier:
html, body { font-family: "Quicksand", "Source Sans Pro", -apple-system, BlinkMacSystemFont, "Segoe UI", Roboto, "Helvetica Neue", Arial, sans-serif; /* 1 */ background: #222; color: white; width: 100vw; height: 100vh; } a, a:visited { color: #3edada; text-decoration: none; } .container { padding: 60px; width: 100vw; height: 100vh; background: #444; }
youtube
Right now we're using a CSS Transition. This only gives us the ability to designate what to do in the middle of two states. We could do something a little more interesting by having an animation adjust in a way that suggests where something is coming from and going to. For that to happen, we could separate out transitions for page-enter and page-leave-active classes, but it's a little more DRY to use a CSS animation and specify where things are coming from and going to, and plug into each for .page-enter-active, and .page-leave-active:
.page-enter-active { animation: acrossIn .45s ease-out both; } .page-leave-active { animation: acrossOut .65s ease-in both; } @keyframes acrossIn { 0% { transform: translate3d(-100%, 0, 0); } 100% { transform: translate3d(0, 0, 0); } } @keyframes acrossOut { 0% { transform: translate3d(0, 0, 0); } 100% { transform: translate3d(100%, 0, 0); } }
Let's also add a little bit of special styling to the product page so we can see the difference between these two pages:
<style scoped> .container { background: #222; } </style>
This scoped tag is pretty cool because it will apply the styles for this page/vue file only. If you have heard of CSS Modules, you'll be familiar with this concept.
We would see this (this page is for demo purposes only, that's probably too much movement for a typical page transition):
youtube
Now, let's say we have a page with a totally different interaction. For this page, the movement up and down was too much, we just want a simple fade. For this case, we'd need to rename our transition hook to separate it out.
Let’s create another page, we’ll call it the contact page and create it in the pages directory.
<template> <div class="container"> <h1>This is the contact page</h1> <p><nuxt-link to="/">Home page</nuxt-link></p> </div> </template> <script> export default { transition: 'fadeOpacity' } </script> <style> .fadeOpacity-enter-active, .fadeOpacity-leave-active { transition: opacity .35s ease-out; } .fadeOpacity-enter, .fadeOpacity-leave-active { opacity: 0; } </style>
Now we can have two-page transitions:
youtube
You can see how we could build on these further and create more and more streamlined CSS animations per page. But from here let's dive into my favorite, JavaScript animations, and create page transitions with a bit more horsepower.
Javascript Hooks
Vue's <transition> component offers some hooks to use JavaScript animation in place of CSS as well. They are as follows, and each hook is optional. The :css="false" binding lets Vue know we're going to use JS for this animation:
<transition @before-enter="beforeEnter" @enter="enter" @after-enter="afterEnter" @enter-cancelled="enterCancelled" @before-Leave="beforeLeave" @leave="leave" @after-leave="afterLeave" @leave-cancelled="leaveCancelled" :css="false"> </transition>
The other thing we have available to us are transition modes. I'm a big fan of these, as you can state that one animation will wait for the other animation to finish transitioning out before transitioning in. The transition mode we will work with will be called out-in.
We can do something really wild with JavaScript and the transition mode, again, we're going a little nuts here for the purposes of demo, we would usually do something much more subtle:
youtube
In order to do something like this, I've run yarn add gsap because I'm using GreenSock for this animation. In my index.vue page, I can remove the existing CSS animation and add this into the <script> tags:
import { TweenMax, Back } from 'gsap' export default { transition: { mode: 'out-in', css: false, beforeEnter (el) { TweenMax.set(el, { transformPerspective: 600, perspective: 300, transformStyle: 'preserve-3d' }) }, enter (el, done) { TweenMax.to(el, 1, { rotationY: 360, transformOrigin: '50% 50%', ease: Back.easeOut }) done() }, leave (el, done) { TweenMax.to(el, 1, { rotationY: 0, transformOrigin: '50% 50%', ease: Back.easeIn }) done() } } }
All of the code for these demos exist in my Intro to Vue repo for starter materials if you're getting ramped up learning Vue.
One thing I want to call out here is that currently there is a bug for transition modes in Nuxt.js. This bug is fixed, but the release hasn't come out yet. It should be all fixed and up to date in the upcoming 1.0 release, but in the meantime, here is a working simple sample demo, and the issue to track.
With this working code and those JavaScript hooks we can start to get much fancier and create unique effects, with different transitions on every page:
youtube
Here's the site that the demo was deployed to if you'd like to see it live: http://ift.tt/2tGAjZd as well as the repo that houses the code for it: http://ift.tt/2twFpHw
Navigation
In that last demo you might have noticed we had a common navigation across all of the pages what we routed. In order to create this, we can go into the `layouts` directory, and we'll see a file called `default.vue`. This directory will house the base layouts for all of our pages, "default" being the, uhm, default :)
Right away you'll see this:
<template> <div> <nuxt/> </div> </template>
That special <nuxt/> tag will be where our `.vue` pages files will be inserted, so in order to create a navigation, we could insert a navigation component like this:
<template> <div> <img class="moon" src="~assets/FullMoon2010.png" /> <Navigation /> <nuxt/> </div> </template> <script> import Navigation from '~components/Navigation.vue' export default { components: { Navigation } } </script>
I love this because everything is kept nice and organized between our global and local needs.
I then have a component called Navigation in a directory I've called `components` (this is pretty standard fare for a Vue app). In this file, you'll see a bunch of links to the different pages:
<nav> <div class="title"> <nuxt-link to="/rufina">Rufina</nuxt-link> <nuxt-link to="/prata">Prata</nuxt-link> <nuxt-link exact to="/">Playfair</nuxt-link> </div> </nav>
You'll notice I'm using that <nuxt-link> tag again even though it's in another directory, and the routing will still work. But that last page has one extra attribute, the exact attribute: <nuxt-link exact to="/">Playfair</nuxt-link> This is because there are many routes that match just the / directory, all of them do, in fact. So if we specify exact, Nuxt will know that we only mean the index page in particular.
Further Resources
If you'd like more information about Nuxt, their documentation is pretty sweet and has a lot of examples to get you going. If you'd like to learn more about Vue, I've just made a course on Frontend Masters and all of the materials are open source here, or you can check out our Guide to Vue, or you can go to the docs which are extremely well-written. Happy coding!
Simple Server Side Rendering, Routing, and Page Transitions with Nuxt.js is a post from CSS-Tricks
via CSS-Tricks http://ift.tt/2vSp2FI
0 notes
Last Seen Blogs

fsagfx-blog
fsagfx

josd19-blog
Sin título

marsbahisgirisyeni
MARSBAHİS MARSBAHİS GÜNCEL GİRİŞ ADRESİ 2024

carofb3
Dr strange is my husband real

violettelebeau
E L Y S I A N