#id_rsa.pub
Text
Installing Hadoop on Ubuntu

Certainly! Let’s present the Hadoop installation process on Ubuntu uniquely and engagingly, suitable for an informative yet reader-friendly course email.
Subject: 🚀 Embark on Your Big Data Journey: Install Hadoop on Ubuntu Easily!
👋 Hello Data Enthusiasts!
Are you ready to dive into the world of Big Data with Hadoop? Here’s a straightforward guide to getting Hadoop up and running on your Ubuntu system. Perfect for beginners and experts alike!
🔧 Getting Started: Prep Your System
Freshen Up Ubuntu: sudo apt update && sudo apt upgrade
Java Installation: sudo apt install default-JDK
Java Check: Ensure it’s installed with the Java -version
👤 Create a Dedicated Hadoop User
A simple command: sudo adduser hadoop
🔑 SSH Setup: Key to Connectivity
Install SSH: sudo apt install ssh
For Hadoop User:
Switch user: su — Hadoop
Generate SSH Key: ssh-keygen -t rsa -P “
Authorize Key: cat ~/.ssh/id_rsa.pub >> ~/.ssh/authorized_keys
📥 Download Hadoop: Grab the Latest Version
Use wget with the link from the official Hadoop website.
📦 Unpack Hadoop
Unzip it: tar -xzf Hadoop-3.x.x.tar.gz
🌐 Environment Setup: Pointing in the Right Direction
Edit .bashrc: nano ~/.bashrc
Add Hadoop paths (adjust with your Hadoop version):
bashCopy code
export HADOOP_HOME=/home/Hadoop/Hadoop-3.x.x export PATH=$PATH:$HADOOP_HOME/bin:$HADOOP_HOME/sbin
Activate changes: source ~/.bashrc
⚙️ Hadoop Configuration: The Blueprint
Edit key files in $HADOOP_HOME/etc/hadoop/:
core-site.xml, hdfs-site.xml, mapred-site.xml, yarn-site.xml
🎬 Initialize and Launch
Format Hadoop FileSystem: hdfs name node -format
Start the engines: start-dfs. Sh and start-yarn. sh
👀 See Hadoop in Action!
Access Hadoop’s ResourceManager and NameNode via your browser.
🛠️ Tips & Tricks
Check firewall settings.
Log files in $HADOOP_HOME/logs/ are your best friends for any hiccups.
🚀 Your Big Data Adventure Awaits!
With these steps, you’re all set to explore the vast universe of Big Data with Hadoop on your Ubuntu machine.
Happy Data Crunching!
Your [Your Course/Team Name]
Note: Ensure the technical steps are accurate and up-to-date for the course email. Personalize the email with course-specific details and offer support for installation issues. To maintain the email’s integrity and prevent it from being flagged as spam, avoid overusing hyperlinks and ensure it’s sent from a recognized, reputable email address.
Hadoop Training Demo Day 1 Video:
youtube
You can find more information about Hadoop Training in this Hadoop Docs Link
Conclusion:
Unogeeks is the №1 IT Training Institute for Hadoop Training. Anyone Disagree? Please drop in a comment
You can check out our other latest blogs on Hadoop Training here — Hadoop Blogs
Please check out our Best In Class Hadoop Training Details here — Hadoop Training
S.W.ORG
— — — — — — — — — — — -
For Training inquiries:
Call/Whatsapp: +91 73960 33555
Mail us at: [email protected]
Our Website ➜ https://unogeeks.com
Follow us:
Instagram: https://www.instagram.com/unogeeks
Facebook: https://www.facebook.com/UnogeeksSoftwareTrainingInstitute
Twitter: https://twitter.com/unogeeks
#unogeeks #training #ittraining #unogeekstraining
0 notes
Text
Active Directoryサーバの再構築
ジャンクかき集めのCF-T4を使って、今稼働中のActive Directoryサーバを再構築するログ。
OSはDebian bookwormで、最小構成のセットアップからスタート。
インストールパッケージの選択は、一旦すべてのチェックを外して実行。
OSセットアップ完了後に最低限のパッケージをインストール。
apt update && apt upgrade && apt install -y sudo vim openssh-server
SSHを鍵認証でセットアップしたけど、公開鍵のファイル名変更を忘れて、ちょっとハマった。
mv ~/.ssh/id_rsa.pub ~/.ssh/authorized_keys
Dockerでコンテナ環境を整える予定だったけど、Dockerの必須要件が64bitだったので断念。
クライアントのDockerでコンテナを作ったあと、chroot環境に展開して行く方針に変更。
と思って、試しにdebianの公式リポジトリから、aptで叩いてみたら、普通にインストールできた・・・
apt install -y docker.io docker-compose
0 notes
Text
gnutls_handshake() failed: Handshake failed - #GIT #error #Ubuntu #BitBucket
When trying to connect via GIT to BitBucket from an older server, I got this error;fatal: unable to access xxx : gnutls_handshake() failed: Handshake failed
After updating GIT, CA root certifiates, rebooting the server, nothing seemed to work.
Then I did;
Get the SSH public key as follows;
cat /home/ubuntu/.ssh/id_rsa.pub
Then log into bitbucket, and press the settings cog in the top right,…

View On WordPress
0 notes
Text
PuTTYgen and Key-Based Authentication: A Secure Approach to Remote Server Access
In the realm of secure remote server access, key-based authentication has emerged as a superior alternative to traditional password-based methods.
PuTTYgen, a crucial component of the PuTTY suite, plays a vital role in generating and managing SSH key pairs, enabling users to leverage the power of key-based authentication.
In this article, we explore the benefits of key-based authentication, walk through the process of using PuTTYgen to generate SSH keys, and demonstrate how this approach enhances security and efficiency in remote server access.

Understanding Key-Based Authentication
Key-based authentication, facilitated by PuTTYgen, offers a secure method of verifying users without passwords. It uses cryptographic pairs of public and private keys, generated by PuTTYgen, to authenticate access to remote systems.
The public key is stored on the server, while the private key remains on the user's local machine. This approach enhances security, eliminates password complexities, and allows for seamless automation and scripting.
Embracing key-based authentication with PuTTYgen ensures a safer and more efficient method for accessing remote servers.
Exploring PuTTYgen and Its Features
PuTTYgen is a user-friendly tool within the PuTTY suite that enables users to generate and manage SSH key pairs for secure authentication. It offers a graphical interface that simplifies the process of generating cryptographic keys.
Users can choose from different key types, and lengths, and add passphrase protection for enhanced security.
PuTTYgen's key generation capabilities empower users to create both public and private keys, ensuring a secure foundation for remote server access.
Generating SSH Key Pairs with PuTTYgen
Generating SSH key pairs with PuTTYgen is a straightforward process. First, open PuTTYgen and select the desired key type and length.
Click "Generate," and the tool will create the public and private keys. Save both keys securely, and optionally, add a passphrase for additional protection.
The public key is copied to the remote server, while the private key remains on the local machine. This key pair enables secure and passwordless authentication when accessing remote systems.
Importance of Securely Storing Private Keys
Securely storing private keys is crucial for preventing unauthorized access to remote systems. PuTTYgen offers password protection and encryption options to safeguard sensitive key material.
Password protection adds an extra layer of security, while encryption ensures the key file remains confidential and unreadable to unauthorized individuals.
By utilizing these features, PuTTYgen users can minimize the risk of unauthorized access and protect their private keys from potential data breaches.
Configuring Key-Based Authentication on Servers
Configuring key-based authentication on remote servers involves the following steps:
Generate SSH Key Pair: Use PuTTYgen to generate an SSH key pair (public and private keys) on your local machine.
Copy Public Key to Server: Copy the contents of the public key (usually found in a file named "id_rsa.pub") to the server's ~/.ssh/authorized_keys file. If the file doesn't exist, create it.
Set Appropriate Permissions: Ensure the correct permissions are set for the ~/.ssh directory (700) and the authorized_keys file (600) on the server. This restricts access to the authorized keys.
Configure SSH Settings: Edit the SSH server configuration file (/etc/ssh/sshd_config) on the server. Set the "PasswordAuthentication" option to "no" to disable password-based logins.
Restart SSH Service: Restart the SSH service on the server to apply the changes.
With key-based authentication configured, you can now access the server securely and passwordlessly.
When you attempt to log in, the server will challenge your local machine to provide the private key's signature, verifying your identity.
If the signature matches the public key on the server, you will be granted access without the need for a password. This method enhances security and streamlines the login process for remote server access.
Key Revocation and Renewal
Key revocation and renewal are crucial security measures to maintain the integrity of SSH communication. If a private key is compromised or if there are personnel changes, it's essential to revoke and renew SSH keys promptly. PuTTYgen simplifies this process:
Key Revocation: If a private key is compromised or no longer needed, it can be revoked. Remove the corresponding public key from the server's ~/.ssh/authorized_keys file. Revoking the key ensures that even if the private key falls into the wrong hands, it cannot be used for unauthorized access.
Key Renewal: To renew an SSH key, generate a new key pair with PuTTYgen on the local machine. Follow the same process as initial key generation. Once the new key pair is created, copy the public key to the server's ~/.ssh/authorized_keys file. Users can then securely access the server using the new key, ensuring continuous secure communication.
By revoking compromised keys and renewing with new key pairs generated by PuTTYgen, users can maintain a strong security posture and safeguard against potential unauthorized access or data breaches. Regularly updating SSH keys is a best practice to reinforce the security of remote server access.
Conclusion:
PuTTYgen streamlines SSH key generation and management, providing users with a secure and effective way to authenticate remote server access.
Embracing key-based authentication enhances security, reduces password vulnerabilities, and fosters smoother connections.
With PuTTYgen's intuitive interface and powerful features, users can bolster their cybersecurity posture, ensuring peace of mind when accessing remote servers.
0 notes
Text
Gitstats
Como fazer?
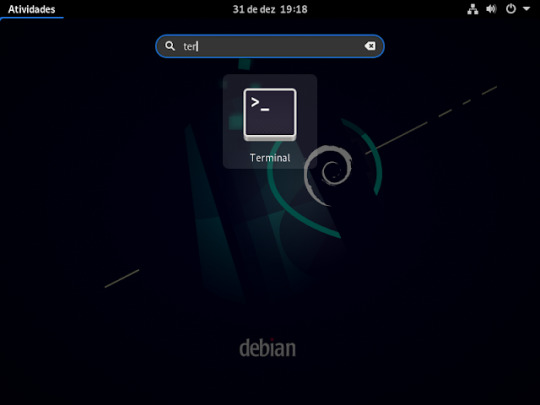
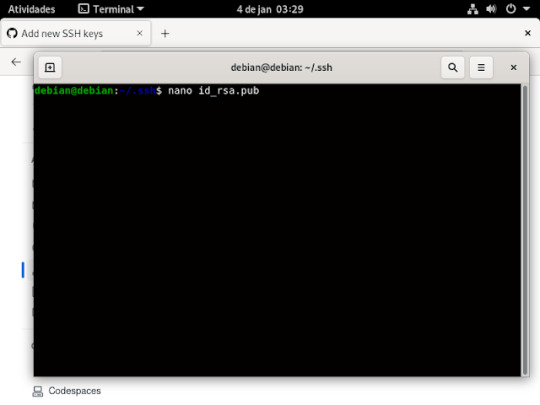
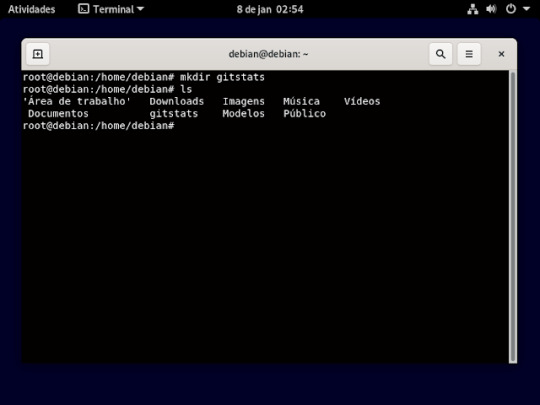
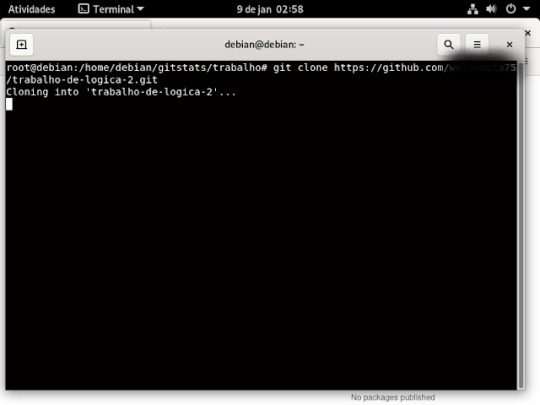
1° passo : abrir a sua maquina virtual Linux, no caso irei utilizar a distribuição Debian, depois que logar. no seu Debian ira abri o terminal ira clicar em atividades e ira digitar terminal, dai e só aperta o enter no que já está selecionado .como mostra a imagem abaixo.
2° passo: ira vira um usuário root, usando o comando su, e aperte o enter do teclado e pedira para digitar senha de root que foi a primeira senha que pede pra criar na instalação do Debian

3° passo: instalar o ssh usando o comando apt install openssh-server, e ai aperte o enter no seu teclado, feito isso ira pergunta se você quer mesmo instalar aperte a letra s do seu teclado e pressione o botão enter

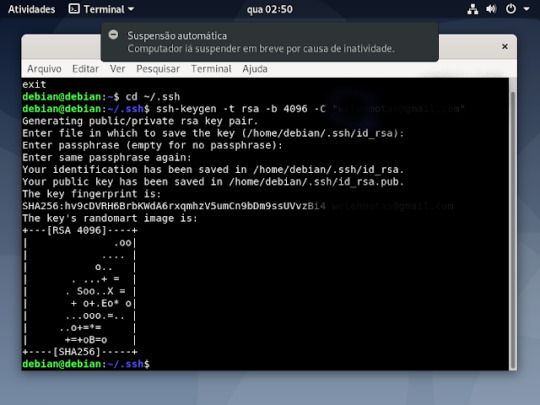
4° passo: feito a instalação , agora iremos criar a chave ssh, primeiro se tiver como root , vai sair usando o comando exit e aperte o enter, como ilustrado na imagem

5° passo: feito isso você ira entra na pasta do ssh usando o comando cd ~/ .ssh como mostra a imagem

6° passo :dentro da pasta você ira criar sua chave usando o comando ssh-keygen -t rsa -b 4096 -c "o seu email cadastado no github"

7° passo: ira perguntar aonde ira salvar a chave, n caso é só aperte o enter

8° passo: pedira para criar uma senha (opcional) no caso não criarei a senha então só aperta o enter do teclado

9° passo: pedira para repetir caso você tenha criado uma senha , caso só irei pressionar o enter

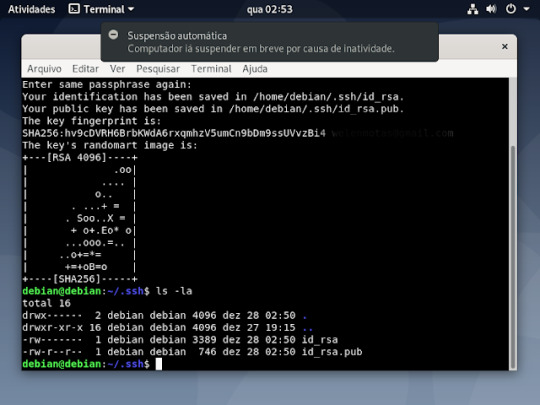
10° passo: sua chave foi criada, ficara assim como ilustrado na imagem
11° passo: se quiser tem certeza se foi criado mesmo, como já está na pasta digite um ls -la, que mostrará os arquivos criados
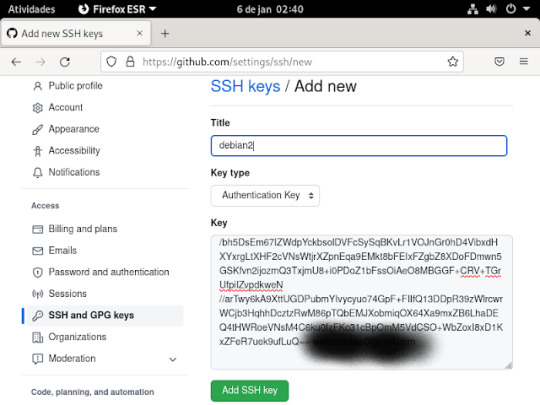
12° passo: feito tudo isso agora é colocar a chave ssh no seu GitHub, para fazer isso , você ira abrir o seu GitHub, dentro do seu git clicar aonde tem sua foto na parte superior do seu git e vai ate a opção settings , dentro dessa opção clica no ssh and gpg key, vai aperta o botão verde que tá escrito new ssh key

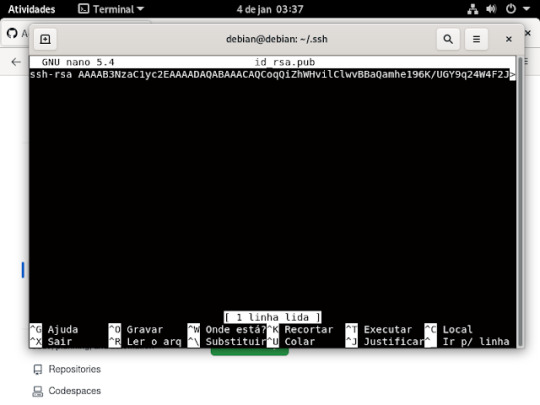
13° passo: é preencher essas informações que estão sendo pedidas, No title você digita o nome que você quiser dar a sua chave, no key é aonde você ira jogar a sua chave ssh que você criou, no terminal entro da pasta aonde esta salvo o id_rsa.pub e ai ou você abre o arquivo usando nano , ficaria nano id_rsa.pub e apertr do enter no teclado, dai coloca a chave no git
Ai quando for abrir no nano ficara assim.
ou usando o comando cat, basta escrever no seu terminal , cat id_rsa.pub, se não quiser digitar tudo usa o tab do teclado que ele completa pra você .
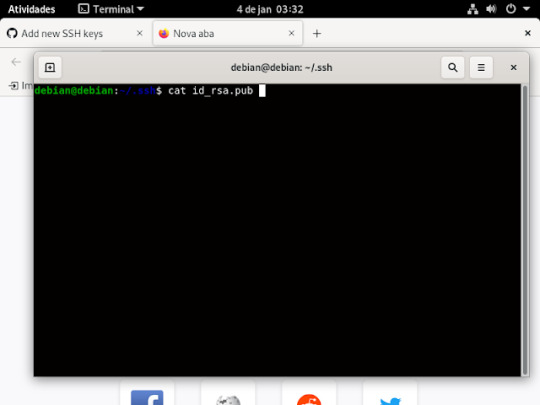
e quando for usar o comando cat abrira assim.
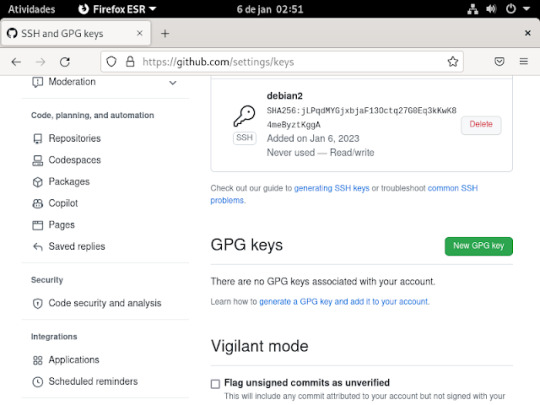
14° passo: A chave que ira aparecer nesse arquivo, você vai colar dentro da caixa aonde está escrito key, se estiver tudo certo clica em add ssh key .como mostra a imagem abaixo;
15° passo: irá pedir para logar. para confirma o que criou , basta usar o celular ou o login e senha e tá pronto o ssh no git
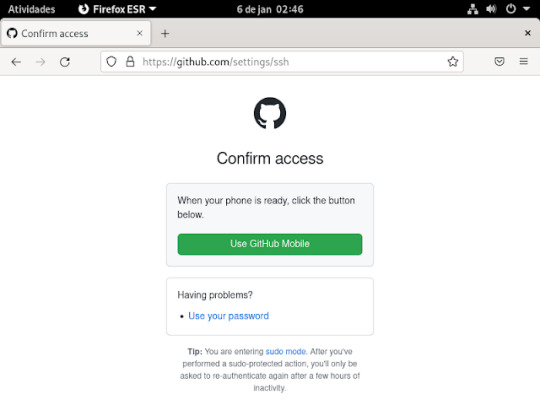
Ai ira ficar assim.
16° passo: Agora criaremos o token, para fazermos isso , precisa clicar em developer settings, como mostra a imagem

17° passo: nessas opções da imagem abaixo ira clicar na opção token (classic)

18° passo: dentro dessa opção aparecera assim, e você ira clicar na opção generate new token, e aparecera opções

19° passo: nessa opções irei escolher a segunda opção generate new token (classic)

20° passo: Aonde está escrito note e o nome que você quiser colocar no seu token, o e abaixo dele e depois de quantos dias ira expirar seu token, nas outras imagens precisa marcas essas caixinhas que estão marcada nas imagens as que não estão marcadas não precisa marca, depois é só clicar na opção generate token para criar ele e aparecera desta maneira que aparece na ultima imagem


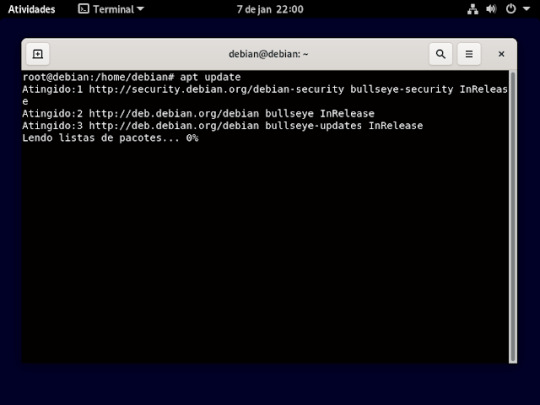
21° passo: ira fazer um update na sua maquina para isso , digitara o comando apt update, como mostra na imagem.
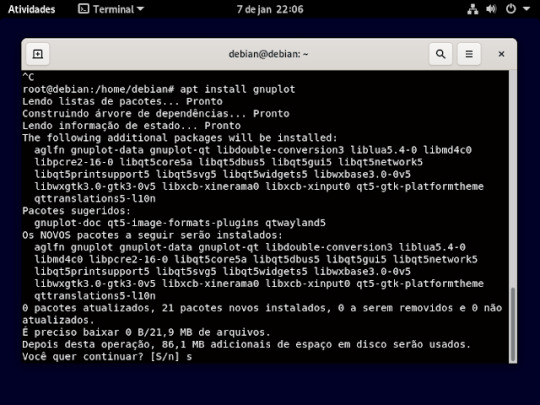
22° passo: agora iremos instalar o gnuplot , usando o comando apt install gnuplot, e vai perguntar se quer mesmo instala e só aperta a letra s e o enter do teclado como mostra imagem
23° passo: Agora instalar o git, usando o comando apt install git e vai perguntar se quer mesmo instala e só aperta a letra s e o enter do teclado

24° passo: Agora instalar o git, usando o comando apt install Python e vai perguntar se quer mesmo instala e só aperta a letra s e o enter do teclado

25° passo: nesse passo você ira ter que criar uma pasta aonde será armazenada, as pasta que for clona, usando o comando mkdir. é só escrever no terminal mkdir e o nome da pasta que vai criar e aperta o enter do teclado, como mostra a imagem abaixo.

se quiser ver se pasta foi criar use o comando ls, esse comando vai lista as pasta que tem dentro do diretório.
26° passo: é utilizar esse comando exatamente como tá escrito na imagem abaixo.

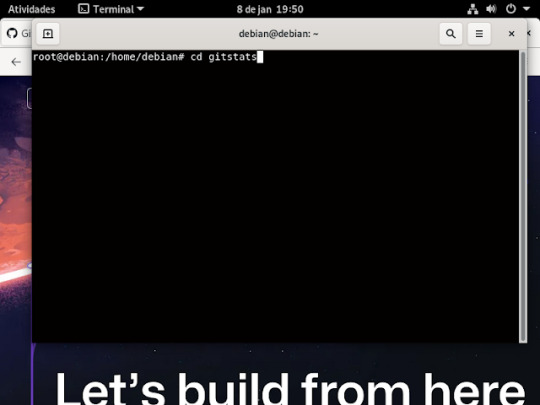
27° passo: depois de executa esse comando anterior , agora iremos entra na pasta que criamos do gitstats usando o comando cd como mostra a imagem.
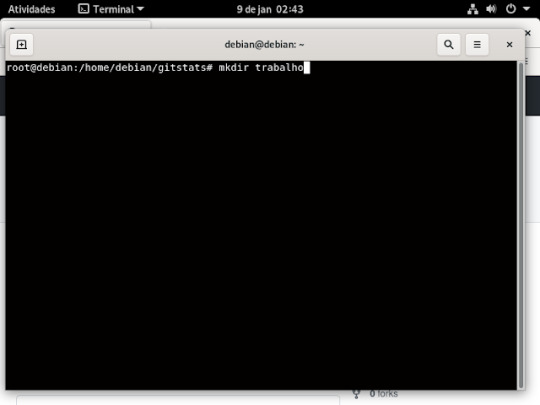
28° passo: dentro da pasta gitstats, irá criar uma outra pasta aonde vai armazena o for captura do GitHub, como mostra a imagem
29° passo: depois que criou você ira entra na pasta, usando o comando cd

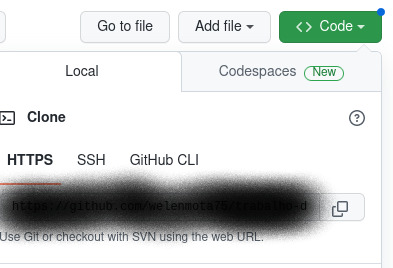
30° passo: dentro do seu GitHub ira no repositório que você quer clonar e ira copiar o link fica no botão verde escrito code clica em cima dele e aparecera assim como mostra a imagem baixo.
31° passo: o link que ira aparecer aonde está na imagem anterior o que ira copiar e no terminal você ira digitar assim:
32° passo: você ira voltar a pasta gitstats , digitando assim, no terminal, apertando o enter do teclado

33° passo: dentro da pasta gitstats , ira digitar esse comando "./gitstats ./nome da pasta que você vai clona/ . /o nome da pasta que você criou no seu debian/ , aperte o enter do teclado e tá pronto
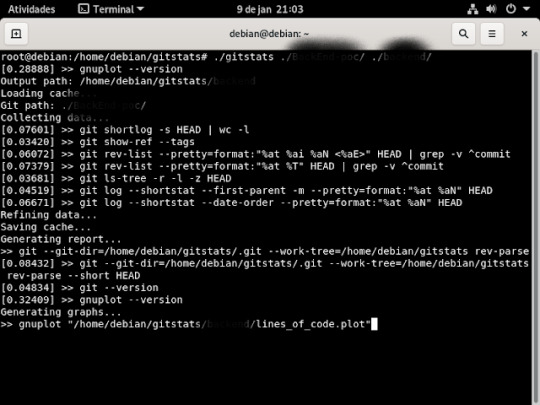
Bom é isso ,se quiser clona outro repositório basta seguir o que fizemos que vai funcionar .....
0 notes
Text
How to login to remote server with ssh key
On your server run:
ssh-keygen -t rsa
You will be asked for key location and password, just leave them empty and then keys will be created in home directory of your user, for exmaple:
/root/.ssh
Then we need to copy public key to remote server:
ssh-copy-id -i ~/.ssh/id_rsa.pub user@server
Replace user with user on remote side and server with server address. You will be asked for password of remote server, fill it.
After this you can connect to remote server with command:
ssh user@server
0 notes
Text
Adding ssh key pair to Openstack using cli: In this series of Openstack configuration and management, let’s look at how to add ssh keypairs to Openstack. This guide is based on Openstack Victoria release.
Public/private key pairs work by keeping the public key on the server, and the private key on your local workstation. Once the server has verified that the two keys match, a secure connection can be made.
So let us generate new ssh key pair, you can skip this if you already have one:
$ ssh-keygen -t rsa -b 4096
Generating public/private rsa key pair.
Enter file in which to save the key (/home/josphat/.ssh/id_rsa):
Created directory '/home/josphat/.ssh'.
Enter passphrase (empty for no passphrase):
Enter same passphrase again:
Your identification has been saved in /home/josphat/.ssh/id_rsa.
Your public key has been saved in /home/josphat/.ssh/id_rsa.pub.
The key fingerprint is:
28:14:e0:14:11:0d:77:23:2d:6c:65:12:4e:26:a1:de josphat@localhost
The key's randomart image is:
+--[ RSA 4096]----+
| XXO+= |
| + *=*.. |
|. ..o. |
|. .. . |
| . E. . S |
| . |
| |
| |
| |
+-----------------+
Copy the key to the clipboard:
xclip -sel clip Key Pairs:
OpenStack can inject a public ssh key into an instance on launch, so that it’s ready for you to access using the private key once it is ready. Go ahead and create a new VM with the key pair uploaded:
openstack server create \
--flavor m1.tiny \
--image CoreOS-x86_64 \
--nic net-id=a54af9d4-d297-45b6-a98c-79d84add5f2e \
--security-group default \
--key-name josphat coreos-test-vm
If you don’t have any image uploaded, i made a comprehensive guide on how to add images to Openstack, check it on the link below:
Adding images to Openstack Glance
Network id, Image name(ID) and security groups can be obtained using:
$ openstack image list
$ openstack network list
$ openstack security group list
See screenshot below:
Check if instance created is running, and obtain its ip address:
$ openstack server list
Verify access:
$ ping -c 4 ip_address
You can now login to the vm using:
$ ssh username@ip_address
Since I’m using CoreOS image, default username is core
core@coreos-test-vm ~ $ cat /etc/os-release
NAME="Container Linux by CoreOS"
ID=coreos
VERSION=1409.8.0
VERSION_ID=1409.8.0
BUILD_ID=2017-08-10-0112
PRETTY_NAME="Container Linux by CoreOS 1409.8.0 (Ladybug)"
ANSI_COLOR="38;5;75"
HOME_URL="https://coreos.com/"
BUG_REPORT_URL="https://issues.coreos.com"
COREOS_BOARD="amd64-usr"
That’s all. More Openstack related tutorials to come. Follow us on twitter to get updated.
0 notes
Text
Ssh tunnel ssl

#Ssh tunnel ssl install#
#Ssh tunnel ssl code#
R = requests.get(f' Example Domain This domain is for use in illustrative examples in documents. Local_bind_address=(local_host, local_port), Remote_bind_address=(local_host, local_port), Ssh_private_key='/home/coil/.ssh/id_rsa', Then we can call from our PC following python script to get to get response from "private server" that was accessed via bastion node: from sshtunnel import SSHTunnelForwarder
#Ssh tunnel ssl install#
Install python packages on our PC: pip3 install sshtunnel requests Now try logging into the machine, with: "ssh check to make sure that only the key(s) you wanted were connectivity: ssh to Ubuntu 18.04.3 LTS (GNU/Linux 4.15.0-135-generic x86_64) usr/bin/ssh-copy-id: INFO: 1 key(s) remain to be installed - if you are prompted now it is to install the new password: usr/bin/ssh-copy-id: INFO: attempting to log in with the new key(s), to filter out any that are already installed PRIVATE SERVER - web service running on Copy your public key to remote server: ssh-copy-id -i ~/.ssh/id_rsa.pub INFO: Source of key(s) to be installed: "/home/coil/.ssh/id_rsa.pub" REMOTE SERVER - server accessible from VM via RSA key We should get back some simple html from that website. Įxample scenario: we will connect from our linux VM on PC into a remote server that this web runs on and then we will contact website that is running on some random server.
#Ssh tunnel ssl code#
Article and code is based on these two related posts:. We will implement such port forwarding solution with Python sshtunnel library ( ). We can then use port forwarding from our PC to bastion node and let bastion contact API on private server. This bastion node will then have access to the private API on some other private server within VPC. What we can do is to setup special server within the VPC (bastion node) that will allow only SSH acces for my specific user via RSA key. This API is private and not open publicly. PRIVATE SERVER - target server that is running the service we are interested in, this server is reachable from REMOTE SERVER and unreachable from LOCAL CLIENT +-+ +-+ +-+Įxample application: we have VPC (Virtual Private Cloud) on Amazon AWS, some services are reachable from the internet, but for our own use we have additional RESTful Flask API that is gathering metrics about our users. REMOTE SERVER - bastion node that we can ssh to from LOCAL CLIENT LOCAL CLIENT - our PC/some server we are connected to already But we have ssh access to another server that CAN connect to the target server that is running the service we want to interact with. This might be caused by for example firewall/routing rules. Let's imagine that we have following situation: we have API/website/some service that is not reachable from our PC/server we are currenly connected to.
0 notes
Text
Go sftp server

Sftp -i private key Login to the SFTP Server using FileZilla: Login to the SFTP Server using the command line interface:.Step #5: External Login to the SFTP Server Finally, select ‘Add’ to complete the process and add your new user to your SFTP server of choice.The key fingerprint is: SHA256:bBGvsTC8AJl3FcvQtGZtfQhtweEiAYloUTabDVKTBCc The key's randomart image is: +-+ | EXXoo**.ooo | | =*+Ooo.B ++. Your public key has been saved in /opt/BounceX.pub. Enter file in which to save the key (/root/.ssh/id_rsa): /opt/BounceX Enter passphrase (empty for no passphrase): Enter same passphrase again: Your identification has been saved in /opt/BounceX. Input the SSH public key data of the SSH key pair (Add id_rsa.pub), and share the private key to the user.Ĭommands :- ssh-keygen ssh-keygen Enter the path where the keys need to save Generating public/private rsa key pair.Input the path to the ‘Home directory’ where your user ends up when they log in using their SFTP client. Configure the S3 bucket which you want to transfer to using AWS SFTP.We created the below policy and labeled it ‘sftp-tests’ as per the image. Next, select the policy by clicking below the ‘Home directory. Input the user name and select the IAM role that you previously created that provides access or create a new IAM role for a specific user.Click on ‘Endpoints’ before clicking ‘Create Endpoint’.Simply follow these guidelines or leverage your MSP, such as Ibexlabs, to implement this for you: Step #1: Create an AWS Transfer for SFTP VPC Endpoint We go into this in more detail later in the article.įinally, it’s possible to set up a secure SFTP server within an organization’s VPC by creating a VPC endpoint right through to configuring an external tool ( FileZilla in this example) for your users to connect with. Next, create a new IAM policy that enables access to the S3 bucket with SFTP before attaching the policy to the previously created role. Simply open the IAM dashboard and create a new IAM Role before establishing a ‘trust relationship’ with the SFTP Service. Administrators can also set custom roles per user to lock down permissions to the S3 storage the files are located in. Authentication simply needs to be set up through custom development and the necessary API Gateway endpoints or by specifying domain names. Integrate AWS IAM with AWS Transfer for SFTPįurthermore, thanks to AWS' mass-service integration for all business-critical environments, AWS Transfer for SFTP supports common internal and external user authentication systems. It’s also possible to configure an SFTP endpoint and set up client access through web, CLI, and API interfaces. Organizations can fully leverage SFTP to upload, download, and delete files to and from these buckets to external entities with ease.įor resource and performance efficiency in file transfers, AWS SFTP leverages elastic resources to auto-scale according to the transfer workload. AWS SFTP provides access to specific S3 buckets and prefixes per user. Rather than have to go through the costly process of investing time and money to run an infrastructure setup of SFTP servers, AWS Transfer for SFTP removes all such maintenance overheads. AWS launched it’s fully managed AWS Transfer for SFTP in answer to this direct dilemma. Secure-Shell File Transfer Protocol (SFTP) servers used to be the go-to answer for this enterprise requirement, but running these is costly and not necessarily efficient best practice. Not only do these transfers need to maintain the security and integrity of internal infrastructure, but the process needs to be practical and cost-effective too. Organizations often find themselves needing to make secure file transfers to outside entities such as clients and vendors.
1 note
·
View note
Text
Proteger un servidor casero Ubuntu

Proteger un servidor casero Ubuntu y derivados.
Ya sea como servidor multimedia, servidor de archivos o incluso como backup local, es algo común que tengamos nuestro propio server casero. Ahora bien, mantenerlo con un minimo de seguridad es otra historia. La seguridad puede llegar a ser tan compleja como importante.
La seguridad basica de un servidor comienza en su propia instalación, piénsalo bien... por que instalas una aplicación o herramienta que no usaras nunca?, no la instales, es así de fácil.
Si no eres novato en linux, no deberías de realizar instalaciones predeterminados, utiliza el modo experto (o similar) que te ofrece un mayor control sobre la misma.
Un control minucioso de las opciones que se van a instalar, puede ahorrarnos un valioso tiempo en deshabilitar posteriormente servicios innecesarios por motivos de seguridad.
Una vez vistas las nociones básicas a la hora de instalar, entramos un poco más en profundidad en el tema.

Servidor casero Ubuntu
Proteger un servidor casero con Ubuntu
Lo primero que tenemos que hacer es asegurarnos que nuestro usuario tendrá acceso mediante ssh (es necesario para poder conectarnos después al servidor remotamente).
sudo -lU tu-usuario
Un ejemplo de respuesta correcta es:
User sergio may run the following commands on SoloLinux:
(ALL) ALL
Si no fuera como el ejemplo anterior, debemos acceder al archivo "sudoers" y agregar nuestro usuario con sus permisos correspondientes.
nano /etc/sudoers
Copia y pega (con tu usuario).
mi-usuario ALL=(ALL) ALL
Guarda el archivo y cierra el editor nano.
Configurar SSH
Como norma general, el server ssh ya viene instalado. Por si acaso ejecutamos el comando siguiente.
sudo apt install openssh-server
La autentificación basada en claves es mucho más segura que con contraseña, por tanto configuraremos SSH para que utilice claves.
OJO!!!, este proceso lo debemos hacer en el cliente con el que después nos conectaremos al servidor (nunca en el propio server).
Primero nos aseguramos que no tenemos ninguna clave ya generada en nuestro sistema.
ls ~/.ssh/
Si en los archivos listados aparece "id_rsa" o "id_rsa.pub" es porque ya tienes una clave, salta el paso que indicamos a continuación.
Generamos una clave con nuestros datos reales.
ssh-keygen -t rsa -b 4096 -C "[email protected]"
Bien... ya la tenemos, en este paso copiaremos nuestra clave de acceso al server, debes tener en cuenta que en un servidor casero (doméstico) es probable que utilicemos la ip para acceder en vez de un nombre. Si no conoces el nombre del servidor, usa la dirección IP en vez del nombre, realmente da lo mismo.
Ejecutamos lo siguiente:
ssh-copy-id miusuario@IP-o-nombre
Nos falta editar la configuración SSH. Iniciamos la sesión desde el PC-cliente en el que tenemos las claves y editamos la configuración del servidor.
sudo nano /etc/ssh/sshd_config
Debes copiar y pegar en el archivo las lineas siguientes, pero ojo... si ya existe alguna no la dupliques.
ChallengeResponseAuthentication no
PasswordAuthentication no
UsePAM no
PermitRootLogin no
Para finalizar reiniciamos el servidor SSH.
sudo systemctl restart ssh
Configurar el firewall
En un servidor casero es más que suficiente utilizar el "firewall UFW", en un articulo anterior ya creamos un tutorial bastante completo, aun así volvemos a explicar los pasos imprescindibles para configurar UFW en tu server Ubuntu.
Dependiendo de la versión de Ubuntu tal vez no lo tengas instalado, procedemos a ello.
sudo apt install ufw
Lo habilitamos.
sudo ufw enable
Al activarlo y de manera predeterminada se bloquearán todos los puertos. Como mínimo debemos habilitar el acceso a la red y a ssh, ejecuta los siguientes comandos para abrir los puertos 80, 443 y 22:
sudo ufw allow 80
sudo ufw allow 443
sudo ufw allow 22
Habilitar actualizaciones automáticas
Si no quieres estar pendiente de actualizar cada X días, tal vez te convenga automatizar las actualizaciones de seguridad, la tarea es sencilla tan solo debes ejecutar lo siguiente.
sudo dpkg-reconfigure -plow unattended-upgrades
Aparecerá en pantalla una ventana similar a la siguiente, pulsa "YES" o "SI".

Configurar auto update en Ubuntu
Este articulo esta pensado para servidores domésticos, si es empresarial o manejas datos sensibles busca en sololinux.es otros post más especializados.
En Sololinux.es seguimos creciendo gracias a nuestros lectores, puedes colaborar con el simple gesto de compartir nuestros artículos en tu sitio web, blog, foro o redes sociales.
Read the full article
#/etc/sudoers#configuraciónSSH#ConfigurarSSH#configurarUFW#editornano#firewall#id_rsa#id_rsa.pub#protegerservidor#servidor#servidorcasero#servidormultimedia#servidorSSH#ssh#sudo#sudoers#ubuntu#ufw
0 notes
Text
哪个男孩子不想拥有一个git同步的网站呢?
服务器创建git用户
addusr git passwd git
创建信任关系
Tip: 每次提交就不用输入密码了
本地创建key公钥证书
ssh-keygen -t rsa -C "[email protected]" cat ~/.ssh/id_rsa.pub
复制公钥到服务器
ssh-copy-id -i .ssh/id_rsa.pub [email protected]
如果不识别ssh-copy-id指令,可以手动替换(建议加在authorized_keys结尾)
scp -p ~/.ssh/id_rsa.pub [email protected]:~/.ssh/authorized_keys
赋予权限
chomd 700 .ssh cd .ssh & chmod 600 authorized_keys
Tip: 可以修改git用户的权限,比如禁止登录等
修改ssh认证
sudo vim /etc/ssh/sshd_config RSAAuthentication yes #开启RSA认证功能 PubkeyAuthentication yes #开启公匙认证 StricModes no #不强制要求登录用户和文件拥有者用户相同
初始化git仓库
su root cd /usr/repos && git init --bare website.git chown -R git.git website.git
本地测试推送
略(git bash/github-desktop)
[email protected]:/usr/repos/website.git
服务器clone
略(git账户)
[email protected]:/usr/repos/website.git
利用钩子编写自动执行程序
touch /usr/repos/website/hooks/post-receive chmod -R 777 /usr/repos/website/hooks/post-receive vim /usr/repos/website/hooks/post-receive
内容如下
#!/bin/sh git --work-tree=/usr/website --git-dir=/usr/repos/website.git checkout -f
设置nginx目录
Tip: 需要管理员账户修改nginx.conf
sudo vim /usr/local/nginx/conf/nginx.conf
修正http和https为正确目录
# http部分 location / { root /usr/website; index index.html index.htm; } error_page 404 /404.html; location = /404.html { root /usr/website; } error_page 500 502 503 504 /50x.html; location = /50x.html { root /usr/website; } # https部分 location / { root /usr/website; index index.html index.htm; } error_page 404 /404.html; location = /404.html { root /usr/website; } error_page 500 502 503 504 /50x.html; location = /50x.html { root /usr/website; }
打完手工
sudo /usr/local/nginx/sbin/nginx -s reload
在本地修改好网站即可通过git提交修改,可以避免每次都要手动同步被修改的文件的痛苦。
补充
网站目录可搬迁,注意一下钩子的指令,最好执行一次以同步。
如果使用hexo等工具搭建可以更方便的修改提交哟,这里针对的是自己写的静态网站。
1 note
·
View note
Text
What is Apache Spark?
Apache Spark is an open-source distributed general-purpose cluster-computing framework. Spark provides an interface for programming entire clusters with implicit data parallelism and fault tolerance.
What is Cluster Computing?
Cluster Computing is a set of loosely or tightly connected computers that work together to complete a certain task.
Prerequisites- Have a minimum of 2 servers. (Tutorial is done for a cluster consisting of 3 servers)
Steps below must be done to Master and all Workers
Install Java (Only if java is not preinstalled on the server)
sudo apt install default-jdk
Confirm Java Installation
Java -version
Install Scala (Only if Scala is not preinstalled on the server)
sudo apt-get install scala
Confirm Scala installation
Scala — version
Open the host files
$ sudo vim /etc/hosts
Edit the hosts files (IP Addresses must be replaced with the your ones)
<MASTER-IP> master
<SLAVE01-IP> slave01
<SLAVE02-IP> slave02
Steps below must only be done to Master
Install Open SSH Server-Client
$ sudo apt-get install openssh-server openssh-client
Generate Key pairs
$ ssh-keygen -t rsa -P “”
Note: Leave the destination folder blank
Configure password less SSH
Copy the content of .ssh/id_rsa.pub (of master) to .ssh/authorized_keys (of all the slaves as well as master).
Check by typing
ssh slave01
ssh slave02
Note: It should ask for the password to login
Steps below must be done to Master and all workers
Spark Installation
$ wget https://www.apache.org/dyn/closer.lua/spark/spark-2.4.4/spark-2.4.4-bin-hadoop2.7.tgz
Extract the Spark File
$ tar xvf spark-2.4.4-bin-hadoop2.7.tgz
Move Spark Software to respective directory.
$ cd /usr/local/bin
$ sudo mv spark-2.3.0-bin-hadoop2.7 /usr/local/spark
Set up environment for spark
$ sudo bim ~/.bashrc
Add the following line to the ~/.bashrc file.
export PATH=$PATH:/usr/local/spark/bin
Source the bash file
$ source ~/.bashrc
Steps below must only be done to Master
Spark Master Configuration
Move to spark conf folder and create a copy of template of spark-env.sh and rename it.
$ cd /usr/local/spark/conf
$ cp spark-env.sh.template spark-env.sh
Edit spark-env.sh
$ sudo vim spark-env.sh
Enter the following lines
export SPARK_MASTER_HOST=’<MASTER-IP>’
export JAVA_HOME=<Path_of_JAVA_installation>
Spark worker configuration
$ sudo vim slaves
Enter the following in slaves file.
slave01
slave02
Start Spark cluster
$ cd /usr/local/spark
$ ./sbin/start-all.sh
Stop Spark Cluster
$ cd /usr/local/spark
$ ./sbin/start-all.sh
1 note
·
View note
Text
Run Android on Docker on Mac OS
How to build and run Android Emulator on a Docker container, run locally on MacBook. Assumption Docker is installed. I learned about Docker from this GitHub tutorial. In this tutorial, we will create and run an Android Emulator inside a Docker container.
1.Pull the Android Docker images.
a. Open Docker application on MacBook.
b. Open a new terminal and enter below commands:
//Pulls android-sdk image
docker pull thyrlian/android-sdk
//Pulls android-sdk-vnc image
docker pull thyrlian/android-sdk-vnc
//Runs android sdk on container
docker run -it — rm -v $(pwd)/sdk:/sdk thyrlian/android-sdk bash -c 'cp -a $ANDROID_HOME/. /sdk'
2.Modified below command to use your file ssh key path “../../ssh/id_rsa.pub”
docker run -d -p 5901:5901 -p 2222:22 -p 5037:5037 -v $(pwd)/sdk:/opt/android-sdk -v /Users/asandoval/.ssh/id_rsa.pub:/root/.ssh/authorized_keys thyrlian/android-sdk-vnc
3.Open new terminal and SSH into container. Use below command to install Android emulator components
ssh [email protected] -p 2222 //enter your SSH id_rsa key password
Enter below commands to download Android emulator components:
sdkmanager "platform-tools" "platforms;android-24" "emulator"
sdkmanager "system-images;android-24;default;armeabi-v7a"
Enter below commands to create new Android Emulator:
avdmanager create avd -n emuTest -k "system-images;android-24;default;armeabi-v7a"
emulator -avd emuTest -noaudio -no-boot-anim -gpu off
4.The Android emulator is starting inside Docker container
Now VNC to the container. With VNC you are able to see the emulator. You will have an android emulator running on your virtual machine “container”
a. On MacBook open application “Screen Sharing”.
b. Enter below:
vnc://0.0.0.0:5901
(password: android)
5. Open new terminal and enter below ADB commands.
$adb kill-server
$adb connect 0.0.0.0:5037
$adb logcat
$adb assembleReleaseGloogeBuild
$adb install -r /PATH-to-your-APK/./.
Since the sdk container is persisted on host machine (`-v $(pwd)/sdk:/sdk`), we don’t need to install the emulator packages after the first run,We just need to open terminal and enter below command.
//Runs android sdk on container
docker run -it — rm -v $(pwd)/sdk:/sdk thyrlian/android-sdk bash -c ‘cp -a $ANDROID_HOME/. /sdk’
The Docker container running the Android emulator keeps running until you stop/kill docker container. Below Docker commands shows how to stop docker container:
docker ps -a
docker rm -f {container ID}
1 note
·
View note
Text
1) nameless@ge-n2 ~ % ssh-keygen
2) nameless@ge-n2 ~ % cat .ssh/id_rsa.pub
3) nameless@ge-n2 ~ % cd T01D01-0
4) nameless@ge-n2 T01D01-0 % git checkout -b develop
5) nameless@ge-n2 T01D01-0 % git branch
6) nameless@ge-n2 T01D01-0 % git push origin develop
7) nameless@ge-n2 T01D01-0 % cd src
8) nameless@ge-m3 src % sh ai_initial_module.sh
9) nameless@ge-m3 src % nano important_data_for_ai_module_2.txt
10) nameless@ge-m3 src % git add important_data_for_ai_module_2.txt
11) nameless@ge-m3 src % git commit -m'First commit'
12) nameless@ge-m3 src % git push origin develop
13) nameless@ge-m3 src % sh ai_door_management_module.sh
14) nameless@ge-m3 src % ls
15) nameless@ge-m3 src % mkdir door_configuration
16) nameless@ge-m3 src % cd door_management_files
17) nameless@ge-m3 door_management_files % mkdir door_configuration
18) nameless@ge-m3 door_management_files % mkdir door_map
19) nameless@ge-m3 door_management_files % mkdir door_logs
20) nameless@ge-m3 door_management_files % ls
21) nameless@ge-m3 src % git add *
22) nameless@ge-m3 src % git status
23) nameless@ge-m3 src % git commit -m'Files moove'
24) nameless@ge-m3 src % git push origin develop
25) nameless@ge-m3 src % sh ai_door_management_module.sh
26) nameless@ge-m3 src % touch quest3.sh
27) nameless@ge-m3 src % nano quest3.sh
28) nameless@ge-m3 src % chmod 777 ai_door_control.sh
29) nameless@ge-m3 src % sh ai_door_management_module.sh
30) ps
31) kill 14658
32) nameless@ge-m3 src % touch quest4.sh
33) nameless@ge-m3 src % nano quest4.sh
34) nameless@ge-m3 src % git add *
35) nameless@ge-m3 src % git commit -m'quest4'
36) nameless@ge-m3 src % git push origin develop
37) nameless@ge-m3 src % cd door_management_files
38) nameless@ge-m3 door_management_files % cd door_configuration
39) nameless@ge-m3 door_configuration % nano door_1.conf
40) nameless@ge-m3 door_configuration % git add *
41) nameless@ge-m3 door_configuration % git commit -m'quest5'
42) nameless@ge-m3 door_configuration % git push origin develop
43) nameless@ge-m3 door_configuration % cd ..
44) nameless@ge-m3 door_management_files % cd ..
45) nameless@ge-m3 src % touch quest5.txt
46) nameless@ge-m3 src % nano quest5.txt
0 notes
Text
Let’s look at how you can update or change your SSH key Passphrase on a Linux system. SSH keys are often used to authenticate users to some kind of information systems. The SSH keys themselves are private keys; the private key is further encrypted using a symmetric encryption key derived from a passphrase. It is easy to change your SSH Key passphrase on a Linux/Unix system.
What is SSH Key Passphrase?
A passphrase is similar to a password and is used to secure your SSH private key from unauthorized access and usage. It is always recommended to set a strong Passphrase for your SSH keys, with at least 15, preferably 20 characters and be difficult to guess.
How to Change or update SSH key Passphrase on Linux / Unix
At times you may need to update your SSH key passphrase or set one if you didn’t set at the time of generating your SSH keys.
As an example, let’s generate SSH key without a passphrase:
$ ssh-keygen
Generating public/private rsa key pair.
Enter file in which to save the key (/root/.ssh/id_rsa):
Enter passphrase (empty for no passphrase):
Enter same passphrase again:
Your identification has been saved in /root/.ssh/id_rsa.
Your public key has been saved in /root/.ssh/id_rsa.pub.
The key fingerprint is:
SHA256:1gSD3mPgxaD0C88YLU+TdYs2T3nBO5ttK5Jj0bvz0gs root@ubuntu-01
The key's randomart image is:
+---[RSA 2048]----+
| . .++ ... |
| . +ooo= o.. |
| =o*++ = .. |
| Xo++* .o |
| . =.S.o. = |
| . . + o |
| oE+ . |
| = =.o |
| . o.*o. |
+----[SHA256]-----+
Now use the command below to set a passphrase:
$ ssh-keygen -p -f ~/.ssh/id_rsa
Enter new passphrase (empty for no passphrase):
Enter same passphrase again:
Your identification has been saved with the new passphrase.
If using a custom path for the private key, replace ~/.ssh/id_rsa with the path to your private key.
The same command applies when resetting the passphrase, you will be asked for the old one, and the new one to set.
$ ssh-keygen -p -f ~/.ssh/id_rsa
Enter old passphrase:
Enter new passphrase (empty for no passphrase):
Enter same passphrase again:
Your identification has been saved with the new passphrase.
Testing new passphrase
To test that your new passphrase is working, copy ssh public key to a remote server and try to ssh with it.
$ ssh-copy-id [email protected]
Enter passphrase for key '/home/jmutai/.ssh/id_rsa':
Now try logging into the machine, with "ssh '[email protected]'", and check in:
.ssh/authorized_keys
to make sure we haven't added extra keys that you weren't expecting.
Save private key passphrase
With ssh, you can configure authentication agent to save passphrase so that you won’t have to re-enter your passphrase every time you use your SSH keys.
# Start agent on demand
eval $(ssh-agent)
# Add default key
ssh-add
# List keys
ssh-add -l
# Add specific key
ssh-add ~/.ssh/id_rsa
# Add with timeout
ssh-add -t 3600 ~/.ssh/id_rsa
# Drop keys
ssh-add -D
For a complete guide on how to use SSH, check SSH cheatsheet for Linux SysAdmins
0 notes
Text
Conectando-se via chave SSH ao Juniper
Conectando-se via chave SSH ao Juniper
Vou dar um exemplo de configuração de uma conexão de chave SSH para Juniper MX.
Primeiro, gerei uma chave pública no servidor Linux do qual precisava me conectar:
1ssh-keygen -t rsa
Então eu olhei para o conteúdo da chave pública:
1cat /root/.ssh/id_rsa.pub
Apareceu algo assim:
1ssh-rsa XXXXXXXXXXXXXXXX root@carran
Em seguida, o conteúdo dessa chave deve ser especificado na configuração do…
View On WordPress
0 notes
Last Seen Blogs

unprovincial-tides-blog
Unprovincial.Tides

punishedrev
Untitled

sad4ppleart
artblog

fairhytale
fairhytale
