#landscape photography techniques
Text
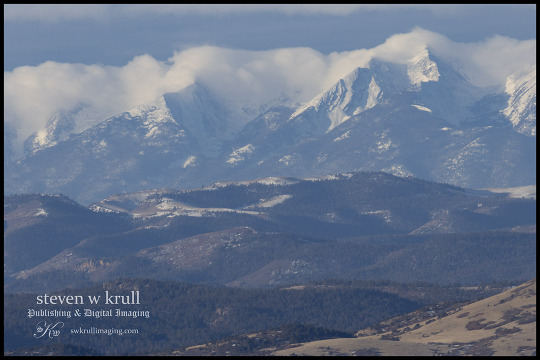
Spirit of the Wolf Moon
View On WordPress
#amazon ebook#books#books worth reading#bookshelf#colorado#Colorado wall art#ebook#eBoook#free books#hiking trail#hiking trails#instabook#landscape#landscape photography#landscape photography techniques#landscape photography tips#photography#prints#prints for sale#Sangre De Cristo#Sangre de Cristo Mountains#Spirit of the Wolf#spirit of the wolf moon#wall art#winter#winter photography#wolf moon
0 notes
Text

#photo#my photos#photooftheday#photoshoot#photograph#picture#photoshop#photography#photographer#photography tips#photography on tumblr#photography blog#photography art#places#landscape#nature#photography editing#photography tag#photography tumblr#photography techniques#photography training#photography inspiration#photography is art#photography ideas#photography is my passion#photography of the day#photography practice#photography project#photography photo#photography aesthetic
137 notes
·
View notes
Text
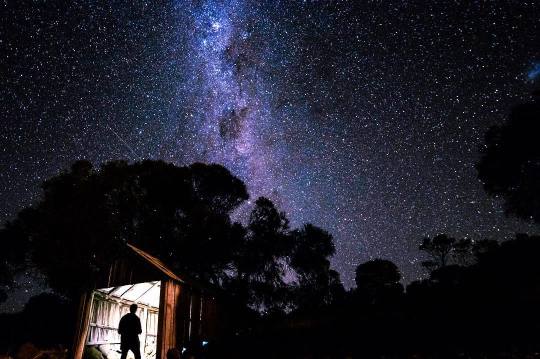
Star Photo Settings for DSLR Cameras
View On WordPress
#adventure photography#aperture settings#astrophotography#astrophotography guide#capturing stars#celestial photography#composition in photography#creative photography#DSLR camera#DSLR settings for stars#exploring the night sky#exposure techniques#focusing at night#ISO settings#landscape photography#light painting#long exposure#low light photography#manual camera settings#manual focus#Milky Way photography#nature photography#night landscape#night photography#night photography essentials#night photography settings#night photography tips#night shooting#night sky#outdoor photography
6 notes
·
View notes
Photo

View from an Overpass, La Junta, Colorado - 2.5″x2.5″ paper negative, kodak brownie hawkeye with inverted lens, caffenol developer - robert matejcek - 2022
"For time is the longest distance between two places."
- Tennessee Williams - The Glass Menagerie
Tags
#robert matejcek#film photography#analog#alternative photographic techniques#paper negative#medium format#ilford multigrade paper#kodak brownie hawkeye#vintage camera#flipped lens#inverted lens#caffenol developer#landscape#train tracks#railroad#lens blur#blurry photographs#blurry aesthetic#artifacts#grunge aesthetic#art#my art#photographers on tumblr#artists on tumblr#backlight#cityscape#small town#americana#trains#horizon
4 notes
·
View notes
Text
Mastering Coastal Photography: A Guide to Taking Stunning Photos by the Sea
Photographing by the sea offers unique opportunities to capture the beauty and drama of the natural world. The dynamic interplay of light, water, and land creates endless possibilities for stunning imagery. However, coastal photography also presents its own set of challenges, from dealing with harsh lighting conditions to managing the ever-changing environment. This guide will walk you through the essential tips and techniques for taking breathtaking photos by the sea.
#seascape photography#ocean photography#beach photography#marine photography#photography#beautiful#beach#Coastal photography tips#Seaside photography techniques#Ocean photography#Beach photography ideas#Seascape photography#Marine photography#Sea photography settings#Beach photoshoot tips#Ocean life photograph#Coastal landscape photography#Best beaches for photography#Coastal photography locations#Photography spots by the sea#Scenic seaside photography spots#Coastal travel photography#Iconic sea photography locations#Coastal photography gear#Beach lighting for photography#Seaside photography lenses#Best camera for sea photography#Waterproof cameras for ocean photography#Drone photography by the sea#Camera settings for beach photography
0 notes
Text
10 Tips for Stunning Golden Hour Photography

As a photographer, there's nothing quite like the thrill of capturing the perfect shot during golden hour. That fleeting moment when the sun dips below the horizon, casting a warm, golden glow over the landscape, is truly magical. At Studio Capture Life, we're passionate about helping photographers of all levels capture life's most precious moments, and golden hour is one of our favorite times to do just that.
In this blog, we'll share our top tips for capturing stunning golden hour photography that will leave your audience in awe. Whether you're a seasoned pro or just starting out, these tips will help you make the most of this beautiful time of day.
Tip 1: Plan Ahead
Golden hour is a short-lived phenomenon, typically lasting around 60 minutes. To make the most of this time, it's essential to plan ahead. Research the location you want to shoot at and find out when golden hour occurs. Use apps like The Photographer's Ephemeris or Golden Hour to help you plan your shoot.
Tip 2: Choose the Right Location
Not all locations are created equal when it comes to golden hour photography. Look for spots with an unobstructed view of the horizon, such as beaches, hills, or mountains. Avoid areas with dense foliage or tall buildings that may block the light.
Tip 3: Shoot in RAW
Shooting in RAW format gives you more flexibility when editing your photos. RAW files capture more data than JPEGs, allowing you to adjust exposure, contrast, and color balance with greater precision.
Tip 4: Use a Wide-Angle Lens
A wide-angle lens is perfect for capturing the expansive views and dramatic skies of golden hour. Look for a lens with a focal length of 10-24mm to capture the full majesty of the scene.
Tip 5: Shoot in Manual Mode
Golden hour is all about capturing the fleeting light, so it's essential to shoot in manual mode. This allows you to adjust your camera settings to capture the perfect exposure.
Tip 6: Pay Attention to Composition
Golden hour is not just about capturing the light; it's also about composition. Look for leading lines, framing elements, and symmetry to add depth and interest to your photos.
Tip 7: Experiment with Different Angles
Don't be afraid to experiment with different angles and perspectives. Shooting from a low or high angle can add drama and interest to your photos.
Tip 8: Shoot in Continuous Mode
Golden hour is a fast-paced environment, and the light can change quickly. Shooting in continuous mode allows you to capture a burst of photos, increasing your chances of getting the perfect shot.
Tip 9: Bracket Your Shots
Bracketing your shots allows you to capture a range of exposures, which can be later merged using HDR software. This is particularly useful for capturing the full dynamic range of golden hour.
Tip 10: Practice, Practice, Practice
Golden hour photography is all about practice and patience. The more you shoot, the more comfortable you'll become with the light and the techniques required to capture it.
Conclusion
In conclusion, golden hour photography is a truly magical experience that requires a combination of planning, skill, and practice. By following these tips, you'll be well on your way to capturing stunning golden hour photography that will leave your audience in awe.
Ready to take your photography skills to the next level? Join our community at Studio Capture Life and get access to exclusive tutorials, workshops, and resources to help you capture life's most precious moments.
#best wedding photographer#best wedding photographer in india#Bracketing Shots#candid wedding photographer#Choosing a Photographer#Cinematic photography#Cinematic storytelling#Composition#Continuous Mode Photography#golden hour photography#indian weddings#Landscape Photography#Manual Mode#Maternity Photography#most luxurious wedding photographer#Photography Planning#Photography techniques#Photography Tips#RAW Format#Sunset Photography#Wide-Angle Lens
0 notes
Text


Seascape intentional blur at Ayr
#photography student#location#nature#photosafari#hndphotography#icm#intentional blur#camera techniques#landscape#seascape
1 note
·
View note
Text
Embracing the Magic in Nature -- Lens-Artists Challenge #279
Discover the magic of nature transformed through the lens of technology and imagination! Dive into my latest blog post for the Lens-Artists Challenge #279, where misty mornings and enchanted forests come alive. #LensArtists #NaturePhotography #Magic
Hi all 😃 My entry for this week’s challenge, set by Leya: Magical.
For me, nature needs nothing added to it for that magical touch; simply a new day, golden sun & a hint of mist to soften the reflections & scene.
Continue reading Untitled

View On WordPress
#Artistic Exploration#Artistic Filters#Blogging Challenge#Creative Photography#Digital Art#Enchantment#Jez Braithwaite#Landscape Photography#LAPC#LENS-ARTISTS#Lens-Artists Challenge#lensy#Magic#Natural Beauty#Nature Magic#Photography Techniques#Prompt Engineering
0 notes
Text
Colorado River Photography

Top 10 Photography Tips For Grand Canyon Rafting
Ever wonder how to capture the roaring majesty of the Colorado River as it carves through towering canyon walls? How about snapping that perfect sunrise shot, where light paints ancient rocks in hues unimaginable? You'll learn what camera gear can withstand water and dirt and discover unique photographic opportunities at places like Lava Falls or Inner Gorge. Imagine dealing with dark shadows cast by enormous rock formations without breaking a sweat or creating silhouette portraits against bright skies effortlessly. We're talking about turning challenges into stunning images here. The world's most dramatic river expedition deserves nothing less than your best shots. Are you ready to dive in? Explore Colorado River photography for unique and captivating images.
Mastering the Art of Grand Canyon Photography
The captivating geological variations of the Grand Canyon, crafted by millions of years of erosion, serve as a picturesque backdrop for photographers. But what's behind these beautiful formations? Let's explore how river cuts, salt deposits, and big rapids enhance your photographic journey.
"The Grand Canyon offers different photographic experiences depending on the rocks the river is cutting through."
- A seasoned canyon photographer
Every geological formation in this majestic landscape holds its charm and presents unique opportunities to capture stunning images.
Getting Ready for Your Grand Canyon Rafting Tour
The prospect of a rafting expedition in the Grand Canyon is thrilling. Starting from popular raft trip launch points like Phantom Ranch, you're all set for an unforgettable journey. But what about capturing these precious moments? Let's dive into some handy whitewater rafting camera tips.
"Choosing the right gear and understanding how to use it effectively can make or break your photographic memories."
- An avid rafter and photographer
A successful photo shoot during your rafting or river trip depends heavily on selecting appropriate equipment. Compact digital cameras with high-resolution capabilities offer quality photos without adding unnecessary weight. If action shots are more your style, consider using a GoPro camera due to its versatility and durability. For those leaning towards professional photography, mirrorless cameras give excellent image quality while being lighter than traditional DSLRs. Don't forget waterproof cases.
Don't Be Afraid To Get Your Feet Wet (And Your Camera Gear, Too)
Sometimes, even a single-use waterproof camera is better than anything, especially for river trips like these. You'll witness that at Lava Falls, seeing how varied geology can create dramatic visuals. This site at river mile 179 along the Colorado River displays dark basaltic lava remnants contrasting with lighter-colored surrounding rocks - an ideal spot for capturing contrast-filled shots. On another note, if you're navigating some big rapids around the Inner Gorge area, where towering cliffs are formed from ancient Vishnu Schist and Zoroaster Granite – be ready. It’s perfect for high-drama landscapes or action photos. Keeping your camera gear safe (especially electronics and camera batteries), clean, and in good shape is critical to top-notch performance. You don't want malfunctions or poor image quality from dust stuck in sensitive areas. A light gust of air to remove the dust and a gentle cleaning with a delicate cloth can make all the difference.
Capturing Big Rapids: The Perfect Moment Matters
If there’s one thing that gets hearts racing during any Grand Canyon National Park rafting expedition, it has got to be its famous big rapids. Each rapid has its character depending upon water level fluctuations due to seasonal changes, which affects their visual appeal, too. Capturing these requires impeccable timing skills; popular ones include Hermit Rapid (Mile 95), Crystal Rapid (Mile 98), and Lava Falls Rapid (Mile 179). Embarking on a Grand Canyon rafting expedition is an adventure like no other. Many photographers have seen that over the past several decades. To capture this experience, you'll need the right camera gear to withstand water and dirt while delivering high-quality images.
"The best camera for your whitewater rafting trip isn't necessarily the most expensive one. It's the one you're familiar with."
- Adventure Photographer
In essence, familiarity trumps features when choosing your non-expensive DSLR camera or mirrorless model. The more comfortable you are with adjusting settings such as shutter speed or switching between modes, the better prepared you'll be to snap those perfect shots amidst all the action. Hopefully, your favorite photography instructor gave you some lessons on using it.
Protecting Your Photography Gear during Your Rafting Expedition
A rough river ride calls for strict protection measures. Floating straps offer security by preventing any accidental drops into the river from turning into total losses. But let's not forget about small waterproof camera cases - they shield against moisture damage and physical impacts. A waterproof case gives photographers peace of mind to focus on framing their next shot instead of worrying about potential mishaps. Besides safety equipment, consider space limitations aboard rafts when deciding which accessories to bring. For instance, wide-angle lenses may be better for commercial day trips than multiple heavy telephoto lenses due to weight restrictions.
Lenses: Wide-Angle vs. Telephoto?
A wide-angle lens will serve you well if expansive vistas are what you're after in your photographs. Yet, don't discount the value of having a telephoto option handy, especially if wildlife photography is part of the agenda. Close-ups of condors soaring overhead or majestic bighorn sheep perched precariously on a cliff edge become possible without approaching too closely.
Action Shots: Capturing Whitewater Thrills
Here are a few tips on capturing the best whitewater thrills during your Grand Canyon river trip:
Burst mode or continuous shooting function allows multiple frames per second - perfect for catching that split-second action amidst chaotic rapids.
Vary perspectives by switching between close-ups and wide-angle views; keep moving subjects within the frame during rapid sequences.
Different angles will bring out unique aspects of each moment – don’t be afraid to experiment.
Mornings after sunrise or evenings before sunset—often called golden hours—are ideal for stunning photographs at Phantom Ranch because of their dramatic lighting conditions.
Plan things so you know exactly where the sun will rise/set relative to your location within the Grand Canyon National Park.
Capturing the majestic beauty of river landscapes can be tricky, but it's all part of our adventure.
The vast landscapes and roaring rapids of a Grand Canyon rafting expedition offer countless opportunities for breathtaking photography. But how can you ensure your photos truly capture the majesty of this natural wonder? Let's explore some techniques.
"The grandeur and scale are emphasized by shooting from a low position, making towering canyon walls appear even more imposing against the blue sky backdrop."
- An avid landscape photographer
Though often overlooked by novice photographers, salt deposits are indeed adored by professionals. They add texture and depth to your photographs. Intriguing white patches amidst red-brown rock faces along various parts of the Colorado River banks make them excellent subjects for close-ups or abstract compositions when photographed creatively.
Techniques to Enhance Your Landscape Shots
Your camera body position is an essential aspect that impacts your shot significantly. For instance, shooting from a higher vantage point lets you include detailed features such as river rapids or wildlife onshore in your frame. A stable grip on your camera ensures sharp images—a lightweight travel tripod could be handy here. Applying the rule of thirds principle, which divides your frame into nine equal sections, helps achieve balanced compositions with the horizon line. It's always a good idea to place points of interest at intersections or along these lines rather than centering them directly. This technique can create more visually appealing and dynamic photographs. You can learn more about the rule of thirds principle here.
Nailing Perfect Timing for Your Shots
Morning light offers softer tones, adding depth to every element in sight—the perfect time for great photos. Evening sunlight casts longer shadows, enhancing texture details on canyon walls—an entirely different mood. On the other hand, the midday sun may cast harsh overhead shadows, obscuring detail clarity—here's where fill light comes into play. Using flash appropriately during daylight hours preserves color fidelity while ensuring foreground subjects remain adequately illuminated amidst stark backgrounds like azure skies above precipitous cliffsides. Wait, there's more than framing the pic. Adjusting for changing light and weather conditions is vital, too. Hang in there and wait for that perfect moment - great photos are worth the patience.
Tackling Tough Lighting Conditions During Your Grand Canyon Rafting Trips
The towering canyon walls often cast long shadows that make your photographs look underexposed. But don't worry. For this situation, there are techniques to help you achieve better results. If your camera is equipped with HDR, take advantage of it. This feature combines multiple photos at different exposures into one image for better lighting balance. Check out this Masterclass on how HDR works. In addition to HDR mode, manually adjusting your ISO settings could help, too. A higher ISO allows more light onto the camera sensor, which might illuminate those darker areas within the rock chasm or other shadowy places without causing any unwanted noise or graininess in your images.
Capturing Action Shots Amidst Rapids
River rapids are where most of the action happens during a private trip - but they're also one of the most brutal scenes to photograph due to rapid movements and potential camera shake. Here's what you can do:
Use Fast Shutter Speeds: A faster shutter speed freezes motion even amidst high-speed action scenes like navigating through river rapids or shooting rafts in motion.
Predict Movements: Anticipate actions before they happen – watching rafters' movements closely will give you time to prepare and focus on where their next move will likely occur, thus enabling you to capture sharp images amidst the chaos.
Burst Mode Shooting Technique: This involves taking several pictures per second, giving you a greater chance at securing the perfect shot amidst tumultuous activity.
As your trip leader would say, always have your life jacket on!
Capturing Dynamic Sunrise Scenes
A sunrise over the Grand Canyon is a scenery that is nothing short of surreal. The break of dawn illuminates rock chasms with hues ranging from mystical purples to fiery oranges, painting a dreamlike landscape just waiting to be captured through your lens. To ensure you get the best shot, scout your location before your commercial raft trips start. Look for spots offering unobstructed views across expansive stretches of the south rim of the canyon and consider elements like cliffs, river cuts, or bends that can add depth and interest to your composition. Shooting directly into the rising sun might lead to underexposed landscapes due to the high contrast between bright skies and dark rocks. But fear not. Using graduated neutral density filters or bracketing exposures for proper exposure and later blending in post-processing can help overcome this challenge.
Creating Silhouette Portraits Against Bright Skies
A silhouette portrait beautifully conveys emotion while highlighting form and shape. During your whitewater rafting trip through the Grand Canyon, early morning or late afternoon hours provide perfect backlit conditions, allowing striking silhouette portraits against vibrant skies. To achieve this effect successfully requires understanding how camera exposure works: You need an intense source of light behind passengers but also ensure they're darker than the background. Hence, their outline stands out clearly without details inside them visible – essentially turning them into black shapes set against a brighter backdrop. Catching action on those roaring rapids isn't just a thrill ride; it's also a perfect chance for snapping amazing photos. Still, photographers know that getting that perfect shot in all the excitement can be tricky during most commercial trips.
Harness Auto Mode Settings
A key ally in your mobile photography journey is auto mode settings - smart systems that automatically adjust parameters such as focus, aperture, and fast or slow shutter speeds based on lighting conditions and subject matter. Capturing action shots? Burst mode captures several frames per second, so you don’t miss any thrilling moments, whether it’s fellow rafters navigating rapids or wildlife sightings along river banks. Auto-mode can be great for serious photography, especially when you don't want to deal with the correct exposure or you don't want missed photo opportunities.
Adjust Your Camera Settings & Compose Your Shots
Adjust your shutter speed accordingly to freeze motion and capture the excitement of rafting. Use wide-angle lenses to capture the expansive beauty of the Grand Canyon. Experiment with different white balance settings to achieve the desired effect. Set your ISO to a low range of 100-200 for bright conditions. Maintain a wide dynamic range using an aperture of f/8-f/11 for optimal depth of field. Remember to use the rule of thirds for eye-catching shots with aesthetic vision. When spotting a fantastic scenery, put three main parts along those imaginary gridlines, making your photos more balanced and intriguing. Don't forget the magic of dawn and dusk at the Grand Canyon - that golden-hour lighting is unbeatable. Experiment with shadow play, too.
Enhance Image Quality With These Simple Steps
Clean your phone lens from dust smudges using a soft cloth to ensure crisp, clear images.
Maintain Stability: Hold your phone firmly with both hands, especially while shooting during turbulent waters.
Framing Matters: Using the gridlines setting in most phones’ camera apps enables the Rule-of-Thirds technique, resulting in sharper composition.
Natural Light Utilization: Make the best use of natural light, especially during 'Golden Hours,' i.e., around sunrise and sunset, providing softer hues and enhancing the overall picture aesthetics.
Whether you are doing daytime hikes or a commercial trip with a whitewater raft, know that it's always good to take photos and spare batteries – image quality can always be enhanced. You'll be confident having perfect images taken on your recent trip.
Conclusion
You've discovered all this and more through our photography tips for Grand Canyon rafting expeditions. Ready to create your visual masterpiece?Contact Advantage Grand Canyon today to search for Grand Canyon rafting trips from all the top 15 outfitters in one place, and book your next Grand Canyon rafting trip today!
#https://www.advantagegrandcanyon.com/top-10-grand-canyon-rafting-photography-tips/#grand canyon photography tips#rafting photography#colorado river photography#grand canyon camera gear#landscape photography grand canyon#whitewater rafting photography#grand canyon sunrise photography#action shots in grand canyon#grand canyon photography equipment#photography during grand canyon rafting#capturing grand canyon beauty#photographing the colorado river#best camera gear for grand canyon#tips for river photography#grand canyon photography techniques#sunrise and sunset photography grand canyon#action shots in rapids#photography during rafting trip#photographing canyon walls#capturing nature's beauty in grand canyon#photography at lava falls#inner gorge photography#capturing contrast-filled shots#protecting camera gear#camera gear for river trips#photographing big rapids#best photography equipment for grand canyon#lenses for grand canyon photography#photographing wildlife in grand canyon
0 notes
Text
I consider myself to be an artist in the making.

Specializing in capturing the beauty and essence of life through photography. I am passionate about art and dedicated to creating stunning visuals that capture memories and evoke emotion, from street photography to landscape and fine art photography,
I consider myself to be an artist in the making.
website: https://myfotolife.com
Shop: https://society6.com/myfotolife
photography, art, portraits, landscape, fine art, visuals, memories, emotion, equipment, techniques
1 note
·
View note
Text
New Stock Photo Workflow
I have taken advantage of a previously overlooked benefit of the Canon R7 to create a new stock photo workflow that will increase efficiency and upload volume.
The R7 of course comes with two card slots which can be configured to capture both raw and jpg images separately on card one and card two. Up to now I’ve been going through the arduous process of editing, rating and running just a few RAW…

View On WordPress
#books for sale#Colorado wall art#film photography#fuji film#landscape photography#landscape photography tips#model photography#model photography for stock#photography#photography books#photography techniques#photography tips#photography tips and tricks#prints#prints for sale#stock images#stock landscape images#stock photo licensing#stock photo tips#stock photography#tips and tricks#wall art#wildlife#wildlife photography books
1 note
·
View note
Text


#photography#photo#photograph#my photos#picture#photoshoot#photooftheday#photoshop#photographer#flowers#photography tips#photography on tumblr#photography blog#photography art#landscape#places#nature#photography editing#photography tumblr#photography tag#photography techniques#photography is art#photography ideas#photography inspiration#photography is my passion#photography of the day#photography project#photography practice#photography photo#photography aesthetic
105 notes
·
View notes
Text
Art Supplies I'd Give to JJK Characters [Protagonist Edition]
My credentials: I make art and I can do what I want.


Yuji Itadori: mechanical pencil- easy to use, easy to manage, forgiving, but he always forgets to bring extra lead and erasers. He'd draw cutesy things and anime characters.


Megumi Fushiguro: charcoal pencils- intense and moody, somewhat forgiving, but you reach the end result faster, less rendering required in comparison to pencil, and much more artistic and professional-looking end piece. He'd make abstract pieces that no one understands but he doesn't care that no one understands.


Choso Kamo: acrylic markers- not always easy to get the hang of, but once you do, you’ll create pieces that are rich in color and texture. I feel like he'd like the big chunky Krink markers. You'd KNOW he'd draw stylized portraits of his brothers!


Nobara Kugisaki: gouache paint- trendy, fun, easy to use, always reliable. Despite their popularity, they're still a viable medium! I feel like she'd paint a lot of Studio Ghibli screenshots.


Satoru Gojo: sumi ink- a classic medium that is always fun to use that yields a classy, minimalistic look. He'd definitely draw Digimon characters in classic Japanese style.


Suguru Geto: willow charcoal- soft and also minimalist, easy to use but can get a little messy when not handled properly. He'd make a lot of soft landscapes and simple still lifes.


Maki Zenin: ink pens- can’t go wrong with ink pens, they’re versatile and deliver beautiful results when used properly. She'd probably draw portraits.


Toge Inumaki: spray paint- unassuming at first, but when in use, they cannot be ignored! He'd do pop art and graffiti-styled works.


Panda: finger paints- do this really need an explanation? Fun, easy to use, and can pack a punch when taken seriously. He'd make self-insert drawings, no matter what the project would be.


Yuta Okkotsu: collage art- when done right, collages can evoke intense visual appeal while also reducing waste. Given that his CT is mimicry, using pieces already produced seems fitting. He'd make abstract stuff that tells a story or expresses his feelings.


Utahime Iori: oil paint- arguably the classiest fine art medium around, requires patience and technique but yields the richest and more alluring end results. Landscapes, portraits, anything beautiful.


Shoko Ieri: photography- why make something out of art supplies when you can capture the beauty of the world in real time? It’s always good to snap a memorable photo before it’s too late. She'd photograph her friends and herself and anything she finds interesting.


Kento Nanami: dry pastels- while they tend to require some skill to produce quality pieces, the technique is worth it. And if you’re a fellow pastel fiend, you know how pricey Sennelier is. Nanami uses the high-quality shit. He'd do still life art of things in his home for the sake of convenience, but he'd probably want to do seascapes if he ever made it to Malaysia :c
lmk if u agree or disagree. i have an antagonist edition coming as well
#jujutsu kaisen#jjk#satoru gojo#gojo#yuji itadori#suguru geto#geto#satosugu#nanami#nanami kento#shoko ieiri#utahime iori#toge inumaki#jjk panda#yuta okkotsu#art#art supplies#nobara kugisaki#maki zenin#choso#choso kamo#megumi fushiguro#jjk megumi
221 notes
·
View notes
Note
Recently I took a panorama of the Pittsburgh skyline at night that got a positive response. That was done on the spur of the moment with an iPhone. I want to do that again and more, but this time with a dedicated camera setup. It's been years since I've had one, so I'm basically starting over again. I'm mostly interested in getting day and night cityscapes, and maybe the carryings-on at this year's Anthrocon. Would you have any particular knowledge to pass on as I set off on this journey?
Since you didn't specify a budget I'm going to assume it is in the $10K range.
And you're probably thinking I'm going to suggest a Leica. Every dentist and his brother (who is also a dentist) gets a Leica. But I just can't take a camera brand seriously when they charge you an extra $2200 for the privilege of not being able to shoot in color.


Sure, you can hit a single button in Lightroom to get B&W and save some money, but then you won't be able to brag about how limiting yourself to only shades of gray has opened up new artistic pathways in your brain while a clueless person responds in mumbles during their root canal.
What you really want for your landscapes is a Hassie.

They were the first camera on the moon! How could you *not* want a Hasselblad? That is some camera gorgeousness right there. And it's so reasonably priced*!
*compared to their previous $40,000 camera systems.
And if you are doing landscapes with the Hassie you'll need a nice wide angle lens to go with it. This one is actually quite affordable*!
*compared to their previous $8000 lenses.
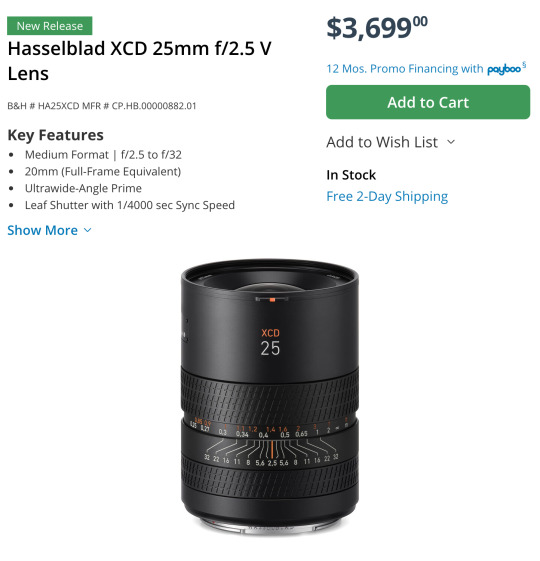
Can we all agree that is a work of art? They even use their H logo as the knurling.

That is just so... extra. And I love it.
Out of the entire alphabet I've heard Hs give you the best grip.
Man, I almost wish I was a dentist just so I could buy a fancy camera.
Sorry... I was just having a little fun.
I never get to recommend the super cool expensive cameras. Because, ya know, the economy and the fact that only dentists have Hasselblad money.
You probably think I'm being silly but there actually is an entire community of dentist photographers keeping the high end camera market alive.
Okay, let's get started...
Landscape Buying Guide
Opening Thoughts
For landscapes I would highly suggest a full frame camera and a high quality wide angle lens.
Full frame has several advantages but it is not necessary. You can go with a smaller sensor like APS-C and get great images. Personally I would not go any smaller, but there have been some great landscapes taken on micro 4/3 and even smartphones. Technique, knowledge, experience, and composition will usually win the day over a camera, but having a nice camera makes things a lot easier.
At this point, with full frame options being very affordable now, the main reason to get a smaller sensor is if you want a smaller system that is easier to carry for extended periods and easier to pack when traveling. Or if you aren't sure you want to take on photography as a hobby, you can get an old APS-C DSLR for under $200 to learn with and test out.
So if you need a very cheap OR very compact system, APS-C and Micro 4/3 might be worth considering, but a bigger sensor will cause less frustration most of the time.
Froggie Note: The expensive Micro 4/3 and APS-C systems are the compact ones. The cheap systems are about as bulky as full frame.
The biggest advantages to full frame are low light shooting, lens selection, and field of view. Full frame cameras have many, many more lenses to choose from. And since the sensor is bigger, it is much easier to get a wider field of view that is often needed for landscapes. And the high ISO noise performance tends to be better on full frame.
However, you can use full frame lenses on APS-C camera bodies within the same ecosystem. They just get a little... zoomier. Roughly 1.5x zoomier. A 35mm acts like a 50mm, for example. So if you want to spend a little less now you can get an APS-C camera with a full frame lens and then upgrade to full frame later on without having to buy a new lens. Full frame lenses work on APS-C bodies but not the other way around.
Most landscapists have a really solid 16-35mm lens and that covers almost all of their needs. So I would suggest something comparable. Please don't get suckered into some crazy 18-300mm superzoom. Just get the focal range you need for the photos you want to achieve.
A purpose-built lens always outperforms one that was made to do everything.
As far as where to get used gear, I highly recommend using KEH or MPB when buying used camera bodies. They check every device and offer between 3 and 6 months warranty to make sure the device won't crap out on you. Lenses are typically a lot more robust and a safer thing to buy on eBay or Facebook Marketplace if you can find a better deal. But the security of having a warranty and a return apparatus if something goes wrong might be worth the extra price when using these two sites.
I am going to recommend Canon, Nikon, and Sony systems. I feel they have the most complete ecosystems with gear that spans all budget ranges. I'm not saying there aren't good cameras from other brands, but you have to remember every camera has an ecosystem surrounding it. There are accessories and upgrade paths and niche lenses that may not be available with other brands. I think Fuji has some tempting options and if you like the look of vintage film photography, their emulation options are quite stunning. Their cameras are also quite attractive and have very satisfying knobs. But I still can't recommend them unless you have a specific reason for wanting their gear.
Just remember that for every Canon DSLR I recommend there is a comparable Nikon option available as well. There are more lenses for a Canon full frame DSLR body than any other brand with Nikon coming in a close second.
So if you choose not to go mirrorless yet, the Canon and Nikon DSLR camera ecosystems are immense and have tons of gear and accessories available to go with them. And since used gear holds up really well, those ecosystems will survive for decades.
Should you buy a mirrorless camera or a DSLR?
Mirrorless cameras are the latest camera technology for interchangeable lens camera systems. At this point they are superior in every aspect and they continue to improve year by year. Because of that, used DSLRs have plummeted in price. This allows people greater access to a starter ILC (interchangeable lens camera) without a significant investment. You can get professional quality images on either format, but mirrorless has a shallower learning curve and much better automatic modes.
The in-body image stabilization (IBIS) stabilizes *every* lens and the eye tracking autofocus make "focus and re-compose" extinct. These are huge selling points for a lot of people. With IBIS you can take photos with up to 2-4 second shutter speeds without a tripod. And never missing focus on a human or animal or bird is pretty cool too.
DSLR camera bodies are no longer being designed by most of the major manufacturers. Thankfully Canon and Nikon developed plenty of bodies and lenses, so you will always have options and upgrade paths. But you will not be able to upgrade to systems with the latest advanced features.
The best DSLRs available are probably the Nikon D850 and the Canon 5D Mark IV. That is as good as it will ever get. The technology ends there. So if you want to enter an active camera ecosystem then you will have to get a mirrorless camera.
DSLR Camera Systems
Full Frame DSLR Camera Bodies
Canon
If you buy a used DSLR, there are some very affordable full frame options. In fact, the classic much-praised budget full frame Canon 6D can be had for under $300 right now.
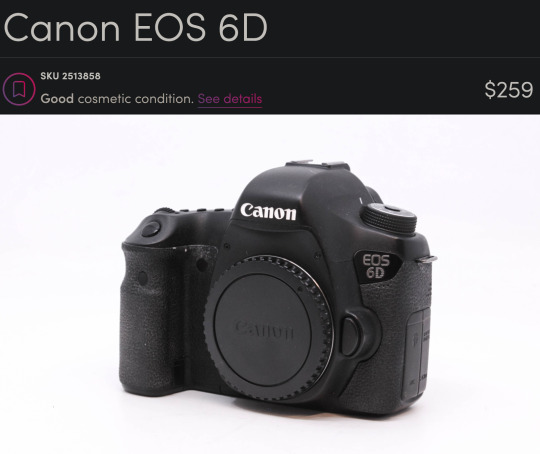
This is an old camera. It has no fancy features. It only has 20 megapixels. It just does what it says on the tin. But it has a big sensor and a *ton* of really cool lenses available for it.
If you are specifically looking to create really high resolution panos, you could also look at the 50 megapixel 5DS R for around $1000.
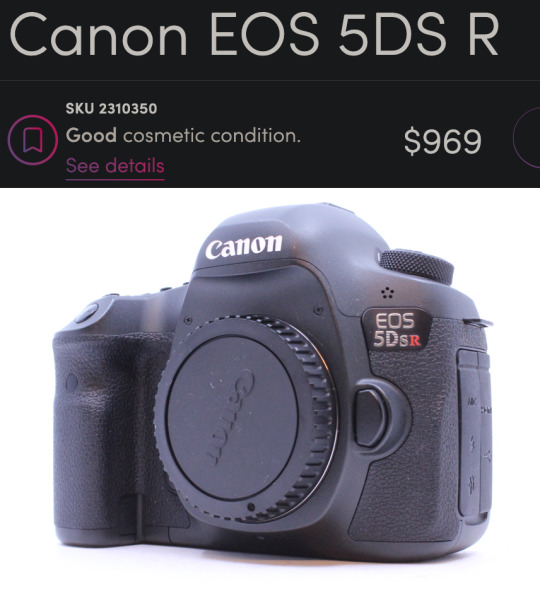
There is a community of landscape pano-maniacs that love to create "gigapans" that have endless amounts of detail where you can zoom in and find new details in every photo. I was only able to create a 120 megapixel photo, but you can still find things like people starting a campfire and a dude fishing and a truck on a far off bridge. So even though this seems expensive for a DSLR, you are looking at another thousand bucks to find anything with more megapixels than this bad boy, so it is quite a good deal relatively speaking.
Nikon
Probably the best DSLRs ever made were the Nikon D800 series and you can get the Nikon D800 for $464.
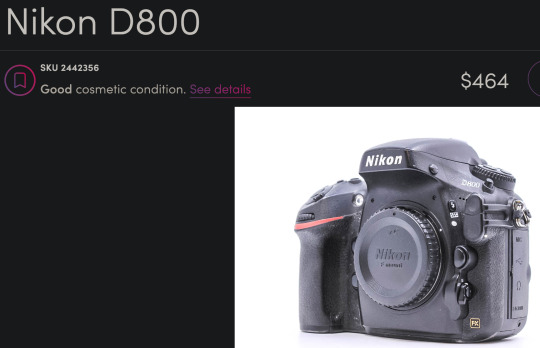
This is a newer camera than the 6D with more megapixels (36) and a better sensor. It also has a more modern autofocus system and about 3 more stops of dynamic range which can come in handy for landscapes. This is an incredible camera for this price.
APS-C DSLR Camera Bodies
If you aren't sure you want to commit to this hobby, you can look into a Canon APS-C sensor body like the Canon Rebels and Canon 60D through 90D models and get good results.
And there are many Nikon DX APS-C bodies that would be great starter cameras as well. If you get a Nikon, you'd have an upgrade path to the D800 if you get hooked by the photography bug. I would miss a few very special Canon lenses like the 100mm f/2.8L macro and the 400mm f/5.6 telephoto but I'm sure I could figure out some reasonable Nikon alternatives that would do roughly the same thing.
Canon APS-C
There is a Canon 60D for $139 right now that would be perfectly adequate for landscape work on a tripod.
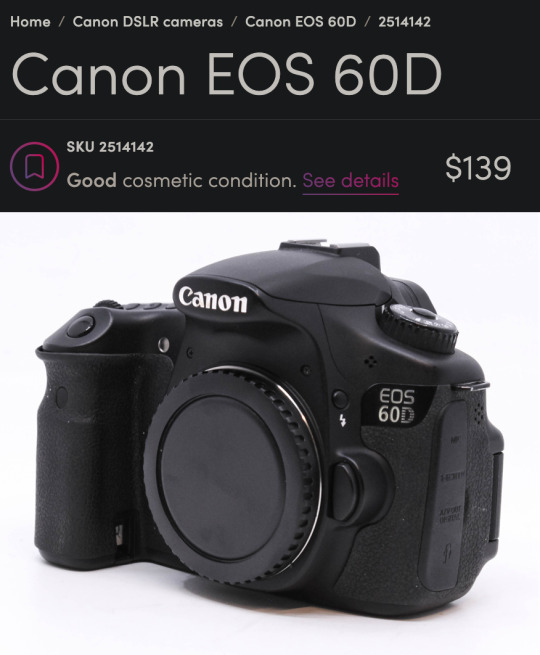
That was my first camera and I took some very nice photos with it. Only 18 megapixels but it has a very convenient flippy screen which was really helpful for a disabled photographer trying to get low angles.
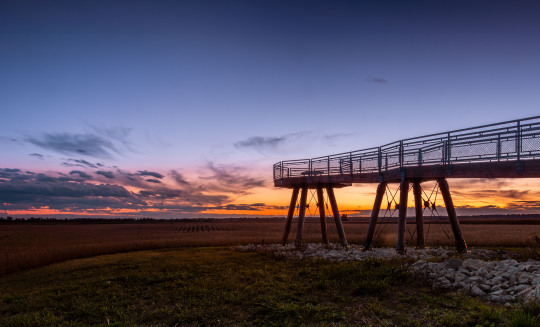
This was in 2014 and I didn't know what I was doing but that is a pretty stellar-looking sunset for a (now) $140 camera.
Nikon APS-C
And the Nikon D3400 would be a great option as well at around $184.
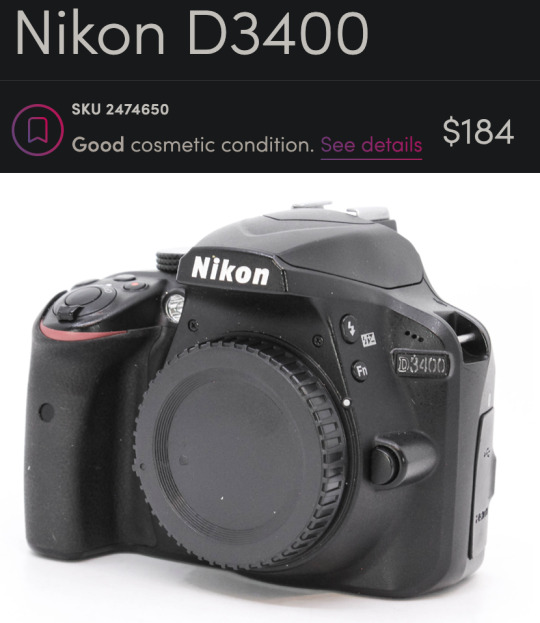
You get some extra megapixels (24) and it is a bit newer than the Canon. I get the sense that used Nikon DSLRs give you more value for your money right now but I don't have a large enough sample size to confirm that.
Full Frame DSLR Lenses
Froggie Note: I am recommending full frame lenses even if you choose an APS-C DSLR body so you have an upgrade path. But also very few purpose-built APS-C lenses had superior glass. Just remember, crop sensor APS-C cameras add ~1.5x to your focal length. So a 16-35mm will have the equivalent field of view of a 24-50mm lens. Still quite acceptable for landscapes, but you may benefit from doing panoramas more often. And if you upgrade to full frame down the road, you'll already have the ideal lens.
Canon DSLR Lenses
If you get the 6D or another Canon you could pair it with the beloved-by-landscapists Canon 16-35mm f/4L.
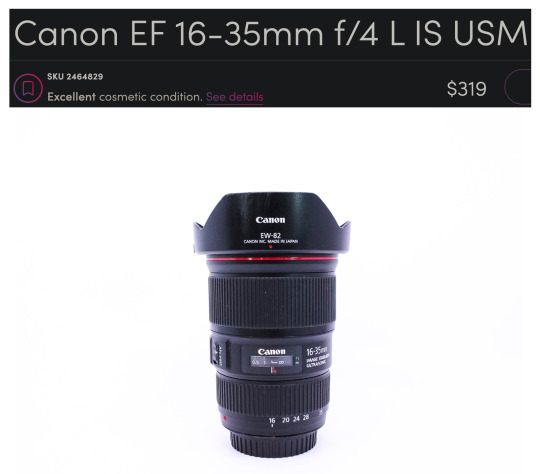
Honestly, it is blowing my mind you can get that combo for under $600. Me from 12 years ago is super jealous right now.
If you are worried you might need something to work in lower light and still want a zoom, the f/2.8L starts at around $434.

This might be the most famous landscape lens of all time. Kinda boggles the mind how many gorgeous vistas this thing has captured the light of.
If you can live without the zoom, you could get a much sharper prime lens that can also be used in even lower light. A used Sigma 24mm f/1.4 Art lens is $439 would be a fantastic option.
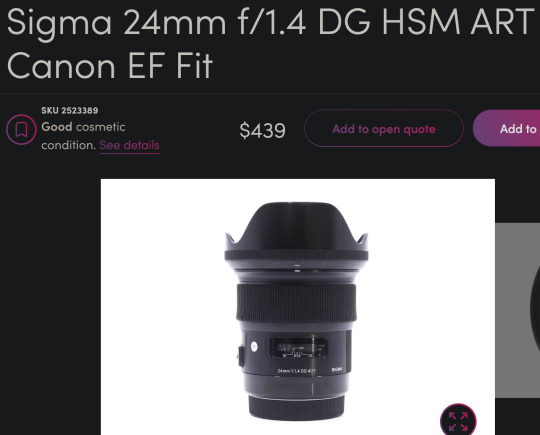
24mm is still a very good focal length for landscapes and the sharpness of this lens lends well to panoramic stitches. Seriously, these art lens are so freaking sharp. Although 35mm is typically preferred for most street photography, I think this would do great for that purpose as well. It couldn't do close up portraits, but 3/4 and full body portraits would look great. I also love this focal length for doggos. It enlarges their heads a bit which enhances adorable-ness.
Though I probably wouldn't recommend the 24mm on APS-C for landscapes as it would put you near a 40mm full frame equivalent field of view.
Nikon DSLR Lenses
And on the Nikon side of things you could get the Nikkor 16-35mm f/4 for $399.
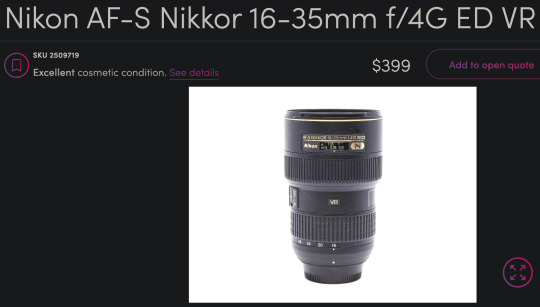
This is a great lens too. Very comparable to the Canon L glass. And paired with that D800 you would have a better shooting experience than with the 6D if it fits within your budget.
It's a little harder to find, but you can also get that same Sigma 24mm f/1.4 Art lens for Nikon at around $528 used on Amazon and in the $400 range on KEH and MPB when it is available.
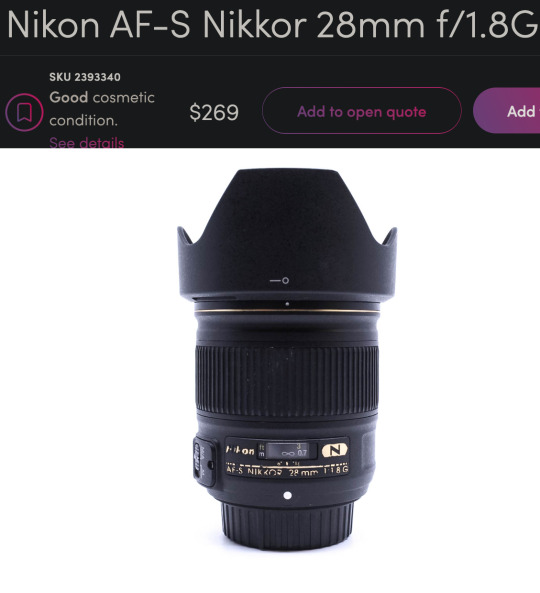
The older and softer Nikkor 28mm f/1.8 is a little more affordable and easier to find.
What if you are not a dentist but are willing to save up for something a little nicer?
Enter the world of...
Mirrorless Camera Systems
Sony currently has my favorite ecosystem of mirrorless cameras and lenses and they are consistently ahead of the other brands as far as technology and features. In fact, many other manufacturers use Sony sensors. They literally supply their competition with their own tech. They are also pretty good about updating firmware—even with older models. So I feel like Sony has a lot of future-proofing advantages over other brands. Sony has a great selection of 3rd party lenses like Sigma, Tamron, Viltrox, Laowa, Samyang, etc. These lenses often have nearly the same optical quality as Sony's G Master lenses at a fraction of the price.
Full Frame Mirrorless
Currently, I think the best value full frame mirrorless camera for landscapes would be the Sony a7R III.

This is very nearly a top-of-the-line landscape camera for a little over $1200.
That might sound like a lot, but I want to be clear...
This isn't just decent.
This isn't "good enough."
This is a spectacular professional grade full frame camera.
10 years ago you could spend $6500 for a *worse* camera.
5 years ago you could spend $3000 for a *worse* camera.
It can do every genre of photography except for maybe fast paced sports/action. It has an amazing 42 megapixels—which are not necessary but they do make editing and printing a lot less of a headache. The file sizes can get a little big, but storage is a lot cheaper than it used to be.
Oh, and it can be used for professional quality 4K video work too.
The a7R III comes with all of the modern bells and whistles including in-body stabilization (IBIS) so you can handhold at very slow shutter speeds. It has one of the best autofocus systems—complete with eye tracking. But not just human eyes! Dog eyes. Cat eyes. Bird eyes. If it has an eye, the Sony can probably lock focus on it. And it has an admirable 10 fps burst shooting mode.
APS-C Mirrorless
If you want to enter the Sony ecosystem but can't afford full frame quite yet, you could do the a6400 for about $600.

You still get the eye-tracking and the in-body stabilization, but you will lose some image quality at higher ISOs due to the smaller sensor size. However, you can get the same full frame E-mount lenses for it and upgrade to a bigger sensor later on and not have to buy new lenses.
Mirrorless Landscape Lenses
I think a good value landscape lens would be the very impressive Tamron 20-40mm f/2.8.

This is a newer lens so there aren't many deals on used options yet. But this is still a great price for the quality and versatility you get. You will never regret spending a little more on glass.
The 20mm range can fit an entire cityscape in the frame without needing to do a panorama. But if you zoom to 40mm and mount the camera vertically, you could stitch together several photos to get well over the 100 megapixel range.
Also, the 40mm focal range is long enough to do street photography and even head & shoulder portraits. The wide f/2.8 aperture combined with the high-ISO friendly full frame sensor and in-body stabilization means you can shoot in very low light without a tripod. You can also get some great pictures of stars if you travel to someplace with minimal light pollution.
The cheapest landscape zoom lens I could find was the Sony 16-35mm f/4 at $384.
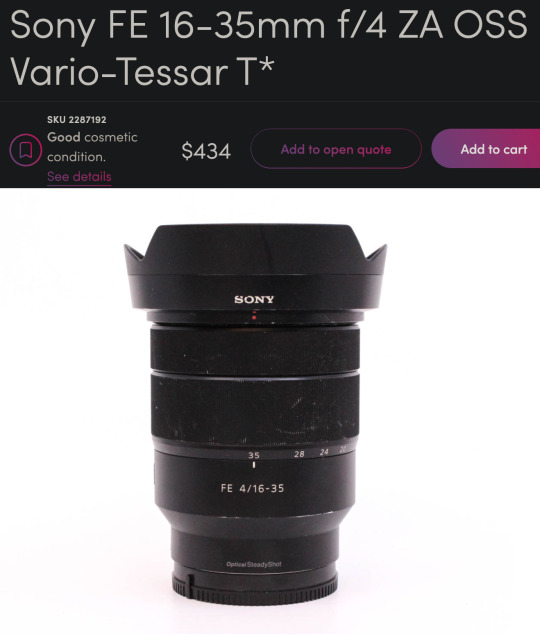
It's one of Sony's older lenses and may not take advantage of all of the a7R III's pixels, but it would be a good option to get you started in this system and upgrade the lens later on.
Mirrorless Prime Lenses
Zoom lenses are great but you have to spend more to get tolerable quality. Kit zooms can be softer than even the tiny plastic lenses on your phone. So a great way to stretch your budget is to get multiple fixed focal length "prime" lenses. Primes can be built inexpensively while still having good low light performance and decent sharpness.
For instance, you could start with something like the Tamron 20mm f/2.8 for $175. And if you want to do more than landscapes you could add the Sony 50mm f/1.8 for $170 later on. Cheap primes will outperform any of those mediocre kit zoom lenses in that same price range. You lose some versatility and have to deal with the pain of changing lenses or zooming with your feet, but sometimes a tight budget demands a little pain.
There is also a higher quality 3rd party wide angle prime lens that is very popular right now. The Viltrox 16mm f/1.8 is only $549 and the reviews say it has similar quality to lenses 3 times its price.
If you have to choose between a better camera body or a better lens, a good lens will help your photos more than a fancy camera body.
Froggie Note: These are examples. You should always do your own research before making a major technological purchase. This post could be a year old by the time you see it and there could be new stuff that is better. But all of the principles I tried to convey should hopefully guide you to a good decision. Also, feel free to message me if you want to ask about specific gear you are considering purchasing.
More Resources
This is my Encyclopedia of Lens Terms which is a helpful primer in understanding all of the wonderful and different lens options available on ILCs.
This is my buying guide for low budget used DSLRs. Similar to this post but less geared toward landscapes.
And this guide for getting decent landscape photos with any camera.
This is a free tutorial that teaches you everything you need to get started with an ILC system.
youtube
And this free tutorial by Karl Taylor is quite good as well.
69 notes
·
View notes
Photo

Marker, Southeast Colorado - 2.5″x2.5″ paper negative, kodak brownie hawkeye with inverted lens, caffenol developer - robert matejcek - 2022
“The wind is us… it gathers and remembers all our voices, then sends them talking and telling through the leaves and the fields.”
- Truman Capote
Tags
#robert matejcek#film photography#analog#alternative photographic techniques#paper negative#medium format#kodak brownie hawkeye#vintage camera#flipped lens#inverted lens#ilford multigrade paper#caffenol developer#rural landscape#prarie#tombstone#cemetary#graveyard#art#my art#artists on tumblr#photographers on tumblr#grunge aesthetic#dark aesthetic#dark academia#blurry photographs#blurry aesthetic
3 notes
·
View notes
Text
Because I had headcanon that Color is Autistic and has developed special interests in things such as photography, travel, maybe even things like social advocacy.
Maybe even philosophy and psychology. For now, in this posts, I’ll focus on the big two: photography and traveling. (I will also touch on how Color’s physical disability, chronic fatigue, his autism, and perhaps his ptsd/ separation anxiety from Killer also effect his ability to engage in his interests in another post.)
I think he’d develop some decent if not above average technical knowledge, such as camera types and functions. Detailed understanding of different types of cameras (DSLR, mirrorless, point-and-shoot, medium format, etc.) and their specific functions.
Knowledge about various lenses (prime, zoom, wide-angle, telephoto, macro) and their applications. Mastery of camera settings like ISO, aperture, shutter speed, and how to manipulate them for different lighting conditions and artistic effects.
In-depth understanding of how aperture, shutter speed, and ISO interact to create a properly exposed photograph. Proficiency in using software like Adobe Lightroom, Photoshop, or other photo editing tools for post-processing and enhancing images.
He’d learn about artistic elements such as composition techniques, lighten and color theory. Develop a familiarity with compositional rules like the rule of thirds, leading lines, framing, symmetry, and how to creatively break these rules.
Knowledge about natural and artificial lighting, how to use light to create mood and depth, and techniques like backlighting, side lighting, and using reflectors. Understanding of how colors interact, complementary colors, and how to use color to convey emotion and direct viewer attention.
Awareness of different photography styles (portrait, landscape, macro, street, documentary, astrophotography, etc.) and genres, and what makes each unique.
Knowledge about influential photographers and their work, such as Ansel Adams, Henri Cartier-Bresson, Annie Leibovitz, and contemporary photographers.
Understanding the evolution of photography, from daguerreotypes to digital photography, and significant milestones in the field. Awareness of current trends in photography, popular styles, and emerging technologies.
And, of course, he’d develop and grow practical experiences and hands on practice. Experience with on-location shoots, managing different weather conditions, and adapting to various shooting environments.
Knowledge about how to properly maintain and clean camera equipment to ensure longevity and optimal performance. Skills in troubleshooting common issues like lens flare, sensor dust, or focus problems.
He’d have a deep enthusiasm for specific techniques or subjects he enjoys photographing, whichever or whatever you all think those could be exactly.
Likely to have personal photography projects, well-organized portfolios, and possibly an online presence showcasing their work. Extensive collection of books, articles, videos, and tutorials related to photography.
A special interest in traveling, in addition to photography, would manifest in the character in several ways, showcasing their passion and extensive knowledge about various aspects of travel. Here are some specific aspects:
For his interest in travel, he’d be very well versed in the planning and research process. Color might create comprehensive travel itineraries, meticulously planning each day's activities, routes, and schedules.
He might gradually develop an extensive knowledge about various travel destinations, including historical sites, natural landmarks, cultural attractions, and lesser-known gems.
He’d display a proficiency in booking flights, accommodations, and transportation, as well as understanding visa requirements, travel insurance, and local regulations.
An expertise in packing efficiently, knowing what to bring for different climates and activities, and how to pack photography gear safely for travel. Color is likely to show a very deep and profound appreciation for different cultures, learning basic phrases or even fluency in multiple languages to better communicate while traveling.
He’d definitely show a deep interest in trying and understanding local cuisines, knowing popular dishes, and even recipes from various regions. He’d have at least some knowledge about local customs, traditions, festivals, and etiquette to respect and immerse themselves in different cultures.
He’d certainly develop some geographical and historical knowledge, with a detailed understanding of world geography, maps, and the ability to navigate using traditional maps as well as digital tools.
Knowledge about the history of the places he visits, including significant events, historical figures, and the cultural evolution of the region.
He might maintain detailed travel logs or journals documenting his experiences, including photos, notes, and personal reflections. He’d definitely collect souvenirs, postcards, or other memorabilia from his travels; often gifting them to beloved friends.
He’d probably engage with travel communities, forums, and social media groups to share experiences and gain insights.
This special interest would possibly lead to him gaining a lot of practical skills, such as in budget management. Expertise in budgeting for travel, finding deals, and managing expenses effectively.
He might display an ability to adapt to different environments, handle unexpected situations, and problem-solve while on the go.
Although it’d probably be harder for him than most, particularly if he has a harder time handling and dealing with change—especially if the change is unexpected and unplanned.
Knowledge about staying healthy while traveling, such as understanding local healthcare options, vaccinations, and travel safety tips.
He’d like combine both interests by using his photography skills to capture stunning images of the places he visits, creating travel blogs or photo albums to document his journeys.
He might create photo essays or visual stories that capture the essence of the cultures and places he explores. Share his travel experiences and recommendations with others, possibly through writing travel guides, blogs, or social media content.
All this is to say that Killer would definitely encourage Color to come with him to explore abandoned places and ghost towns, and Color’s going to be so overjoyed he starts hand flapping. He’s going to take so many pictures, he’s going to remember it forever.
#utmv headcanons#utmv hc#killer sans#utmv#sans au#sans aus#killer!sans#killertale#othertale#othertale sans#other sans#color!sans#colour sans#color spectrum duo#colorkiller#undertale#undertale au#undertale aus#utmv au#autistic headcanon#special interest#undertale something new#undertalesomethingnew#something new#something new sans#something new au#killertale sans#canon disabled character#bad sanses#bad sans gang
36 notes
·
View notes
Last Seen Blogs

cortar-x-la-linea-depuntos
Zero-mania

phantom-of-the-pages
I Am Alive

wearevery
We Are Very

stellamaris2020-blog
Untitled

rawr-nico-xd
nico🦇