#make.com ai
Explore tagged Tumblr posts
Visit Tumblr Blog
Explore Tumblr blogs with no restrictions, modern design and the best experience.
Last Seen Tumblr Blogs


Fun Fact
Women make up for the other 50% of Tumblr’s audience.
Text
AI Agent with Make.com - The Future of Automation for Agencies

In today's fast-paced digital landscape, automation is the key to scaling operations and optimizing workflows. Make.com, a powerful visual platform for workflow automation, enables businesses and agencies to connect applications, automate tasks, and streamline operations without writing a single line of code. With the introduction of AI Agents, Make.com has further expanded its capabilities, allowing agencies to achieve unparalleled efficiency and smart automation.
Why AI Agents?
AI Agents are autonomous programs designed to perform specific tasks by mimicking human intelligence. When integrated with Make.com, AI agents can handle repetitive tasks, make intelligent decisions, and improve business processes without human intervention. This combination of Make.com automation and AI agents opens up new possibilities for low-code AI automation and no-code AI workflows, making it easier for digital agencies to automate tasks efficiently.
Make.com AI Integrations - Powering Intelligent Automation
One of the standout features of Make.com is its seamless integration capabilities. Agencies can leverage Make.com AI integrations to connect with tools like OpenAI, CRM systems, marketing platforms, and more. With Make.com API integrations with AI, you can build robust workflows that intelligently respond to triggers, automate multi-step processes, and enhance client experiences.
For instance, agencies can automate lead nurturing by integrating AI-powered Make.com scenarios with their CRM. The AI agent can capture leads, follow up with personalized messages, and schedule meetings automatically. This eliminates manual work, accelerates the sales cycle, and improves conversion rates.
Key Use Cases for AI Agents with Make.com
1. Marketing Automation
With Make.com for marketing automation, AI agents can optimize campaigns by automating email follow-ups, social media posts, and lead scoring. Smart agents can analyze user behavior and trigger actions based on engagement, making campaigns more efficient and personalized.
2. CRM Automation
Integrating CRM automation with Make.com allows agencies to manage client interactions seamlessly. AI agents can track communication, update records, and send reminders without manual intervention. This enhances client relationships and reduces administrative overhead.
3. Project Management
For project-centric workflows, AI workflow automation using Make.com scenarios can manage task assignments, monitor project milestones, and send automated updates. This keeps team members aligned and projects on track.
4. Digital Branding Services
Agencies offering Make.com branding services can benefit from AI-driven automation. From generating brand assets to scheduling posts, AI agents can handle the heavy lifting, allowing creative teams to focus on strategy.
5. Chatbot Development
The rise of Make.com chatbot development powered by AI has revolutionized customer service. Agencies can deploy smart chatbots for instant support, lead qualification, and 24/7 engagement without the need for extensive development.
Make.com Scenarios for Agencies
The flexibility of Make.com scenarios for agencies is unmatched. Whether it's automating internal workflows, handling client-facing interactions, or building scalable automation solutions, Make.com provides a robust platform for no-code AI workflow creation. With Make.com and OpenAI integration, the possibilities extend even further, allowing intelligent decision-making and advanced analytics.
Benefits of Using AI Agents with Make.com
Cost Efficiency: Reduces manual labor costs and minimizes human error.
Scalability: Enables rapid scaling of business operations without proportional increases in staff.
24/7 Operations: AI agents can operate around the clock, ensuring tasks are executed even outside business hours.
Increased Productivity: Automates repetitive tasks, allowing teams to focus on high-value activities.
Data-Driven Insights: AI integration provides valuable analytics, improving decision-making processes.
How to Get Started with AI Agents and Make.com
To begin leveraging AI Agent Development Services with Make.com, agencies should:
Define the Workflow: Identify the processes that can be automated.
Choose the Right Integrations: Select the right tools and platforms for integration (e.g., CRM, marketing platforms).
Build Scenarios in Make.com: Use the visual builder to create custom scenarios without coding.
Deploy and Optimize: Launch the automation and continuously optimize for better performance.
Make.com Consulting and Solutions
For agencies looking to scale their operations, Make.com consulting services provide strategic guidance on building Make.com solutions that align with business goals. Whether it's Make.com web development, app development, or chatbot development, Make.com professionals can help design scalable, AI-driven systems that boost productivity and client satisfaction.
Final Thoughts
As digital agencies look to scale and optimize operations, integrating AI Agents with Make.com provides a competitive edge. With Make.com API integrations for agencies, robust automation scenarios, and AI-powered workflows, agencies can enhance productivity, reduce costs, and deliver superior client experiences. Embracing smart agents for business automation is not just an option—it's the future of agency operations.
Want to explore how AI agent software development can transform your agency? Reach out for a consultation and discover the possibilities of custom AI agent development with Make.com today.
0 notes
Text
How to Automate Blog Creation with AI and Earn Money
Automate Blog Creation with AI : Learn how to set up a fully automated AI blogging system. It finds news and generates unique content. It also publishes blog posts to WordPress, even while you sleep. Boost traffic, save time, and grow your business effortlessly! How to Set Up an AI Automated Blogging System and Grow Your Company While You Sleep Imagine waking up every morning with new blog…
#AI blog automation#AI blog posting system#AI blog writer#AI blogging tools#AI content creation#automate blog posts#automate WordPress posts#blog automation tutorial#earn money blogging#gravitywrite AI#make.com automation#WordPress blog automation
0 notes
Video
Hey everyone! Have you ever wanted to create your own print-on-demand products with a touch of AI magic? Well, guess what? The game just got leveled up! In our latest video, we've introduced supercharged print-on-demand workflows that now include a native idiogram module in Make, and a cool new set of version 101 AI automated product generators. Whether you're after a handful of unique designs or planning to launch an entire e-commerce store, these workflows are designed to streamline your process like never before. Imagine generating 100 products while you sleep or making your design process incredibly efficient. But here's the twist - would you rather focus on quality over quantity, or are you all in for scaling up your store with hundreds of products at once? Let us know which approach you think is more exciting for your creative journey! And if you're curious about the tools you'll need to jump on this bandwagon, you might be surprised by the mix of platforms involved - from Make.com for workflow automation to idiogram for text-perfect graphics. How many of these platforms have you already signed up for? To dive deeper, check out our video where we walk you through setting everything up, from OpenAI for AI capabilities to Printify for product fulfillment. Do you think mastering these tools could be a game-changer for your business? #PrintOnDemand #AIAutomation #eCommerce #Make #Idiogram #OpenAI #Printify #DesignAutomation #CreativeBusiness #SideHustle #Entrepreneurship #DigitalMarketing #ProductDesign #InnovativeTools #OnlineBusiness
0 notes
Note
Hello! I do something similar in order to auto x-post my bookmarked-on-pinboard AO3 fics as recs on tumblr, using IFTTT - it used to be incredibly easy to have them come out formatted nicely but when tumblr switched over to the new post format it fucked it up royally; I'm going to take a look at make.com to see how that works, but what I've been doing with IFTTT is to auto-make text posts instead of link posts, which lets me auto-scrape and include my bookmark tags... with the loss of working hyperlinks, which I have to add manually later. If I figure out anything more effective I'll definitely let you know!

This was a fun journey to go on this morning 😂 /gen
Yeah, most of the tutorials etc. I've seen for stuff like this use IFTTT, and apparently even I tried to use it for something at some point because when I first tried to set up *this* blog, I already had an account over there that was linked to my tumblr. But I was having the formatting issues you mentioned, and for some reason it kept returning a 403 error for the RSS feed, so I looked into other options.
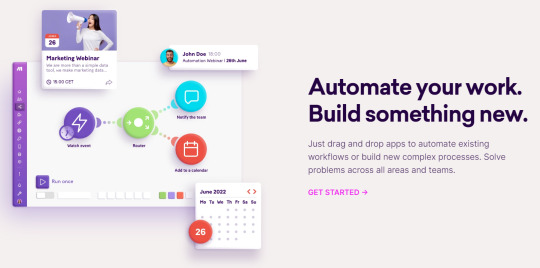
I found make.com on a reddit thread for free workflow automators, and it seemed both easy to use and had relatively out-of-your-face AI options (current bane of my existence is everything under the sun saying it has AI integrations, and I have to figure out if it's the kind of AI I'm mad at that uses boatloads of electricity, or if it's just a regular-degular computer algorithm that's now being marketed as AI to keep up with the current trends). It really does do a lot of beautiful html coding for you; when I found out that it lists all the tags and ratings as hyperlinks to ao3, I was ecstatic.
The thing I have to do manually is add those things as tumblr tags--make will automatically make a tumblr post with certain tags, but I have yet to find a way to make those tags conditional. Since this is an ao3feed for all DBD fic, I can't blanket tag with a ship/characters like ao3feeds for specific ships can. You can put filters on your scenarios in make, though, so I'm hoping I can do some "if--then" filters like "if text contains [x] then add [y] tag"--but I'm not sure that's within the site's capabilities. I need to do some more reading.
Anyway, thanks for looking into it! I really appreciate it!
0 notes
Text
Let AI Handle the Repetitive Tasks: A Guide to AI Automation

What’s eating up your time at work? Is it sorting data, responding to repetitive emails, or juggling endless tasks that leave little room for strategy? Imagine handing those over to a tool that works tirelessly to simplify your workload. That’s the promise of AI automation. It’s not just a tech trend—it’s reshaping how businesses operate every day. Let’s explore how this can transform your business.
Why Businesses Are Turning to AI Automation
Businesses everywhere are embracing AI automation because it solves common pain points:
Time-saving: Routine tasks, like data entry or scheduling, are handled quickly, freeing up teams to focus on innovation, strategy, and customer engagement.
Cost efficiency: By streamlining processes, businesses cut down on operational costs and maximize productivity.
Consistency: AI performs tasks with reliable accuracy, ensuring workflows run smoothly and predictably.
Real-World Applications of AI Automation
AI automation isn’t just theoretical—it’s changing how companies work right now. Here are a few ways businesses are putting it to use:
Customer support: AI-powered chatbots handle FAQs, process orders, or troubleshoot issues 24/7, improving response times and customer satisfaction.
Data management: Tools equipped with AI simplify tasks like data collection, organization, and analysis, providing insights faster than ever before.
Marketing automation: AI helps businesses create personalized campaigns, manage ads, and track performance, ensuring marketing efforts hit the mark.
Overcoming Common Misconceptions About AI
Many people fear that AI will replace jobs, but in reality, it’s designed to support teams, not replace them. By automating repetitive tasks, AI frees up time for employees to focus on work that requires creativity, problem-solving, and personal interaction.
Another misconception is that AI is only for big corporations. In truth, there are scalable, budget-friendly solutions like Airtable, Make.com, Zapier, and other tools that fit small businesses just as well as large ones.
How to Get Started with AI Automation
Not sure where to begin? Here’s how to take the first steps:
Evaluate your workflows: Identify repetitive or time-intensive tasks that slow your team down.
Research tools: Look into automation solutions like Airtable, Make.com, Zapier, or even custom-built systems to address your needs.
Partner with experts: Collaborate with professionals who can guide you through setup and ensure a seamless integration tailored to your business.
Final Thoughts
AI automation isn’t just a luxury for big companies; it’s a necessity for staying competitive in today’s fast-paced market. Starting small—by automating just one process—can lead to significant long-term benefits, like saving time, cutting costs, and boosting efficiency.
Looking to integrate AI automation into your business processes? Contact us at PrestoFlow, and let’s explore how we can help you streamline your workflows and take repetitive tasks off your plate!
0 notes
Text
Unlocking the Power of AI Agents for Your Workflow
AI agents are changing the game! 🤖 These powerful systems can automate tasks, boost productivity, and free up your time. Learn how to harness their potential with Make.com (link in bio!). #AI #Automation #Makecom #Productivity #FutureOfWork #AIAgents #ProductivityHacks #MakeDotCom #Automation #TechTrends #WorkflowOptimization #DigitalSolutions #FutureOfWork #AIInBusiness…
#africanwealth#climatechangehoax#corruption#economicgrowth#europeagenda#mphodagada#recolonizingafrica#southafricapolitics
0 notes
Text
Review: Make.com - The Ultimate AI Business Process Automation Tool
Review: Make.com - The Ultimate AI Business Process Automation Tool
As a business owner, you know that time is money. That’s why finding a reliable automation tool is so important. Make.com is gaining popularity for this reason. In this review, we’ll explore why it stands out and how it can benefit your business.
What Is Make.com?
Make.com is an AI-powered platform that focuses on business process automation. Think of it as your digital assistant, automating tasks that usually take up a lot of time. The platform is user-friendly, even if you’re not tech-savvy. Whether you need help with marketing, software development, or project management, Make.com has solutions for you.
Key Features of Make.com
Make.com offers features that make business operations simpler and more efficient. Here are some highlights:
AI-Powered Automation: Uses artificial intelligence to automate workflows, making your job easier.
Integration Capabilities: Works with a variety of software you already use, like CRM systems and email marketing tools.
Drag-and-Drop Interface: Intuitive design makes setting up automation workflows simple.
Customizable Workflows: Tailor the automation to fit your business’s unique needs.
How Does Make.com Improve Your Business?
By automating repetitive tasks, you can focus on growing your business. Here's how Make.com helps:
Efficiency and Productivity
Automating low-value tasks allows your team to focus on more important activities. Imagine automating data entry or email responses. Your efficiency goes up, and your team becomes more productive.
Cost-Effective Solution
Using an AI automation tool like Make.com can save you money. Automating tasks reduces the need for extra staff, cutting overhead costs. Plus, the pricing plans are flexible and scalable to fit your business needs.
Enhanced Customer Experience
Great customer service sets successful businesses apart. Make.com can automate tasks like responding to customer queries or sending follow-up emails. This leads to faster responses and happier customers.
Why Choose Make.com Over Competitors?
There are many tools available, but Make.com offers unique advantages:
User-Friendly Interface
You don’t need to be a tech expert. The drag-and-drop interface makes it easy to set up workflows, so it’s accessible to all business owners.
Comprehensive Tutorials and Support
The platform has detailed tutorials and robust support. Whether you’re setting it up for the first time or adjusting workflows, help is always available.
Scalable Solutions
As your business grows, so should your tools. Make.com scales with your business, allowing its automation capabilities to expand as your needs change.
Final Thoughts
Media & Technology Group, LLC specializes in bringing cutting-edge technology solutions to businesses like yours. With Make.com, you'll find an efficient and user-friendly tool. If you want to enhance your business processes with AI-powered automation, Make.com is a strong option. It’s more than just a tool; it’s an investment in your business’s future.
Ready to streamline your operations and grow your business?
0 notes
Photo

AI or Automation: The Real Dueling Duo
Are you confused about needing AI or some good old-fashioned automation to revamp your business? You’re not alone!
Why it matters: Many small business owners think AI is the magic wand for all automation needs, but there's a catch—often, the simpler automation tools pack the biggest punch. Understanding the difference could streamline your operations and save you time and money.
The big picture: Picture your business as a well-oiled machine. Automation tools like Zapier are the gears that whir quietly in the background, taking care of mind-numbing tasks, while AI plays the role of the dazzling front end, sprinkling a little pixie dust here and there. One’s a trusty mechanic; the other’s the flashy race car you always wanted.
Overheard at the water cooler: “I thought jumping on the AI bandwagon would solve everything! It turns out all I needed was a Make.com subscription and an extra cup of coffee!”
Yes, but: Sure, AI is cool and all, but it doesn’t mean you’ll unlock the secrets of the universe overnight. Think of it like trying to whip up a Michelin-star dish with just a microwave. Some dishes require actual cooking!
The bottom line: Embrace the power of automation tools for everyday tasks and sprinkle in a bit of AI where it truly adds value. Understanding this distinction enables small business owners to optimize their workflows and actually get back to what they love—running their business without getting lost in the tech jungle.
#artificial intelligence#automation#machine learning#business#digital marketing#professional services#marketing#web design#web development#social media#tech#Technology
0 notes
Video
youtube
```html
How to Set Up an AI-Automated Blogging System for Blogger
In this step-by-step guide, we'll walk you through setting up an AI-automated blogging system specifically for the Blogger platform. This process involves using Make.com to automate the generation and posting of content, including titles, images, and blog posts. Let's dive into the setup process. First, you need to open your Make.com account. If you're new to this process or haven't seen the previous videos detailing how to prompt and set up the initial modules, make sure to check them out. There's a link provided in the video description for reference. The setup for AI modules in Make.com follows a similar pattern across different platforms. Here, the workflow involves generating a subject, creating an image, drafting the entire blog post, and then publishing it to Blogger. However, there's a peculiar challenge with Blogger: it doesn't offer built-in image hosting through the module, so we'll use a workaround by uploading images to Google Photos and embedding them via HTML. Let's start by creating a fresh setup. Delete any existing modules and unlink them if necessary. Now, we'll add a new module by searching for 'Google Photos'. Once selected, you'll see a list of options. If you've never used the Google Photos API to upload images before, you'll first need to create an album.
1. **Create an Album via API**: You cannot upload an image to Google Photos until you have an API-created album. Note, this album must be created through the API and cannot be a pre-existing one made manually. To do this, choose to 'Create a new blank album' and give it a title, like 'Blogger Images' or something similar.
2. **Upload a Media Item**: After creating the album, you can now upload a photo. Select 'Upload a media item' from the Google Photos module, ensuring that you choose the album you just created. If you haven't created the album yet, this step will fail.
Next, we'll link this setup to your Blogger account. Begin by signing into your Blogger account through Make.com, as it uses a sign-in method rather than requiring an API fetch. Once logged in, select the blog where you want to post your content. To set up your blog post module in Blogger, follow these steps:
1. **Select Your Blogger Module**: From within Make.com, choose your Blogger module.
2. **Choose Your Blog**: If you have multiple blogs, they will appear in a list. Select the appropriate one.
3. **Set the Title**: Click on the title field, and from the fly-out menu, choose the result that corresponds to the title module. Typically, this would be the first module (number 1). Navigate to 'Choices', then 'Message', and finally 'Content' to select the title.
4. **Set the Content**: Similarly, for the content, go to the module number corresponding to your blog post generator (likely module number 14). Select 'Choices', 'Message', and 'Content' here as well.
Once everything is set, decide if you want your post to be published immediately or scheduled for a future date. In this guide, we'll leave it in draft state initially to check the setup. Run the process to see if everything works. After the process completes, go to your Blogger platform and refresh the page. You should see a new post, like "Exploring the Therapeutic Benefits of Cannabis". If titles start becoming redundant, like always starting with 'Exploring', you can refine your prompts to avoid this. Use negative prompting in your title prompt setup by adding instructions like "Do not use the word exploring". Run the process again to test the changes. Once the process finishes, refresh your Blogger site to view the new article. You'll notice that while the text and title are automatically formatted, the image needs to be added manually. Since integrating images directly into the content didn't work through HTML in this setup, here's how you do it:
1. **Add Image Manually**: Go to edit your blog post. Place your cursor where you want the image. Click on 'Insert image', then choose 'From Google Photos'. Select the image you uploaded earlier, adjust the size, and align it as desired (e.g., large and centered).
Preview your post to ensure everything looks good, and you're done! This manual step is necessary because of the limitations with Blogger's image handling through automation modules. By following these steps, you've successfully set up an AI-automated blogging workflow for Blogger, from generating content to manually embedding images, ensuring a seamless flow of content creation and publication. If you found this guide useful, don't forget to like and subscribe, and remember to hit the notification bell for more helpful content. Thank you for tuning in, and I hope this guide propels you onward and upward in your blogging journey! ```
0 notes
Text
Automate Your Blog with AI: Step By Step Guide for 2024

Most bloggers are burnt out. They find themselves on a hamster wheel trying to post consistent, high-quality content. But a smart few have found a better way. They’re using AI to automate their blog content creation and posting – without the stress of doing it all themselves. This article will show you a complete blog automation process you can run on autopilot. The result? Content creation and publishing becomes as easy as pressing a few buttons. The 3 Key Steps to Blog Automation Here are the steps to follow to set up your blog automation. 1. Set Up Automation Tools Let’s kick things off with setting up your automation tools. I’m using Make.com, a powerhouse no-code platform that will be the backbone of your automation strategy. First, head over to make.com and create an account. Once you’re in, take a little time to explore the interface. It might initially seem overwhelming, but I promise it’ll soon become easier. As you navigate the platform, you’ll encounter terms like “scenarios,” “modules,” and “connections.” These are the building blocks of your automation journey. Think of: - scenarios as your master plans - modules as the individual tasks within those plans - connections as the bridges between different tools. Speaking of connections, we will connect make.com with many other tools that will make your blog automation possible. First up is Airtable—a tool for storing and managing all your data. Next, we’ve got Claude AI and OpenAI, your content generation powerhouses. Claude AI helps with writing, while OpenAI will be your image prompt wizard. Don’t forget about good old Google Docs. It’ll be your content’s home before it goes live. And if you’re using WordPress, we’ll connect that too for seamless publishing. Setting up these connections might take a little time – but it’s worth it. Each connection you make is like adding another superpower to your automation arsenal. Remember, the goal here is to create a smooth, efficient workflow. So take your time, play around with the connections, and don’t be afraid to experiment. 2. Developing Your Keyword Strategy Now that our automation tools are set up, it’s time to consider keywords. Let’s start with some keyword generation. Sometimes you wish you had a magic wand to conjure up the perfect keywords, right? Well, we’ve got the next best thing—AI tools! We will use my AI Niche Hunter to do the heavy lifting. Here’s how it works: you feed this generator your main niche. In return, it will spit out a treasure trove of sub-niches and keyword ideas. Once you’ve got your list, take some time to explore the suggested sub-niches and analyze the keyword lists. Here’s a pro tip: don’t spread yourself too thin (this tool can make it easy to lose focus). Instead of tackling every keyword, focus on one sub-niche with about 10-20 keywords. Think of it as your content sweet spot. When choosing your sub-niche, consider two things: - Can you make money from it (because, let’s face it, we all need to eat), and - Does it align with your interests or expertise? Creating content about something you’re passionate about (and that’s monetizable) makes the whole process a lot more enjoyable. Here’s where it gets interesting. We’re going to mix things up with both informational and transactional keywords. Think of it as a content cocktail—75% informational (the “how to” stuff) and 25% transactional (the “best product” type). This blend keeps your content helpful and potentially profitable. Before you start writing, you can take an extra step to ensure these keywords are worth your time. This is where tools like Ahrefs come in handy. We’ll use this tool to check search volume and keyword difficulty. We’re looking for those hidden gems with decent search volume but aren’t too competitive. As you’re doing your keyword research, consider this. Sometimes, the road less traveled is the best one. Instead of trying to compete in oversaturated markets like business or finance, why not explore some niche hobbies or specialized interests? Finding these niches with less competition (but still plenty of potential customers) can be a goldmine. Lastly, let’s talk about organizing your content. Think of your sub-niche as a tree, with 5-6 main branches (your content pillars) and 3-4 smaller twigs growing from each branch (your subtopics). This structure ensures you cover all aspects of your niche, from products and techniques to care and maintenance. And there you have it! Your very own, tailor-made keyword strategy. It might seem like a lot of work upfront. However, this foundation will make your content creation process as smooth as possible. 3. Setting Up Your Automation Workflow Let’s get back to the automation I’m setting up. Head over to make.com and create a new scenario. Now, add a webhook module as your trigger. This little guy is going to be the one who says “Go!” every time we want to create a new piece of content. When you create a webhook, you’ll get a web address that you’ll use to make your “calls”. This will tell the automation system that things are ready to get moving. Next up, we’re bringing in our trusty sidekick, Airtable. Remember all those juicy keywords we collected earlier? Well, Airtable is going to be their new home. Create a (data)base in Airtable with fields for your keywords. Then, connect Airtable to make.com and set up a module to fetch your keyword data. This connection means your Make.com workflow will always know which keyword you’re working on. Now add a Claude AI module to your make.com scenario. This is where we’ll generate our article outlines. Configuring the AI prompt is a bit like training a puppy. It might take a few tries to get it right, but once you do, it’ll be your best friend. Don’t be afraid to test and refine your prompt until you get outlines that make you go “Wow!” In our Claude prompt, we ask it to produce data in a specific format called JSON. JSON (which stands for JavaScript Object Notation) is a structured way of returning data. Why do I use this structure? I want data to be returned to me the same way every single time. This makes it easy to work with this data without errors popping up. Here’s the thing – Claude will give us a long string. We need a way to convert that long string into individual JSON items. And that’s where our JSON parser comes in. Add this module and configure it to structure your outline data. It’s like translating your outline into a language all your other tools can understand. Here are the different sections of the article: And here’s the outline for the main contents: Now, let’s write that article! Here, you’ll craft a prompt that uses your outline to create full-length content. And here’s a pro tip: include instructions for maintaining a conversational tone. We want our articles to sound like a human, not a robot, wrote them! But what’s an article without a picture? Next, let’s add some visual flair with OpenAI. Add an OpenAI module to your scenario and configure it to generate image prompts. It’s like having a creative director on your team, coming up with cool image ideas for your articles. Once you have your image prompt, it’s time to bring it to life. Configure the settings to your liking – think size, style, and the works. And don’t forget to store that image URL—we’ll need it later! Here’s what the image generator produced: Don’t like the image? There are many ways to improve your prompt to get different image styles. Now, let’s get that content ready for prime time. Add a “markdown to HTML” converter module. Since we’re creating a Google document, we’ll need to change the article format to one that plays nicely with this software. Next, add a module to create a new Google Doc (so you can insert the generated article and the image). This is where your content will live before it goes live on your blog. We’re almost there! Let’s update Airtable with all our hard work. Add an Airtable update module to your scenario. This will track which articles you’ve created and where they’re stored. And finally, it’s time to publish to WordPress. We will keep the article in drafts so that a human can review its content before posting. And guess what? You’ve just set up an entire content creation factory! With this workflow, you can churn out high-quality, SEO-optimized content faster than ever. What Happens After This Workflow? Alright, we’ve got our content creation machine humming along nicely. But here’s the thing—we’re not trying to build an army of robot writers. We want to create content that resonates with real people. So, let’s roll up our sleeves and add that all-important human touch to our AI-generated content. First, put on your editor’s hat and give that AI-generated article a thorough once-over. Read it from start to finish, just like your readers would. As you’re reading, look out for a few key things: - Is everything factually correct? - Does the article flow smoothly from one point to the next? - And most importantly, does it sound like something a real person (i.e., you) would write? This is your chance to sprinkle in your expertise. Do you have any personal stories that relate to the topic? Throw ’em in there! Have you worked on projects or case studies that illustrate your points? Share those experiences! Your readers aren’t just looking for information—they’re looking for your unique perspective. This is also your opportunity to showcase your industry know-how. What insights can you offer that someone couldn’t just Google? Maybe you’ve got some predictions about where your industry is heading. Perhaps you’ve got a controversial opinion on a popular trend. Don’t be afraid to let your expertise shine through! Next, ensure your content is as engaging as a fireside chat with a good friend. Vary your sentence structure—mix short, punchy sentences with longer, more detailed ones. It’s like creating a rhythm in your writing. Remember to add those little transitional phrases that help your ideas flow smoothly from one to the next. Also, ask a rhetorical question now and then. It’s like you’re having a conversation with your reader. “Want to know the best part?” or “Sounds too good to be true, right?” These little questions keep your readers on their toes and make them feel involved in the discussion. Conclusion You’ve just learned how to automate your blog posting. Using the right tools saves time, reduces stress, and keeps your blog running smoothly. Now, you can focus on creating great content and growing your audience. Finally, remember that automation is a tool, not a replacement. Use it to handle the tasks that take up too much of your time. Then, pour your energy into the creative parts that make your blog unique. Read the full article
0 notes
Text
Expert-Level Business Intelligence Scenario on Make.com: Automated Sales Data Consolidation and Analysis
Introduction
In today's competitive business landscape, harnessing the power of business intelligence (BI) is crucial for making data-driven decisions. One of the most valuable and specific scenarios is automating the consolidation and analysis of sales data from multiple sources. This blog post will guide you through creating an expert-level scenario using Make.com to automate this process, providing a robust solution to enhance your BI capabilities.
Unique Reference: AI-Proj-jJPSkZamHwLmXO4FxZn7McPy1UQyQf03sRJvKpmGMG7B
Current Date: July 16, 2024 End Date: July 20, 2024 (Estimated Timeframe: 4 days)
Final Product

The final product is an automated system that consolidates sales data from various sources (CRM, eCommerce platforms, Google Sheets) into a centralized Google Sheets file, performs data cleaning and transformation, and generates visual reports in Google Data Studio. This system will:
Reduce manual data entry and errors.
Provide real-time sales insights.
Enhance decision-making capabilities.
Scenario Overview
Business Problem
Manual data consolidation and reporting are time-consuming and prone to errors. Automating this process allows businesses to focus on analysis and decision-making rather than data entry.
Tools and Platforms

Make.com: Automation platform.
Google Sheets: Data consolidation and storage.
Google Data Studio: Data visualization and reporting.
CRM (e.g., HubSpot, Salesforce): Source of sales data.
eCommerce Platforms (e.g., Shopify, WooCommerce): Source of sales data.
Scenario Steps
Trigger: Sales data update in CRM/eCommerce platform.
Data Extraction: Extract sales data from CRM and eCommerce platforms.
Data Transformation: Clean and format the data.
Data Consolidation: Merge data into a centralized Google Sheets file.
Data Visualization: Create visual reports in Google Data Studio.
Detailed Steps
1. Trigger: Sales Data Update
Set up triggers in Make.com to detect updates in your CRM and eCommerce platforms. For example, when a new deal is closed in HubSpot or a new order is placed in Shopify.
2. Data Extraction
Modules:
CRM Module (e.g., HubSpot > Get Deals)
eCommerce Module (e.g., Shopify > Get Orders)
Configuration:
Set the module to retrieve relevant sales data (e.g., deal amount, deal stage, order total, order date).
3. Data Transformation
Modules:
Data Store Module
Iterator Module
Configuration:
Use the Data Store module to store intermediate data.
Apply transformations (e.g., convert dates to a consistent format, normalize currency values).
4. Data Consolidation
Modules:
Google Sheets > Add Row
Google Sheets > Update Row
Configuration:
Create a Google Sheets file with columns for consolidated data.
Use the Add Row module to insert new data.
Use the Update Row module to update existing data.
5. Data Visualization
Modules:
Google Data Studio > Create Report
Configuration:
Connect the consolidated Google Sheets file to Google Data Studio.
Design visual reports (e.g., sales trends, top-performing products, sales by region).
Pro Tips
Use Filters: Filter data in Make.com to ensure only relevant records are processed.
Error Handling: Set up error handling to manage data extraction or transformation failures.
Scheduling: Schedule scenarios to run at regular intervals (e.g., hourly, daily) for real-time updates.
Data Backup: Regularly back up your consolidated Google Sheets file to prevent data loss.
Timeline and Acceptance Criteria

Timeline
Day 1: Set up triggers and data extraction.
Day 2: Configure data transformation and consolidation.
Day 3: Set up data visualization in Google Data Studio.
Day 4: Testing, error handling, and final adjustments.
Acceptance Criteria
A user should be able to set up the entire scenario following the step-by-step instructions.
A user should see real-time sales data consolidated in Google Sheets.
A user should view visual reports in Google Data Studio without manual data entry.
Conclusion
By following this guide, you can create a robust, automated sales data consolidation and analysis system using Make.com. This solution will save time, reduce errors, and provide valuable insights to drive business growth. The blueprint: https://drive.google.com/drive/u/0/folders/1NcnM-DbAlkLLgswXSznE5Qhioxgpmj9P
0 notes
Text
AUTOMATE GOOGLE CALENDAR APPOINTMENTS WITH VAPI.AI

Monika’s life was a whirlwind of work calls, client meetings, and personal errands, until she discovered Vapi.ai. Inspired to simplify her schedule, she integrated OpenAI’s advanced AI to create a voice assistant. Now, with just a command, appointments seamlessly populate her Google Calendar, thanks to Make.com’s automation. What began as a quest for efficiency became a transformative journey, where technology turned time into Monika’s greatest ally.
#AIAssistant#VoiceAutomation#ProductivityHacks#OpenAI#VapiAI#MakeDotCom#EfficiencyTools#GoogleCalendarIntegration#WorkflowAutomation#TimeManagement#DigitalTransformation#TechInnovation#WorkLifeBalance#PersonalAssistant
0 notes
Text
AI or Die AI Content Resources
AI Chatbots (as of June 2024) ChatGPT Google Gemini Claude Perplexity Microsoft Copilot Meta AIGrok My Current Favorites ChatGPT Perplexity.ai Wave.video Make.com ZimmWriter Apify Learning Resources General AI (New Tools and Demos) Matt Wolfe Make.com Tutorials (Automation Examples) Jack Roberts Nick Saraev Wave.video Wave.video ZimmWriter Tutorials ZimmWriter Beginner…

View On WordPress
0 notes
Text
A Revolutionary Breakthrough In the realm of web automation, a groundbreaking innovation has emerged – HARPA AI. This formidable Chrome extension marries the prowess of ChatGPT with the finesse of web automation, revolutionizing the way professionals navigate and interact with the digital landscape. With HARPA AI as your co-pilot, the possibilities are endless, and productivity reaches unprecedented heights. Unleashing Hybrid Power HARPA AI is no ordinary tool; it's a hybrid marvel that merges the intelligence of ChatGPT with the automation capabilities of a copilot. This dynamic duo empowers you to embark on a transformative journey, automating tasks that span from copywriting and summarization to data extraction and real-time monitoring. HARPA AI's adaptive prowess seamlessly integrates AI into your daily workflow. A Symphony of Features Dive into the spectrum of features that HARPA AI effortlessly brings to your fingertips: AI-Assisted Search Bid adieu to conventional searches. With HARPA AI, your queries come alive, with ChatGPT responses enriching your Google Search results. Extract and summarize web pages, engage in insightful conversations, and broaden your horizons effortlessly. Price Tracking Precision Never miss a price drop again. HARPA AI vigilantly monitors product prices across e-commerce giants like Amazon, AliExpress, Walmart, and Ebay. It notifies you when the opportune moment to purchase arises, putting savings at your fingertips. Page-Aware GPT Prompts HARPA AI empowers you with a repertoire of over 100 page-aware commands. Whether you're engaged in Marketing, SEO, Copywriting, HR, or Engineering, these prompts unlock unparalleled efficiency and precision. Unveiling Competitor Insights Stay steps ahead of the competition by monitoring competitor websites for changes. Transform websites into APIs, and even trigger IFTTT actions using the Make.com integration. AI-Powered Content Creation From Twitter tweets to LinkedIn replies, HARPA AI is your creative muse. Craft content, articles, and scripts with the assistance of AI, ensuring your messaging is impactful and tailored to perfection. Masterful YouTube Video Summaries Navigate the labyrinth of lengthy YouTube videos with ease. HARPA AI extracts key takeaways from hours of content, delivering concise and insightful summaries that save you valuable time. Privacy in Focus HARPA AI is rooted in privacy-centric design. It operates locally within your browser, ensuring that your data remains in your control. Your interactions with ChatGPT prompts are seamlessly processed by OpenAI servers, without compromising your confidentiality. Unveiling the Path Forward Eager to harness the prowess of HARPA AI? Embark on a journey of empowerment with these essential steps: Step 1: Integration Seamlessly incorporate HARPA AI into your browser by adding the Chrome extension. This simple act opens the gateway to unparalleled web automation and AI augmentation. Step 2: Unleash AI Experience the potential of HARPA AI on any website. Employ Alt + A to summon the AI agent, magnifying your capabilities across a multitude of tasks. Step 3: Customize and Innovate Explore the extensive library of ChatGPT prompts and automations that HARPA AI offers. Tailor these tools to your unique needs, optimizing your workflow and redefining efficiency. Transforming Industries, One Task at a Time HARPA AI transcends boundaries, catering to a spectrum of industries and professions: Marketing & SEO Maestros Segment audiences, unravel SEO goldmines, devise marketing blueprints, and craft compelling blog content with unparalleled finesse. Copywriting Visionaries Elevate your messaging with captivating content. HARPA AI crafts everything from tweets to video scripts, aligning with your brand's voice. Productivity Pioneers Unearth information effortlessly, summarize web pages, and harness data extraction like never before. HARPA AI simplifies intricate tasks, freeing you to focus on strategic decisions. HR & Recruitment Experts
Refine resumes, generate LinkedIn responses, and formulate compelling cover letters. HARPA AI adds a touch of finesse to every aspect of your HR endeavors. Trailblazing Product Developers Navigate coding complexities, find solutions on Stack Overflow, and even rewrite code across languages and stacks. HARPA AI propels your development journey. Spreadsheet Virtuosos Master Google Sheets and Microsoft Excel with ease. HARPA AI simplifies formulas, generates macros, and unlocks the true potential of these tools. Unshackling Potential: User Testimonials The impact of HARPA AI is evident in the words of those who have embraced its transformative capabilities: "SANNA K" of Heavy Lift News attests, "Very nice to have what feels like a well-spoken expert in just about all topics to add on to what I search for and give me the answer and explanation I was looking for." JASON H from Zalando hails, "HARPA has been the real game-changer for my productivity! I love it because it reliably automates content creation for me. Very impressive!" ASIM A of WISE raves, "We run HARPA monitors to efficiently keep track of updates on our suppliers’ websites. It works flawlessly and saves us a ton of time." Embrace the Future: Join the HARPA Movement HARPA AI beckons you to join a paradigm-shifting journey. Transform the way you navigate the web, automate tasks, and elevate your professional prowess. Embrace the future of web browsing and automation – experience HARPA AI today and shape a more efficient, empowered tomorrow. Navigating Your Queries While the world of HARPA AI unfolds before you, you might have questions. We're here to guide you: What is HARPA AI? HARPA AI is a Google Chrome extension, fusing ChatGPT's brilliance with the power of web automation. Discover its boundless potential here. How Can HARPA AI Transform Your Workflow? From copywriting to data extraction, HARPA AI amplifies your capabilities. Embrace a new level of efficiency as you navigate tasks with finesse. How Does HARPA AI Prioritize Privacy? HARPA AI is built on privacy-centric principles. It operates locally on your device, safeguarding your data from external servers. Is HARPA AI Free to Use? HARPA AI offers a freemium model, allowing access to core features without registration. Unleash its capabilities and explore premium offerings at your pace. The Evolution of AI and Automation HARPA AI bridges the gap between AI and automation. It acts as your virtual assistant, a copilot in your digital journey. Shape Tomorrow with HARPA AI HARPA AI is not just an extension; it's a gateway to limitless possibilities. Experience the fusion of AI and automation, redefine productivity, and embark on a journey of efficiency and innovation. The future of web browsing is here – embrace HARPA AI and reshape the way you navigate the digital frontier.
0 notes
Note
The placeholder message text, combined with the blog URL, makes it sound (to me) like this blog generates AI art based on prompts, rather than generating a prompt by itself. It might be a good idea to change the placeholder message to be clearer about that, just in case anyone interprets it similarly!
I don't control what the placeholder message is, sorry! I assume that's what make.com inputs.
0 notes
Video
youtube
How to Create an AI-Generated Blog on Medium: A Step-by-Step Guide
Welcome to this comprehensive guide on creating an AI-generated blog on Medium. In this blog post, we'll walk you through the process used in a recent YouTube video where the creator demonstrated how to automate blog posts using AI tools. Let's dive right into it. First, you need to log into your Make.com account to begin creating your new scenario. Make.com is the platform where we'll set up our automation workflow. If you're not familiar with Make.com, it's similar to tools like Zapier or IFTTT, but with more advanced integration capabilities. To start, create a new scenario in Make.com. We'll begin by showcasing an automated blog setup for Medium, but the creator also mentioned setups for Blogger, Shopify, and WordPress, noting that each platform might require slightly different configurations based on their image hosting policies. For platforms where you need to host your images, the creator uses Google Photos for streamlined image management. The setup for an automated blog consists of two primary elements: an OpenAI module for content generation and the blogging platform module for publishing. Here's how you can set it up: 1. **Add the OpenAI Module:** - **First Module - Title Generation:** Begin by adding an OpenAI module. Choose 'Create a Completion' and configure it later for generating a title or subject for your blog post. - **Second Module - Image Generation:** Add another OpenAI module by clicking the plus icon. This time, use it for image generation. The creator used DALL-E 3 for this, mentioning that DALL-E 2 is simpler but DALL-E 3 offers better quality images. Make sure to configure the prompt to reference the title you just created for thematic consistency. - **Third Module - Article Generation:** The final OpenAI module should generate the blog post itself. Here, switch to a model like GPT-4 for better long-form content creation. Your prompt should instruct the AI to generate a blog post about the title you created, aiming for around 2500 characters or less. 2. **Configuring the OpenAI Modules:** - For the title generation, use model 3.5 Turbo for cost-effectiveness. Set the system role to 'come up with a random topic about earning passive income online' and limit the response to 100 tokens, which translates to about 100 characters. - When generating an image, prompt DALL-E 3 to 'create an image about' the previously generated title. Adjust settings for image size and style as needed, choosing 'Image File' for Medium to allow direct image uploads. - For the article, set the tokens to 3000 to ensure enough space for a comprehensive blog post. Ensure the response is set to text format. 3. **Setting Up the Medium Module:** - Now, add the Medium module to your scenario. You'll first need to upload the image generated by the OpenAI module. This step is crucial as Medium requires the image to be uploaded before referencing it in the post. - Next, add another Medium module to create the post. Reference the title from the first OpenAI module and the content from the third. Make sure you're uploading the content as a draft first to review before publishing. - Remember to embed the image at the top of the article using HTML. The correct format is ``. 4. **Finalizing and Scheduling:** - After setting up your modules, run the process to ensure everything works. You should see a title generated, an image created, and a blog post drafted. - Edit the draft in Medium for better formatting, adding spaces, additional graphics, or refining the content to make it your own. - Schedule your blog post creation. In the video, the creator set it to run once every day at 8 a.m. This automation ensures a fresh post is generated and posted daily. 5. **Publishing Strategy:** - The creator advises against automatic publishing without review for quality control. For personal branding, manually curate posts to maintain high standards. However, for less personal projects, like promoting Amazon products, automated publishing might be acceptable if you're not attaching your brand identity directly. By following these steps, you can leverage AI to generate content efficiently, allowing you to focus on curation and strategy. This automation reduces the workload while still providing you with control over the final product. Remember, while AI can automate the creation, your touch in editing and strategizing ensures the content aligns with your brand and audience expectations. Don't forget to engage with your audience by asking for likes, comments, and subscriptions, much like the video creator recommended. Keep experimenting with different prompts and platforms to see what works best for your niche. Finally, stay updated with the latest AI tools and platforms by joining communities or watching tutorial videos. Happy blogging!
0 notes