#multiple select vuejs
Explore tagged Tumblr posts
Visit Tumblr Blog
Explore Tumblr blogs with no restrictions, modern design and the best experience.
Last Seen Tumblr Blogs


Fun Fact
Tumblr is used by 21% of adults online aged 18-29 years.
Text
Use v-select in Vue js
Use v-select in Vue js
In this article, we will learn about how we can use v-select in Vue js. I will show you step by step guide to implement v-select with options in Vue js. Basic Example of v-select In the below example you will learn how to implement v-select with options. <template> <div> <v-select v-model="selected" label="title" :options="multipleOption"/> </div> </template> <script> import…
View On WordPress
#multiple select#multiple select vue js#v select default value#v select dynamic options#v select multiple example#v select options#v select reduce#v select vuejs#v select vuetify example#v-select vue json#vue select
0 notes
Text
Noteworthy PHP Development Tools that a PHP Developer should know in 2021!

Hypertext Preprocessor, commonly known as PHP, happens to be one of the most widely used server-side scripting languages for developing web applications and websites. Renowned names like Facebook and WordPress are powered by PHP. The reasons for its popularity can be attributed to the following goodies PHP offers:
Open-source and easy-to-use
Comprehensive documentation
Multiple ready-to-use scripts
Strong community support
Well-supported frameworks
However, to leverage this technology to the fullest and simplify tasks, PHP developers utilize certain tools that enhance programming efficiency and minimize development errors. PHP development tools provide a conducive IDE (Integrated Development Environment) that enhances the productivity of PHP Website Development.
The market currently is overflooded with PHP tools. Therefore, it becomes immensely difficult for a PHP App Development Company to pick the perfect set of tools that will fulfill their project needs. This blog enlists the best PHP development tools along with their offerings. A quick read will help you to choose the most befitting tool for your PHP development project.
Top PHP Development tools
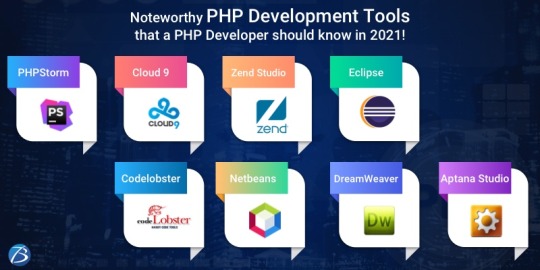
PHPStorm
PHPStorm, created and promoted by JetBrains, is one of the most standard IDEs for PHP developers. It is lightweight, smooth, and speedy. This tool works easily with popular PHP frameworks like Laravel, Symfony, Zend Framework, CakePHP, Yii, etc. as well as with contemporary Content Management Systems like WordPress, Drupal, and Magento. Besides PHP, this tool supports JavaScript, C, C#, Visual Basic and C++ languages; and platforms such as Linux, Windows, and Mac OS X. This enterprise-grade IDE charges a license price for specialized developers, but is offered for free to students and teachers so that they can start open-source projects. Tech giants like Wikipedia, Yahoo, Cisco, Salesforce, and Expedia possess PHPStorm IDE licenses.
Features:
Code-rearranging, code completion, zero-configuration, and debugging
Support for Native ZenCoding and extension with numerous other handy plugins such as the VimEditor.
Functions:
Provides live editing support for the leading front-end technologies like JavaScript, HTML5, CSS, TypeScript, Sass, CoffeeScript, Stylus, Less, etc.
It supports code refactoring, debugging, and unit testing
Enables PHP developers to integrate with version control systems, databases, remote deployment, composer, vagrant, rest clients, command-line tools, etc.
Coming to debugging, PHPStorm works with Xdebug and Zend Debugger locally as well as remotely.
Cloud 9
This open-source cloud IDE offers a development eco-system for PHP and numerous other programming languages like HTML5, JavaScript, C++, C, Python, etc. It supports platforms like Mac OS, Solaris, Linux, etc.
Features:
Code reformatting, real-time language analysis, and tabbed file management.
Availability of a wide range of themes
In-built image editor for cropping, rotating, and resizing images
An in-built terminal that allows one to view the command output from the server.
Integrated debugger for setting a breakpoint
Adjustable panels via drag and drop function
Support for keyboard shortcuts resulting in easy access
Functions:
With Cloud 9, one can write, run and debug the code using any browser. Developers can work from any location using a machine connected to the internet.
It facilitates the creation of serverless apps, allowing the tasks of defining resources, executing serverless applications, and remote debugging.
Its ability to pair programs and track all real-time inputs; enables one to share their development eco-system with peers.
Zend Studio
This commercial PHP IDE supports most of the latest PHP versions, specifically PHP 7, and platforms like Linux, Windows, and OS X. This tool boasts of an instinctive UI and provides most of the latest functionalities that are needed to quicken PHP web development. Zend Studio is being used by high-profile firms like BNP Paribas Credit Suisse, DHL, and Agilent Technologies.
Features:
Support for PHP 7 express migration and effortless integration with the Zend server
A sharp code editor supporting JavaScript, PHP, CSS, and HTML
Speedier performance while indexing, validating, and searching for the PHP code
Support for Git Flow, Docker, and the Eclipse plugin environment
Integration with Z-Ray
Debugging with Zend Debugger and Xdebug
Deployment sustenance including cloud support for Microsoft Azure and Amazon AWS.
Functions:
Enables developers to effortlessly organize the PHP app on more than one server.
Provides developers the flexibility to write and debug the code without having to spare additional effort or time for these tasks.
Provides support for mobile app development at the peak of live PHP applications and server system backend, for simplifying the task of harmonizing the current websites and web apps with mobile-based applications.
Eclipse
Eclipse is a cross-platform PHP editor and one of the top PHP development tools. It is a perfect pick for large-scale PHP projects. It supports multiple languages – C, C++, Ada, ABAP, COBOL, Haskell, Fortran, JavaScript, D, Julia, Java, NATURAL, Ruby, Python, Scheme, Groovy, Erlang, Clojure, Prolong, Lasso, Scala, etc. - and platforms like Linux, Windows, Solaris, and Mac OS.
Features:
It provides one with a ready-made code template and automatically validates the syntax.
It supports code refactoring – enhancing the code’s internal structure.
It enables remote project management
Functions:
Allows one to choose from a wide range of plugins, easing out the tasks of developing and simplifying the complex PHP code.
Helps in customizing and extending the IDE for fulfilling project requirements.
Supports GUI as well as non-GUI applications.
Codelobster
Codelobster is an Integrated Development Environment that eases out and modernizes the PHP development processes. Its users do not need to worry about remembering the names of functions, attributes, tags, and arguments; as these are enabled through auto-complete functions. It supports languages like PHP, JavaScript, HTML, and CSS and platforms such as Windows, Linux, Ubuntu, Fedora, Mac OS, Linux, and Mint. Additionally, it offers exceptional plugins that enable it to function smoothly with myriad technologies like Drupal, Joomla, Twig, JQuery, CodeIgniter, Symfony, Node.js, VueJS, AngularJS, Laravel, Magento, BackboneJS, CakePHP, EmberJS, Phalcon, and Yii.
Offerings:
It is an internal, free PHP debugger that enables validating the code locally.
It auto-detects the existing server settings followed by configuring the related files and allowing one to utilize the debugger.
It has the ability to highlight pairs of square brackets and helps in organizing files into the project.
This tool displays a popup list comprising variables and constants.
It allows one to hide code blocks that are presently not being used and to collapse the code for viewing it in detail.
Netbeans
Netbeans, packed with a rich set of features is quite popular in the realm of PHP Development Services. It supports several languages like English, Russian, Japanese, Portuguese, Brazilian, and simplified Chinese. Its recent version is lightweight and speedier, and specifically facilitates building PHP-based Web Applications with the most recent PHP versions. This tool is apt for large-scale web app development projects and works with most trending PHP frameworks such as Symfony2, Zend, FuelPHP, CakePHP, Smarty, and WordPress CMS. It supports PHP, HTML5, C, C++, and JavaScript languages and Windows, Linux, MacOS and Solaris platforms.
Features:
Getter and setter generation, quick fixes, code templates, hints, and refactoring.
Code folding and formatting; rectangular selection
Smart code completion and try/catch code completion
Syntax highlighter
DreamWeaver
This popular tool assists one in creating, publishing, and managing websites. A website developed using DreamWeaver can be deployed to any web server.
Offerings:
Ability to create dynamic websites that fits the screen sizes of different devices
Availability of ready-to-use layouts for website development and a built-in HTML validator for code validation.
Workspace customization capabilities
Aptana Studio
Aptana Studio is an open-source PHP development tool used to integrate with multiple client-side and server-side web technologies like PHP, CSS3, Python, RoR, HTML5, Ruby, etc. It is a high-performing and productive PHP IDE.
Features:
Supports the most recent HTML5 specifications
Collaborates with peers using actions like pull, push and merge
IDE customization and Git integration capabilities
The ability to set breakpoints, inspecting variables, and controlling the execution
Functions:
Eases out PHP app development by supporting the debuggers and CLI
Enables programmers to develop and test PHP apps within a single environment
Leverages the flexibilities of Eclipse and also possesses detailed information on the range of support for each element of the popular browsers.
Final Verdict:
I hope this blog has given you clear visibility of the popular PHP tools used for web development and will guide you through selecting the right set of tools for your upcoming project.
To know more about our other core technologies, refer to links below:
React Native App Development Company
Angular App Development Company
ROR App Development
#Php developers#PHP web Development Company#PHP Development Service#PHP based Web Application#PHP Website Development Services#PHP frameworks
1 note
·
View note
Text
Form Input binding in vuejs - Form Handling in vuejs - Vuejs tutorial - Tutorial 17
Form Input binding in vuejs – Form Handling in vuejs – Vuejs tutorial – Tutorial 17
[ad_1] [DISCOUNTED] Master CSS Grid Course: https://bit.ly/2NONxxE
Form Input binding in vuejs – Form Handling in vuejs – In this lecture we will learn how can we bind property value to form fields like input field, checkbox, radio, textarea.
This form input binding lecture will be pretty quick and easy to learn. First we will start with simple input type text. Where we will bind it value to…
View On WordPress
#binding#form#form handlign vuejs#form handling#form handling in vuejs#form input binding vuejs#form vuejs#forms#forms vuejs#Handling#handling form#Input#input binding vuejs#multiple select vuejs#select multiple vuejs#tutorial#v-model#v-model vuejs#vuejs#vuejs beginners tutorial#vuejs form#vuejs form handling#vuejs form input binding#vuejs forms#vuejs multiple select#vuejs radio#vuejs select#vuejs textarea#vuejs tutorial#vuejs tutorial for beginners
0 notes
Text
Who is a Full Stack web Developer and how it is Advantageous?
Are you a Backend developer? Do you code backend for the web applications in Java, or Dot net, or Python, or Nodejs? If yes, then pull up your socks, the front-end challenge is right in front of you. Companies now want you to do the front-end task as well. Yes, please prepare yourself for that. You can still be a frontend developer or a backend developer. Though, Full Stack developers are more in demand. In this article, we discuss this issue in deep. Further, we discuss topics like what a full stack developer is, prior knowledge required for a full stack developer, various skills required, what are the advantages if you are one such, and lastly will discuss the jobs and salary issue. So,let us begin our article. And you can contact us for your Full-stack Developer training. Naresh I Technologies is the number one computer training institute in Hyderabad and among the top five computer training institutes in India. Contact us anytime for your Full stack web Development training.
Who is a Full Stack Developer?
So, who is a full-stack developer? He is the one who can single-handedly complete the whole web development project. He looks after the back-end development work, as well as the front-end development work. The backend is the server, and the front end is the UI. Single-page applications like Angular, React and Vuejs is the modern-day UI. And now we have the UI/UX developed using AR/VR as well. Also, the traditional HTML5, Bootstrap, jQuery, MVC, and various such are part of the front-end development. Some of the above technologies like the last four are used in Backend as well. Anyways, Backend also requires a template. And you provide through the front-endtechnologies’ application. Previously, two different teams used to do the backend and frontend tasks. However, now both one person is conducting tasks. And companies now look for such technocrats in the majority.
Prerequisites for Becoming a Full Stack Developer
You need to be possessed experience in web development or web designing. A web developer can become a full stack developer, and so is a web designer. And, it is the 21st-century requirement. Both need to upgrade themselves to meet this challenge from the market. The demand in the Market is maximum for the Full-stack developer, and there are multiple stacks, that we discuss in the next section. Above all, you should be ready for very hard work. However, the payment will make you happy. Please be assured.
Skills for Full Stack developer
Loads of skills together make a Full-stack developer. Some of the skills required are as below:
Front-end:
HTML5, jQuery, Bootstrap, Material UI, Angular, React Vuejs, AR/VR, MVC, MVVM, and various JS versions.
Backend:
You need different combinations, like as below:
· Java, Spring Boot, Hibernate
· Dot net, C#, LINQ, Entity Framework, ADO.NET, WCF. Web services, Socket programming. Signal R, HTTP, HTTPS, RESTFUL API, and various other technologies in Dot net
· Dot net core version of all the above technologies
· PHP, and various MVC frameworks like Code Igniter, and various such.
· Nodejs, and various frameworks like Express
· Python and various frameworks
You should learn one out of all these backend technologies. And you should complement the backend knowledge with a matching front-end technology. We have various stacks. There is a Dot net Angular Stack, LAMP Stack, MEAN stack, MERN stack, and various such. You need to be proficient in one stack for Full stack designation. However, you need some more technical skills now. And, they are:
· We included entity framework, and let us also add to the list JDBC, Oracle, MSSQL, MYSQL, MongoDB, Document DB, DynamoDB, and various others. Concisely, you should know the structured, semi-structured as well as unstructured databases. And, in the current context, learn from the AWS, Azure, and GCP list, the database you find in your stack.
· Apart from these, you need advanced programming skills like how to make use of the APIs and various third-party tools related to your stack.
· You also need knowledge of the DevOps procedure, as no programmer or designer., and hence a full stack developer can withstand the challenge from the market without DevOps.
· And you need special skills related to version control and repository for sure. Each day you need to push or pull the code from the version control systems like GIT.
Advantages as a Full Stack Developer
There are various advantages you get as a Full-stack developer. They are:
· There is a huge demand for each stack. And you can be a full stack developer in any one stack.
· Pay Scale is the best in the market, and we will experience that in the next section.
· You always have a bright future if you become a full-stack developer in any one of the stacks.
Jobs and Salary related to Full Stack web Developer
Remember, the full-stack developer is one of the highest paying coding jobs, and it ranks fourth currently in the list after System engineer, IT security specialist, and Software Engineer. According to Glass door, the average annual salary of a Full stack developer in the US is around $88000 currently. In India, the average salary of a Full stack developer is around 575000 INR. And it can be as high as around 1195000 INR. Some companies pay even more based on the expertise and experience of the full stack developer.
Hence, if you select Full stack development as your career, you have a bright present, as well as a bright future. And that brings us to the end of the article. Have a nice career! Remember, you can still exist as a backend developer or a front-end developer. However, the demand for Full Stack developers is increasing day by day, as there is less burden on the management hence.
Naresh I Technologies is the number one computer training institute in Hyderabad and among the top five computer training institutes in India. Contact us anytime for your Full-stack Developer training. You can also opt for Full-stack Developer online training, and from any part of the world. And a big package is waiting for you. And all is yours for a nominal fee affordable for all with any range of budget. Let us have a look at what you will get with this Full-stack Developer training package:
· You need to pay a nominal fee.
· You can choose any stack, as per your skills and interest.
· You have the option to select from online and classroom training.
· A chance to study at one of the best Full-stack Developer training institutes in India
· We provide Full-stack Developer training in Hyderabad and the USA, and no matter in which part of the world you are, you can contact us.
· Naresh I technologies cater to one of the best Full-stack Developer training in India.
· And a lot more is waiting for you.
Contact us anytime for your complete Full stack web Development online training.
0 notes
Photo
20 Best JavaScript Admin Templates for React, Angular, and Vue.js
Are you building an app and looking for a JavaScript admin panel template to help you streamline your build? Take the effort out of your next front-end app build with one of these powerful React, Angular, and Vue.js admin templates.
With this list of JavaScript admin panel templates and dashboards, it's painless to create beautiful, interactive UIs.
Built using cutting-edge technology like React and Bootstrap, these dashboards and admin templates offer flexibility and dependability for your next app build. Create a stunning UI easily by selecting from modular components and clean layouts so that you can focus on the business logic of your app build.
The Best Modern JavaScript Admin Templates on ThemeForest
On ThemeForest you will discover an amazingly extensive library of the most powerful admin templates ever created. With a cheap one-time payment, you can purchase one of these high-quality admin templates and give your app users an excellent interactive experience.
Angular Admin Templates
Angular is a powerful and feature-complete framework that you can use to build fast, professional web apps.
Check out these templates that you can use to get your next Angular app off on the right foot with clean code and great design.
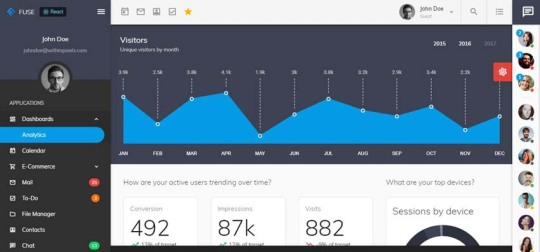
1. Bestseller: Fuse Material Design Admin Template
This best-selling template is a 3-in-1 bundle, with Angular 7+, Bootstrap 4, and 21 layered PSD designs. Fuse is based on Google's Material Design and comes with ahead-of-time compiler support, as well as a complete NgRx reactive Angular example app. This template includes configurable layouts, a skeleton project, built-in apps such as calendar, e-commerce, mail, and chat, and more than 20 pages to get you started.
Fuse supports all modern browsers (Chrome, Firefox, Safari, Edge) and comes with Bootstrap 4, HTML, and CSS versions, along with the Angular app.
2. Pages Admin Dashboard Template
Pages is the simplest and fastest way to build a web UI for your dashboard or app. This beautifully designed UI framework comes with hundreds of customizable features, which means that you can style every layout to look exactly the way you want it to.
Pages is built with a clean, intuitive, and fully responsive design that works on all major browsers and devices. Featuring developer-friendly code, full Sass and RTL support, and five unique dashboard layouts, this Angular 5+ ready template boasts flawless design and a 5-star rating.
3. Apex Admin Template
Apex is a powerful and flexible admin panel based on Angular 6+ and Bootstrap 4. The Angular CLI makes it easy to maintain and modify this Angular dashboard. With easy-to-understand code and a handy starter kit, this dashboard works right out of the box. Apex includes multiple solid and gradient menu color options and sizes, with an organized folder structure and more than 500 components and 50 widgets.
This template is fully responsive, clean on every device and modern browser, and comes with ahead-of-time compilation and lazy loading. Choose from a few pre-made layout options and customize with ready-to-use elements and popular UI components.
4. Stack Admin Template and Starter Kit
Stack Admin is a Bootstrap 4 modern admin panel template with unlimited possibilities. This product includes eight pre-built templates with an organized folder structure, clean and commented code, and more than 1,500 pages and 1,000 components. Stack Admin provides RTL support, searchable navigation, unique menu layouts, and advanced cards.
With three niche dashboards, Stack Admin can be used for any type of web app: project management, e-commerce back ends, analytics, or any custom admin panels. This template looks great on all devices, and it comes with a kit to help developers get started quickly.
5. Able Pro 7.0 Responsive Template
Able Pro 7.0 is a fully responsive Bootstrap admin template that provides a flexible solution for your project development. Built with Bootstrap framework, this admin dashboard has a Material look, with well structured and commented code. This Retina-ready template comes with more than 150 pages and infinite design possibilities—use the Live Customizer feature to do one-click checks on color combinations and layout variations.
With more than 100 external plugins included, advanced menu layout options, and ready-to-deploy dashboards and landing pages, Able Pro 7.0 will streamline your app development process to save you time and effort.
6. Fury Material Design Admin Template
Clean, unique, and blazing fast, Fury is an admin template that offers you everything you need to get started with your next project. Built with Angular and Material Design, this template is the perfect framework for building large enterprise apps, and it allows for a modular component setup.
This template is designed to be lightweight and easy to customize. Features include completely customizable dashboard widgets and Angular Flex Layout, to provide a fast and flexible way to create your layouts.
React Dashboards and Admin Templates
React is a JavaScript library for building user interfaces that has taken the web development world by storm. React is known for its blazing-fast performance and has spawned an ecosystem of thousands of related modules on NPM, including many tooling options.
These admin templates and dashboards are a great starting point for your next React app.
1. Isomorphic Admin Dashboard
Isomorphic is a React and Redux-powered JavaScript admin panel template. It's based on a progressive web application pattern and is highly optimized for your next React app. With no need to install or configure tools like Webpack or Babel, you can get started building your app immediately.
This React dashboard helps you write apps that behave consistently, run properly in different environments, and are easy to test. With Sass and CSS styling modules, multilingual support, a built-in Algolia search tool, Firestore CRUD, and easy-to-integrate code, you can use this template to build anything you want.
2. Clean UI React Admin Template
Are you building a single-page app and interested in moving to React and Redux? Don’t start from scratch—build a scalable, highly polished JavaScript admin dashboard with this React, Redux, Bootstrap, and Ant Design template that works well on mobile, tablet, and desktop.
Clean UI React is create-react-app based, so getting started is simple. Modular code allows you to add and remove components with ease. Developer friendly and highly customizable, this template includes 9 example apps, more than 50 pages, multiple layout options with easy-to-update Sass or CSS styling, and ample reusable React components.
3. Jumbo React Admin Template
Kick-start your app project with Jumbo React, a complete JavaScript admin panel template. This product includes two React templates, one based on Google Material Design and the other on the stunning flat style. Each template comes with multiple design concepts and hundreds of UI components and widgets, as well as an internationalization feature that allows you to develop a multilingual app.
Think of this template package as a starter kit to build your app. With it, you can develop a scalable React app rapidly and effectively and save yourself time and money in the process.
4. Fuse Material Design Admin Template
Looking for a template to get your React project started? Fuse is a complete JavaScript admin panel template that follows Google’s Material Design guidelines and will allow you to learn some of the advanced aspects of React while you build your app.
This React admin template uses Material UI as the primary UI library and Redux for state management. It comes with built-in page templates, routing, and authorization features, along with five example apps, more than 20 pages, and lots of reusable React components.
Vue.js Admin Templates
Vue.js is a front-end JavaScript framework that is easy to learn if you already know HTML and CSS. The versatility of Vue is great for small- and large-scale web apps alike. On top of all this, it's blazing fast!
These Vue templates are sure to save you a lot of time and effort coding your next app.
1. Vuexy—Vue and Laravel Admin Dashboard Template
If you’re a developer looking for a Vue admin template, look no further than Vuexy. A powerful admin dashboard template built on Vue.js, Vuexy is developer-friendly, rich with features and highly customizable. Bringing your vision to life is a piece of cake!
Not only is Vuexy fast and easy to use, but it is also highly scalable.
2. Vuely—Material Design and Laravel Blade Admin Template
Vuely is a fully responsive JavaScript admin panel template designed to give you a hassle-free development experience. Carefully crafted to look beautiful on mobile and tablet devices with pre-designed custom pages and integrated features like charts, graphs, and data tables, this template allows you to create your back-end panel with ease. More than 200 UI elements and 78 custom widgets simplify your development process.
Vuely is translation ready with RTL support and comes with multiple color and theme options to give you the flexibility you need.
3. VueJS Laravel Admin Template
Looking for a full-featured admin panel template for your Vue.js project? Look no further. This Vue admin template is completely modular, so you can modify layouts, colors, and other features without disturbing the rest of the code. Simply customize it with the provided Sass variables. This template is well documented, with seven layout and multiple color scheme options. With all the components you need, this Vue.js template will get you started on your next dashboard build.
4. Piaf—Vue Admin Template
Piaf is a combination of good design, quality code and attention to details. It is built with Vue without jQuery. The same design language is used for components, layouts, apps and other parts of the theme.
A lot of work has gone into design harmony between components and layouts of this Vue admin template. From carousels to charts, switches to list, you can see it in the colors, icons, and composition. This Vue admin template is simple and pleasant to use and does the job well.
5. Clear—Vue and Laravel Admin Template
If you're looking for a clean, uncluttered JavaScript admin template then Clear is the way to go. The Clear Vue admin template comes with features like: task and contact application, Vue version build system updated with Laravel mix, and extended Vue.js eCommerce dashboard.
The awesome layouts come in two simple and stylish versions, light and dark. It looks good across dashboards, components, widgets, and various charts. In addition, the code is very clean and developer friendly. You can start using Clear admin template in no time. Just follow the code and documentation.
Multi-Framework Admin Templates
Finally, here are some templates that work with multiple frameworks.
1. Bestseller: Metronic
Metronic has been called the mother of all JavaScript admin panel templates. For one, it works smoothly across many frameworks like Bootstrap 4, React, Angular 9, Vue, and Laravel. Secondly, it has a well-structured design, and is easy to customize. In addition, the CSS and JavaScript of this best-selling multi-framework admin template are of the highest coding standard. To help you easily implement it in your app, it comes with extensive documentation and video tutorials.
2. Material Design Admin and Multipurpose Template
This Material Design admin panel template provides you high performance with Vue, React and Angular versions. This super flexible template uses SCSS, Gulp, Webpack, NPM Modern Workflow, and Flexbox, and has all the components you need to create your front-end app project. With stunning layouts, over 500 components and lifetime updates and customer support, this is the most complete admin app available.
3. Primer—Angular and React Admin Template
Primer is a creative Material Design admin template, with ahead-of-time (AoT) compilation for a more performant user experience. Fully responsive and packaged with both Angular and React versions, this template has left-to-right and right-to-left support and light and dark colour schemes. Well documented and easy to customize, with this app template you get everything you need to start working on your SaaS, CRM, CMS, or dashboard-based project.
4. Clean UI Pro Bundle
Clean UI is an exceptionally simple way to build user interfaces across all web front-end platforms with the power of React, Angular, Vue, or HTML. Build beautiful and user-friendly interfaces with blazing fast pre-built components, widgets and ready to use apps.
Don’t start from scratch. Build a scalable, highly polished admin application with React and Redux, Angular and NgRx, or Vue and Vuex. All based on the Bootstrap and Ant design frameworks, and all fully-responsive to work great on mobile and tablets as well as on the desktop.
This JavaScript admin panel template includes 17+ example apps, 60+ pages, lots of reusable components and more.
Get Your JavaScript Admin Templates on ThemeForest Now!
This is just a sample of the many app admin templates available on ThemeForest. There is a template for you, no matter what your style or specifications. These templates will make coding the front end of your app easier and help you deliver an app that provides a high-quality user experience. All this will save you time and effort, letting you focus on the real details of coding your project.
by Franc Lucas via Envato Tuts+ Code https://ift.tt/2ZTyt9e
0 notes
Link
One of the most important questions for any business willing to develop an application is, “which front-end technology (client-side) should we choose?” With so many options for JavaScript frameworks available, your app development team needs to be cautious about their choice. This article will examine the positives and negatives of React, Angular, and Vue and situations in which each is optimal to use. What Is Angular? Angular is an open source, frontend web app framework by Google that has a Model-View-Controller (MVC) architecture and makes development, maintenance, and testing easier for developers. It’s great for building highly active and interactive web applications, but it is most popular for Single page applications. Latest Angular release cycle Source You may also like: Everything React: Tutorials for Beginners and Experts Alike. What Is React? Introduced by Facebook, React is an open source JavaScript library for building interactive, stateful, and reusable user interfaces (UI). It is good for rendering complex UI with high performances. It also works with the basic fundamental of virtual Document Object Model (DOM) to offer a highly stable web application. React Native What Is Vue? Vue is a progressive JavaScript framework for building user interfaces. Vue is designed from the ground up to be incrementally adoptable. It comes with various optional tools for building user interfaces. Vue has a high capability of backing sophisticated Single-Page Applications when used in combination with modern tooling and supporting libraries. Popularity Well, if you see the analytics snapshot of Google trends, Angular was very popular until 2016, but from 2017 on, searches for React are steadily growing. Popularity by Google search traffic The Stackoverflow also shows the popularity of tags. Between “AngularJS,” “ReactJS,” and “VueJS” and popularity of React is clear. Popularity by Stack Overflow searches With every new update, React, Angular, and Vue come with new features that further offer reliability and stability to the web apps. Difference Between Angular, React, and Vue Differences between Angular, React, and Vue Benefits of AngularJS Web applications built on Angular run in any browser environment, regardless of the platform. Two-way, or bidirectional data binding, ensure that data change in the model will reflect in the view immediately, and when data in the view changes, the model is also updated. Two-way data binding The pre-built material design components help in building a highly interactive and easily navigable UI for your mobile/web app. The Angular Command Line Interface ensures easy updates of components from third-party which reduces the time to create apps and deploy the same. Benefits of React Virtual DOM helps React developers an easily render any changes in the application without affecting the other parts of the interface. React allows users to reuse components. This makes app development easier and more efficient. React uses Redux, which simplifies storing and managing component states in large applications. Unidirectional data binding makes code stable and supports future development as the data flow is directed towards one direction. Benefits of Vue One of the most significant benefits of Vue is its small size. It comes with detailed documentation. It allows developers to write a template in an HTML file, JavaScript file, and pure JavaScript file, using virtual Node. Its MVVM architecture makes it quite easy to handle HTML blocks. Finding the Right Framework for You Performance Performance is the most important aspect of a frontend application. HTML requires much attention from the developers. Both React and Angular take completely different approaches to update HTML that in turn affect the performance of an application. However, considering the direct changes in DOM in the browser, Angular is best suited for Single-page applications, where the content is updated occasionally. On the other hand, React can be selected for applications of any size, which needs content update regularly (for example Instagram). While talking about Vue.js performance, its core library is focused on the view layer only and is easy to pick up & integrate with other libraries or existing applications. Vue.js also comes with virtual DOM delivering high performance and memory allocation. However, these three frameworks are comparatively faster than other JavaScript frameworks. Speed of Development Though modification is easy with both React and Angular, the speed of your application depends on the number of libraries with the functionalities that are available to the developers. React’s architecture is easier to scale than Angular, but developing a web app in Angular is faster than React. For rendering a relatively complex UI with some user interaction, all three frameworks are a great choice. But, if you are looking for something that you can add to your app instantly, Vue is an excellent choice. Vue makes it easy to go from prototype to product. Application Size Angular holds all the necessary parts of a Minimum Viable Product to produce a fully functional Single-page application. If you want to regulate the size of your app and keep it small and compact, then Angular is the best choice. On the other hand, React is a great choice for applications that you desire to expand in the future across multiple operating systems. Vue's core library is created to be focused and flexible. As a result, Vue is great for applications of any size: single-file components, highly modular component interface, platform options with Vue CLI3, etc. So, if you are using it for a moderately complex single page or larger-scale app that includes navigation between multiple pages, it will work well. Some popular examples of these JS frameworks Conclusion While React gives you flexibility and simplicity, Angular is a comprehensive framework. But that doesn’t help a lot when developers don’t need most of the features that Angular provides. Due to Reactjs’s implementation with a virtual DOM, it guarantees better performances than Angular. Being a progressive framework, Vue can be combined into an existing project. It comes with a vast set of tools and companion libraries that allow the framework to respond to the complex needs of enterprise-grade applications. Also, with Vue CLI 3 and Vue UI, it is great for quickly delivering MVPs. Vue is also a cost-effective solution for small and medium applications. Further Reading
0 notes
Text
Full Stack Roadmap 2019
Becoming a full stack web developer seems an intimidating task, especially if you are completely new to the field of coding. As a beginner, you might think that you have a whole lot to learn within a short span of time. The languages, frameworks, libraries and databases along with everything else required is a whole long list of tools of full stack web development. If you start attempting to learn everything at the same time is setting yourself up to FAIL spectacularly. The easiest way to begin any work is to strategize with a road map. A road map is the best way to kick start your attempt to become a full stack web developer.

Tackle each layer one by one. Your objective should be to learn the bare minimum skill set so that you can start experimenting and honing your learned skills. Once you have mastered the basics, you can go ahead and learn full stack technologies which will give you an edge over other people. Follow a structured path and equip yourself steadily rather than trying to learn all over the web development spectrum.
This road map has multiple sections and is the go-to guide for organizing and selecting technologies to learn. The article mainly benefits the noobs but is also useful to the professional coders looking to become a full stack web developer. If you already have knowledge of some of the technologies we are going to talk about here, skip to the sections that will be useful to you. Feel free to customize this road map to suit your needs.
Front end technologies roadmap for a full stack web developer

You can start by learning the technologies required for the presentation or the front end layer. Follow this roadmap strategy if you wish to master front end development requisites. There are again the must learn, should learn and the value additions.
Basic languages
HTML- the HyperText Markup Language is the most basic and must know for any website you are contriving. You define and structure the content of a website.
CSS- this is used for styling websites and adding layouts, fonts and colours.
SQL- Structured Query Language, this is a basic language that is used for database management.
Front-end frameworks
BootStrap- An open-source toolkit for developing responsive, mobile first projects. Uses HTML,CSS and JavaScript. It helps design the website faster and easier. It has design templates for forms, buttons, tables, navigation etc., It also supports JavaScript plugins.
AngularJS- This a structural framework for dynamic web apps. The JavaScript-based open source web framework is maintained by Google and a community of corporations and individuals. They address challenges in a single-page application. It allows usage of HTML as the template language. It data-binding and dependency reduce the amount of coding required substantially.
ReactJS- A JavaScript library maintained by Facebook and a group of companies as well as individual developers. React is optimal for fetching fast-changing data that needs to be recorded. It is used for building user interfaces for single page applications. It allows users to create reusable UI components.
VueJS-This is yet another open-source JavaScript framework for single page applications and UIs.It is very compact in size and high on performance. The best option for new coders, it offers hand-picked the choicest features of other frameworks like Angular and React. It is known as the most approachable framework today.
Other programming languages required by a full stack developer:

You need to be proficient in multiple programming languages as most of the core processes for any business have to be written in them. It is not possible to master all of them in a short time, so we have a list of languages for you to begin with.
JavaScript- It is a just-in-time compiled programming language. It helps in adding dynamic features to your website is the predominant usage of JavaScript. This is used for both front end and back end operations. The JavaScript basics are easy to learn. Many of the front-end as well as back-end frameworks, like NodeJS and AngularJS, use JavaScript. It is widely used for aplication like chatbots using full stack technology.
TypeScript- Developed and maintained by Microsoft for development of large applications. A prerequisite if you want to learn Angular, this has recently become very popular. This is an addition to JavaScript and is always used along with JavaScript for features like type checking.
Python- This is a high-level, general-purpose language. It can be used on a server to create web applications, mathematics and server scripting. It connects to databases to read and manipulate files. It was designed for readability and runs on an interpreter system. It can also be used in a procedural, object-oriented or functional way.
Ruby- A dynamic, open source language, it is easy to learn and code. It focuses on productivity and simplicity.it can be used for web applications, servers, system utilities, backups and database works.
PHP- The most popular scripting language, it can be embedded into HTML. PHP scripts can only be interpreted on a server where PHP is installed. It is used to collect form data, send or receive cookies amongst other functions.
Back end technologies roadmap for a full stack web developer.
Developers need a back end framework so that an application can be created. It is the script-side of a dynamic application. A lot of options are available for back end frameworks.
Express-Express.js is a framework and is used as a web application for Node.js. It is a module of the NodeJS. It can be used for apps that are based on servers that will listen for connection requests from clients. It can be used for single-page, multi-page, and hybrid web applications. It is fast, easy to use and assertive.
NodeJS-This is an open-source, cross-platform in nature, that is runs across various platforms. it is a JavaScript runtime environment that executes JavaScript outside a browser.
Django- This is a high-level Python web framework that follows model-template-view architecture. It is used to simplify the creation of complex, database-driven websites. It is fast and promotes a clean design.
Ruby on Rails- This is a server-side web application framework based on the Ruby language. It provides default structures for databases, web services and web pages. It uses model-view-controller architecture. This is comparatively hard to learn as you have to learn multiple and independent concepts.
Database systems roadmap.
In today's scenario, there are tons of databases. Each company develops its own databases according to their requirements.
The objective of this roadmap is to learn and become a database administrator.
MySQL, SQLite, Postgres- These are Relational Database management system, and the data is stored in table-like schemes. This is good to store business data. These use SQL
MongoDB, Cassandra, Apache storm, Sphinx- These are the NoSQL databases. Their only commonality is that they do not use a relational database scheme. This type of database covers a wide range of technologies and can be used to find key-value DB, graph DBs, streaming DBs etc.,
VoltDB, MemSQL- These are a new kind of database, the NewSQL. They follow the relational scheme but instead of disks, they use memory. the advantage is that they outperform the traditional RDBMS but the limited amount of memory available is definitely a downside to this type of database.
Recommended additional skills for a full stack web developer.
Git- The most popular distributed version control system. It is fast and efficient. It has the capacity to handle small to very large projects. It is used to coordinate between programmers as well as track any changes made to any code stored in its repository. Check out the git basics before getting started. GitHub is the most widely used code repository and thus a must learn for an aspiring coder.
Machine Learning- A subset of AI, it is a top trending topic in 2018, machine learning is now being incorporated into various industries. It has entered the web development field as well. This provides the ability to learn and improve without being explicitly programmed. This is a good-to-learn skill for a full stack web developer.
SSH- The secure shell protocol is used to operate network services securely over an unsecured network. The SSH provides a secured remote login from one computer to another. It ensures the privacy and integrity of the data.
HTTP/HTTPS-HyperText Transfer Protocol (HTTP) is the protocol used by the world wide web. it defines how messages are transmitted, the actions taken by the Web servers and browsers when responding to commands. HTTPS is the secured version of HTTP. Here, the communication protocol is encrypted using Transport Layer Security. It ensures protection against man-in-the-middle attacks and eavesdropping.
Linux command-line basic-Having this skill is not a must but one you should definitely have. It is not necessarily easy or hard to learn and saves a lot of time. The job that otherwise consumes a lot of time when done manually, like organizing items on the back-end will be over very fast.
Data structures and algorithms-Data structures are just ways to store the data while an algorithm is a generic approach methodology to solve a problem or requirement. Every programmer needs to be familiar with these concepts. By themselves, they are not a core skill, but the more intuitive you are about these, the easier it is to solve issues or add requirements. The impacts are felt in efficiency, scalability and performance of an application. As a full stack developer, this will help immensely.
Character encoding-This is a must learn if you are planning on developing global applications. If there is no proper character encoding, you might end up with unreadable text on display, the data will not be properly processed and your content may not be found by the search engines.
Use this road map and start by equipping yourself on these basic to intermediate skills required to become a successful full stack developer. Keep adding to your skills to give more value- addition to your role and by extension to your organization.
#web development#webdesign#full stack web development#ui development#uxdeveloper#html5#css#learn react#angular#php#python
0 notes
Text
Codelobster IDE - Free PHP, HTML, CSS, JavaScript editor - Review

If you are a seasoned developer, you most likely already know what an IDE is: however, for the sake of those readers who never touched a single line of code, we'll briefly summarize the concept. In computing, IDE is an acronym for Integrated Development Environment: in a nutshell, a software application that provides comprehensive facilities to computer programmers for software development. A standard IDE normally consists of three major elements: a source code editor, a build engine (or equivalent building automation tools), and a debugger. Most modern IDEs have also other cool features, such as intelligent code completion mechanisms (IntelliSense), shortcuts, syntax highlighting, and other cool add-ons to ease the overall experience of their developers. In this post we'll talk about one of the most interesting - yet underestimated - IDE released in the latest few years: Codelobster, a portable, multi-platform development environment made for PHP yet also supporting HTML, CSS and JavaScript languages. As developers, we went through a full test-drive - from installation to coding and, last but not least, building.
Multi-Platform approach
A good IDE has to be multi-platform and Codelobster makes no exceptions: both the free and professional editions come with native Windows, MacOS and Linux binaries: for this review we used the screenshots of the Windows port, however we also tried the Linux build which offered the same look and feel and overall experience.
Installing
Installing Codelobester is just as easy as any other software: you just have to visit the official download page from the Codelobster website and pick the version you want to try: Codelobster IDE - the free edition, with all the basic features active and no expiration time. Codelobster Professional - the shareware edition with additional features, plugins and add-ons. We'll compare the two edition's features later on. For the purpose of this test-drive, we just picked up the Codelobster IDE free edition 1.5.1, released on February 28, 2019, which was the latest version at the time of writing. The installation wizard is pretty standard, you'll just have to accept the End-User Agreement and hit Next a couple times. You'll also get the chance to choose which File Types to open with Codelobster (the suggested extensions are .php, .js, .php5, .inc, .xml, .xsl and .module), the color scheme to use and the components/features you want to use:

The setup wizard will also install the Microsoft Visual C++ 2015 Redristibutable package, unless it's already present on the system.
Main Window
Once the installed ends, the wizard will give you the chance to immediately run Codelobster. After you hit YES, the main window of the IDE will appear in all its glory:

As we can see, the main GUI is splitted in multiple sections. In the topmost section there's a standard Menu, followed by some customizable Toolbars. In the left panel we have a standard File Explorer, which can be used to visually browse the code files to open and their folders: such files can be found within the local FileSystem or custom FTP/SFTP servers that we can connect to. The Explorer window can be switched out for a series of other project-related panels (Structure, Class View, Project, SQL) using the tabs placed just below the panel. The center panel is where the Text Editor will open, as soon as a file has been selected (or created with the File > New menu option). In the right panel we can see a series of other useful tabs (Index, Dynamic Help, Properties, Map) which we can use to access contextual info about our project. In the bottom panel we have the "standard" ouput, search result and debug/call stack windows, as expected by any modern IDE GUI. The overall look and feel loosely reminds us the most recent installments of Visual Studio / Visual Studio Code, which is indeed a good thing! This could be great to attract the typical ASP.NET developer, who could have issues in using Visual Studio or Visual Studio Code when working with PHP as both the Microsoft IDEs don't natively support that language.
Text Editor
One of the most defining things of any IDE undoubtely is the Text Editor, which is where most of the developer work takes place. Codelobster's text editor is natively packed out with the following features: Powerful Syntax Highlighting: it highlights the syntax and gives hints for tags, functions and their parameters, even with files that contain mixed content (HTML + PHP + CSS). Auto-Completion function, which greatly speeds up the programmer's work and minimizes the chances of coding errors and typos. Highly Customizable interface with several visual styles. Portable mode - you'll be able to bring your IDE everywhere using any USB pendrive. File comparison tool (WinMerge-alike) Web Browser Preview (with any browser) File Explorer with complete file and folder editing capabilities (new, edit, delete) Code formatting tools (professional version only) Advanced search & replace features with full special characters and Regular Expressions support. Search & replace in files and folders, even recursively. Auto indent Visible spaces, paragraphs and tabs. Extended text selection and deletion Full Unicode support and multiple encoding conversions Line sorting with a wide range of options Bookmarks SQL management tools (professional version only) Version Control integration with SVN, Git and Mercurial HG support (professional version only) 1-Click Contextual Help for all supported programming languages: the help database uses the most up to date documentation for each supported language by downloading it from official sites.

Debugger
The built-in PHP debugger allows you to execute PHP scripts step by step, moving through the lines of code using the standard F5 (debug) - F10 (step over) - F11 (step into) function keys: the GUI allows the developer to assign breakpoints and monitor the values of all variables using the Locals and Watch windows (bottom panel) during the execution of the script. We tested the debugger, together with the text editor, against one of our biggest PHP project - the Myst.it website, which features more than 150.000 lines of PHP code splitted between ~ 20.000 files. The debugger worked really well, giving our best developers a nice experience: we're talking about experienced guys used to work with Visual Studio and PHP Tools, therefore they know what a good GUI and development IDE actually are... however, they were really happy and positively surprised by the Codelobster environment and had no issue in working with it.
Version Control
The professional version of CodeLobster IDE supports the following Version Control Systems: Git SVN (PHP Edition only) Mercurial (PHP Edition only) We tried to configure Git without significative issues. The first thing to do is to configure the Git executable path:

Right after that, the Git commands features will appear on the File Explorer contextual menu, accessible by right-clicking on any file or folder:

Most of the SCM preferences can be configured in the Tools > Preferences > IDE > HotKeys > VCS:

Additional Features
Here are some useful function which got our attention, as they cannot be found in most IDEs: Pair highlighting of parentheses and tags : the text editor will instantly notice (and warn you) if there are missing opening or closing parentheses/tags. Highlighting and collapsing of blocks, selections and code snippets: another great feature of Visual Studio, which we gladly found here as well. Code Validator for PHP, HTML and CSS which identifies syntax errors in expressions, declarations and cycles (PHP), as well as names/attribute errors (HTML, CSS): sadly, this feature is now available only on the professional version. Full Internalization Support, with 17 user interface languages including: English, German, Russian, Spanish, French, Italian and others.
Supported Systems
The program works on the following operation systems: Windows 7, Windows 8, Windows 10, Mac OS, Linux, Ubuntu, Fedora, Debian.
Compare Editions
Here's the full features breakdown of the Free Version compared to the Professional Version, taken from the official site. Abilities Free Version Professional version HTML editor V V HTML code inspector V V CSS editor V V JavaScript editor V V PHP editor V V PHP debugger V V Advanced features Free Version Professional version FTP/SFTP support - V SQL manager - V Version Control Systems - V Code validator - V Code snippets - V Code formatting - V SASS and LESS - V Split Window, Compare - V Node.js support - V Other: sorting, converting - V Additional plug-ins Free Version Professional version

AngularJS plug-in - V

BackboneJS plug-in - V

Bootstrap plug-in - V

CakePHP plug-in - V

CodeIgniter plug-in - V

Drupal plug-in - V

EmberJS plug-in - V

JQuery plug-in - V

Joomla plug-in - V

Laravel plug-in - V

Magento plug-in - V

MeteorJS plug-in - V

Phalcon plug-in - V

Smarty plug-in - V


Symfony+Twig plug-ins - V

VueJS plug-in - V

WordPress plug-in - V

Yii plug-in - V
Conclusion
Codelobster IDE really impressed us for its nice set of features, the user-friendly GUI and the sleek window design, which is clearly inspired from other top-grade IDEs. Given all this, we can only recommend it: the free edition itself is good enough for small-to-medium PHP/HTML projects, while the professional version might be a good choice if you need the advanced features or the language-specific plugins. Read the full article
0 notes
Text
How To Do More With Vue Router
About The Author
Front-end developer based in Lagos, Nigeria. He enjoys converting designs into code and building things for the web. More about Timi …
Vue Router is the official router for Vue that is mostly used for creating multiple pages living on different routes (/home, /profile) in your application but has some features that some people do not know about. In this tutorial, we’re going to learn about some amazing features the Vue Router has and how we can make use of them in our app.
Vue Router is the official router for Vue. It deeply integrates with Vue core to make building Single Page Applications with Vue a breeze. Some of its popular features include:
Dynamic Route matching.
Named Routes.
Named views.
Programmatic navigation.
These features are heavily used when developing with Vue and this is because they are part of the basics you need to understand to efficiently use the Router. But the Vue Router has some very useful features that can be very helpful in development and in this article, we’re going to take a look at them.
For the purpose of this tutorial, we’re going to be building a simple application that would help in understanding some of the concepts covered in this article. You can find all the code used in this article on GitHub. If you are interested in doing more with the router, you’ll benefit from this tutorial.
Note: This article requires a basic understanding of Vuejs and Vue Router.
Scroll Behaviour
This is the behavior that is observed when navigating from one page to another. The default behavior of Vue router is only noticeable after scrolling to a position that isn’t the top of the page. This is because, by default, the scroll position when navigating away from a page is maintained on a new page. What this means is, if you click on a link that leads to a new route ( i.e from /home to /about) in a position that is let’s say close to the footer of the current page, the new page would start from that same position instead of starting from the top of the page.
I have created a Vue application using the Vue CLI command vue create vue-router-demo, I also selected Vue Router as part of the options while setting up my app because we will be using it throughout this tutorial.
We will also need to make API calls to JSONPlaceholder, to illustrate some of the concepts using Vue router. For this, we will be using Axios. To install Axios:
# using YARN yarn add axios # or NPM npm install axios
After installing Axios, we can update our Home.vue to look like this:
<template> <div class="home"> <p v-if="loading" class="post--empty">Loading....</p> <ul v-else> <li v-for="post in posts" :key="post.id"> <router-link :to="{ name: 'Post', params: { id: post.id, post: post } }" > </router-link> </li> </ul> </div> </template> <script> // @ is an alias to /src import axios from "axios"; export default { name: "Home", data() { return { posts: null, loading: false, }; }, mounted() { this.getPosts(); }, methods: { async getPosts() { this.loading = true; try { let res = await axios({ url: "https://jsonplaceholder.typicode.com/posts", method: "GET", }); let posts = res.data; this.posts = posts; this.loading = false; } catch (error) { this.loading = false; } }, }, }; </script> <style> .home { padding: 0 30px; max-width: 800px; margin: 0 auto; } @keyframes blink { from { opacity: 1; } to { opacity: 0; } } .post--empty { height: 250px; margin-top: 30px; animation: blink 0.8s ease-in-out infinite alternate both; display: flex; align-items: center; justify-content: center; font-family: "Lobster", cursive; } ul { text-align: left; } a { color: inherit; } </style>
Here, we’re importing axios and using it to fetch a list of posts from JSONPlaceholder in the getPost method. We’re also assigning the array of posts gotten from this API call to posts from the data function from this page, this is because we want to use this data in our template section. After this, we loop through the array of posts in a list ( <ul></ul>) and also attach a link to each post using id of each post as the link param (this is called dynamic route matching). We have also added a paragraph that would serve as a loading indicator.
At this point, here’s what this page looks like:
List of posts from JSONPlaceholder. (Large preview)
The next thing would be to create the page that will display the info for each post and create a link for it in the router of our app.
Post.vue
<template> <div class="about"> <div class="post"> <h1></h1> <p v-html="post.body"></p> </div> <p>End of page</p> </div> </template> <script> export default { name: "Post", props: ["id", "post"], }; </script> <style> .post { padding: 0 30px; height: 110vh; margin: 0 auto; } p { margin: 10px 0; } </style>
Here, we make use of passing props to route components to define id and post which we’re passing from the previous page in the form of route params. This is a neat way of accessing route params and query as opposed to doing this:
Post.vue
<script> export default { name: "Post", data() { return { post: this.$route.post, }; }, }; </script>
We then make use of this post value in the template section to display post title and body. Finally, we add a paragraph to the end of the page. We also add styling for the page in the styling section, which includes defining a height of 110vh. This is because we need the page to have a height that is more than the default height 100vh so we can observe the default scroll behavior of the router.
The next thing would be to create a route that would display each post. Update your index.js file in the /router folder ( or router.js file) to look like this:
import Vue from 'vue' import VueRouter from 'vue-router' import Home from '../views/Home.vue' Vue.use(VueRouter) const routes = [{ path: '/', name: 'Home', component: Home }, { path: '/:id', name: 'Post', props: true, component: () => import ( /* webpackChunkName: "post" */ '../views/Post.vue') } ] const router = new VueRouter({ mode: 'history', base: process.env.BASE_URL, routes }) export default router
Here, we define a new route that makes use of id that would be passed to this route from the homepage. We’re also decoupling the router param (in this case, post and id) using props.
The top of this page looks like this:
Top of post page. (Large preview)
If we click on any of the posts on the home page that does not require us to scroll, we would not notice any weird behavior scroll wise, but if we scroll down a little and click on the last post in this list, this should be the position the /post page would land on:
Default scroll position. (Large preview)
This is bad for UX and this is because the user isn’t expecting this behavior and they might need to start from the top of a page to get the full information on the said page.
Vue Router comes with the option to customize this behavior to individual preferences, an example would be saving scroll position of a previous route when trying to move back/forward. To fix the current issue in our app, we would update our router file to include the following:
import Vue from 'vue' import VueRouter from 'vue-router' import Home from '../views/Home.vue' Vue.use(VueRouter) const routes = [...] const router = new VueRouter({ mode: 'history', base: process.env.BASE_URL, routes, //add this scrollBehavior(to, from, savedPosition) { return { x: 0, y: 0 } } }) export default router
Now, if we scroll to the bottom of the home page and click on the last post, you should notice that it now starts from the top of the page.
New scroll position. (Large preview)
Data Fetching
When fetching data from an API, we either call the method in the mounted or created lifecycle hook, these are by far the most popular methods people use when developing in Vue. Vue router comes with another method in which we make this API request before navigating to a new route by making this request using the beforeRouterEnter guard in such a component. Here is an example of how to fetch data from JSONPlaceholder using this method:
beforeRouteEnter(to, from, next) { axios .get("https://jsonplaceholder.typicode.com/posts") .then((res) => { next((vm) => vm.fetchData(res)); }) .catch((err) => { console.error(err); }); }, methods: { fetchData(res) { let post = res.data; this.posts = post; }, },
Here, we’re fetching a list of posts from an API using Axios and when this request is complete, we call next. At this point in the lifecycle of this component, this is not available because the component has not been created but we have access to vm which gives us access to the component’s instance. Inside this function, we pass the response from the API request res to our method fetchData which we’ve created to assign the value from this response to post so we can use it in our template. Now, if we refresh our / route, we would notice that the data gets updated very fast and at no time is there a blank or page ( provided the request is successful).
Transitions
Vue comes with a <transition></ transition> component that enables easy implementation of CSS transitions and animations. This feature can be extended to work for navigation between routes in Vue. Here’s an example:
<template> <div id="app"> <div id="nav"> <router-link to="/">Home</router-link> </div> <transition name="slide-fade"> <router-view /> </transition> </div> </template> <style> #app { font-family: Avenir, Helvetica, Arial, sans-serif; -webkit-font-smoothing: antialiased; -moz-osx-font-smoothing: grayscale; text-align: center; color: #2c3e50; } #nav { padding: 30px; } #nav a { font-weight: bold; color: #2c3e50; } #nav a.router-link-exact-active { color: #42b983; } .slide-fade-enter-active { transition: transform 0.3s cubic-bezier(1, 0.5, 0.8, 1), color 0.5s cubic-bezier(1, 0.5, 0.8, 1); } .slide-fade-leave-active { transition: transform 1s cubic-bezier(1, 0.5, 0.8, 1), color 1s cubic-bezier(1, 0.5, 0.8, 1); } .slide-fade-enter { color: mediumblue; transform: translateY(20px); } .slide-fade-leave-to { transform: translateX(100px); color: cyan; } </style>
Here, we’re adding a transition with the name slide-fade to our application and wrapping it around all the route navigation that would take place in the app. We’re also adding a set of styles that control/define the way the transitions would work in our app. Without these rules, there would be no visible transition taking place. Now, if we try to navigate from the homepage to the individual posts, we would notice a sliding and fading transition taking place during the navigation process.
There are two types of route based transitions.
1. Per-route Transition
This type of transition is defined in the component that renders a route and so, it only affects the navigation to and from such a page. This gives us the ability to define a special transition for individual routes if we want. Here is an example of how to do that.
<template> // add a transition component with name and mode props <transition name="slide-fade" mode="in-out"> <div class="about"> <div class="post"> <h1></h1> <p v-html="post.body"></p> </div> <p>End of page</p> </div> </transition> </template> <script> export default { name: "Post", props: ["id", "post"], }; </script> <style> //... .slide-fade-enter-active { transition: transform 2s cubic-bezier(1, 0.5, 0.8, 1), opacity 2s ease-in; } .slide-fade-leave-active { transition: transform 2s cubic-bezier(1, 0.5, 0.8, 1), opacity 2s ease-out; } .slide-fade-enter { opacity: 1; transform: skewY(20deg); } .slide-fade-leave-to { transform: skewY(-45deg); opacity: 0.5; } </style>
If you try to navigate away from this page, we would notice the page gets skewed and fades for a duration of 2s as the navigation changes.
2. Route-Based Dynamic Transition
This is similar to the general method of adding transitions to all routes in your application but it has one major difference, that is, it accepts a dynamic transition name prop which gives you the ability to change the transition type any way you want. Let us create an example of how to do this.
We’re going to update our App.vue file with a dynamic name prop and configure it to choose a transition name depending on a value.
<template> <div id="app"> <div id="nav"> <router-link to="/">Home</router-link> </div> <transition :name="transitionName"> <router-view /> </transition> </div> </template> <script> export default { data() { return { transitionName: "slide-fade", }; }, watch: { $route(to, from, params) { const toParam = to.params && to.params.id ? to.params.id : 0; this.transitionName = toParam % 2 === 0 ? "slide-left" : "slide-fade"; }, }, }; </script> <style> /* add transition styles */ .slide-fade-enter-active { transition: transform 0.3s cubic-bezier(1, 0.5, 0.8, 1), color 0.5s cubic-bezier(1, 0.5, 0.8, 1); } .slide-fade-leave-active { transition: transform 1s cubic-bezier(1, 0.5, 0.8, 1), color 1s cubic-bezier(1, 0.5, 0.8, 1); } .slide-fade-enter { color: mediumblue; transform: translateY(20px); } .slide-fade-leave-to { transform: translateX(100px); color: cyan; } .slide-left-enter-active { transition: transform 0.3s cubic-bezier(1, 0.5, 0.8, 1), color 0.5s cubic-bezier(1, 0.5, 0.8, 1); } .slide-left-leave-active { transition: transform 1s cubic-bezier(1, 0.5, 0.8, 1), color 1s cubic-bezier(1, 0.5, 0.8, 1); } .slide-left-enter { color: mediumblue; transform: translateY(20px); } .slide-left-leave-to { transform: skewY(90deg); color: cyan; } </style>
Here, we’re adding a dynamic transition name which is defined in the script section of our app. We’re also watching the $route so that whenever it changes, we run the function that checks if the current route has a param of id otherwise, we give it a value of 0. We also determine the transition name based on the type of number the id is (i.e even or odd number). Now, if we navigate between the landing page and the different posts available, we would observe there are two types of transitions occurring as we navigate.
Meta Fields And Navigation Guards
Meta Fields
Meta fields help provide extra context to a certain route. An example of such context would be if a user needs to be authenticated to access such route or not. Here’s what this looks like:
import Vue from 'vue' import VueRouter from 'vue-router' import Home from '../views/Home.vue' Vue.use(VueRouter) const routes = [{ path: '/', name: 'Home', component: Home, // add meta to this route meta: { requiresAuth: true } }, ] const router = new VueRouter({ mode: 'history', base: process.env.BASE_URL, routes }) export default router
Here, we’ve added a meta property requiresAuth to the / route meaning we want users to be authenticated before they can access that route. Note that ‘requiresAuth’ is not a standard property, so you can choose any name you prefer. Whatever value you select at the end can be accessible in the $route object. This meta field at this point would not prevent unauthorized users from accessing that route, we need to hook it up to the Navigation guard.
Navigation Guard
Just as the name implies, the navigation guard helps protect and guard routes based on your preferences (i.e redirect to another page or preventing the navigation). This feature works together with the Route Meta Fields to effectively guard the routes of your application. There are 3 ways of adding router guard in our app:
1. In-component
Vue offers the option to configure your router guard for a particular route directly inside your components. Here’s an example in our Home.vue file:
<template> <div class="home"> <p v-if="loading" class="post--empty">Loading....</p> <ol v-else> <!-- add this text to your template --> <p v-if="guest">Hi Guest</p> <li v-for="post in posts" :key="post.id"> <router-link :to="{ name: 'Post', params: { id: post.id, post: post } }" > </router-link> </li> </ol> </div> </template> <script> // @ is an alias to /src import axios from "axios"; export default { name: "Home", data() { return { posts: null, // add this property guest: false, loading: false, }; }, // add this function beforeRouteEnter(to, from, next) { if (to.matched.some((record) => record.meta.requiresAuth)) { // this route requires auth, check if logged in // if not, display guest greeting. const loggedIn = JSON.parse(localStorage.getItem("loggedIn")); if (!loggedIn) { next((vm) => { vm.guest = true; }); } else { next(); } } else { next(); // make sure to always call next()! } }, methods: {...} }; </script> <style>...</style>
Here, we’re adding a paragraph that is only visible to unauthenticated users. We also add a property that controls the visibility of this text. Finally we have a router method beforeRouteEnter in which we also connect the router guard and check if the user is authenticated or not using a value that would be manually added later. We also have an if/else statement, and inside this statement, we change the value of guest depending on the authentication of the user.
And in your App.vue, add this lifecycle to the file.
export default { mounted() { localStorage.setItem("loggedIn", false); } };
So if you refresh your app, we should see the text we added in the Home.vue file.
Guest text visible. (Large preview)
2. Per-route
We can also add a router guard to our apps per-route in our router file as another property inside the specific route object. Here’s an example:
{ path: '/', name: 'Home', component: Home, // add meta to this route meta: { requiresAuth: true }, beforeEnter: (to, from, next) => { if (to.name !== 'Home') { console.log('Per-Route navigation guard ti wa online'); next() } else next() } }
Here, we add a router guard to the / route and we’re currently just logging a random text to the console but we can do a couple of things inside this guard. Now, each time you visit the home page, you would see this in your console:
Message printed in terminal. (Large preview)
3. Globally
We also have the option of creating a router guard that works globally for every part of the app (provided it meets the guard condition). This global guard is created in the router file just like the per-route guard but instead of defining it inside a specific route object, it is defined as a method of the router instance. For an example of how it works, we’re going to create a new file and route in our app and name it guest.vue, then add the following lines of code to the file.
<template> <div> <h1>Guest page</h1> <p>You're seeing this page because you are not logged in</p> </div> </template> <script> </script> <style></style>
Next, we create a /login route with this newly created page and add a meta property to other existing routes.
// create new route { path: '/login', name: 'login', component: () => import ( /* webpackChunkName: "auth" */ '../views/guest.vue') }, { path: '/:id', name: 'Post', props: true,a // add meta property meta: { requiresAuth: true }, component: () => import ( /* webpackChunkName: "post" */ '../views/Post.vue') }
The next thing would be to create the global navigation guard for all routes that require authentication and check the user’s authentication using localStorage (previously created). We would redirect users that have a loggedIn value of false to /login.
router.beforeEach((to, from, next) => { if (to.matched.some((record) => record.meta.requiresAuth)) { // this route requires auth, check if logged in // if not, display guest greeting. const loggedIn = JSON.parse(localStorage.getItem("loggedIn")); if (!loggedIn) { next({ path: '/login' }); } else { next(); } } else { next(); // make sure to always call next()! } })
So if you check your app in your browser, you would notice it is currently on this page:
Guest page. (Large preview)
If we try to navigate to any of the existing routes, we would automatically get redirected to this page no what we do and that means our router guard is effectively guarding those routes.
Conclusion
We can see that the Vue Router is a very powerful tool that can be used for more than just creating routes in your application. We have learned how to configure the scroll behavior of routes in our application, the different ways to add transitions to routes in our app, how to fetch data from an API before a component gets mounted, how to use meta property for our routes and the different ways to set up router guard.
Resources
Vue Router
CSS Transitions In Vuejs And Nuxtjs
(ks, ra, yk, il)
Website Design & SEO Delray Beach by DBL07.co
Delray Beach SEO
source http://www.scpie.org/how-to-do-more-with-vue-router/ source https://scpie.tumblr.com/post/628084272888184832
0 notes
Text
How To Do More With Vue Router
About The Author
Front-end developer based in Lagos, Nigeria. He enjoys converting designs into code and building things for the web. More about Timi …
Vue Router is the official router for Vue that is mostly used for creating multiple pages living on different routes (/home, /profile) in your application but has some features that some people do not know about. In this tutorial, we’re going to learn about some amazing features the Vue Router has and how we can make use of them in our app.
Vue Router is the official router for Vue. It deeply integrates with Vue core to make building Single Page Applications with Vue a breeze. Some of its popular features include:
Dynamic Route matching.
Named Routes.
Named views.
Programmatic navigation.
These features are heavily used when developing with Vue and this is because they are part of the basics you need to understand to efficiently use the Router. But the Vue Router has some very useful features that can be very helpful in development and in this article, we’re going to take a look at them.
For the purpose of this tutorial, we’re going to be building a simple application that would help in understanding some of the concepts covered in this article. You can find all the code used in this article on GitHub. If you are interested in doing more with the router, you’ll benefit from this tutorial.
Note: This article requires a basic understanding of Vuejs and Vue Router.
Scroll Behaviour
This is the behavior that is observed when navigating from one page to another. The default behavior of Vue router is only noticeable after scrolling to a position that isn’t the top of the page. This is because, by default, the scroll position when navigating away from a page is maintained on a new page. What this means is, if you click on a link that leads to a new route ( i.e from /home to /about) in a position that is let’s say close to the footer of the current page, the new page would start from that same position instead of starting from the top of the page.
I have created a Vue application using the Vue CLI command vue create vue-router-demo, I also selected Vue Router as part of the options while setting up my app because we will be using it throughout this tutorial.
We will also need to make API calls to JSONPlaceholder, to illustrate some of the concepts using Vue router. For this, we will be using Axios. To install Axios:
# using YARN yarn add axios # or NPM npm install axios
After installing Axios, we can update our Home.vue to look like this:
<template> <div class="home"> <p v-if="loading" class="post--empty">Loading....</p> <ul v-else> <li v-for="post in posts" :key="post.id"> <router-link :to="{ name: 'Post', params: { id: post.id, post: post } }" > </router-link> </li> </ul> </div> </template> <script> // @ is an alias to /src import axios from "axios"; export default { name: "Home", data() { return { posts: null, loading: false, }; }, mounted() { this.getPosts(); }, methods: { async getPosts() { this.loading = true; try { let res = await axios({ url: "https://jsonplaceholder.typicode.com/posts", method: "GET", }); let posts = res.data; this.posts = posts; this.loading = false; } catch (error) { this.loading = false; } }, }, }; </script> <style> .home { padding: 0 30px; max-width: 800px; margin: 0 auto; } @keyframes blink { from { opacity: 1; } to { opacity: 0; } } .post--empty { height: 250px; margin-top: 30px; animation: blink 0.8s ease-in-out infinite alternate both; display: flex; align-items: center; justify-content: center; font-family: "Lobster", cursive; } ul { text-align: left; } a { color: inherit; } </style>
Here, we’re importing axios and using it to fetch a list of posts from JSONPlaceholder in the getPost method. We’re also assigning the array of posts gotten from this API call to posts from the data function from this page, this is because we want to use this data in our template section. After this, we loop through the array of posts in a list ( <ul></ul>) and also attach a link to each post using id of each post as the link param (this is called dynamic route matching). We have also added a paragraph that would serve as a loading indicator.
At this point, here’s what this page looks like:
List of posts from JSONPlaceholder. (Large preview)
The next thing would be to create the page that will display the info for each post and create a link for it in the router of our app.
Post.vue
<template> <div class="about"> <div class="post"> <h1></h1> <p v-html="post.body"></p> </div> <p>End of page</p> </div> </template> <script> export default { name: "Post", props: ["id", "post"], }; </script> <style> .post { padding: 0 30px; height: 110vh; margin: 0 auto; } p { margin: 10px 0; } </style>
Here, we make use of passing props to route components to define id and post which we’re passing from the previous page in the form of route params. This is a neat way of accessing route params and query as opposed to doing this:
Post.vue
<script> export default { name: "Post", data() { return { post: this.$route.post, }; }, }; </script>
We then make use of this post value in the template section to display post title and body. Finally, we add a paragraph to the end of the page. We also add styling for the page in the styling section, which includes defining a height of 110vh. This is because we need the page to have a height that is more than the default height 100vh so we can observe the default scroll behavior of the router.
The next thing would be to create a route that would display each post. Update your index.js file in the /router folder ( or router.js file) to look like this:
import Vue from 'vue' import VueRouter from 'vue-router' import Home from '../views/Home.vue' Vue.use(VueRouter) const routes = [{ path: '/', name: 'Home', component: Home }, { path: '/:id', name: 'Post', props: true, component: () => import ( /* webpackChunkName: "post" */ '../views/Post.vue') } ] const router = new VueRouter({ mode: 'history', base: process.env.BASE_URL, routes }) export default router
Here, we define a new route that makes use of id that would be passed to this route from the homepage. We’re also decoupling the router param (in this case, post and id) using props.
The top of this page looks like this:
Top of post page. (Large preview)
If we click on any of the posts on the home page that does not require us to scroll, we would not notice any weird behavior scroll wise, but if we scroll down a little and click on the last post in this list, this should be the position the /post page would land on:
Default scroll position. (Large preview)
This is bad for UX and this is because the user isn’t expecting this behavior and they might need to start from the top of a page to get the full information on the said page.
Vue Router comes with the option to customize this behavior to individual preferences, an example would be saving scroll position of a previous route when trying to move back/forward. To fix the current issue in our app, we would update our router file to include the following:
import Vue from 'vue' import VueRouter from 'vue-router' import Home from '../views/Home.vue' Vue.use(VueRouter) const routes = [...] const router = new VueRouter({ mode: 'history', base: process.env.BASE_URL, routes, //add this scrollBehavior(to, from, savedPosition) { return { x: 0, y: 0 } } }) export default router
Now, if we scroll to the bottom of the home page and click on the last post, you should notice that it now starts from the top of the page.
New scroll position. (Large preview)
Data Fetching
When fetching data from an API, we either call the method in the mounted or created lifecycle hook, these are by far the most popular methods people use when developing in Vue. Vue router comes with another method in which we make this API request before navigating to a new route by making this request using the beforeRouterEnter guard in such a component. Here is an example of how to fetch data from JSONPlaceholder using this method:
beforeRouteEnter(to, from, next) { axios .get("https://jsonplaceholder.typicode.com/posts") .then((res) => { next((vm) => vm.fetchData(res)); }) .catch((err) => { console.error(err); }); }, methods: { fetchData(res) { let post = res.data; this.posts = post; }, },
Here, we’re fetching a list of posts from an API using Axios and when this request is complete, we call next. At this point in the lifecycle of this component, this is not available because the component has not been created but we have access to vm which gives us access to the component’s instance. Inside this function, we pass the response from the API request res to our method fetchData which we’ve created to assign the value from this response to post so we can use it in our template. Now, if we refresh our / route, we would notice that the data gets updated very fast and at no time is there a blank or page ( provided the request is successful).
Transitions
Vue comes with a <transition></ transition> component that enables easy implementation of CSS transitions and animations. This feature can be extended to work for navigation between routes in Vue. Here’s an example:
<template> <div id="app"> <div id="nav"> <router-link to="/">Home</router-link> </div> <transition name="slide-fade"> <router-view /> </transition> </div> </template> <style> #app { font-family: Avenir, Helvetica, Arial, sans-serif; -webkit-font-smoothing: antialiased; -moz-osx-font-smoothing: grayscale; text-align: center; color: #2c3e50; } #nav { padding: 30px; } #nav a { font-weight: bold; color: #2c3e50; } #nav a.router-link-exact-active { color: #42b983; } .slide-fade-enter-active { transition: transform 0.3s cubic-bezier(1, 0.5, 0.8, 1), color 0.5s cubic-bezier(1, 0.5, 0.8, 1); } .slide-fade-leave-active { transition: transform 1s cubic-bezier(1, 0.5, 0.8, 1), color 1s cubic-bezier(1, 0.5, 0.8, 1); } .slide-fade-enter { color: mediumblue; transform: translateY(20px); } .slide-fade-leave-to { transform: translateX(100px); color: cyan; } </style>
Here, we’re adding a transition with the name slide-fade to our application and wrapping it around all the route navigation that would take place in the app. We’re also adding a set of styles that control/define the way the transitions would work in our app. Without these rules, there would be no visible transition taking place. Now, if we try to navigate from the homepage to the individual posts, we would notice a sliding and fading transition taking place during the navigation process.
There are two types of route based transitions.
1. Per-route Transition
This type of transition is defined in the component that renders a route and so, it only affects the navigation to and from such a page. This gives us the ability to define a special transition for individual routes if we want. Here is an example of how to do that.
<template> // add a transition component with name and mode props <transition name="slide-fade" mode="in-out"> <div class="about"> <div class="post"> <h1></h1> <p v-html="post.body"></p> </div> <p>End of page</p> </div> </transition> </template> <script> export default { name: "Post", props: ["id", "post"], }; </script> <style> //... .slide-fade-enter-active { transition: transform 2s cubic-bezier(1, 0.5, 0.8, 1), opacity 2s ease-in; } .slide-fade-leave-active { transition: transform 2s cubic-bezier(1, 0.5, 0.8, 1), opacity 2s ease-out; } .slide-fade-enter { opacity: 1; transform: skewY(20deg); } .slide-fade-leave-to { transform: skewY(-45deg); opacity: 0.5; } </style>
If you try to navigate away from this page, we would notice the page gets skewed and fades for a duration of 2s as the navigation changes.
2. Route-Based Dynamic Transition
This is similar to the general method of adding transitions to all routes in your application but it has one major difference, that is, it accepts a dynamic transition name prop which gives you the ability to change the transition type any way you want. Let us create an example of how to do this.
We’re going to update our App.vue file with a dynamic name prop and configure it to choose a transition name depending on a value.
<template> <div id="app"> <div id="nav"> <router-link to="/">Home</router-link> </div> <transition :name="transitionName"> <router-view /> </transition> </div> </template> <script> export default { data() { return { transitionName: "slide-fade", }; }, watch: { $route(to, from, params) { const toParam = to.params && to.params.id ? to.params.id : 0; this.transitionName = toParam % 2 === 0 ? "slide-left" : "slide-fade"; }, }, }; </script> <style> /* add transition styles */ .slide-fade-enter-active { transition: transform 0.3s cubic-bezier(1, 0.5, 0.8, 1), color 0.5s cubic-bezier(1, 0.5, 0.8, 1); } .slide-fade-leave-active { transition: transform 1s cubic-bezier(1, 0.5, 0.8, 1), color 1s cubic-bezier(1, 0.5, 0.8, 1); } .slide-fade-enter { color: mediumblue; transform: translateY(20px); } .slide-fade-leave-to { transform: translateX(100px); color: cyan; } .slide-left-enter-active { transition: transform 0.3s cubic-bezier(1, 0.5, 0.8, 1), color 0.5s cubic-bezier(1, 0.5, 0.8, 1); } .slide-left-leave-active { transition: transform 1s cubic-bezier(1, 0.5, 0.8, 1), color 1s cubic-bezier(1, 0.5, 0.8, 1); } .slide-left-enter { color: mediumblue; transform: translateY(20px); } .slide-left-leave-to { transform: skewY(90deg); color: cyan; } </style>
Here, we’re adding a dynamic transition name which is defined in the script section of our app. We’re also watching the $route so that whenever it changes, we run the function that checks if the current route has a param of id otherwise, we give it a value of 0. We also determine the transition name based on the type of number the id is (i.e even or odd number). Now, if we navigate between the landing page and the different posts available, we would observe there are two types of transitions occurring as we navigate.
Meta Fields And Navigation Guards
Meta Fields
Meta fields help provide extra context to a certain route. An example of such context would be if a user needs to be authenticated to access such route or not. Here’s what this looks like:
import Vue from 'vue' import VueRouter from 'vue-router' import Home from '../views/Home.vue' Vue.use(VueRouter) const routes = [{ path: '/', name: 'Home', component: Home, // add meta to this route meta: { requiresAuth: true } }, ] const router = new VueRouter({ mode: 'history', base: process.env.BASE_URL, routes }) export default router
Here, we’ve added a meta property requiresAuth to the / route meaning we want users to be authenticated before they can access that route. Note that ‘requiresAuth’ is not a standard property, so you can choose any name you prefer. Whatever value you select at the end can be accessible in the $route object. This meta field at this point would not prevent unauthorized users from accessing that route, we need to hook it up to the Navigation guard.
Navigation Guard
Just as the name implies, the navigation guard helps protect and guard routes based on your preferences (i.e redirect to another page or preventing the navigation). This feature works together with the Route Meta Fields to effectively guard the routes of your application. There are 3 ways of adding router guard in our app:
1. In-component
Vue offers the option to configure your router guard for a particular route directly inside your components. Here’s an example in our Home.vue file:
<template> <div class="home"> <p v-if="loading" class="post--empty">Loading....</p> <ol v-else> <!-- add this text to your template --> <p v-if="guest">Hi Guest</p> <li v-for="post in posts" :key="post.id"> <router-link :to="{ name: 'Post', params: { id: post.id, post: post } }" > </router-link> </li> </ol> </div> </template> <script> // @ is an alias to /src import axios from "axios"; export default { name: "Home", data() { return { posts: null, // add this property guest: false, loading: false, }; }, // add this function beforeRouteEnter(to, from, next) { if (to.matched.some((record) => record.meta.requiresAuth)) { // this route requires auth, check if logged in // if not, display guest greeting. const loggedIn = JSON.parse(localStorage.getItem("loggedIn")); if (!loggedIn) { next((vm) => { vm.guest = true; }); } else { next(); } } else { next(); // make sure to always call next()! } }, methods: {...} }; </script> <style>...</style>
Here, we’re adding a paragraph that is only visible to unauthenticated users. We also add a property that controls the visibility of this text. Finally we have a router method beforeRouteEnter in which we also connect the router guard and check if the user is authenticated or not using a value that would be manually added later. We also have an if/else statement, and inside this statement, we change the value of guest depending on the authentication of the user.
And in your App.vue, add this lifecycle to the file.
export default { mounted() { localStorage.setItem("loggedIn", false); } };
So if you refresh your app, we should see the text we added in the Home.vue file.
Guest text visible. (Large preview)
2. Per-route
We can also add a router guard to our apps per-route in our router file as another property inside the specific route object. Here’s an example:
{ path: '/', name: 'Home', component: Home, // add meta to this route meta: { requiresAuth: true }, beforeEnter: (to, from, next) => { if (to.name !== 'Home') { console.log('Per-Route navigation guard ti wa online'); next() } else next() } }
Here, we add a router guard to the / route and we’re currently just logging a random text to the console but we can do a couple of things inside this guard. Now, each time you visit the home page, you would see this in your console:
Message printed in terminal. (Large preview)
3. Globally
We also have the option of creating a router guard that works globally for every part of the app (provided it meets the guard condition). This global guard is created in the router file just like the per-route guard but instead of defining it inside a specific route object, it is defined as a method of the router instance. For an example of how it works, we’re going to create a new file and route in our app and name it guest.vue, then add the following lines of code to the file.
<template> <div> <h1>Guest page</h1> <p>You're seeing this page because you are not logged in</p> </div> </template> <script> </script> <style></style>
Next, we create a /login route with this newly created page and add a meta property to other existing routes.
// create new route { path: '/login', name: 'login', component: () => import ( /* webpackChunkName: "auth" */ '../views/guest.vue') }, { path: '/:id', name: 'Post', props: true,a // add meta property meta: { requiresAuth: true }, component: () => import ( /* webpackChunkName: "post" */ '../views/Post.vue') }
The next thing would be to create the global navigation guard for all routes that require authentication and check the user’s authentication using localStorage (previously created). We would redirect users that have a loggedIn value of false to /login.
router.beforeEach((to, from, next) => { if (to.matched.some((record) => record.meta.requiresAuth)) { // this route requires auth, check if logged in // if not, display guest greeting. const loggedIn = JSON.parse(localStorage.getItem("loggedIn")); if (!loggedIn) { next({ path: '/login' }); } else { next(); } } else { next(); // make sure to always call next()! } })
So if you check your app in your browser, you would notice it is currently on this page:
Guest page. (Large preview)
If we try to navigate to any of the existing routes, we would automatically get redirected to this page no what we do and that means our router guard is effectively guarding those routes.
Conclusion
We can see that the Vue Router is a very powerful tool that can be used for more than just creating routes in your application. We have learned how to configure the scroll behavior of routes in our application, the different ways to add transitions to routes in our app, how to fetch data from an API before a component gets mounted, how to use meta property for our routes and the different ways to set up router guard.
Resources
Vue Router
CSS Transitions In Vuejs And Nuxtjs
(ks, ra, yk, il)
Website Design & SEO Delray Beach by DBL07.co
Delray Beach SEO
source http://www.scpie.org/how-to-do-more-with-vue-router/
0 notes
Text
How To Do More With Vue Router
About The Author
Front-end developer based in Lagos, Nigeria. He enjoys converting designs into code and building things for the web. More about Timi …
Vue Router is the official router for Vue that is mostly used for creating multiple pages living on different routes (/home, /profile) in your application but has some features that some people do not know about. In this tutorial, we’re going to learn about some amazing features the Vue Router has and how we can make use of them in our app.
Vue Router is the official router for Vue. It deeply integrates with Vue core to make building Single Page Applications with Vue a breeze. Some of its popular features include:
Dynamic Route matching.
Named Routes.
Named views.
Programmatic navigation.
These features are heavily used when developing with Vue and this is because they are part of the basics you need to understand to efficiently use the Router. But the Vue Router has some very useful features that can be very helpful in development and in this article, we’re going to take a look at them.
For the purpose of this tutorial, we’re going to be building a simple application that would help in understanding some of the concepts covered in this article. You can find all the code used in this article on GitHub. If you are interested in doing more with the router, you’ll benefit from this tutorial.
Note: This article requires a basic understanding of Vuejs and Vue Router.
Scroll Behaviour
This is the behavior that is observed when navigating from one page to another. The default behavior of Vue router is only noticeable after scrolling to a position that isn’t the top of the page. This is because, by default, the scroll position when navigating away from a page is maintained on a new page. What this means is, if you click on a link that leads to a new route ( i.e from /home to /about) in a position that is let’s say close to the footer of the current page, the new page would start from that same position instead of starting from the top of the page.
I have created a Vue application using the Vue CLI command vue create vue-router-demo, I also selected Vue Router as part of the options while setting up my app because we will be using it throughout this tutorial.
We will also need to make API calls to JSONPlaceholder, to illustrate some of the concepts using Vue router. For this, we will be using Axios. To install Axios:
# using YARN yarn add axios # or NPM npm install axios
After installing Axios, we can update our Home.vue to look like this:
<template> <div class="home"> <p v-if="loading" class="post--empty">Loading....</p> <ul v-else> <li v-for="post in posts" :key="post.id"> <router-link :to="{ name: 'Post', params: { id: post.id, post: post } }" > </router-link> </li> </ul> </div> </template> <script> // @ is an alias to /src import axios from "axios"; export default { name: "Home", data() { return { posts: null, loading: false, }; }, mounted() { this.getPosts(); }, methods: { async getPosts() { this.loading = true; try { let res = await axios({ url: "https://jsonplaceholder.typicode.com/posts", method: "GET", }); let posts = res.data; this.posts = posts; this.loading = false; } catch (error) { this.loading = false; } }, }, }; </script> <style> .home { padding: 0 30px; max-width: 800px; margin: 0 auto; } @keyframes blink { from { opacity: 1; } to { opacity: 0; } } .post--empty { height: 250px; margin-top: 30px; animation: blink 0.8s ease-in-out infinite alternate both; display: flex; align-items: center; justify-content: center; font-family: "Lobster", cursive; } ul { text-align: left; } a { color: inherit; } </style>
Here, we’re importing axios and using it to fetch a list of posts from JSONPlaceholder in the getPost method. We’re also assigning the array of posts gotten from this API call to posts from the data function from this page, this is because we want to use this data in our template section. After this, we loop through the array of posts in a list ( <ul></ul>) and also attach a link to each post using id of each post as the link param (this is called dynamic route matching). We have also added a paragraph that would serve as a loading indicator.
At this point, here’s what this page looks like:
List of posts from JSONPlaceholder. (Large preview)
The next thing would be to create the page that will display the info for each post and create a link for it in the router of our app.
Post.vue
<template> <div class="about"> <div class="post"> <h1></h1> <p v-html="post.body"></p> </div> <p>End of page</p> </div> </template> <script> export default { name: "Post", props: ["id", "post"], }; </script> <style> .post { padding: 0 30px; height: 110vh; margin: 0 auto; } p { margin: 10px 0; } </style>
Here, we make use of passing props to route components to define id and post which we’re passing from the previous page in the form of route params. This is a neat way of accessing route params and query as opposed to doing this:
Post.vue
<script> export default { name: "Post", data() { return { post: this.$route.post, }; }, }; </script>
We then make use of this post value in the template section to display post title and body. Finally, we add a paragraph to the end of the page. We also add styling for the page in the styling section, which includes defining a height of 110vh. This is because we need the page to have a height that is more than the default height 100vh so we can observe the default scroll behavior of the router.
The next thing would be to create a route that would display each post. Update your index.js file in the /router folder ( or router.js file) to look like this:
import Vue from 'vue' import VueRouter from 'vue-router' import Home from '../views/Home.vue' Vue.use(VueRouter) const routes = [{ path: '/', name: 'Home', component: Home }, { path: '/:id', name: 'Post', props: true, component: () => import ( /* webpackChunkName: "post" */ '../views/Post.vue') } ] const router = new VueRouter({ mode: 'history', base: process.env.BASE_URL, routes }) export default router
Here, we define a new route that makes use of id that would be passed to this route from the homepage. We’re also decoupling the router param (in this case, post and id) using props.
The top of this page looks like this:
Top of post page. (Large preview)
If we click on any of the posts on the home page that does not require us to scroll, we would not notice any weird behavior scroll wise, but if we scroll down a little and click on the last post in this list, this should be the position the /post page would land on:
Default scroll position. (Large preview)
This is bad for UX and this is because the user isn’t expecting this behavior and they might need to start from the top of a page to get the full information on the said page.
Vue Router comes with the option to customize this behavior to individual preferences, an example would be saving scroll position of a previous route when trying to move back/forward. To fix the current issue in our app, we would update our router file to include the following:
import Vue from 'vue' import VueRouter from 'vue-router' import Home from '../views/Home.vue' Vue.use(VueRouter) const routes = [...] const router = new VueRouter({ mode: 'history', base: process.env.BASE_URL, routes, //add this scrollBehavior(to, from, savedPosition) { return { x: 0, y: 0 } } }) export default router
Now, if we scroll to the bottom of the home page and click on the last post, you should notice that it now starts from the top of the page.
New scroll position. (Large preview)
Data Fetching
When fetching data from an API, we either call the method in the mounted or created lifecycle hook, these are by far the most popular methods people use when developing in Vue. Vue router comes with another method in which we make this API request before navigating to a new route by making this request using the beforeRouterEnter guard in such a component. Here is an example of how to fetch data from JSONPlaceholder using this method:
beforeRouteEnter(to, from, next) { axios .get("https://jsonplaceholder.typicode.com/posts") .then((res) => { next((vm) => vm.fetchData(res)); }) .catch((err) => { console.error(err); }); }, methods: { fetchData(res) { let post = res.data; this.posts = post; }, },
Here, we’re fetching a list of posts from an API using Axios and when this request is complete, we call next. At this point in the lifecycle of this component, this is not available because the component has not been created but we have access to vm which gives us access to the component’s instance. Inside this function, we pass the response from the API request res to our method fetchData which we’ve created to assign the value from this response to post so we can use it in our template. Now, if we refresh our / route, we would notice that the data gets updated very fast and at no time is there a blank or page ( provided the request is successful).
Transitions
Vue comes with a <transition></ transition> component that enables easy implementation of CSS transitions and animations. This feature can be extended to work for navigation between routes in Vue. Here’s an example:
<template> <div id="app"> <div id="nav"> <router-link to="/">Home</router-link> </div> <transition name="slide-fade"> <router-view /> </transition> </div> </template> <style> #app { font-family: Avenir, Helvetica, Arial, sans-serif; -webkit-font-smoothing: antialiased; -moz-osx-font-smoothing: grayscale; text-align: center; color: #2c3e50; } #nav { padding: 30px; } #nav a { font-weight: bold; color: #2c3e50; } #nav a.router-link-exact-active { color: #42b983; } .slide-fade-enter-active { transition: transform 0.3s cubic-bezier(1, 0.5, 0.8, 1), color 0.5s cubic-bezier(1, 0.5, 0.8, 1); } .slide-fade-leave-active { transition: transform 1s cubic-bezier(1, 0.5, 0.8, 1), color 1s cubic-bezier(1, 0.5, 0.8, 1); } .slide-fade-enter { color: mediumblue; transform: translateY(20px); } .slide-fade-leave-to { transform: translateX(100px); color: cyan; } </style>
Here, we’re adding a transition with the name slide-fade to our application and wrapping it around all the route navigation that would take place in the app. We’re also adding a set of styles that control/define the way the transitions would work in our app. Without these rules, there would be no visible transition taking place. Now, if we try to navigate from the homepage to the individual posts, we would notice a sliding and fading transition taking place during the navigation process.
There are two types of route based transitions.
1. Per-route Transition
This type of transition is defined in the component that renders a route and so, it only affects the navigation to and from such a page. This gives us the ability to define a special transition for individual routes if we want. Here is an example of how to do that.
<template> // add a transition component with name and mode props <transition name="slide-fade" mode="in-out"> <div class="about"> <div class="post"> <h1></h1> <p v-html="post.body"></p> </div> <p>End of page</p> </div> </transition> </template> <script> export default { name: "Post", props: ["id", "post"], }; </script> <style> //... .slide-fade-enter-active { transition: transform 2s cubic-bezier(1, 0.5, 0.8, 1), opacity 2s ease-in; } .slide-fade-leave-active { transition: transform 2s cubic-bezier(1, 0.5, 0.8, 1), opacity 2s ease-out; } .slide-fade-enter { opacity: 1; transform: skewY(20deg); } .slide-fade-leave-to { transform: skewY(-45deg); opacity: 0.5; } </style>
If you try to navigate away from this page, we would notice the page gets skewed and fades for a duration of 2s as the navigation changes.
2. Route-Based Dynamic Transition
This is similar to the general method of adding transitions to all routes in your application but it has one major difference, that is, it accepts a dynamic transition name prop which gives you the ability to change the transition type any way you want. Let us create an example of how to do this.
We’re going to update our App.vue file with a dynamic name prop and configure it to choose a transition name depending on a value.
<template> <div id="app"> <div id="nav"> <router-link to="/">Home</router-link> </div> <transition :name="transitionName"> <router-view /> </transition> </div> </template> <script> export default { data() { return { transitionName: "slide-fade", }; }, watch: { $route(to, from, params) { const toParam = to.params && to.params.id ? to.params.id : 0; this.transitionName = toParam % 2 === 0 ? "slide-left" : "slide-fade"; }, }, }; </script> <style> /* add transition styles */ .slide-fade-enter-active { transition: transform 0.3s cubic-bezier(1, 0.5, 0.8, 1), color 0.5s cubic-bezier(1, 0.5, 0.8, 1); } .slide-fade-leave-active { transition: transform 1s cubic-bezier(1, 0.5, 0.8, 1), color 1s cubic-bezier(1, 0.5, 0.8, 1); } .slide-fade-enter { color: mediumblue; transform: translateY(20px); } .slide-fade-leave-to { transform: translateX(100px); color: cyan; } .slide-left-enter-active { transition: transform 0.3s cubic-bezier(1, 0.5, 0.8, 1), color 0.5s cubic-bezier(1, 0.5, 0.8, 1); } .slide-left-leave-active { transition: transform 1s cubic-bezier(1, 0.5, 0.8, 1), color 1s cubic-bezier(1, 0.5, 0.8, 1); } .slide-left-enter { color: mediumblue; transform: translateY(20px); } .slide-left-leave-to { transform: skewY(90deg); color: cyan; } </style>
Here, we’re adding a dynamic transition name which is defined in the script section of our app. We’re also watching the $route so that whenever it changes, we run the function that checks if the current route has a param of id otherwise, we give it a value of 0. We also determine the transition name based on the type of number the id is (i.e even or odd number). Now, if we navigate between the landing page and the different posts available, we would observe there are two types of transitions occurring as we navigate.
Meta Fields And Navigation Guards
Meta Fields
Meta fields help provide extra context to a certain route. An example of such context would be if a user needs to be authenticated to access such route or not. Here’s what this looks like:
import Vue from 'vue' import VueRouter from 'vue-router' import Home from '../views/Home.vue' Vue.use(VueRouter) const routes = [{ path: '/', name: 'Home', component: Home, // add meta to this route meta: { requiresAuth: true } }, ] const router = new VueRouter({ mode: 'history', base: process.env.BASE_URL, routes }) export default router
Here, we’ve added a meta property requiresAuth to the / route meaning we want users to be authenticated before they can access that route. Note that ‘requiresAuth’ is not a standard property, so you can choose any name you prefer. Whatever value you select at the end can be accessible in the $route object. This meta field at this point would not prevent unauthorized users from accessing that route, we need to hook it up to the Navigation guard.
Navigation Guard
Just as the name implies, the navigation guard helps protect and guard routes based on your preferences (i.e redirect to another page or preventing the navigation). This feature works together with the Route Meta Fields to effectively guard the routes of your application. There are 3 ways of adding router guard in our app:
1. In-component
Vue offers the option to configure your router guard for a particular route directly inside your components. Here’s an example in our Home.vue file:
<template> <div class="home"> <p v-if="loading" class="post--empty">Loading....</p> <ol v-else> <!-- add this text to your template --> <p v-if="guest">Hi Guest</p> <li v-for="post in posts" :key="post.id"> <router-link :to="{ name: 'Post', params: { id: post.id, post: post } }" > </router-link> </li> </ol> </div> </template> <script> // @ is an alias to /src import axios from "axios"; export default { name: "Home", data() { return { posts: null, // add this property guest: false, loading: false, }; }, // add this function beforeRouteEnter(to, from, next) { if (to.matched.some((record) => record.meta.requiresAuth)) { // this route requires auth, check if logged in // if not, display guest greeting. const loggedIn = JSON.parse(localStorage.getItem("loggedIn")); if (!loggedIn) { next((vm) => { vm.guest = true; }); } else { next(); } } else { next(); // make sure to always call next()! } }, methods: {...} }; </script> <style>...</style>
Here, we’re adding a paragraph that is only visible to unauthenticated users. We also add a property that controls the visibility of this text. Finally we have a router method beforeRouteEnter in which we also connect the router guard and check if the user is authenticated or not using a value that would be manually added later. We also have an if/else statement, and inside this statement, we change the value of guest depending on the authentication of the user.
And in your App.vue, add this lifecycle to the file.
export default { mounted() { localStorage.setItem("loggedIn", false); } };
So if you refresh your app, we should see the text we added in the Home.vue file.
Guest text visible. (Large preview)
2. Per-route
We can also add a router guard to our apps per-route in our router file as another property inside the specific route object. Here’s an example:
{ path: '/', name: 'Home', component: Home, // add meta to this route meta: { requiresAuth: true }, beforeEnter: (to, from, next) => { if (to.name !== 'Home') { console.log('Per-Route navigation guard ti wa online'); next() } else next() } }
Here, we add a router guard to the / route and we’re currently just logging a random text to the console but we can do a couple of things inside this guard. Now, each time you visit the home page, you would see this in your console:
Message printed in terminal. (Large preview)
3. Globally
We also have the option of creating a router guard that works globally for every part of the app (provided it meets the guard condition). This global guard is created in the router file just like the per-route guard but instead of defining it inside a specific route object, it is defined as a method of the router instance. For an example of how it works, we’re going to create a new file and route in our app and name it guest.vue, then add the following lines of code to the file.
<template> <div> <h1>Guest page</h1> <p>You're seeing this page because you are not logged in</p> </div> </template> <script> </script> <style></style>
Next, we create a /login route with this newly created page and add a meta property to other existing routes.
// create new route { path: '/login', name: 'login', component: () => import ( /* webpackChunkName: "auth" */ '../views/guest.vue') }, { path: '/:id', name: 'Post', props: true,a // add meta property meta: { requiresAuth: true }, component: () => import ( /* webpackChunkName: "post" */ '../views/Post.vue') }
The next thing would be to create the global navigation guard for all routes that require authentication and check the user’s authentication using localStorage (previously created). We would redirect users that have a loggedIn value of false to /login.
router.beforeEach((to, from, next) => { if (to.matched.some((record) => record.meta.requiresAuth)) { // this route requires auth, check if logged in // if not, display guest greeting. const loggedIn = JSON.parse(localStorage.getItem("loggedIn")); if (!loggedIn) { next({ path: '/login' }); } else { next(); } } else { next(); // make sure to always call next()! } })
So if you check your app in your browser, you would notice it is currently on this page:
Guest page. (Large preview)
If we try to navigate to any of the existing routes, we would automatically get redirected to this page no what we do and that means our router guard is effectively guarding those routes.
Conclusion
We can see that the Vue Router is a very powerful tool that can be used for more than just creating routes in your application. We have learned how to configure the scroll behavior of routes in our application, the different ways to add transitions to routes in our app, how to fetch data from an API before a component gets mounted, how to use meta property for our routes and the different ways to set up router guard.
Resources
Vue Router
CSS Transitions In Vuejs And Nuxtjs
(ks, ra, yk, il)
Website Design & SEO Delray Beach by DBL07.co
Delray Beach SEO
source http://www.scpie.org/how-to-do-more-with-vue-router/ source https://scpie1.blogspot.com/2020/09/how-to-do-more-with-vue-router.html
0 notes
Text
Who is Full Stack web Developer and how it is Advantageous?
Are you a Backend developer? Do you code backend for the web applications in Java, or Dot net, or Python, or Nodejs? If yes, then pull up your socks, the front-end challenge is right in front of you. Companies now want you to do the front-end task as well. Yes, please prepare yourself for that. You can still be a frontend developer or a backend developer. Though, Full Stack developers are more in demand. In this article, we discuss this issue in deep. Further, we discuss topics like what a full stack developer is, prior knowledge required for a full stack developer, various skills required, what are the advantages if you are one such, and lastly will discuss the jobs and salary issue. So,let us begin our article. And you can contact us for your Full-stack Developer training. Naresh I
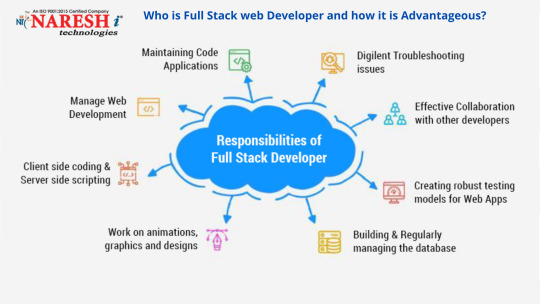
Technologies is the number one computer training institute in Hyderabad and among the top five computer training institutes in India. Contact us anytime for your Full stack web Development training
Who is a Full Stack Developer?
So, who is a full-stack developer? He is the one who can single-handedly complete the whole web development project. He looks after the back-end development work, as well as the front-end development work. The backend is the server, and the front end is the UI. Single-page applications like Angular, React and Vuejs is the modern-day UI. And now we have the UI/UX developed using AR/VR as well. Also, the traditional HTML5, Bootstrap, jQuery, MVC, and various such are part of the front-end development. Some of the above technologies like the last four are used in Backend as well. Anyways, Backend also requires a template. And you provide through the front-endtechnologies’ application. Previously, two different teams used to do the backend and frontend tasks. However, now both one person is conducting tasks. And companies now look for such technocrats in the majority.
Prerequisites for Becoming a Full Stack Developer
You need to be possessed experience in web development or web designing. A web developer can become a full stack developer, and so is a web designer. And, it is the 21st-century requirement. Both need to upgrade themselves to meet this challenge from the market. The demand in the Market is maximum for the Full-stack developer, and there are multiple stacks, that we discuss in the next section. Above all, you should be ready for very hard work. However, the payment will make you happy. Please be assured.
Skills for Full Stack developer
Loads of skills together make a Full-stack developer. Some of the skills required are as below:
Front-end:
HTML5, jQuery, Bootstrap, Material UI, Angular, React Vuejs, AR/VR, MVC, MVVM, and various JS versions.
Backend:
You need different combinations, like as below:
· Java, Spring Boot, Hibernate
· Dot net, C#, LINQ, Entity Framework, ADO.NET, WCF. Web services, Socket programming. Signal R, HTTP, HTTPS, RESTFUL API, and various other technologies in Dot net
· Dot net core version of all the above technologies
· PHP, and various MVC frameworks like Code Igniter, and various such.
· Nodejs, and various frameworks like Express
· Python and various frameworks
You should learn one out of all these backend technologies. And you should complement the backend knowledge with a matching front-end technology. We have various stacks. There is a Dot net Angular Stack, LAMP Stack, MEAN stack, MERN stack, and various such. You need to be proficient in one stack for Full stack designation. However, you need some more technical skills now. And, they are:
· We included entity framework, and let us also add to the list JDBC, Oracle, MSSQL, MYSQL, MongoDB, Document DB, DynamoDB, and various others. Concisely, you should know the structured, semi-structured as well as unstructured databases. And, in the current context, learn from the AWS, Azure, and GCP list, the database you find in your stack.
· Apart from these, you need advanced programming skills like how to make use of the APIs and various third-party tools related to your stack.
· You also need knowledge of the DevOps procedure, as no programmer or designer., and hence a full stack developer can withstand the challenge from the market without DevOps.
· And you need special skills related to version control and repository for sure. Each day you need to push or pull the code from the version control systems like GIT.
Advantages as a Full Stack Developer
There are various advantages you get as a Full-stack developer. They are:
· There is a huge demand for each stack. And you can be a full stack developer in any one stack.
· Pay Scale is the best in the market, and we will experience that in the next section.
· You always have a bright future if you become a full-stack developer in any one of the stacks.
Jobs and Salary related to Full Stack web Developer
Remember, the full-stack developer is one of the highest paying coding jobs, and it ranks fourth currently in the list after System engineer, IT security specialist, and Software Engineer. According to Glass door, the average annual salary of a Full stack developer in the US is around $88000 currently. In India, the average salary of a Full stack developer is around 575000 INR. And it can be as high as around 1195000 INR. Some companies pay even more based on the expertise and experience of the full stack developer.
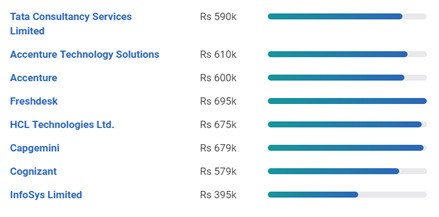
Hence, if you select Full stack development as your career, you have a bright present, as well as a bright future. And that brings us to the end of the article. Have a nice career! Remember, you can still exist as a backend developer or a front-end developer. However, the demand for Full Stack developers is increasing day by day, as there is less burden on the management hence.
Naresh I Technologies is the number one computer training institute in Hyderabad and among the top five computer training institutes in India. Contact us anytime for your Full-stack Developer training. You can also opt for Full-stack Developer online training, and from any part of the world. And a big package is waiting for you. And all is yours for a nominal fee affordable for all with any range of budget. Let us have a look at what you will get with this Full-stack Developer training package:
· You need to pay a nominal fee.
· You can choose any stack, as per your skills and interest.
· You have the option to select from online and classroom training.
· A chance to study at one of the best Full-stack Developer training institutes in India
· We provide Full-stack Developer training in Hyderabad and the USA, and no matter in which part of the world you are, you can contact us.
· Naresh I technologies cater to one of the best Full-stack Developer training in India.
· And a lot more is waiting for you.
Contact us anytime for your complete Full stack web Development online training.
0 notes
Link
I am an entrepreneur from Non-tech background (10+2 in non-science stream ), after running a successful marketing agency for about 5 years we decided to build a SaaS product in the same industry.After the initial ideation phase, the product looked complicated and hiring a developer to join us without fully understanding the tech infra or scope was becoming difficult.I started to explore the tech space and did research on how we could achieve the goal at hand, the more I explored the more I started to like these things.The crazy javascript front-end space with React, Vue Angular wars, the backend scene with Python, Node & Larvel or the databases like Mysql, postgresql, Mongo.Learning about Different APIs, each with their own implementation of how they worked, getting into Rest vs Web-sockets threads etc.It was so fascinating and a very different world from my earlier life which revolved around SEO, SEM, ROI, CPM, CPA, CPC Conversion rates, backlinks & traffic etc.Soon enough, I was spending 6-8 hrs a night to learn more and more and after about 2 months hacked together the first prototype which kinda worked on command line.Half of the code was lifted from GitHub and the other half from Stack-overflow, but somehow it worked :)With that, Now I was in a much better position to hire a full-time programmer and get the product (MVP) built and hired a new CTO.With him onboard, It took us about 2 months to build a presentable MVP, from there we went on to get to $25K MRR in next 6 months.We just recently closed a funding round as well from few of the top investors, if that counts.About the toolWhile the MVP was being built I was working on potential marketing lead magnets which could attract lots of potential customers to our website.Being in the industry for years I knew few of the pain points the industry had and decided to address them by building those tools.This tool allowed users to check if a given domain is available for registration or not, 20,000 domains at a time.Since the CTO was already occupied working on the product, I decided to build it myself and test my newly learned skills in real-world.Here is the technologies I selected for this -Front-end : Vuejs, Because it was relatively easier to learn than the other front-end frameworks. I could quickly pick a html template and convert it into a Vue project.Backend : Node-Js : Because It sounded easier to learn one language for front-end and backend both.Communication layer : Rest APII built it in few weeks and shared around in our circles for testing, people from the marketing community loved it and soon I had hit scaling issues.With few days of research & testing those issues were fixed.Later I replaced rest API with web-sockets for real-time results & Vuejs with Nuxt for Server-side rendering & SEO.So far It has been used by over 20,000 marketers to check 737 M domains (lots of them checks same domains multiple times).You can see the uses graph here -We now limit uses for non-logged in users and ask them to signup for a free account or free trial, a 7 email series then encourage them to use rest of the product line with a good success rate.My learning from this is :Even if you are a non-tech founder It's a lot easier to build a product or business when you spend time to learn the inner workings of how things works at a micro level.You will have so much more respect for your tech co-founder / CTO when you have a first hand experience of how frustrating fixing even a small bug is. Which ultimately leads to a far better working environment.You will have much better success hiring a CTO or a tech co-founder when you show them the work you have done, it instantly boosts your credibility & capabilities as a founder in a market filled with wannabe billionaires with an idea.Questions ?PS : For those who gets tech, I didn't go into much technical in the post, If you have specific questions feel free to ask in comments.
0 notes
Text
What is a Full Stack Developer?
Full stack development is one of the most talked about services in the contemporary world. In order to save cost and time, various companies hire full stack developers. Do you get confused with the homonyms like MEAN stack developers, MERN stack developers, full stack developers, etc? Don’t worry, it’s not only with you! Most of the people get confused with this.
I am a Senior Software Consultant and on a day-to-day basis, I am inquired with some common questions about full stack coders. They are generally asked by businesses that want web or mobile app development.
Some of these questions are:
1. What are full stack developers? Are they the kings of the coding world?
2. What is the job of full-stack developers?
3. What is the difference between full-stack programmers/coders and normal programmers?
4. What are the advantages that I can avail by choosing full-stack coders?
5. What is the difference between the level of coding done by a full stack developer and a normal developer?
To answer these common queries of all businesses about full-stack developers, I have included them in this blog.
You can go through the questionnaire given below to get precise knowledge about full stack web coders.
Query 1: What is the meaning of full-stack web development?
The services of full-stack developers include:
1. Write code for website designing: HTML, CSS, JavaScript, and HTML5 are certain popular programming languages that a full stack web developer uses.
2. Write code to receive users’ information input and saving it in databases: To manipulate the users’ collected data, algorithms and business logic are created by full stack developers by using many popular languages like Ruby on Rails, PHP and Python.
3. Managing servers: On servers, a database is hosted by full stack developers. Anyone can access your website online as soon as your website is hosted on a server.
Query 2: What is the job of a full stack web developer?
A full stack developer works on both the portions of mobile or web app development, that is the front end development and back-end development. This means that a full-stack developer is responsible for both the effective look and efficient functionality.
You must be wondering about What is a Full Stack Engineer?
A professional at a senior level role of the developer with the skills of a full stack developer is known as a Full Stack Engineer. Such a professional also has the experience of project management in areas like systems administration (configuring, maintaining and managing computer networks and systems).
Query 3: How is a full stack developer different from the MEAN stack developer?
One who possess expertise for working in various technologies, namely, MongoDB, ExpressJS, AngularJS, and NodeJS is known as a MEAN stack developer. These technologies are frameworks of JavaScript.
There are different stacks like MERN, LAMP and MEAN. A full stack developer possesses the knowledge and experience of all of them. Although full stack developers are not expected to be masters in all these stacks.
Query 4: How are front end, back end, and full stack different from each other?
A Front end developer makes the look of a web/mobile app attractive, appealing and effective. React developers, NodeJS developers, AngularJS developers, etc are front end developer. They have the capability to make changes in the represented information on a web/mobile app. One who writes information for receiving the information input from the users is known as back-end developers. PHP developers, Python developers or ASP.Net developers are included in this category of developers. They save the information on the database.
The one who can work in all of these technologies whether they are back-end or front-end are known as Full-Stack Web Developer. Moreover, they possess additional knowledge of MEAN, MERN, and LAMP.
Query 5: How does a Full Stack web developer help in increasing your business? The full-stack developers are efficient in both and frontend and backend of mobile and web applications. They can formulate attractive and appealing web applications for your business.
Moreover, they are also capable of improving its functionality by writing the required codes. The database of your website on the server is hosted by iOS developers or Android mobile app developers or a full stack web developer.
A full stack web developer helps in getting potential customers from the online domain by providing an efficient and appealing website.
Companies and businesses need professionals who can handle multitasking. It reduces the cost in comparison to hiring multiple developers, programmers, and coders. Therefore, in case you know both the front-end as well as back-end then there are more chances of getting a bright job and career in software or tech industry.
Another advantage of full-stack developers is that businesses can switch between frontend and backend development according to the requirements of projects.
Query 7: What are the programming languages that a full stack developer knows?
A full stack developer knows languages of both frontend and backend programming. They have extensive experience of working with CSS, HTML, JavaScript (like Nodejs Development, VueJS development, Reactjs Development, and AngularJS development).
They have experience in backend languages as well such as PHP web development, Ruby web development, Python web development, and ASP.Net web development.
Query 8: How much does a Junior full stack developer make?
A junior full stack developer makes around $68,098 annually in the United States as of April 2019 according to the findings of ZipRecruiter. Their salaries can be as high as $107,500 and as low as $30,500.
These are the salaries estimated by evaluating the salaries posted in job advertisements. These salaries remain the same regardless of the location.
Query 9: What is the best market for Junior full stack developer?
The Junior full stack developer job market is extremely active in Noida, India as well as surrounded area. The job generation and quality of services in this area are unmatchable.
Query 10: What is the degree possessed by Full stack developers? One can become a normal web developer by attaining an associate’s degree but to become a full stack developer, it is necessary to possess a bachelor’s degree. Apart from a degree in computer science or programming, the full stack developers can also be benefitted by attaining certifications in various languages and frameworks like JavaScript.
Query 11: How much time does it take to become a full stack developer?
There is no specific time which is required to become a full stack developer. To master the art of delivering full stack is a continuous process. It may take 5 years to fifteen years or even a lifetime. The study of a dynamic field like software programming can never be narrowed to some years of learning or experience.
Query 12: Why are Full Stack developers in demand?
There was 20% more growth in demand of full-stack developers in 2018 in comparison to 2017 as per the report published on ZeeBusiness. This is probably because companies are looking for multi-skilled professionals.
The full-stack developers are involved in all stages and dimensions of development that includes a business logic layer, presentation layer, and the database layer.
Query 13: Is the cost of hiring full-stack web developers high? What is the average pay of these developers?
The average salary of a full-stack developer in India is 6.25 lakhs per annum according to a survey conducted by Indeed. This means that a full-stack developer in India earns around 52 thousand on a monthly basis.
Query 14: Why are full-stack web developers better than usual web developers?
Full stack developer has extensive experience in both the frontend as well as backend development. Apart from them, a full stack developer possesses knowledge about technologies like MERN, MEAN, and LAMP.
In place of them, if you will hire normal web developers then they would not be providing you with all these expertise in various technologies. They will either be a frontend developer or backend developer.
Therefore, instead of hiring separate developers for frontend and backend development, businesses can hire one full-stack developer who will be solely responsible for managing and maintaining the complete application or website development from the start to the end.
Query 15: Why should businesses outsource their full stack web development?
Robust full stack web development services are offered by various full stack web development providers. Outsourcing Full Stack Web Development can provide you access to the best services by expert professionals at a fixed time.
Moreover, when you hire a dedicated development team in India you can save both your time and cost because INR (Indian national rupees) costs less than the dollars.
Many companies in India provide initial consulting services so that you can select the optimum developer as per your custom business requirements. Apart from these benefits, you can get skilled developers, strict NDA, easy team scale up and down, ready-to-use infrastructure, etc. the most important advantage of this is that you get all of these at a lesser price.
Wrapping Up:
Before representing and answering these questions in this questionnaire, I have done thorough research. I hope that these questions will provide you with all the information that you are looking about Full-stack Web developers.
I think that all the doubts and confusions of companies and businesses related to hiring full-stack developers are cleared through this blog. Undoubtedly, full-stack developers help in saving time & cost.[Source]-https://hackernoon.com/what-is-a-full-stack-developer-7b7750aa4c98
62 Hours Full Stack Training includes MongoDB, JavaScript, A62 angularJS Training, MongoDB, Node JS and live Project Development. Demo Mean Stack Training available.
0 notes
Photo

30+ Web Tools and Services to Help You Launch Your Next Big Thing
This article was created in partnership with Mekanism. Thank you for supporting the partners who make SitePoint possible.
2019 is the best year to become successful, to launch your own online or offline business, to invent a product or service, or to grow your business into a huge corporation. Because to sketch, test, build and launch that business that will become the next Uber, Instagram, or Waze is now easier than ever before.
The difference between now and previous years, is that there are now a plethora of web tools and services to help you launch your next big thing - some of them are even free! Today anybody can build a website or logo without any specialist knowledge or previous experience. With only a few hours investment, you can get amazing results. It's a quick and affordable way to get your site or product to market.
In this article we are going to review 36 different web tools and services that are recommended by successful people. Each of them will save you time and money, or help improve your business and workflows, so you can get on with launching and scaling.
1. Creative-TIM - Premium Bootstrap Themes and Templates
Creative Tim is the perfect place where web designers and web developers can find fully coded UI tools to help you build web and mobile apps. With over 750.000 users, Creative Tim offers UI Kits, Dashboards and Design Systems.
All the development is made on top of Bootstrap 4: Vuejs, Angular, React, React Native. Using these tools will save developers and designers hours of work since the products already contain a large number of components and are packed with all the plugins that you might need on a project. Everything used to create the products can be downloaded for free under the MIT License.
For people with many upcoming projects, Creative Tim offers 6 Bundles at special prices, to encourage developers to save precious time and to trust the quality of their projects. Last but not least, Creative Tim’s products are used not only by thousands of freelancers and developers but by top companies like NASA, Cisco, IBM, and Amazon.
Check out their website and find the product that matches your needs. Pricing: Free to $249
2. Brizy - Innovative Site Builder
Brizy is the most user-friendly visual page builder in town! No designer or developer skills required. The only tools you'll need to master are clicks and drags.
Brizy can be used two ways. One is to download the WordPress plugin and use it as such, and the next one is the Cloud platform where you can create landing pages in minutes. From hosting to domain setups Brizy handles everything. Brizy Cloud is included with any Brizy PRO plan.
Creating a powerful, fully functional website is extremely easy with Brizy and anybody can do it without having any designer’s skills or writing a single line of code. This website builder has the most powerful features included, both for the free and paid plans. The free account will bring you premium features that you have to pay for on other website builders. At Brizy, these features are free.
Build a free website with Brizy today, the process is very fast and intuitive.
3. Tailor Brands
Tailor Brands is a revolutionary online logo and branding platform that will help you design your logo in seconds. It has over 10 million users and counting, and it was used to create over 400 million designs. Every second 1 a new design is made via it.
This AI-powered online logo maker platform does not use pre-made logo templates. Every design is uniquely crafted to match your business and brand personality perfectly. You don’t need to have any design skills or special knowledge, it is super simple to use and extremely fast.
Write down the logo name you want, make a few selections from the options provided by Tailor Brands and you will get a number of designs to choose from.
4. 48HoursLogo – Affordable Logos Done Fast
48hourslogo is a fast, easy and very affordable logo crowdsourcing website that has created over 3 million logos. With contest prizes starting at just $99, more than 40,000 small businesses and entrepreneurs have used this amazing logo design service to get gorgeous and creative designs.
After launching your logo design contest at 48hourslogo, your project will go through 3 stages before arriving at your final design. The qualifying stage: the contest is open to all registered designers and they will submit multiple logo concepts for you to choose from. The design revision stage: at the end of qualifying stage, you will be prompted to select up to 3 finalist designers to enter the “design revision stage”. And at the end, the finalizing stage: after selecting your contest winner, you will work with your winning designer on finalizing your design, (you can still request small changes and tweaks to your winning logo).
Start a logo design contest using 48hourslogo.
5. Codester
Codester is a huge marketplace where web designers and web developers will find tons of premium PHP scripts, app templates, themes, plugins and much more.
Always check the Flash Sales section where hugely discounted items are being sold.
Browse Codester and pick the items you need.
6. NameQL
NameQL helps you find a great name. It considers thousands of potential names in milliseconds and shows you the best ones that are still available for purchase as [name].com. It'sa huge time saver whenever you are looking for a new website domain name.
7. SeekVisa
Australia is a great destination to live and work, with developers, software engineers and user experience/user interface designer in high demand. If you're considering immigrating to Australia, you can discuss with SeekVisa, who are migration experts.
Australia's Employer Nomination Scheme (ENS) enables Australian employers to sponsor highly skilled workers to live and work permanently in Australia. This is the quickest way for IT developers to immigrate to Australia. Contact Seekvisa to determine your eligibility.
8. MobiLoud
Publishers are seeing up to 90% of their traffic coming from mobile. Mobile apps give readers the experience they want and let publishers increase engagement, traffic, and revenue.
With fast loading times, your app encourages loyalty and repeat visits. With push notifications, it brings people back again and again. Your icon is a constant reminder of your brand and content.
MobiLoud is the best solution for news mobile apps built on WordPress. They will publish and maintain your custom app, with push notifications, advertising and subscriptions, all at a fraction of the time and cost of traditional app development.
The post 30+ Web Tools and Services to Help You Launch Your Next Big Thing appeared first on SitePoint.
by SitePoint Team via SitePoint http://bit.ly/2ZMaC8U
0 notes
Photo

RT @vuetifyjs: v1.3.8 is live! Includes fixes for multiple components: tabs, buttons, data-tables selects and more. Get it while it's hot 🔥 https://t.co/mMMvXDpbNo #Vuejs
0 notes