#offload iPhone apps
Explore tagged Tumblr posts
Visit Tumblr Blog
Explore Tumblr blogs with no restrictions, modern design and the best experience.
Last Seen Tumblr Blogs


Fun Fact
Tumblr has 16.74 million mobile monthly users in the US.
Text
How to offload apps from iphone?
How to offload apps from iPhone? Ever felt your iPhone getting sluggish? Running out of space for those epic travel vlogs? Offloading apps can be a lifesaver! It frees up valuable storage without completely deleting the app itself. Here’s how to become an offloading pro on your iPhone: Understanding Offloading: Offloading removes the app itself from your phone, but keeps all its data…
#best way to optimize iPhone storage#clear iPhone cache#free up iPhone storage#how to clear app cache on iPhone#how to clear cache on iPhone#how to delete app cache on iPhone#how to free up iPhone storage#how to free up space on iPhone without deleting photos#how to manage iPhone storage#how to offload apps on iPhone#how to offload unused apps on iPhone#how to speed up iPhone#iPhone app storage#iphone performance#iPhone space#iPhone storage#iPhone storage management#iPhone tips and tricks#offload iPhone apps#optimize iPhone storage
0 notes
Text
I’m currently suffering in loading hell
#stupid iPhone is updating but it’s taking forever to download the update#plus I had to delete/offload almost every fucking app on my phone just to be able to download the damn update#I fucking hate it here#I need a new phone
0 notes
Text
i loooooove having an old phone i love this stupid fucking thing and its complete lack of memory i love going to check the score on my team's hockey game i'm too neurotic to watch and finding out my phone deleted the app to make space for one (1) photo of a shitty hat at work, i love when an annoying customer comes in and tries to tell me he's got suchhhh an old phone, he only upgrades by fives and he only has an iphone 15!!!! so behind the times hahahahaha. and i get to tell him. my phone still has a button dude. im winning this competition. i <3 tactile components and enough memory only for my 4 silly little puzzle games and one social media app at a time. i love offloading my pics every few months to free up space, i love that my camera app doesn't try to edit my pics before ive even taken them i love this thang!!!!!!!!!!!!!!!!!!!!!!!!!! three years ago or so i thought the speaker was failing and had to take every call on speakerphone or i could not hear a word anyone was saying and had it cleaned on a whim whilst at the repair shop for a laptop issue and it was good as new!!!!!! outdated shit rocks i hope i dont have to buy another phone for another 10 years
2 notes
·
View notes
Text
Solving Common iPhone Problems: A Guide for Seamless Functionality
Are you an iPhone user facing persistent issues with your device? From minor glitches to major malfunctions, iPhone-related problems can be frustrating. But fret not! We've compiled a comprehensive guide to troubleshoot common iPhone issues and restore your device's functionality.
As your go-to resource for iPhone repairs in Melbourne, Repair Mate understands the nuisances that iPhone users encounter. Let's delve into solutions for prevalent iPhone problems:
Battery Drainage Woes Solution: Adjust settings like background app refresh, brightness, and disable unnecessary notifications. Consider replacing the battery if it's aged.
Unresponsive Touchscreen Solution: Perform a hard reset by holding down the Home and Power buttons simultaneously. If issues persist, seek professional assistance.
Overheating Solution: Close unused apps, update iOS, and avoid exposing your iPhone to direct sunlight or extreme temperatures.
Wi-Fi and Bluetooth Connectivity Issues Solution: Reset network settings, update firmware, and ensure you're in range of the network or device you're connecting to.
Frozen or Crashing Apps Solution: Update apps regularly and restart your iPhone. If problems persist, uninstall and reinstall problematic apps.
Water Damage Solution: Immediately turn off your device, dry it gently, and seek professional assistance at our Melbourne repair center.
Inadequate Storage Solution: Clear cache, delete unused apps, and offload photos and videos to iCloud or another storage service.
Issues with Updates Solution: Ensure a stable internet connection, back up your data, and try updating via iTunes if over-the-air updates fail. Why Trust [Repair Center Name] for iPhone Repairs in Melbourne? At Repair Mate , we specialize in resolving a myriad of iPhone issues. Our certified technicians possess the expertise to diagnose and fix problems efficiently. Here's why choosing us is your best bet:
Expertise: Our team comprises skilled professionals well-versed in handling iPhone repairs of all kinds. Quality Service: We prioritize quality, ensuring that your iPhone receives top-notch care and precision repairs. Quick Turnaround: We understand the importance of your device, striving for swift repairs without compromising on quality. Genuine Parts: We use authentic replacement parts to ensure the longevity and optimal performance of your iPhone. Conclusion Don't let iPhone issues disrupt your user experience! With these troubleshooting tips and our dedicated repair services in Melbourne, you can bid farewell to common iPhone problems.
Visit Repair Mate today for expert iPhone repairs and a seamless user experience. Contact us to schedule a consultation or repair service, and get your iPhone back to its optimal functionality!
For more information or to book an appointment, visit our website Repair Mate.
2 notes
·
View notes
Text
How to Connect Cricut to iPhone? (Complete Tutorial)
This is one of the frequent questions asked by Cricut users with iOS software on their respective devices. In the following section of this blog, you will definitely find out ‘how to connect Cricut to iPhone‘. You will also learn about the reasons for any connectivity issues and the solutions to resolve them.
If you have a Cricut machine, you need a device to process your cuts or designs. Cricut allows you to connect your machine to any device. It is user-friendly, which enables users to experience ease when creating professional or personalized crafts.
Before you dive into the complete guide to connecting your machine to your iPhone, you must know what supplies you will require to download or install Cricut Design Space and how many ways you can connect the machine.
System Requirements to Download Design Space
To download and use the Cricut Design Space app on your iPhone, your device must meet the following requirements:
Download Cricut Design Space on Your iPhone
Before you connect your machine to your iPhone, you need to install the Cricut Design Space app. This app contains various tools, images, text, and ready-to-use projects that can easily run on an iOS system. Let’s begin with the installation process.
Once you have successfully installed the Design Space app, you can connect your mobile device to your crafting machine via Bluetooth or a USB cable.
How to Connect Cricut to iPhone: Simple Steps
You can choose either of the following methods to connect your iPhone via Bluetooth or a USB cable.
Method 1: Through Bluetooth
If you want to connect your iPhone via Bluetooth, follow these steps:
Method 2: Using a USB Cable
If you wish to connect your iPhone to the machine using a USB cable, check out the following steps:
Congratulations! You have successfully connected your Cricut machine to your iPhone.
What to Do If You Can’t Connect Your iPhone to Cricut?
If you encounter any issues pairing your machine, we have explained the errors and provided solutions to resolve them efficiently. Here are some shortlisted errors; go through the steps given below:
Error 1: Unsuccessful Sign In
Remember, your iPhone doesn’t accept one or more special characters in the password. Follow the steps:
Error 2: Machine Communication Error
Go through the following steps to resolve the communication error:
After solving the errors by following the instructions, you can create your design on Canvas in the Cricut Design Space application.
Frequently Asked Questions (FAQs)
How to offload Cricut Design Space?
Uninstalling the iOS app may be mandatory to resolve some issues. However, if you haven’t saved your projects to the Cricut Cloud, do that right away, as uninstalling the app will also delete those projects and any images or fonts you have downloaded to the device.
To offload Design Space:
What are the system requirements to install Cricut Design Space on iPhone?
Every iPhone user needs to have these requirements while installing Design Space:
How to fix error code 4 – offline content when connecting Cricut app?
If you receive this error message, first try checking your internet connection. Then, simply uninstall the Design Space app and the Cricut Basics app (If they are currently installed on your device) and reinstall them from the App Store. If the problem persists after trying the steps, contact Cricut’s Member Care for further assistance.
Sometimes, the Cricut Design Space servers may be down or experiencing issues.
Visit: cricut.com setup mac
Source: https://explorenewmachine.com/how-to-connect-cricut-to-iphone-complete-tutorial/
#HowtoConnectCricuttoiPhone#cricutcomsetup#installcricutdesignspaceapp#wwwcricutcomsetuplogin#cricutcreateconnecttocomputer#cricutnewproductsetup#settingupmycricutmaker#connectingcricutmakertocomputer#cricutsetupcreateaccount#cricutcuttingmachinesetup#cricutsetuponcomputer#settingupnewcricutmaker#cricutsetuplogin#cricutaccountsetup#cricutcomsetupdownload#cricutinstallsetup#cricutprintersetup
0 notes
Video
youtube
How to FULLY Delete Apps on iPhone Permanently! (2025 Masterclass📱)
Can’t delete apps on your iPhone?
If the “Delete App” button is missing and all you see is “Remove from Home Screen,” this 2025 Masterclass shows you exactly how to fix it.
📱 Full walkthrough with fixes for: ✅ Hidden apps ✅ Screen Time restrictions ✅ Offloaded apps ✅ MDM / work or school lockdowns
🎥 Watch now → https://youtu.be/T2TK2dOic74?si=NV2kACtSHkNYF6Kz
1 note
·
View note
Text
How To Clear Cache in Messenger iPhone? – The Ultimate Guide

Does your Facebook Messenger feel sluggish? Is it taking up too much storage? The culprit could be cached files! Over time, Messenger stores temporary data that can slow down your app and device.
Why Should You Clear Cache in Messenger iPhone?
✅ Frees up storage space
✅ Improves app speed & performance
✅ Fixes minor glitches and slow loading
How to Clear Cache in Messenger iPhone?
Since iPhones don’t have a direct "Clear Cache" button, you can follow these steps:
1️⃣ Go to Settings > General > iPhone Storage 2️⃣ Scroll and tap Messenger 3️⃣ Select Offload App (this clears cache without deleting data) 4️⃣ Reinstall Messenger to refresh the app
💡 Pro Tip: Clearing your cache every few weeks keeps Messenger running smoothly! 🚀
Read the full guide here: Clear Cache in Messenger iPhone
#Messenger #ClearCache #iPhoneTips #TechHacks #FacebookMessenger
#iphonerepairservice#iphonerepairshop#iphonescreenrepair#iphonescreenreplacement#30minutesrepair#batteryreplacement#bayridgebrooklyn#androidrepair#blocknumber#brooklyn#clearcache#messenger#facebook#iphoneapps#macbook#apple#smartphone
0 notes
Video
youtube
How To Turn Off Offload Unused Apps on iPhone
0 notes
Text
How to Diagnose Common Mobile Phone Problems: A Step-by-Step Guide
Mobile phones have become an integral part of our daily lives. They serve as communication tools, entertainment devices, work assistants, and much more. But like any other technology, they can face issues that disrupt their functionality. Knowing how to diagnose common mobile phone problems can save time, money, and stress. While some issues are easy to fix yourself, others might require professional repair services. In this step-by-step guide, we’ll walk you through how to diagnose and troubleshoot common mobile phone problems effectively.
1. Battery Drain Issues
One of the most common problems users face is rapid battery drain. If you notice that your phone's battery is draining quickly, it could be due to several factors.
Diagnosis Steps:
Check Battery Usage: Go to your phone's settings and check battery usage. Look for apps that are consuming more battery than usual.
Background Apps: Close unnecessary apps running in the background. Some apps keep running even when not in use, draining your battery.
Brightness and Power Settings: Lower your screen brightness or enable adaptive brightness. Also, consider turning off features like Bluetooth, Wi-Fi, or location services when not in use.
Battery Health: In iPhones, you can check battery health in the settings under "Battery Health" to see if the battery needs replacement. For Android, you may need a third-party app to monitor battery health.
If these steps don't help, it might be time to replace the battery.
2. Overheating Problems
Mobile phones tend to overheat due to prolonged use, running power-hungry apps, or environmental factors. Overheating can lead to performance throttling or damage to internal components.
Diagnosis Steps:
Remove the Case: Sometimes, the case traps heat, leading to overheating. Try removing the case and see if the phone cools down.
Close Power-Consuming Apps: Gaming, streaming, and using heavy apps can cause your phone to heat up. Close all apps and give your phone a break.
Update Software: Ensure your phone’s operating system is up to date. Sometimes, software bugs can cause excessive power consumption, leading to overheating.
Ambient Temperature: Avoid using your phone in hot environments or direct sunlight, as it can cause the device to overheat.
If your phone continues to overheat despite these steps, there could be a hardware issue with the battery or internal components, requiring professional assistance.
3. Slow Performance
A lagging or slow phone can be frustrating, especially when you need it the most. Several factors can contribute to slow performance, such as insufficient storage or outdated software.
Diagnosis Steps:
Clear Cache: Over time, cached data can slow down your phone. Go to settings and clear the cache data for individual apps or for the entire system.
Free Up Storage: Check the storage space on your phone. If it's almost full, delete or offload unnecessary files, apps, or photos to free up space.
Uninstall Unnecessary Apps: Unused apps consume resources and storage. Uninstall apps you no longer need.
Software Update: Ensure your phone is running the latest version of its operating system. Updates often include performance improvements and bug fixes.
If these tips don't resolve the issue, a hardware problem like a failing processor or insufficient RAM could be the culprit, and professional repair might be needed.
4. Screen Flickering or Touch Issues
A flickering screen or unresponsive touchscreen can be caused by software glitches, hardware malfunctions, or issues with the display itself.
Diagnosis Steps:
Restart Your Phone: A simple restart can often fix minor software glitches that cause screen flickering or touch issues.
Check for Software Updates: If there's a bug in the operating system causing the issue, updating the software could resolve it.
Inspect for Physical Damage: Check if the screen has any cracks or visible damage. If there is, the screen may need to be replaced.
Test the Touchscreen: You can test the touchscreen functionality by opening apps or using touch gestures. If the screen is unresponsive or erratic, it could indicate a hardware issue.
If the screen continues to flicker or the touch is unresponsive after troubleshooting, the screen or digitizer may need to be replaced.
5. Charging Problems
If your phone is not charging properly or takes too long to charge, it could be a result of software issues, charging port damage, or issues with the charger itself.
Diagnosis Steps:
Check the Charging Cable and Adapter: Ensure the charger and cable are not damaged. Try using a different charger and cable to see if that solves the problem.
Inspect the Charging Port: Dirt, dust, or lint in the charging port can prevent proper charging. Use a soft brush or compressed air to clean the port carefully.
Check for Software Issues: Sometimes, charging issues are related to software. Try restarting the phone to rule out any software glitches.
Battery Health: If the battery is old or damaged, it may no longer hold a charge properly. Check the battery health via your phone's settings or use a third-party app to assess the battery’s condition.
If none of these steps resolves the issue, it could indicate a problem with the charging port or battery, which may require professional repair.
Conclusion
Diagnosing common mobile phone problems can be easy if you follow a logical step-by-step process. From battery drainage to charging issues and sound problems, most of these issues can be fixed with a little effort. However, if you find that the problem persists or seems beyond your ability to solve, it's always a good idea to seek professional help.
At GoFix, we specialize in diagnosing and repairing mobile phones quickly and efficiently. Whether it's a screen replacement, battery replacement, or any other repair, our expert technicians are here to help. GoFix offers affordable repair services for all kinds of mobile phone issues, ensuring your device gets back to working like new. Visit us online or at our repair centers for all your mobile phone repair needs!
0 notes
Text
How to Handle Error Code 83 on DisneyPlus.com/Begin
Disney+ is a widely popular streaming platform offering an extensive library of movies, TV shows, and exclusive content. However, like any digital service, users sometimes encounter technical issues. One common problem faced by Disney+ subscribers is Error Code 83. This error can be frustrating, but understanding its causes and solutions can help you resolve it quickly.
In this guide, we’ll explore what Error Code 83 means, its potential causes, and how to troubleshoot the issue step-by-step to regain access to disneyplus.com/begin.
What Is Error Code 83 on Disney+?
Error Code 83 on Disney+ is a general device compatibility or network issue. When this error occurs, it prevents users from accessing Disney+ content, disrupting their streaming experience. The error message typically reads:
"Something went wrong. Please try again. If the problem persists, visit the Disney+ Help Center. Error Code 83."
Understanding the root cause of this issue is essential to determine the appropriate solution.
Common Causes of Error Code 83
1. Device Compatibility Issues
Not all devices are compatible with Disney+. Older operating systems or unsupported devices may trigger Error Code 83.
2. Network Connectivity Problems
A weak or unstable internet connection can prevent Disney+ from functioning properly. This may include Wi-Fi disruptions, router issues, or ISP throttling.
3. Account Authentication Errors
If Disney+ cannot verify your account credentials due to login issues or server errors, it might result in Error Code 83.
4. App or Browser Issues
Using an outdated version of the Disney+ app or an unsupported web browser can cause compatibility errors.
5. Digital Rights Management (DRM) Restrictions
Disney+ uses DRM to protect its content. If your device fails to meet DRM requirements, you may encounter Error Code 83.
Troubleshooting Steps for Error Code 83
Below are detailed steps to resolve Error Code 83. Follow these systematically to identify and fix the issue.
Step 1: Check Device Compatibility
Verify Device Requirements:
Ensure your device is compatible with Disney+. Refer to the Disney+ device compatibility list.
Update Operating System:
Check for updates on your device and install the latest operating system.
For example:
iOS/Android: Update to the latest version in your settings.
Windows/Mac: Update via system preferences or control panel.
Switch Devices:
If your current device remains unsupported, try accessing DisneyPlus.com/begin on another compatible device.
Step 2: Test Your Network Connection
Check Internet Speed:
Disney+ requires a minimum speed of 5 Mbps for HD streaming and 25 Mbps for 4K. Use an online speed test tool to verify your connection.
Restart Your Router:
Turn off your router, wait 30 seconds, and power it back on to reset your connection.
Switch Networks:
If possible, switch to a different Wi-Fi network or try a mobile hotspot to identify whether the issue is network-specific.
Disable VPN or Proxy:
Disney+ might block access if you’re using a VPN or proxy. Disable these services and try again.
Step 3: Update the Disney+ App
Check for Updates:
Open your app store and search for Disney+.
Install any available updates.
Reinstall the App:
Uninstall the Disney+ app and reinstall it to ensure you’re using the latest version.
Clear Cache and Data:
If reinstalling isn’t feasible, clear the app’s cache and data:
iOS: Go to Settings > General > iPhone Storage > Disney+ > Offload App.
Android: Go to Settings > Apps > Disney+ > Storage > Clear Cache.
Step 4: Use a Supported Browser
If you’re accessing DisneyPlus.com/begin via a web browser:
Update Your Browser:
Use the latest version of Chrome, Firefox, Safari, or Edge.
Enable DRM Settings:
Ensure your browser’s DRM settings are enabled. For example:
Chrome: Go to Settings > Privacy and Security > Site Settings > Additional Content Settings > Protected Content.
Clear Cookies and Cache:
Clear your browser’s cookies and cache to eliminate potential conflicts.
Disable Browser Extensions:
Temporarily disable ad blockers or other extensions that might interfere with Disney+.
Step 5: Resolve Account Authentication Issues
Re-login to Your Account:
Log out of DisneyPlus.com/begin and log back in to refresh your session.
Reset Your Password:
If login issues persist, reset your password through the Disney+ account management page.
Verify Your Subscription:
Ensure your Disney+ subscription is active. Check your billing details in your account settings.
Contact Disney+ Support:
If authentication problems persist, visit the Disney+ Help Center for assistance.
Step 6: Check Device DRM Support
Verify DRM Requirements:
Check if your device supports Widevine DRM or equivalent protocols.
Switch to a Certified Device:
If your current device lacks DRM support, use a certified device like a Smart TV, game console, or streaming device.
Additional Tips to Avoid Error Code 83
1. Maintain Up-to-Date Software
Regularly update your devices, apps, and browsers to prevent compatibility issues.
2. Optimize Internet Connection
Position your router for maximum signal strength and avoid network congestion during streaming.
3. Use Authorized Devices
Avoid jailbroken or rooted devices that might fail DRM checks.
4. Avoid Simultaneous Logins
Limit the number of simultaneous logins on your Disney+ account to prevent conflicts.
5. Enable Auto-Updates
Set your apps and system to auto-update to stay current with the latest Disney+ features and fixes.
When to Contact Disney+ Support
If you’ve tried all the steps above and still encounter Error Code 83, it’s time to reach out to Disney+ support:
Visit DisneyPlus.com/begin.
Navigate to the Help Center and select the appropriate troubleshooting category.
Use the live chat or email options to describe your issue.
Provide details such as:
Your device model and operating system.
Internet speed and connection type.
Steps you’ve already taken to resolve the issue.
Conclusion
Error Code 83 on Disney+ can stem from various issues, including device compatibility, network problems, or app glitches. By systematically following the troubleshooting steps outlined above, you’ll likely resolve the error and enjoy seamless streaming on disneyplus.com/begin. If the problem persists, don’t hesitate to contact Disney+ support for personalized assistance. With these solutions, you can minimize disruptions and make the most of your Disney+ subscription.
0 notes
Text
How to Clear Cache on iPhone?
How to Clear Cache on iPhone: A Step-by-Step Guide If your iPhone is slowing down, apps are lagging, or you’re running low on storage, clearing the cache can help improve performance. Cached data includes temporary files stored by apps and Safari to speed up loading times. Over time, these files can take up unnecessary space. Here’s how to clear the cache on your iPhone. 1. Clear Safari…
#clear cache iphone#delete app cache iphone#free up space iphone#ios cache management#iphone cache cleaner#iphone performance boost#iphone storage cleanup#iphone storage tips#offload unused apps#safari cache removal
0 notes
Text
The Best Password Managers to Secure Your Digital Life
Keep your logins locked down with our favorite password management apps for PC, Mac, Android, iPhone, and web browsers.
Password managers are the vegetables of the internet. We know they’re good for us, but most of us are happier snacking on the password equivalent of junk food. For nearly a decade, that’s been “123456” and “password”—the two most commonly used passwords on the web. The problem is, that most of us don’t know what makes a good password and aren’t able to remember hundreds of them anyway.
The safest (if craziest) way to store your passwords is to memorize them all. (Make sure they are long, strong, and secure!) Just kidding. most of us are not capable of such fantastic feats. We need to offload that work to password managers, which offer secure vaults that can stand in for our memory.
Try Free Sign up for product your PW Manager!
0 notes
Text
Phone Won’t Connect to Wi-Fi? Try These Solutions

In today’s connected world, Wi-Fi has become essential for work, entertainment, and everyday tasks. So, when your phone won’t connect to Wi-Fi, it can be incredibly frustrating. Fortunately, most Wi-Fi connectivity problems are easy to resolve with a few troubleshooting steps. In this article, we will guide you through common reasons your phone may not connect to Wi-Fi and provide practical solutions. We’ll also discuss how a phone diagnostic software can help identify the issue and address potential storage issues that could affect Wi-Fi connectivity.
1. Check Your Wi-Fi Network
Before diving into deeper troubleshooting, make sure that the issue isn’t with your Wi-Fi network itself. Here’s how to do a quick check:
Ensure Wi-Fi is Turned On: It may sound simple, but ensure that Wi-Fi is enabled on your phone. Head to your phone’s settings, tap on “Wi-Fi,” and toggle it on.
Verify the Network Name and Password: Ensure you're trying to connect to the right network, and double-check if the password is entered correctly.
Restart Your Router: Sometimes the issue is not with your phone but with the router. Unplug the router, wait for 30 seconds, and then plug it back in. After it restarts, try reconnecting your phone.
If the network is functioning and other devices are connected without any issues, you may need to investigate potential problems with your phone.
2. Toggle Airplane Mode
A quick fix for Wi-Fi issues is toggling your phone’s Airplane Mode. This can reset network settings without the need for a full restart. Simply swipe down from the top of your screen to access the quick settings panel, tap on the Airplane Mode icon to turn it on, wait for about 10 seconds, and then turn it off. This might refresh the phone’s connection to Wi-Fi.
3. Forget and Reconnect to the Wi-Fi Network
If your phone has saved the wrong credentials or there’s a glitch in the connection, forgetting the network and reconnecting can resolve the issue. Here’s how:
Go to Settings > Wi-Fi.
Find the Wi-Fi network you're trying to connect to.
Tap on the network name and select Forget Network.
Afterward, reconnect by entering the network password again.
This method resets the connection and can clear any stored data or incorrect settings that might be preventing you from connecting.
4. Restart Your Phone
If the basic checks don’t resolve the problem, the next step is to restart your phone. Sometimes, temporary software glitches can prevent your phone from connecting to Wi-Fi, and a restart can refresh all processes and connections.
5. Check for Software Updates
If your phone hasn’t been updated recently, outdated software may be causing connectivity issues. Head to Settings > System > Software Update to check if any updates are available. Software updates often contain fixes for bugs and network-related issues that could be hindering your Wi-Fi connection.
6. Clear Cache and Free Up Storage Space
A storage issue could potentially affect how well your phone manages its resources, including Wi-Fi connections. Clearing the cache can help:
On an Android device, go to Settings > Storage > Cached Data, and tap to clear cached data.
On an iPhone, you can clear app caches by offloading unused apps or by performing a soft reset.
Freeing up storage space ensures your phone runs smoothly, and this may help resolve connectivity issues. If your phone is low on storage, deleting unnecessary files or using a phone diagnostic software to identify and clean junk data can improve overall performance, including Wi-Fi connectivity.
7. Check for Interference from Other Devices
Electronic devices such as microwaves, cordless phones, and even baby monitors can interfere with Wi-Fi signals. If possible, place your phone closer to the router or reduce the number of devices connected to the same network. Additionally, switching your router’s frequency from 2.4 GHz to 5 GHz (if supported) can often result in better connection stability and speed.
8. Reset Network Settings
If none of the above solutions work, resetting your phone’s network settings can help resolve more stubborn connectivity issues. Here’s how to reset network settings:
On an Android device, go to Settings > System > Reset Options > Reset Wi-Fi, Mobile & Bluetooth.
On an iPhone, go to Settings > General > Reset > Reset Network Settings.
This option clears all saved Wi-Fi networks and Bluetooth connections, so you’ll need to reconnect to your Wi-Fi network afterward. However, it can be a highly effective solution for network problems.
9. Use Phone Diagnostic Software
When you’ve tried all the usual troubleshooting steps and your phone still won’t connect to Wi-Fi, a phone diagnostic software can be a valuable tool. This type of software scans your phone’s hardware and software for any issues affecting connectivity, providing a detailed report and solutions. Some phone diagnostic apps can even check for specific problems like weak signal strength, malfunctioning network adapters, or outdated drivers.
These diagnostic tools often come with additional features, such as detecting background apps that could be hogging your phone’s resources, further helping to identify and fix storage issues that may affect performance.
10. Consult a Professional
If your phone still won’t connect to Wi-Fi despite trying all the solutions above, it might be time to consult a professional technician. There could be a hardware issue with the Wi-Fi antenna or internal components, which requires expert attention.
Conclusion
Wi-Fi connectivity issues can be frustrating, but in most cases, the solutions are straightforward. By following these troubleshooting steps, from basic checks like restarting your phone to more advanced fixes like resetting network settings or using phone diagnostic software, you can quickly get your phone back online. Don’t forget to monitor potential storage issues, as they can indirectly affect your phone’s ability to maintain a stable connection.
#mobile phone repair#mobile phones#phone diagnostic#software development#wifi issue#phone wifi problem#fix phone wifi
0 notes
Text
Okay so I’m an apple user since 2014 (on my second phone that i bought in 2018 after my first was crushed in a car door) so I’ll try to address a few!
Face id can be toggled off in settings!
Looks like this, settings app > face id & passcode.


The “pull up all open apps” swipe is more of a up and over, illustrated in blue and to go straight to the Home Screen swipe straight up like the yellow line. To show notifications and the clock pull straight down like the purple line, to pull open your quick menu use the yellow motion in the upperhand corner.

As for the pre loaded stuff you can delete some of them (apple inc can’t be deleted but individual programs from it can!) here. Settings app > general > iPhone storage.

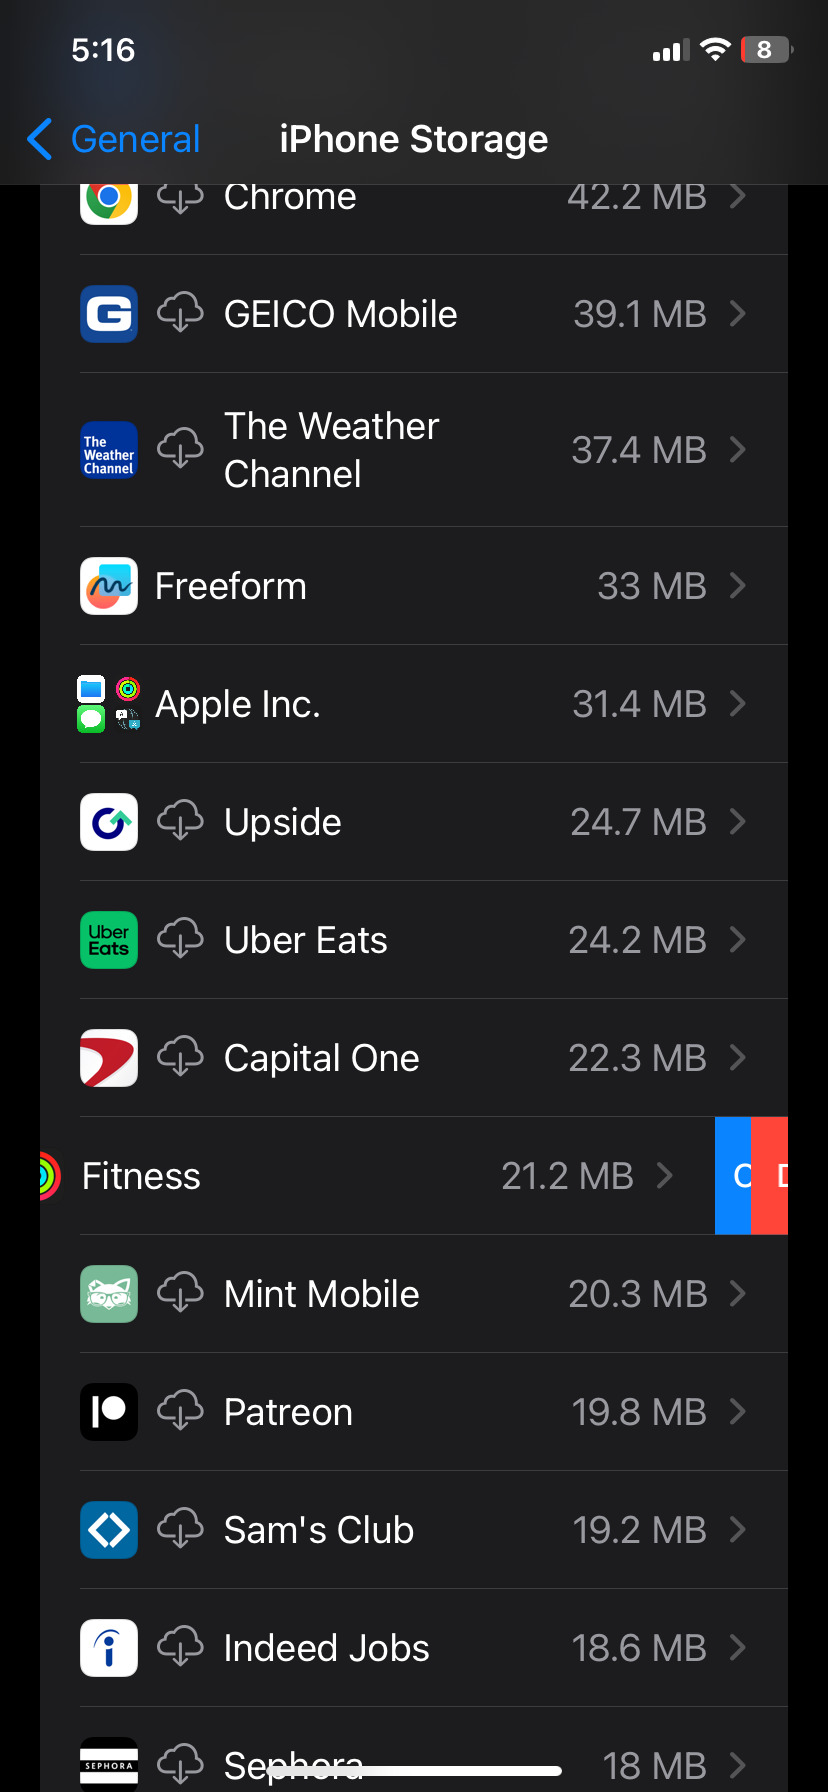
Swipe to the left to delete or offload your data.
The lack of headphone port also enrages me and I’m a Bluetooth girlie now as a result. There are connectors you can buy (Walmart carries them, no need to go to the Apple Store) but the fact we have to buy it in the first place is terrible business practice.
The two camera options is so you can hand off your phone to someone without your face id and they can access the camera but not the camera roll (no snooping!) or anything else in the phone. Those individual pics can be pulled for editing but the rest of the camera roll is hidden. If you unlock your phone and then open the camera you can click the little image preview and it will take you to your entire camera roll.
Idk about the notifications and whatnot, setup is way different now than it was in 2018 but i hope a few of these tidbits were useful. I’m gonna go charge my phone now.
I just got my first ever iPhone and my god it is terrible, how did they get so popular this thing is a nightmare
#yeah they’re not super intuitive at all#you’ll get it down even if apple will never produce a user friendly device
9K notes
·
View notes
Text
Why Renting High-Tech Mobile Devices is a Smart Choice for London Businesses?

In today’s fast-paced business environment, staying connected and maintaining productivity is essential. High-tech mobile devices play a crucial role in ensuring that employees and executives can perform their tasks efficiently, whether in the office, at events, or on the go. For businesses in London, renting the latest smartphones, such as the Samsung S10 and iPhone 15 Pro Max, is a smart and cost-effective choice. Here’s why.
1. Cost-Effective Solution
Purchasing the latest mobile devices for short-term needs can be a significant financial burden, especially for small and medium-sized businesses. The cost of acquiring, maintaining, and eventually upgrading these devices adds up quickly.
By opting for Samsung S10 or iPhone 15 Pro Max Hire in London, businesses can access cutting-edge technology without the hefty upfront investment. Renting allows companies to manage their budgets more effectively, allocating resources to other critical areas of operation.
2. Access to the Latest Technology
The tech industry evolves rapidly, with new smartphone models offering enhanced features, better performance, and more advanced capabilities. However, keeping up with these technological advancements can be challenging and costly.
Opting for Samsung S10 Hire or renting the iPhone 15 Pro Max ensures that businesses in London have access to the latest technology whenever they need it. This is particularly beneficial for short-term projects, events, or when testing new apps and software that require the latest hardware specifications.
3. Flexibility and Scalability
Business needs can change quickly, and the ability to scale operations up or down is crucial. Renting mobile devices provides the flexibility to meet these changing demands without the long-term commitment of ownership.
For instance, if a company is hosting a large event or conference, they might require a significant number of smartphones for a short period. Samsung S10 Hire or iPhone 15 Pro Max Hire allows businesses to easily adjust the number of devices they need, ensuring they only pay for what they use.
4. Reduced Maintenance and Management Hassles
Owning a fleet of high-tech mobile devices comes with the responsibility of maintaining them, managing software updates, and ensuring they are always in good working condition. This can be time-consuming and requires dedicated IT resources.
By renting devices, businesses can offload these responsibilities to the rental provider, who typically handles all maintenance, software updates, and even technical support. This reduces the burden on internal IT teams, allowing them to focus on more strategic tasks.
Conclusion
For London businesses, renting high-tech mobile devices like the Samsung S10 and iPhone 15 Pro Max is a strategic decision that offers numerous benefits. From cost savings and access to the latest technology to flexibility and reduced maintenance, Samsung S10 and iPhone 15 Pro Max Hire in London provides a smart solution for businesses looking to stay competitive in a fast-paced digital world.
0 notes
Text
Going through my photos on my broken ass iPhone because it has no storage anymore 😒 to delete things. I scroll back even last year and I am such a different person.
My earliest photos on that phone are from 2019. I have bad few memories of anything before last year and especially bad memories of 2023 (I had a terrible period of crisis for most of the year)
Looking through my old photos is like looking through a shop of diamonds to me. I am so much of a different person now. The people around me are so much of different people now. I don’t even talk to a lot of them anymore but I could NEVER bring myself to delete their photos, they are the only memories I have of events, they help me keep my thoughts in order.
There are a lot of things I look on in my gallery and cringe at a bit (like the watt pad stories I photo’d to read later that were.. questionable) but these are now a part of my history. The very very small part I still have left of before my identity crisis and before gender dysphoria and before depression and before burnout. I have nothing of my childhood self because I was so angry I killed my internal perception of her. She’s gone now. I’m alone in my head now.
I have memories of before I moved house. Moving house killed me. I lived in that house for so long and I think a part of my soul is still there. I can’t even look at it if I ever go by it again because the new owners changed so many of the things I loved about it. There were tall bushes and flowers around the front and they’re all gone now. I wonder if they got rid of the big patch of plants we had in the garden or the lavender or the pear tree the age of my little brother that I loved so much. I think it would kill me if they did. I don’t have pictures of them. I wish I did. I want to see it again. Our garden was so beautiful and big.
I have old memes from group chats nobody uses anymore. I have memories of my now old school (some may say that it was bad so why would I want to remember, but I miss the life I had so badly). I have time stamps of every holiday I’ve been on so I can remember it. I have pictures of me with my long hair that I can now look back on with fondness rather than disgust. I have pictures of me with Disney princesses.
I have old photos of my friends, and photos of old friends. Photos of people I haven’t talked to in years.
On other parts of my phone I have group chats full of my primary school friends and all sorts of things. I have notes in my notes app from years ago. The few good memories I put down in my mood tracker diary. My webtoon and watt pad apps that have been offloaded for ages. I can’t delete them even for storage because I will forget I will forget.
To all the big tech companies all of the photos are just data. But for me (and I’m sure others with memory problems) the storage of a phone is worth more than a lot of very expensive things. The most beautiful thing in the world is a memory. The pictures are like my snow globes that I keep from my holidays and the memory box in my wardrobe and my baby memory box my parents have of me. Every day I pray for the resurfacing of more memories. There are so many small things that seem insignificant to others that are symbols of my childhood that I remember. I have lists of things to help my memories.
#I got progressively more emotional throughout this#cried so hard#vent post#mental problems#memory problems#actually autistic#disabled#affects of stress#memory lane#memory loss
0 notes