#open excel file online and edit
Explore tagged Tumblr posts
Visit Tumblr Blog
Explore Tumblr blogs with no restrictions, modern design and the best experience.
Last Seen Tumblr Blogs


Fun Fact
Tumblr’s website traffic is steadily declining.
Note
Hi Foxghost! First, I’d like to say that I hope you are doing well these days, and also thank you for the work you did for Joyful Reunion; you gave me the ability to discover a novel that soon became one of my favourites. I’m not too sure you’ll be able to answer this given your pinned, but I will give it a shot anyway. A lot of people seem to not be open minded to the new translation and act as if you were slighted, are you able to speak on your own feelings in regard to those assumptions?
I wasn’t able to fit this in with my previous question, so I’d also like to add that I’m very much open to the new translation and think there’s nothing wrong with something being interpreted through a new lens! I will be reading the official translations you are signed on for as well and look forward to them. Much luck to you.
Hi anon! I'm doing much better these days -- I'm in a wonderful new relationship, have an abundance of work I enjoy, a cat, my kidlet, and a freezer full of dim sum. This is such an improvement from just over 1 year ago.
As for your other question -- let's start with this: I don't have any social media. If it wasn't for my Tumblr, I'm not very online at all. Which means that aside from those who read my fan-tl or know me from the Dragon Age fandom, I'm an invisible entity on the internet -- this is intentional, as I wanted to NOT BE STALKED ONE DAY BY EX. So when initial decisions were made about the JR project, I was not involved because nobody knew about me. It was also right around the time I was leaving abusive ex, finding a place for me and my cat and my kidlet, and I was turning my life upside down in a good way, but it was still quite upside down and I barely had time for my ONE contract.
I never felt slighted by this -- I think it is my place as a fan translator to get the work known to the world, and maybe I might have felt bad about it for a little while if I had to take it down as soon as I finished it, but it was already up for a year and a half. The only annoyance I felt at having to take it down was entirely due to Tumblr's lack of mass-editing capabilities. (I had to do it one file a time)
And as for the now: I'm very much involved in the JR project now, and as someone who've read book 1 and went through it with a fine-toothed comb, I can tell you that the current translation is excellent and I endorse it 100%. It retains that feeling of majestic landscapes, that hallmark of FTYX writing where you can see every scene. I can perfectly understand how some might think it "won't be the same", and no, it won't be the same. A fan translation allows a translator to do things that you cannot get away with in a localization, but ultimately what matters is how it makes you feel in the end. The new translation will still make you cry buckets. (I hope it hurts you as much as it hurts me)
Thank you for saying you'll read my future work! :3 I still can't believe that I get to work on this classic sometimes.
And if anyone else still want to read my translations, preorder The Wife Comes First or Three Hundred Years of Longing! The quality and amount of FOOD we're going to be serving over here is amazing.
19 notes
·
View notes
Text
PSA: Free Software
Reading this may really save your time, privacy, and money! Reblog or share to spread awareness!
Folks often use software that’s expensive and sometimes even inferior because they don’t know there are alternatives. So to those unfamiliar: basically, free and open-source (FOSS) or "libre" software is free to use and anyone can access the original code to make their own version or work on fixing problems.
That does not mean anyone can randomly add a virus and give it to everyone—any respectable libre project has checks in place to make sure changes to the official version are good! Libre software is typically developed by communities who really care about the quality of the software as a goal in itself.
There are libre alternatives to many well-known programs that do everything an average user needs (find out more under the cut!) for free with no DRM, license keys, or subscriptions.
Using libre software when possible is an easy way to fight against and free yourself from corporate greed while actually being more convenient in many cases! If you need an app to do something, perhaps try searching online for things like:
foss [whatever it is]
libre [whatever it is]
open source [whatever it is]
Feel free to recommend more libre software in the tags, replies, comments, or whatever you freaks like to do!
Some Libre Software I Personally Enjoy…
LibreOffice
LibreOffice is an office suite, much like Microsoft Office. It includes equivalents for apps like Word, Excel, and Powerpoint, which can view and edit files created for those apps.
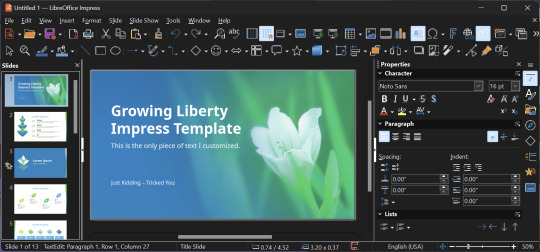
I can't say I've used it much myself yet. I do not personally like using office software except when I have to for school.
OpenShot
OpenShot Video Editor is, as the name suggests, a video editing program. It has industry-standard features like splicing, layering, transitions, and greenscreen.
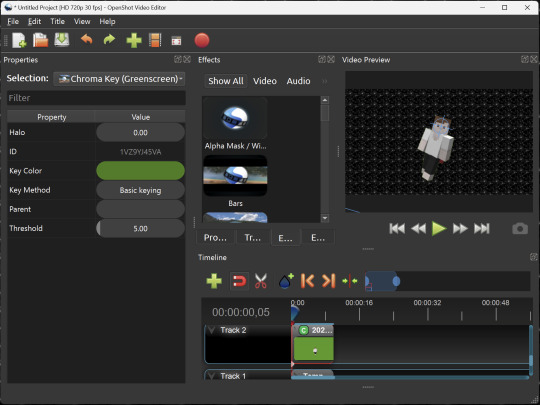
I've only made one video with it so far, but I'm already very happy with it. I had already paid for a video editor (Cyberlink PowerDirector Pro), but I needed to reinstall it and I didn't remember how. Out of desperation, I searched up "FOSS video editor" and I'm so glad I did. There's no launcher, there's no promotion of other apps and asset packs—it's just a video editor with a normal installer.
GIMP
GNU Image Manipulation Program is an image editor, much like Photoshop. Originally created for Linux but also available for Windows and MacOS, it provides plenty of functionality for editing images. It is a bit unintuitive to learn at first, though.
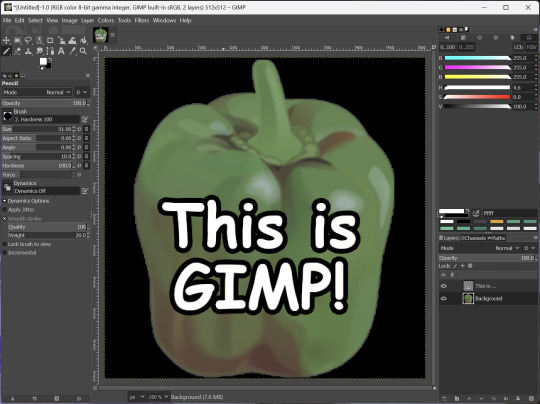
I've used it to create and modify images for years, including logos, really bad traceover art, and Minecraft textures. It doesn't have certain advanced tech like AI paint-in, but it has served my purposes well and it might just work for yours!
(Be sure to go to Windows > Dockable Dialogs > Colors. I have no idea why that's not enabled by default.)
Audacity
Audacity is an audio editing program. It can record, load, splice, and layer audio files and apply effects to them.
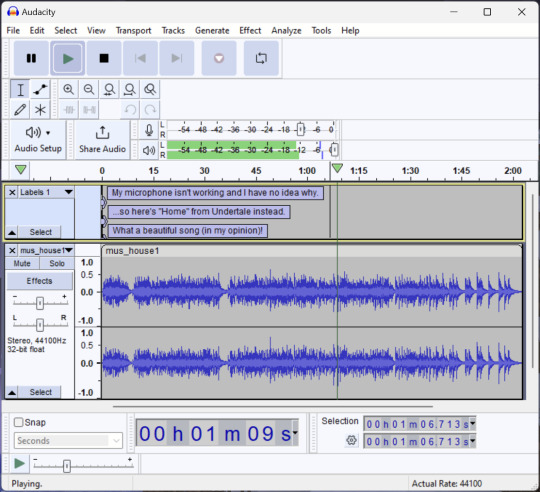
Audacity is another program I've used for a long time. It is not designed to compose music, but it is great for podcasts, simple edits, and loading legacy MS Paint to hear cool noises.
7-Zip
7-Zip is a file manager and archive tool. It supports many archive types including ZIP, RAR, TAR, and its own format, 7Z. It can view and modify the contents of archives, encrypt and decrypt archives, and all that good stuff.
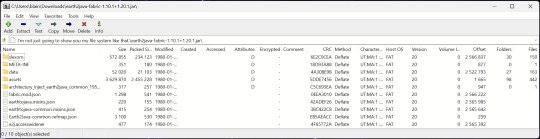
Personally, I use 7-Zip to look inside JAR files for Minecraft reasons. I must admit that its UI is ugly.
Firefox
Firefox is an internet browser, much like Google Chrome, Microsoft Edge, or Safari. While browsers are free, many of them include tracking or other anti-consumer practices. For example, Google plans to release an update to Chromium (the base that most browsers are built from these days) that makes ad blockers less effective by removing the APIs they currently rely on.
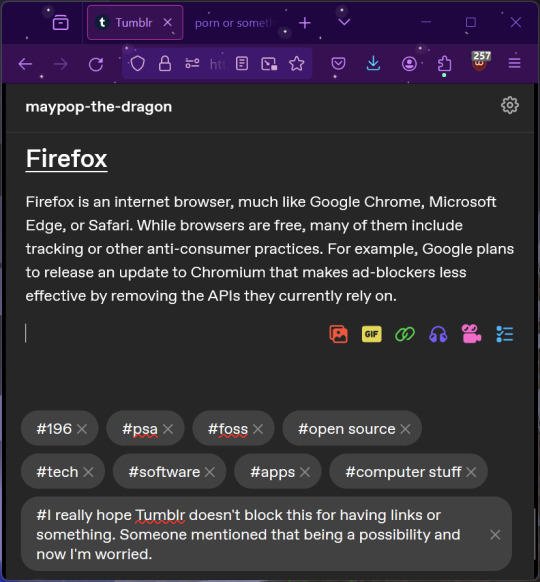
Aside from fighting monopolies, benefits include: support for animated themes (the one in the picture is Purple Night Theme), good ad blockers forever, an (albeit hidden) compact UI option (available on about:config), and a cute fox icon.
uBlock Origin
As far as I know, uBlock Origin is one of the best ad blockers there is.
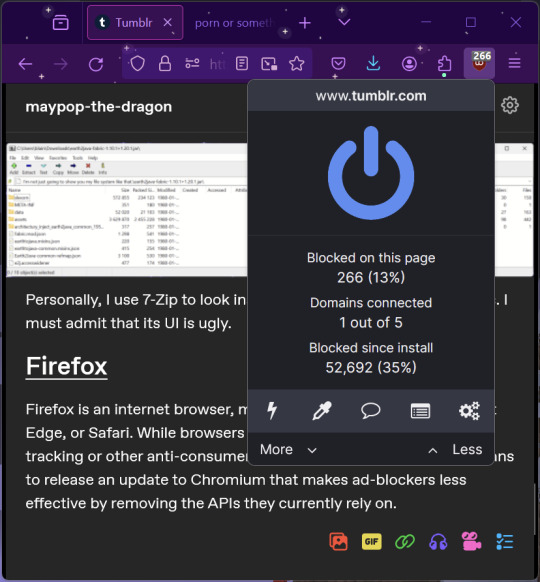
I was on a sketchy website with my brother, and he was using Opera GX's ad blocker. Much of the time when he clicked on anything, it would take us to a random sponsored page. I suggested that he try uBlock Origin, and with uBlock Origin, that didn't happen anymore.
Linux
Linux is a kernel, but the term is often used to refer to operating systems (much like Windows or MacOS) built on it. There are many different Linux-based operating systems (or "distros") to choose from, but apps made for Linux usually work on most popular distros. You can also use many normally Windows-only apps on Linux through compatibility layers like WINE.
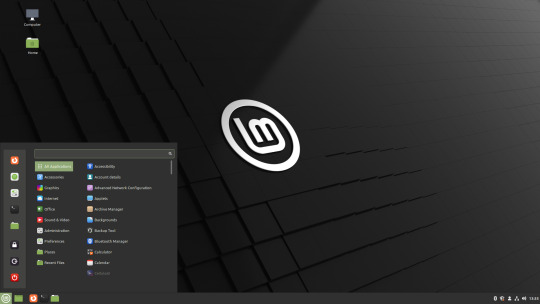


I don't have all four of these, so the images are from Wikipedia. I tried to show a variety of Linux distros made for different kinds of users.
If you want to replace your operating system, I recommend being very careful because you can end up breaking things. Many computer manufacturers don't care about supporting Linux, meaning that things may not work (Nvidia graphic cards notoriously have issues on Linux, for example).
Personally, I tried installing Pop!_OS on a laptop, and the sound output mysteriously doesn't work. I may try switching to Arch Linux, since it is extremely customizable and I might be able to experiment until I find a configuration where the audio works.
Many Linux distros offer "Live USB" functionality, which works as both a demo and an installer. You should thoroughly test your distro on a Live USB session before you actually install it to be absolutely sure that everything works. Even if it seems fine, you should probably look into dual-booting with your existing operating system, just in case you need it for some reason.
Happy computering!
#196#psa#foss#open source#tech#software#apps#computer stuff#I really hope Tumblr doesn't block this for having links or something. Someone mentioned that being a possibility and now I'm worried.#please reblog#2024-01-26
47 notes
·
View notes
Text
Help Choosing Online Spreadsheet Software?
I use spreadsheet software a lot, and sometimes I like to share the stuff I create. Which means using online software. I dislike Google Sheets for more than just being a Google product (copying data back and forth with other programs changes the formatting, they changed the search AGAIN so I don't currently know how to do it, etc).
Any advice about open source alternatives?
I'm leery of Open Office descendants because I STILL have Open Office documents from 2004 that I can't open in any program. But if people have good things to say about LibreOffice Calc (Online) I'm willing to try it out.
Collabora Online is the one I keep seeing in my research.
There's also Sheetster, OnlyOffice, Calligra Sheets, and many others.
I'm mostly making text databases, so ability to format and play with text is my priority.
I'd LOVE a program that let me transform the first character of cells (Excel will not let me add accents unless I type a dummy character before the one I'm going to transform.)
Searching and sorting need to work (I HATE YOU Google Sheets!)
I need to be able to link to it from here, people need to be able to see the file without creating an account, and it would also be nice if I could choose whether or not other people could edit it
Keeping text size, colour, and font when I copy/paste to or from Excel would be nice
For math, calculating percentages and averages would be nice. Mostly I'm just adding lists of numbers, but I've discovered that good percentage functions aren't a given
8 notes
·
View notes
Text
I'll have to consider a Google break-up. But this reminds me how I did just go through separation with Microsoft 365.
My very first step was listing out all the places where I use Microsoft and thinking through what my requirements were for replacing them. OneDrive, for the longest time, was my sticking point. This program has saved me twice now when I've had computer issues. I needed something that would keep copies of my files in the cloud, connect with multiple folders, sync instantly, and connect with my phone. I also wanted to pay no more than I was already paying for Microsoft 365. Finally, it had to be easy to use.
For the Office Suite, I just needed something that could open and edit my Microsoft files and have similar features. I rarely use Word/Excel/etc outside of work, though that may change if I do breakup with Google (I use Google Sheets for myriad things).
OneDrive
To replace the online drive and sync, I've switched to pCloud. It isn't free, though. It costs $50-60/year for 500GB (and about a $100 for 2T).
Steps for switching:
Make sure you have downloaded everything from OneDrive to your computer. Most of your files actually live in the cloud and you'll lose access to them when you uninstall OneDrive (note: they'll still be online).
Move all of your files into your User directory or somewhere else on your computer that isn't your OneDrive folder. (Learn from my mistakes...)
Uninstall OneDrive.
Go through your files and delete all of your OneDrive folders.
Download and install pCloud and follow their directions.
(Note: pCloud does have a OneDrive import feature, but I did not use that and I do not know how well it supports uninstalling OneDrive afterward.)
I also have pCloud on my phone now. I don't know if I just have rosy glasses on, but it feels nicer than the OneDrive app.
(Note: I do not rec NextCloud. I tried it and was met with nothing but pure frustration. Plus, for basic sync, I learned I had to download another program/extension, but then it was super unclear on how to install that extra bit and etc etc etc.)
ETA: OneDrive will still exist in some pretty critical default filepaths (e.g., your desktop folder). I followed this to fix it in my registry.
Office Suite
I've downloaded LibreOffice (free!)for this. If your Calc is an utter glacier when you open it, look up how to check the "Force Skia software rendering" box. That fixed the issue for me.
If you prefer ribbons over menus, there is a view option for that, too.
I am also currently trialing Typora, which costs $15 and is beautiful. It is a Markdown editor in which your Markdown is instantly rendered.
Other Microsoft Apps
I don't tend to use other Microsoft apps much outside of work. If I used a desktop email client, I'd probably go back to Thunderbird, which I used back in college.
As for OneNote, I'm not sure. Obsidian, which I use for my worldbook for my current story, is fantastic, but I've not tried to have different projects on it at once.
For teams, there's Slack and Discord. For the Sharepoint side of teams, maybe Box, Basecamp, or Confluence? I've not really looked into this because I don't use Teams in my non-work life and there is a 0% chance my workplace transitions away from Teams and Sharepoint anytime soon.
For Notepad, Notepad++ has always been one of the first programs I download to new computers. It is stellar.
For other apps, I'm already using alternatives (e.g., VLC Media Player, Firefox, WonderShare) or they aren't programs I even knew existed (e.g., Journal?, Family?). A few, though, just feel like system tools (e.g., Snipping Tool, Calculator).
Of course, there is the Linux of it all.
I have considered linux before. I have even tried linux (Ubuntu) before.
Most of what I use these days will work with Linux, with one major and rather important-to-me exception: Scrivener.
I am yet to find a single other application I like half as well as Scrivener.
Just in time for Valentine’s Day... 💔
Ready to break up with Google?

So are we!
We’ve rounded up a bunch of privacy-centric alternatives for everything Google.

Check out the full list over on the blog!
- The Ellipsus Team xo
49K notes
·
View notes
Text
Excel to PDF: Simplify Data Sharing and Reporting
Converting Excel to PDF is one of the most practical ways to present and share spreadsheet data. Whether you’re creating financial reports, invoices, or charts, the PDF format ensures your content remains consistent and secure when viewed on any device.
Why Convert Excel to PDF?
Excel files are great for editing and analyzing data, but they aren’t always ideal for sharing. Here’s why converting Excel to PDF is often the better choice:
Uniform Viewing: PDFs display the same on all screens, regardless of software or device.
Preserves Layout: Charts, tables, fonts, and spacing remain intact.
Professional Look: PDFs are widely accepted in business, legal, and academic settings.
File Protection: PDFs can be secured with passwords or restrictions on editing and copying.
How to Convert Excel to PDF
There are several methods to convert your Excel files into PDFs, depending on the tools you prefer:
1. Use Excel's Built-In PDF Export Option
Microsoft Excel makes it easy:
Open your Excel file.
Go to File > Save As or Export.
Choose PDF from the file type dropdown.
Select what to publish: entire workbook, active sheet, or specific range.
Click Save.
This is the fastest way to convert Excel to PDF without leaving the app.
2. Online Excel to PDF Converters
If you don’t have Excel installed, try a free online tool:
Upload your Excel file to a site like Smallpdf, PDFCandy, or Adobe Acrobat Online.
Wait for the conversion to complete.
Download the resulting PDF.
These tools are great for quick, one-time conversions.
3. Convert Excel to PDF with Google Sheets
For Google Workspace users:
Upload the Excel file to Google Drive.
Open it in Google Sheets.
Click File > Download > PDF Document (.pdf).
It’s an easy way to work with Excel files in the cloud and convert them on the go.
Helpful Tips Before You Convert
To ensure your Excel to PDF conversion looks polished:
Set Print Area: Only convert the part of the sheet you want.
Adjust Page Layout: Use landscape or portrait orientation as needed.
Check Margins: Leave enough space to avoid data being cut off.
Preview Before Saving: Use Print Preview to catch formatting issues.
When to Use Excel to PDF Conversion
You should consider converting Excel to PDF in these scenarios:
Sharing financial reports with clients
Submitting assignments or projects
Distributing data summaries to stakeholders
Archiving spreadsheets in a format that won’t change
Final Thoughts
Learning how to convert Excel to PDF is a simple but powerful skill. It makes your spreadsheets easier to share, more secure, and more professional-looking. Whether you're working in Excel, Google Sheets, or using an online converter, you now have the tools to turn your data into clean, reliable PDFs anytime.
1 note
·
View note
Text
Build the Future of Recruitment: Online Job Portal Project in ASP.NET
Recruitment has gone digital—and so should your learning. The Online Job Portal Project in ASP.NET, available at ProjectsForEveryone.com, is a powerful tool for developers and students looking to gain hands-on experience with enterprise-level web applications.
Whether you're building your portfolio or launching a real-world solution, this project gives you everything you need to understand how modern job portals function under the hood.
🏗️ A Complete Job Portal Solution
This project is not just code—it’s a complete platform. It simulates the end-to-end job search and recruitment process, allowing different user roles to interact in a realistic environment.
Administrators can manage users, job categories, and postings.
Employers can register and post job openings, and track applications.
Job Seekers can browse openings, apply online, and build resumes.
With this modular system, you get a close-up look at how each component of a live job portal works together.
🛠️ Technologies Used
Backend: ASP.NET with C#
Database: SQL Server
Frontend: HTML, CSS, and basic ASP.NET Web Forms
Authentication: Session-based login system for secure access
It’s a great opportunity to understand key development concepts like data binding, session management, CRUD operations, and multi-user role management—all within a practical application.
🎓 A Project That Teaches While It Works
More than just a demo, this project is built for learning through doing. It's especially useful for:
Final-year computer science and IT students
ASP.NET beginners looking to practice full-stack development
Educators needing a structured example to teach web technologies
Entrepreneurs testing out job portal ideas with minimal upfront investment
📦 What’s Included?
When you get this project, you receive:
Complete and editable source code
SQL Server database file with sample data
Setup documentation
Free technical support for installation and configuration
💰 Affordable & Effective
At ₹1,499 (50% off), this project is an excellent deal for the amount of practical knowledge it offers. It's also fully customizable, so you can enhance it, rebrand it, or extend it for your own unique use case.
🚀 Start Today
Transform your theoretical skills into practical expertise. Learn how real-world web systems are built, deployed, and managed.
👉 Explore the project here: https://projectsforeveryone.com/project/online-job-portal-project-in-asp-net-with-source-code/
0 notes
Text
Be Future-Ready: Start with the Basics of Computers

In a world where almost everything is going digital, knowing how to use a computer isn’t a luxury anymore—it’s a necessity. Whether you're applying for a job, paying bills online, studying, or just staying in touch with loved ones, computer skills make life easier, faster, and more efficient. If you're someone who’s still hesitant about technology, this post is for you.
Let’s explore how learning the basics of computers can make you future-ready in every aspect of life.
Read More About: Computer Course for Everyone | Learn Basic Computer Skills Easily
🚀 Why "Basic Computer Skills" Are No Longer Optional
You don't need to be a tech genius to use a computer effectively. But not knowing how to use one at all? That can hold you back in so many ways.
Here's why learning computers is essential in 2025:
Digital India is real: Government services are online—from Aadhaar updates to ration card renewals.
Jobs are changing: Employers expect you to at least know MS Office and how to write an email.
Education has gone hybrid: Schools and colleges use digital tools daily.
Banking and payments are online: From UPI to digital wallets, it's all happening online now.
Communication is digital: From Zoom to Gmail, the world talks online now.
The sooner you get comfortable using computers, the better prepared you’ll be for this new world.
💡 What Does a Basic Computer Course Teach?
You might be wondering: “What will I even learn in a basic course?”
Here’s what’s usually covered:
How to operate a computer (ON/OFF, keyboard, mouse)
Typing basics and shortcuts
Introduction to MS Word, Excel, and PowerPoint
Internet browsing and safety
Sending and receiving emails
File and folder management
Basics of online banking and digital payments
In short, you’ll learn how to do everyday tasks more smartly.
👩🏫 Who Should Take a Basic Computer Course?
Everyone. Yes, everyone.
If you think computers are “not for you,” this course is especially for you.
🧑🎓 Students – To complete assignments, research, and attend online classes
💼 Job seekers – To meet the most basic requirements in job descriptions
🏠 Homemakers – To manage bills, shop online, and even explore home businesses
👵 Senior citizens – To connect with family, use online services, and stay informed
📈 Small business owners – To manage accounts, promote online, and stay competitive
📱 Real-Life Benefits of Learning Computer Basics
Learning computer skills isn’t just about using a machine. It’s about gaining confidence and freedom.
Here’s what you can do more easily: TaskHow Computers HelpApply for jobsCreate resumes, send emails, use job sitesPay billsUse net banking or payment appsCommunicate with othersUse WhatsApp Web, Gmail, or ZoomLearn onlineAttend webinars or watch YouTube tutorialsManage household documentsSave and find them digitallyRun a businessHandle inventory, billing, and marketing
🧠 Learning Computers = A Smarter You
What’s even more exciting is that learning computers opens the door to future learning. Once you’re confident with basics, you can easily pick up:
Graphic design
Digital marketing
Video editing
Coding
Data analysis
Social media marketing
But it all begins with that first step—mastering the basics.
🌟 Be Future-Ready—One Click at a Time
The world is changing fast. Everything is becoming smarter—from phones to TVs. But to keep up, you need to become smarter too. And no, that doesn’t mean becoming a techie. It just means getting started.
You don’t need to understand complex software or write code. You just need to understand the basics well enough to not feel lost in a digital world.
💬 Final Thoughts
Think about this: every ATM you use, every train ticket you book, and every app on your phone—all of it is made to be operated by someone with basic computer literacy.
So why not become that person?
Don’t let fear of technology hold you back. Start learning today, and you’ll be surprised how simple it actually is.
“The best way to predict the future is to create it.” – Abraham Lincoln
With just a few hours of learning, you’ll be better equipped to live, work, and grow in a digital-first world. So go ahead—be future-ready. Start with the basics.
0 notes
Text
Top 5 Free Tools to Compress Videos Without Losing Quality for Social Sharing

Sharing videos on social media platforms like Instagram, Facebook, TikTok, and YouTube often comes with limitations on file size and upload speed. Whether you're a content creator, marketer, or casual user, having the right tool to compress videos without compromising quality is essential. Fortunately, there are several free tools that offer excellent video compression while preserving resolution, frame rate, and audio clarity. Here are the top five free tools to help you optimize your videos for social sharing.
1. HandBrake
Best for: Cross-platform users who want customizable compression settings.
Platforms: Windows, macOS, Linux
HandBrake is a powerful open-source video transcoder that offers professional-level compression options for free. It supports nearly every video format and includes preset settings optimized for various platforms like YouTube, Vimeo, and Gmail. You can adjust resolution, bit rate, and encoding format while retaining high video quality.
Pros:
Free and open source
Presets for social media platforms
Batch processing
Supports almost all video formats
Cons:
Learning curve for beginners
Why it’s great: HandBrake balances file size and video quality, making it ideal for reducing large videos before sharing them online.
2. VLC Media Player
Best for: Users who already use VLC and want simple compression features.
Platforms: Windows, macOS, Linux
VLC is more than just a media player—it also includes a built-in video converter and compressor. While not as robust as HandBrake in terms of customization, it allows basic compression by lowering resolution and bit rate. It's perfect for quick, no-fuss conversions.
Pros:
Lightweight and easy to use
No need to install another program if you already use VLC
Supports wide range of formats
Cons:
Limited compression controls
Not ideal for batch processing
Why it’s great: VLC offers a simple way to compress video clips quickly without needing to learn a new interface.
3. Clipchamp
Best for: Online users looking for drag-and-drop convenience.
Platforms: Web-based (now owned by Microsoft)
Clipchamp is a free online video editor that includes a compression tool designed for social sharing. With presets for Instagram, YouTube, and Facebook, you can compress videos in your browser without downloading software. It offers a clean, user-friendly interface and integrates with cloud storage.
Pros:
No installation needed
Easy for beginners
Social media presets
Cons:
Requires internet connection
Free version has some limitations on export resolution
Why it’s great: Clipchamp is ideal for quick social media content creation and compression directly in your browser.
4. Shotcut
Best for: Content creators who want more editing and compression control.
Platforms: Windows, macOS, Linux
Shotcut is a free, open-source video editor that includes advanced exporting and compression settings. It supports high-quality codecs and allows users to customize bit rate, resolution, and format. Though more complex than basic tools, it gives creators full control over video quality and file size.
Pros:
Professional-grade features
High-quality exports
Extensive format support
Cons:
Steeper learning curve
Interface may feel cluttered to beginners
Why it’s great: Shotcut is perfect for those who want to both edit and compress videos without switching tools.
5. FreeConvert
Best for: Quick, no-install compression for mobile and desktop users.
Platforms: Web-based
FreeConvert is a free online tool that lets you upload videos and compress them with minimal hassle. It supports multiple formats and lets you adjust video quality, resolution, and codec settings. Upload limits apply, but it’s a great tool for fast, high-quality compression.
Pros:
No software installation
Simple and intuitive
Works on any device with a browser
Cons:
File size upload limits (1GB for free users)
Ads and upsell prompts
Why it’s great: FreeConvert is perfect for compressing short videos quickly without needing technical knowledge.
Final Thoughts
Whether you're posting to Instagram Stories, uploading to YouTube, or sending videos via WhatsApp, compressing your videos without losing quality is crucial. These five tools—HandBrake, VLC, Clipchamp, Shotcut, and FreeConvert—cover a wide range of needs, from simple one-click solutions to professional-grade compression. Try out a few to find the one that fits your workflow and start sharing your videos faster and smarter.
0 notes
Photo

AMD Ryzen 5 6-Core 3.7GHz 4600G AM4 Vega7 8GB 500GB SSD Strategize and reach your targets easily with the PCBuilder AMD Ryzen 5 4600G Home Master Windows 11 Desktop PC. This pre-built desktop PC is designed for use at home or in the office and is powered by an AMD Ryzen 5 4600g CPU with Radeon built-in graphics. It also comes with an A520 chipset motherboard, 8GB of high-speed DDR4 memory, and a 2.5″ SATA SSD. Built with efficiency in mind so you can reach your deadlines on time, this pre-built PC has everything you need to hit those daily targets. With Microsoft Windows 11 already installed, you can also run the latest versions of all your apps with more features and better security. Its Radeon built-in graphics are also a great option for presentations and video content or editing. The Home Master features a Ryzen 4000 G-Series CPU and DDR4 memory, which will ensure that every task gets completed quickly and efficiently. With 6 cores and 8GB of DDR4 memory, no task is too much for it to handle. Data can be transferred, and applications can be loaded at lightning-quick speeds thanks to the included 2.5″ SATA SSD. This makes using apps like Microsoft Word and Excel run even more smoothly, so you can get more work done. All the components are held together with a high-performance AM4 Motherboard with Lightning Gen 3 support. The motherboard delivers an efficient and productive experience with stable functionality and maximum performance. Everything is protected and held together inside a sleek-looking Micro-ATX Chassis. This modern-looking compact chassis is easy to maintain and upgrade, while its smaller form factor is great for saving some space in the home or office. The Home Master comes installed with Windows 11 which has easy-to-use tools that can help you optimize your screen space and maximize your productivity. It features great tools like Microsoft Edge, the new and improved Microsoft Store, Snap Layouts to arrange your open windows into grids, Desktops for better organization, as well as Widgets. Windows Security also offers advanced protections to defend against today’s ever-changing cyber threats. This includes device encryption, find my device, firewall and network protection, internet protection, parental controls, secure boot, and Windows Hello among other features. Norton Security Software is designed to protect your connected device as well as your personal information and offers more powerful layers of protection from ever-changing threats. It can protect your PC or Mac from viruses, ransomware, malware, and other online threats while you bank, shop and browse the internet. It ensures that your personal device is protected from unauthorized access to your personal files and the financial information it stores with the Smart Firewall. FEATURES: Keep your components protected in the sleek-looking PCBuilder Bunker M-ATX Chassis Six-Core AMD Ryzen 5 4600G CPU with a boost clock of up to 4.2GHz Radeon built-in graphics designed for videos and presentations High-quality and reliable performance with DDR4 Desktop Memory Get lightning-fast storage with a 2.5″ SATA SSD Durable and versatile AM4 Micro-ATX Motherboard Microsoft Windows 11 Operating System SPECIFICATIONS: Operating System: Microsoft Windows 11 Home Software: Norton Security Software AMD Ryzen 5 4600G 6-Core 3.7GHz AM4 CPU Cores: 6 Cores Base Clock Speed: 3.7GHz Boost Clock Speed: 4.2GHz GPU Cores: 7 Socket: AM4 A520 Chipset AM4 Micro-ATX Motherboard Socket: AM4 Form Factor: Micro-ATX 8GB DDR4 3200MHz Desktop Memory Memory Capacity: 8GB Data Transfer Rate: 3200MHz Generation: DDR4 500GB 2.5″ SATA SSD Capacity: 500GB 300W ATX Non-Modular Power Supply Rated Output Power: 300W Cooling: 120mm Silent Fan PCBuilder Bunker M-ATX Chassis Type: Micro-ATX Mid Tower Side Panel: Steel Expansion Slots: 4 Dimension: 38 x 21 x 38 cm WHAT’S IN THE BOX: PCBuilder AMD Ryzen 5 4600G HOME MASTER Windows 11 Desktop PC x1 1.8m Power Cable x1 Please note that the images displayed are for illustrative purposes only. Components will be supplied as per the technical specifications in this listing. 3DMark FPS & Time Spy benchmark scores are estimates only.
#COMPUTERS#DESKTOPS#GAMING_DESKTOPS#3.7_GHZ#4600G#500GB_SSD#6_CORE#8GB_DDR4_RAM#AMD#PREBUILT#RYZEN_5#WINDOWS_11_HOME
0 notes
Text
Enhance Your Photos with White Backgrounds, Santa Hats, Blending Images, and More Using PhotoCut

The art of photo editing deserves utmost concern for beauty, both in personal and professional settings, in today's modern world. There are many things you can do with PhotoCut, like giving an existing photo an extra white background, putting Santa hats on people, blending two images online together, and doing some cool tricks with images. In this article, we will give you a complete walkthrough of these topics and discuss how you can use PhotoCut to achieve some remarkable and glamorous-looking photos with ease.
Learn how to click amazing selfies with useful tips.
Adding a White Background to Your Photos

Adding or replacing a white background is one of the more banal photo-editing jobs one is likely to engage in. It is a trick that gives an image a crisp, professional look, allowing the viewer to focus clearly on the subject. This matters all the more for product photography, professional portraits, and headshots.
PhotoCut does a great job of providing an easy way to change backgrounds by running AI to remove backgrounds from images. In this case, we shall describe how to put a white background into your photo using PhotoCut:
Open your image file for editing on PhotoCut. PhotoCut accepts many image formats, including JPG, PNG, etc.
AI works in the background as you upload the image to detect the background and remove it automatically. The application goes on to find the edges of the subject and separate it from the background.
After removing the background, go ahead and set the specified background to white. Sounds simple? Open up the background settings and choose the solid white color option. At this moment, you should see the subject sitting on a clean, white background.
If desired, you may go into Edge Refinement to give the cutout a more natural finish. Run your brush or eraser across any pixels you'd like to adjust to make sure that nothing unwanted, or a trace from the original background, sticks with the subject.
Last of all, you must save or download the image in your desired format. This is how your freshly white-backgrounded photograph would have limitless working options for business and personal jobs.
Changing Photo Backgrounds to White

There are times you might not want to add a white background but change an existing background to white, especially when the background at hand tends to distract from the subject or is out of character with the theme of your picture.
Changing a photo's background to white is made easy with PhotoCut, and the approach is mostly similar to the white-background adding methods:
Begin by uploading the photo whose background you want to change. This could be a portrait, product shot, or any other image that features an existing background.
PhotoCut’s background removal tool will automatically detect the subject of the image and separate it from the old background. The tool will ensure that the edges of the subject are well-defined for a smooth transition.
Once the original background has been removed, the subject will now be all by itself. From here, go to background settings and choose the white background option. This instantly replaces the old background with a clean, bright white one.
Optionally, you can adjust the positioning of the subject on the white background, like center, enlarge, or even slightly rotate it to get the desired composition.
Take some time to touch up the edges of the subject with PhotoCut’s editing tools. Smooth rough spots and ensure no remnants of the old background are left.
By now, the background change should have been completed, so go ahead and download your image with the white background. It is now ready for professional or personal use.
Find the easiest methods to make photo collages.
Adding Santa Hats to Your Photos

With the Christmas season in full swing, using festive accessories like Santa hats in pictures is an excellent way to share joy. So, whether you're creating Christmas cards, social media postings, or simply experimenting with your photographs, adding Santa hats is a simple process with PhotoCut.
Begin by uploading the photo to which you want to add the Santa hat; this can be a portrait, a group photo, or even photographs of pets.
If the photo's subject has not yet been isolated (i.e., the backdrop has not been removed), you can use PhotoCut to remove the human or animal from the background. This ensures that the Santa hat fits over the subject's head without interference from other items in the photograph.
You can either use a pre-made Santa hat image from some stock photo website or a transparent PNG Santa hat that you find online. Just make sure to use a version that has a transparent background for an even easier overlay.
Once you have the Santa hat image, import it over in PhotoCut, placing it on the head of the subject. Adjust the size and rotation so it fits well. If you find you need to adjust the hat size, do so with the resize tools in PhotoCut.
You might want to refine the edges of the hat to have it sit naturally on your subject. Again, use PhotoCut's editing tools to ensure that the hat looks perfect on the subject's head.
Once everything sits well with the Santa hat, download the edited photo, and there you go! It's ready for distribution among friends, family, or on social media to bring in some holiday cheer.
Discover the coolest tattoo fonts to use in your next tattoo.
Blending Two Images Online

Blending two images online is a common technique for composite pictures, double-exposure effects, and creative photo manipulation; blending allows the best aspects of two or more images to resurface into the same final product.
Start by uploading the two images that you want to blend. The photos may include anything from portraits to landscapes, any type of photo you want to merge.
If either image has a distracting or unnecessary background, remove it using PhotoCut. This ensures that you are working on the key subjects of each photo.
Overlay the first image onto the second, adjusting the positioning, size, and top image opacity to enter into more interaction with the blending of both images.
Paint blending should be made more seamless for experimentation with blending modes and opacity, in a way that allows control regarding how the two images merge. For instance, try the "Multiply" or "Overlay" modes for creating interesting lighting effects.
Use the masking tools to clean the edges of two images for better blending together. Make sure there is no hard line and a visible seam where the two images meet, once such hard work or effort is achieved.
After that, you can download the final blended image. Now, the two of them have been combined into a single picture that's uniquely creative.
Design T-shirts for your business online for free with PhotoCut’s T-shirt Design Maker.
Shaping Your Images Online

Shaping images is a contemporary task that adds uniqueness to any photo through funky frames, curves, or cutouts. Whether you wish to crop it into a circle or a heart, or any custom shape, PhotoCut makes things easy.
Start by uploading the image that you want to shape. This might be a portrait, a product picture, or any other style of image.
PhotoCut has a number of predefined shapes, including circles, ovals, hearts, and stars. Choose the one that best meets your needs.
Resize the shape to encompass the section of the image you wish to highlight. You can also change its position to ensure the most important part of the image falls within the frame.
Now, apply this to the image once you feel happy with the shape and position. This will crop your image into the selected shape, disregarding everything outside it.
You can smooth the edges or crop the aspect ratio if you want to. Use the editing tools present at PhotoCut to make it look all crisp and polished.
So, your image is shaped and cleaned, and it will be ready for download in the final version. It is now ready for sharing, printing, or liking.
Conclusion
On the other hand, whether you want to add a white background, change a present one by adding some festive touches such as Santa hats, or perhaps combine two images, or cut your photos into custom forms, PhotoCut will help you achieve that without the hustle, just like in the case of anything, it's dosage for such works. The tools of PhotoCut and features that a novice would think are just for beginners are as easy for professionals to use in creating perfect results within a short time. Just follow the steps given above, and your photo editing will now move to the next level, a unique and very high-quality image, whether for personal or professional use.
Design your posters online for free with PhotoCut’s Poster Maker.
FAQs
Q1. Is it easy to add a white background to a complex photo that has many tiny details?
Ans. This is contingent on the tool and the complexity of the image itself. Automated tools are advancing, but images with hair or fur or those with very intricate patterns usually require manual refinement for clean results.
Q2. Will I have to get special software to add a white background?
Ans. No. Many online tools are either free or have free trials for basic removal of white backgrounds. Else, you can also work with more advanced software like Adobe Photoshop or GIMP, but these usually have quite some steep learning curves.
Q3. What kind of images work best for changing the background to white?
Ans. Images with a clear contrast between the subject and background are the most suitable. Very well-lit photos generally produce better results when the subject has clearly defined edges against the background.
Q4. Any tips for ensuring the look appears natural after the background change?
Ans. Try the following:
Utilize a high-resolution photo: The higher the resolution, the more detail and clarity are sustained.
Edge refinements: Pay special attention to the edge of the subject while utilizing all refinement options available to clean up any leftover parts of the original background.
Think about shadows: Adding soft shadows behind your subject will assist in achieving a more natural placement on the white backdrop. Some tools can automatically generate these.
Avoid over-smoothing: Over-smoothing edges can make the subject look artificial.
Q5. Is making the Santa hat look realistic that difficult?
Ans. Sure is!
Pick a hat that matches the lighting and style of your photo.
Resize and rotate the hat to fit over the person's head properly.
Remember perspective.
Maybe add a soft shadow below the hat for realism.
Some software allows you to color-correct and brighten the hat, matching the overall lighting in the photo.
Q6. Can I add Santa hats to other people with one image?
Ans. Yes, most apps allow multilayering stickers or overlays on a single image. Simply add the hat individually and align it.
Q7. How will you define blending?
Ans. Blending is the merging of two or more photographs into a single image, which creates a sense of layering or merging. The technique can allow one to create double exposures and surreal compositions or simply bring two images together.
Q8. What effects can I do with blending?
Ans. Too many! Among others, you can create:
Double exposures: A portrait combined with a landscape or texture.
Surreal images: Merging unrelated objects or scenes to create dreamlike or fantastical compositions.
Photomontages: A collage of different images to make a coherent scene.
Light leaks and textures: Overlay textures (or simulated light leaks) for effects.
Q9. How can I shape my images online?
Ans. Here are a few methods:
Shape Masks: Many online editors allow you to apply shape masks to an image. The image will then only be visible within the selected shape. Options include circles, stars, hearts, speech bubbles, and more.
Image Frames: Some websites provide pre-designed frames with unique shapes that you can place your image inside.
Clipping Masks (in more advanced editors): Create custom shapes and use them as clipping masks to define the visible area of the image.
Q10. What are some creative ways to use image shapes?
Ans. Here are some creative ways:
Profile Pictures: Use a circular shape for a clean and modern profile picture.
Social Media Graphics: Create eye-catching graphics with images shaped into stars, hearts, or other relevant forms.
Collages: Use different shapes to arrange images in a visually interesting way.
Logos: Incorporate shaped images into logos or branding materials.
0 notes
Text
Don’t Let File Formats Slow You Down – Here’s What You Need to Know
There’s nothing more frustrating than trying to send a file and getting hit with “unsupported format” or “file too large.” Whether it’s work documents, school projects, or video clips from your phone, we all deal with files that don’t play nice. That’s why knowing how to convert, compress, and merge files is such a game-changer—it just makes digital life smoother.
Luckily, there are tools out there that make these file tasks ridiculously simple, even if you're not the most tech-savvy person in the room.
What File Conversion Actually Means (And Why It Matters)
File conversion is basically taking a file in one format and changing it into another. That could mean turning a .docx into a .pdf so it opens the same on any device, or converting a .mov video to .mp4 so it uploads faster.
Here are a few real-world conversion examples:
Documents: Excel to CSV, Word to PDF, PDF to editable Word
Images: HEIC to JPG, PNG to WebP
Audio/Video: MP4 to MP3, FLAC to AAC, MKV to MP4
eBooks: PDF to EPUB, MOBI to Kindle
If you’ve ever had a file rejected when uploading it somewhere, you already know why having a good converter matters.
Two Ways to Convert: Offline vs. Online
You’ve got two main ways to get the job done—offline software or online tools.
Offline Tools
These are your downloadable apps like Wondershare UniConverter, Format Factory, or PDF Architect. They're super reliable and great for working offline or doing bulk conversions. But they also take up space, need regular updates, and can be a little overkill for quick one-off tasks.
Online Tools
Online converters are perfect for when you just want to get something done without installing anything. A great example is Convert Eaze, which lets you convert, compress, and merge files all from your browser. Whether it’s a PDF report that’s too large to send or a few documents that need to be merged for a presentation, it handles it all in one place—fast, clean, and hassle-free.
Discovering Useful Tools in Unexpected Places
It’s funny how we come across helpful tools in the weirdest corners of the internet. Maybe you’re scrolling through sneaker news on Hypebeast, checking out fan art on DeviantArt, or reading productivity tips on Lifehacker—and someone casually drops a link to a tool they swear by for converting files. That kind of random discovery can end up being exactly what you needed.
If you’re curious to explore this more, here are a few earlier blog posts that go deeper into the topic:
Blog #1: Breaks down file conversion in detail, with examples and tech behind it
Blog #2: Focuses more on compression and merging, plus how people stumble onto tools online
These posts are great if you want to go deeper or share the knowledge with someone else struggling with file issues.
Don’t Sleep on Compression & Merging
Sure, converting gets most of the spotlight—but compression and merging are just as important.
Compression helps reduce file sizes without destroying quality, which is a must for email attachments or uploading to sites that have size limits.
Merging is perfect for combining several PDFs into one doc, stitching videos together, or bundling images into one downloadable file.
Both features help you stay organized, save time, and avoid the classic “file too big” or “can’t open this” issues we all run into.
Final Thoughts
Files don’t always behave the way we want—but that doesn’t mean you have to waste time fixing them. When you’ve got a tool that can convert, compress, and merge in just a few clicks, it honestly feels like cheating (in the best way).
Next time a file refuses to upload or open correctly, you’ll know exactly what to do—and you won’t need to download a dozen different programs just to do it.
And hey, if you happen to find a tool that helps, don’t forget to be that person who drops the link in a random comment thread. You never know whose day you might save.
0 notes
Text
The Ultimate Guide to Free Online Invoicing Tools and Invoice Template Generators

In today’s fast-paced, digitally driven business environment, managing finances quickly and efficiently has never been more crucial. Whether you're a freelancer juggling multiple clients, a small business owner just starting out, or an agency managing projects at scale—sending invoices is part of the game. But let’s be honest, creating invoices manually? Total time-waster. That’s where free online invoicing tools come into play. These aren’t just fancy digital receipts—they’re a complete transformation in how businesses get paid faster and maintain professional communication.
Think about it: no more editing Word documents, calculating taxes by hand, or dealing with formatting issues. With the click of a button, an online invoicing tool lets you generate sleek, professional invoices ready to be sent out instantly. It automates the dull stuff—totals, tax percentages, payment links—and gives you back your time to actually focus on your work.
What’s more? There are dozens of free tools out there that are surprisingly powerful. They offer stunning templates, integrate with accounting systems, and let you track who’s paid and who’s ghosting you. And guess what? You don’t need to be a tech wizard to use them.
Why Invoicing Tools are a Game-Changer
Let’s face it: invoicing isn't glamorous. But invoicing software? That’s a game-changer. These tools streamline your billing process from start to finish. You input the client details, your services, prices, and boom—you're done. No formatting issues. No confusion about what’s due. Just clean, clear, and professional invoices that build trust and speed up payments.
Here’s how they shake things up:
No more manual math: Tax, discounts, subtotals? All calculated automatically.
Instant professionalism: Custom branding makes even solo freelancers look enterprise-level.
Auto-reminders: Tired of chasing late payments? Let the tool handle that.
Analytics & tracking: Know exactly who paid, when, and how much.
We live in a world where clients expect efficiency. Sending an invoice that looks like it was made in Microsoft Paint from 2002 doesn’t exactly scream professionalism. A well-designed, auto-generated invoice, on the other hand? It sends a message: “I know my worth.”
The Rise of Free Invoice Creators
Back in the day, creating invoices meant either hiring an accountant or struggling through clunky spreadsheets. But today? Free invoice creators have leveled the playing field. They're intuitive, cloud-based, and built with modern entrepreneurs in mind. These tools exploded in popularity during the remote work boom, and for good reason—they’re simple, accessible, and get the job done.
Platforms like Wave, Zoho Invoice, and even PayPal offer free invoicing tools packed with features that rival their paid counterparts. The best part? You don’t need to install anything. Just open your browser, select a template, plug in your info, and you’re ready to go.
So, why are they free? Many companies offer limited features to get users in the door—kind of like a “freemium” model. But for most freelancers and small businesses, these free versions are more than enough. You can create unlimited invoices, track payments, and even integrate with tools like Stripe or PayPal for direct payments.
What is a Free Online Invoicing Tool?
In plain English, a free online invoicing tool is a web-based application that helps you create, send, and manage invoices—without costing a dime. These tools are built to simplify the entire billing process, letting you focus more on your actual business and less on the boring admin stuff.
Unlike traditional invoice templates that live on your desktop or inside clunky Excel files, online invoicing tools store everything in the cloud. That means you can access your invoices from anywhere—whether you're at your desk or sipping a cappuccino in a café.
Here’s what a typical tool can do:
Let you choose from customizable templates
Auto-fill client details and recurring billing info
Add your logo, brand colors, and payment terms
Send invoices directly to your client’s email
Track who opened, viewed, or paid the invoice
Integrate with accounting software like QuickBooks or Xero
And the best part? They’re built for non-accountants. Most platforms offer a clean, drag-and-drop interface that even a tech newbie could master in minutes. It's like having your own personal billing assistant—only this one doesn’t ask for a paycheck.
How It Differs from Traditional Invoicing Methods
Traditional invoicing—think Word docs, Excel sheets, or even paper—is outdated, inefficient, and error-prone. Ever typed out the same client address 10 times? Ever miscalculated a tax line and had to resend the invoice? You’re not alone.
Here’s how online tools blow the old-school methods out of the water:
Traditional Invoicing
Online Invoicing Tool
Manual entry every time
Auto-fill client & item info
Easy to lose or misplace
Cloud-based, always backed up
Limited formatting
Dozens of professional templates
No reminders
Auto-send payment reminders
No analytics
See who viewed & paid in real time
Let’s be real—manual invoicing wastes time. And in business, time equals money. Online tools not only save you time but also reduce errors, speed up cash flow, and make you look more legit. Whether you're sending out one invoice a month or fifty, the right tool can seriously change how you handle your finances.
Benefits of Using an Online Invoice Template Generator
Creating invoices doesn’t have to feel like a tedious chore. With an online invoice template generator, you not only save time but also create invoices that look polished and professional. And the best part? You don’t need any graphic design skills or accounting experience to pull it off.
Let’s break down the key benefits:
Speed and Efficiency
One of the top reasons to use an invoice generator is how much time it saves. Instead of designing invoices from scratch every time, you simply fill in your project or service details in a pre-made template. These tools automate all the hard parts—like calculating totals, applying taxes, and formatting everything properly. That means less time staring at spreadsheets and more time doing what you love.
Professional-Looking Invoices
First impressions matter, even in the world of invoicing. A messy or outdated invoice can give clients the wrong idea. But with an invoice generator, you can instantly produce invoices that look like they came straight out of a professional design studio. Most tools let you:
Upload your logo
Customize colors and fonts
Include your business branding
Choose from clean, modern templates
These visual touches do more than just make things pretty—they boost your credibility.
Error-Free Billing
We all make mistakes—but invoicing errors can cost you. Forgetting to include taxes or accidentally duplicating line items can lead to confusion, delayed payments, or even legal headaches. With template generators, everything is structured and pre-validated. The built-in calculators ensure accuracy, and you don’t have to worry about decimal points or conversion errors ever again.
Who Needs a Free Invoice Creator?
You might be thinking, “Do I really need an invoice generator?” If you’re offering any kind of service or product in exchange for money, the answer is a resounding yes. These tools are designed for a wide range of professionals and business owners who need to invoice quickly and professionally.
Freelancers and Solopreneurs
Freelancers are often one-person shows. That means you're the marketing department, customer support, project manager, and—yes—the accountant. Invoice creators simplify your life. Whether you’re a graphic designer, copywriter, or virtual assistant, a good invoice tool lets you:
Send branded invoices within minutes
Track outstanding payments easily
Set up recurring invoices for monthly clients
And since most tools are mobile-friendly, you can send an invoice right from your phone after a client meeting or completed gig.
Small Businesses and Startups
When you’re running a small business or startup, every resource counts. Using a free invoice creator helps you look professional without having to hire a full-time bookkeeper or purchase expensive accounting software. Many of these tools come with additional perks like:
Inventory management
Customer databases
Integration with CRM or accounting tools
It’s like adding a turbo boost to your back office without increasing your costs.
Agencies and Consultants
Agencies often manage multiple clients, each with unique contracts, rates, and terms. A reliable invoice creator keeps everything organized and consistent. Consultants also benefit from setting up invoice templates that reflect their services, retainers, and consultation hours, reducing redundancy and errors.
Key Features to Look for in a Free Invoice Generator
Not all invoice generators are created equal. Some are sleek and feature-rich, while others are just glorified text editors. If you’re serious about making your invoicing process easier and more efficient, here’s what to look for in a free invoice tool:
Customizable Templates
You want your invoices to match your brand—period. That means the ability to:
Upload your logo
Change color schemes
Use your preferred fonts
Adjust layout and line items
Templates that can be tweaked to fit your business style make you look more legit and recognizable.
Multiple Currencies and Languages
If you're working with international clients, you need a tool that supports:
Currency conversion
Different tax regulations
Multiple language options
Many free tools like Zoho Invoice or Invoicely offer multi-language and multi-currency support to cater to global business needs.
Payment Integration Options
Let’s be real—clients love convenience. And nothing is more convenient than paying an invoice with just a click. The best invoice generators integrate with platforms like:
PayPal
Stripe
Square
Direct bank transfers
This not only speeds up payment but also offers tracking so you can see exactly when your client completed the transaction.
Auto-Calculations and Tax Settings
Manual calculations are not only a hassle—they’re risky. A missed tax rate or incorrect total can mess up your books. Good invoice tools should:
Automatically calculate taxes and discounts
Allow custom tax rules for different regions
Handle subtotal and grand total lines clearly
This ensures you’re not undercharging—or overcharging—by mistake.
Best Free Online Invoicing Tools in 2025
The market for online invoicing tools is booming, and several free platforms have earned top marks from users. Here's a look at five of the best free options available in 2025, based on usability, features, and value for solopreneurs and small teams.
Tool #1: Wave
Wave is a crowd favorite for a reason. It's 100% free with no hidden fees and includes full invoicing, accounting, and receipt scanning. It’s ideal for freelancers and small business owners who want everything in one place.
Top features:
Unlimited invoices
Recurring billing
Payment integration with Stripe
Bank account sync
Tool #2: Zoho Invoice
Zoho Invoice is part of the powerful Zoho suite, and its free version is surprisingly robust. It offers slick templates and automation options.
Best for: Global invoicing, thanks to support for 30+ languages and multiple currencies.
Tool #3: Invoicely
Simple yet powerful, Invoicely is perfect for users who want clean templates and basic automation without the clutter.
Key features:
Multi-currency support
Time & expense tracking
Custom branding options
Tool #4: Invoice Generator by Shopify
If you’re an eCommerce seller or operate through Shopify, this free invoice generator is incredibly useful. It’s quick, clean, and doesn’t require sign-up.
Great for: On-the-fly invoices without account creation.
Tool #5: PayPal Invoice
For businesses already using PayPal, their invoice tool is a convenient way to bill clients. It’s free, integrated with your account, and supports international payments.
Perks:
Payment reminders
One-click payments
Mobile-friendly interface
How to Use an Invoice Template Generator Step-by-Step
You don’t need an accounting degree to use an invoice template generator. Here's a simple guide that breaks it down into four easy steps:
Step 1: Choose a Template
Most tools offer several template designs—some minimalistic, others a bit more stylish. Pick one that matches your business tone. For example:
A lawyer might prefer a clean, black-and-white layout.
A designer might choose a colorful, artistic style.
Step 2: Customize the Design
Upload your business logo, add your contact info, and tweak the color scheme. Your goal? Make sure your invoice looks like it came straight from your brand, not a generic form.
Step 3: Add Itemized Services and Taxes
This part is crucial. Break down what you're charging for:
Include service descriptions (e.g., "Website Redesign - Homepage & About Us page")
Add quantity, rate, and tax (if applicable)
Use built-in tools to calculate totals automatically
Step 4: Download or Send Online
Once your invoice is ready, you can usually:
Download it as a PDF
Email it directly through the platform
Share a link for online payment
Some tools also let you track views and send reminders if the client hasn’t opened it.
Free vs Paid Invoicing Tools – Which One Should You Use?
There’s always that moment when you ask yourself: “Should I just stick with the free plan or is it time to go premium?” The answer depends on where you’re at in your business journey. Free tools are fantastic to get started, but as your needs grow, you may need more features that are locked behind a paywall.
Pros of Free Invoicing Tools
Cost-effective: Zero upfront investment, ideal for side hustlers and freelancers
Easy to use: Designed for quick setup and minimal learning curve
Enough features for small-scale invoicing: Most offer templates, basic customization, and email delivery
No contracts or commitments
Cons of Free Invoicing Tools
Limited features: You may hit a cap on clients, invoices, or storage
Branding limitations: Some tools slap their logo on your invoices
No automation or advanced reporting
Fewer integrations with other tools like CRMs or accounting platforms
When to Consider Upgrading
You invoice multiple clients weekly or monthly
You need advanced analytics and automation
You want a fully branded, white-label solution
You want to integrate invoices with your CRM or bookkeeping software
A good rule of thumb? Start free. As you scale, reassess your needs every few months. Many tools offer free trials of their paid features so you can test before committing.
Common Mistakes to Avoid When Creating Invoices
Invoicing may seem straightforward, but even a minor mistake can delay your payments—or worse, make your business look unprofessional. Here are some common errors people make, and how you can avoid them using an invoice generator:
Forgetting to Include Due Dates
One of the biggest mistakes? Leaving out a clear due date. Vague terms like “pay upon receipt” can lead to confusion. Always specify:
The exact payment due date
Whether you offer early payment discounts
The penalty for late payments
Not Adding Late Payment Terms
Let’s face it: some clients just don’t pay on time. If your invoice doesn’t include late fee terms, you’ve got no leg to stand on. Be upfront with something like: “A late fee of 5% will apply to unpaid invoices past 14 days.”
Overlooking Tax or Discount Details
Taxes vary by region, and if you forget to include them, it could hurt your bottom line or trigger compliance issues. Same goes for discounts—whether it's a promotional offer or a bulk order incentive, always mention them clearly with proper line items.
Missing Invoice Numbers or Dates
Each invoice should have a unique identifier (e.g., INV-0032) and a clear issue date. This helps with tracking and bookkeeping. Fortunately, most invoice generators auto-create these for you.
Inconsistent Branding
Your invoice is an extension of your business. If your logo, colors, and tone vary wildly across documents, it can hurt your brand consistency. Stick to a template, and make sure your visual identity is on point.
How Invoicing Impacts Cash Flow and Client Relationships
It’s easy to think of invoicing as just paperwork, but in reality, it plays a massive role in the health of your business. Done right, it can boost your cash flow and strengthen relationships. Done wrong? You’re left chasing money and damaging your reputation.
Timely Invoices = Timely Payments
The sooner you send an invoice, the sooner you get paid. Simple math, right? But a lot of people delay because they dread the process. Online invoice tools eliminate that friction—just fill in the blanks and click send. Some platforms even automate the entire process based on project completion or milestones.
Clarity Builds Trust
A clear, detailed invoice shows that you’re organized and professional. Clients appreciate knowing exactly what they’re paying for. It avoids awkward questions and disputes, especially when the scope of work is long or complex.
Follow-Ups Without the Awkwardness
Chasing payments is uncomfortable, especially when you’ve built a good rapport with a client. Automated reminders built into most invoice tools handle this for you. They’re polite, persistent, and effective—no awkward emails necessary.
Improved Forecasting and Planning
Regular invoicing helps you predict income, set budgets, and spot problem clients. If someone is consistently late, you’ll know it. If a certain month is always light, you can plan around it.
Mobile vs Desktop Invoicing – What's Better for You?
Both mobile and desktop invoicing have their perks, but the best choice depends on your work style. Luckily, most good invoicing tools offer both options, allowing you to switch seamlessly depending on the situation.
Benefits of Mobile Invoice Apps
Mobile invoicing is perfect for freelancers and field workers who are always on the go. Need to send an invoice from a client site or during your commute? Just pull out your phone and boom—it’s done.
Why mobile rocks:
Create invoices from anywhere
Instant notifications on payments
Perfect for quick edits and approvals
Some apps even support voice-to-text input
Desktop Tools for Advanced Features
If you’re someone who needs in-depth financial reports or deals with bulk invoicing, desktop platforms are more robust. You get a larger workspace, keyboard shortcuts, and integrations that might not be available in mobile versions.
Best for:
Advanced analytics and reporting
Connecting to CRMs, time trackers, or accounting software
Batch invoicing and bulk email sends
Pro Tip: Use both! Create detailed invoices on your desktop, and use your mobile device to track payments or send reminders.
Integrating Invoice Tools with Your Accounting Software
Why stop at invoicing? When you integrate your invoice generator with accounting software, you unlock a whole new level of efficiency. You can eliminate double entry, reduce human errors, and have a full picture of your business finances.
Top Integrations to Streamline Finances
Many invoicing tools seamlessly integrate with platforms like:
QuickBooks: Ideal for SMBs needing full-service accounting
Xero: Great for cloud-based accounting lovers
FreshBooks: Combines time-tracking and invoicing
Stripe or PayPal: For instant online payments
Reducing Manual Errors Through Syncing
Let’s say you bill $2,000 to a client. With integration, that invoice—and any payment—gets automatically reflected in your financial reports. No need to input the same data twice. This helps with:
Accurate tax filings
Real-time cash flow tracking
Easier expense categorization
Making Tax Time Less Stressful
When tax season hits, having all your invoices synced with your accounting software is a game-changer. Your accountant will thank you—and you’ll avoid the frantic search for missing documents or receipts.
The Future of Online Invoicing Tools
As more businesses embrace digital transformation, the future of invoicing is moving far beyond simple templates and PDF downloads. AI, automation, and data analytics are shaping smarter, more personalized invoicing experiences that not only save time but help business owners make informed decisions.
AI-Powered Invoicing
Imagine invoice tools that automatically generate the perfect invoice based on your calendar, email threads, or past jobs. AI can already scan client interactions to detect billable hours, populate line items, and even set pricing tiers based on historical data. These tools are evolving rapidly and will continue to change how freelancers and businesses handle billing.
Automation and Recurring Billing
Recurring invoices are no longer just for SaaS companies. Freelancers, subscription-based services, and even consultants are leveraging auto-billing tools to ensure they never miss a payment. Future tools will be able to detect missed deadlines, auto-generate new invoices, and sync with client schedules to reduce friction.
Invoicing Meets Data Analytics
Beyond payments, invoicing tools are turning into mini-financial dashboards. You’ll be able to see which clients pay on time, how much revenue each service brings in, and even get predictive insights about slow seasons or cash flow risks. This transforms invoicing from a chore into a strategy tool.
Conclusion
Free online invoicing tools and invoice template generators are game-changers for freelancers, startups, and growing businesses. They take the headache out of billing, save precious time, and help you look professional—all without costing a dime. Whether you're sending your first invoice or automating hundreds each month, these tools are your silent business partner, working in the background so you can focus on delivering great work.
The key takeaway? Don’t overthink invoicing. With the right free invoice creator in your toolkit, billing becomes fast, error-free, and even enjoyable. Choose one that fits your workflow, customize it with your brand, and let technology do the heavy lifting.
0 notes
Text
How to Make a Digital Design: A Step-by-Step Guide

Digital design is an essential skill in today’s digital world, whether you’re creating graphics for social media, websites, branding, or digital art. Whether you’re a beginner or an aspiring professional, understanding the process can help you create visually appealing and functional designs. In this guide, we’ll break down the steps to making a digital design from start to finish.
Step 1: Define Your Purpose and Audience
Before you start designing, determine the goal of your design and your target audience. Ask yourself:
Is it for a website, social media, advertisement, or personal project?
Who will see this design? What are their preferences?
What emotions or actions do you want to evoke?
Having clarity on these points will help guide your design choices.
Step 2: Choose the Right Software
There are many digital design tools available, and selecting the right one depends on your project needs:
Adobe Photoshop – Best for photo editing and raster graphics.
Adobe Illustrator – Ideal for vector graphics and logo design.
Canva – User-friendly for beginners, great for social media and presentations.
Figma – Excellent for UI/UX design and collaboration.
Procreate – Perfect for digital painting and illustrations.
Step 3: Gather Inspiration and Plan Your Design
Before starting, gather inspiration from online sources such as Pinterest, Behance, or Dribbble. Create a mood board to organize color schemes, typography, and layout ideas.
Sketch your ideas on paper or use wireframing tools to map out the structure of your design before you dive into software.
Step 4: Set Up Your Canvas
Open your chosen software and set the appropriate dimensions for your design. Consider:
Resolution: Use 72 DPI for digital designs and 300 DPI for print designs.
Color Mode: RGB for screens, CMYK for print.
Aspect Ratio: Make sure it suits the platform where it will be displayed (e.g., Instagram post vs. website banner).
Step 5: Create a Strong Composition
A well-balanced layout improves readability and visual appeal. Follow design principles such as:
Rule of Thirds: Place key elements along grid lines for balance.
Alignment and Spacing: Keep elements aligned and maintain consistent spacing.
Hierarchy: Emphasize important elements through size, contrast, and placement.
Step 6: Choose Colors and Typography
Colors: Use a color palette that complements your design's theme. Tools like Adobe Color or Coolors can help.
Fonts: Select readable and appropriate fonts. Use font pairings that work well together (e.g., bold headings with simple body text).
Contrast: Ensure good contrast between text and background for readability.
Step 7: Add Graphics and Visual Elements
Enhance your design with:
Icons and illustrations
High-quality images
Shapes and lines to guide the viewer’s eye Make sure these elements blend well with the overall design.
Step 8: Use Layers and Effects Wisely
Most design software allows working with layers. Organize your layers and name them for easier editing. Use effects like:
Shadows and gradients for depth
Transparency and overlays for a modern look
Blending modes to merge images creatively
Step 9: Review and Refine
Take a step back and analyze your design. Check for:
Spacing and alignment issues
Color consistency
Readability of text Ask for feedback from peers and make necessary adjustments.
Step 10: Export in the Right Format
Save your design in the appropriate format:
PNG – High quality, supports transparency.
JPEG – Smaller file size, good for web use.
SVG – Scalable vector format, ideal for logos and icons.
PDF – Best for print and document sharing.
Conclusion
Creating a digital design involves planning, creativity, and technical skills. By following these steps, you can improve your design process and produce stunning visuals for any purpose. Keep practicing, stay updated with design trends, and experiment with new techniques to refine your skills. Happy designing!
1 note
·
View note
Text
Convert Excel to PDF Online – Fast, Free & Accurate! 📊➡️📄
Tired of messy formatting when sharing Excel files? The PDF Leader offers a quick, secure, and free solution to convert Excel to PDF online in just a few clicks! Say goodbye to compatibility issues and hello to professional-looking PDFs. 🚀
Why Convert Excel to PDF? 🤔
✔ Keep Formatting Intact – No more broken tables or misaligned text. ✔ Easy Sharing – PDFs open seamlessly on any device. ✔ Professional & Secure – Protect sensitive data and prevent edits. ✔ No Software Required – Convert Excel to PDF directly from your browser.
How to Convert Excel to PDF Online? 🔄
1️⃣ Visit The PDF Leader. 2️⃣ Upload your Excel file (XLS/XLSX). 3️⃣ Click ‘Convert’ and wait a few seconds. 4️⃣ Download your perfectly formatted PDF instantly!
Why Use The PDF Leader? 🌟
✅ 100% Free – No hidden costs or sign-ups. ✅ Fast & Accurate – Converts in seconds while keeping your layout. ✅ Safe & Private – Files are deleted after processing. ✅ Works on Any Device – Convert from desktop, tablet, or mobile.
💼 Whether you’re a business professional, student, or freelancer, The PDF Leader makes Excel-to-PDF conversion effortless. Try it today! 💻✨
🔗 Convert Now
0 notes
Text
good morning dead pixel <3
it is my (@byronstan)'s belief that @internetpoetry leaving the world left a vacuum where image-driven poetry once existed. it is @deadpixelpoetry's mission to fill that void, finding the middleground between fun and pretentious, open-access and gatekept. with a thousand screens at each of our disposal every day that consistently prime us to process visual media, not to mention the boundless online creative tools at our disposals, i want to again create a space for image- and text-driven poetry to meet.
digital collages and image macros don't need to be complicated to mean something. i want things that mean something. i want things that hurt my eyes with how much they mean something. send me things that mean something to you.
some excellent starting places include:
your phone's in-app photo editor
canva
the public domain image archive
gifcities.org
gimp, adobe free online editing tool, pictures in your camera roll that you never look at but can't bring yourself to delete, that file of poem scraps that you haven't figured out yet, etc.
1 note
·
View note
Text
Top 10 Free Alternatives to Photoshop in 2025
Introduction
Adobe Photoshop is a top choice for photo editing and graphic design, but it can be expensive. Many small businesses, freelancers, and hobbyists need budget-friendly tools with similar features. Fortunately, there are free alternatives that offer powerful editing tools without the high cost.
Below is a quick list of the free alternatives for Photoshop. Keep reading for details on each tool, including features, pros and cons, and the best use cases.
Top 10 Free Alternatives to Photoshop
1. GIMP
Features: Advanced tools, layers, filters, customizable brushes, plugin support, scripting capabilities
Platforms: Windows, Mac, Linux
Pros: Powerful, highly customizable, open-source, supports various file formats, including PSD
Cons: Can be difficult to learn
Best for: Professionals, advanced users, those who need an open-source Photoshop alternative
2. Krita
Features: Brush stabilizers, vector tools, animation support, customizable workspace, HDR support
Platforms: Windows, Mac, Linux
Pros: Excellent for digital painting, open-source, supports PSD files
Cons: Not ideal for photo editing, limited text tools
Best for: Digital artists, illustrators, comic creators
3. Photopea
Features: PSD support, layers, web-based, masks, filters, vector editing
Platforms: Web
Pros: No installation needed, works directly in the browser, similar interface to Photoshop
Cons: Ads in free version, requires internet connection, lacks some advanced Photoshop features
Best for: Quick edits, PSD file access, basic graphic design
4. Canva
Features: Templates, drag-and-drop design, cloud storage, stock images, AI-powered design tools
Platforms: Web, Mobile (iOS, Android)
Pros: Extremely easy to use, great for beginners, collaborative design features
Cons: Limited advanced features, not ideal for detailed editing
Best for: Social media graphics, marketing materials, presentations
5. Pixlr
Features: AI tools, filters, layers, retouching tools, web-based editor
Platforms: Web, Mobile (iOS, Android)
Pros: User-friendly, no installation needed, quick edits
Cons: Some features behind a paywall, occasional ads
Best for: Beginners, casual users, fast online photo editing
6. Paint.NET
Features: Layers, plugins, special effects, simple UI, history tool
Platforms: Windows
Pros: Lightweight, easy to use, supports extensions
Cons: Only available on Windows
Best for: Basic photo editing, quick adjustments
7. Inkscape
Features: Vector graphics, SVG support, customizable tools, text editing, path operations
Platforms: Windows, Mac, Linux
Pros: Free alternative to Illustrator, powerful vector tools
Cons: Not ideal for photo editing, UI can be complex for beginners
Best for: Vector design, logo creation, scalable graphics
8. Fotor
Features: AI filters, batch editing, cloud storage, collage maker, one-tap enhancements
Platforms: Web, Mobile (iOS, Android)
Pros: Simple interface, fast editing, easy-to-use templates
Cons: Free version has ads, some features require a subscription
Best for: Quick social media edits, one-click enhancements
9. Darktable
Features: RAW editing, color correction, non-destructive editing, tethered shooting, curve adjustment
Platforms: Windows, Mac, Linux
Pros: Great for photographers, open-source, handles RAW images well
Cons: Steeper learning curve, interface may feel complex
Best for: RAW photo processing, professional photographers
10. RawTherapee
Features: Advanced color correction, RAW processing, noise reduction, HDR support
Platforms: Windows, Mac, Linux
Pros: High-quality image processing, free, powerful RAW editing tools
Cons: Interface can be complex, slower compared to Darktable
Best for: Professional photographers, RAW image adjustments
How to Choose the Right Alternative
Choosing the right Photoshop alternative depends on your needs. Here are some factors to consider:
Skill Level: Beginners may prefer Canva or Pixlr, while professionals may opt for GIMP or Darktable.
Primary Use: If you need vector design, Inkscape is best. For RAW image processing, Darktable and RawTherapee excel.
Ease of Use: Canva and Photopea are user-friendly, while GIMP and Inkscape have a steeper learning curve.
Compatibility: Check if the tool is available on your platform (Windows, Mac, Linux, or Web).
Need Help?
If you run into any issues while using these tools, don’t worry! Most of them have official help centers, tutorials, and active community forums where you can find answers. You can also check their official websites for FAQs, user guides, or You can get the contact details of the support teams through the online directory. Whether you need troubleshooting tips or step-by-step guides, help is just a click away!
FAQs
1. Are these alternatives really free?
Yes, all the software listed above has a free version. Some offer premium features for advanced users.
2. Can I use these tools for professional work?
Yes! GIMP, Krita, Darktable, and Inkscape are great for professional use, depending on your needs.
3. Do these alternatives support Photoshop files (PSD)?
Photopea, GIMP, and Krita can open and edit PSD files, making them good choices for users transitioning from Photoshop.
Conclusion
There are many free alternatives to Photoshop in 2025, each offering different features. Whether you need a quick design tool, professional editing software, or a simple photo enhancer, there is an option for you. Try out a few to see which one fits your workflow best!
0 notes